Welcome to the Monthly Art With Heart Creative Showcase.
Tonight we’re sharing projects that use new products from the 2021-22 Stampin’ Up1 Annual Catalogue. If you haven’t seen the new catalogue yet, this 50 second video shows you some of the stunning products inside!
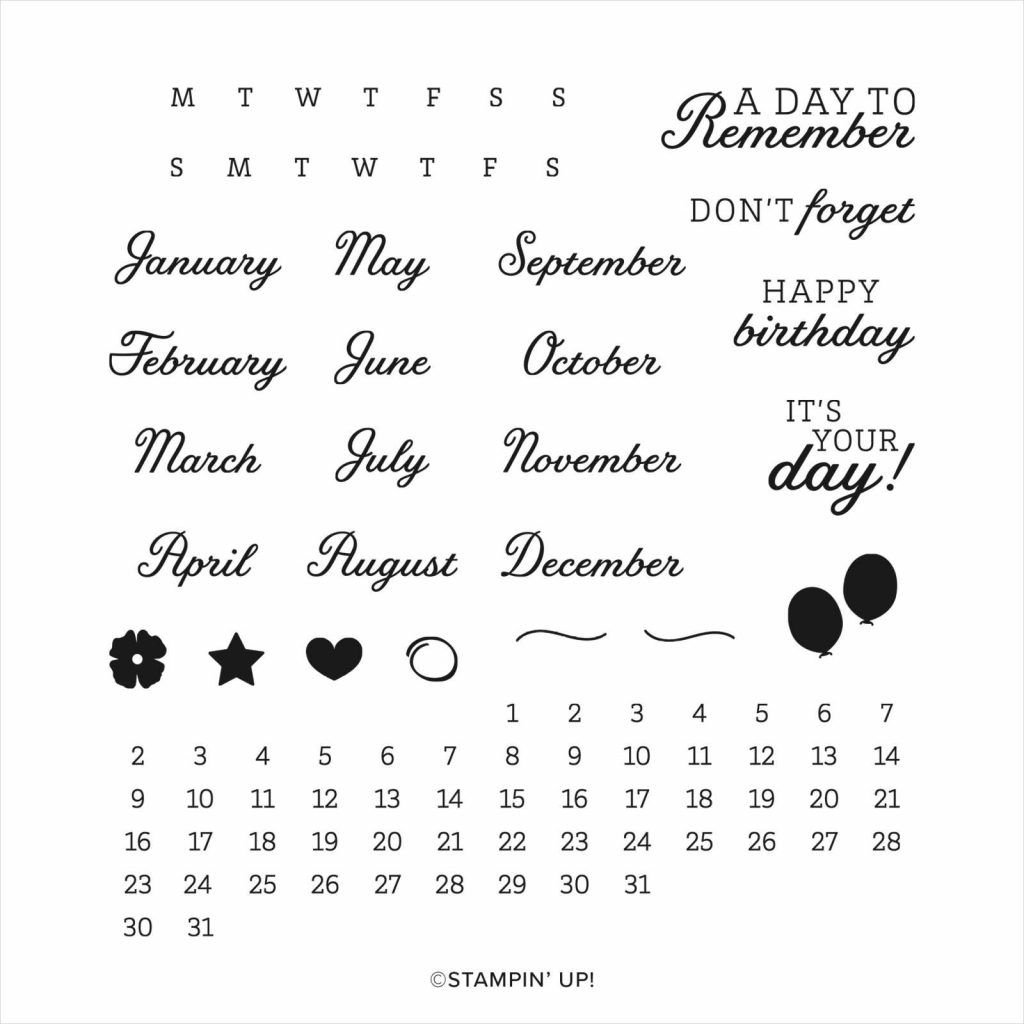
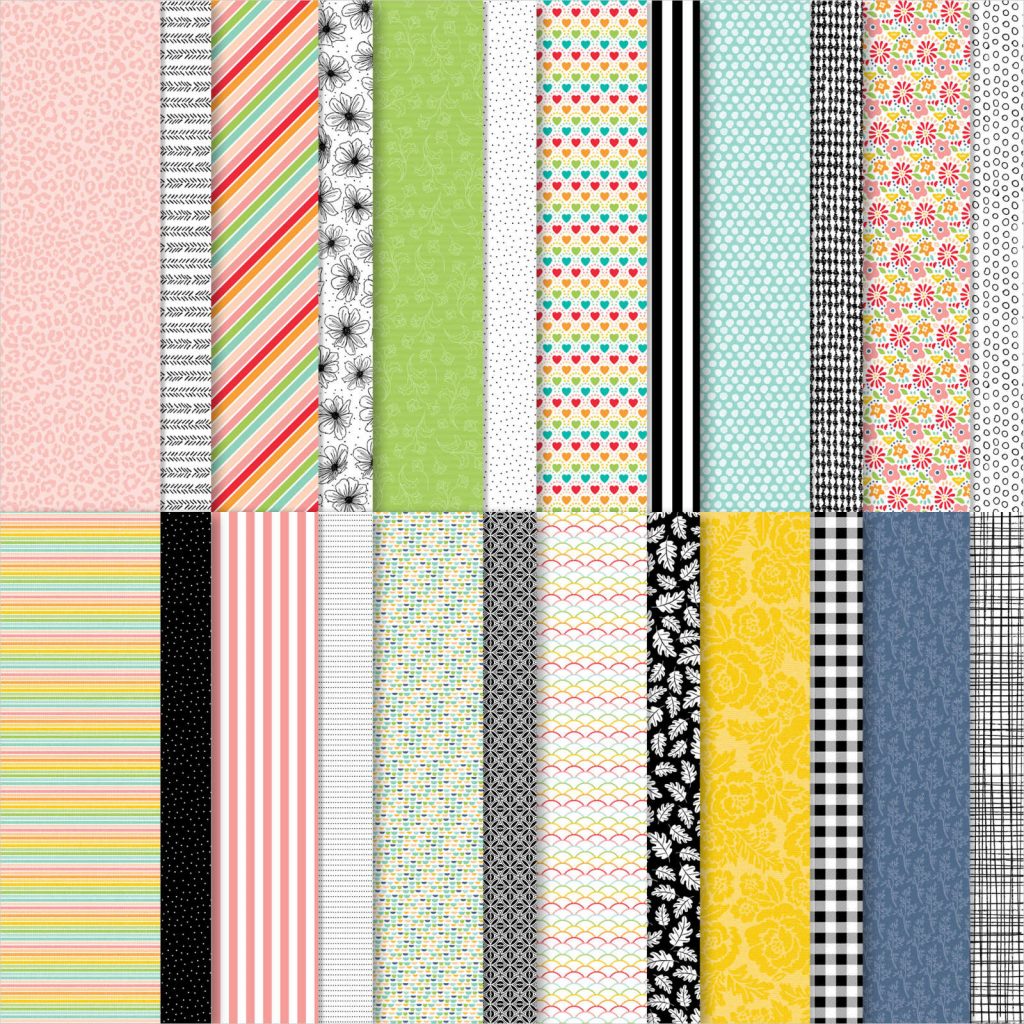
Two of my favourite products from the new 2021-22 Annual Catalogue are the Days to Remember stamp set and the Party Pattern DSP, which is one of the new host products.
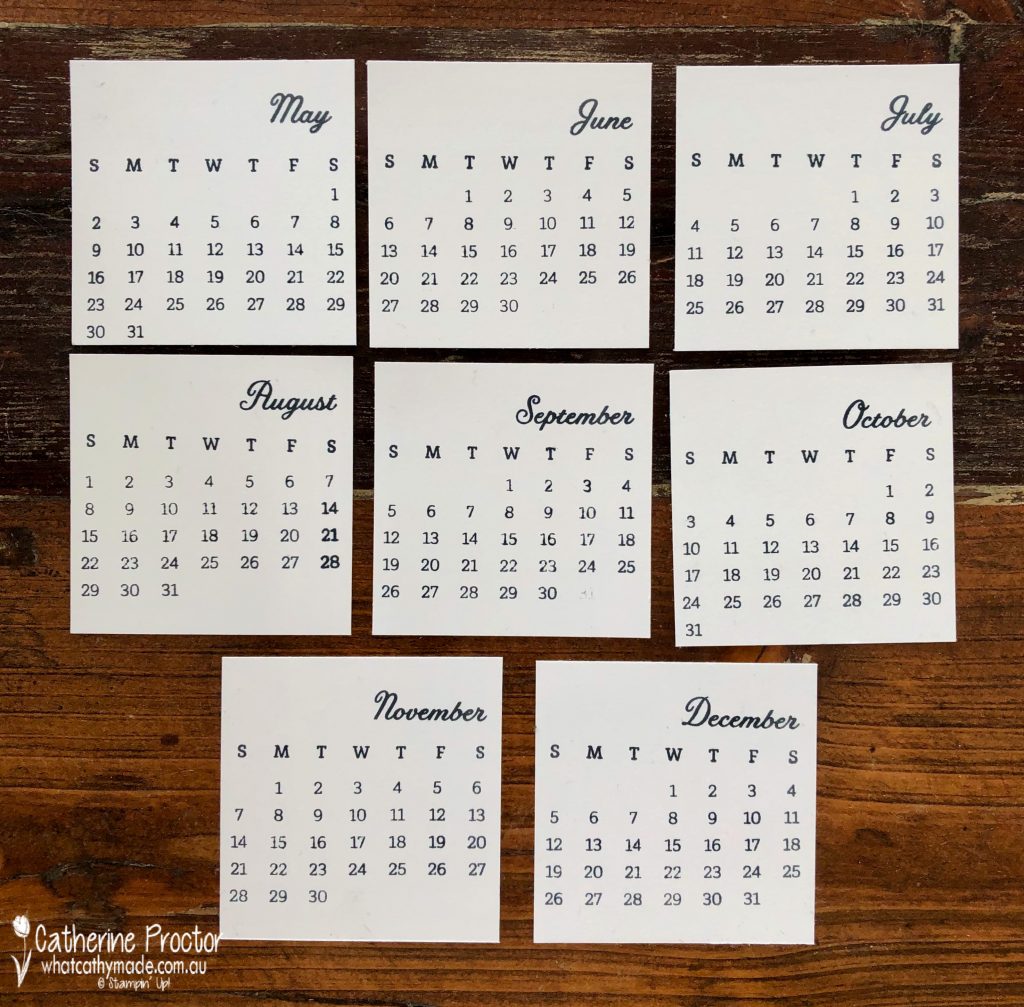
The Days to Remember stamp set has everything you need to create calendars and it is also perfect for using on scrapbooking layouts or in a bullet journal.
I can’t tell you how much I love this Pattern Party DSP! It has bright graphic patterns on one side and really versatile black and white patterns on the other side. AND you get 48 sheets – 4 each of 12 double-sided designs!
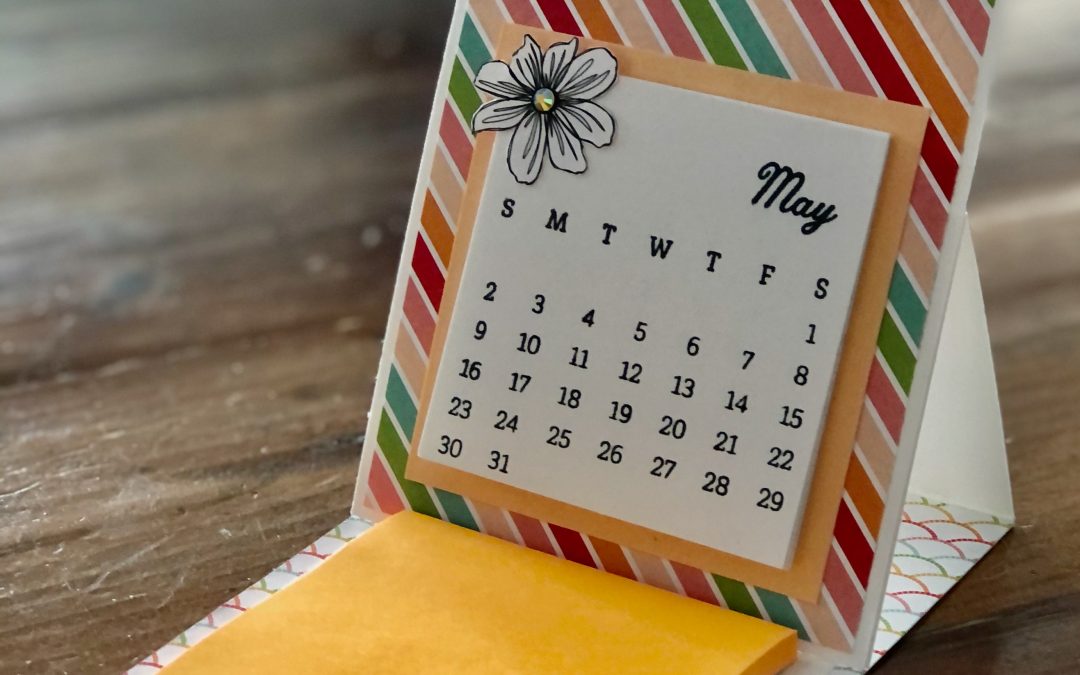
My easel card is a really practical desk accessory that uses two simple folds to create a combined calendar and Post It note holder. You can use any DSP for this project.
This card folds flat for postage but due to its weight and the thickness it will cost slightly more than a standard letter to post. It will fit into a C6 envelope.
The days to Remember stamp is super easy to line up and stamp because it has been designed to fit the width of an inkpad. My Calendar pages measure 7x7cm – just don’t forget to remove the ink from the number 31 for the months that only have 30 days.
When all months are stamped use a few drops of multipurpose glue along the top of each calendar month to attach them together into a calendar.
For the rest of the card, cut and score as follows:
Cut base: Thick Basic White card stock at 29 x 10 cm
Cut card front: Thick Basic White card stock at 14.5 x 10 cm
Score base: Score and fold card base at 14.5 cm and 27.5 cm
Card front DSP layer: Cut Pattern Party DSP at 14 x 9.5 cm
Inside card DSP layer: Cut Pattern Party DSP at 14.5 x 10 cm
Card stock layer under Post It Note: Basic White card stock 9 x 9 cm
Card stock layer under calendar: Pale Papaya card stock 8 x 8 cm
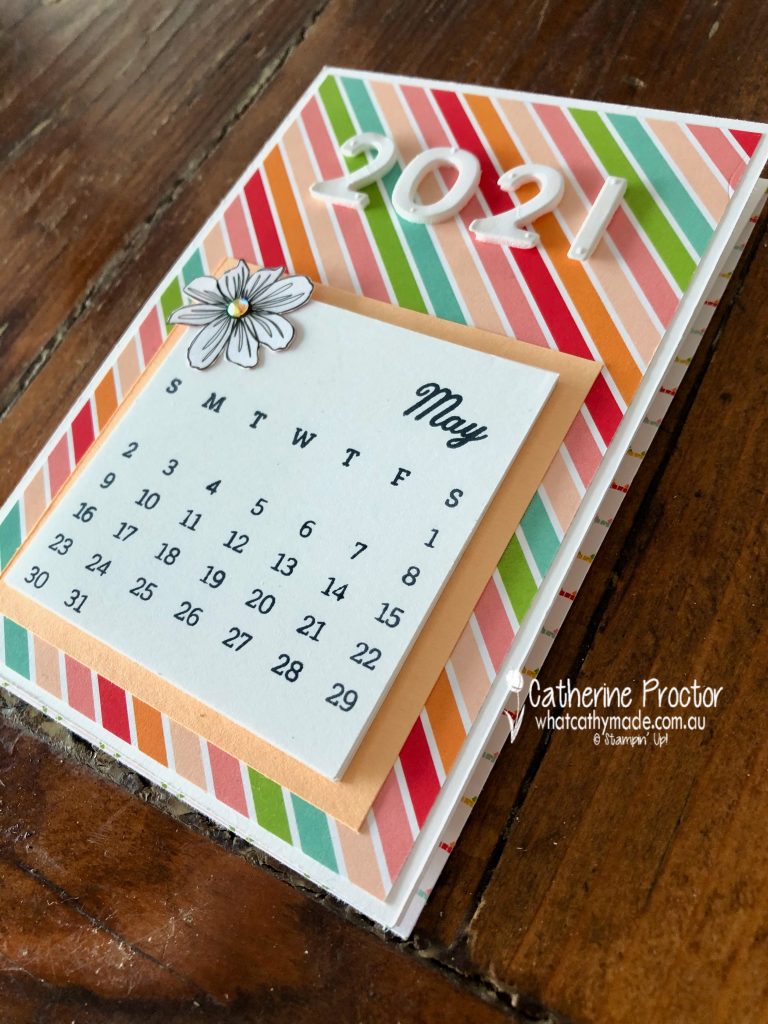
I added the 2021 lettering (die cut AFTER mounting onto foam adhesive sheets) to the top of the calendar and finished my card with a flower fussy cut from the reverse side of the striped DSP and a Pale Papaya 2021-2023 In Colour Jewel.
To see the rest of the AWH team’s projects, go back to Rachel’s blog as she is hosting the monthly showcase.
To purchase any of the products used in my card tonight, click on the links below.
If you’d like me to post you your very own copy of the brand new 2021-22 Stampin Up! Annual Catalogue, the January – June 2020 mini catalogue, or to simply find out about more about Stampin’ Up! contact me.
In the meantime, wherever you are in the world, stay safe, stay calm…and keep on crafting xxx
Welcome to week fifteen of our 2020-2021 Art With Heart Colour Creations Showcase.
Each week various members of our Art With Heart Colour Creations team will be bringing you weekly colour inspiration as we showcase our range of over 50 beautiful Stampin’ Up! colours in alphabetical order.
Week 15 – Early Espresso
I actually made this special card in July for my brother’s 50th birthday but I waited until tonight to share it with you because it features the rich dark chocolate brown of Early Espresso…a colour that is just perfect for male cards.
I love using Early Espresso with other neutral colours and especially with foils – Early Espresso really makes foils pop. For my card today I’ve paired Early Espresso with Crumb Cake, Brass Foil, Whisper White and just a touch of Misty Moonlight.
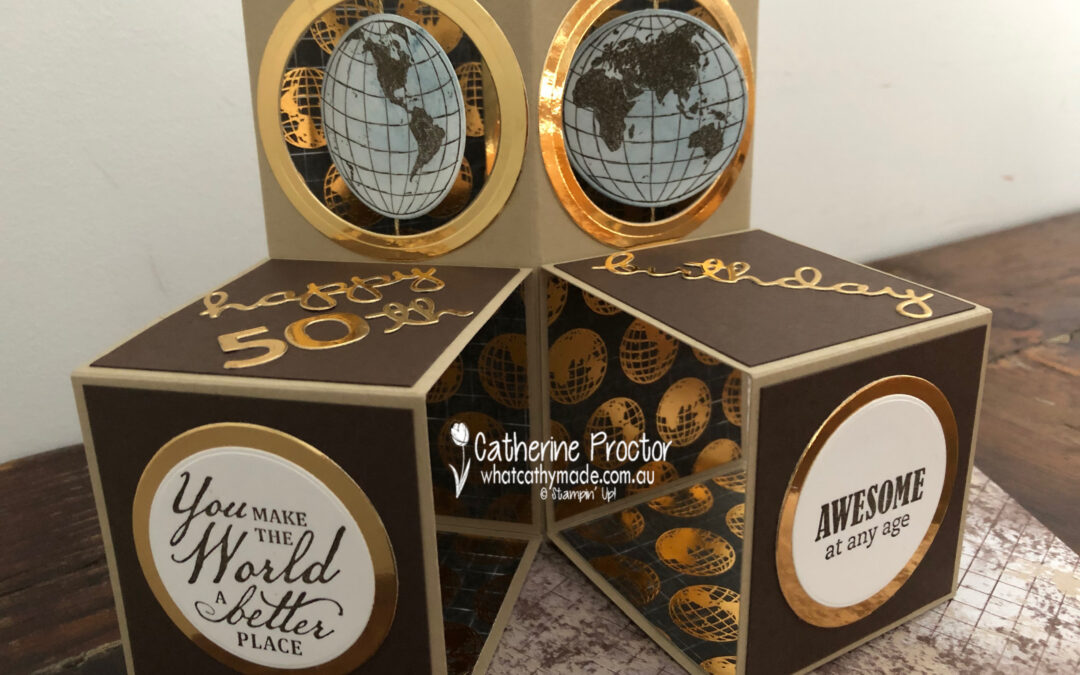
I wanted to make a birthday card that moved for my brother because he used to be an engineer but I couldn’t find a pattern for a combined spinner and triple cube card so I designed one myself.
This 30 second video shows you how my double spinner triple cube pop-up card goes from lying flat in an envelope to popping up with spinning globes – it’s such a cool card to make if you love cards that move, like I do!
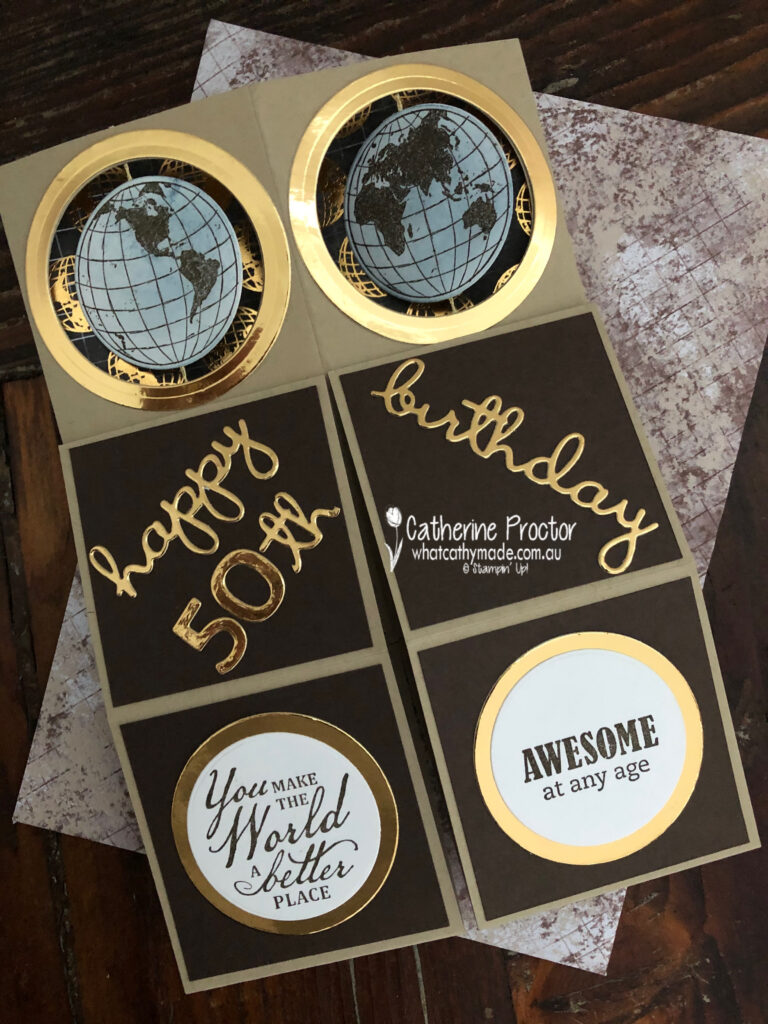
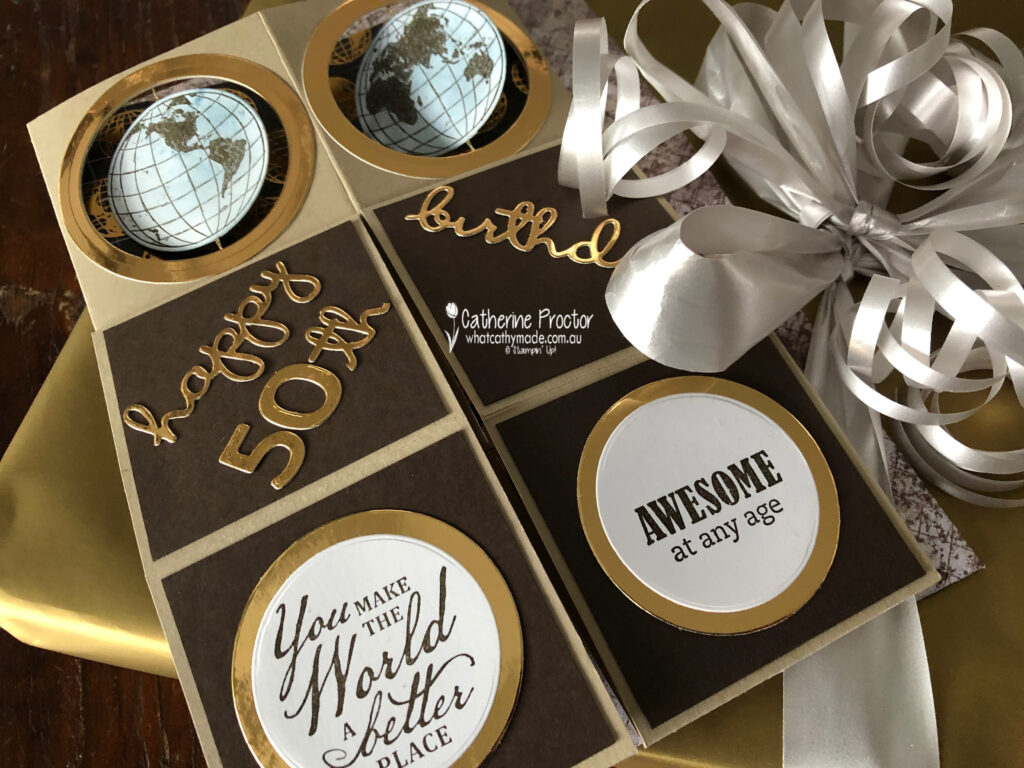
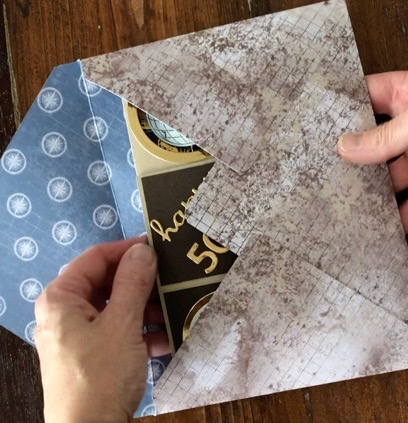
Here’s a close up of what the double spinner triple cube pop-up card looks like lying flat to slip inside an envelope.
And here’s how to make the card.
Triple Cube Instructions
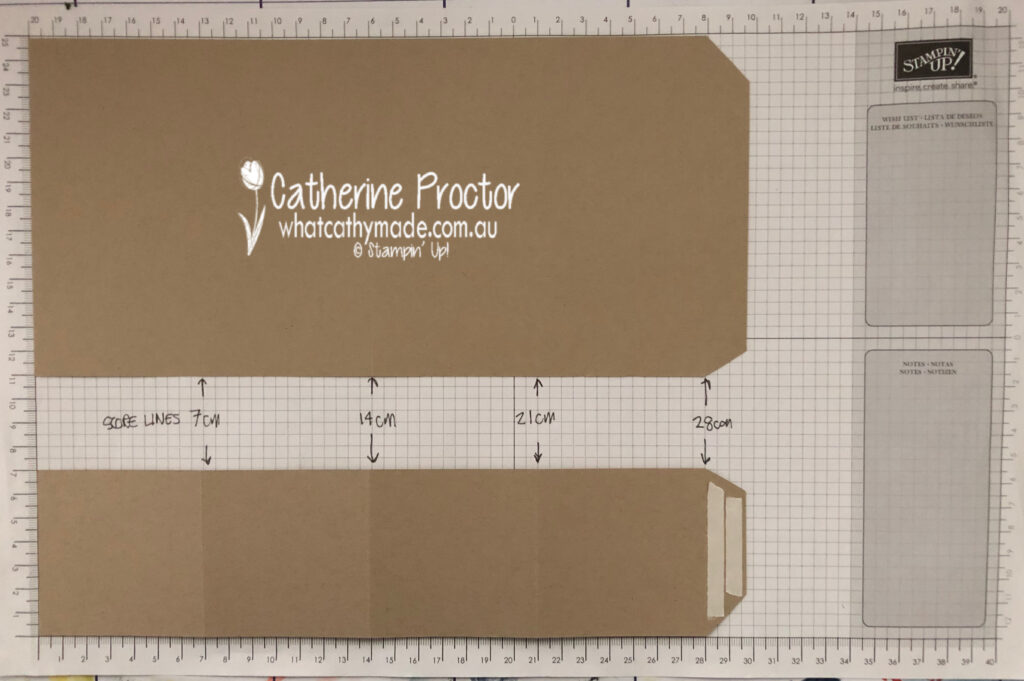
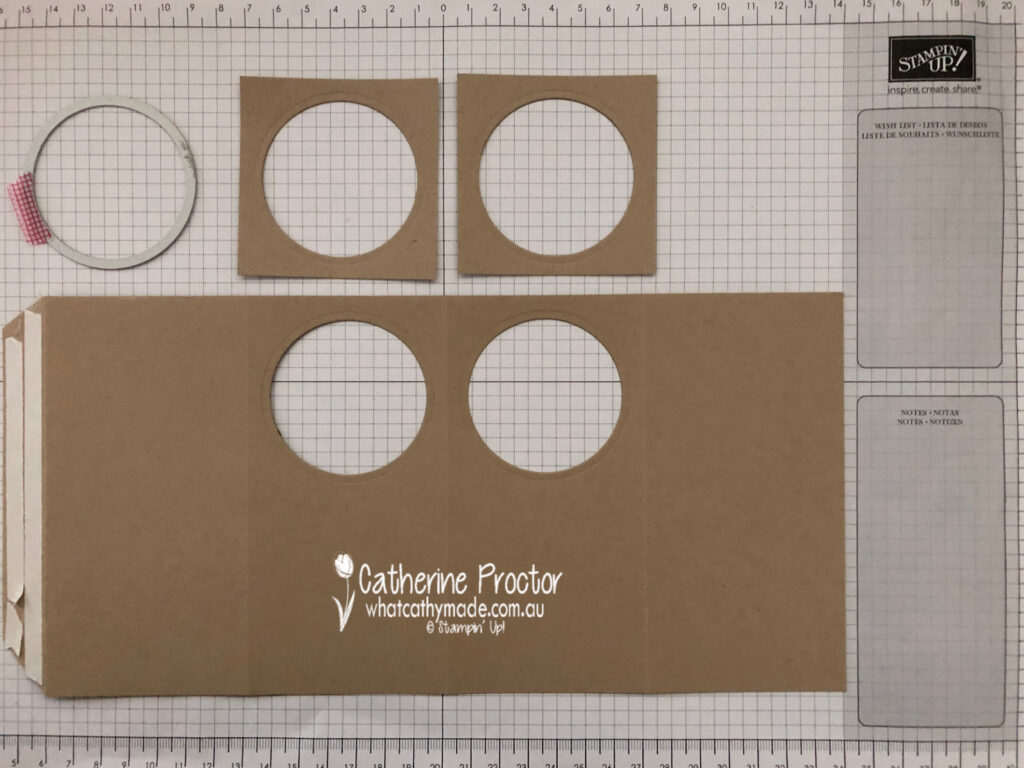
Use your trimmer to score an A4 piece of Crumb Cake card stock at 7cm, 14cm, 21cm and 28cm and then cut across the A4 sheet at 7cm along the 21cm side as shown in photo above.
Trim another A4 piece of Crumb Cake card stock at 7cm x 29.7cm and score at 7cm, 14cm, 21cm and 28cm (this piece is identical to the smaller rectangle in the photo above).
You will now have one larger 14cm x 29.7cm rectangle and two smaller 7cm x 29.7cm pieces. Bevel the side flap of all three rectangle pieces and adhere Tear & Tape to the beveled edges.
Double Spinner Instructions
Create the holes for the two spinner mechanisms by cutting two 7x7cm squares of Crumb Cake card stock and laying them over the top of the two centre panels of the largest rectangle. Use a layering circle die in the centre of the 7cm square pieces to cut through both layers of card stock.
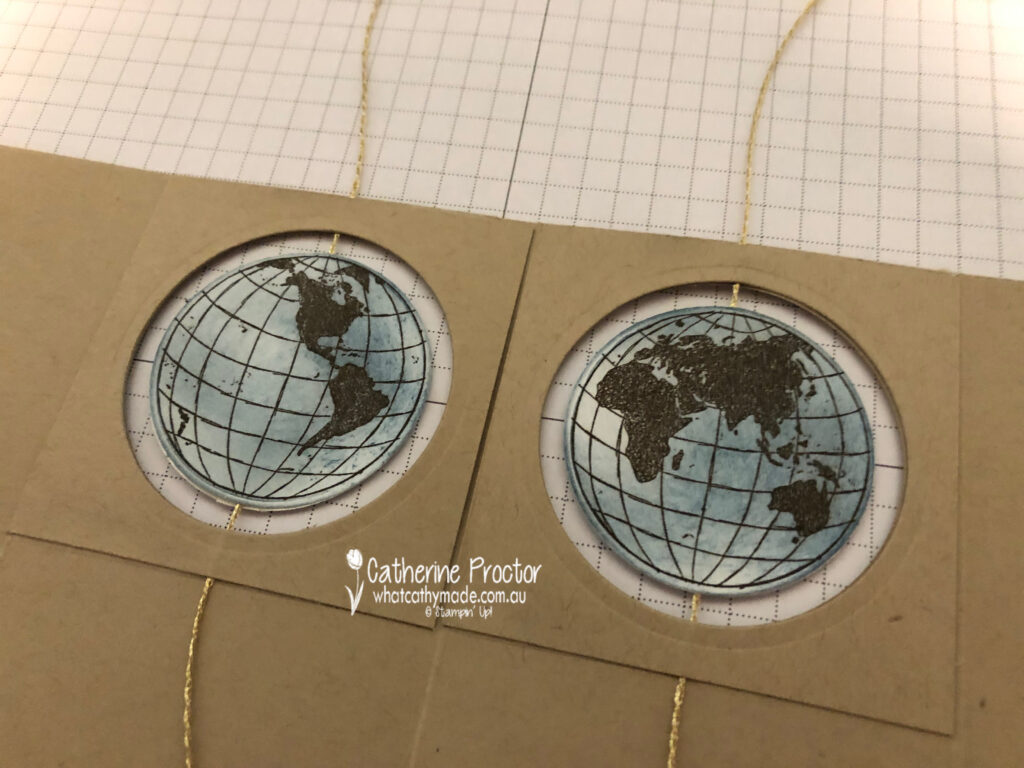
Stamp four globes in Early Espresso onto Whisper White card stock – two of each side of the world. Die cut these four globe pieces with the matching circle die. Use a sponge dauber to gently shade some Misty Moonlight ink onto the globes.
Carefully lay a strip of Tear & Tape from the north pole to the south pole on two of the globes and lay a piece of gold trim (from the Forever Greenery trim pack) along the Tear & Tape. Glue the other side of the globe together – you will now have two complete double-sided globes.
Align the globes onto the card base and glue the 7x7cm square of Crumb Cake to the inside of the card base to hold the spinner globes in place as shown in the photo below. Cut off the excess gold trim.
Double Spinner Triple Cube Pop-up Card Assembly and Decoration
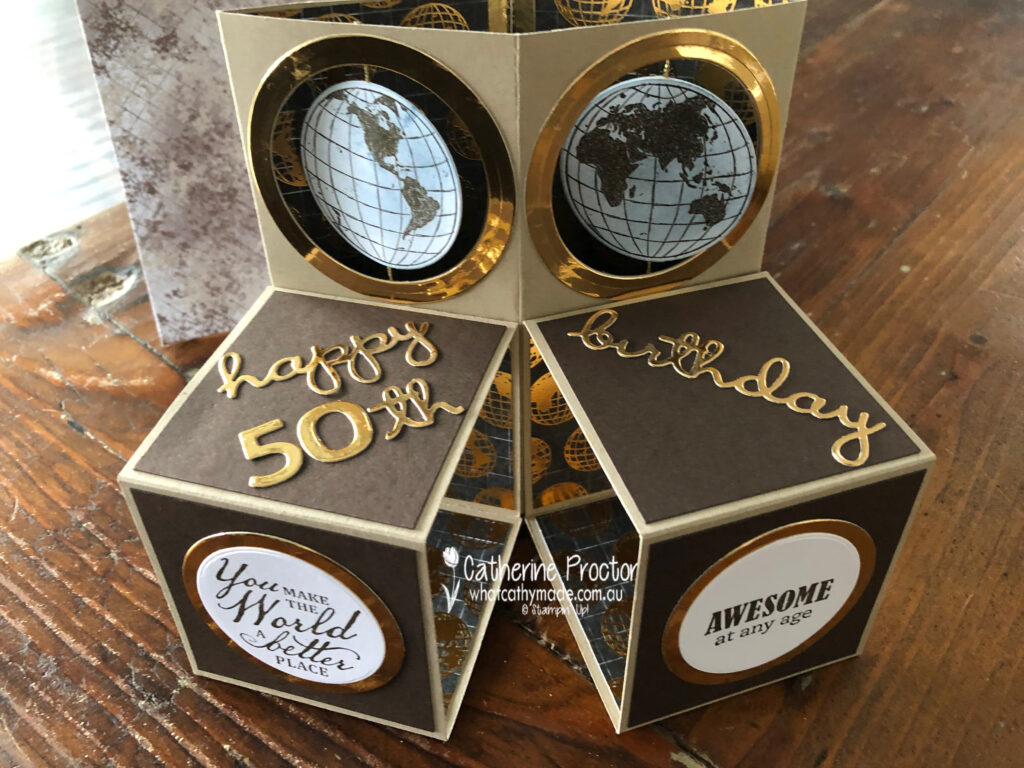
Fold the large cube card base and the two smaller cube bases, closing them into cube shapes by removing the Tear & Tape to adhere the sides of the cubes together.
Use multipurpose glue or Tear & Tape to attach the two smaller cubes to the bottom front of the larger spinner cube base as shown below.
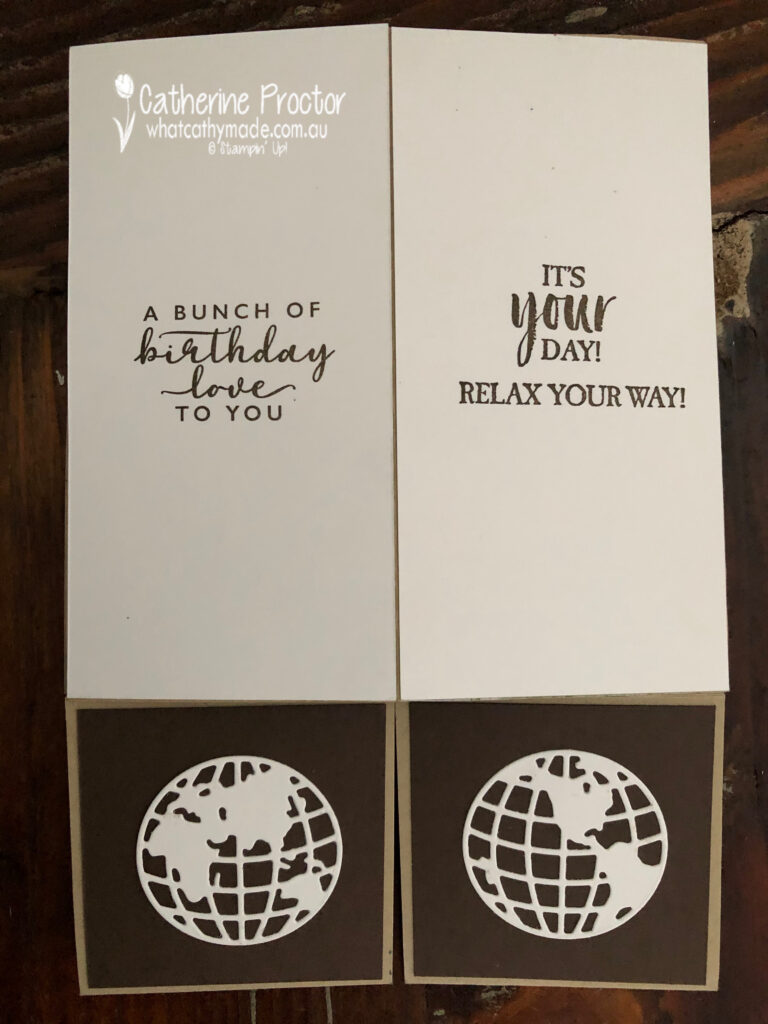
Die cut six 6.5 x 6.5cm squares of Early Espresso card stock and attach to the outer squares of the two smaller cubes. Decorate with sentiments of your choice – I’ve stamped my sentiments in Early Espresso onto Whisper White card stock.
Other decorations on the spinner cube include brass foil circles die cut using the layering circle dies, squares of the World of Good DSP and “Happy 50th birthday” greeting die cut from brass foil with the Well Written dies and the Playful Alphabet Dies.
The back side of my card has Whisper White panels to write a message on and more globes die cut using the World Map dies.
Finally, I used another sheet of the World of Good DSP to make a simple co-ordinating envelope.
I can’t wait to see what the rest of the Art With Heart team have created with Early Espresso today. Click on the links below to see what they’ve made.
Next Wednesday we’ll be showcasing one of the Brights family: Flirty Flamingo. We hope you can join us all then.
To purchase any of the products featured in today’s post, simply contact your Stampin’ Up! demonstrator, any of the ladies in the AWH Colour Creations Showcase or click on the product links below.
If you’d like me to post you your very own copy of the August – December 2020 Mini Catalogue, the 2020-21 Stampin Up! Annual Catalogue, the 2020-21 Beginners Brochure, or to simply find out about more about Stampin’ Up! contact me.
In the meantime, wherever you are in the world, stay safe, stay calm…and keep on crafting xxx

")
 Host Designer Series Paper")


")


