Stampin’ Up! Flirty Flamingo – Week 17 AWH Colour Creations Blog Hop
Welcome to week 17 of our 2021-22 Colour Creations blog hop! Tonight we are showcasing Flirty Flamingo, a vibrant pink from the Brights colour collection.

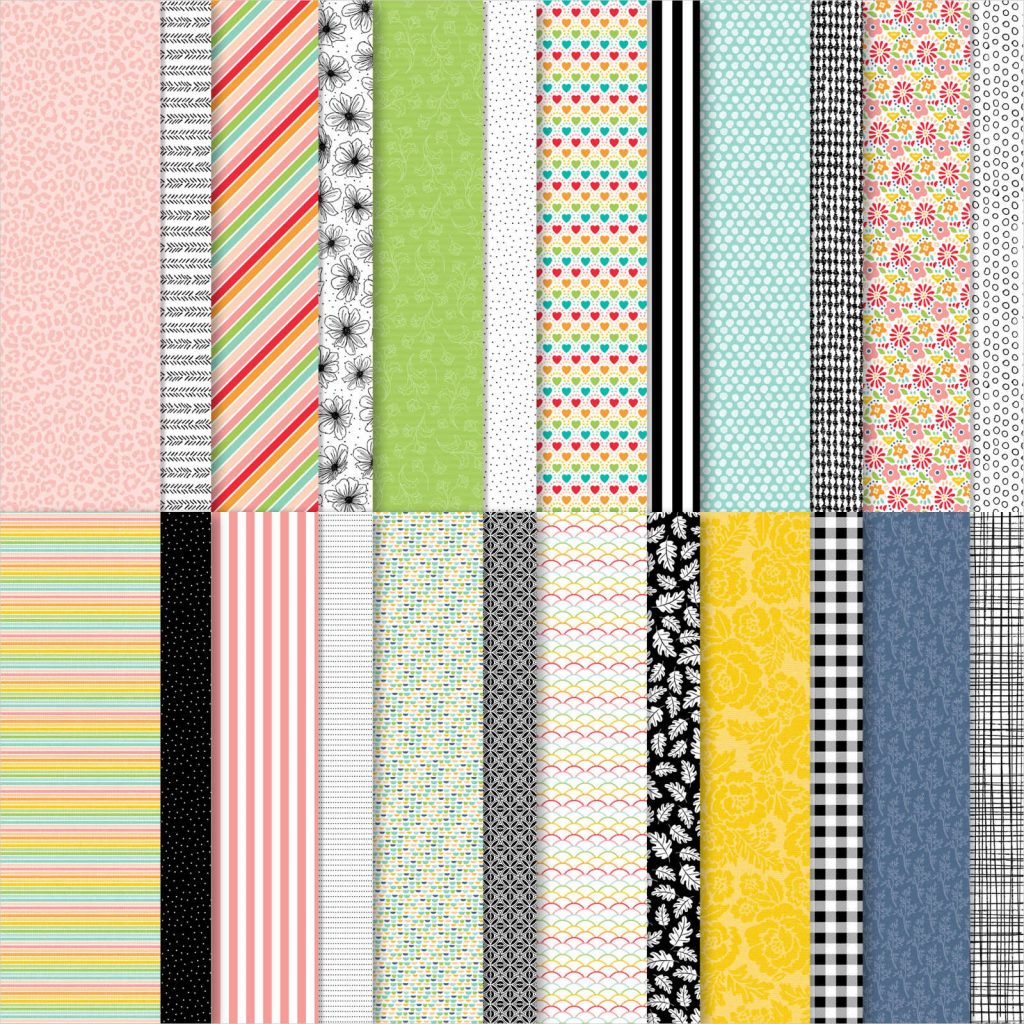
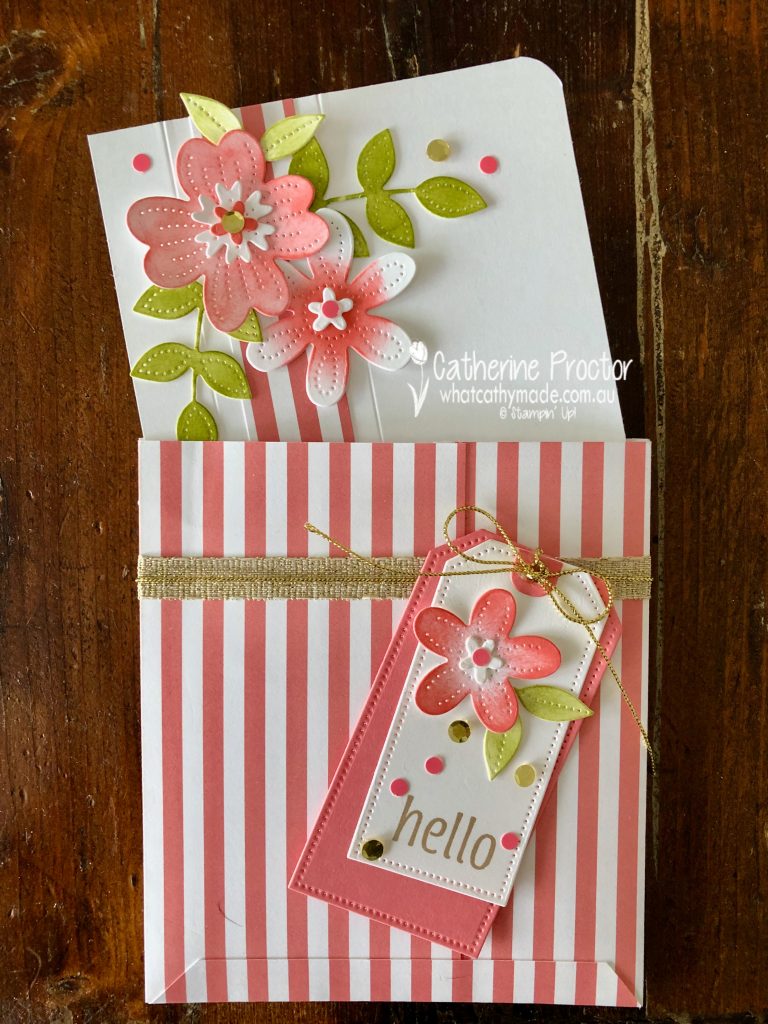
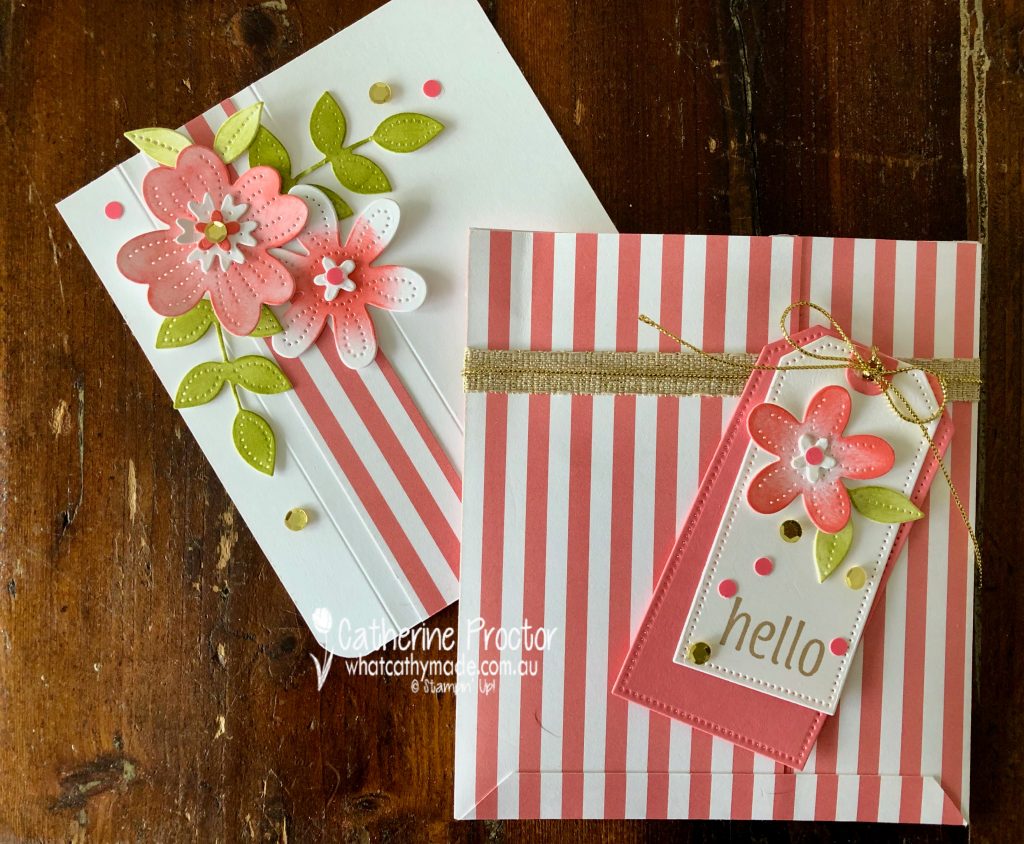
I started my making an 5″ x 5 1/2″ bag, using these instructions for a 6×6 DSP, even though this DSP is 12 x 12″. The bag uses either one sheet of 12×12″ DSP cut into 6×6″ squares or 3 sheets of 6×6″ DSP.
- Cut piece 1 at 5″ wide x 6″tall and score 1/2″ at the bottom.
- Cut piece 2 to 3 1/2″wide x 5 1/2 ” tall and score 1/2″ along the left side of 5 1/2 ” edge.
- Cut piece 3 to 3 1/2″wide x 5 1/2 ” tall and score 1/2″ along the right side of 5 1/2 ” edge.
- Adhere the folded sides of pieces 2 and 3 to the left and right edges of piece 1.
- Adhere together the overlapped section of pieces 2 and 3 together.
- Fold up the bottom flap and adhere.
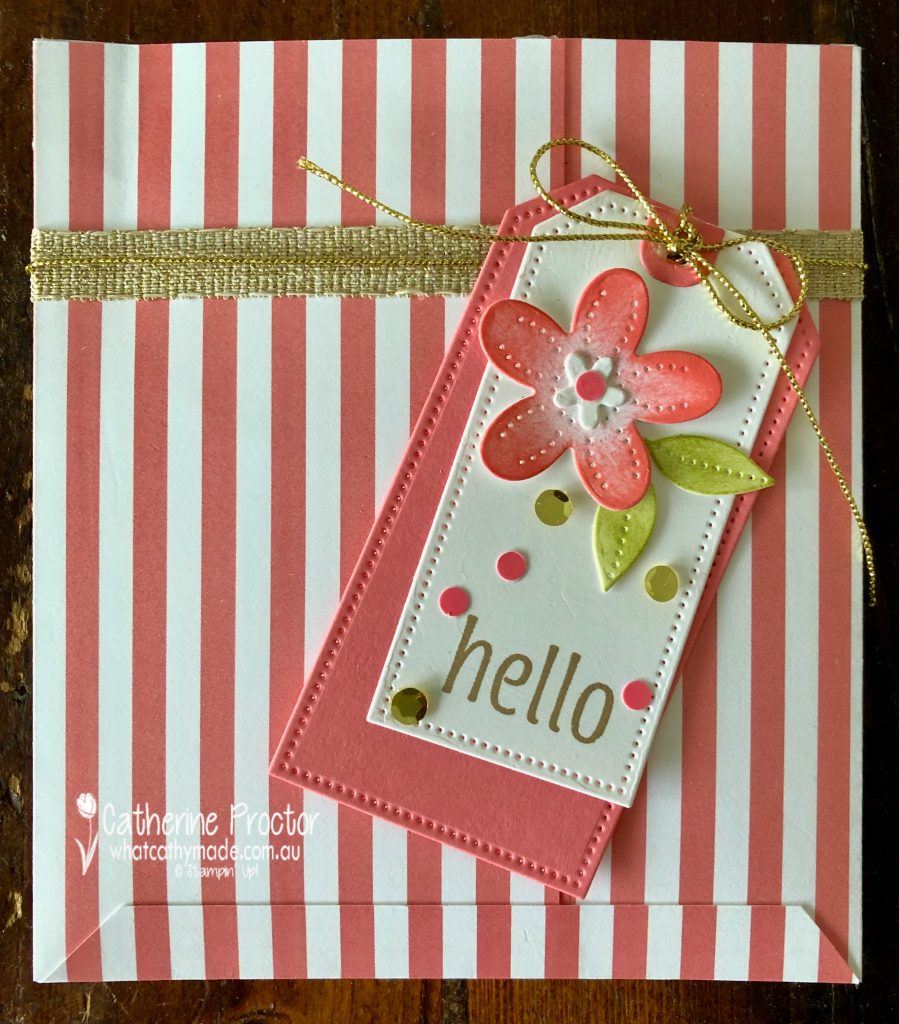
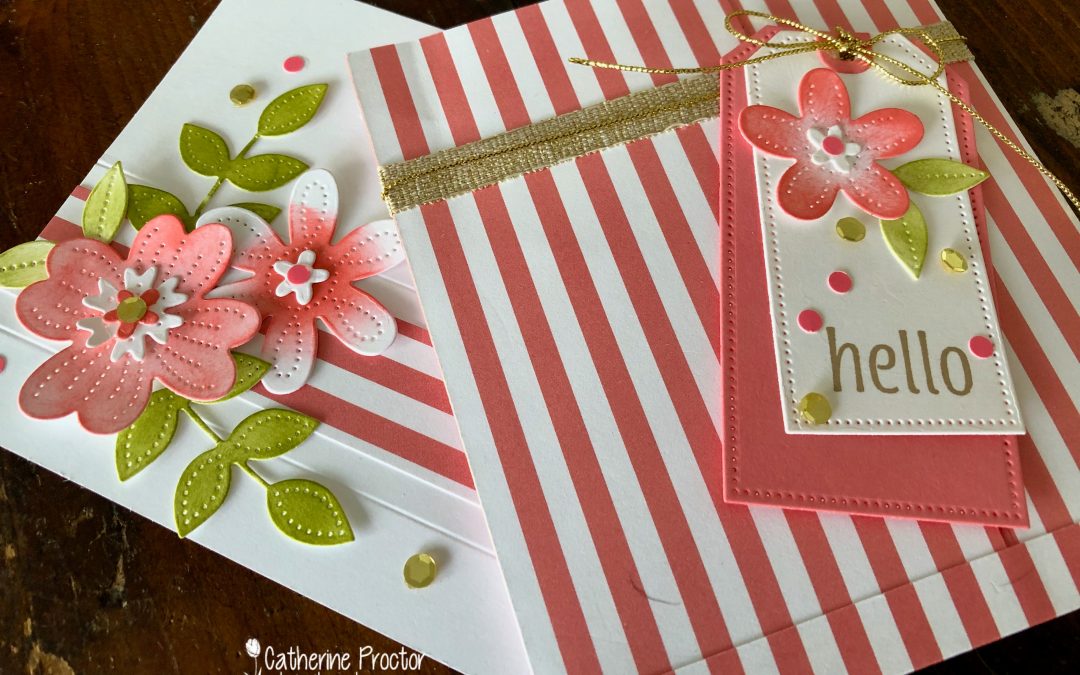
I wrapped the Fine Art 3/8″ (1 cm) Ribbon and gold metallic Simply Elegant Trim around the bag and tied a bow. The Simply Elegant Trim is slippery and hard to keep sitting in a nice bow shape so I always use a couple of glue dots.
The layered tags are cut using the Tailor Made Tags Dies, Pierced Blooms Dies and Flirty Flamingo and gold sequins from the Sequins For Everything.
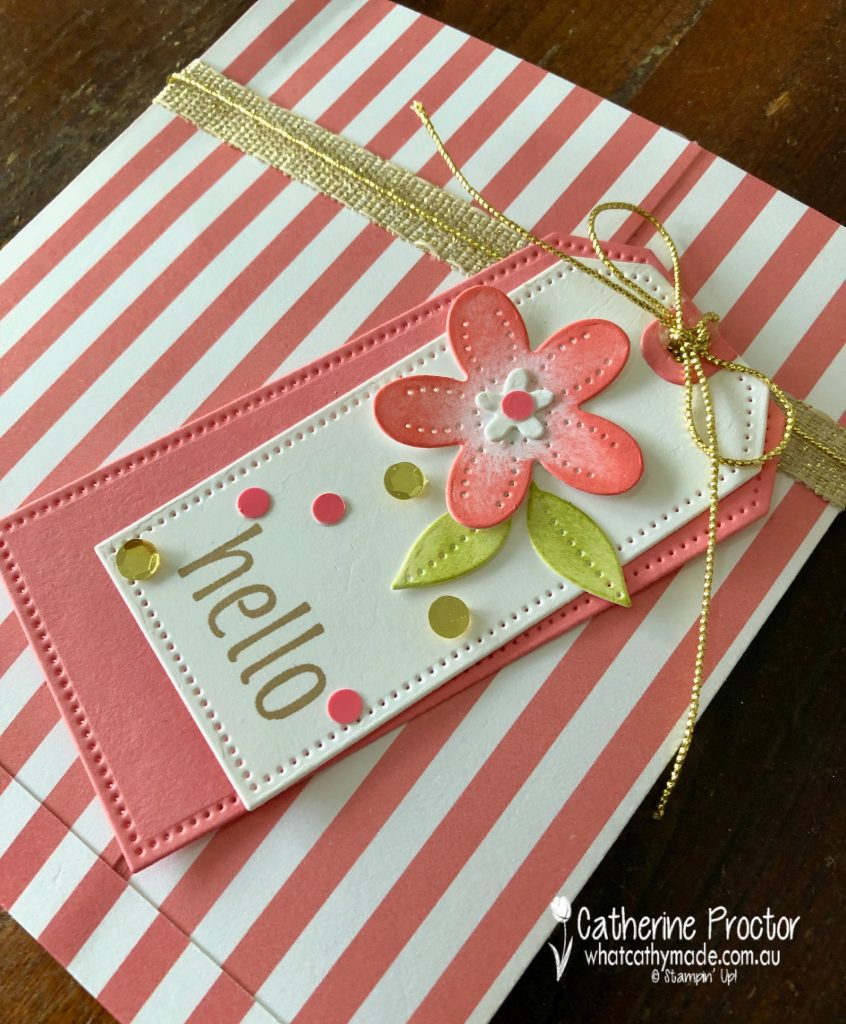
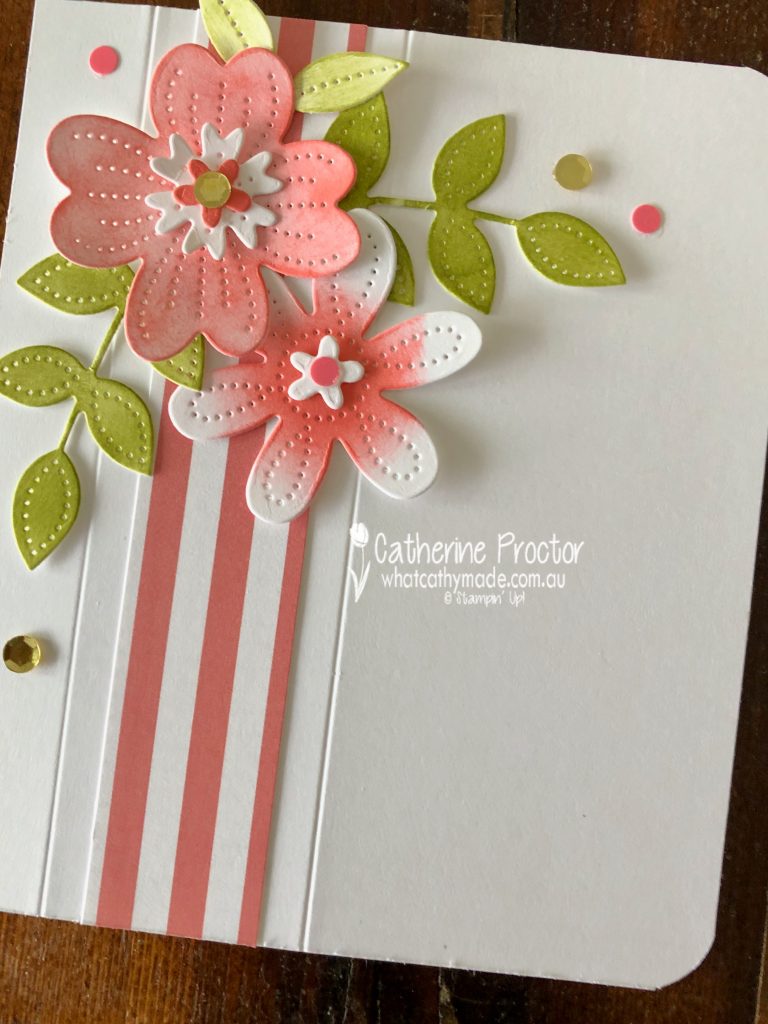
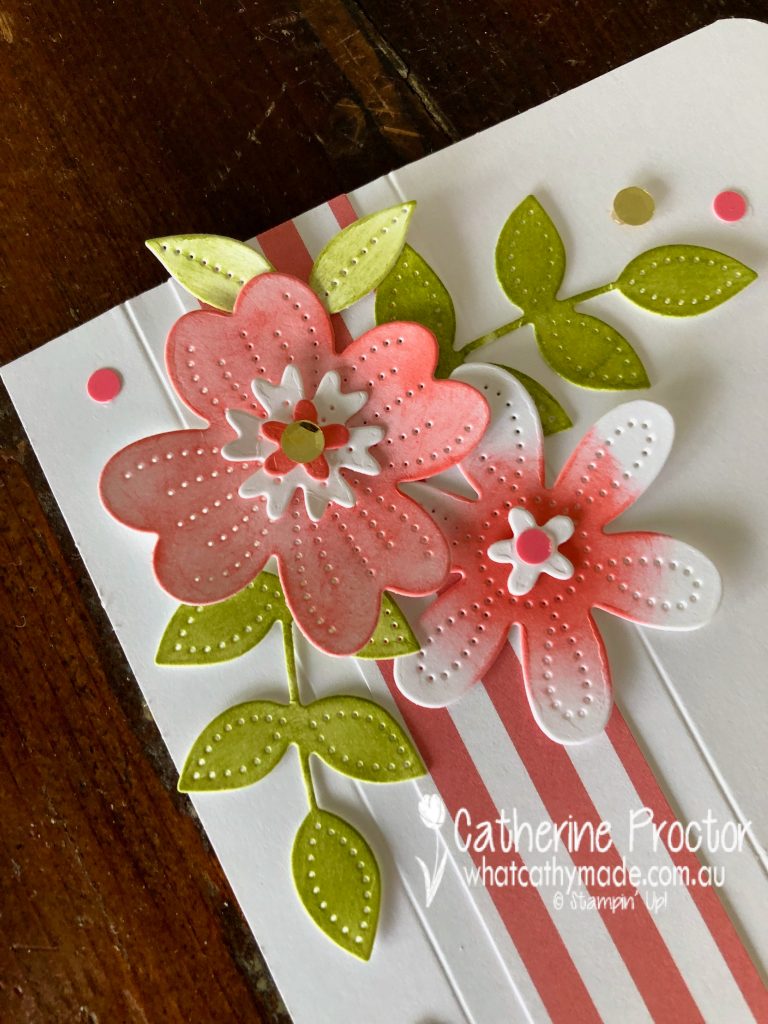
I cut the single layer card to fit inside the bag, decorating it with the same embellishments and a strip of the striped DSP I used for the bag. All of the flowers and leaves were die cut in Basic White using the Pierced Blooms Dies and then colored with Pear Pizzazz and Flirty Flamingo ink using sponge daubers.
I added a score line either side of the strip of DSP using the score blade on my paper trimmer.
I’m not sure if there is an official name for a single layer card in an bag that acts like an envelope? Whatever it is called, I think I will be making more of these as they have plenty of room to also enclose photos, a Christmas letter or even gift cards of any size.
I’ve left room to write on the front of the card, however you could simply use the reverse side if you wanted to write a longer message.
Now it’s time to hop on over to our next participant, my friend Kate Morgan – I can’t wait to see what she’s made this week!

If you find a broken link or have come to this blog hop from a different entry point, you can view the the full list of participants below:
Catherine Proctor – you are here!
If you live in Australia, you can find and purchase all these products in my Stampin’ Up! Online Store.
Don’t forget to use my monthly Host Code (if your order is between $50 – $250) and I will send you a thank you gift the following month. If your order is over $250 don’t use the host code because you will qualify for your own stamping rewards. My September Host Code is WVX3UYCR and it is valid until midnight September 30.
I’ll be back with another Christmas card next Monday. In the meantime, wherever you are in the world, stay safe, stay calm … and keep on crafting xxx