The challenge for Day 14 of the 30 Day Christmas Card Making Challenge is “Christmas Morning”.
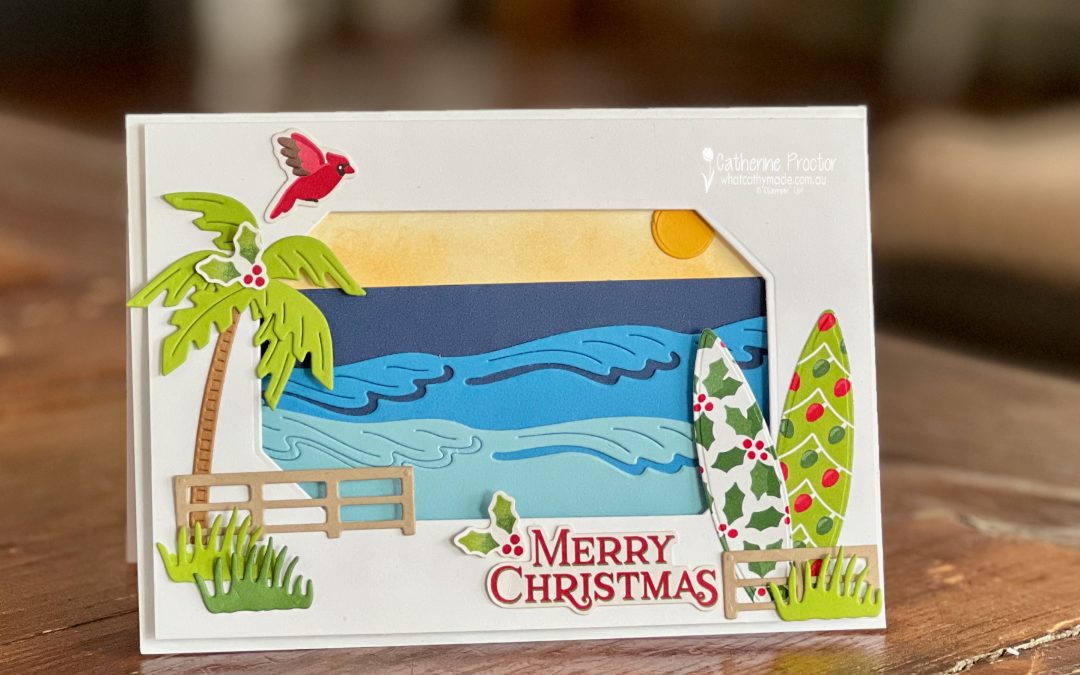
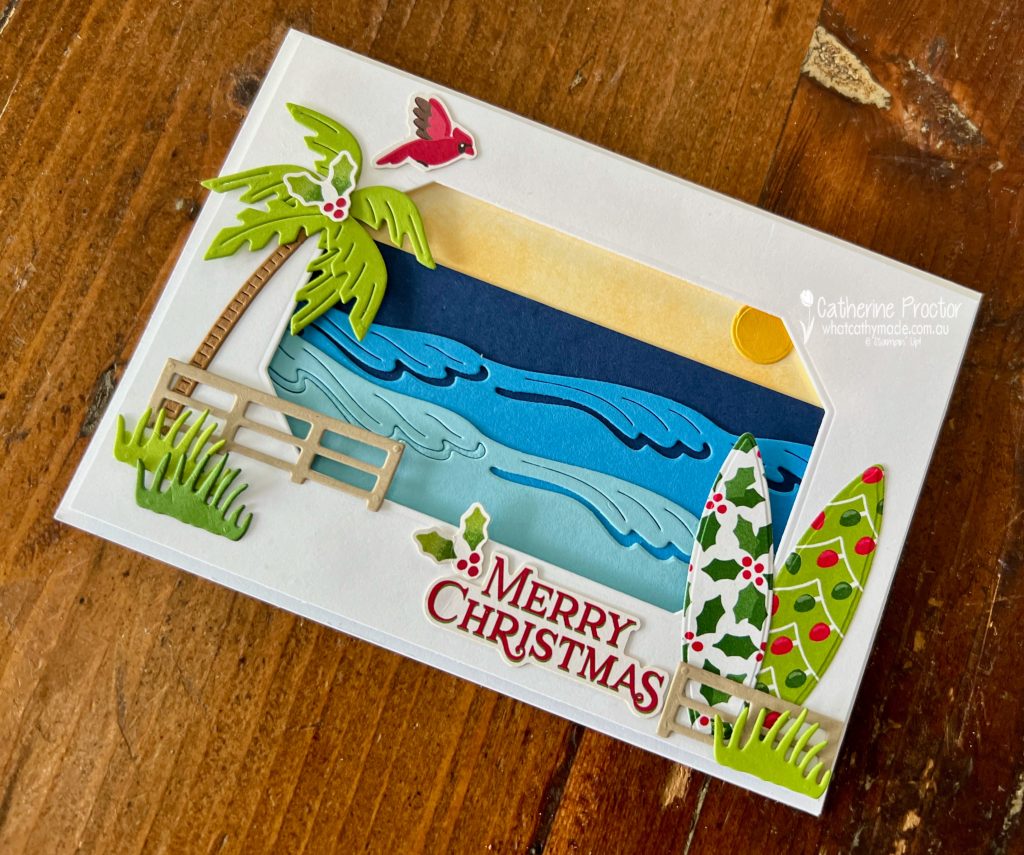
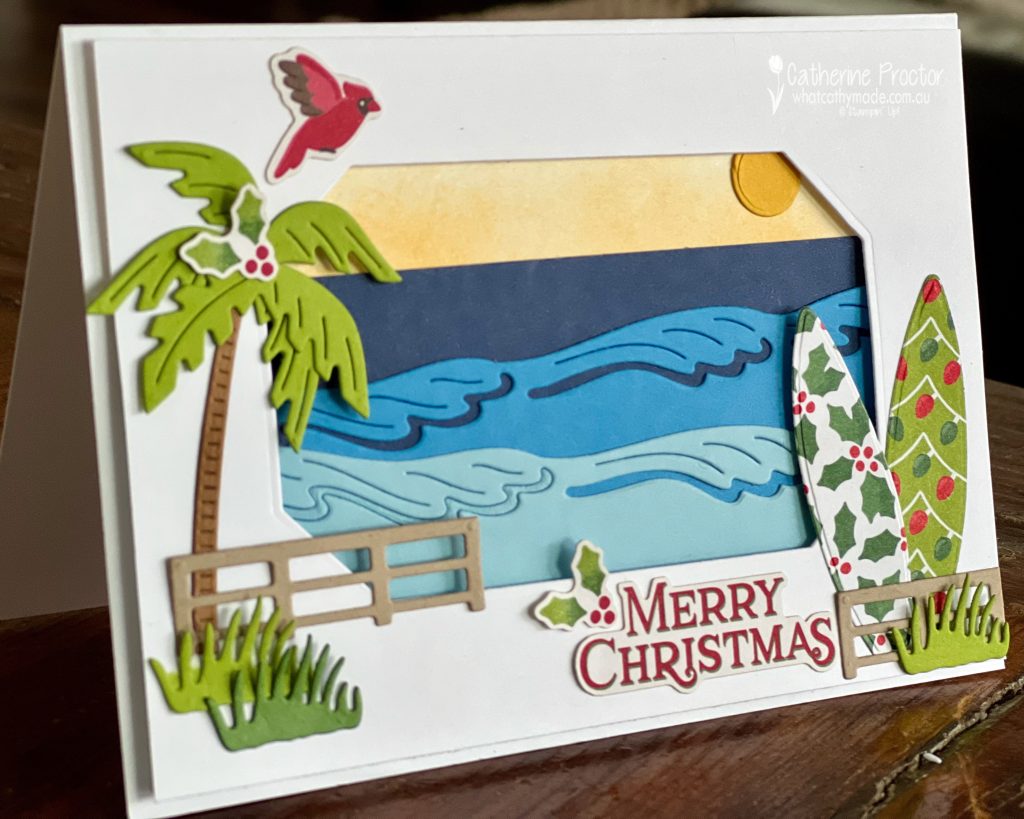
I’m sure my Christmas beach scene is not what most people think of when they think Christmas morning!
However, I’m incredibly lucky to live in Australia at the beach and I have the most beautiful Christmas tradition of spending Christmas morning at the beach with my friends. It’s such a wonderful way to start the day. My family then do a Christmas patrol at our beach, South Curl Curl Surf Life Saving club.
To create a card that truly reflects my Christmas morning I’ve added some festive elements to a beach scene that I created using the Beach Day dies.
The palm tree has a Christmas cardinal sticker and a sprig of holly from the Reindeer Days Memories & More pack.
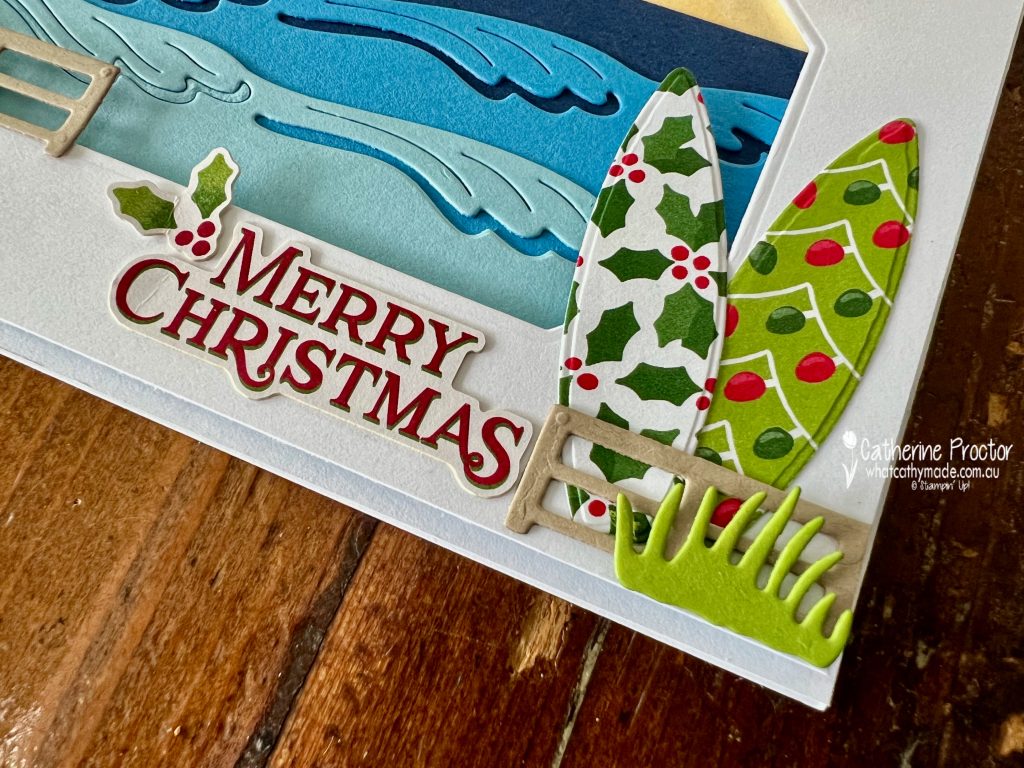
But my favourite festive touch would have to be the Christmas patterned surfboards, duie cut from the Reindeer Days DSP!
What does your Christmas morning look like? Is it hot like mine or cold and cosy?
I’ll be tomorrow I’ll be back tomorrow with another “30 Days of Christmas” Christmas card.
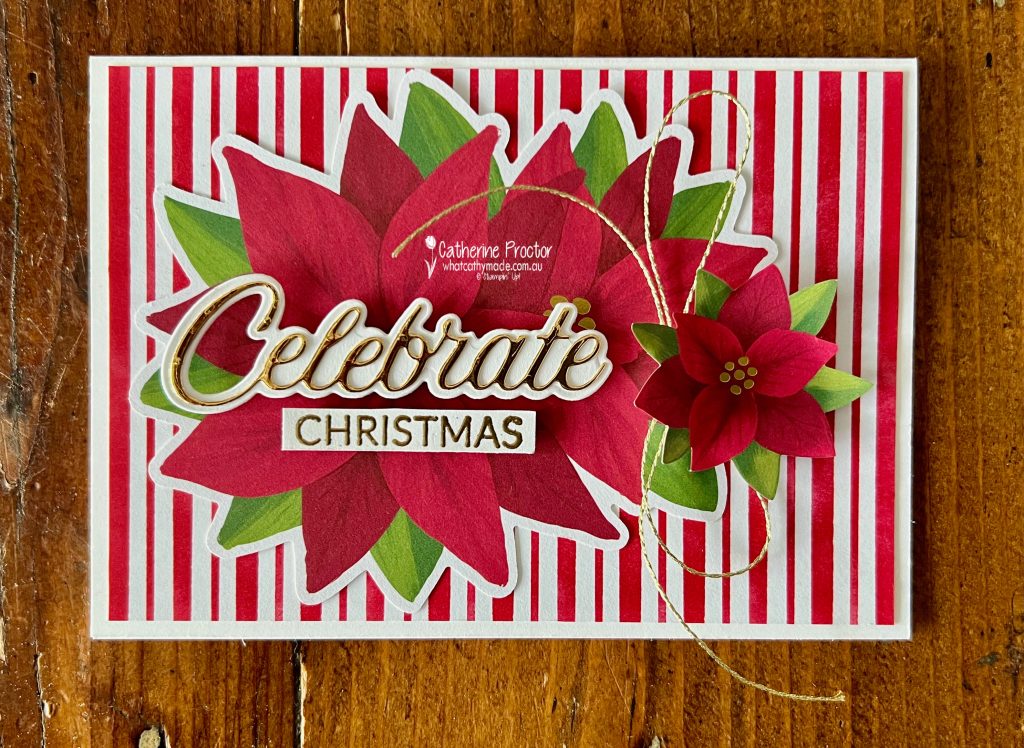
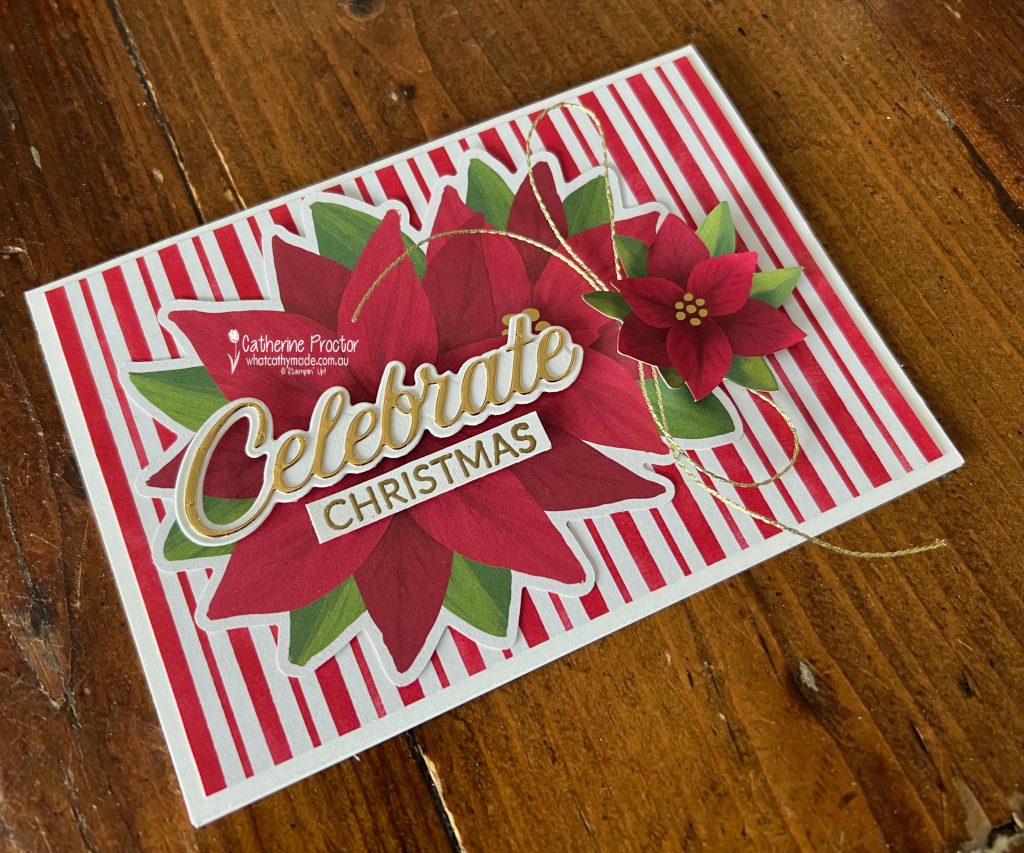
The challenge for Day 13 of the 30 Day Christmas Card Making Challenge is “Poinsettia Perfection”.
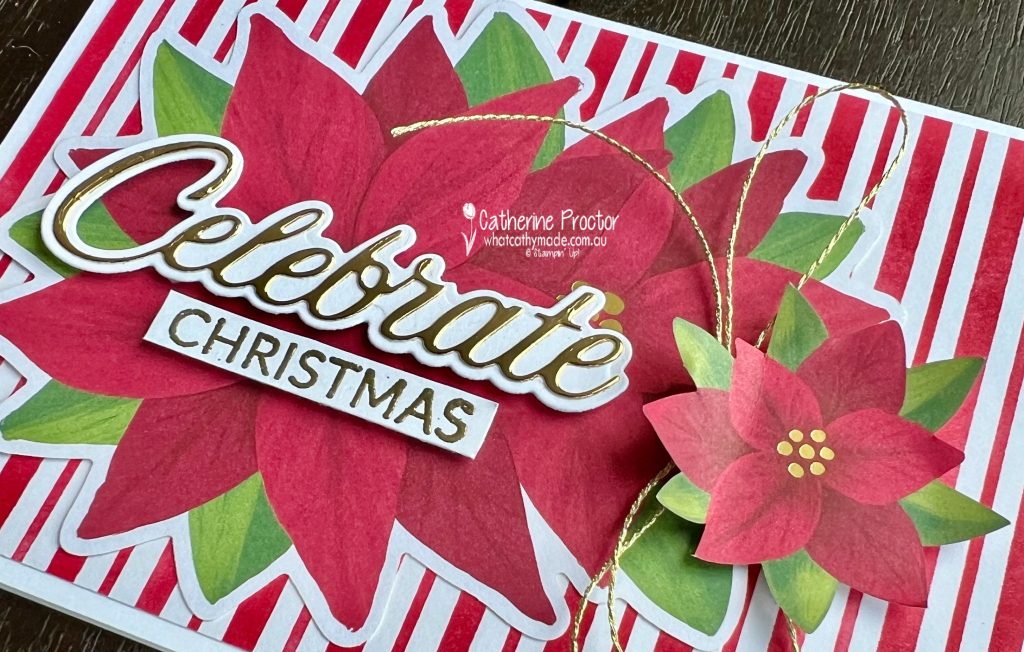
I’ve used the large die cut poinsettia from the A Little bit Festive DSP along with a smaller die cut poinsettia from the Joyful Images Mix & Match Ephemera Pack to make this quick and easy Christmas card.
The red striped DSP is also from the A Little bit Festive DSP.
The gold foil “Celebrate” sentiment is die cut using one of the Wanted To Say dies, with the word “Christmas” from the Greetings of the Season Stamp Set heat embossed in gold.
I’ve tucked some of the new online exclusive Gold Twisted Thread under the smaller poinsettia.
I’ll be back later tonight with the AWH Colour Creations blog hop where we will be showcasing Gray Granite.
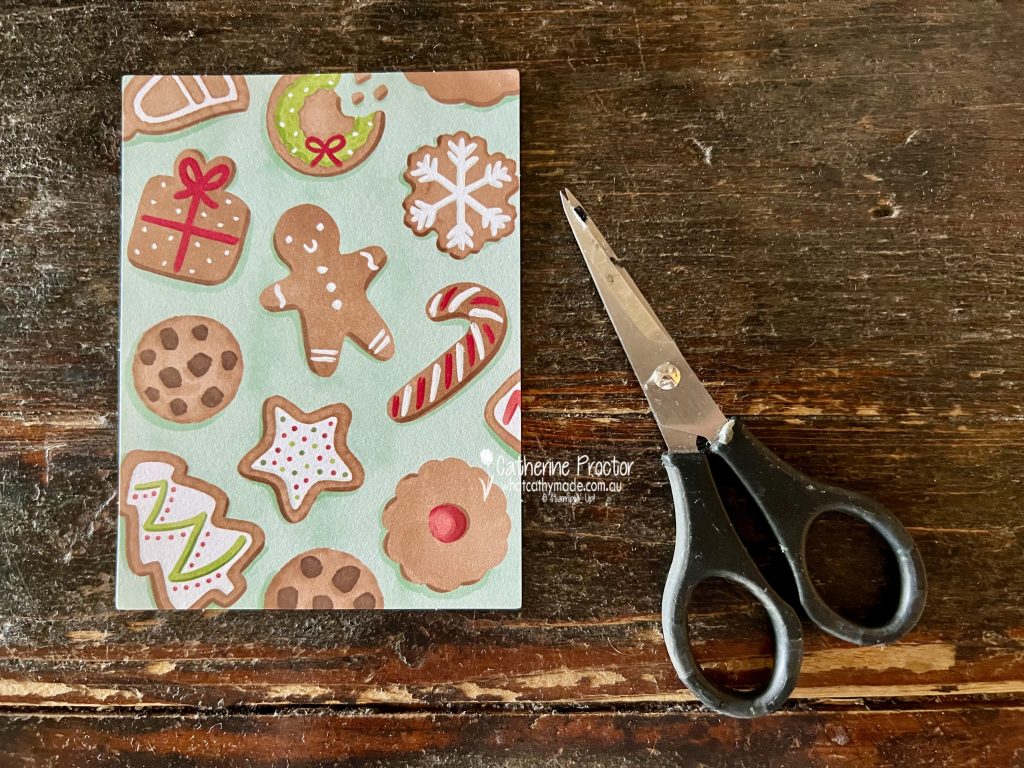
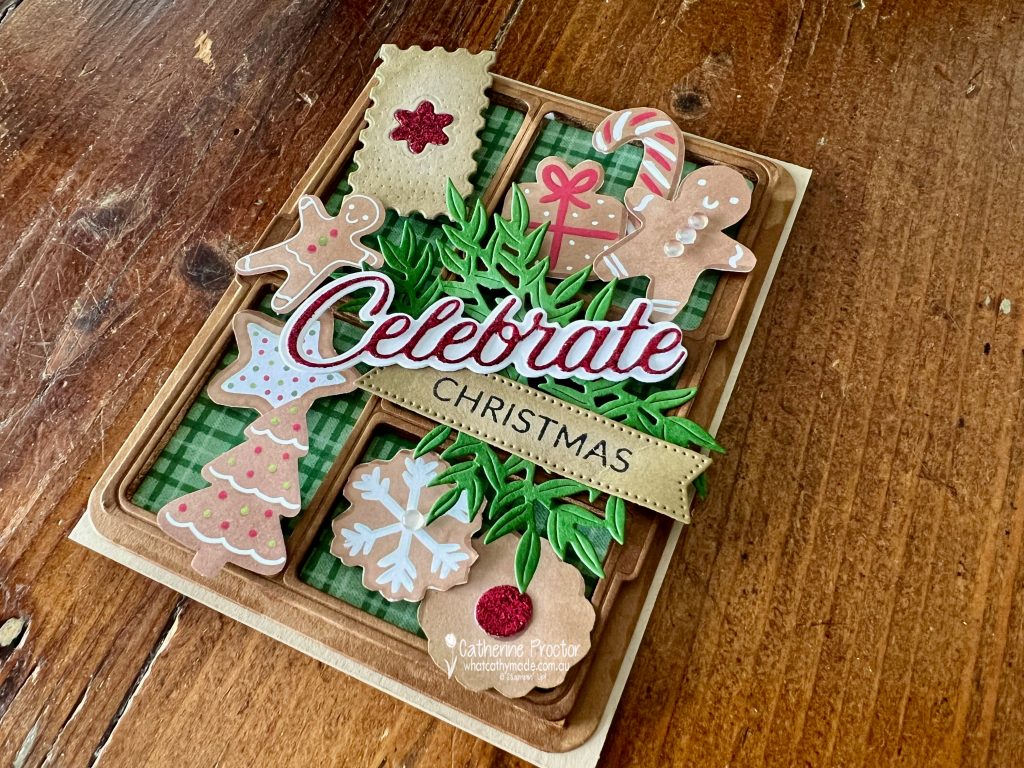
Today’s challenge is “Gingerbread Dream” and the brief is to create a festive card that evokes the sweet, cozy charm of gingerbread.
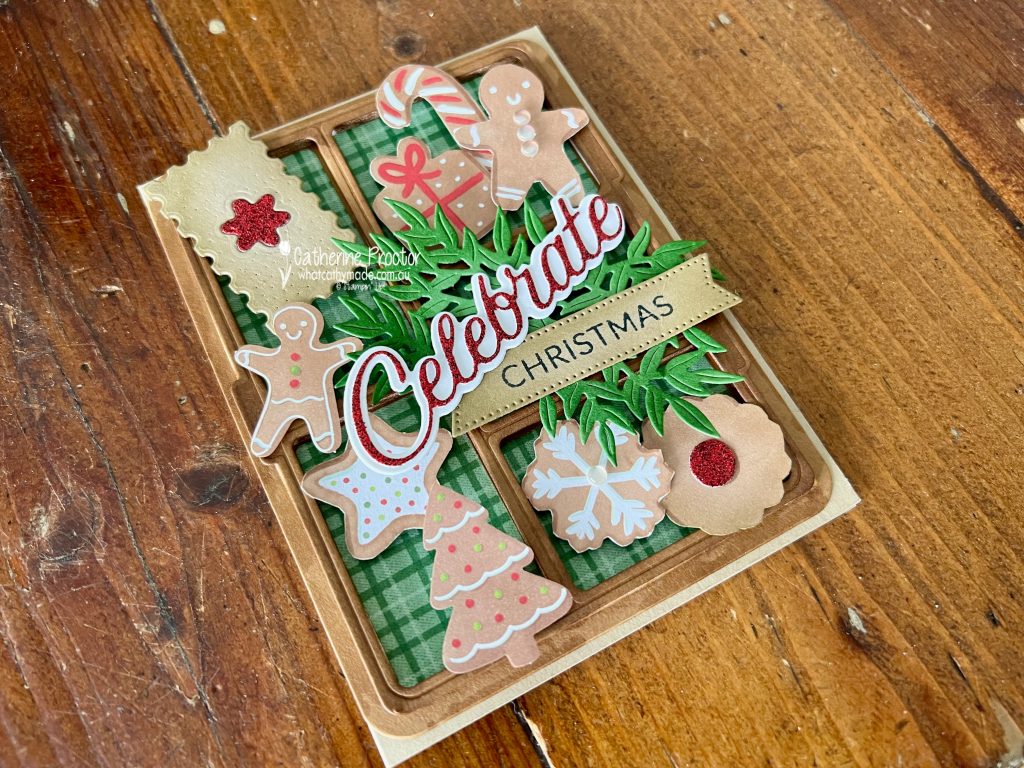
I have to confess if had to name my favourite Christmas food it would be gingerbread. Literally, any type of gingerbread–German lebkuchen, Dutch speculaas, Swedish pepparkakor, gingerbread men, iced gingerbread biscuits and fully decorated gingerbread houses. I even love plain old Arnotts Ginger Nut Biscuits!
So I couldn’t I just make a card with only one gingerbread item, could I?
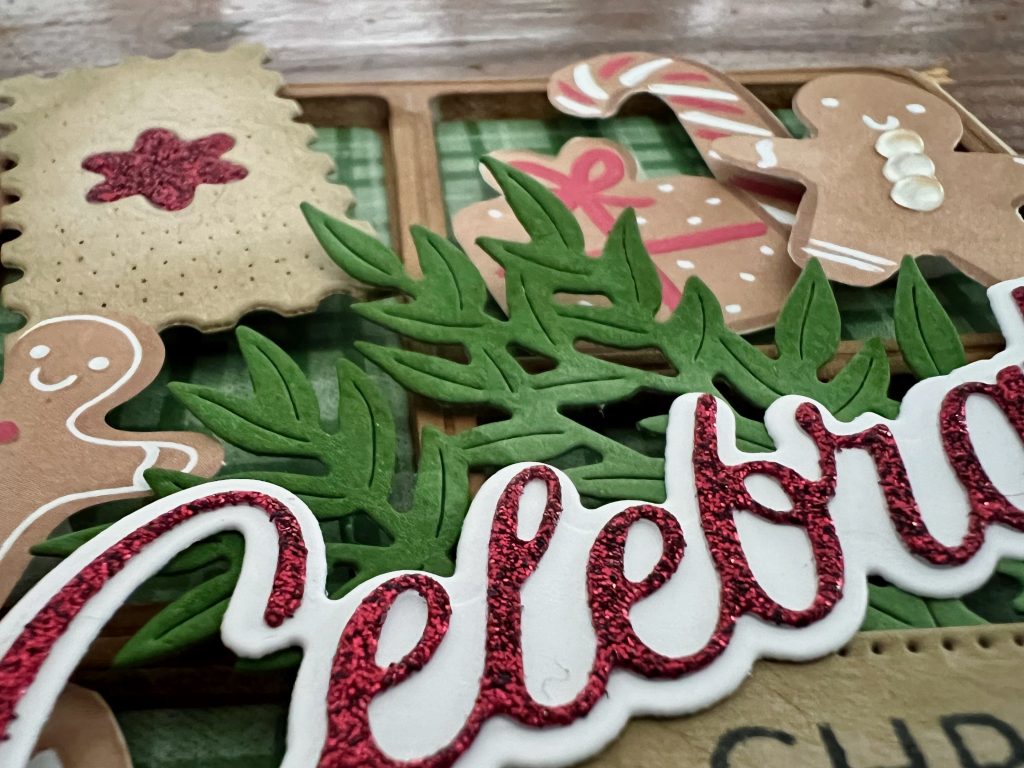
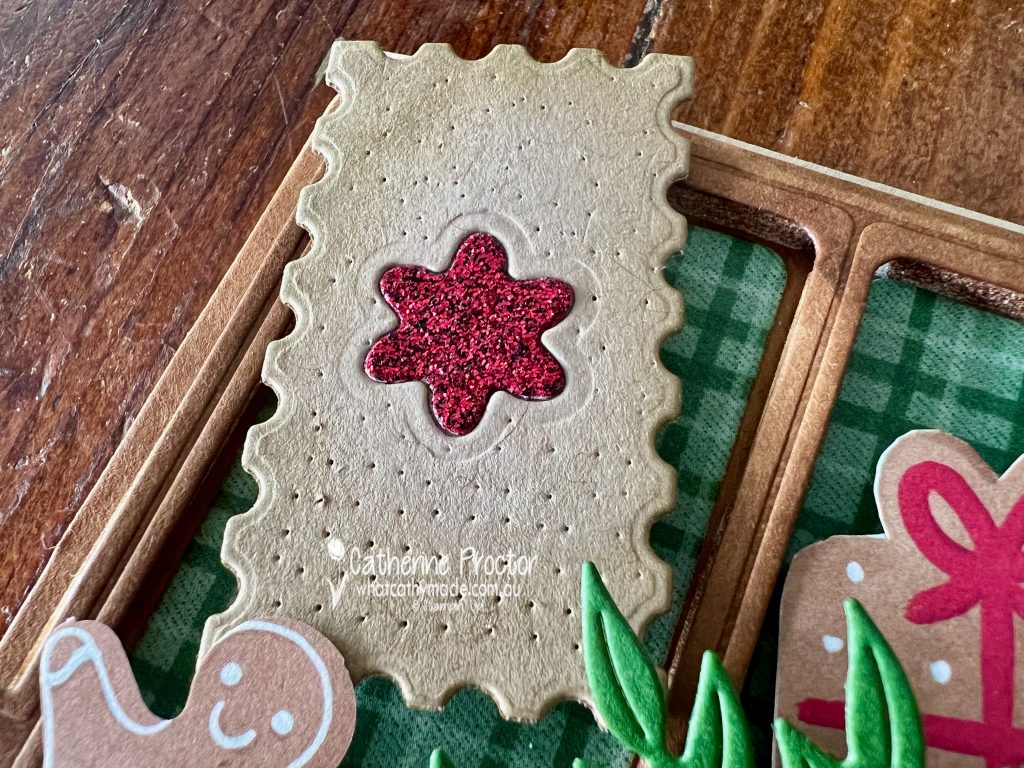
I’ve created the biscuit box using the two tackle box dies from the Gone Fishing dies. Die cut Pecan Pie card stock was attached the tackle box base using foam adhesive strips.
A Pecan Pie Stampin’ Blend coloured the inside and the outside edge of the white foam adhesive strips to match the cardstock and create the illusion of a biscuit box
I used the top tackle box die to die cut the tartan DSP to perfectly fit and line the box and then created an assortment of gingerbread using fussy cut images from the A Little Bit Festive DSP.
I also created an extra jam filled gingerbread biscuit made using the Perennial Postage Dies and the star from the Snowy Wonder dies die cutting the jam centre from glimmer paper.
The Garden Green foliage was die cut using Citrus dies and the “Celebrate” sentiment is from the Well Wishes dies.
Many of the elements in the card have had shading added using a sponge dauber.
I’ll hopefully be back tomorrow with another “30 Days of Christmas” Christmas card. I hope you can join me then.
Welcome to week twenty one of our Art With Heart 2023-24 Colour Creations blog hop! This week we are showcasing Daffodil Delight, a sunny yellow from the Brights family.
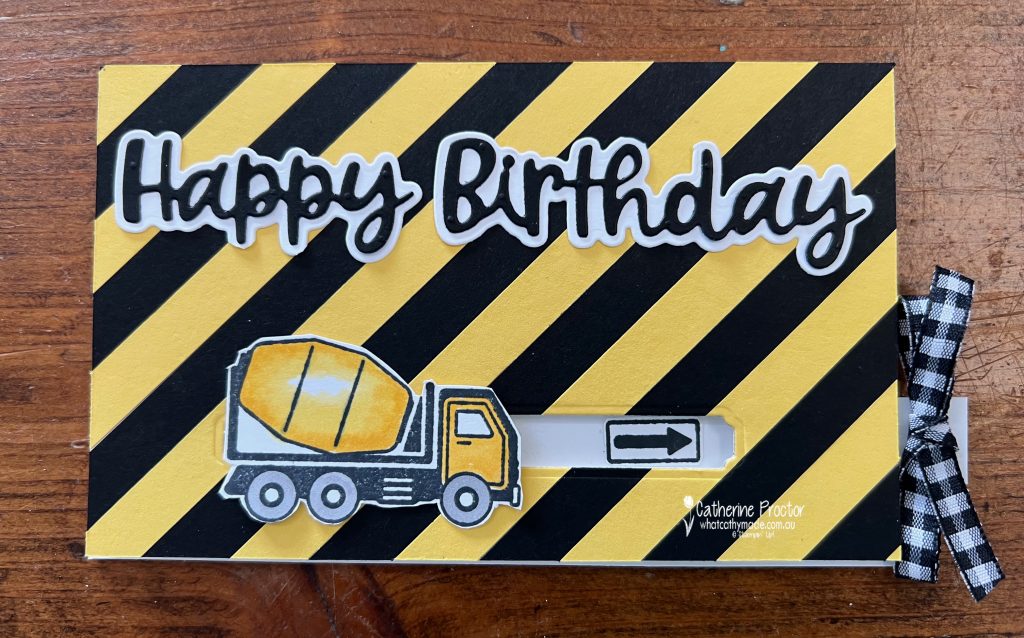
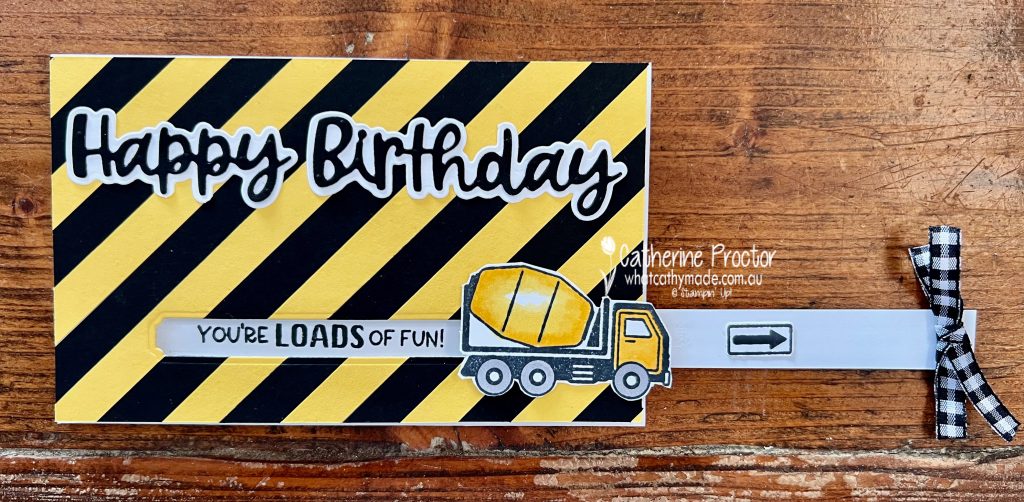
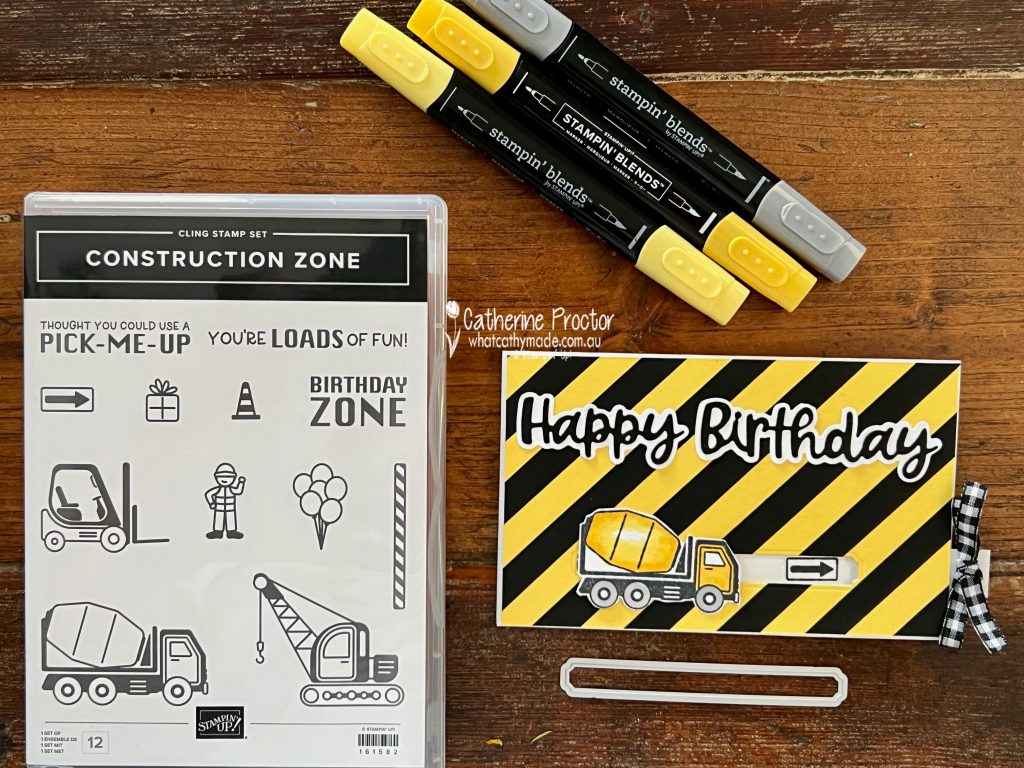
Have you seen any of the cards that use the Construction Zone stamp set, creating a “high vis” vibe by using strips of Daffodil Delight and Basic Black cardstock? Today I’ve stepped it up by creating a “high vis” card that is also a slider card.
Here is what the slider card looks like with the slider mechanism sitting inside the card…
And here it is with the slider pulled open…
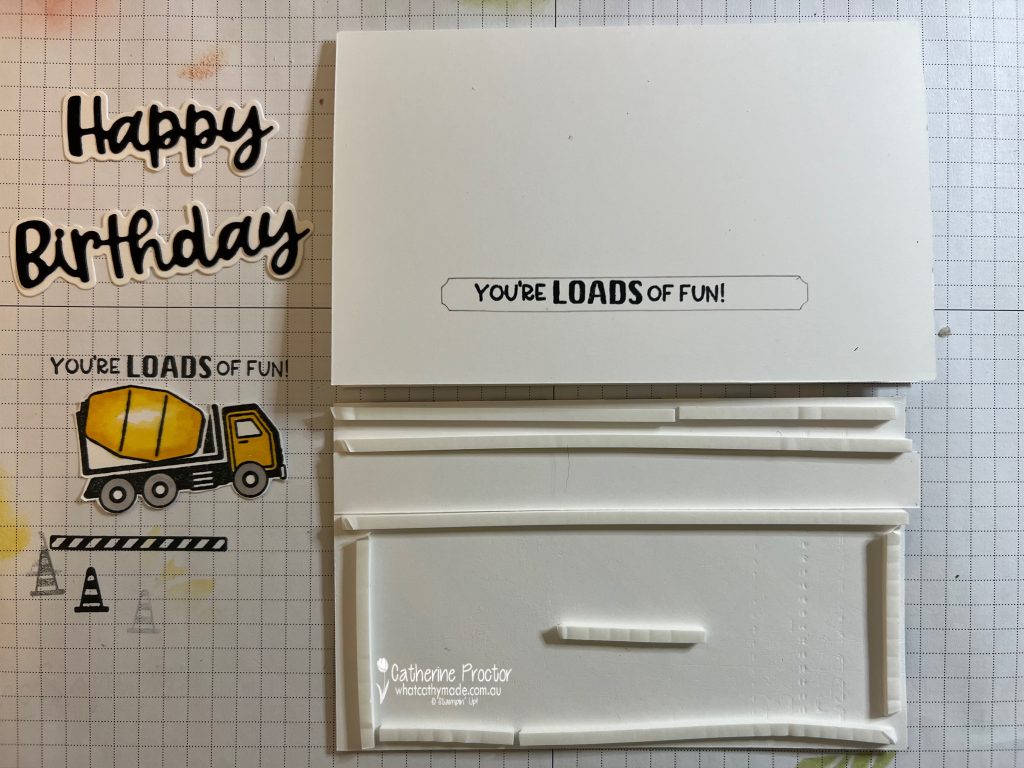
The “You’re loads of fun” sentiment from the Construction Zone stamp set was the perfect size and shape to use as the sentiment for the slider reveal. The “Happy Birthday” sentiment is from the Wanted to Say dies, cut in half to create a horizontal sentiment.
To create the “high vis” vibe is relatively simple. I adhered adhesive sheets to Daffodil Delight and Basic Black cardstock before cutting the cardstock into 1cm wide strips.
These strips were then attached on a 45 degree angle to a piece of Basic White card stock to create the front layer.
The channel for the slider mechanism was then cut out of this front layer using the longest die from the Sending Dies.
Here’s a peek at the construction process – I made up the design of this card and the mechanism as I went along so I only took one (very messy) photo of the construction stage.
One important aspect of creating a slider card is to place the top layer over the front of the card (BEFORE adhering the top layer to the card front with foam strips) and trace the die-cut channel area onto the card. This shows you exactly where to stamp the slider reveal sentiment.
This photo also shows the reverse side of the slider strip sitting between the strips of foam that line the slider channel – line the slider strip up between theses foam strips to ensure it slides smoothly but is still snug BEFORE you attach the cement truck to the front slider strip using either foam strips or dimensionals.
This short video shows the slider card in action, as well as the back of the slider strip pull mechanism.
I’ve used the arrow stamp from the Construction Zone stamp set to indicate where to pull, using a bow of Black & White 1/4″ (6.4 mm) Gingham Ribbon adhered with a black Square Brad to the slider strip, which is 1.5cm wide.
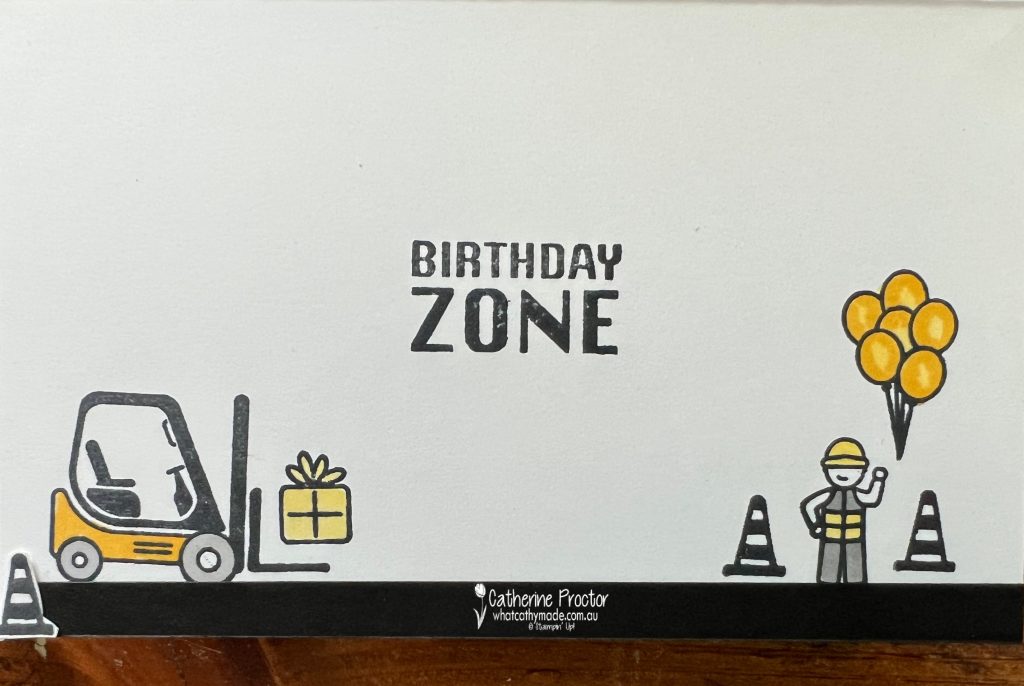
On the inside of the card I had fun playing with the other stamps from the construction Zone stamp set.
I’ve coloured the inside images and the cement mixer on the front of the card with Daffodil Delight and Smoky Slate stampin blends.
Now it’s time to hop on over to our next participant, the lovely Andrea Sargent – I can’t wait to see what Andrea has made this week!
If at any time you find a broken link, you can find the complete list of all participants below.
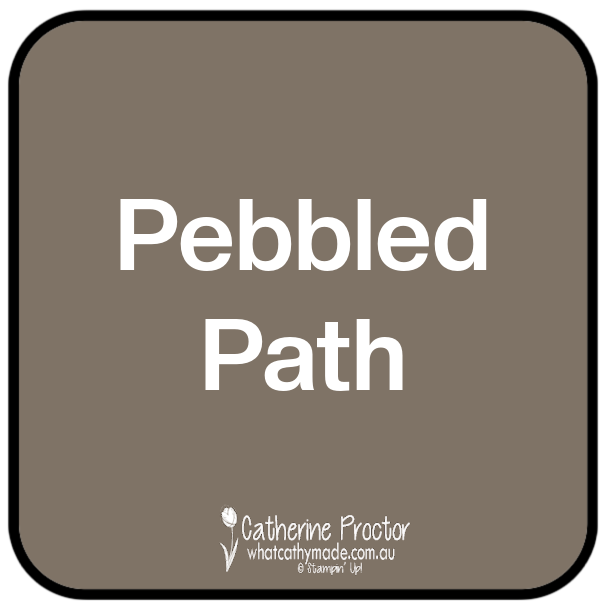
Welcome to week four of our Art With Heart 2023-24 Colour Creations blog hop!
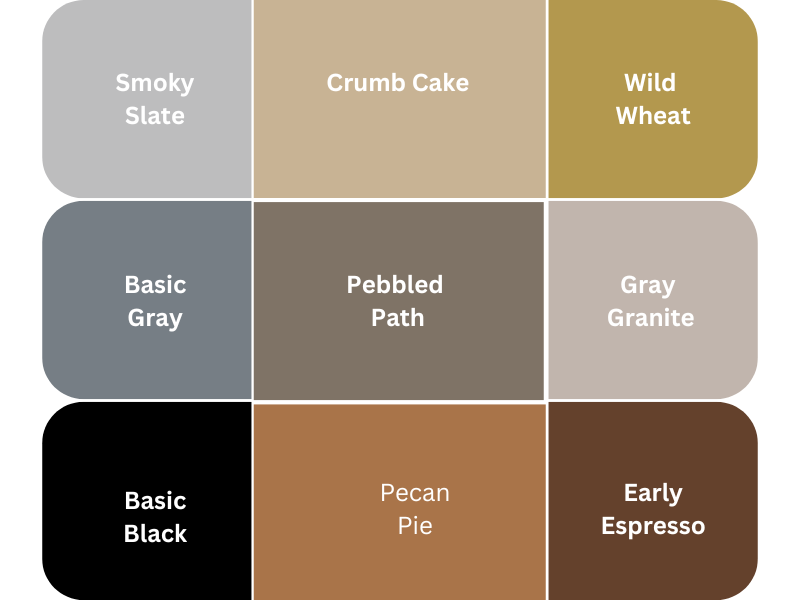
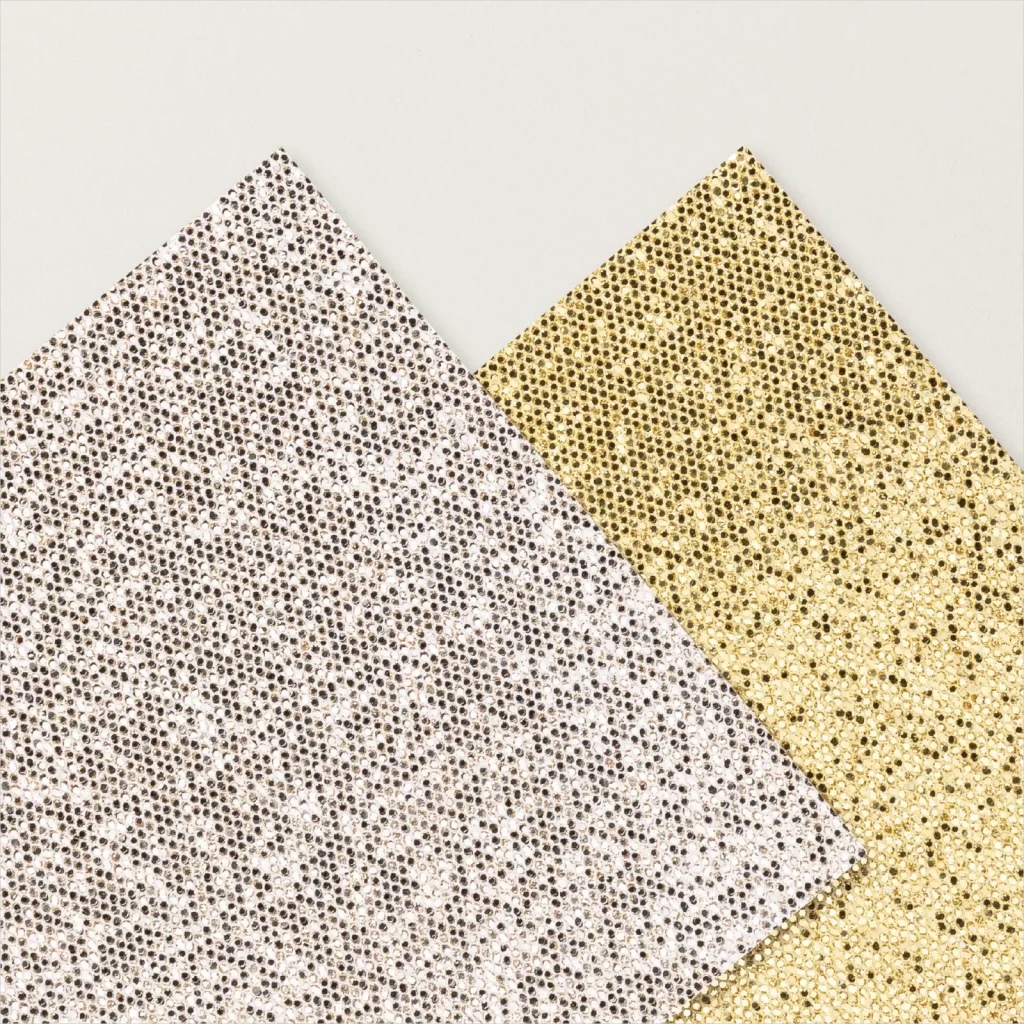
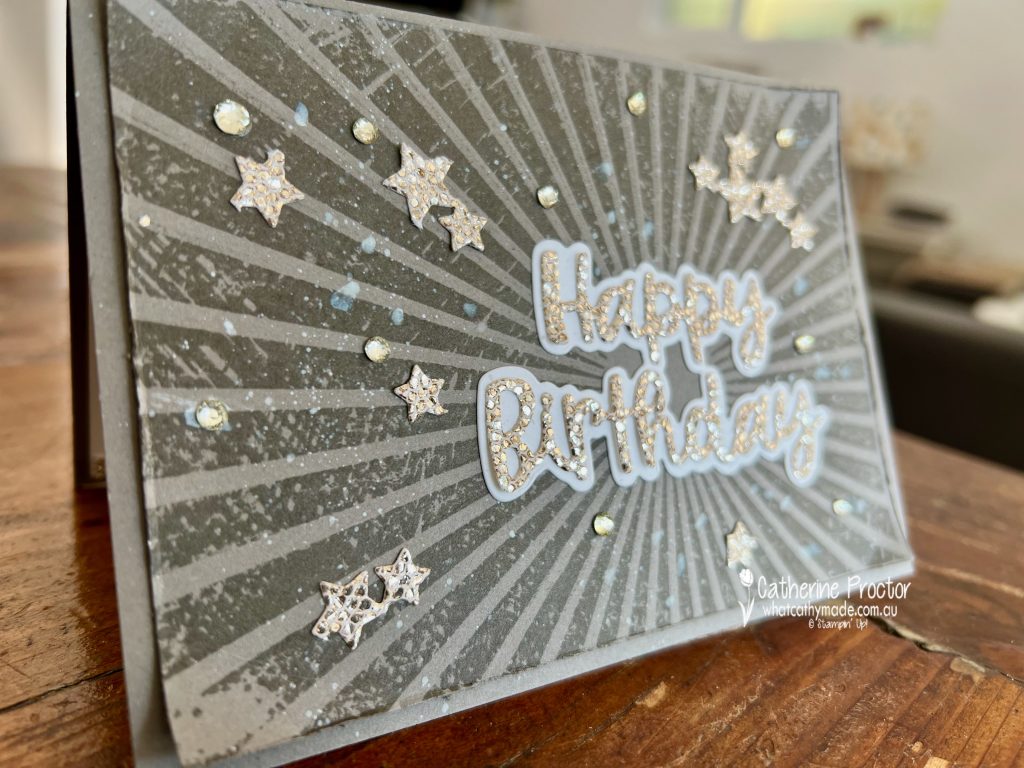
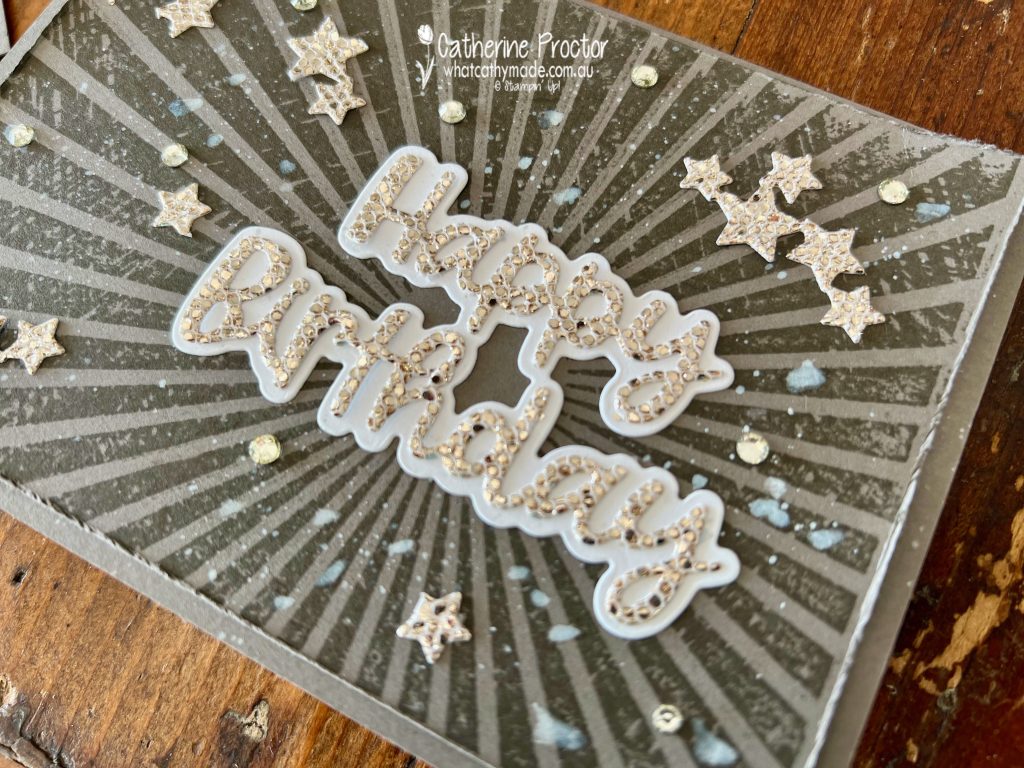
This week we are showcasing another brand new 2023-25 In Colour: Pebbled Path. Pebbled Path is a warm mid-tone gray, similar to a previous In Color, Tip Top Taupe.
Here’s how Pebbled Path compares to the other current Stampin’ Up! grays and browns. It really sits in between the grays and the browns.
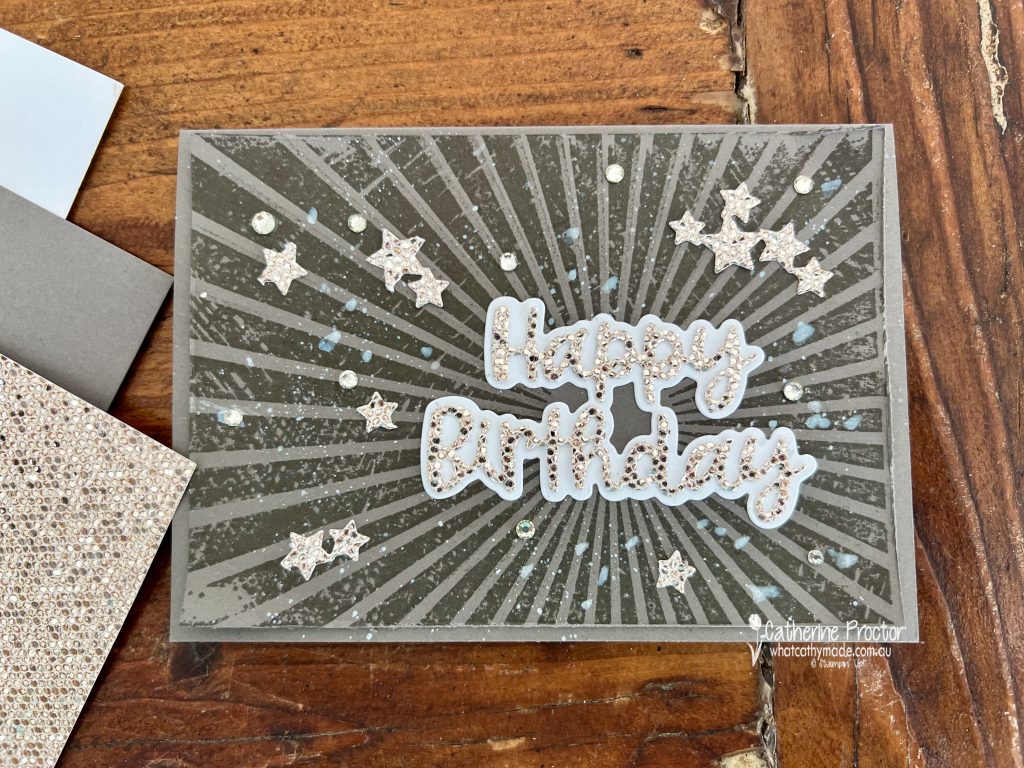
I’ve paired Pebbled Path with Basic White and this stunning Champagne coloured More Dazzle 6″ x 6″ Specialty Paper.
This specialty paper adds so much “wow” factor to your cards – I can’t wait to use this for my Christmas cards too.
The only downsides of this incredibly sparkly specialty paper are that it is hard to photograph and it can also be tricky to die cut – you’ll need to run it back and forth in your cut’ n’ emboss machine a few extra times.
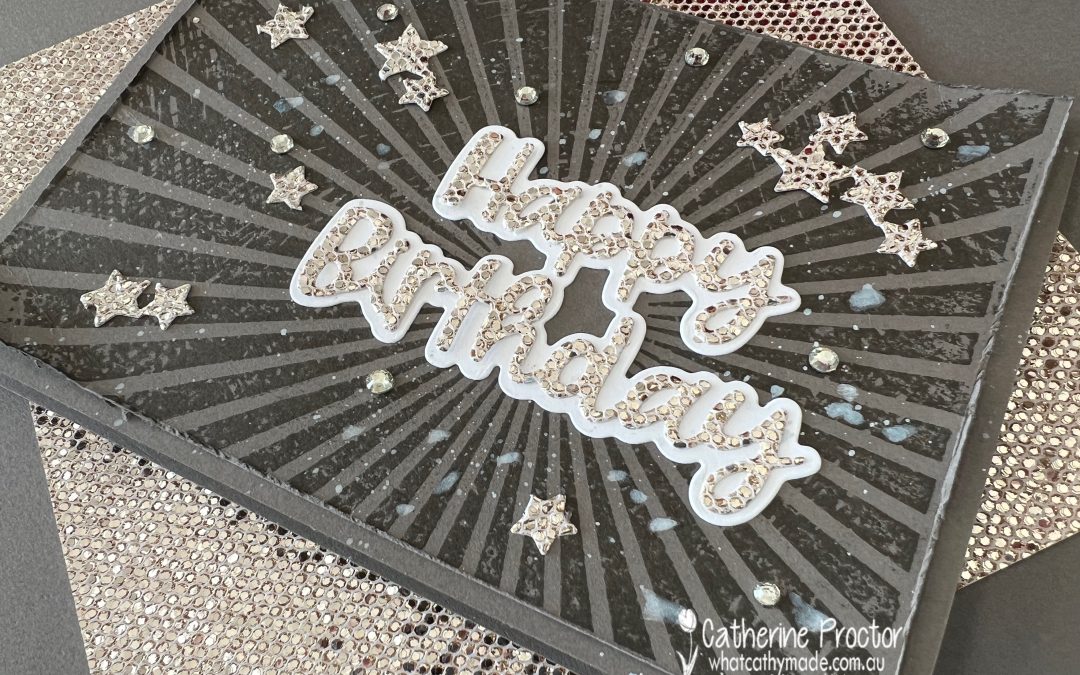
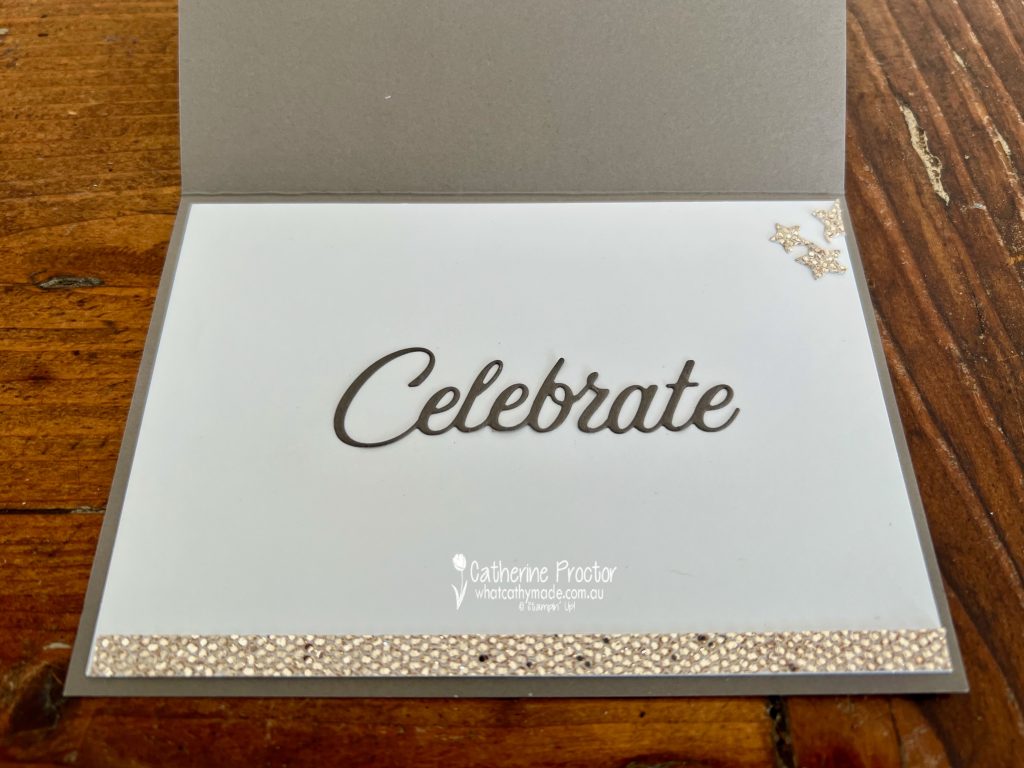
Apart from stamping the Rays of Light background stamp in Pebbled Path ink onto the Pebbled Path cardstock, there is actually no other stamping on this card.
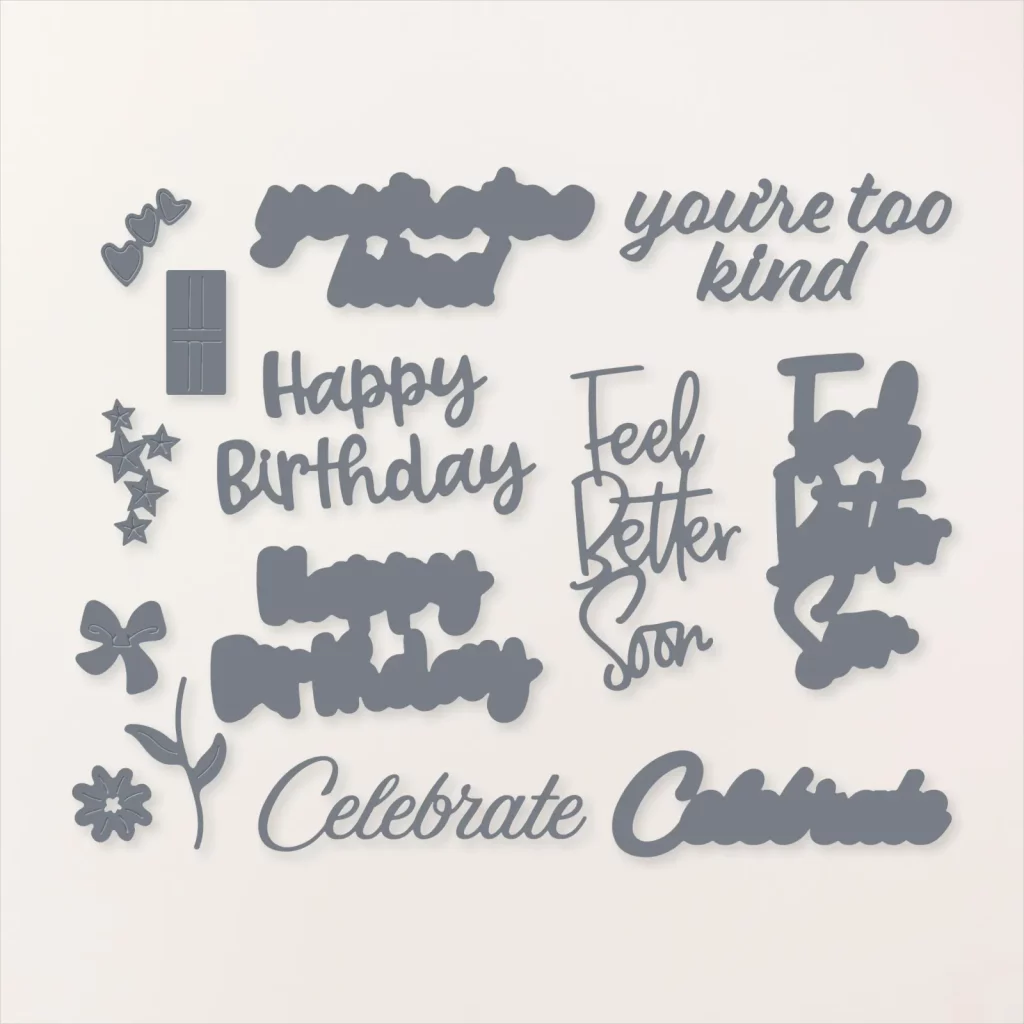
The Wanted to Say Dies do all the hard work for you and they have a sentiment for most occasions as well as die cut decorations that include stars, hearts, a flower, a stem and leaf and a bow.
The Wanted to Say Dies also include a layer for all the sentiments so you can either use the sentiment with a layer behind it or on its own, as I’ve done here on the inside of my card.
TOP TIP for using these dies – adhesive sheets applied to the specialty paper and the cardstock BEFORE you die cut are a must for this type of card!
I’ve splattered some white craft ink with a water painter (I definitely need to practise my technique, LOL!) and added a few Rhinestone Basic Jewels to embellish my card.
Now it’s time to hop on over to our next participant, the lovely Vicki Boucher – I can’t wait to see what Vicki has made this week!
If at any time you find a broken link, you can find the complete list of all participants below.