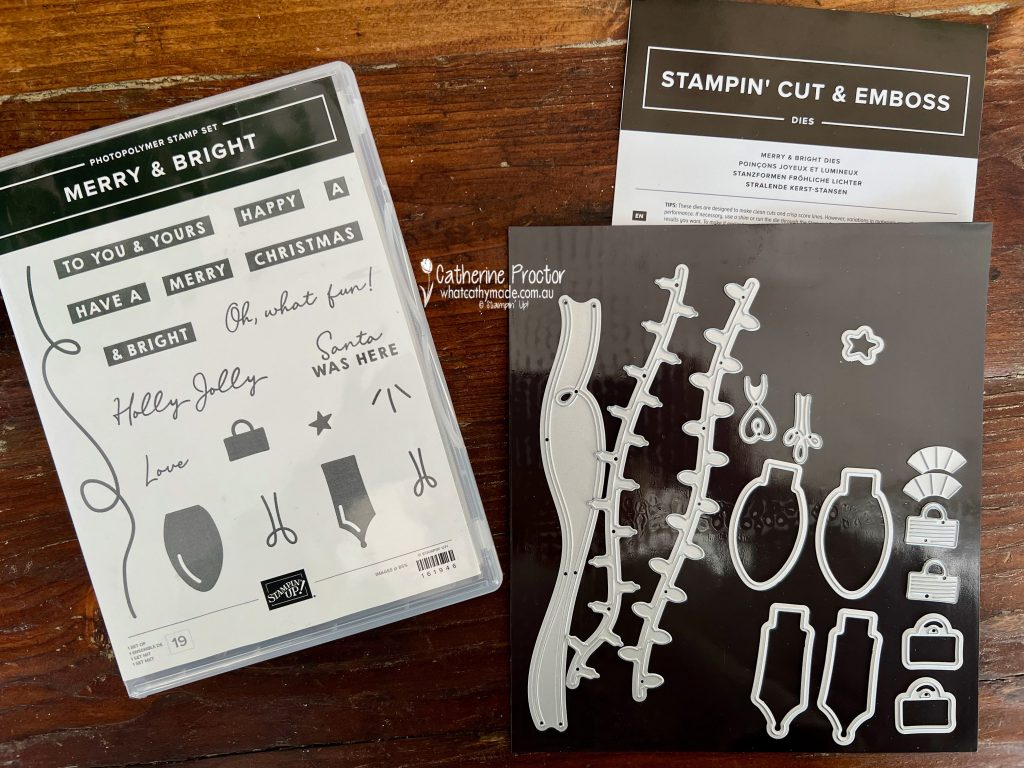
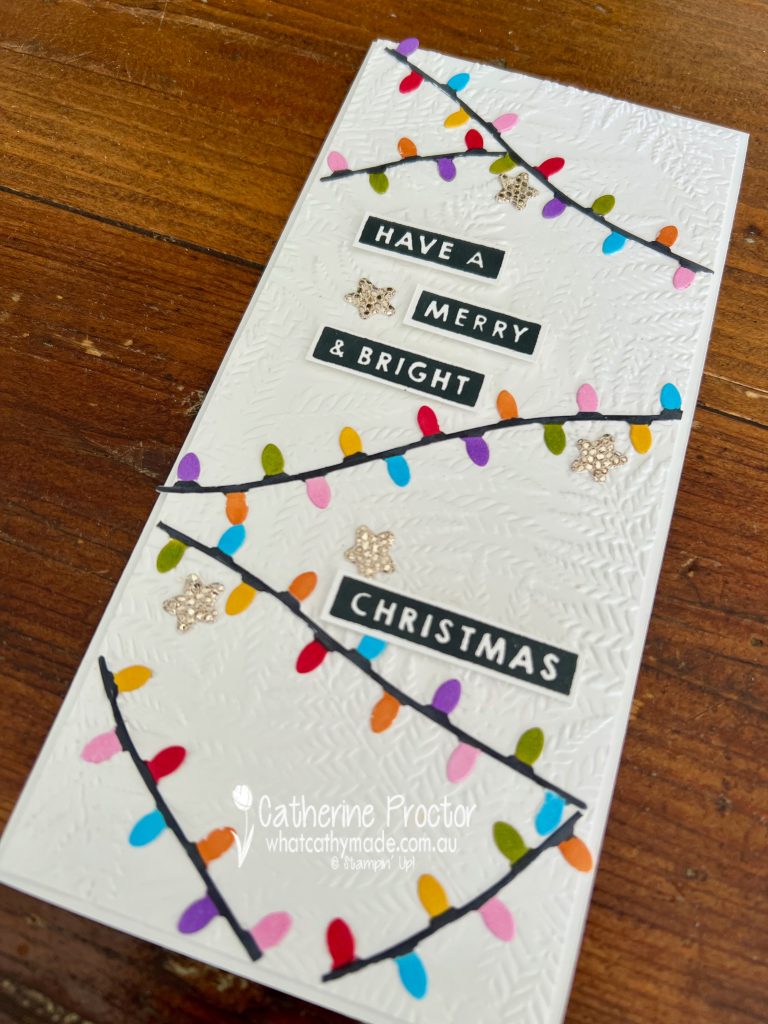
Your Christmas countdown continues – it’s 16 weeks today until Christmas Day! And in even more exciting news, it’s only two days until the Stampin’ Up! September December Mini Catalogue goes live and you can purchase the Merry & Bright bundle.
Sometimes the dies in a bundle can be overlooked if they don’t have a matching stamp set, and to honest, I don’t think I realised the Merry & Bright bundle included these two strings of Christmas lights until my delivery arrived!
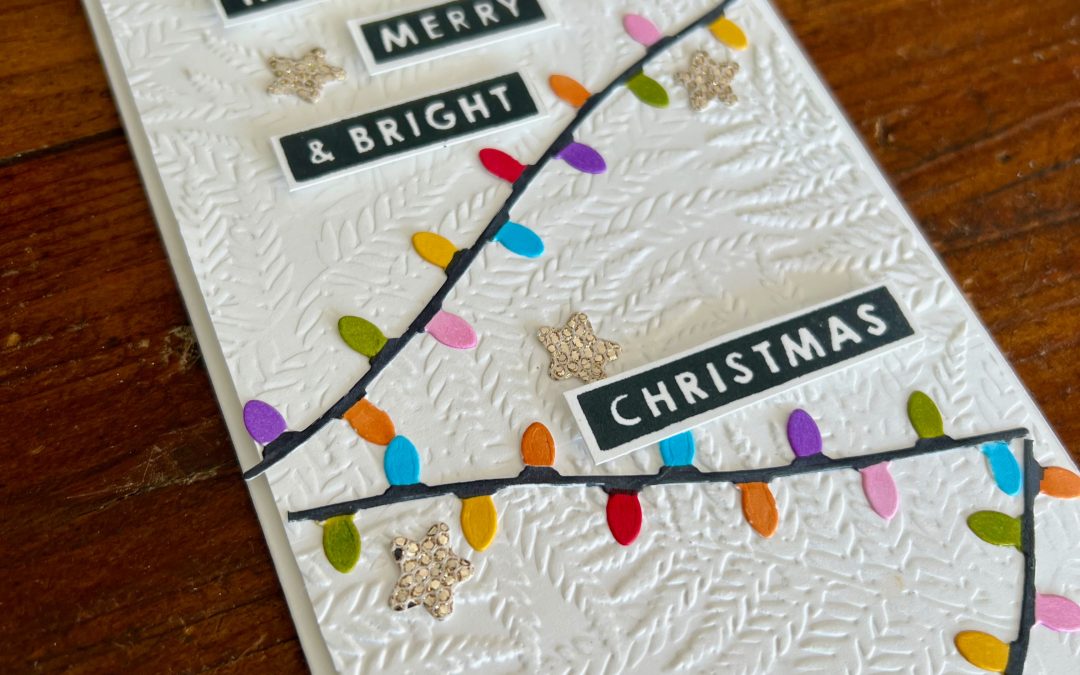
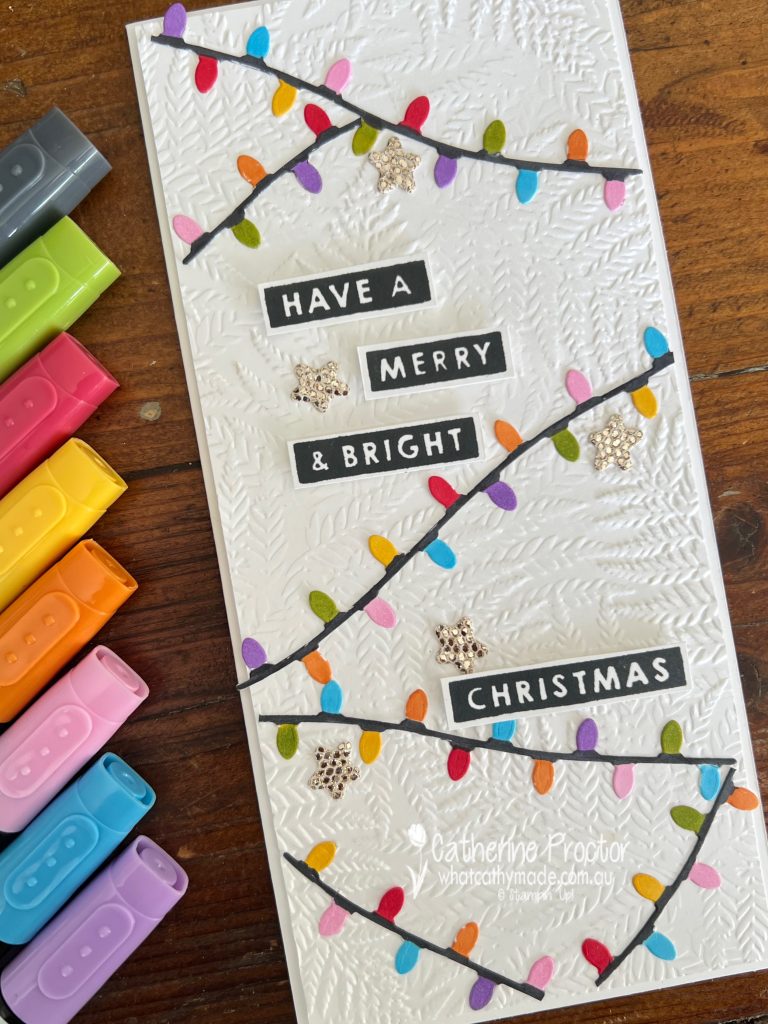
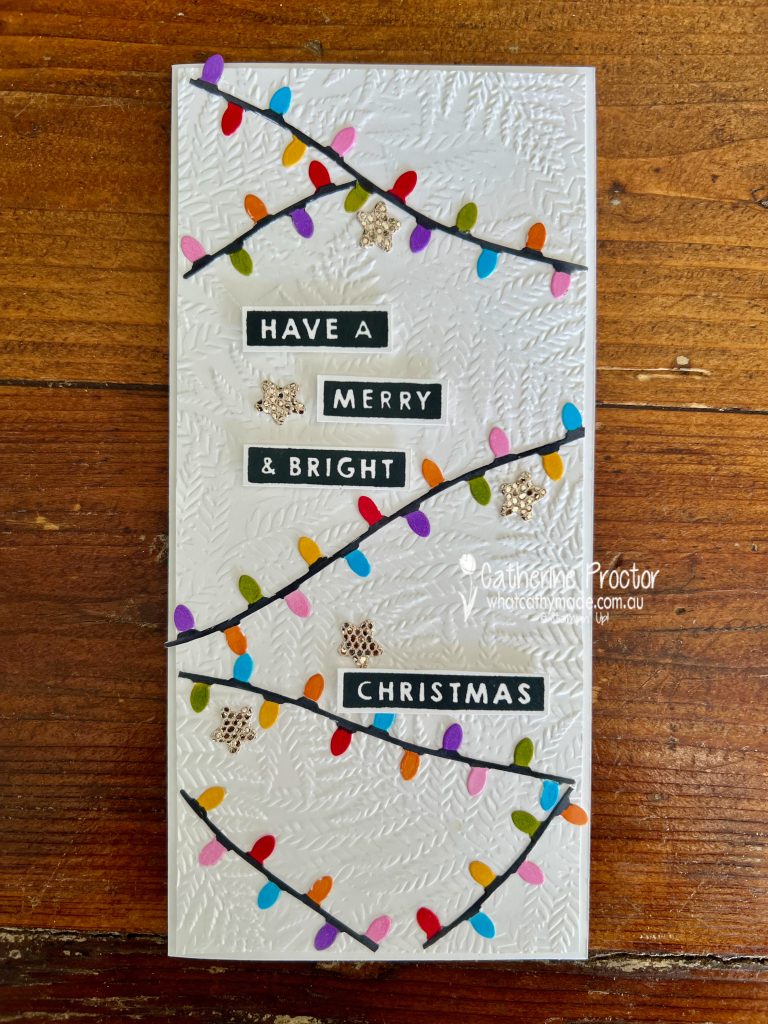
I’ve used the die with the more rounded light bulb to create this slimline card. Four “string of Christmas lights” dies were die cut from Basic White cardstock and then coloured in with a variety of Stampin’ Blends.
The top layer of the card was embossed using the Fern 3D embossing folder to mimic the branches of a Christmas tree.
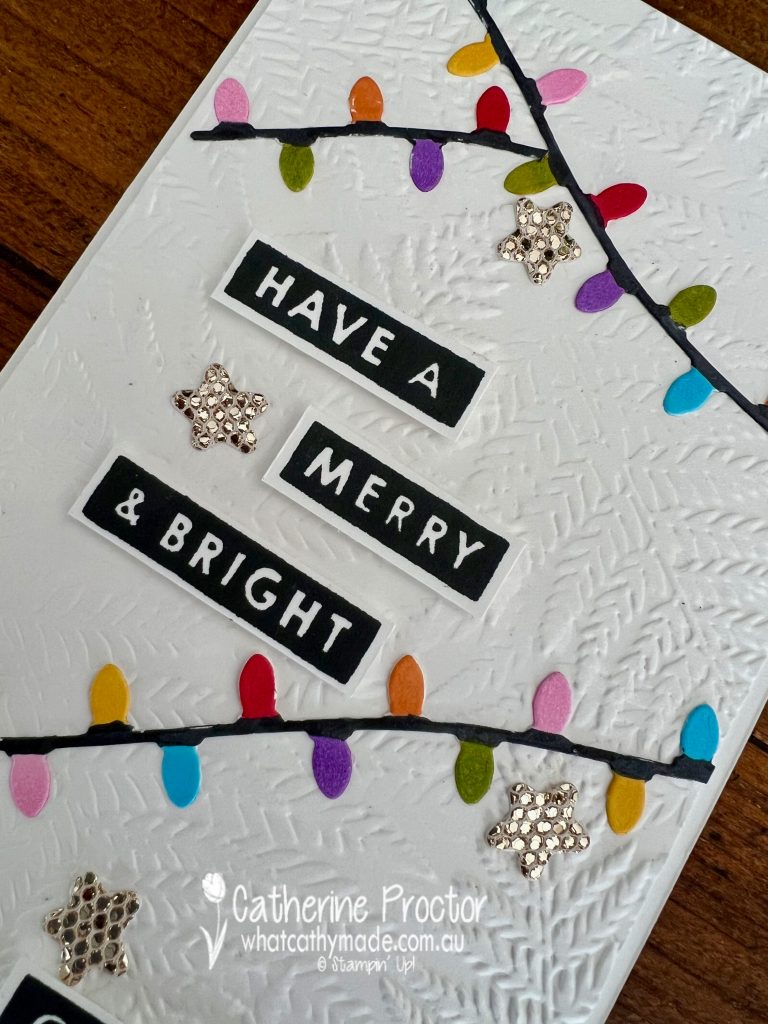
Using the star die in the Merry & Bright bundle, I die cut a few stars from the More Dazzle Specialty paper.
The sentiment is from the Merry & Bright stamp set, stamped in Memento Tuxedo black for contrast against the white card base and card front layer and and the bright colours of the Christmas lights.
Now it’s time to hop on over to our next participant, the lovely Rosa Leyden. I can’t wait to see what Rosa has made this week.
If at any time you find a broken link, you can find the complete list of all participants on Sharon’s blog.
The Christmas countdown continues – it’s 18 weeks today until Christmas Day! Have you started making Christmas cards yet?
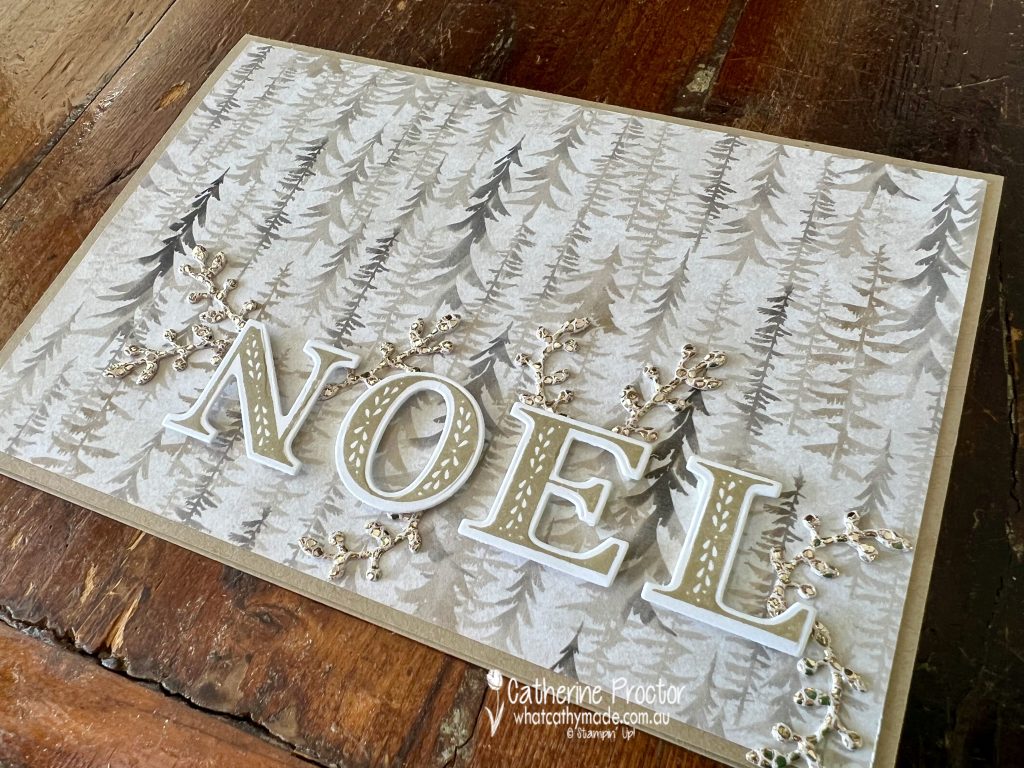
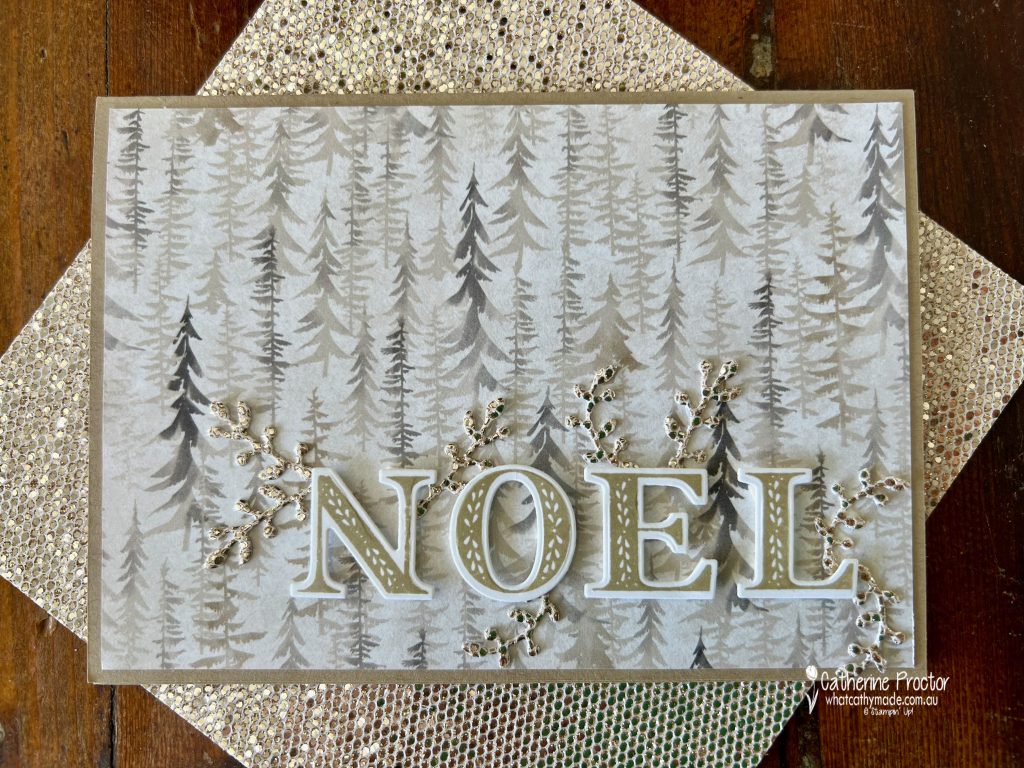
This week I was short of time so I’m following the example of my friend, Tina Gillespie, by creating a 20 minute card. It was this beautiful One Horse Open Sleigh 6″ x 6″ DSP that also inspired the fast and simple card – I just didn’t want to cover it up too much!
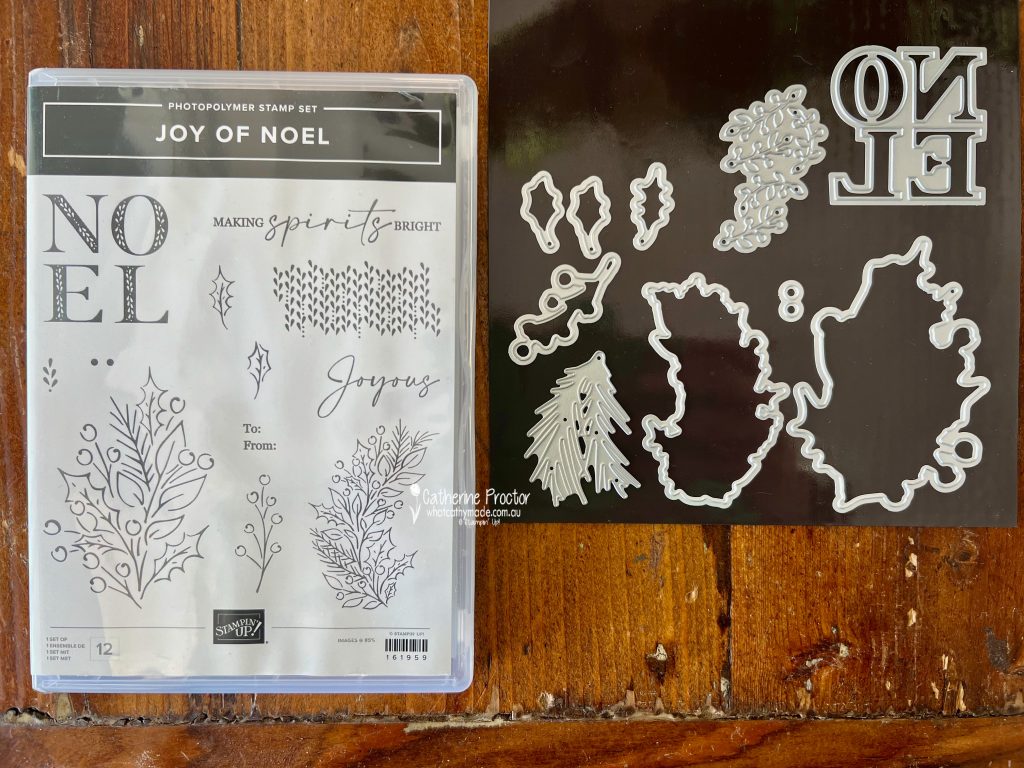
The Joy of Noel bundle will be available to purchase from September 3 – it was the large Noel sentiment with matching dies that tipped this bundle into my shopping cart!
I stamped the NOEL in Crumb Cake, die cut it out and used mini dimensionals to adhere the letters to the One Horse Open Sleigh 6″ x 6″ DSP.
Instead of adding an embellishment for a touch of sparkle, I used a die from the Joy of Noel dies to cut some fronds from the More Dazzle Specialty paper.
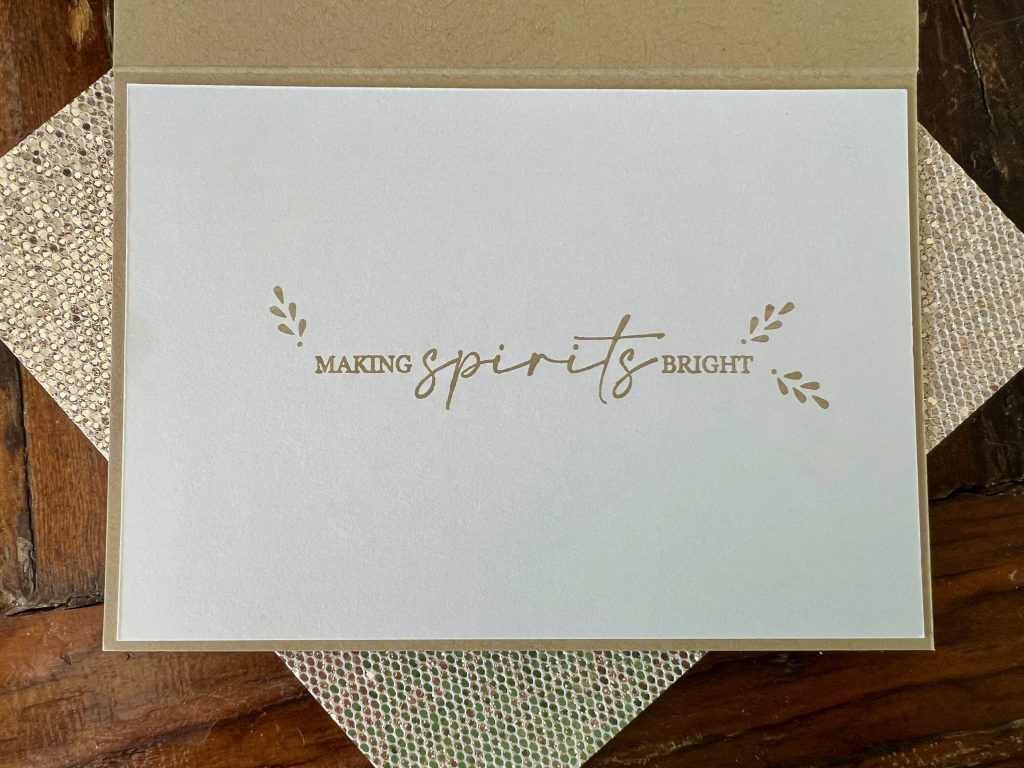
I kept the inside of the card simple too, with Crumb Cake stamped sentiments from the Joy of Noel stamp set.
Now it’s time to hop on over to our next participant, the lovely Sharon Davern. I can’t wait to see what Sharon has made this week.
If at any time you find a broken link, you can find the complete list of all participants on Sharon’s blog.
Welcome to week five of our Art With Heart 2023-24 Colour Creations blog hop!
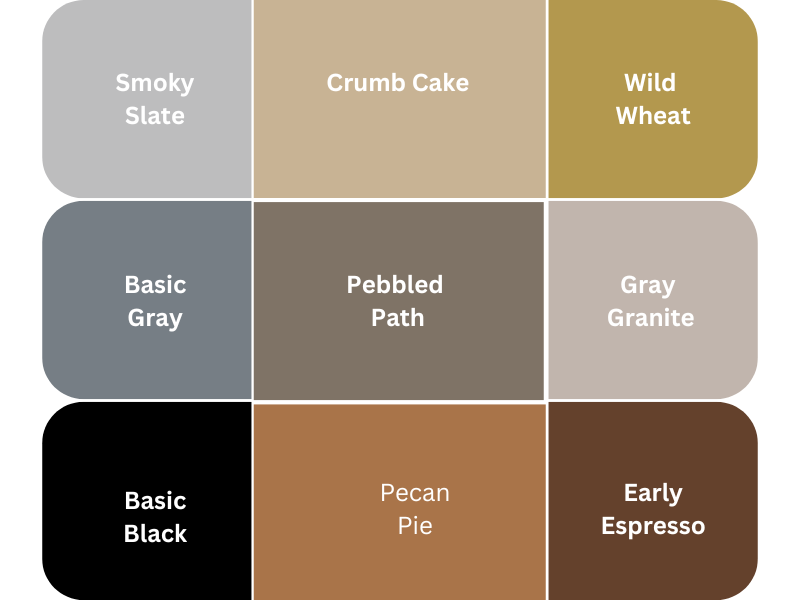
This week we are showcasing our fifth 2023-25 In Colour: Wild Wheat. Wild Wheat is a warm mustard gold colour, similar to a previous In Color, Delightful Dijon.
Here’s how Wild Wheat compares to the other current Stampin’ Up! yellows and browns.
Although I love shades of mustard when used as an accent colour for homewares, leather shoes and bags, I must admit I found Wild Wheat challenging at first to craft with … especially as I’m a 7 hour drive away from home this week and I packed the wrong supplies!!!!
Luckily, I’d packed some of my 2023–2025 In Color 6″ x 6″ (15.2 x 15.2 cm) Designer Series Paper as well as my specialty paper share, which included Wild Wheat in the 2023–2025 In Color 12″ x 12″ (30.5 x 30.5 cm) Luster Specialty Paper and the “oh so fabulous” More Dazzle 6″ x 6″ (15.2 x 15.2 cm) Specialty Paper.
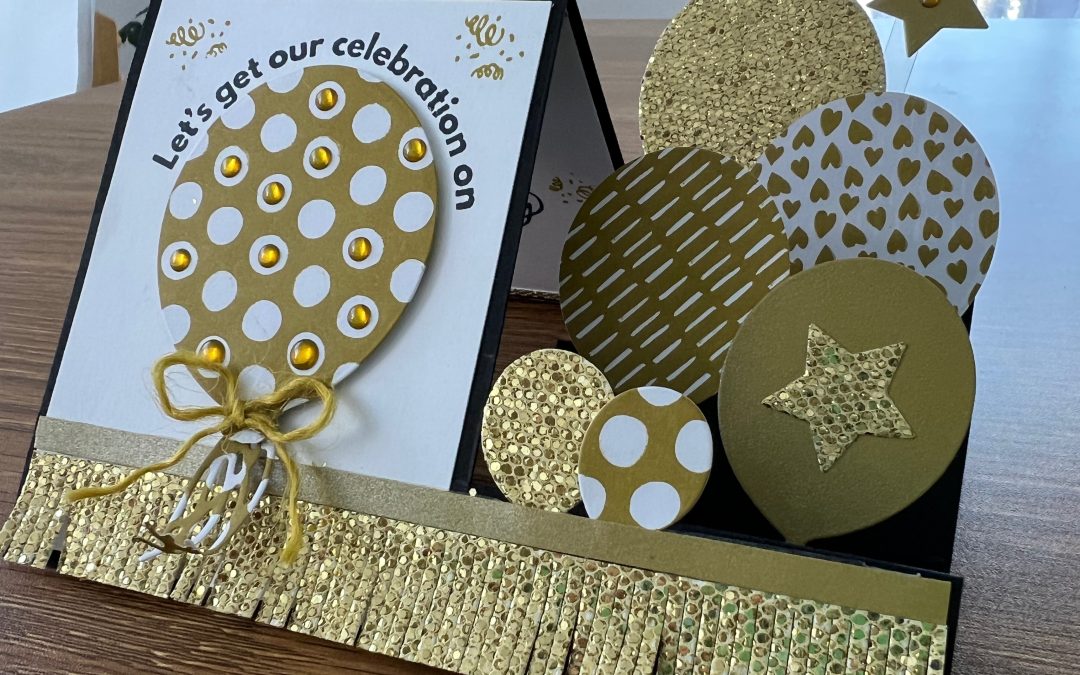
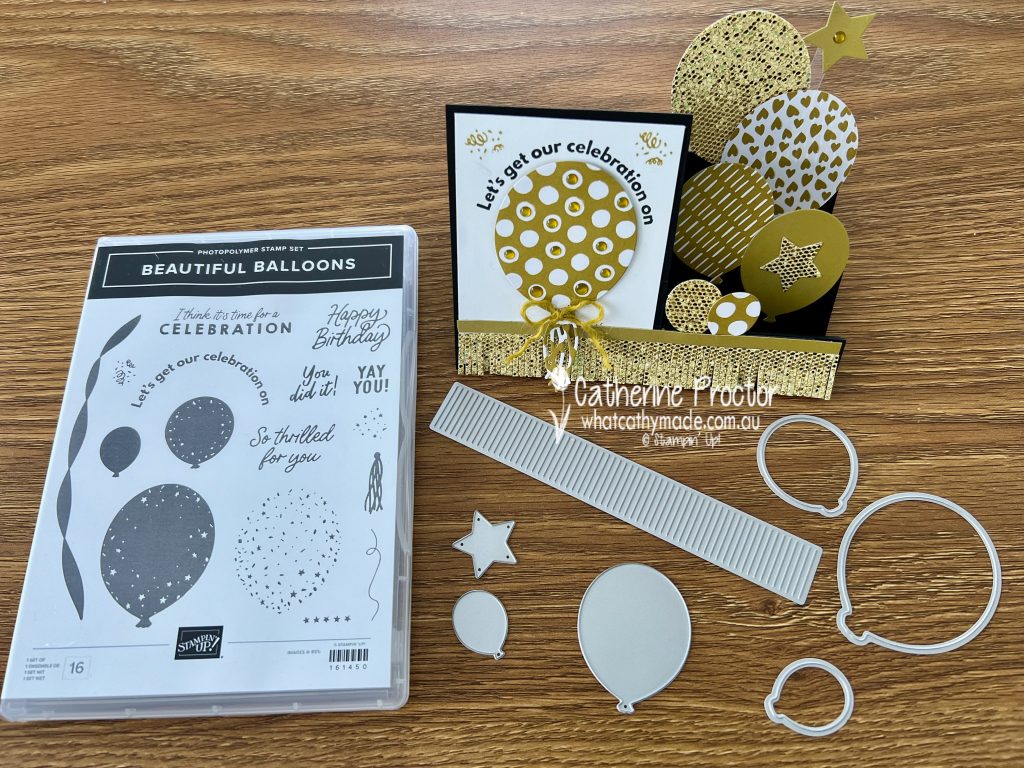
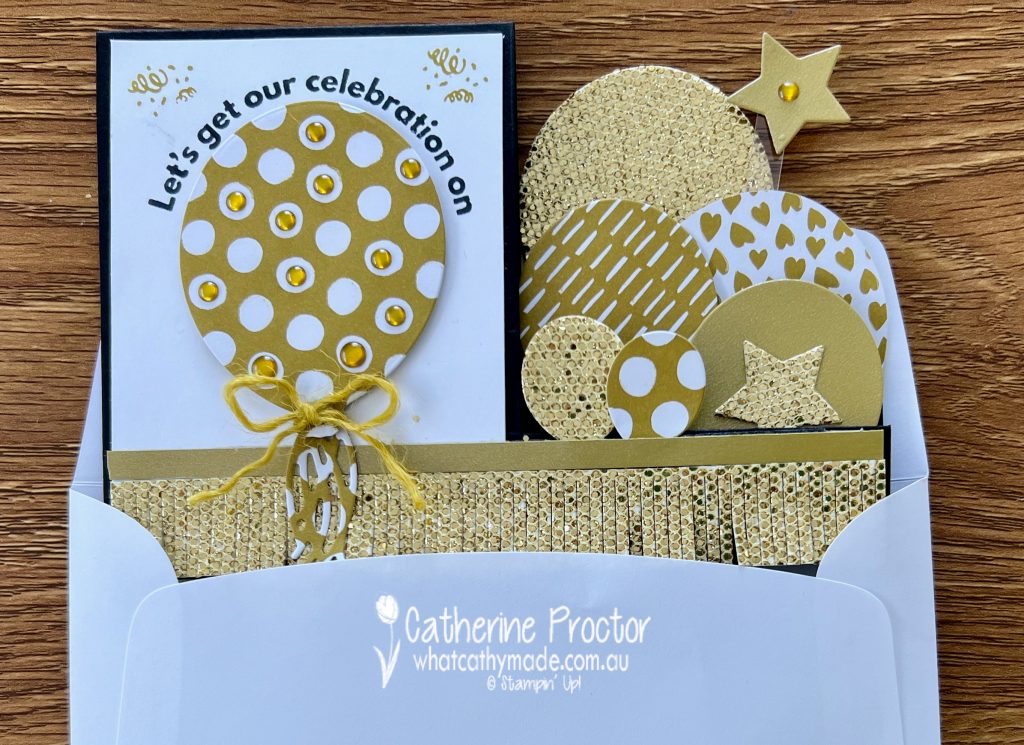
I’d also packed the Beautiful Balloons bundle to make a card for next week’s blog, but decided to use it this week instead to make a side stepper/side step card.
Making a side step card is quite simple – there is only one single cut and a few folds. One sheet of A4 paper is enough for 2 card bases, each measuring 14.8cm x 21cm each.
Use your paper trimmer to cut your A4 card stock in half and then cut and score as per the template below – the fold on the left hand side of the card is at 10.5cm.
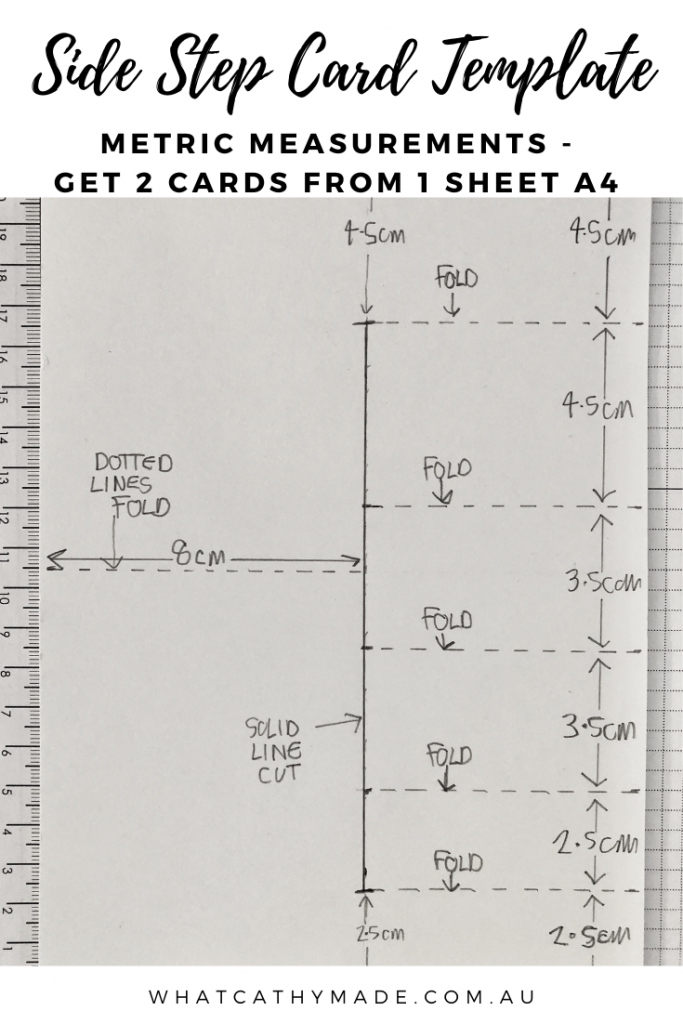
Side Step Card Template
Measure in 8cm from the left on the 14.8cm side of your card base and draw a pencil line from top to bottom.
Along this line measure down 4.5cm from the top of the card stock and measure up 2.5cm from the base of the card stock. The solid line in between these 2 measurements is your only cutting line for this card- I’ve marked this as a solid black line in my template.
Cut along this solid line, being very carful not to cut above or below this line.
All the other dotted lines are fold lines – measure and score these with your paper trimmer.
Once you’ve scored these lines, rub out the pencil mark along your cut line and fold the score lines so the side folds of your card look like this.
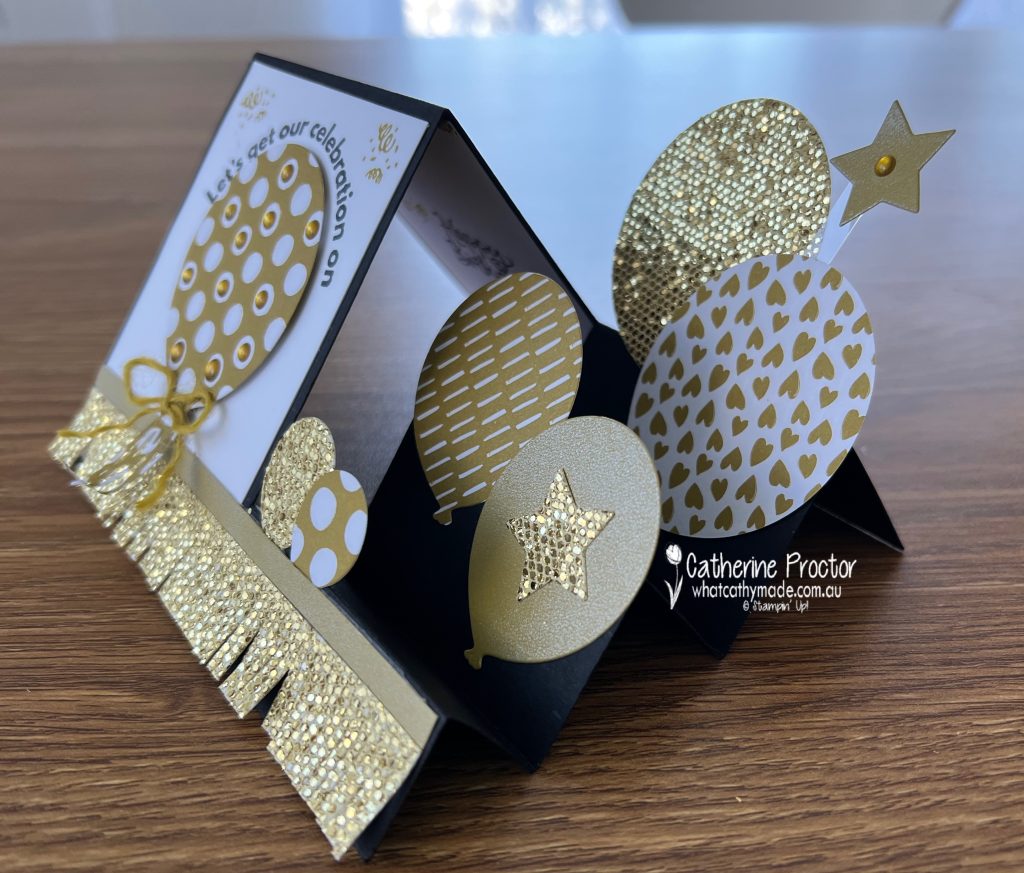
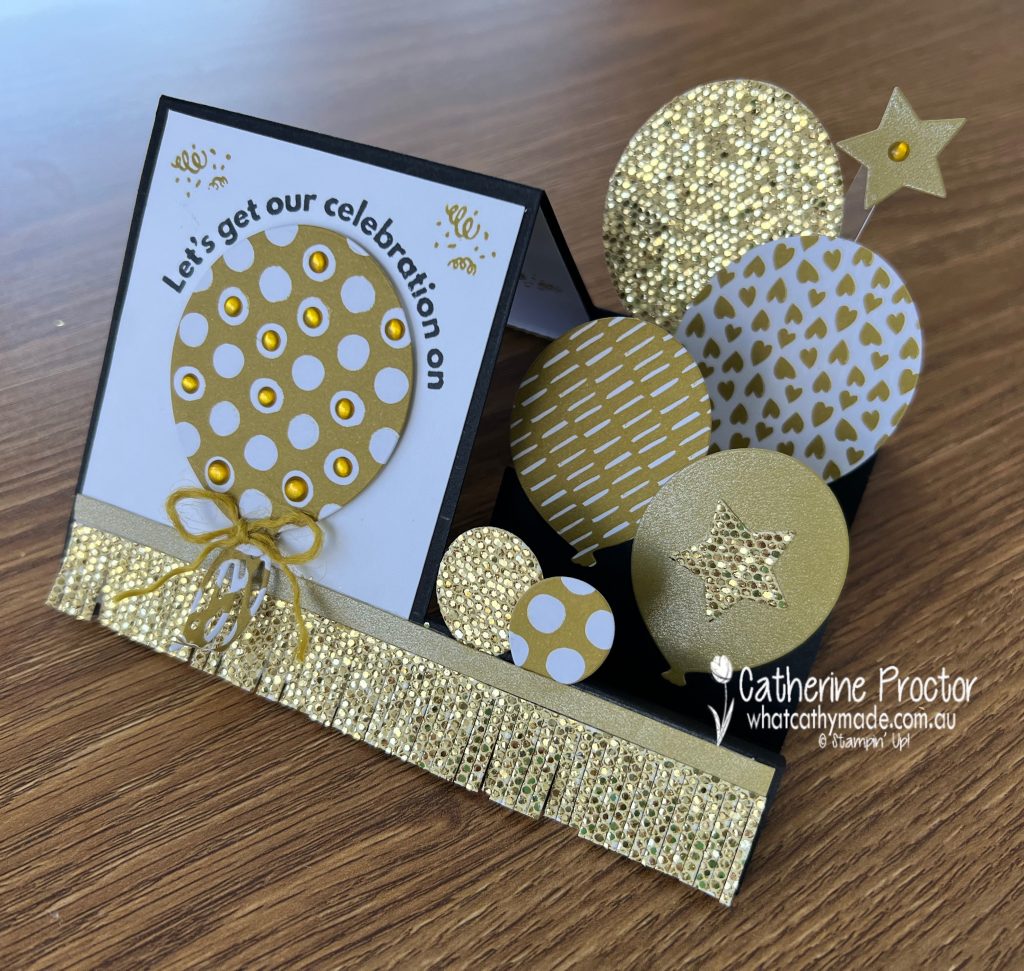
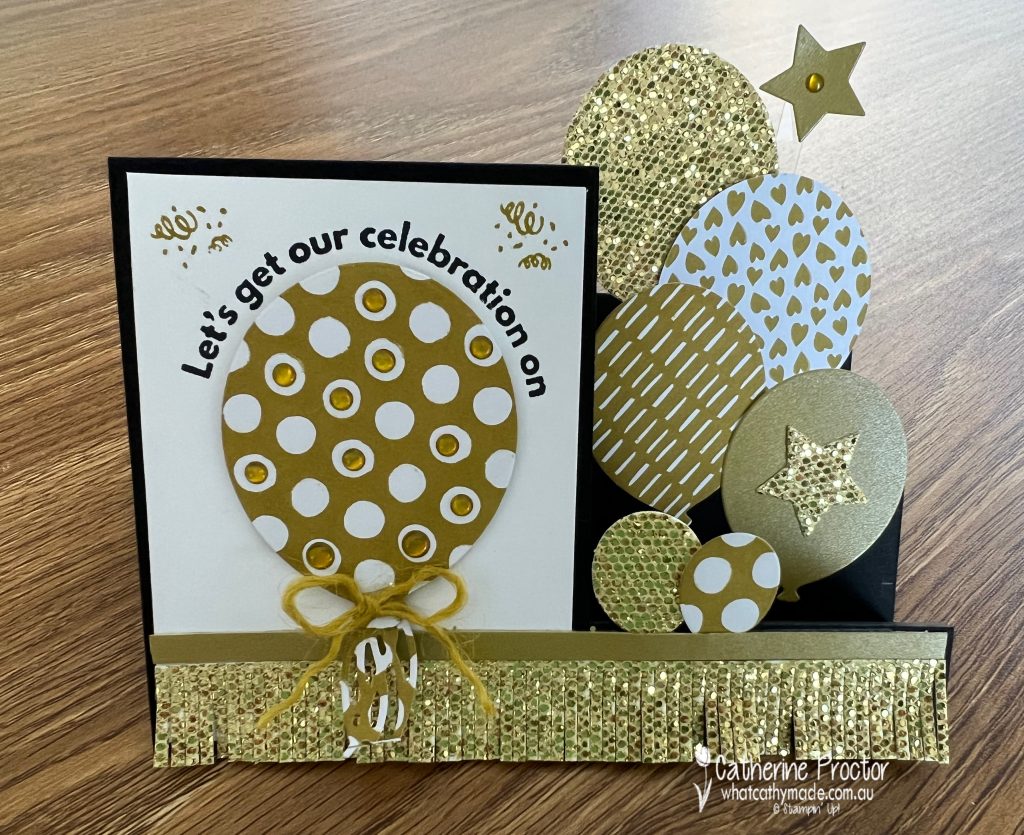
I’ve paired Wild Wheat with black, white and gold as it really looks like a kind of fools gold, especially in the Luster Specialty Paper. Here’s what the side step card looks like when laid flat.
Here’s what it looks like correctly folded and in an envelope.
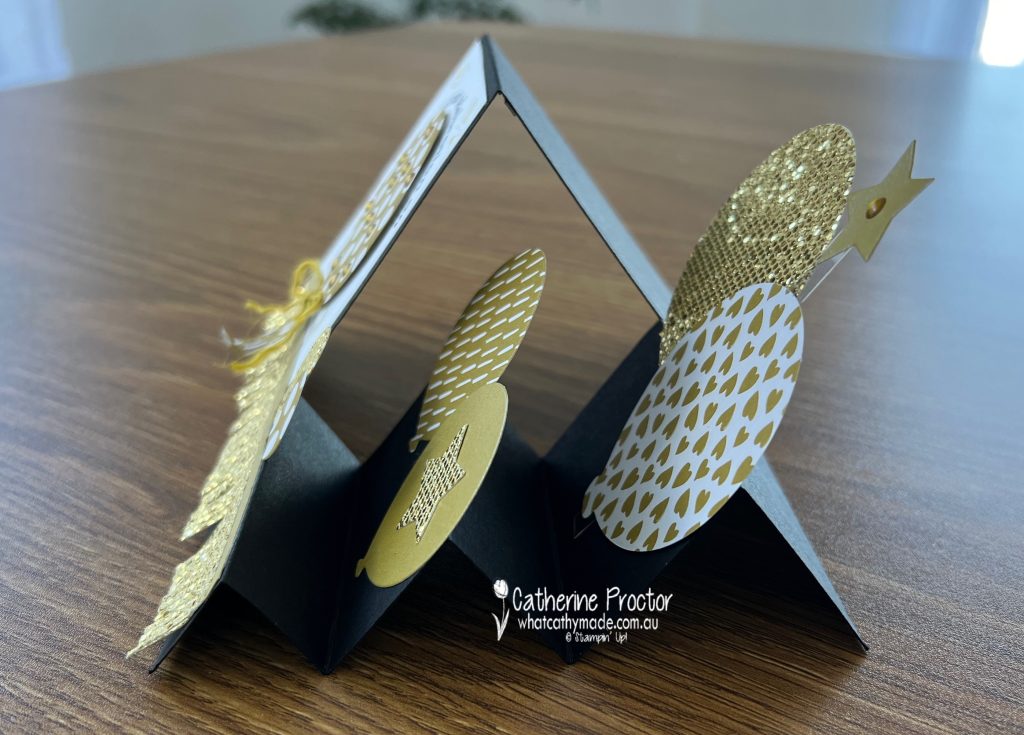
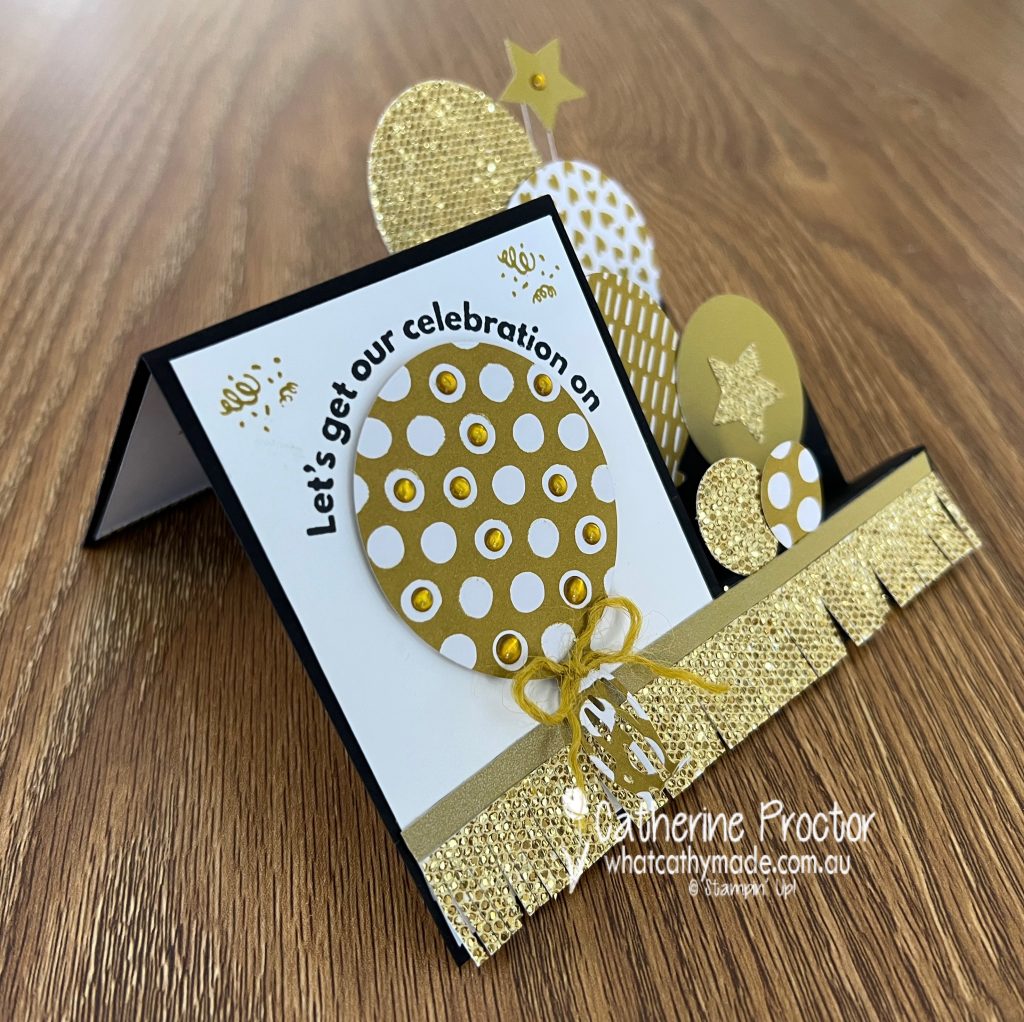
Here’s what it looks like from the right side when sitting up for display.
And from the left side.
Did you notice the frill on the bottom of the card? It’s a long die from the Beautiful Balloon dies that I used to die cut the More Dazzle specialty paper. I trimmed one end off to make a long frill.
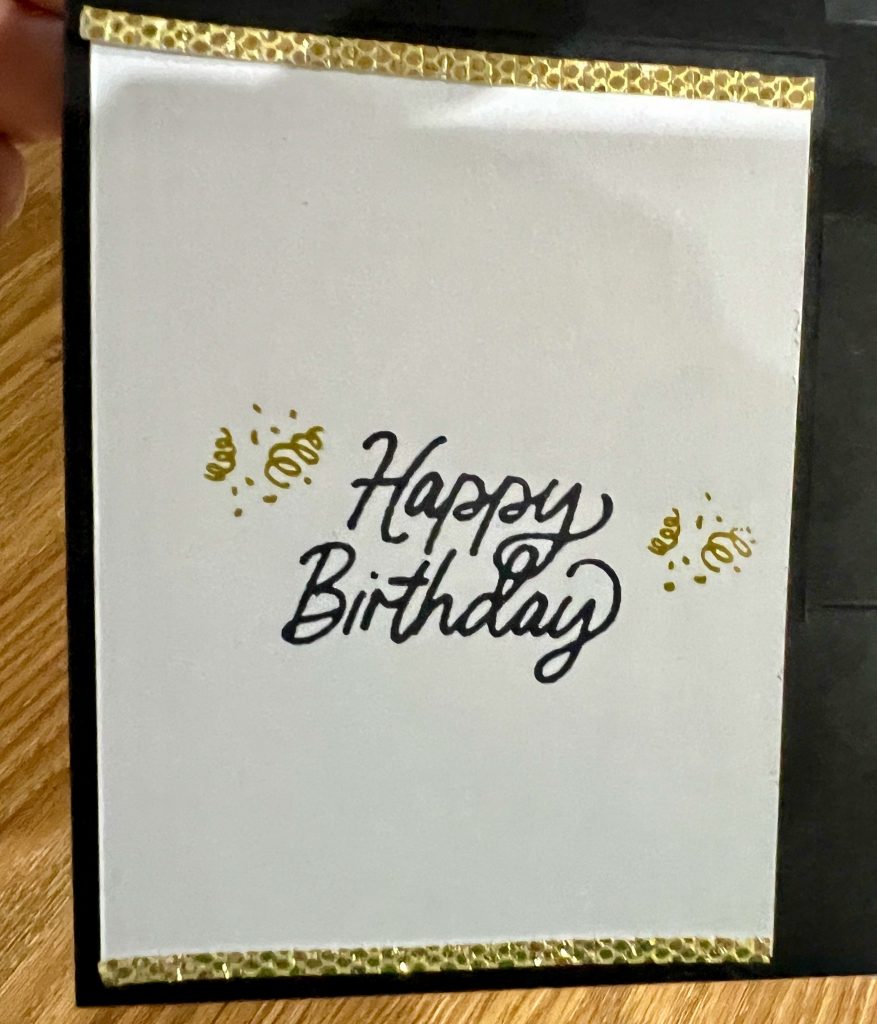
The offcut side from the long fringe was used to decorate the inside of the card.
The front of the side step card was embellished with a bow of the Wild Wheat 2023–2025 In Color Jute Trim and Wild Wheat 2023–2025 In Color Dots on the largest balloon.
Now it’s time to hop on over to our next participant, the lovely Christine Blain – I can’t wait to see what Christine has made this week!
If at any time you find a broken link, you can find the complete list of all participants below.
From next Wednesday, June 7, we’ll be showcasing our core colours in alphabetical order. Our core colours include new colours and returning colours and we’ll start with a brand new colour, Azure Afternoon.
Welcome to week four of our Art With Heart 2023-24 Colour Creations blog hop!
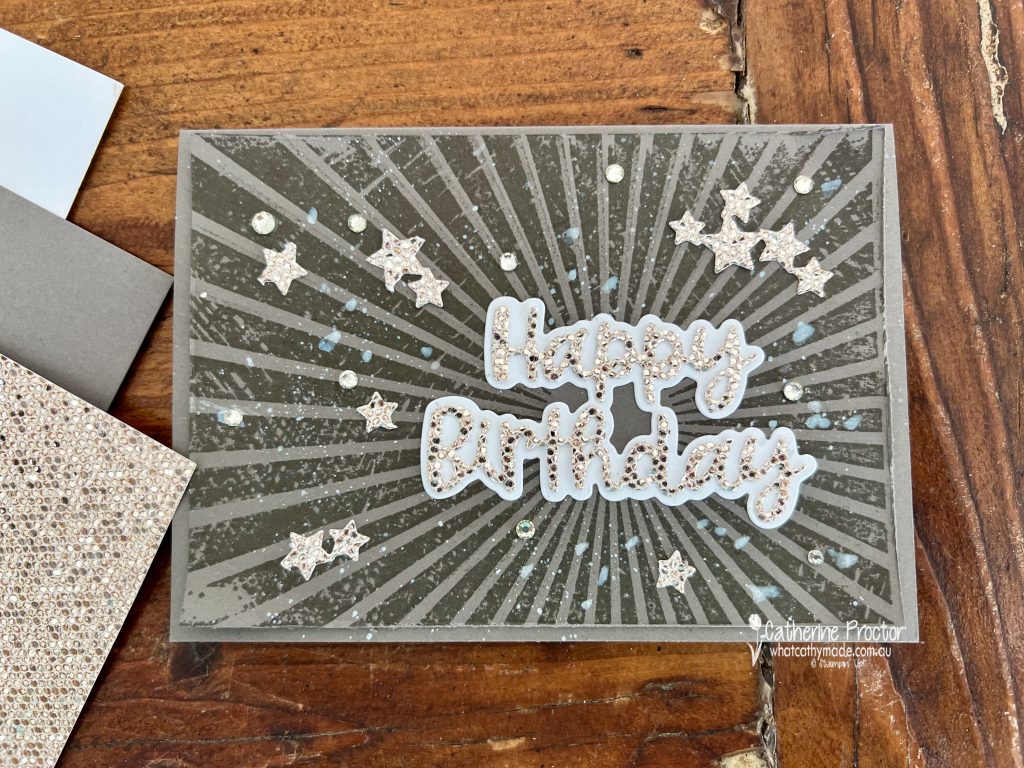
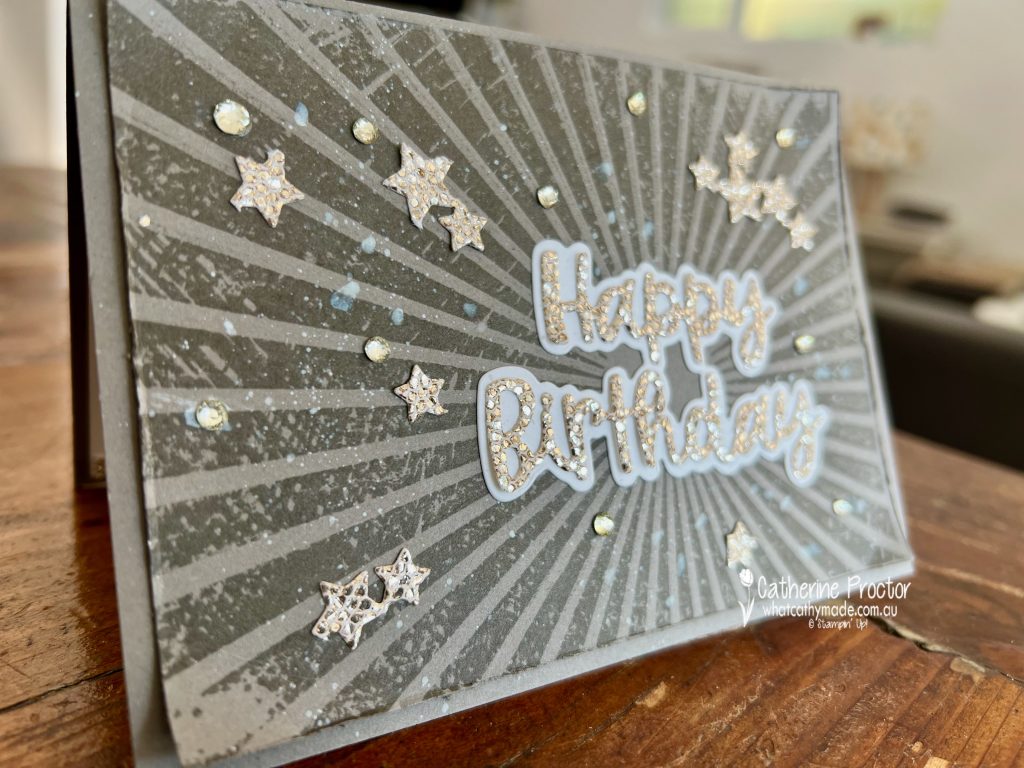
This week we are showcasing another brand new 2023-25 In Colour: Pebbled Path. Pebbled Path is a warm mid-tone gray, similar to a previous In Color, Tip Top Taupe.
Here’s how Pebbled Path compares to the other current Stampin’ Up! grays and browns. It really sits in between the grays and the browns.
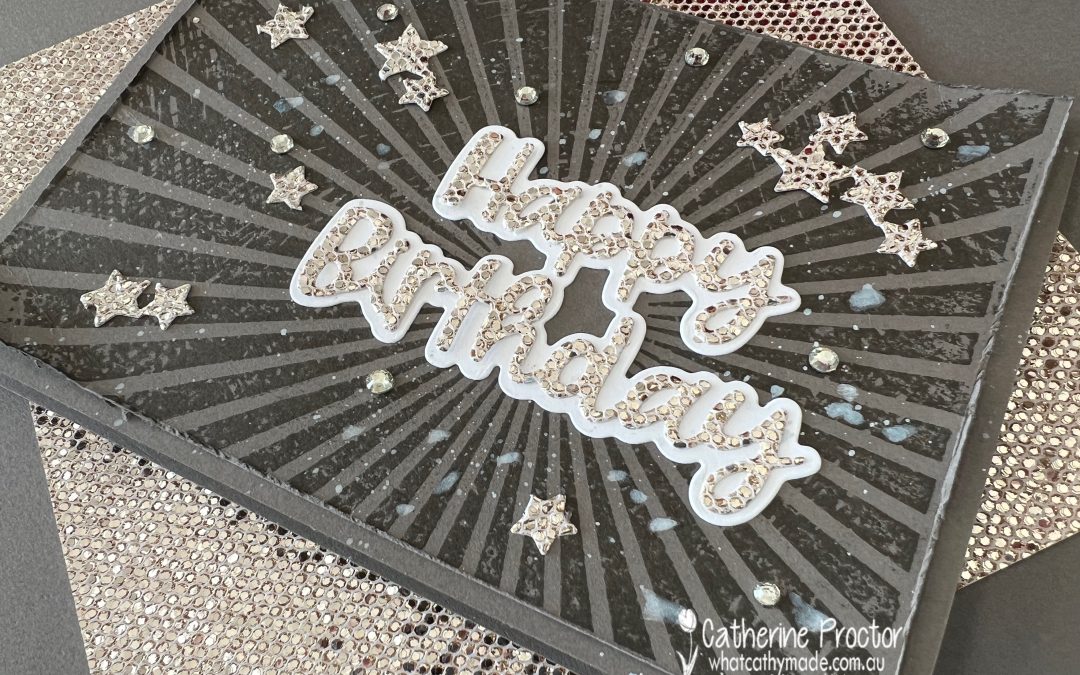
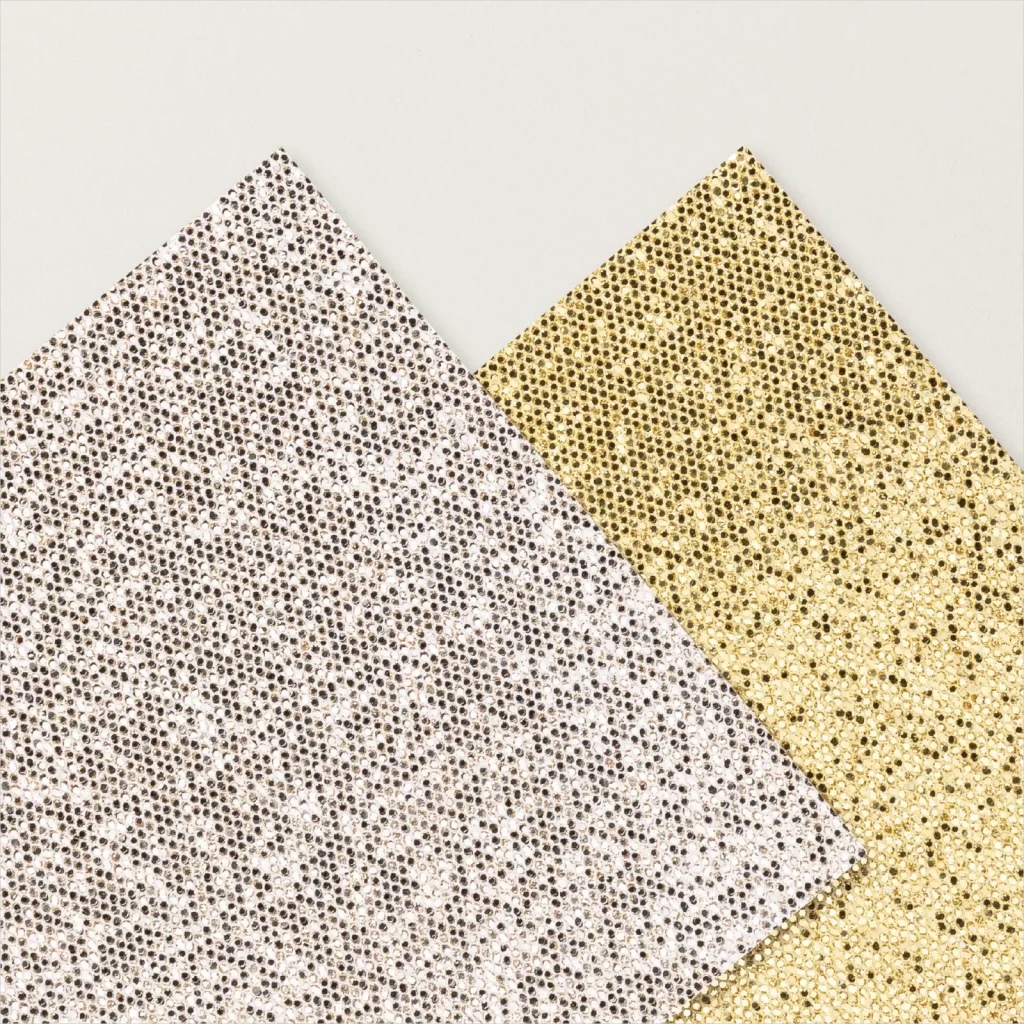
I’ve paired Pebbled Path with Basic White and this stunning Champagne coloured More Dazzle 6″ x 6″ Specialty Paper.
This specialty paper adds so much “wow” factor to your cards – I can’t wait to use this for my Christmas cards too.
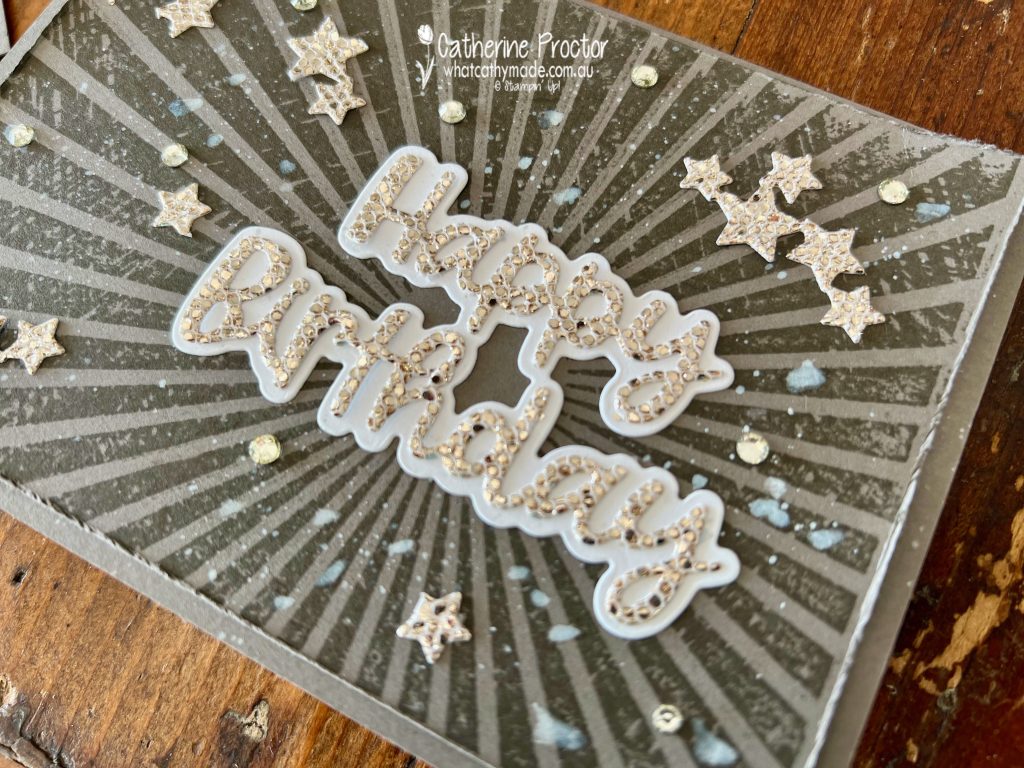
The only downsides of this incredibly sparkly specialty paper are that it is hard to photograph and it can also be tricky to die cut – you’ll need to run it back and forth in your cut’ n’ emboss machine a few extra times.
Apart from stamping the Rays of Light background stamp in Pebbled Path ink onto the Pebbled Path cardstock, there is actually no other stamping on this card.
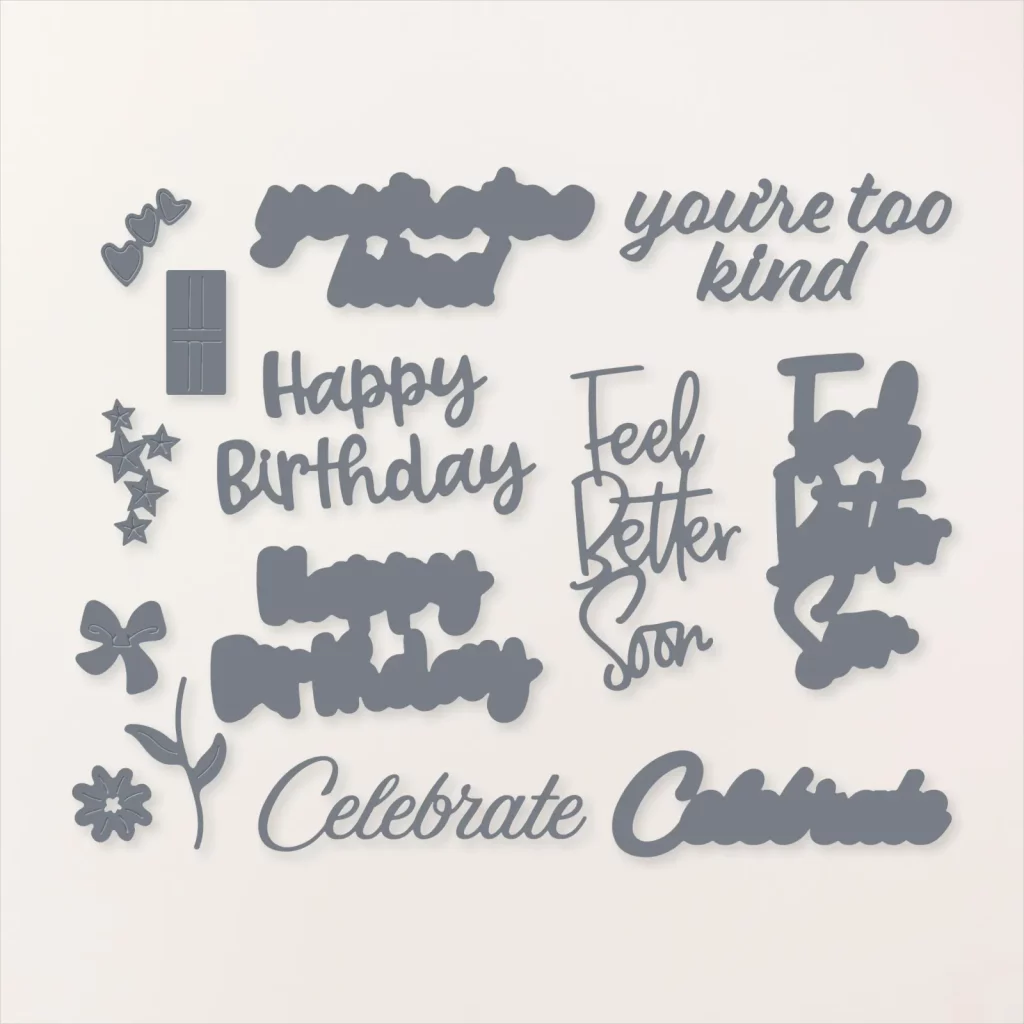
The Wanted to Say Dies do all the hard work for you and they have a sentiment for most occasions as well as die cut decorations that include stars, hearts, a flower, a stem and leaf and a bow.
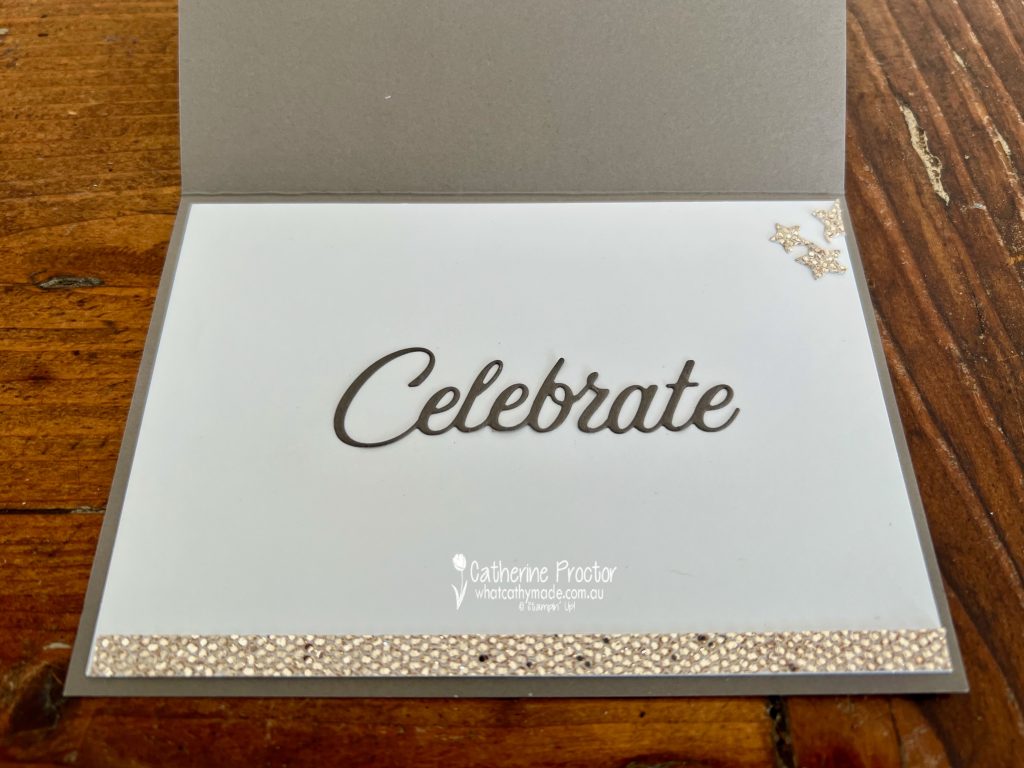
The Wanted to Say Dies also include a layer for all the sentiments so you can either use the sentiment with a layer behind it or on its own, as I’ve done here on the inside of my card.
TOP TIP for using these dies – adhesive sheets applied to the specialty paper and the cardstock BEFORE you die cut are a must for this type of card!
I’ve splattered some white craft ink with a water painter (I definitely need to practise my technique, LOL!) and added a few Rhinestone Basic Jewels to embellish my card.
Now it’s time to hop on over to our next participant, the lovely Vicki Boucher – I can’t wait to see what Vicki has made this week!
If at any time you find a broken link, you can find the complete list of all participants below.