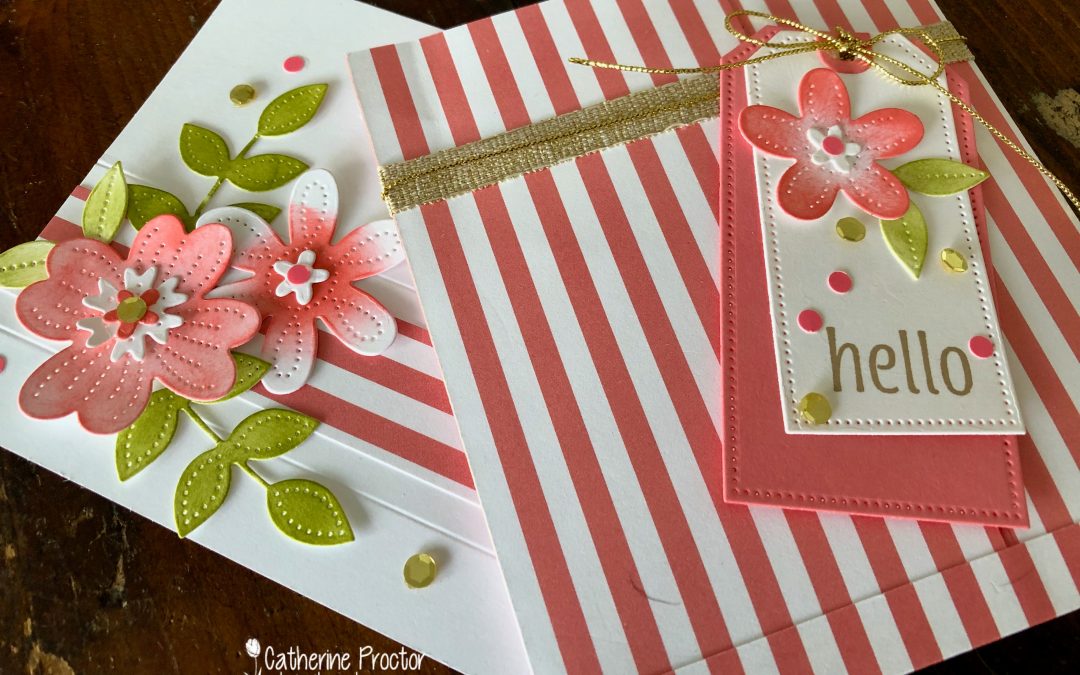
Welcome to week 17 of our 2021-22 Colour Creations blog hop! Tonight we are showcasing Flirty Flamingo, a vibrant pink from the Brights colour collection.
The starting point for my card today was the beautiful Flirty Flamingo striped paper from the Pattern Party Designer Series Paper. This is a host product, only available with Stampin’ Rewards, and it includes 48 sheets (4 each of 12 double-sided designs) in these gorgeous colours: Basic Black, Crushed Curry, Flirty Flamingo, Granny Apple Green, Misty Moonlight, Pale Papaya, Petal Pink, Pool Party and Poppy Parade.
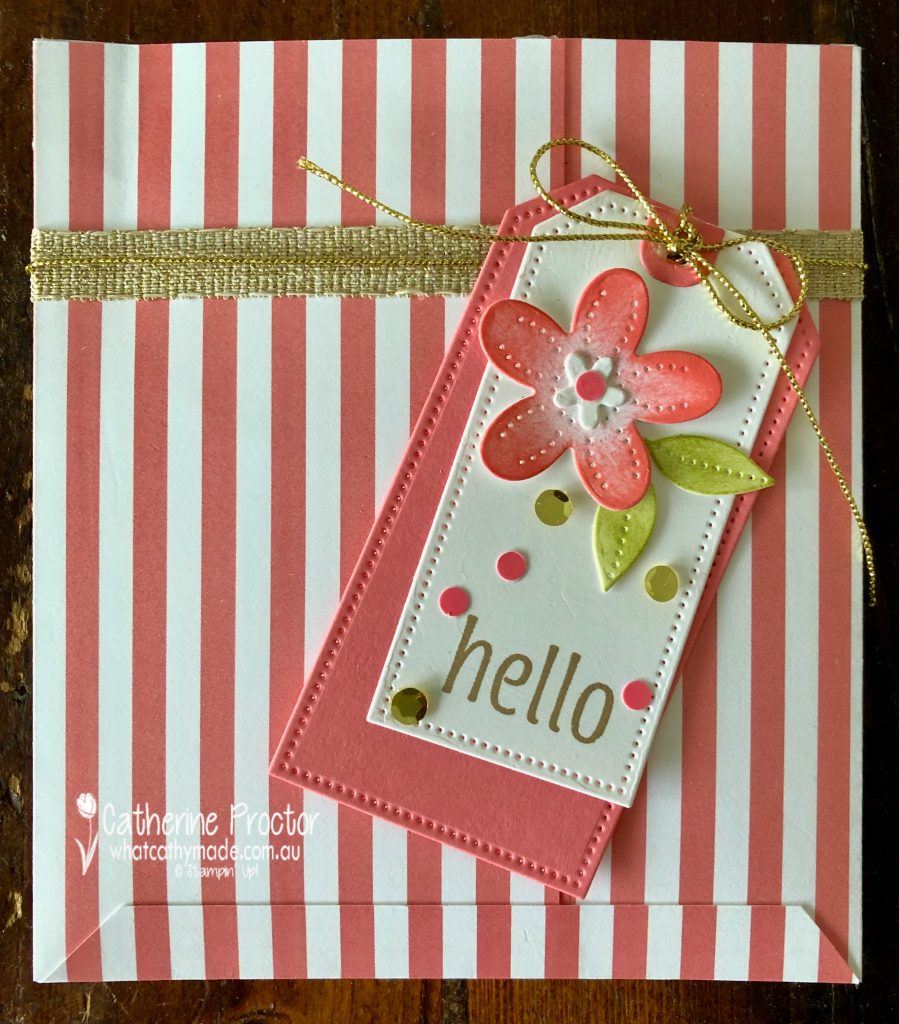
I started my making an 5″ x 5 1/2″ bag, using these instructions for a 6×6 DSP, even though this DSP is 12 x 12″. The bag uses either one sheet of 12×12″ DSP cut into 6×6″ squares or 3 sheets of 6×6″ DSP.
Cut piece 1 at 5″ wide x 6″tall and score 1/2″ at the bottom.
Cut piece 2 to 3 1/2″wide x 5 1/2 ” tall and score 1/2″ along the left side of 5 1/2 ” edge.
Cut piece 3 to 3 1/2″wide x 5 1/2 ” tall and score 1/2″ along the right side of 5 1/2 ” edge.
Adhere the folded sides of pieces 2 and 3 to the left and right edges of piece 1.
Adhere together the overlapped section of pieces 2 and 3 together.
Fold up the bottom flap and adhere.
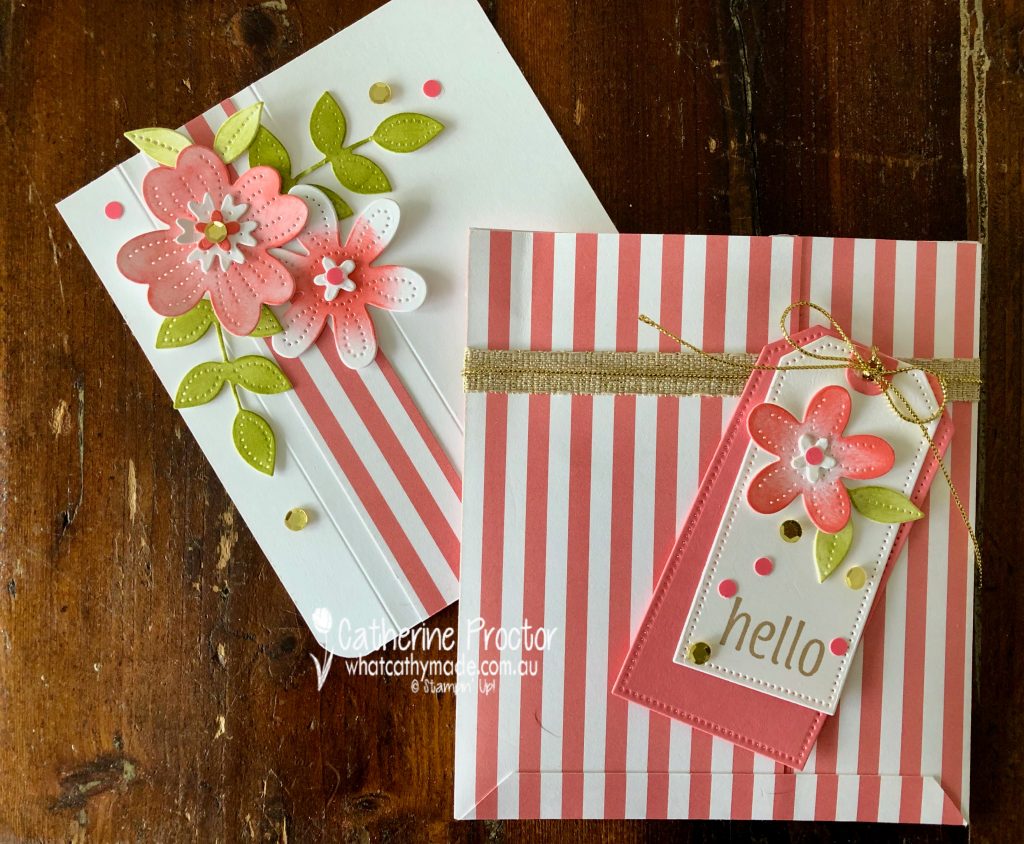
I wrapped the Fine Art 3/8″ (1 cm) Ribbon and gold metallic Simply Elegant Trim around the bag and tied a bow. The Simply Elegant Trim is slippery and hard to keep sitting in a nice bow shape so I always use a couple of glue dots.
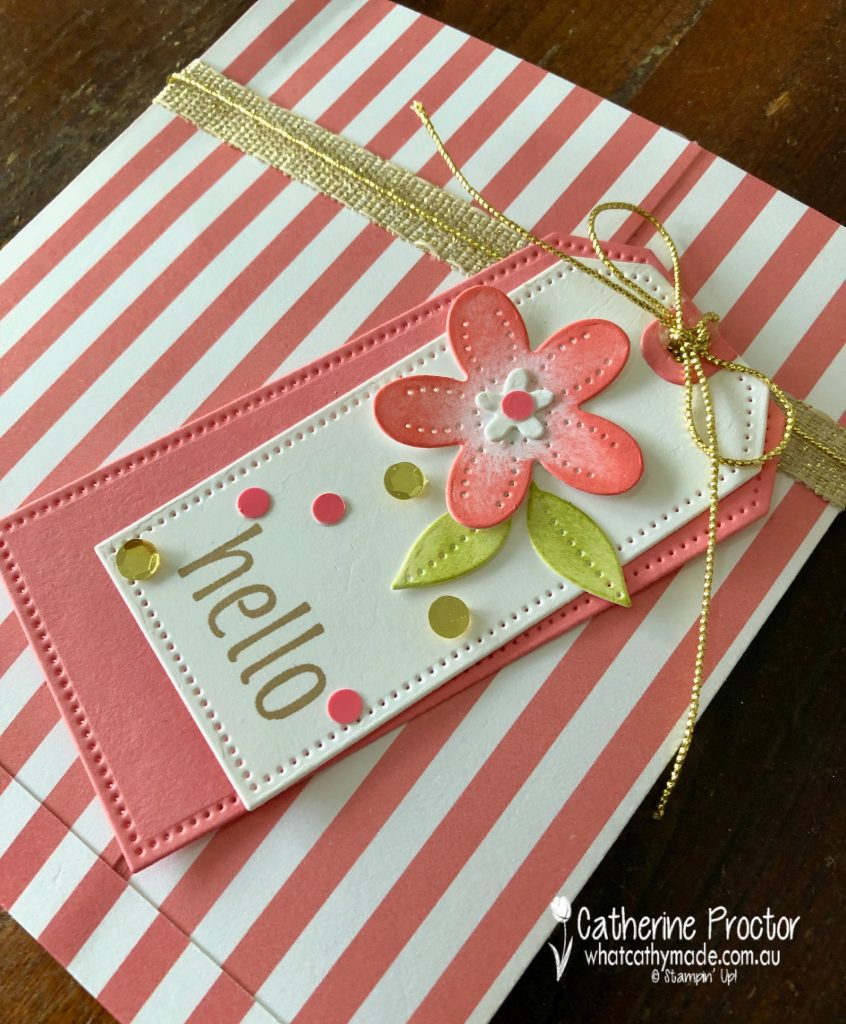
The layered tags are cut using the Tailor Made Tags Dies, Pierced Blooms Dies and Flirty Flamingo and gold sequins from the Sequins For Everything.
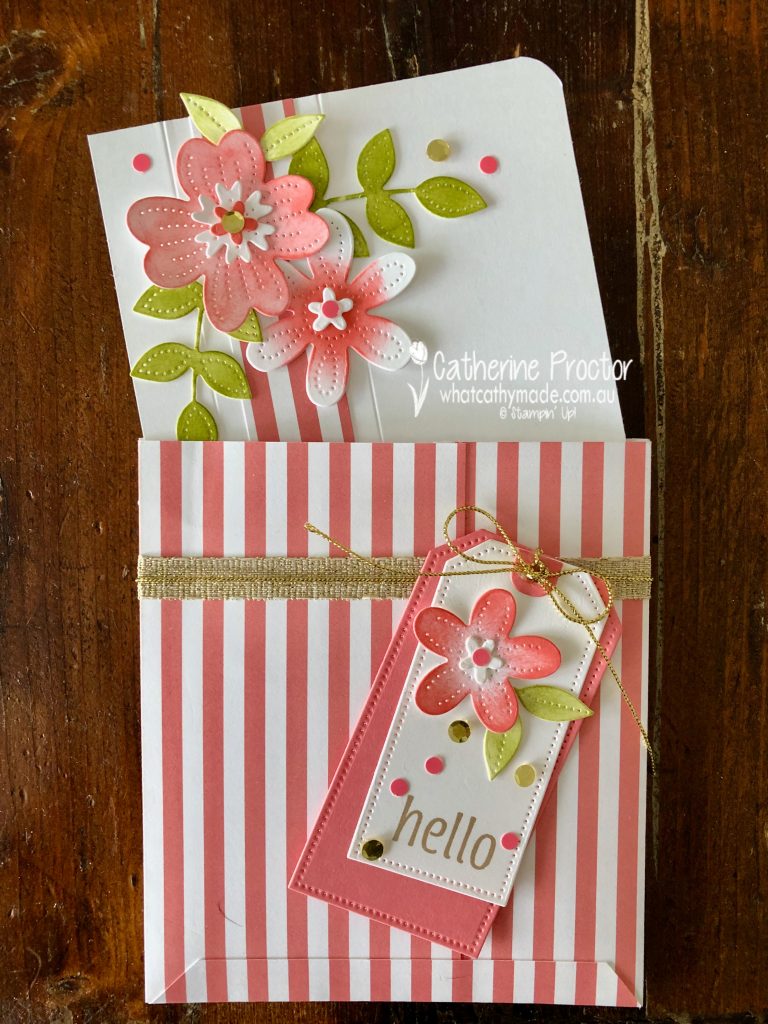
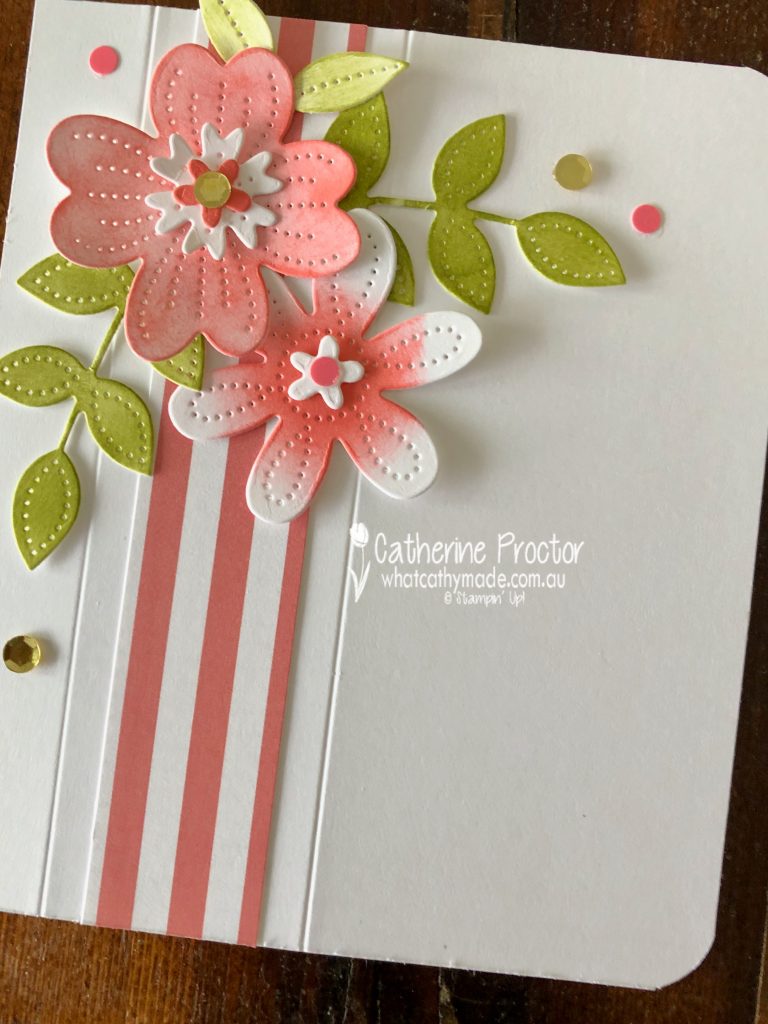
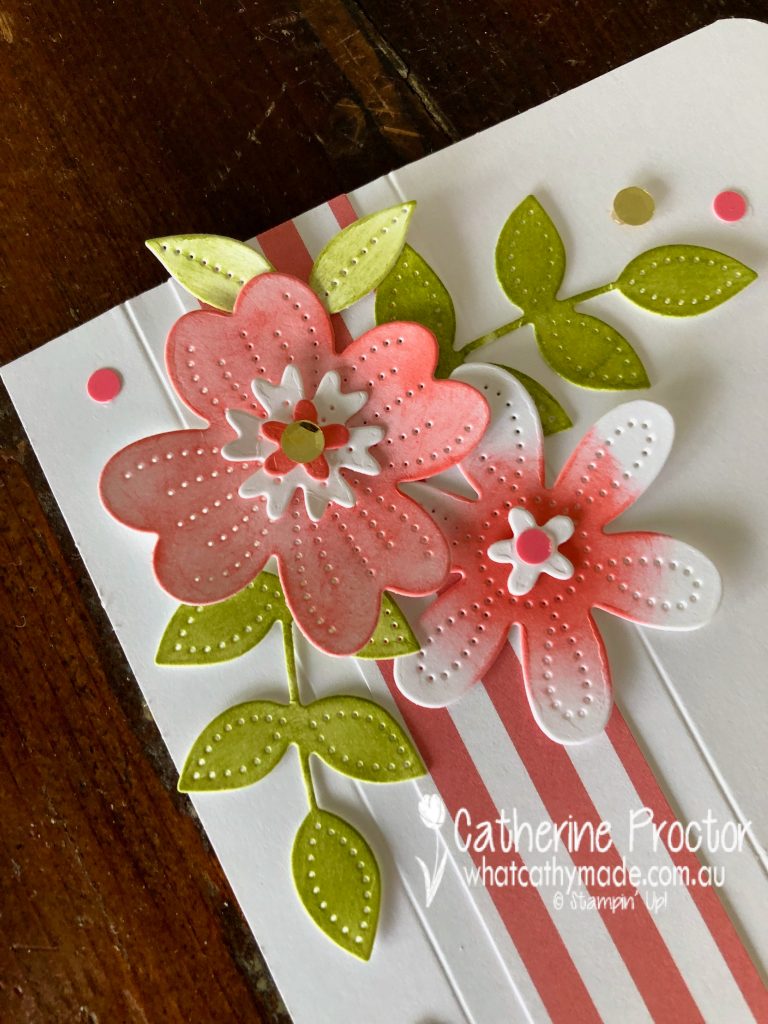
I cut the single layer card to fit inside the bag, decorating it with the same embellishments and a strip of the striped DSP I used for the bag. All of the flowers and leaves were die cut in Basic White using the Pierced Blooms Dies and then colored with Pear Pizzazz and Flirty Flamingo ink using sponge daubers.
I added a score line either side of the strip of DSP using the score blade on my paper trimmer.
I love how quick and easy it is to achieve different shades of colour and a variegated effect by adding colour with a sponge dauber.
I’m not sure if there is an official name for a single layer card in an bag that acts like an envelope? Whatever it is called, I think I will be making more of these as they have plenty of room to also enclose photos, a Christmas letter or even gift cards of any size.
I’ve left room to write on the front of the card, however you could simply use the reverse side if you wanted to write a longer message.
Now it’s time to hop on over to our next participant, my friend Kate Morgan – I can’t wait to see what she’s made this week!
If you find a broken link or have come to this blog hop from a different entry point, you can view the the full list of participants below:
Don’t forget to use my monthly Host Code (if your order is between $50 – $250) and I will send you a thank you gift the following month. If your order is over $250 don’t use the host code because you will qualify for your own stamping rewards. My September Host Code is WVX3UYCR and it is valid until midnight September 30.
I’ll be back with another Christmas card next Monday. In the meantime, wherever you are in the world, stay safe, stay calm … and keep on crafting xxx
Welcome to the Monthly Art With Heart Creative Showcase.
Tonight we’re sharing projects that use new products from the 2021-22 Stampin’ Up1 Annual Catalogue. If you haven’t seen the new catalogue yet, this 50 second video shows you some of the stunning products inside!
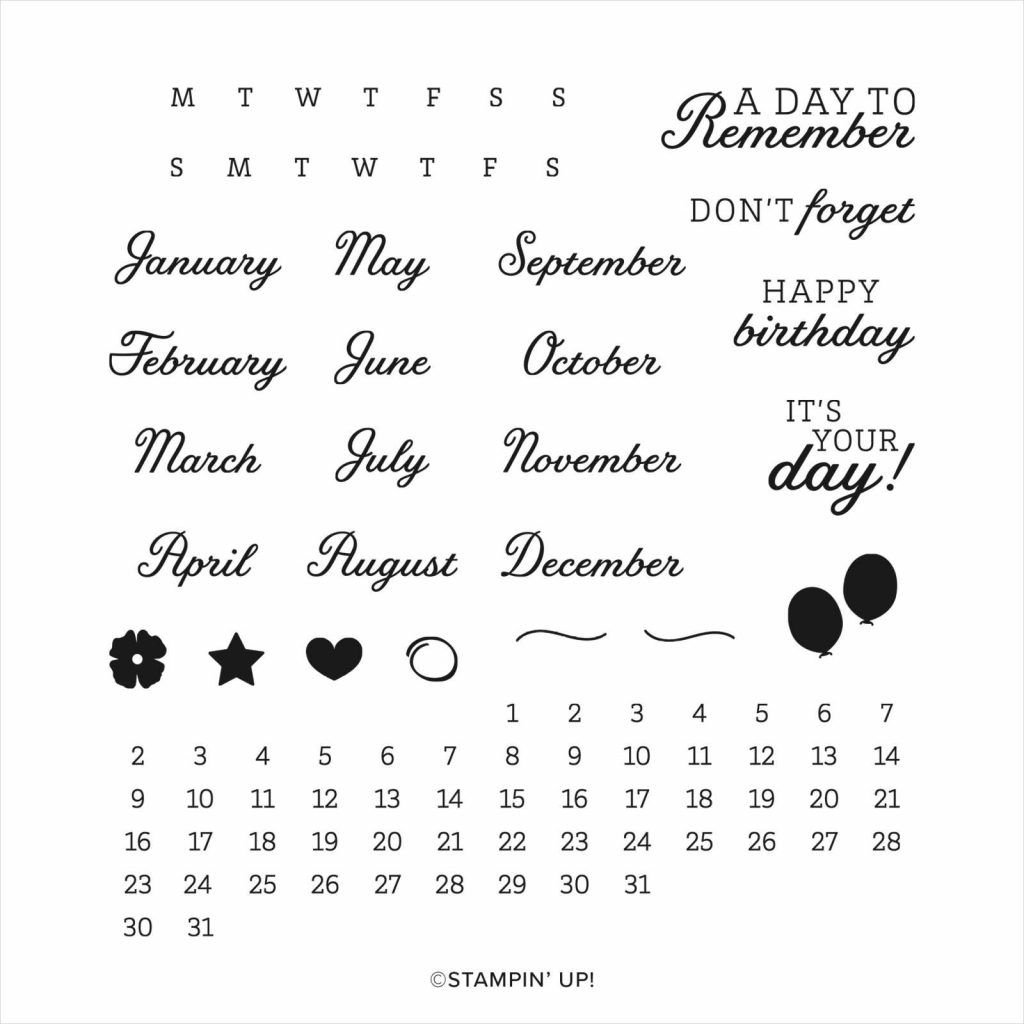
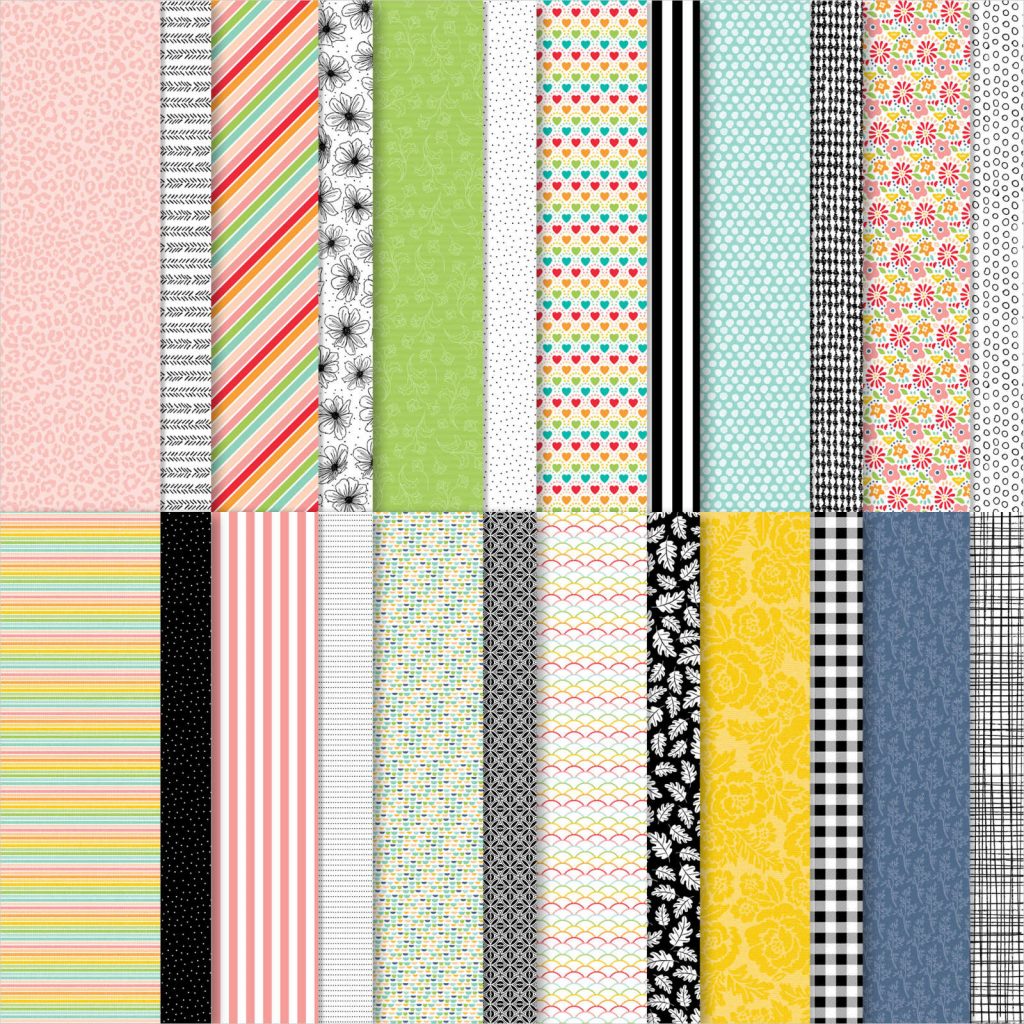
Two of my favourite products from the new 2021-22 Annual Catalogue are the Days to Remember stamp set and the Party Pattern DSP, which is one of the new host products.
The Days to Remember stamp set has everything you need to create calendars and it is also perfect for using on scrapbooking layouts or in a bullet journal.
I can’t tell you how much I love this Pattern Party DSP! It has bright graphic patterns on one side and really versatile black and white patterns on the other side. AND you get 48 sheets – 4 each of 12 double-sided designs!
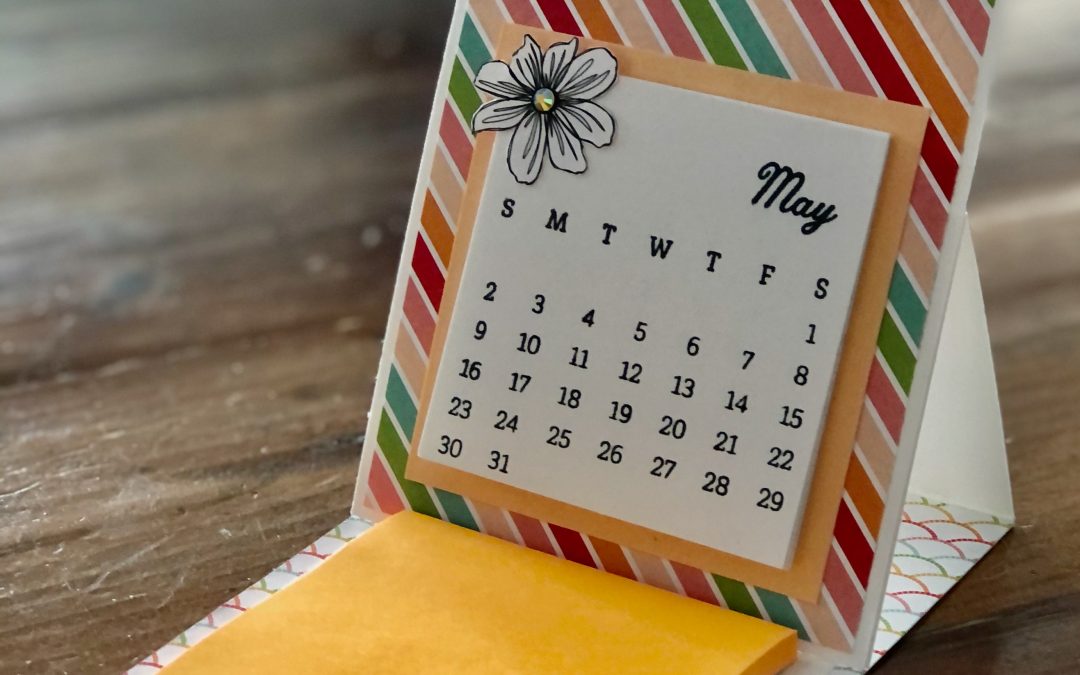
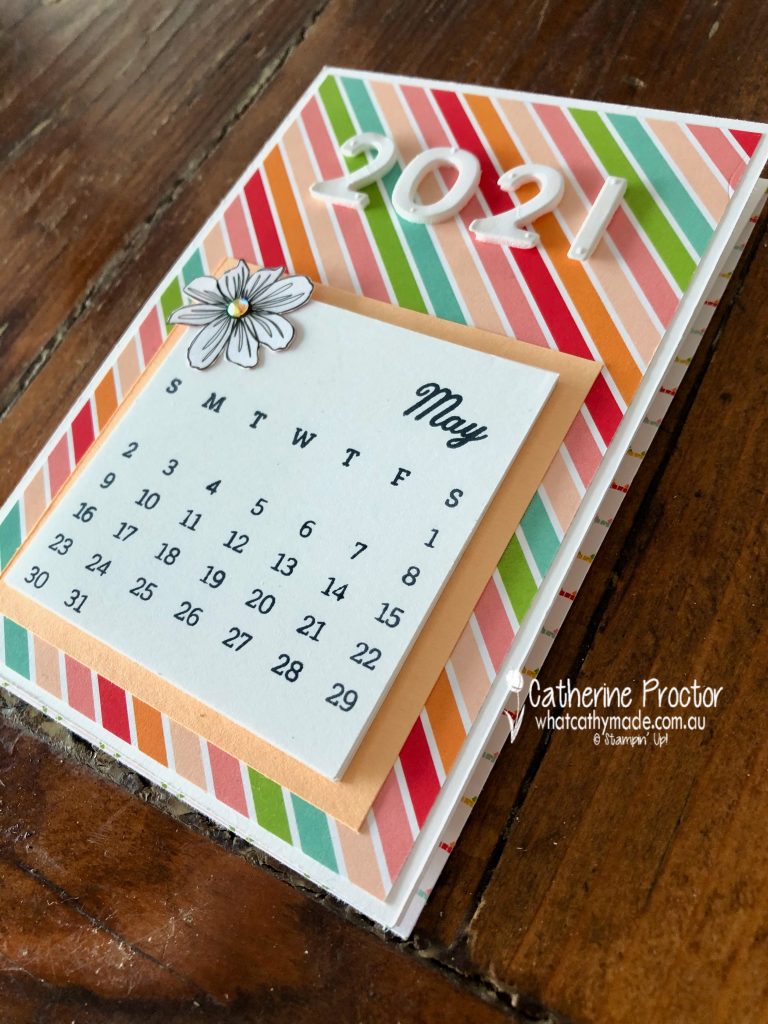
My easel card is a really practical desk accessory that uses two simple folds to create a combined calendar and Post It note holder. You can use any DSP for this project.
This card folds flat for postage but due to its weight and the thickness it will cost slightly more than a standard letter to post. It will fit into a C6 envelope.
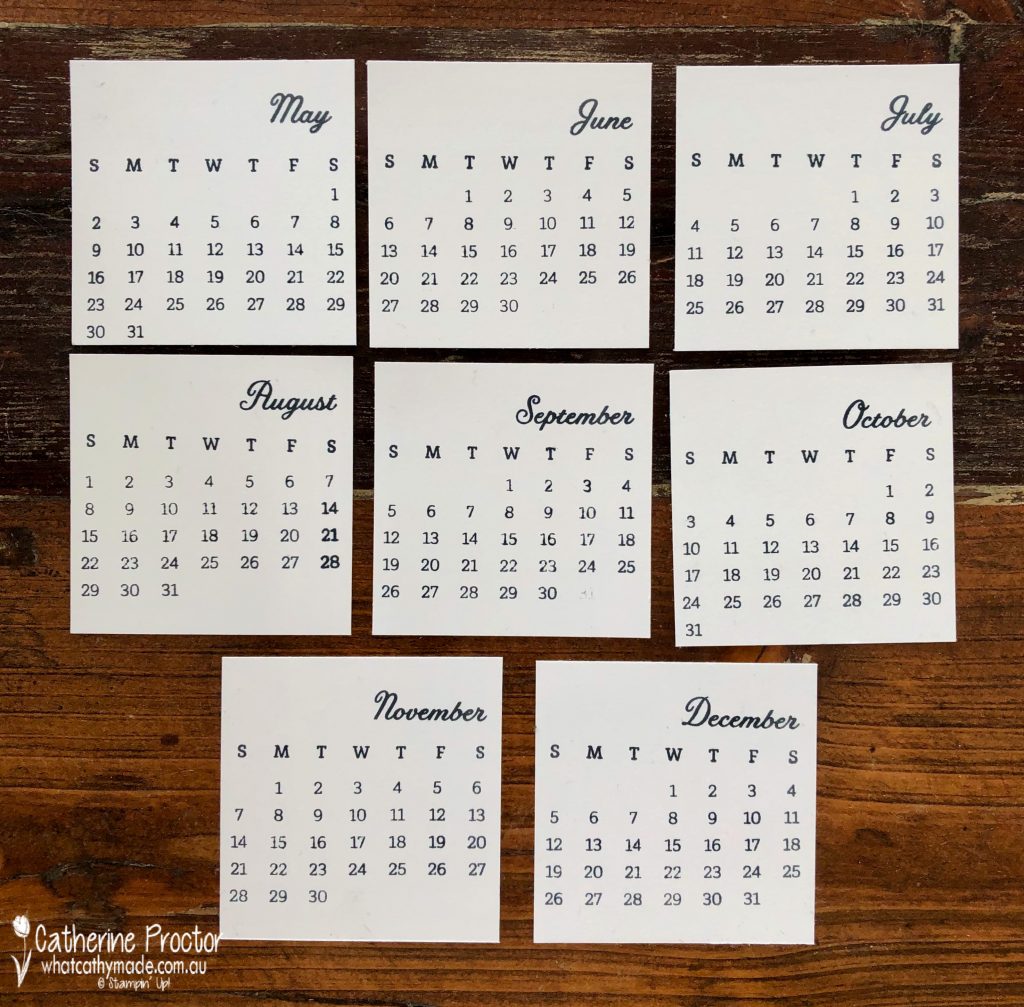
The days to Remember stamp is super easy to line up and stamp because it has been designed to fit the width of an inkpad. My Calendar pages measure 7x7cm – just don’t forget to remove the ink from the number 31 for the months that only have 30 days.
When all months are stamped use a few drops of multipurpose glue along the top of each calendar month to attach them together into a calendar.
For the rest of the card, cut and score as follows:
Cut base: Thick Basic White card stock at 29 x 10 cm
Cut card front: Thick Basic White card stock at 14.5 x 10 cm
Score base: Score and fold card base at 14.5 cm and 27.5 cm
Card front DSP layer: Cut Pattern Party DSP at 14 x 9.5 cm
Inside card DSP layer: Cut Pattern Party DSP at 14.5 x 10 cm
Card stock layer under Post It Note: Basic White card stock 9 x 9 cm
Card stock layer under calendar: Pale Papaya card stock 8 x 8 cm
I added the 2021 lettering (die cut AFTER mounting onto foam adhesive sheets) to the top of the calendar and finished my card with a flower fussy cut from the reverse side of the striped DSP and a Pale Papaya 2021-2023 In Colour Jewel.
To see the rest of the AWH team’s projects, go back to Rachel’s blog as she is hosting the monthly showcase.
To purchase any of the products used in my card tonight, click on the links below.
If you’d like me to post you your very own copy of the brand new 2021-22 Stampin Up! Annual Catalogue, the January – June 2020 mini catalogue, or to simply find out about more about Stampin’ Up! contact me.
In the meantime, wherever you are in the world, stay safe, stay calm…and keep on crafting xxx


")
 Host Designer Series Paper")


