Two card designs ideal for using up your designer series paper (DSP), even the scraps!
This week for the Art With Heart Colour Creations we’re celebrating Real Red ❤️ and I’ve set myself a little challenge… use up some Designer Series Paper instead of saving it “for something special”!
I only had a small share of the Beautiful Love Notes DSP, so I wanted to create cards that:
used smaller pieces;
showcased multiple designs;
and made the most of every scrap.
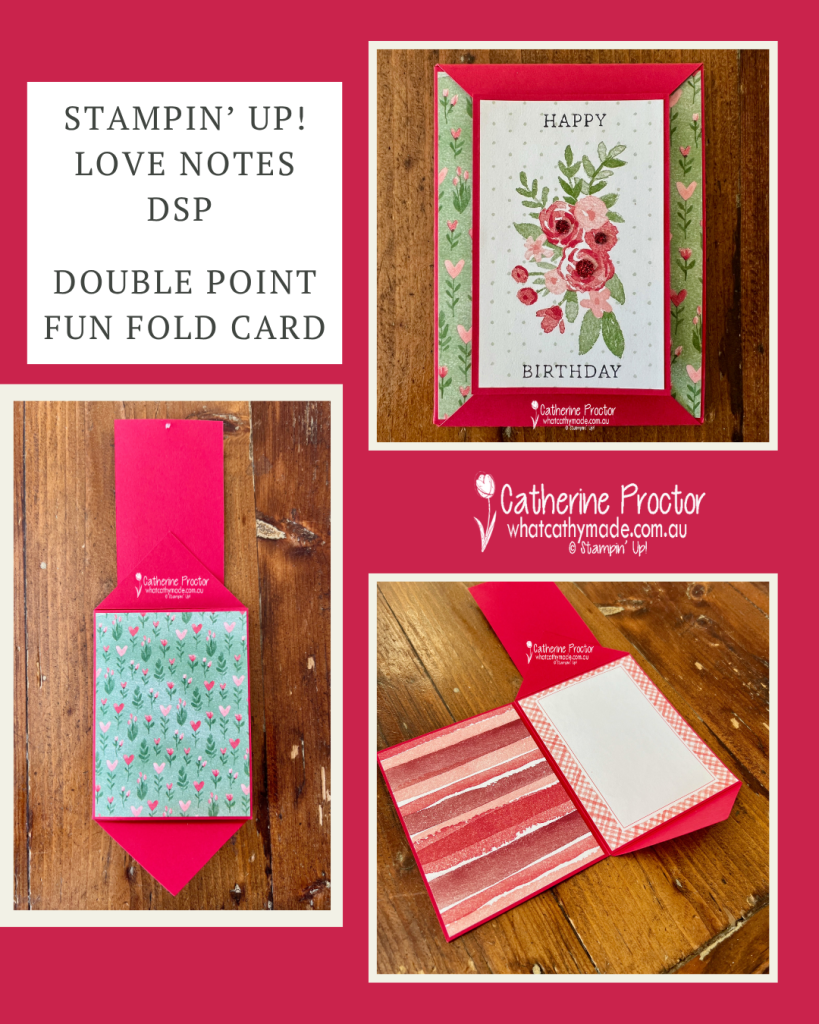
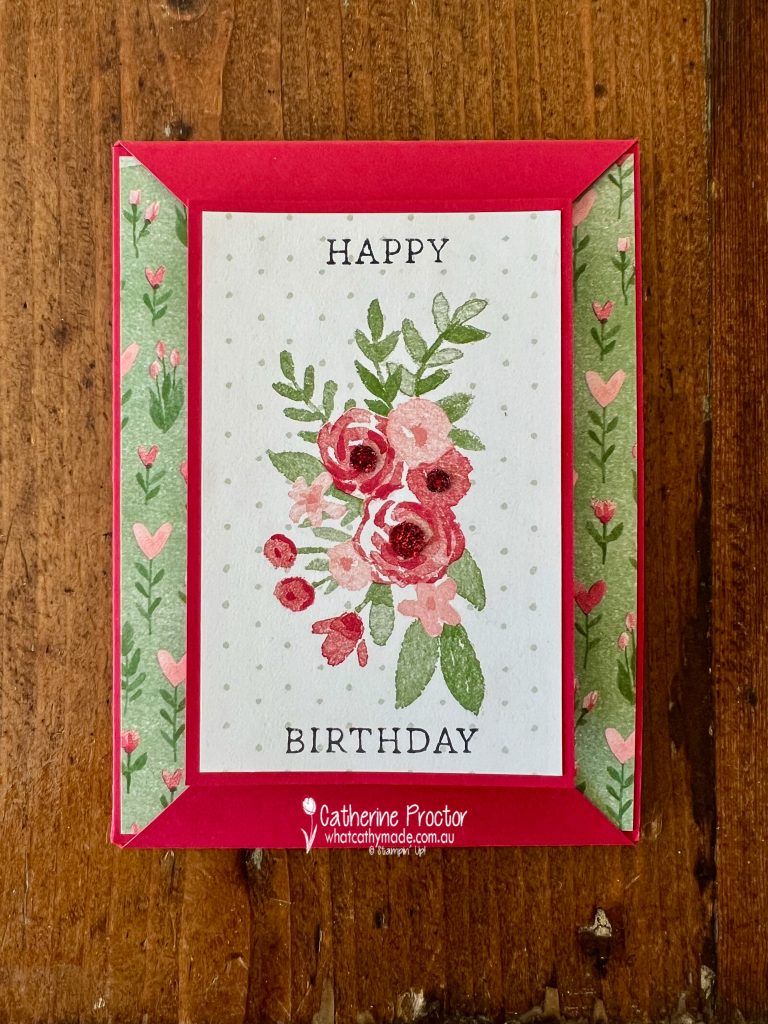
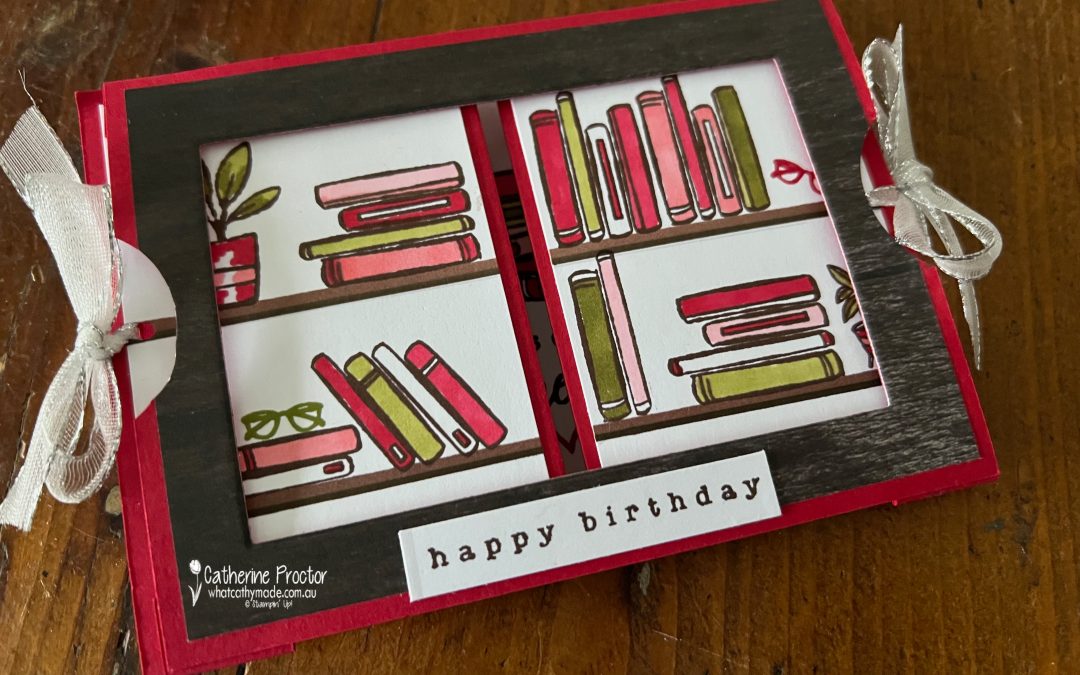
Double Point Fun Fold Card
I wanted to showcase my favourite DSP designs from of the Love Notes DSP and this fancy fold was just perfect with all its different layers.
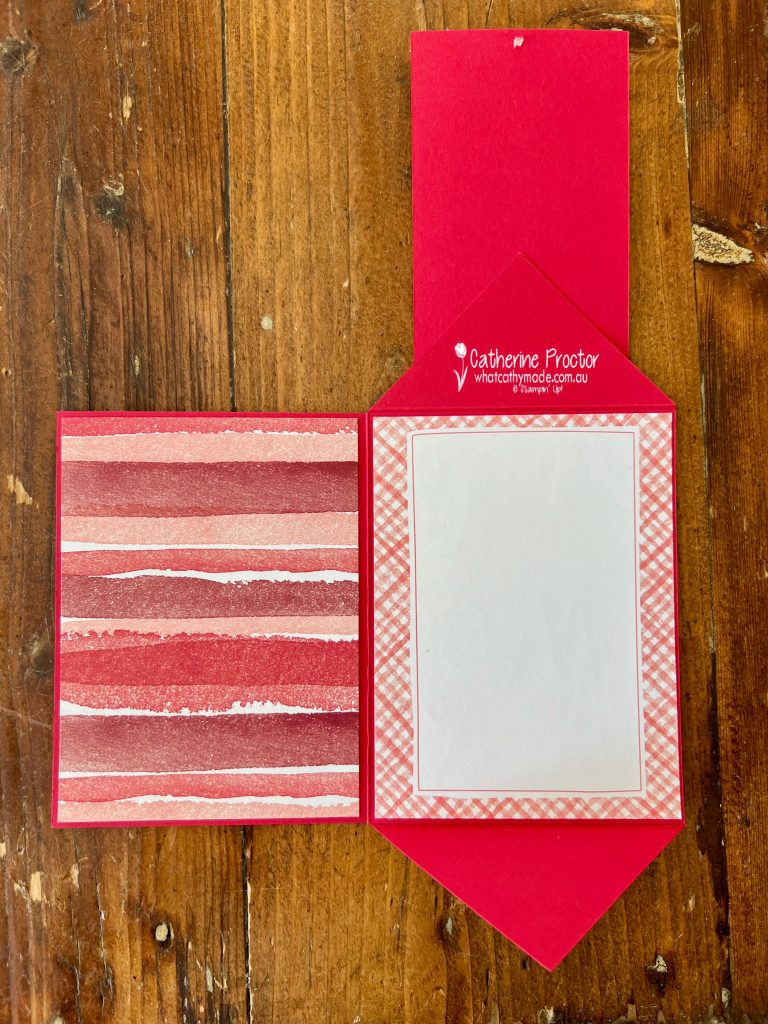
This graphic below shows the different layers that are revealed as you open up the card.
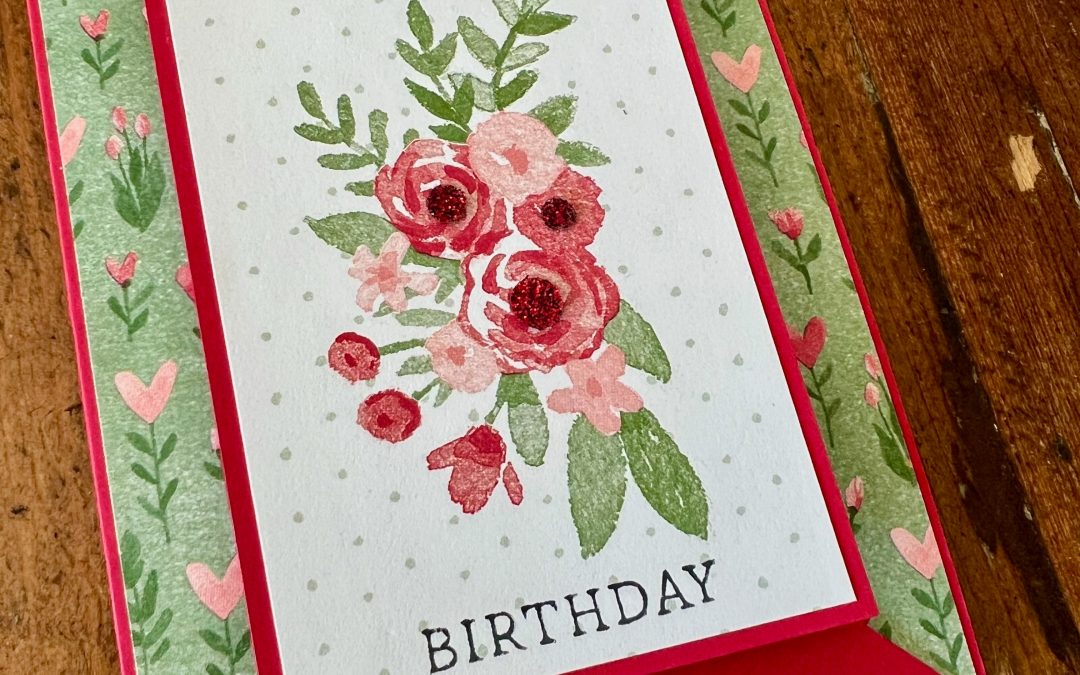
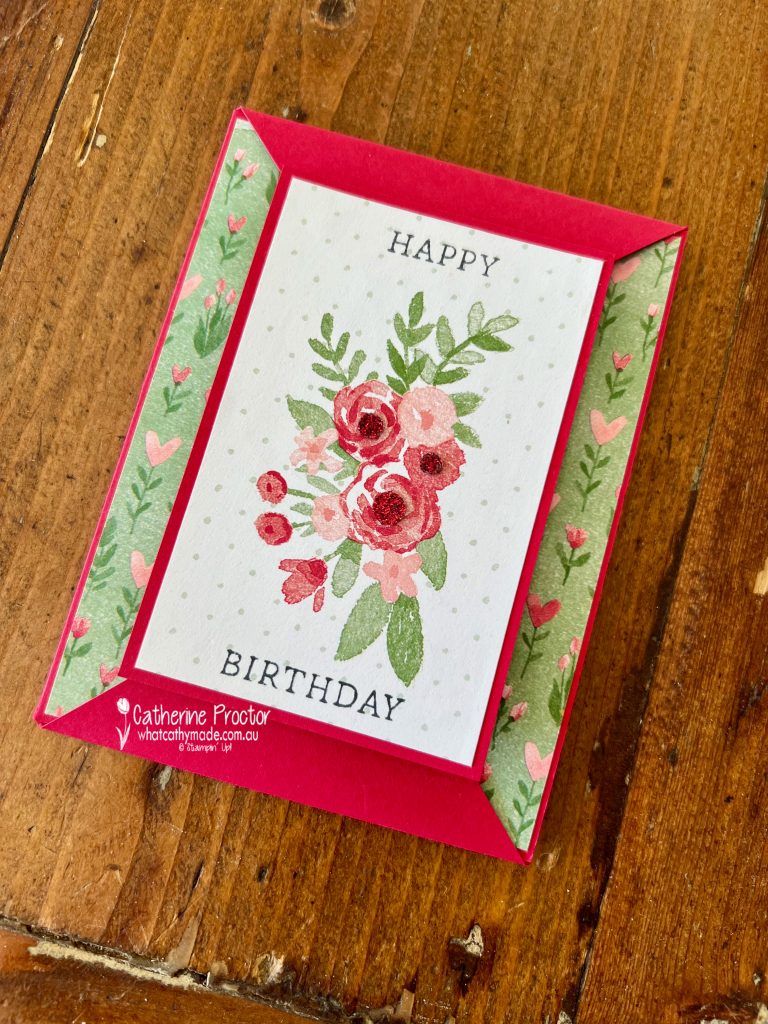
For the sentiment, I stamped the happy birthday stamp from the “Simply Said” stamp set onto the front layer of the card, stamping both above and below the central floral image.
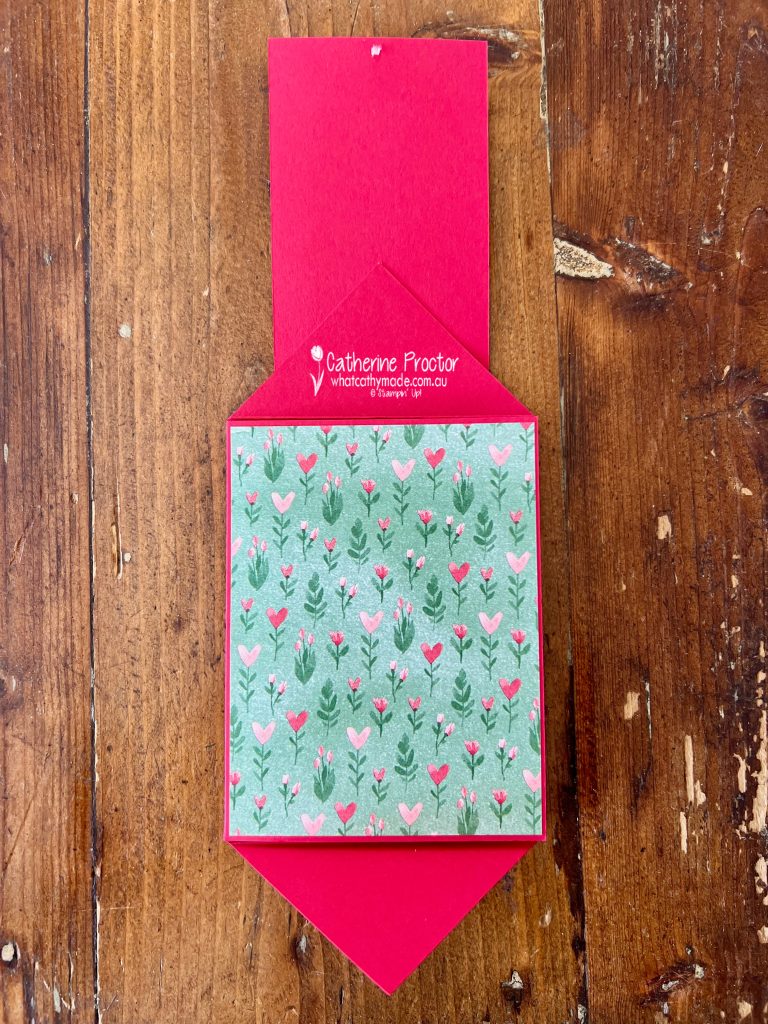
This inside section is a “card within a card” and the card front features this gorgeous floral pattern from the Love Notes DSP.
The inside of the card features more of the designs from the Love Notes DSP, trimmed to fit the card base.
This is one of those fancy fold cards that looks impressive, but is incredibly easy to make.
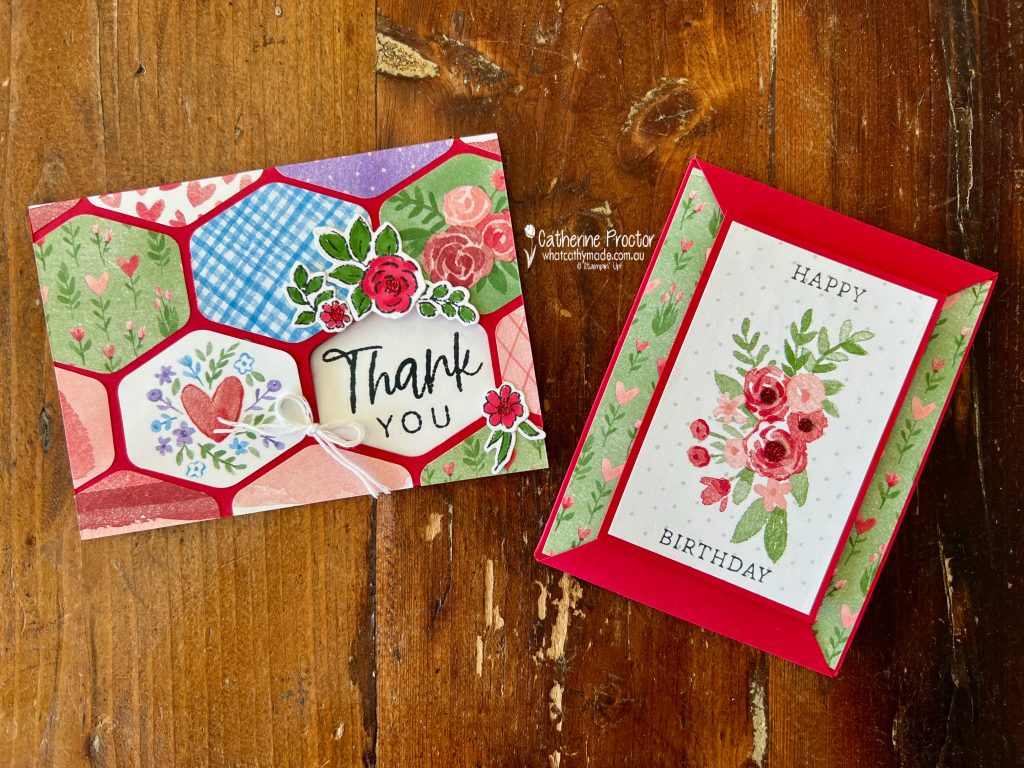
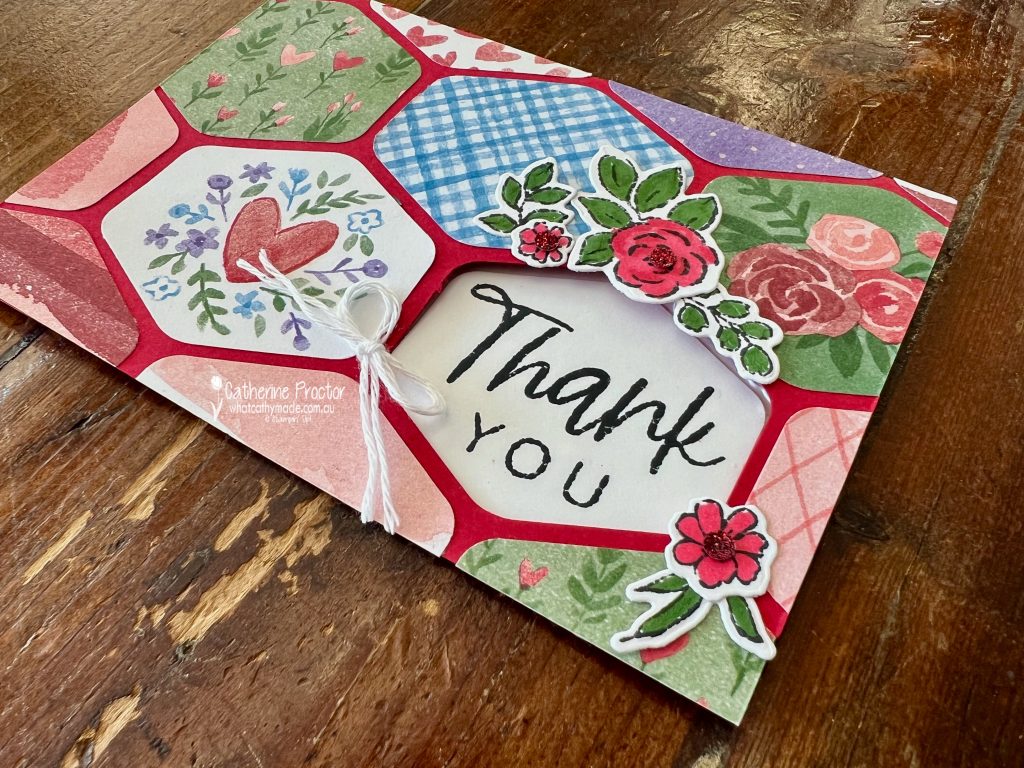
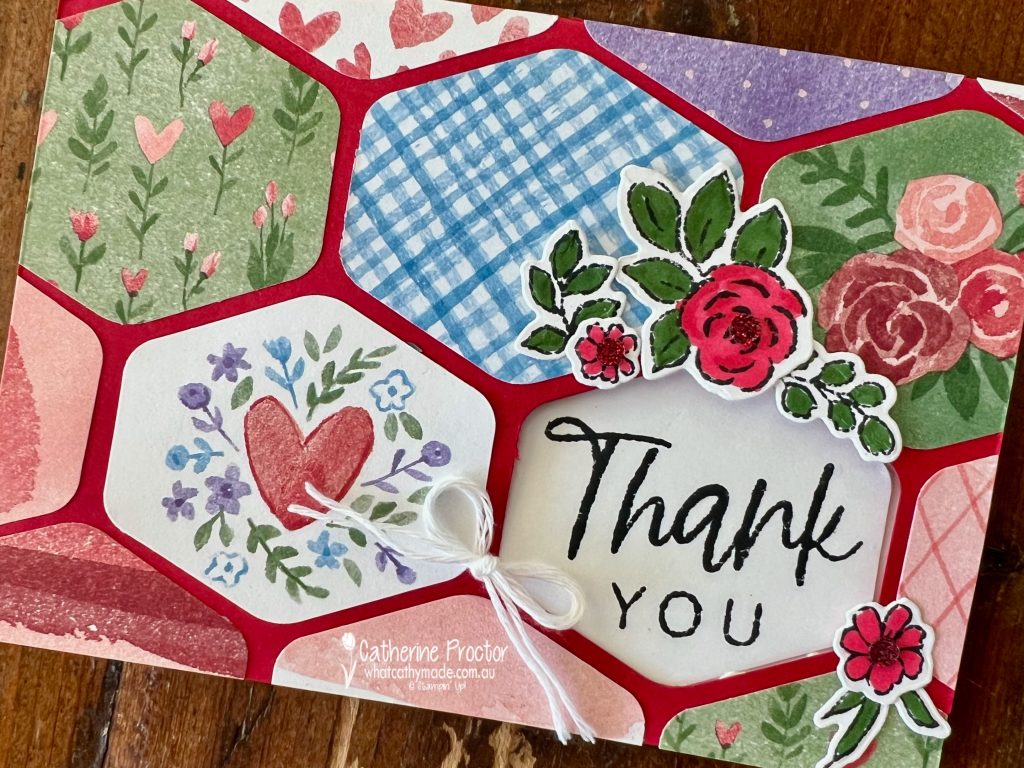
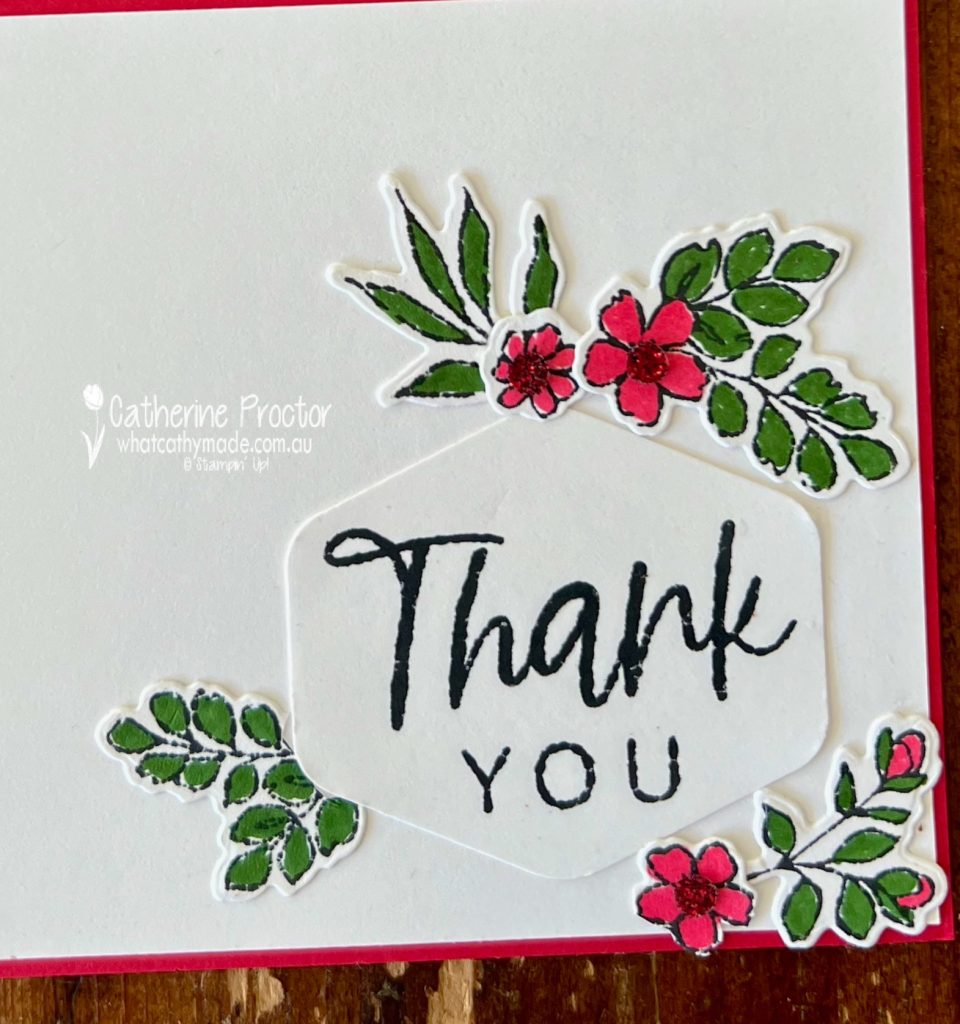
Heartfelt Hexagon Window Card
For my second project, I created a hexagon window card, using the Heartfelt Hexagon punch and his one is all about using up the smaller scraps.
After punching out a hexagon on the bottom right of the card front, I then punched lots of small pieces of DSP to create a patchwork-style front, featuring multiple patterns from the same pack.
I used the “Extraordinary Flora” bundle to created floral ephemera pieces that match the floral design and the main colours (Real Red and Garden Green) in the Love Notes DSP.
The hexagon window draws your eye straight to the sentiment, which is stamped on the inside of the card using the thank you stamp from the “With You in Mind” Stamp Set.
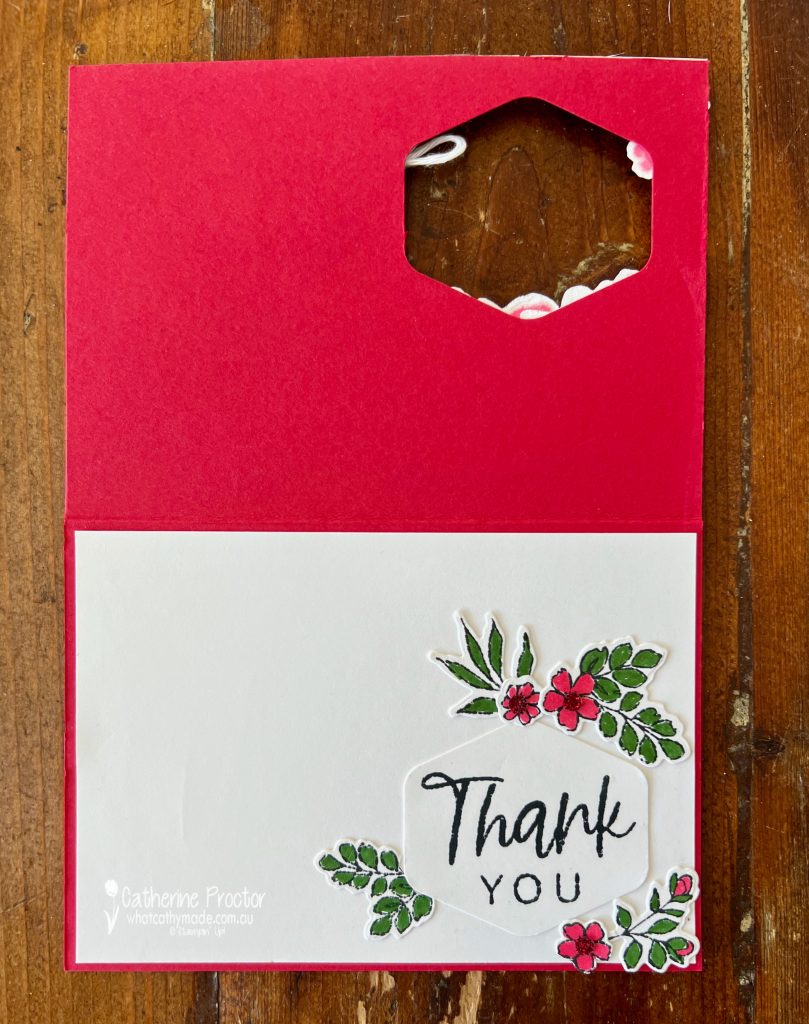
This is what the card looks like when opened up.
To decorate the inside of the card, I also added some extra Extraordinary Flora pieces around the sentiment.
Tips for Using Up Your Designer Series Paper
If your Designer Series Paper stash is growing (and growing 😅), here are a few easy ways to start using it:
Cut your paper into smaller panels instead of saving full sheets
Choose fun folds that naturally require multiple pieces
Stick to one colour family (like Real Red here) to keep everything cohesive
Try patchwork or mosaic layouts
Mix bold and subtle prints to create balance
These cards were such a good reminder that DSP is meant to be used, mixed, layered and enjoyed… not hidden away in a drawer!
Take a look at some more Real Red inspiration on our Insta Hop!
Our blog hop is now an Instagram hop but the good news is that you don’t need to have an Instagram account to view all of the other projects!
Simply copy any of the Insta handles below into a new search engine window to follow the Instagram hop at any point.
Next in our Hop is Kate @craftwithkate. Be sure to check out her gorgeous project/s.
The full list of this week’s InstaHop is listed below:
Kate @craftwithkate
Kirsty @crafty.littlemiss
Rosa @hum.and.stamp
Helen @apaperparadise
Cathy @whatcathymade – you are here!
Thank you for joining me for Week 45 of Colour Creations. We’ll be back next Wednesday when we are showcasing Shaded Spruce. I hope you can join us then.
A group of the Art With Heart Team is hopping through the Stampin’ Up! colours in alphabetical order. Week 47 is all about Real Red.
I must confess I usually only use Real Red for Christmas cards, so it was good to challenge myself to use it for a birthday card this week. This is my colour combination and I love it!
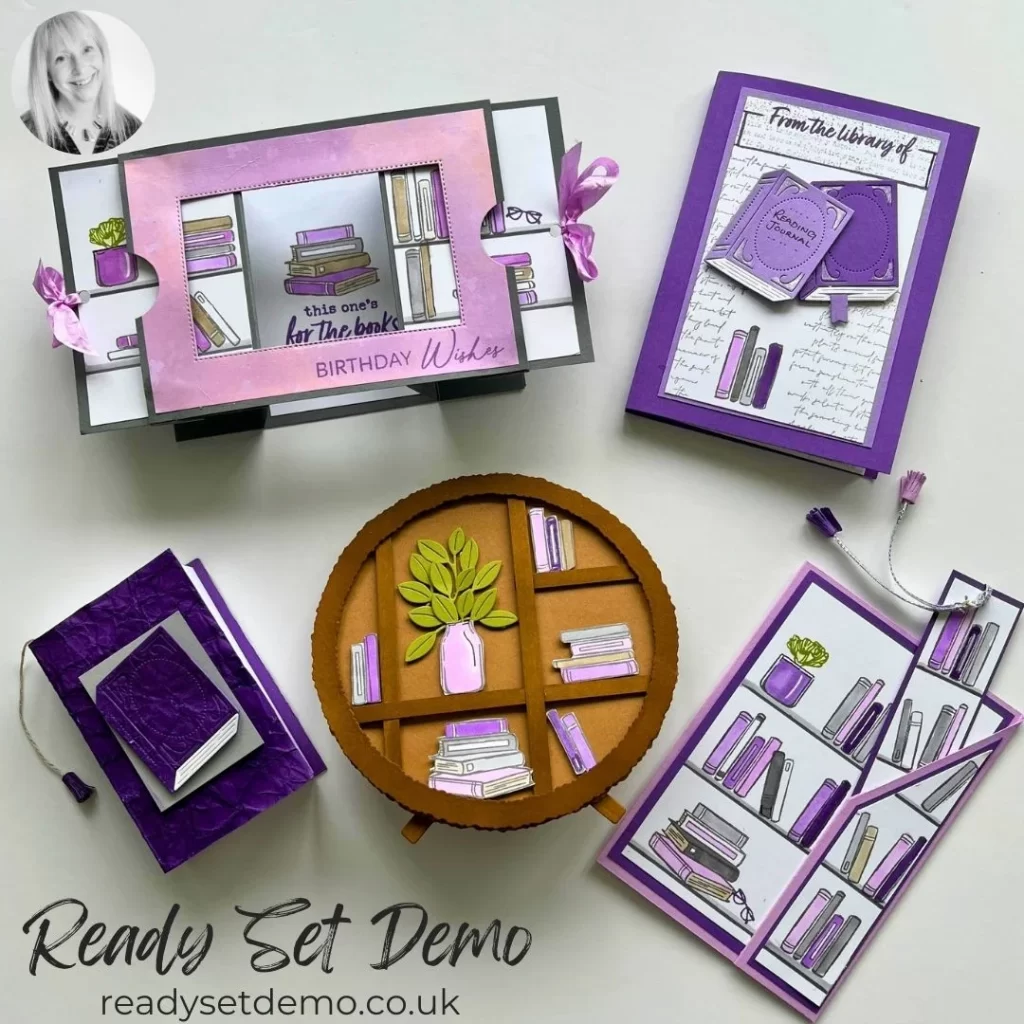
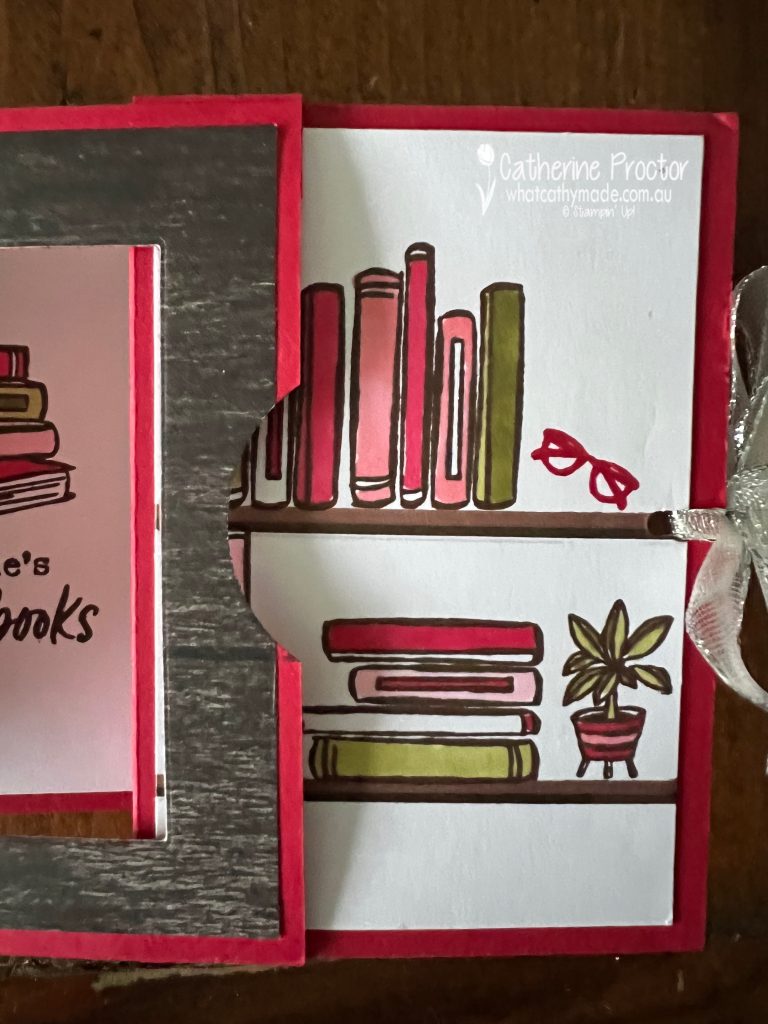
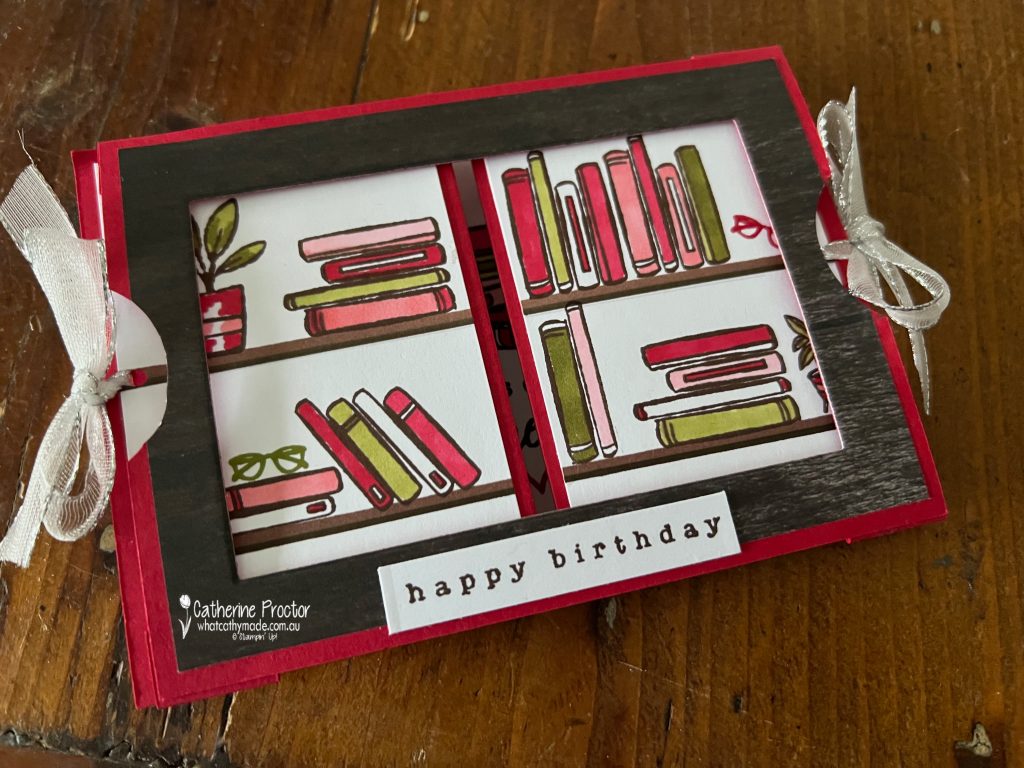
My card was made following an excellent template I purchased from an amazing UK Demonstrator called Liz Shannon. I bought this tutorial from her intending to make the adorable mid century bookcase but I ended up making the Secret Sliding card instead. I will make the other projects too.
Here is a picture of the projects included in her tutorial.
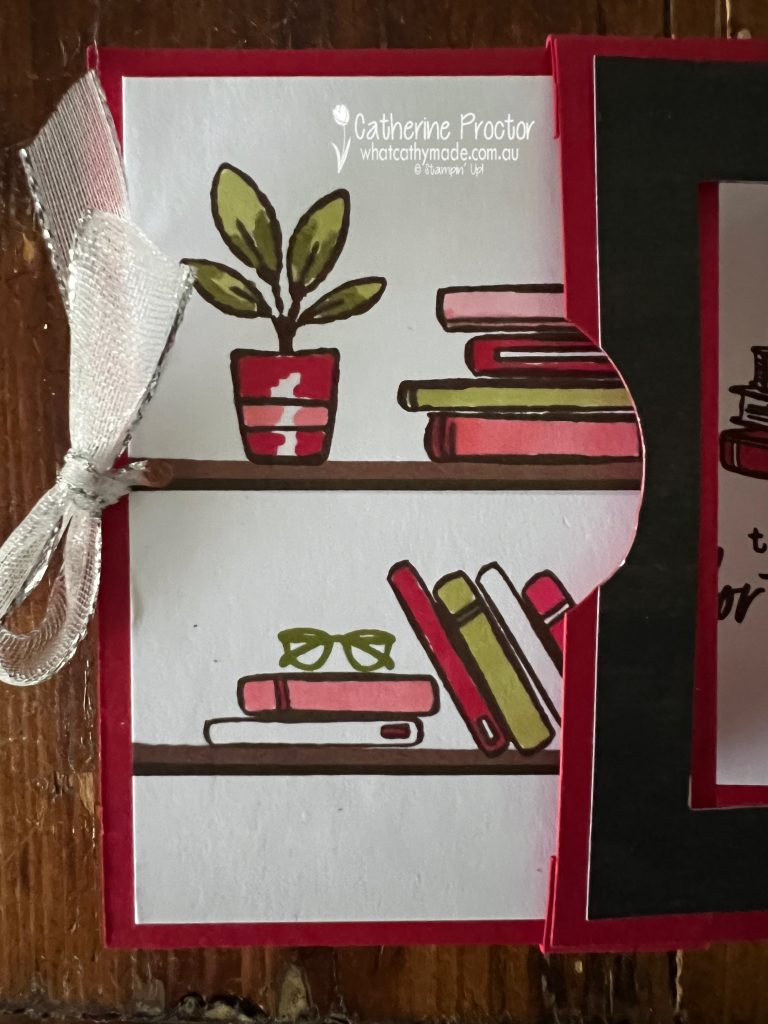
The alternative products I used in my card include the pot plant from the Attention Shoppers stamp set for the left hand panel.
Another pot plant from the new Online Exclusives stamp set, “She’s the Greatest” is stamped on the right hand panel.
I’ve also used the “Happy Birthday” sentiment from the Country Birdhouse stamp set for the front of the card.
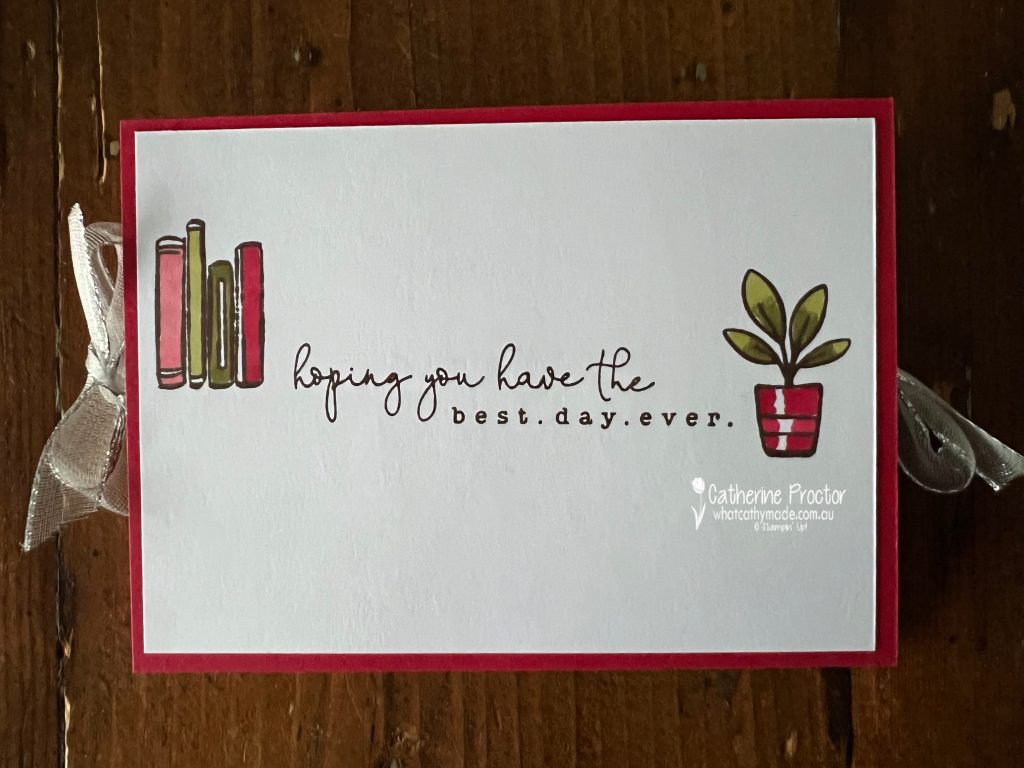
And another sentiment the Country Birdhouse stamp set on the writing panel on the back of the card too.
Here’s a short video to show you how this card opens and closes.
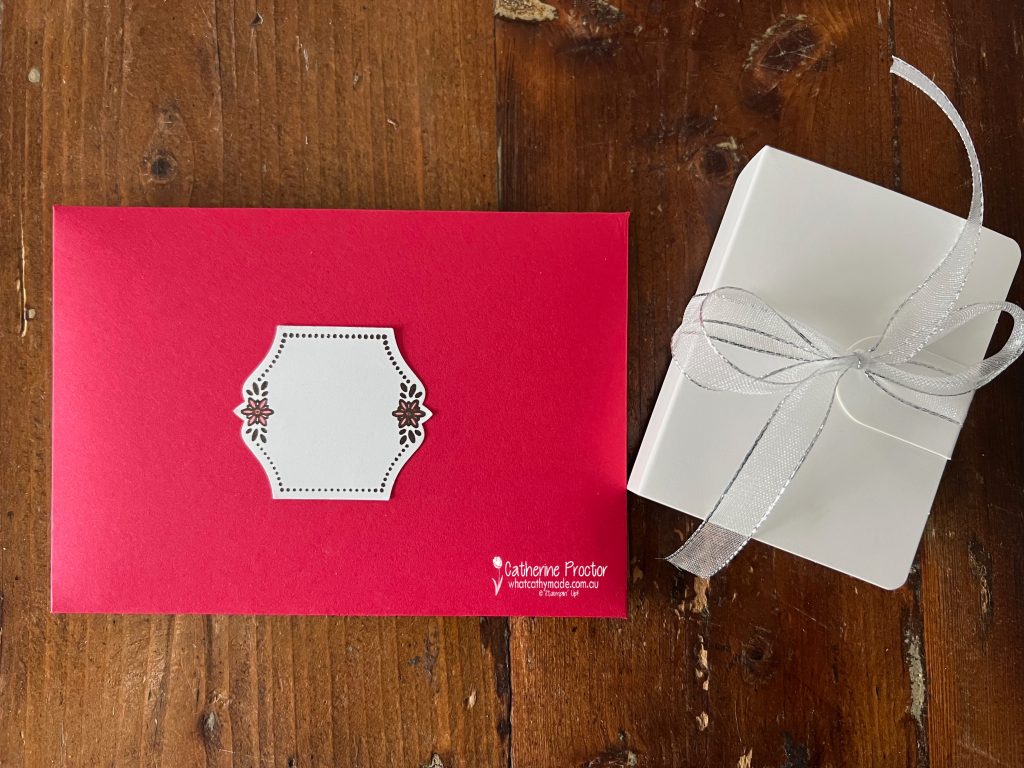
I made a custom made envelope out of Real Red cardstock to fit this special card and made a name label for the front of the card using the To the Point Label Punch and the coordinating Bright Borders Stamp Set.
Unfortunately, the book I’d ordered as the birthday gift did not arrive in time so I printed a copy of the book’s cover and popped it into one of the cute little Book Treat Boxes.
Our blog hop is now an Instagram hop but the good news is that you don’t need to have an Instagram account to view all of the other projects! Simply copy any of the Insta handles below into a new search window to follow the Instagram hop.
Next in our hop is Vicki @vickiboucher. Be sure to check out her gorgeous project/s.
The full list of this week’s Insta Hop are listed below:
Welcome to week forty two of our Art With Heart 2022-23 Colour Creations blog hop.
This is a weekly blog hop where we showcase the stunning range of Stampin’ Up! colours in alphabetical order over 12 months and this week we are featuring Real Red from the Regals family.
Sometimes you feel like stamping – sometimes you don’t!
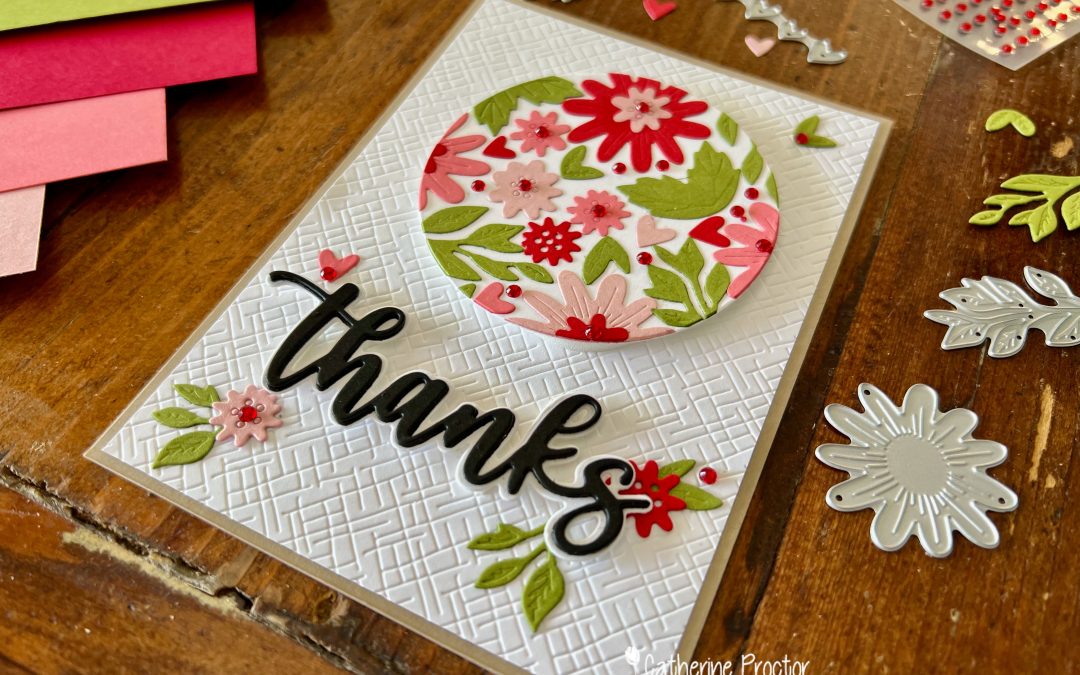
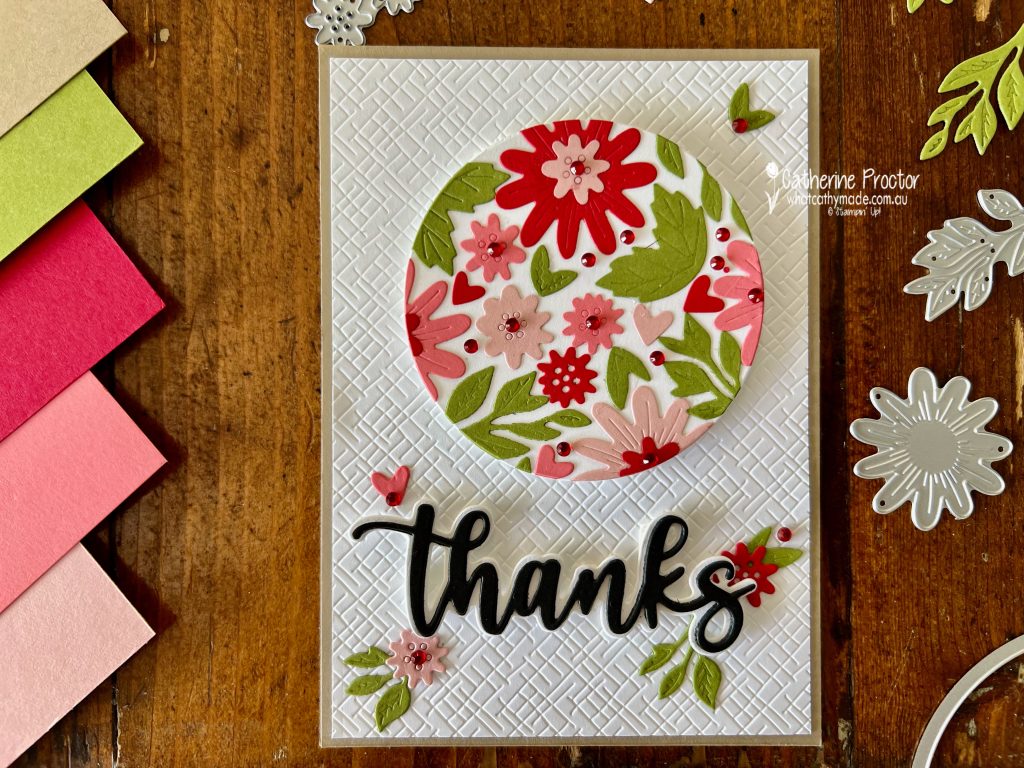
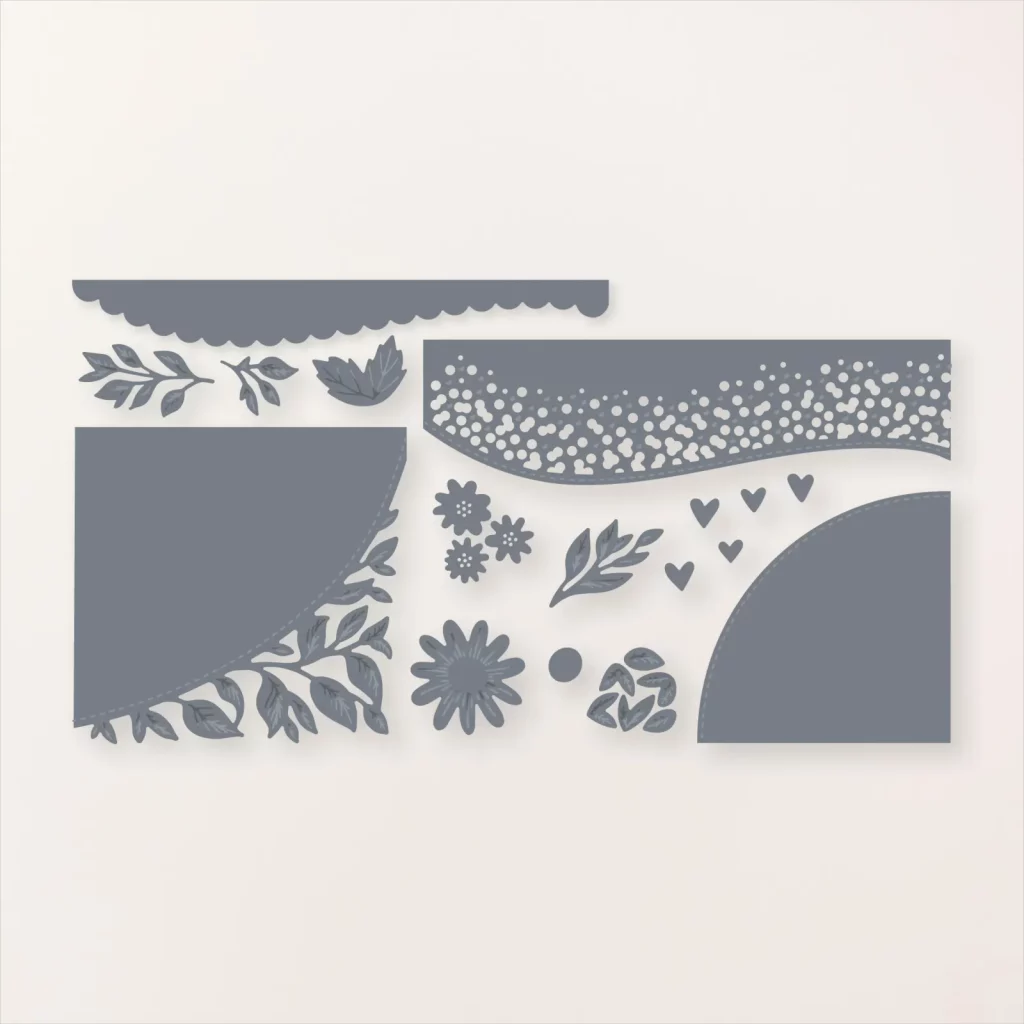
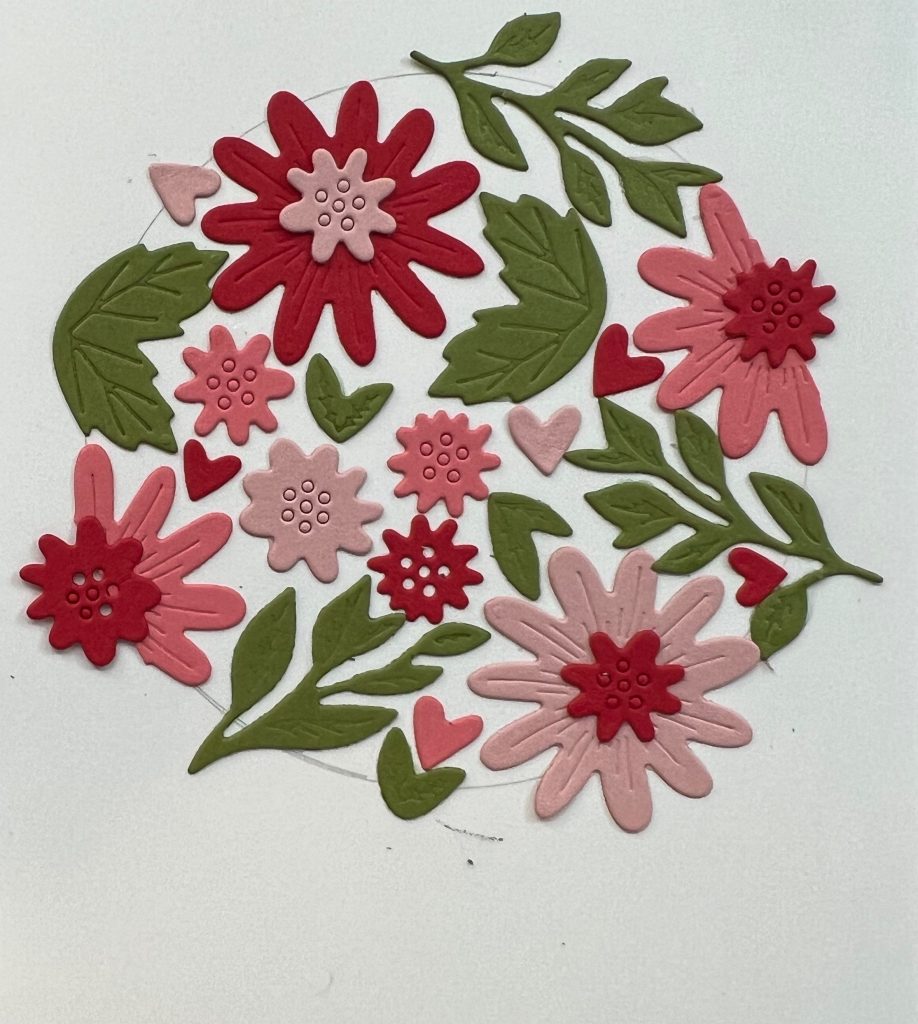
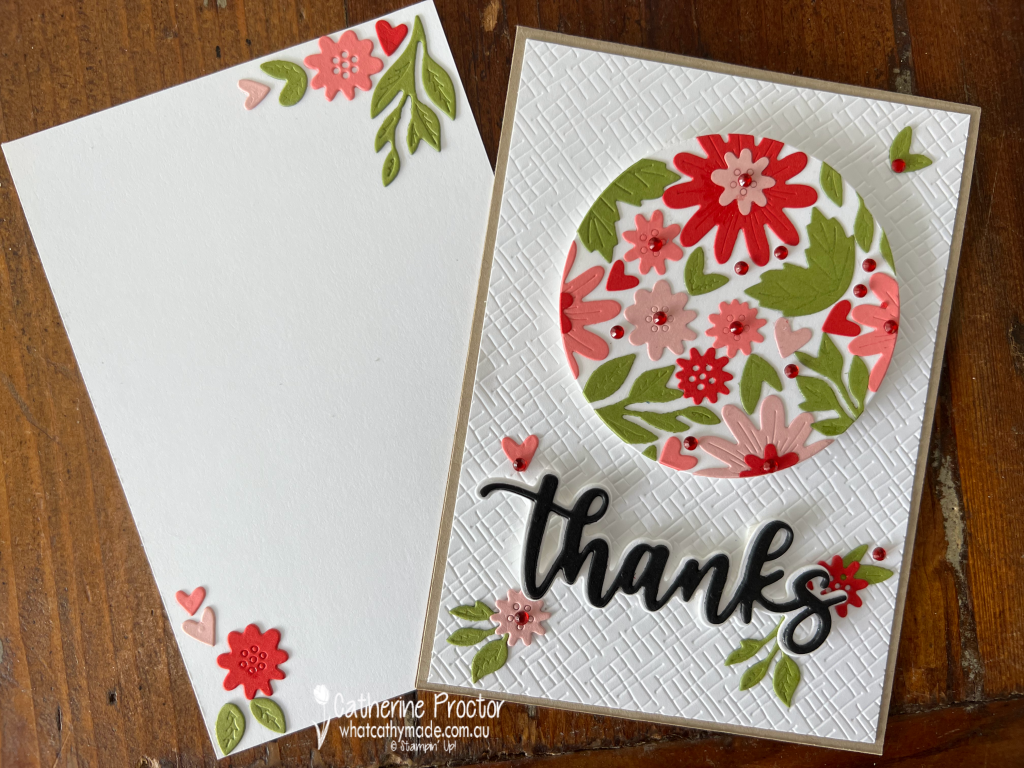
This Real Red card does not have any stamping thanks to the Amazing Thanks Dies and the Around The Bend Dies, which include multiple “stand alone” floral dies.
Stand alone floral dies do not die cut stamped images – they die cut and emboss flower and leaf pieces that you can layer or use on their own. The Around the Bend dies give you 20 floral pieces as well as four larger curved border dies.
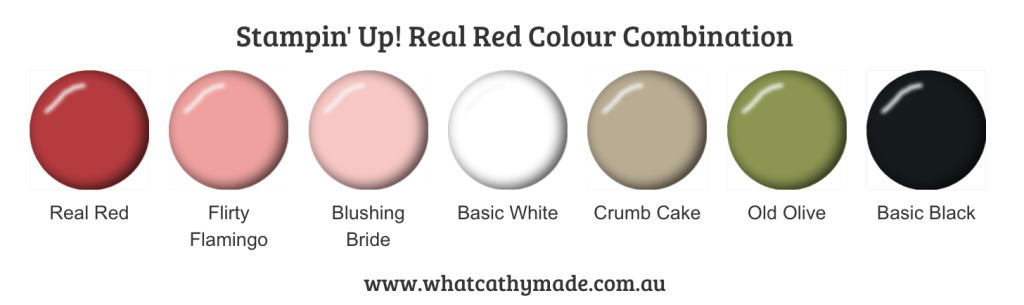
I have to confess that I don’t use Real Red very often outside of Christmas cards, however, I do love using red and pink together, hence my colour combination today.
This style of card is so easy to make – you can use any large die or shape template. I used a pencil to trace around the outside of the largest of the layering stitched circle dies.
After die cutting an assortment of flowers and leaves I arranged them within the circle shape, making sure the die cut pieces fit together snugly and overlap the circle outline. I always take a photo at this stage to use as a reference before I remove all the die cuts and then glue them back into the circle shape.
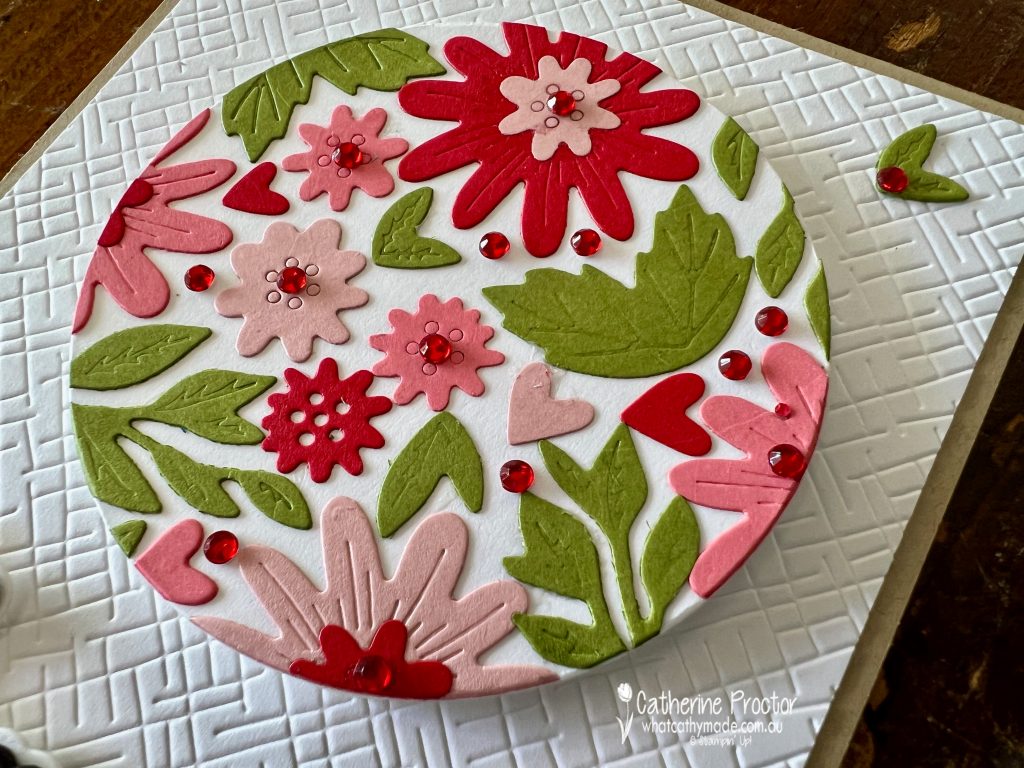
Once I’d adhered all of the die cut shapes I used the circle die to cut the floral circle out and adhere to my card base, adding red Rhinestone jewels. There’s no need to rub out the pencil marks as the layering circle die cuts the flowers INSIDE the pencil circle outline.
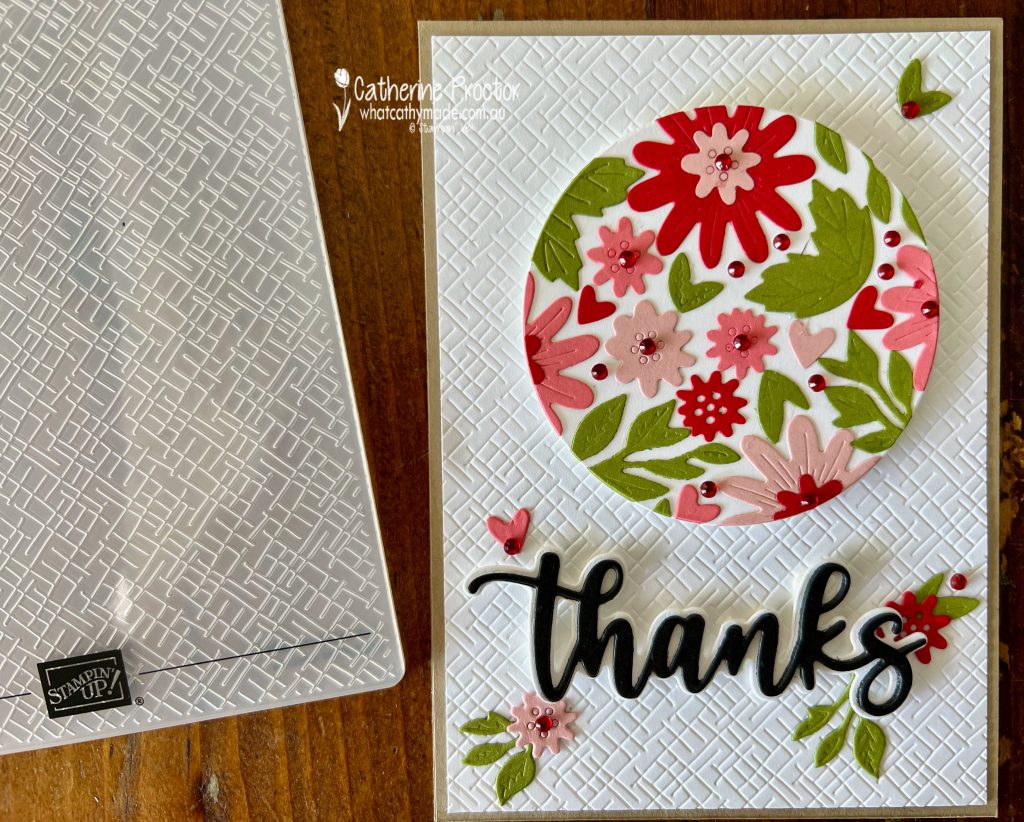
Did you notice the embossed background on this card? Today, Stampin ‘Up! has released online exclusive products and this embossing folder is part of a three pack called Basic 3D embossing folders.
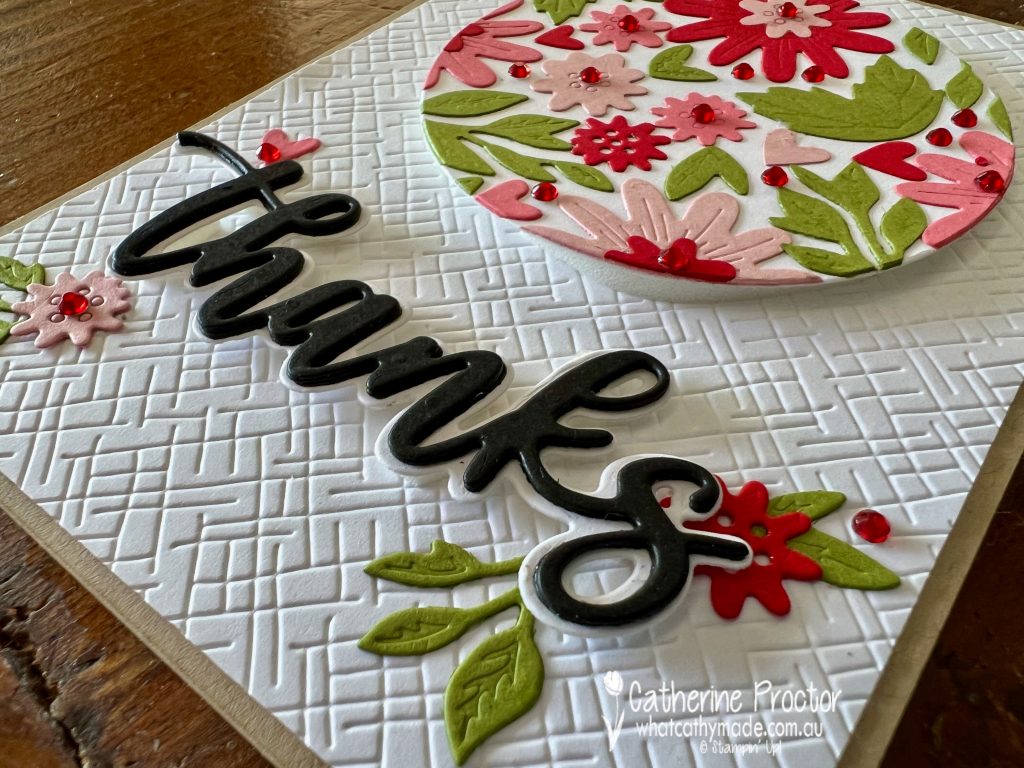
I’ve die stacked the “Thanks” die by cutting it out three times in Basic Black cardstock, gluing the three layers together and then adhering it to the “Thanks” die layer die cut in Basic White. You can see the incredible dimension from the side of the card.
I decided to leave the inside of the card blank, just using up some spare die cuts to decorate it. This truly is a no stamping card!
Now it’s time to hop on over to our next participant, the lovely Rachel Palmieri – I can’t wait to see what Rachel has made this week!
If at any time you find a broken link, you can find the complete list of all participants below.
Welcome to week 39 of our 2021-22 Colour Creations blog hop! Tonight we are showcasing Real Red from the Regals family.
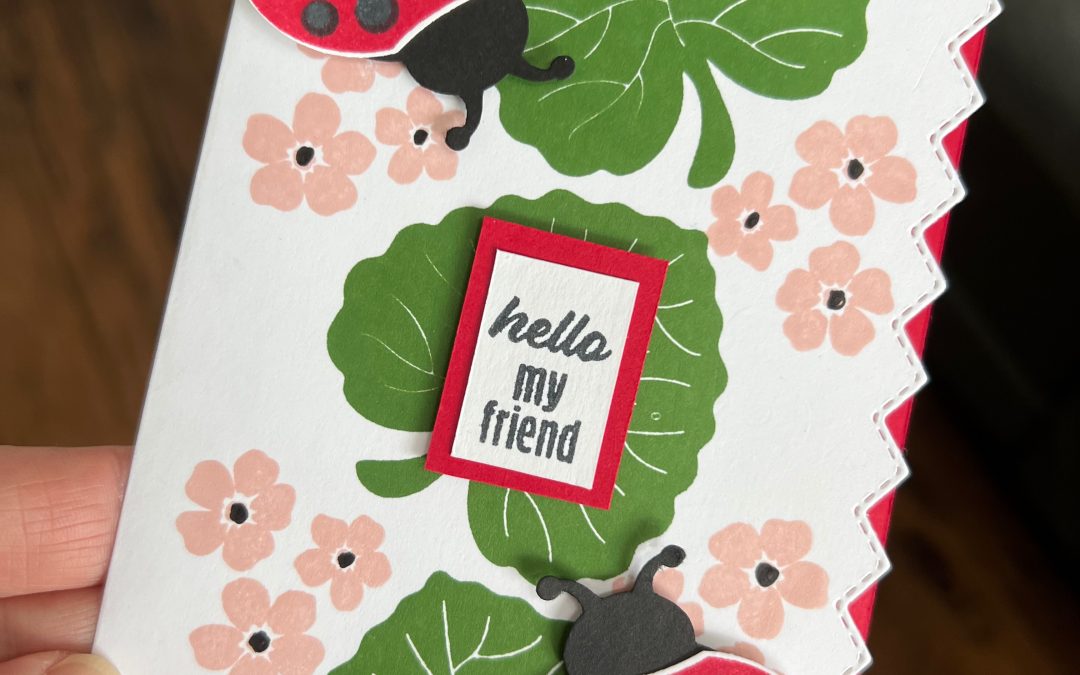
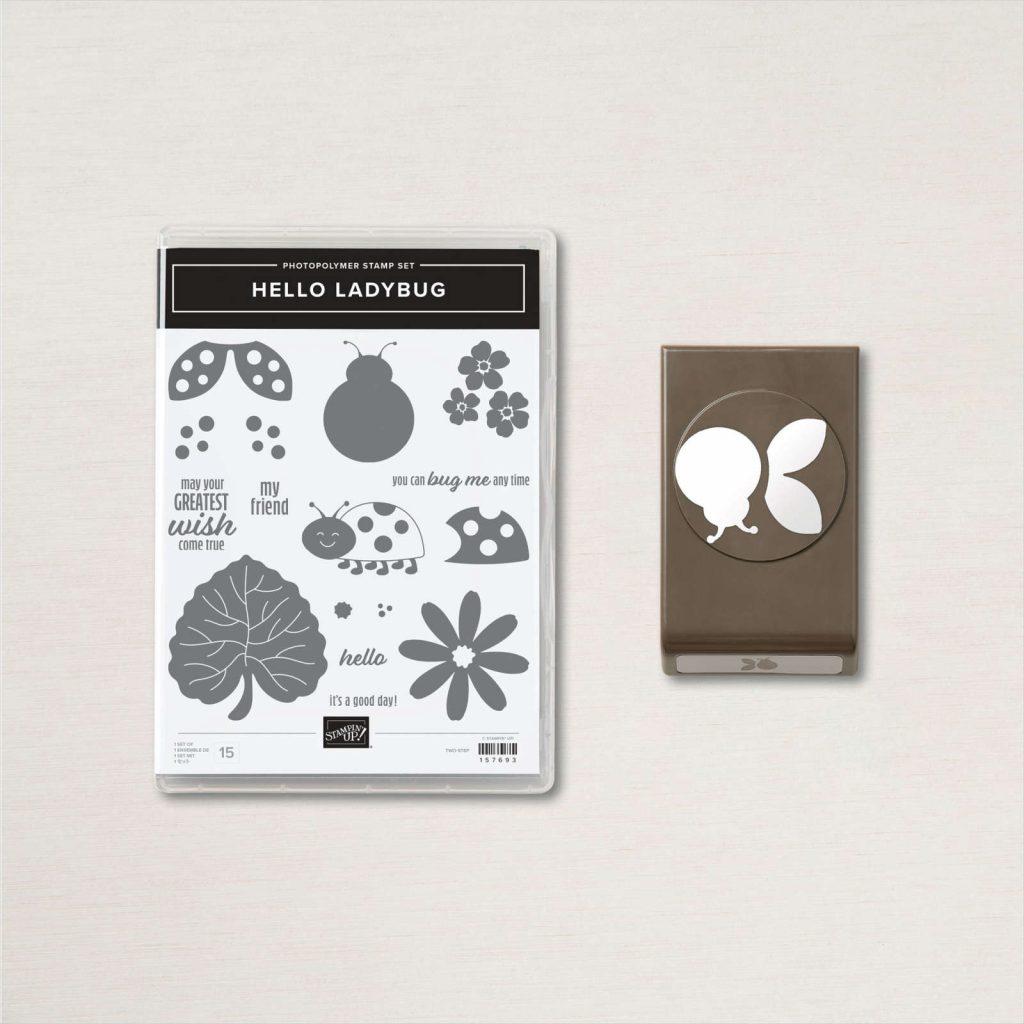
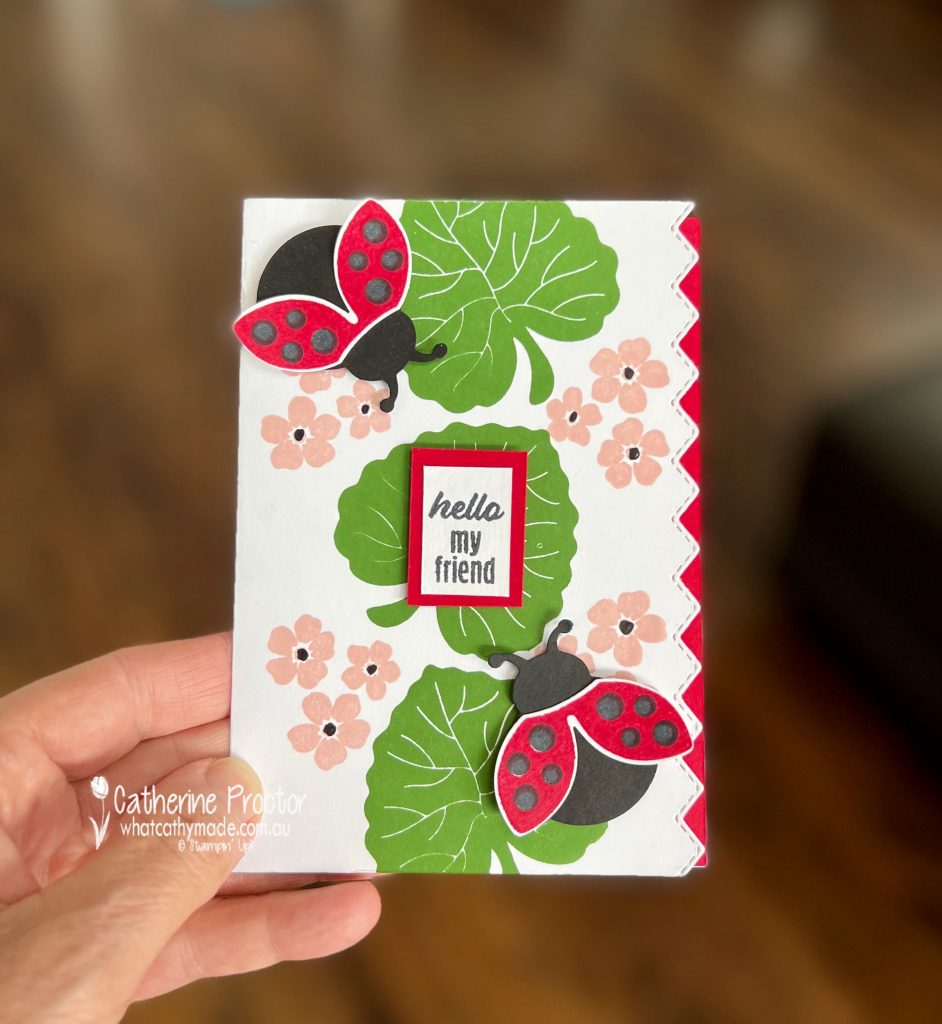
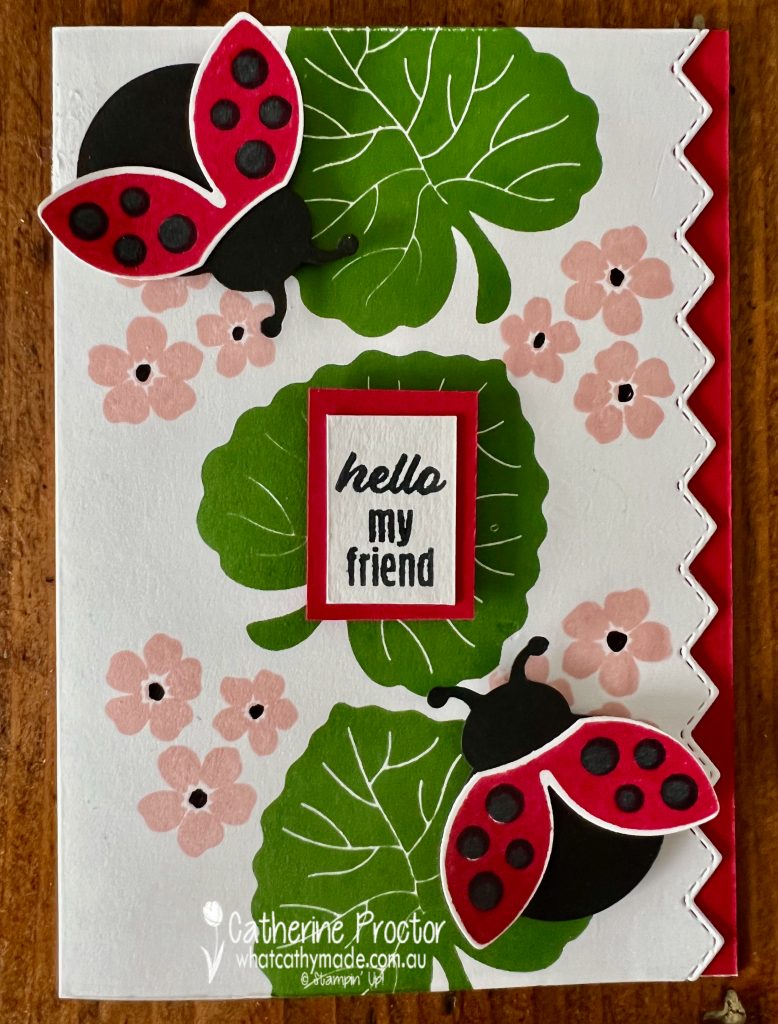
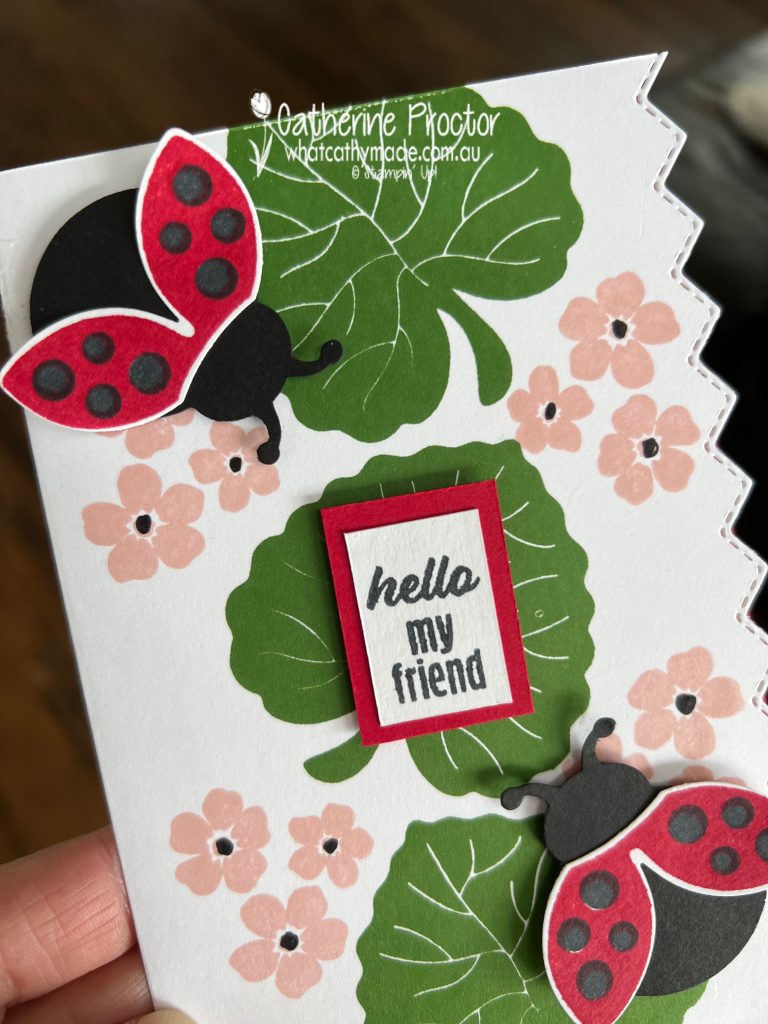
I needed a quick and easy card this week so I reached for the adorable Hello Ladybug bundle. I love a punch bundle!
This card is super simple but I love the bright, graphic nature of these images from the Hello Ladybug stamp set. My colour scheme pairs Real Red with Garden Green, Blushing Bride and Basic Black.
The natural light in this photo makes Garden Green look like Granny Apple Green!
To add visual interest and extra red to quite a simple card, I die cut a zig zag border using one of the Basic Border dies and added a strip of Real Red card stock under the border edge.
Inside the card I added another strip of Real Red cardstock on the other side and stamped another ladybug – or ladybird, as we call them here in Australia!To make the flowers pop, I used my Basic Black marker to colour in the centres.
This card really makes me smile – I hope it makes you happy too!
Now it’s time to hop on over to our next participant, the lovely Andrea Sargent – I can’t wait to see what Andrea has made this week!
If at any time you find a broken link, you can find the complete list of all participants below.
Welcome back to our Colour Creations Showcase as we continue our showcase of over 50 beautiful Stampin’ Up! colours in alpha order.
This week we are showcasing Real Red, a vibrant red from our regals family.
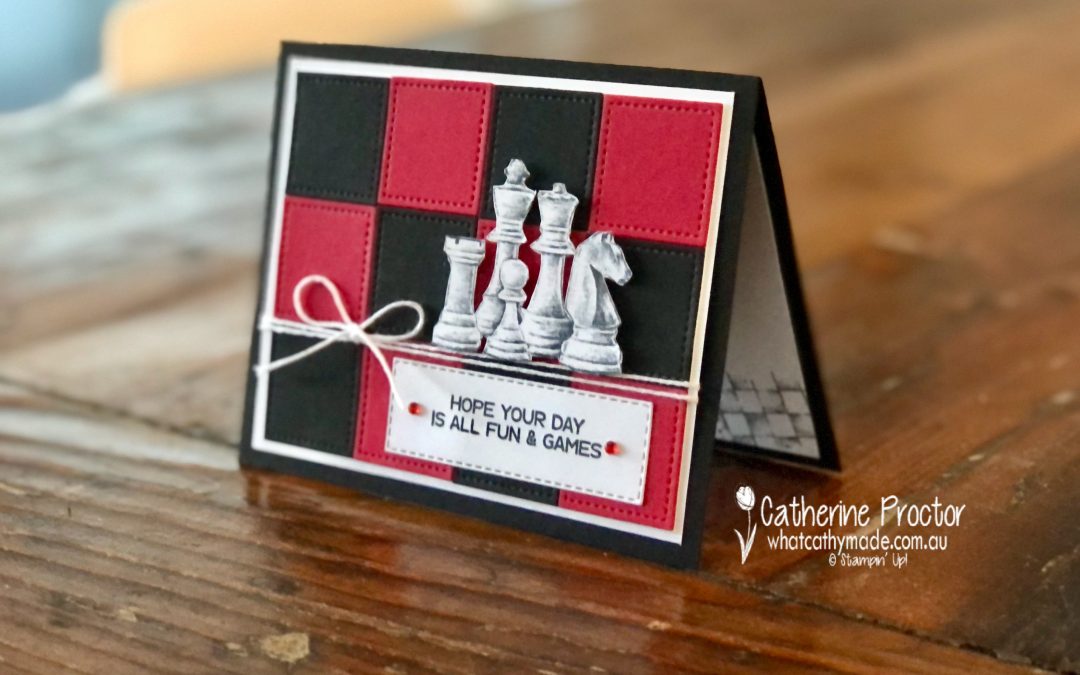
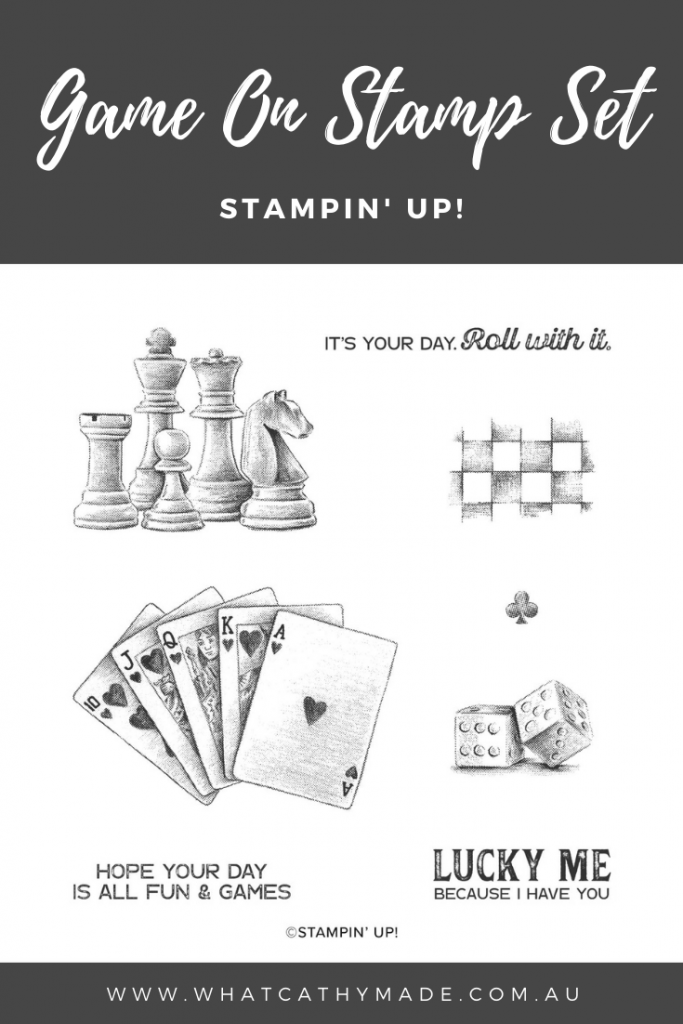
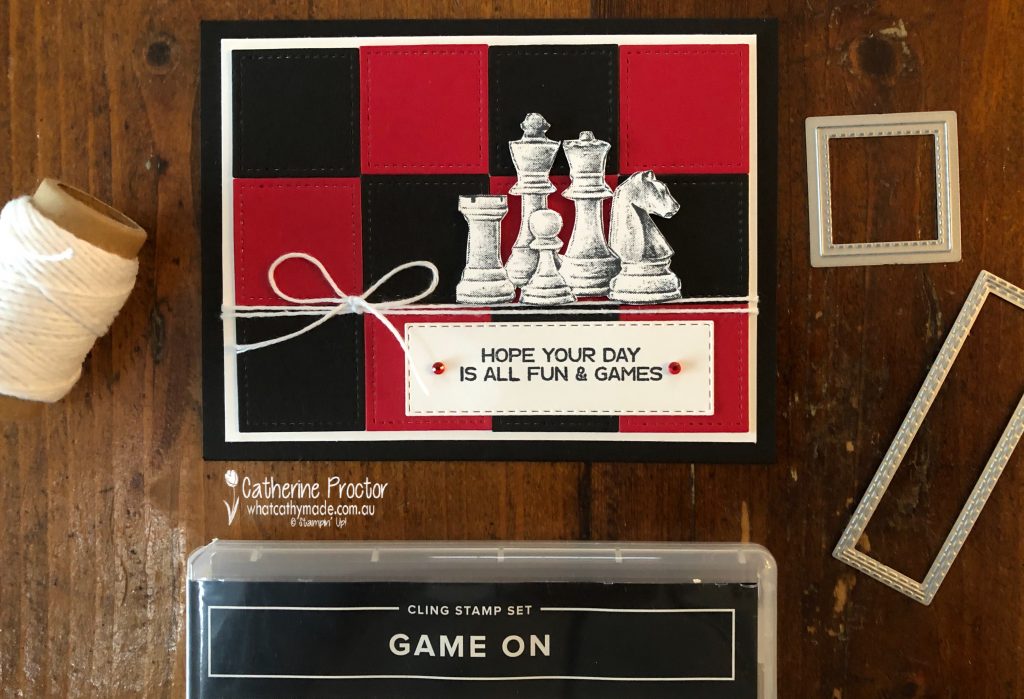
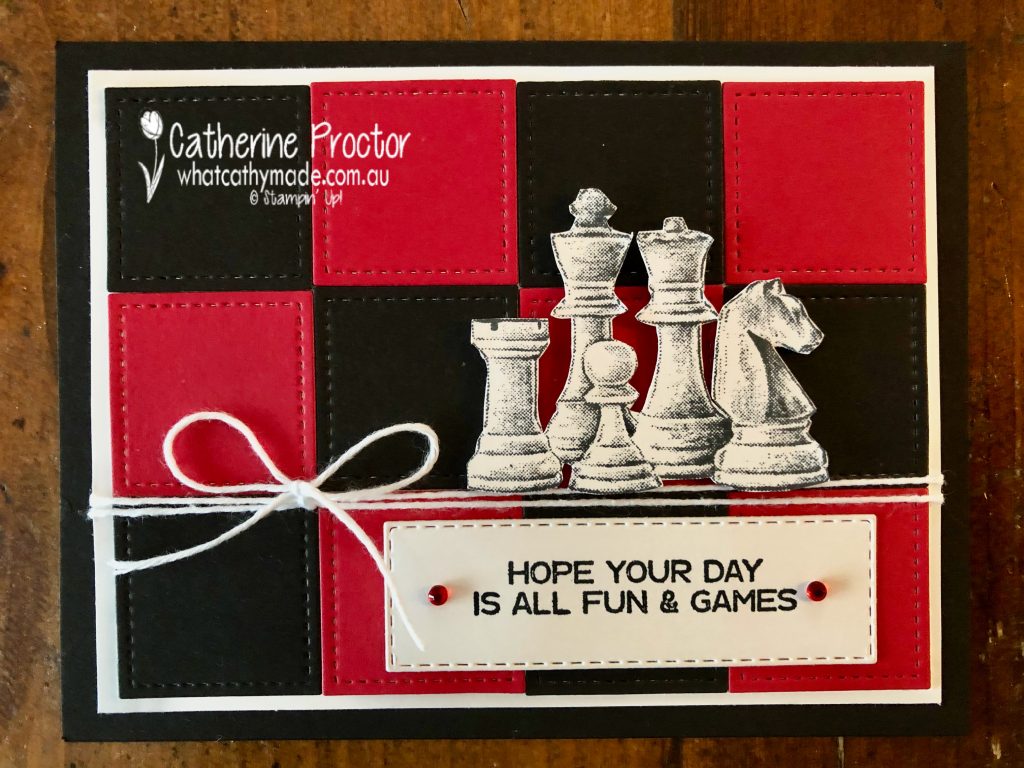
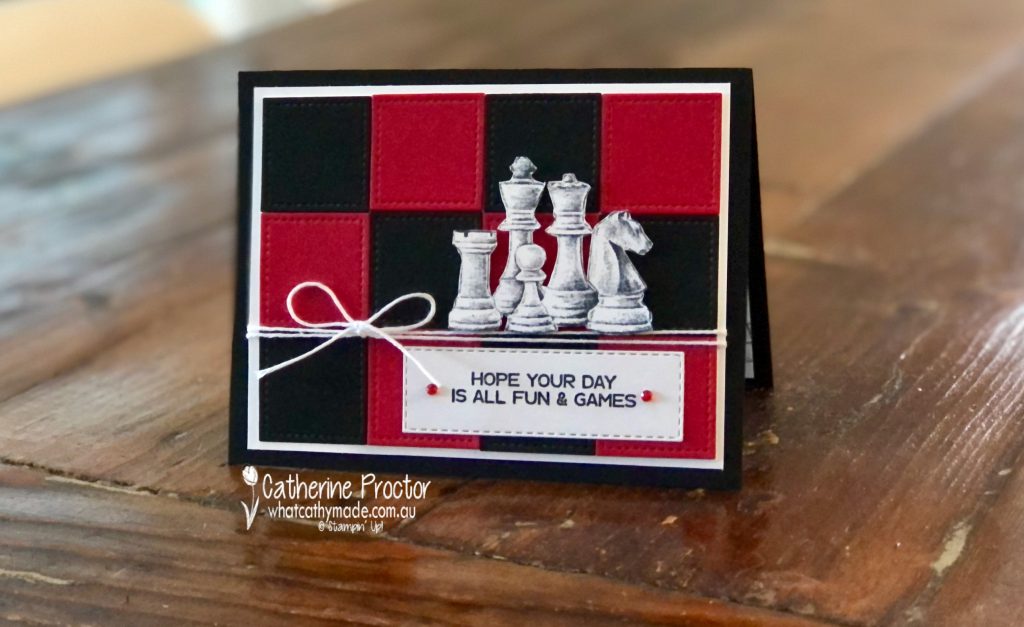
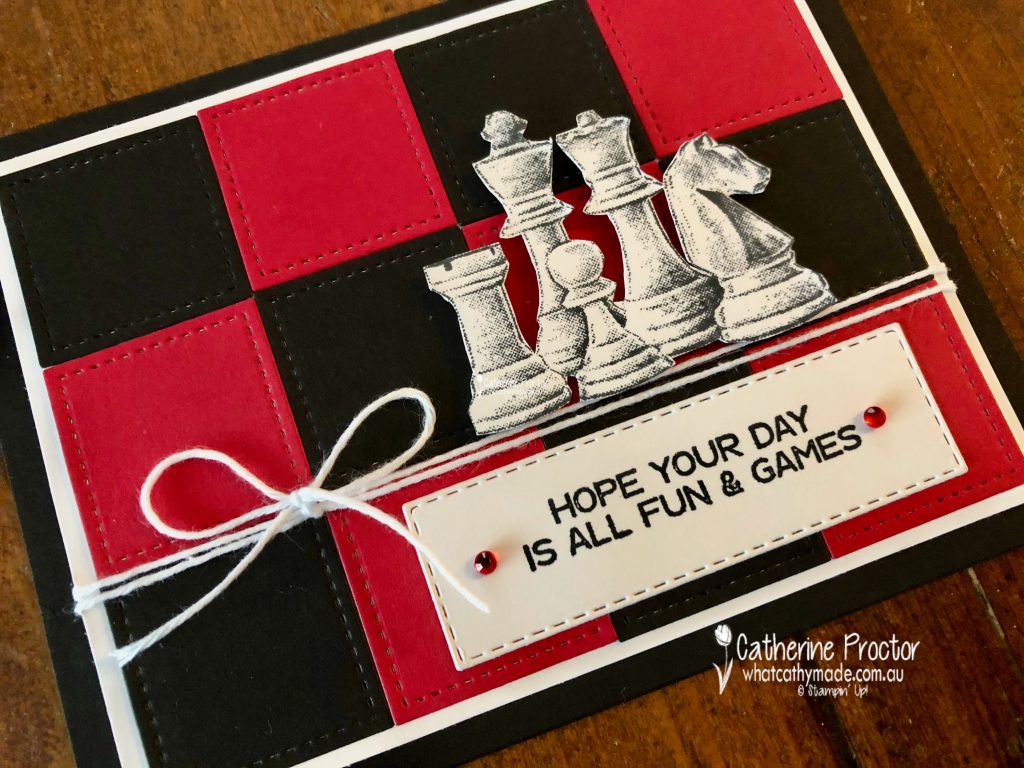
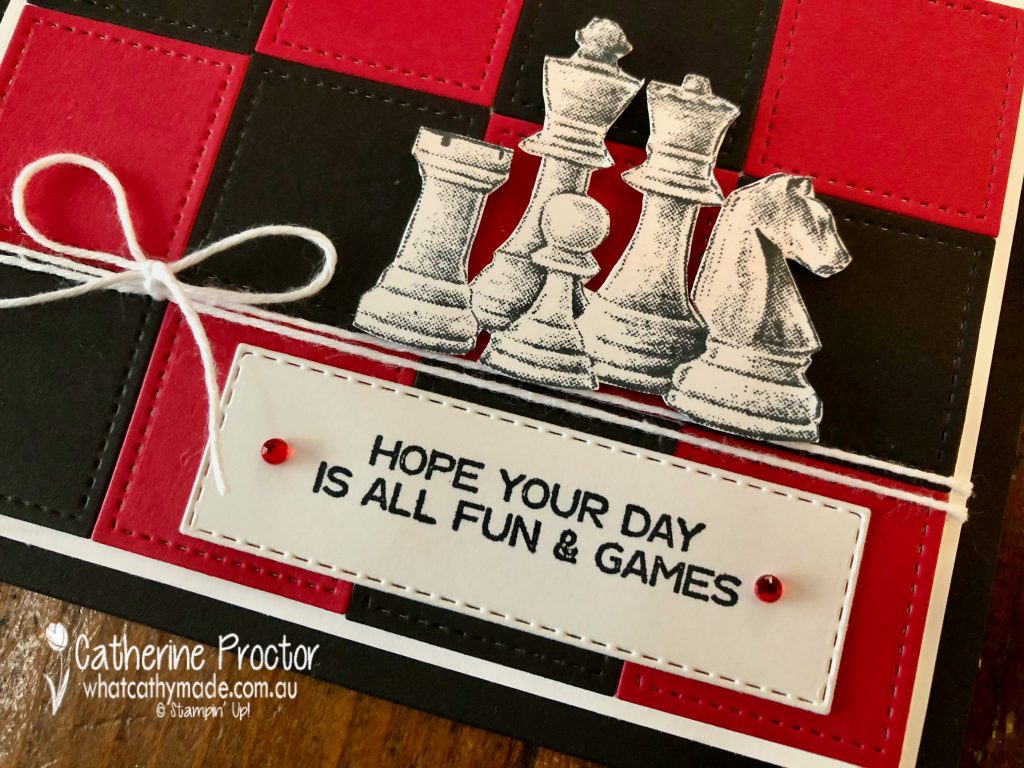
If you have a person in your life who loves playing chess, cards or dice games, the “Game On” stamp set is one you’ll want to add to your collection.
I decided to create a chess board for the chess stamp, using the smallest stitched square die from the Stitched Shapes dies to die cut 6 Real Red squares and 6 Basic Black squares.
I laid the squares in a checkerboard pattern and adhered alternate squares of red and black to a 12 x 9 cm Basic White layer – I wish I’d gone a tiny bit slower to get my alignment more precise!
The card base is half a piece of A4 Basic Black card stock folded in half, with another Basic White layer in between.
Before I adhered the two top layers to my card base I wrapped Whisper White twine twice around these top layers and tied a bow.
The chess pieces were fussy cut using my paper snips and the sentiment die cut using the stitched rectangle dies – two red rhinestone jewels add a tiny touch of bling.
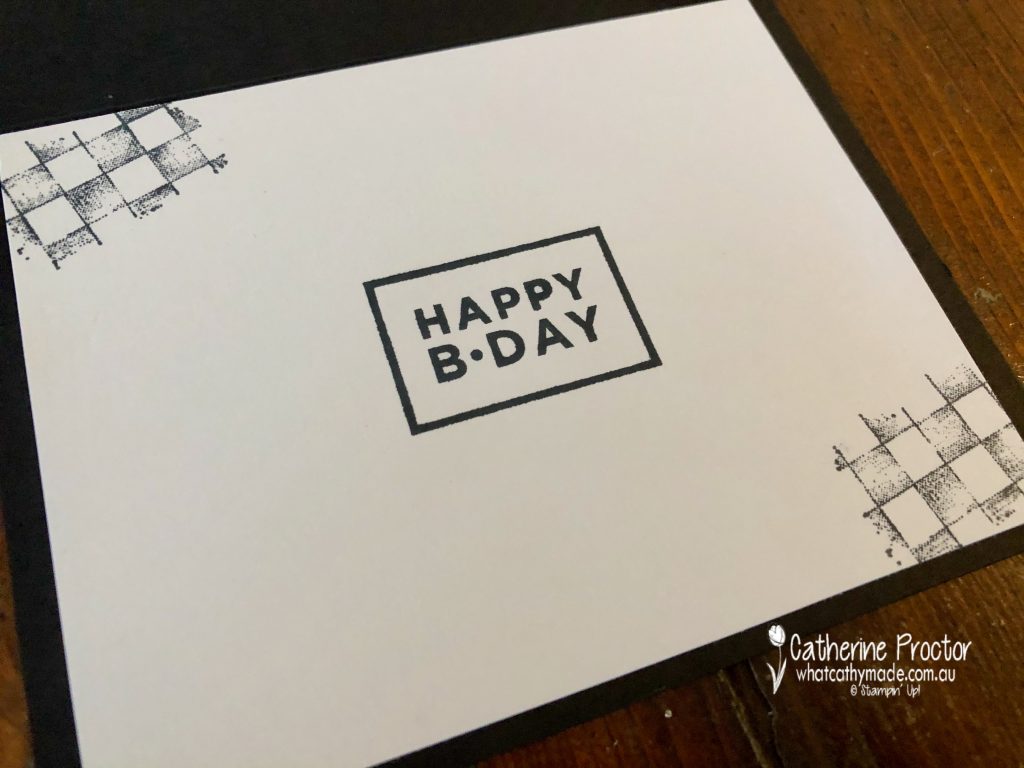
Thanks to my friend Tina, I’m gradually forming the habit of stamping inside all my cards. I’ve used a chequerboard stamp from the “Game On” stamp set and the happy b.day stamp from the “Happiest of Birthdays Stamp Set” – I thought the graphic quality of this stamp worked well with this style of card.
I can’t wait to see what everyone else has created with Real Red today!
If you’d like me to post you your very own copy of the January – June 2020 mini catalogue, the 2020-21 Stampin Up! Annual Catalogue, the 2020-21 Beginners Brochure, or to simply find out about more about Stampin’ Up! contact me.
In the meantime, wherever you are in the world, stay safe, stay calm…and keep on crafting xxx
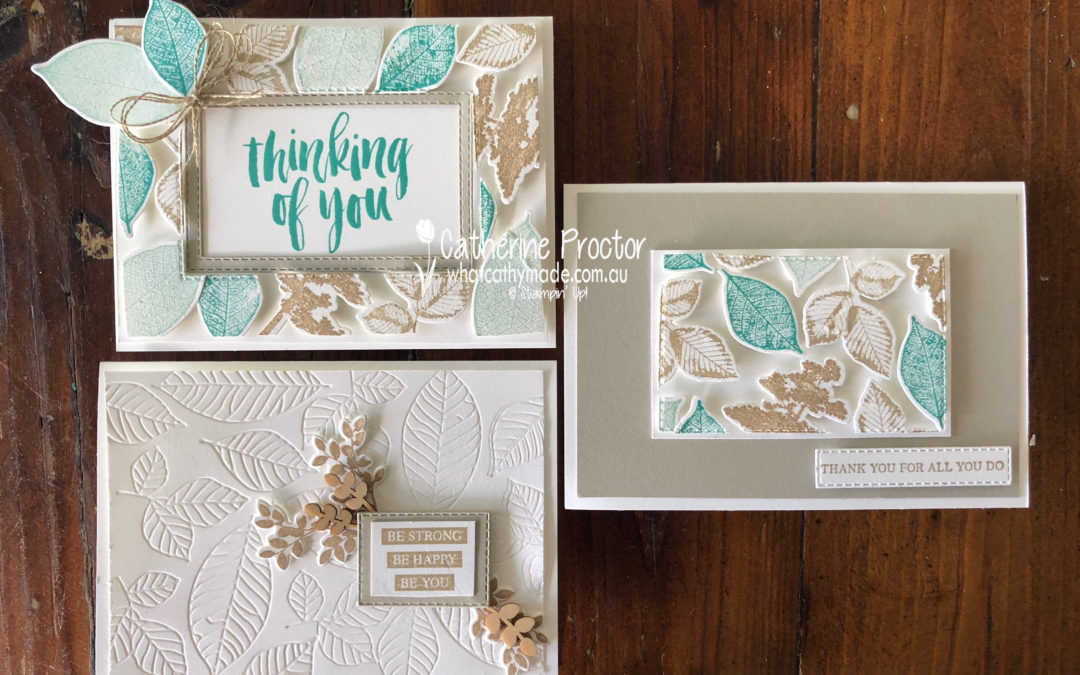
Welcome to week 44 of the Art With Heart Colour Creations Blog Hop!
Our colour this week is one of the lightest neutral colours: Sahara Sand.
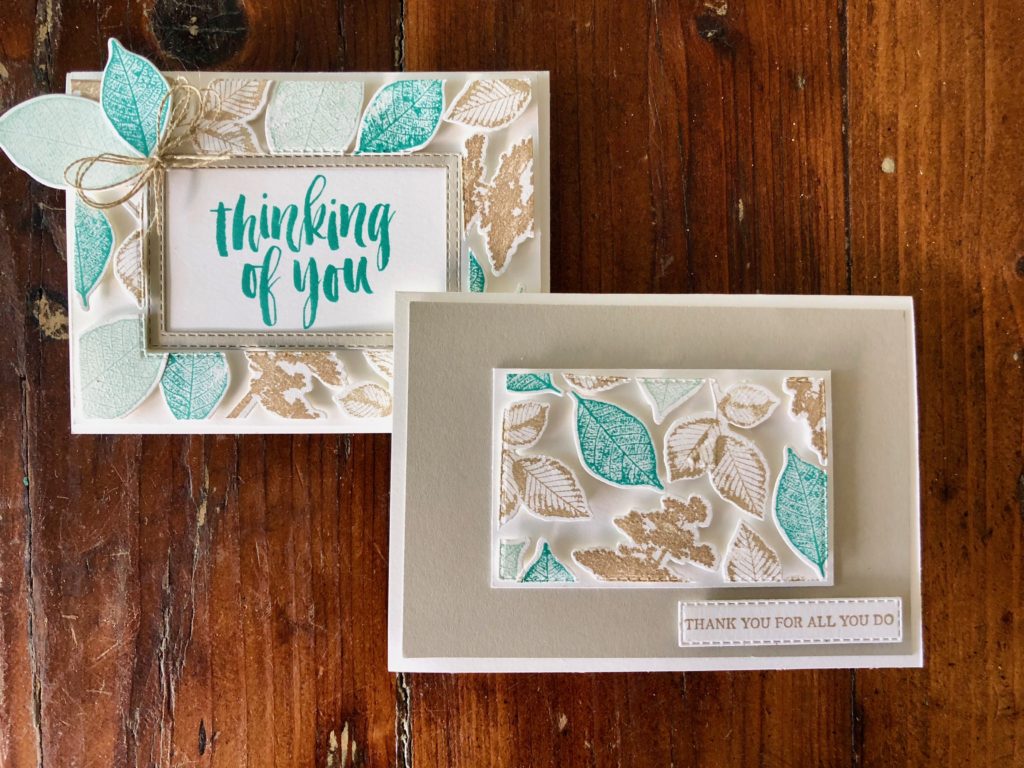
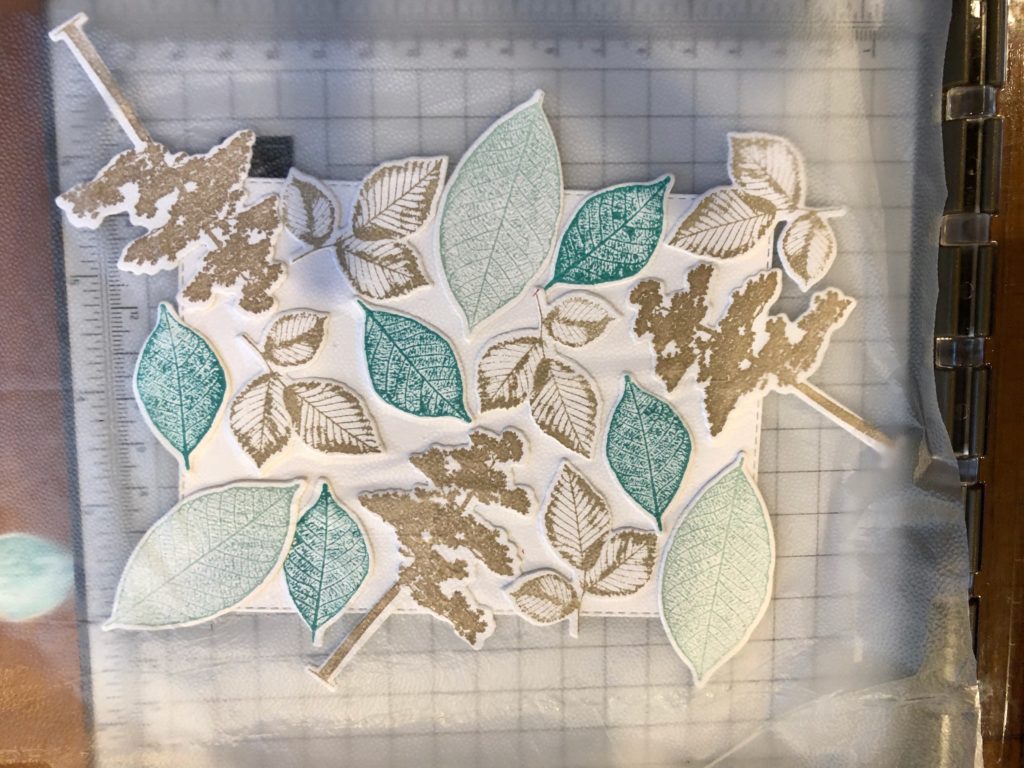
There’s a new technique around called the floating frame technique and I decided to try it out for my project this week, using the Rooted in Nature stamp set and the matching Nature’s Root Framelits.
The technique is quite similar to making your own DSP. I began by stamping the leaves and trees and die cutting them out before I arranged them onto a rectangle. Once I was happy with my layout I laid a sheet of Glad Press and Seal over the top of my die cut pieces, turned everything upside down and trimmed off the overlap.
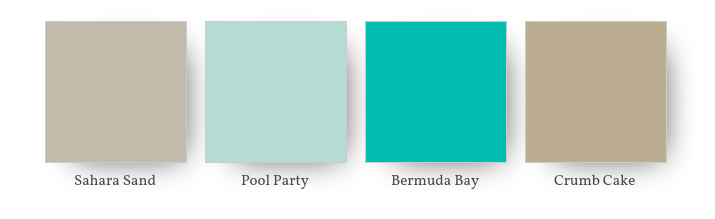
My colour combination is Sahara Sand, Pool Party, Bermuda Bay and Crumb Cake.
Once I’d trimmed off the excess, I die cut a rectangle out of the middle before removing the Whisper White cardstock from behind the die cuts. The Glad Press and Seal keeps your die cut pieces in place while you do this.
The final step is to use a lot of dimensionals behind the die cut pieces to adhere them to your card base. When your frame is in place you gently peel off the Glad Press and Seal. If you look closely at my card you can see where I’ve stuck the Press and Seal down too hard and it’s lifted some of my ink off.
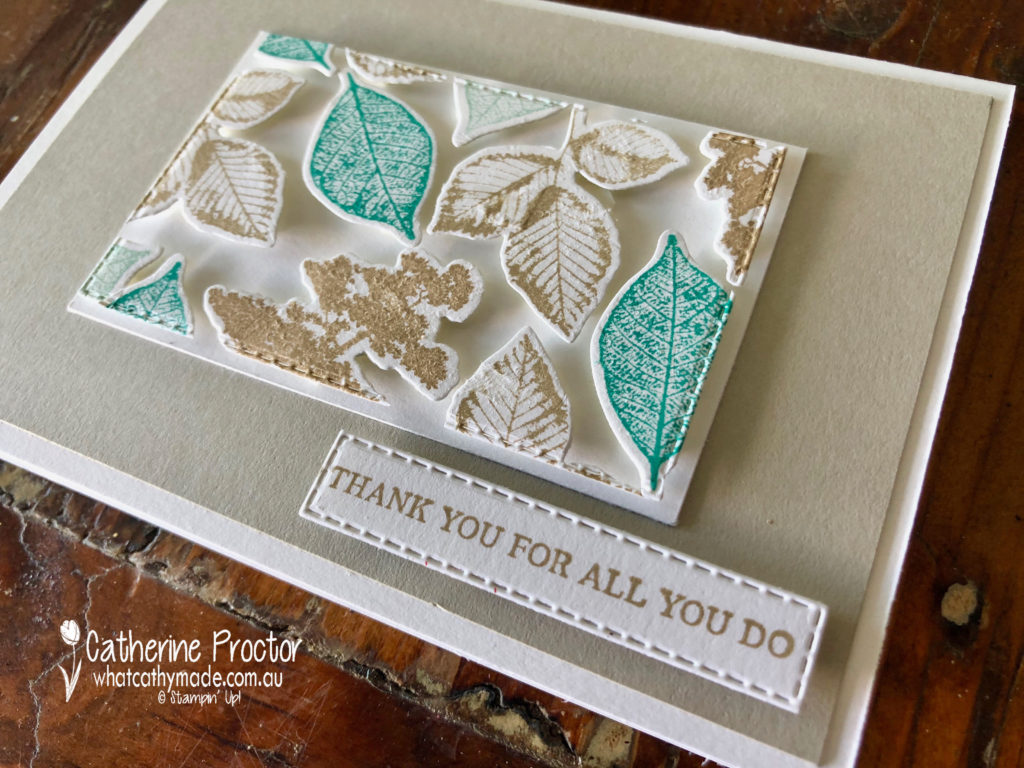
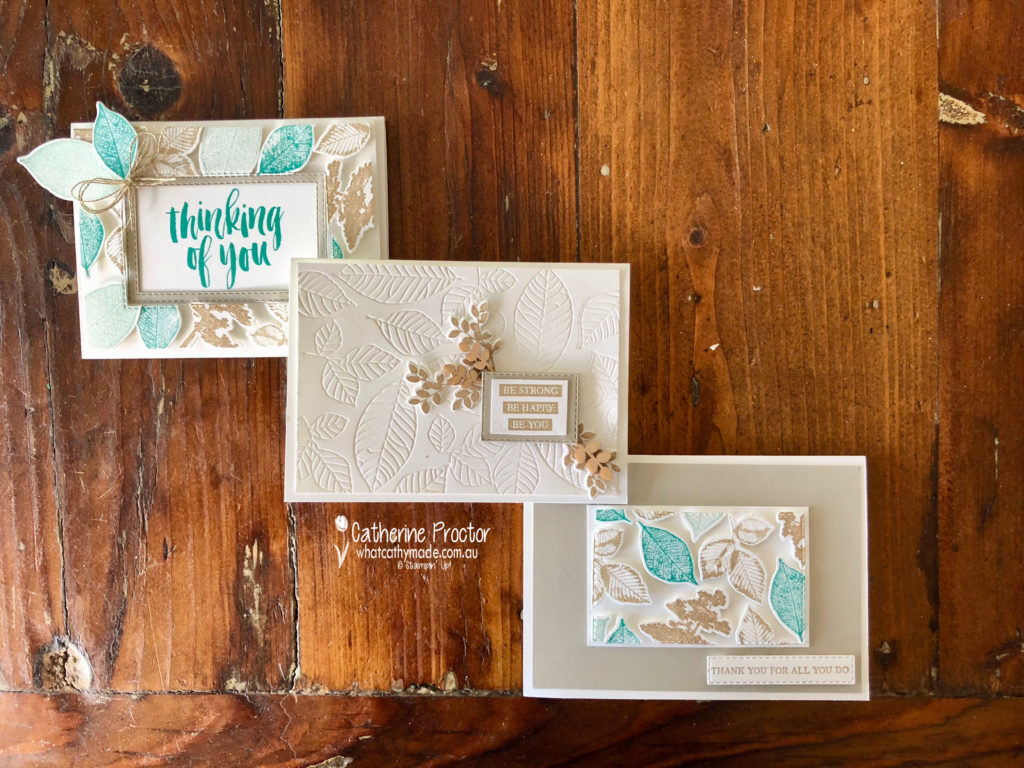
One of my favourite things about this technique is that you get 2 cards from it. Here’s the second card, made from the inside piece.
I decided to make a third card to showcase the lovely embossing dies in the Nature’s Root Framelits, as well as showing how elegant Sahara Sand looks on its own when paired with Whisper White.
To see what the rest of the team have made click on the links below.
To purchase any of the products I used in this project you can shop with me here. Or if you’d like me to post you your very own copy of any of the Stampin Up! catalogues or find out about more about Stampin’ Up! contact me .
We will be back again next week showcasing a regal colour: Shaded Spruce! We hope you can along with us then.
Welcome to week 42 of the Art With Heart Colour Creations Blog Hop!
Our colour this week is a regal colour: Real Red.
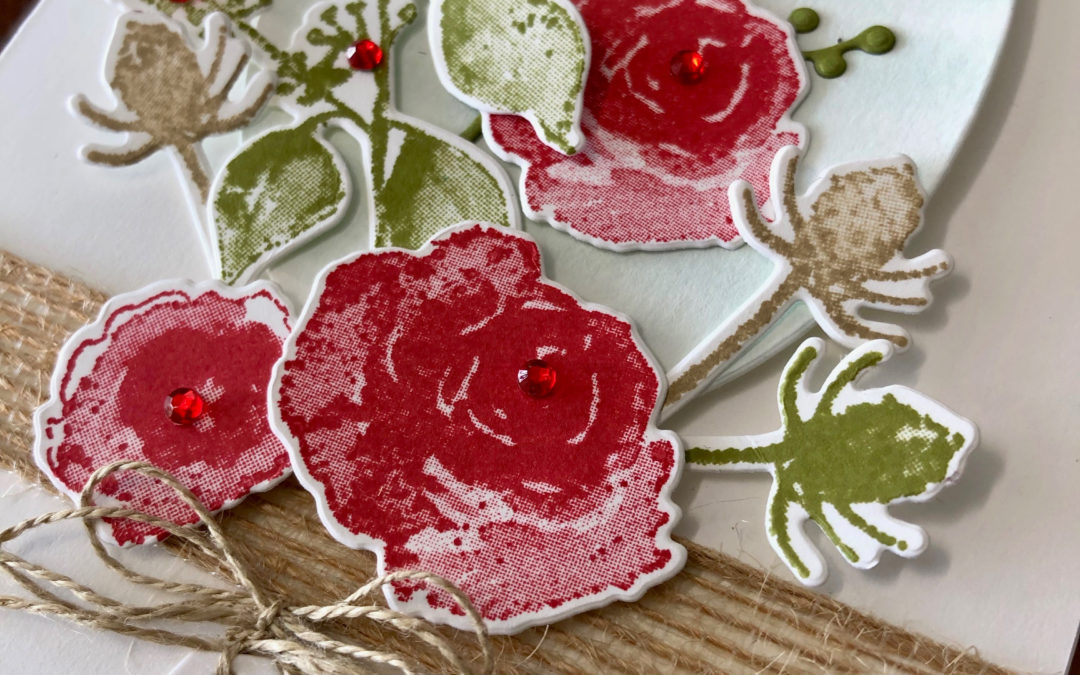
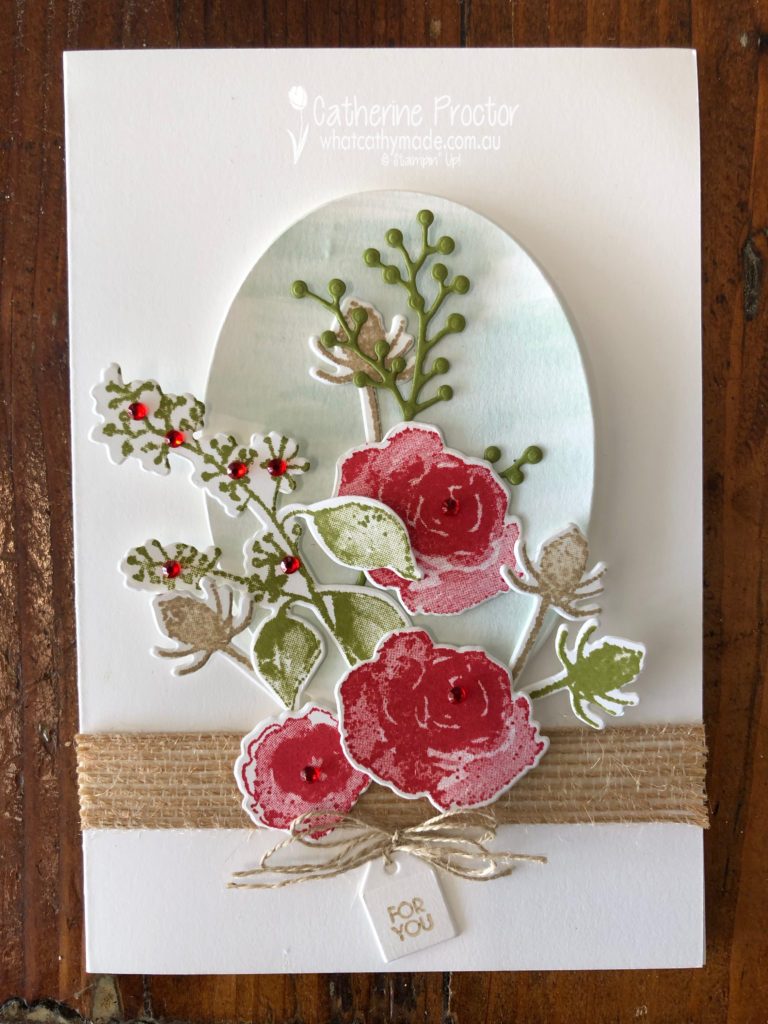
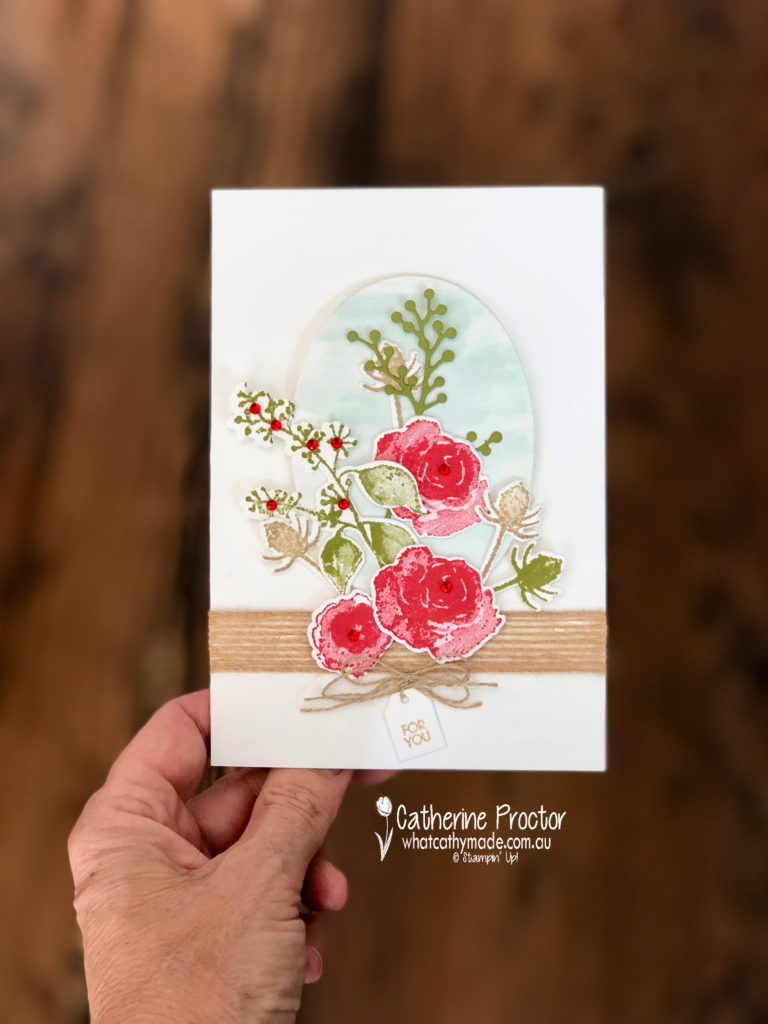
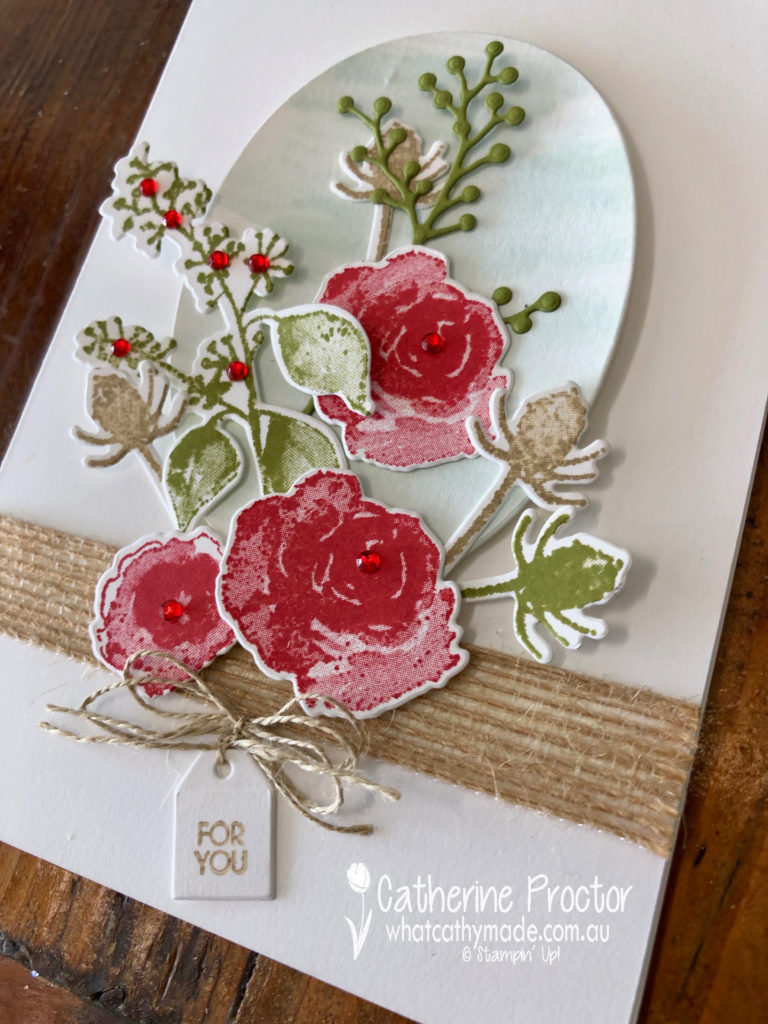
Real red is such a classic, stunning colour I wanted to pay homage to it with another classic: a bunch of red roses.
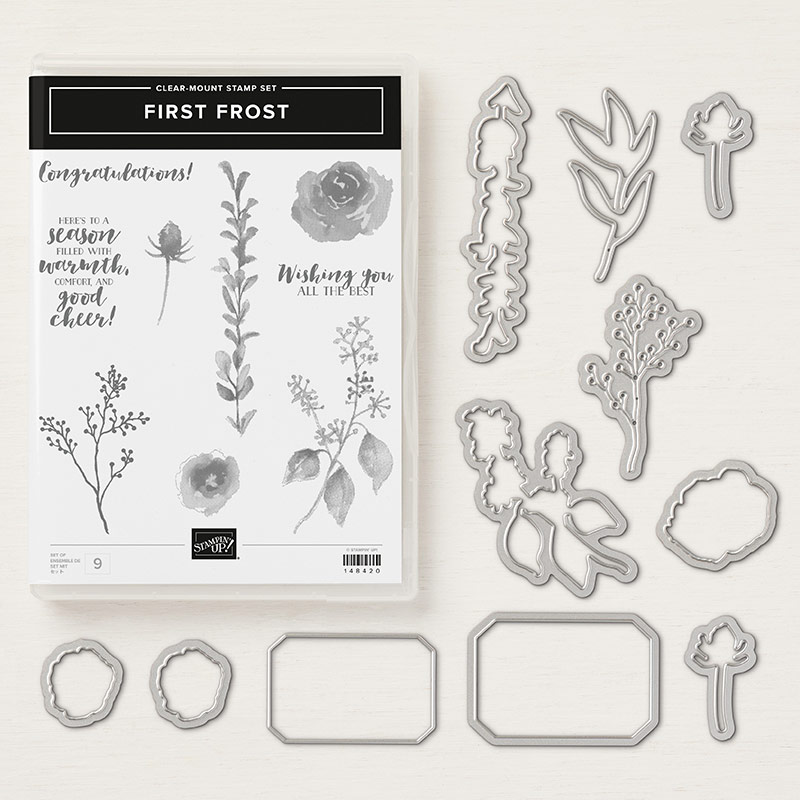
I’ve used one of my favourite stamp sets to create my beautiful rose bouquet: the first frost stamp set with its matching dies.
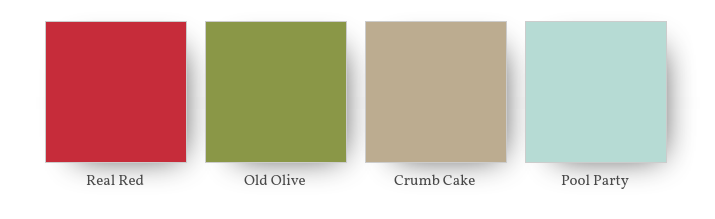
My colour combination is real red, crumb cake and old olive with a touch of pool party in the backgroud.
In my opinion, real red, just like old olive, really is one of those colours you can almost use as a neutral. It looks amazing with virtually any colour and really makes your card pop even if you only use a touch of it.
Last week I also used used real red in this colour combination.
In my project this week I’ve only used real red for my roses and for a touch of bling and dimension with the addition of the red rhinestones, but I still think it is the dominant colour of the card.
At the bottom of my card I used another all-time favourite of mine, the tiny little tag from the Bouquet Bunch Framelits Dies, stamped with the “for you” stamp from the Beautiful Bouquet Photopolymer Stamp Set.
To lift my bouquet off the front of the card I washed some pool party onto some card stock before cutting it out with my largest oval die. I love pool party with any shade of red.
To see what the rest of the team have made click on the links below.
To purchase any of the products I used in this project you can shop with me here. Or if you’d like me to post you your very own copy of any of the Stampin Up! catalogues or find out about more about Stampin’ Up! contact me .
We will be back again next week showcasing another one of the regal colours Rich Razzelberry! We hope you can along with us then.


")


")
")