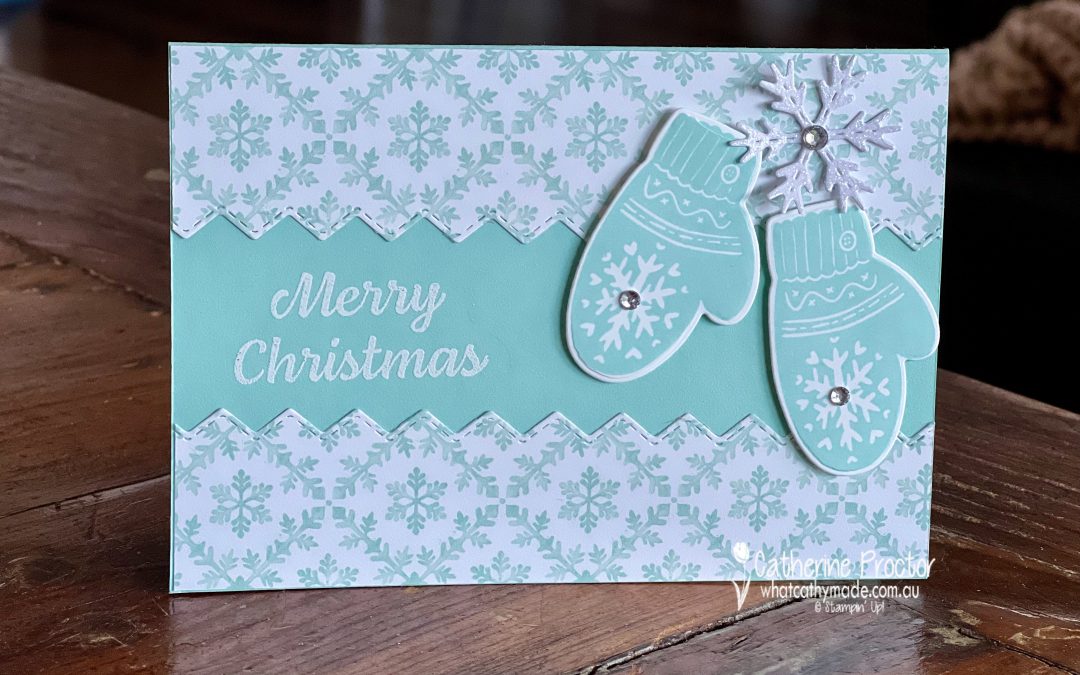
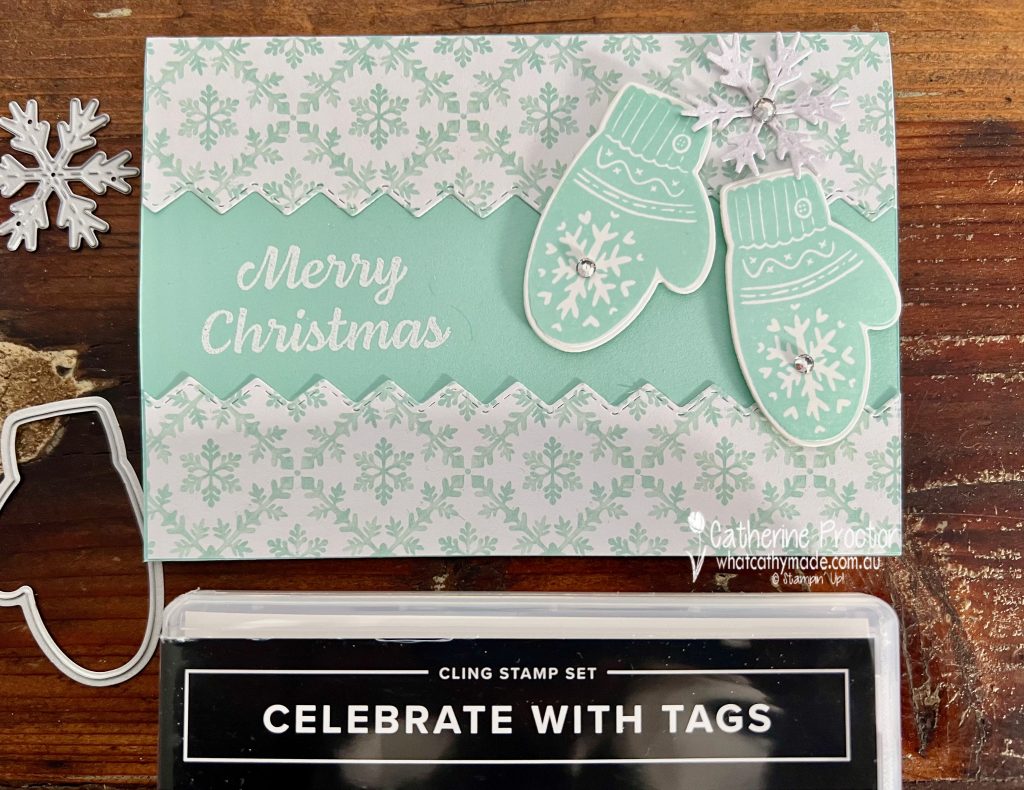
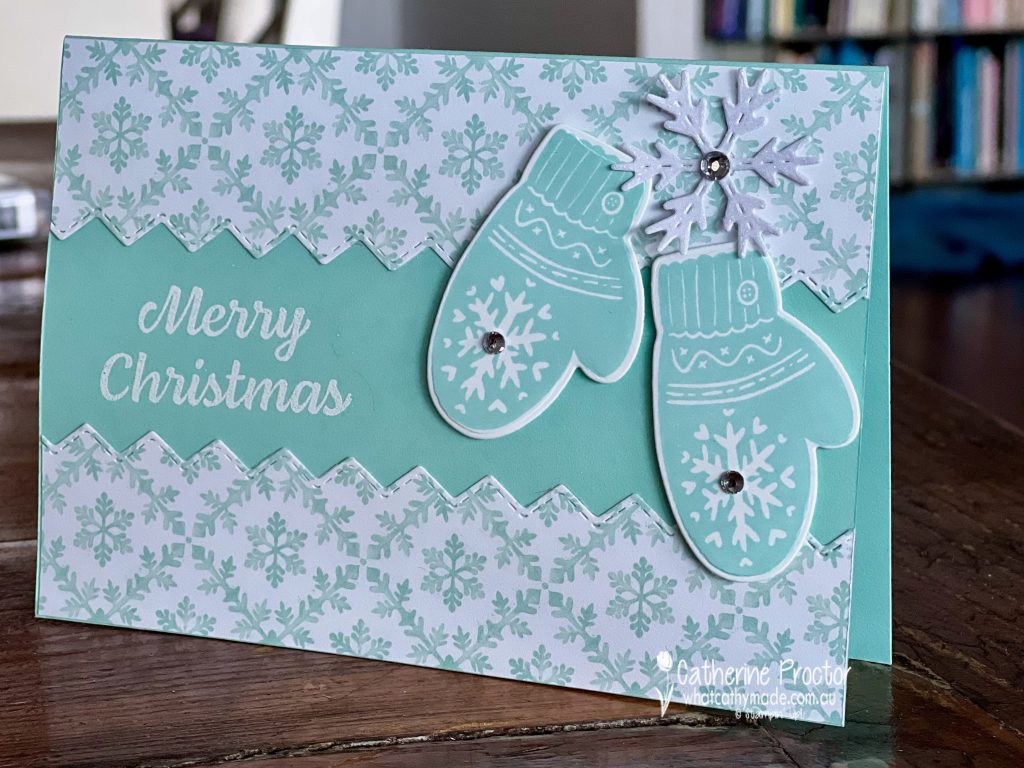
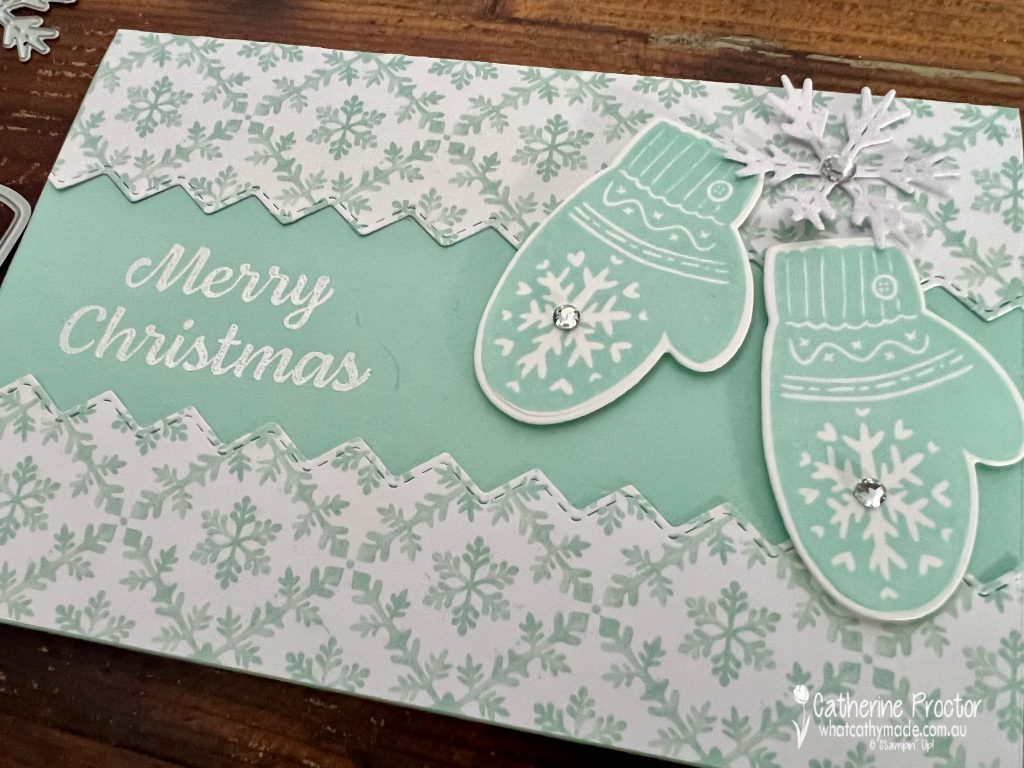
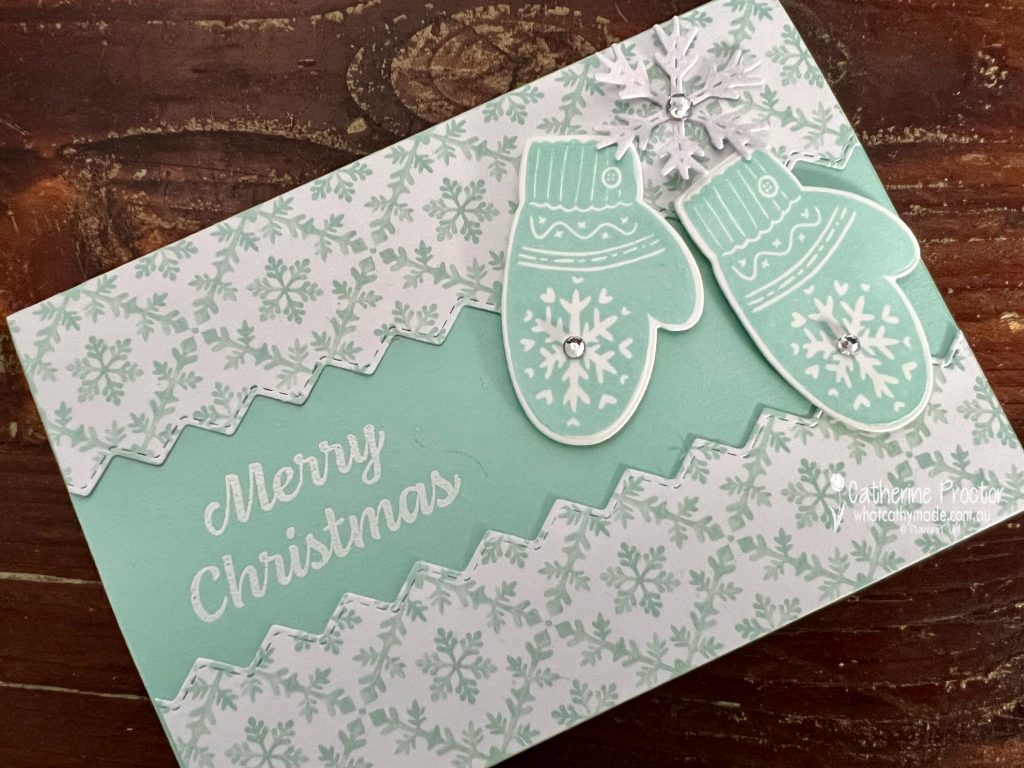
The 30 Day Christmas Card Making Challenge is a global challenge hosted by UK Artisan Stampin’ Up! demonstrator, Martin Stone and the challenge for Day 3 is “Warm & Cosy”.
This theme was the perfect opportunity to use the gorgeous mittens from the Celebrate With Tags bundle.
The Pool Party and Basic White monochrome colour scheme was inspired by the Storybook Gnomes 12″ x 12″ Designer Series Paper. I loved how this pattern coordinated with the pattern on the mittens.
The zig zag die from the Basic Borders dies cut the DSP strip in half and I adhered it to the top and the bottom of the card.
I couldn’t resist adding a snowflake die cut with the Celebration Tags Dies and a few Basic Rhinestone Jewels to my card for some extra sparkle.
You can catch up on my previous entries for this challenge by clicking on the links below.
Welcome to week fifteen of the Heart Of Christmas Blog Hop!
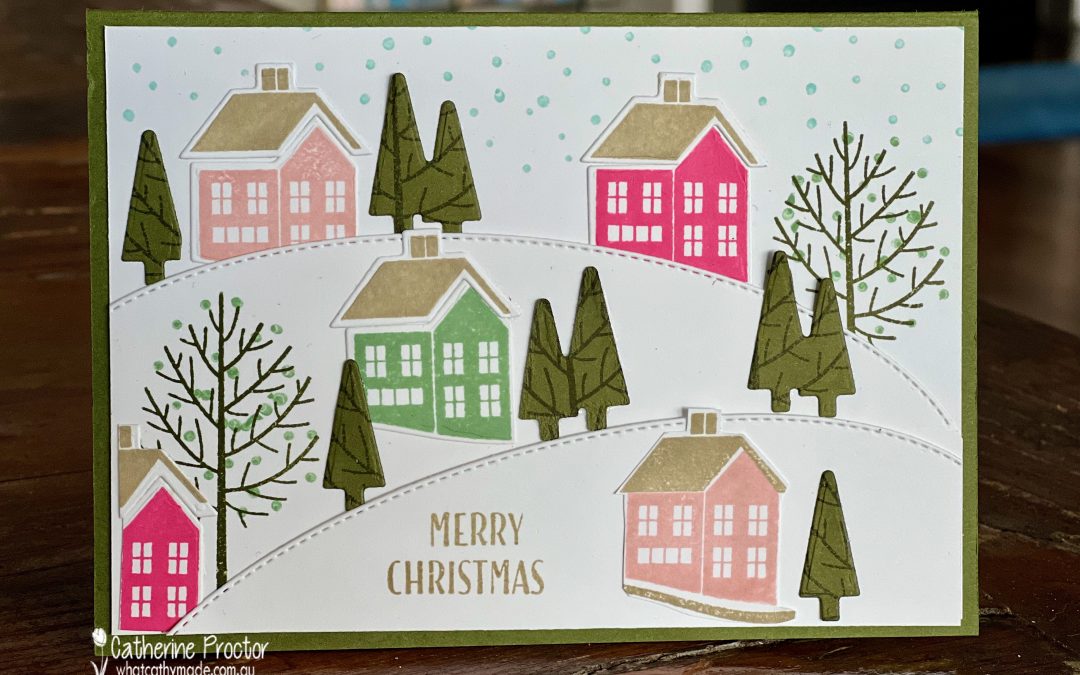
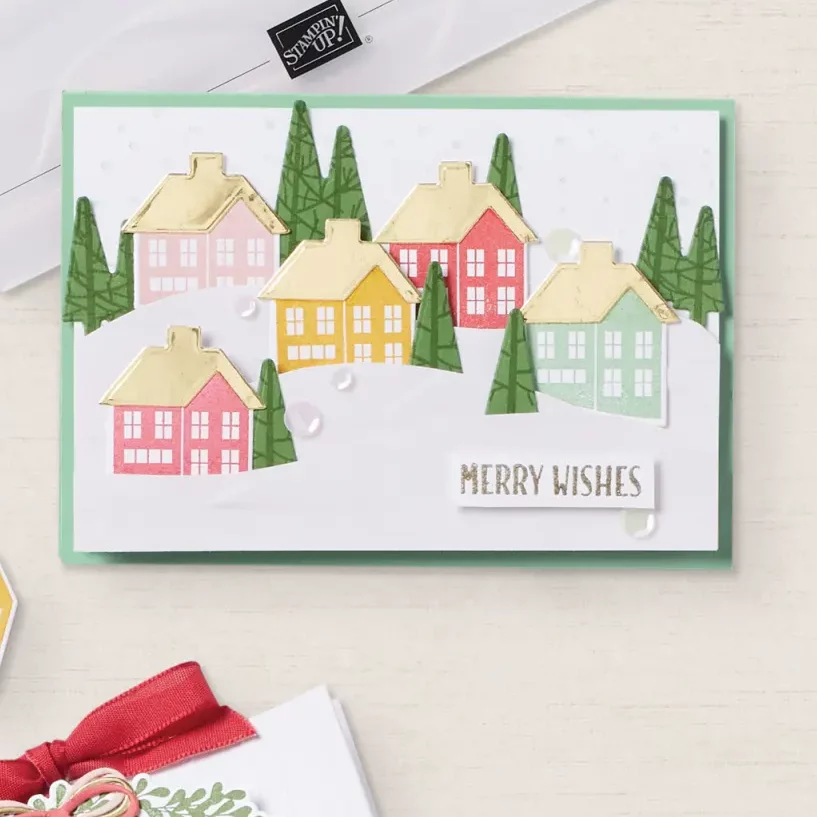
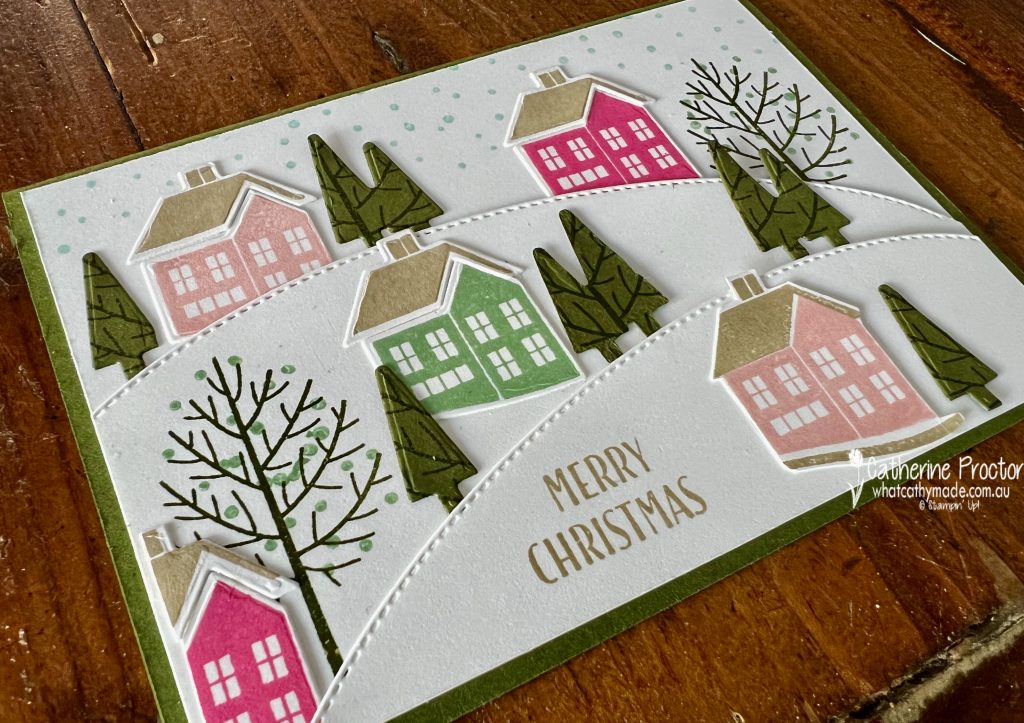
I love taking inspiration for card making from our Stampin’ Up! catalogues – they are full of amazing ideas! One card that caught my eye was this card on page 36 of the July-December Mini Catalogue.
The clever detail in this card is the way they stamped the large tree stamp from the Window Wishes stamp set onto cardstock before using the smaller solid tree dies to die cut the trees for this scene.
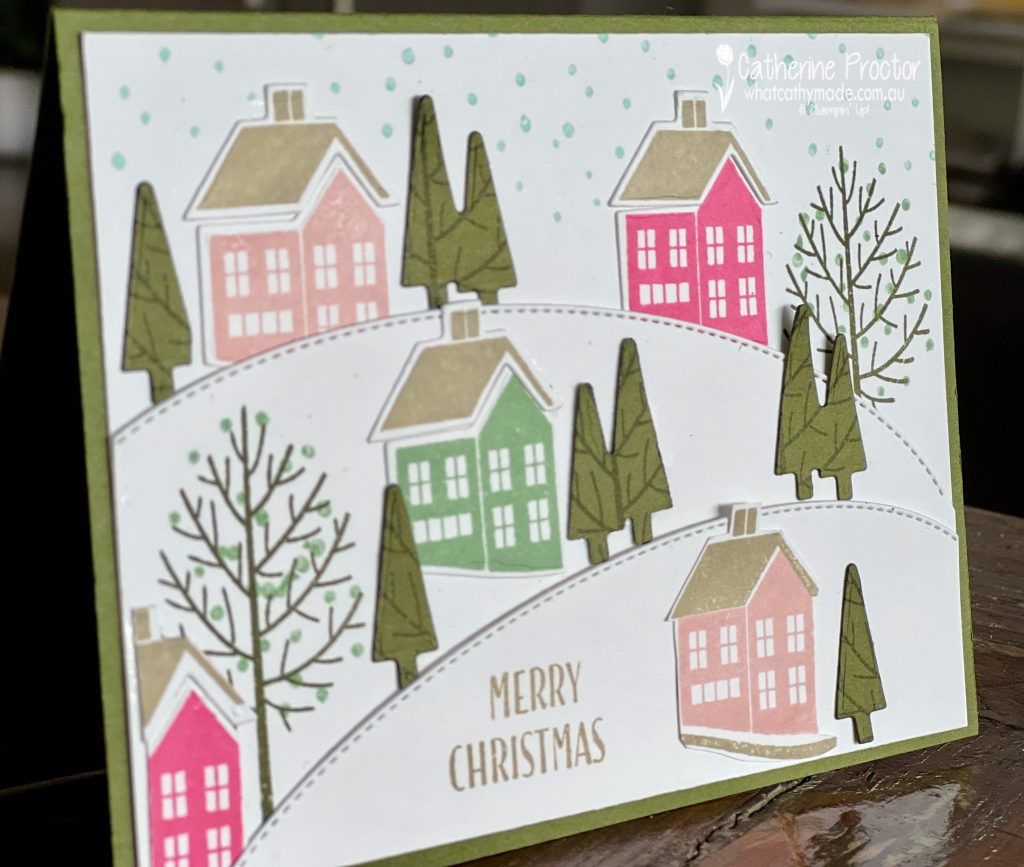
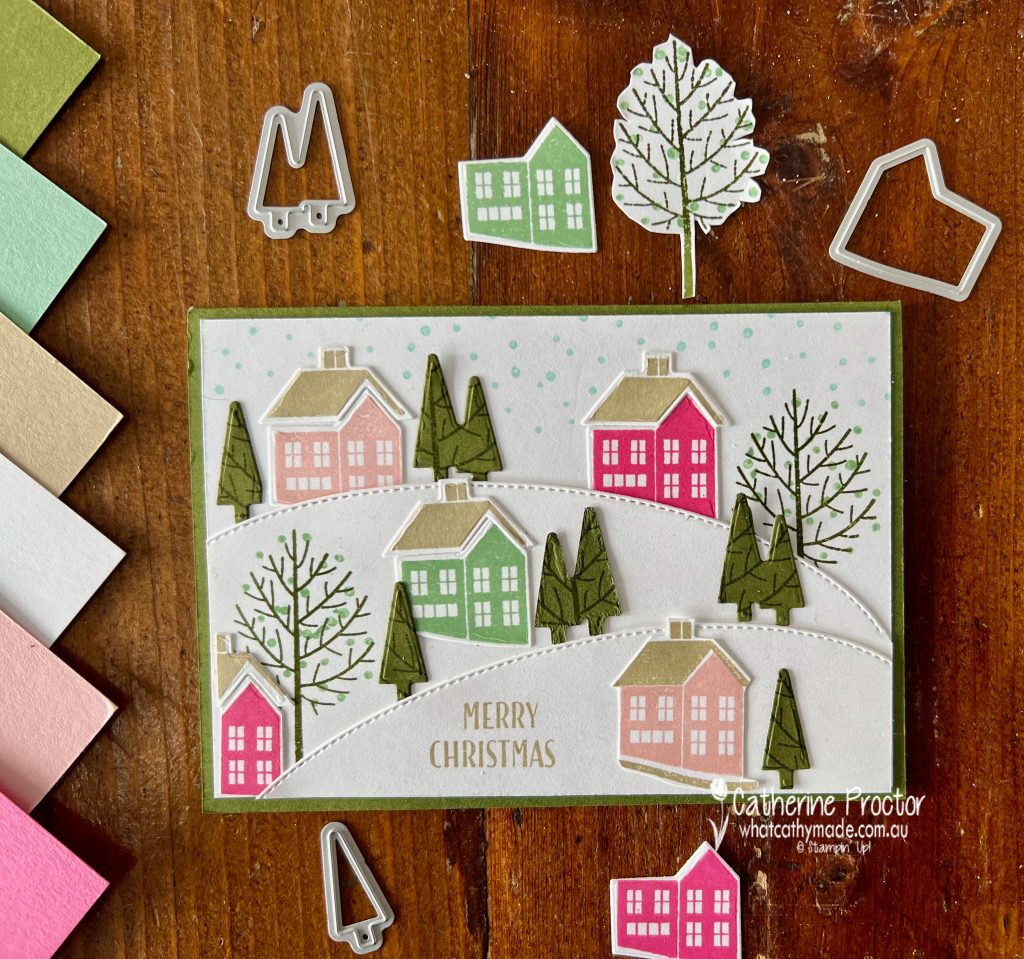
My version of this card uses some of the colours in the gorgeous Whimsy and Wonder DSP that was in last year’s Holiday catalogue: Blushing Bride, Polished Pink, Crumb Cake, Mint Macaron and Mossy Meadow.
Stampin' Up! Window Wishes Scene Card Colour Combination
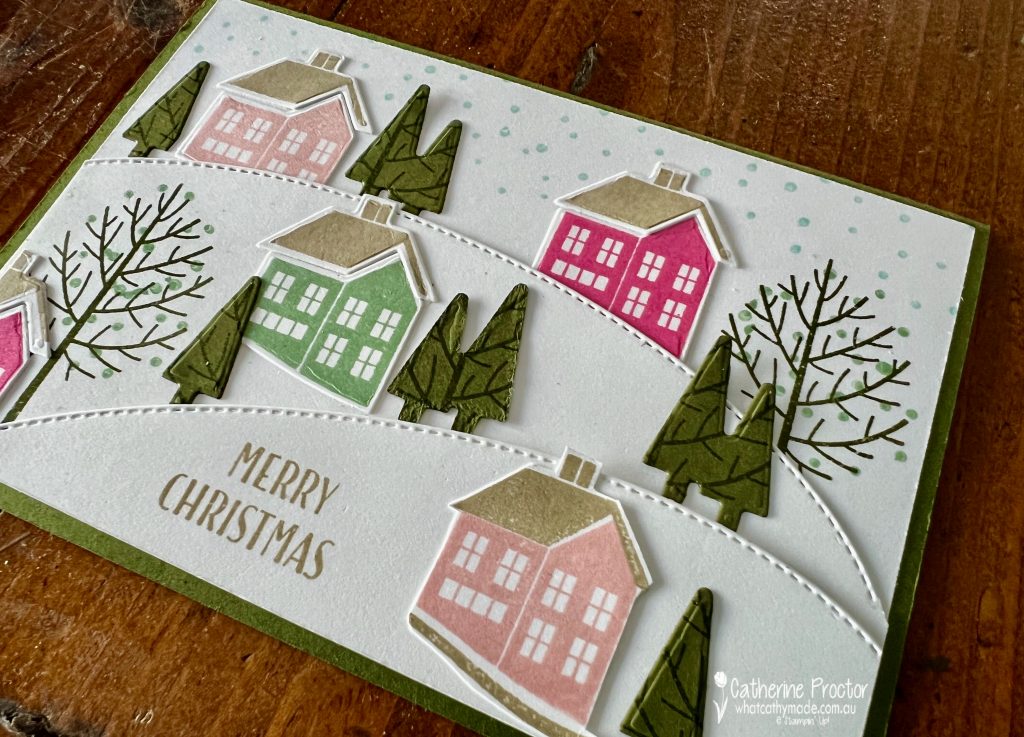
I decided to use the curved Basic Border die to create my snowscape. Two pieces of Basic White cardstock were cut with this die and positioned over a front layer of Basic White cardstock on a Mossy Meadow Card base.
I then stamped a large tree on two of the layers and stamped assorted trees and houses on scraps of Whisper White, die cutting with the Window dies and then building my scene as I went along.
Once I was happy with the arrangement I took a photo as a guide to remind myself where everything went and glued everything down, starting with the base layer.
The “Merry Christmas” greeting was stamped using two of the sentiment stamps in the Window Wishes stamp set. I simply inked up “Merry” and the “Christmas” but not the rest of the sentiments.
You could make this little scene in any colour you want and instead of using the Basic Border dies to create the landscape, you could simply freehand cut or trace around the edge of a plate.
Now it’s time to hop on over to our next participant, the lovely Rosa Leyden – I can’t wait to see what Rosa has created today!
If at any time you find a broken link, you can find the complete list of all participants on Sharon’s blog.
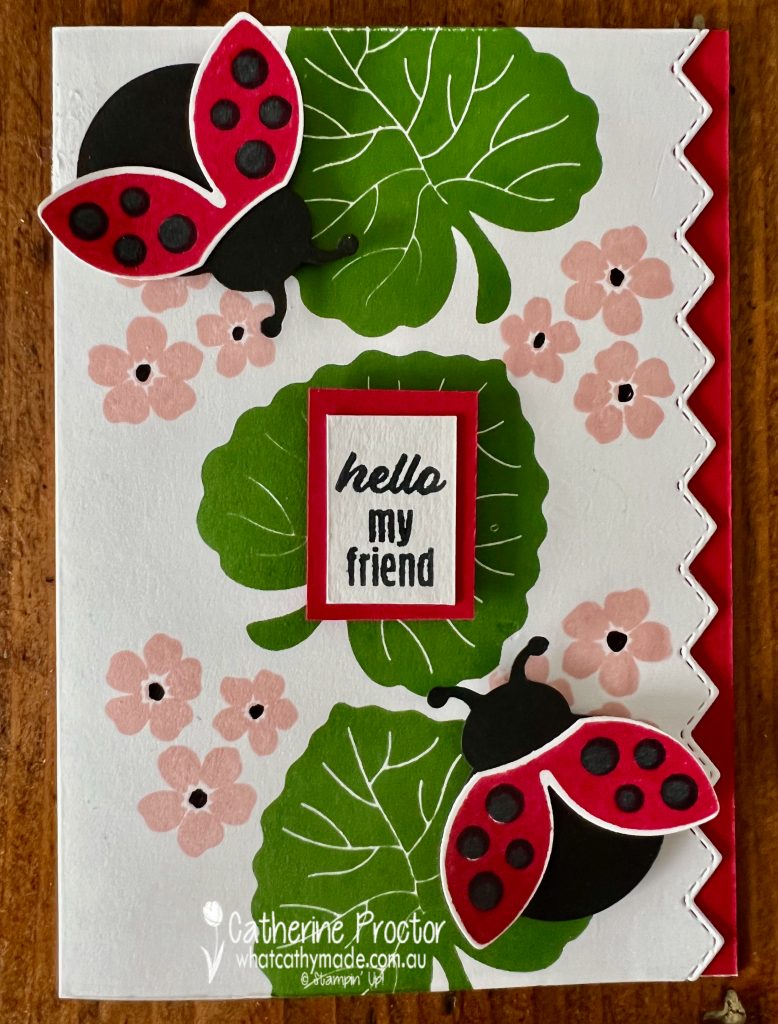
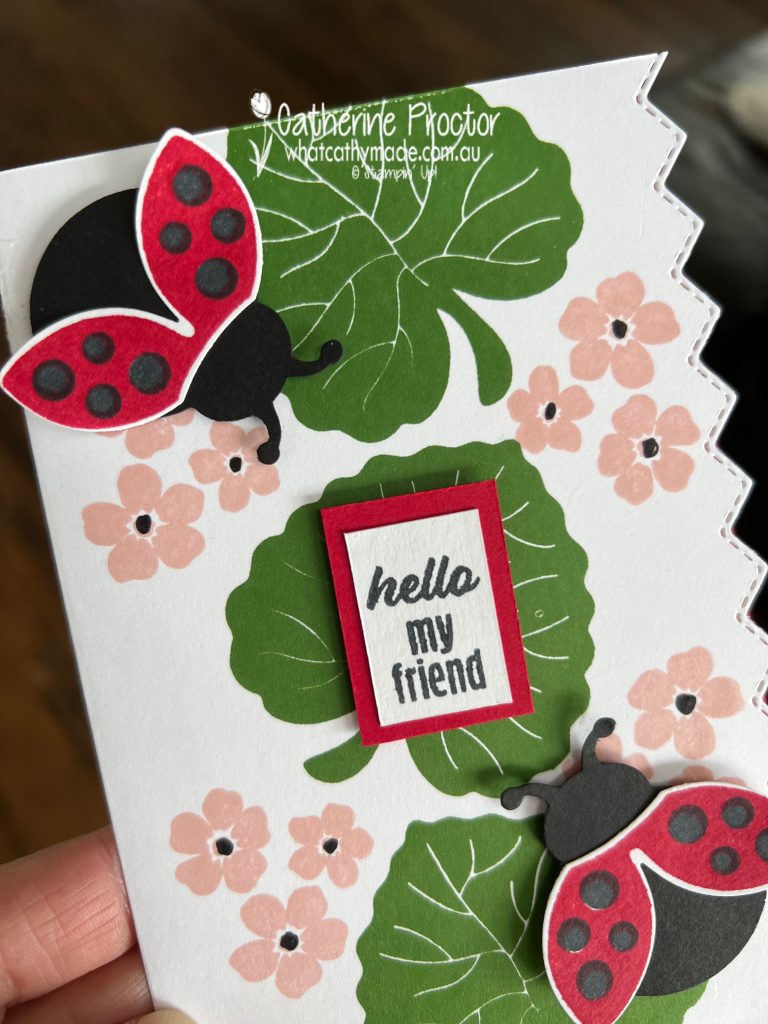
Welcome to week 39 of our 2021-22 Colour Creations blog hop! Tonight we are showcasing Real Red from the Regals family.
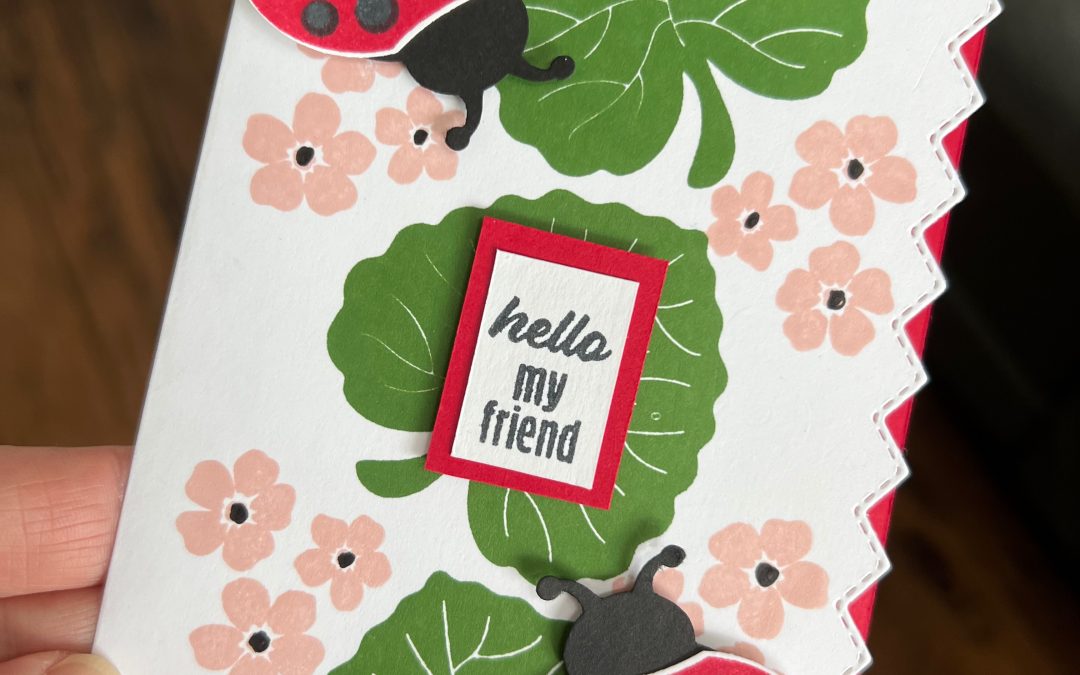
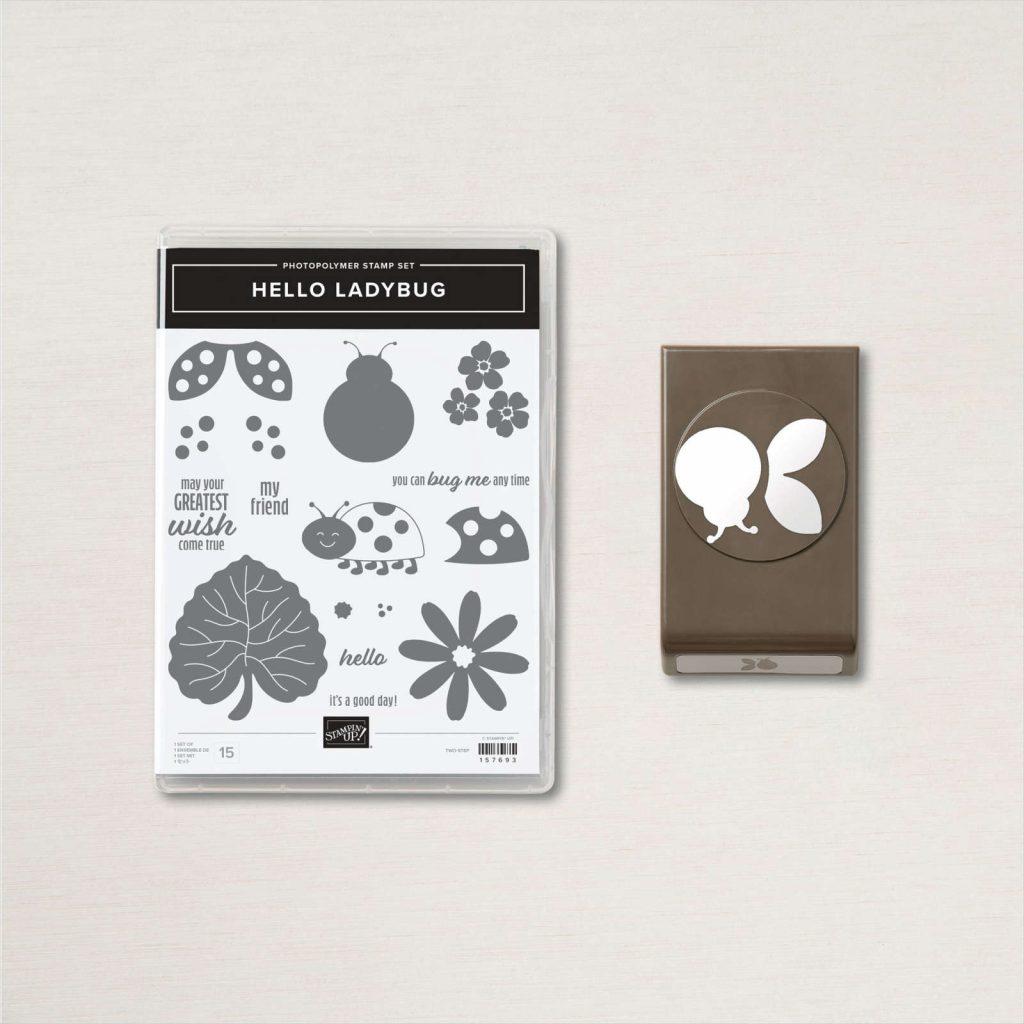
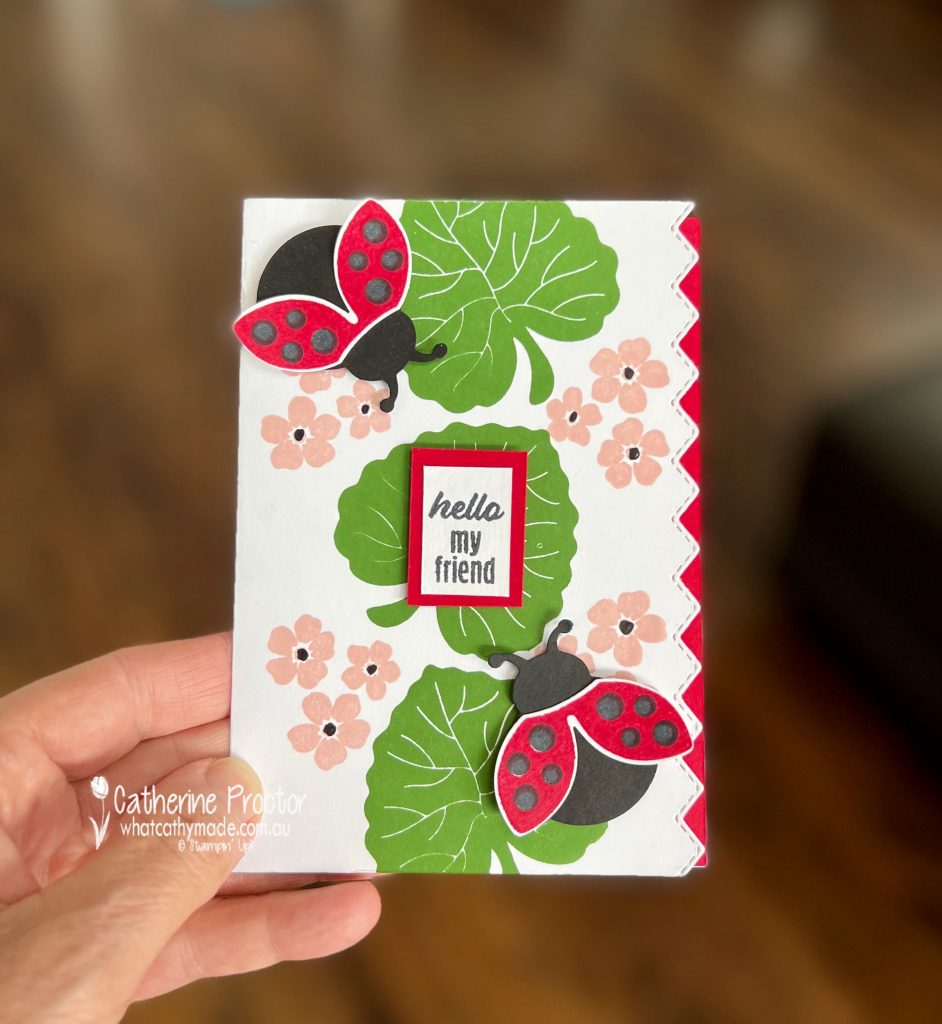
I needed a quick and easy card this week so I reached for the adorable Hello Ladybug bundle. I love a punch bundle!
This card is super simple but I love the bright, graphic nature of these images from the Hello Ladybug stamp set. My colour scheme pairs Real Red with Garden Green, Blushing Bride and Basic Black.
The natural light in this photo makes Garden Green look like Granny Apple Green!
To add visual interest and extra red to quite a simple card, I die cut a zig zag border using one of the Basic Border dies and added a strip of Real Red card stock under the border edge.
Inside the card I added another strip of Real Red cardstock on the other side and stamped another ladybug – or ladybird, as we call them here in Australia!To make the flowers pop, I used my Basic Black marker to colour in the centres.
This card really makes me smile – I hope it makes you happy too!
Now it’s time to hop on over to our next participant, the lovely Andrea Sargent – I can’t wait to see what Andrea has made this week!
If at any time you find a broken link, you can find the complete list of all participants below.
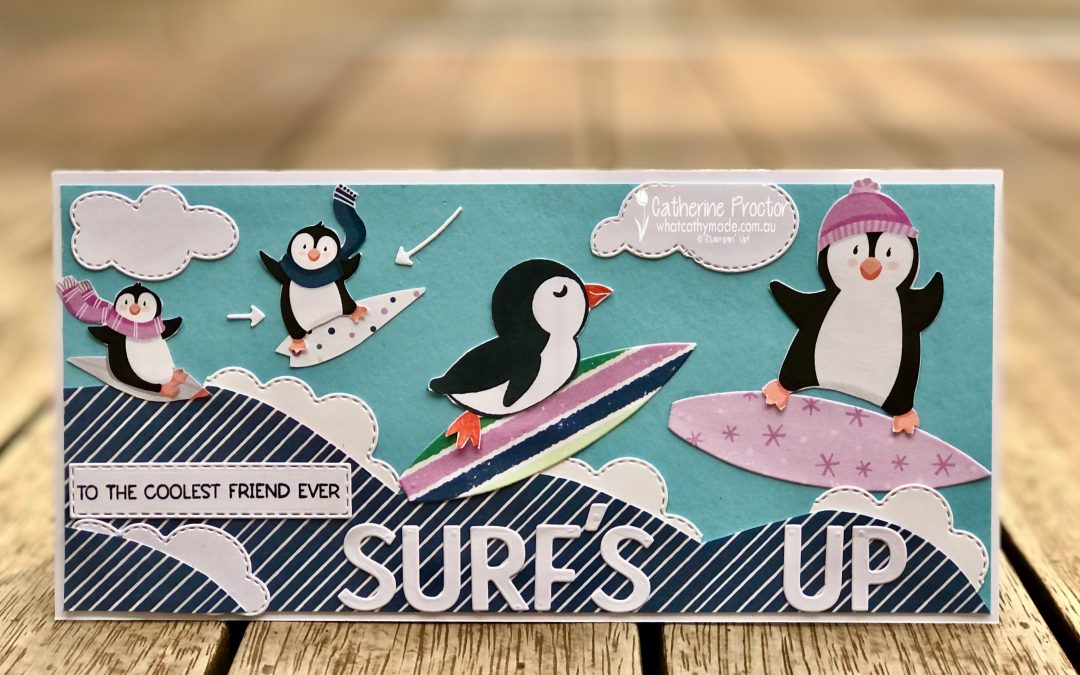
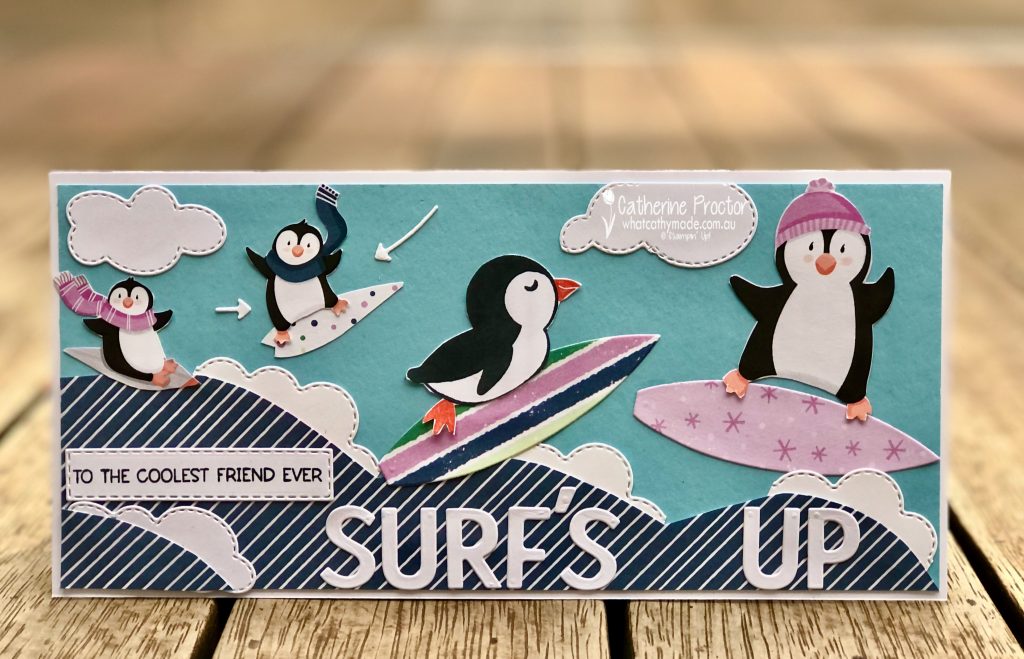
Hello to all my crafting friends! I’m back with another entry for the “G’day Fri’yay’ Card Making Challenges” Facebook group, a fortnightly Card Making Challenge with Aussie Themes.
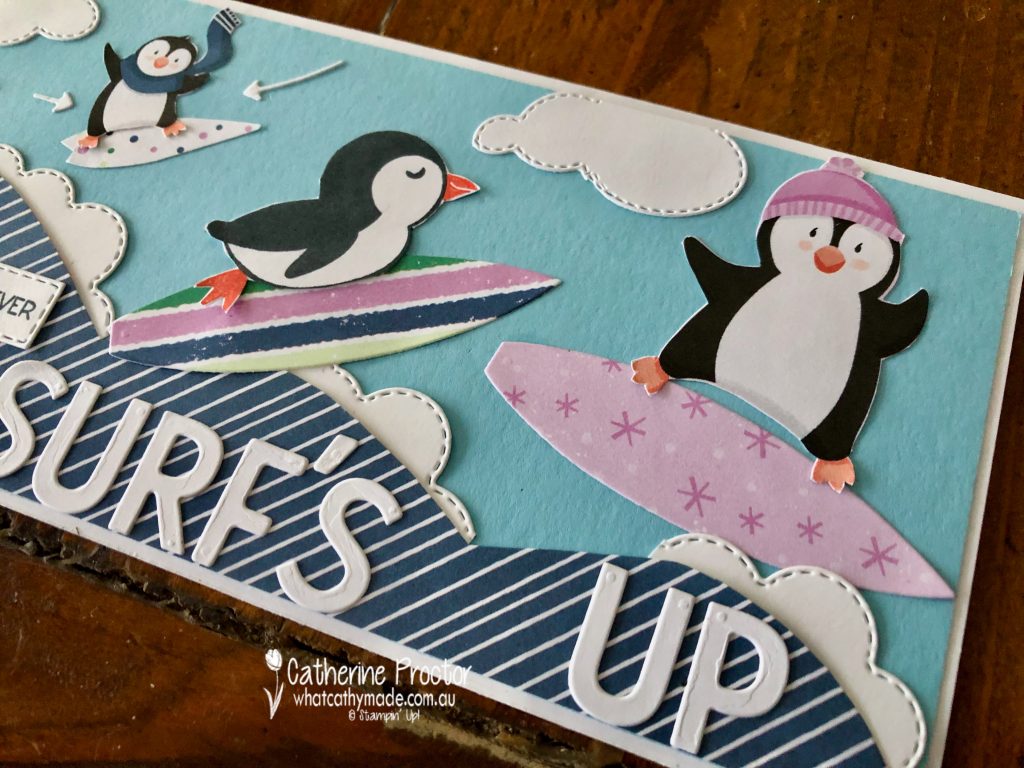
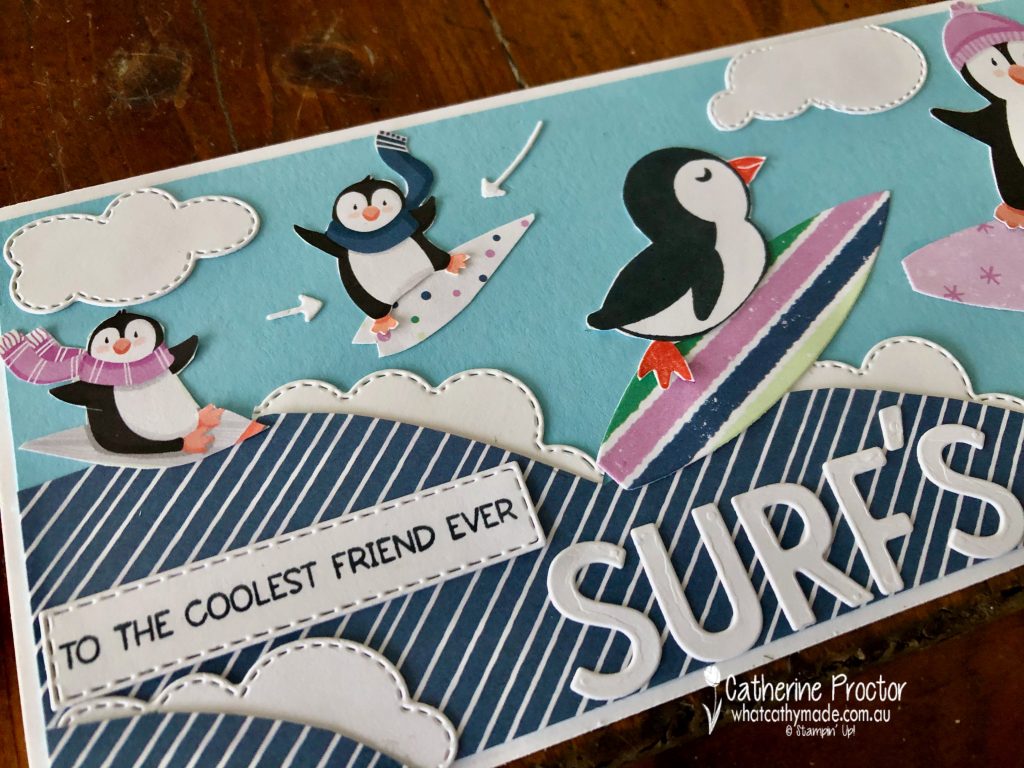
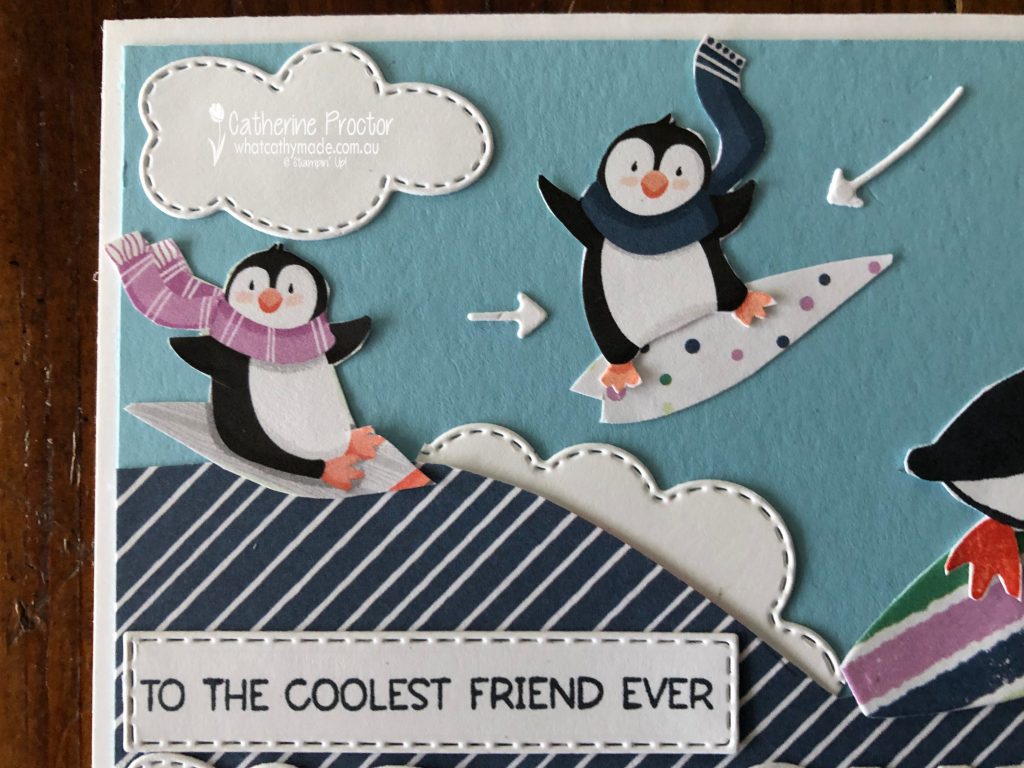
The theme for this challenge is “Surf’s UP!”. My husband and my sons are all obsessive surfers so I have a stack of surfing stamps and have made many a surfing card in my time, however, for this challenge I wanted to create a surfing card using non-surfing craft products.
Is it just me who gets a kick out of the idea that you might see penguins dressed in scarves and beanies out in the surf?
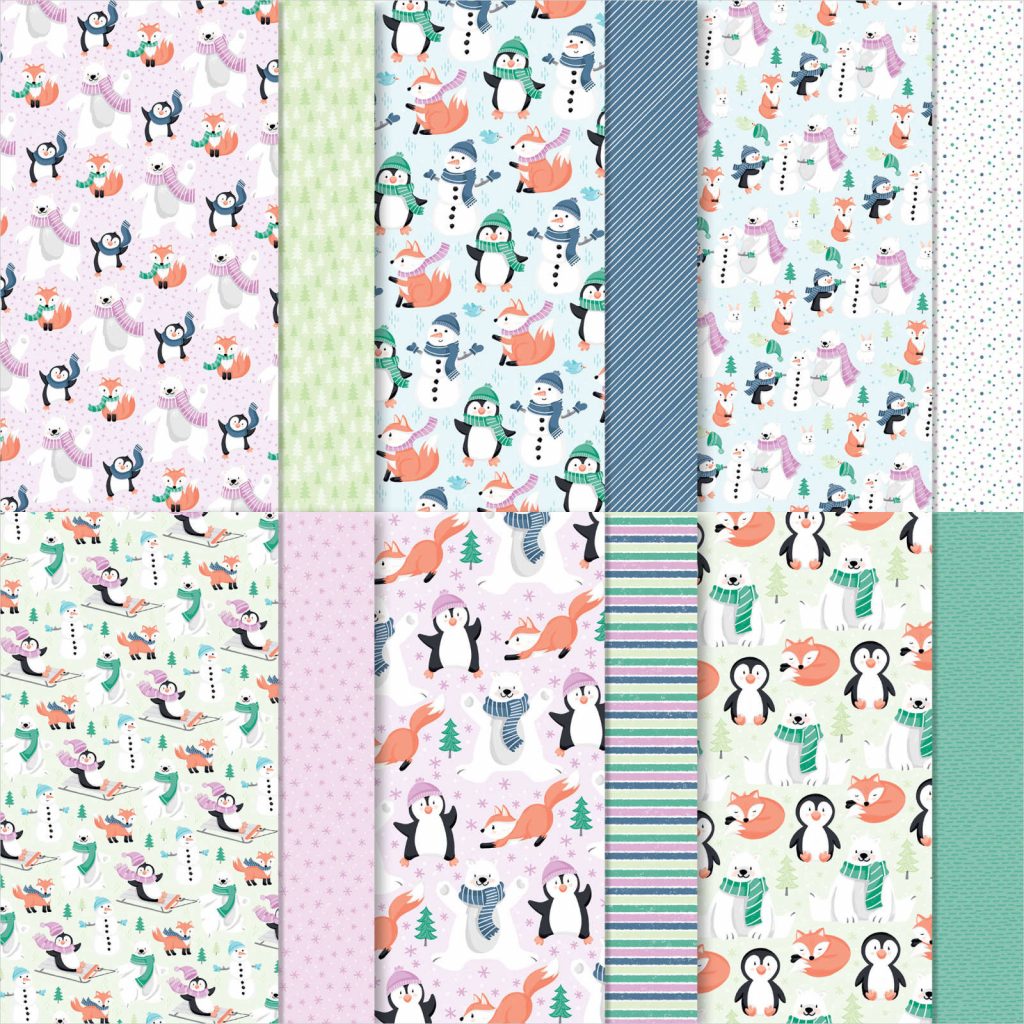
I know surfing is not the first thing that might spring to mind with the FREE SALE-a-bration DSP Penguin Playmates, but the stance and movement of these penguins reminded me of the way surfers hold their bodies while surfing.
The Misty Moonlight and white striped DSP was used make waves, with one of the Basic Border dies cut into smaller pieces to create whitewash foam on the edge of the waves.
I did use a die from my stash to use some of the Penguin Playmates DSP to create the two larger surfboards. The two smaller surfboards were just hand trimmed from this DSP. The penguin who is bodyboarding was stamped and fussy cut – the others are all fussy cut from the same Penguin Playmates DSP.The little penguin getting air is my fave – let’s just crown him the “Gabriel Medina” of surfing penguins right now! I’ve used the arrow dies from the Give it a Whirl dies to draw attention to him (I’ve also used the cloud dies from the Give it a Whirl dies). This penguin really is the “coolest” of the penguins, hence the matching sentiment!
Playful Alphabet dies form the “Surf’s Up”, leaving you in no doubt that, believe it or not, these penguins are actually surfing, not skiing. I had so much fun making this card and I hope my surfing penguins put a smile on your face too!
Thanks for visiting my blog today. I’ll be back tomorrow with some more Heart of Christmas inspiration and on Wednesday our weekly AWH Colour Creations Showcase – we are creating projects with Crushed Curry this week.
When you shop online in my Stampin’ Up! Online Store don’t forget to use my monthly Host Code (if your order is between $50 – $250) and I will send you a thank you gift the following month. If your order is over $250 don’t use the host code because you will qualify for your own stamping rewards.
My August Host Code is AHQUWNVQ and it is valid until midnight August 31.
In the meantime, wherever you are in the world, stay safe, stay calm … and keep on crafting xxx
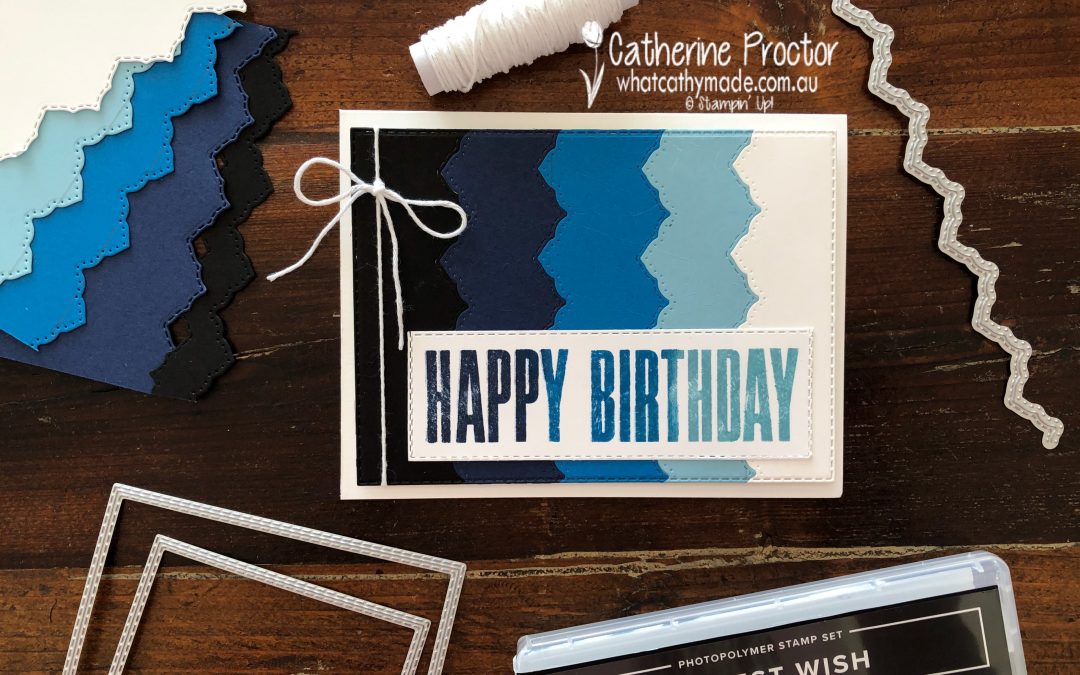
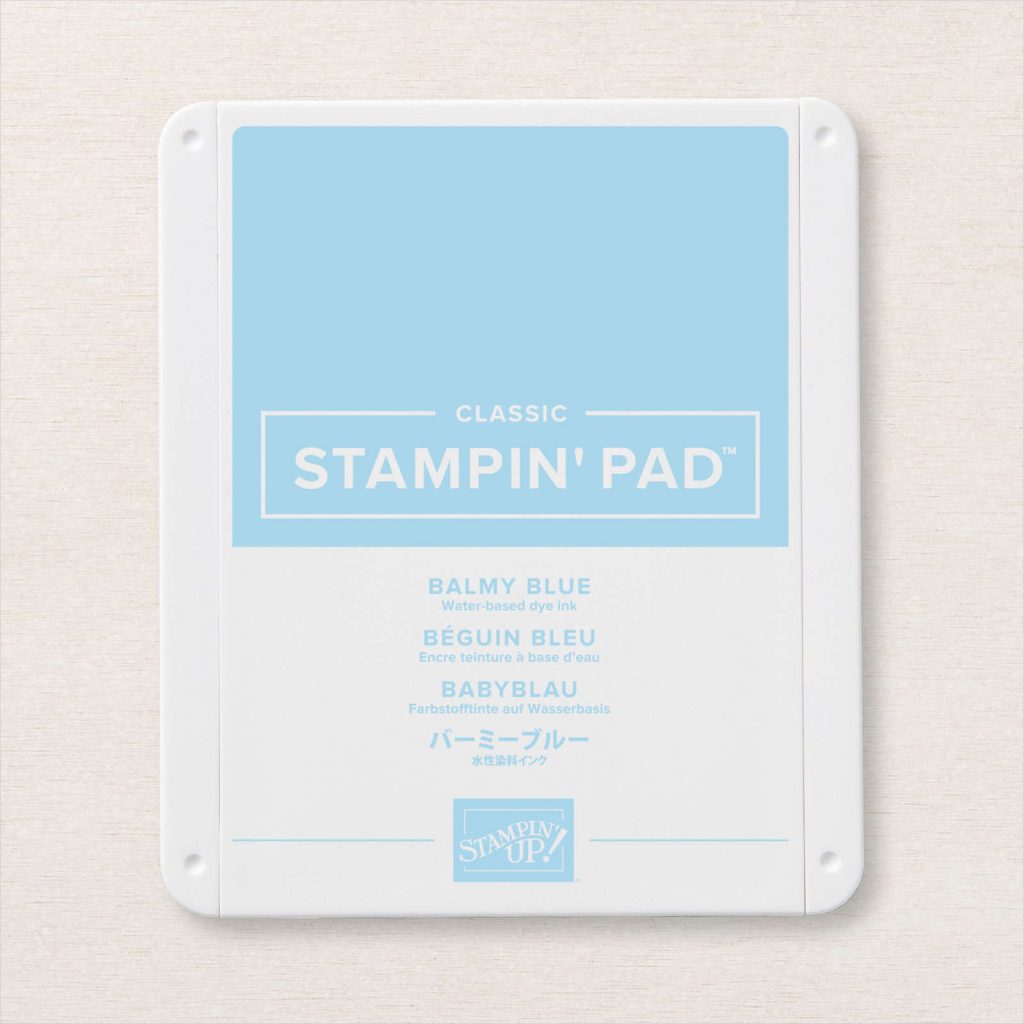
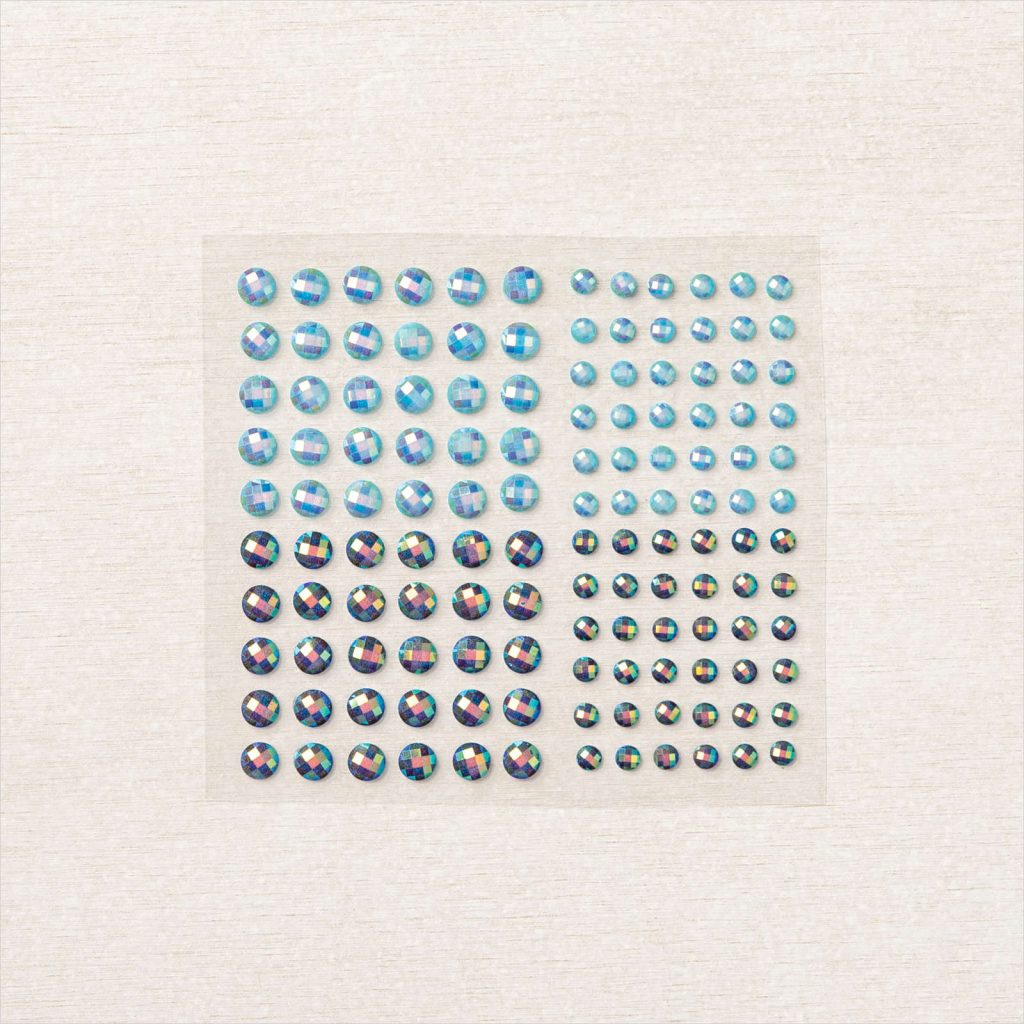
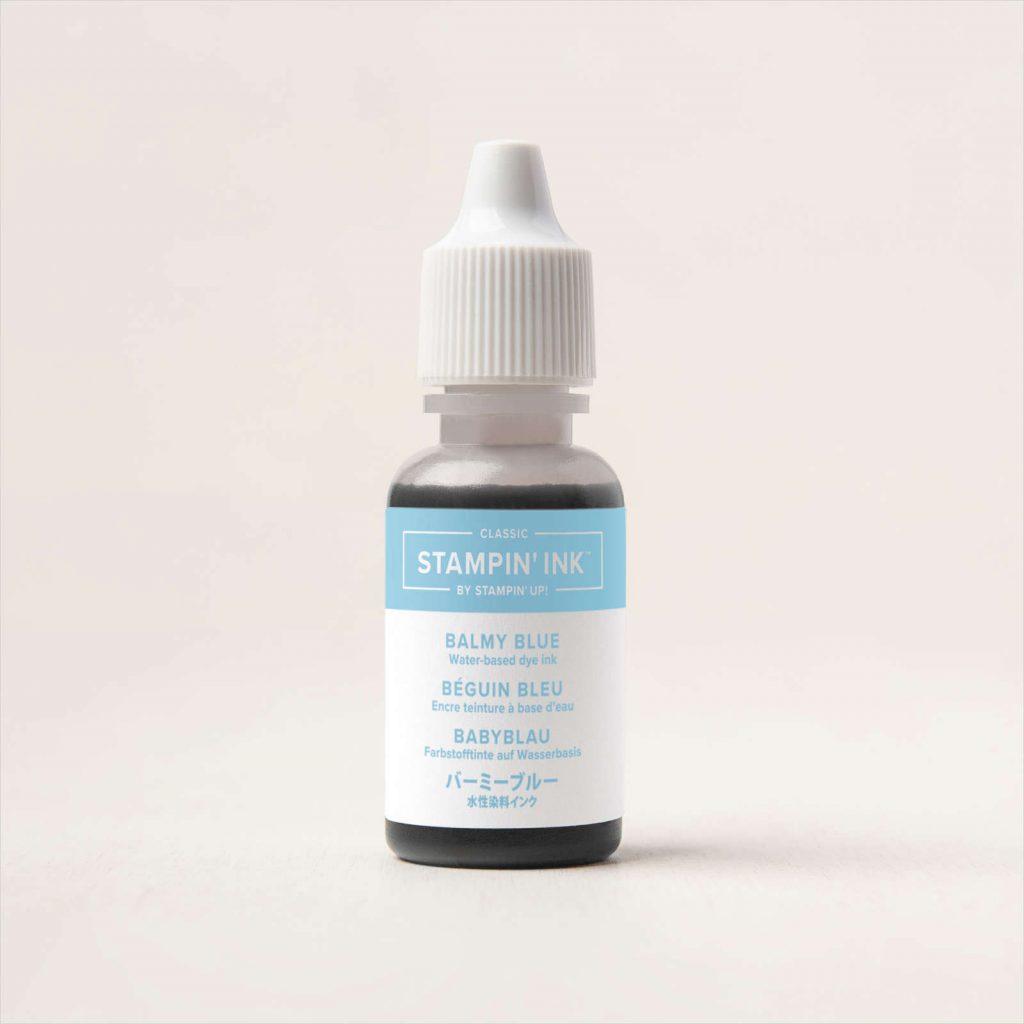
This week we’re showcasing Balmy Blue for week two of our Art With Heart Colour Creations Blog Hop 2020-21.
Balmy Blue is a lovely soft and powdery blue and part of the subtles family. It is available in the following products.
Classic Stampin’ Pad
Blue Adhesive-backed Gems
Balmy Blue Stampin’ Blends
Balmy Blue Classic Stampin’ Ink Refill
Balmy Blue A4 Card stock
Subtles A4 Card stock
Subtles 12×12 Card stock
Subtles 6×6 DSP Assortment
Watercolour Pencils assortment 2
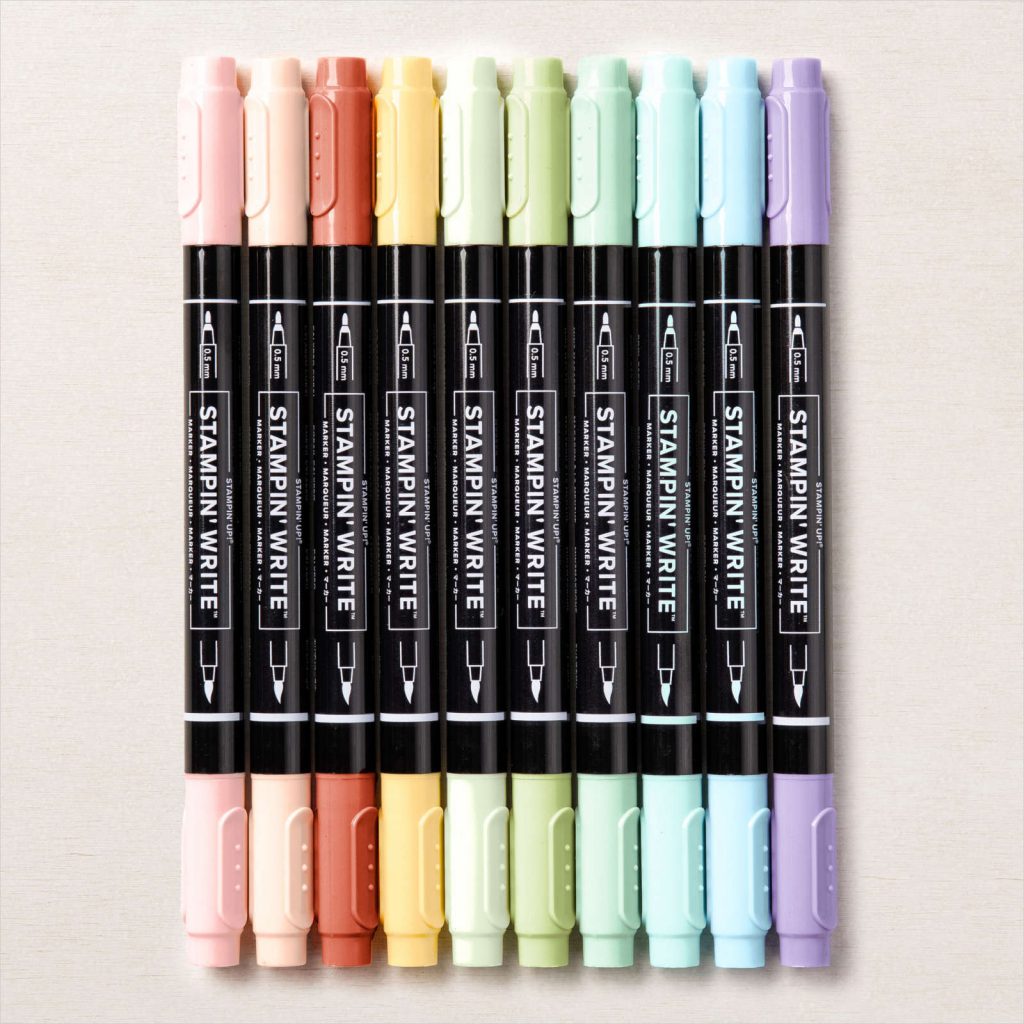
Subtles Stampin’ Write Markers assortment
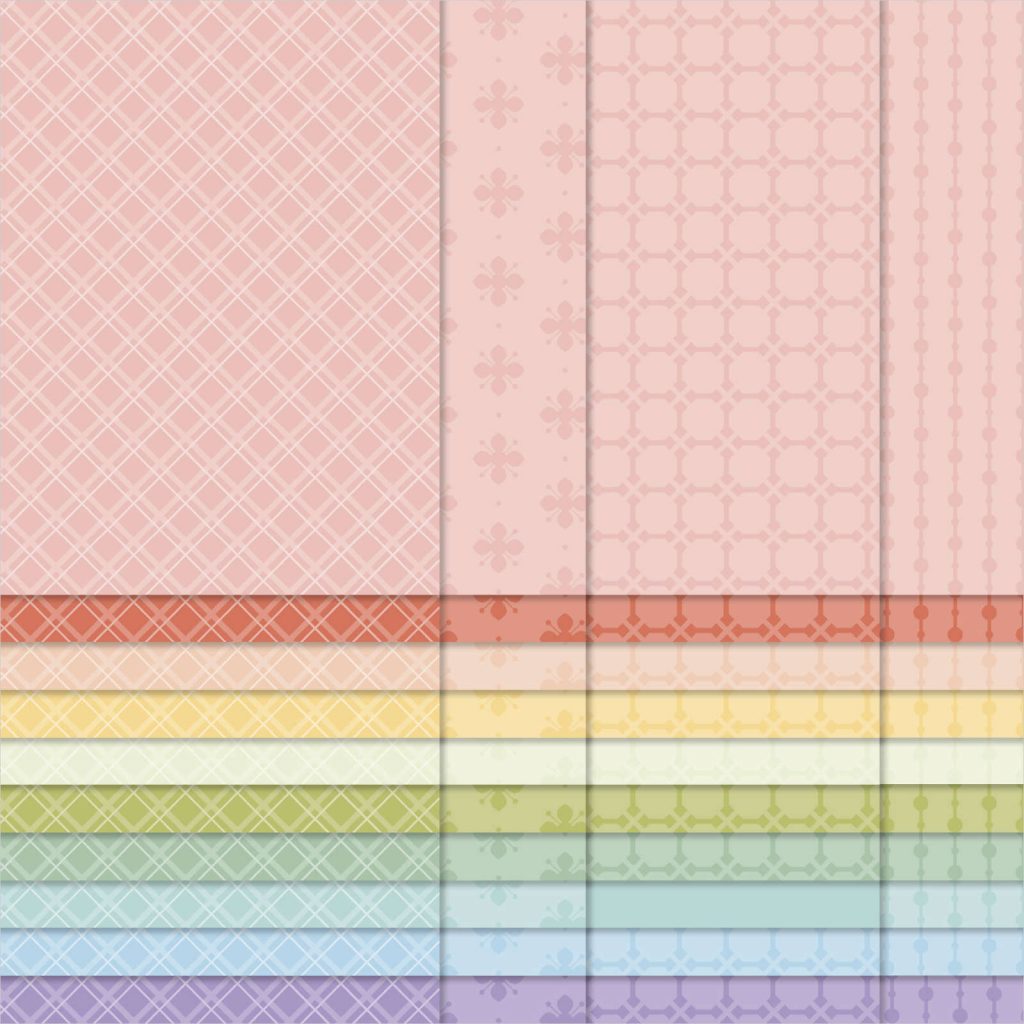
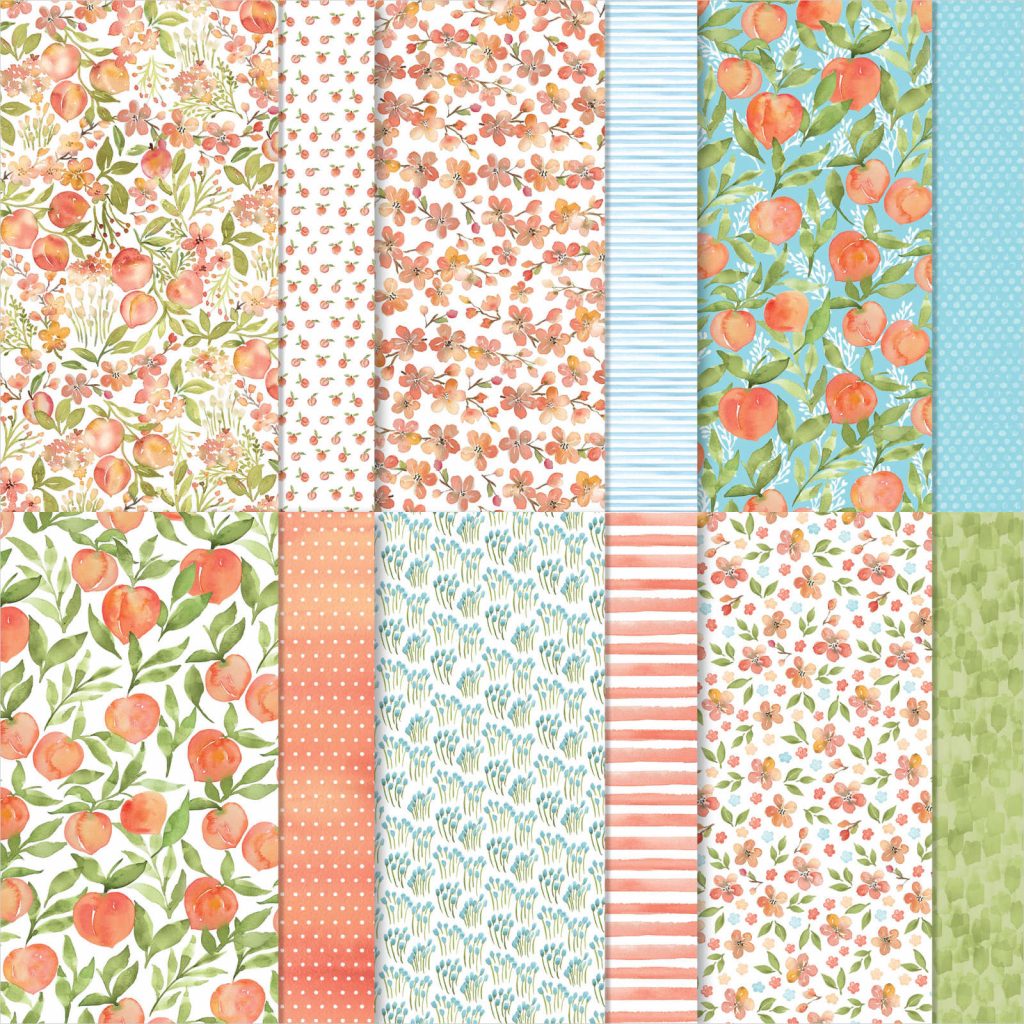
You’re a Peach 12×12 DSP
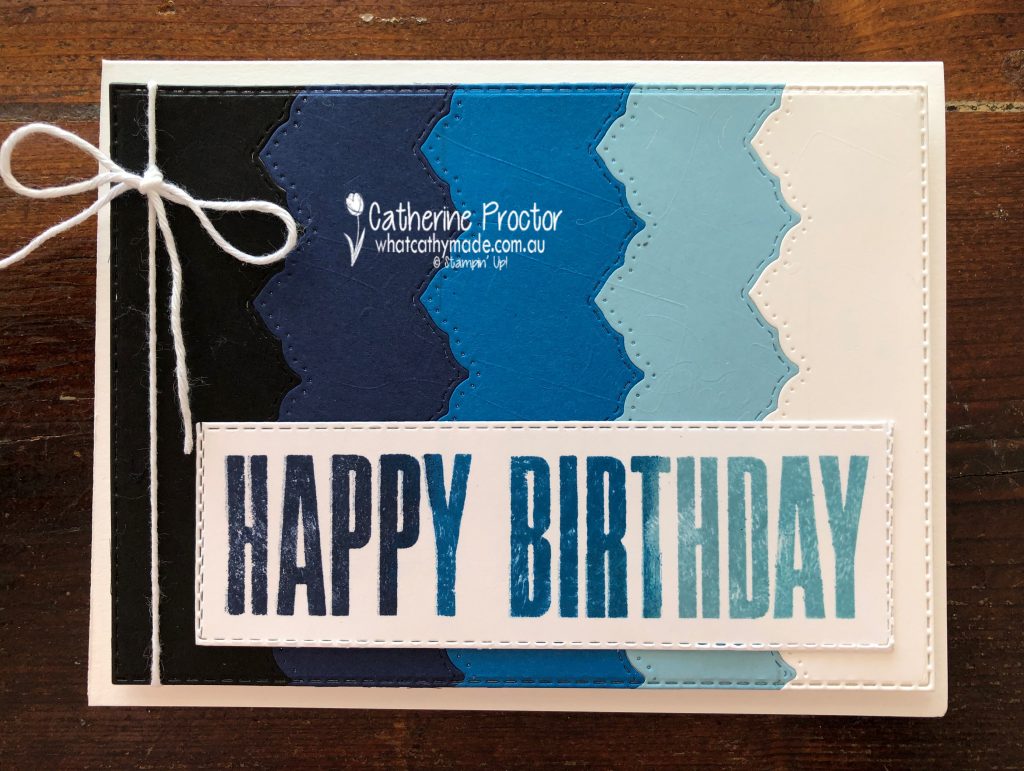
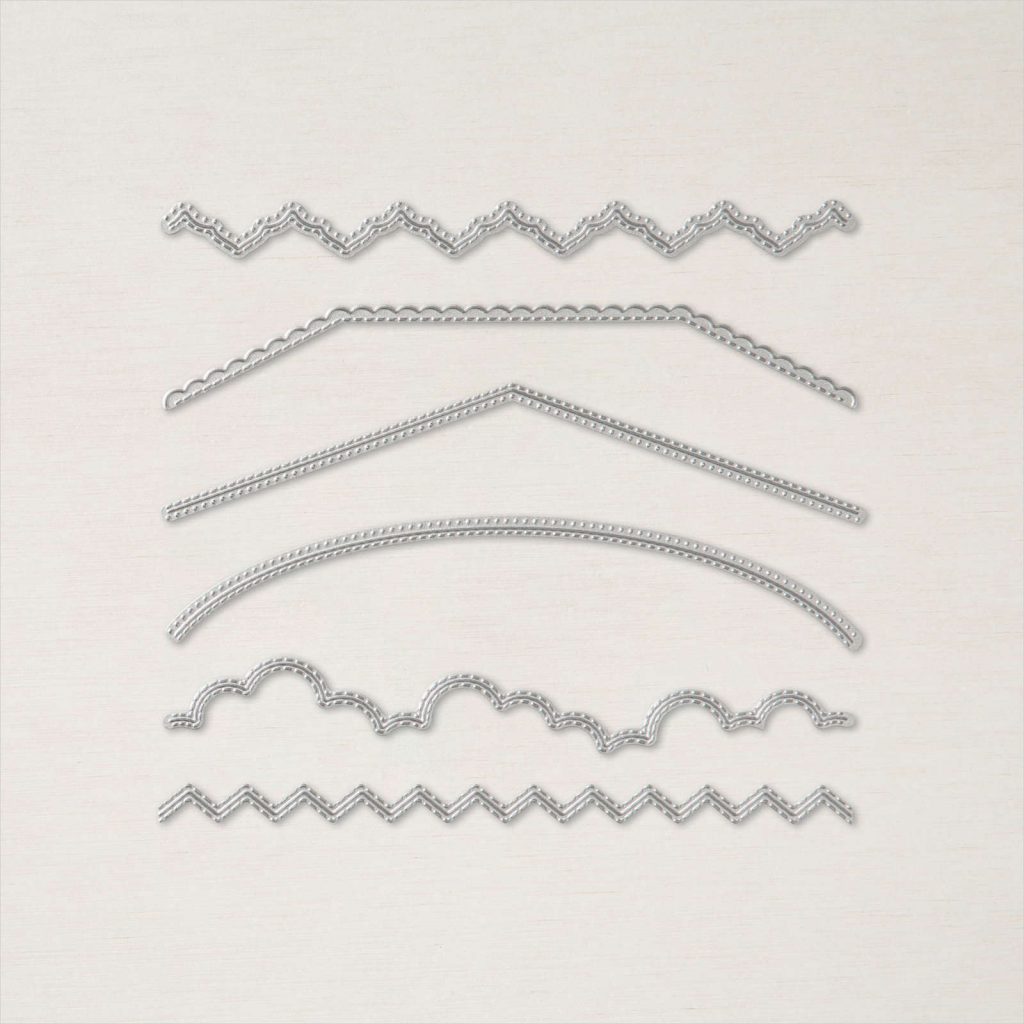
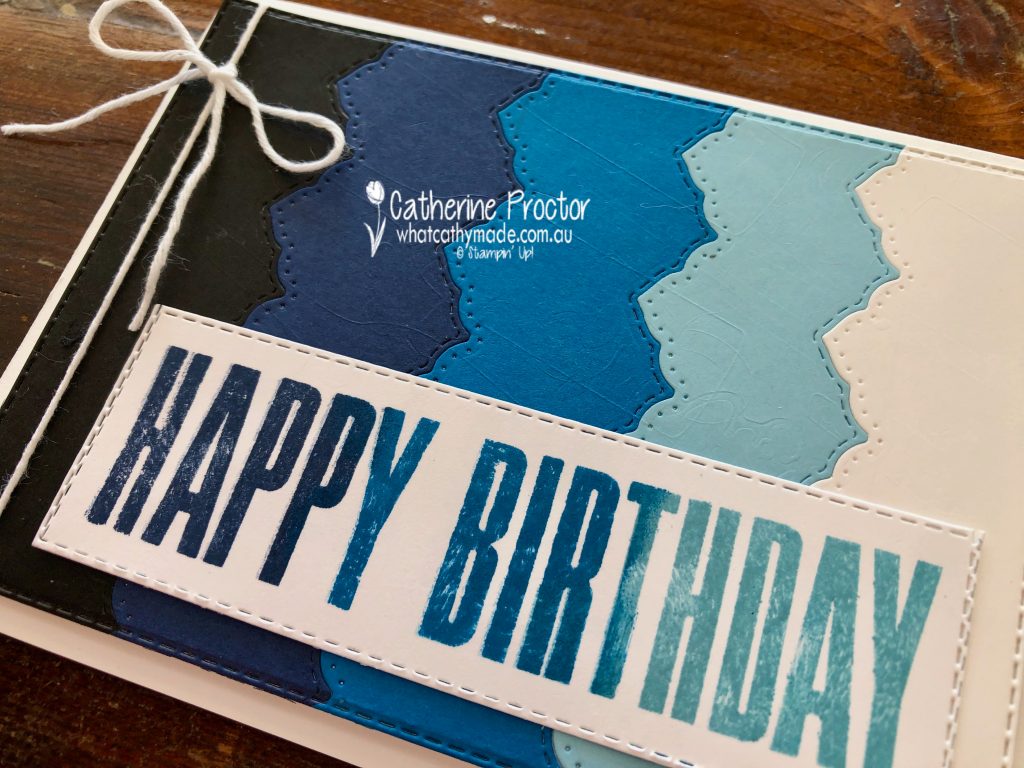
Today I’m sharing a card that uses two really versatile new products from the 2021-22 Annual catalogue: the Basic Border dies and the Biggest Wish stamp set.
To make an ombre card you simply chose a colour and fade from dark to light. Balmy Blue is our colour this week so I’ve paired it with the other blues as well as black and white to get an ombre effect.
Each strip of card stock was die cut using one of the Basic Borders dies at approximately 3cm wide. Once all my card stock strips were die cut I carefully lined them up in ombre order, then adhered them to a piece of Basic White card stock. This ombre layer was then die cut using the largest stitched rectangle die. (Tip – if you place your rectangle die and card stock on a angle it is much easier to die cut.)
These Basic borders dies are incredible – there are six different shaped dies and the die I’ve used on my card leaves a stitched pattern on one side and a dotted pattern on the other side of the die cut.
My Stamparatus made creating an ombre sentiment quick and easy. I lined up the “happy” and the “birthday” stamps and then used sponge daubers and the Stamparatus to repeatedly stamp and gradually build up ombre colour. The ombre effect was created by stamping in Night of Navy, then Pacific Point and finally Balmy Blue.
A slightly smaller stitched rectangle die was used twice to die cut the sentiment and a single layer of Basic White twine from the Bakers Twine Essentials pack was wrapped around the side of the card.
Now it’s time to hop on over to our next participant, the very talented, Caroline Manwaring.
If you find a broken link or have come to this blog hop from a different entry point, you can view the participants below:


")


")


