If it’s July, it must be birthday card making time at my place! With eight birthdays to celebrate for immediate family members in July, the only month busier for family birthdays is December and you can imagine what a hoot that is!
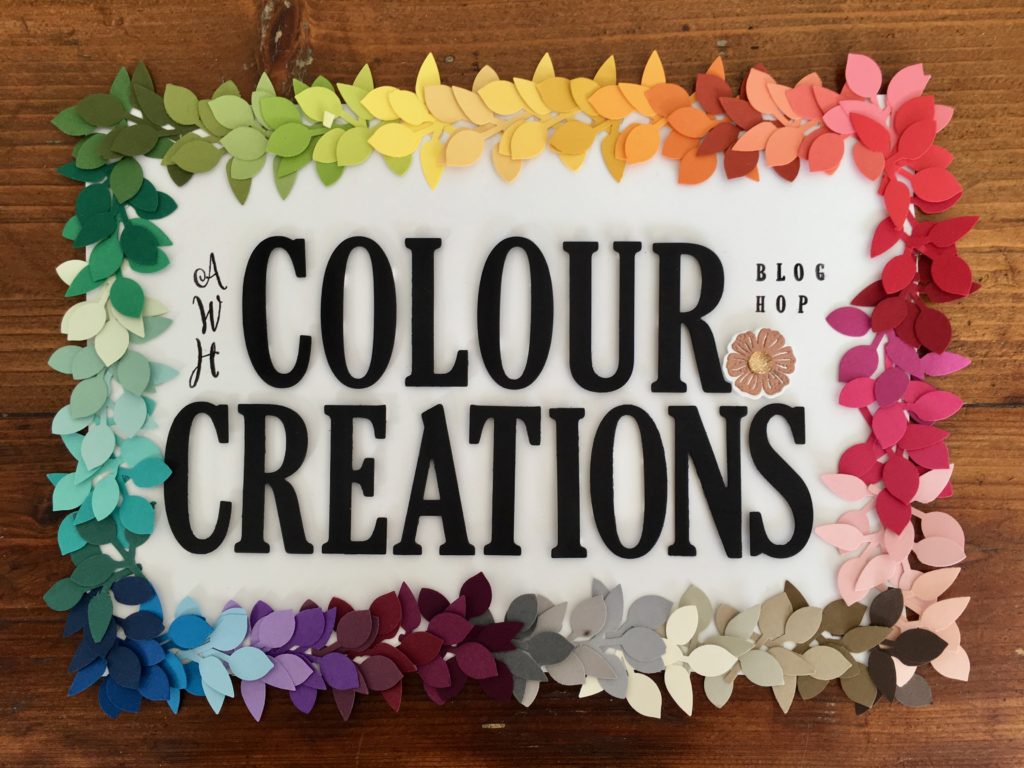
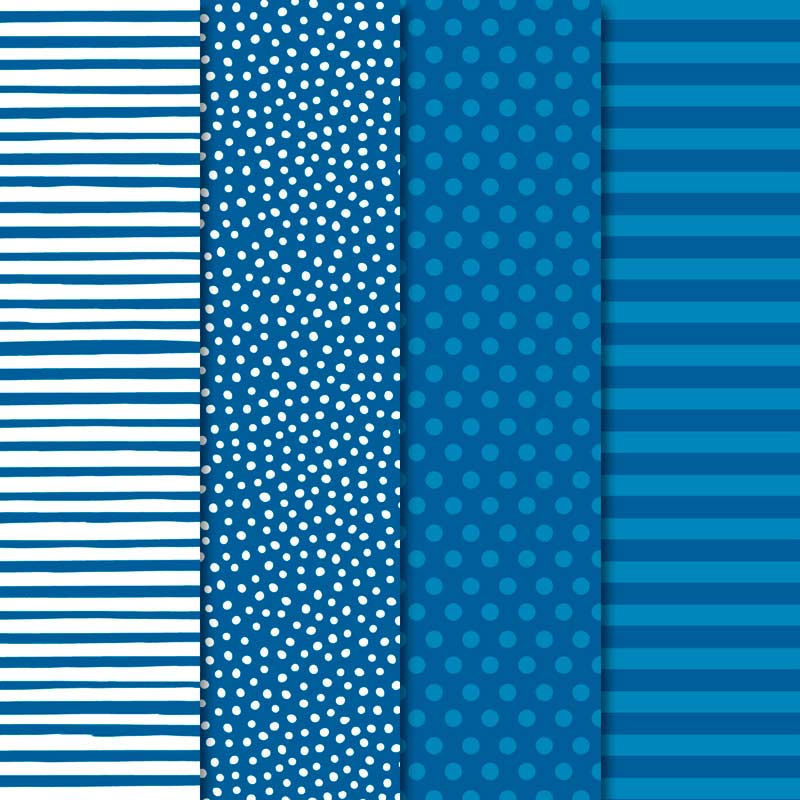
Week 11 of our Art With Heart 2025-26 Colour Creations Insta Hop celebrates Blueberry Bushel, a rich blue colour that I’ve used this week to make birthday cards for my brother and my father.
One card showcases the darker side of Blueberry Bushel, while the other card showcases its softer side.
I wonder which card will be your favourite?
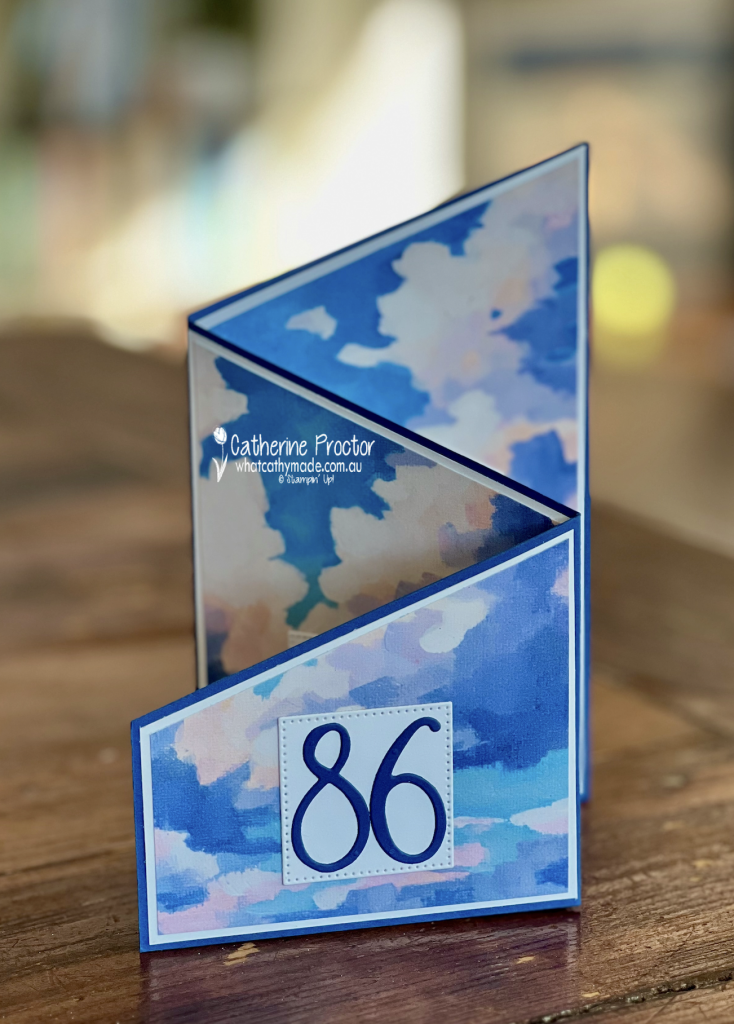
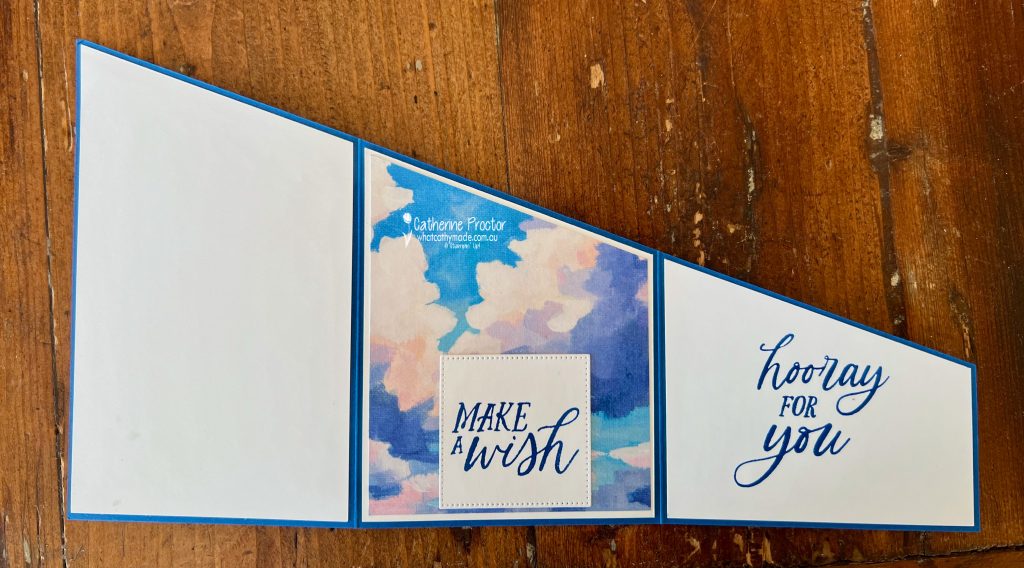
Everyday Skies Trifold Angle Card
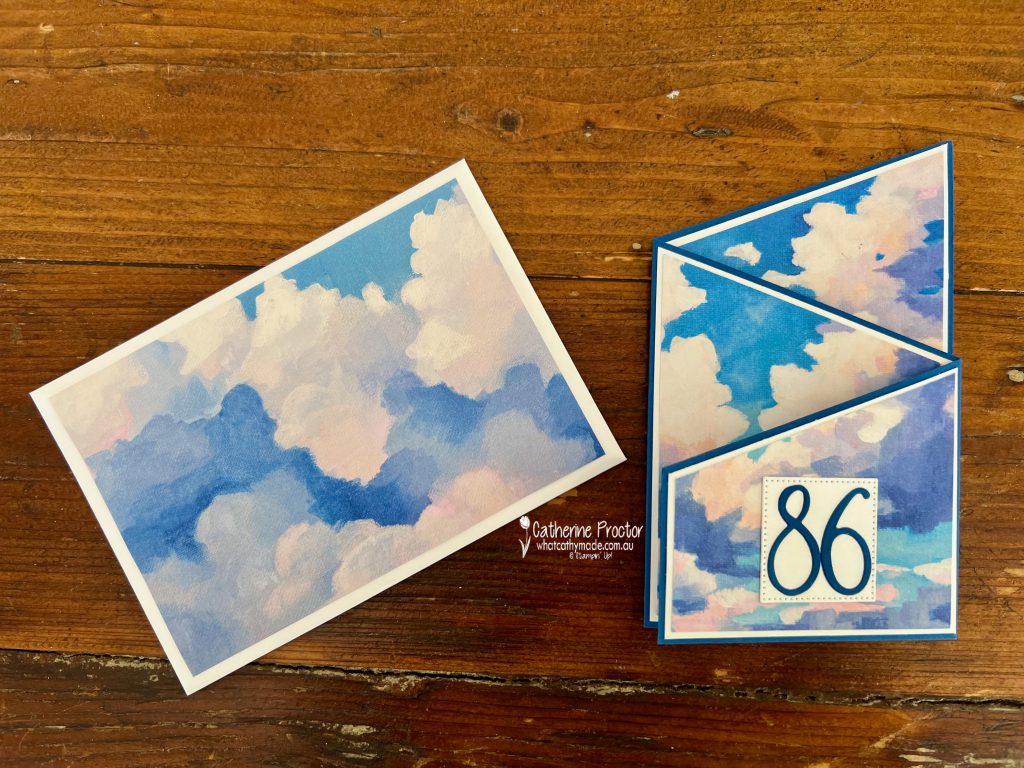
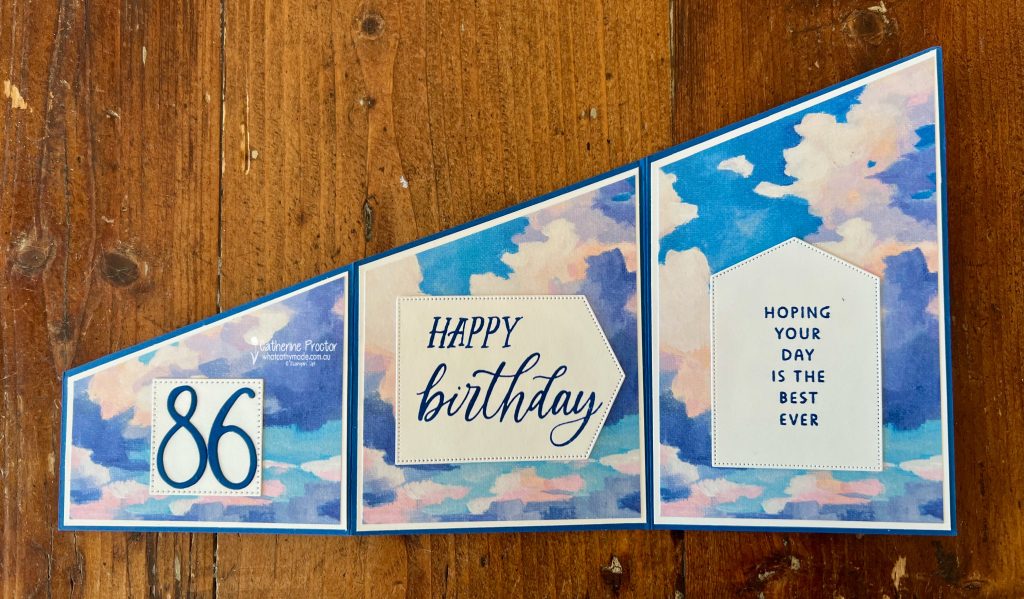
It’s hard to believe my dad is turning 86! A number like this deserves a special card, so I decided to use this stunning design in the Everyday Skies DSP to create an elegant Trifold Angle Card with matching envelope.
This Everyday Skies DSP design pairs Blueberry Bushel with Azure Afternoon, Balmy Blue, Bubble Bath, Fresh Freesia, Gorgeous Grape, Highland Heather, Misty Moonlight and a touch of Petal Pink.
To make the matching envelope I used a C6 Basic White envelope, layered with some of the Everyday Skies DSP. As this is a 6″ x 6″ (15.2 x 15.2 cm) Designer Series Paper it is too small to handmake a full envelope for this sized card, so add the DSP to the front of the envelope is an easy compromise.
I’ve used stamps and dies from the Birthday Celebration Bundle, the Stylish Shapes dies and the the You Are Remarkable Stamp Set, to create the 86 on the front of the card as well as the sentiments on the panels of the card.
The back panel of the card has been left blank for a handwritten birthday message.
I seriously cannot stop using the Everyday Skies DSP – it is perfect for so many different card styles and occasions.
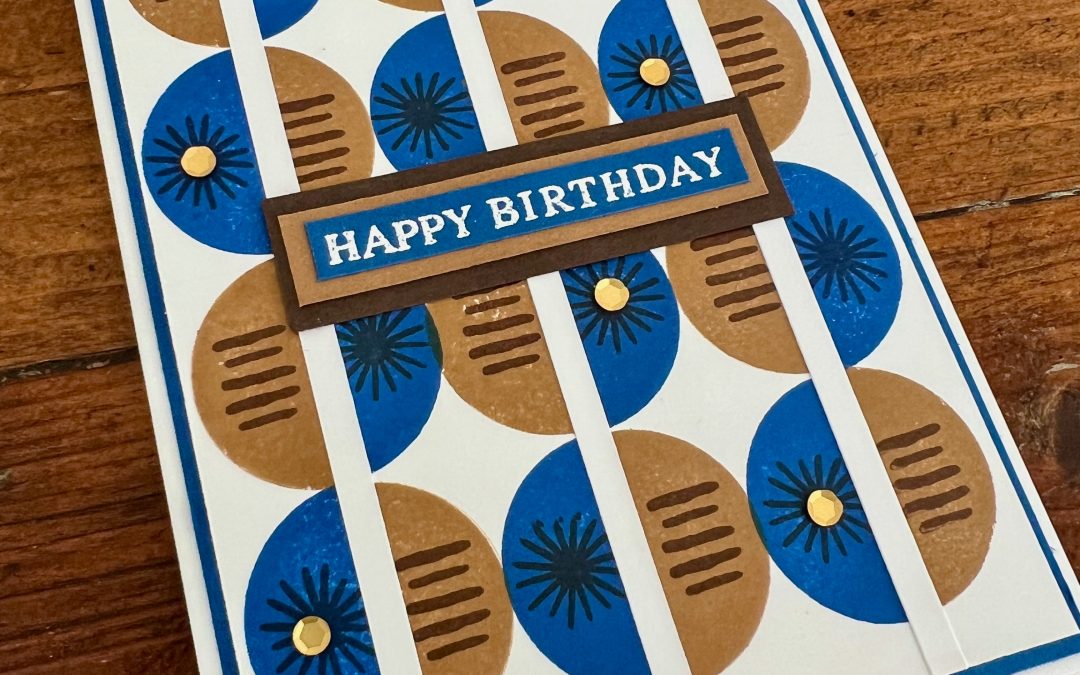
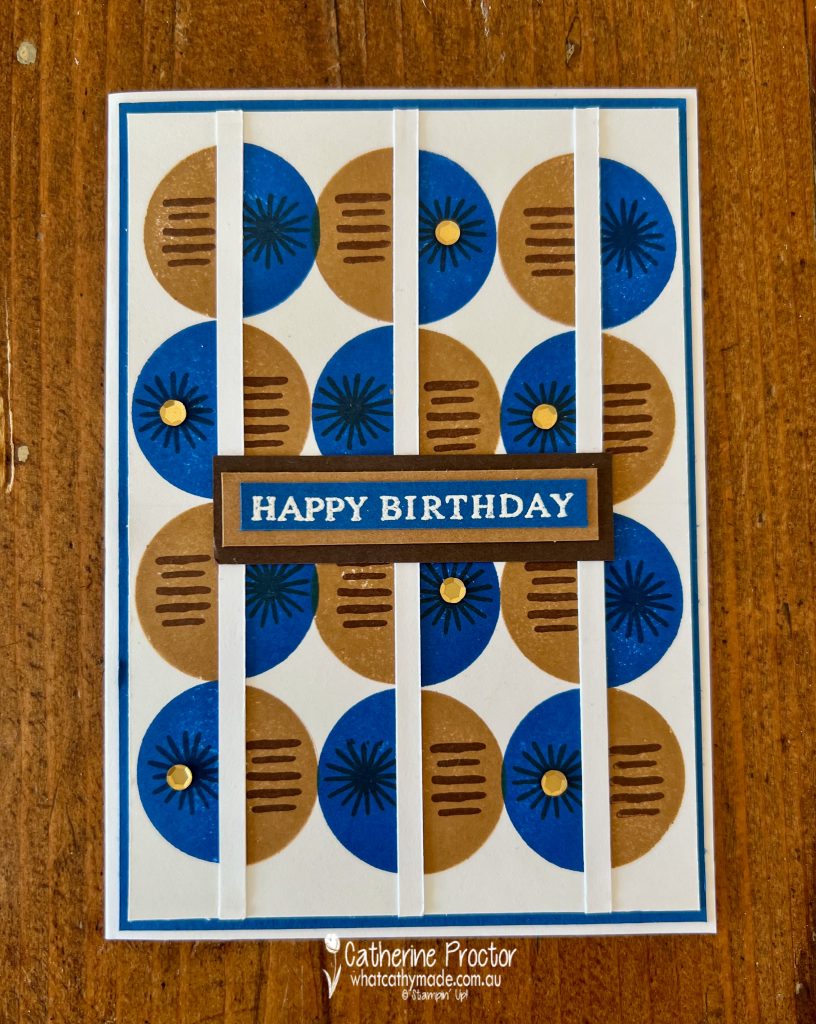
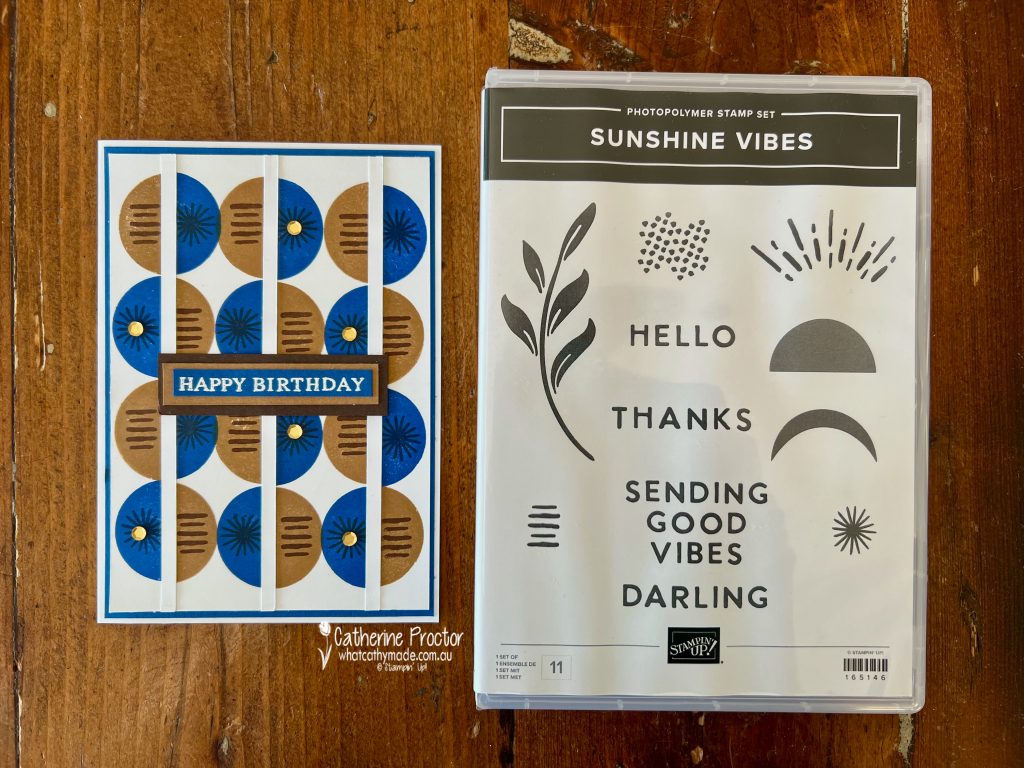
Sunshine Vibes Birthday Card
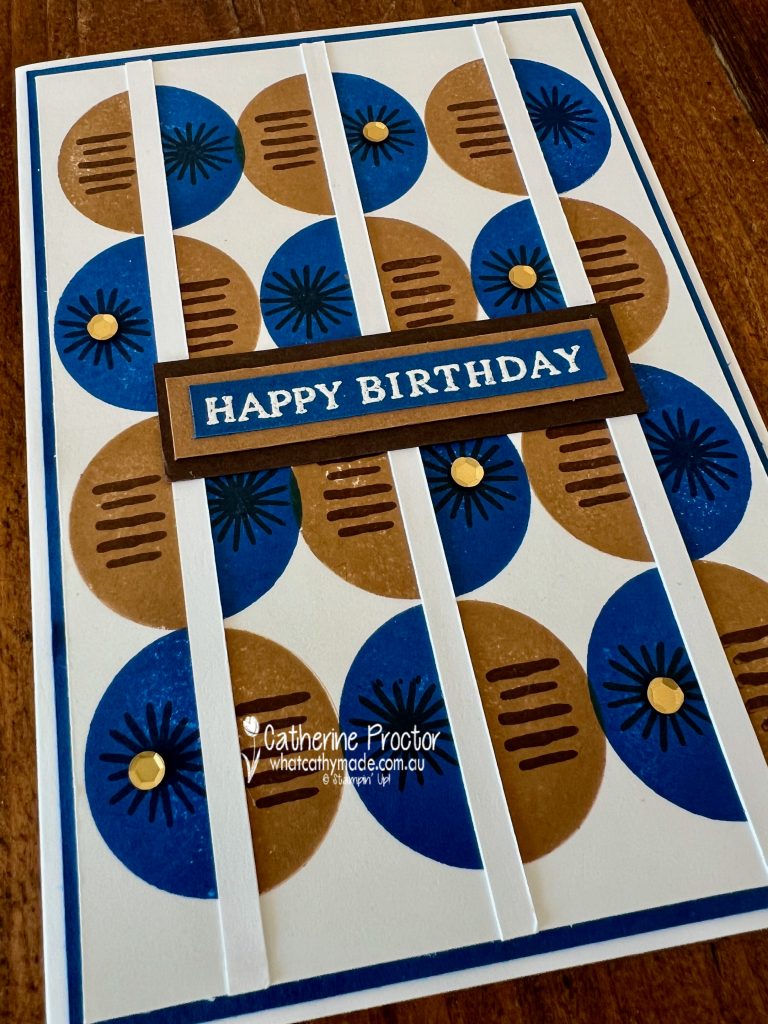
This birthday card for my brother uses the half circle stamp from the Sunshine Vibes stamp step to create a modern graphic looking card in Blueberry Bushel, Pecan Pie, Night of Navy and Early Espresso. I’ve also used some of the smaller stamps in the stamp set to add details to the stamped half circles.
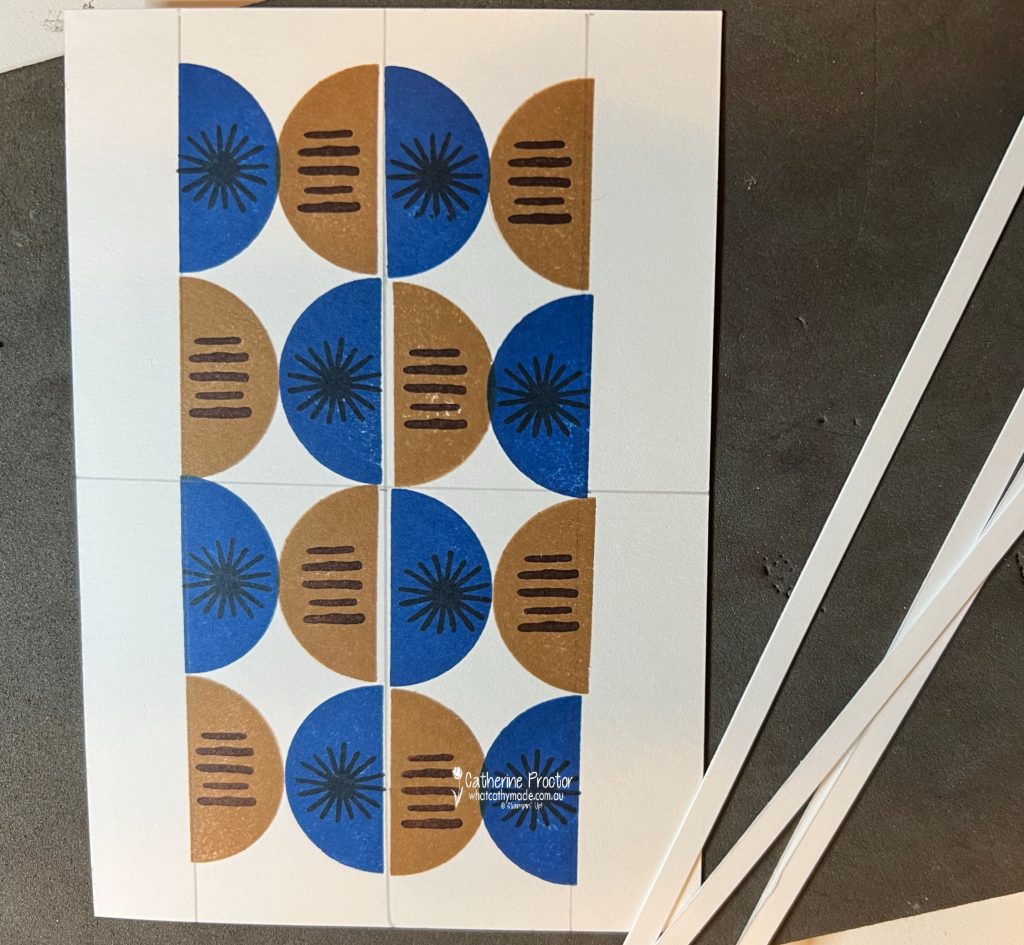
To line up the circles I drew pencil lines as a guide, stamping out from the centre and then I layered 5mm strips of Basic White Cardstock over the top of the stamped images to tidy the card up. Here’s a “work in progress” image of the card.
A few Neutrals Adhesive-Backed Sequins add a touch of bling, while the layered and white heat embossed “Happy Birthday” sentiment comes from the the Beautiful Butterflies Stamp Set.
Take a look at some more Blueberry Bushel inspiration on our Insta Hop!
Our blog hop is now an Instagram hop but the good news is that you don’t need to have an Instagram account to view all of the other projects!
Simply copy any of the Insta handles below into a new search window to follow the Instagram hop at any point.
Next in our hop is Rosa @hum.and.stamp. Be sure to check out her gorgeous project/s.
Here’s the full list of this week’s InstaHop:
Rosa @hum.and.stamp
Kate @craftwithkate
Helen @apaperparadise
Kirsty @crafty.littlemiss
Leanne @createwithleanne2
Rachel Woollard @handstamped_by_rachel
Cathy @whatcathymade – you are here!
We’ll be back next Wednesday when we are showcasing Bubble Bath,
Welcome to week twelve of our Art With Heart 2024-25 Colour Creations blog hop!
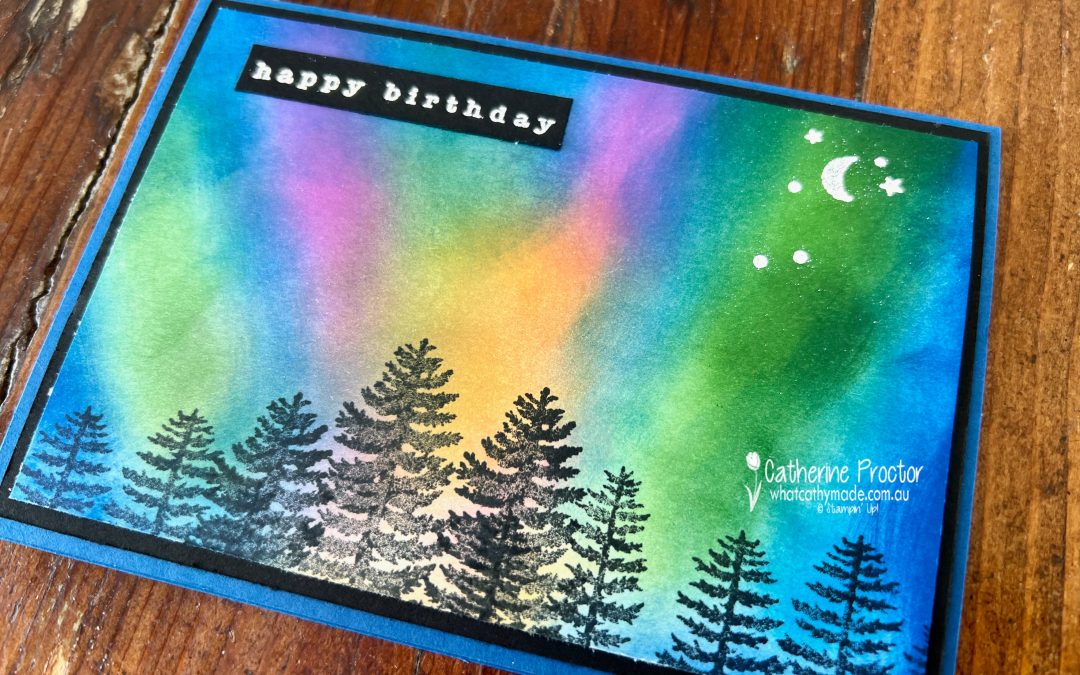
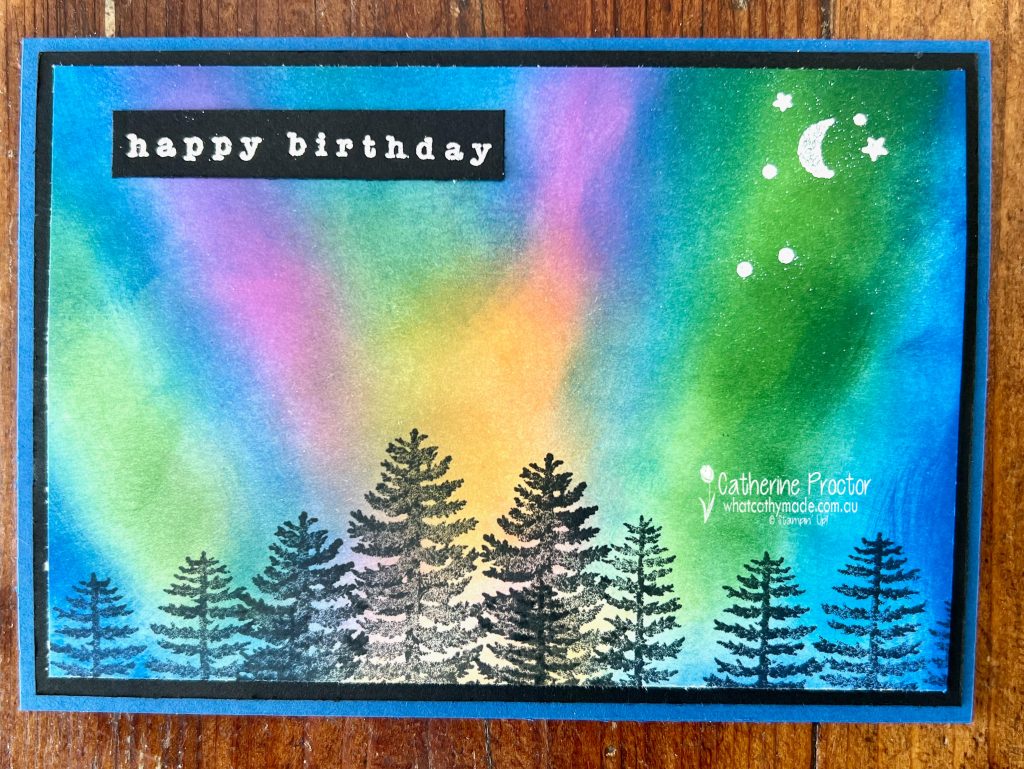
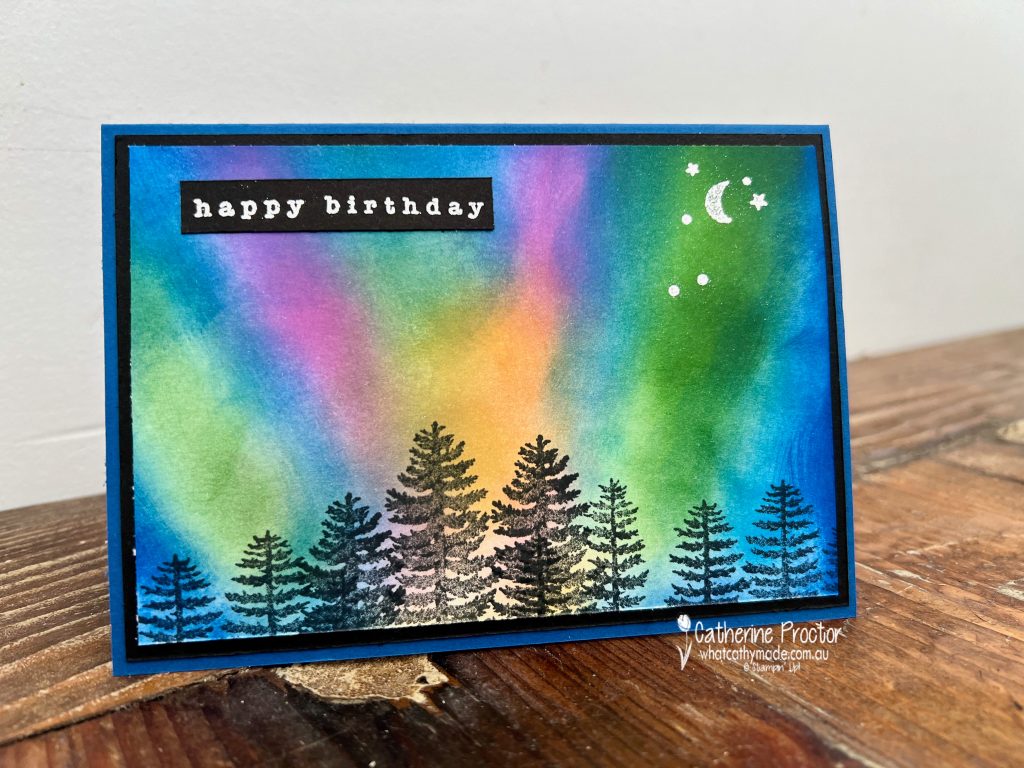
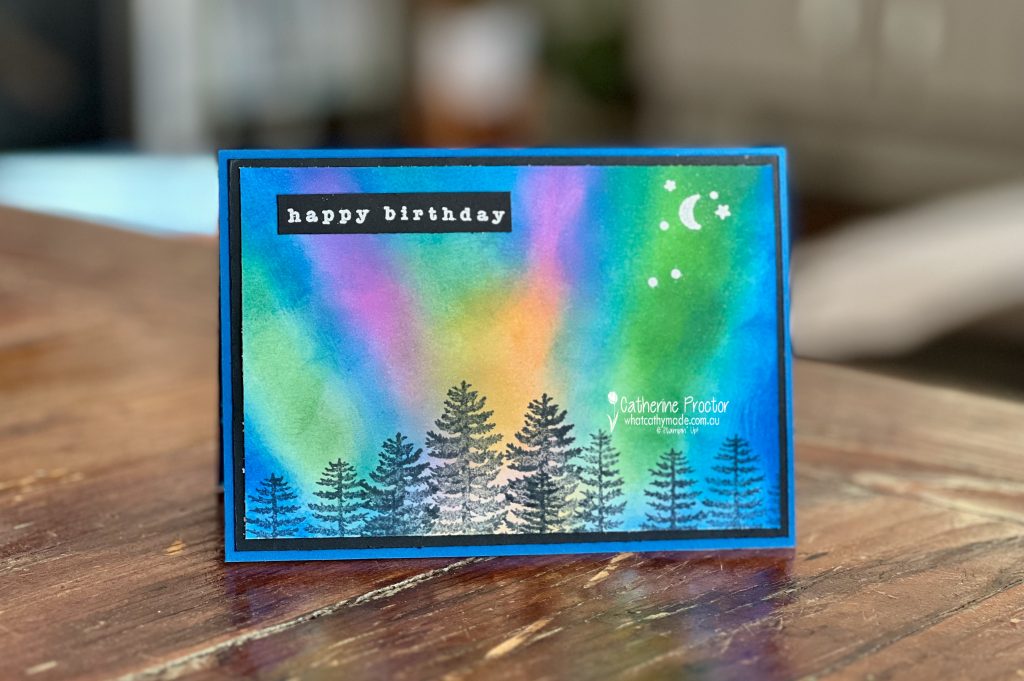
This week we’re featuring Blueberry Bushel, a rich and clear deep blue from the Regals family. And as it my dad’s birthday this weekend I’ve made him a Blueberry Bushel birthday card.
My dad loves all things astronomical so I decided to give the northern lights technique a go. This is the colour combination I chose, although if you look at photos of the northern lights you’ll see that you can really use any combination of colours.
The northern lights technique is fun and easy to do. All you need is blending brushes, ink and cardstock.
Start from the bottom of the card and apply the ink in upward strokes working in order from the lightest colour to the darkest colour. Then go back over each colour to add depth and blend. I added the Blueberry Bushel last.
I used two of the tree stamps from the Forever Forest Stamp set (stamped in Memento ink) to create the forest silhouette at the base of the card.
I stamped the moon and stars image from the same stamp set in Versamark ink and heat embossed it in white.
The “Happy Birthday” sentiment is from the Country Birdhouse Stamp Set, also stamped in Versamark ink and heat embossed in white. I chose this sentiment as it was long and narrow and I didn’t want to cover up any of the gorgeous northern lights.
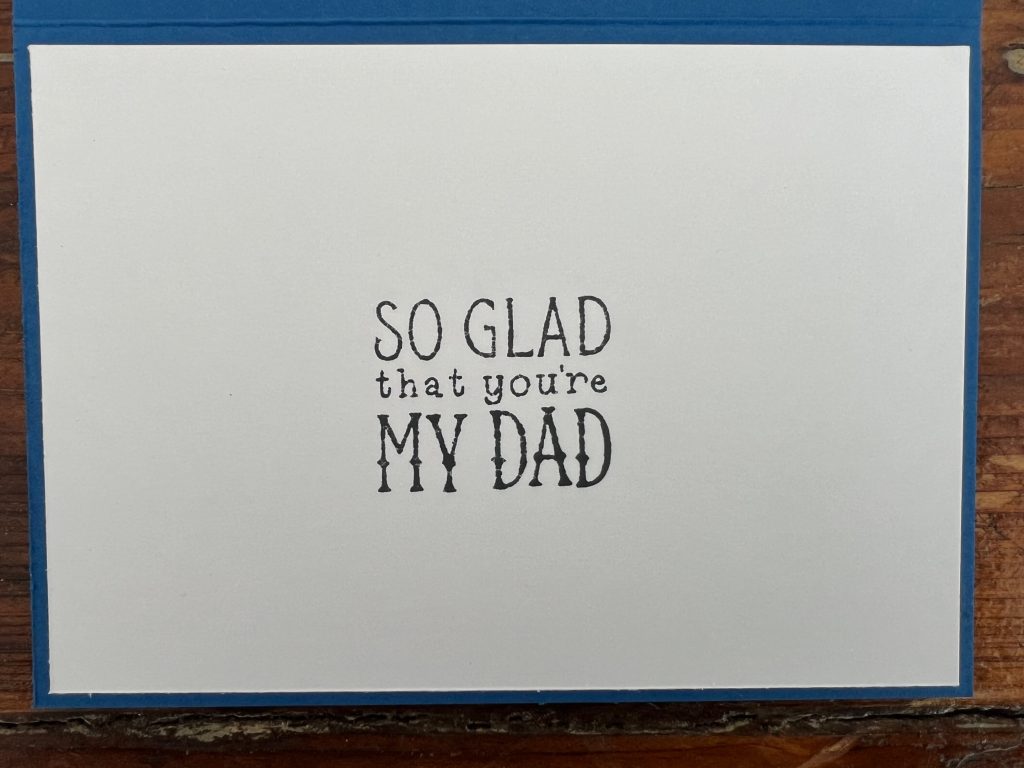
This sentiment from the Gone Fishing stamp set was the perfect sentiment to use on the inside of my dad’s birthday card!
Now it’s time to hop in over to our next participant, the lovely Rachel Woollard – I can’t wait to see what Rachel has made this week!
If at any time you find a broken link, you can find the complete list of all participants below.
Welcome to week fourteen of our Art With Heart 2023-24 Colour Creations blog hop!
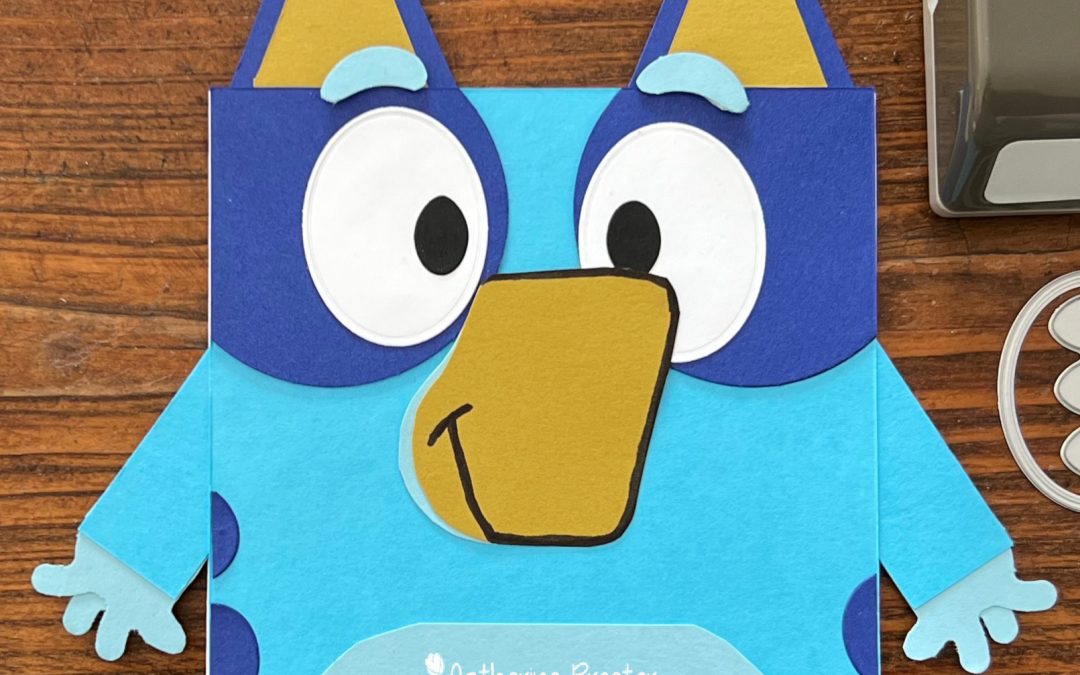
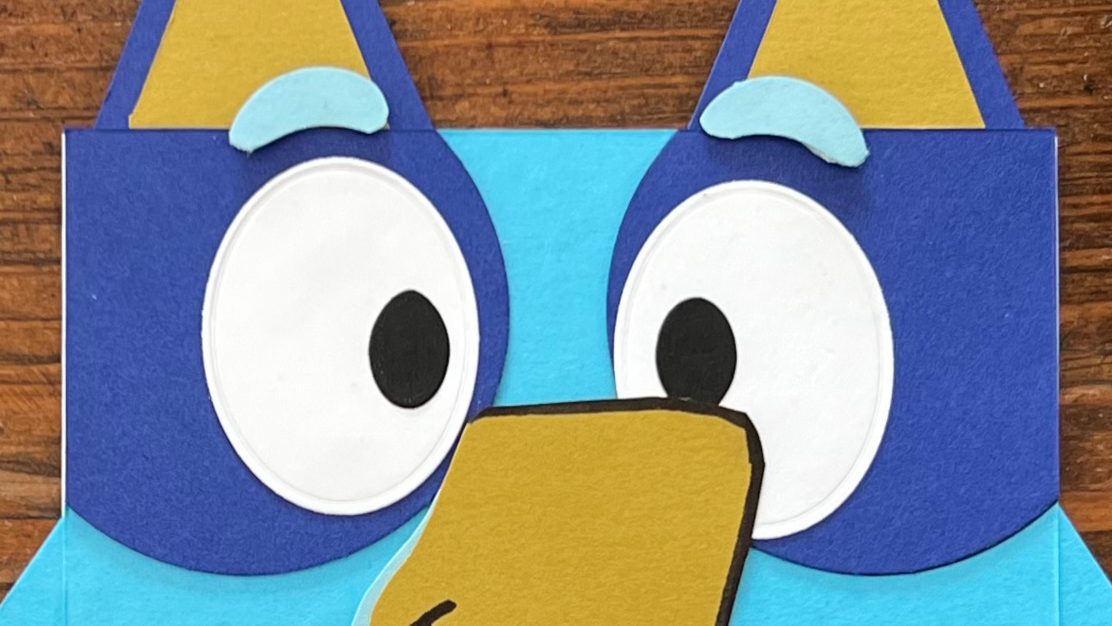
This week’s Blueberry Bushel card was made for my niece’s birthday – she adores Bluey! I originally got the idea to make a Bluey punch art/die art card from a card I saw by a USA Stampin’ Up! demonstrator called Michelle Suit. As her Bluey had no arms, I Googled images of Bluey and based my card on this image instead.
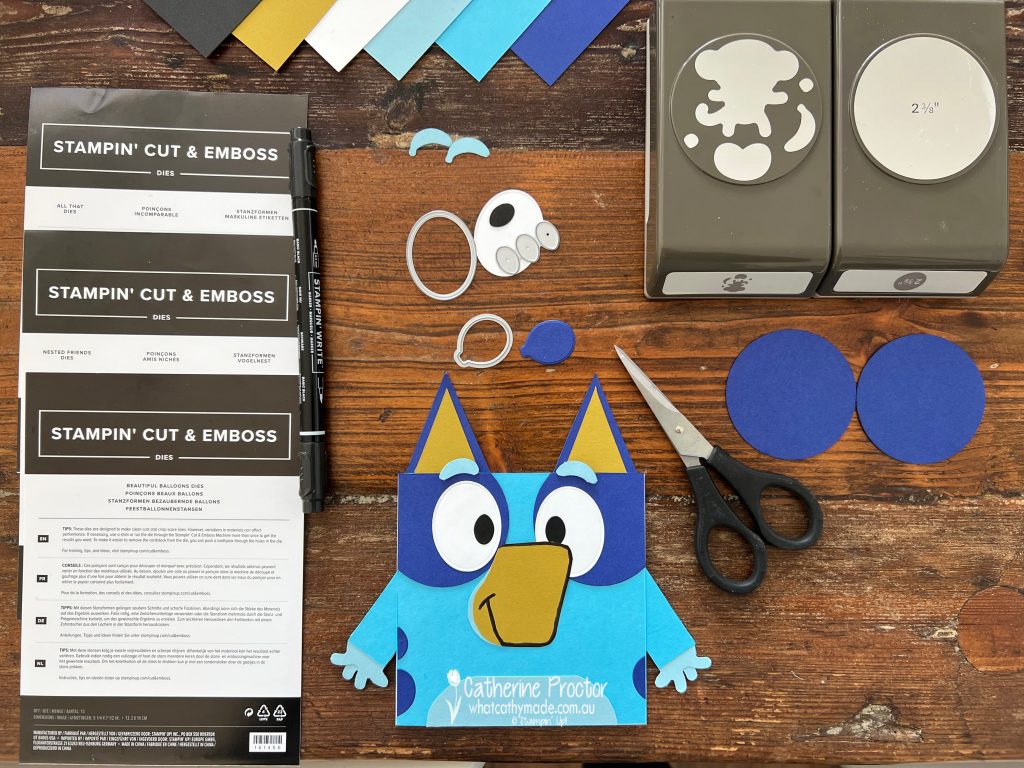
My Bluey card uses the current Stampin’ Up! supplies I had on hand and I realised while writing this blog that I omitted to add his shiny black nose even though I had punched one out in Basic Black cardstock! The nose was supposed to be made from the section of the Monkey Builder Punch you can see in the image below.
The front card layer of Azure Afternoon, measures 11.5 x 11.5 cm (4 ½ x 4 ½ inches). The card base also measures 11.5 x 11.5 cm (4 ½ x 4 ½ inches), created from a piece of Basic White cardstock measuring 23 cm x 11.5 cm (9 x 4 ½ inches) scored and folded in half. Do not attach the front card layer to the card base until you’ve completed the card front.
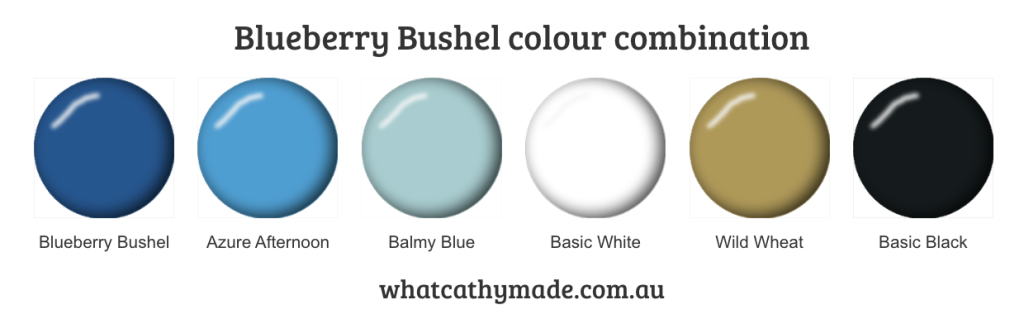
Colours used to make the Bluey Card include: Blueberry Bushel, Azure Afternoon, Balmy Blue, Basic Black, Basic White and Wild Wheat. I love the look of Blueberry Bushel and Azure Afternoon together.
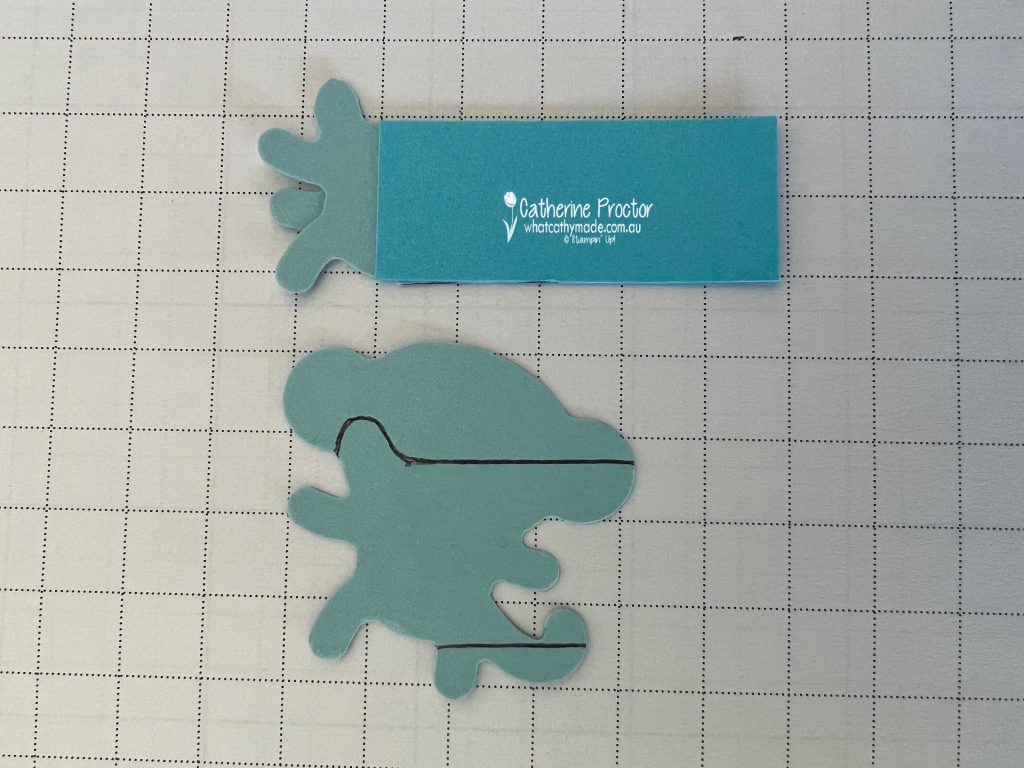
The best way to create this card is to start with the eyes, punched out of Blueberry Bushel with the 2⅜ circle punch and positioned to the sides of the card. The whites of the eyes are cut using the oval die from the “All That Dies”, with the black pupil of the eye die cut using the eggs from “Nested Friends” dies.
The Balmy Blue eyebrows are actually bananas, punched using the Monkey Builder punch, then trimmed with Paper Snips.
The Wild Wheat nose is freehand drawn then fussy cut with Paper Snips and outlined with a Black Stampin’ Write Marker. Should have added the black nose tip at this stage of the card!
The side Blueberry Bushel “splodges” are die cut with the Beautiful Balloon dies and the bottom Balmy Blue tummy is freehand fussy cut, just like the nose.
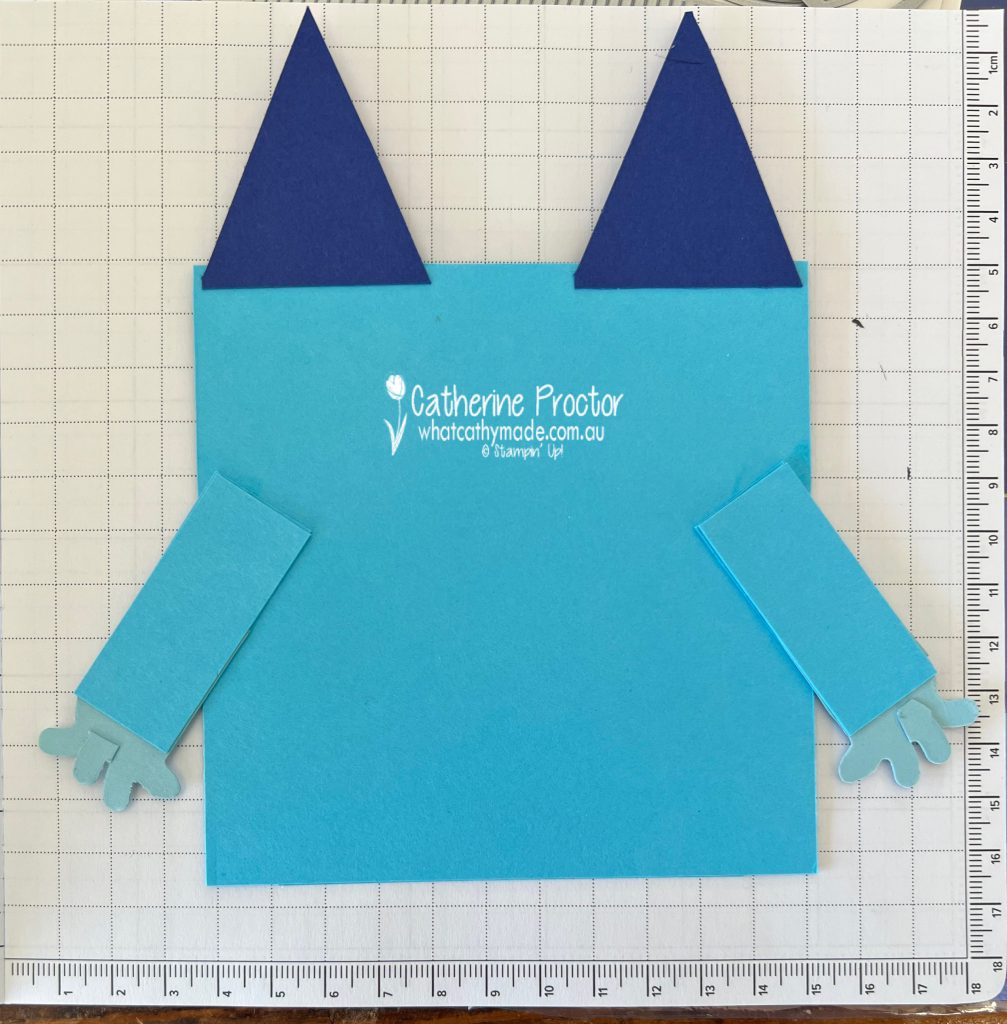
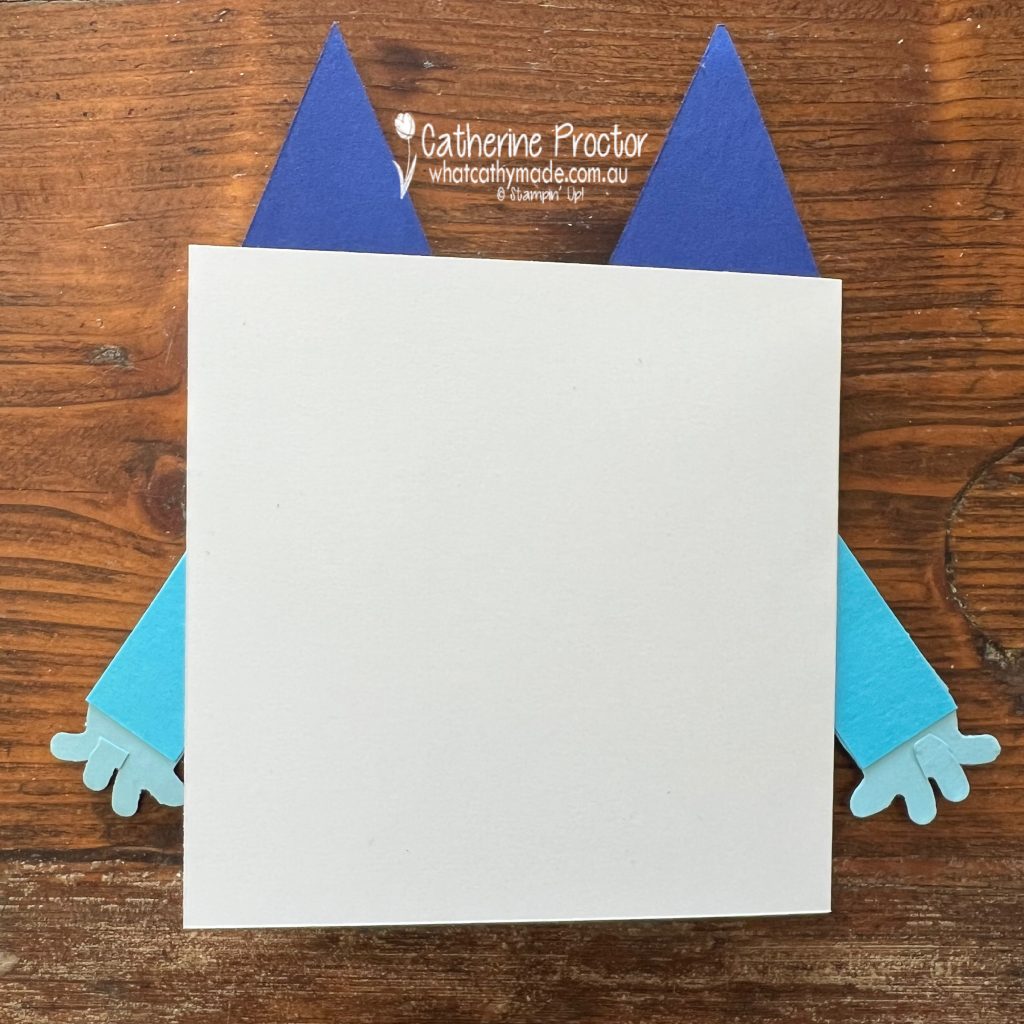
The ears are cut using the paper trimmer and adhered to behind the eyes. Now it’s time to turn the top layer over and create the arms. Two 2cm strips of Azure Afternoon make the arms and part of the monkey from the Monkey Builder punch creates hands and fingers. Fun fact I learnt while making this card – Bluey only has 4 fingers!
Adding two more 2cm strips of Azure Afternoon tidies up the back of the arms.
Attach your card front to your card base, Attaching it at this last stage hides the join of the arms behind the face.
Now it’s time to hop on over to our next participant, the lovely Di Furniss – I can’t wait to see what Di has made this week!
If at any time you find a broken link, you can find the complete list of all participants below.
Welcome to week 6 of the Art With Heart Colour Creations Blog Hop!
This week we are showcasing one of the 2018 – 2020 In Colours: Blueberry Bushel.
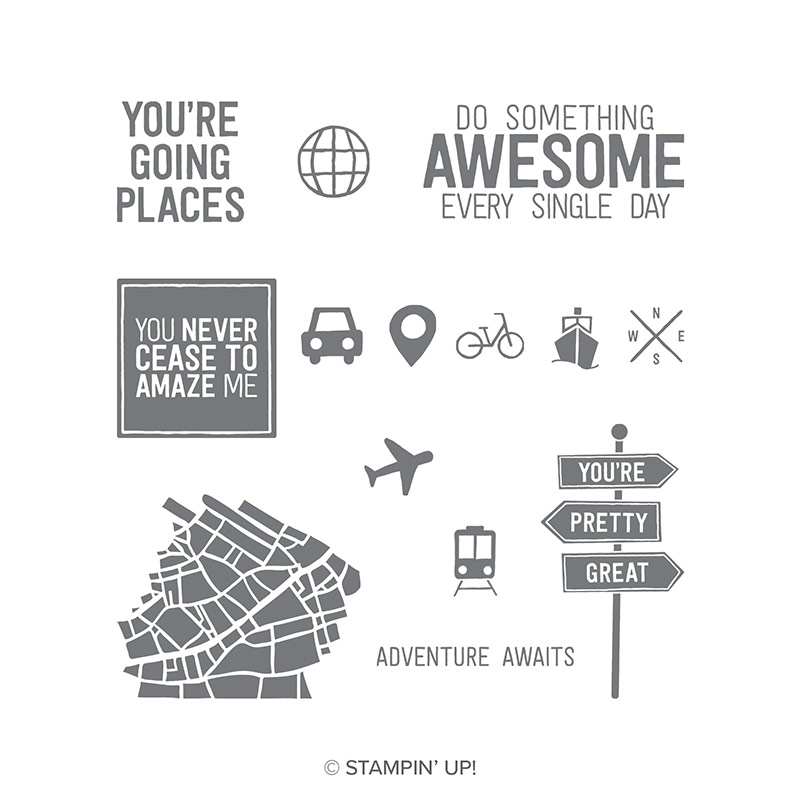
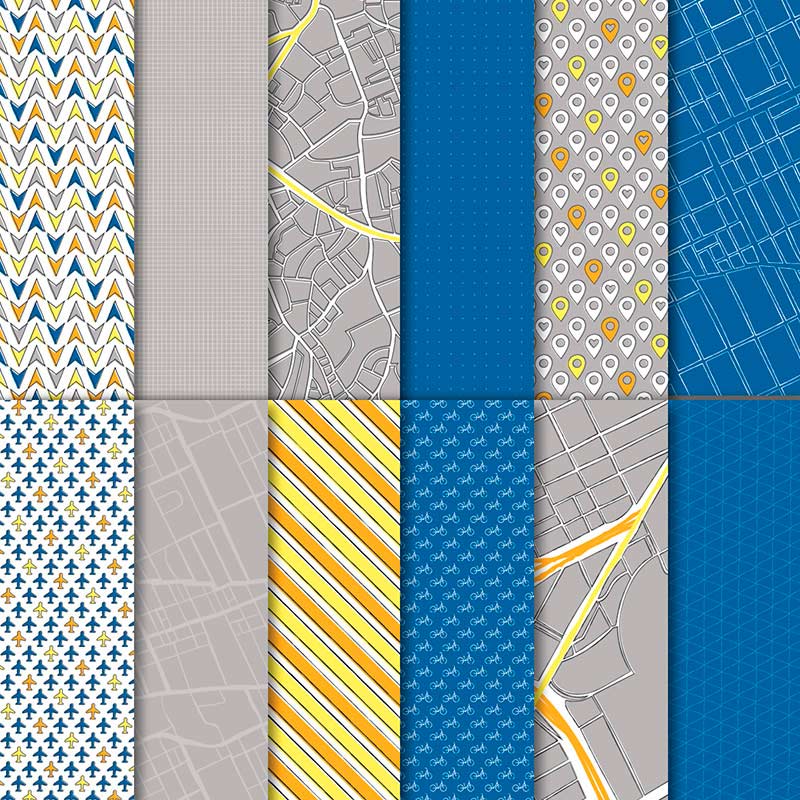
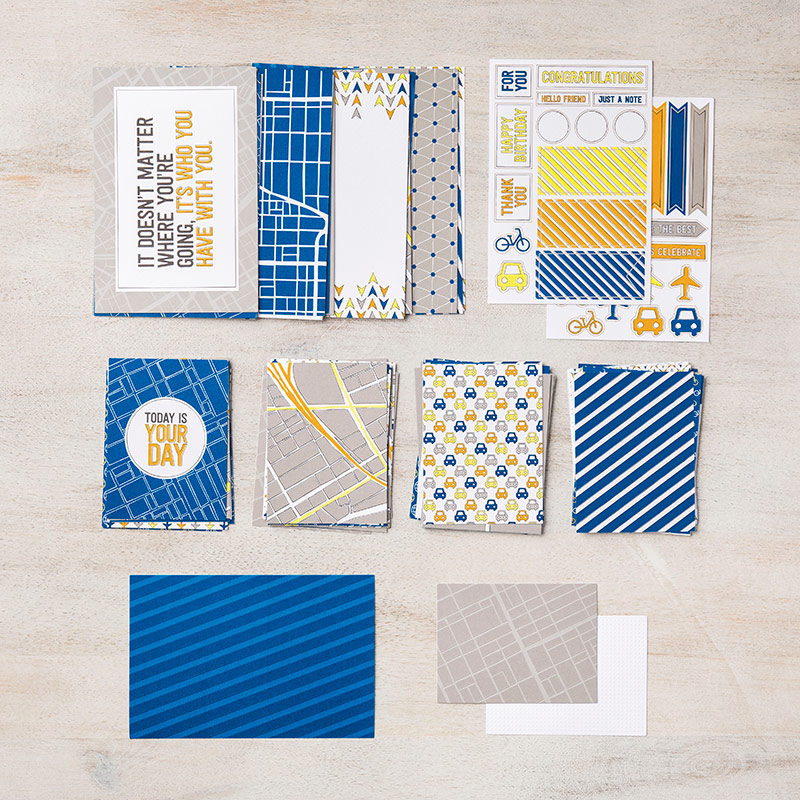
For my project this week I decided to showcase Blueberry Bushel by using products from the Best Route suite, including the Best Route Designer Series Paper, the En Route stamp set, and the new Best Route Memories & More Card Pack.
I love how this Best Route DSP combines Blueberry Bushel with Basic Black, Gray Granite, Mango Melody and Pineapple Punch. Doesn’t this colour combination really pop?
And how amazing are these new Memories & More Card Packs, designed to be used for both cardmaking and scrap booking?
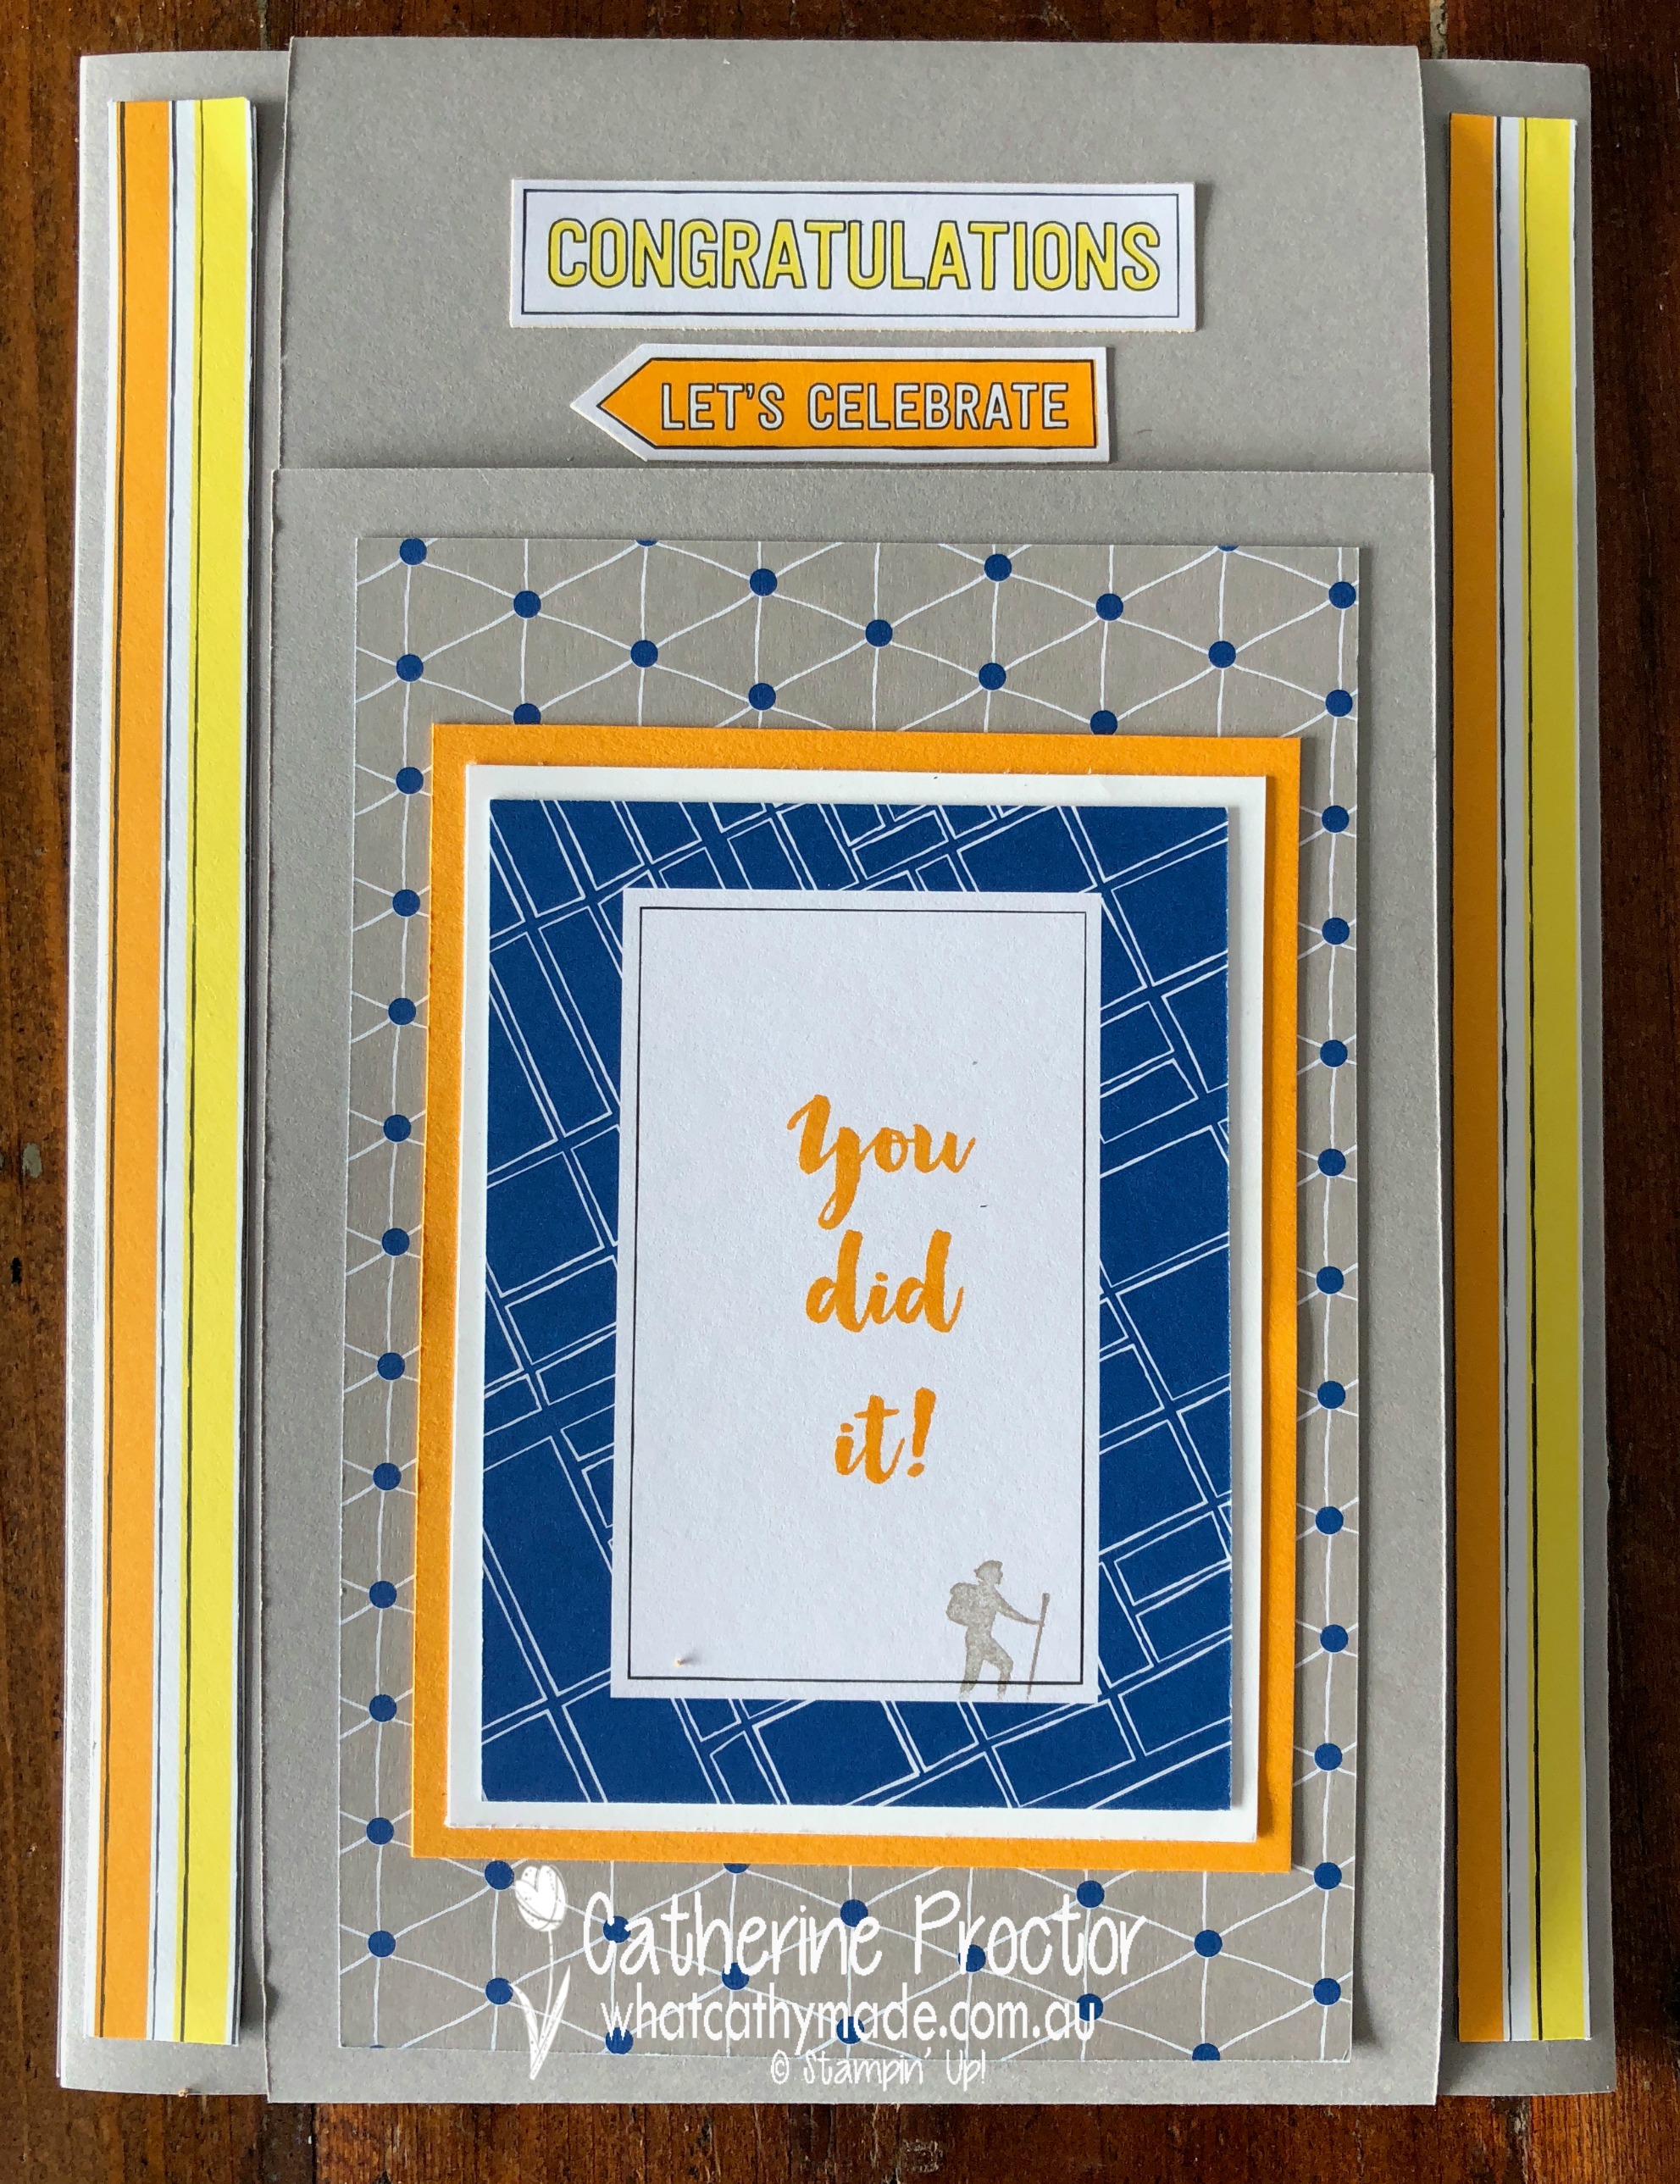
The card I made this week was a very, very special card for a very, very special person in my life: my hubby!
You see, he finally sold his business of 20 years this week, and selling it was a huge leap of faith into the unknown, both personally and career-wise. This was a business he built from scratch in an industry that wasn’t really his passion…but he has persevered and worked very hard in it for the past 20 years to support our family.
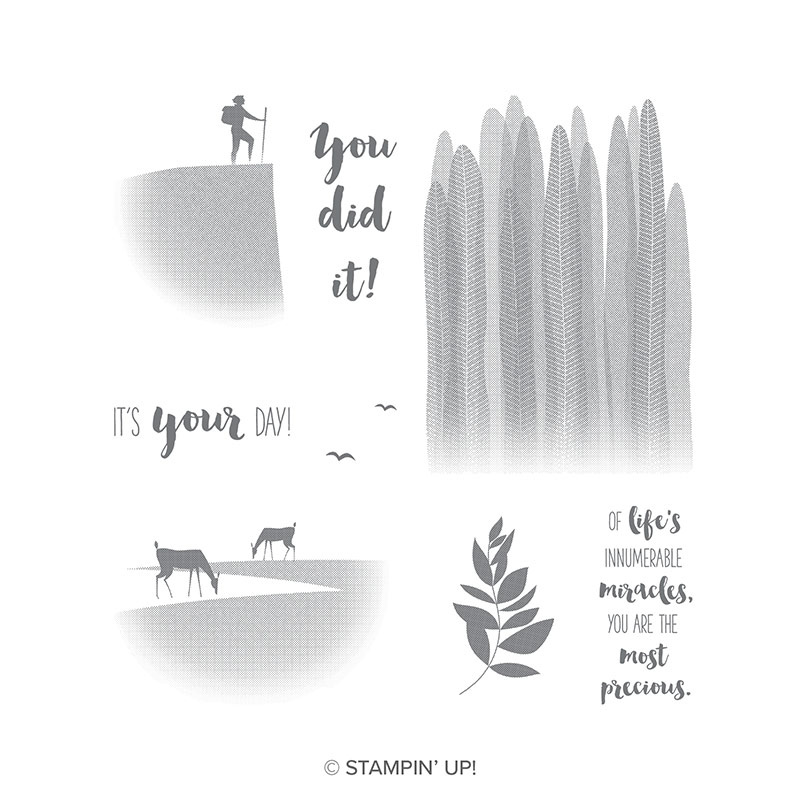
I designed this card as I was making it around the card sizes in the Best Route Memories & More Card Pack, and I also used stamps from the inspirational stamp set, Seize the Day (and the wonderful “just breathe” stamp set from Colourful Seasons). These sets are both great for male cards and they were simply perfect for all of the things I wanted to say to my hubby.
I’m not sure what you call this type of fancy fold card as I made it up as I went along! Maybe it could simply be called multi-fold card? Hopefully, these pictures will explain more clearly how I made it.
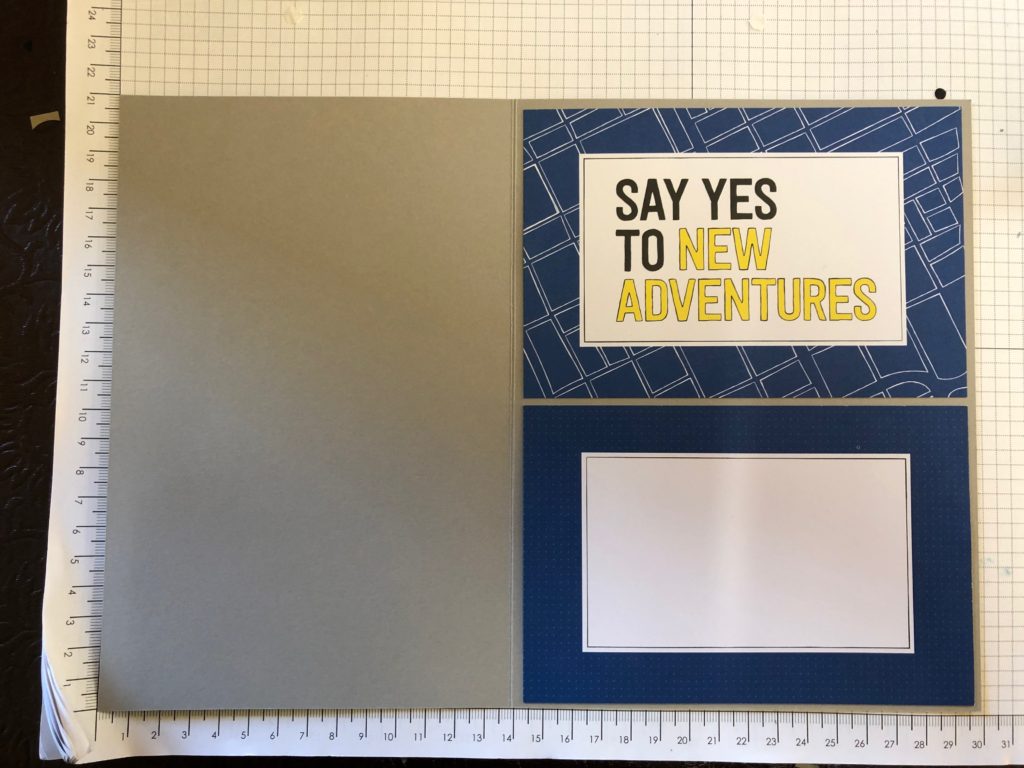
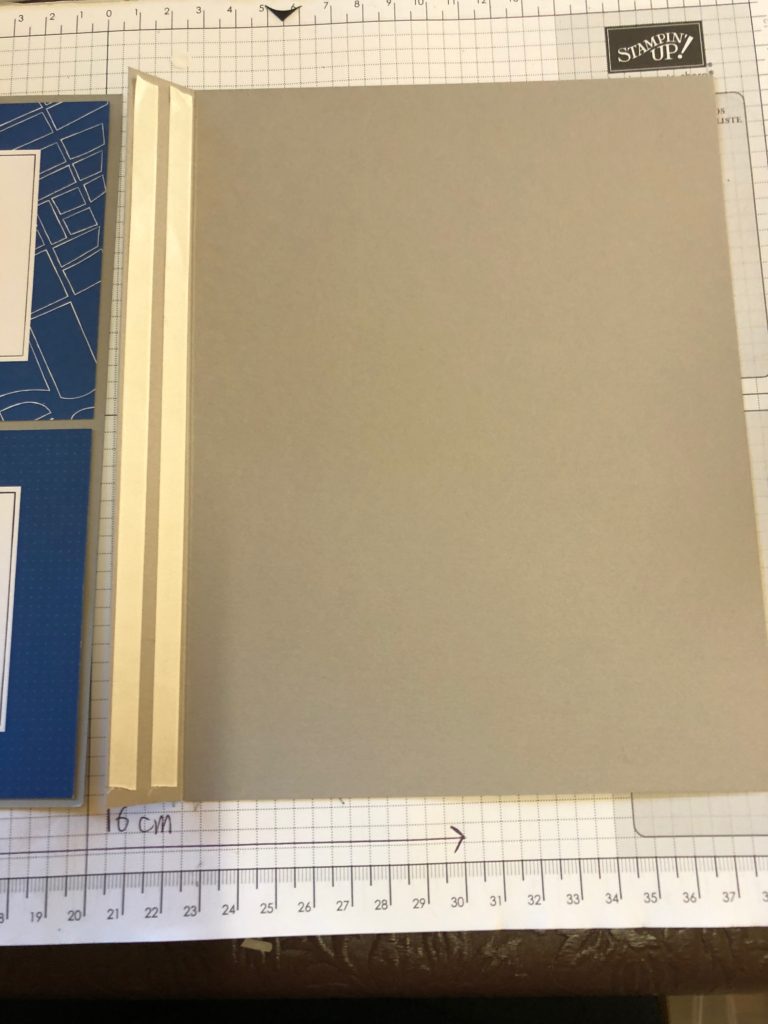
I began with the centre section of the card and added flaps to the top, bottom, left and right of the centre section. The centre section is made with one A4 piece of Gray Granite with 2 of the Memories & More smaller sized cards aligned to the right of this piece of cardstock, with fold line scored to the left of these cards. The bottom card I deliberately left blank to write a message on.
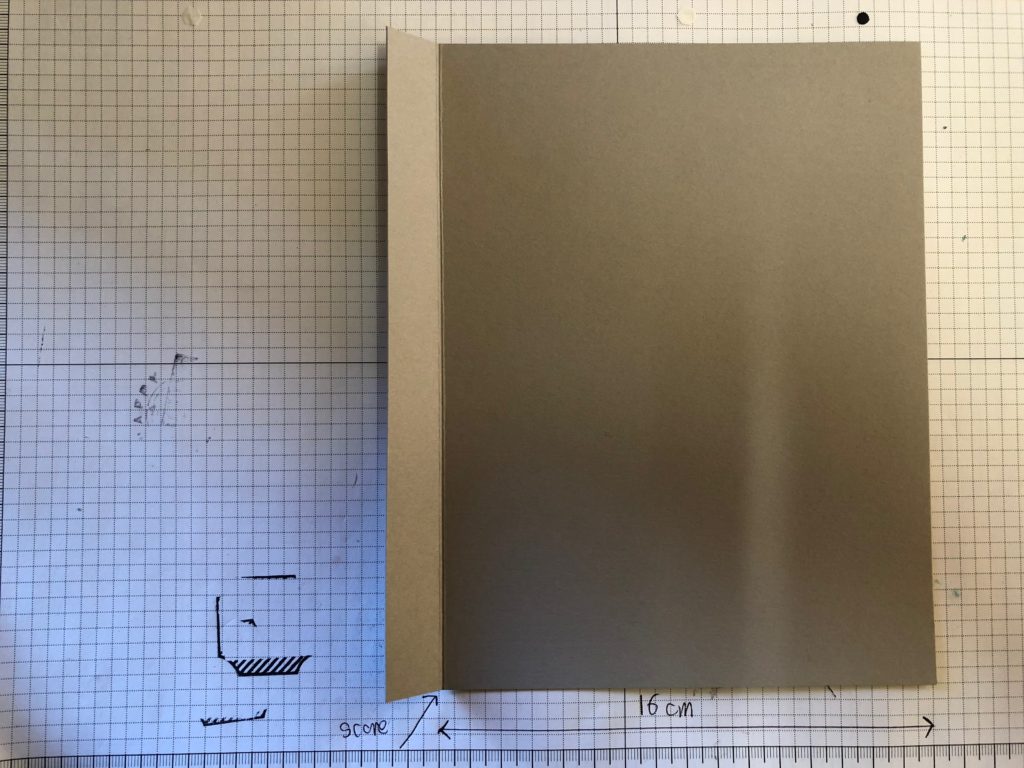
To make the right hand flap, I used another piece of A4 Gray Granite cardstock, cutting and folding as per measurements below. There’s about an inch of extra cardstock to the left of the fold line…you just need to leave enough to be able to adhere this piece to the centre piece of the card.
I adhered 2 strips of tear and tape and then attached the right-hand flap to the centre section of the card.
The top flap was made with the leftover piece of cardstock I chopped off from the right-hand flap (see earlier image), and then I cut an identically sized piece for the bottom flap. Both top and bottom flaps were attached using tear and tape, just like the right flap.
And here’s how the entire card looks as you gradually open each flap to unfold the card.
All closed up, with the bottom flap on the front of the card ⇓.
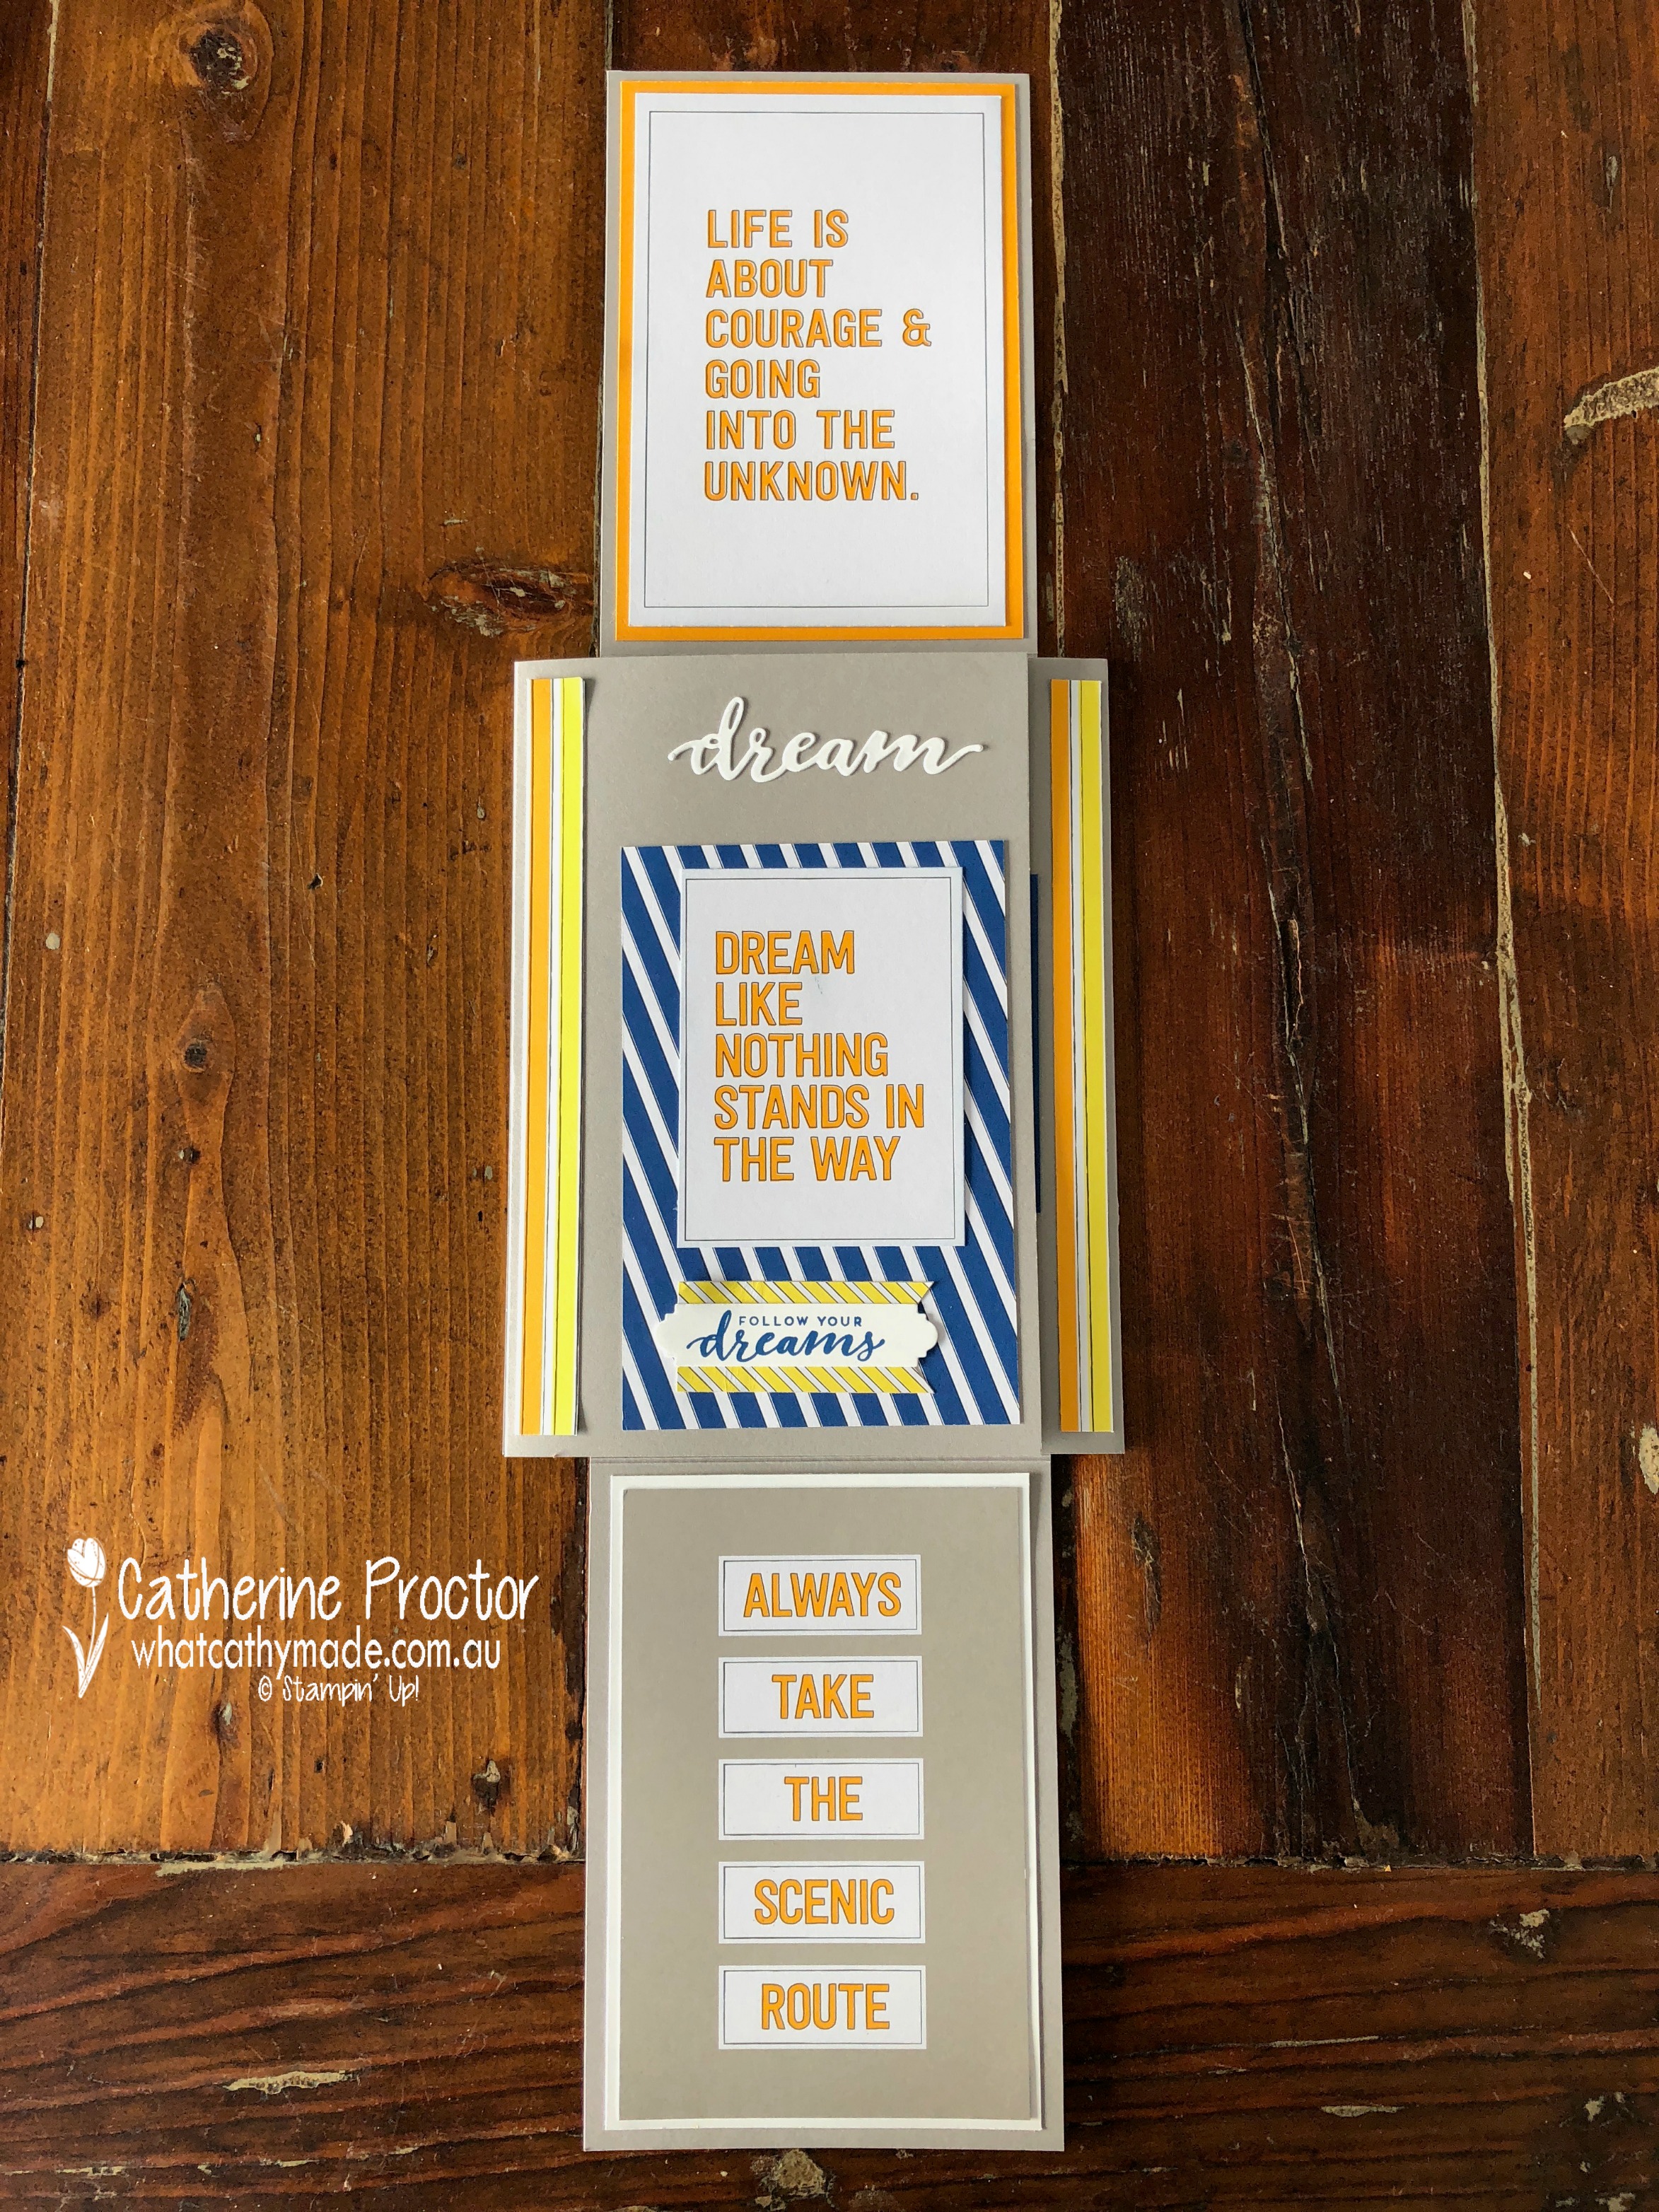
With the top and bottom flap opened ⇓.
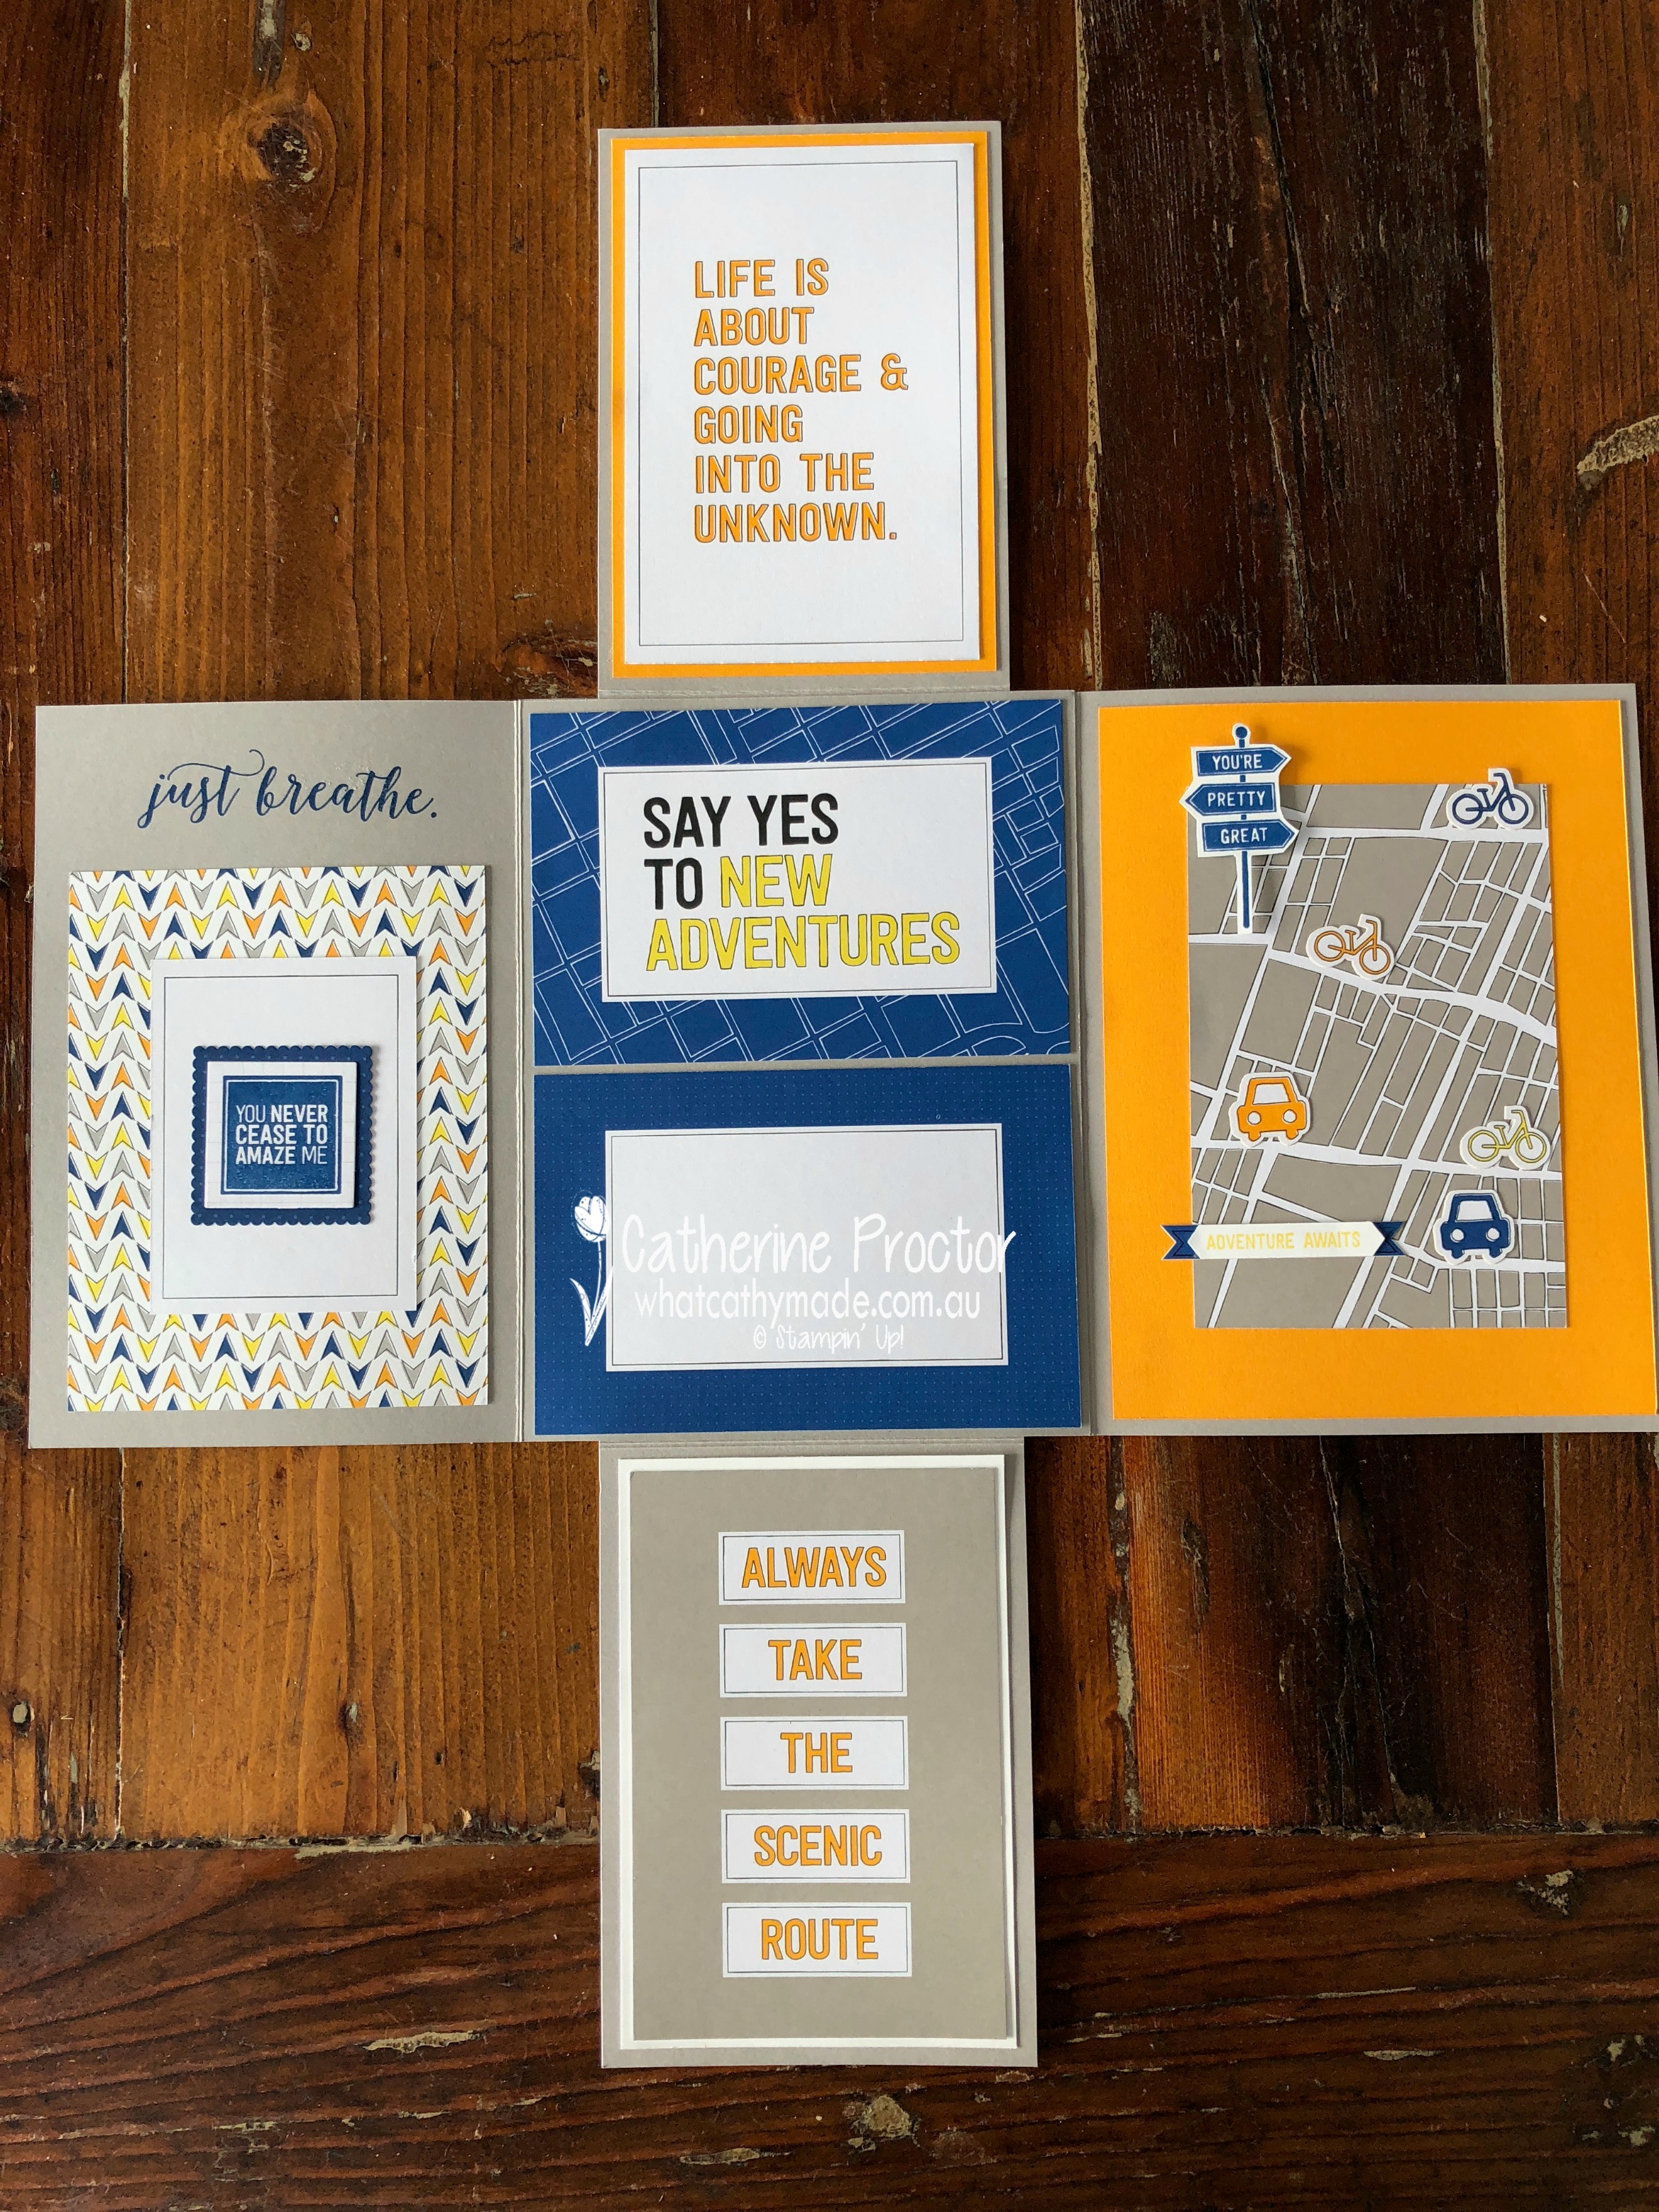
With the left and right flap opened ⇓.
And here is the reverse of the card…I cut a piece of Gray Granite cardstock to cover all of the joins where I’ve attached the flaps to the card.
Thanks so much for hopping along with the Art With Heart Team on our weekly Colour Creations Blog Hop.
To see what the rest of the team have made click on the links below.