The challenge for Day 5 of the #30DayChristmasCardMakingChallenge is the following sketch.
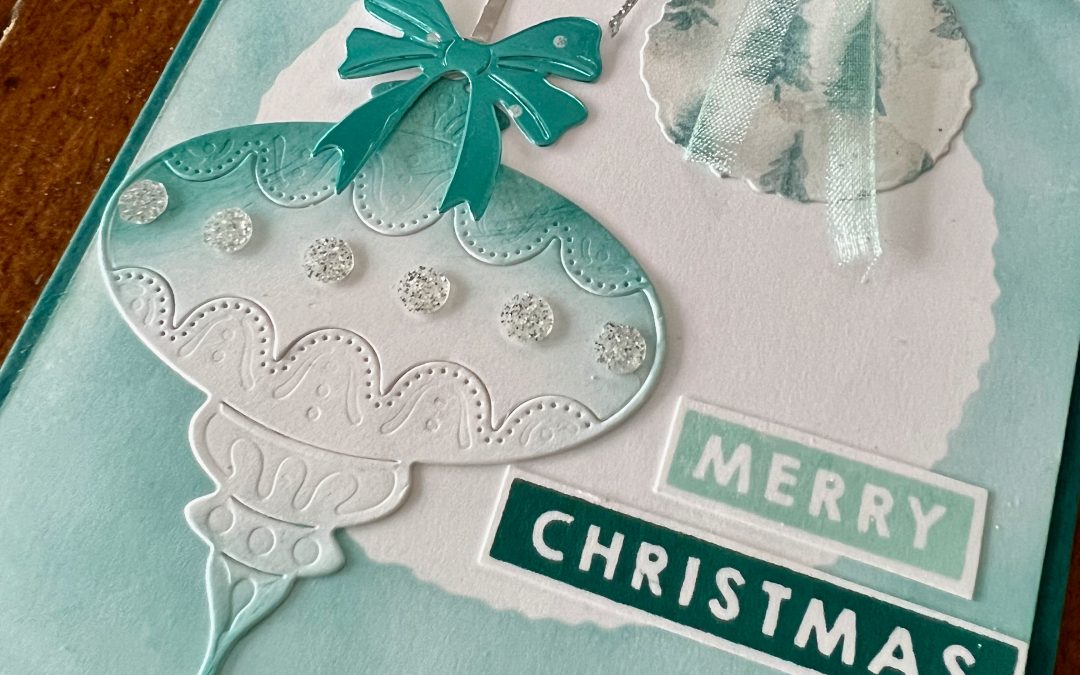
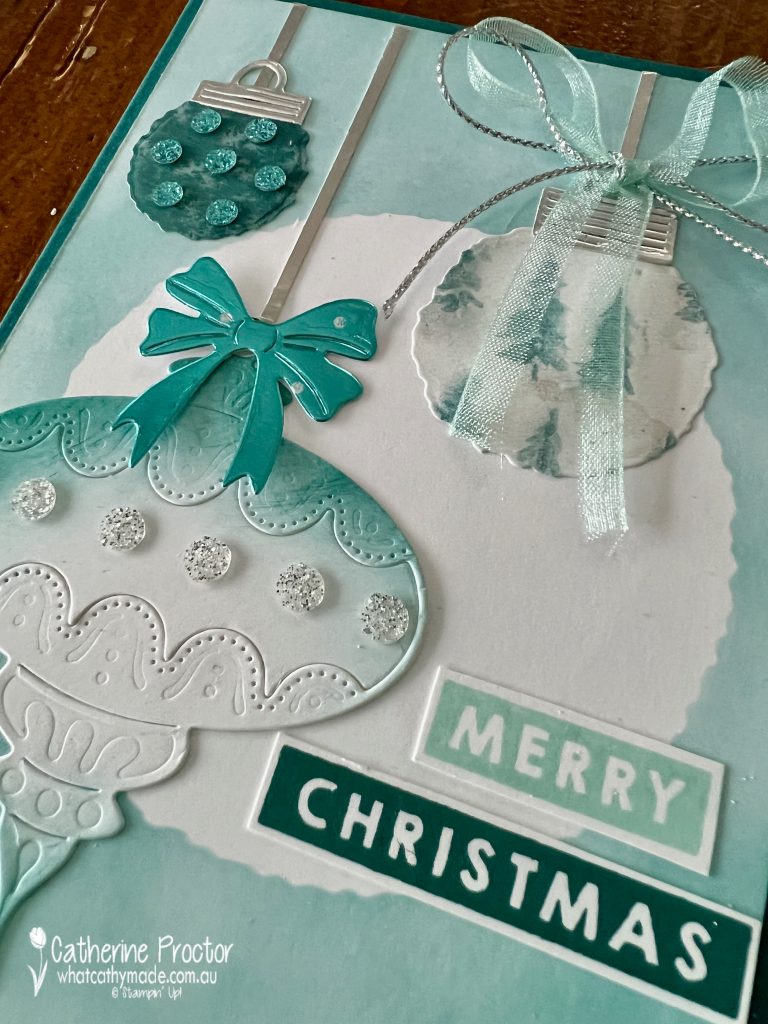
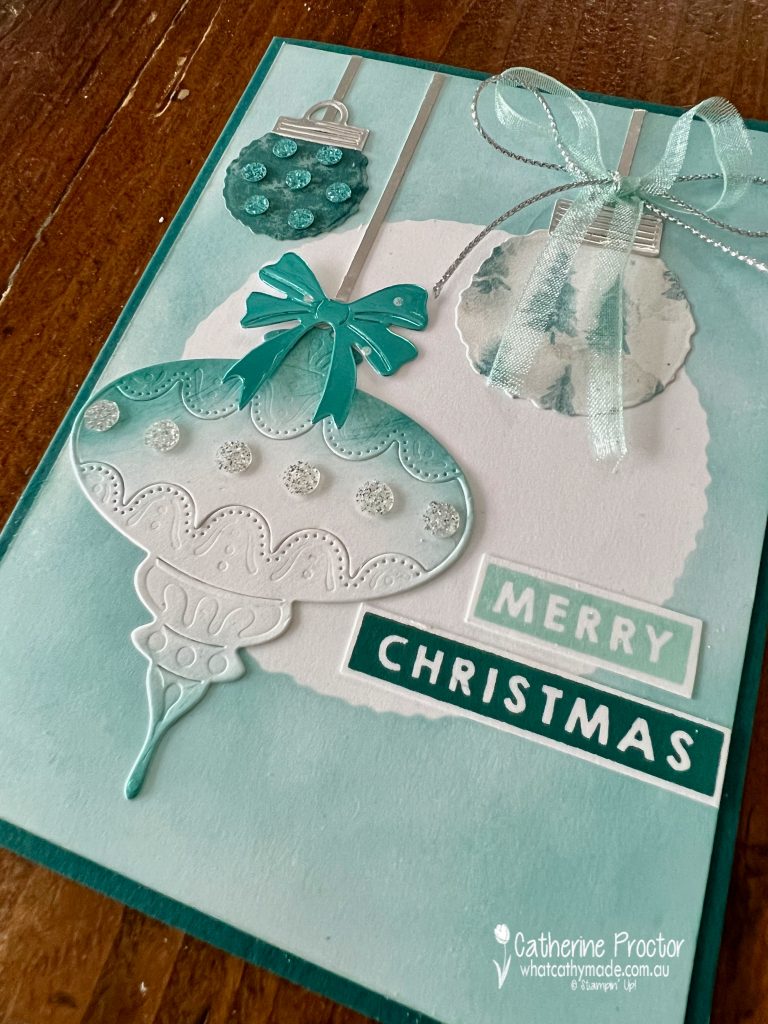
I’ve used the Deckled Circles dies and the Handcrafted Elements Dies to create three Christmas ornaments.
The background of this card has been created using a blending brush and Pool Party ink. The embellishments are the gorgeous Adhesive-Backed Glitter Sequins.
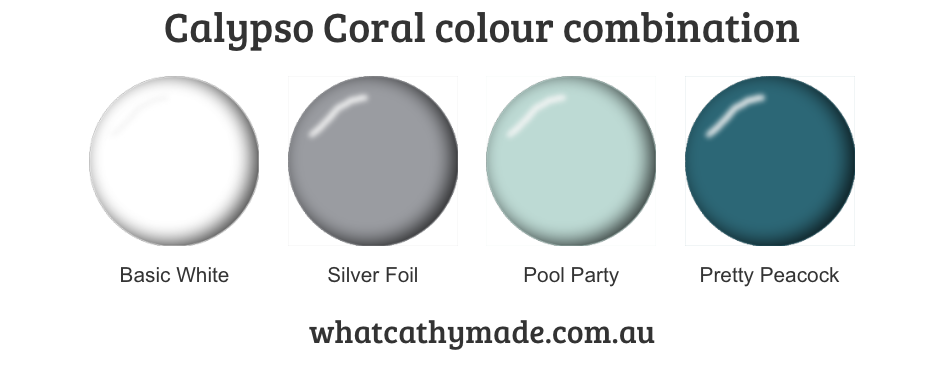
Pretty Peacock card stock and ink, silver foil and Snowflake Magic 12″ x 12″ (30.5 x 30.5 cm) Specialty Designer Series Paper all combine beautifully for a monochrome effect.
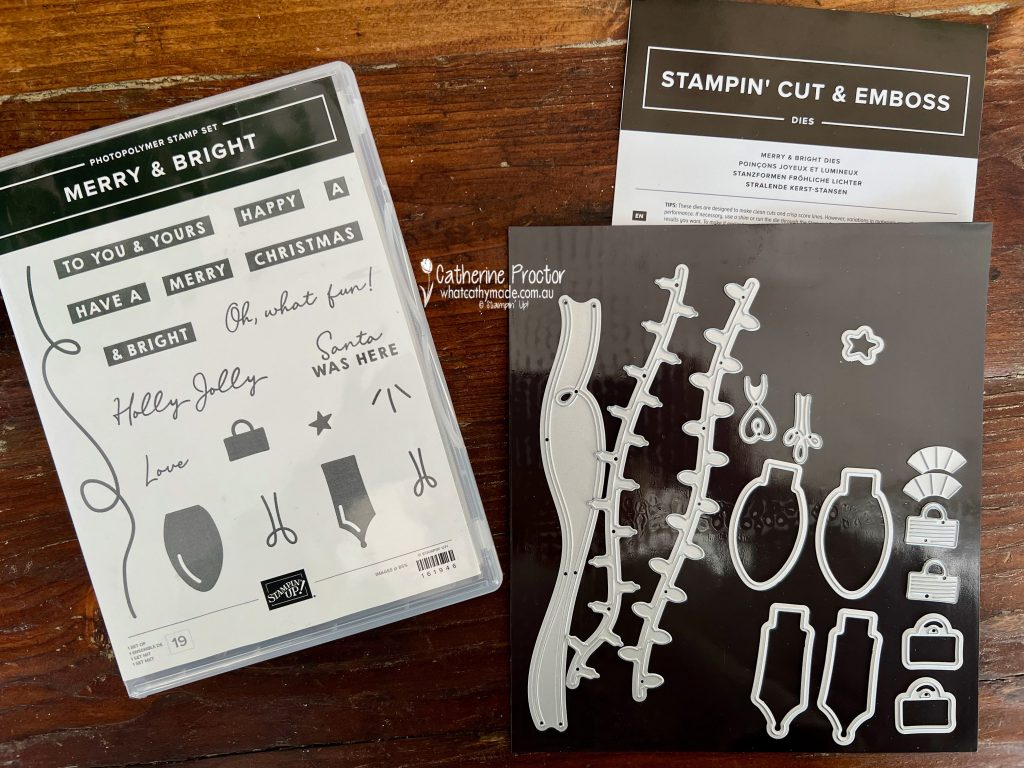
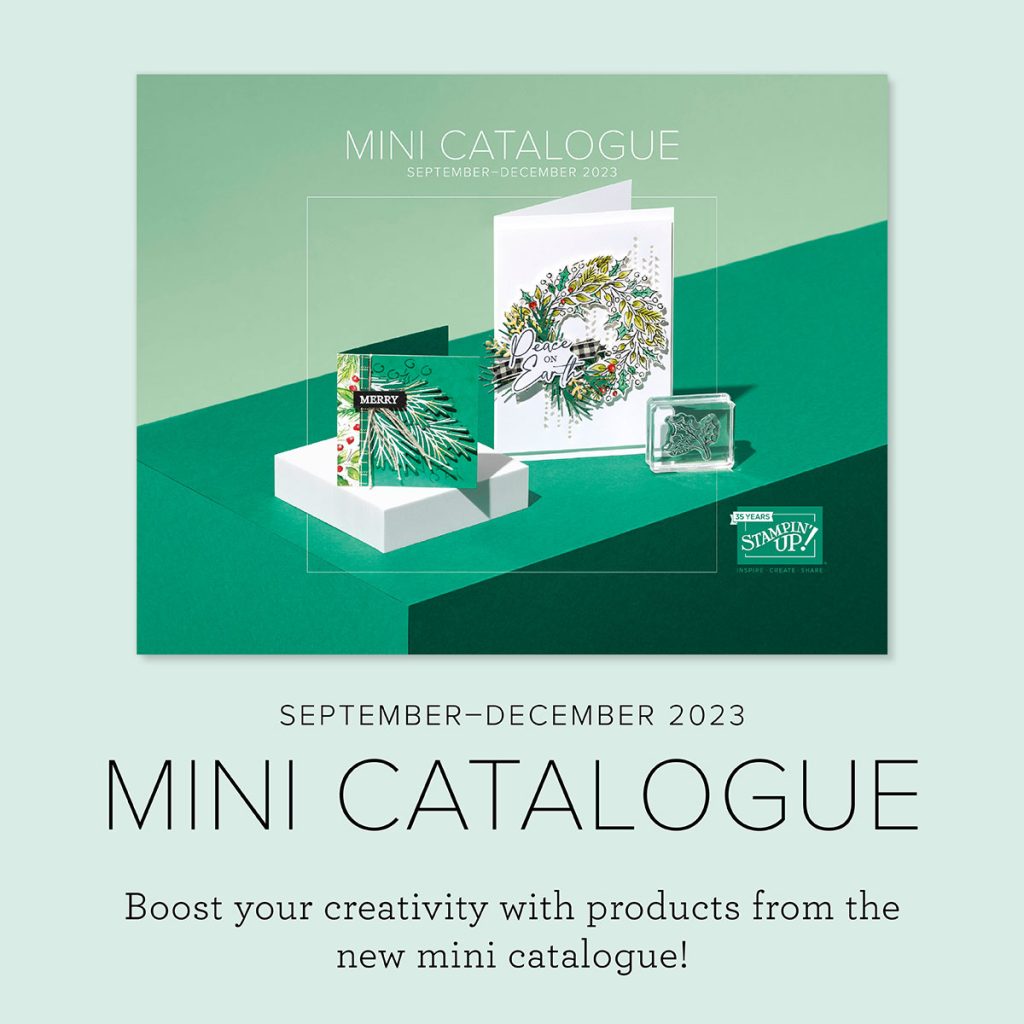
Your Christmas countdown continues – it’s 16 weeks today until Christmas Day! And in even more exciting news, it’s only two days until the Stampin’ Up! September December Mini Catalogue goes live and you can purchase the Merry & Bright bundle.
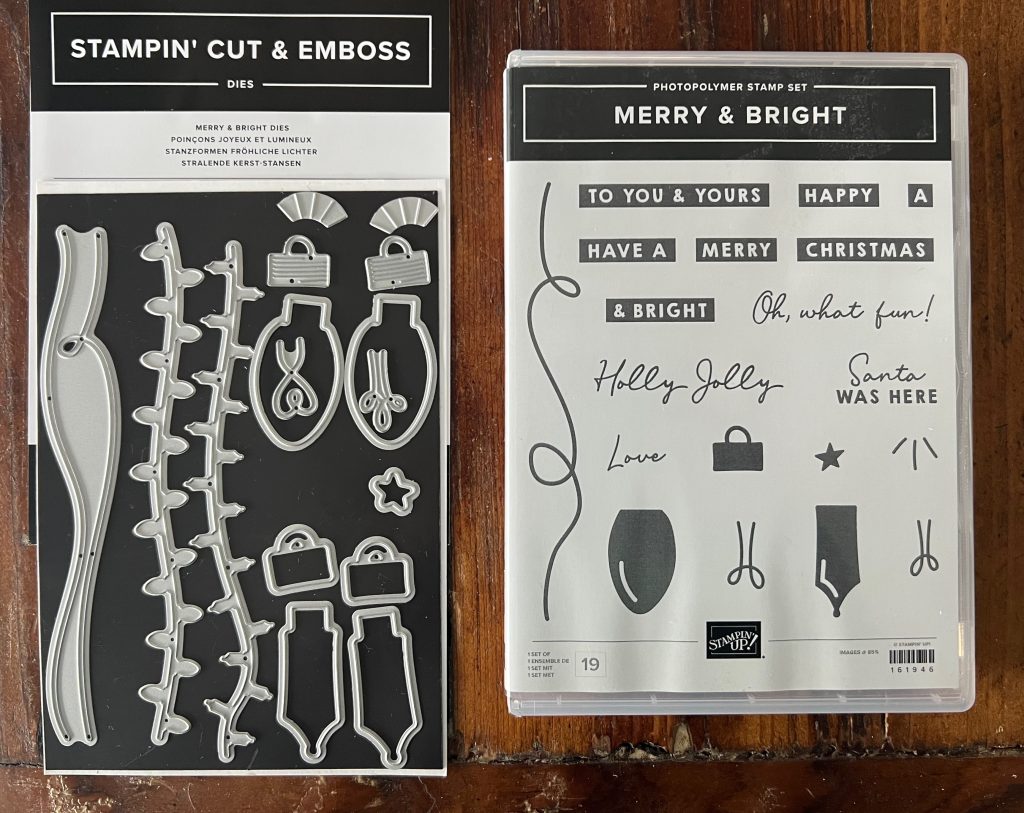
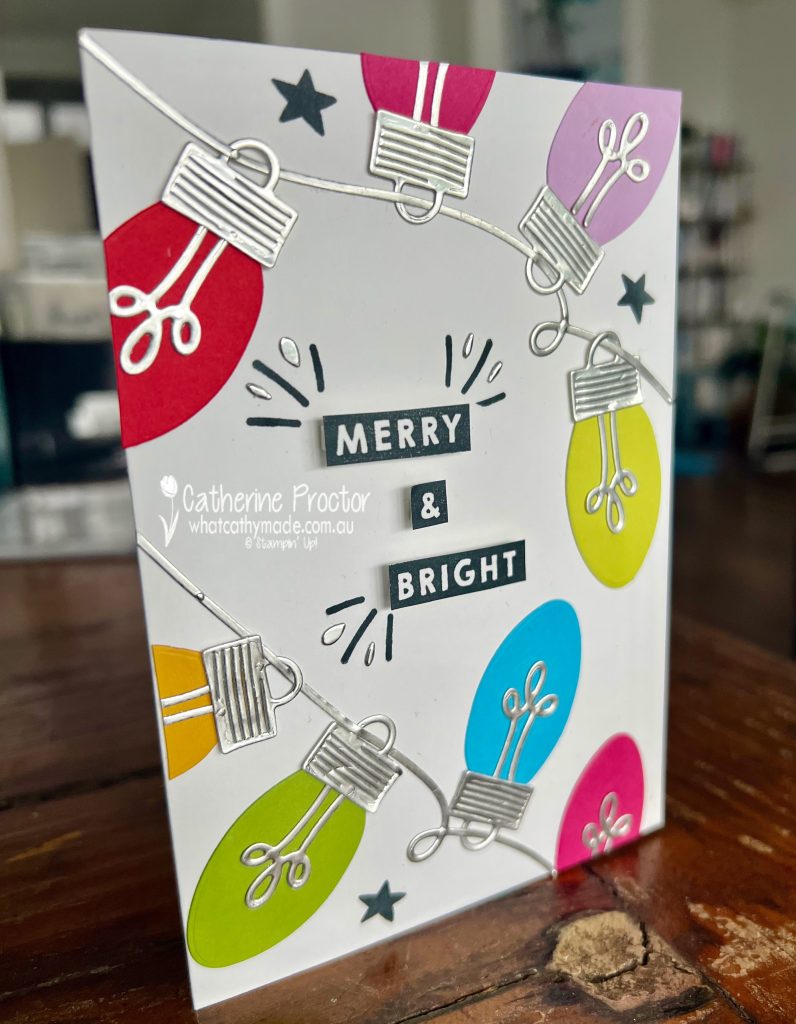
Sometimes the dies in a bundle can be overlooked if they don’t have a matching stamp set, and to honest, I don’t think I realised the Merry & Bright bundle included these two strings of Christmas lights until my delivery arrived!
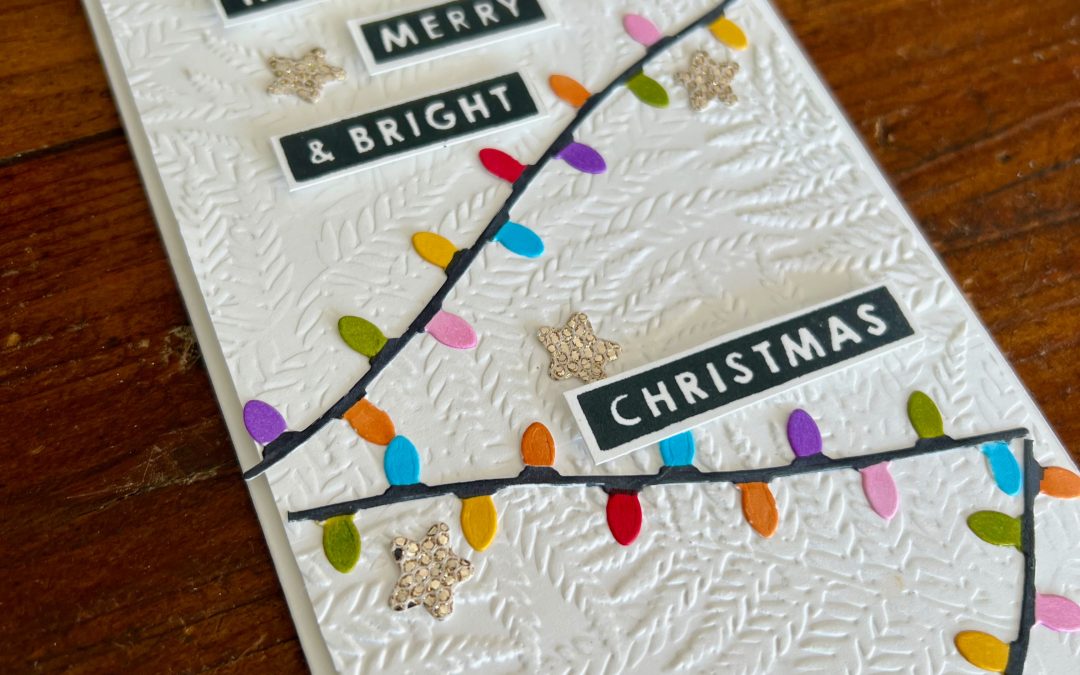
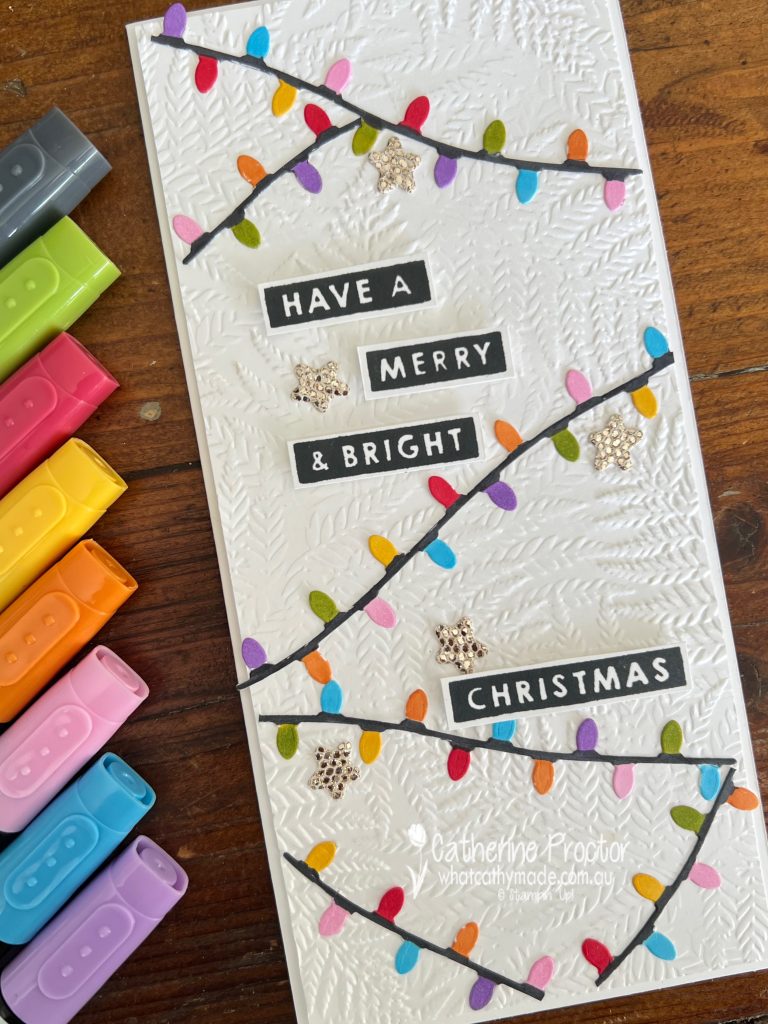
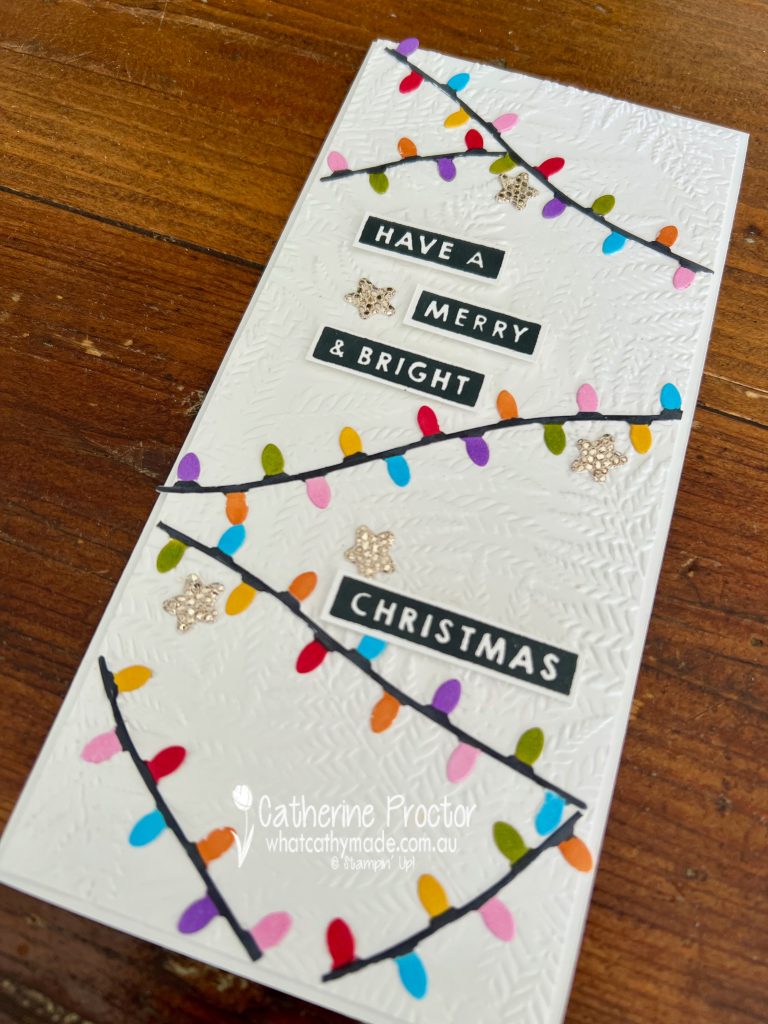
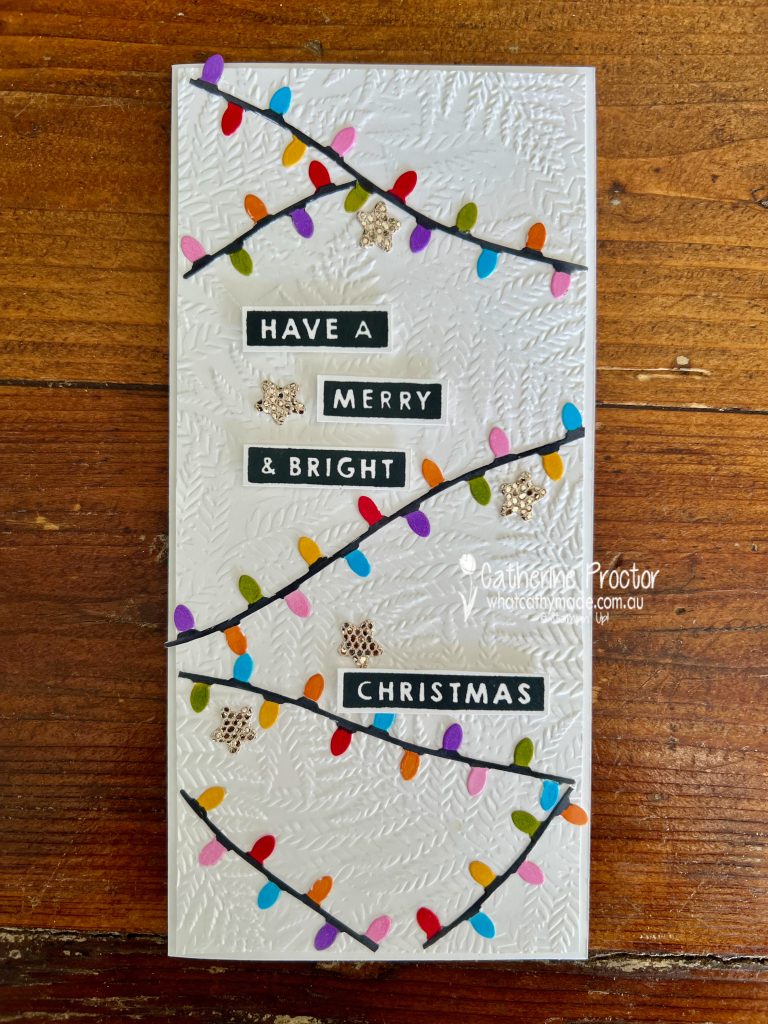
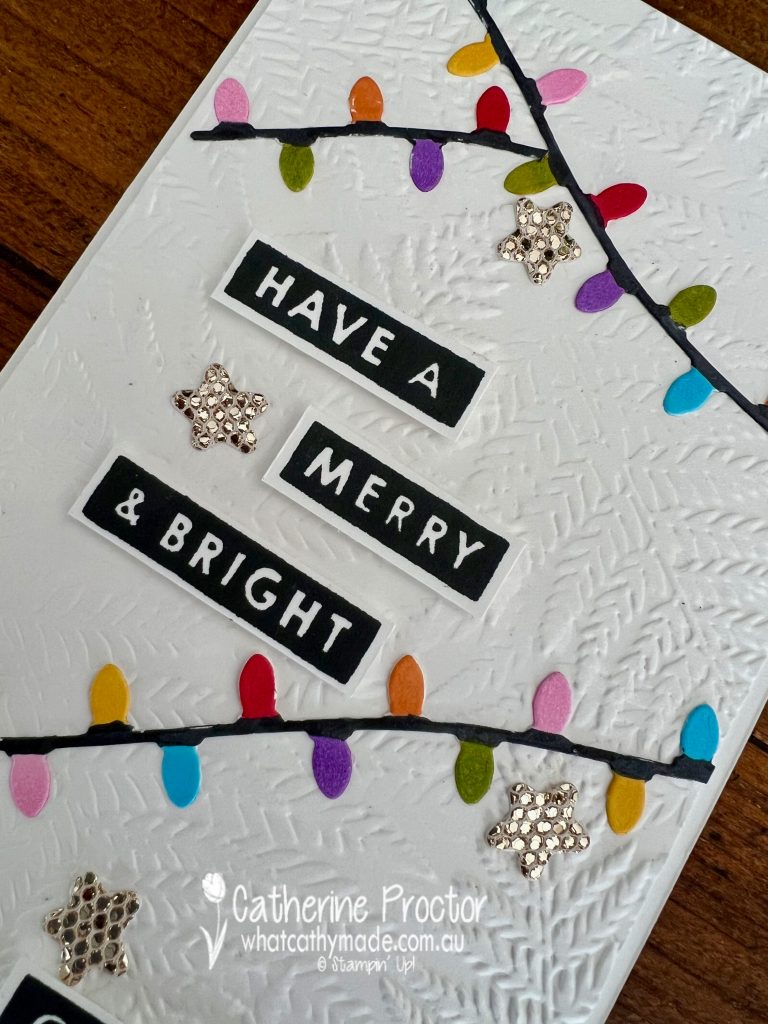
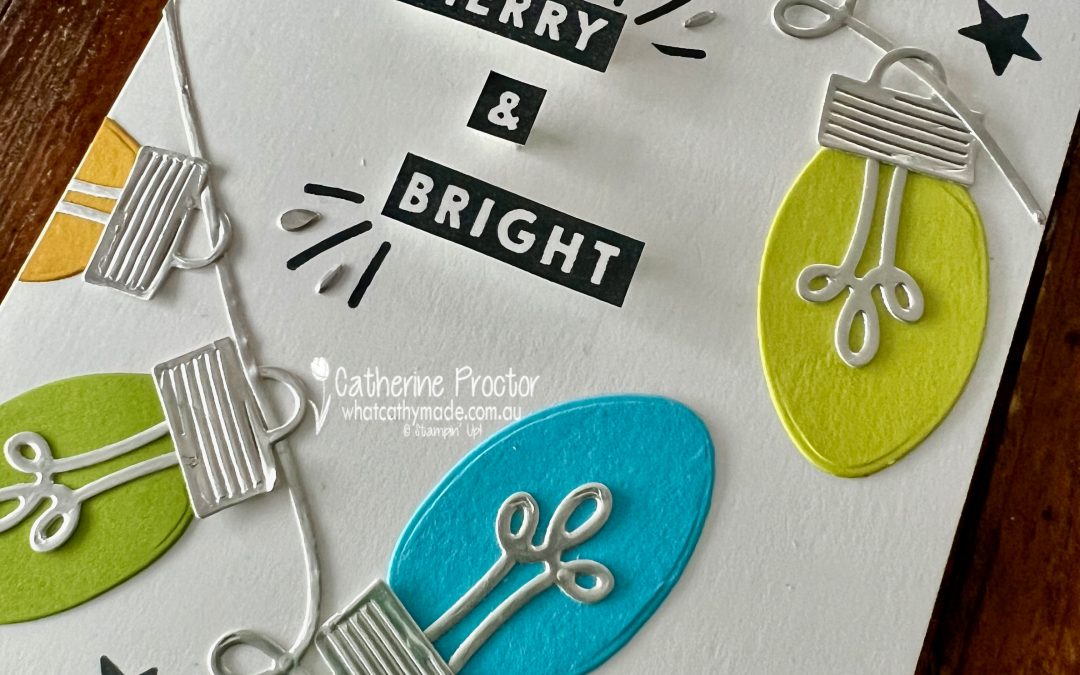
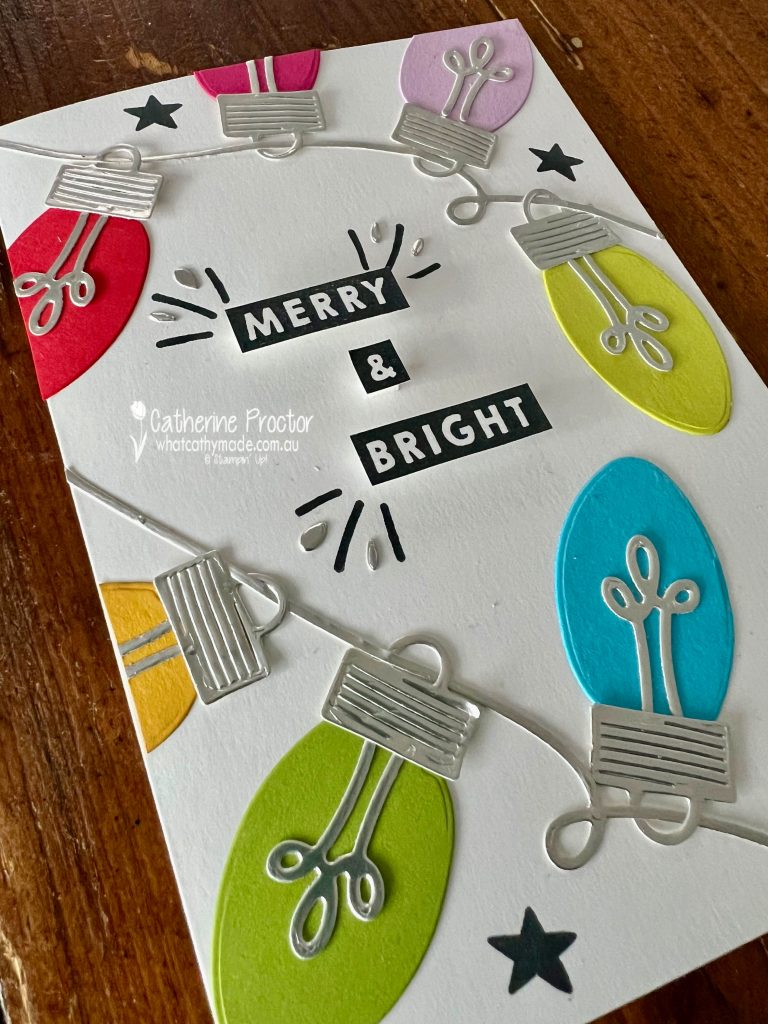
I’ve used the die with the more rounded light bulb to create this slimline card. Four “string of Christmas lights” dies were die cut from Basic White cardstock and then coloured in with a variety of Stampin’ Blends.
The top layer of the card was embossed using the Fern 3D embossing folder to mimic the branches of a Christmas tree.
Using the star die in the Merry & Bright bundle, I die cut a few stars from the More Dazzle Specialty paper.
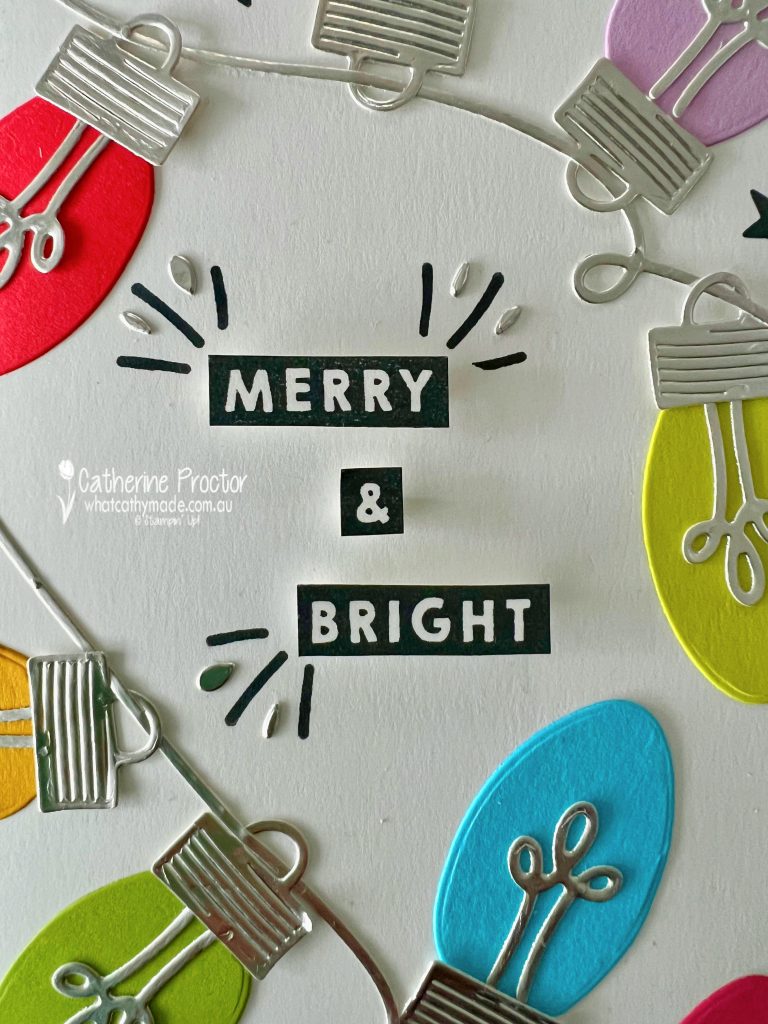
The sentiment is from the Merry & Bright stamp set, stamped in Memento Tuxedo black for contrast against the white card base and card front layer and and the bright colours of the Christmas lights.
Now it’s time to hop on over to our next participant, the lovely Rosa Leyden. I can’t wait to see what Rosa has made this week.
If at any time you find a broken link, you can find the complete list of all participants on Sharon’s blog.
Are you ready for 17 weeks of Christmas inspiration?
Yes, I know it’s still 20 weeks today until Christmas, however time does fly and it’s also less than a month until the Stampin’ Up! 2023 September-December Mini Catalogue (AKA the Christmas Catty) goes live on 6 September.
So, beginning tonight, our Art with Heart team will be sharing Christmas inspiration, tips and tricks every Monday night for 17 weeks right up until November 27th.
If you haven’t already received your paper copy of the Stampin’ Up! 2023 September-December Mini Catalogue in the post, here’s a sneak peek of the cover. Isn’t it stunning?
Luckily, as a demonstrator, I already have a copy of the catalogue and I was able to place an order last week which I received just in time to make a card for our very first 2023 Heart of Christmas blog hop.
I’ve decided to start my 17 weeks of Christmas card making using a one of the brightest, boldest and happiest bundles in the catalogue – the Merry & Bright bundle.
We’re not permitted to share the inside pages of the catalogue until September 6, however I can show you my own photos of the products I’ve already bought.
Introducing the fun and fabulous Merry & Bright bundle!
My card’s colour scheme is basically an assortment of scraps of bright and happy cardstock colours that were lying around on my craft table.
TOP TIP – The silver foil was adhered to an adhesive sheet before die cutting. This makes it super easy to position and reposition the die cut pieces on the card without any glue mess. The die cuts basically become a repositionable sticker!
After adhering all of the light bulbs and strings, the “Merry & Bright” sentiment was stamped in Memento, fussy cut with Paper Snips and adhered to the card from using foam adhesive strips for extra dimension.
I’ve added impact to the sentiment using the “sparkle” stamp (actually designed to be used with the light bulbs) and some of the tiny silver offcuts from the inside of the light filaments.
The card inside is decorated with leftover die cut pieces as well as a mix of sentiment stamps from the Merry & Bright stamp set.
Now it’s time to hop on over to our next participant, the lovely Rosa Leyden. I can’t wait to see what Rosa has made this week.
If at any time you find a broken link, you can find the complete list of all participants on Sharon’s blog.