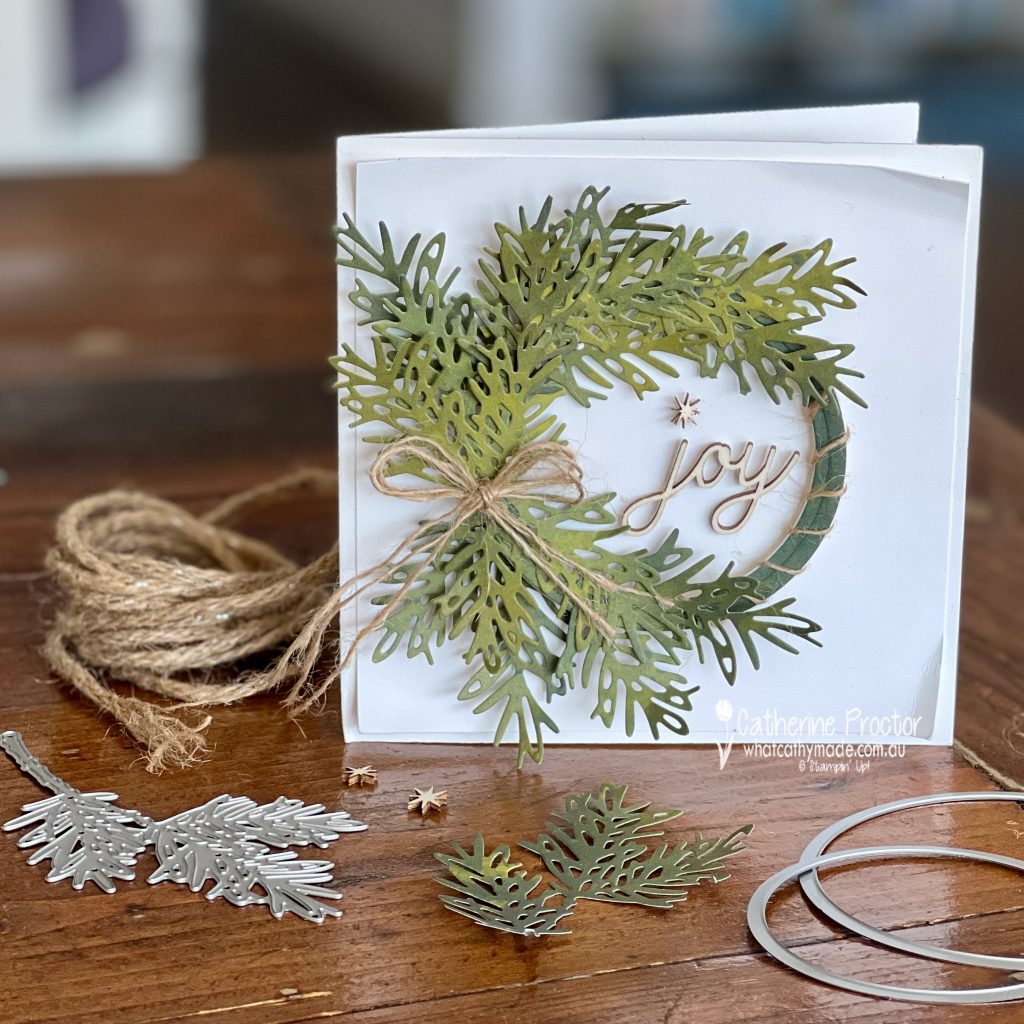
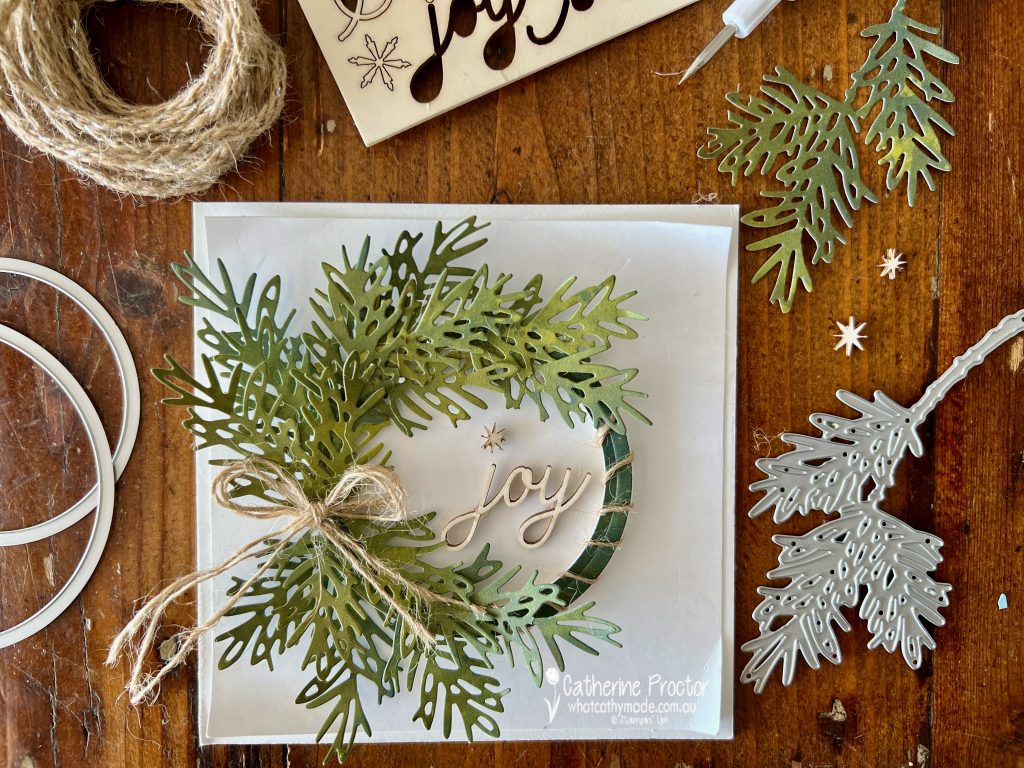
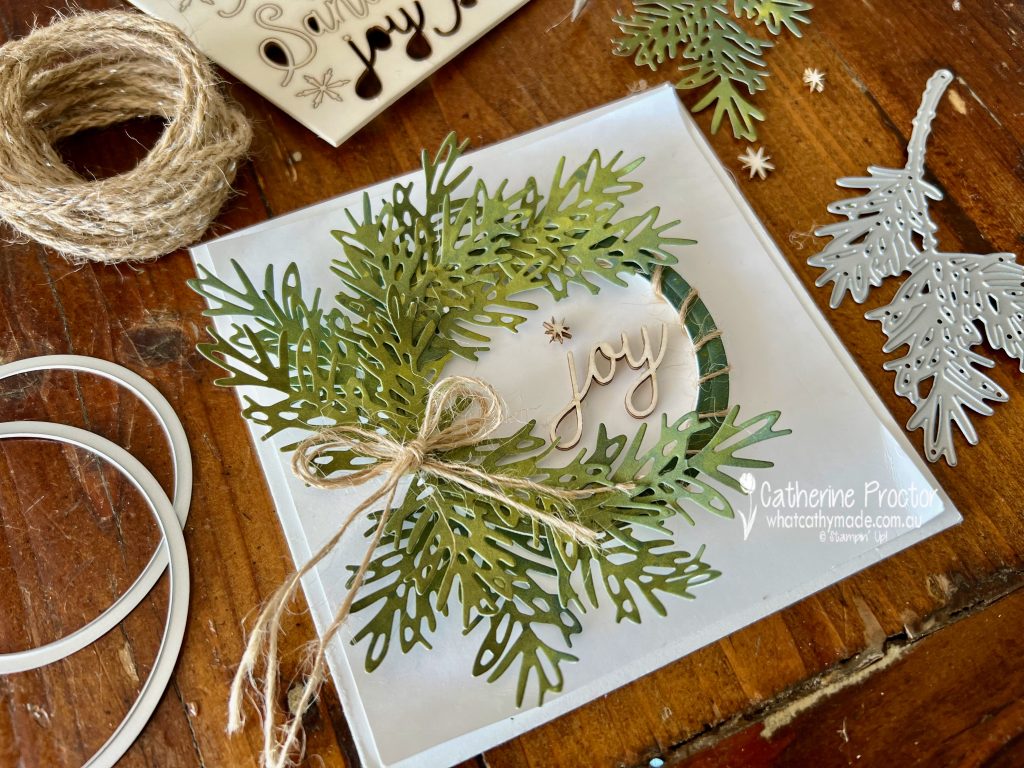
Day 6 of the #30DayChristmasCardMakingChallenge is “Something Green”.
With so many gorgeous greens in the Stampin’ Up! colour range, the hardest part of this challenge was deciding just which green to use!
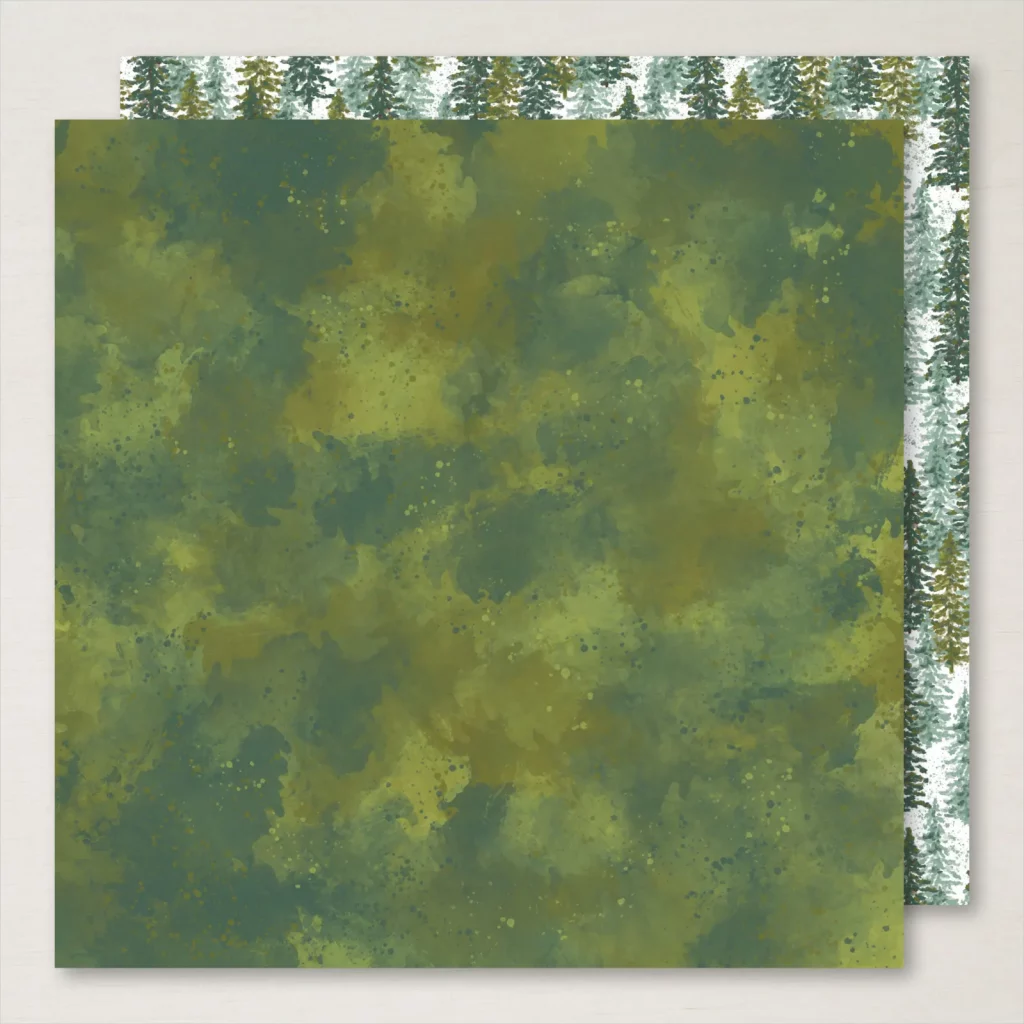
Eventually I decided to use this design from the beautiful Boughs of Holly DSP because it combines several greens on the one sheet of DSP: Evening Evergreen, Mossy Meadow, Old Olive, Shaded Spruce and Soft Succulent. Is that cheating or clever?
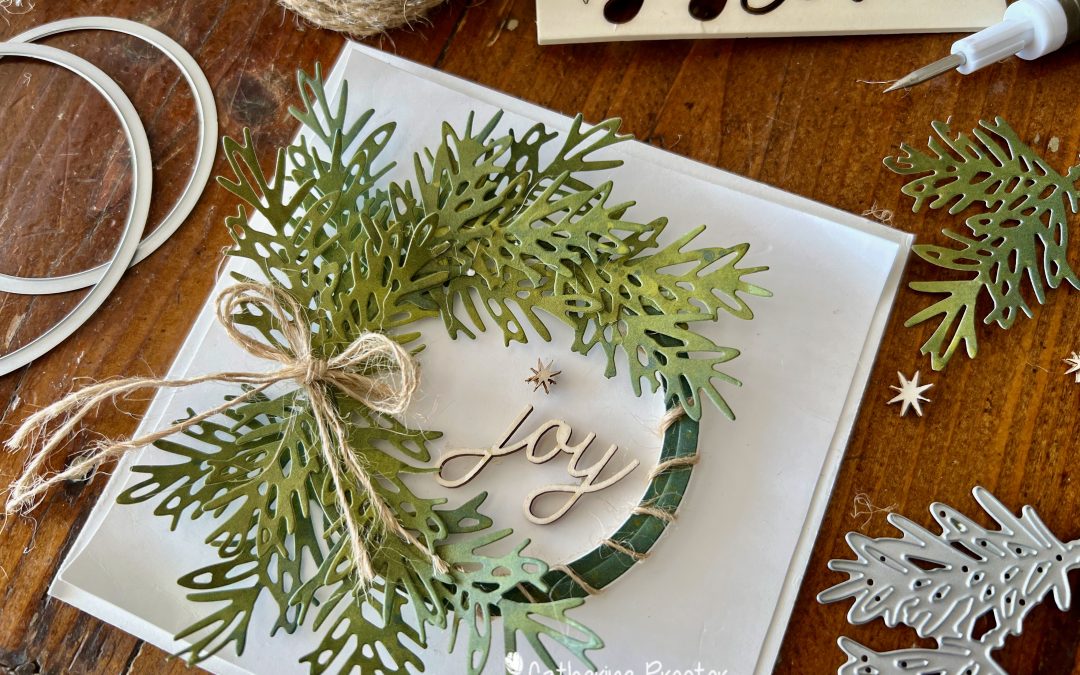
This paper was also the perfect shortcut to incorporate vergation of colour into my rustic wreath Christmas card without having to do any stamping. In fact this is a no stamping card!
The long branch die from the Decorated Pine dies is just perfect for making a wreath as it cuts 3 pine fronds with each branch that is die cut.
Rustic Wreath Christmas Card
Start by using two of the Layering Circle dies to die cut a hoop from the Boughs of Holly DSP
Mount the hoop to the card with an adhesive foam strip
Die cut branches from Boughs of Holly DSP, snip into smaller pieces and adhere to the wreath
Undo a length of the Silver Threaded Twine to wrap around the hoop and to make a bow
Finish the card with laser-cut embellishment words and shapes from the Santa Express Memories & More Card Pack
I couldn’t resist adding a few Basic Rhinestone Jewels to my card for some extra sparkle.
Welcome to week thirteen of the Heart Of Christmas Blog Hop!
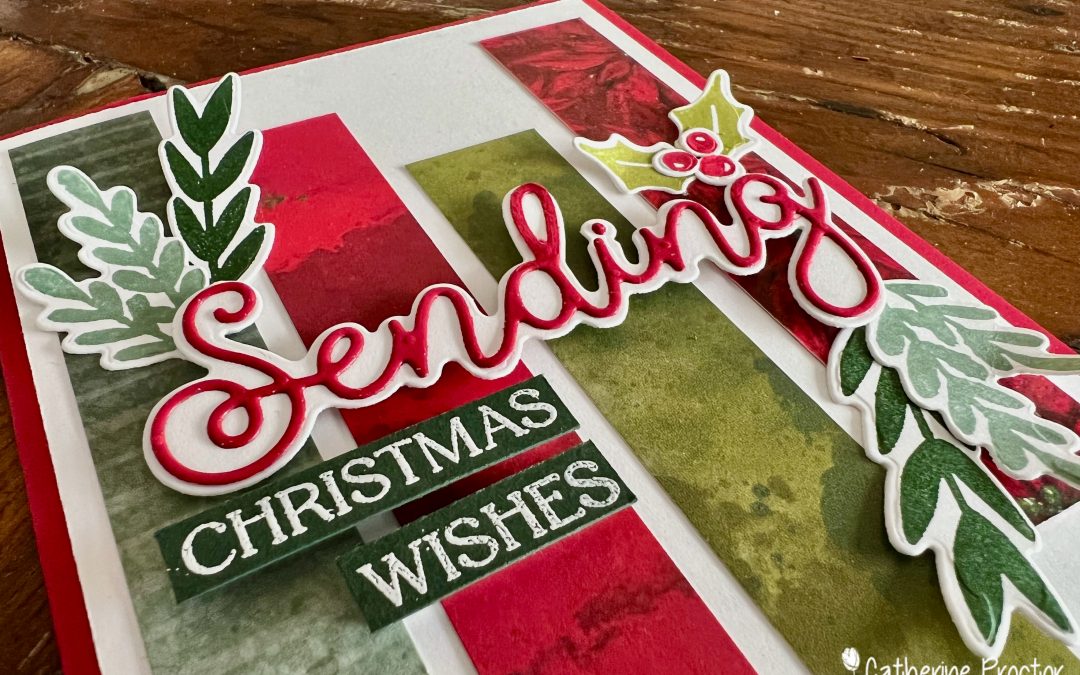
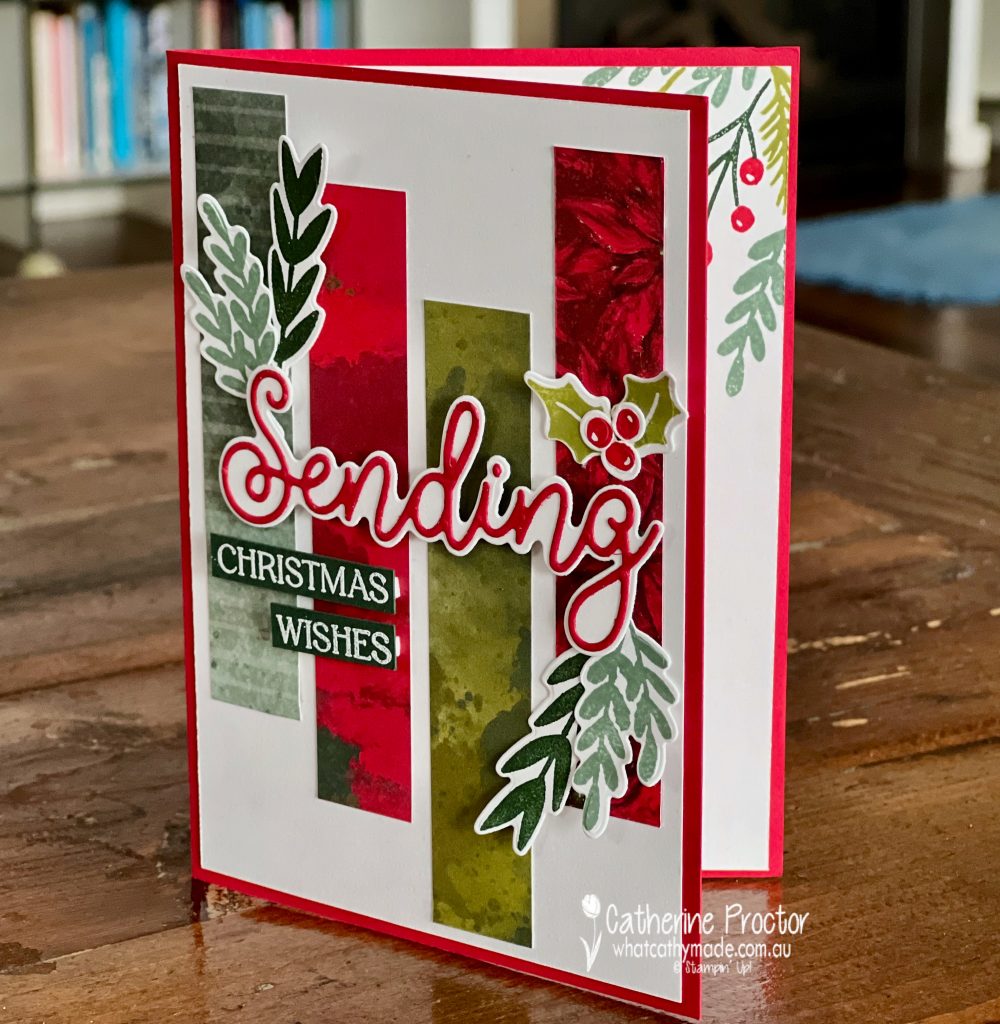
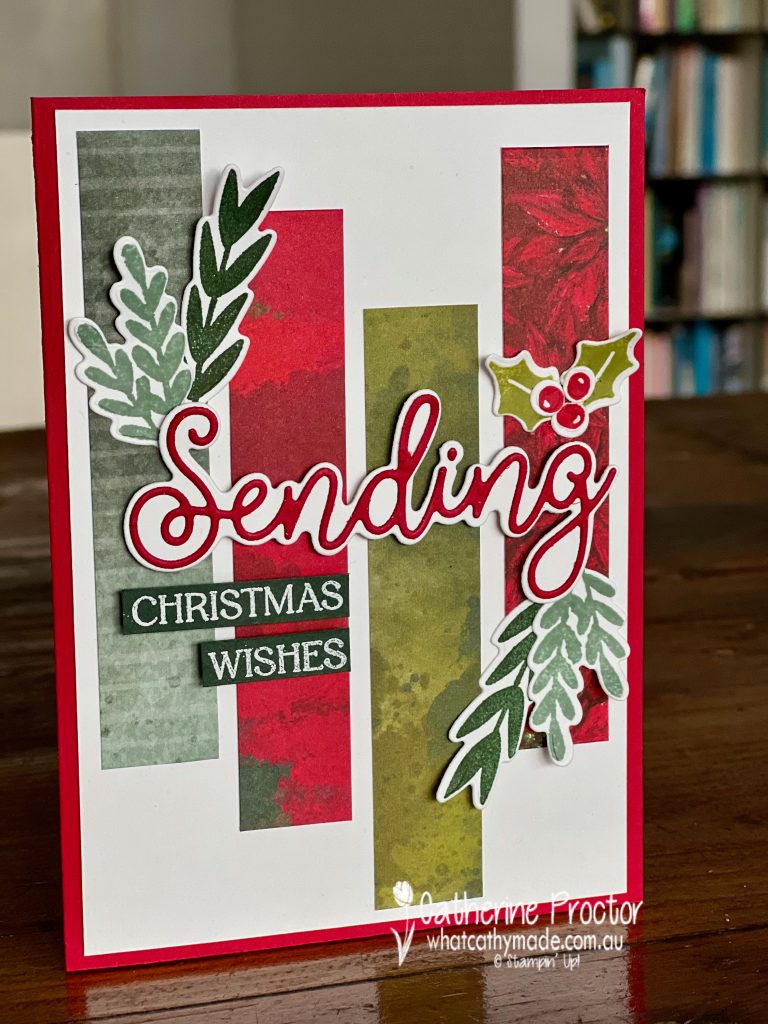
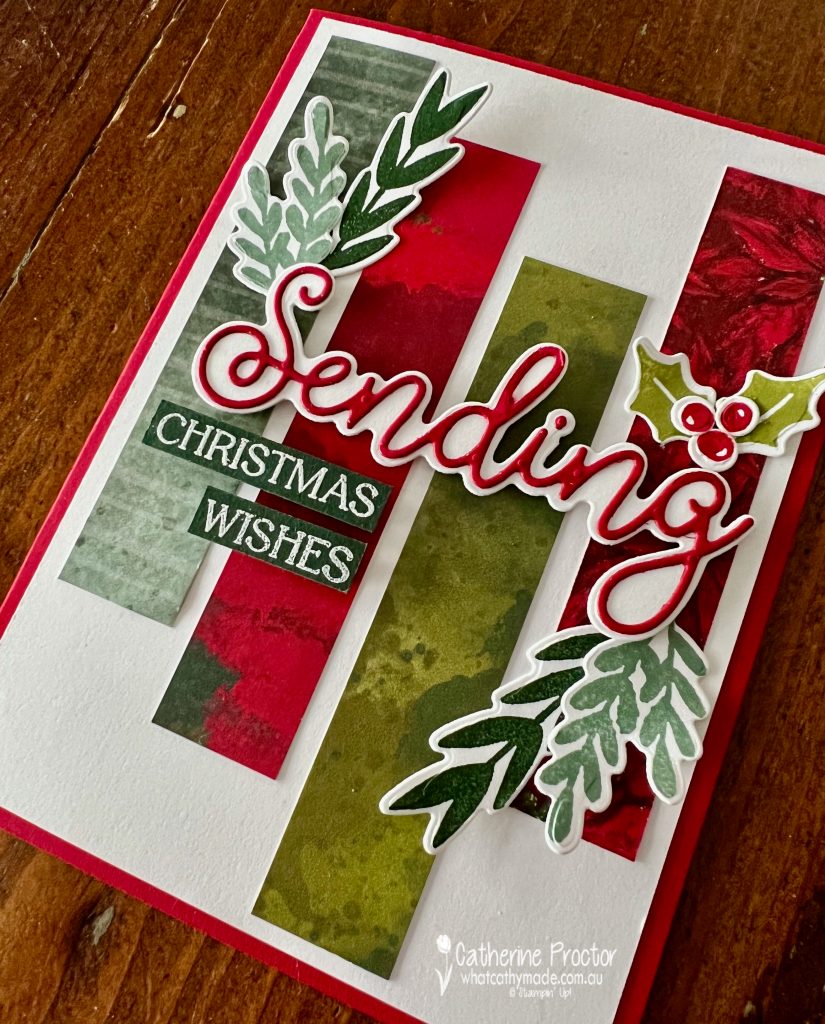
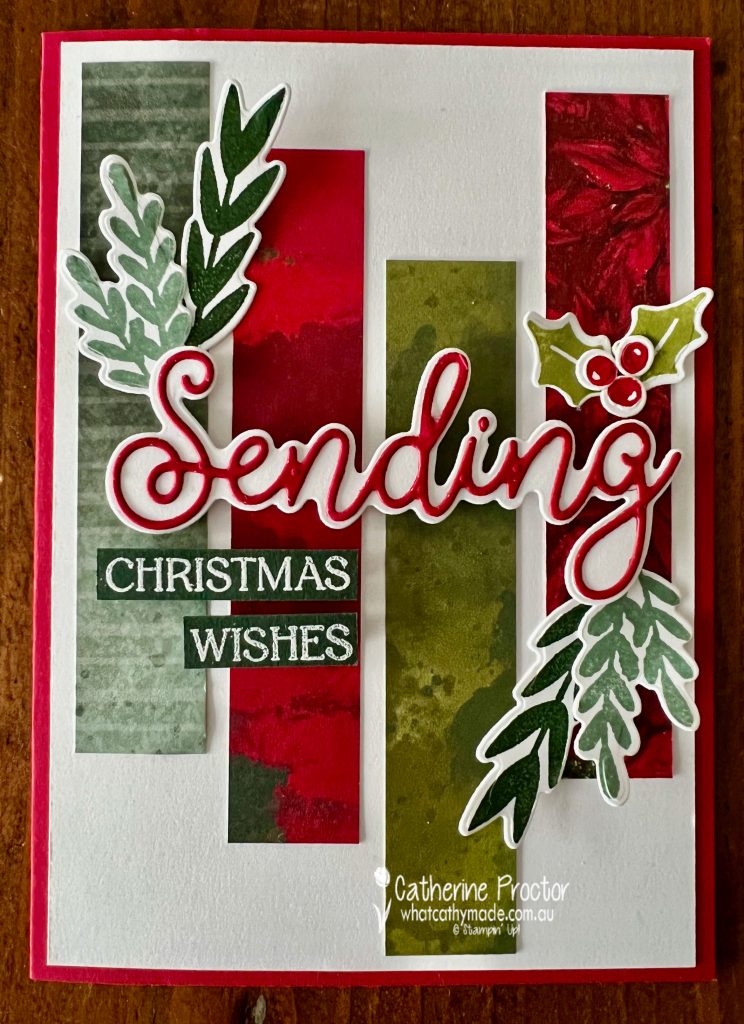
Wondering how to use up your leftover strips of designer series paper or how to incorporate more than one DSP pattern on your card front? This simple layout is very effective and it can be made with virtually any DSP.
The trick to stop the background DSP competing with the foreground elements is to use a DSP that has a smaller pattern or more solid colours.
I originally intended to use the Painted Christmas DSP for this card, however I felt that the Boughs of Holly DSP was a better match as it really allowed the sentiment and foliage pieces to shine.
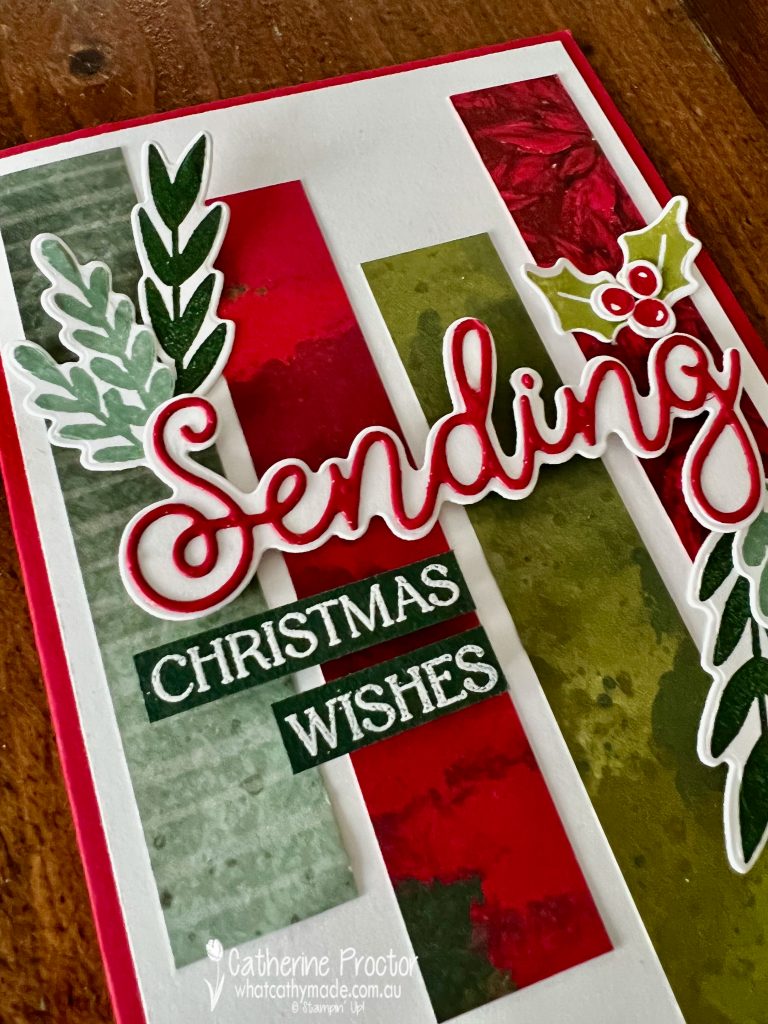
The foliage is stamped and die cut using the Christmas Banners Bundle in colours selected to match the Boughs of Holly DSP: Real Red, Evening Evergreen, Soft Succulent, Old Olive (stamped off) and Basic White.
Stampin' Up! Boughs of Holly DSP colour combination
I love the versatility and impact of word dies. This layered “sending” sentiment is from the Sending Smiles dies and I reach for a lot. Don’t forget to use an adhesive sheet for the top word layer – it turns the word into a repositionable sticker and prevents any adhesive mess.
There is no Christmas sentiment in the Sending Smiles bundle, so I used the “Christmas” and the “wishes” sentiment from the Christmas Banners Stamp Set, stamped in Versamark ink onto scraps of Evening Evergreen cardstock and then white heat embossed.
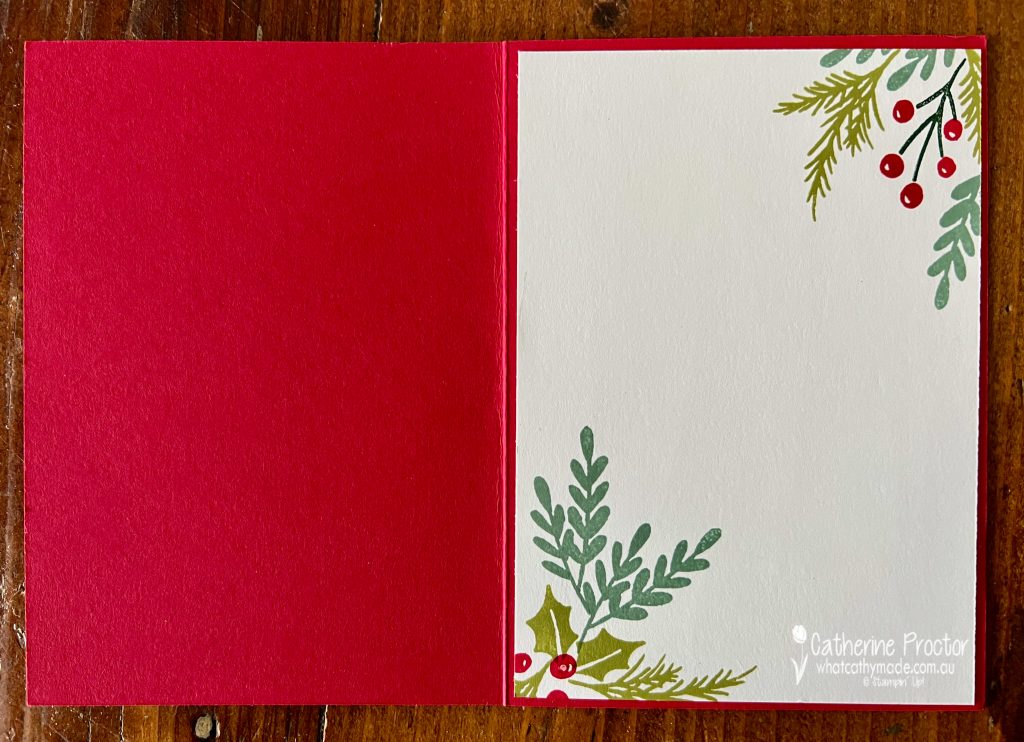
I’ve stamped some more of this gorgeous foliage from the Christmas Banners stamp set inside the card too.
Now it’s time to hop on over to our next participant, the lovely Rosa Leyden– I can’t wait to see what Rosa has created today!
If at any time you find a broken link, you can find the complete list of all participants on Sharon’s blog.
If you live in Australia, you can find and purchase these products in my Stampin’ Up! Online Store or by clicking on the links below.
Welcome to week five of the Heart Of Christmas Blog Hop!
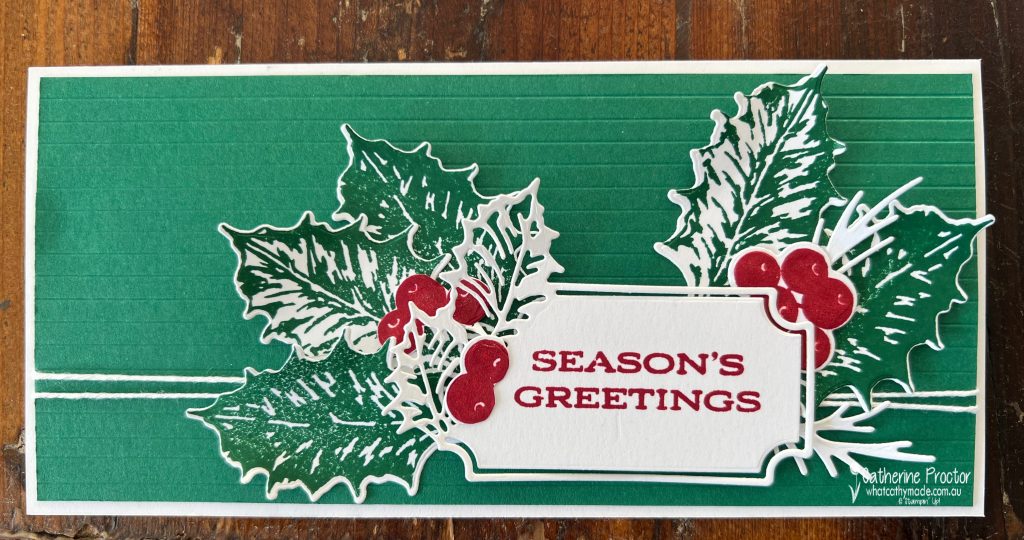
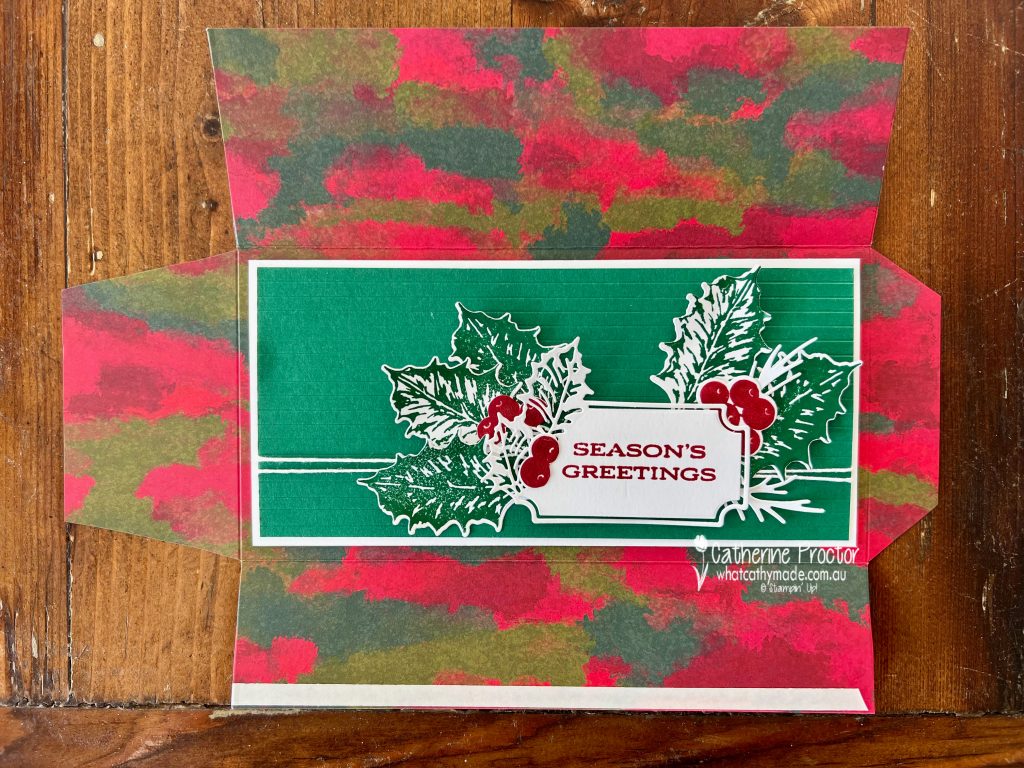
My card this week is brought to you by the stamped and die cut pieces I rejected from my Cherry Cobbler card last week, repurposed this week to make a slimline Christmas card!
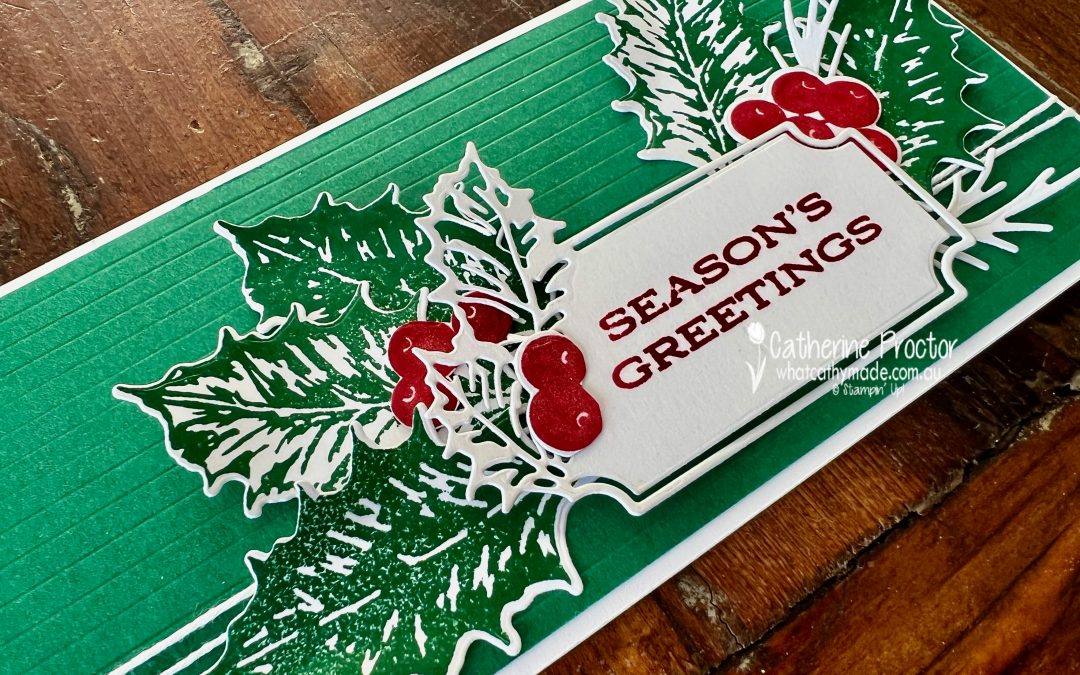
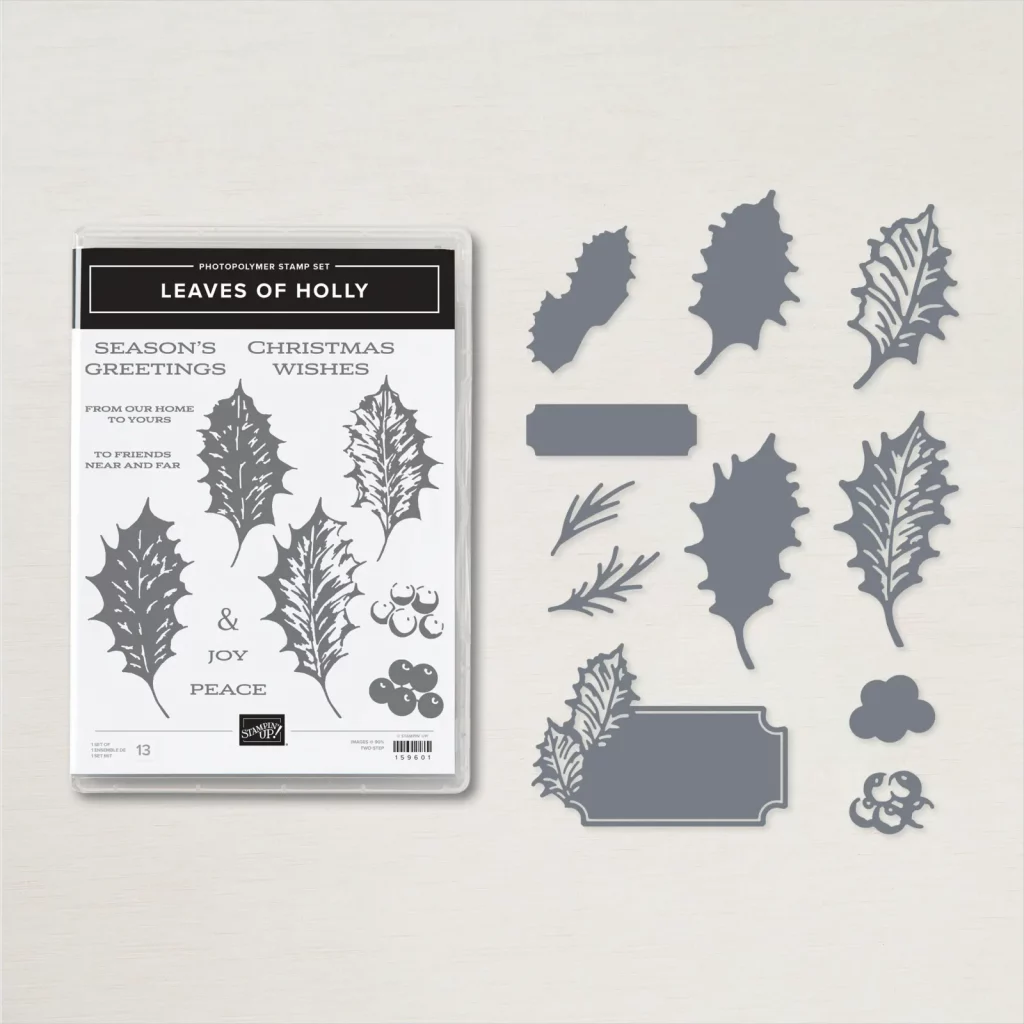
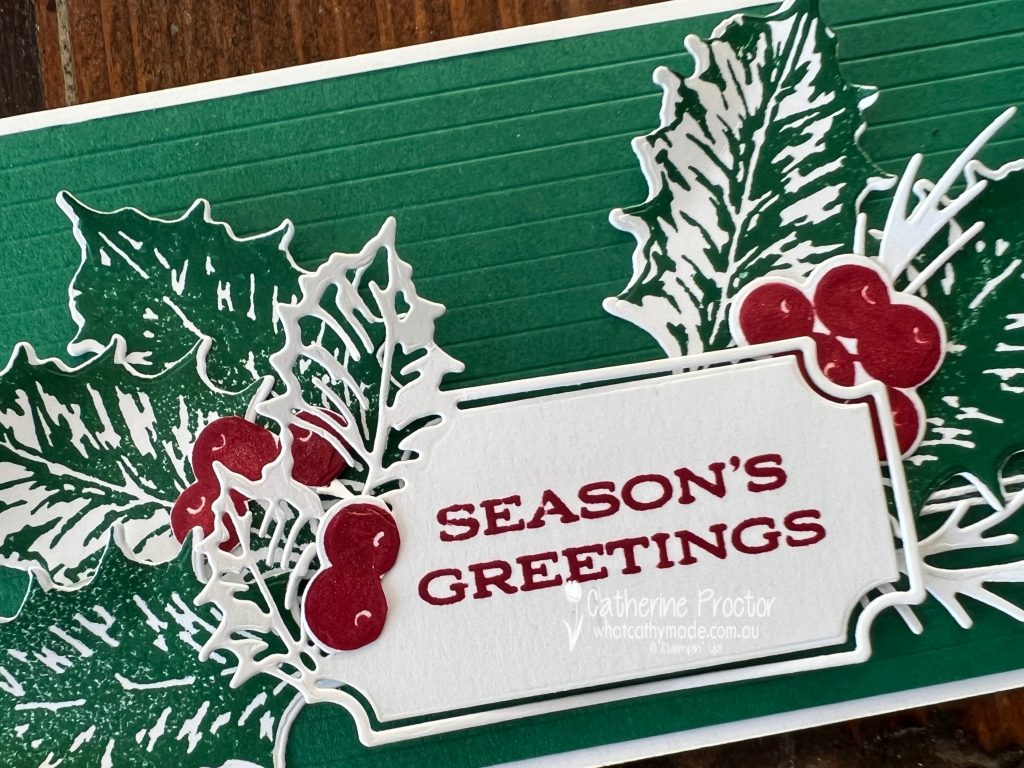
I have to confess I bought the Leaves of Holly Bundle (the Leaves of Holly Stamp Set and the Holly Berry Dies) mainly because I love this sentiment die with its holly frame!
I was worried about how to use the holly leaves and berries on a card as they are quite large, so I decided to leave the background layer quite plain, using cardstock instead of DSP and extending the length of the card to a slimline card.
I used the scoring blade on my paper trimmer to score the Shaded Spruce cardstock at 5 mm intervals, creating a clean and modern embossed layer that lets the oversized holly berries and leaves take centre stage.
A length of white bakers twine was wrapped twice around the Shaded Spruce layer before the stamped “Seasons Greetings” sentiment and holly leaves and berries were adhered to the front of the card.
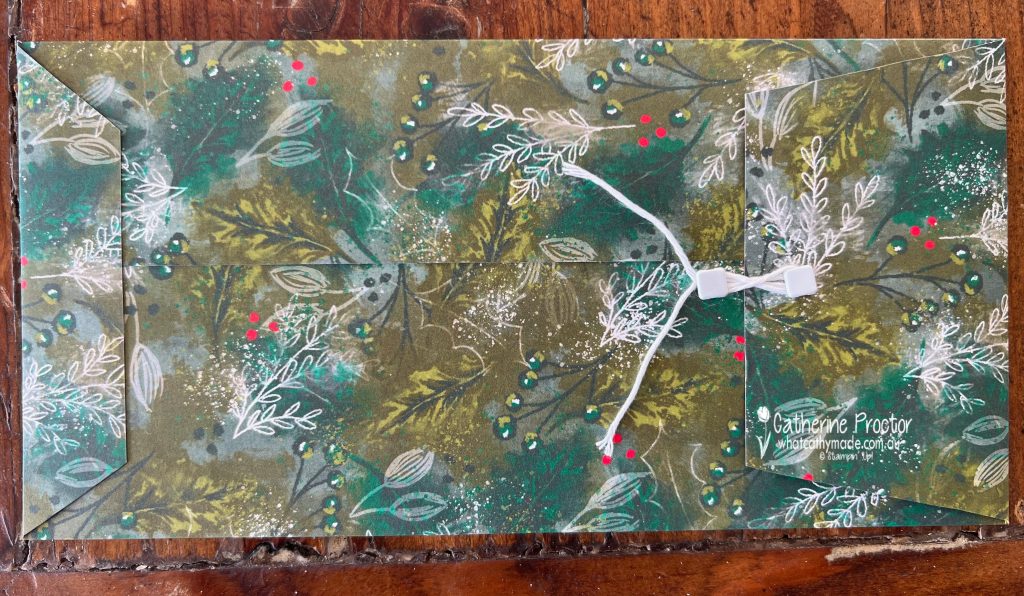
To make an envelope for my 20 x 10 cm slimline card I used the coordinating Boughs of Holly 12″ x 12″ (30.5 x 30.5 cm) Designer Series Paper.
It’s very simple to make a matching envelope for any sized card. All you need is a paper trimmer, tear’n’tape adhesive and some brads and bakers twine for the closing mechanism.
To work out the size of the envelope add 1 cm to the length and the height of the card so it has enough room to easily slide in and out. Then work out how much overlap is needed in the middle of the card to adhere the sides of the envelope together.
Slimline Envelope instructions for a 20×10 slimline card
Using 12×12 DSP, score at 7 cm and 18 cm and then cut at 23 cm
Rotate the DSP once and score at 2.5 cm and 24.5cm
Cut away the 4 corner pieces away
Add a strip of tear’n’tape to the length of the 5 cm side flap
Cut an angle in to both sides the top and the bottom flaps – I eyeball it, but it’s around 1cm at its widest point
Fold the sides in, adhering the 5cm flap over the top of the 7 cm flap.
Add tear’n’tape to the bottom 2.5cm flap and adhere it to form the base of the envelope
Form the closure using two brads and another length of white bakers twine.
For the front of the envelope that gorgeous sentiment die is used as an address label, decorated with holly berries.
Now it’s time to hop on over to our next participant, the lovely Sharon Davern – I can’t wait to see what Sharon has made this week!
If at any time you find a broken link, you can find the complete list of all participants on Sharon‘s blog. Sharon Davern is the host of our Heart of Christmas blog hop this year – thank you so much Sharon!!!


")
")


 Designer Series Paper")