Welcome to week thirty-five of our Art With Heart 2023-24 Colour Creations blog hop!
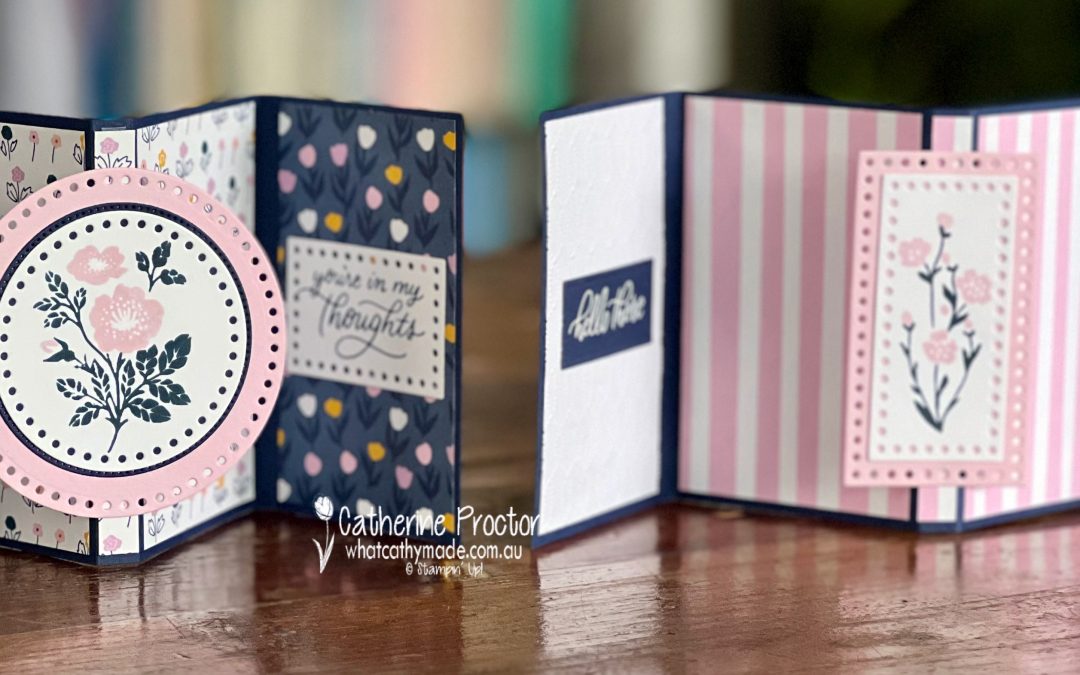
Our colour this week is Night of Navy, one of my favourite colours. This Neutral colour works with most other colours and tonight I’ve paired it with Bubble Bath, Basic White and Misty Moonlight, drawing colour inspiration from the colours in the the Delightfully Eclectic 12″ x 12″ (30.5 x 30.5 cm) Designer Series Paper.
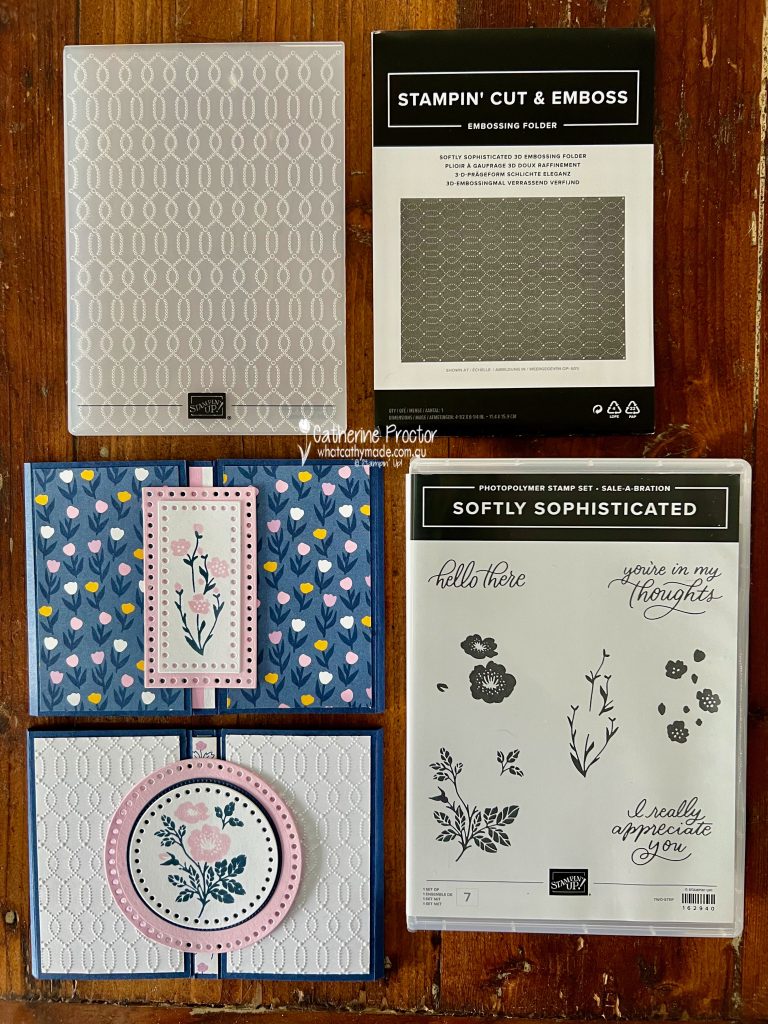
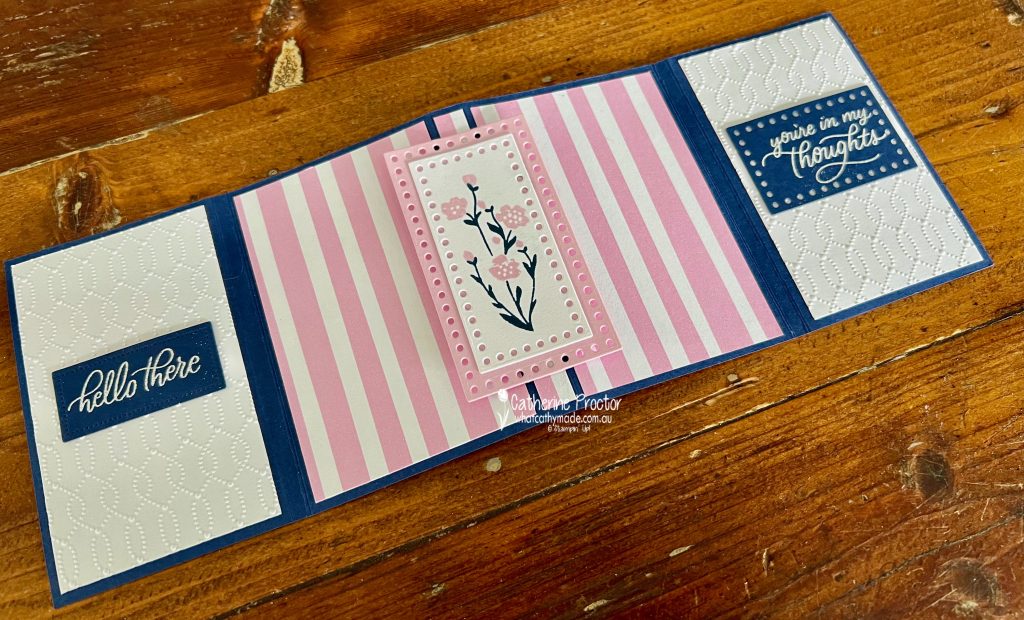
My two sympathy cards use products from the brand new January–April 2024 Mini Catalogue and the Sale-A-Bration catalogue: the Softly Sophisticated bundle (stamps and embossing folder) and the Everyday Details Dies.
The Softly Sophisticated bundle is a Sale-a-bration item that includes a stamp set and an embossing folder. You can earn it for FREE when you place any order over $180AUD.
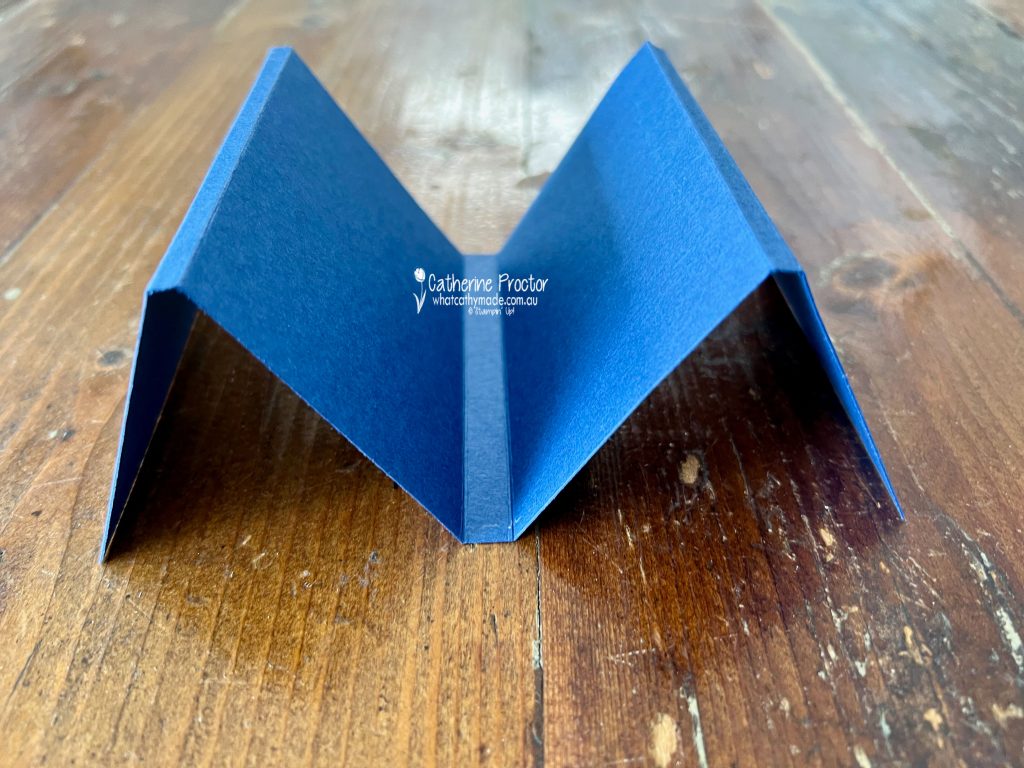
I’ve CASED my cards from a fancy fold created by Susan Campfield, a Stampin’ Up! demonstrator based in the USA. The fancy fold is called “The Marvelous Fun Fold Card”. You can watch her video on how to make the M fold here.
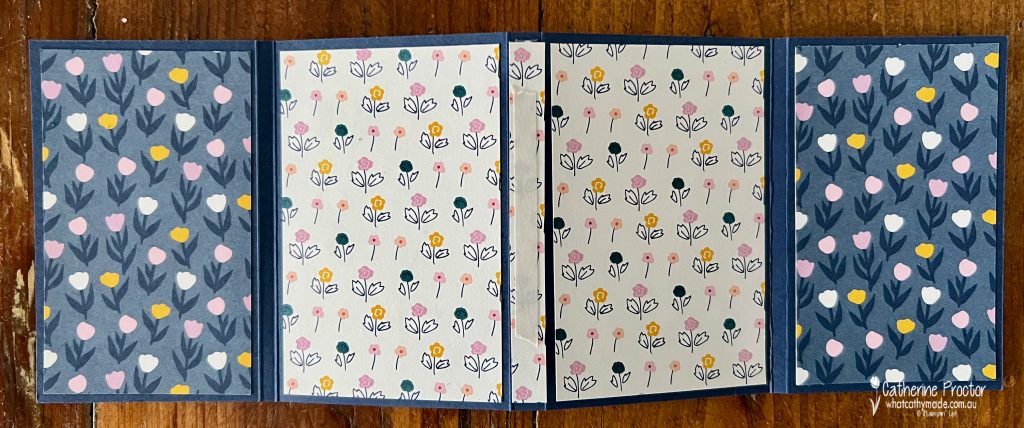
I’ve altered Susan’s measurements to create a slightly different metric template that allows two card bases to be cut from one sheet of A4 cardstock.
Cut the A4 cardstock in half lengthways at 10.5cm to create two card bases. For each card base, score along the long side of the card base at 6.5, 7, 14, 15, 22, 22.5 and then cut the excess off at 29 cm. Then you fold along these lines to form an M shape.
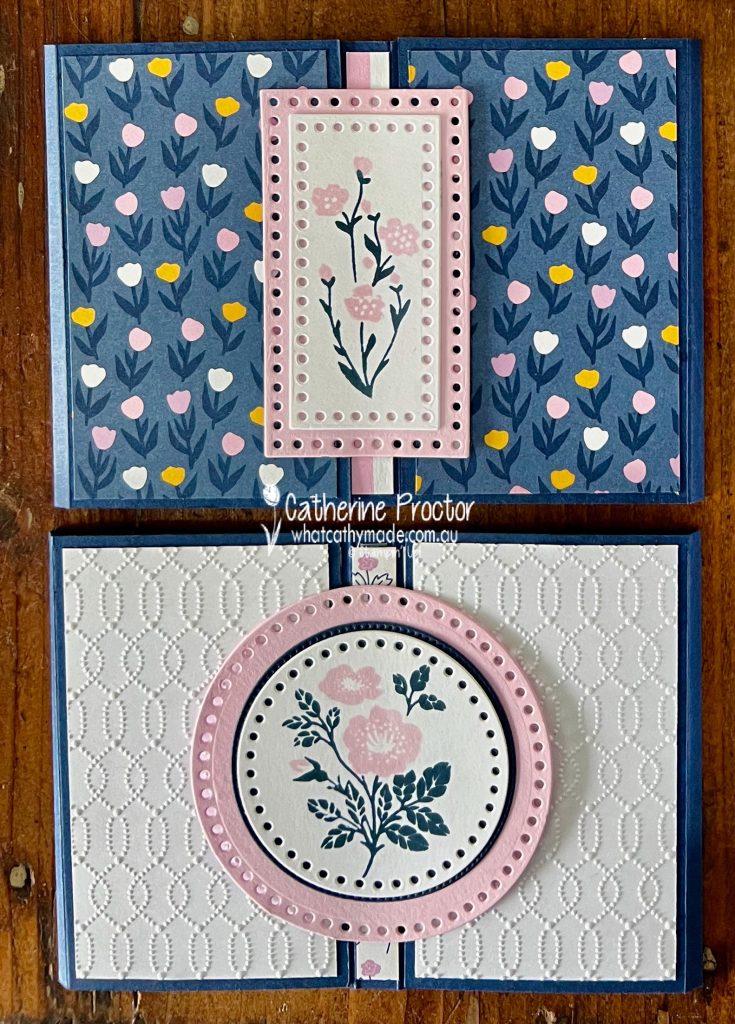
Decorate with Embossed cardstock panels and DSP panels before adhering a strip of Tear & Tape Adhesive to the middle 1cm wide panel – this is to adhere the centre image and make the fancy fold mechanism work.
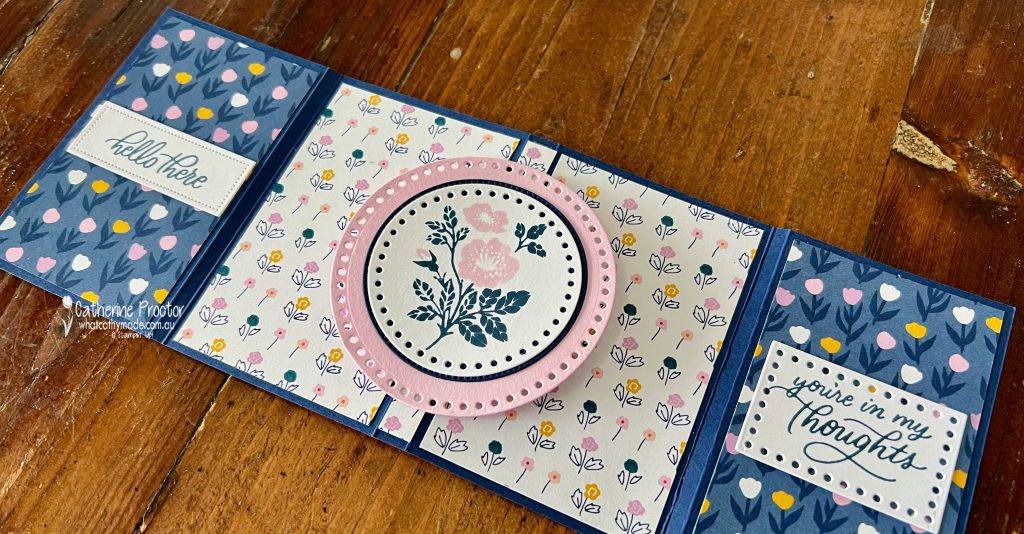
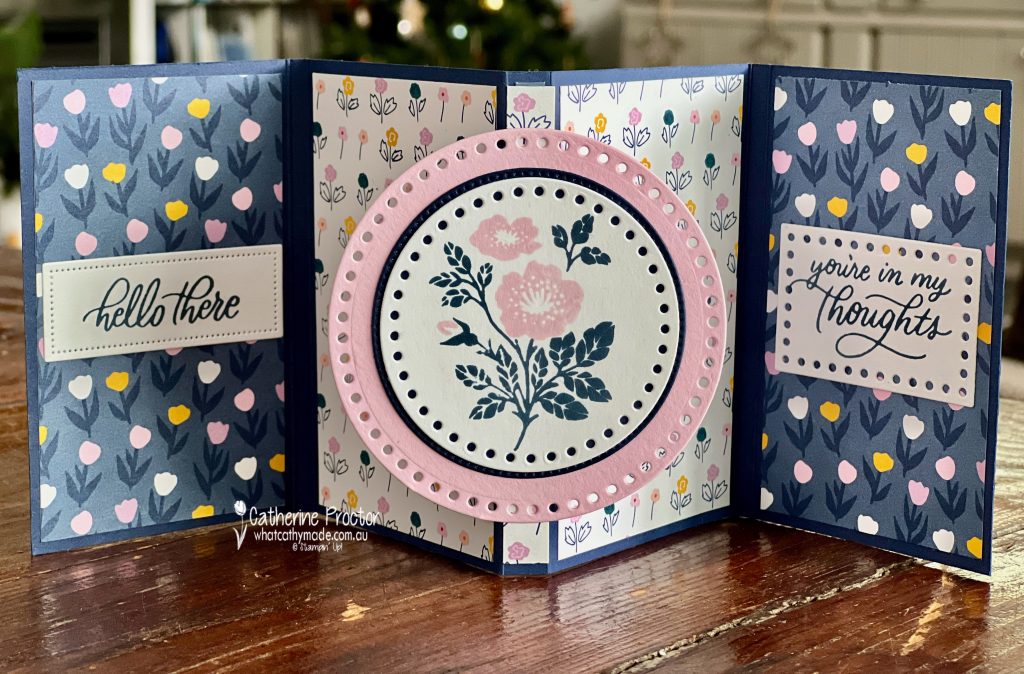
I’ve stamped the centre image in Misty Moonlight and Bubble Bath, using two stamps from the Softly Sophisticated bundle. The image is layered on circle dies from the new Everyday Details dies, as well as a middle circle cut from Night of Navy cardstock using the Stylish Shapes dies.
The sentiments on the inner side flaps are die cut using the Everyday Details dies, shortened where necessary.
The side flaps tuck in in behind this centre floral image to close the card. You can write your message on Basic White cardstock panels adhered to the back of the card.
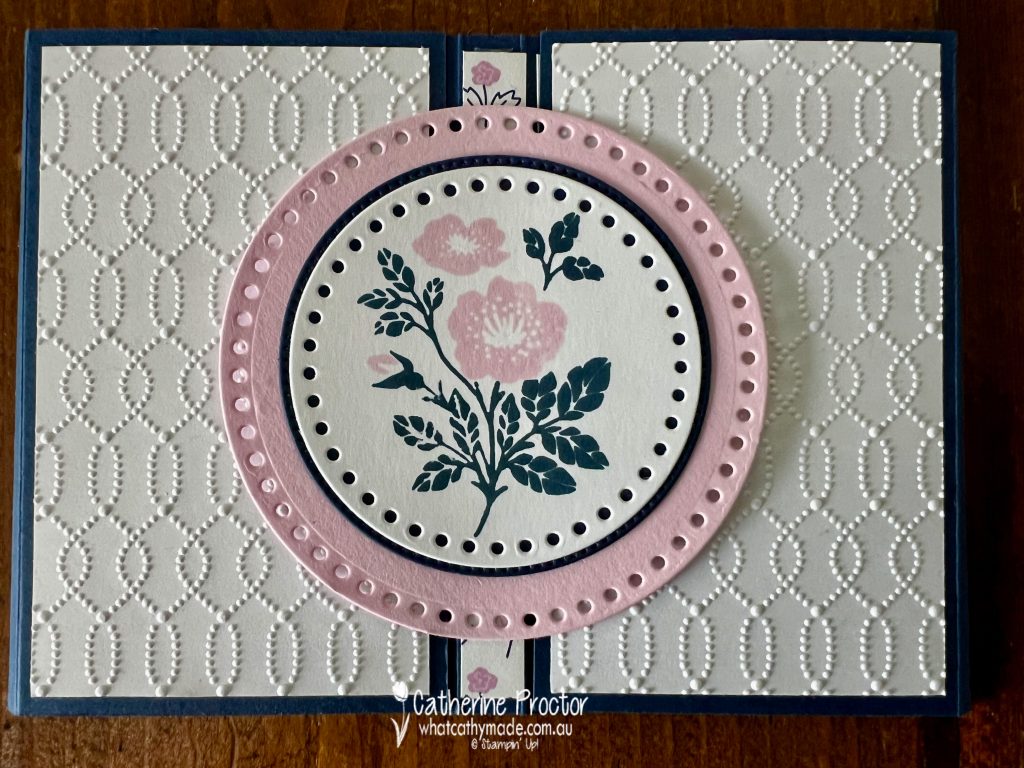
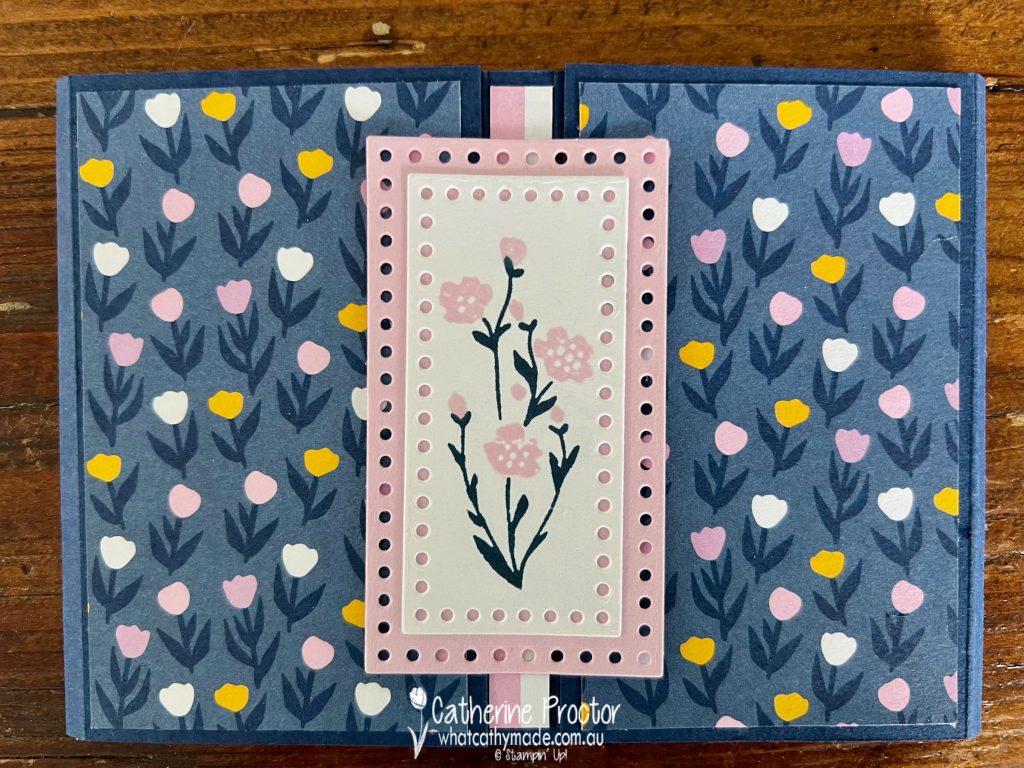
For the second card, the embossed panels are placed inside the card, with the DSP on the front side flaps.
The centre image is stamped in Misty Moonlight and Bubble Bath, using two stamps from the Softly Sophisticated bundle, layered on rectangle dies from the new Everyday Details dies
This is such a cool fancy fold – here’s a short video to show how the card opens and closes.
Now it’s time to hop on over to our next participant, the lovely Kate Morgan – I can’t wait to see what Kate has made this week!
If at any time you find a broken link, you can find the complete list of all participants below.
Welcome to week thirteen of our Art With Heart 2023-24 Colour Creations blog hop!
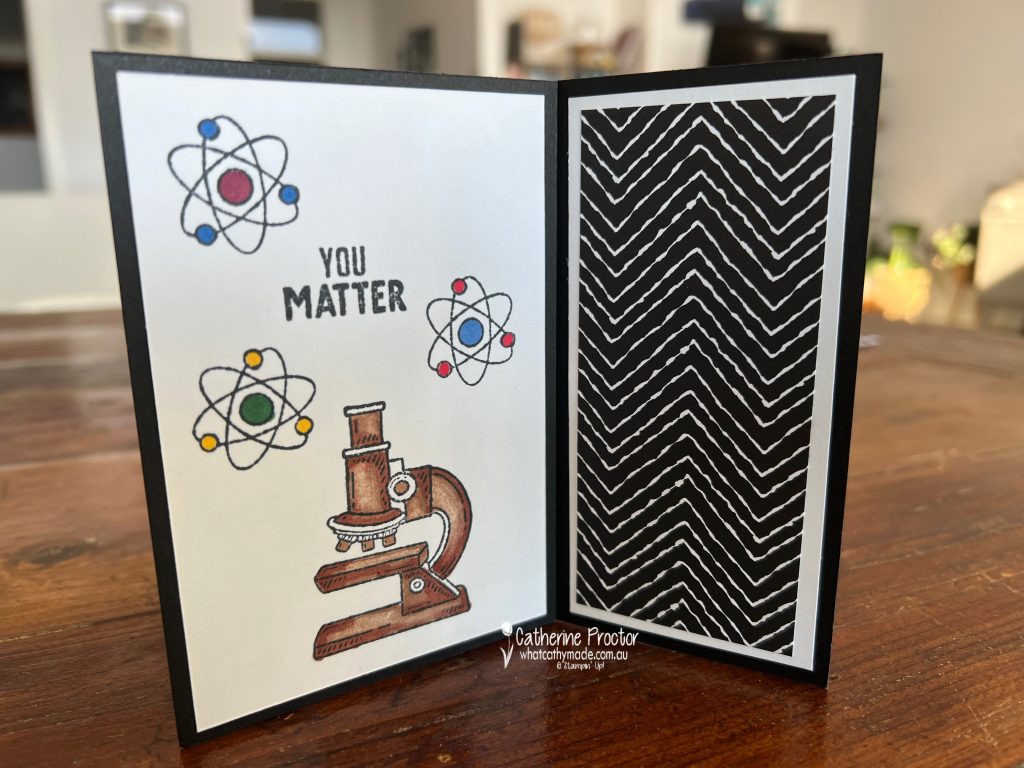
Last week was my dad’s birthday and as I gave him some science books for his birthday it only seemed appropriate to make a science-themed card using the “It’s a Science” stamp set.
I don’t normally buy stamp sets with puns, however the puns in this stamp set are really clever and I love the line art style too. It’s also a really versatile set if you enjoy colouring techniques.
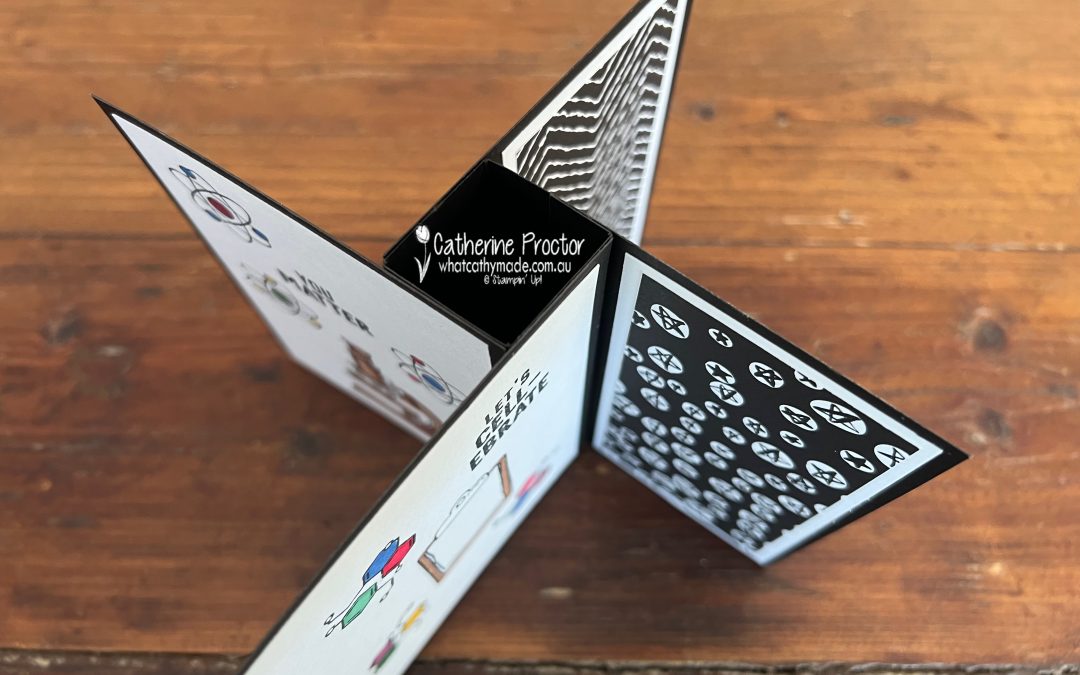
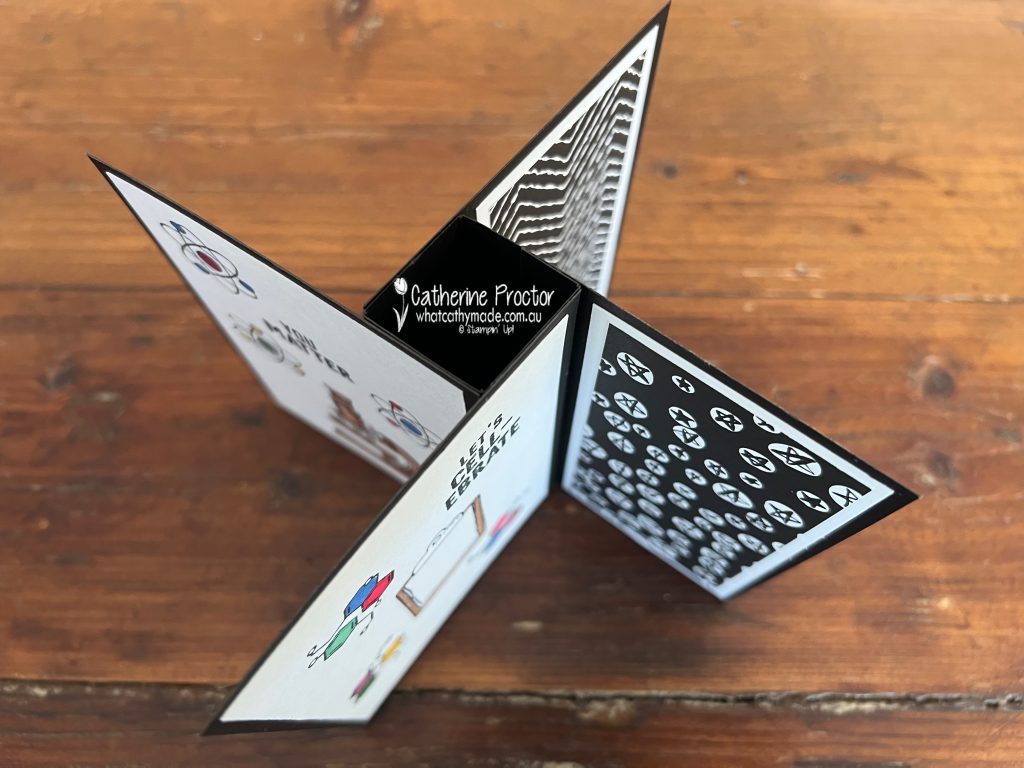
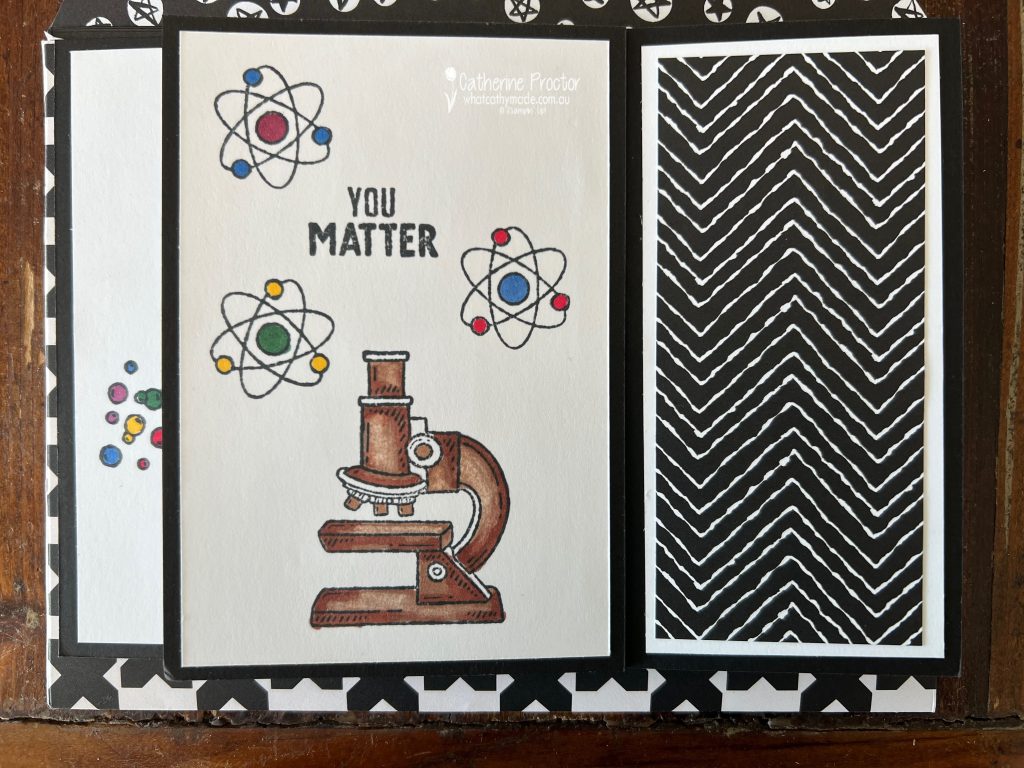
I had originally planned to make a tower flap card, like this one below by US Stampin’ Up! demo, Karen Titus, however the images from the stamp set were too large for the flaps.
So I made a pinwheel tower card instead. It’s a very easy fancy fold to make and fabulous for display. This is what it looks like from above.
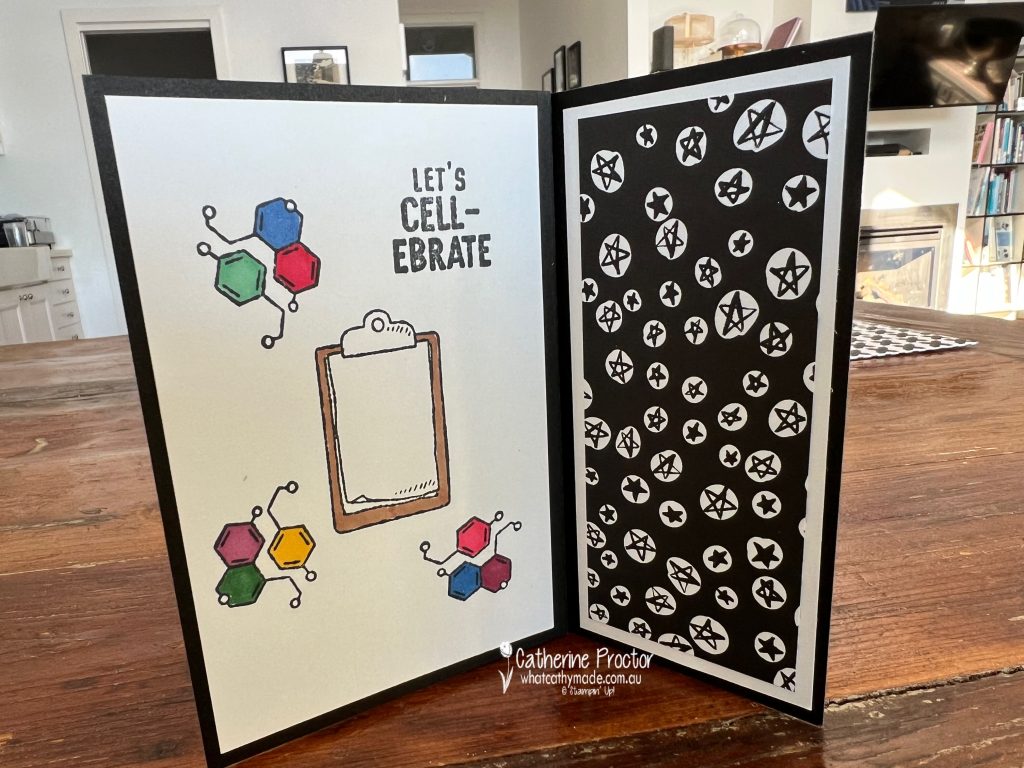
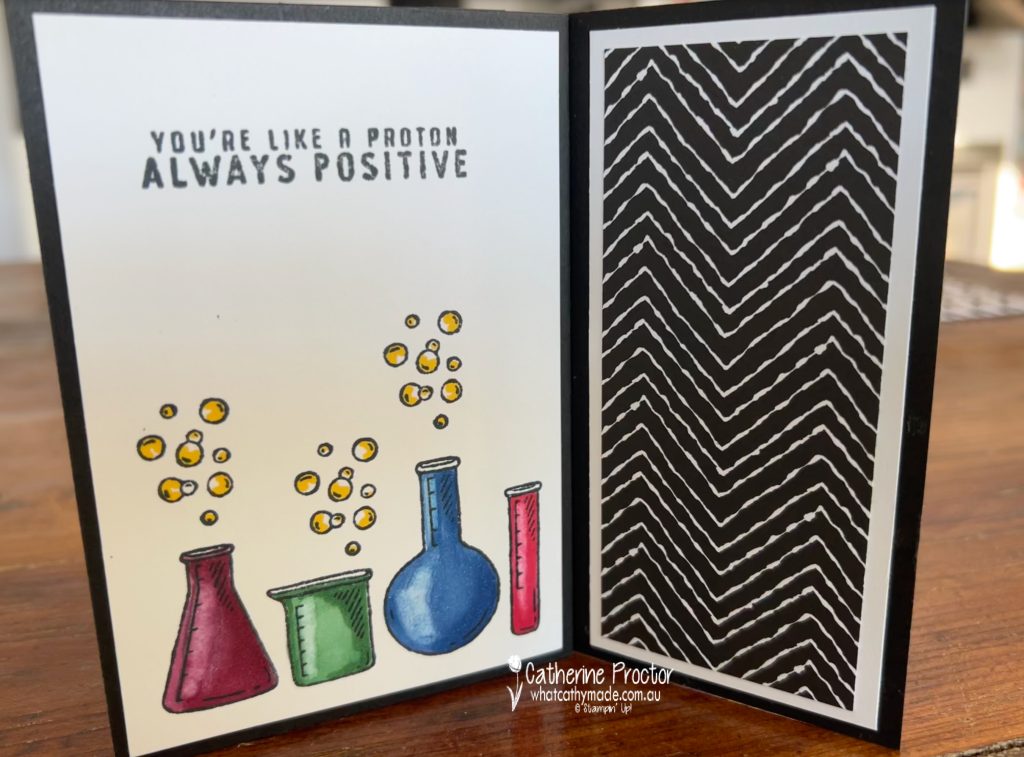
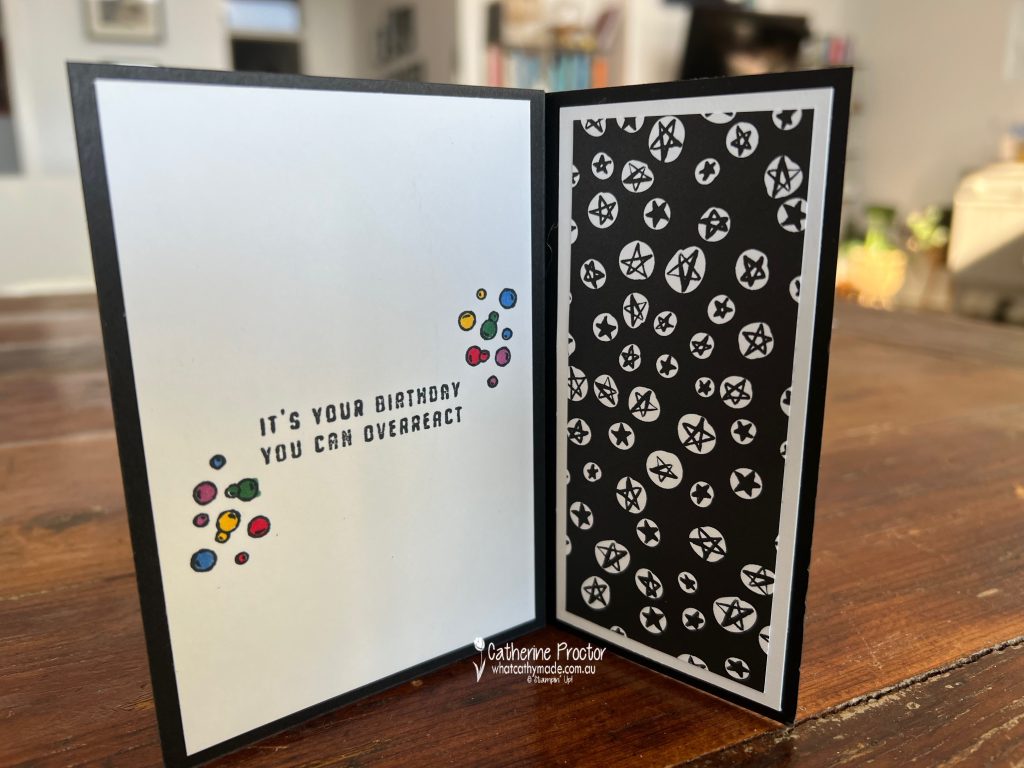
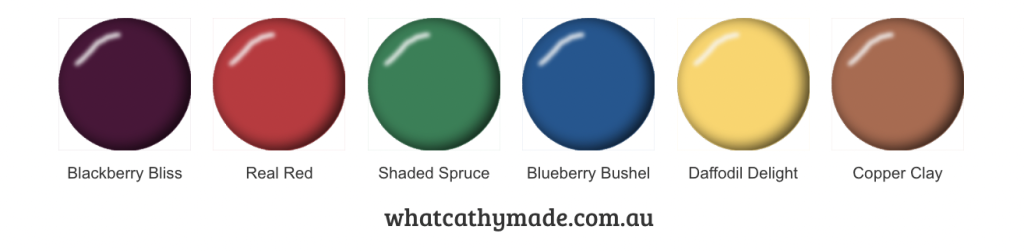
And here are the images on each of the four flaps. I’ve used Stampin’ Up! blends to colour the line art images in Blackberry Bliss, Shaded Spruce, Real Red, Blueberry Bushel and Daffodil Delight.
Using the colour lifter on the areas where light would fall gives instant dimension to my beakers. Instead of colouring them to be partially filled with different coloured liquids I’ve coloured them as if they were coloured glass. Dad used to collect blue glass and it gives such a pretty effect.
The microscope is coloured using Copper Clay, with the colour lifter again adding reflection and dimension.
The black and white DSP on the reverse side of the images is from the Zoo Crew 12″ x 12″ Designer Series Paper. I deliberately left space on this final flap to write a birthday greeting.
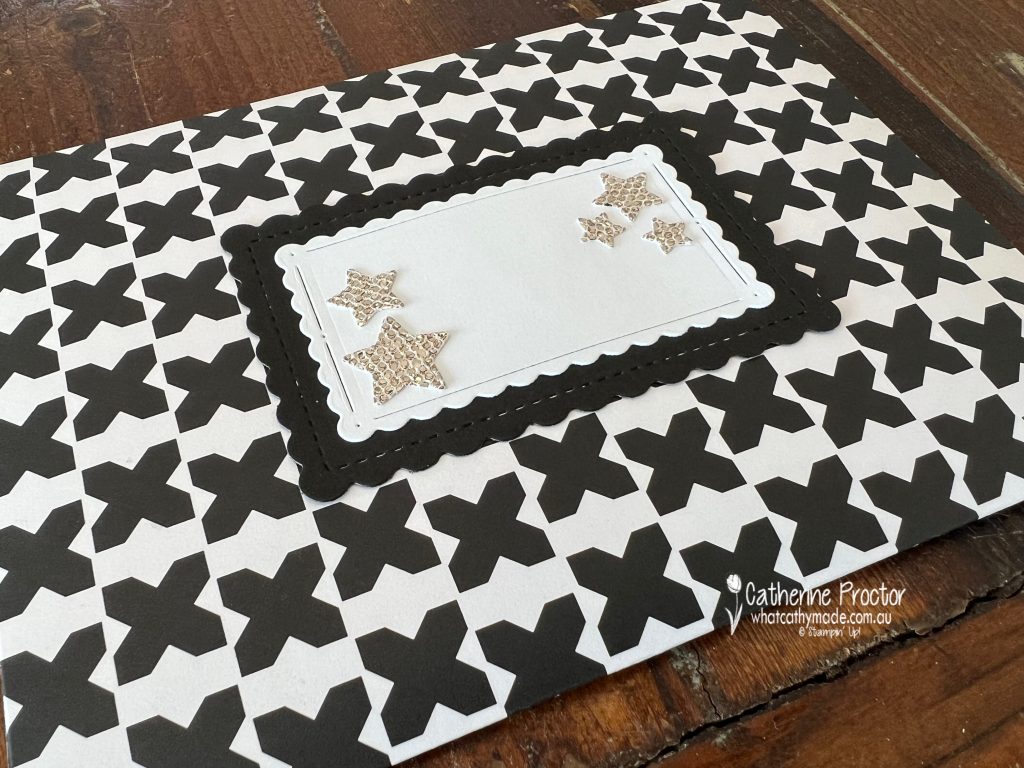
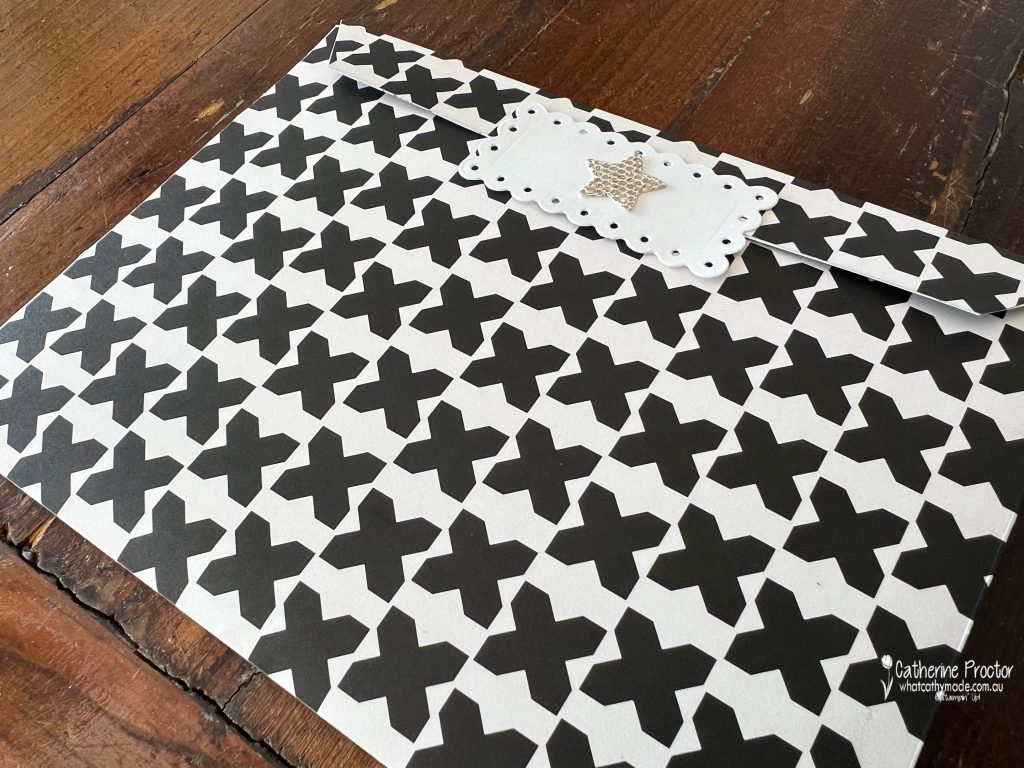
This card folds flat for posting, however because it is oversized a handmade envelope was required.
I used the Delightfully Eclectic DSP to make a black and white envelope to match the card. The name label for the front of the card was die cut using the Scalloped Contours Dies, with More Dazzle stars die cut using the Give It a Whirl Dies.
The envelope flap is also adhered using a Scalloped Contours Die, attached with glue dots to make sealing and resealing possible.
I really haven’t showcased Blackberry Bliss as the main colour this week, however hopefully I’ve shown how well it can work with colours from different colour families. I guess that’s why Stampin’ Up! have moved it to the neutrals family now!
Now it’s time to hop on over to our next participant, the lovely Di Furniss – I can’t wait to see what Di has made this week!
If at any time you find a broken link, you can find the complete list of all participants below.
Welcome to week seven of our Art With Heart 2023-24 Colour Creations blog hop!
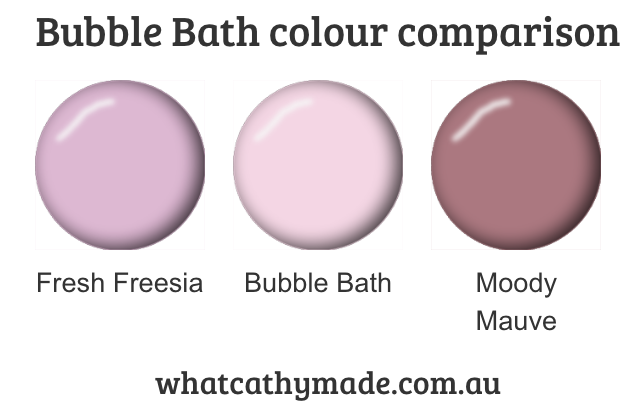
Bubble Bath is a gorgeous light pink that’s in the Subtles family, sitting somewhere in between Fresh Freesia and Moody Mauve.
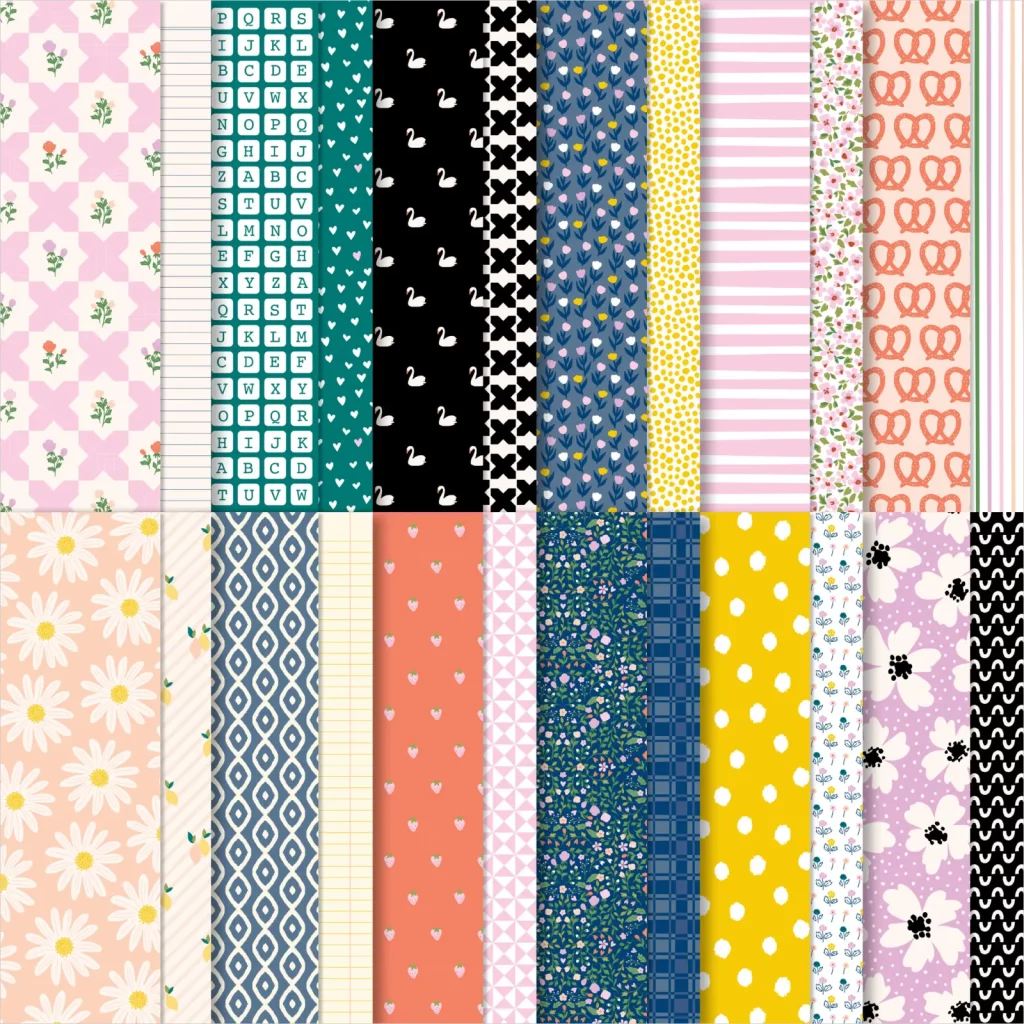
My three Bubble Bath cards are all paper quilt cards that feature the Delightfully Eclectic DSP, one of the Designer Series Papers on sale at 15% off for the entire month of June (the entire list of papers on sale is listed here).
By only using four of these DSP designs, I’ve narrowed my colour pallette to Bubble Bath, Misty Moonlight, Garden Green and Basic White – with just a tiny touch of Night of Navy, Crushed Curry and Cajun Craze in the selected DSP patterns.
If you’ve never you ever made a paper quilt card before it’s such a fun technique for using DSP. I’ve created three different paper quilt cards this week, however there are as many ways to make this style of card as there are ways to make quilts!
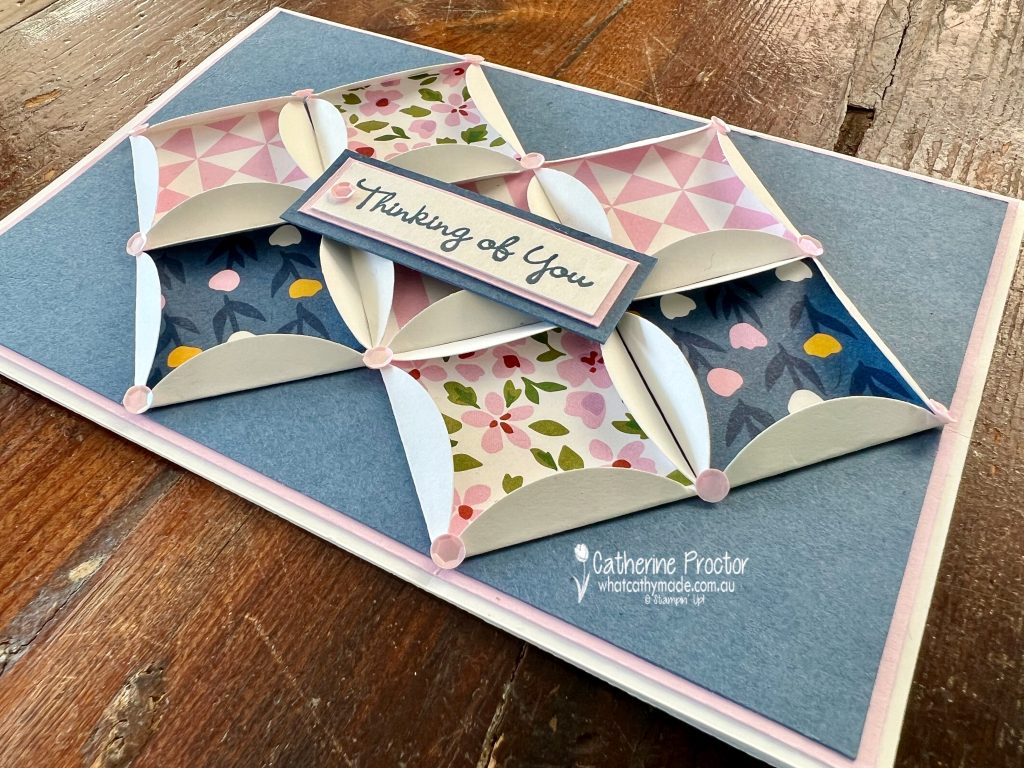
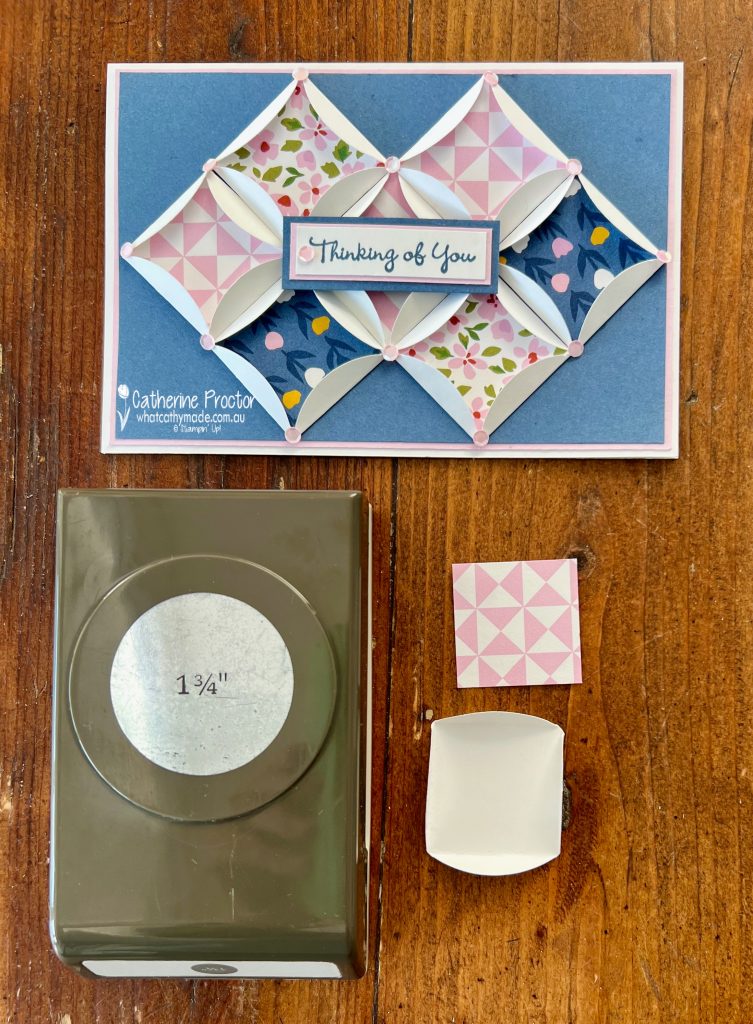
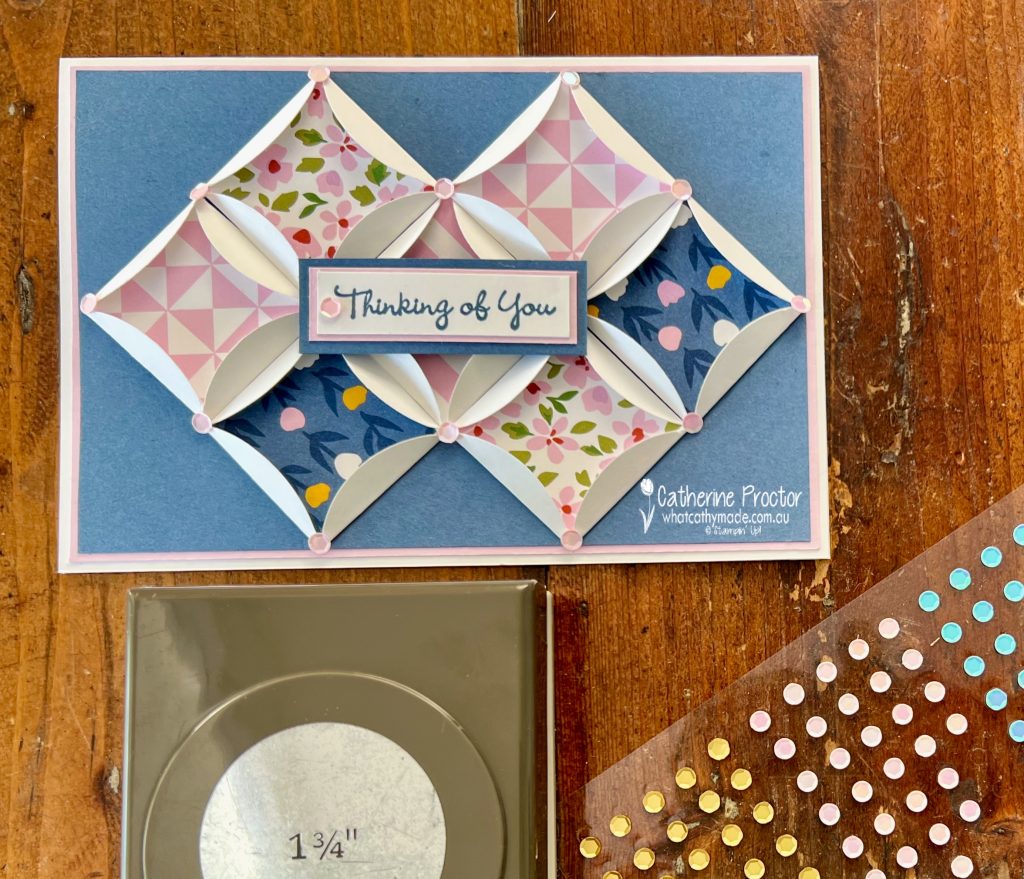
This “Thinking of you” card is a cathedral windows card, named after the cathedral windows style of quilts it looks like. It has a lot of dimension as you can see more clearly in this side-on photo.
I’ve used the 1 3/4″ circle punch (you can also use dies) to cut Basic White cardstock circles as I wanted the effect of the white edges against the Misty Moonlight layer.
Insert squares of DSP inside the circles and use your fingers and your bone folder to fold the edges of the circle around the squares of DSP, creating the square cathedral window shape.
The colour of these pink Pastel Adhesive-Backed Sequins are actually listed on the packet as Petal Pink, but I think they match Bubble Bath perfectly.
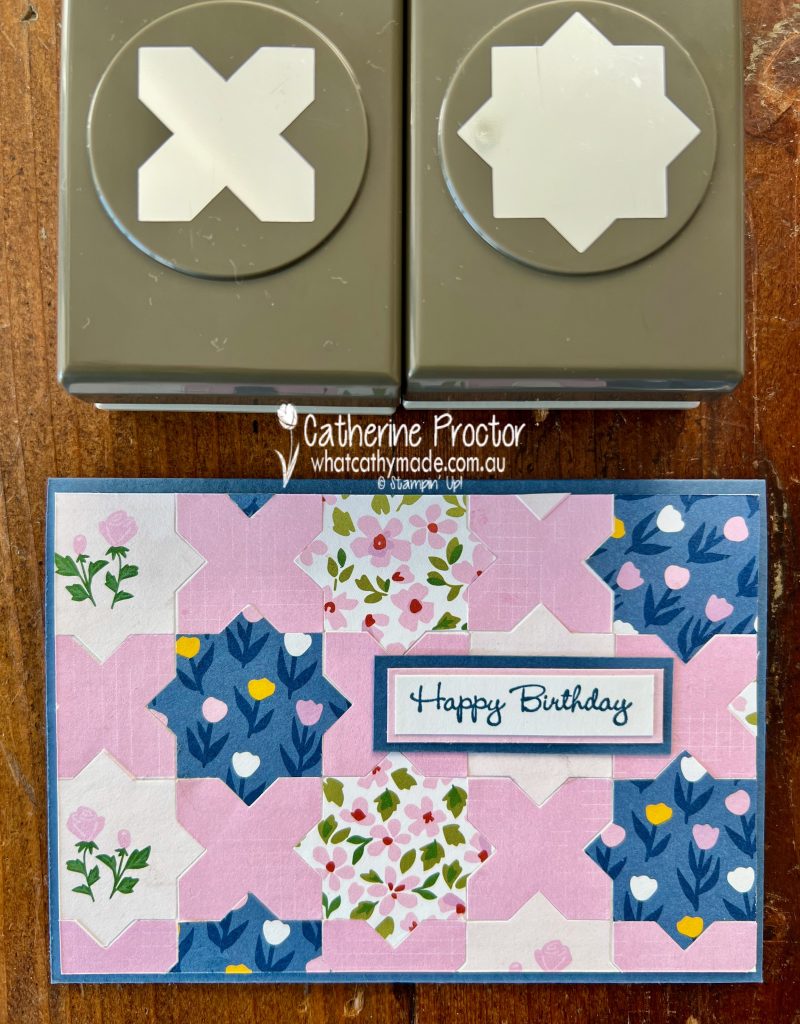
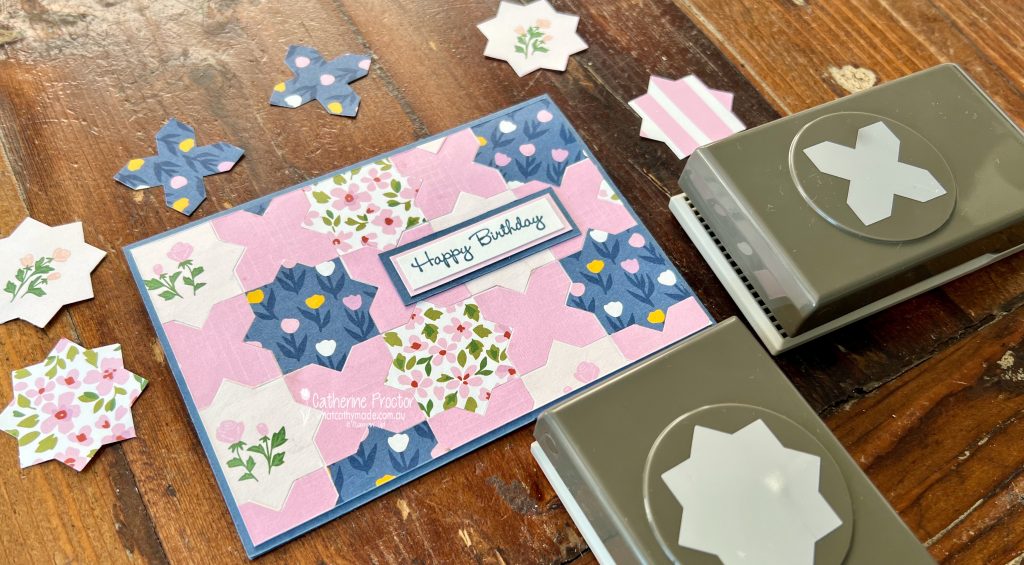
My “Happy Birthday” card uses the the Inked & Tiled Punch Pack. These punches are designed to slot into each other so they are ideal for making a paper quilt.
No folding or measuring required for this paper quilt! Simply arrange the punched out pieces into your preferred quilt design, glue them onto a layer of Basic White cardstock and adhere your quilt to your card base.
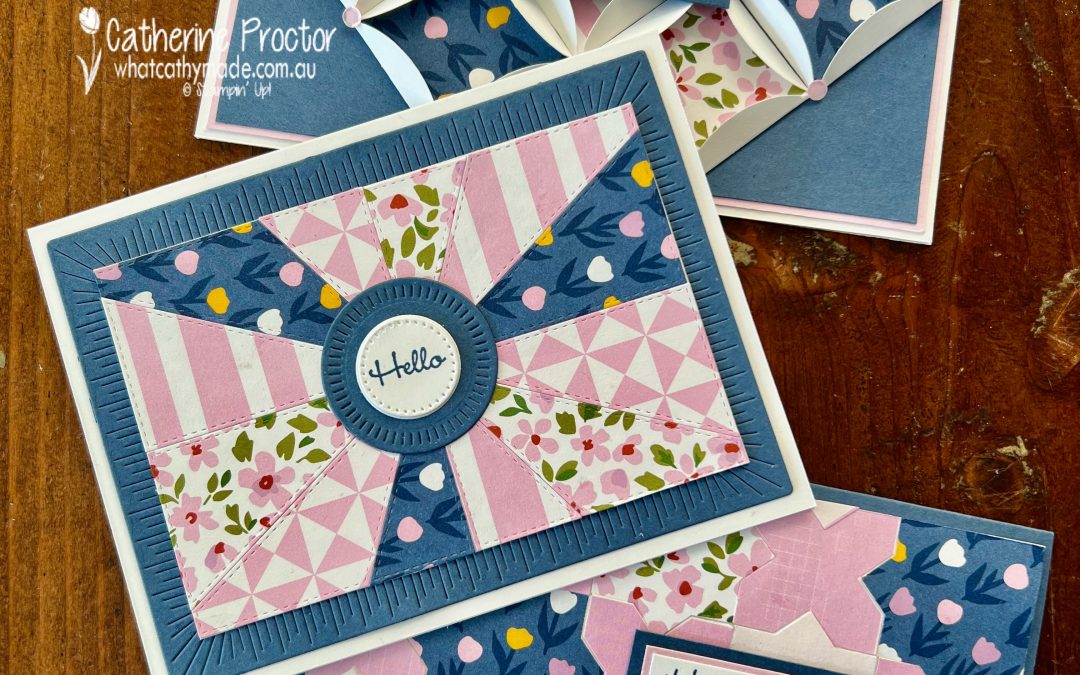
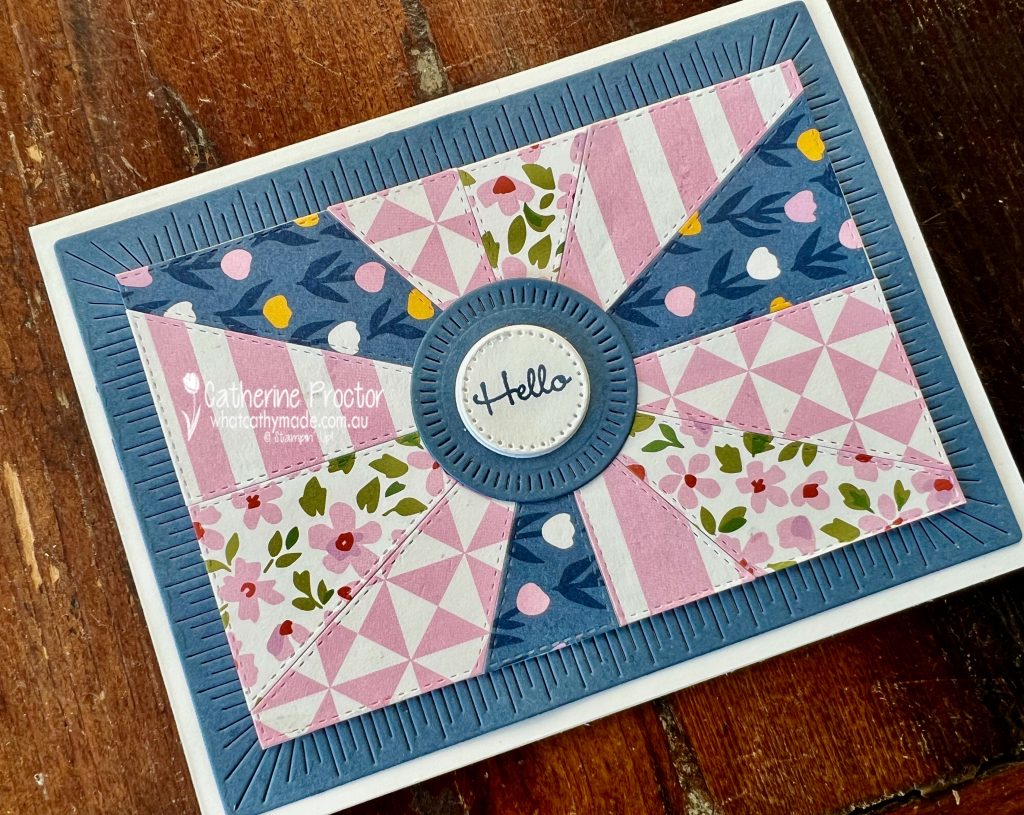
The “Hello” card uses dies from the Patchwork Pieces dies, the Stylish Shapes dies and the Radiating Stitches dies. Seriously, how many different dies can I use on the one card, LOL!
Die cut four different DSP patterns using the Patchwork Pieces die and then arrange them in a symmetrical design, gluing alternating DSP pieces onto a cardstock layer.
The Misty Moonlight base layer and the Misty Moonlight circle layer under the sentiment are die cut with the Radiating Stitched dies – an online only product. The Hello sentiment is die cut using the smallest circle from the Stylish Shapes dies.
All three cards use sentiments from the “Go To Greetings” stamp set, stamped in Misty Moonlight. I thought the soft feminine script of these sentiments really suited the colour pallette and DSP patterns on my quilt cards.
Now it’s time to hop on over to our next participant, the lovely Kathryn Ruddick – I can’t wait to see what Kathryn has made this week!
If at any time you find a broken link, you can find the complete list of all participants below.