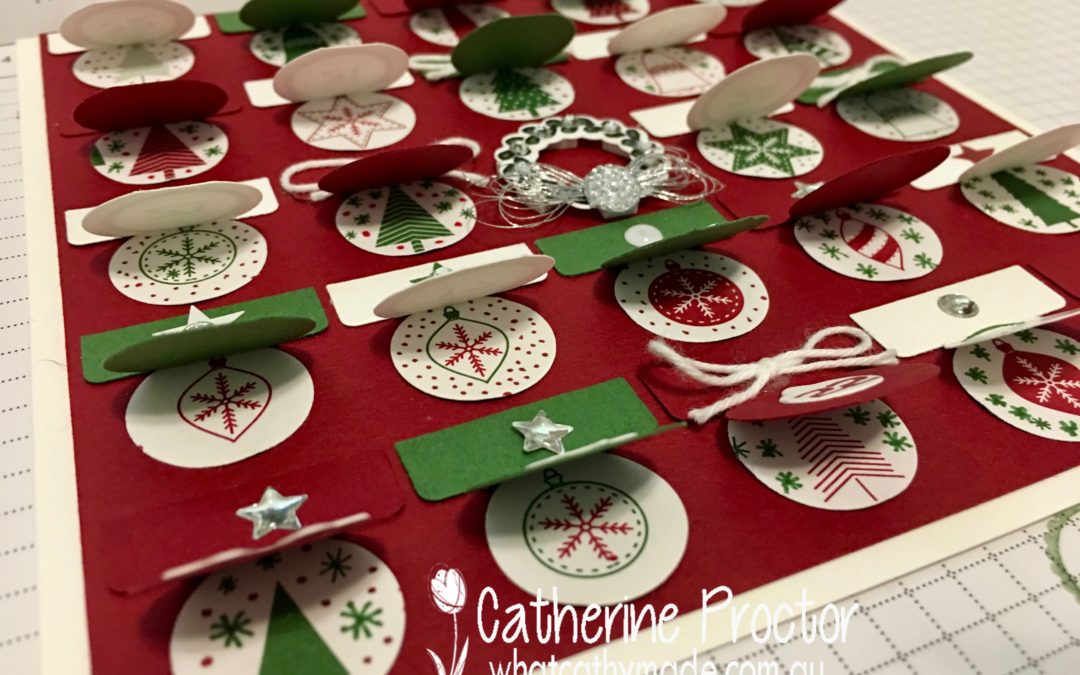
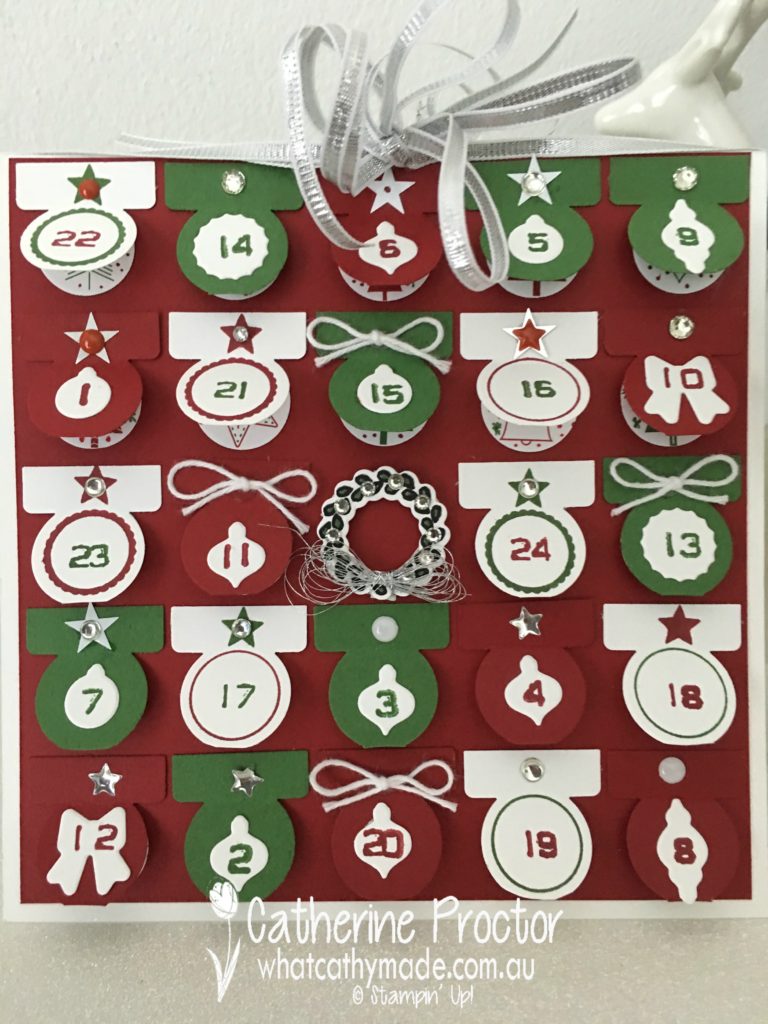
“Tabs for Everything Advent Calendar” Card
Do you love advent calendars as much as I do?
 I’ve always loved advent calendars, but the one I remember most vividly from my childhood was a Christmas card that had a mini advent calendar as its front with a tiny image under each of the 24 flaps.
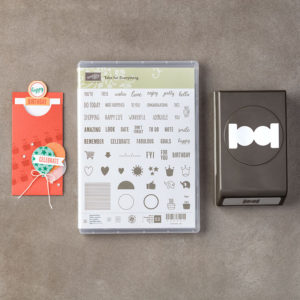
So as soon as we received the “Tabs for Everything” stamp set at Onstage earlier this year, I knew I needed to buy the matching Circle Tap punch and try to recreate this mini advent calendar card from my childhood.
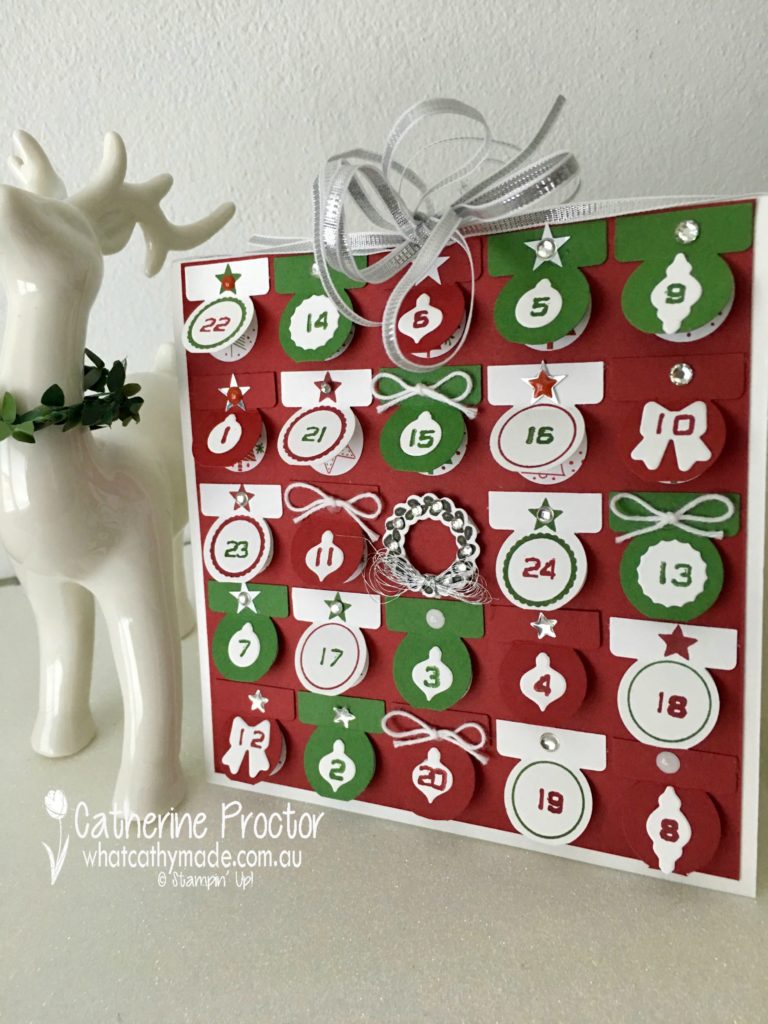
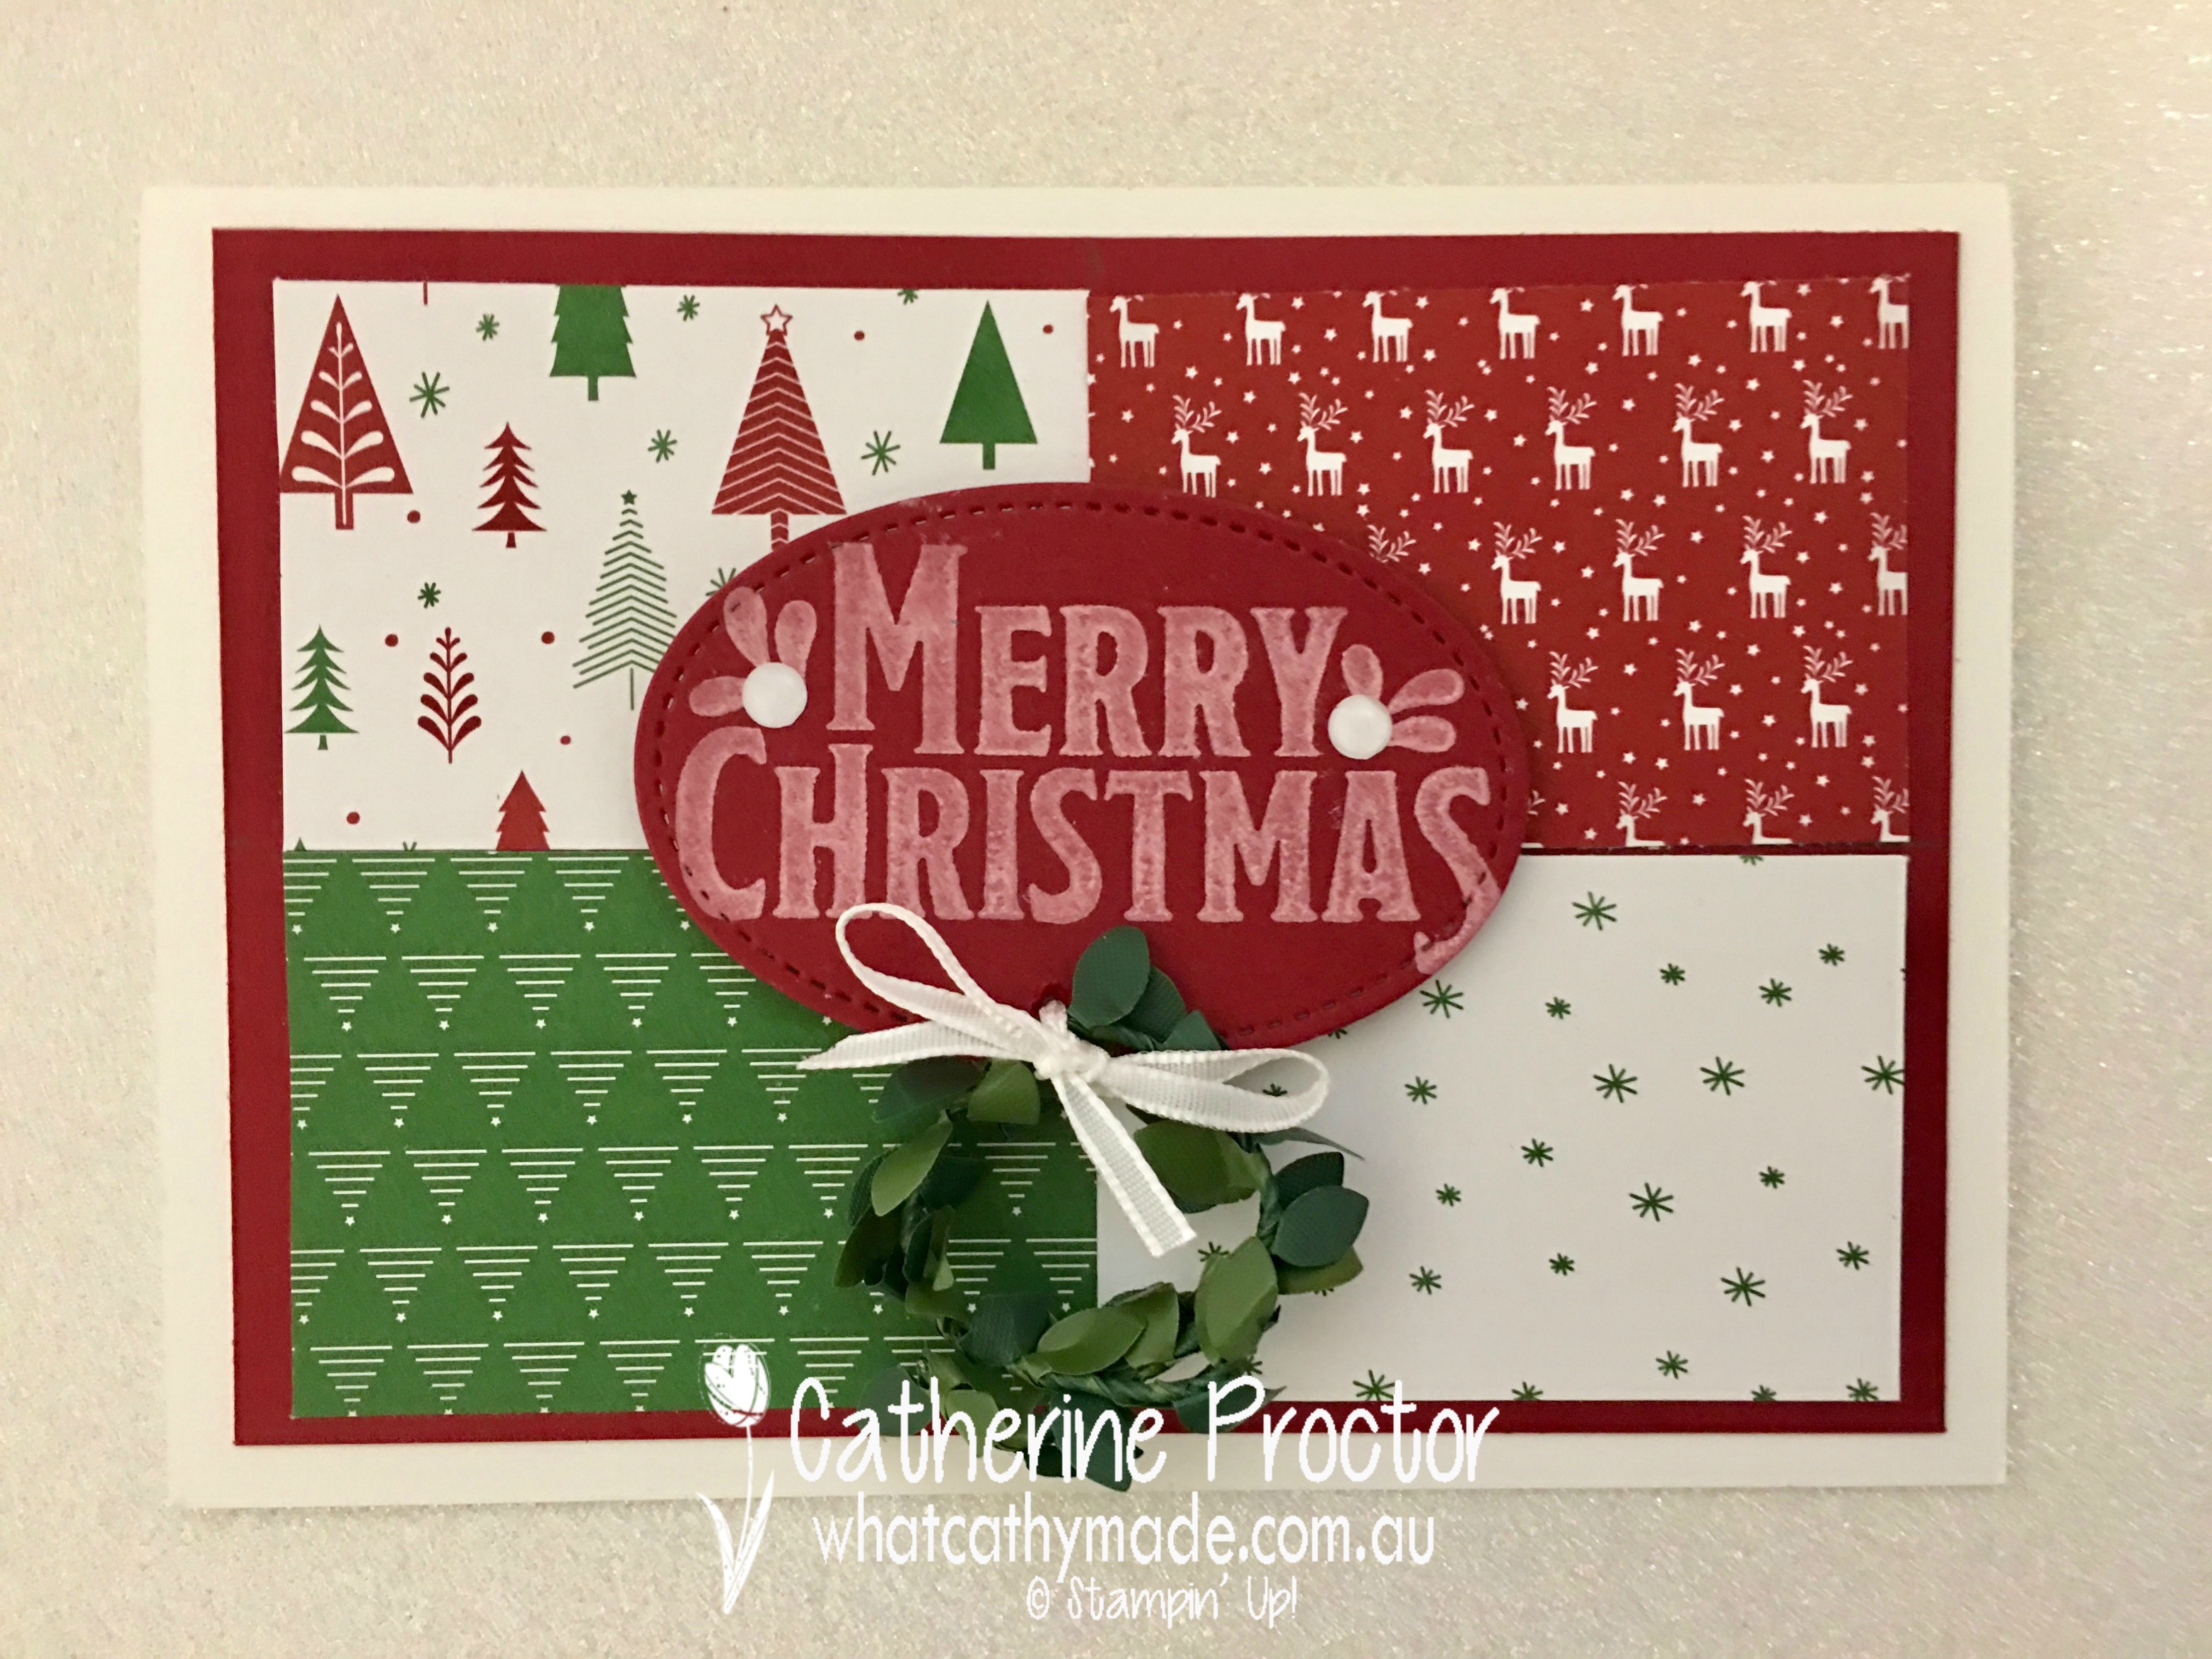
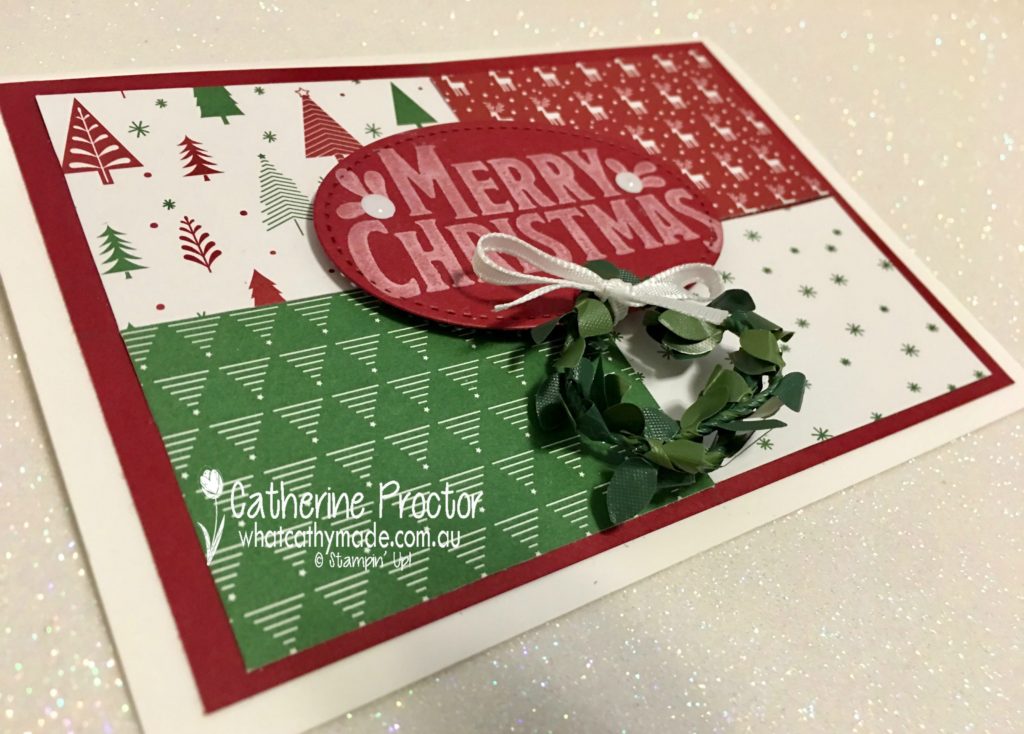
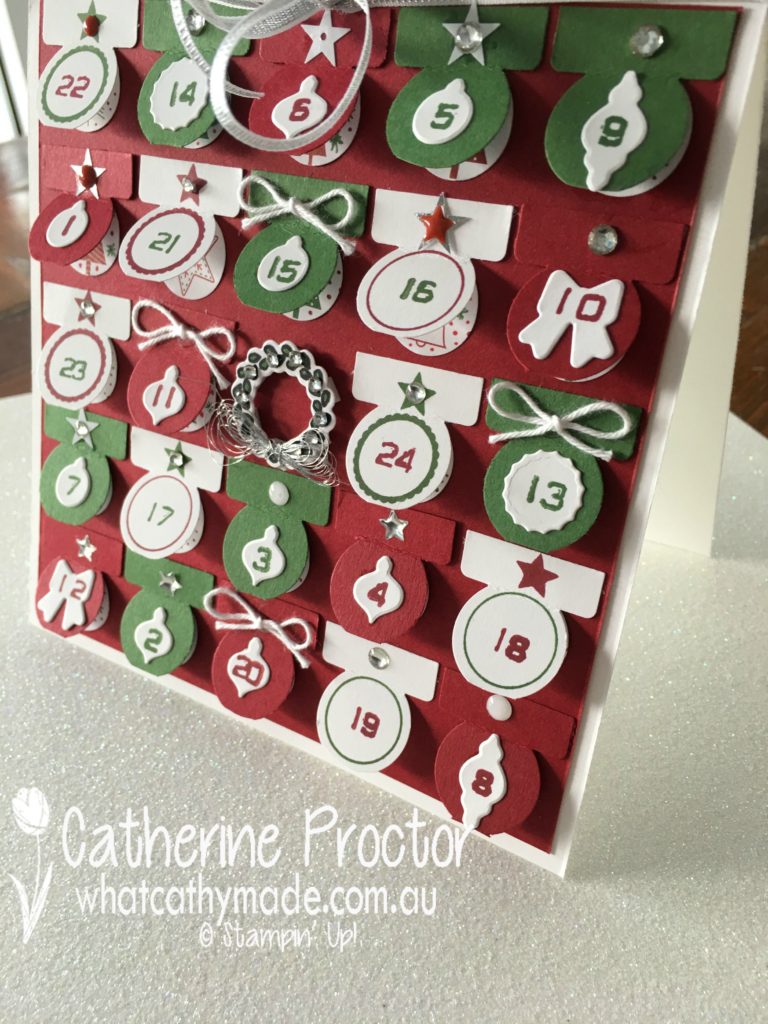
The calendar flaps are simply created by punching out garden green, whisper white and cherry cobbler card stock with the circle tab punch, then cutting these punches in half and adhering the “t-bar section” to the card with tear’n’tape. The numbers are stamped with the labeler alphabet stamp set and the wreath in the middle of the card is made using the Santa’s Sleigh stamp set and matching dies, adhered with stamping dimensionals and decorated with silver thread and Rhinestone jewels.
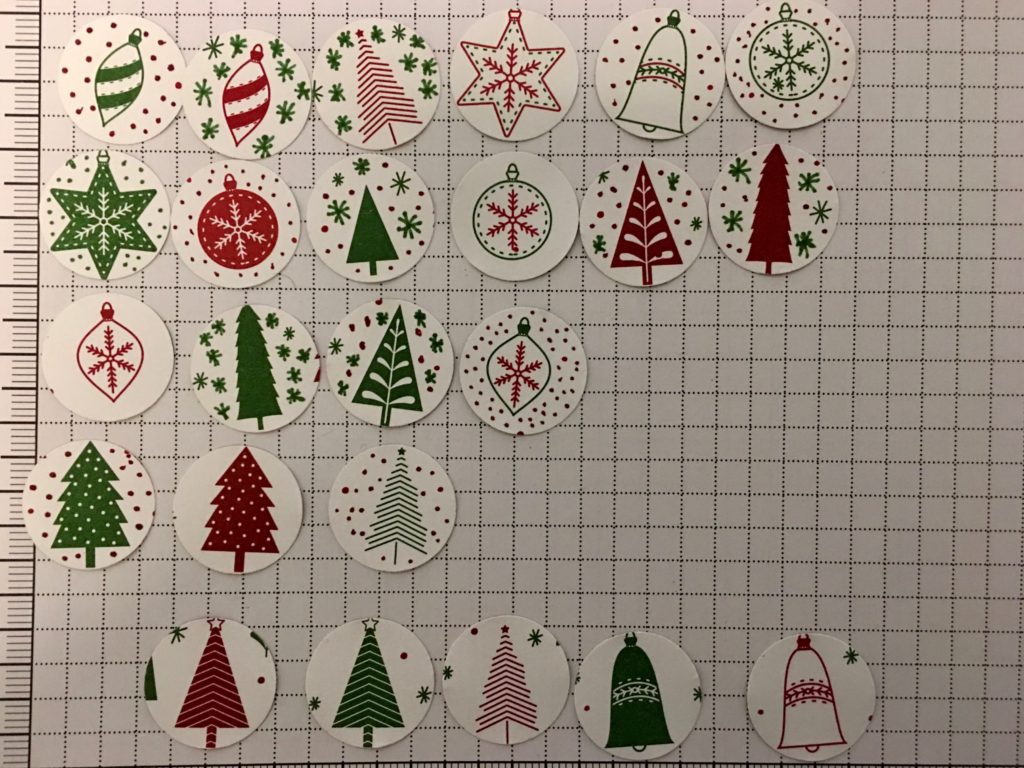
I’m really happy with the final result but I will admit it took me a while to figure out how to make this card because most of my stamps do not have small enough images to fit under the Circle Tab punch. It was only when I got my hands on the Be Merry DSP that I worked out how to do this. I used my 3/4 inch (1.9cm) circle punch to punch out tiny images from the DSP…they were just the right size to fit under the tab. And there was enough variety in the design of the paper to allow me to punch out 24 different images so that every day is a suprise!
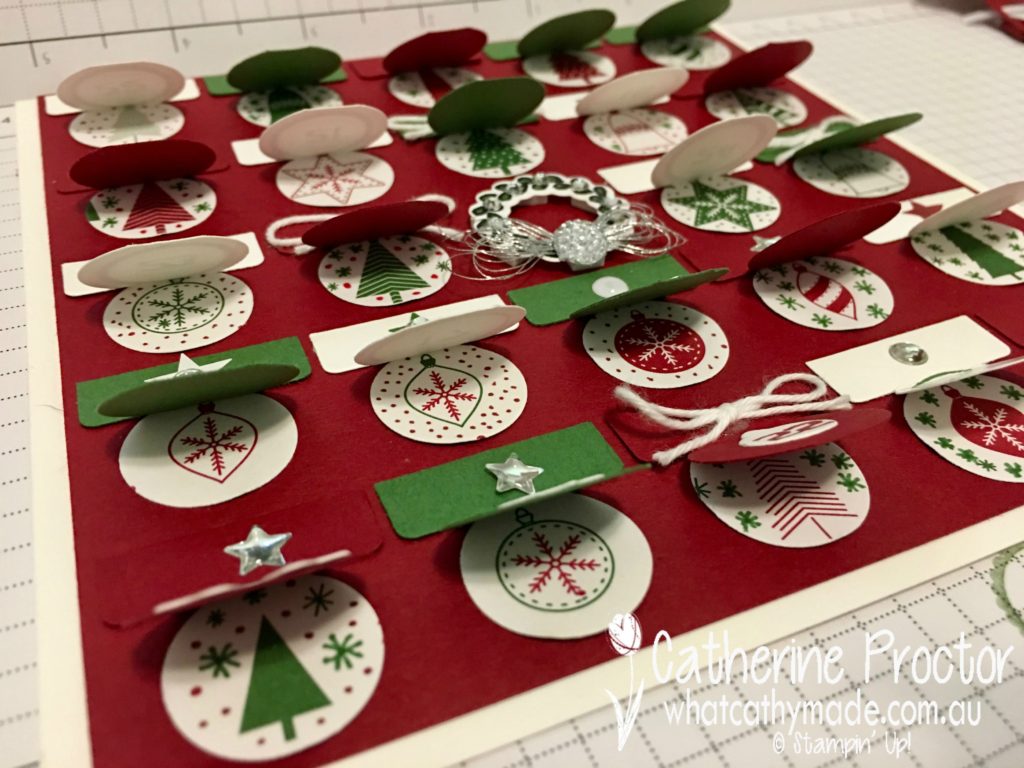
Because the pattern of the DSP wasn’t always centred or even around the main image I’d punched out I simply took my Garden Green and cherry Cobbler Markers out and extended the pattern of the DSP to further enhance the tiny images. The picture below show the bottom 5 images before I used the marker to extend the pattern (the rest of the images have already been done).
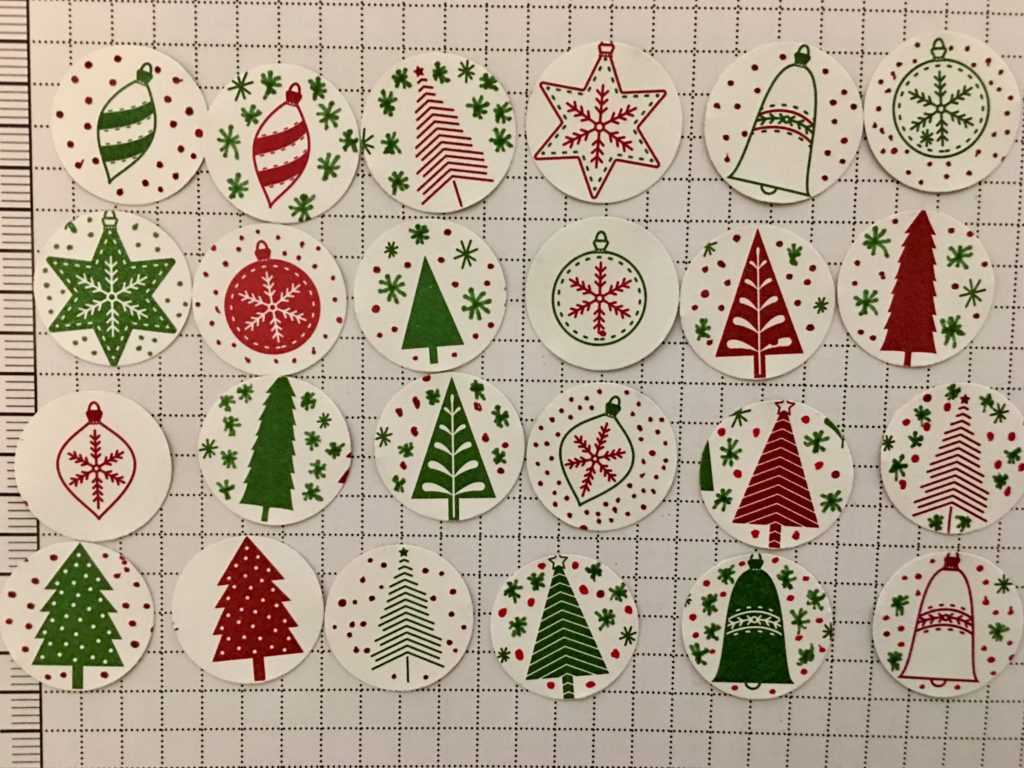
And here they are all done…I had so much fun doing these!
I needed a fairly large sentiment inside the card because I had to make the card base quite big (6 x 6 inches) to fit the 24 tags onto the front, so I used a combination of the stamps from the “Oh, what Fun” stamp set.

If you look closely at some of the numbered flaps on the advent calendar you’ll see some brand new gorgeous little ornament shapes in whisper white that I’ve used to stamp the numbers onto.
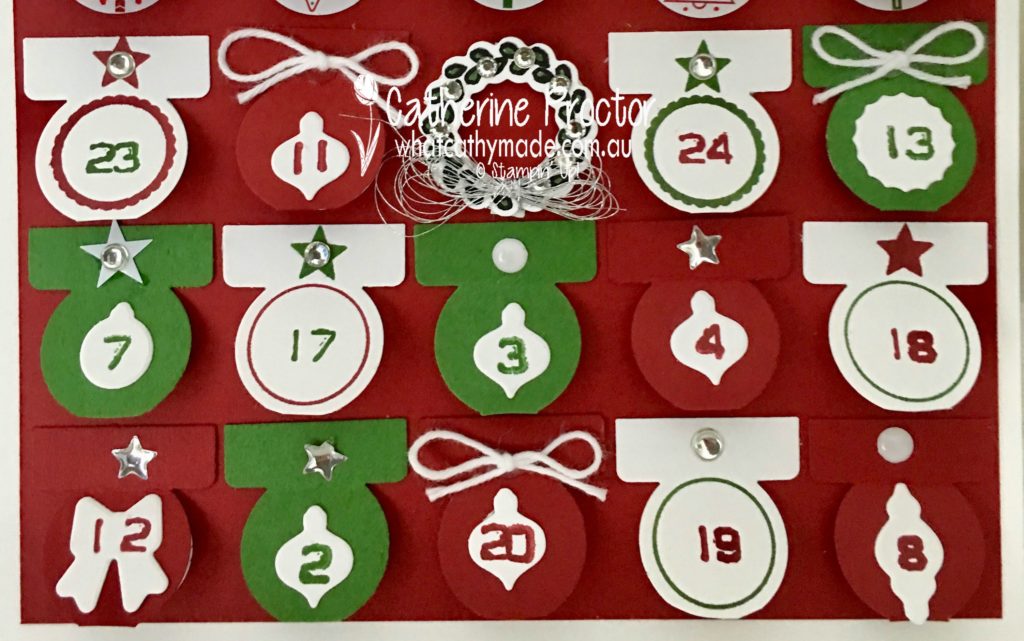
These are dies from a new Christmas bundle called “Carols for Christmas”, which you can order from the 1st August, one month ahead of the Holiday catalogue release date. You can see these little dies on the “Deck the Halls” card below, but in this picture they’re stamped with the ornament stamp from the Carols for Christmas set.

I hope you enjoyed stopped by today. You can see all the other beautiful cards the Art With Heart Team have made by going to Claire’s blog.
You can also click on the links below to purchase any of the supplies I’ve used for this card.
I’ll be back next week with some more Christmas Card inspiration.
Product List