Welcome to week forty-eight of our Art With Heart 2023-24 Colour Creations blog hop – only two weeks to go!
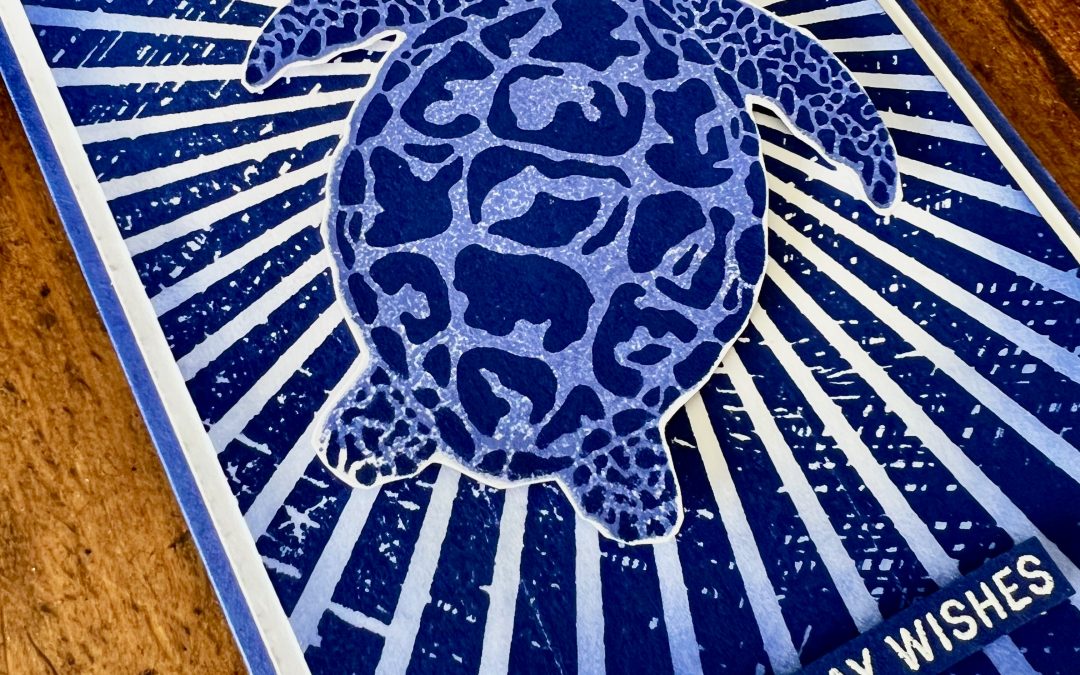
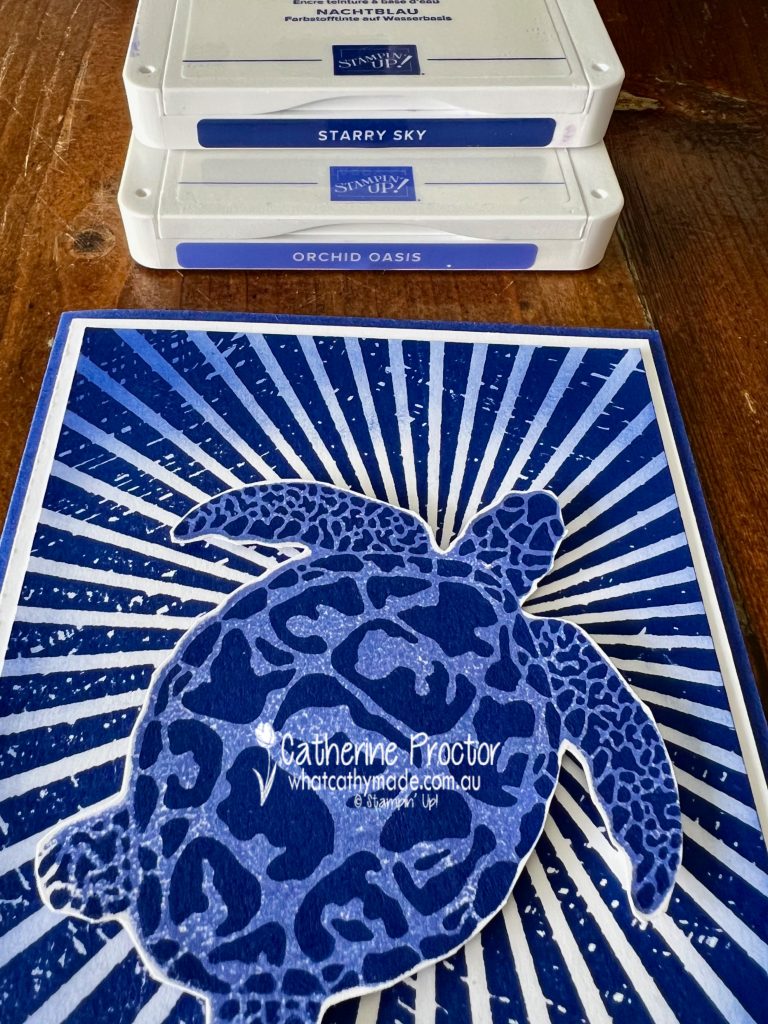
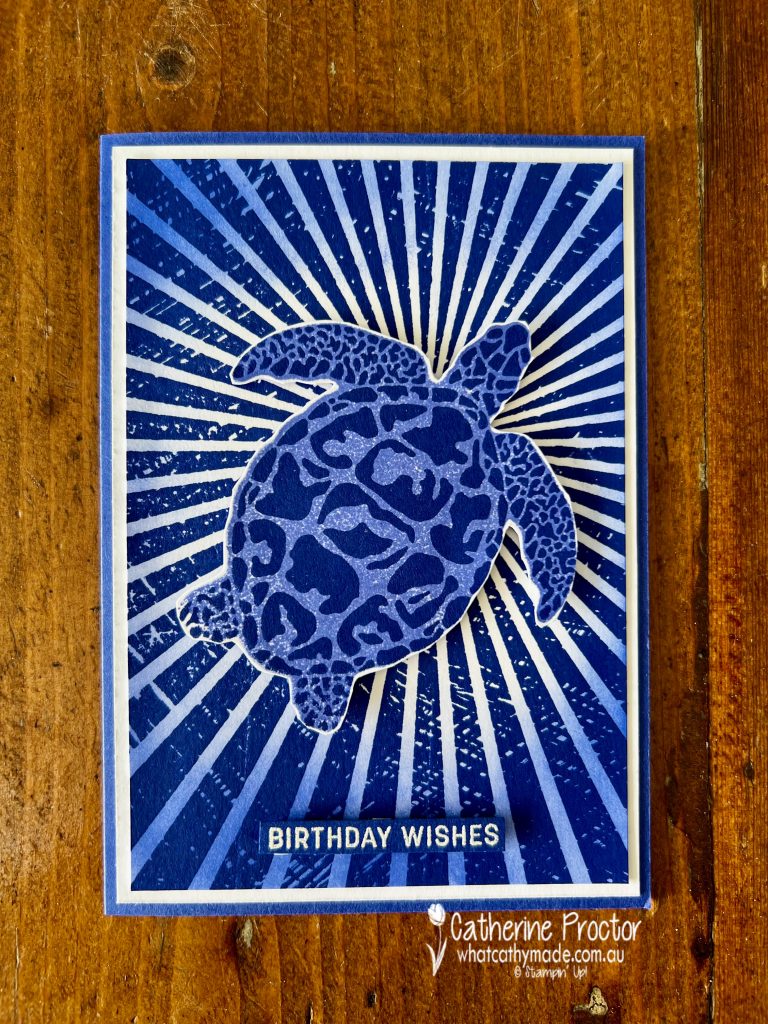
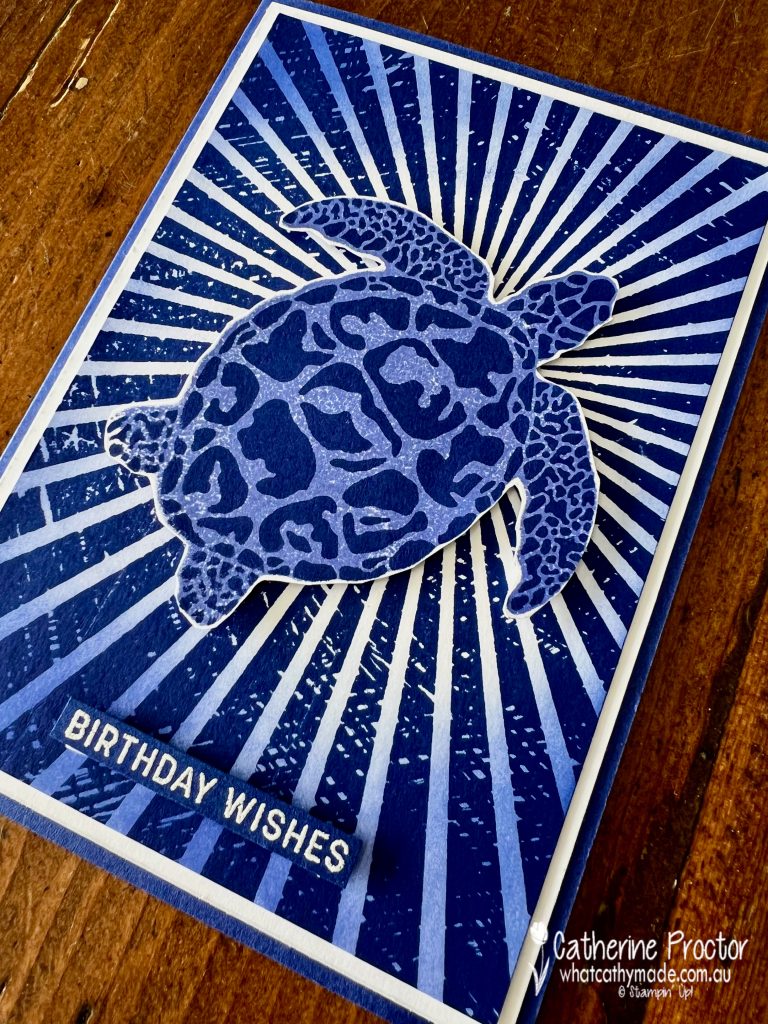
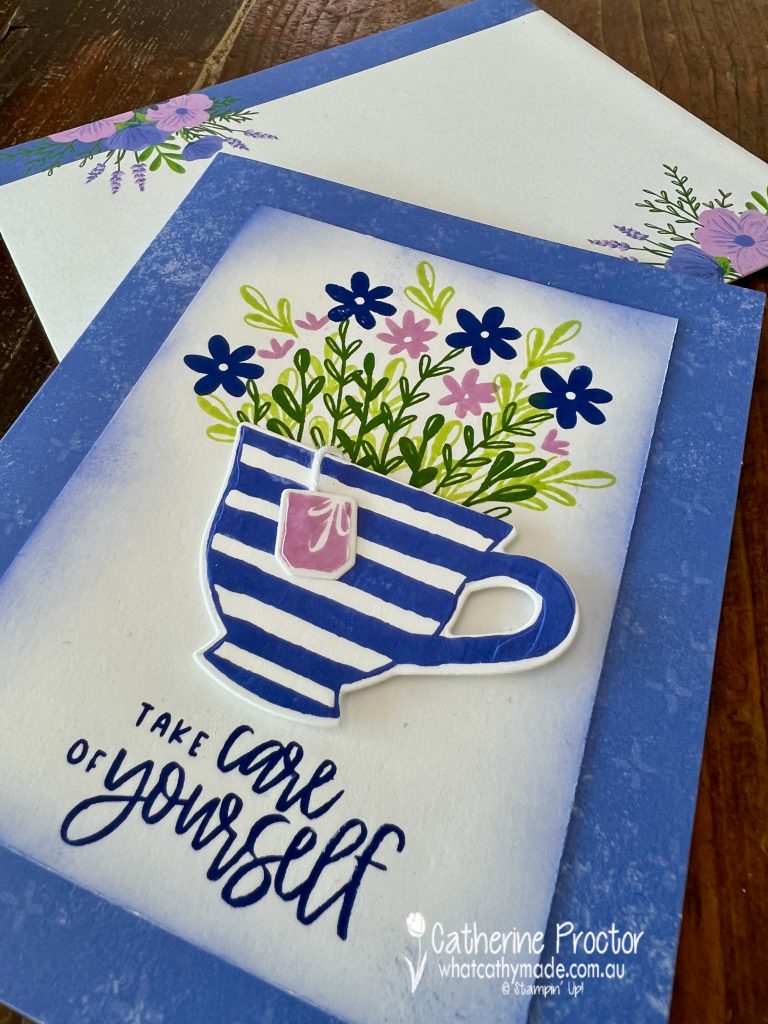
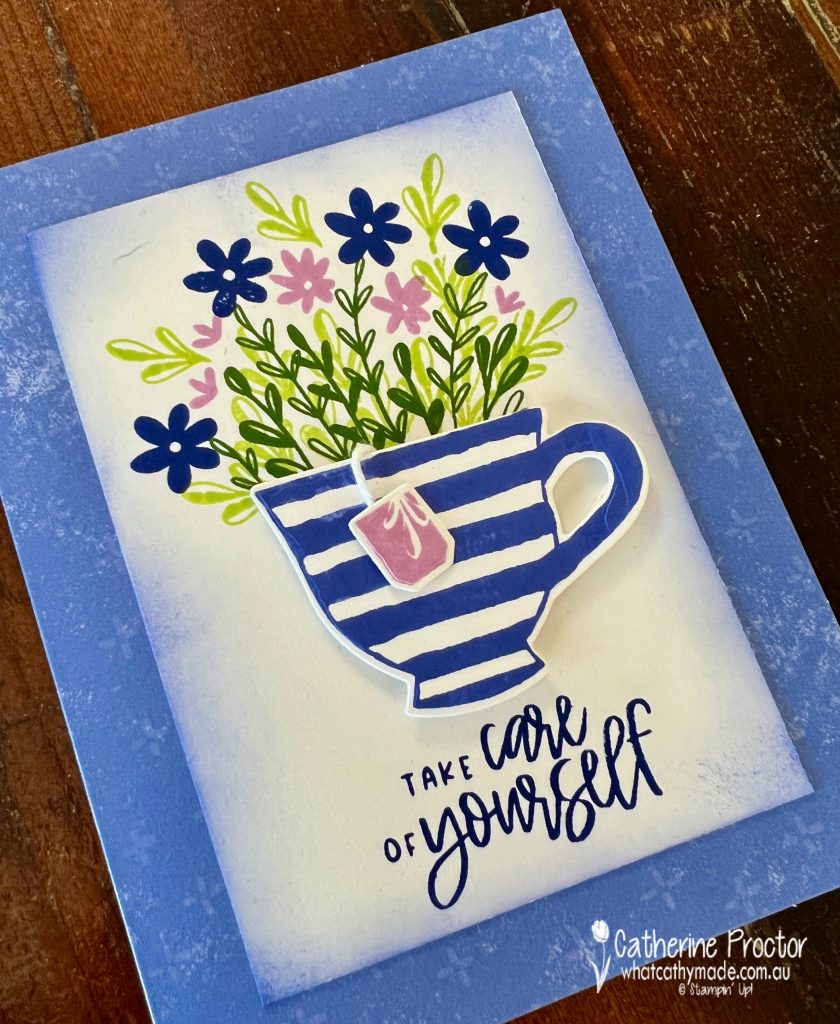
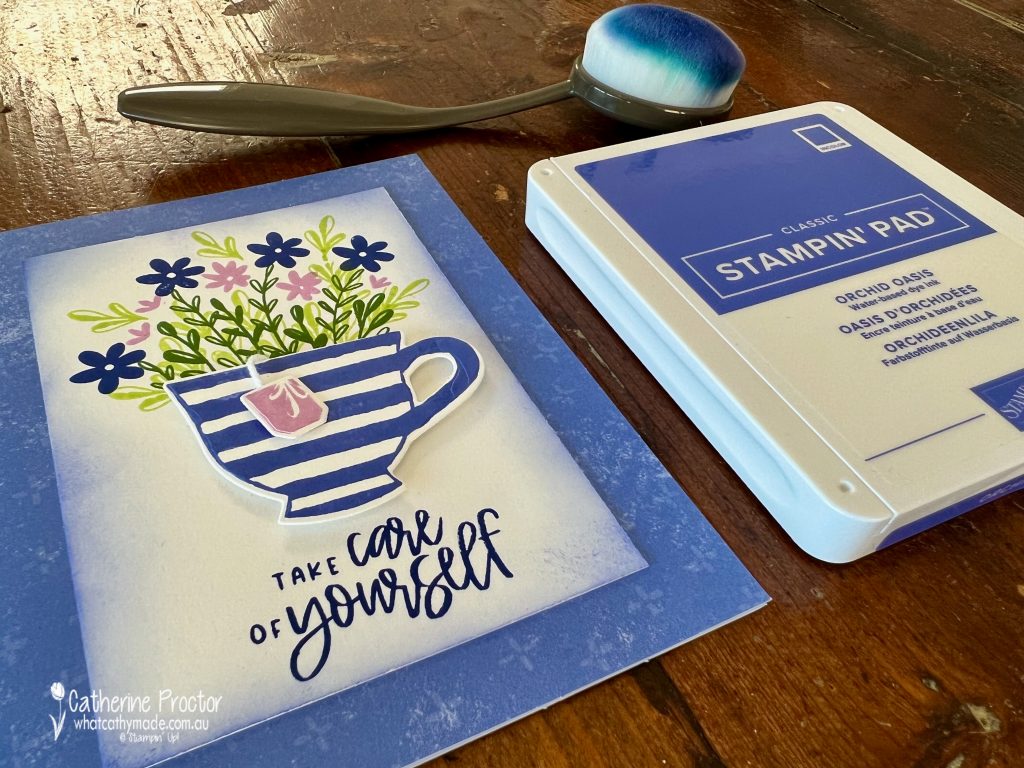
Our colour this week is Starry Sky, one of the 2022-24 In Colors that is about to retire. I’ve paired it with another retiring 2022-24 In Color, Orchid Oasis to make a turtle birthday card.
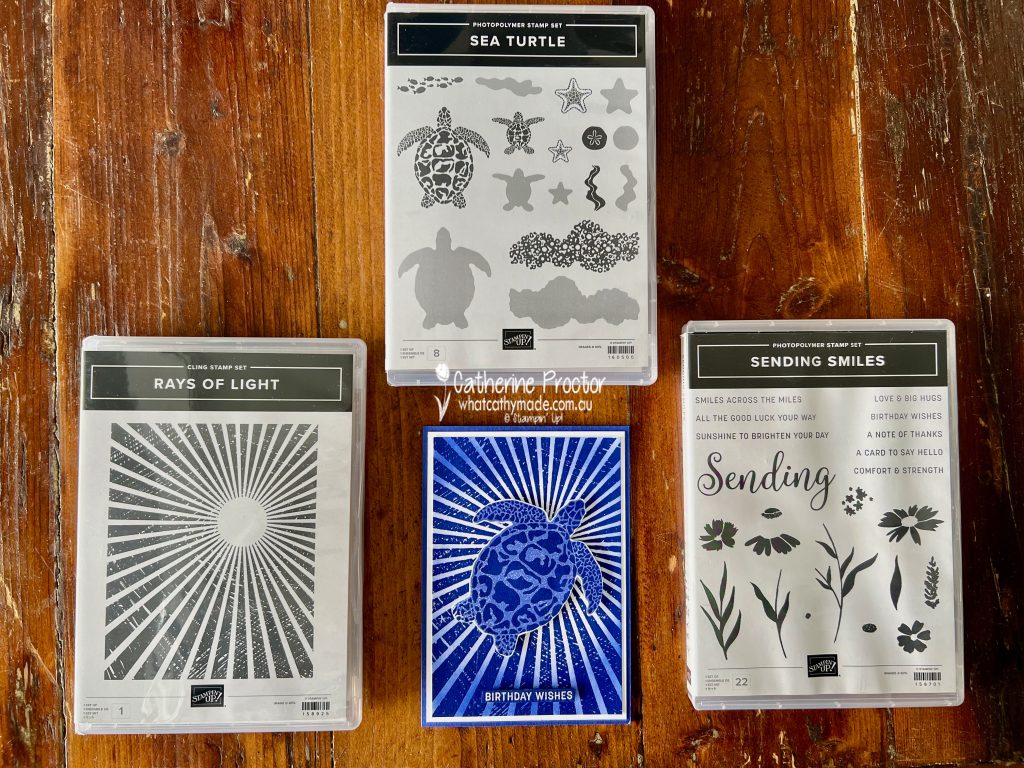
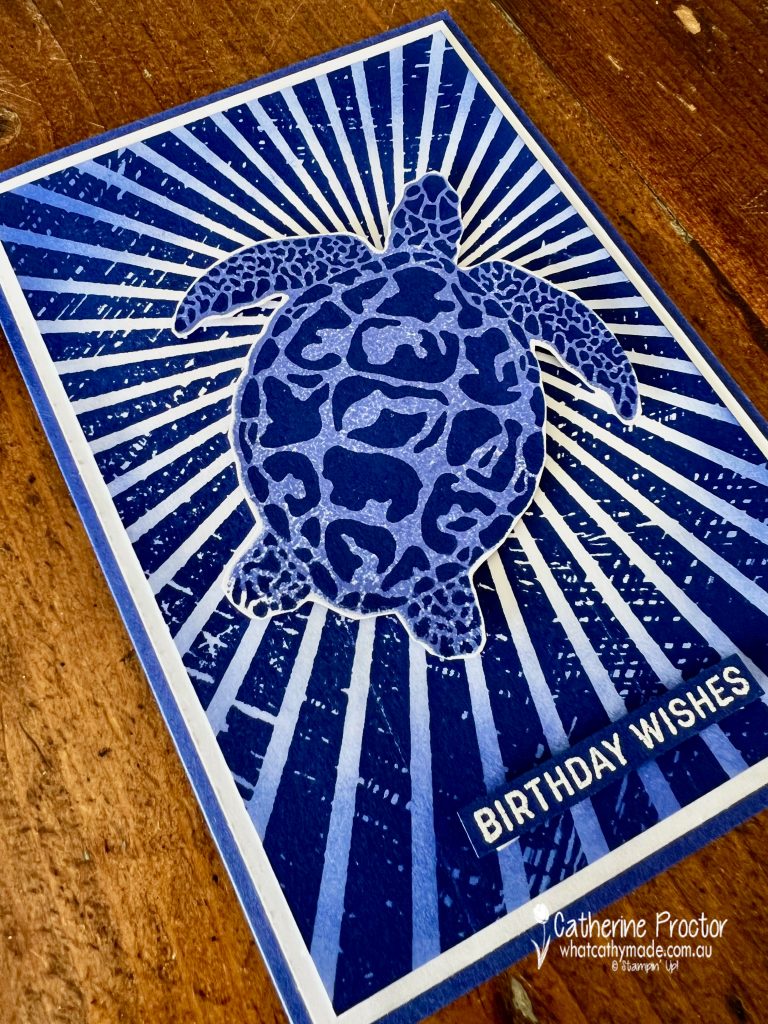
This is simple-to-make monochromatic card achieves its visual interest thanks to the incredible Rays Of Light stamp set that is also about to retire. I’m really going to miss this background stamp.
Another stamp about to retire is the Sending Smiles Stamp set, which I’ve used to stamp the birthday sentiment. Luckily the reversible Sea Turtle stamp set is carrying over to the new catalogue.
After stamping the Rays of Light stamp in Starry Sky I used a blending brush to add a touch of Orchid Oasis around the border.
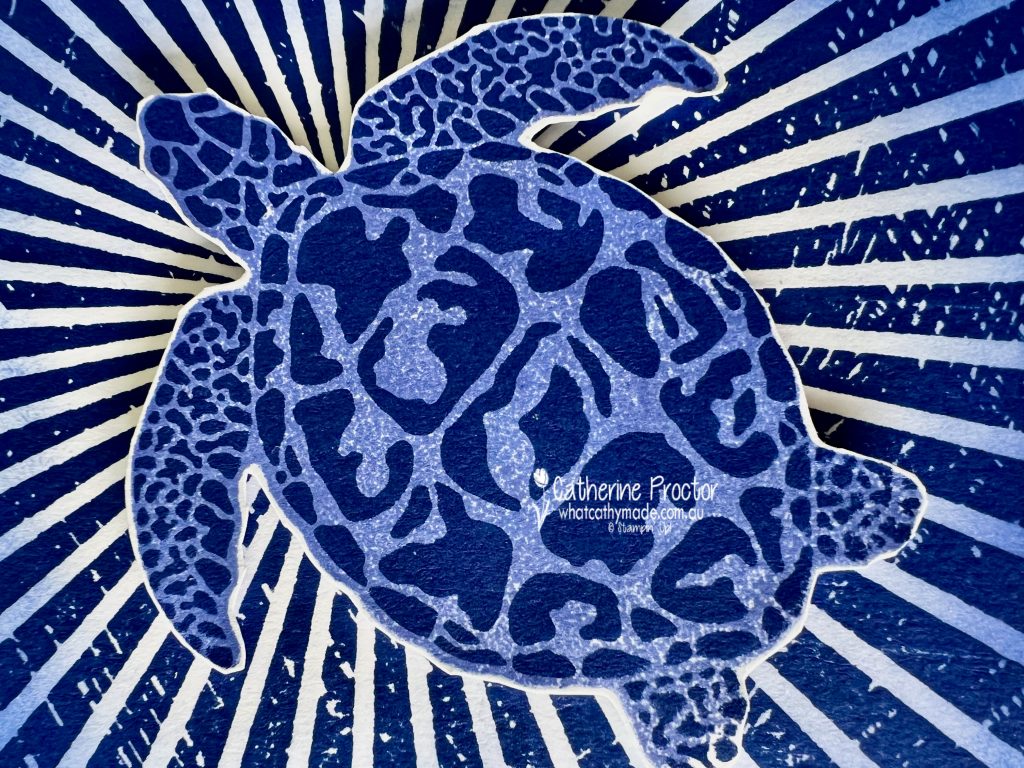
The reversible turtle was stamped in both Starry Sky and Orchid Oasis before being fussy cut and adhered to the Rays of Light layer with dimensionals.
The sentiment was heat embossed with white embossing powder.
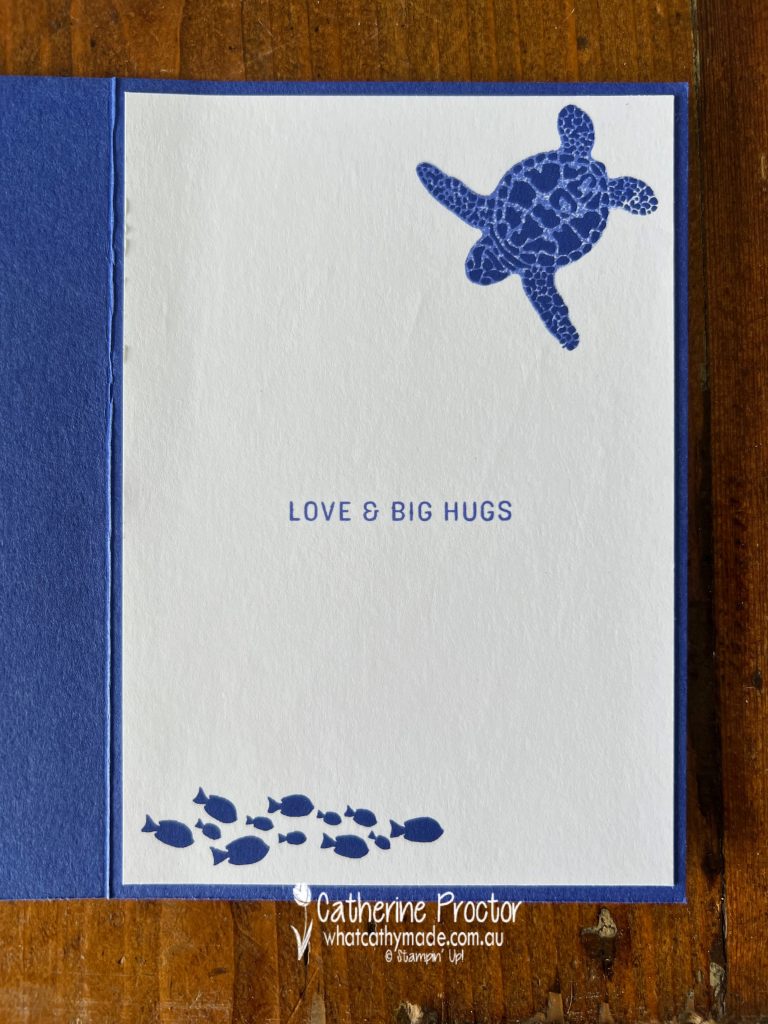
Shock, horror, I’ve actually remembered to stamp the inside of my card as well!
Now it’s time to hop on over to our next participant, the lovely Rachel Palmieri. I can’t wait to see what Rachel has made this week!
If at any time you find a broken link, you can find the complete list of all participants below.
Welcome to week thirty-seven of our Art With Heart 2023-24 Colour Creations blog hop!
Our colour this week is Orchid Oasis, an 2022–2024 In Color. Whether this is a blue or a purple shade really depends on what colour you put it against. Either way, I think this is a gorgeous colour and it’s one I hope will join the core colour range one day.
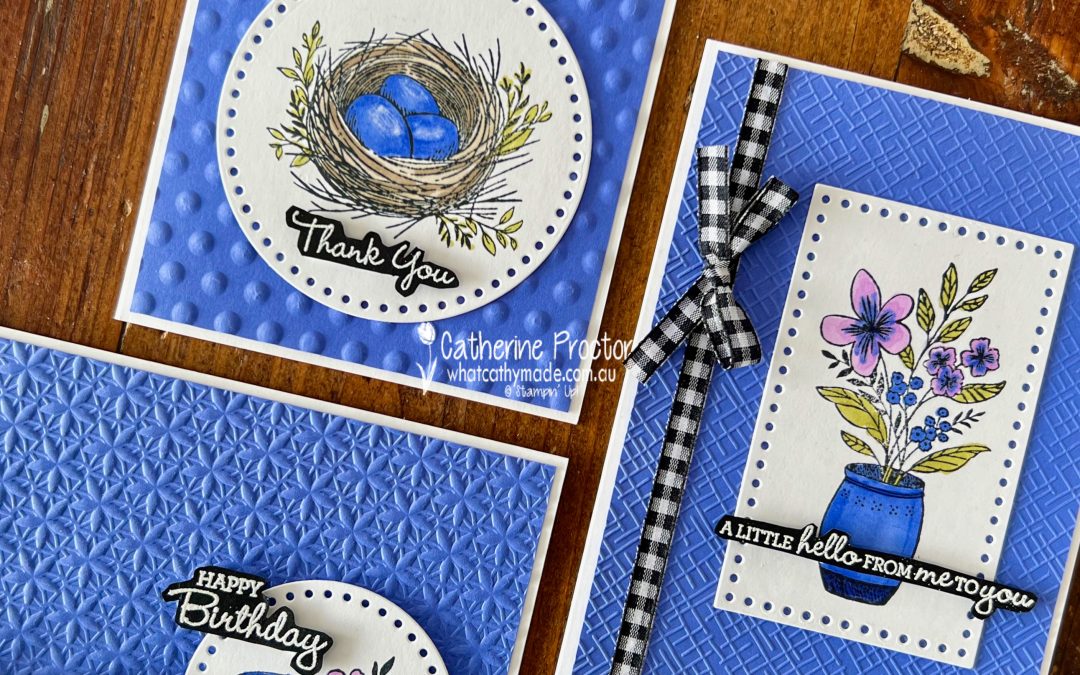
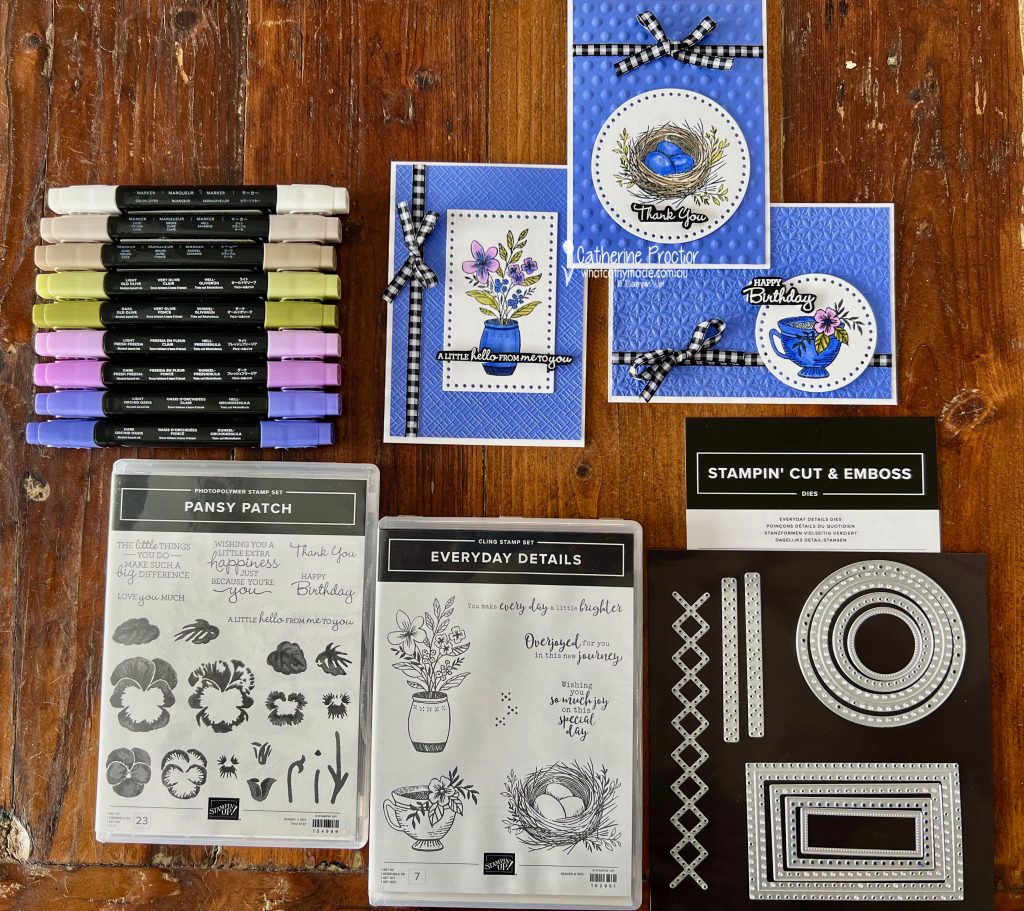
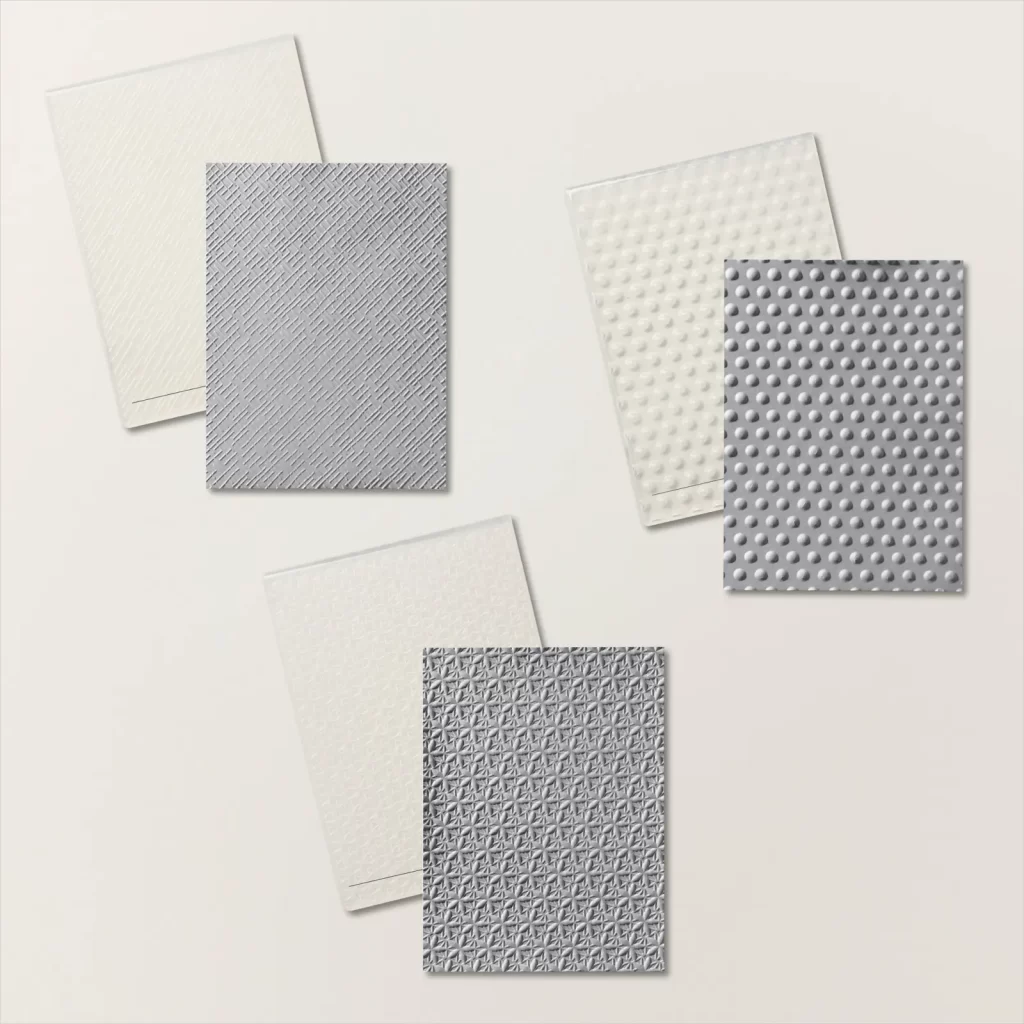
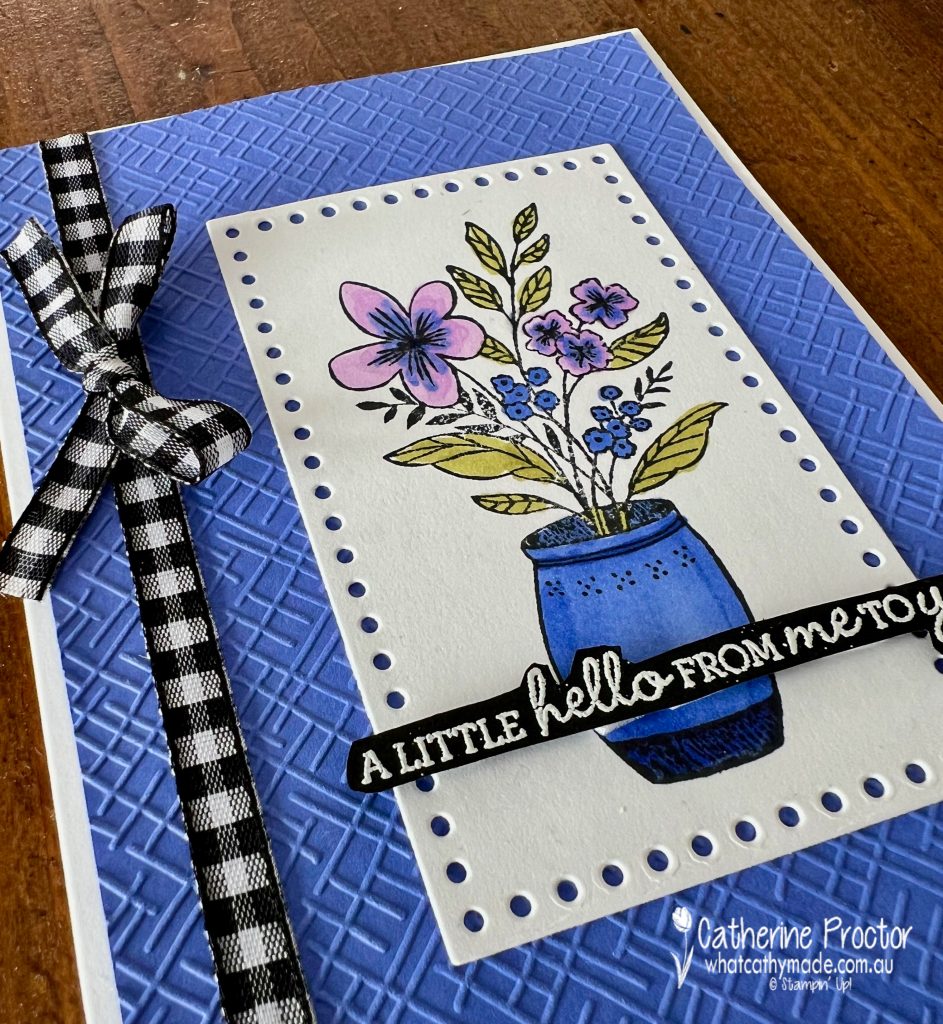
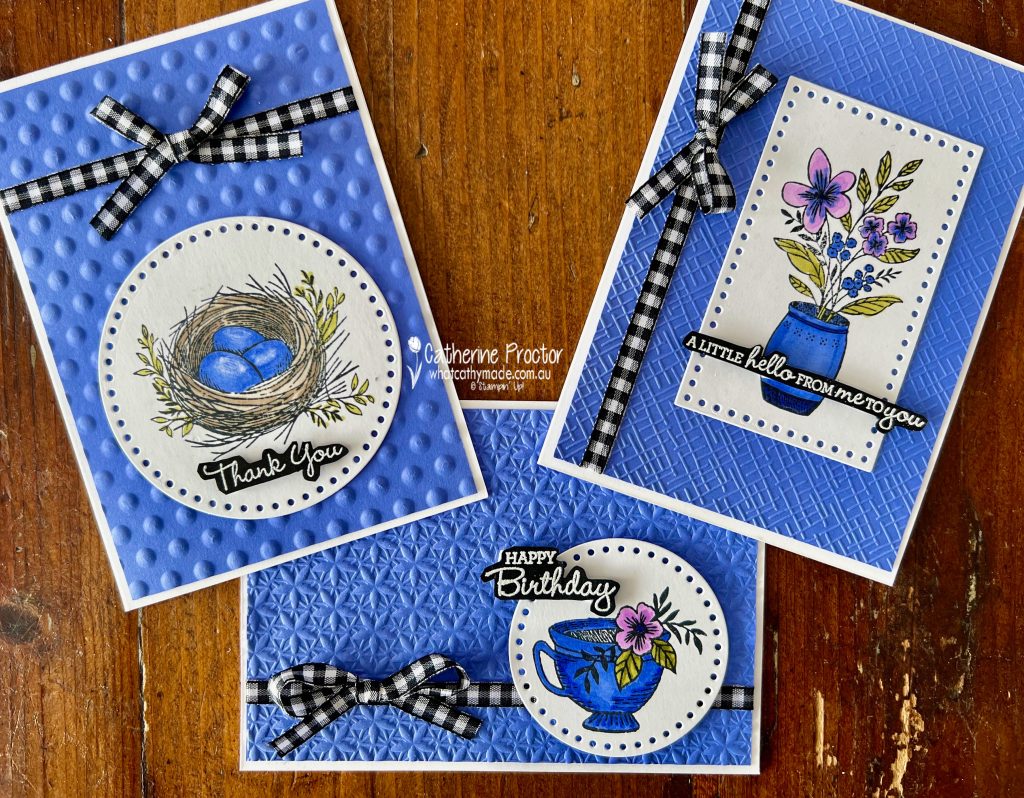
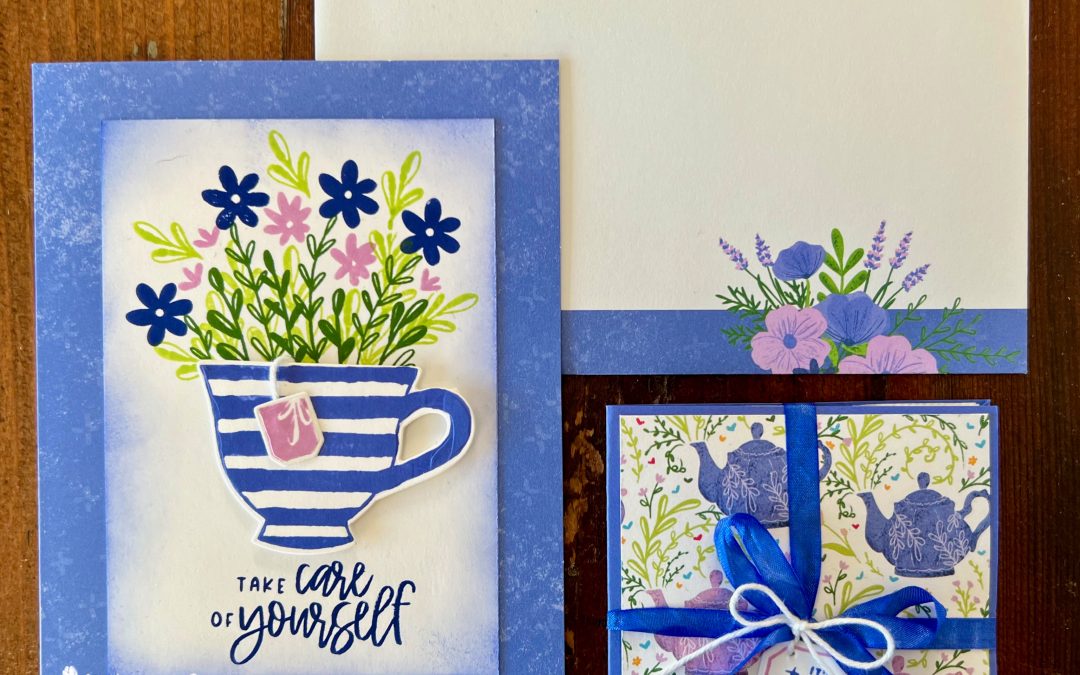
My three cards this week all use the brand new Everyday Details bundle from the January–April 2024 Mini Catalogue as well as the versatile Basics 3D Embossing folders from the online exclusives.
Card one uses the criss cross hatched embossing folder and the largest rectangle die from the Everyday Details dies.
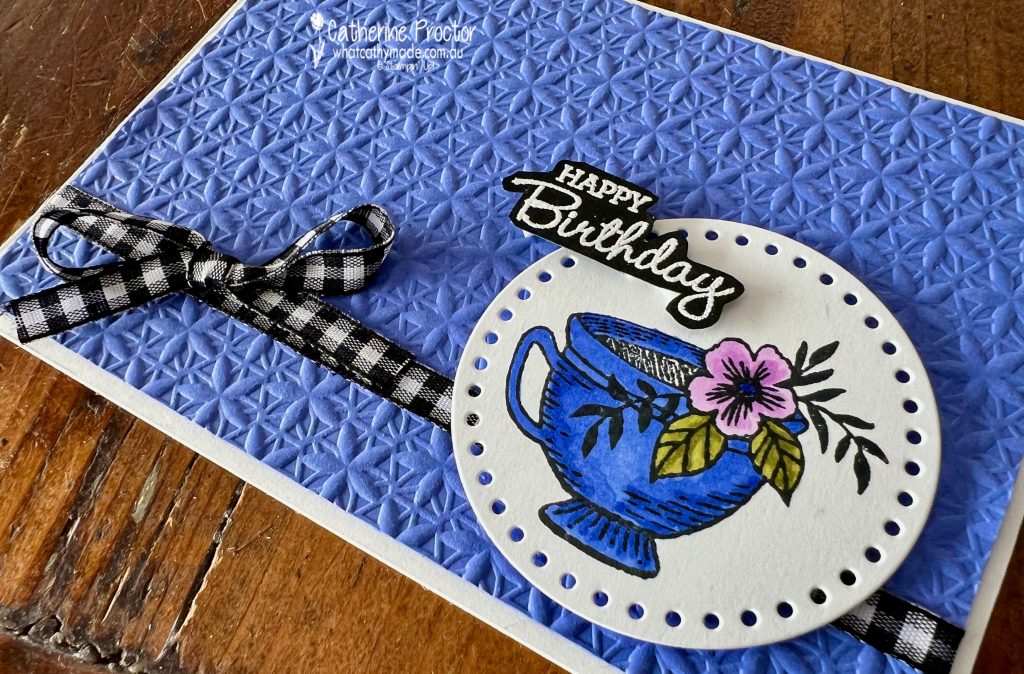
Card two features the teacup image, die cut using the second largest circle die from the Everyday Details dies.
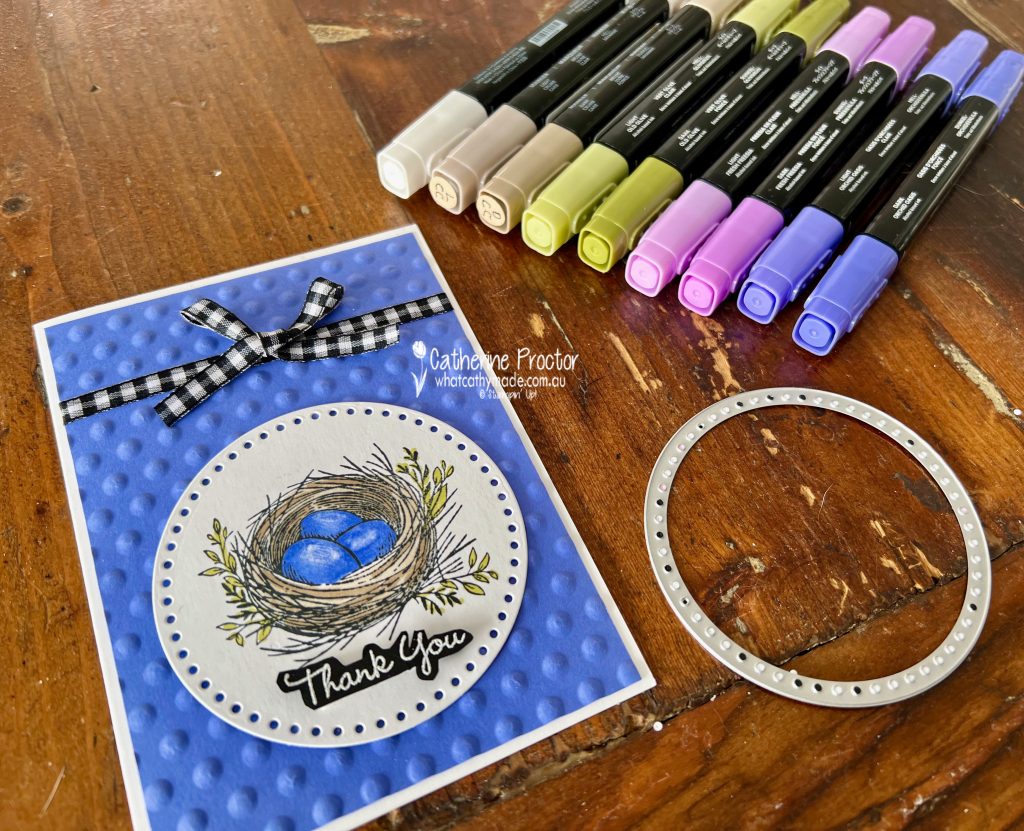
I think card three is my favourite as I love the three little blue eggs in the nest and the “bubble circle” embossing of Orchid Oasis card stock layer.
I don’t often use ribbon on my cards but I couldn’t resist adding a strip of black and white gingham ribbon adhered with Tear & Tape Adhesive with a bow attached with an adhesive dot.
Now it’s time to hop on over to our next participant, the lovely Andrea Sargent – I can’t wait to see what Andrea has made this week!
If at any time you find a broken link, you can find the complete list of all participants below.
Welcome to week twenty six of our Art With Heart 2023-24 Colour Creations blog hop!
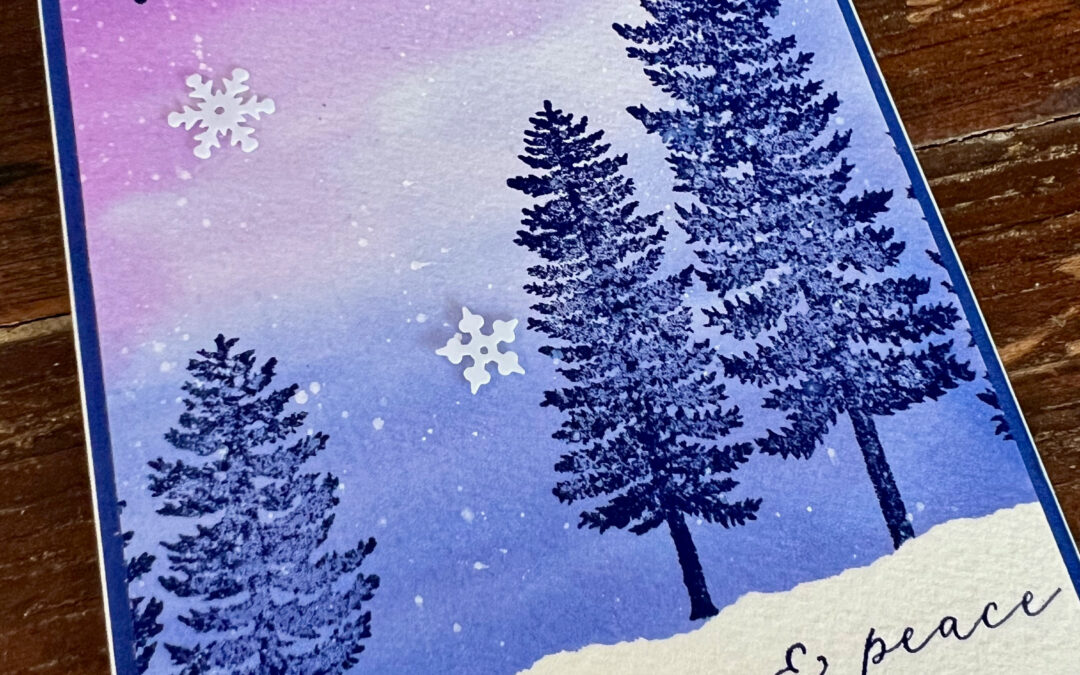
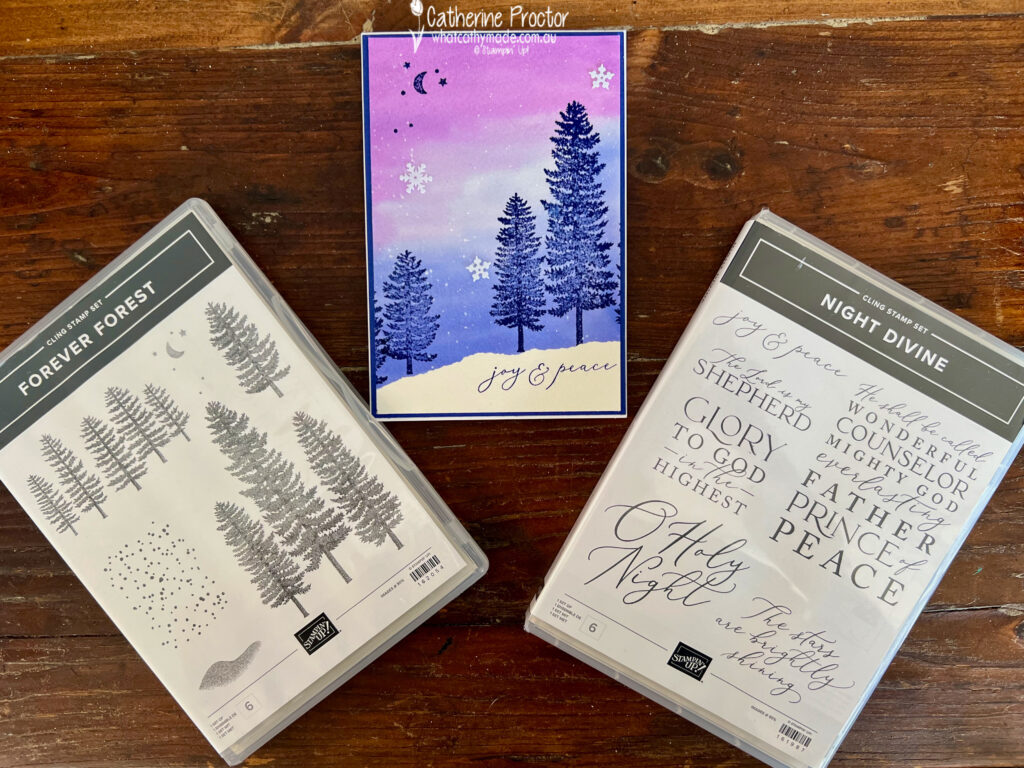
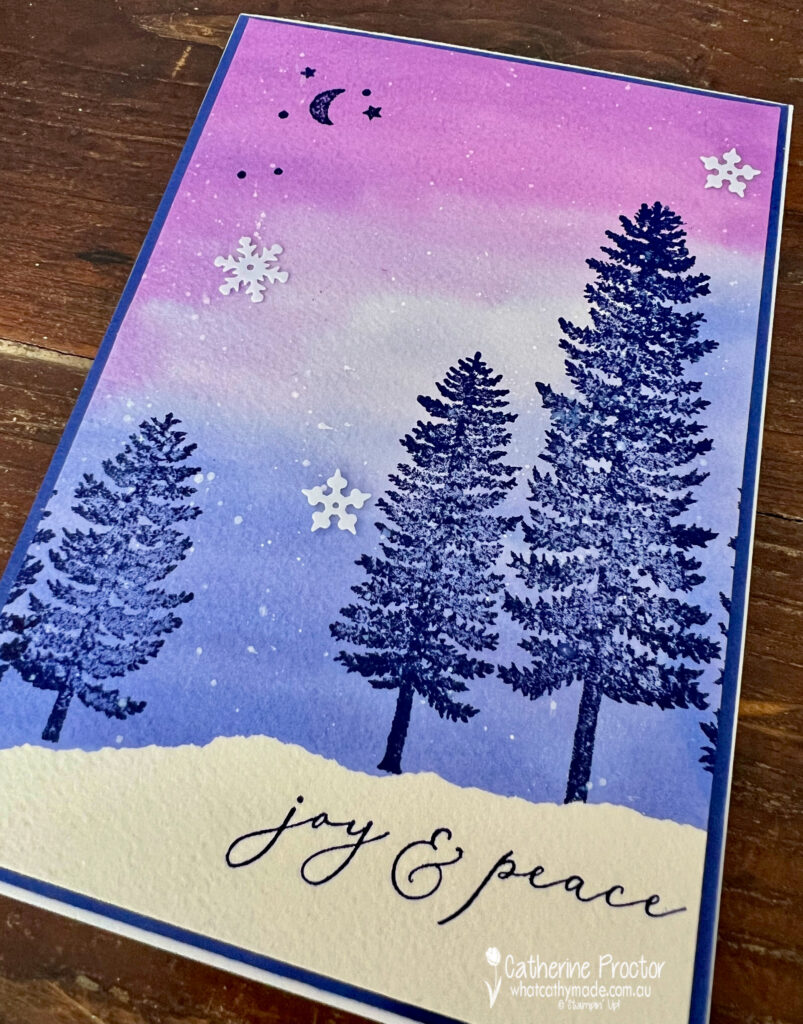
This week we are showcasing Gorgeous Grape, a vibrant purple colour that is now in the regals family, however I still consider it to be a bright! I’ve made a watercolour Christmas card that pairs Gorgeous Grape with Orchid Oasis and Starry Sky.
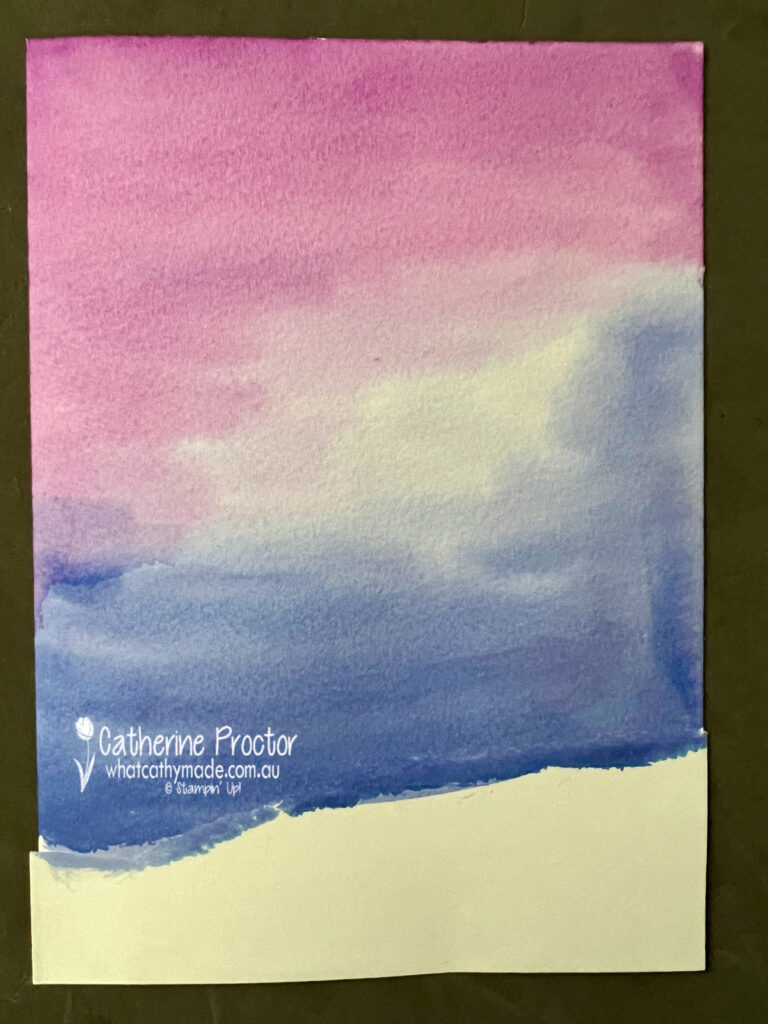
Watercolor backgrounds are so easy to make and even though they come out differently every time you really can’t make a mistake with watercolour. Well, that’s what I like to tell myself, anyway.
Adhere a torn strip of Stampin’ Up masking paper to the bottom section of a sheet of Fluid 100 watercolour paper and then use the widest water painter brush to cover the watercolour paper with water.
Once the paper is all wet, colour it in with Gorgeous Grape, Orchid Oasis and Starry Sky from top to bottom. Use a heat tool to dry the water coloured background.
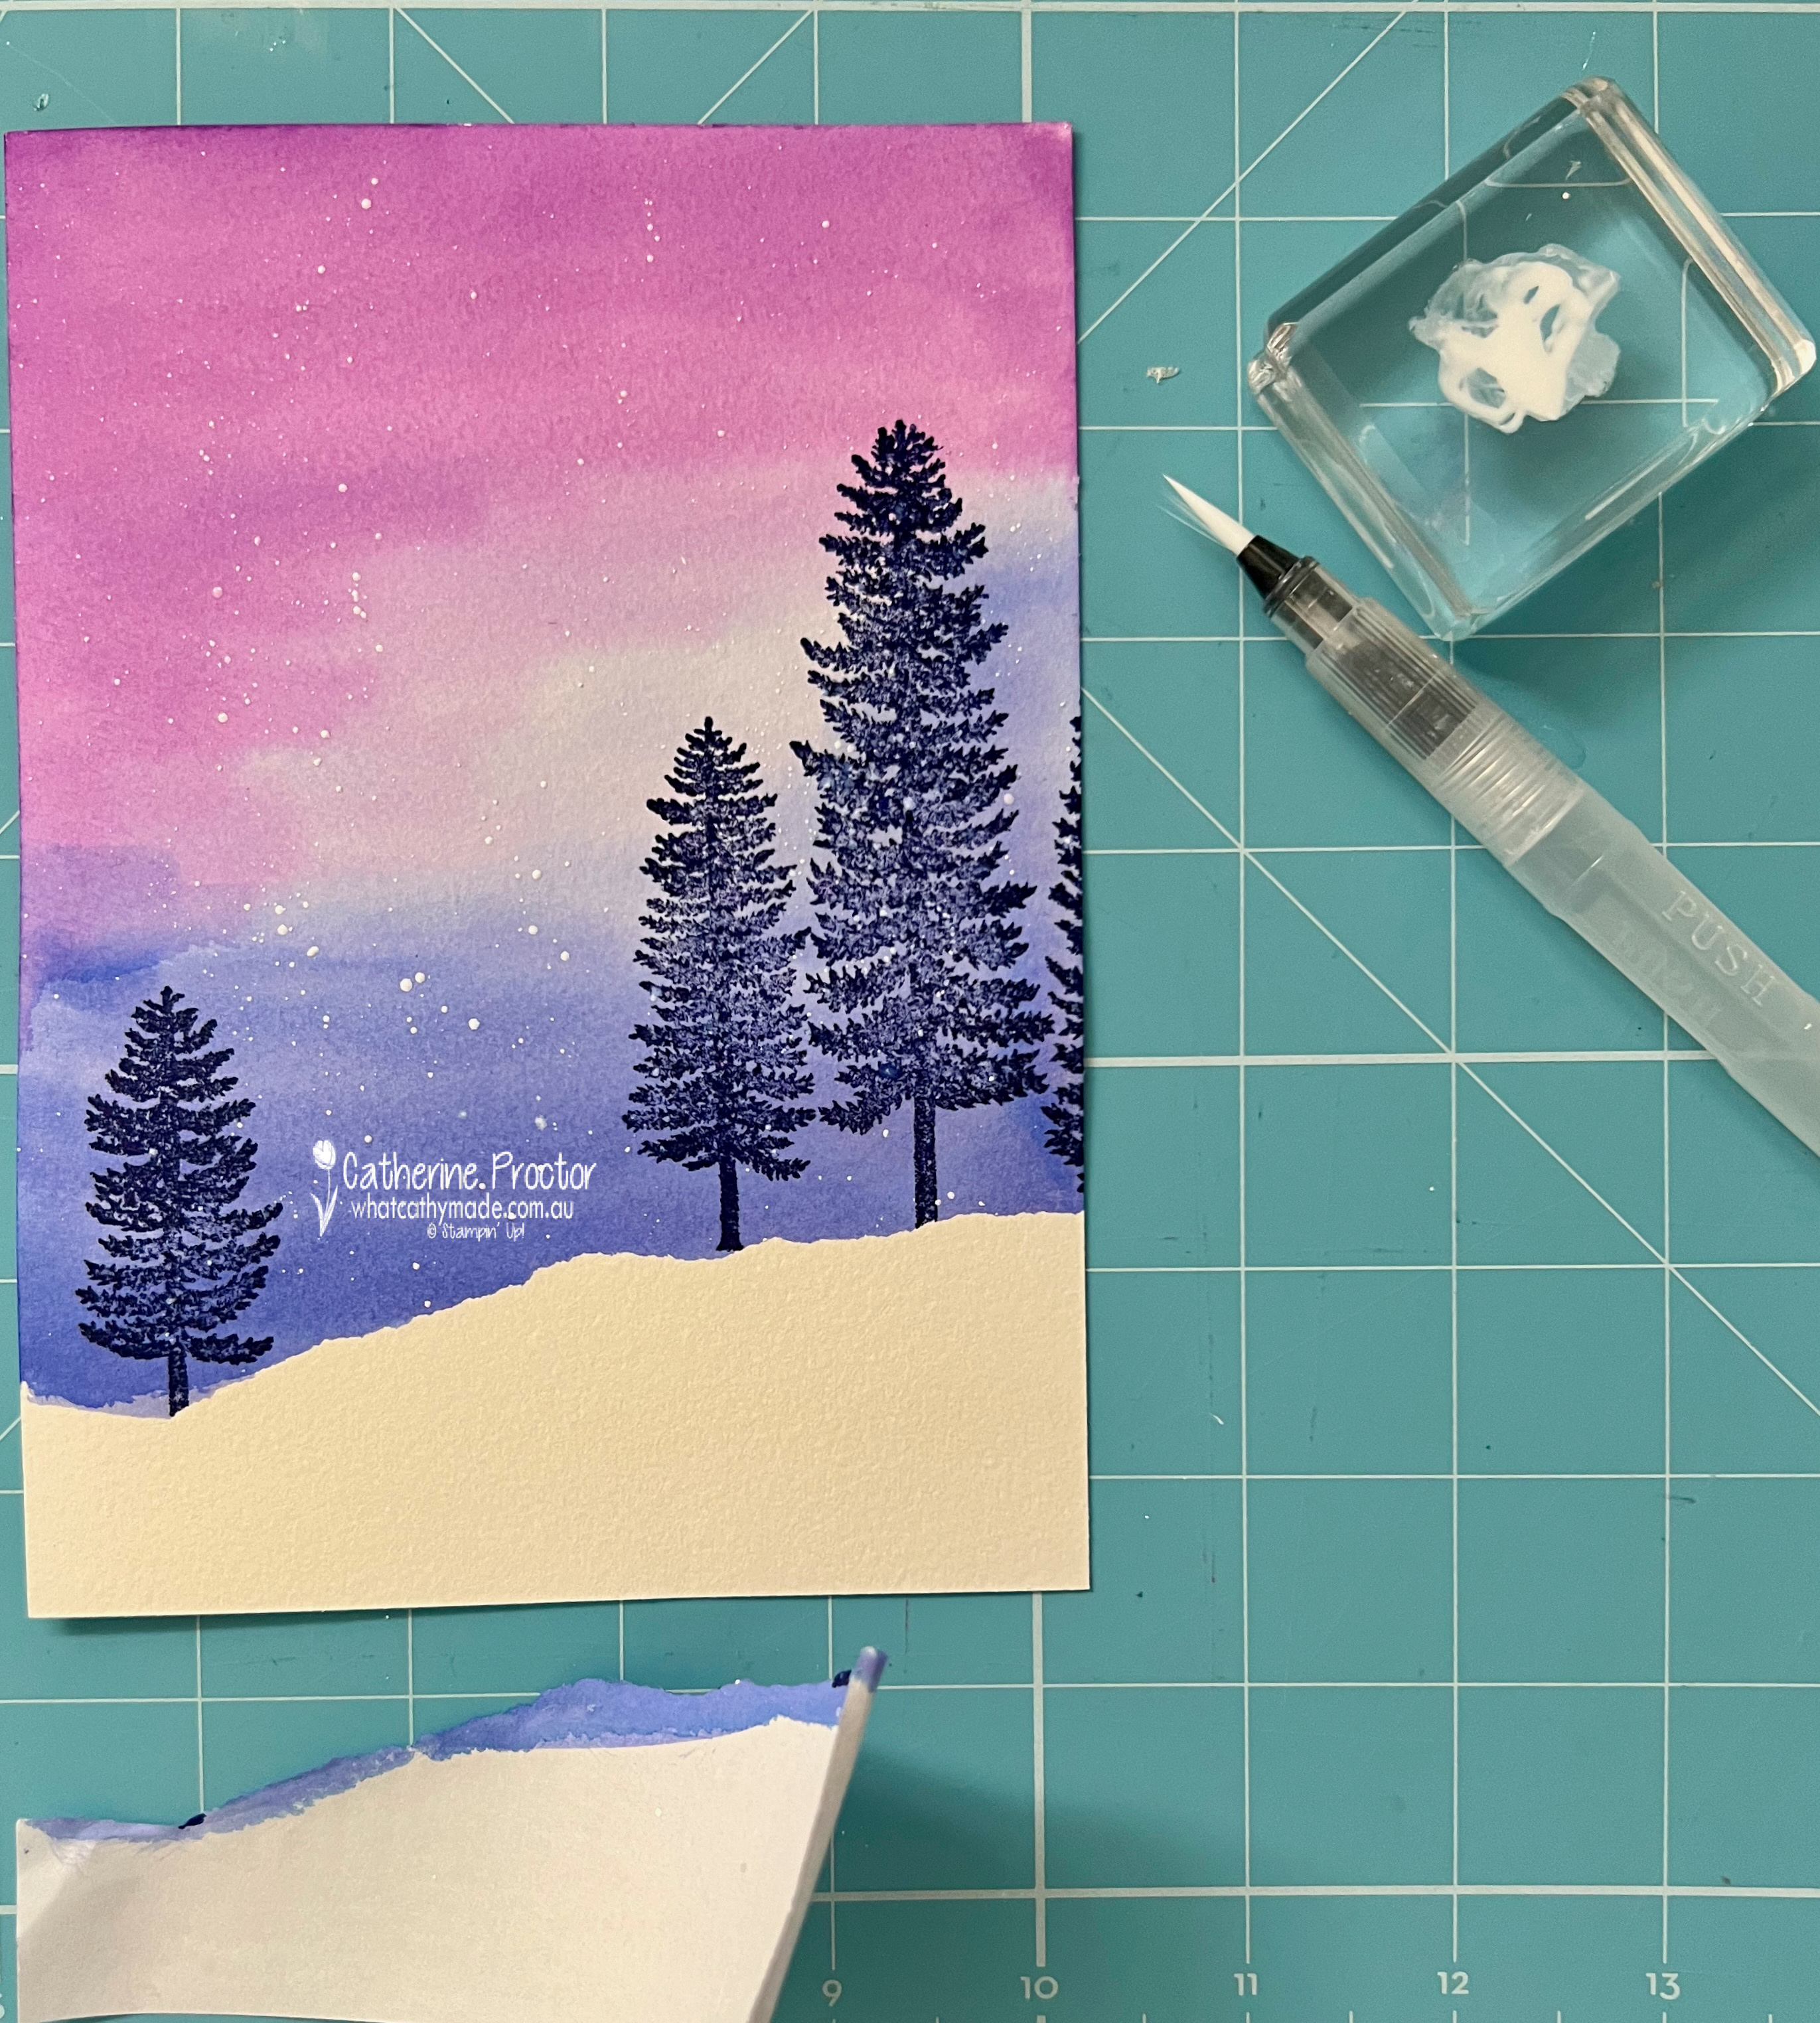
Stamp trees from the Forever Forest stamp set in Starry Sky and splatter some Whisper White Craft Stampin’ Ink Refill (diluted with water) before carefully removing the masking paper to reveal the snowy landscape.
The ‘joy & peace’ sentiment is from the Night Divine stamp set and the moon and star images are from The Forever Forest stamp set, both stamped in Starry Sky.
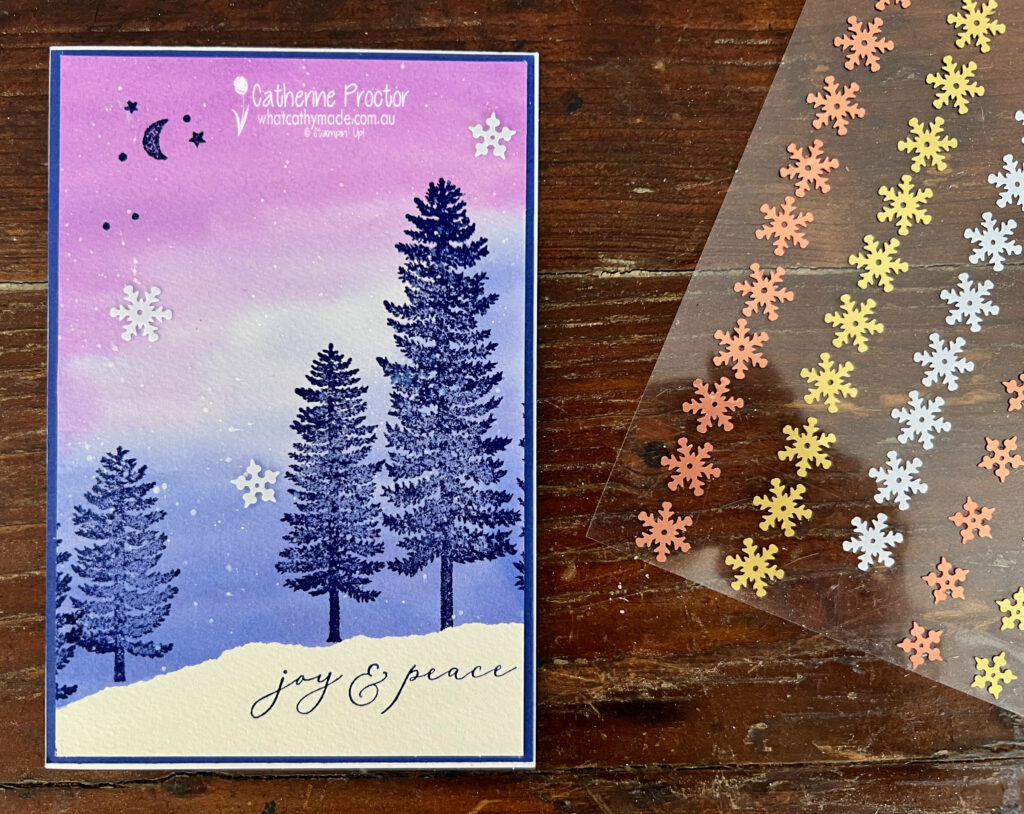
Tiny white snowflakes from the Adhesive-Backed Snowflake Assortment complete the front of the card.
I stamped another tree on the left in Starry Sky once I trimmed the card front to fit on the card base – I forgot the watercolour paper is a lot wider than our metric card bases.
The Starry Sky cardstock layer behind the water coloured card front really makes the Gorgeous Grape water coloured section of the sky stand out.
Now it’s time to hop on over to our next participant, the lovely Rachel Palmieri – I can’t wait to see what Rachel has made this week!
If at any time you find a broken link, you can find the complete list of all participants below.
Welcome to first last week of our Art with Heart 2022-23 Colour Creations blog hop! This year we are going to showcase each of the 5 new In Colours for the first 5 weeks and then we are going to feature our core colours in alphabetical order.
This is our gorgeous new header image.
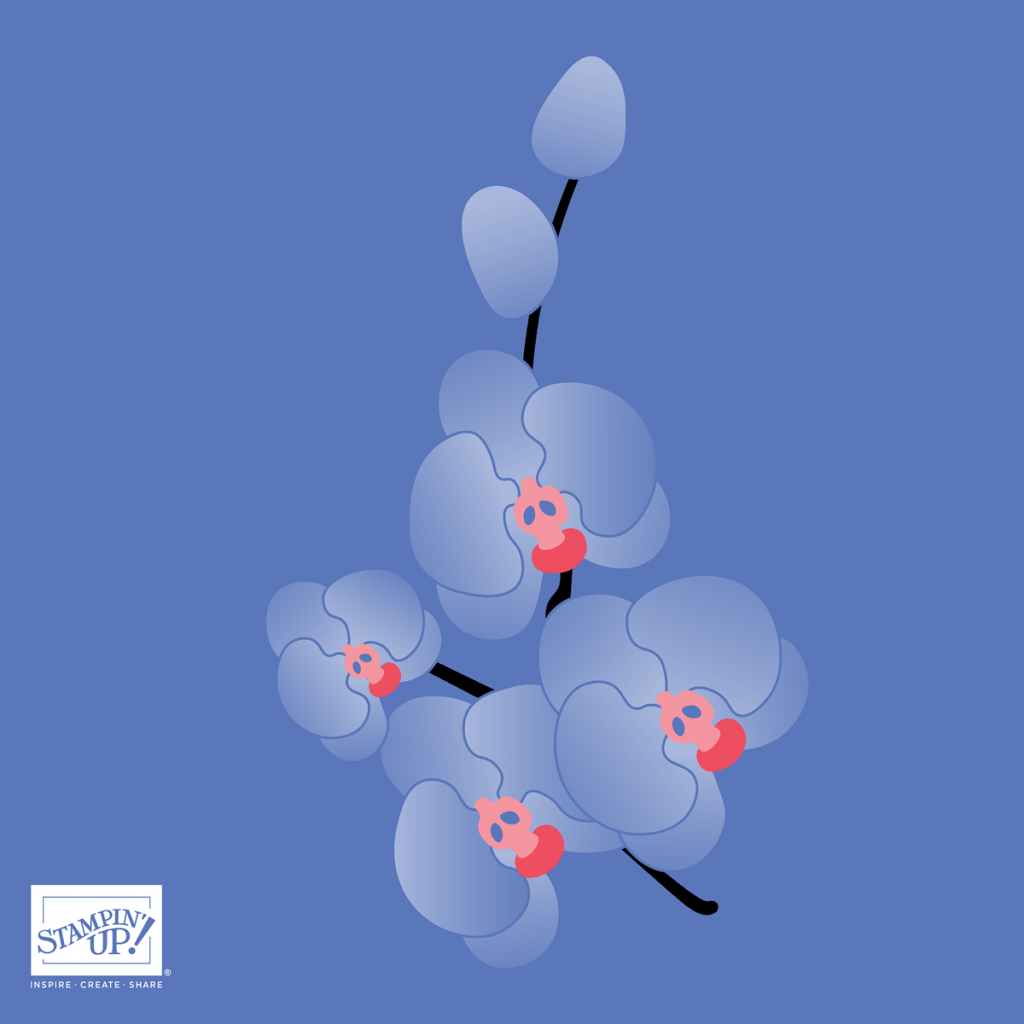
And this is our first new In Colour: Orchid Oasis, a pretty periwinkle blue that looks stunning with soft grays, lilac, greens and other blues.
Here’s what Orchid Oasis looks like in comparison to the other current Stampin’ Up! blues.
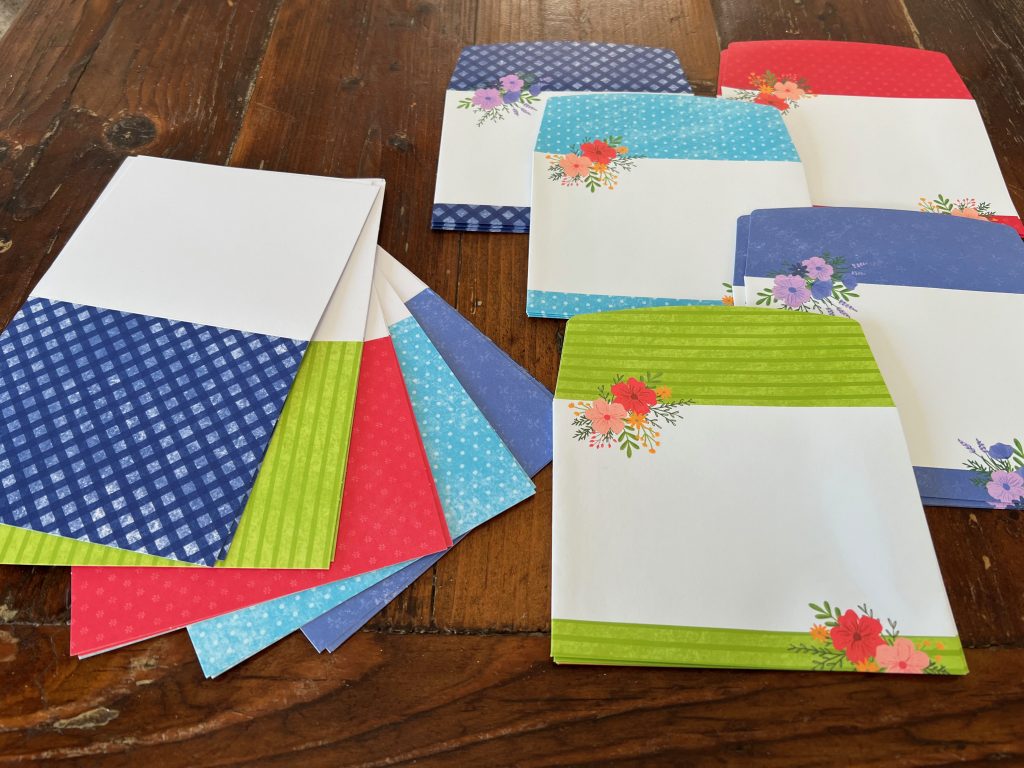
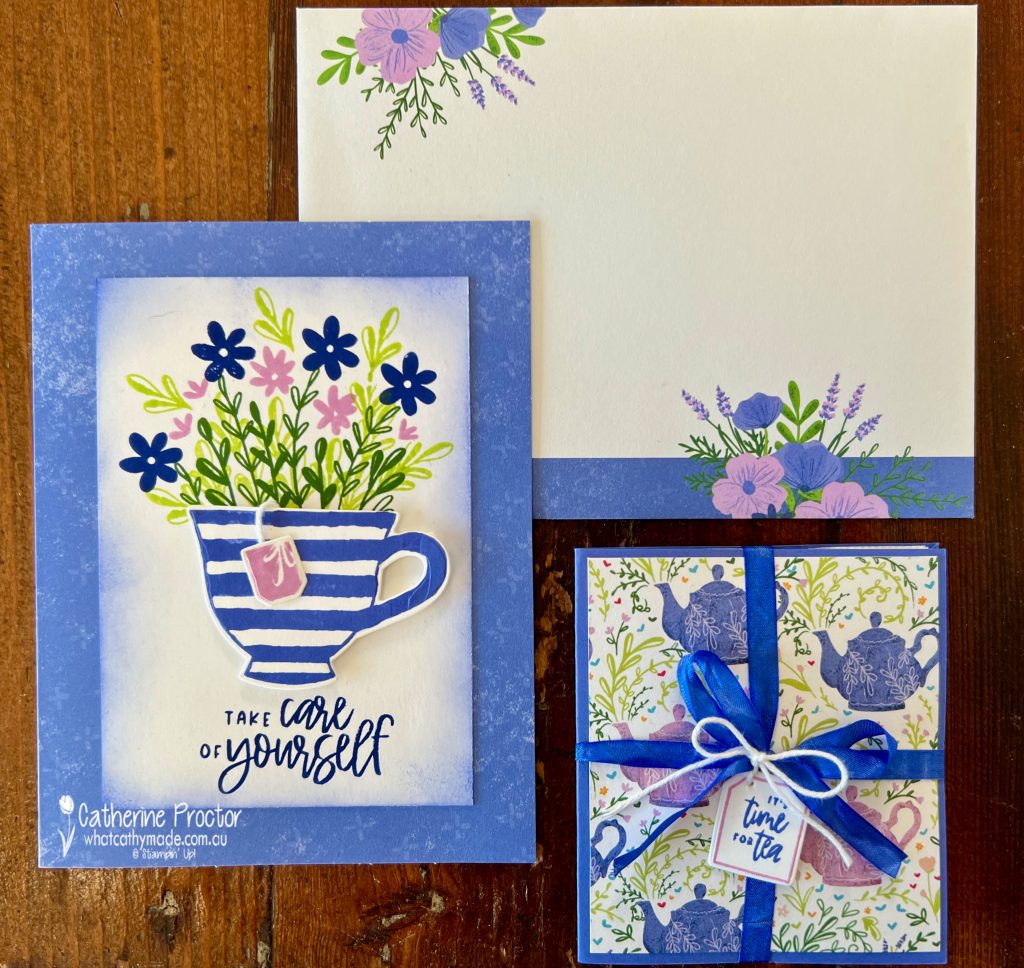
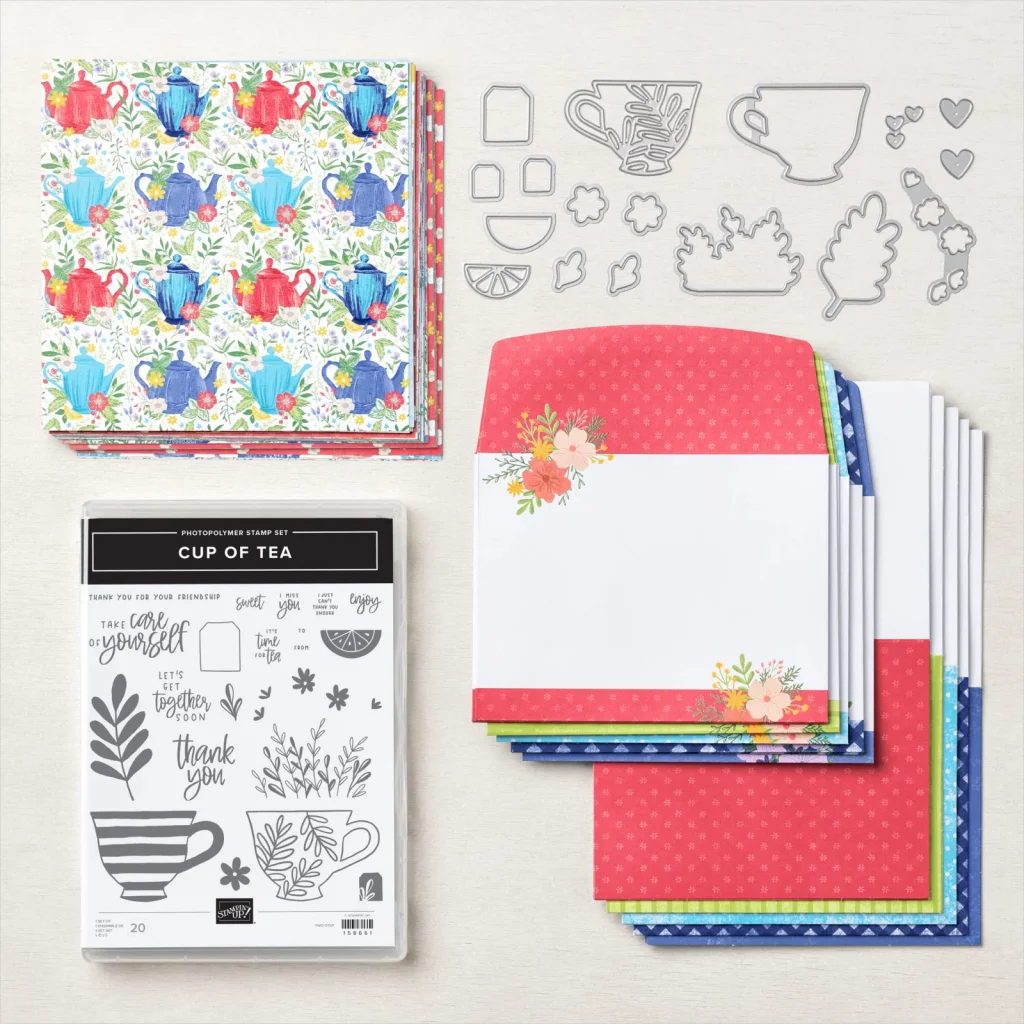
My card’s colour scheme has been inspired by the colours in the Tea Boutique cards and envelopes. There are 20 card bases and envelopes, 4 of each in the new In Colours: Orchid Oasis, Parakeet Party, Starry Sky, Sweet Sorbet and Tahitian Tide, as well as touches of Crushed Curry, Fresh Freesia, Garden Green and Petal Pink.
I’ve chosen the Orchid Oasis card base and envelope and used the coordinating Cup of Tea Bundle to stamp and die cut the elements for the front of my card.
Isn’t this little teabag stamp and die adorable? I stamped it in Fresh Freesia and attached it to the teacup with some Basic White Bakers Twine.
Some soft sponging with a blending brush around the edge of my stamped Basic White layer really adds another layer of interest.
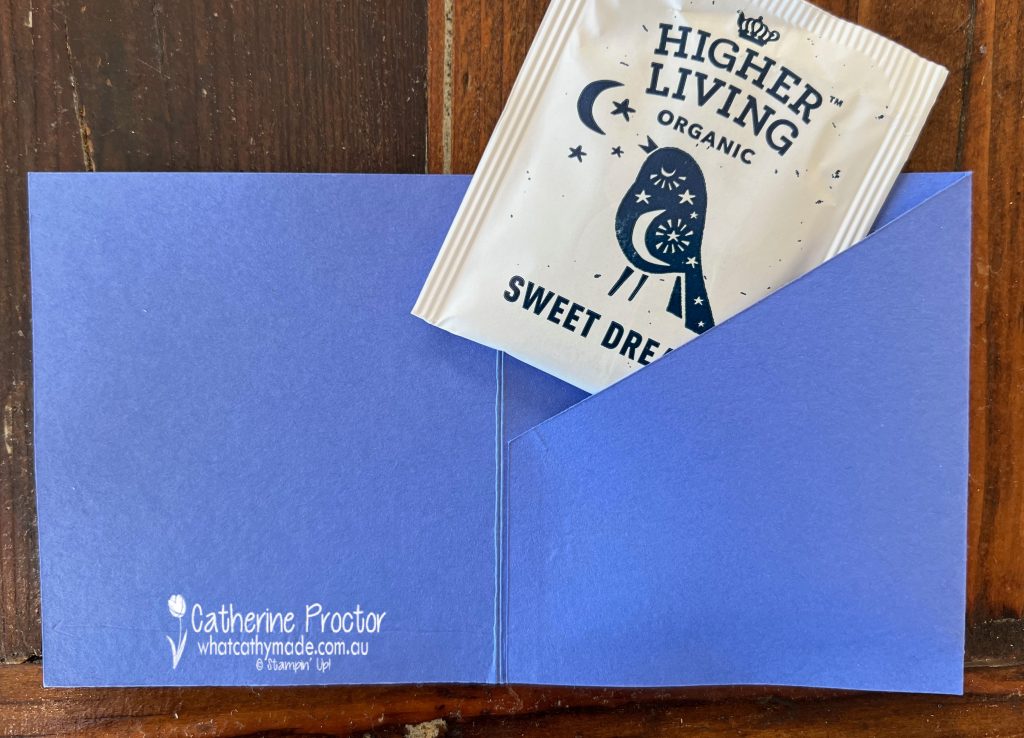
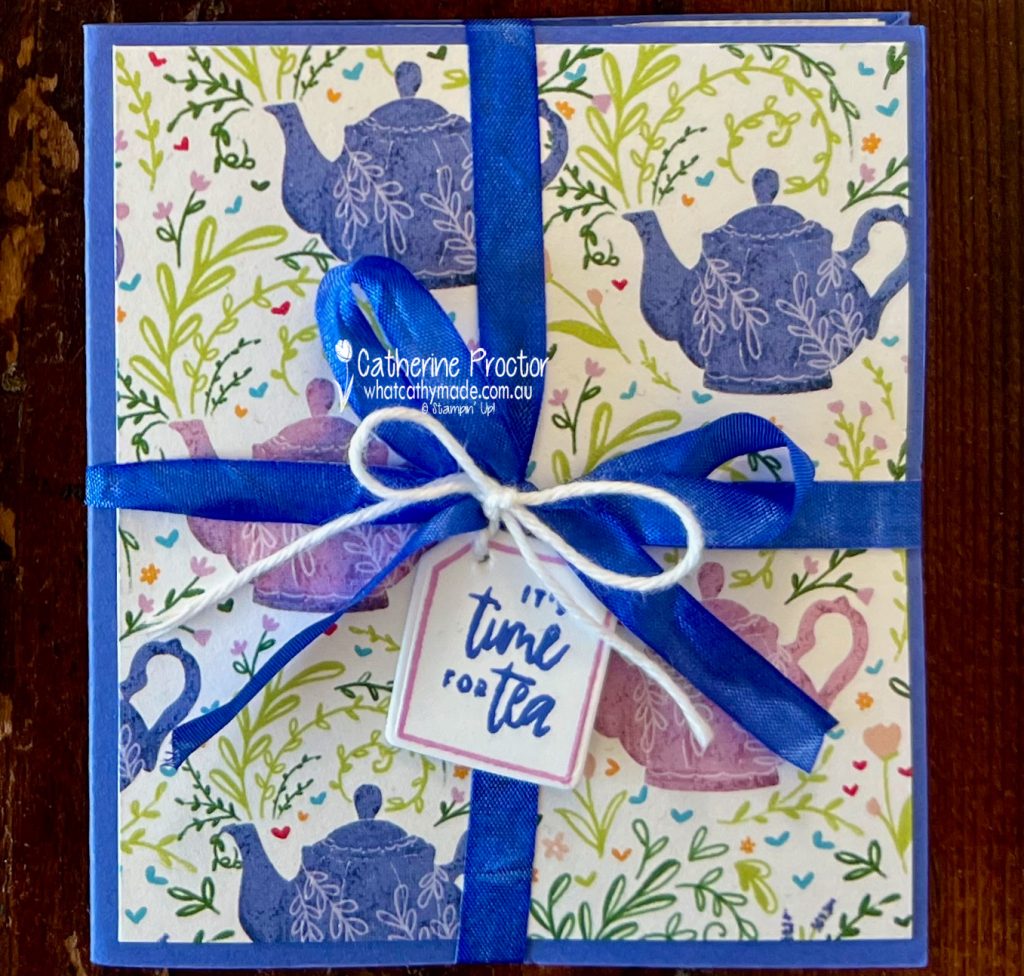
I’ve also designed a very easy-to-make coordinating teabag holder for a single teabag using Orchid Oasis Cardstock and Tea Boutique 6×6 DSP. This single size is just perfect for popping in the post for when you want to send more than just a card.
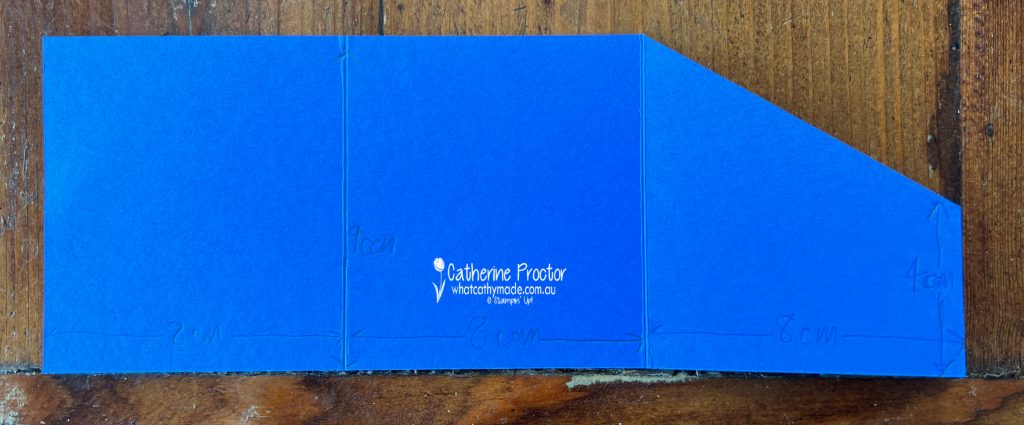
If you’d like to make this simple tea bag holder, here are the instructions:
Cut Orchid Oasis cardstock base 24 x 9 cm
Score and fold at 8cm and 16 cm
Cut 2 x pieces of DSP 7.5 x 8.5 cm and adhere to the outside of the left and middle panel
Mark 4cm from the bottom right hand side of the far right panel (this is the one without any DSP) and then cut on the diagonal from this point to the top of the 16cm fold
Add a strip of tear’n’tape along the bottom and far right edge of the far right panel
Fold this angled panel in and adhere
Insert teabag and close the holder
Tie with ribbon and use bakers twine to attach a stamped and die cut tea bag sentiment to the front bow.
Step 1
Step 2
Step 3
The ribbon around the teabag holder is the White Crinkled seam binding ribbon coloured in with the dark Orchid Oasis Stampin’ Blend.
I’m really enjoying playing with this versatile and so pretty Tea Boutique suite! I can see so many uses for this suite – after all, who doesn’t love a cuppa tea!
Now it’s time to hop on over to our next participant, the lovely Kate Morgan– I can’t wait to see what Kate has made this week!
If at any time you find a broken link, you can find the complete list of all participants below.