Art With Heart Creative Showcase: Cards Using Only Five Supplies
Welcome to the Monthly Art With Heart Creative Showcase. Tonight we’re sharing some ideas for cards that only use five supplies or less – a challenge for many avid crafters.
Luckily we all agreed that paper trimmers, paper snips, acrylic blocks and adhesives were core supplies assumed to be already on hand, which meant we could chose five more supplies in addition to these basics.

Although technically you could argue that an all inclusive card kit could be counted as one supply I did feel that would be cheating for the purposes of this challenge, so after much deliberation I settled on the following five supplies:
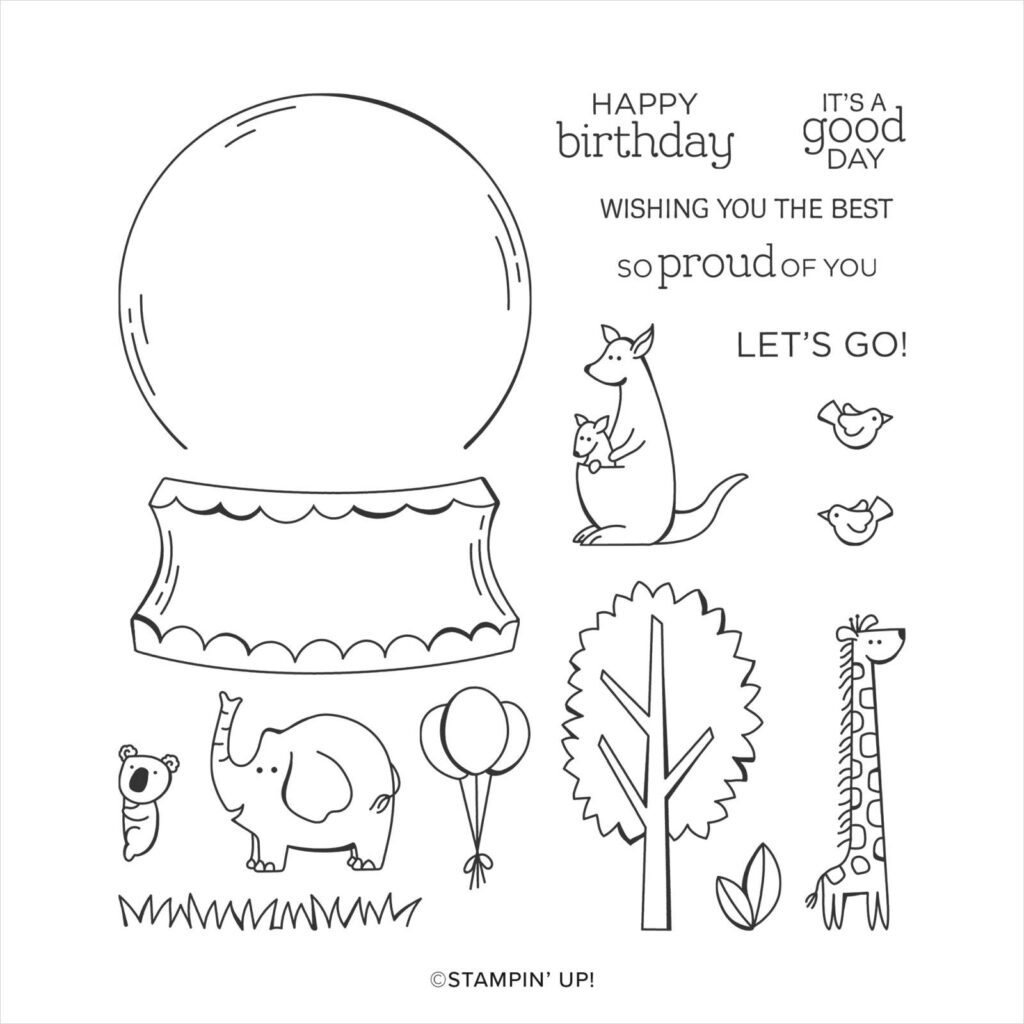
- Zoo Globe Stamp Set – this set is perfect for colouring and has both sentiments and images
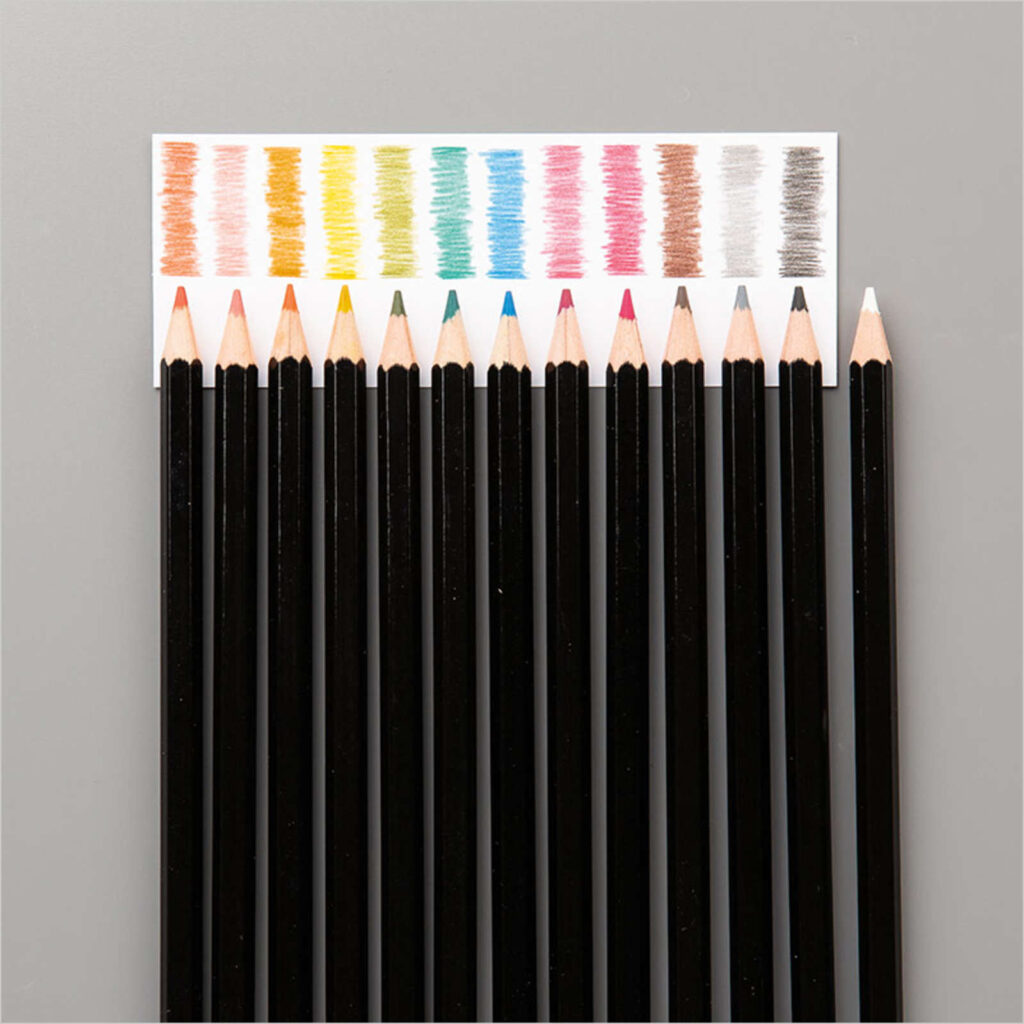
- Watercolour Pencils – an affordable and easy way to get a wide range of Stampin’ up! colours
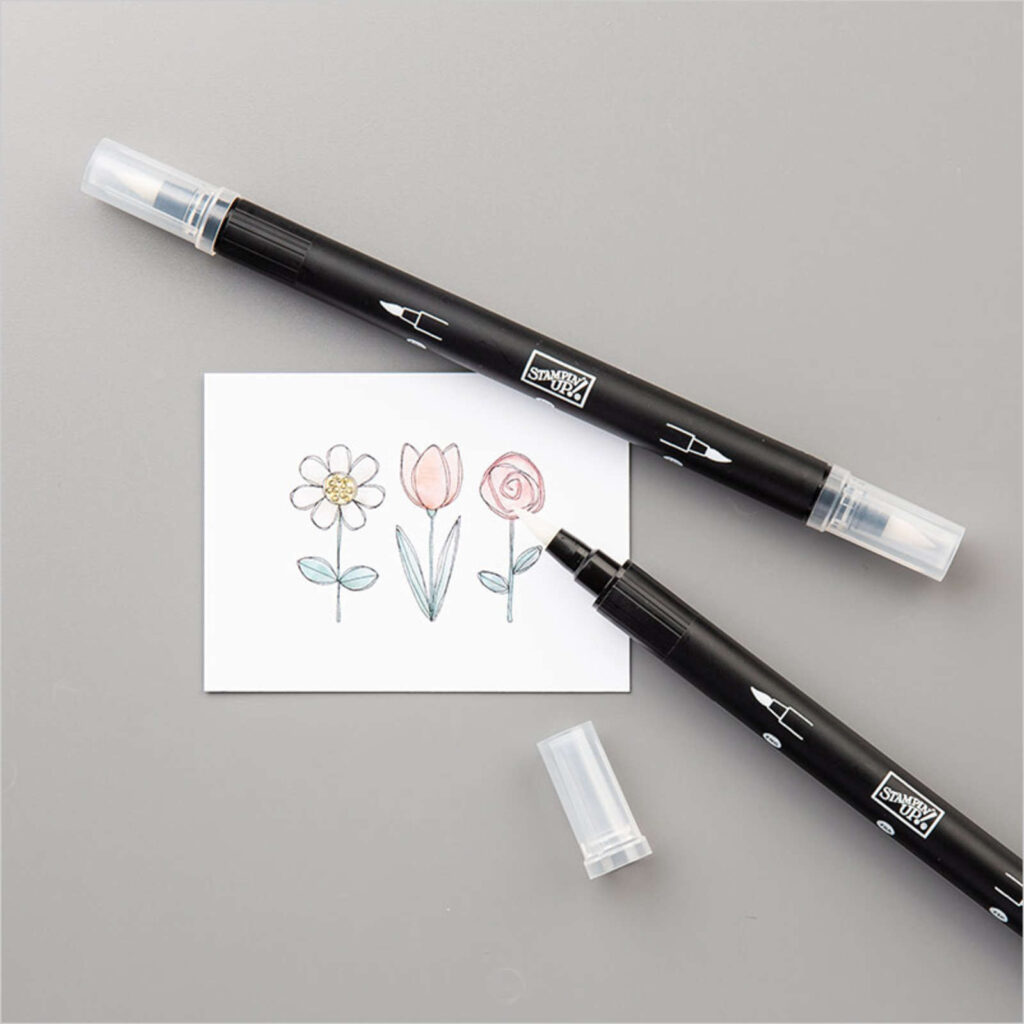
- Blender Pen – brings watercolours to life and not as wet or messy on the card stock as water painters
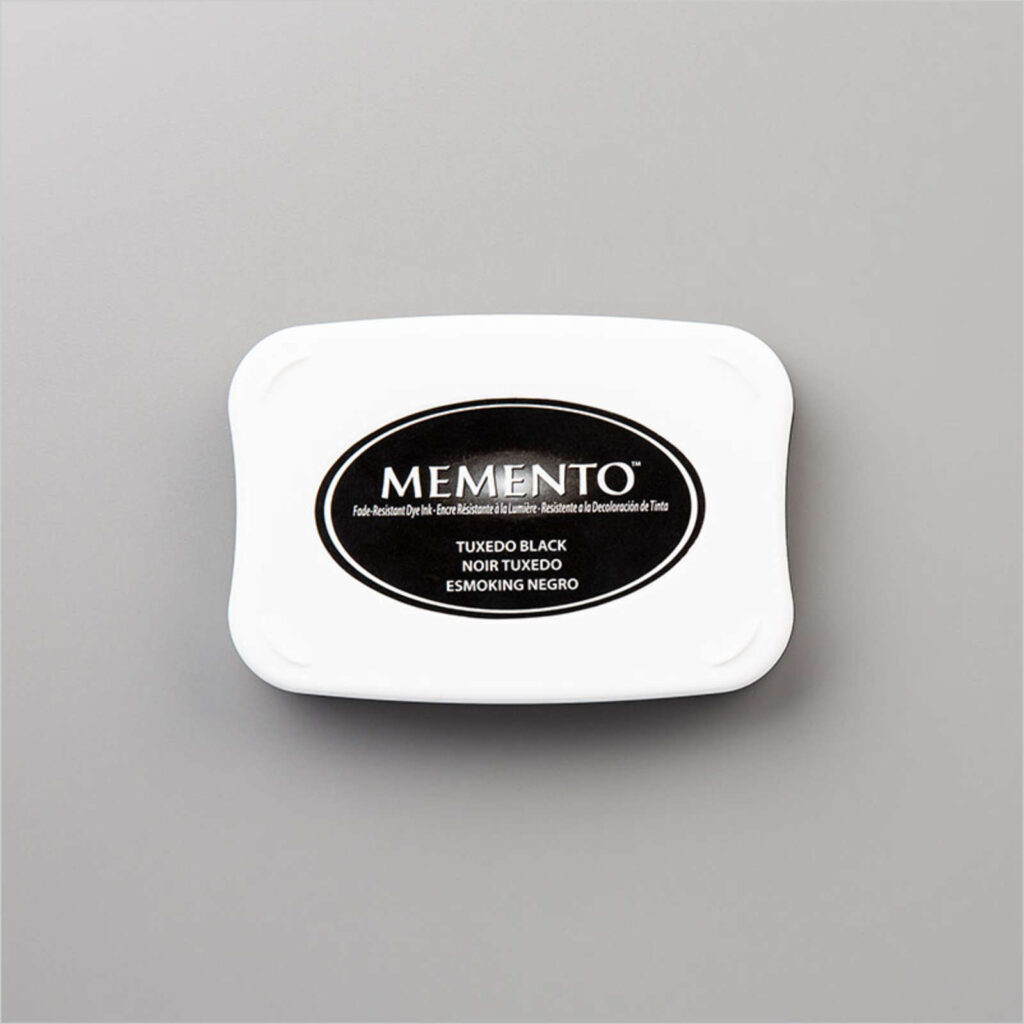
- Memento Stamp Pad – versatile black stamp pad for images and sentiments
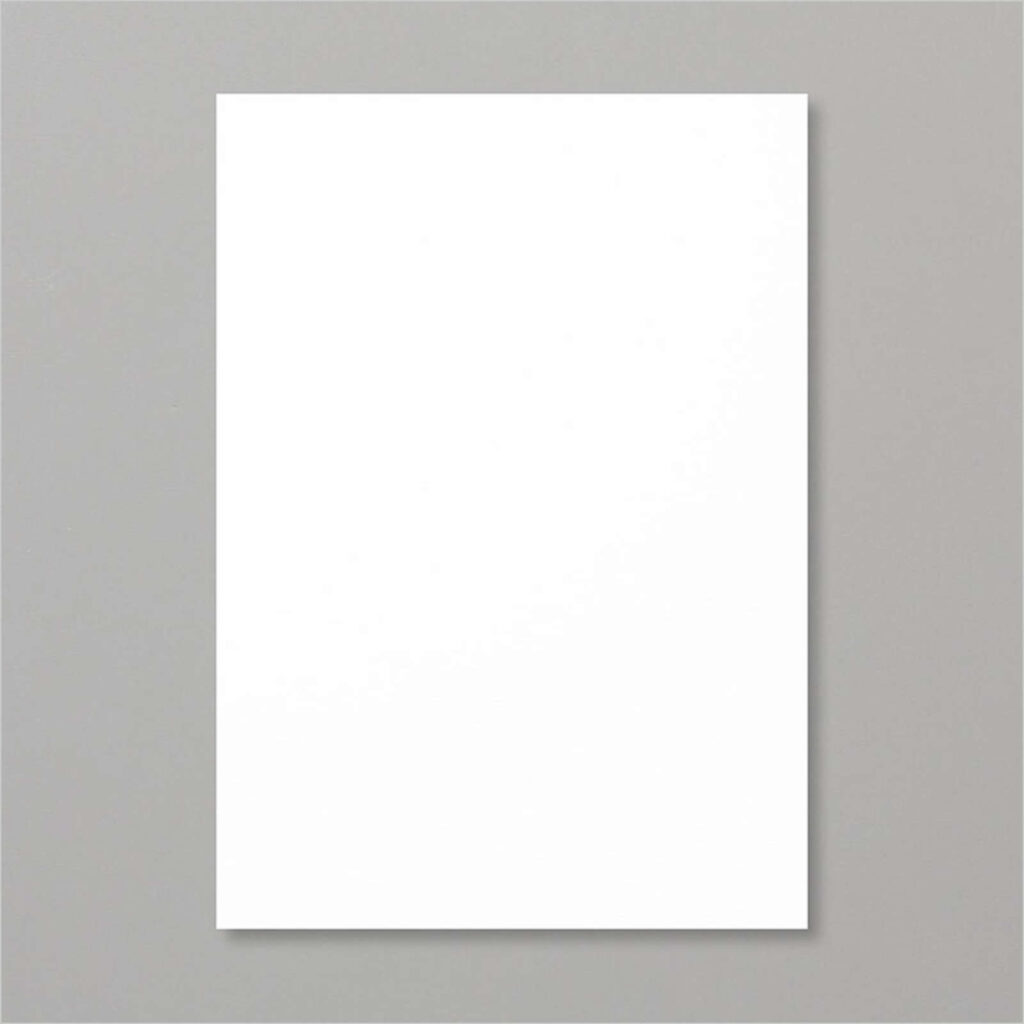
- Whisper White card Stock – an essential and versatile basic for both making the card base and stamping the card layer
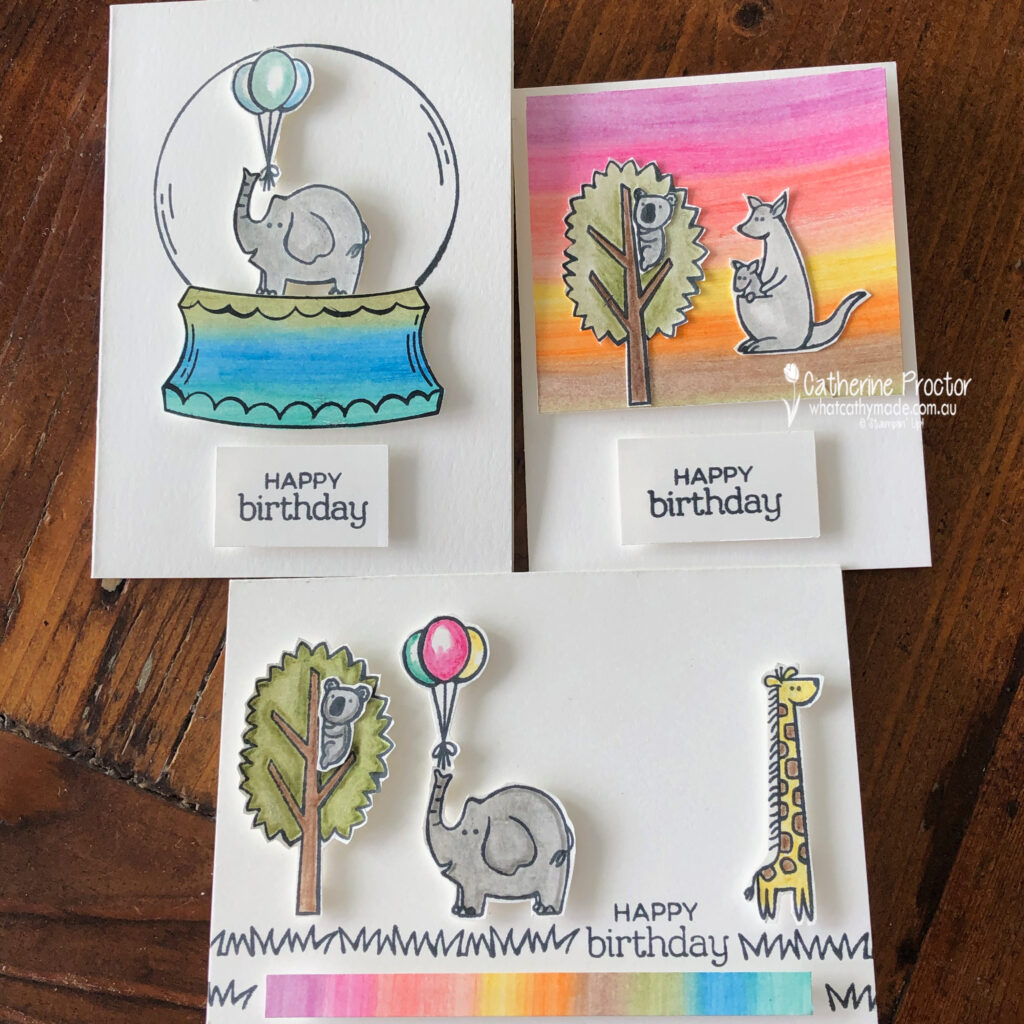
I had so much fun playing with the zoo globe stamp set I ended up making three cards to share with you several different techniques you can try even if you only have limited supplies.
TECHNIQUES 1 AND 2: CREATING YOUR OWN DSP AND BLENDING WATERCOLOUR PENCILS WITH BLENDER PENS
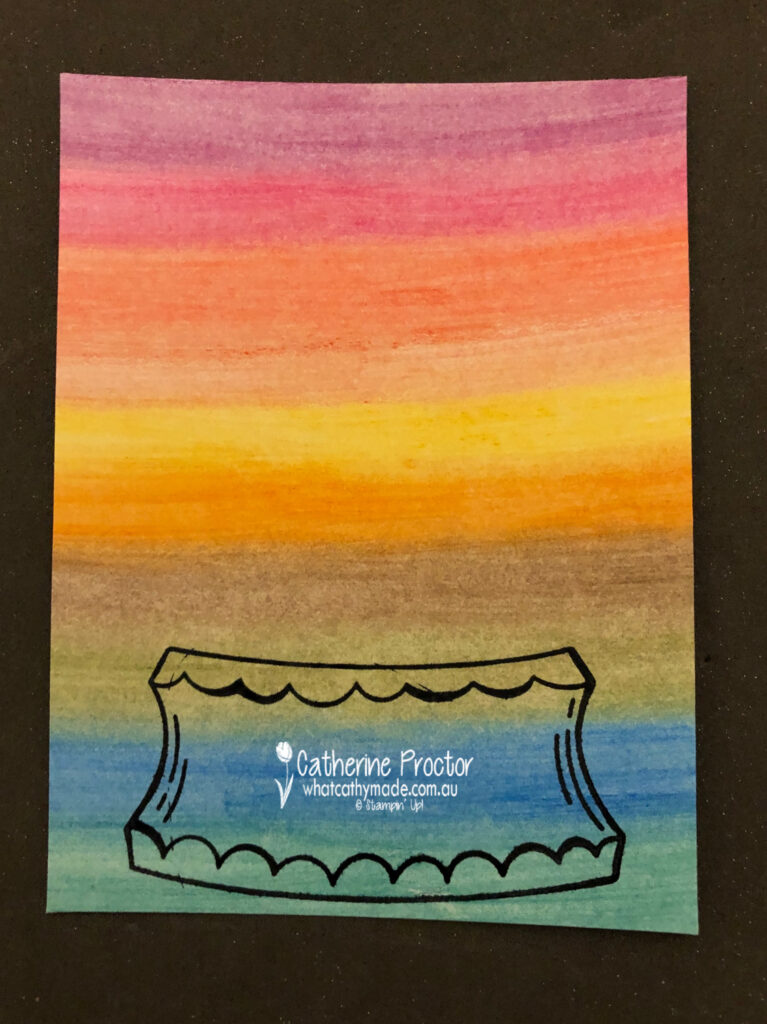
All three of my cards today begin with a piece of home made rainbow DSP. I created my rainbow DSP by simply using my watercolour pencils to scribble on my card stock in rainbow order. I could have also created a homemade patterned DSP by stamped images onto the card stock and either coloured them in or left it as black and white but this was much faster.
To blend the colours together I simply coloured over the top of my pencil marks with my blender pen – it’s amazing to watch the pencil lines smooth out with the blender pen. Once I’d finished I rubbed the nip of my blender pen onto some scrap paper until it ran clear. It doesn’t matter if your nib is stained – it’s now ready to use again with any colour.
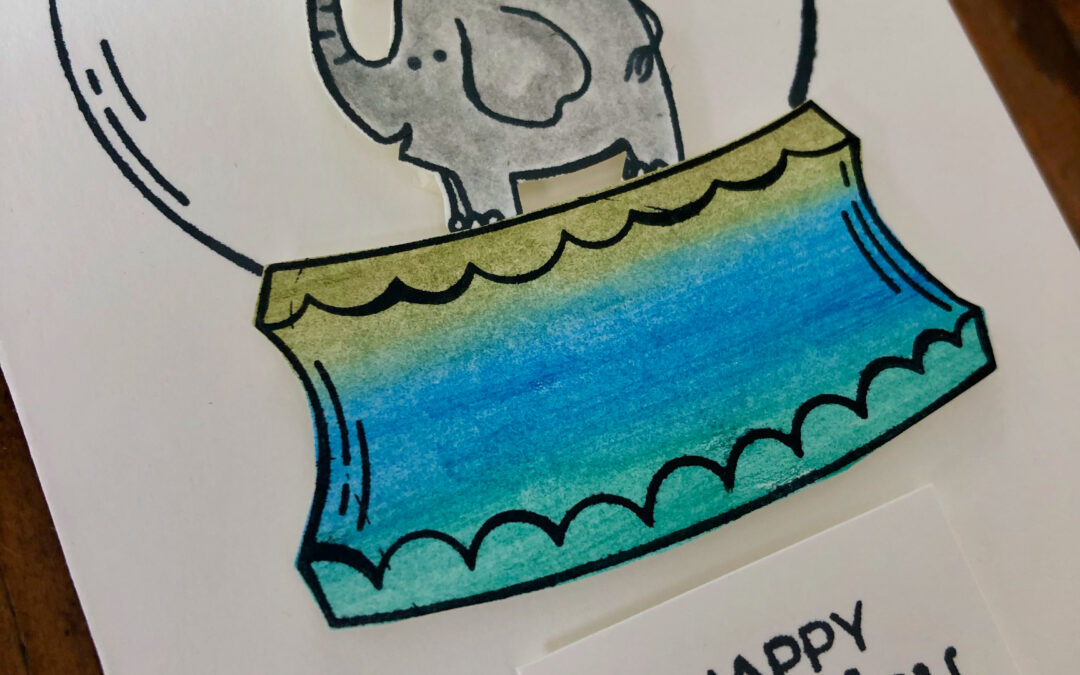
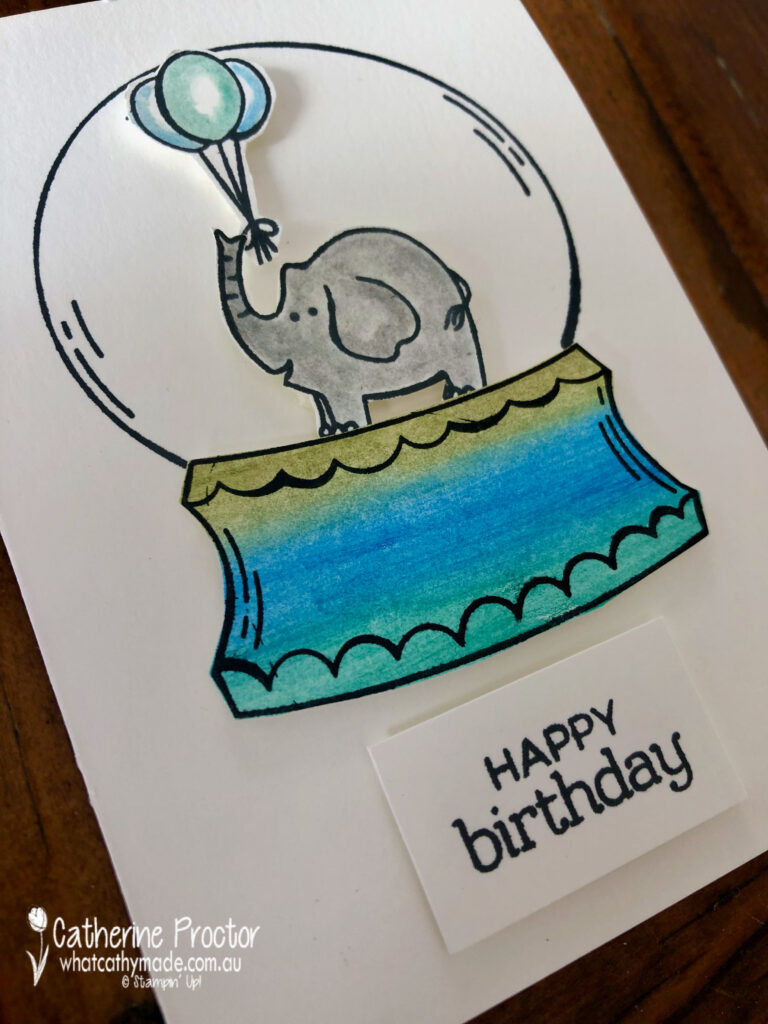
The photo below shows my homemade DSP with the globe base stamp already stamped onto it, which leads to my next techniques….
TECHNIQUES 3 AND 4 : PAPER PIECING AND FUSSY CUTTING
Once you’ve created your own DSP you can use it in a variety of ways. For card one I’ve stamped the base of the globe onto it before fussy cutting this piece out with my paper snips.
The dome of the globe was stamped directly onto my card base but the balloons, elephant and base of the globe were all coloured in with watercolour pencils and then blended with the blender pen before being fussy cut out and adhered to the card using Stampin’ Dimensionals.
Leaving a white space in the middle of the balloons gives them a real dimension.
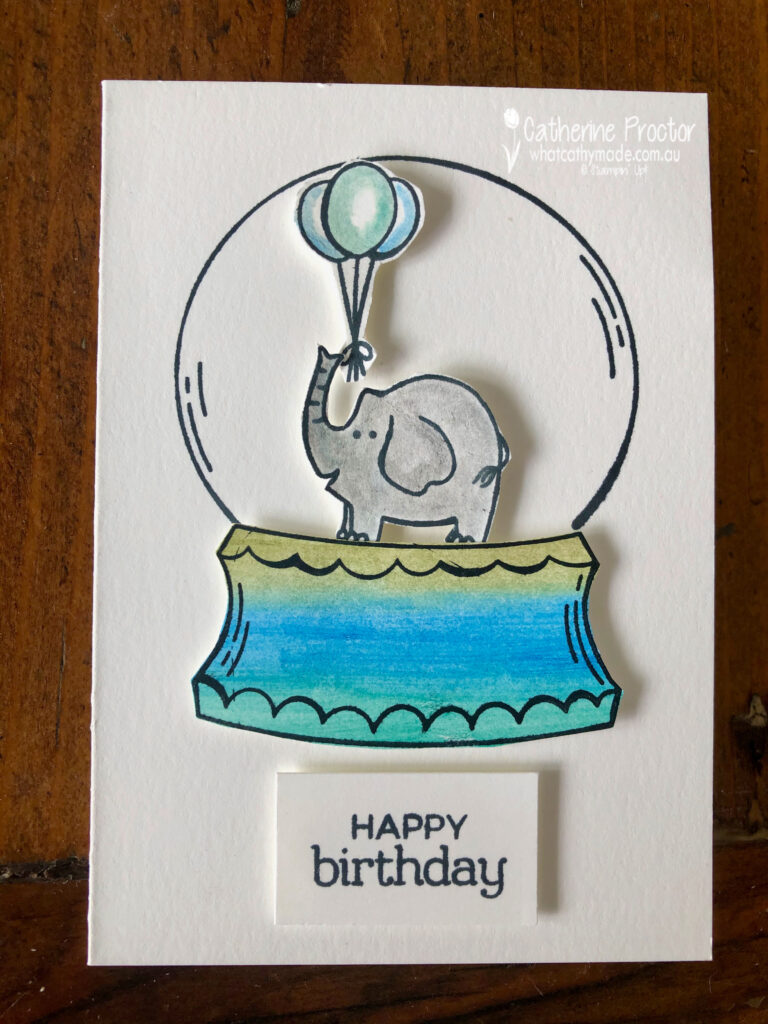
The “happy birthday” sentiment was stamped onto scrap piece of Whisper White card stock before being trimmed to size with the paper trimmer and adhered using Stampin’ Dimensionals.
TECHNIQUES 5 AND 6: CREATING A BORDER WITH STAMPS AND THE BLENDER PEN DIRECT TO PENCIL COLOURING TECHNIQUE
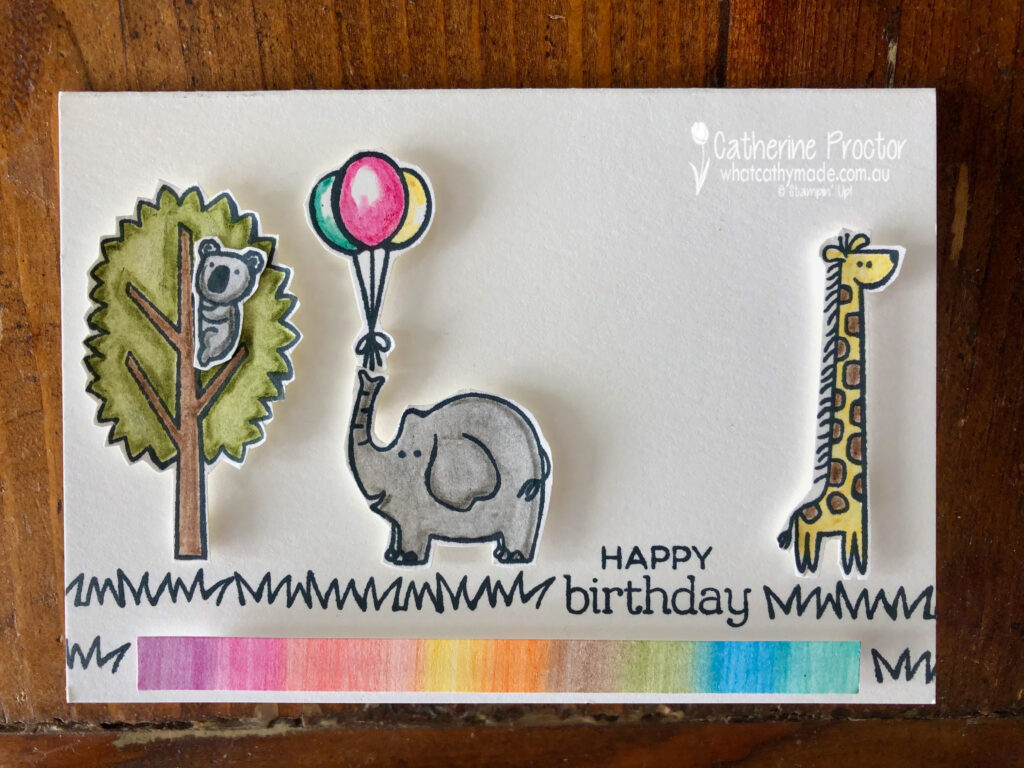
For my second card I used a rainbow strip of my homemade DSP and the grass stamp to create a double border for the base of my card.
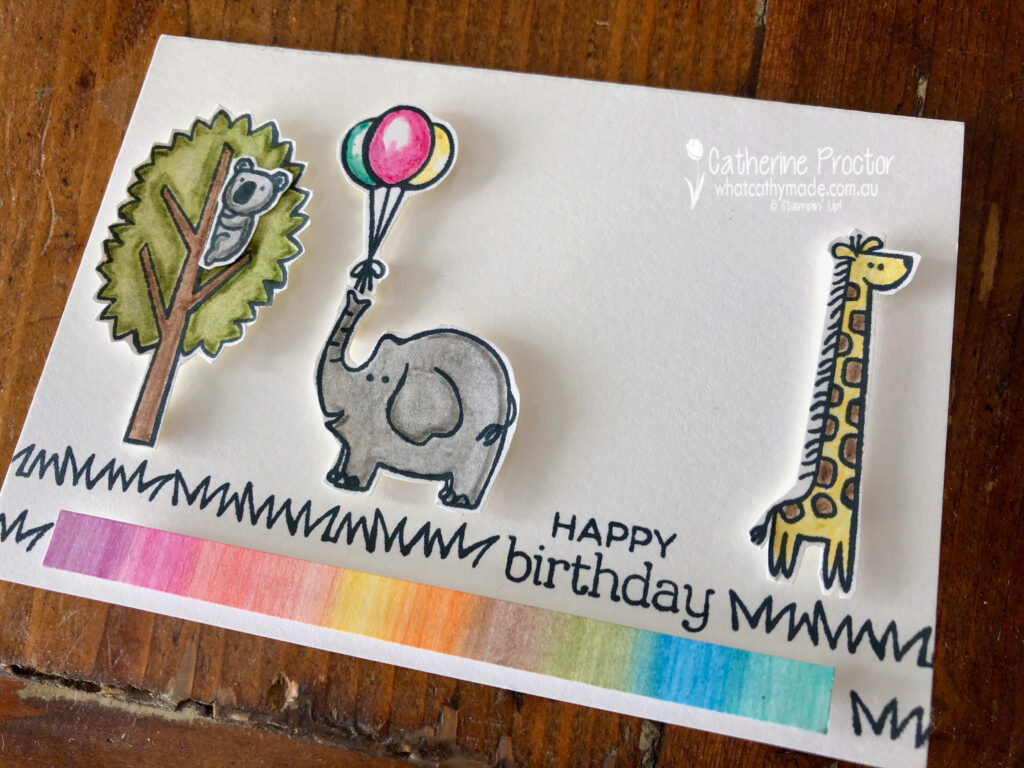
This time, when colouring my animals I first applied the nib of my marker to the tip of the pencil, lifting the colour off the pencil with my blender pen and then colouring the images with my blender pen.
You can also use your blender pen in this way to lift ink from the lid of your ink pad or ink from an acrylic block – it means your clear blender pen can be used to colour in any coloured pencil or ink that you have.
TECHNIQUE 7: USING HOMEMADE DSP AS BACKGROUND LAYER
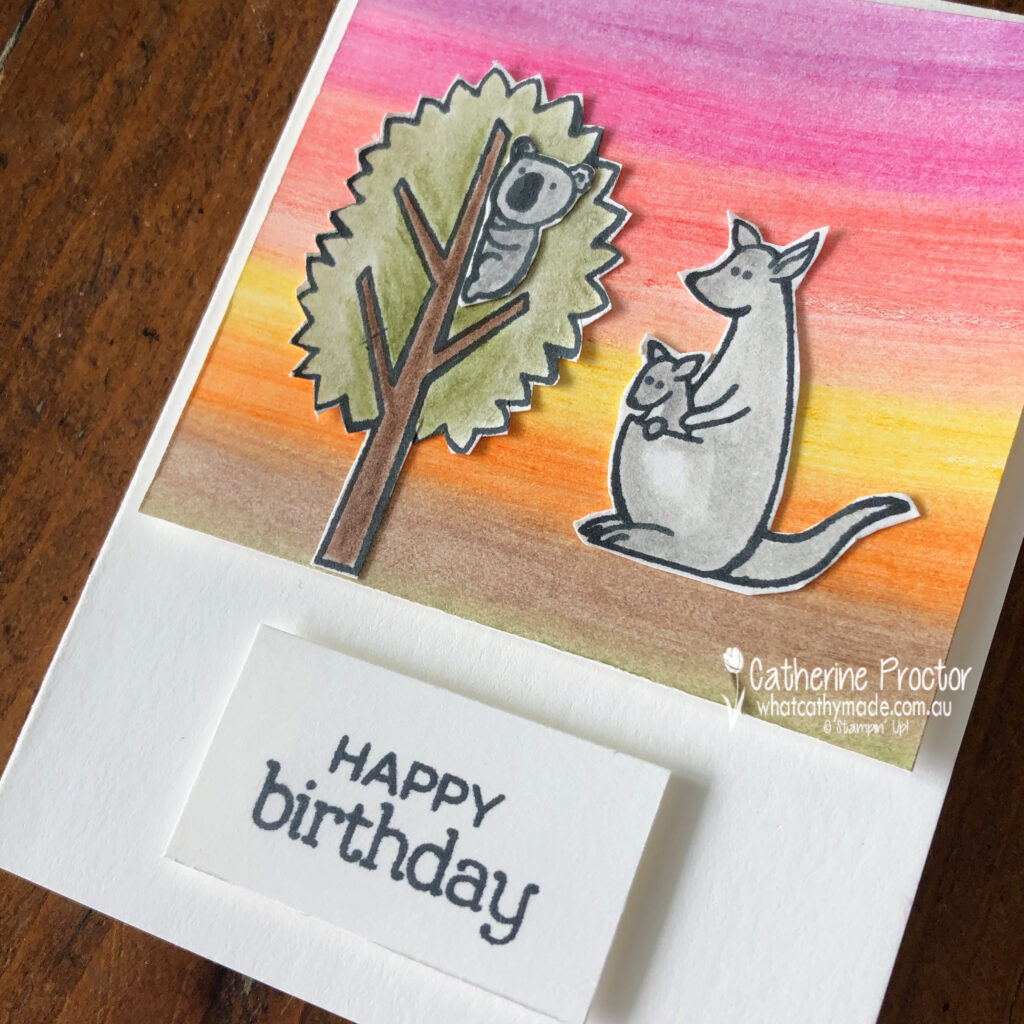
I hadn’t originally intended to make a third card but the colours on my remaining section of homemade DSP reminded me of the Australian outback…and I hadn’t used the adorable kangaroo and joey stamp yet!
This time I glued both of the stamped, water coloured and fussy cut images directly onto my home made DSP and added dimension behind the DSP by using Stampin’ Dimensionals to adhere it to the card base.
So what do you think of my 5 ingredient cards?
Simple cards made with few supplies can be really effective…especially if you have a few techniques and tricks up your sleeve that enable you to maximise whatever supplies you have on hand.
To see more Designer Series Paper inspiration from the AWH Team head back to Rachel‘s page as she is hosting our monthly blog hops.
To purchase any of the products I’ve used in my cards tonight simply click on the phots of the products below.
Product List


If you’d like me to post you your very own copy of the forthcoming January-June 2021 Mini Catalogue, the August – December 2020 Mini Catalogue, the 2020-21 Stampin Up! Annual Catalogue, the 2020-21 Beginners Brochure, or to simply find out about more about Stampin’ Up! contact me.