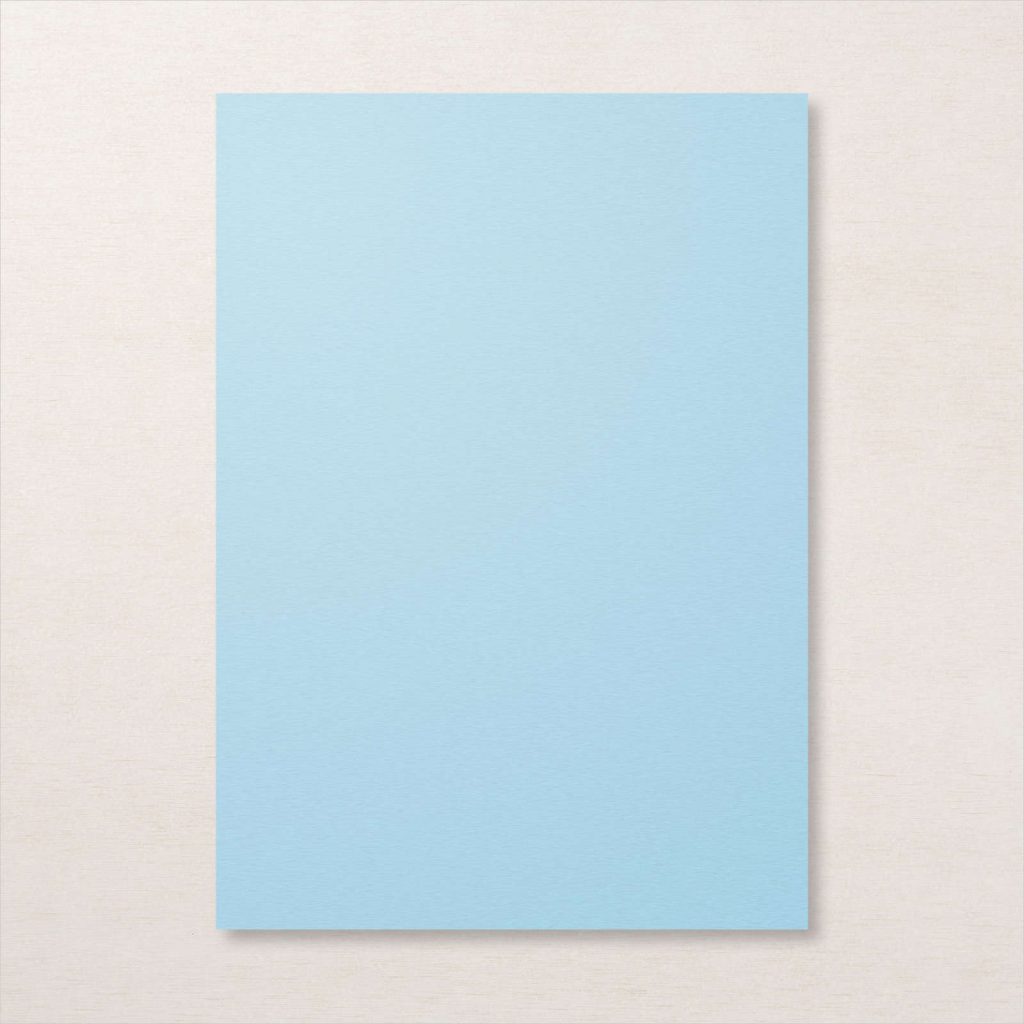
This week we’re showcasing Balmy Blue for week two of our Art With Heart Colour Creations Blog Hop 2020-21.
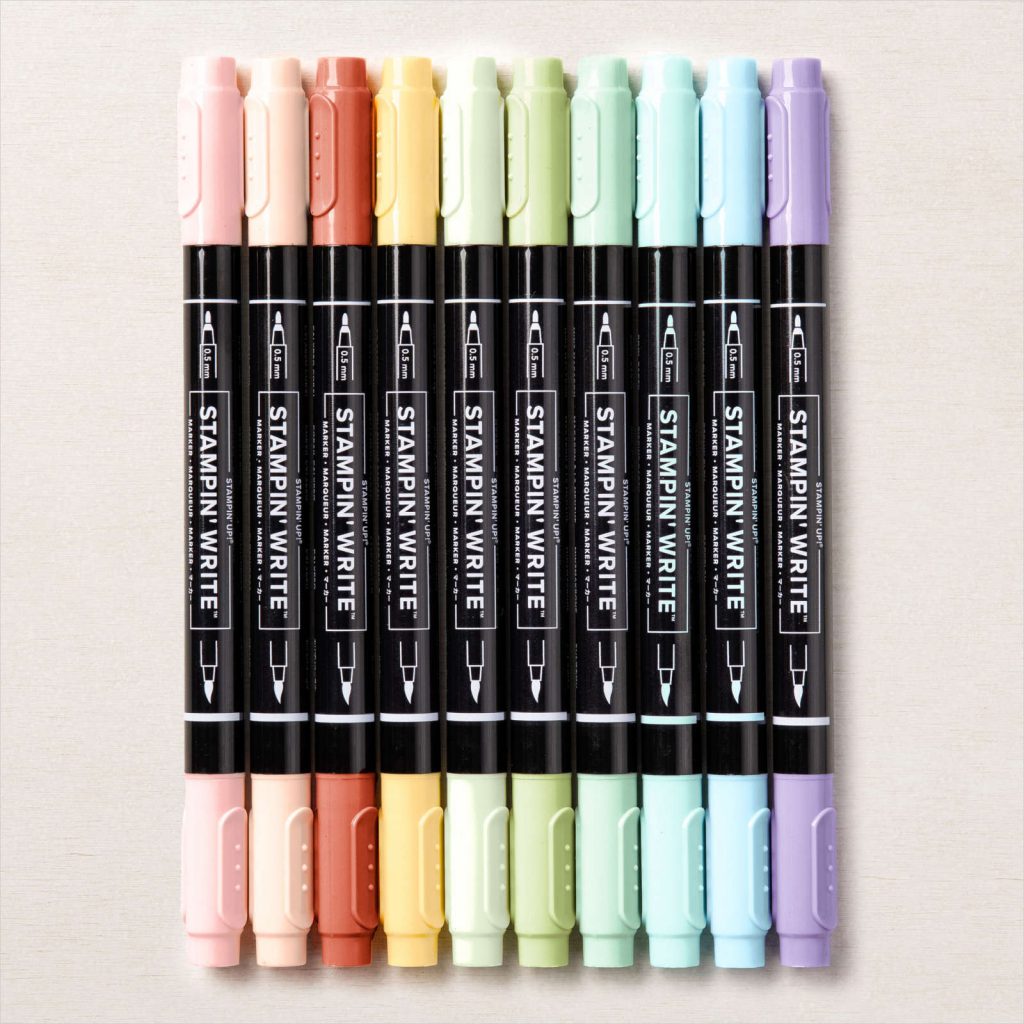
Balmy Blue is a lovely soft and powdery blue and part of the subtles family. It is available in the following products.
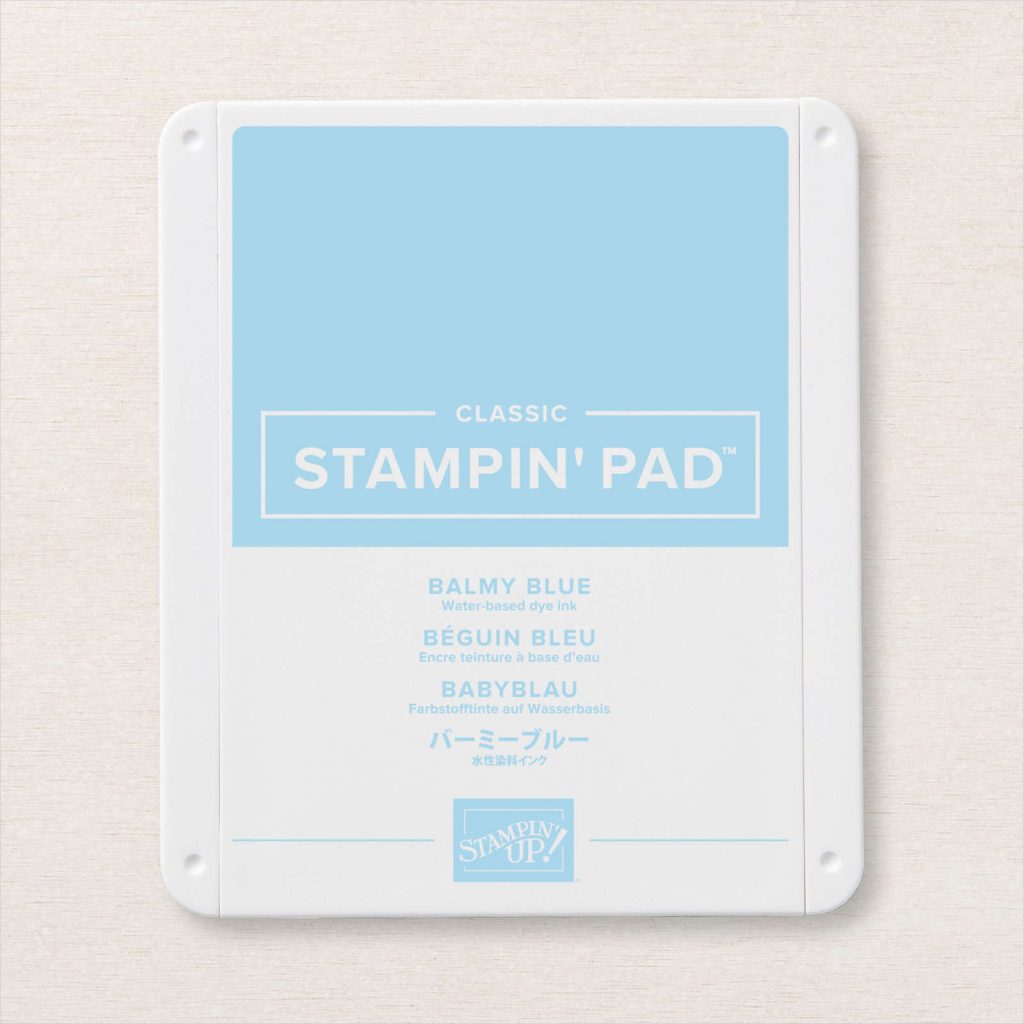
Classic Stampin’ Pad
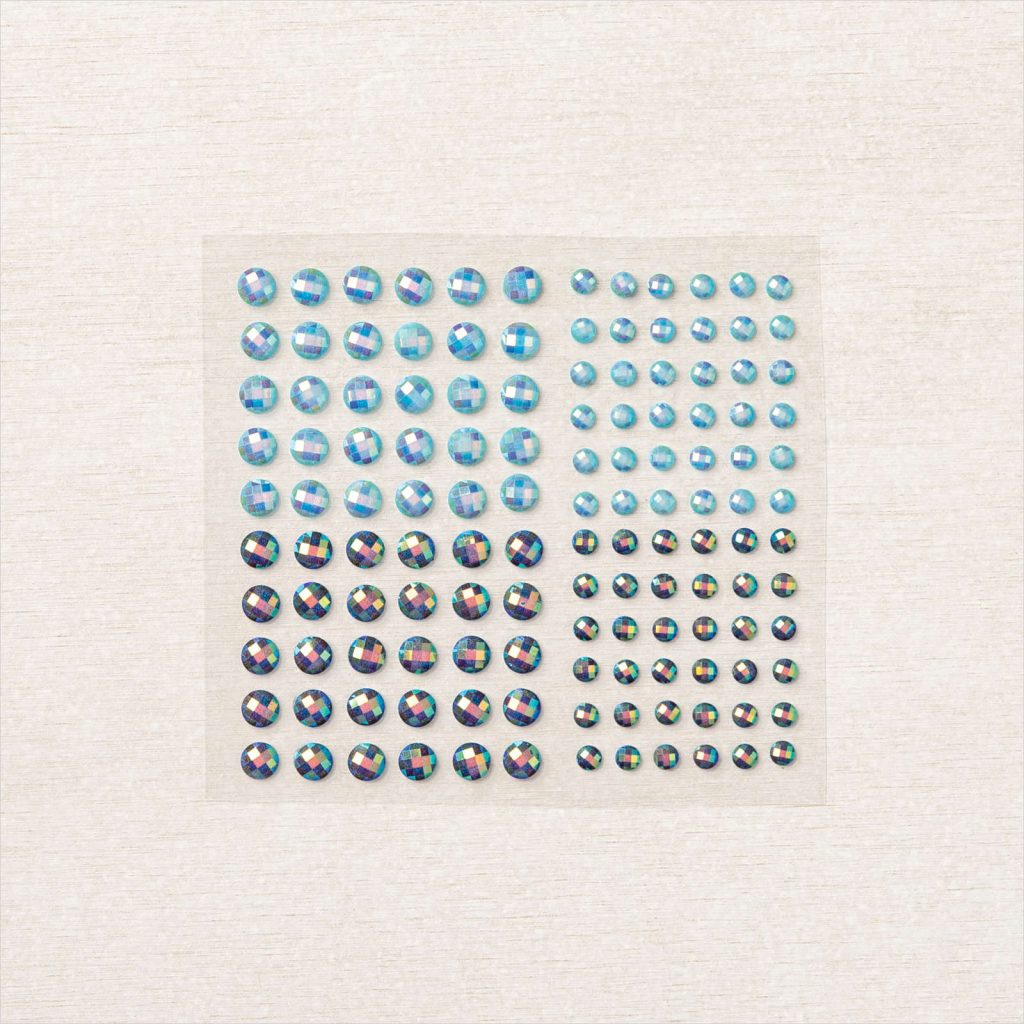
Blue Adhesive-backed Gems
Balmy Blue Stampin’ Blends
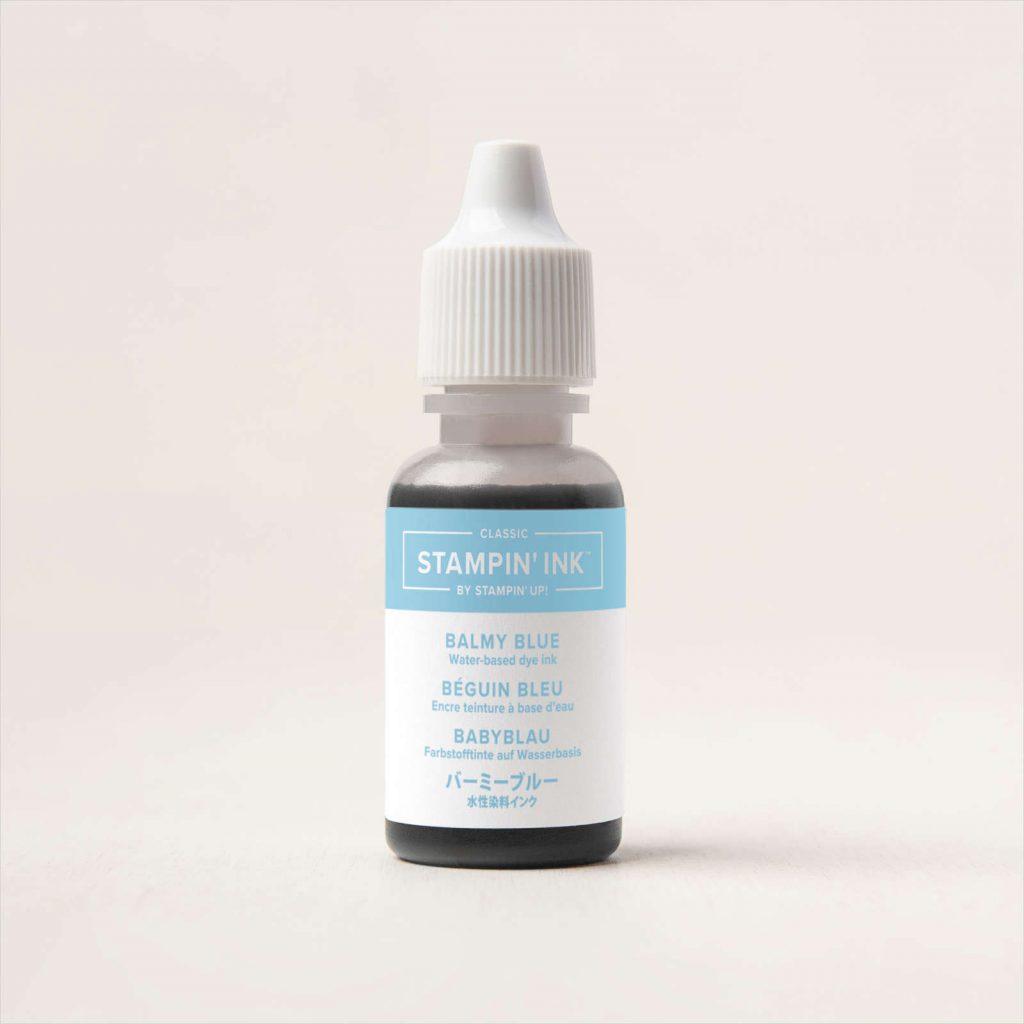
Balmy Blue Classic Stampin’ Ink Refill
Balmy Blue A4 Card stock
Subtles A4 Card stock
Subtles 12×12 Card stock
Subtles 6×6 DSP Assortment
Watercolour Pencils assortment 2
Subtles Stampin’ Write Markers assortment
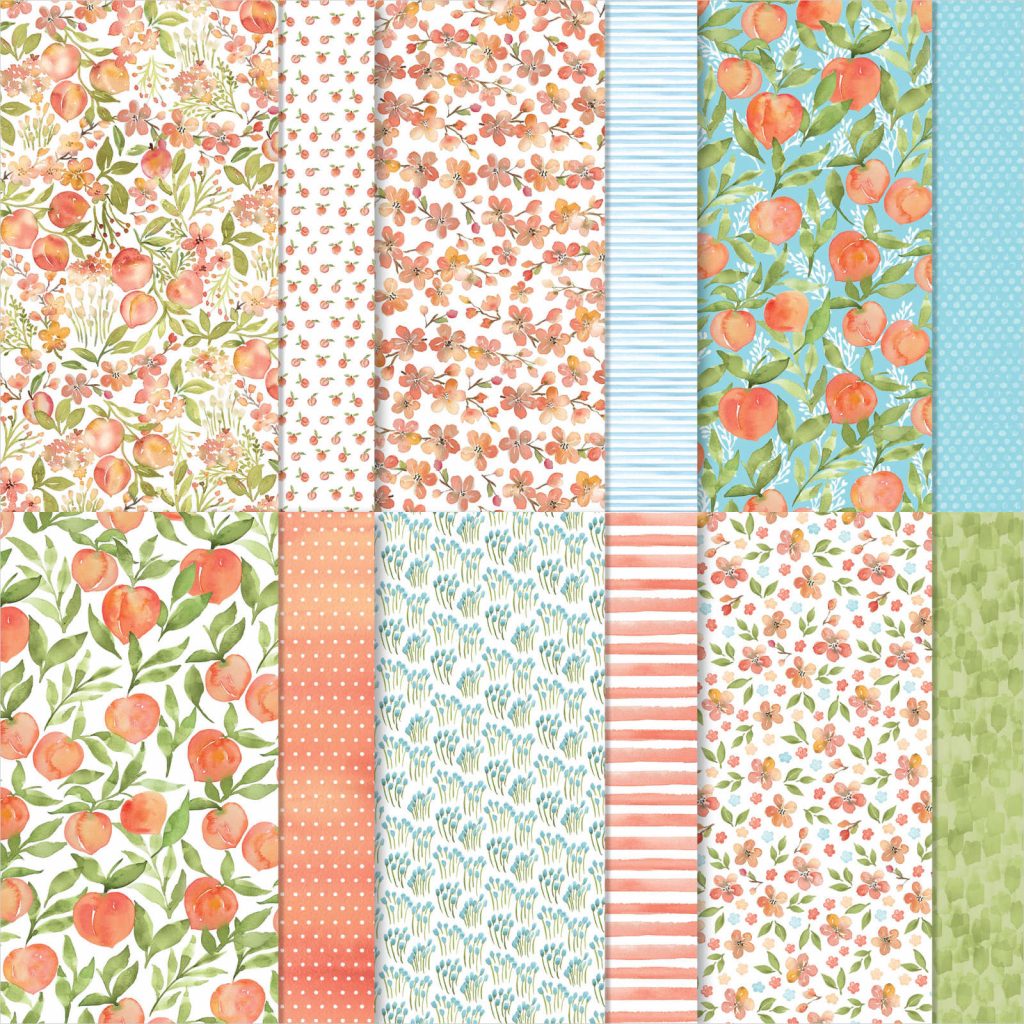
You’re a Peach 12×12 DSP
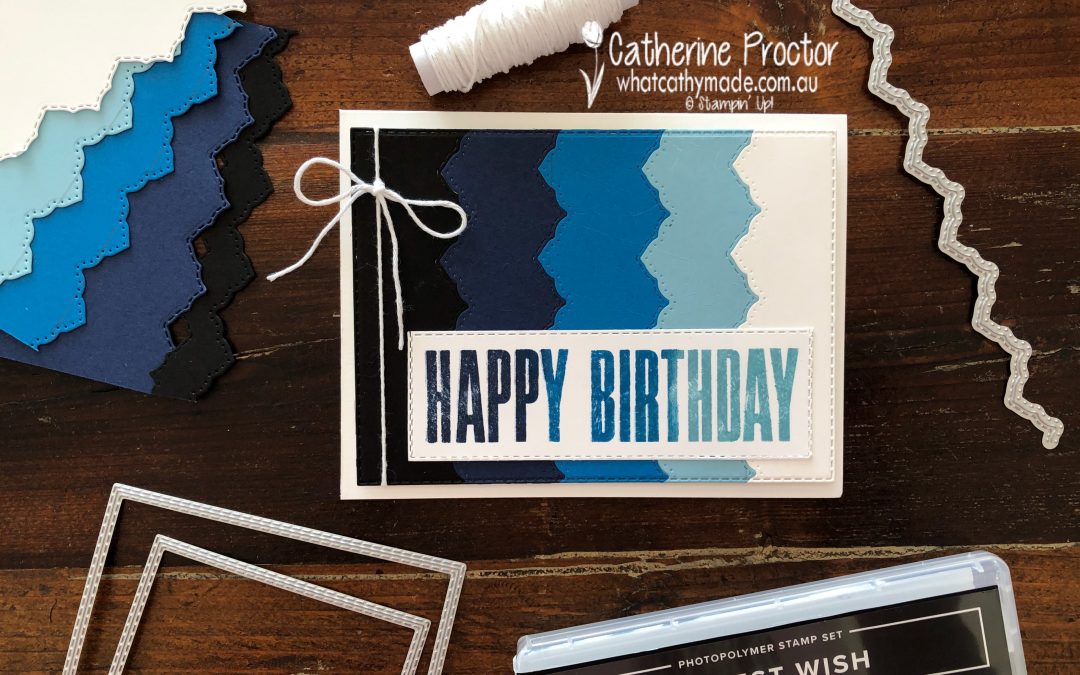
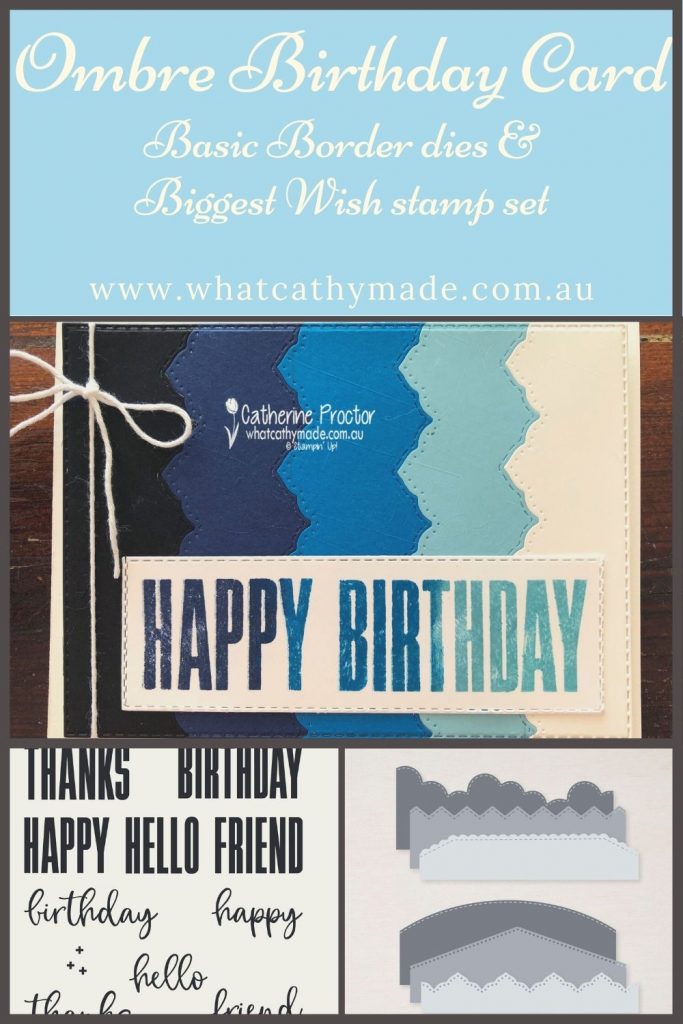
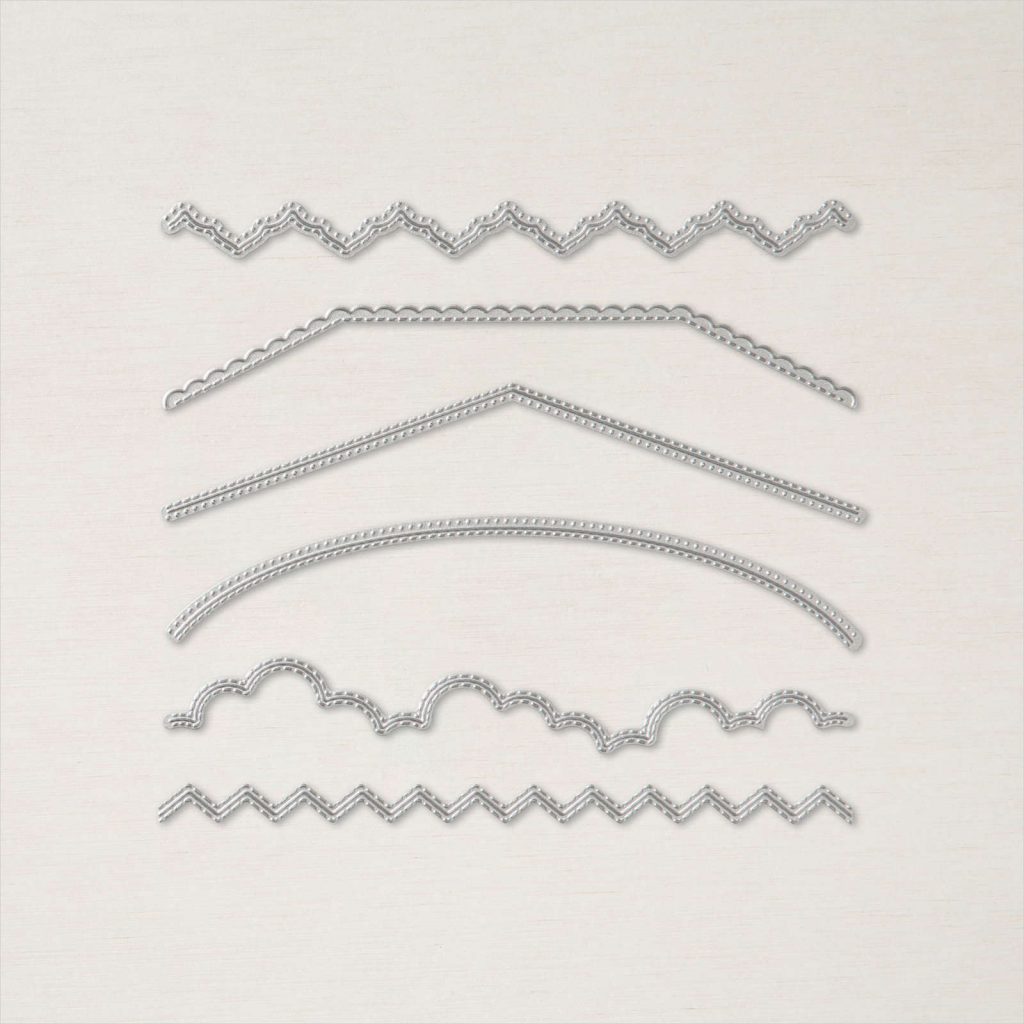
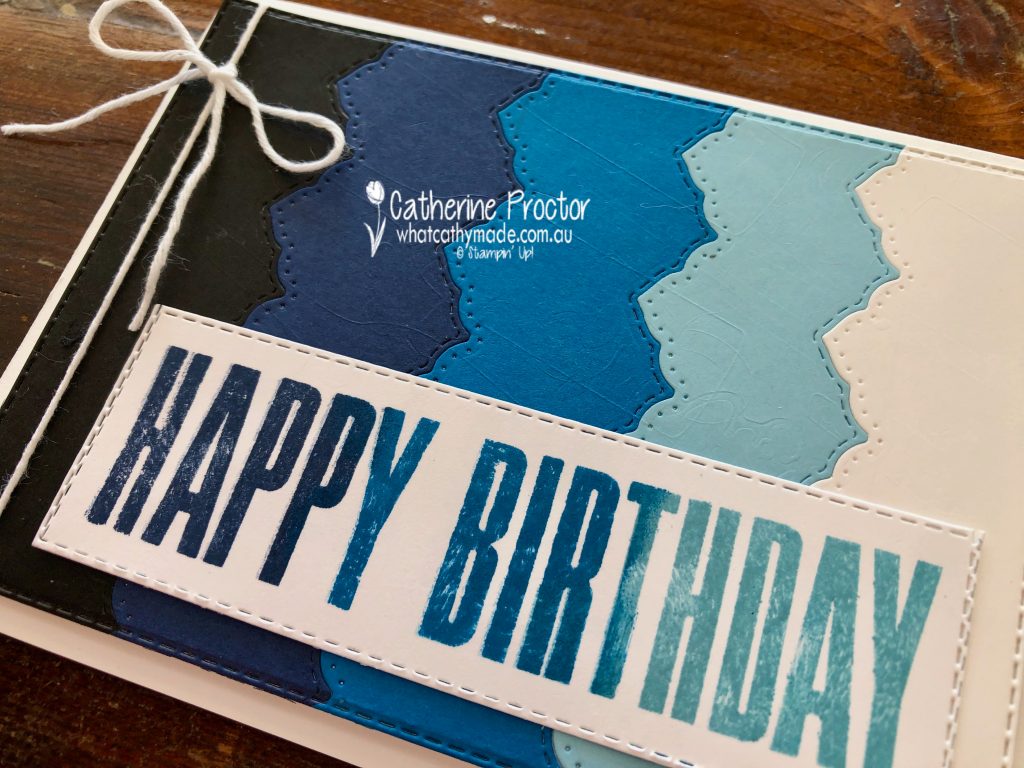
Today I’m sharing a card that uses two really versatile new products from the 2021-22 Annual catalogue: the Basic Border dies and the Biggest Wish stamp set.
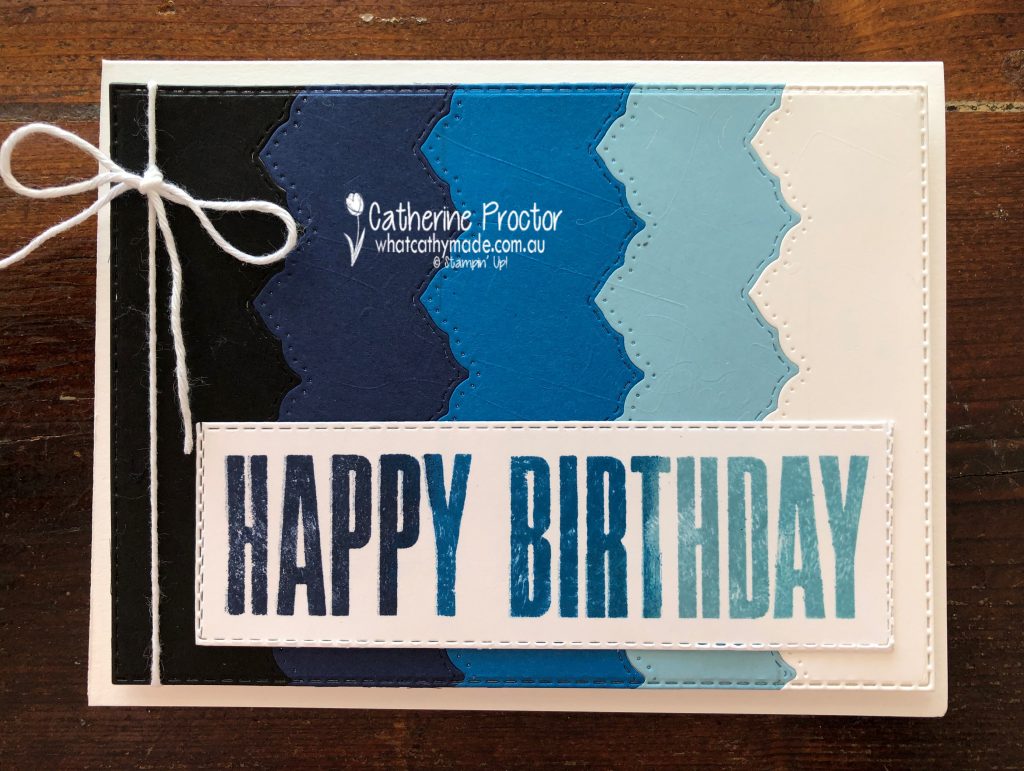
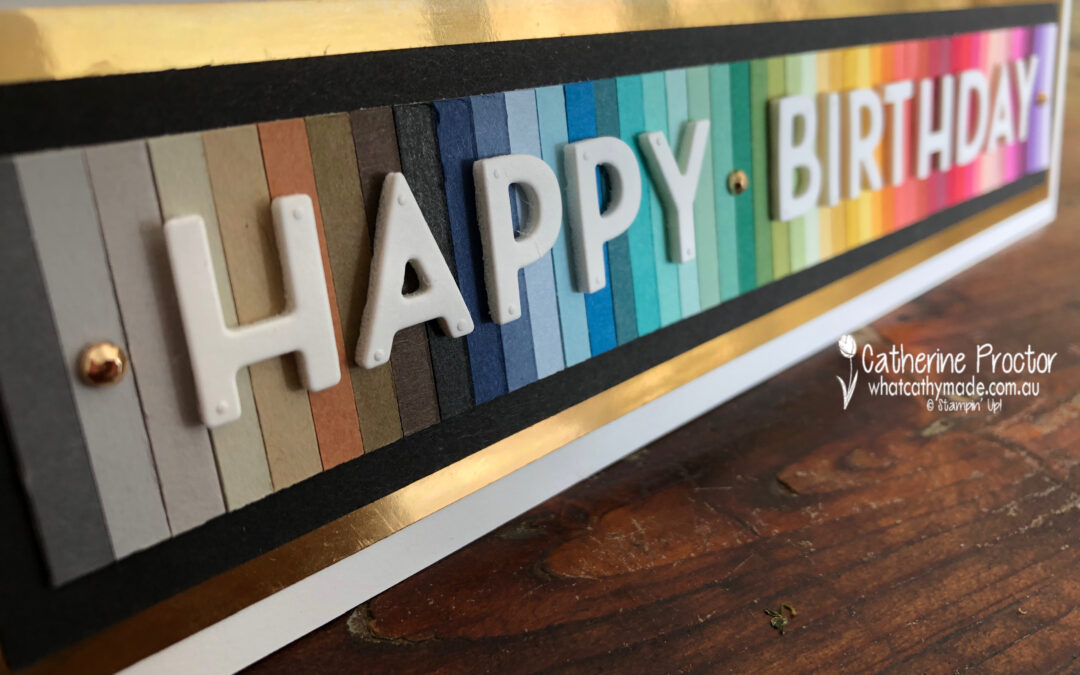
To make an ombre card you simply chose a colour and fade from dark to light. Balmy Blue is our colour this week so I’ve paired it with the other blues as well as black and white to get an ombre effect.
Each strip of card stock was die cut using one of the Basic Borders dies at approximately 3cm wide. Once all my card stock strips were die cut I carefully lined them up in ombre order, then adhered them to a piece of Basic White card stock. This ombre layer was then die cut using the largest stitched rectangle die. (Tip – if you place your rectangle die and card stock on a angle it is much easier to die cut.)
These Basic borders dies are incredible – there are six different shaped dies and the die I’ve used on my card leaves a stitched pattern on one side and a dotted pattern on the other side of the die cut.
My Stamparatus made creating an ombre sentiment quick and easy. I lined up the “happy” and the “birthday” stamps and then used sponge daubers and the Stamparatus to repeatedly stamp and gradually build up ombre colour. The ombre effect was created by stamping in Night of Navy, then Pacific Point and finally Balmy Blue.
A slightly smaller stitched rectangle die was used twice to die cut the sentiment and a single layer of Basic White twine from the Bakers Twine Essentials pack was wrapped around the side of the card.
Now it’s time to hop on over to our next participant, the very talented, Caroline Manwaring.
If you find a broken link or have come to this blog hop from a different entry point, you can view the participants below:
Welcome back to our Colour Creations Showcase as we continue our showcase of over 50 beautiful Stampin’ Up! colours in alpha order.
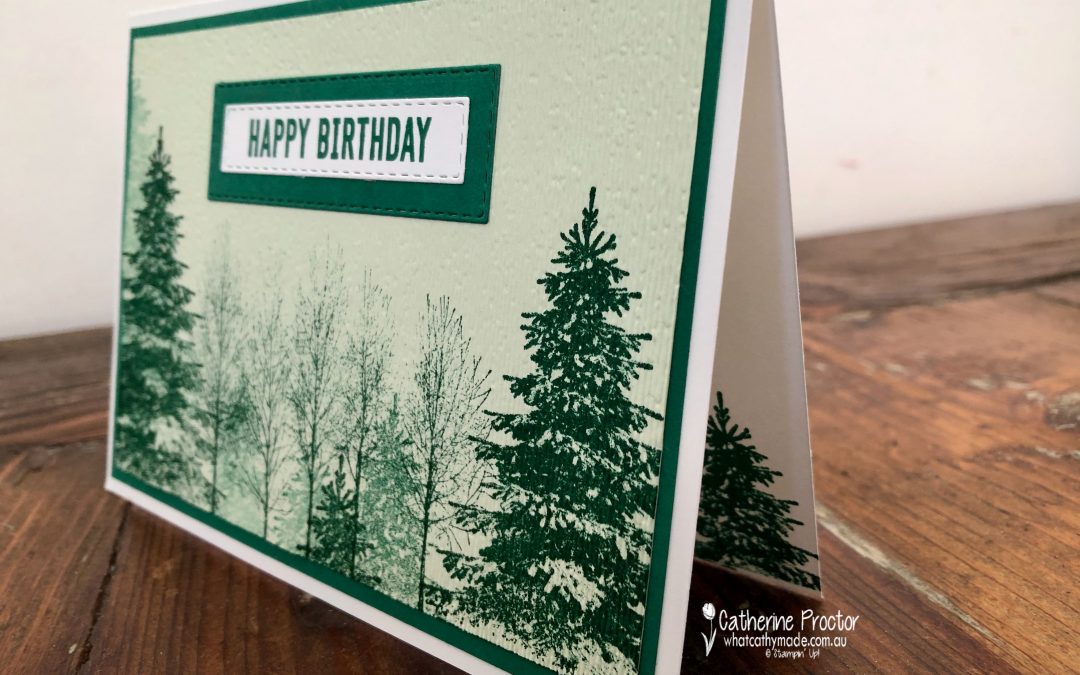
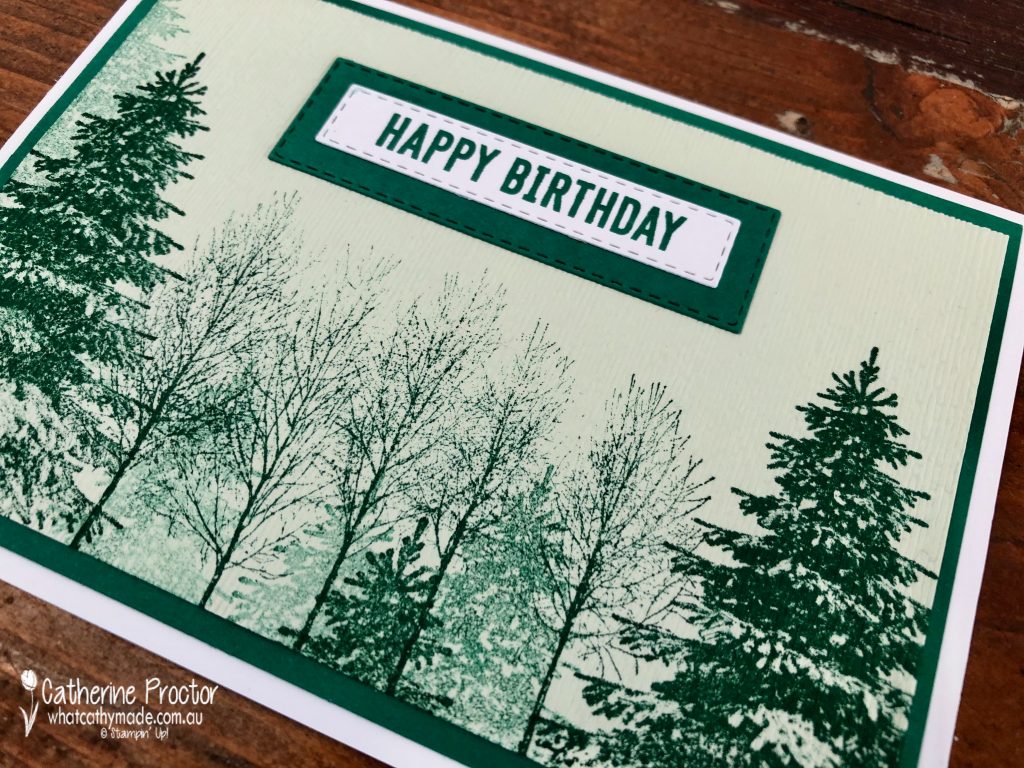
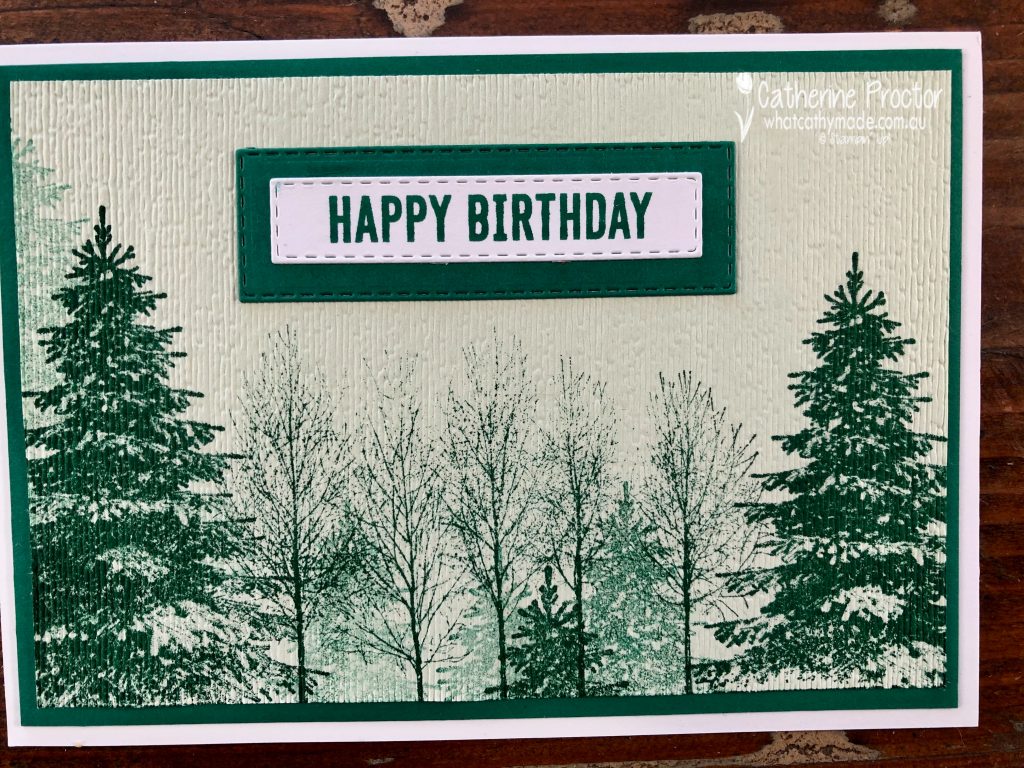
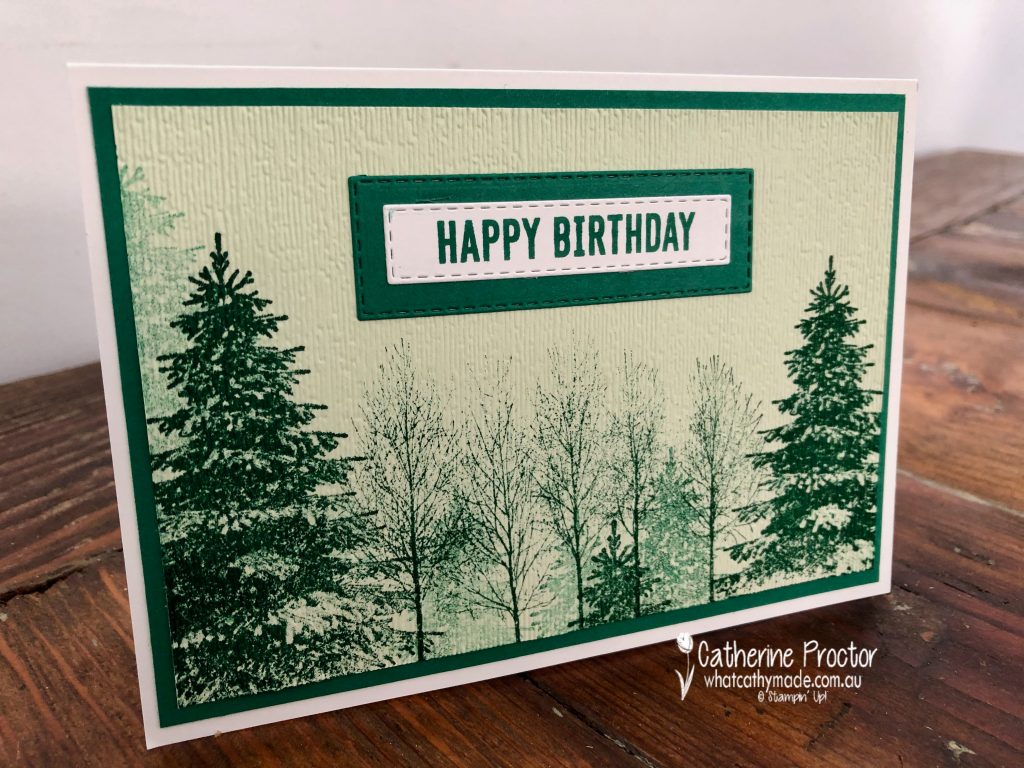
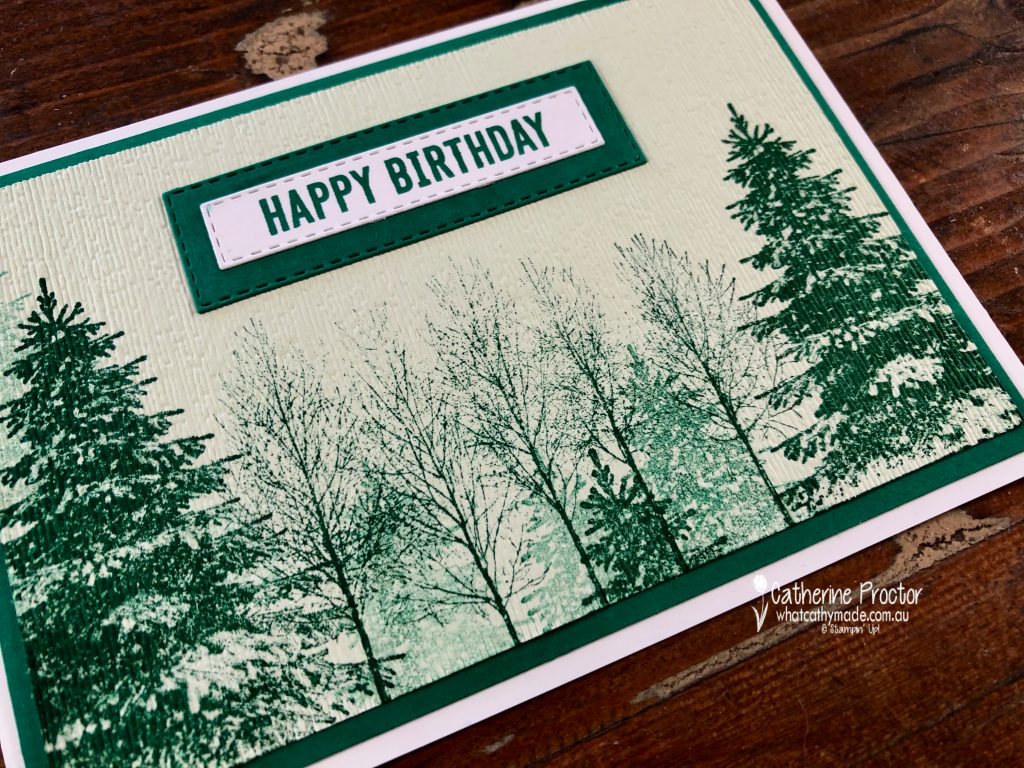
This week we are showcasing Shaded Spruce, a dark green colour from our Regals Family.
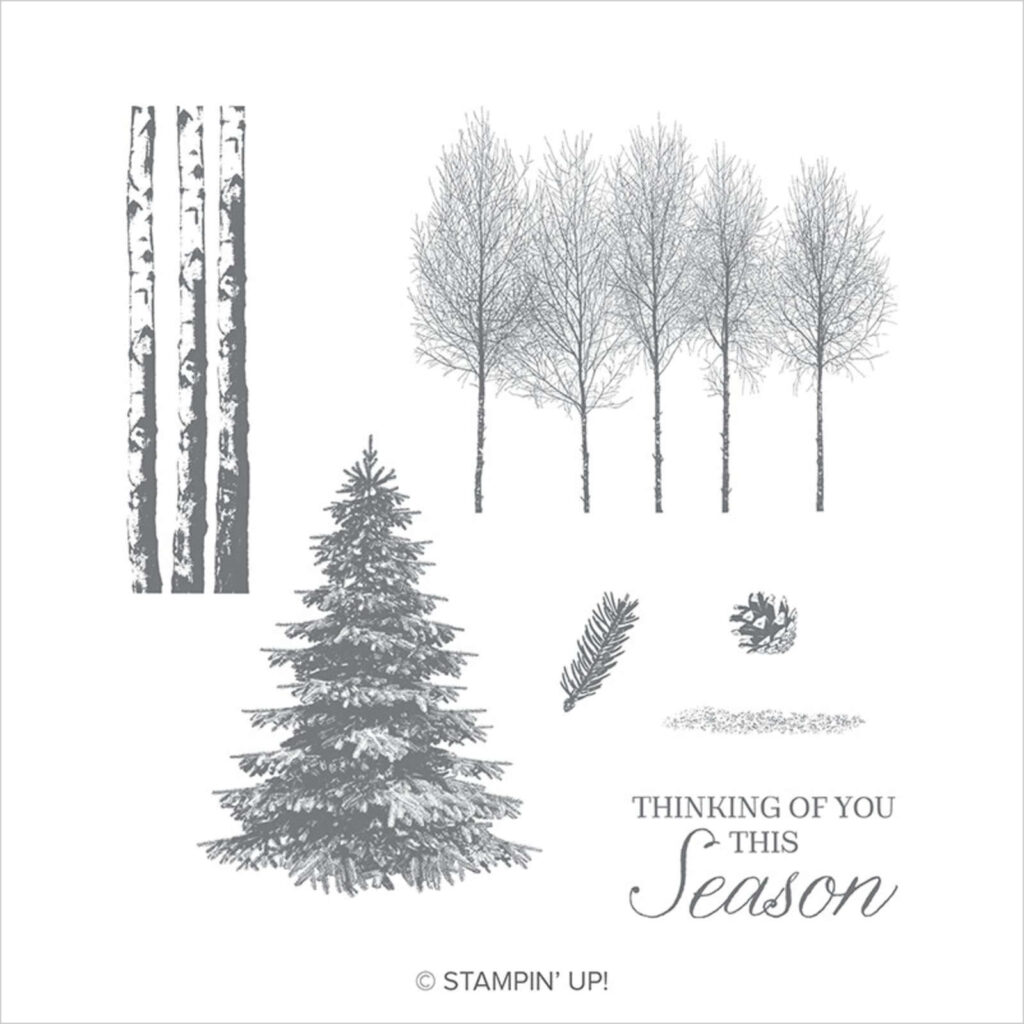
This is our last Colour Creations Showcase before the 2020-21 Annual Catalogue retires so I’m using some of my retiring favourites for this card: the Subtles Embossing folder, the Itty Bitty Birthdays stamp set and the Winter Woods stamp set.
I can’t take credit for the basic design of this card as I’ve CASED it from a beautiful Christmas card made by an overseas Stampin’ Up! demonstrator called Theresa McEntee. However, I felt April was was just a tad early to start making Christmas Cards so I’ve changed the sentiment and some elements of Theresa’s design to make a masculine birthday card instead.
If you don’t already have the Winter Woods stamp set it’s one I definitely recommend adding to your collection for simple stamping and for masculine cards. Although this stamp set only has a Christmas sentiment, I turned it into a birthday card by simply using a “happy birthday” sentiment from the Itty Bitty Birthdays stamp set.
Can you see the lovely texture I’ve added to the stamped front panel using the subtle embossing folder? If you want to try this technique don’t forget to always stamp first and then emboss afterwards.
I love the colour combination of Shaded Spruce with Soft Sea Foam. Although they are the darkest and the lightest greens in the Stampin’ Up colour range they work really well together. All of the trees have been stamped in Shaded Spruce but I’ve “stamped off” some of the trees to create depth in my forest.
I can’t wait to see what everyone else has created with Shaded Spruce today!
If you’d like me to post you your very own copy of the forthcoming 2021-22 Stampin Up! Annual Catalogue, the January – June 2020 mini catalogue, or to simply find out about more about Stampin’ Up! contact me.
In the meantime, wherever you are in the world, stay safe, stay calm…and keep on crafting xxx
Welcome to the Monthly Art With Heart Creative Showcase. Tonight we’re sharing some ideas for masculine cards, something I know many of us can find challenging to make.
I recently made two masculine cards I’d like to share with you: the card I made for my dad’s birthday in July and the card I made last week for him for Father’s Day.
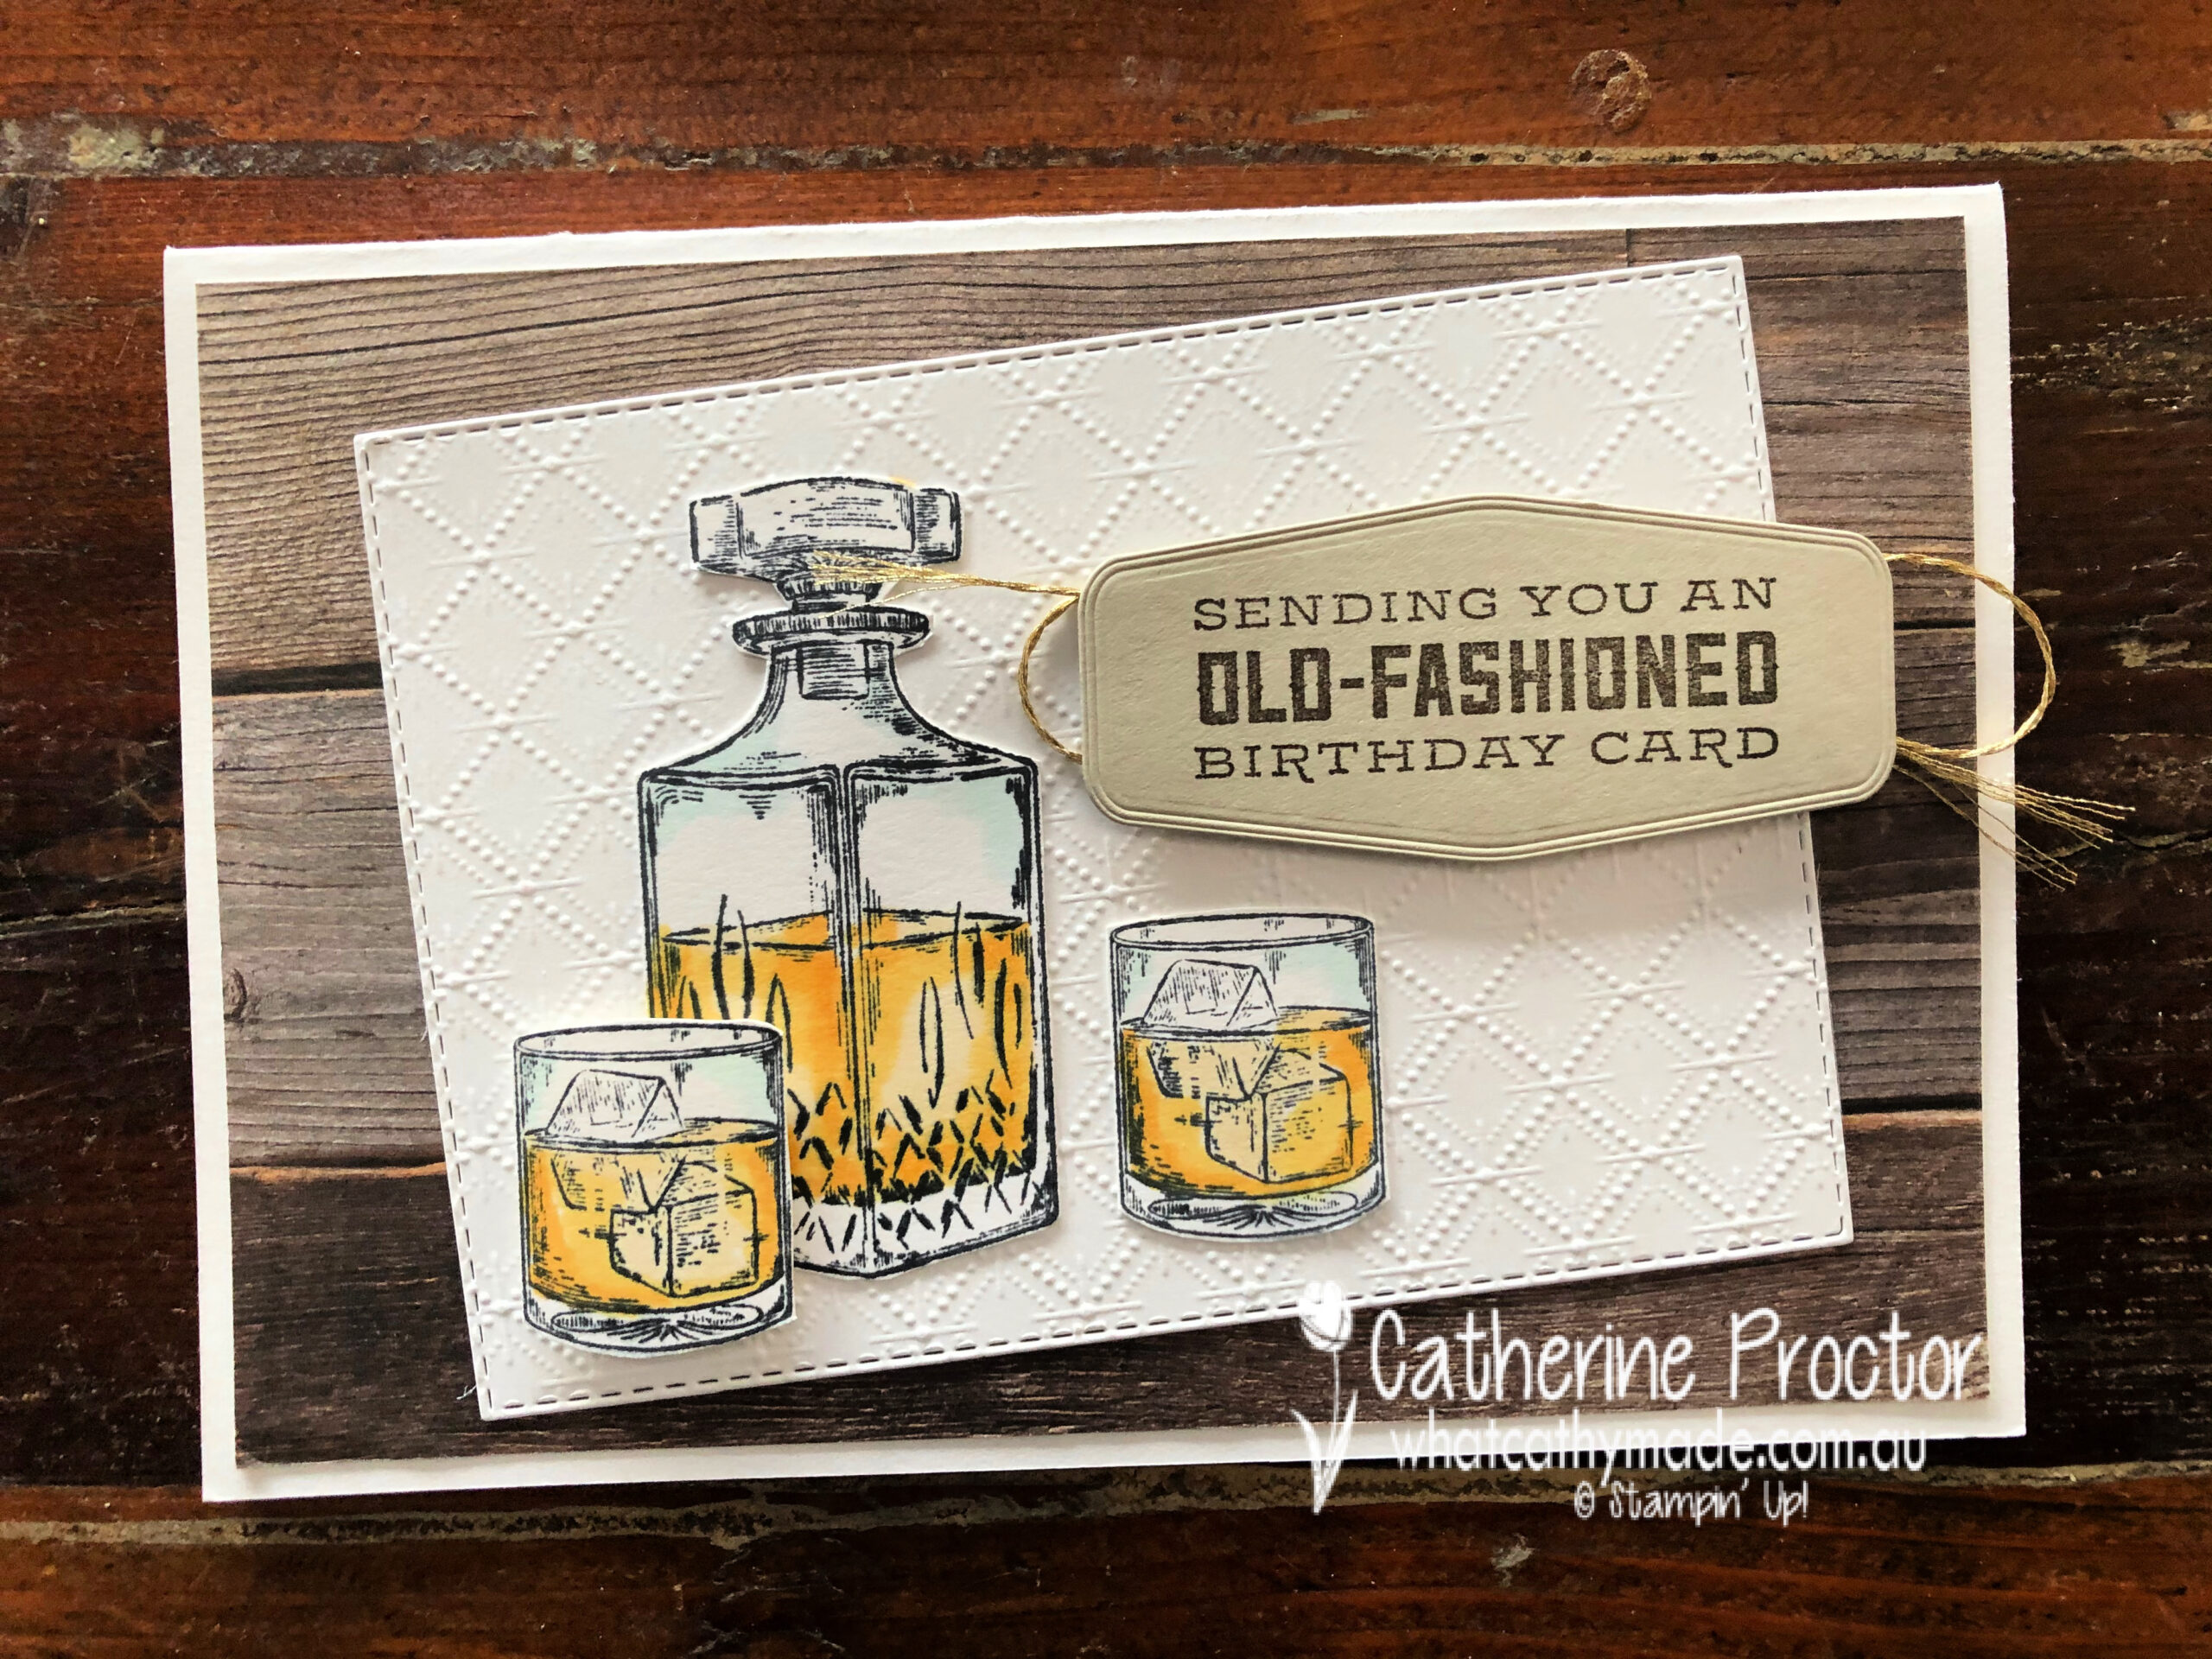
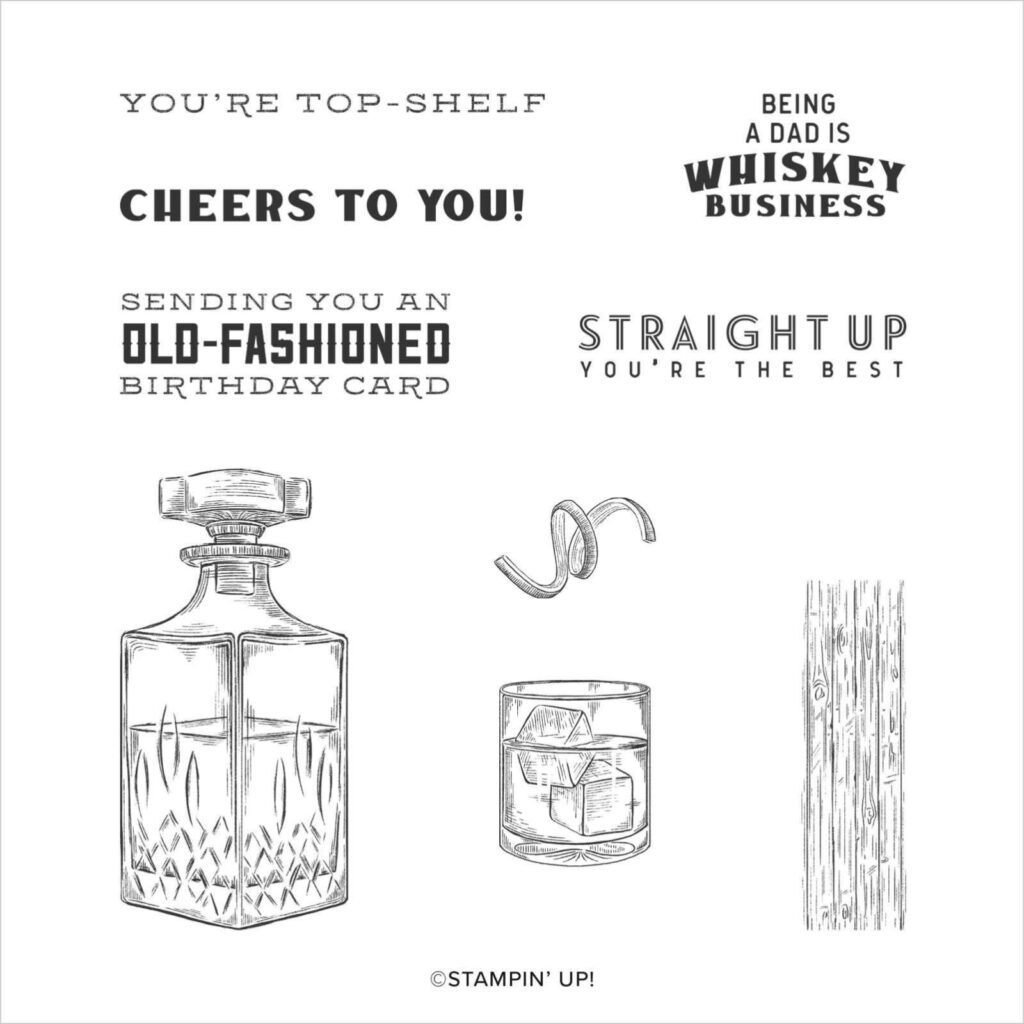
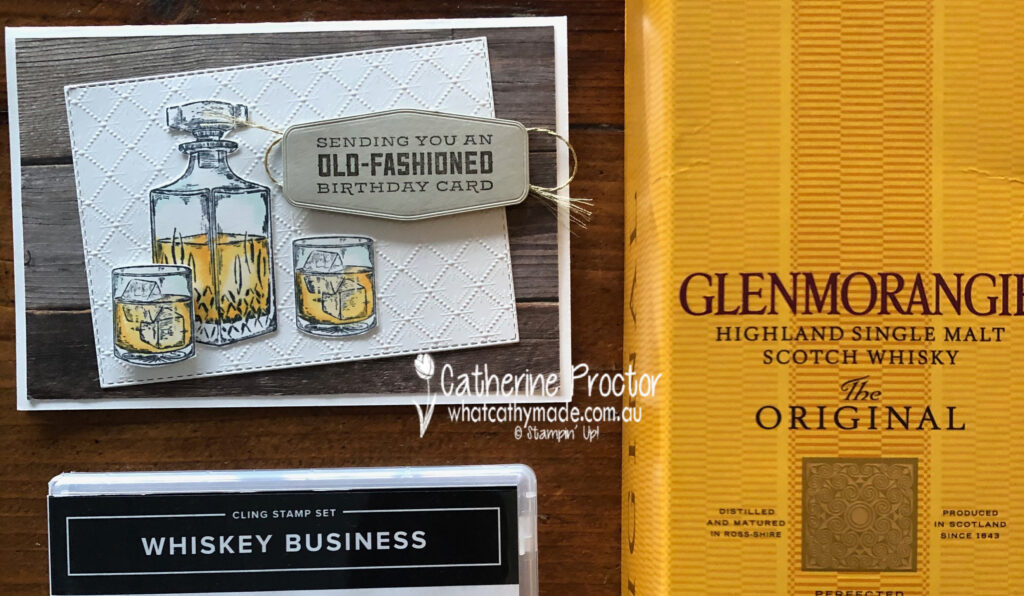
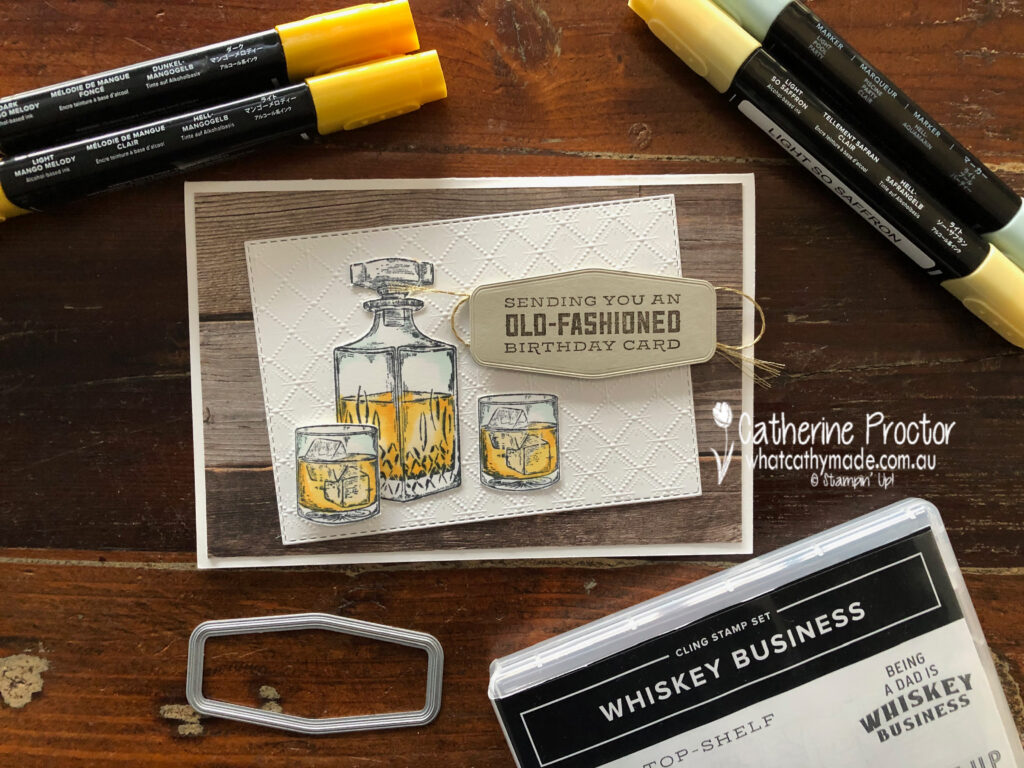
My dad is not a typical card game/car/fishing/treking/BBQ/sport kind of a dad and that can make designing masculine cards for him quite tricky. But there are two Stampin’ Up! stamp sets that perfectly matched the gifts I was giving to my dad: Whiskey Business and Press On.
For Dad’s birthday card I used the Whiskey Business set… no prizes for guessing what I gave him for his birthday!
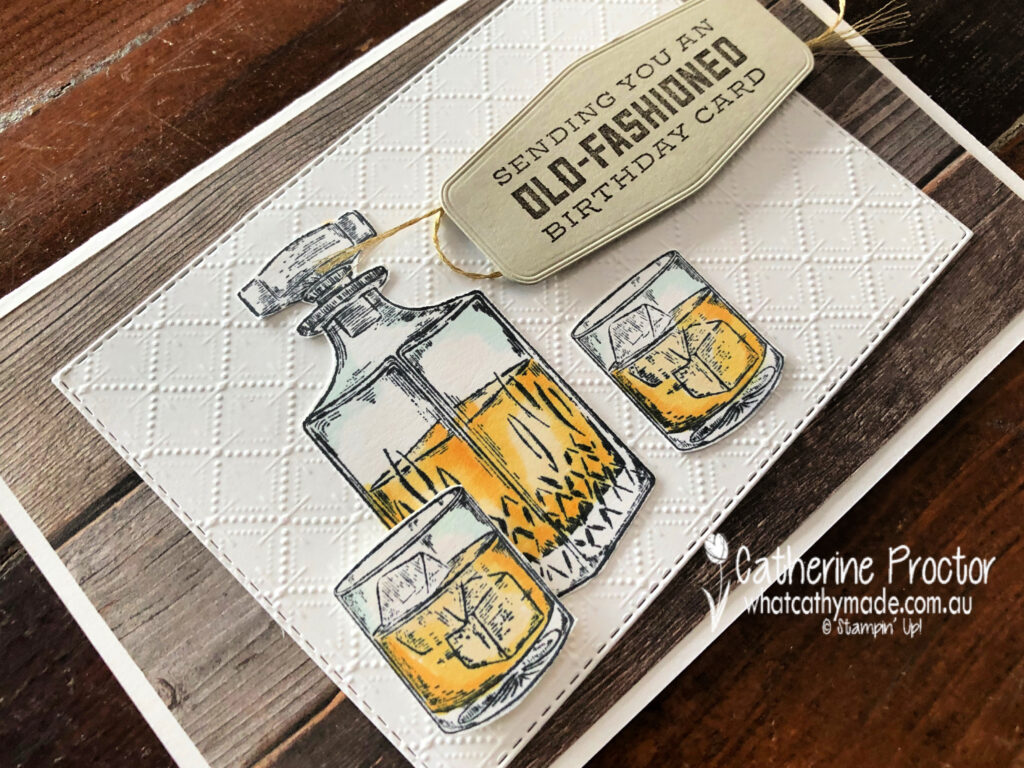
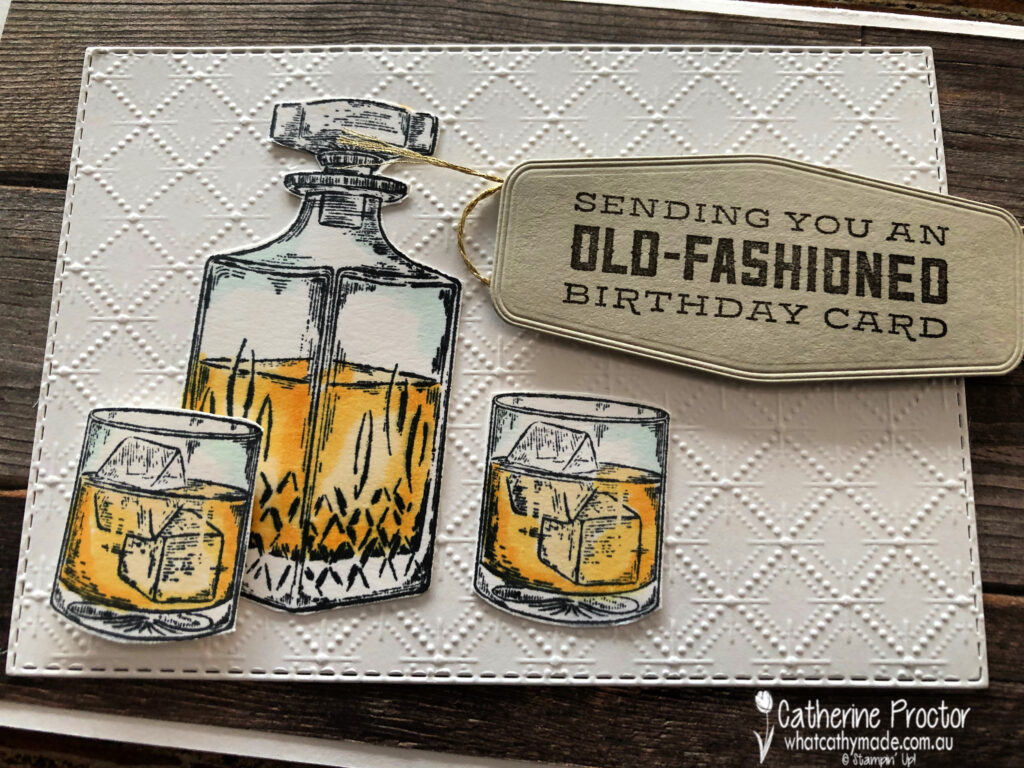
This card was CASED from the design of the card on page 33 of the Annual Catalogue but I made a few changes to make it my own. I just had to use the Dainty Diamonds embossing folder to emboss the Whisper White card stock because it looks just like the pattern in the cut crystal that the Whiskey decanter and whiskey glasses are made of.
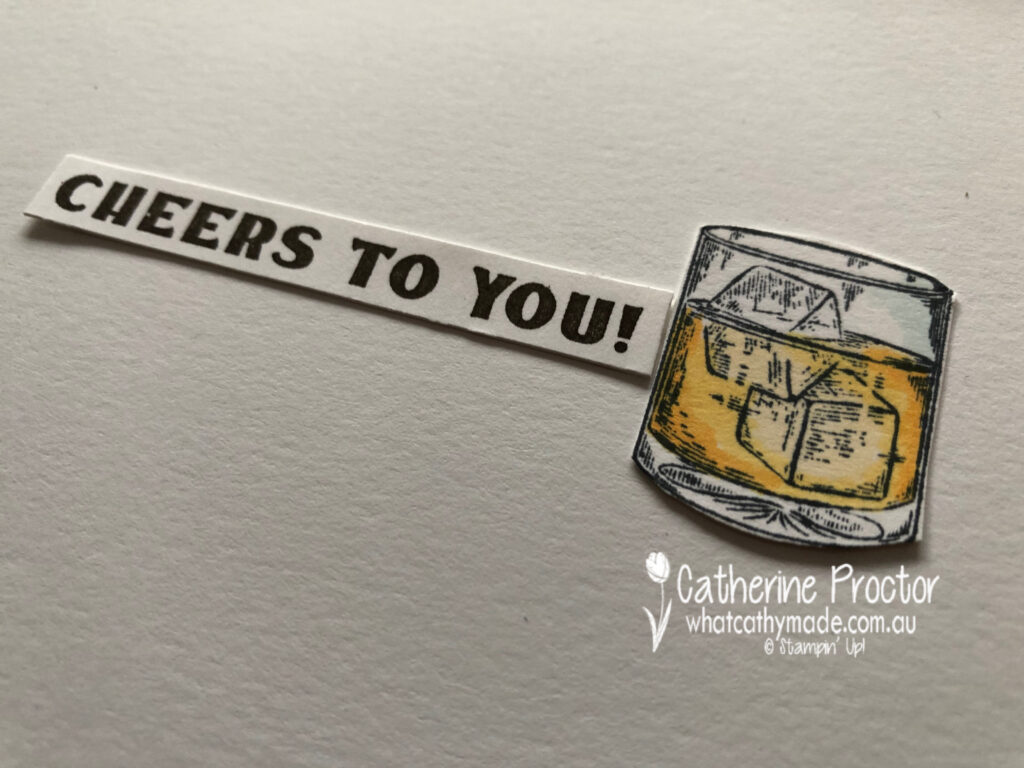
The detailed line drawings of the Whiskey Business are so realistic and the Stampin’ Blends make it so easy to bring these stamps to life. I’ve used light Pool Party for the crystal, and light So Saffron, light Mango Melody and dark Mango Melody for the whiskey.
Here’s a close up showing the detail in this stamp set. I simply fussy cut my decanter and glasses using my paper snips before adhering them to the embossed Dainty Diamonds layer.
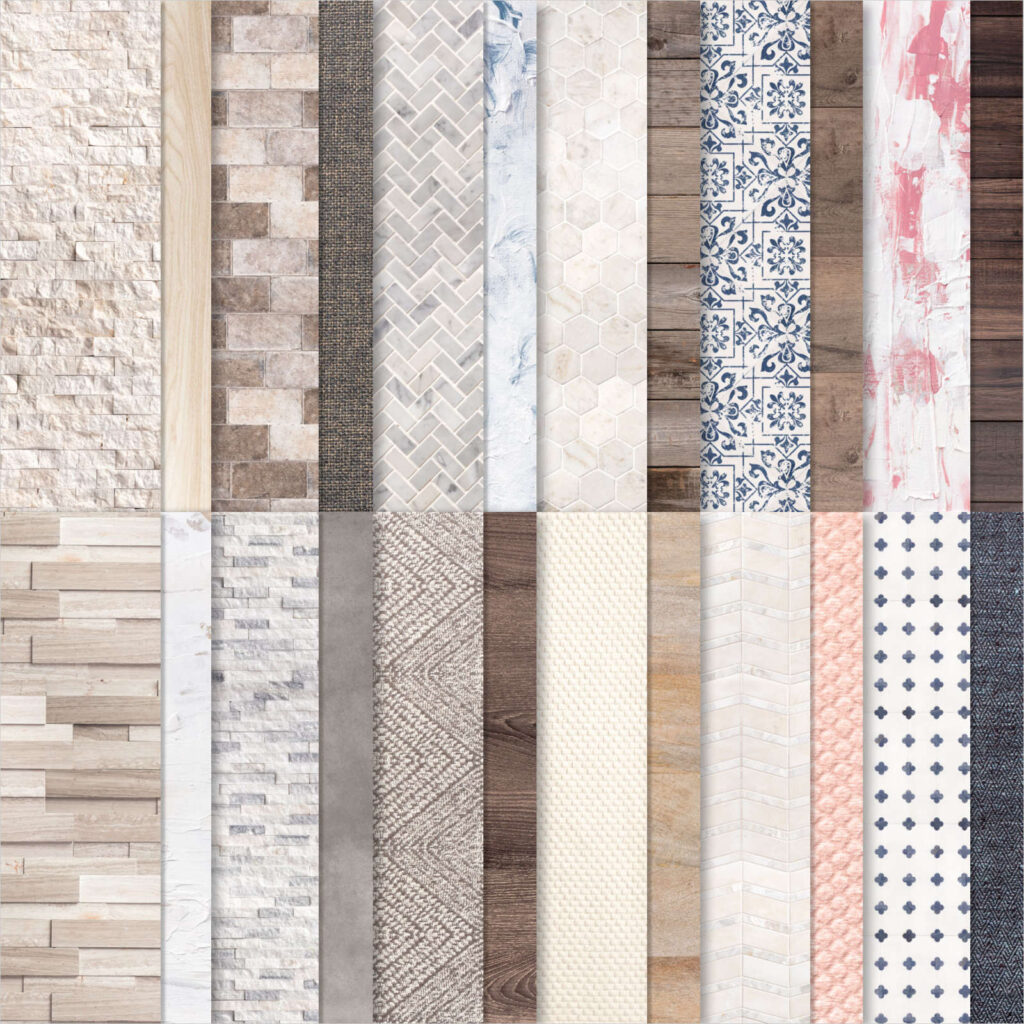
Speaking of realistic – how amazing is this wood patterned DSP from the In Good Taste DSP! All of this patterned paper was created from photographs of actual wood, stone, textiles, etc and it’s just perfect for masculine cards.
And finally, here’s the inside of the card.
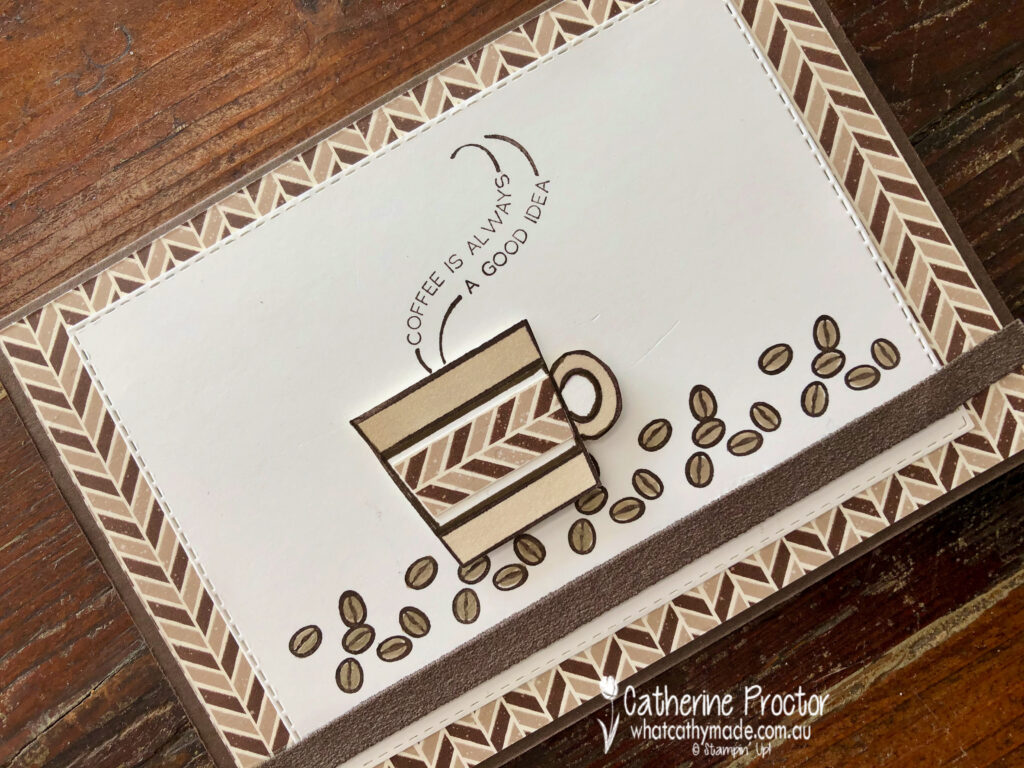
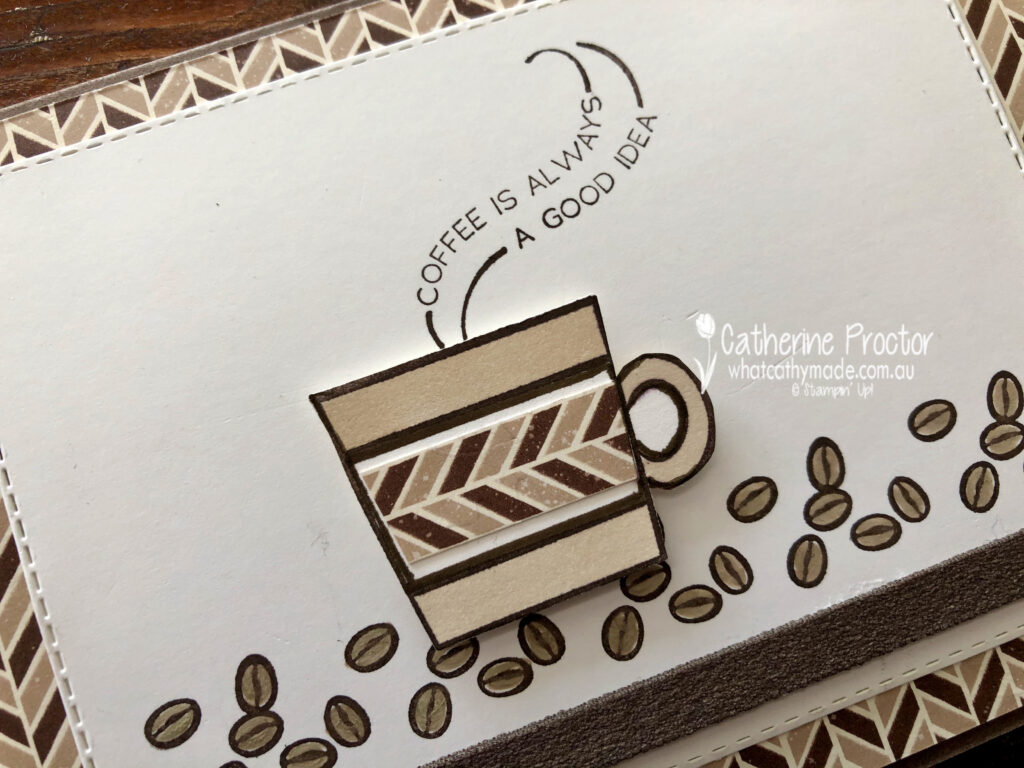
For my second card I’m sharing the one I made for Father’s Day to accompany a coffee machine and coffee, which is why I decided to use the Press On stamp set.
I kept this card very neutral, using coffee shades (Early Espresso and Crumb Cake) with Whisper White.
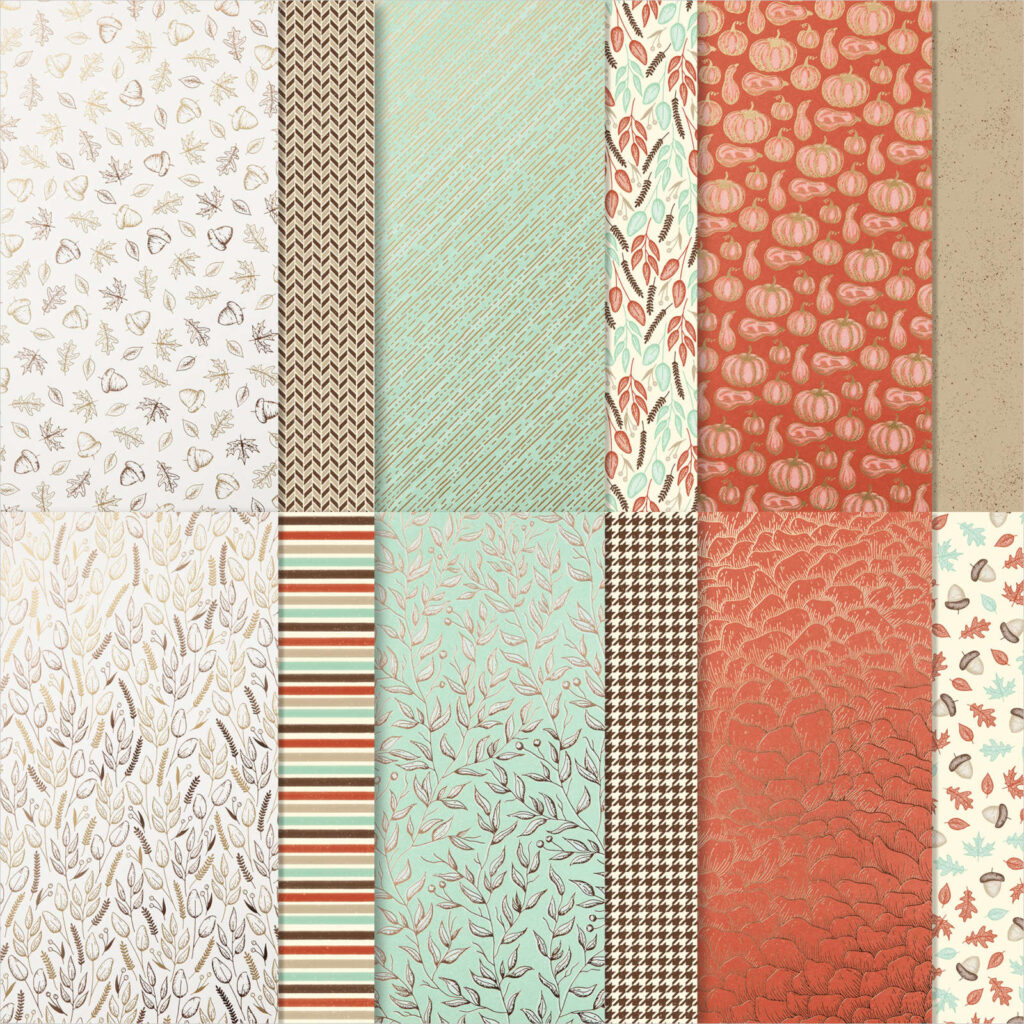
The lovely masculine chevron DSP is one you might have overlooked – I certainly did! This DSP is part of the Gilded Autumn specialty DSP which is found on page 45 of the August – December 2020 Mini Catalogue.
The coffee cup and beans were stamped in Early Espresso before being coloured in using Crumb Cake Stampin’ Blends and a Crumb Cake Stampin’ Write marker for the coffee beans.
The strip of early espresso faux suede ribbon along the base of the card co-ordinated perfectly and added a luxurious texture to the card.
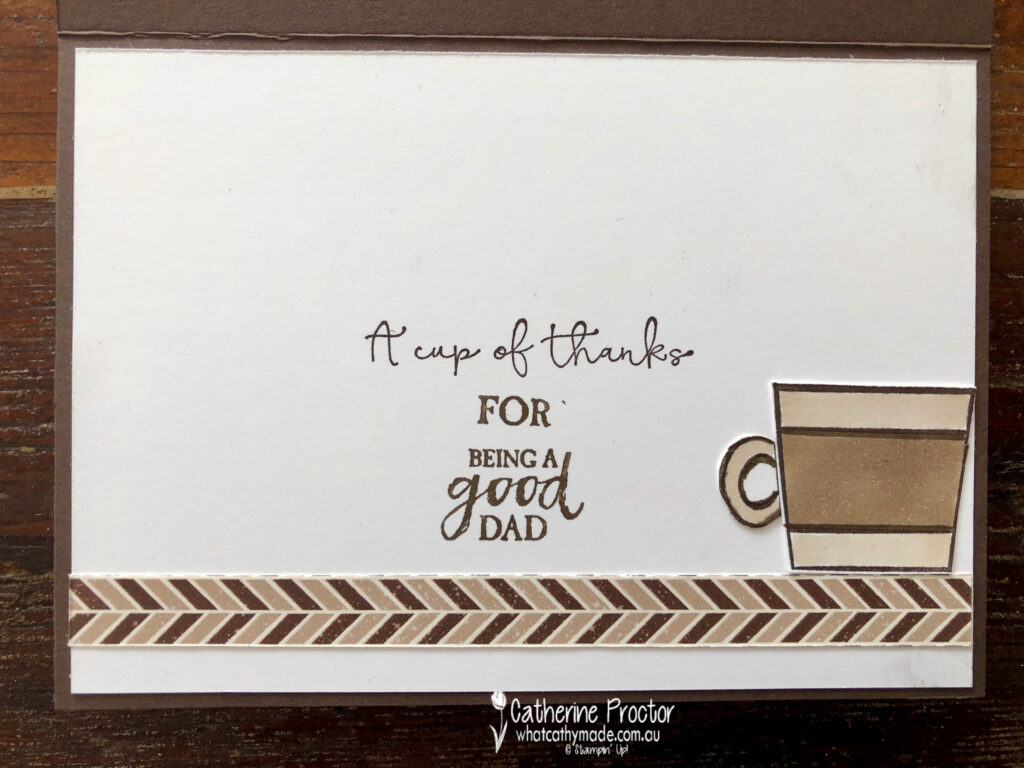
Inside my card I used a variety of sentiments to create a meaningful Father’s Day message – I’m not sure if it really worked, but my dad seemed to appreciate it and that’s what really counts.
To see more masculine card inspiration from the AWH Team head back to Rachel‘s page as she is hosting our monthly blog hops.
To purchase any of the products I’ve used in my cards tonight simply click on the phots of the products below.
If you’d like me to post you your very own copy of the August – December 2020 Mini Catalogue, the 2020-21 Stampin Up! Annual Catalogue, the 2020-21 Beginners Brochure, or to simply find out about more about Stampin’ Up! contact me.
Welcome to the Monthly Art With Heart Creative Showcase.
With all that’s happening worldwide at the moment the Art With Heart Team are here with a Rainbow theme Creative Showcase to brighten your day.
Every month the talented ladies share their inspirational ideas in a monthly Showcase and this month our projects are inspired by Rainbows.
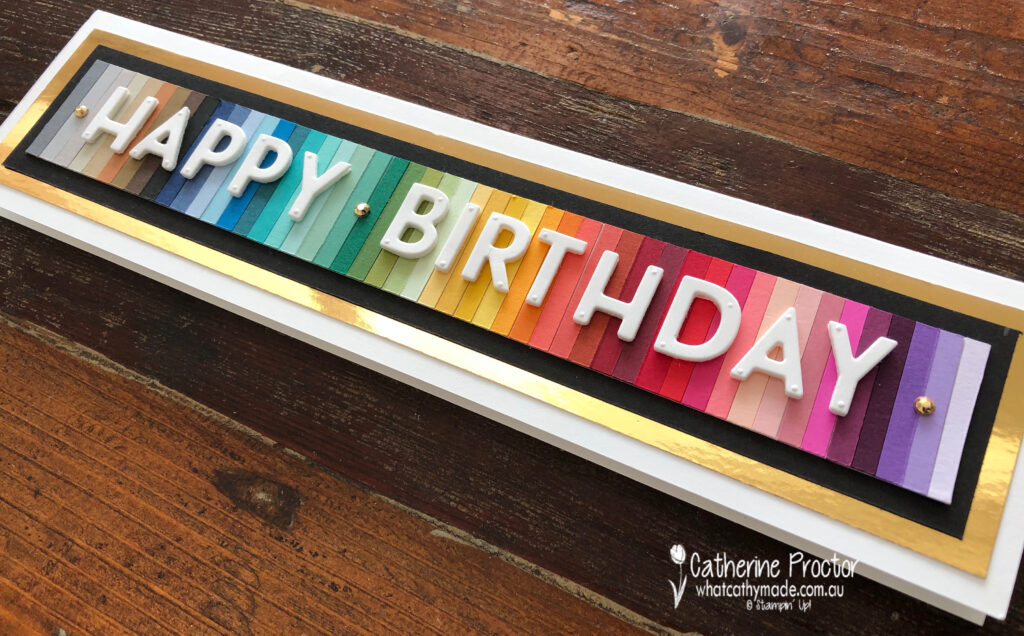
With 40 core colours, 10 in colours and the 3 basic colours of Whisper White, Basic Black and Very Vanilla I found it impossible to chose a just a few of these colours for my rainbow, so I decided to use them all!
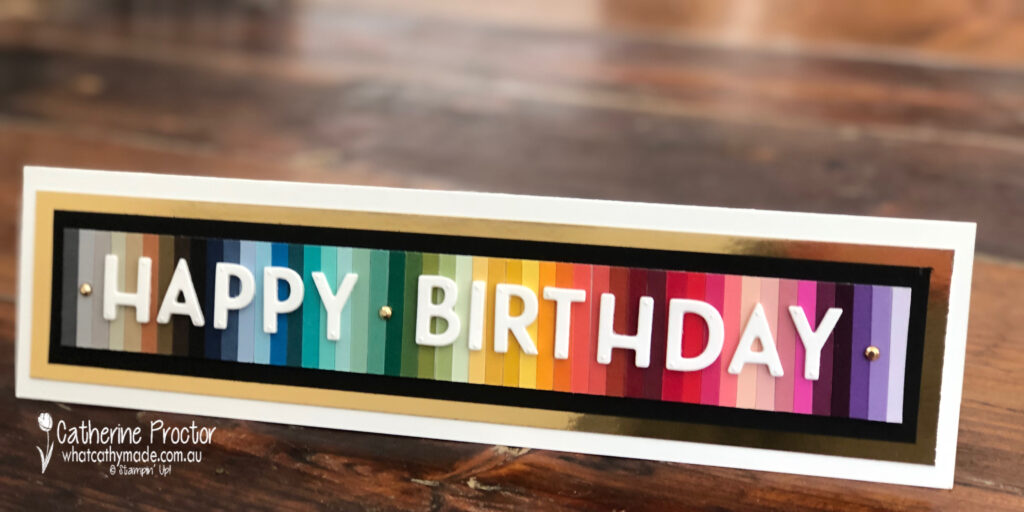
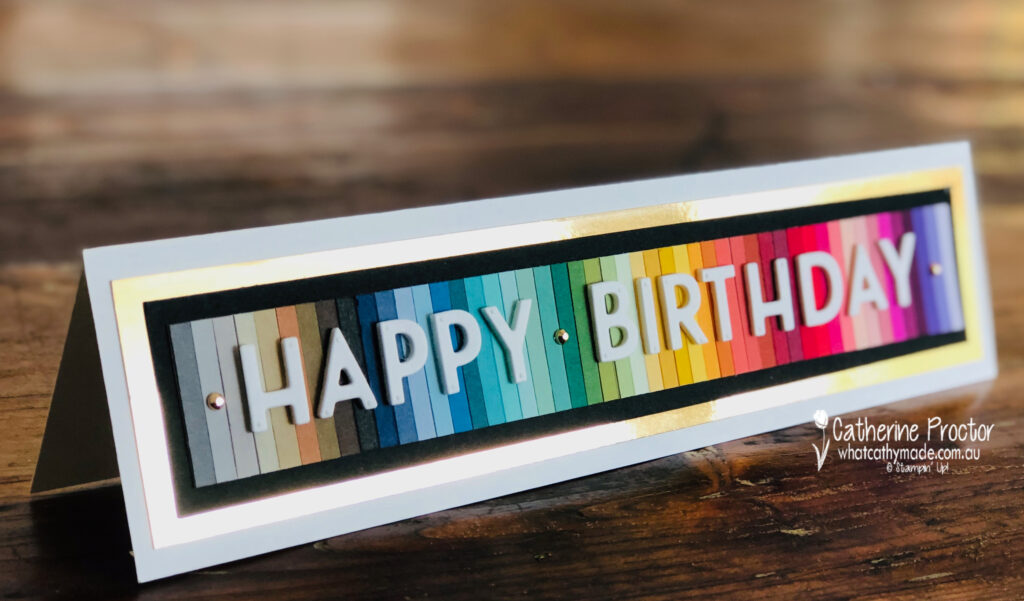
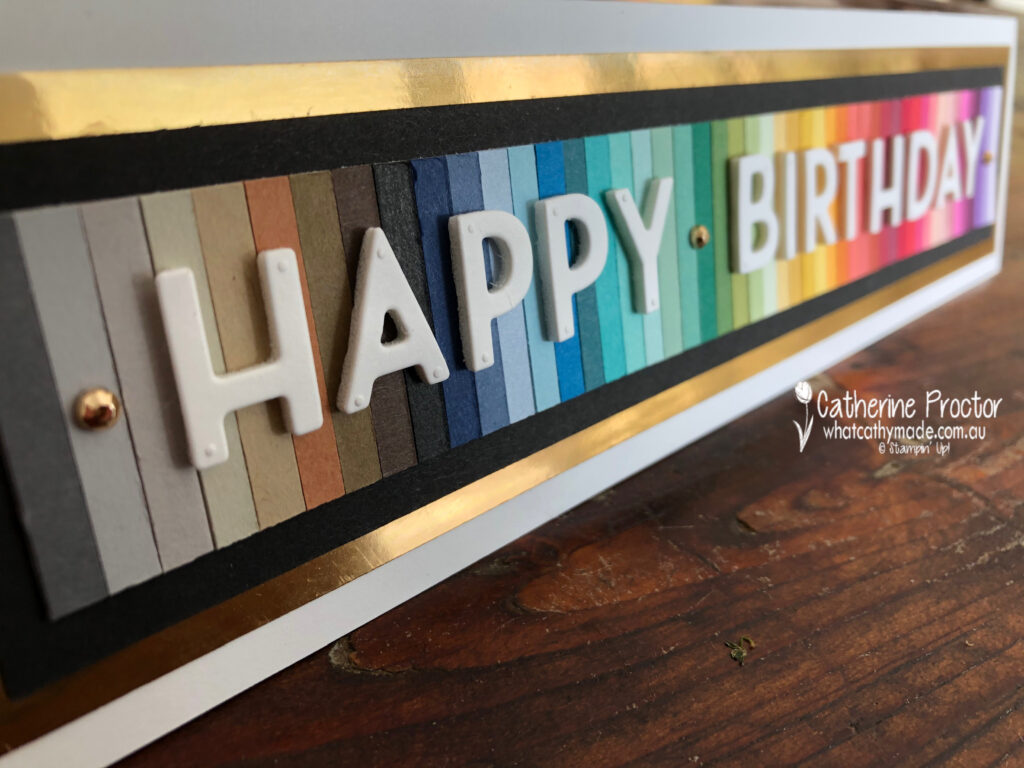
The only way I could fit them onto one card was to create a slimline card. For each colour I cut a 5mm thick strip with my paper trimmer and then I organised them into rainbow order onto strips of tear & tape on a Whisper White base.
It took a while to decide on a colour order – there are so many ways you could arrange these colours!
The rainbow strip was trimmed to size, mounted onto a Basic Black card stock layer and a gold foil layer before attaching it all to a Whisper White slimline card base.
The “Happy Birthday” was cut out using the Playful Alphabet dies mounted onto the new foam adhesive sheets – I love the dimension it gives!
Three Gilded Gems add a final touch of bling to tie in the gold foil layer and finish off the card.
I do have a confession to share with you.
After I finished making and photographing my card I planned to list all the colours I used in their rainbow order, but when I counted the strips I realised I have left two colours out and I don’t know which ones they are!
I deliberately didn’t include Whisper White or Very Vanilla card stock in the rainbow strip but I did include Basic Black, which means I should have 51 strips – but I only have 49.
Can you help me out and tell me which two colours I’ve left out!
The next Art With Heart Team Member to share their colouring technique with you is the very talented Caroline Manwaring.
If you have a broken link or have come to this blog hop midway, you can view all the participants below:
Today I’m excited to bring you a blog hop with some of the awesome ladies in the Art With Heart Stampin’ Up! Team.
Today we focus on the kids in our lives, from birthday cards to party ideas.
Sale-a-bration continues and this week we have three new additional items you can earn for free with a $90 order – ask me how!
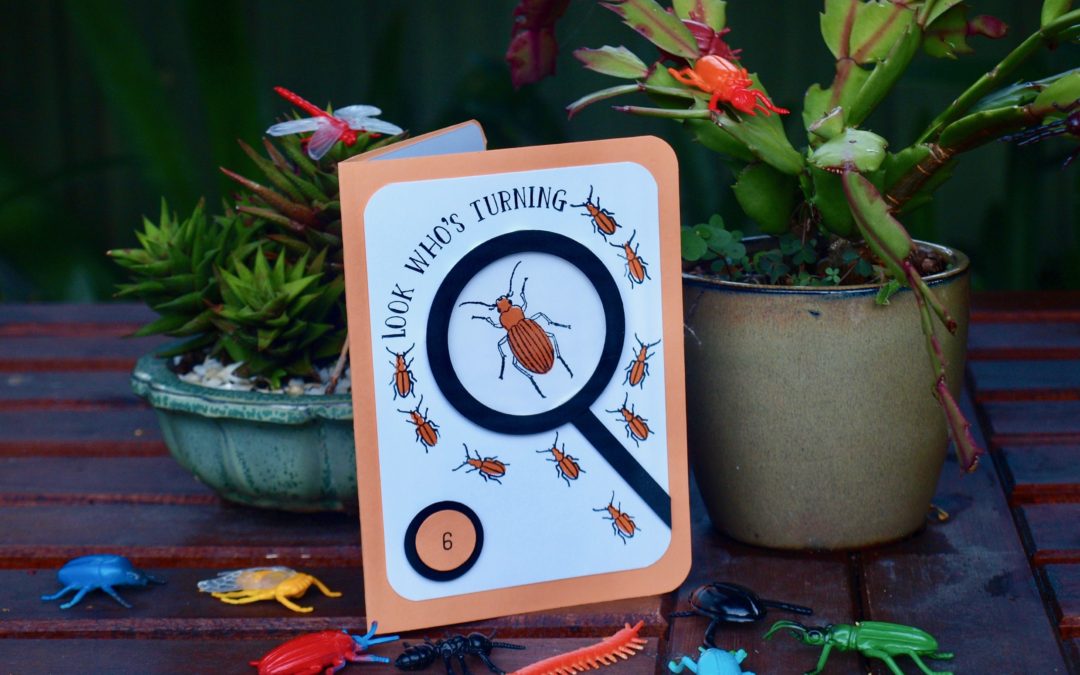
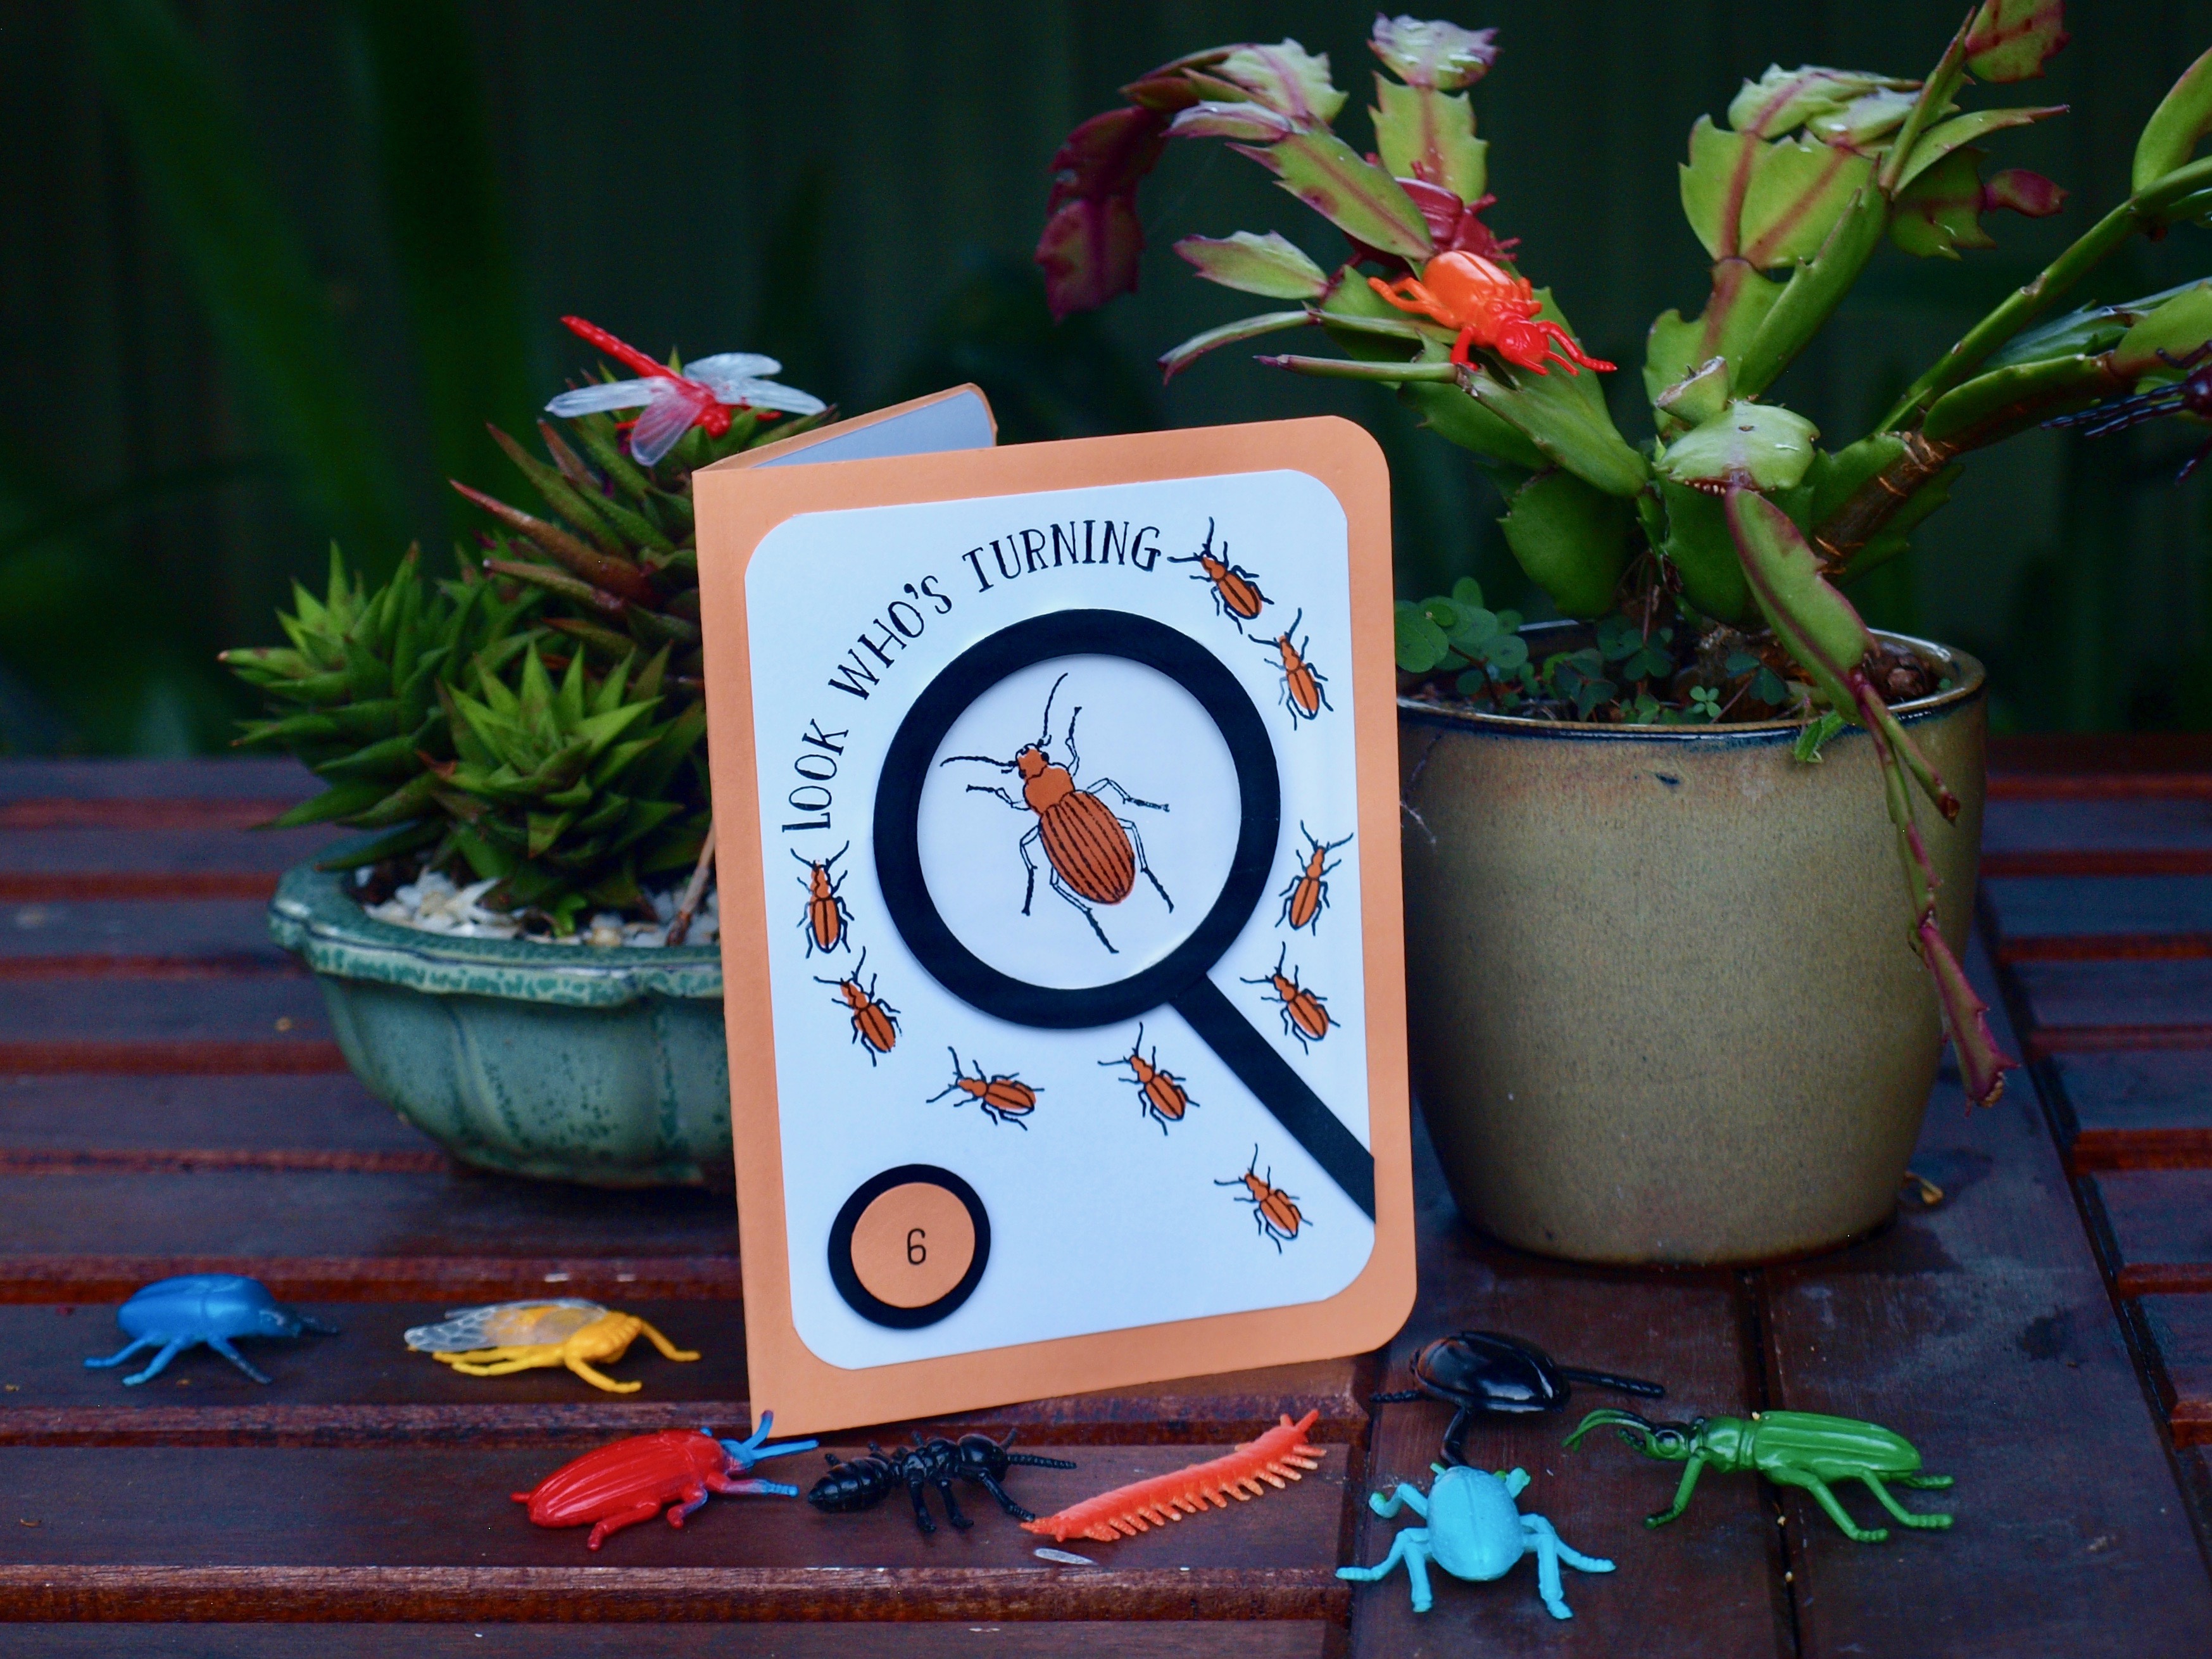
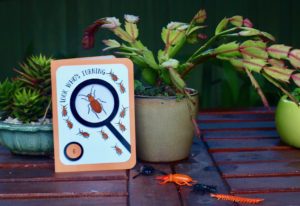
As soon as I received my Occasions catalogue I knew I was just going to have to have the Beetles and Bugs stamp set. It instantly evoked memories of coming to the big smoke (i.e. Sydney) as a child and going to the Australian Museum with my parents when we put on our Sunday best and caught the train into the city.
As a child from the country, Sydney was total sensory overload!
We’d have lunch in a smart coffee shop in the city, visit the David Jones Food Hall and we were allowed to chose just one thing from the Nut Shop in the Strand Arcade.
There was always something new and exciting to see in the Australian Museum, but my favourite part was the insect collection. I think I loved the wide wooden drawers the insects were stored in as much as the insects themselves!
My love affair with beetles and bugs has continued to this day…as long they’re not in my house!
Stamp Sets for Boys Can Be So Hard to Find!
…which is why I love this set so much!
As a mother to two boys I instantly knew this stamp set would be incredibly useful. It’s also very versatile because beetles and bugs come in so many different colours, which means you can use any Stampin’ Up! ink you like with this set.
When making this card I decided to try a colour I hadn’t used before – Peekaboo Peach – and I just love how well it co-ordinates with Pumpkin Pie, Whisper White and Basic Black. I’ll definitely be using Peekaboo Peach again.
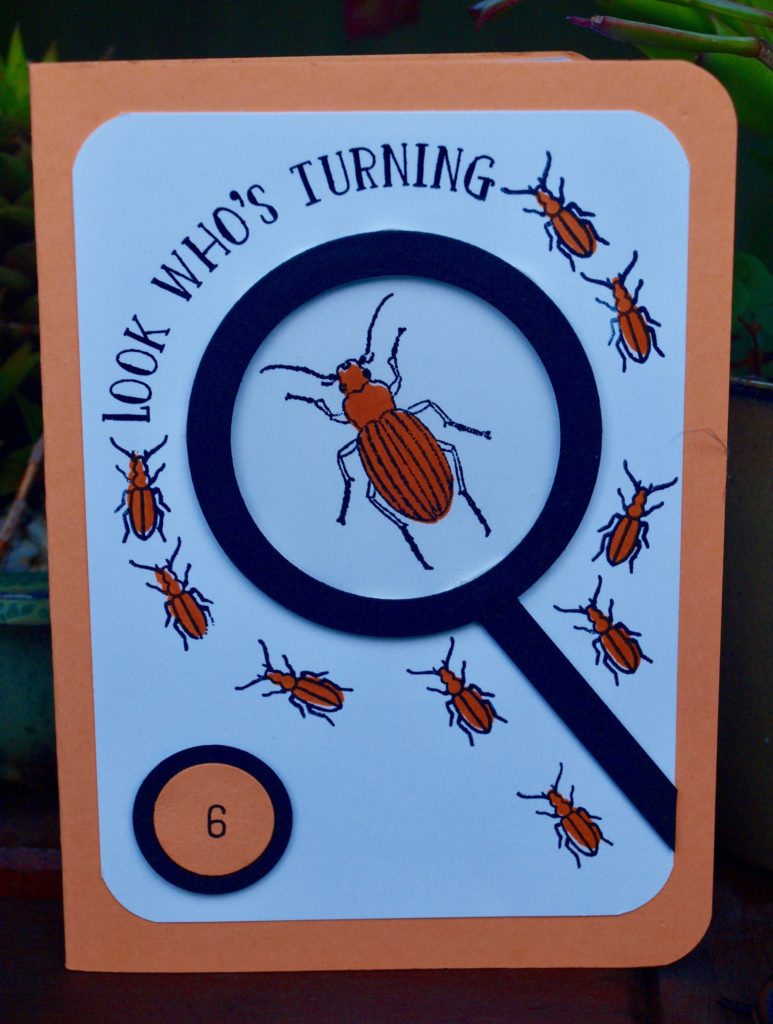
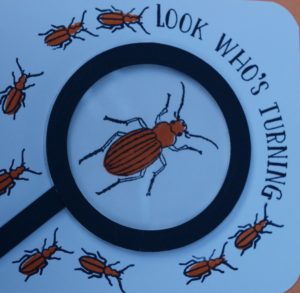
I used the layering circle framelits with basic black card stock and window sheets to make my magnifying glass and I’m really pleased with how realistic it looks, however it’s hard to photograph the ‘glass’ in the centre of my magnifying glass. Here’s a close-up to give you a bit of a better look.
The sentiment is from the Number of Years stamp set and because it is a photopolymer stamp I was able to bend it to exactly fit around the curve of the magnifying glass. The tiny number 6 is from the incredibly useful and versatile Labeler Alphabet stamp set.
Little Boys Always Love a Surprise!
The Party Pop-up Thinlits die would have to be one of my all time favourite dies to add that ‘wow’ factor to all of my birthday cards.
Both my boys would have loved to receive this card when they were younger…in fact I’m sure that even as teenagers they would still secretly love it today!
I hope you enjoy the versatility and ‘boy friendliness’ of the Beetles and Bugs set as much as I do.
Thanks for stopping by!
Now it’s time to see what the incredibly talented Alisha Watson has created by clicking on the next blog hyperlink below.
If you find a broken link or have come to this blog hop from a different entry point, you can view the participants below:


")


")


 Faux Suede Trim")


 …which is why I love this set so much!
 Both my boys would have loved to receive this card when they were younger…in fact I’m sure that even as teenagers they would still secretly love it today!