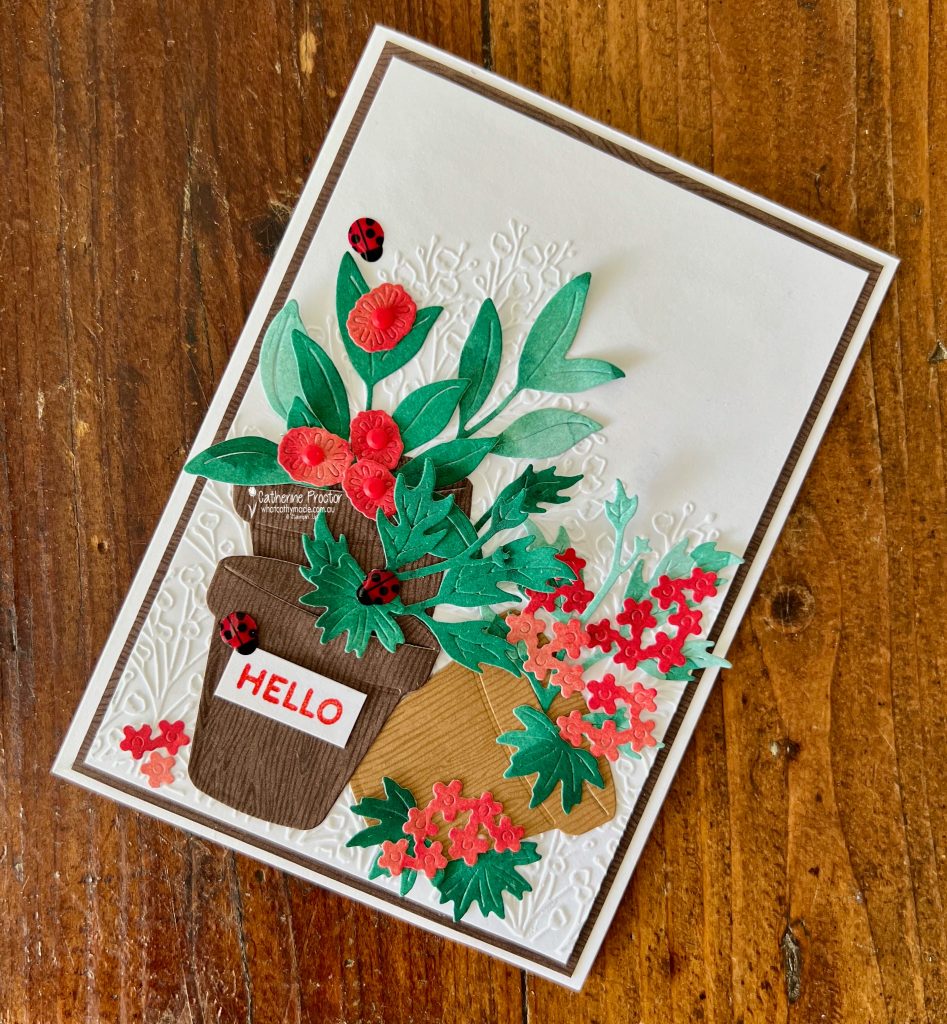
This week for Colour Creations we’re celebrating Poppy Parade, and I’ve created a layered garden scene using three brand new Online Exclusives that will be available to order from Tuesday 3 March:
Help Me Grow Bundle
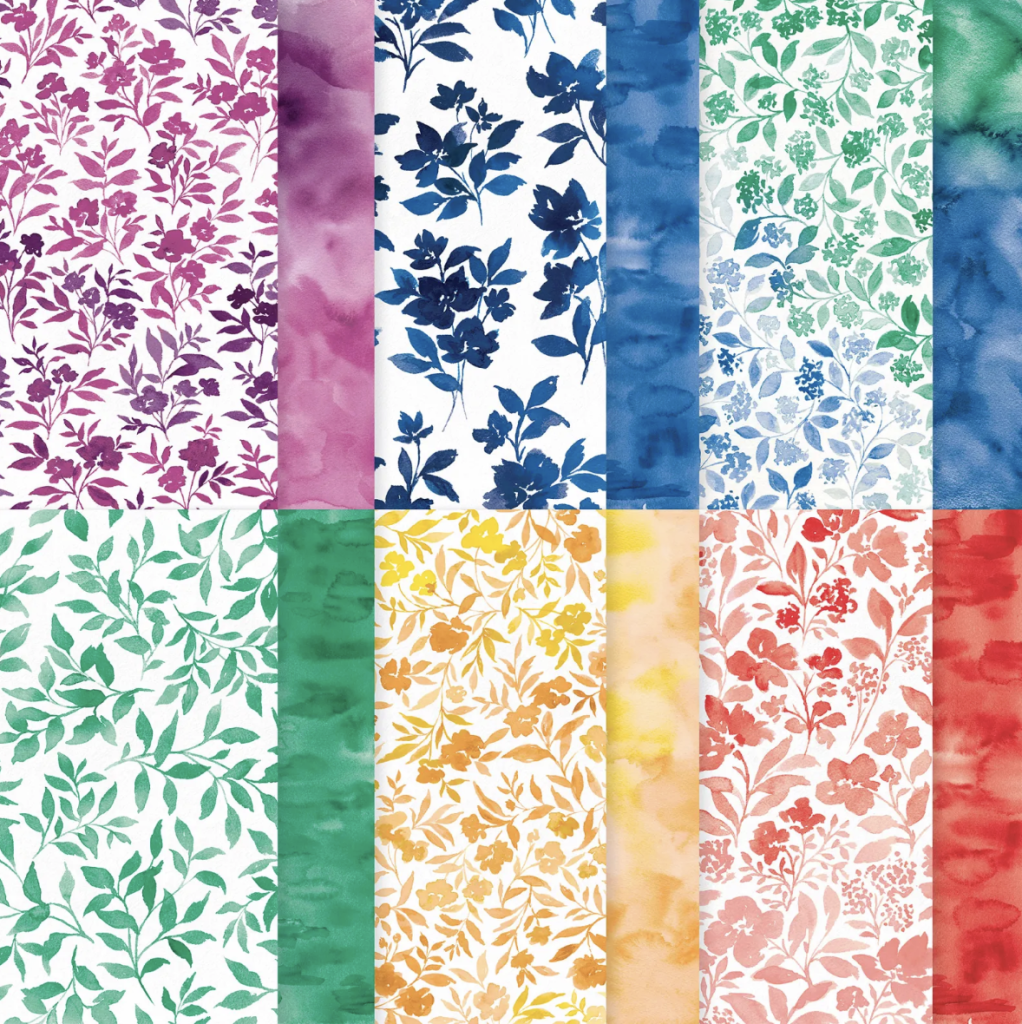
Garden Poetry 12″ x 12″ Designer Series Paper
Wood Grain Wonders 12″ x 12″ Designer Series Paper
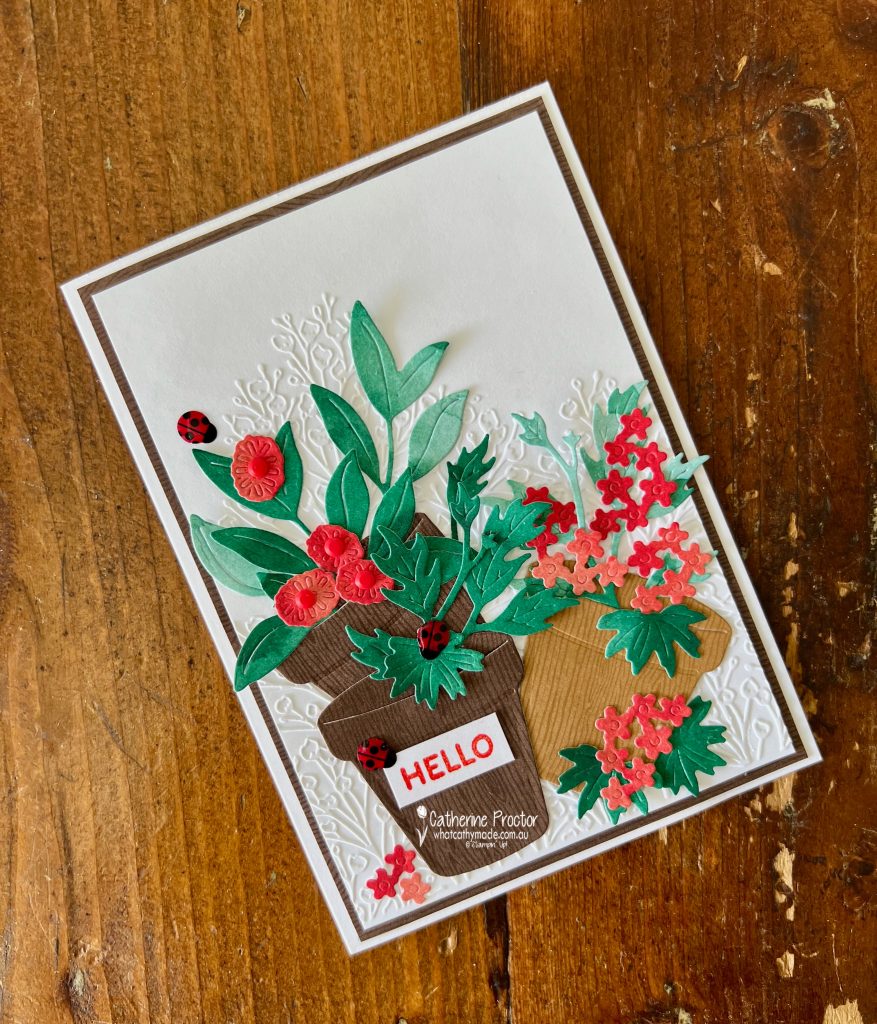
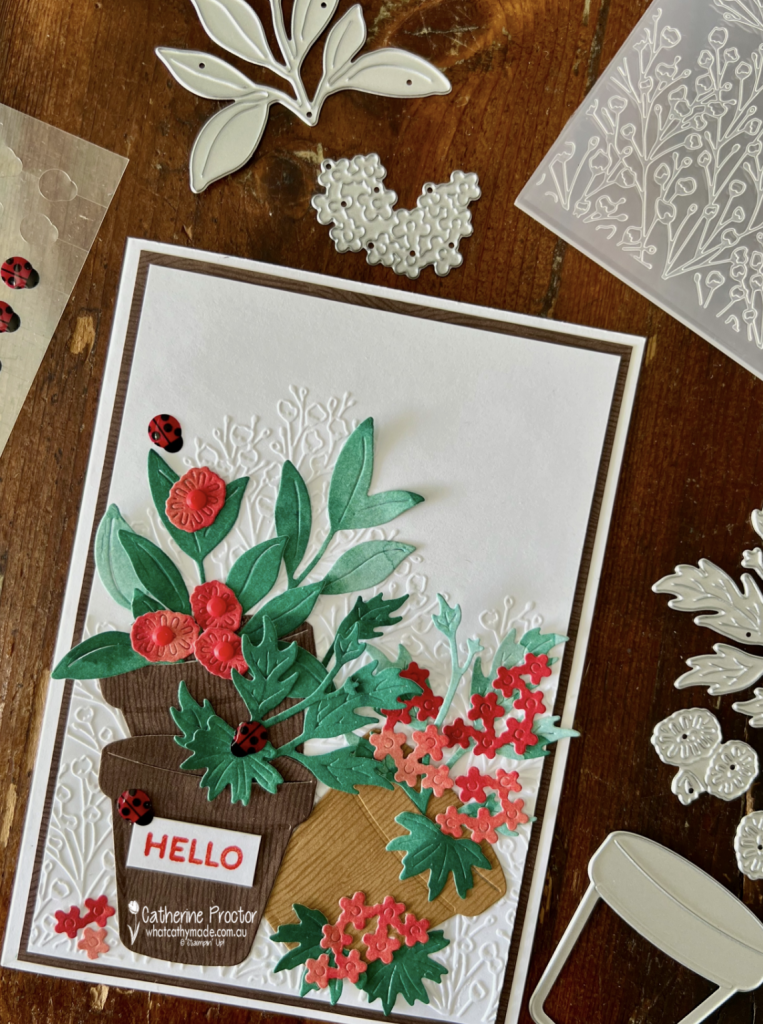
This all-purpose “hello” card was the perfect excuse to play with these exciting new goodies, as well as a fabulous embossing folder which is currently in the last chance section of the website.
My colour combination of Poppy Parade, Shaded Spruce, Basic White, Early Espresso and Pecan Pie was inspired by the colours in the two Designer Series Papers I used for the card.
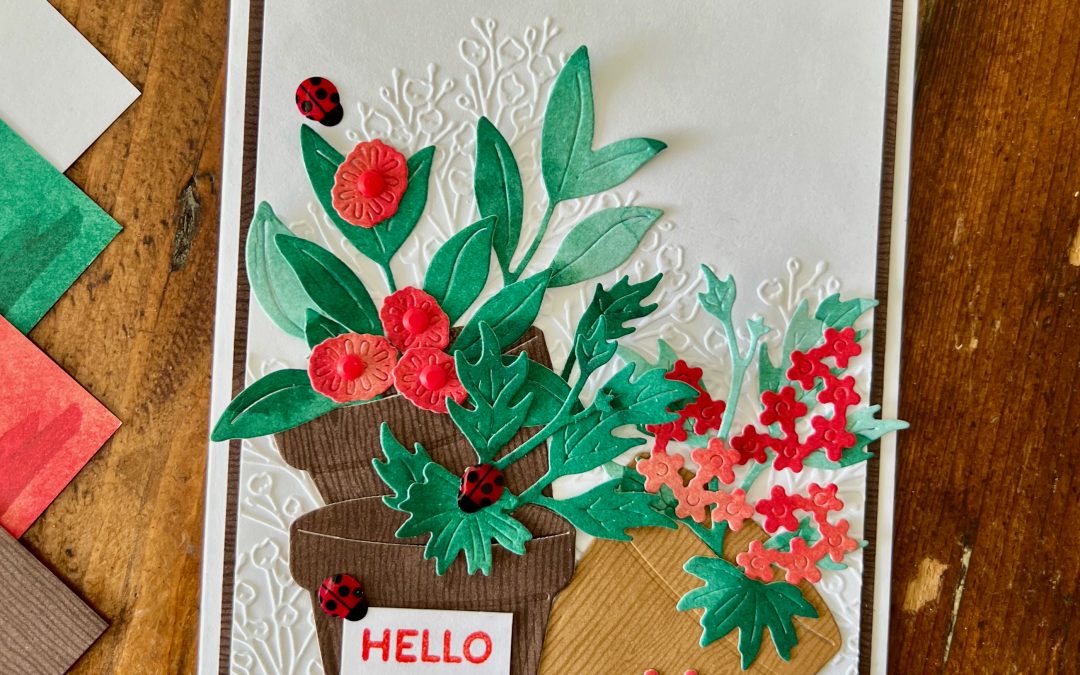
The Garden Poetry 12″ x 12″ Designer Series Paper gives the plant flowers and leaves a soft watercolour effect, so it looks hand coloured without any actual colouring.
I simply used the Help Me Grow dies to die cut the leaves and flowers from the Poppy Parade and Shaded Spruce patterns in the DSP.
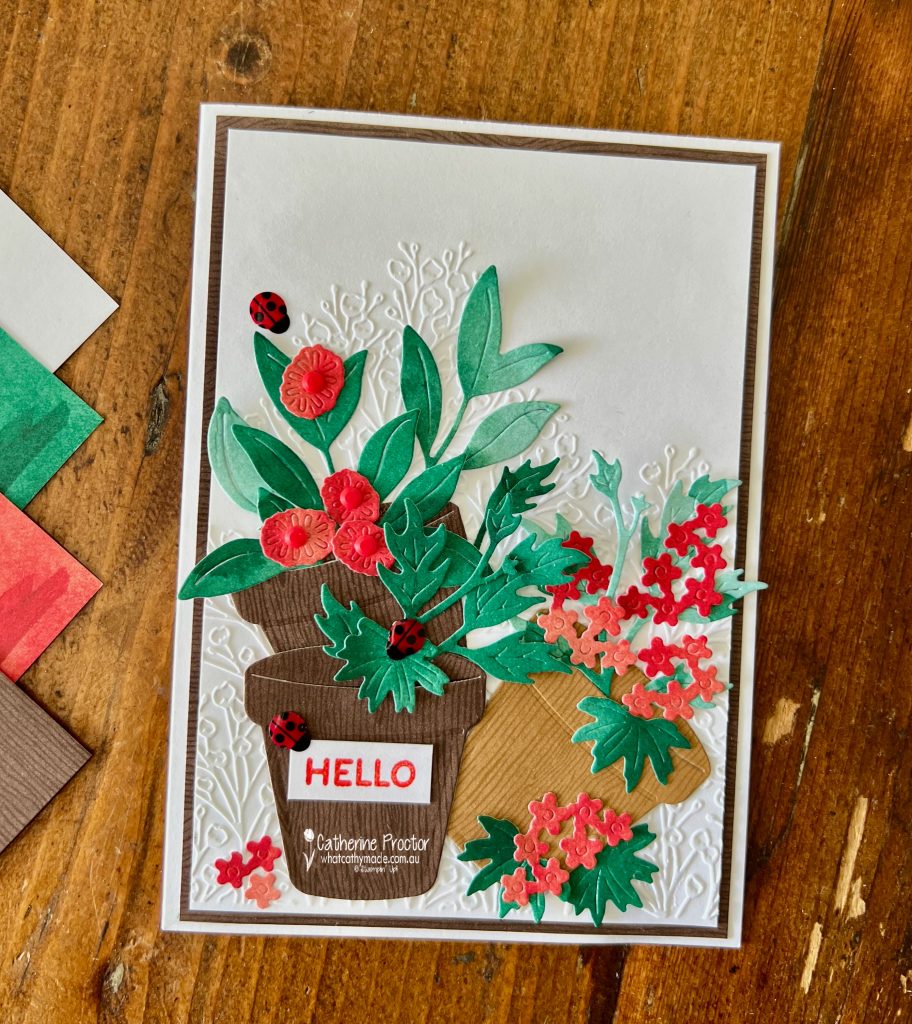
The three plant pots from the Help Me Grow dies are cut from the timber patterns in the Wood Grain Wonders DSP, giving them beautiful warmth and realism.
Behind the garden scene, I added a panel embossed with the Pressed Flowers Embossing Folder. It gives the softest, delicate background texture without competing with the focal point. And at $7.70 on the Last Chance list, it’s an absolute steal.
The only stamping on the card is the simple “Hello” sentiment from the Help Me Grow stamp set.
I embellished the garden scene with three Ladybirds from the Ladybug Garden Epoxy Shapes and a few Poppy Parade Dear Dots in the centre of the flowers.
Take a look at some more Poppy Parade inspiration on our Insta Hop!
Our blog hop is now an Instagram hop but the good news is that you don’t need to have an Instagram account to view all of the other projects!
Simply copy any of the Insta handles below into a new search engine window to follow the Instagram hop at any point.
Next in our Hop is Kate @craftwithkate. Be sure to check out her gorgeous project/s.
The full list of this week’s InstaHop is listed below:
Kate @craftwithkate
Helen @apaperparadise
Kirsty @crafty.littlemiss
Rachel @rachelpalmieristampin
Cathy @whatcathymade – you are here!
Thank you for joining me for Week 41 of Colour Creations. We’ll be back next Wednesday when we are showcasing Pretty In Pink. I hope you can join us then.
A group of the Art With Heart Team is hopping through the Stampin’ Up! colours in alphabetical order and Week 44 is all about Poppy Parade.
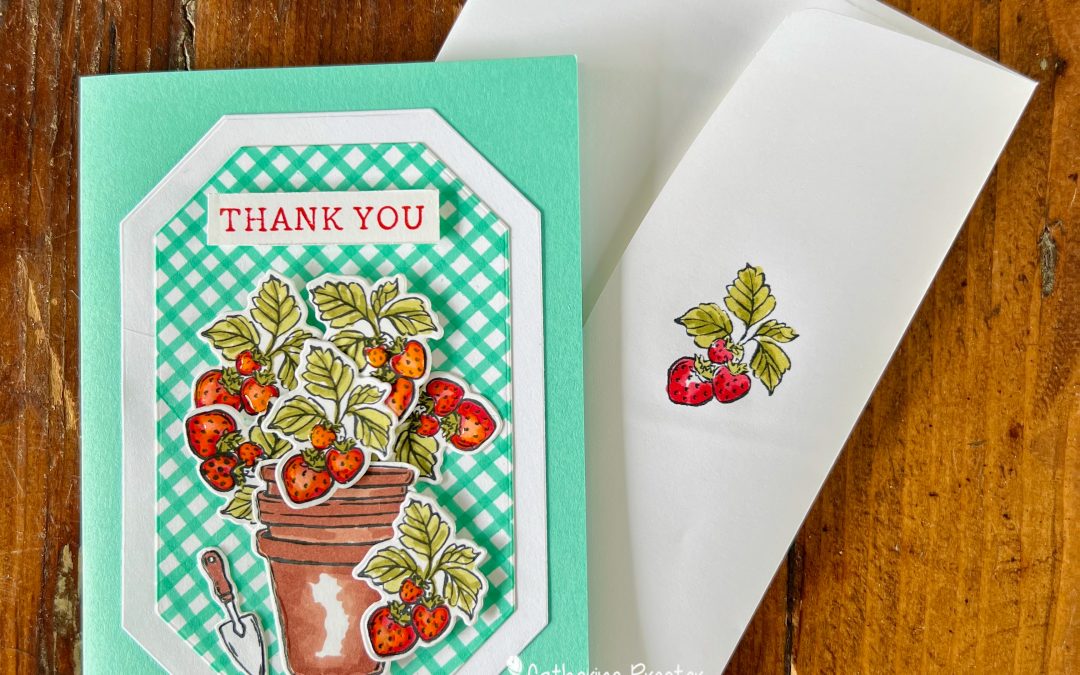
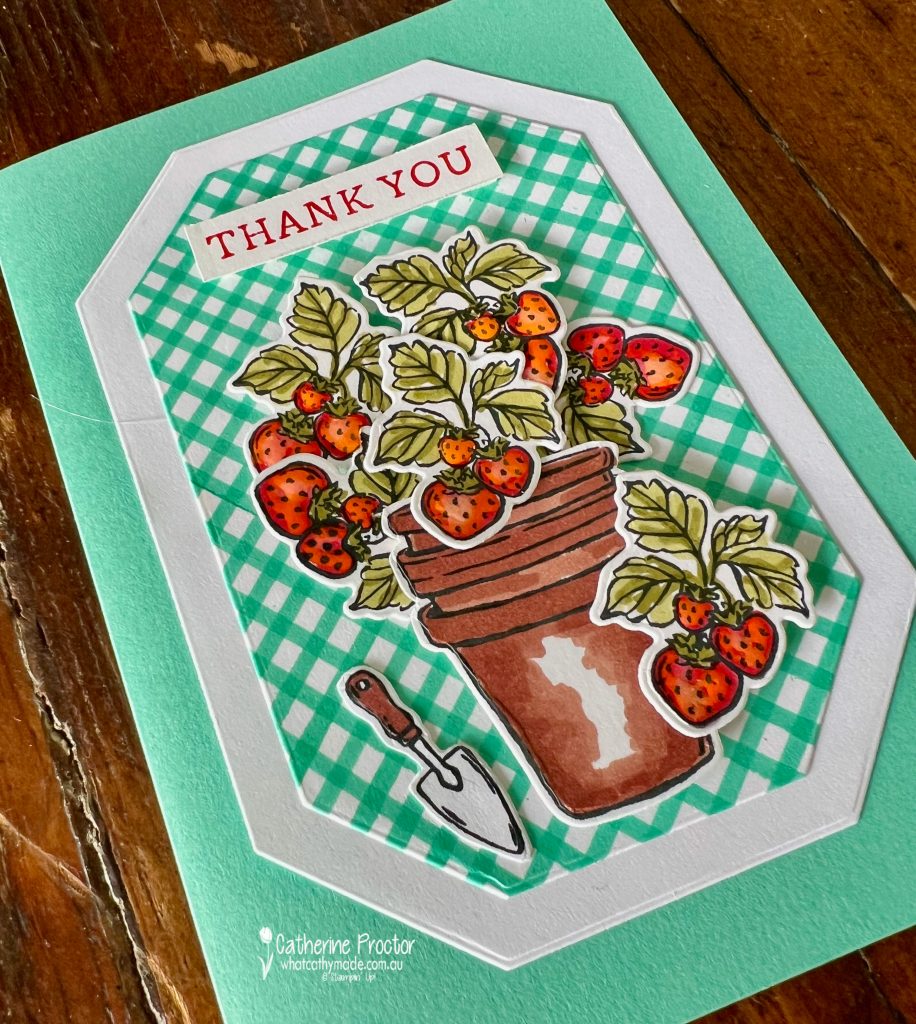
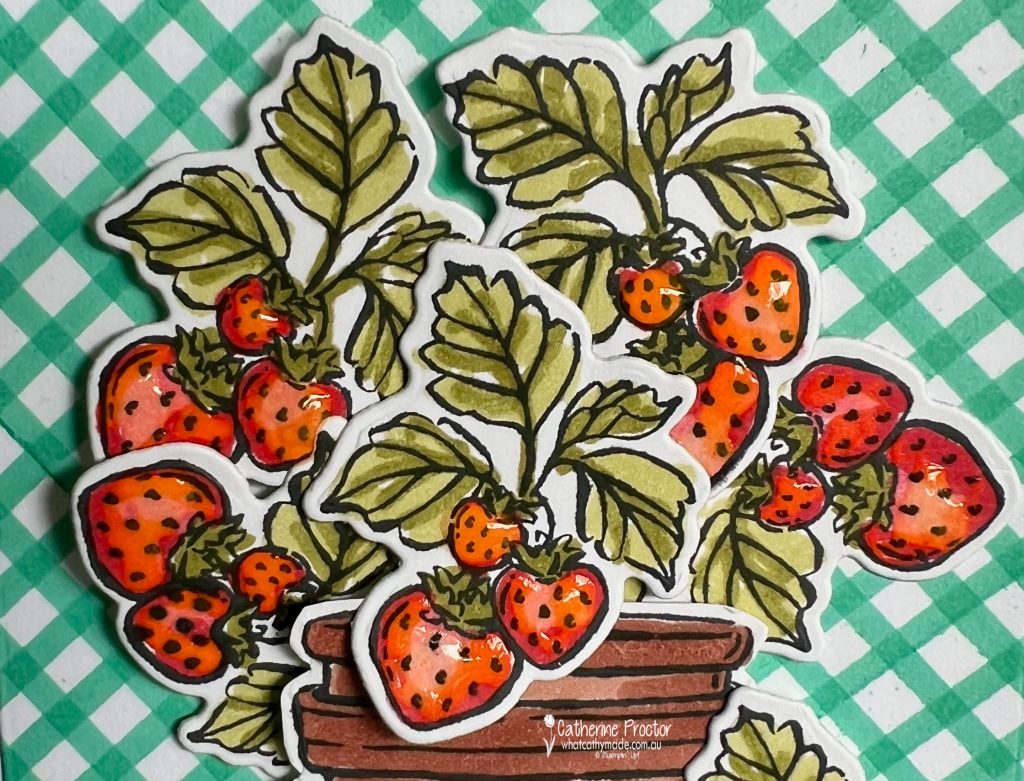
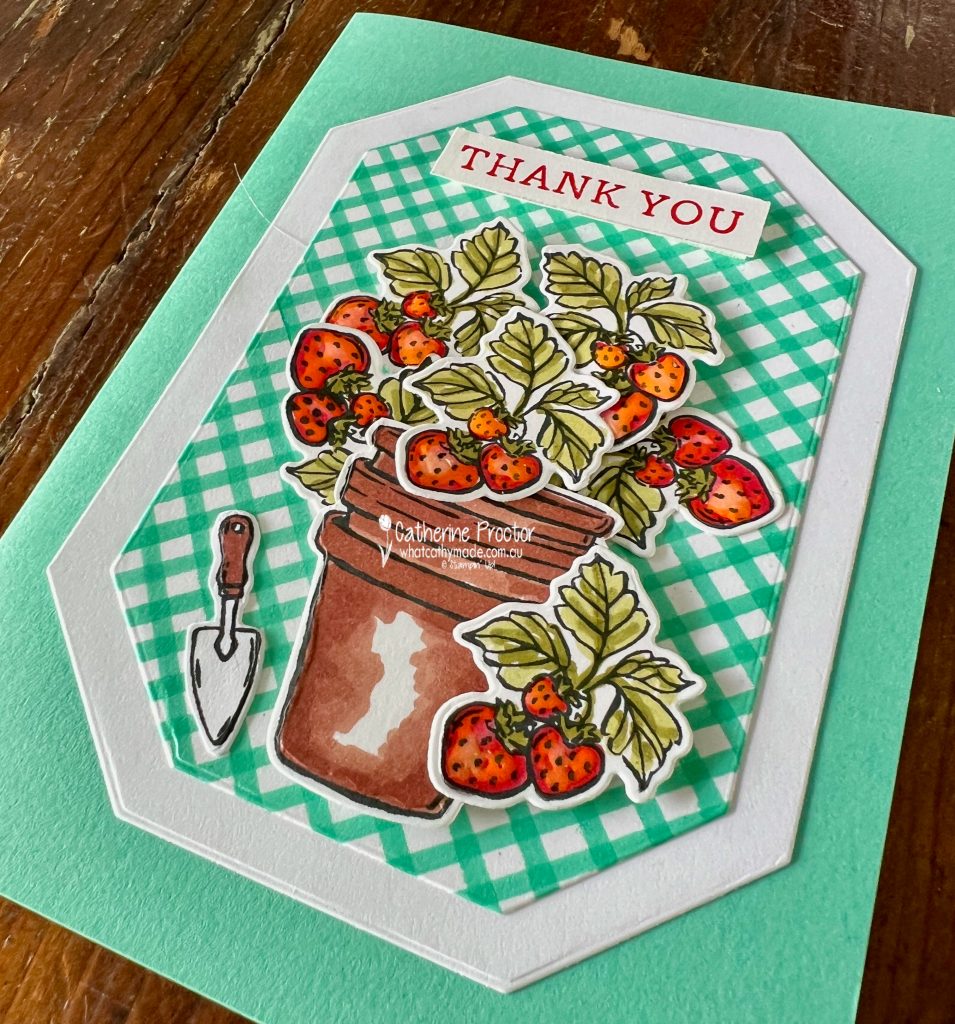
Here is my project, a rich red cluster of Poppy Parade cherries sitting in a stack of terracotta pots. Don’t they pop against my hand drawn Summer Splash gingham background (created with a ruler and the Stampin’ Blends)?
My card is CASED from an amazing card made by @hammondandpenny for a recent @stampinthroughthecatalog challenge. I loved Melodie’s hand drawn gingham and her retro colour combination! This is Melody’s card.
To create my juicy cherries I coloured them using the Poppy Parade Stampin’ Up! blends before covering the cherries with a thin layer of glue from the fine-tip glue pen. Let it dry before adhering to the card.
The leaves and the pot are also coloured using Stampin Blends. I’ve used Old Olive for the leaves and Copper Clay for the pots.
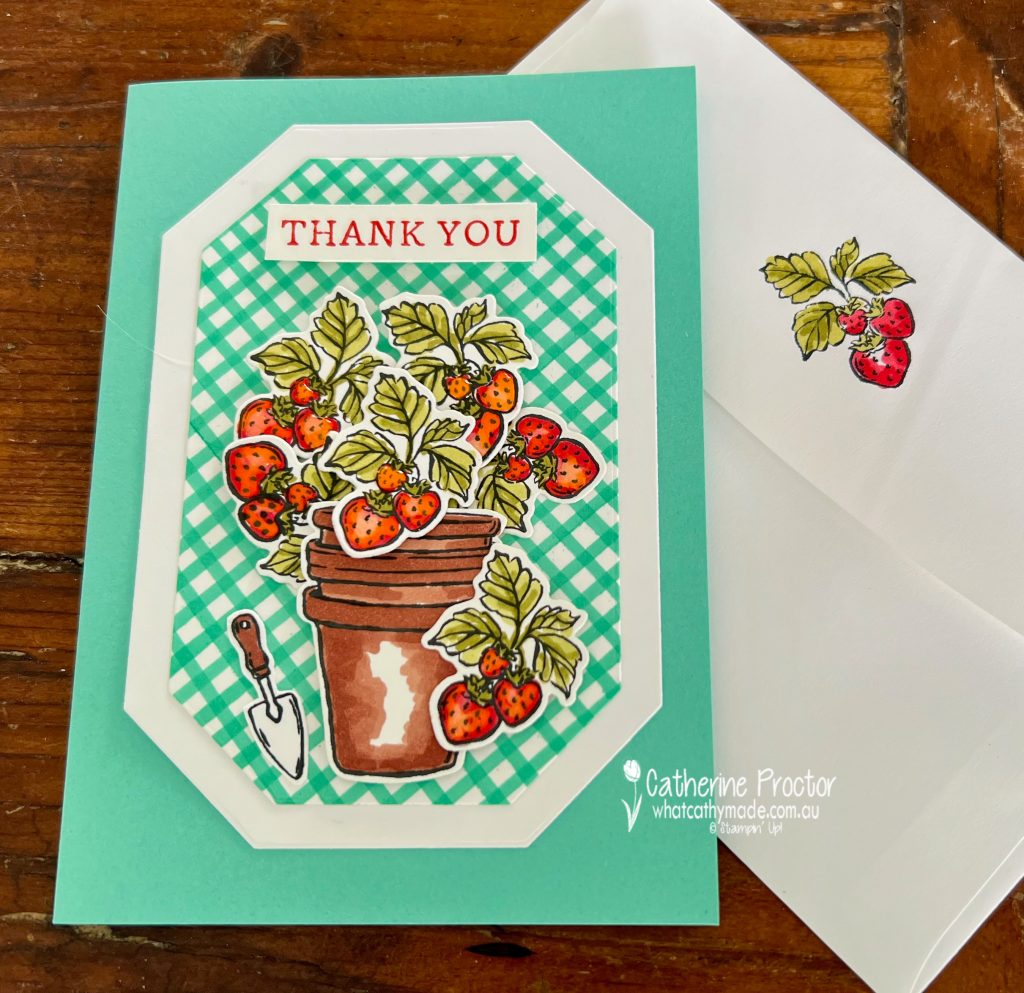
The layers are die cut using the Countryside Corners dies and I’ve stamped and coloured another cluster of strawberries on the envelope flap.
Next in our Hop is Kate @craftwithkate, the coordinator of our Insta hop. Be sure to check out her gorgeous project/s.
The full list of this week’s Insta Hop are listed below:
I’m off to On Stage in Brisbane first thing tomorrow morning to catch up with all my Stampin’ Up! friends and find out what’s in the new Annual Catalogue, which is so exciting!
Ill ‘be back next Wednesday night with our weekly AWH Colour Creations Insta hop when we will be showcasing Pretty Peacock.
Welcome to week forty of our Art With Heart 2022-23 Colour Creations blog hop.
This is a weekly blog hop where we showcase the stunning range of Stampin’ Up! colours in alphabetical order over 12 months and this week we are featuring Poppy Parade from the Brights family.
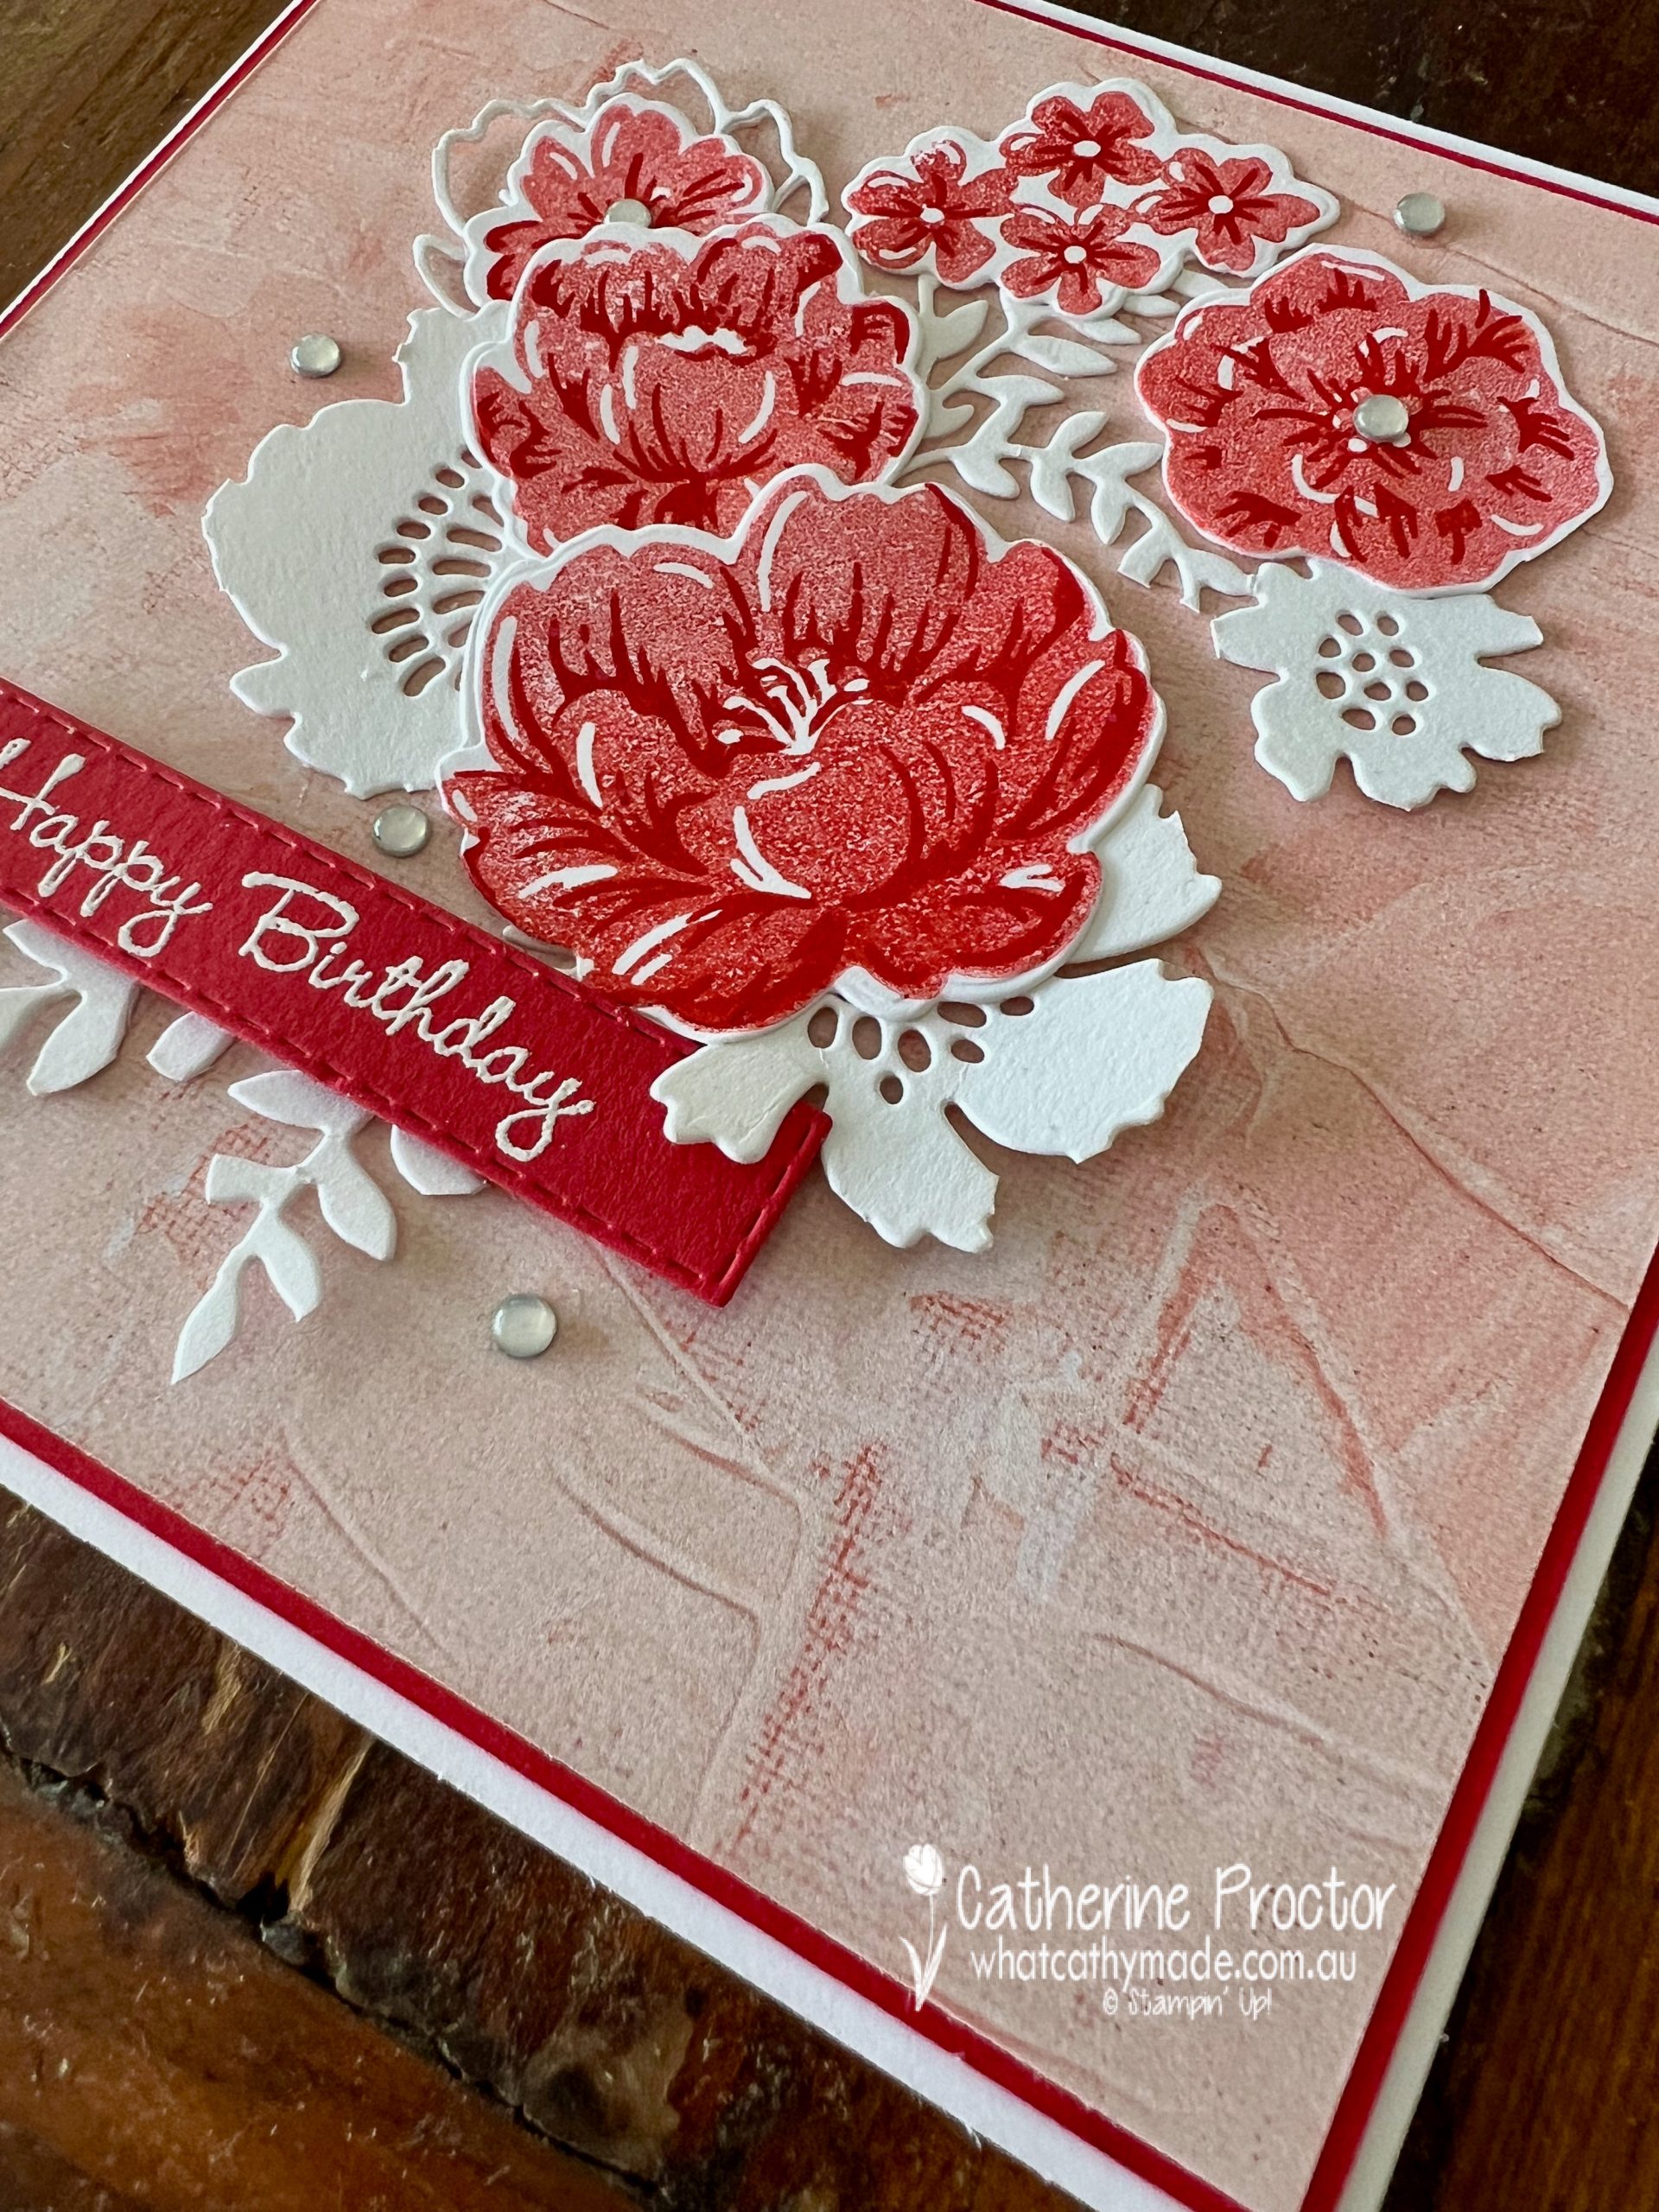
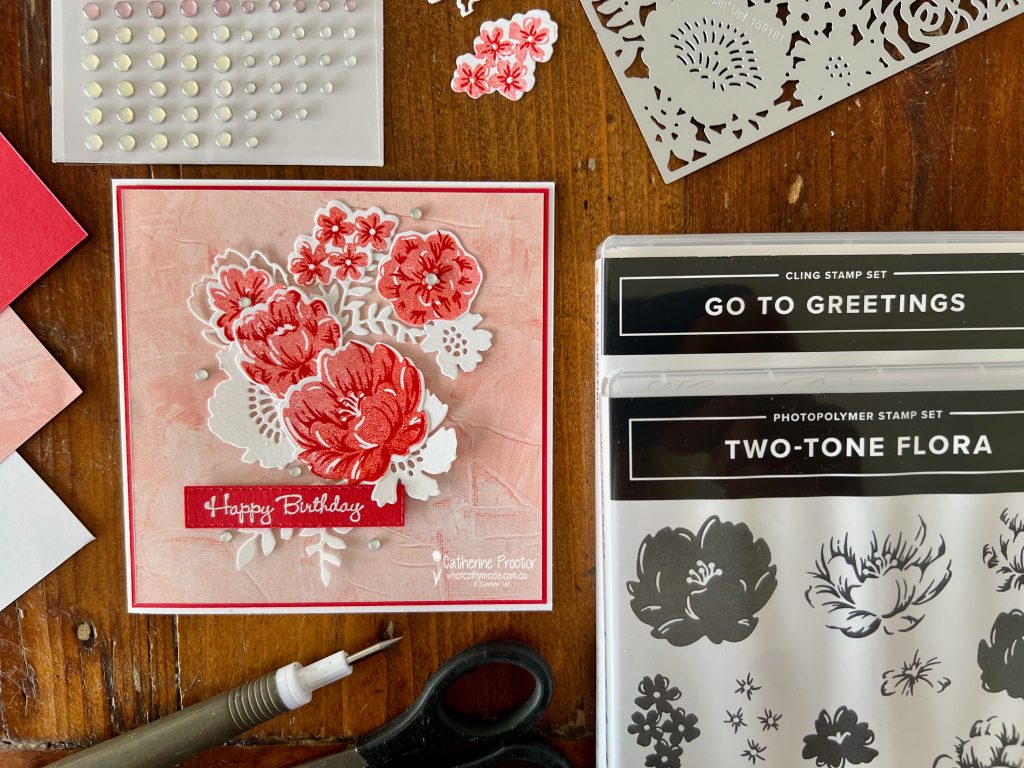
The Fancy Flora Suite includes the Two-Tone Flora Stamp Set and the Two-Tone Flora Dies. I’ve used the Two-Tone Flora Stamp Set, which is a two step stamp set, to stamp Poppy Parade at full strength stamping for the detailed sections of the flower and and stamped off once for the solid flower image.
Because these are photopolymer stamps they are easy to line up. I always stamp the solid flower first and then stamp the detailed image. Then I die cut the flowers using the Two-Tone Flora Dies.
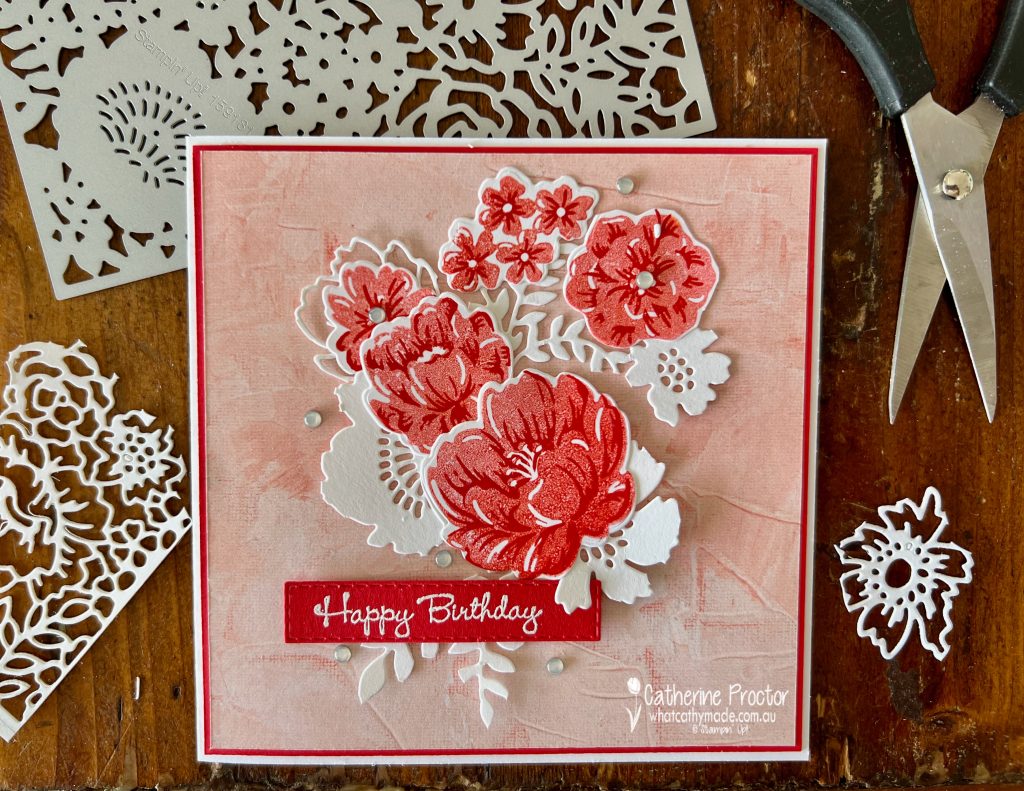
The white die cut pieces are cut from the large background die in the Two-Tone Flora Dies die set which is completely filled with pretty flowers. I’ve used my paper snips to cut out flowers and sprigs and create a floral arrangement with the Poppy Parade stamped and die cut flowers.
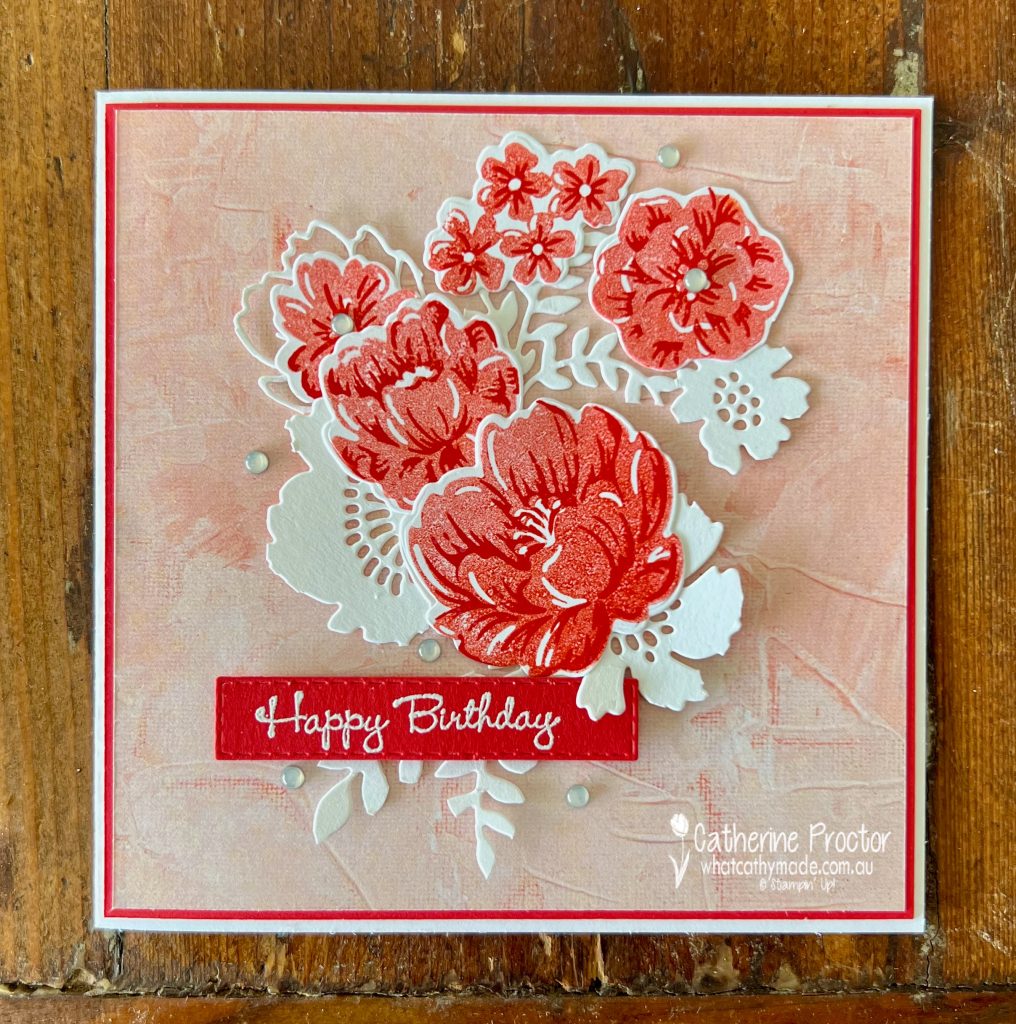
Once I’d created a floral arrangement, I adhered it to a sheet Fancy Flora DSP. This pattern in the Fancy Flora DSP has a gorgeous textured painted effect that really softens Calypso Coral – I like this softer shade of Calypso Coral and how beautifully it pairs with Poppy Parade.
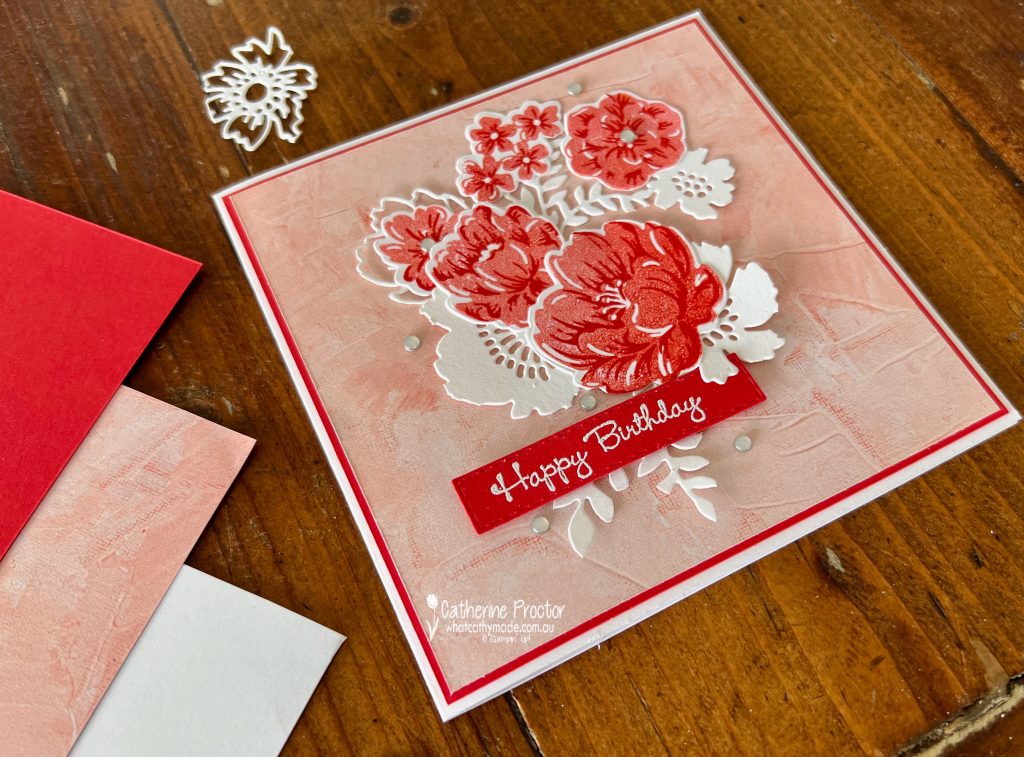
I couldn’t resist using the smallest “Happy Birthday” sentiment from the Go To Greetings stamp set, white heat embossed onto Poppy Parade cardstock. It’s such a feminine script.
The final touch for the front of my birthday card? A scattering of clear Adhesive-backed Milky Dots are the perfect embellishment.
Now it’s time to hop on over to our next participant, the lovely Di Furniss – I can’t wait to see what Di has made this week!
If at any time you find a broken link, you can find the complete list of all participants below.
If you live in Australia, you can find and purchase these products in my Stampin’ Up! Online Store once they are available to purchase tomorrow morning.
We’ll be back next Wednesday, February 22, with projects showcasing Pumpkin Pie.
Welcome back to our Colour Creations Showcase as we continue our showcase of over 50 beautiful Stampin’ Up! colours in alpha order.
This week we are showcasing Poppy Parade, a very bright and happy red!
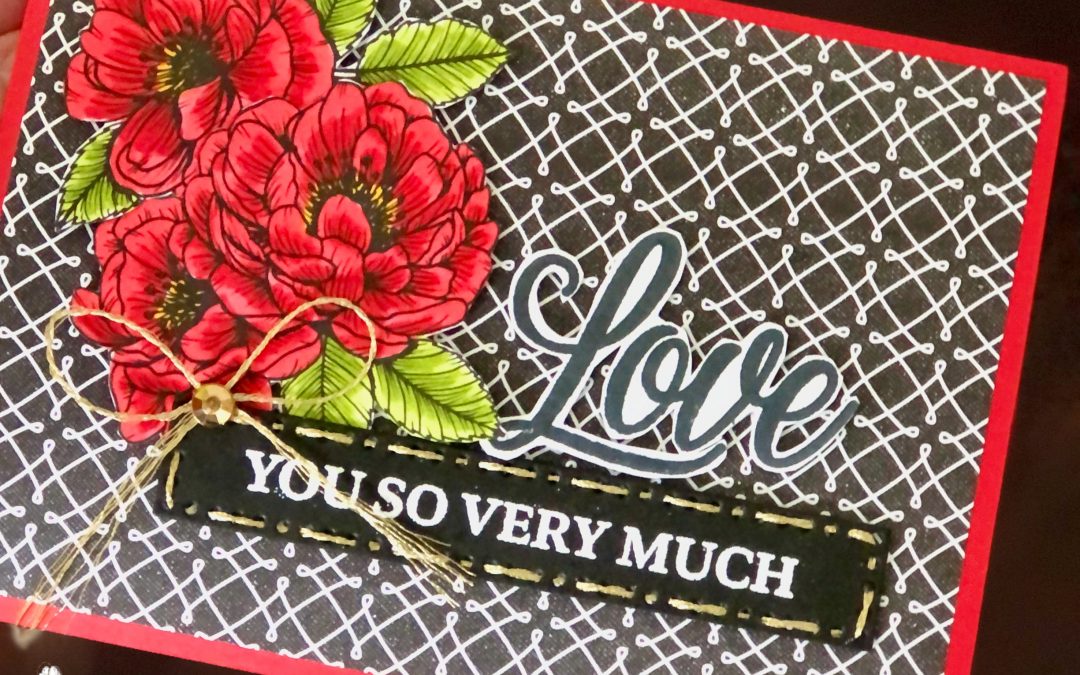
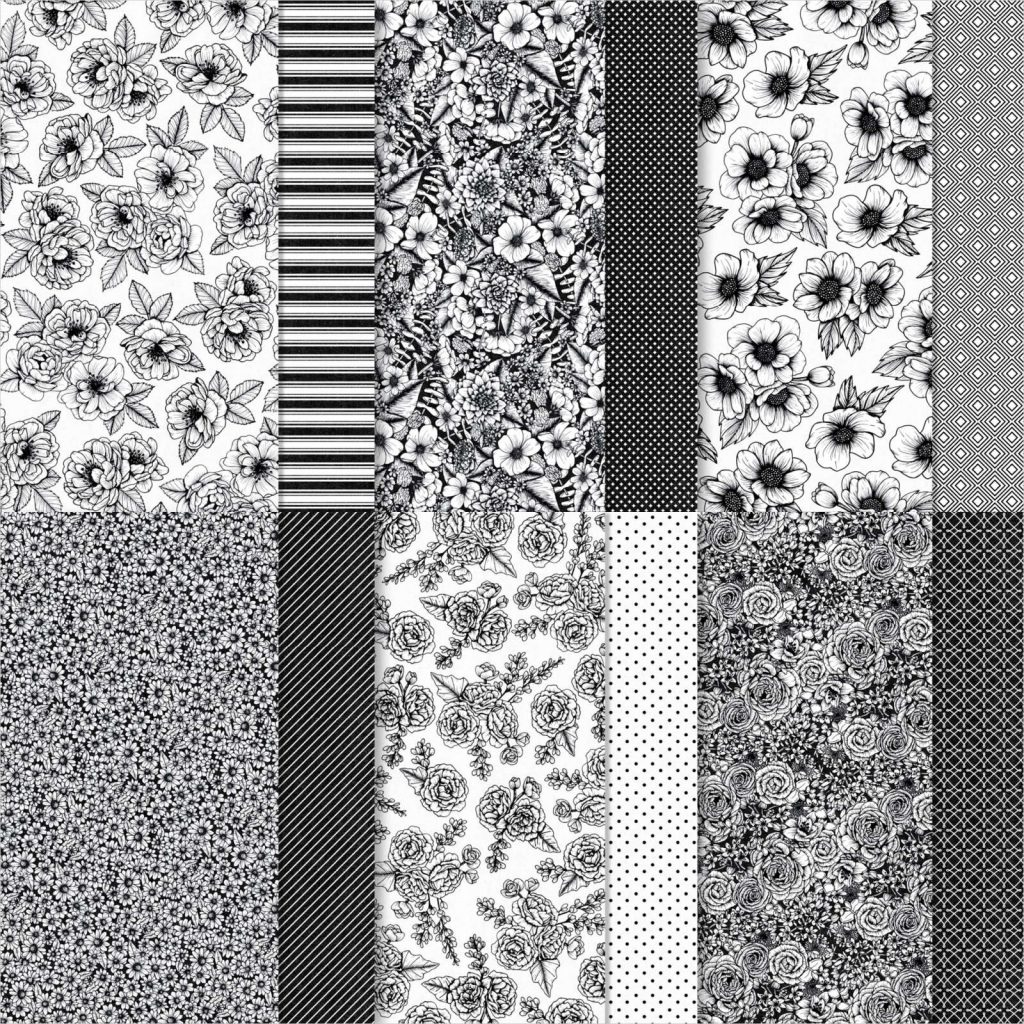
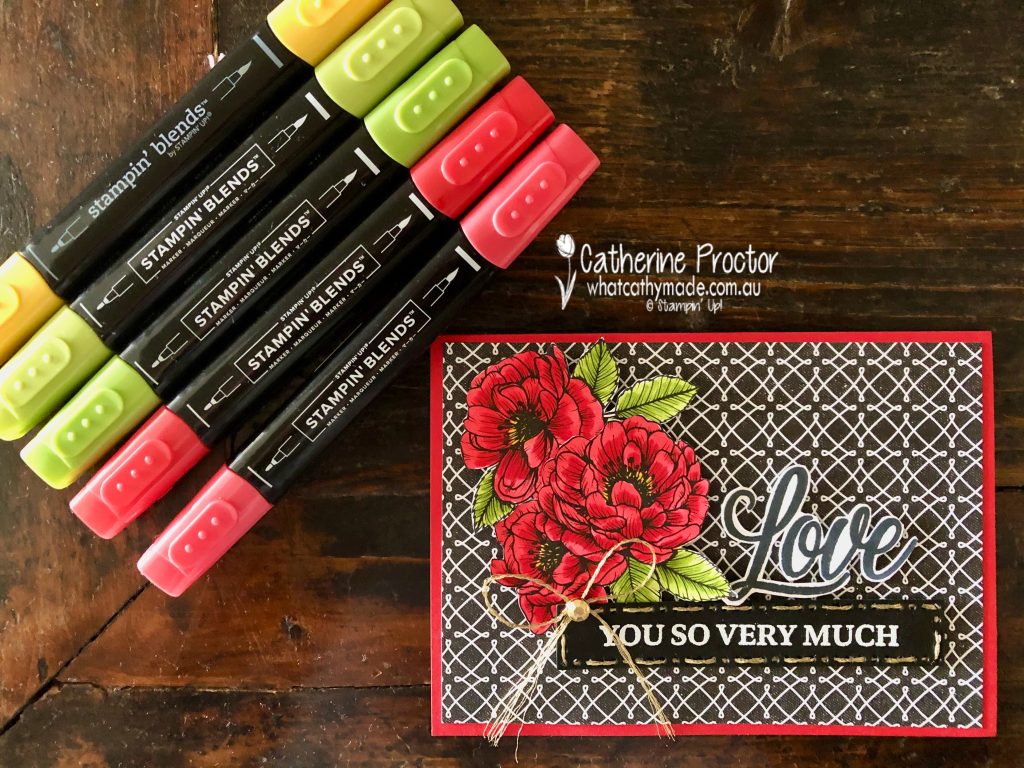
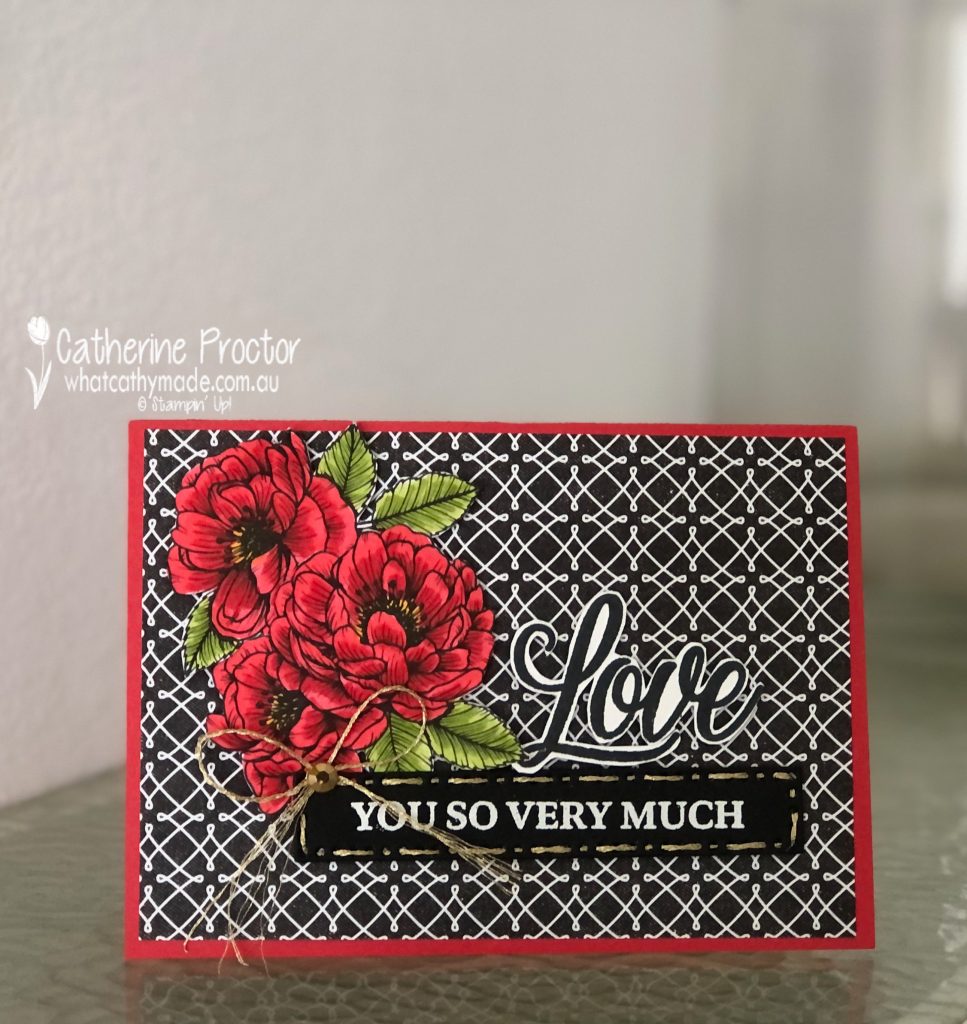
If you’ve got a “thing” for black and white paper like I do, you’re going to love, love, love this True Love DSP. It’s so very versatile because you can use it for backgrounds, colour it in different ways or fussy cut the flowers to use on your cards or scrapbook layouts.
And the back and white patterns just makes any colour pop!
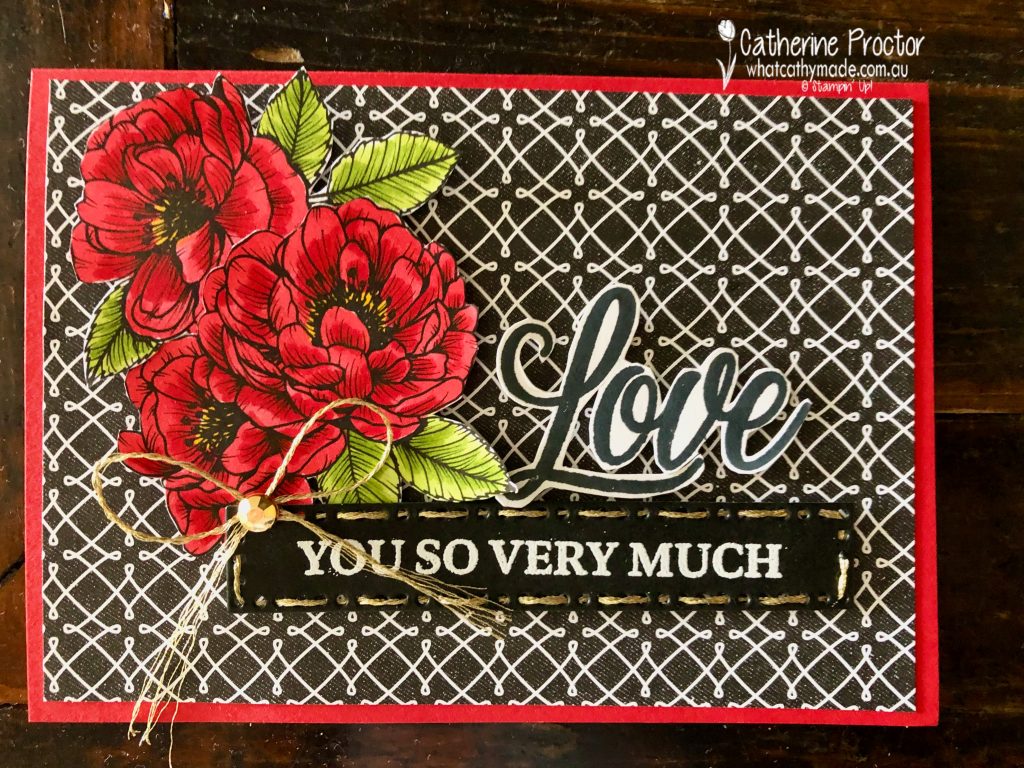
The colour scheme I’ve used today is such a classic: Poppy Parade, black and white…with just a touch of another bright: Granny Apple Green.
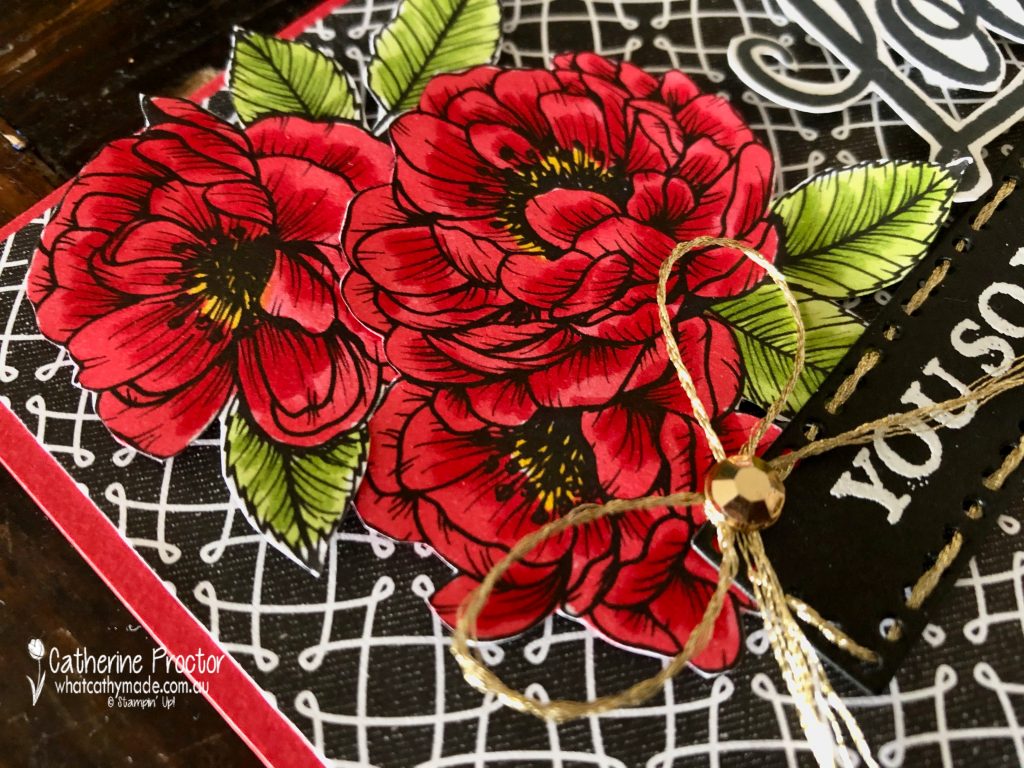
The beautiful red flowers were coloured in with Stampin’ Blends: Poppy Parade for the petals, Granny Apple Green for the leaves, oh, and I nearly forgot the centre of the flowers…Daffodil Delight.
The detail on these flowers in the True Love Designer Series Paper make them so easy to colour and shade – just follow the lines!
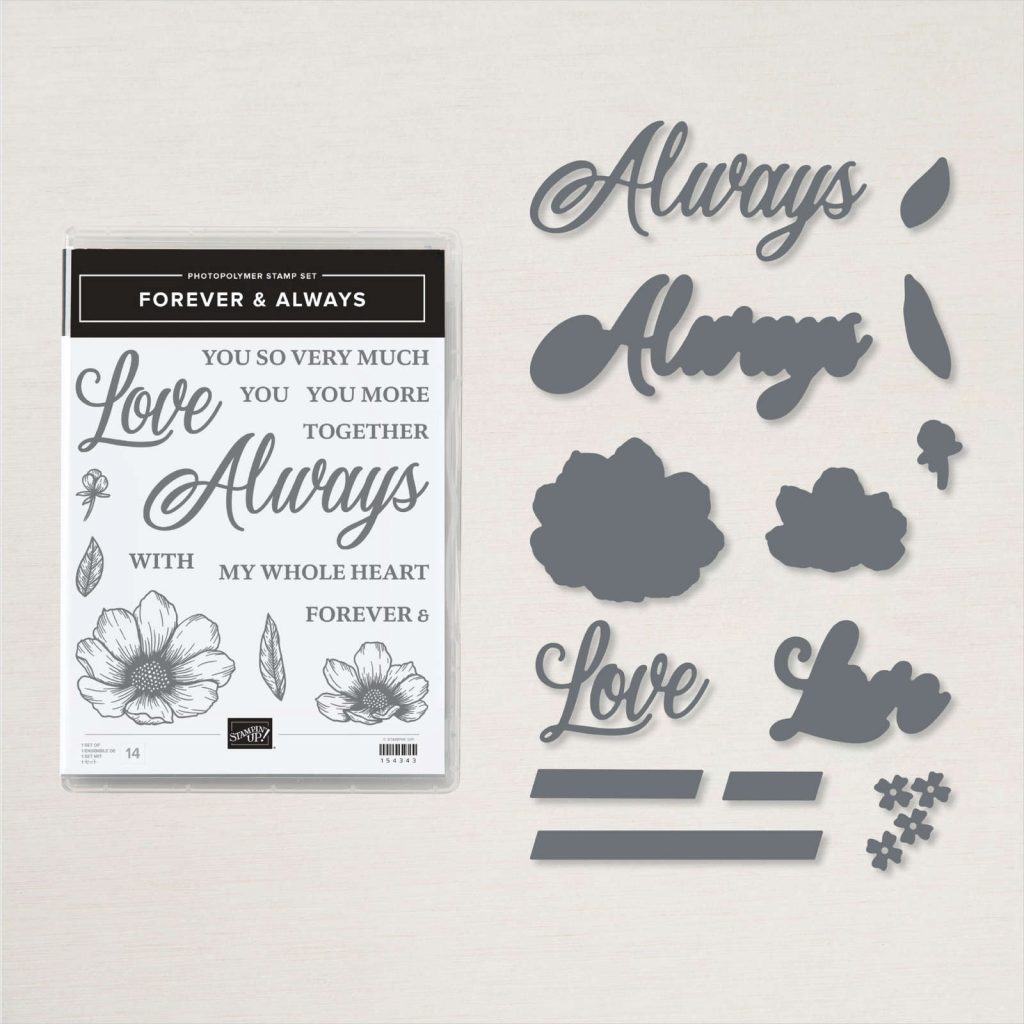
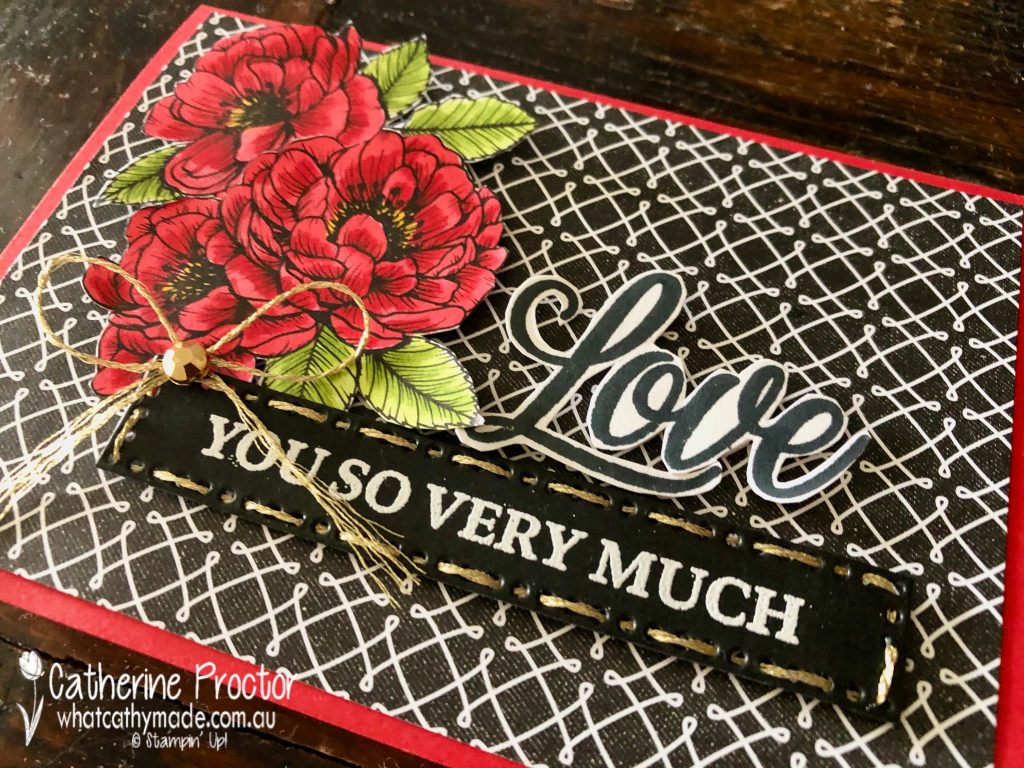
The sentiment is from the matching stamp set: “Forever & Always”. After stamping the “Love” stamp I fussy cut it out only to remember I actually own the co-ordinating “Always” dies!!! Duh!!!!
Instead of adding a swirl of the Forever Greenery gold trim behind the “you so very much sentiment” I die cut it using the long rectangle die from the Field Tiles Dies. I then used a needle to thread the gold trim through the holes and then tie a bow, which is secured with a gilded gem.
I really like this effect and must remember to use it again.
I can’t wait to see what the rest of the Art With Heart team have created with Poppy Parade today. Click on the links below to see what they’ve made.
We will return next week on Wednesday February 24th when we’ll be showcasing one of the 2020-22 InColours: Pretty Peacock. We hope you can join us all then.
To purchase any of the products used in my project tonight, click on the links below.
If you’d like me to post you your very own copy of the January – June 2020 mini catalogue, the 2020 Sale-a-bration catalogue, the 2020-21 Stampin Up! Annual Catalogue, the 2020-21 Beginners Brochure, or to simply find out about more about Stampin’ Up! contact me.
When you shop online in my Stampin’ Up! Online Store don’t forget to use my monthly Host Code (if your order is between $50 – $250) and I will send you a thank you gift the following month. If your order is over $250 don’t use the host code because you will qualify for your own stamping rewards.
My February 2021 Host code is ZYAR6HTF and it is valid until midnight February 28.
Would you like to get a 20% discount on everything you order? Click here to join my team:
In the meantime, wherever you are in the world, stay safe, stay calm…and keep on crafting xxx
Tonight the Art with Heart team are sharing creative projects with an Easter theme.
Don’t forget, sale-a-bration ends on March 31st! There is still time to earn free product with purchase or even join our Stampin’ Up! team. Ask any of the girls on the hop for more details.
Easter means different things to different people. For some, it is all about bunnies, Easter eggs, hot cross buns and public holidays. For others, it is the most important day on the religious calendar. But although Easter is a celebration of the resurrection from the dead of Jesus Christ, did you know the Easter holiday is also based on an ancient Pagan ritual?
Easter dates change every year because it is also based on the Pagan ritual of the Spring Equinox, which is a celebration of new life and the change that comes with spring.
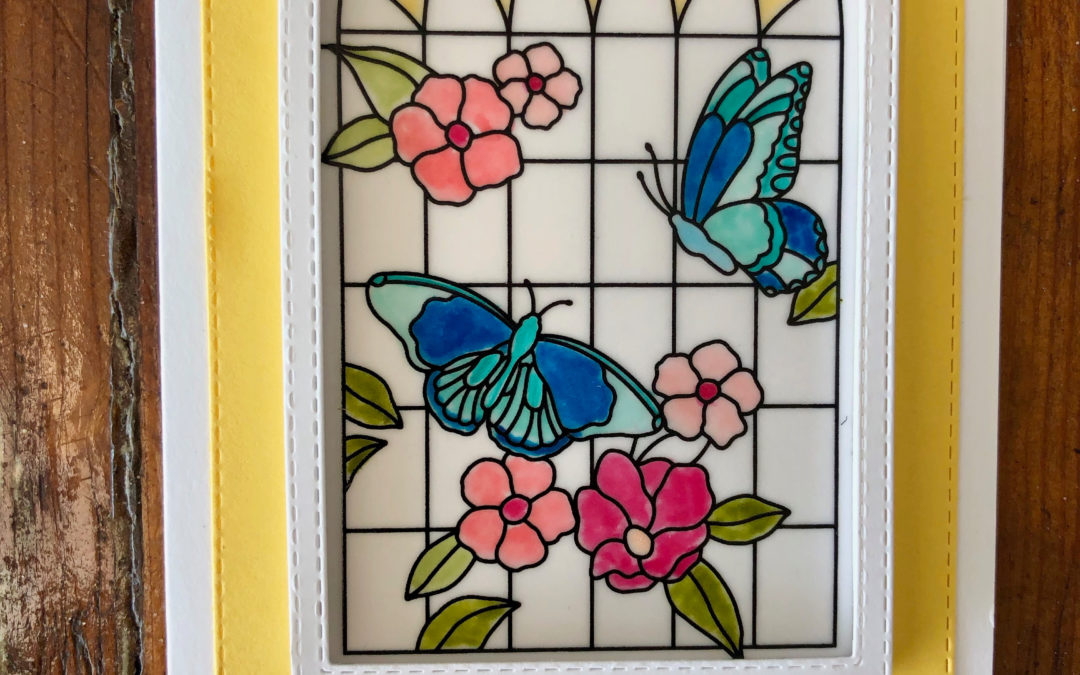
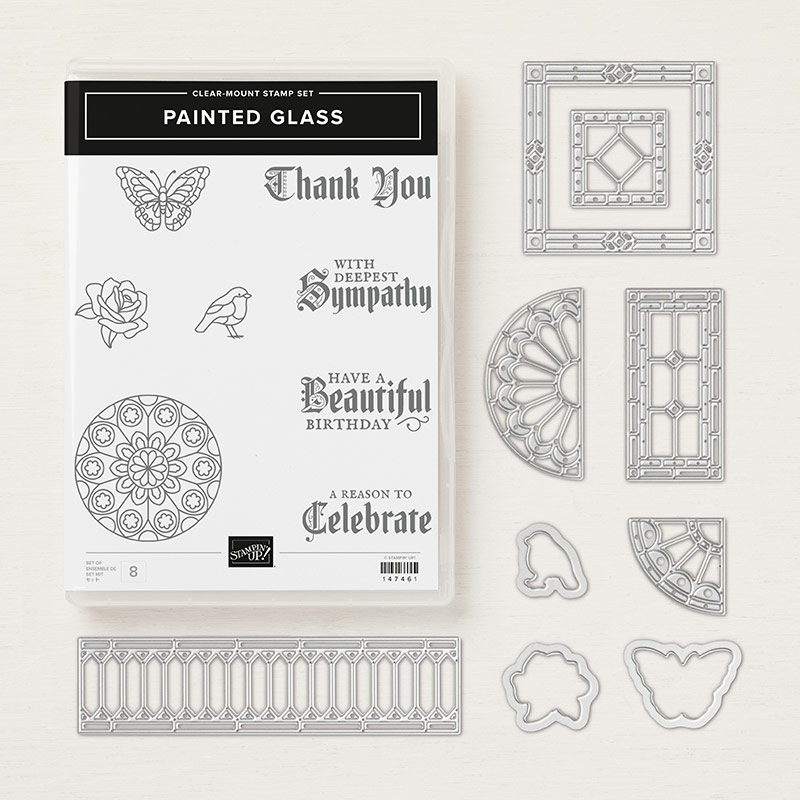
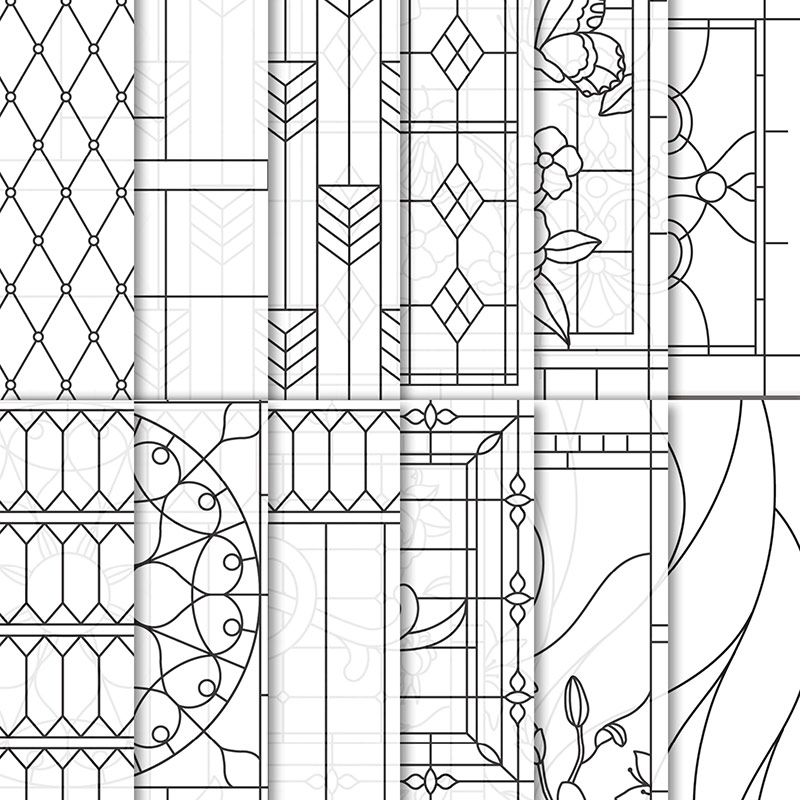
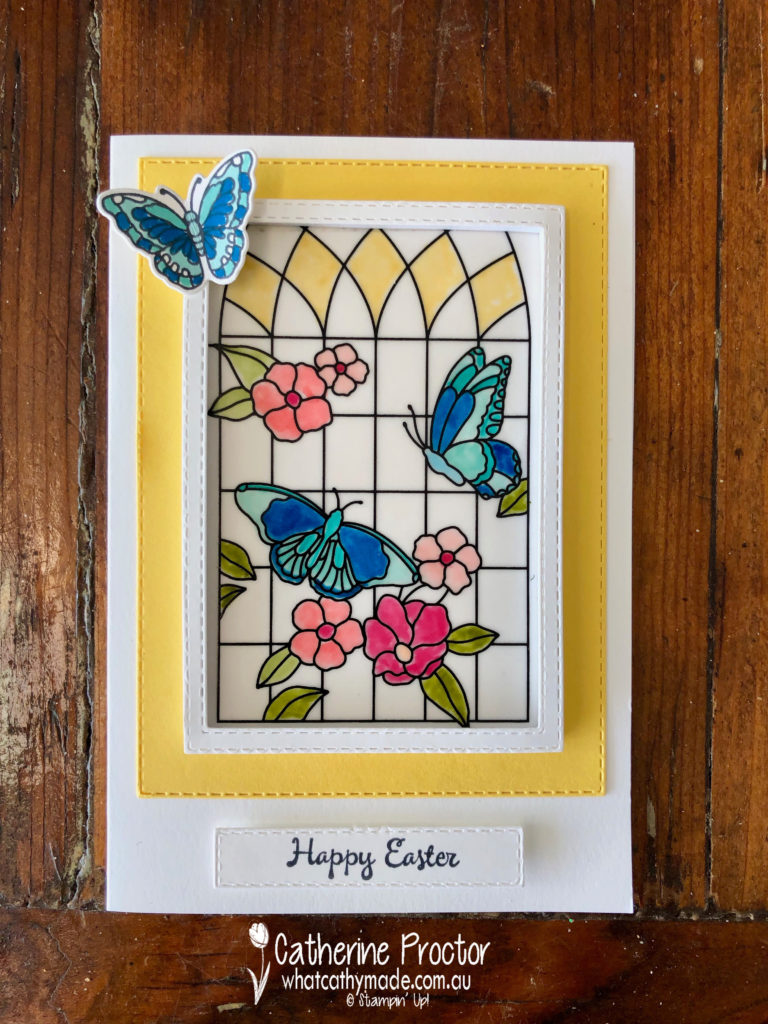
For my project tonight decided to celebrate both aspects of Easter – the Pagan and the religious celebration of Easter – by referencing the beautiful stained glass windows of the churches I would celebrate Easter morning in as a minister’s daughter. The Painted Glass Clear-Mount Bundle and Graceful Glass 6″ X 6″ Designer Vellum was just perfect for this.
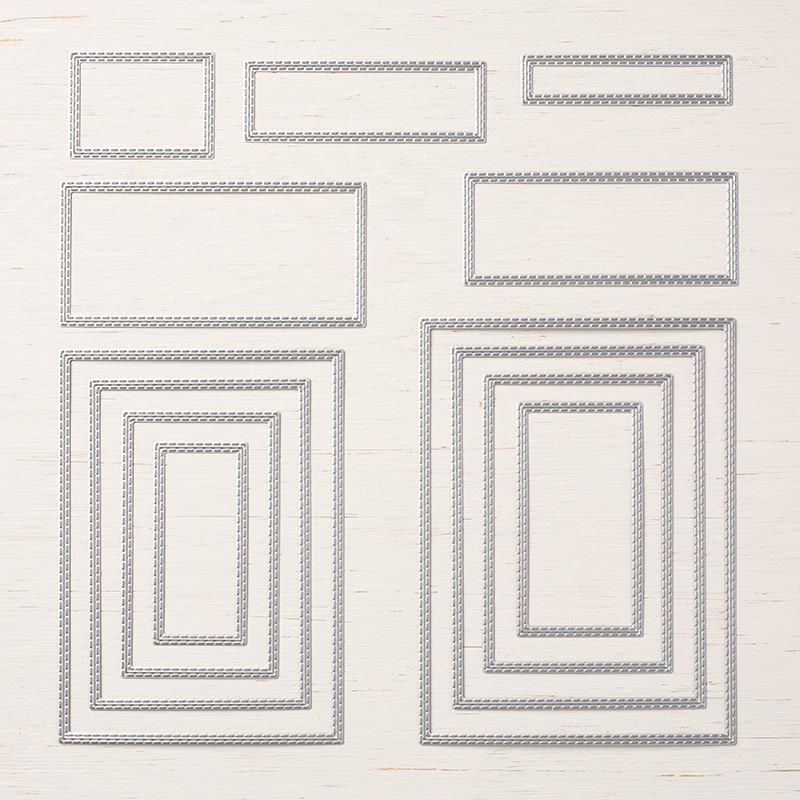
After colouring in my sheet with my Stampin blends, I used the Rectangle Stitched Framelits Dies to make a window frame for my stained glass window.
I then mounted my frame using the Foam Adhesive Strips and hey presto, I had created a beautiful stained glass window!
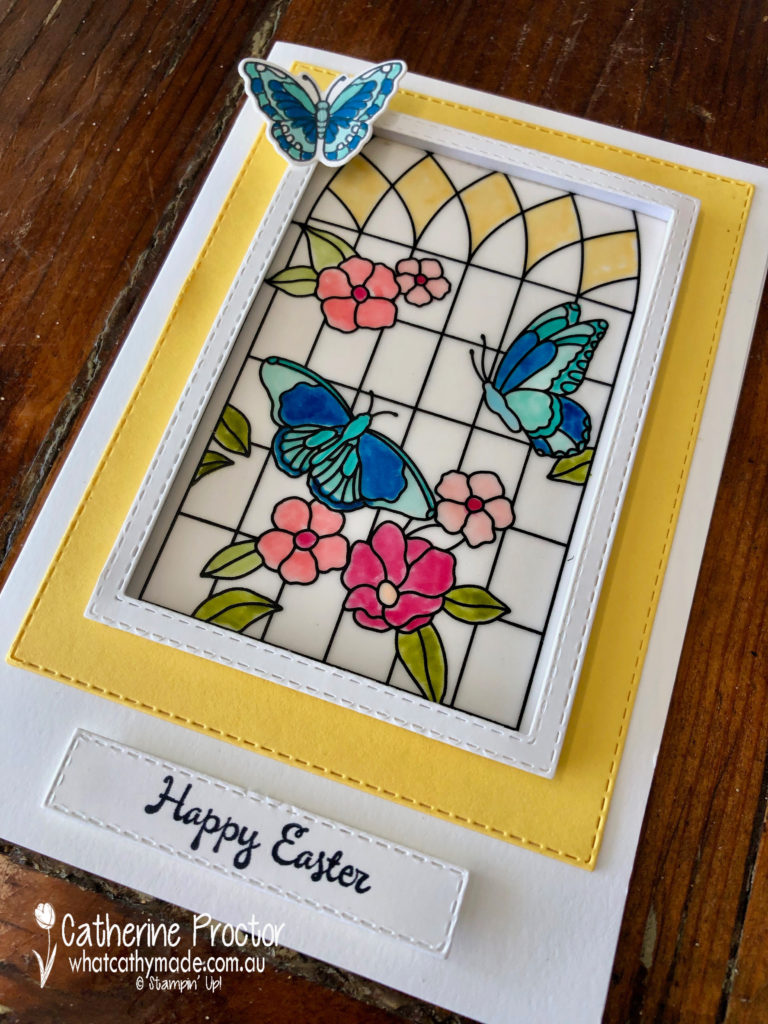
The Rectangle Stitched Framelits Dies were put to good use again for my Daffodil Delight layering mat and for my sentiment, which was stamped using the “You’re Inspiring” stamp set.
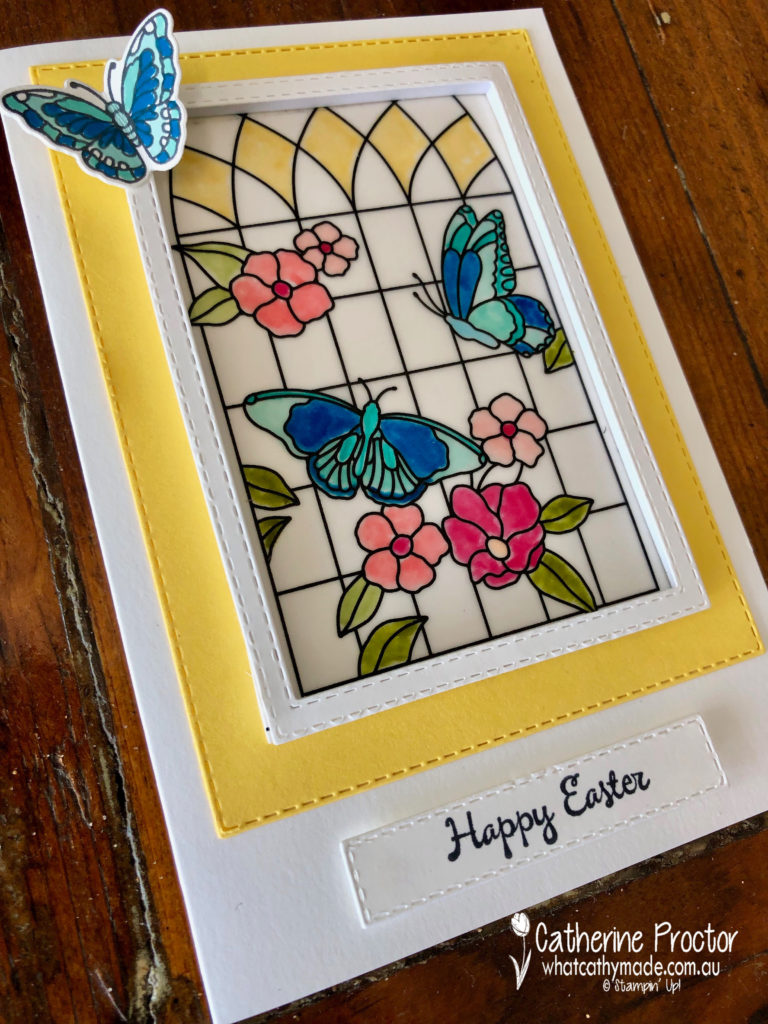
To celebrate new life and the change of season my final touch was a butterfly resting gently on my window…I think it makes my butterflies in my window come to life and look like they might fly away too!
Now it’s time to hop on over to our next participant, the very talented, Caroline Manwaring.
If you find a broken link or have come to this blog hop from a different entry point, you can view the participants below:
Welcome to week 39 of the Art With Heart Colour Creations Blog Hop!
Our colour this week is a returning bright: Poppy Parade.
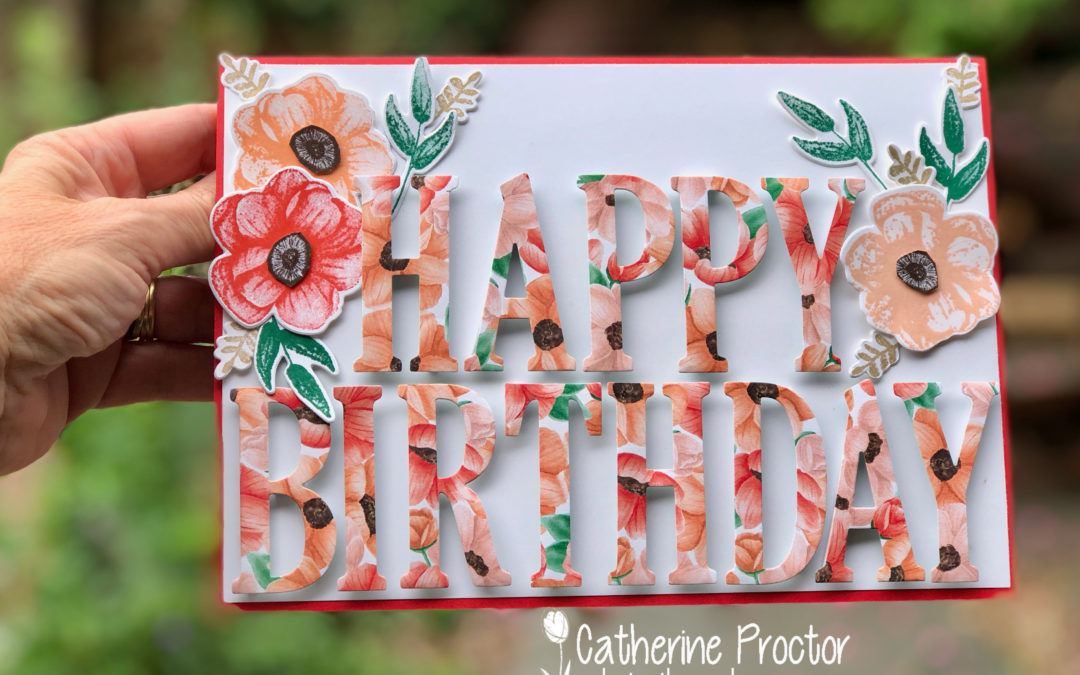
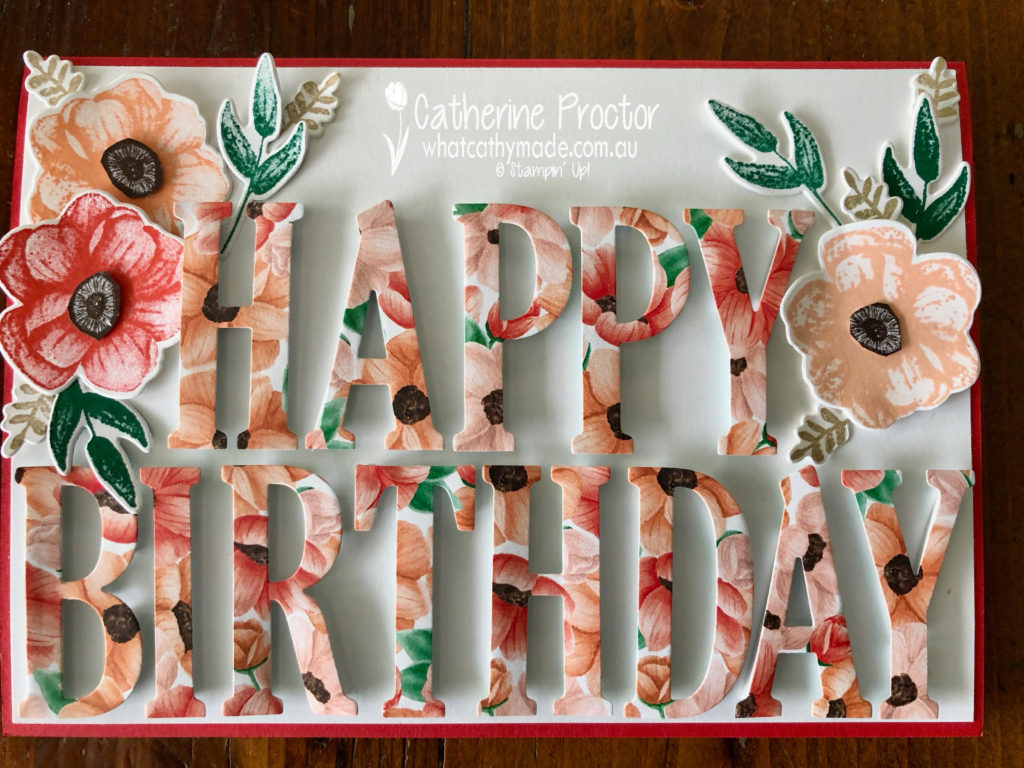
Last weekend I needed to make a very large card for a friend from my mother’s group. Our eldest children were born on the very same day and they turn 21 this year!!! My friend turns 50 today and we celebrated with a girl’s night out for 16 people. We all put in for a group present so there needed to be lots of room on the card for everyone to write a message.
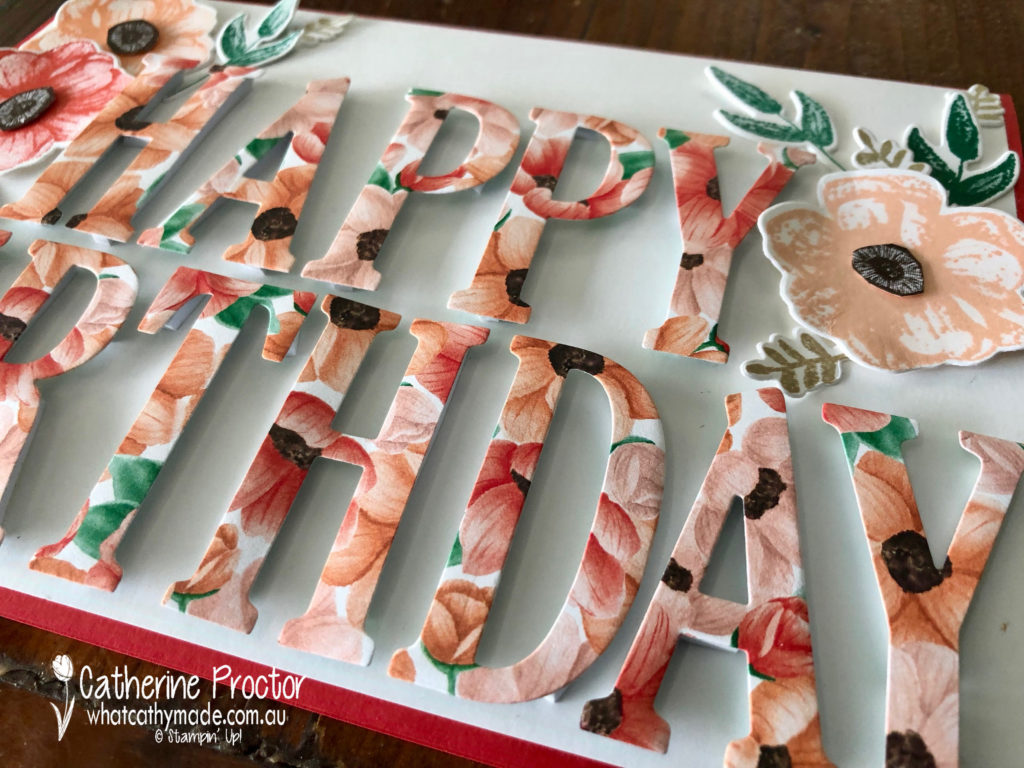
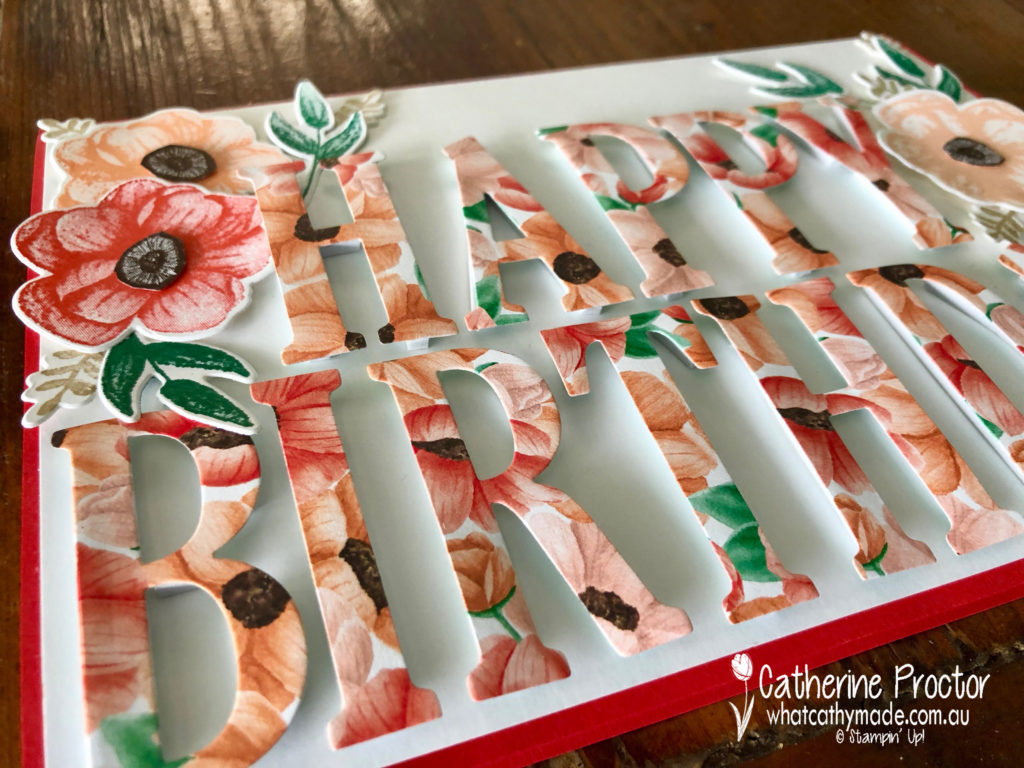
Red is her favourite colour so I made the base of my card by simply scoring a piece of A4 Poppy Parade cardstock in half. I added a layer of Whisper White and then used my large letter dies to cut out “happy birthday” from the stunning Painted Seasons floral DSP. I mounted my letters onto the front of my card with the foam adhesive strips…they really make the letters pop!
Then I stamped some flowers and leaves in the coordinating colours and die cut them out using the Painted Seasons stamp set and the matching Four Seasons framelits.
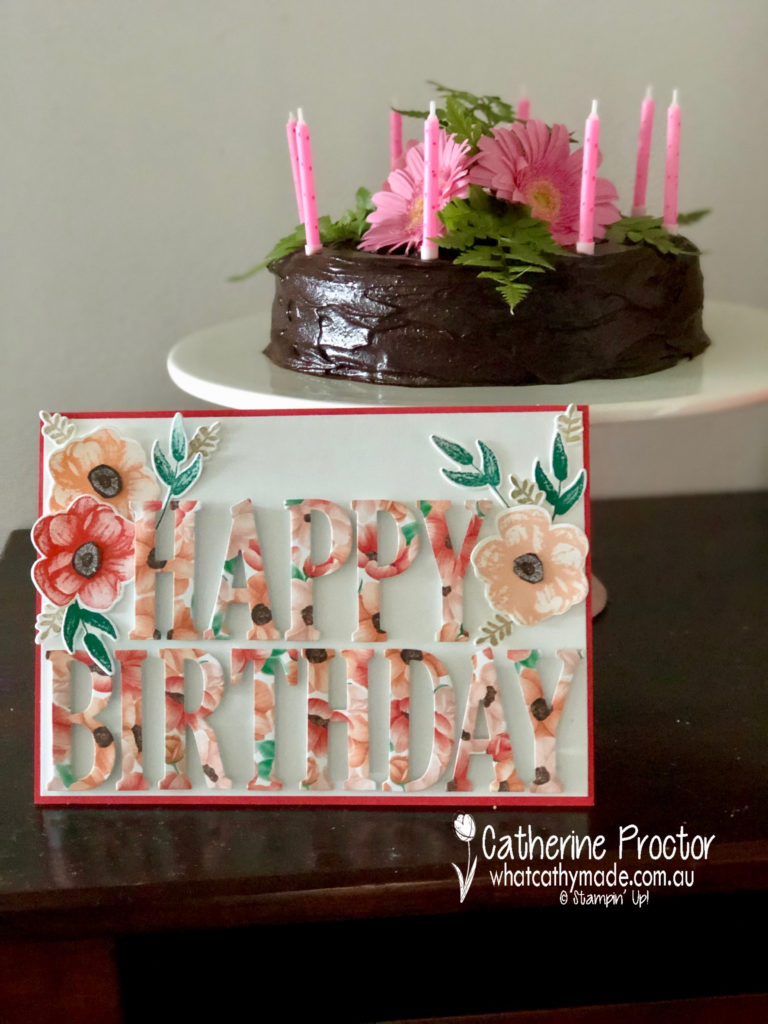
I also made the birthday cake for dessert for my friend because she is gluten-free. Every time I make this cake I get so many requests for the recipe I thought I might share it here too.
It is so simple to make, not too sweet and very moist. I think Claudia Roden created this recipe but I have also seen Stephanie Alexander and Nigella Lawson make it. My variation is to ice it with a dark chocolate ganache, which is the perfect counterpoint for the orange cake.
Flourless Orange Almond Cake
Ingredients
2 navel oranges
6 eggs
1 cup sugar
1 tsp gluten free baking powder
250gm almond meal
2 blocks of dark Lindt chocolate
2 tbsp cream
Method
Cover the oranges with water in a saucepan and boil for 1-2 hrs or until soft.
Remove from water and let cool.
Preheat oven to 180 C. Grease and line a springform pan.
Leaving the skin on, roughly chop oranges into chunks and blend in a food processor until smooth.
Add eggs, sugar, almond meal and baking powder to a food processor and blitz to combine. the mixture will be quite runny.
Pour into your lined springform tin and bake for about 1 hour or until a skewer comes out cleanly and cake starts to come away from the sides.
Let cool for a few minutes and then gently release cake from the tin.
Once the cake has totally cooled, melt chocolate and cream together and combine to make a glassy ganache. Spread over cake, decorate and enjoy!
To see what the rest of the team have made click on the links below.
To purchase any of the products I used in this project you can shop with me here. Or if you’d like me to post you your very own copy of any of the Stampin Up! catalogues or find out about more about Stampin’ Up! contact me.
We will be back again next week showcasing one of the 2018-20 in colours Powder Pink! We hope you can along with us then.
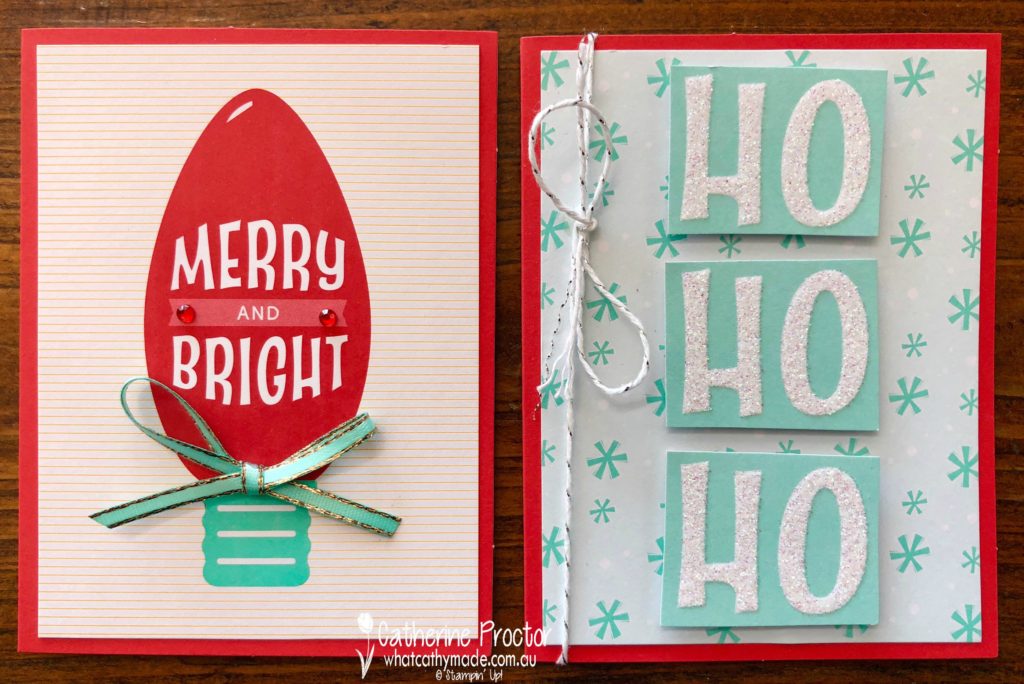
Welcome to week 3 of the Art With Heart “Heart Of Christmas” blog hop.
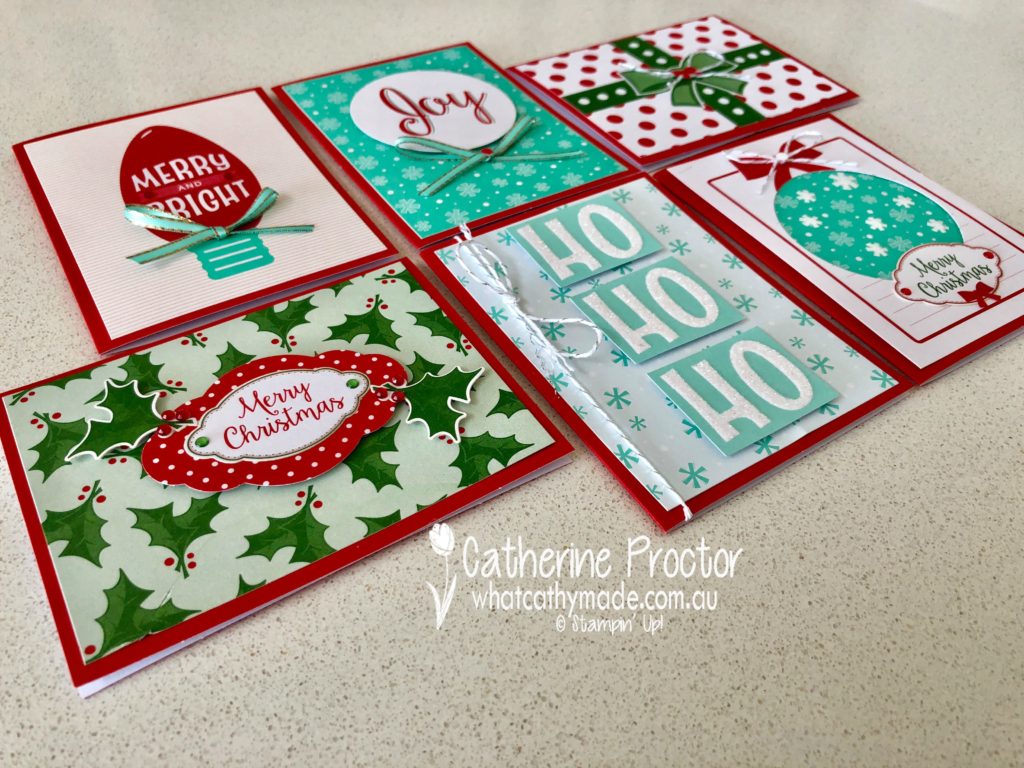
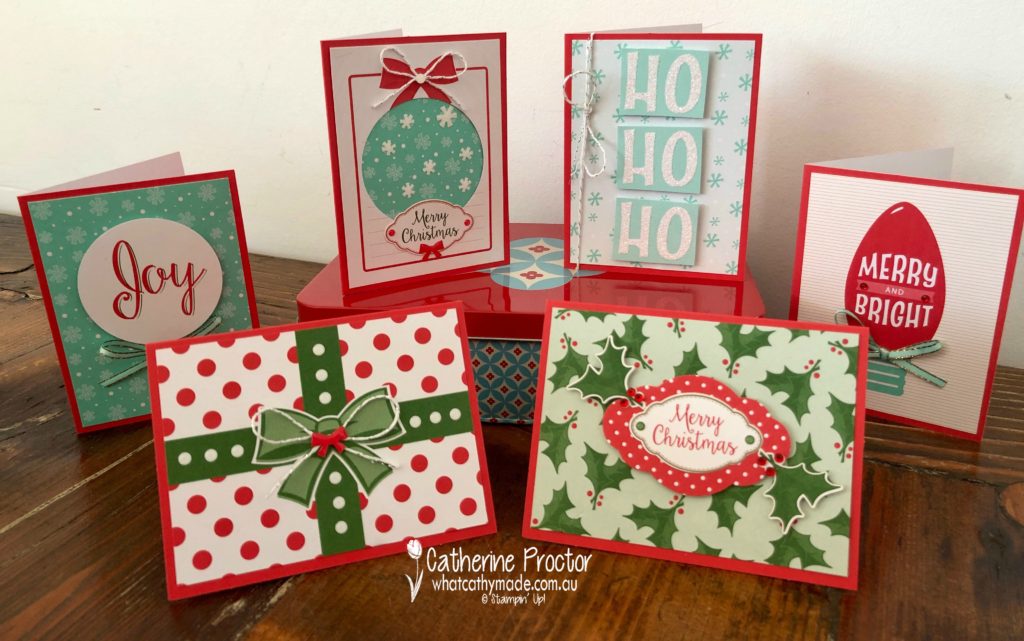
Stampin’ Up!’s Santa’s Workshop Memories & More Card Pack make it so quick and easy to create professional-looking Christmas cards…in fact, it is so easy I’m almost embarrassed to claim creative credit for these cards.
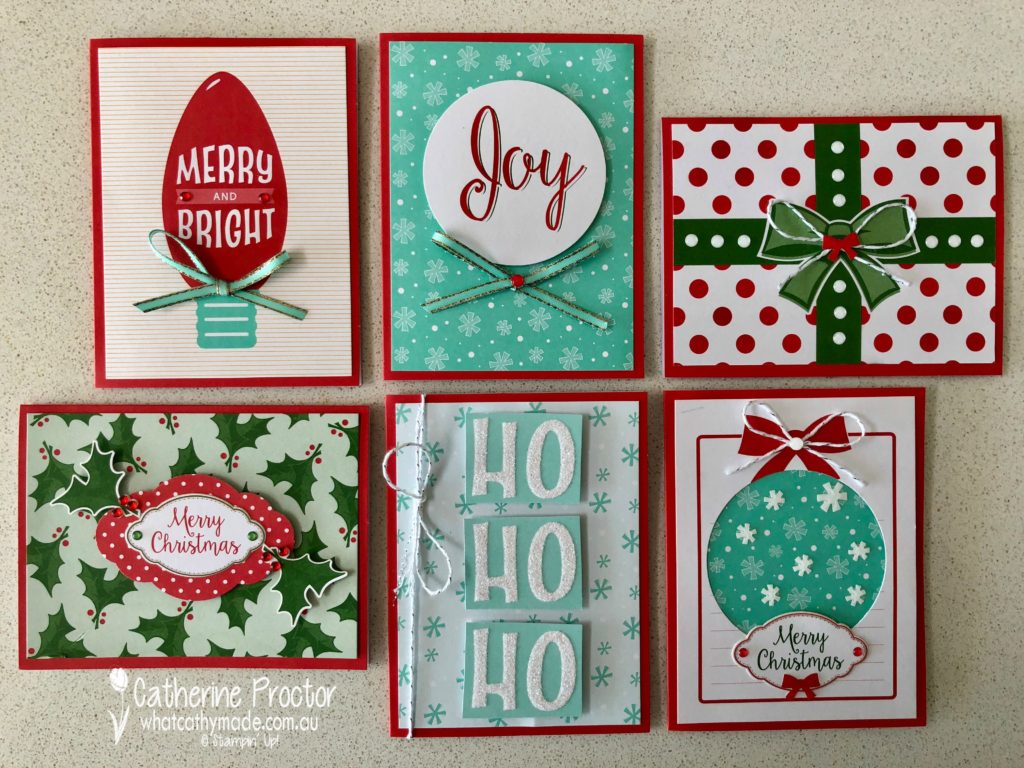
Luckily, I did a little creative cutting and embellishing to make these cards my own design, but even so, I still managed to make 6 cards in less than 30 minutes!
And as if Stampin’ Up haven’t made it easy enough already with 50 pre-printed cards suitable for both scrapbooking and card making, this year they’ve also released the co-ordinating Santa’s Workshop Memories & More 20 cards in two sizes (with matching envelopes) in Poppy Parade, which I’ve used to make my cards this week.
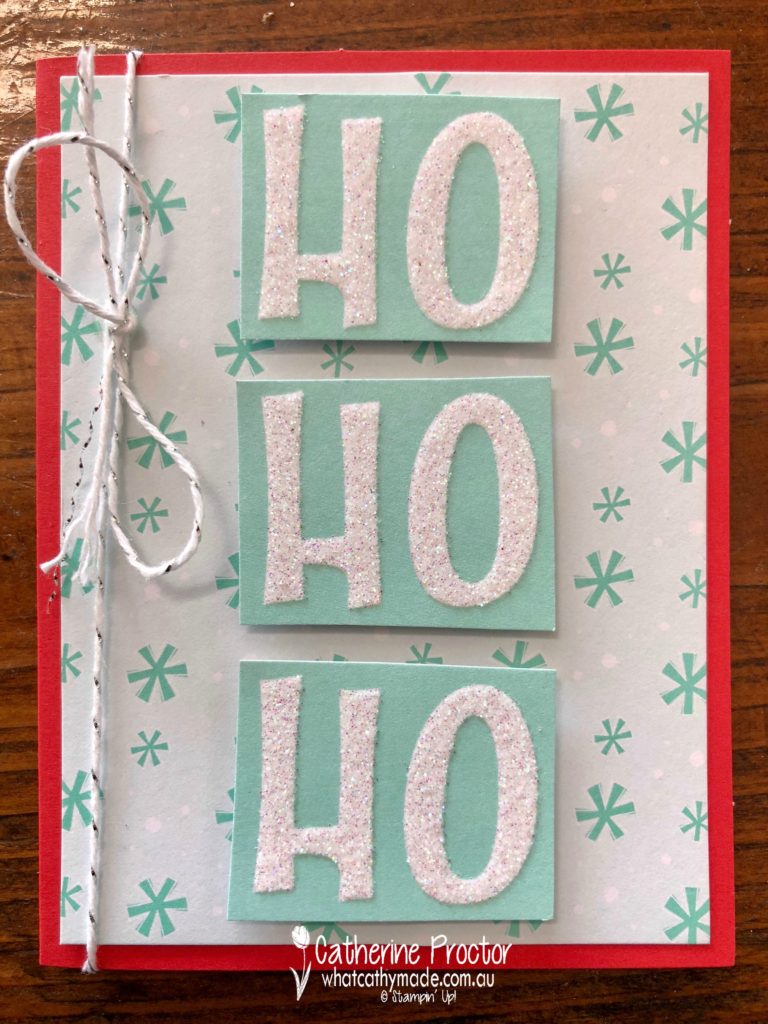
How gorgeous do the colours Poppy Parade and Coastal Cabana look together? For my first card below, I used one of the smaller Memories & More cards as the background and then chopped up the frosted glittery “ho ho ho” from one of the larger Memories & More cards to mount on top. Silver and white bakers twine complete the card.
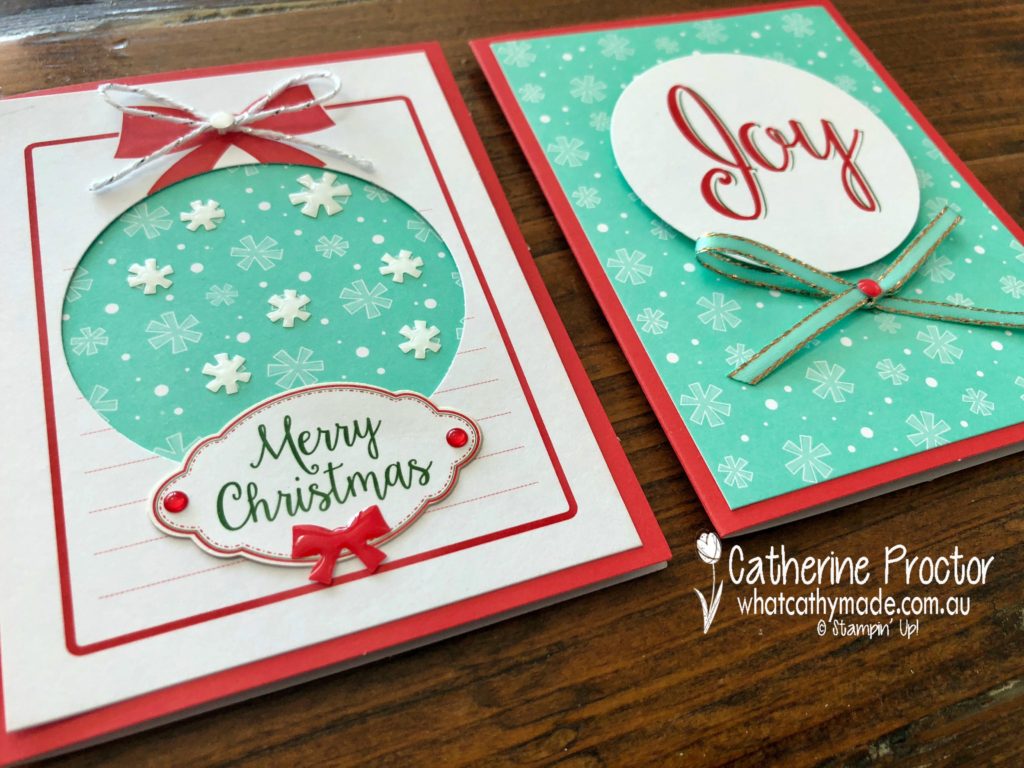
My next 2 cards use a Coastal Cabana background card and the same card on top. I used my largest Stampin’ Up! punch to punch the word joy out of the Memories & More card and mounted it onto the card on the right, then flipped over the card and used the reverse side and negative image for the card on the left, embellished with some Santa’s Workshop enamel shapes and stickers from the Memories & More card pack.
For my “Merry Christmas” card below I used my Pretty Label punch to punch out a red and white spotted memories & more card as an extra layer under the “Merry Christmas” sticker, then I added two holly stickers and some red rhinestone jewels. The top card also features a dotty card to which I added further dots, using white Santa’s Workshop enamel shapes to embellish the green bow.
And finally, how cute is this “Merry and Bright” Memories & More card? All it needed was a couple of red rhinestone jewels and a bow of Coastal Cabana ribbon to add a little extra bling.
To see what the rest of the AWH team have made head back to the lovely Claire Daly’s blog.
To purchase any of the products I used in this project from the annual catalogue you can shop with me here.
You can order the new products from the holiday catalogue from September 5, or if you join as a demonstrator you can order them now…contact me if you’d like to find out more or receive a free copy of the holiday catalogue.