Welcome to week twelve of the 2019 Heart of Christmas blog hop.
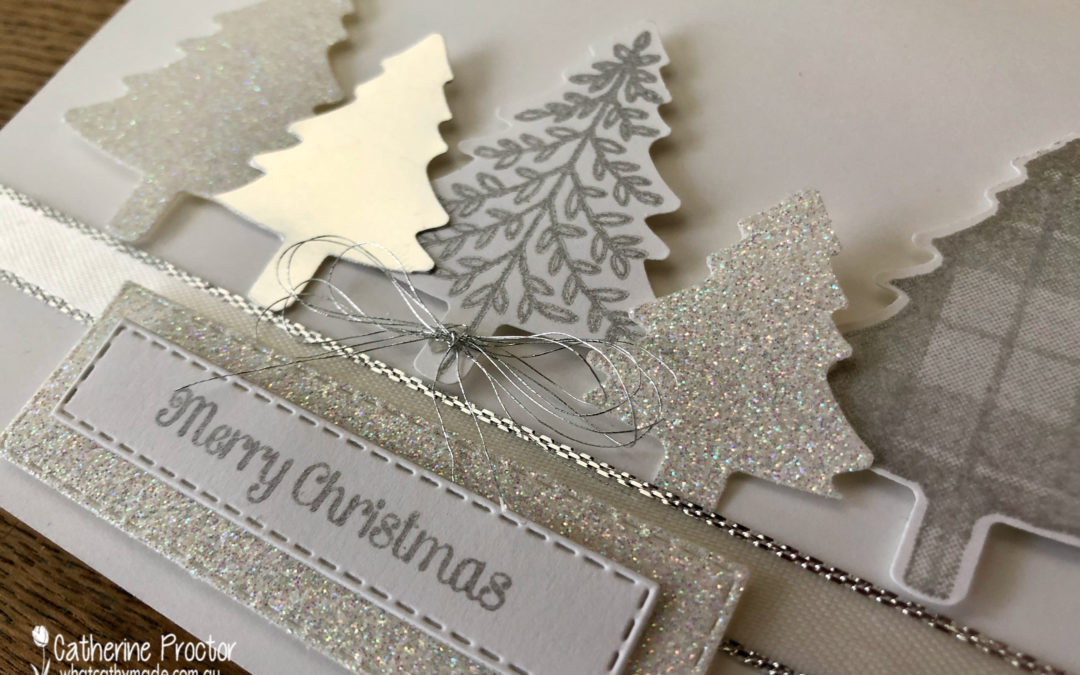
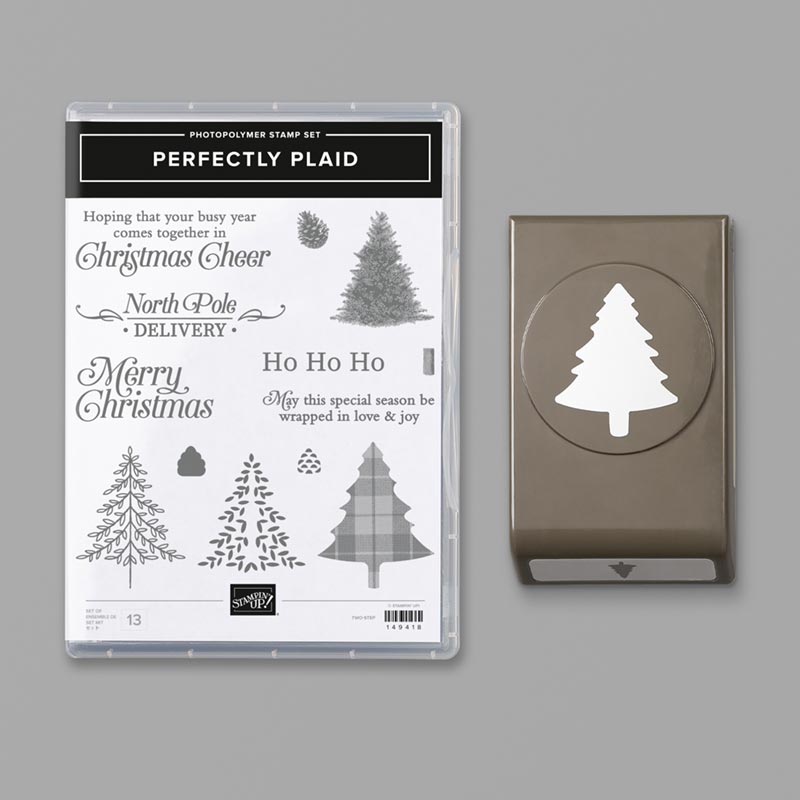
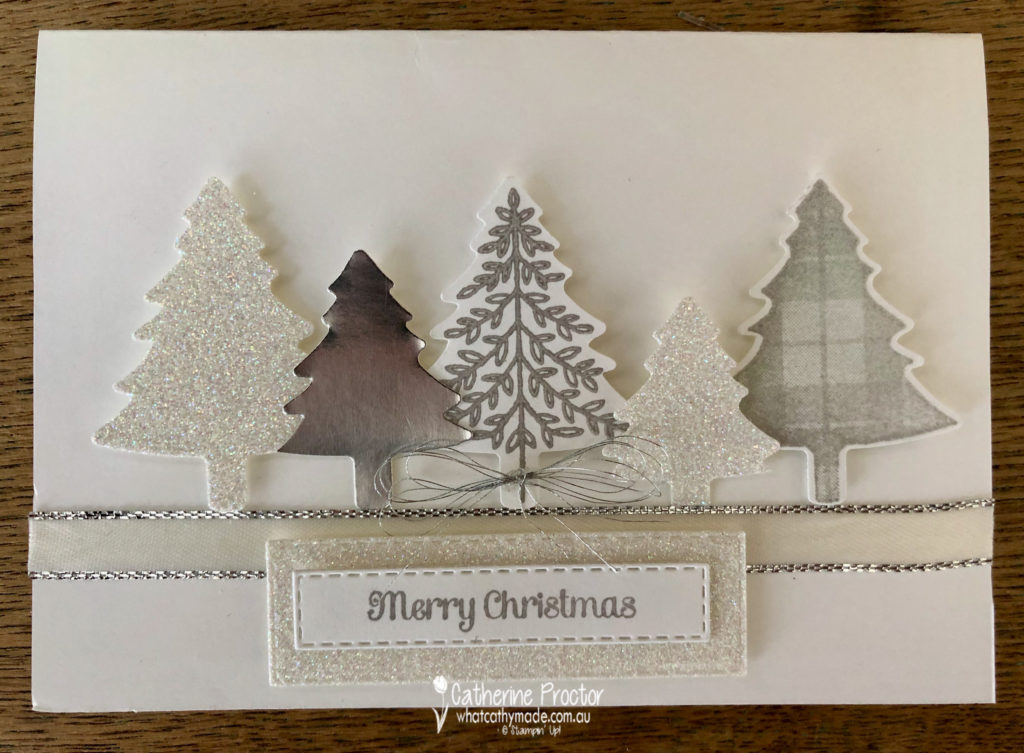
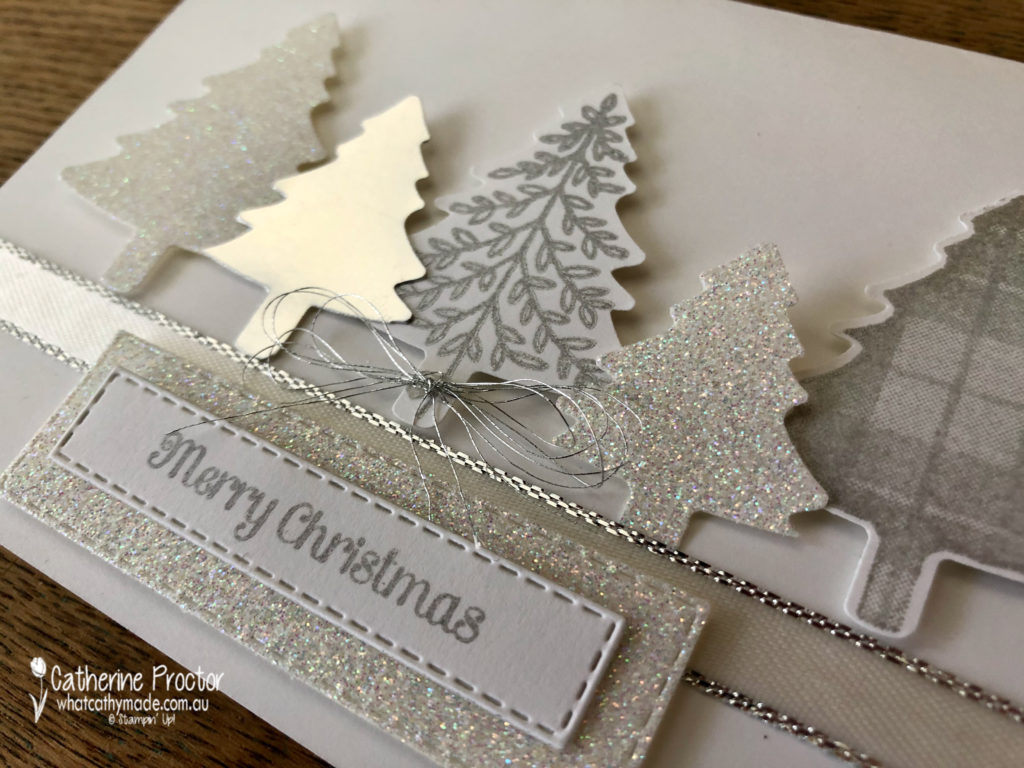
This week I’ve used the Perfectly Plaid Bundle (which includes the Pine Tree Punch and its co-ordinating Perfectly Plaid Photopolymer Stamp Set) to make a silver and white Christmas card.
I’ve used two neat little tricks that you may not realise you can do with your punches and your stamp sets.
The secret to both my tricks…Post It notes!
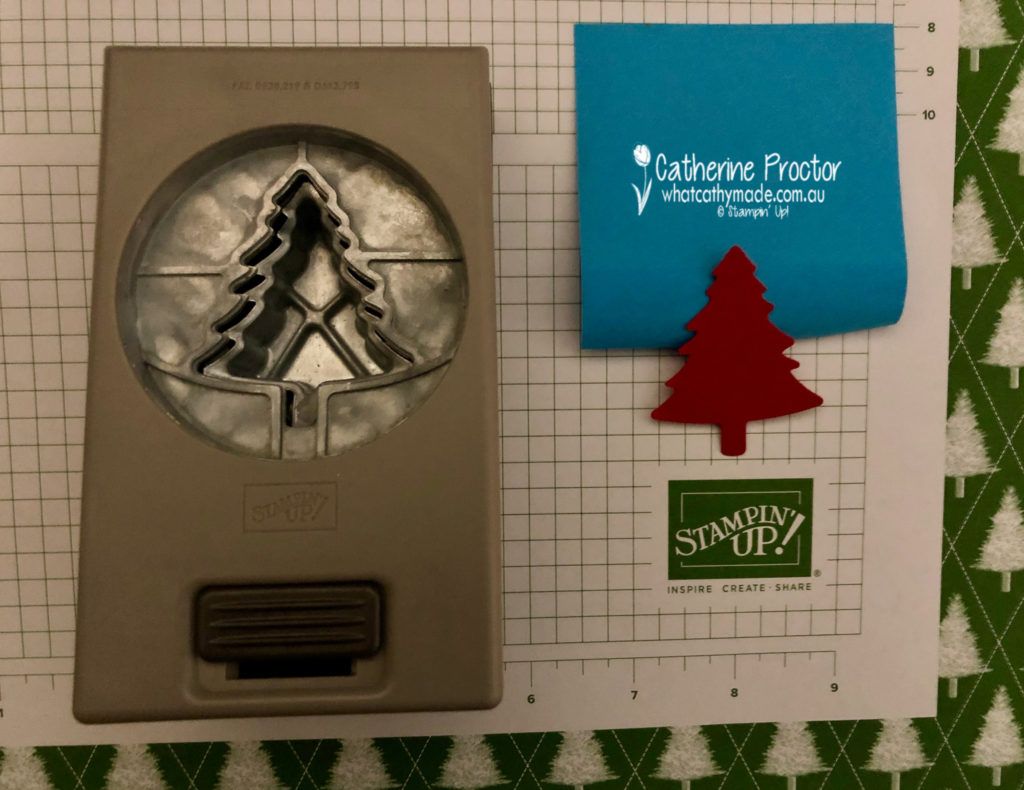
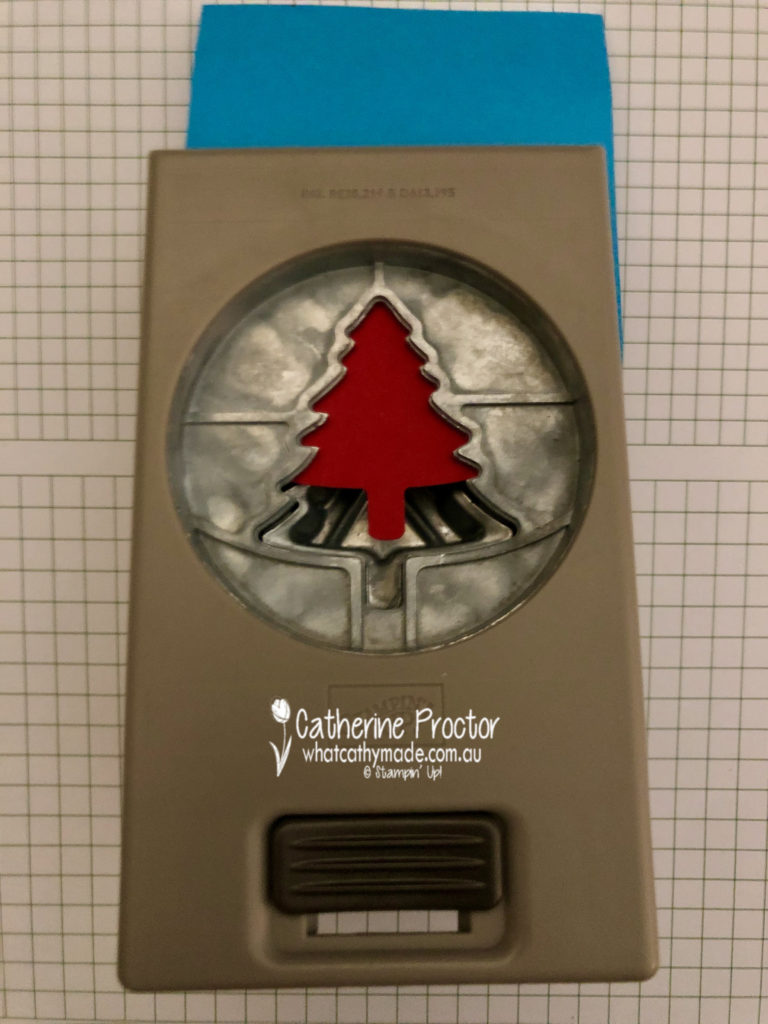
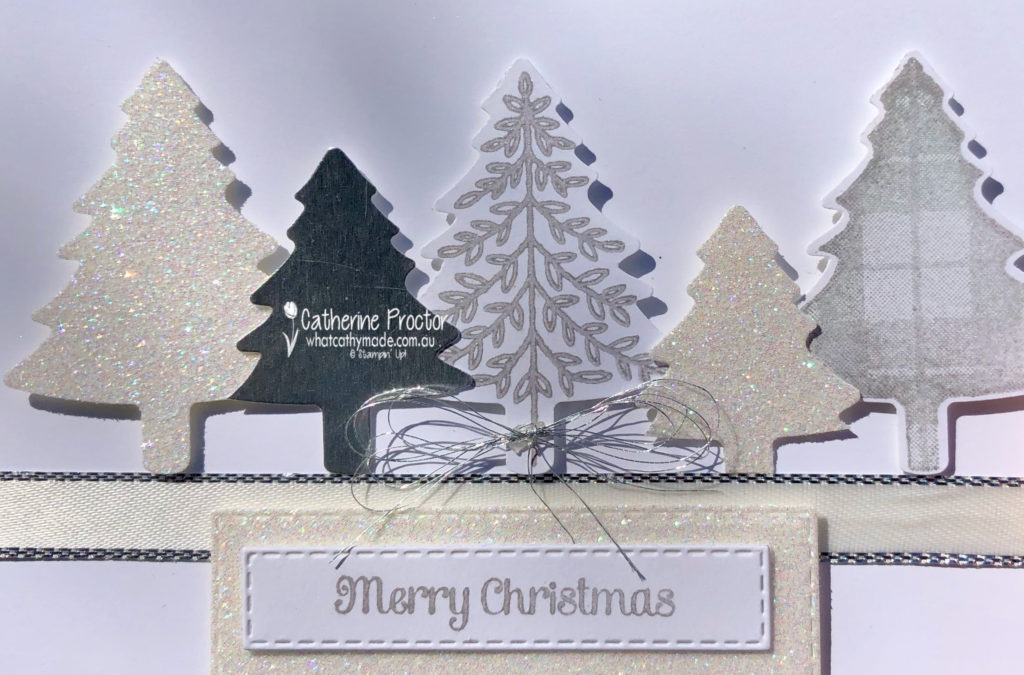
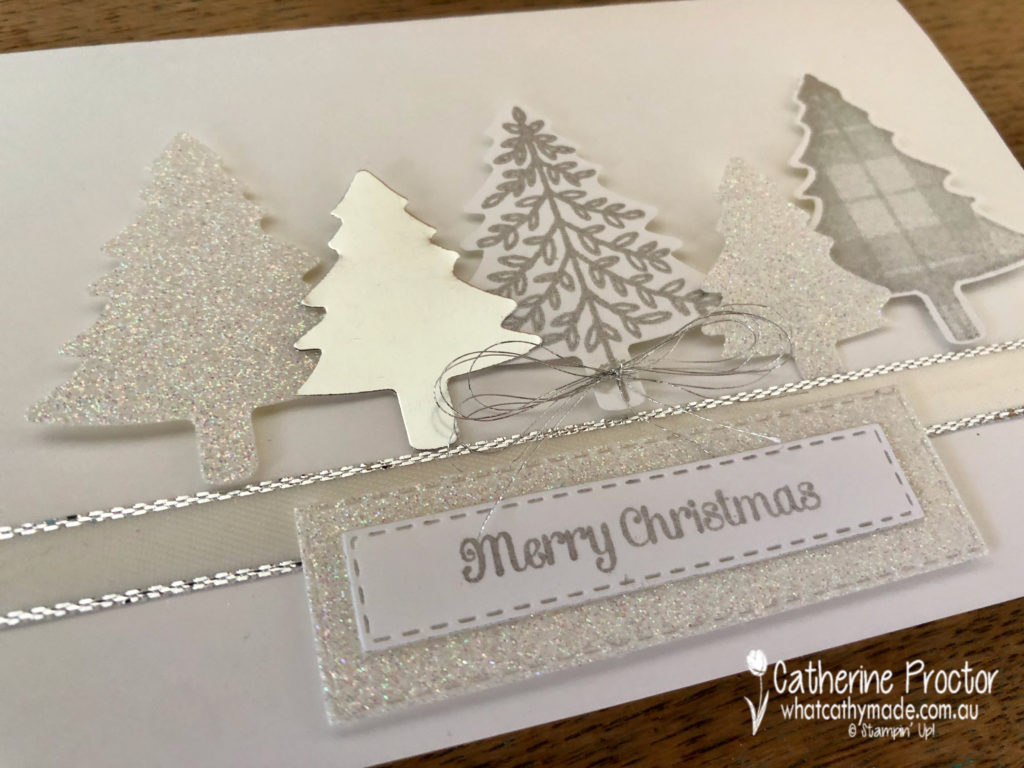
Did you notice the two smaller trees sitting between the three larger trees on my card? All five trees have been punched using the same Pine Tree Punch, so how did I get two different sizes?
After I punched my tree out I placed the tip of the tree onto the sticky part of a post it note.
The post it note gives me something to hold so I can place the punched tree back into the punch, line it up again and then punch out a smaller tree from the same shape.
The photo below shows how I did this.
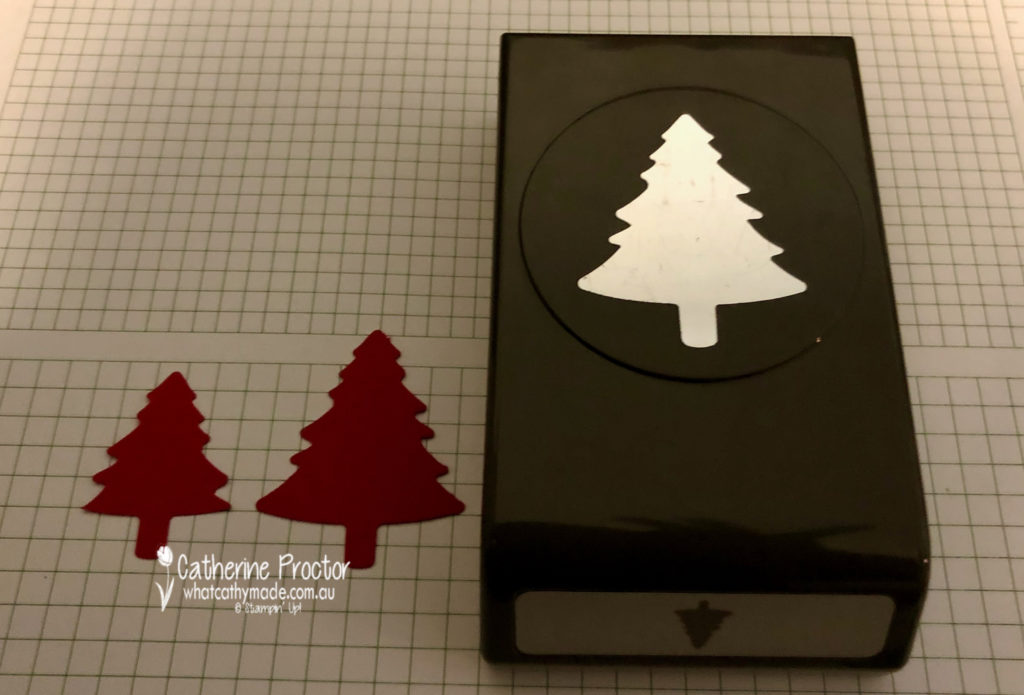
Here’s how the two punched shapes look side by side. On the right is the tree punched out once and on the left is the smaller tree created by punching the shape out twice. How cool is that!
As well as different sized trees I used a mixture of papers for my card today, stamping two of them in the Silvery Shimmer Delicata Metallic Ink before punching them out as well as using silver foil sheets and shimmery white cardstock. I love the look of silver and white together.
My card is finished off with a strip of Silver 3/8″ Metallic-Edge Ribbon and a Merry Christmas sentiment stamped in Silvery Shimmer Delicata Metallic Ink onto Whisper White cardstock.
I die cut my sentiment with the smallest Stitched Shape Rectangle and layered it over a rectangle of shimmery white card stock die cut out with the next largest Stitched Shape Rectangle.
My second cool technique using Post It notes on this card is masking the sentiment for my card.
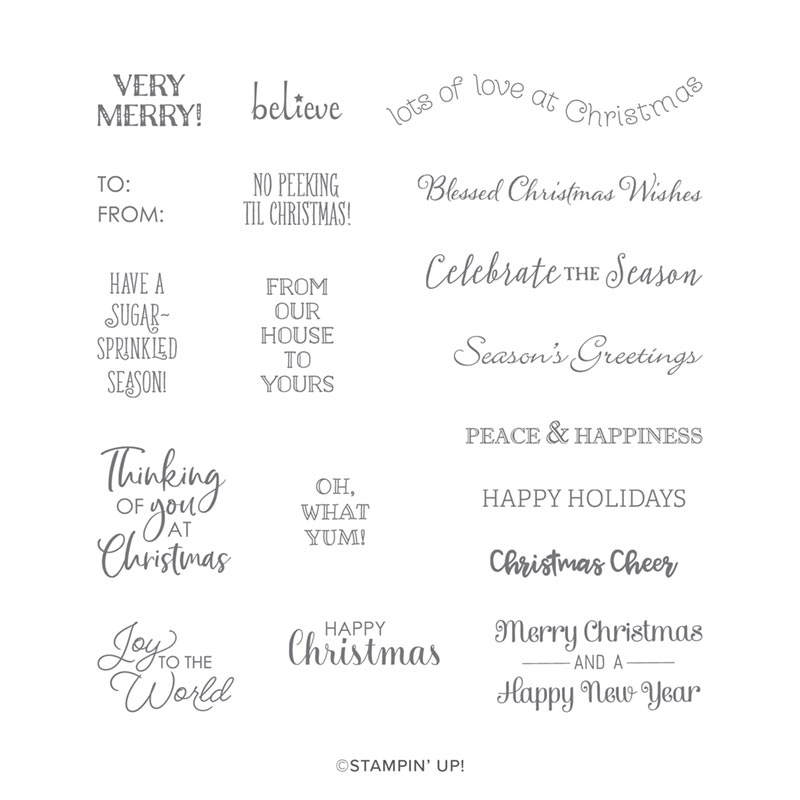
If you look at the images on the Itty Bitty Christmas stamp set below you’ll see the bottom right sentiment says “Merry Christmas and a Happy New Year” but I only wanted to stamp the Merry Christmas for this card.
I covered up the “and a Happy New Year” section of the sentiment with a post it note BEFORE I inked up my stamp and then removed the post it note before stamping onto the card stock. This ensured I only stamped the “Merry Christmas” section of the sentiment.
A bow of silver thread completes my silver and white Christmas card.
The lovely Claire Daly is hosting our Heart of Christmas blog hop this week – to see what the rest of the team have made this week you can visit Claire’s page here.
To purchase any of the products I used in this project you can shop with me here.
If you’d like me to post you your very own copy of the brand new 2019 Stampin Up! Holiday Catalogue, the 2019-20 Stampin Up! annual catalogue or to simply find out about more about Stampin’ Up! contact me.
Welcome to week nine of the 2019 Heart of Christmas blog hop!
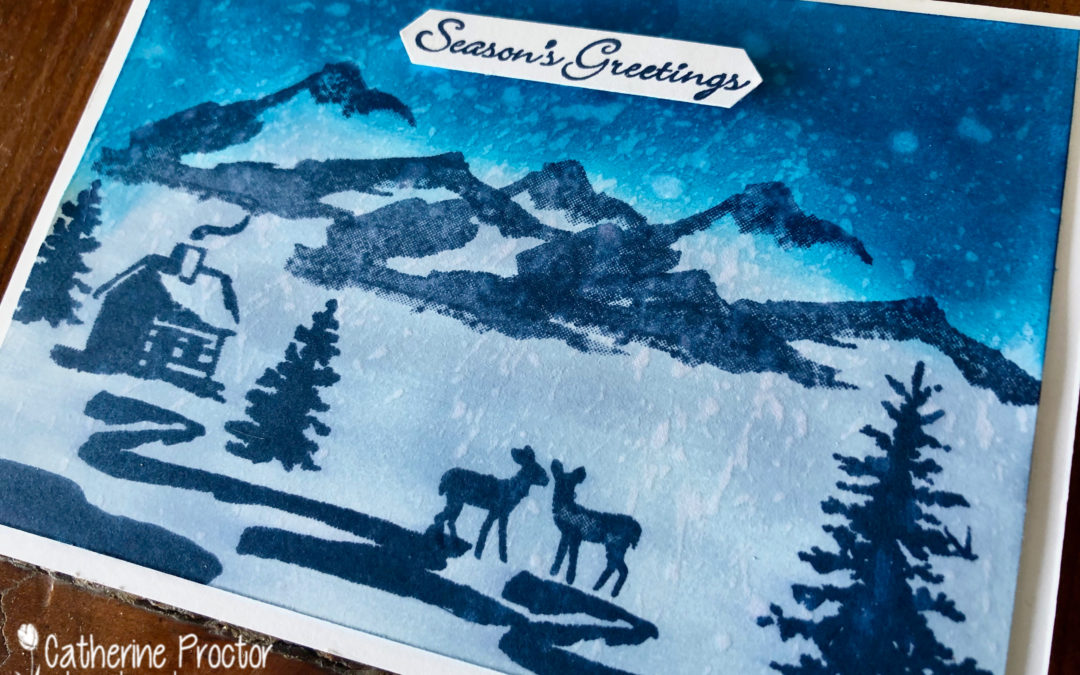
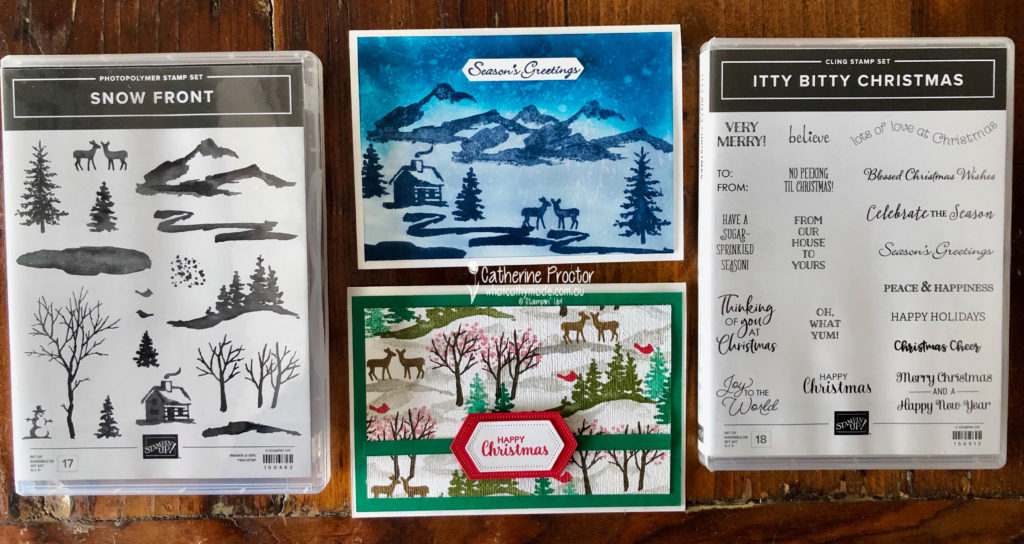
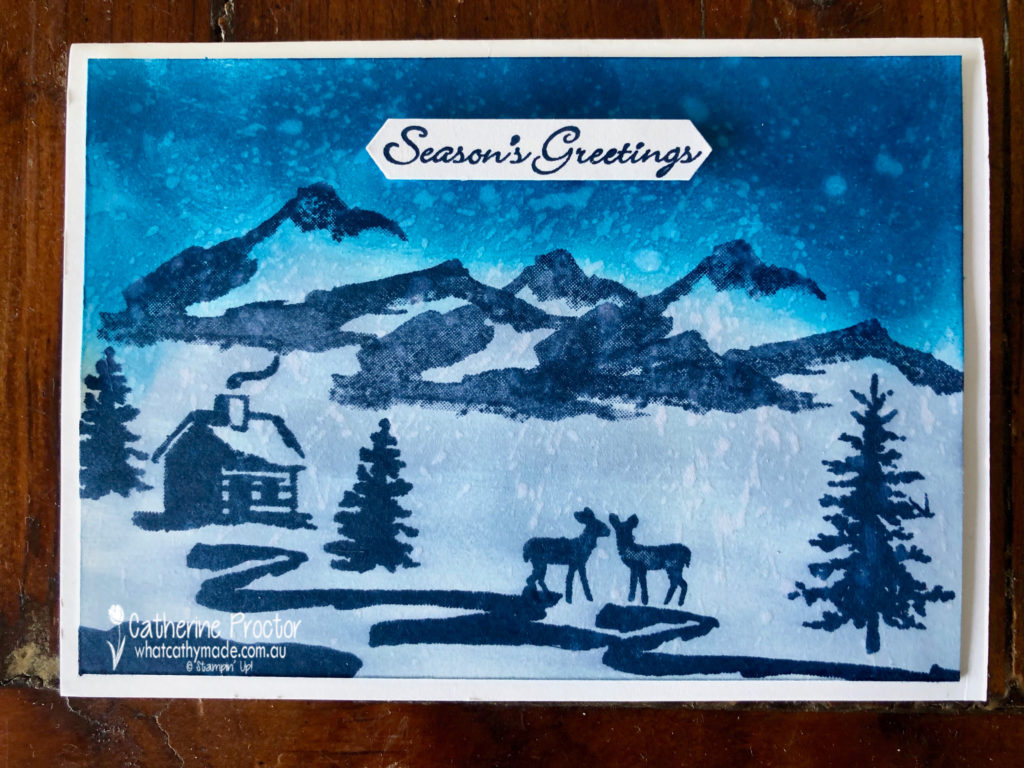
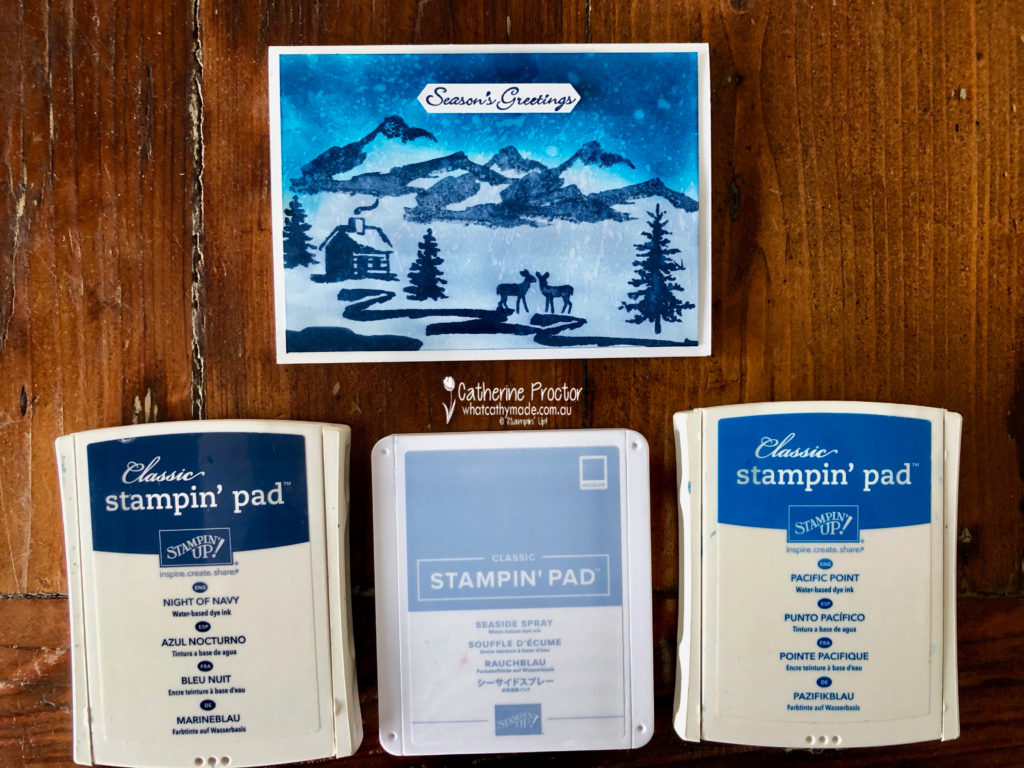
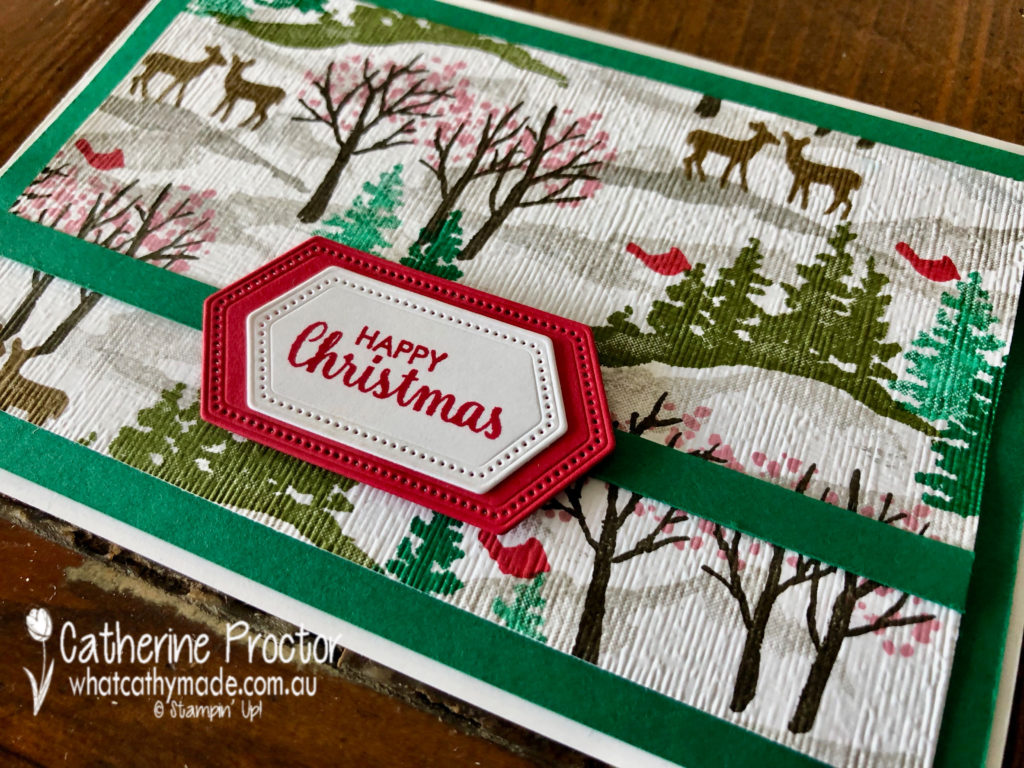
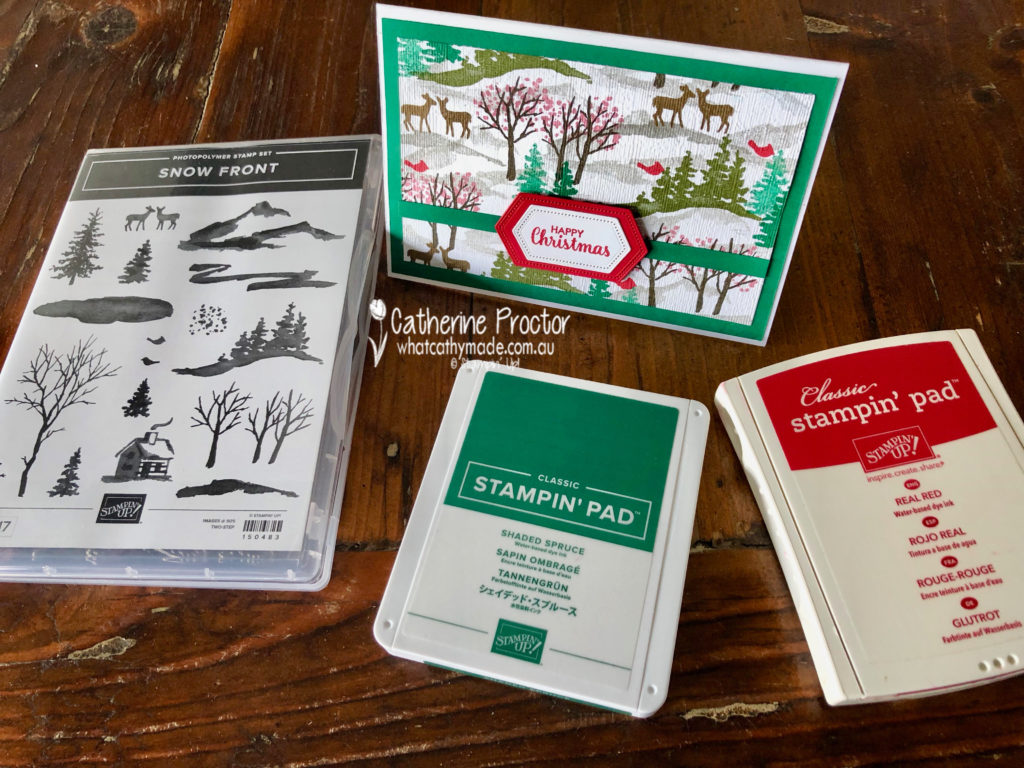
My cards this week feature two of my favourite stamp sets from the Holiday Catalogue: Itty Bitty Christmas and Snowfront. It’s amazing how the same stamp sets can give totally different looks just by using different inks and layouts.
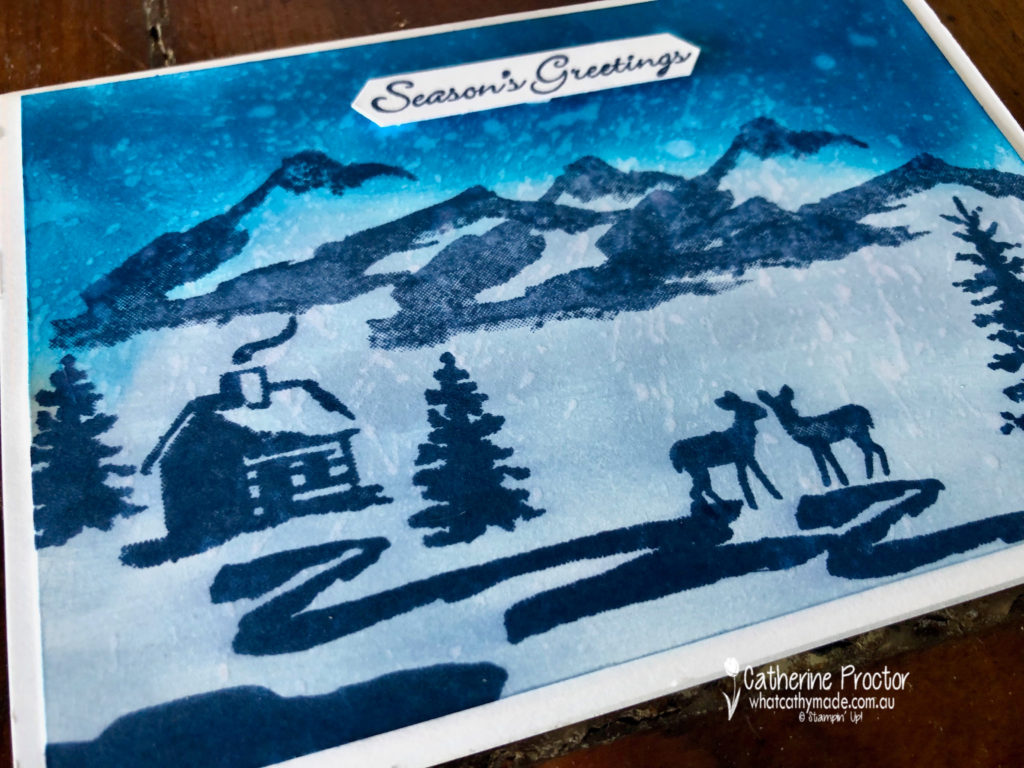
Let’s take a closer look at the blue card first. The colours of this card were inspired by a card made by an overseas Stampin’ Up! demonstrator, but I’ve changed the layout to make it my own.
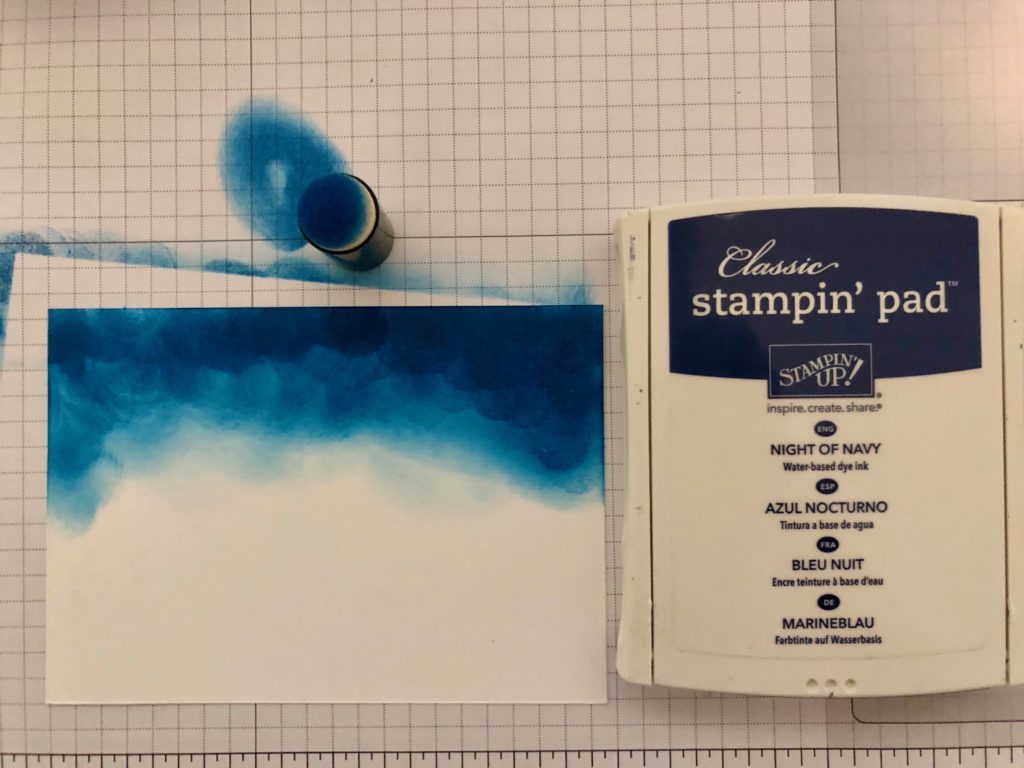
This monochrome scene is easy to create. I started by using my sponge dauber to add some darker shades of blue to the top of my card.
Here’s how it looks at the start.
I then stamped my scene using stamps from the Snowfront stamped in Night of Navy, basically making it up as I went. Some lighter shades of blue were gently applied to the rest of the scene using another sponge dauber.
To give the card the look of watercolour silk I used my aqua painter to flick water all over it before adhering it to a white card base and adding a sentiment from the fabulous Itty Bitty Christmas stamp set.
The Snowfont stamp set is so much fun to play with! For card two I randomly stamped a background scene to create my own DSP (again inspired by another Stampin’ Up! demo).
I then embossed it both vertically and horizontally using the subtles embossing folder – what a great effect this gives to the image.
How cute is the “Happy Christmas” sentiment from Itty Bitty Christmas, die cut out with the nested labels dies?
I’ll certainly be making a lot more cards using both these versatile stamp sets. Which card is your favourite?
The lovely Claire Daly is back hosting our Heart of Christmas blog hop this week – to see what the rest of the team have made this week you can visit Claire’s page here.
To purchase any of the products I used in this project you can shop with me here.
If you’d like me to post you your very own copy of the brand new 2019 Stampin Up! Holiday Catalogue, the 2019-20 Stampin Up! annual catalogue or to simply find out about more about Stampin’ Up! contact me.
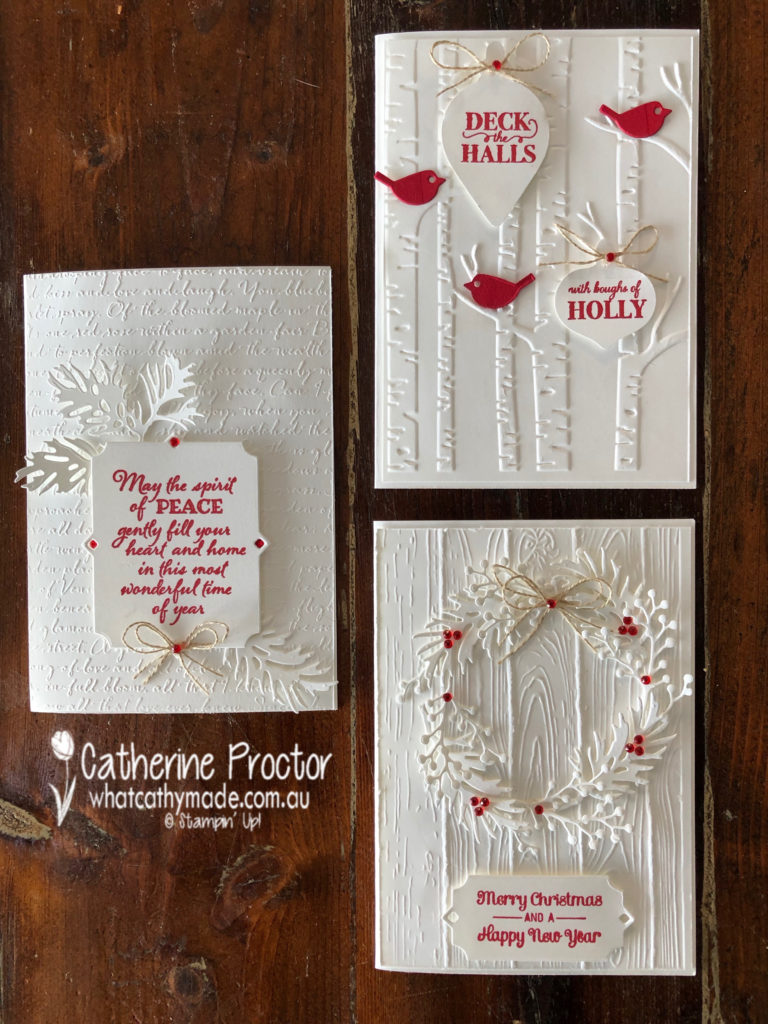
Welcome to week five of the 2019 Heart of Christmas blog hop!
This week I’ve decided to challenge myself to use three different embossing folders to create my Christmas cards. I often to forget to use my folders because I’m so focussed on DSP, stamps and dies, which is really silly because embossing folders are so quick and easy to use.
With so many beautiful designs to chose from, can you guess which three I chose?
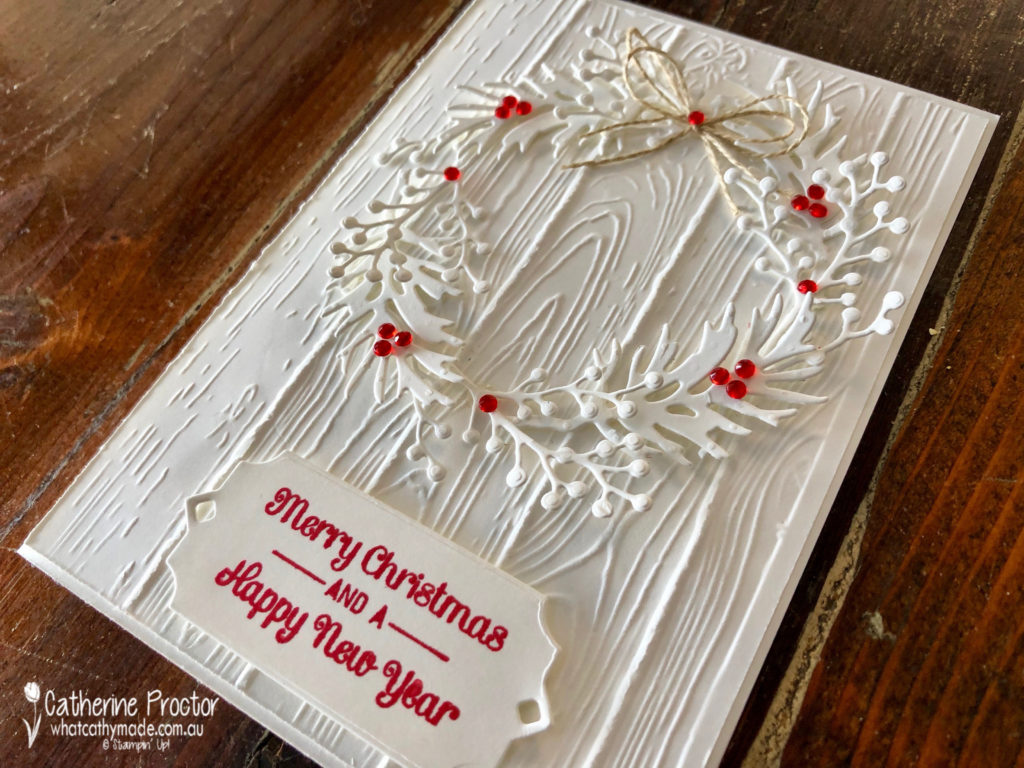
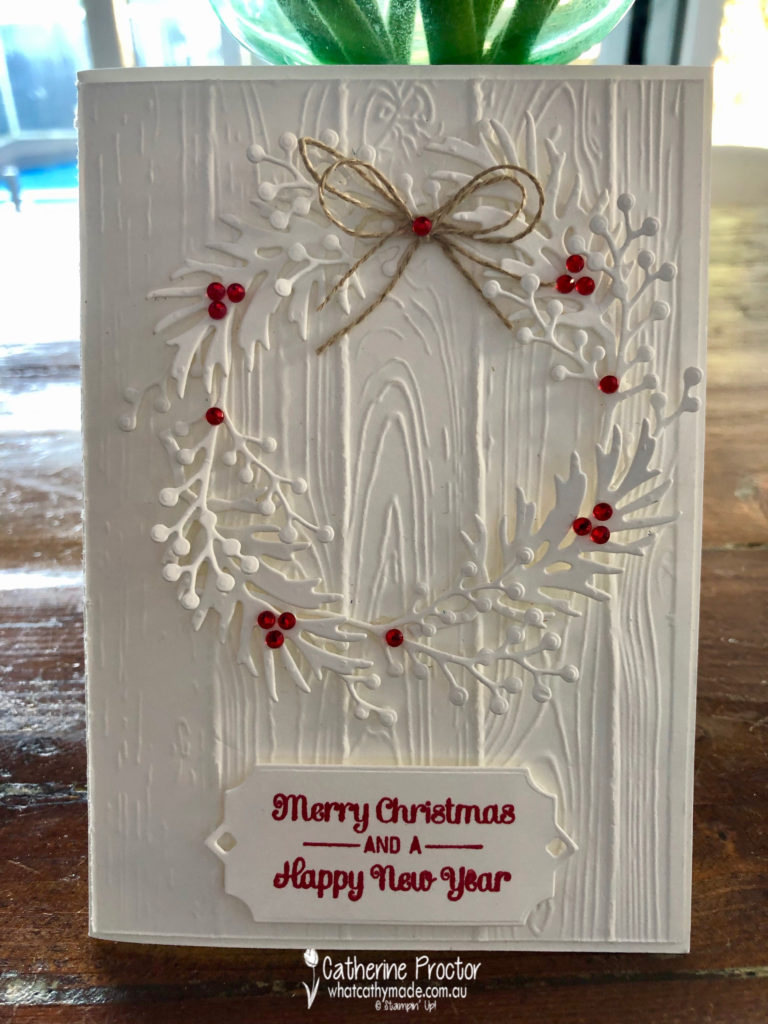
For my first card I used the Pinewood Planks embossing folder, which can be used either way up.
The wreath is made using a combination of dies from the Frosted Bouquet Dies and the Beautiful Boughs Dies.
How cute is that sentiment? It’s from the Itty Bitty Christmas Stamp set – I’m so glad I got this set. It has been die cut with the stunning frame from the Beautiful Boughs Dies.
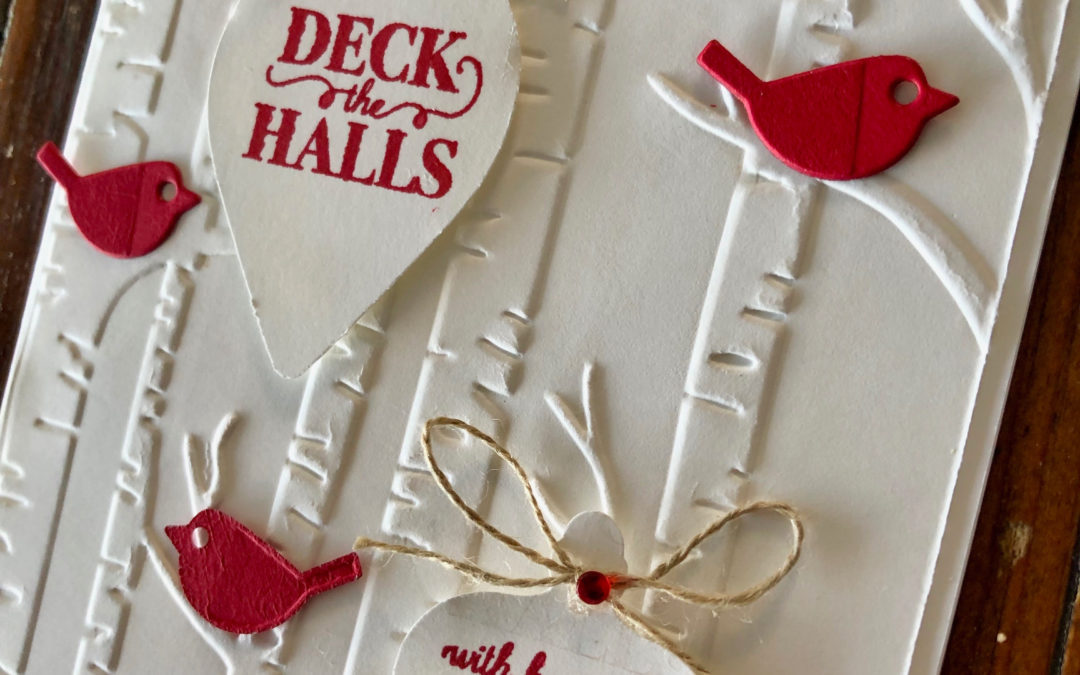
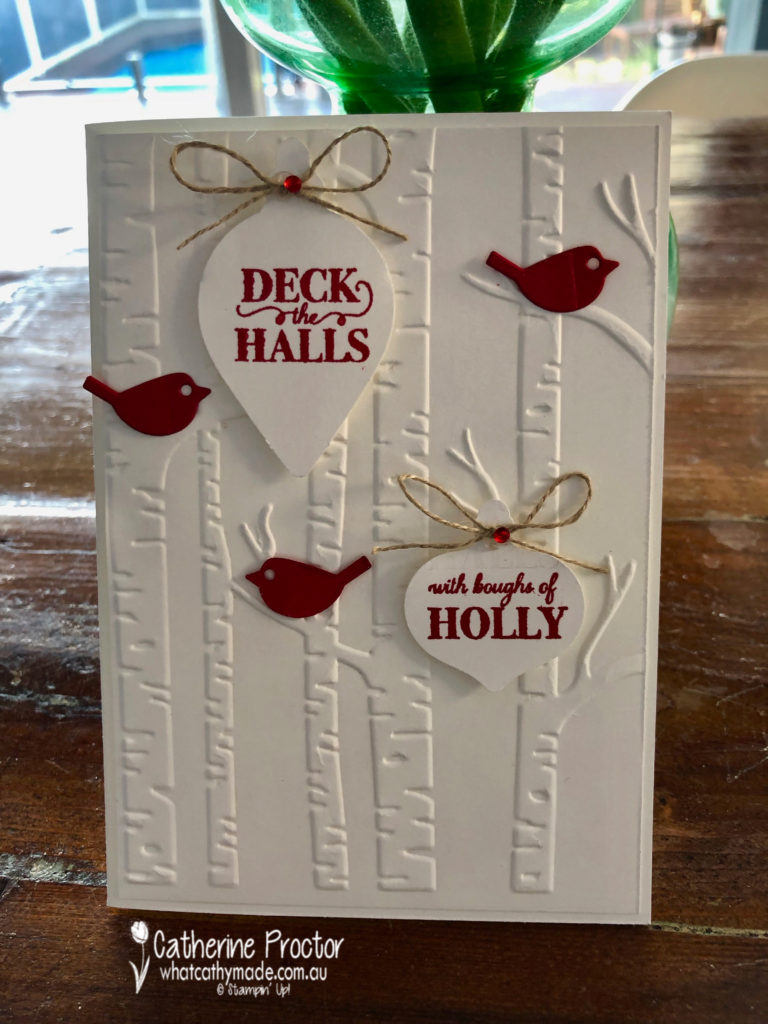
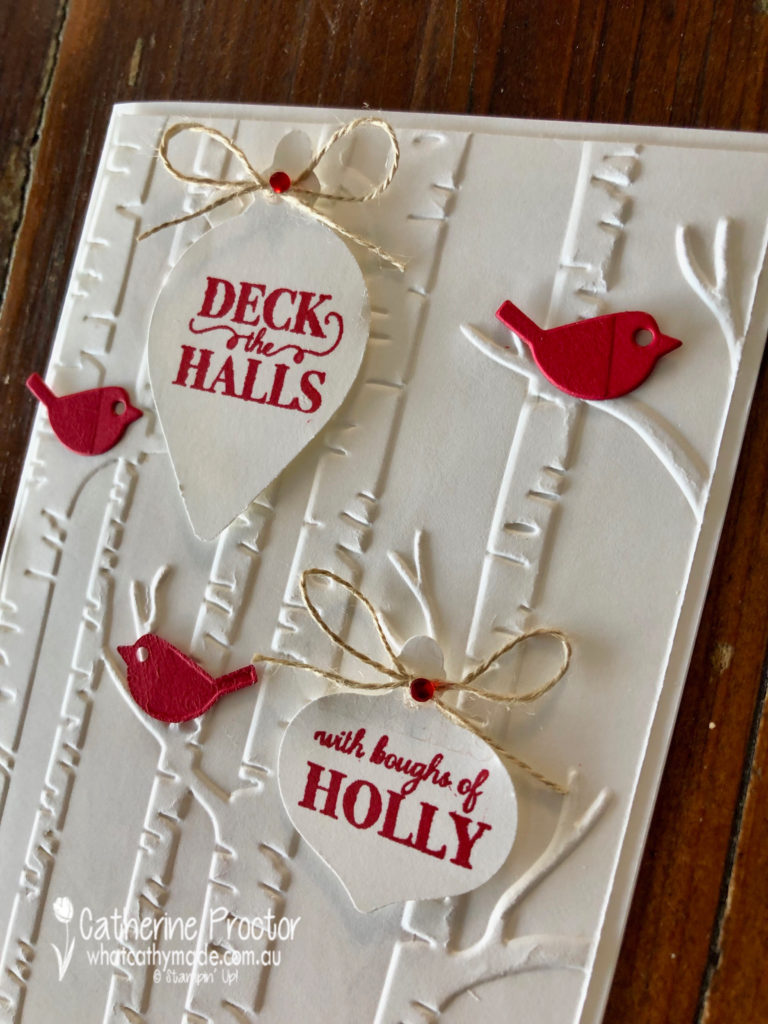
Card two continues the red and white theme, this time with the Woodland Embossing folder. Those branches were just crying out for some little birds – you might have overlooked these, they are in the Well Written die set.
The two baubles were punched out using the Gleaming Ornaments punches and then stamped with a stamp from the coordinatiing Christmas Gleaming stamp set.
To split the sentiment in half you can cut your stamp with scissors or do what I did and mask one side of your stamp with washi tape before inking up. Before you stamp, remove the washi tape and then stamp your image. Mask up the other side of your stamp with washi tape, ink your stamp, remove the washi and then stamp the other bauble.
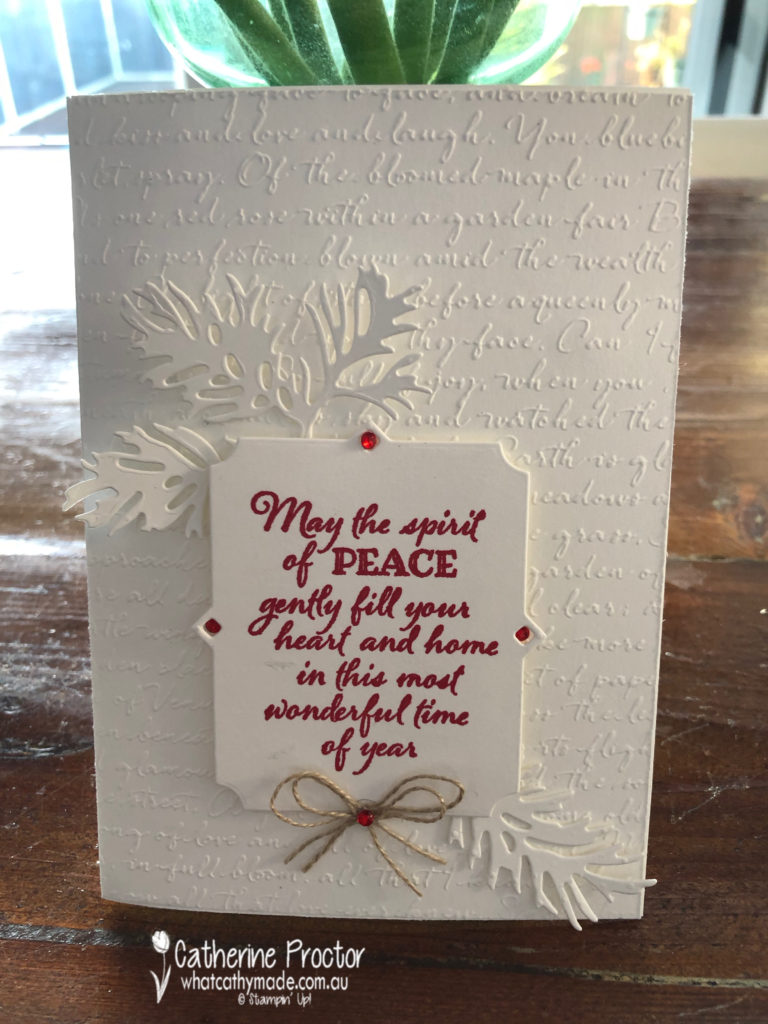
My final card uses the Scripty 3D embossing folder, topped with a sentiment from the Peaceful Boughs stamp set, die cut with the largest frame from the Beautiful Boughs Die set.
Here’s a close up of this gorgeous frame and the boughs I’ve die cut with the Peaceful Boughs Dies set. Can you see the lovely script effect this embossing folder gives?
All my cards this week are finished off with a bow (or two) of linen thread and some red rhinestones.
These cards were quick and easy to make and I really love how the embossing folders add so much dimension and texture while also allowing me to make very clean and simple cards.
I will definitely be reaching for my embossing folders more often!
The lovely Claire Daly is hosting our Heart of Christmas blog hop this week – to see what the rest of the team have made this week you can visit Claire’s page here.
To purchase any of the products I used in this project you can shop with me here.
If you’d like me to post you your very own copy of the brand new 2019 Stampin Up! Holiday Catalogue, the 2019-20 Stampin Up! annual catalogue or to simply find out about more about Stampin’ Up! contact me.