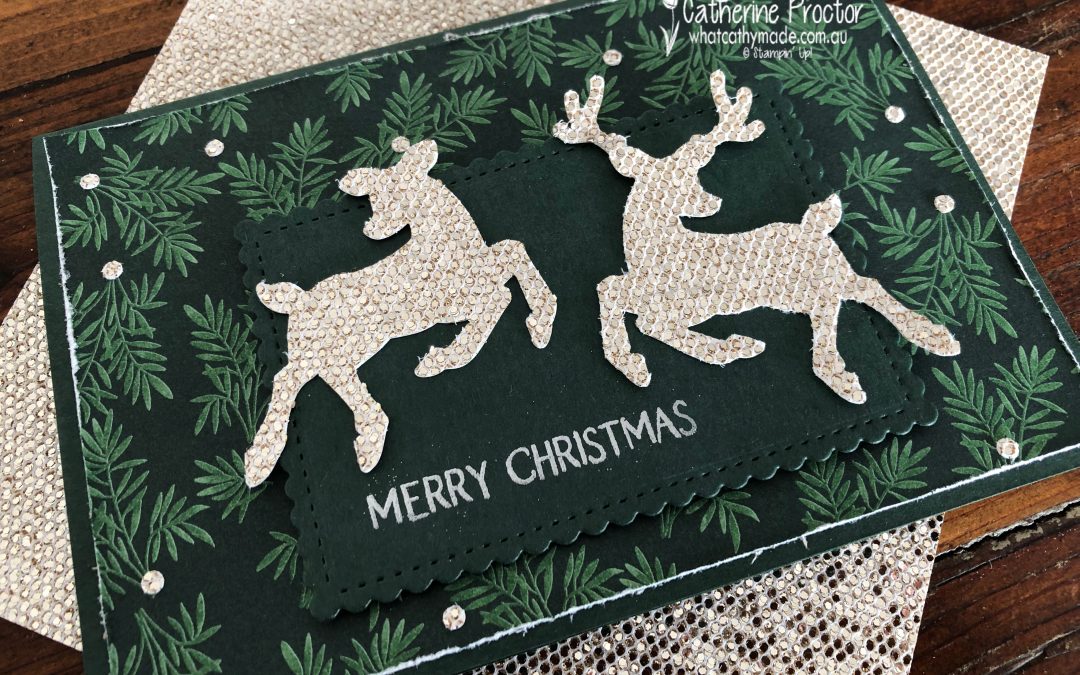
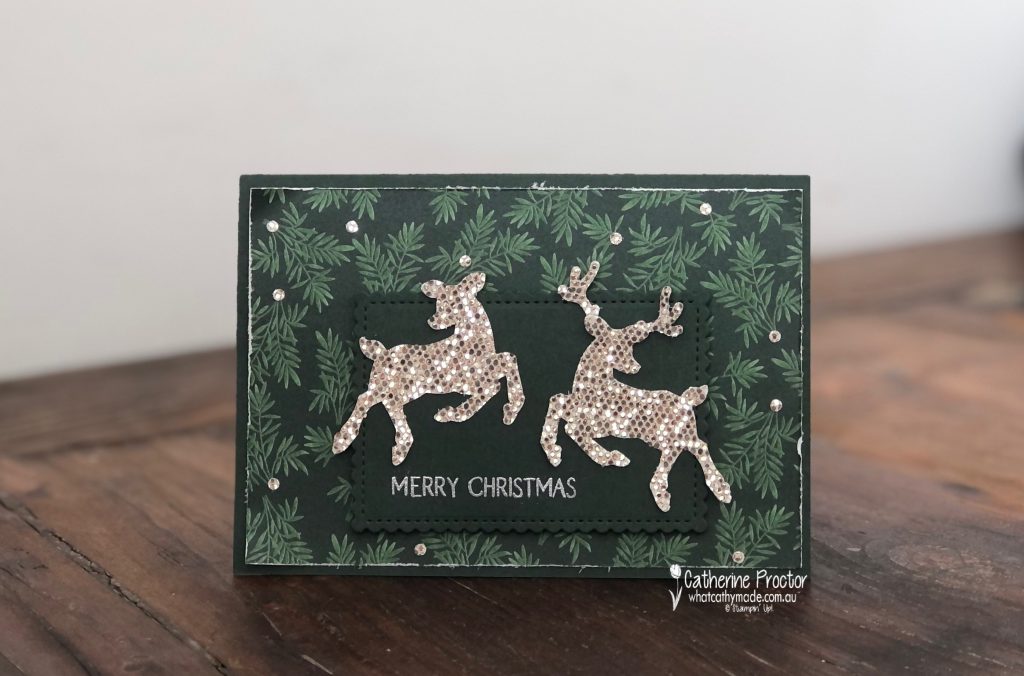
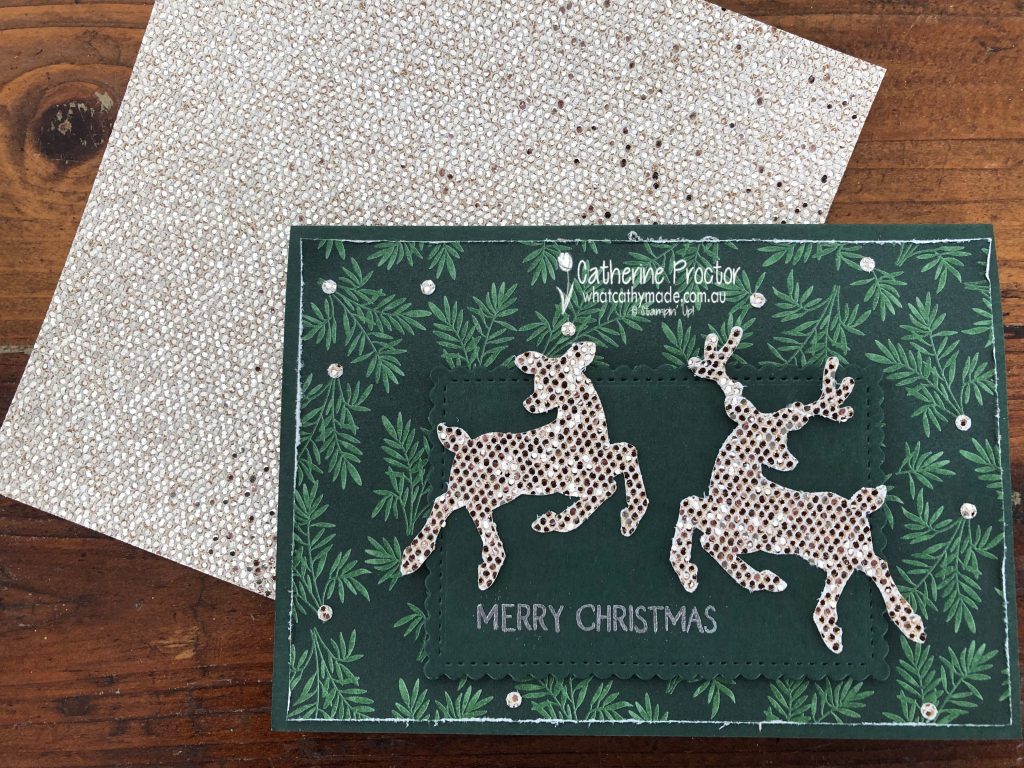
Welcome to week 17 of our 2021-22 Colour Creations blog hop! Tonight we are showcasing Garden Green, a mid green from the Regals colour collection.
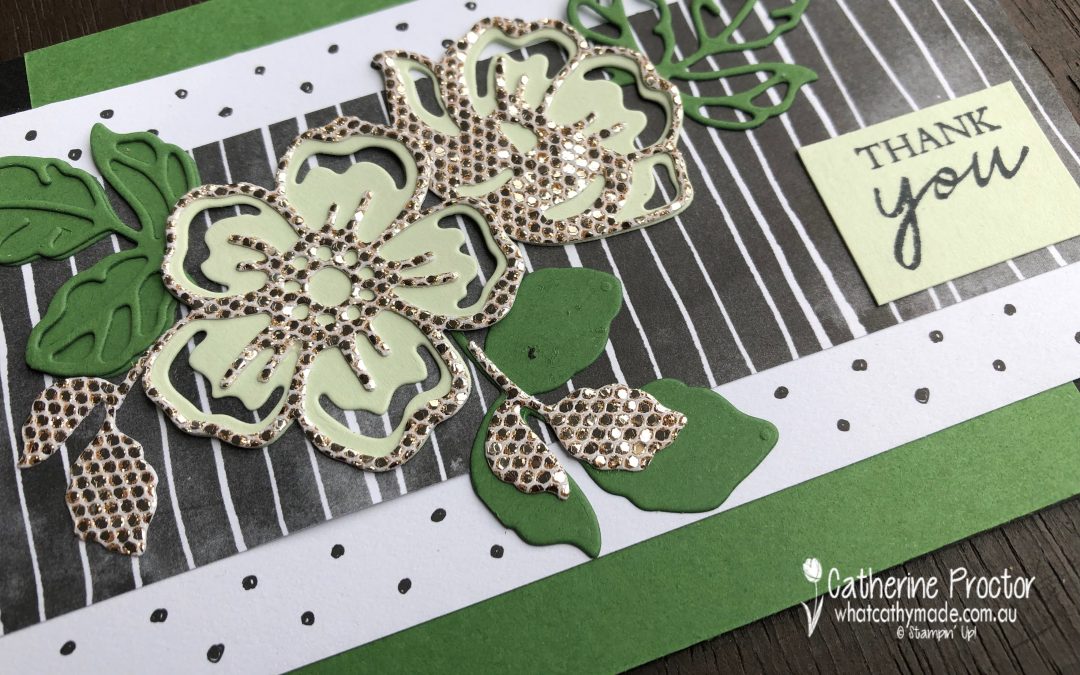
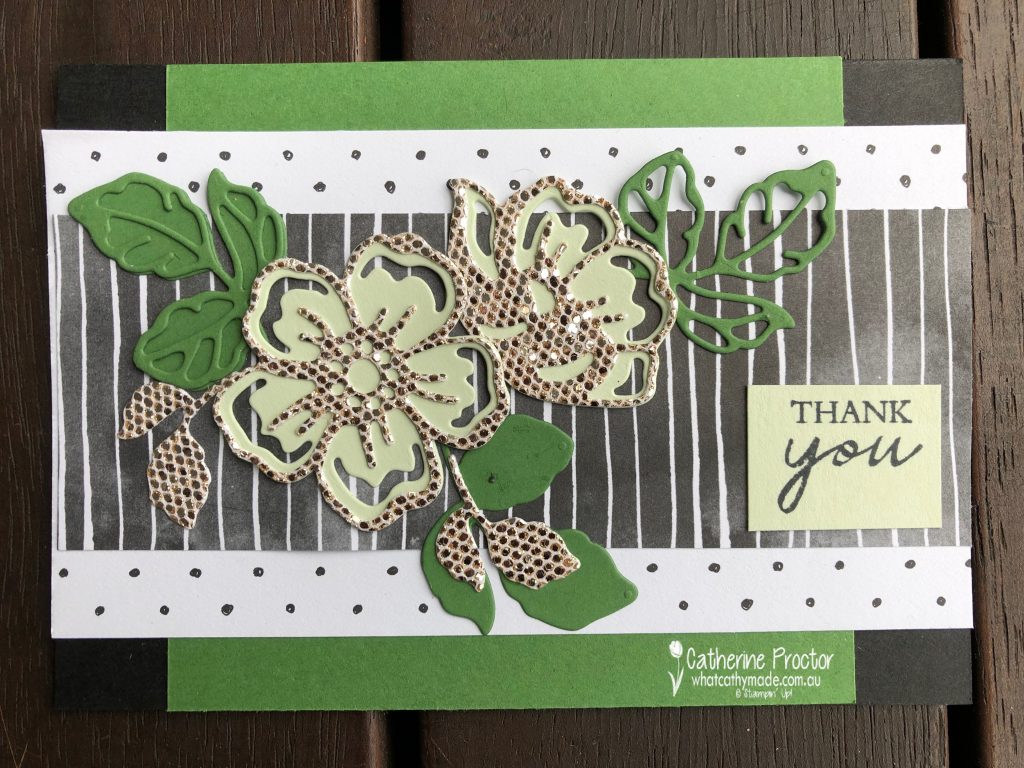
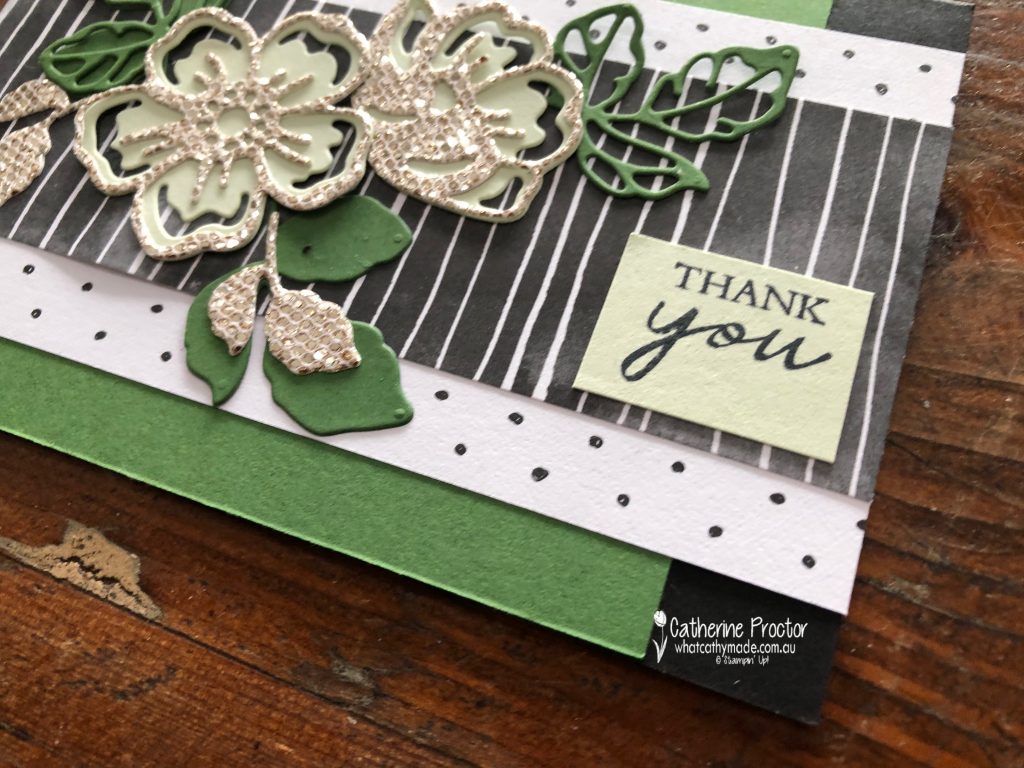
As SALE-a-bration ends tomorrow night I decided to bring together three of my favourite products from SALE-a-bration for my card tonight: the Be Dazzling DSP, the Beautifully Penned Designer Series Paper and the Summer Shadow Dies.
Although Garden Green is not a green I use very often, I really like pairing it with Basic Black and Soft Seafoam.
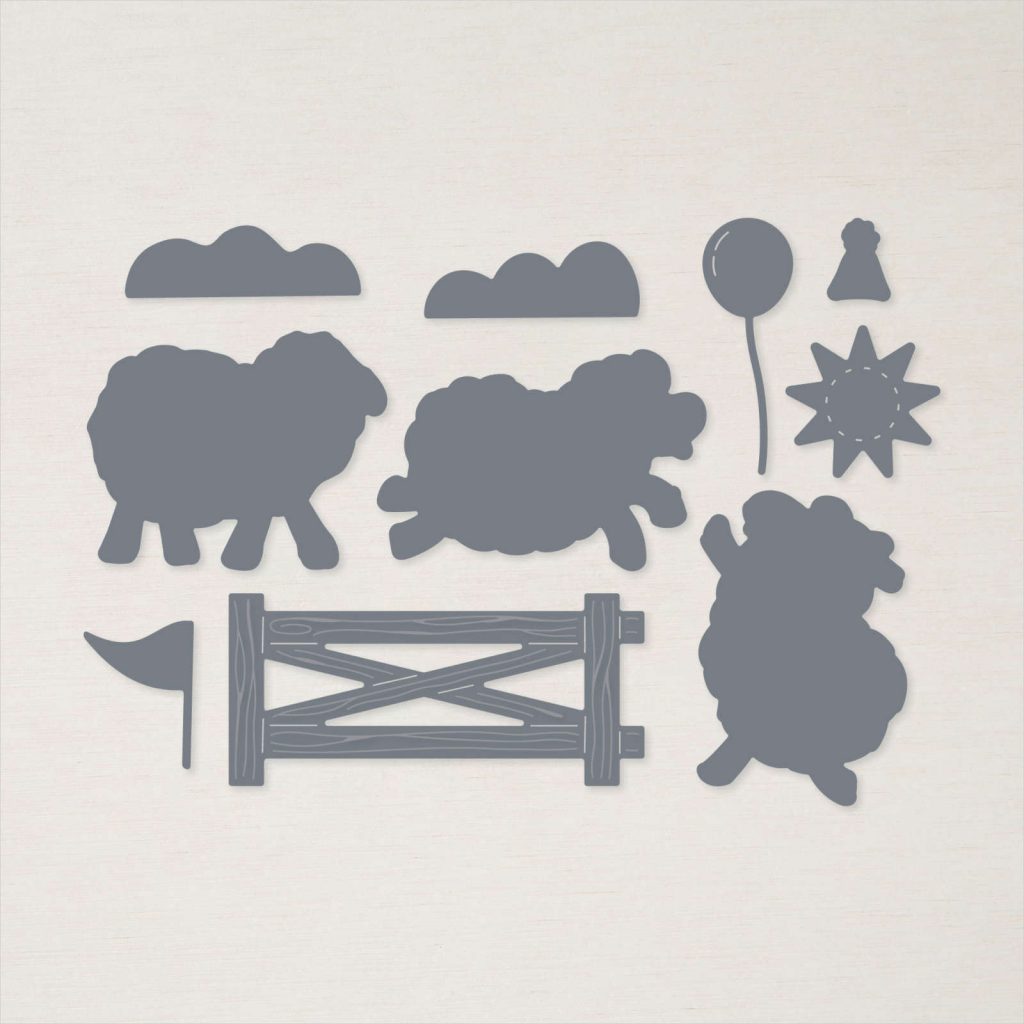
These Summer Shadow Dies are a great die set because they work so well on their own or you can use them to cut out the stamped images from the Shaded Summer Stamp Set. You can use them as single layer dies or layer them – I’ve done both single and double layers on my card.
The black and white Beautifully Penned Designer Series Paper goes with any colour and you can use it just as it is or you can colour it in.
Now it’s time to hop on over to our next participant, the lovely Theresa Gerrard – I can’t wait to see what she’s made this week!
If you find a broken link or have come to this blog hop from a different entry point, you can view the the full list of participants below:
Don’t forget to use my monthly Host Code (if your order is between $50 – $250) and I will send you a thank you gift the following month. If your order is over $250 don’t use the host code because you will qualify for your own stamping rewards. My September Host Code is WVX3UYCR and it is valid until midnight September 30.
I’ll be back with another Christmas card next Monday. In the meantime, wherever you are in the world, stay safe, stay calm … and keep on crafting xxx
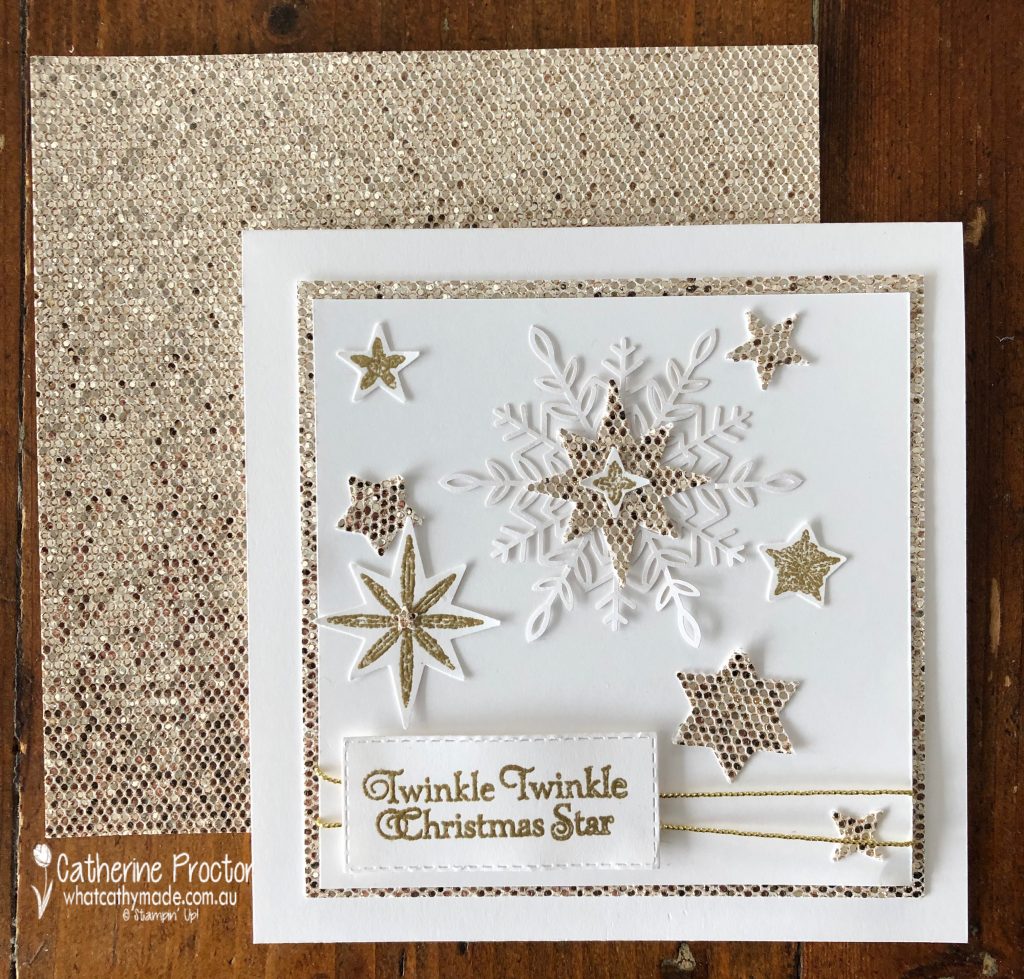
Hello crafters! It’s the last week of SALE-a-bration so I decided to make a Christmas card that uses my favourite SALE-a-bration item. Yep, you guessed it, it’s the Be Dazzling DSP!
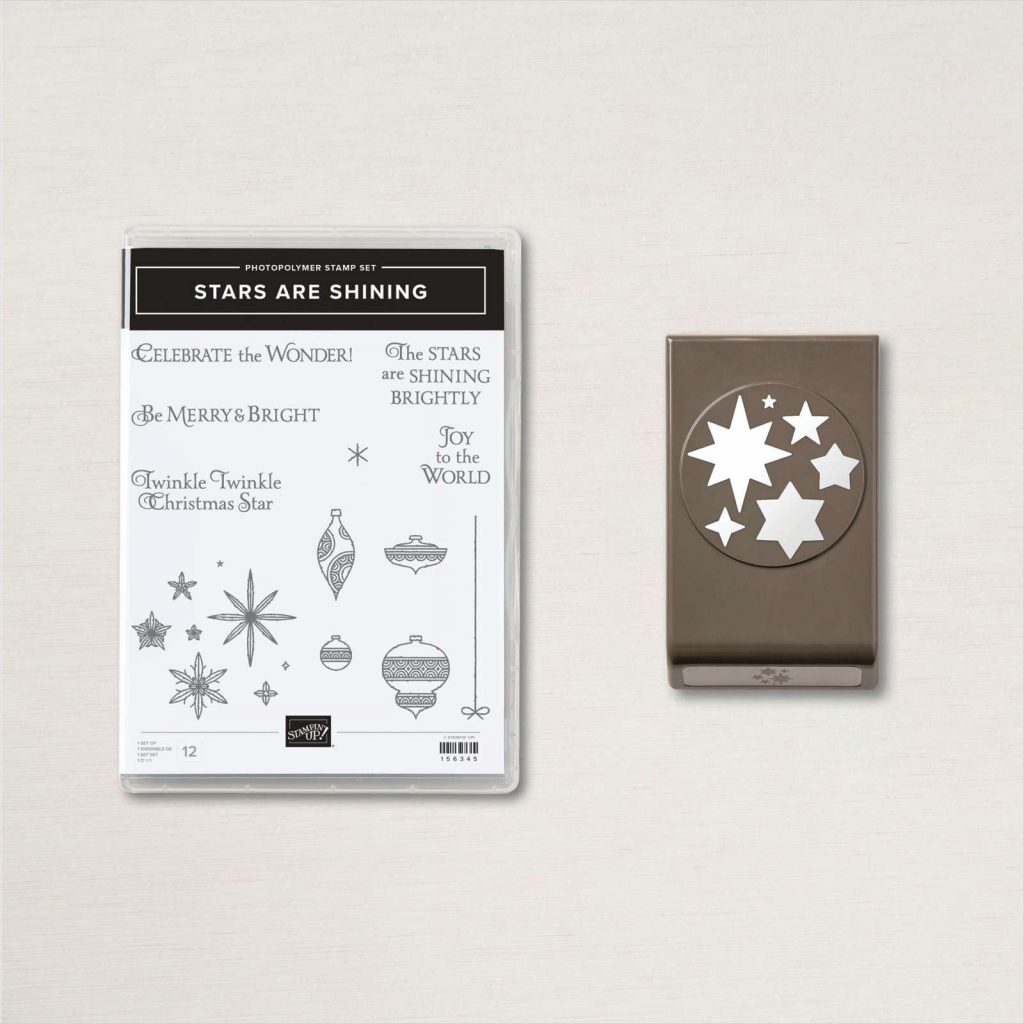
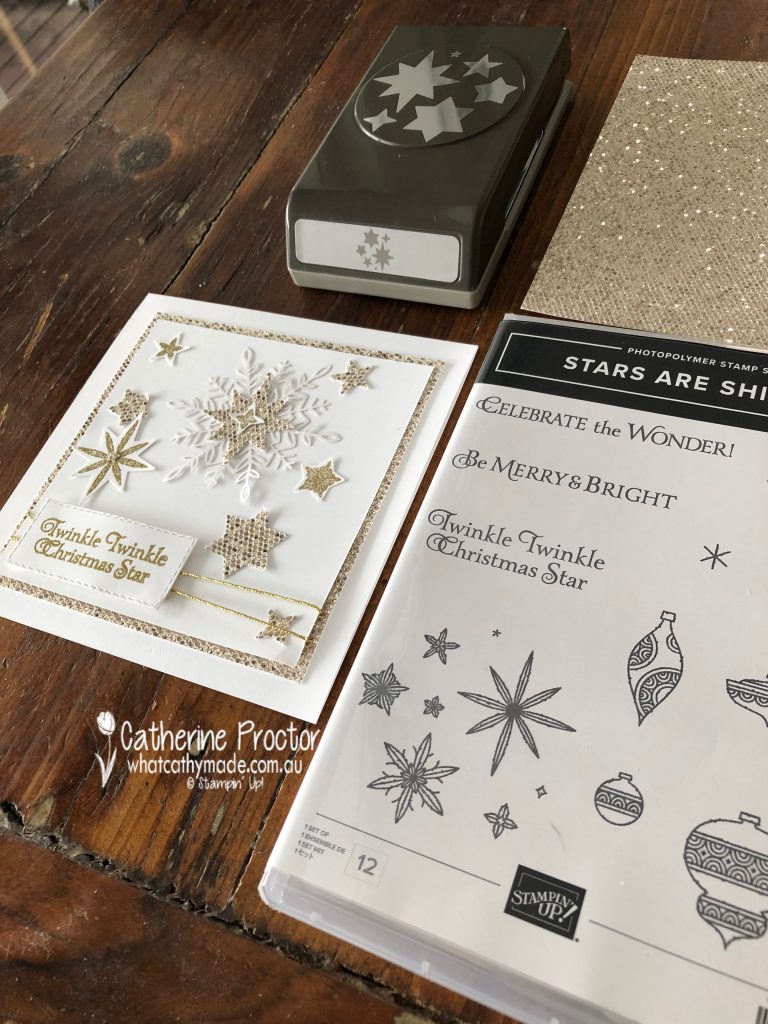
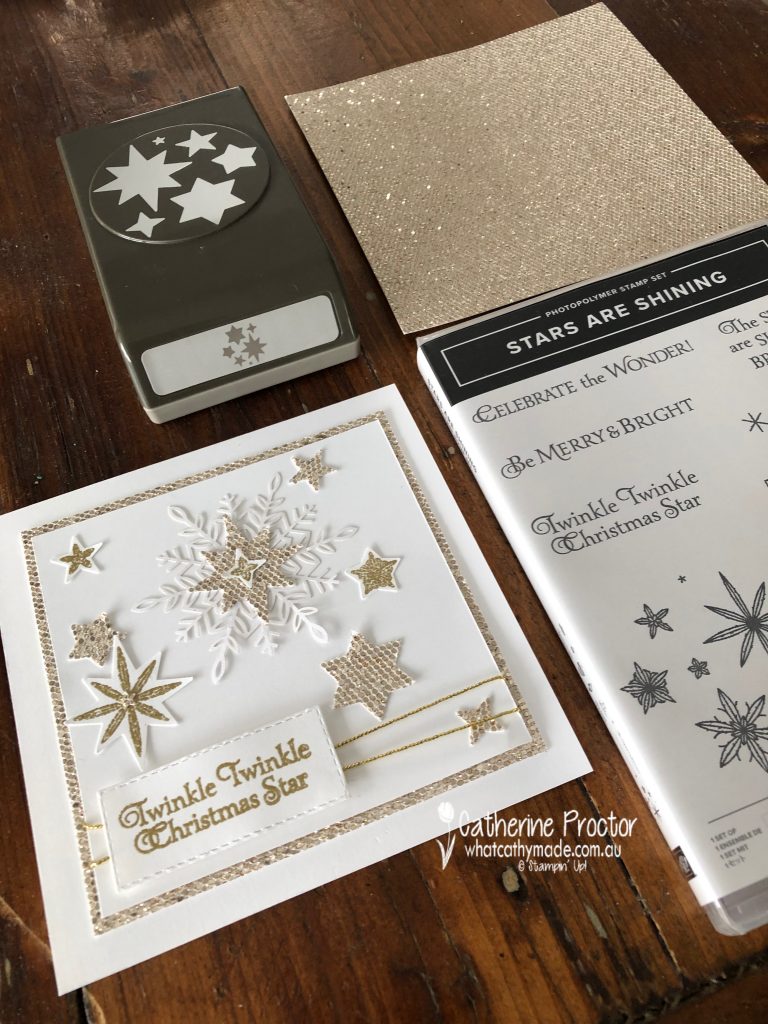
I’m also using a punch bundle that I initially overlooked in the July – December 2021 Mini Catalogue, the Stars are Shining bundle. At just $53 this a really affordable bundle with a versatile stamp set that includes 5 Christmas sentiments, 4 ornament stamps and a large cluster of stars on 1 star stamps you can punch out to create 6 separate stars.
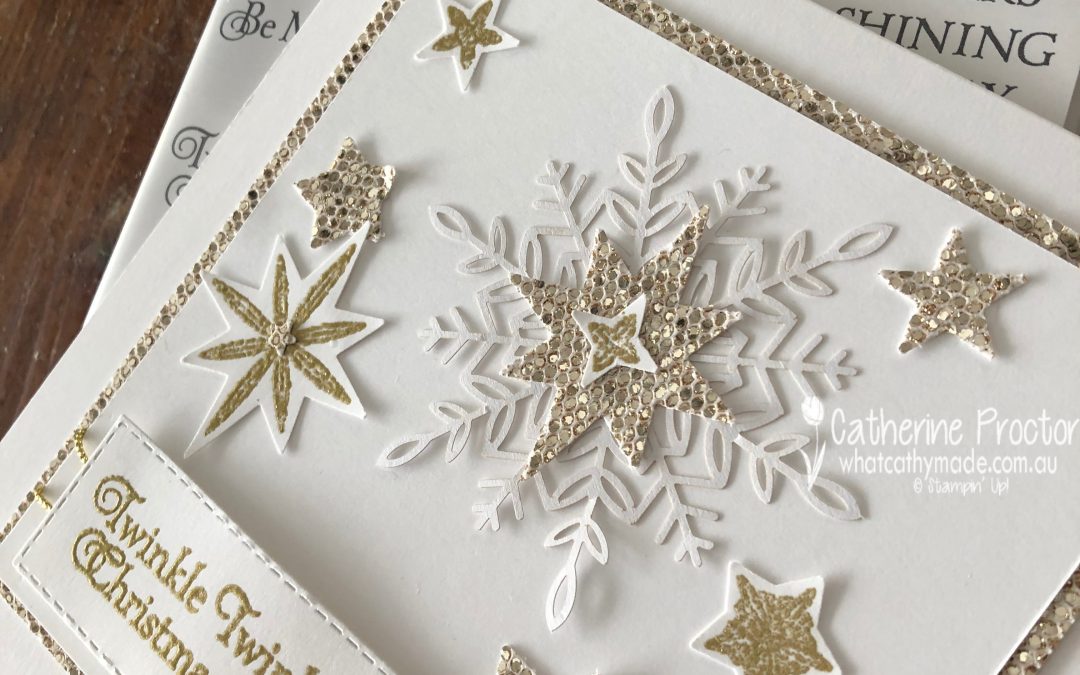
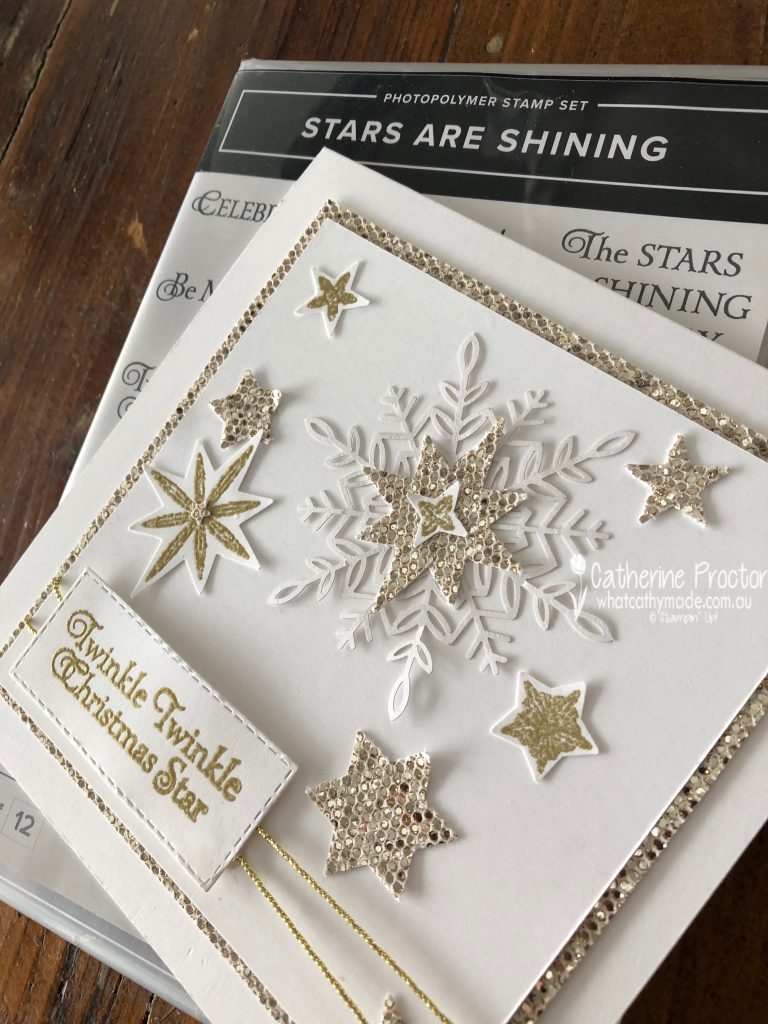
This Be Dazzling DSP just had to be paired with the punched out stars and the “Twinkle Twinkle Christmas Star” sentiment!
My Basic White card base measures 5 1/2 x 5 1/2 “; the Be Dazzling DSP layer measures 4 3/4 x 4 3/4 “; and the stamped Basic White top layer measures 4 1/2 x 4 1/2″.
After stamping in the star stamp in versamark and heat embossing it in gold embossing powder I punched the stars out with the Starlit Punch and also used punched stars out of the Be Dazzling DSP. With these 2 punches I had plenty of stars to cover my card.
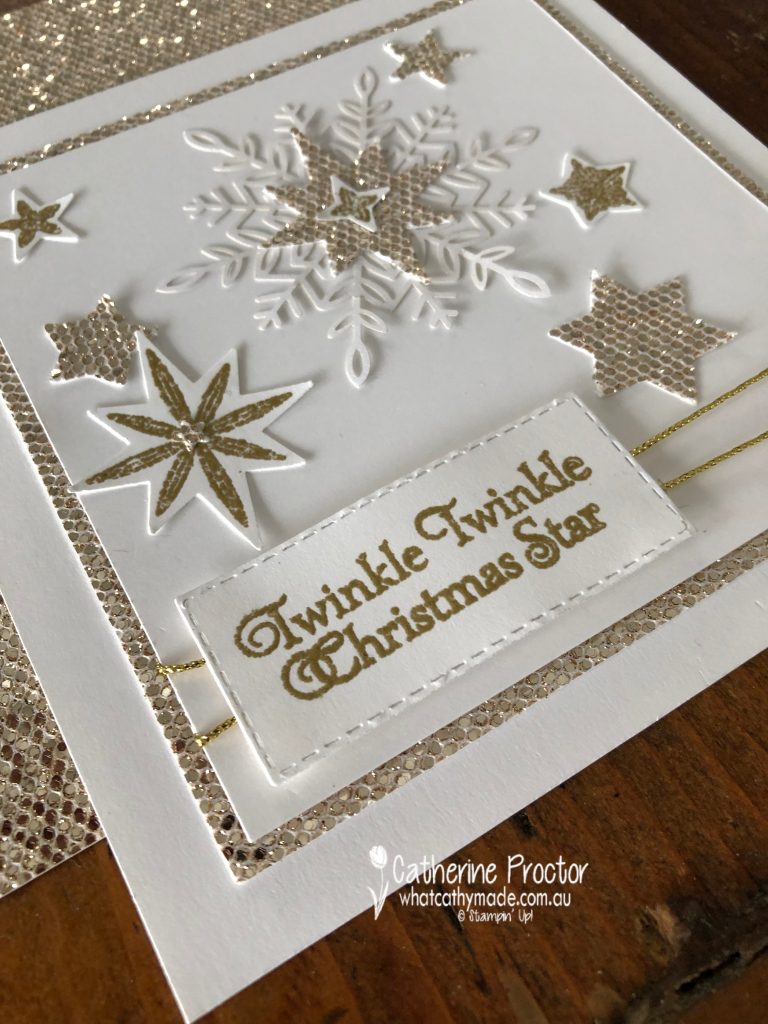
A wonderful snowflake embellishment sits behind the largest Be Dazzling star, with the smallest stamped and gold embossed star sitting on top.
Gold metallic Simply Elegant Trim wrapped around the bottom of the card under the sentiment.
I’ve stockpiled a few packets of this Be Dazzling DSP to use on my Christmas cards this year. If you want to use the Be Dazzling DSP on your Christmas cards too it will be retired this Thursday, September 30, so don’t miss out!
Now it’s time to hop on over to our next participant, the lovely Kate Morgan. I can’t wait to see what Kate shares with us today!
If at any time you find a broken link please head to the blog of this week’s host of The Heart Of Christmas Blog Hop, Sharon Davern, and she will have the list of all those participating.
You can purchase any of the products I’ve used tonight, here.
Thanks for visiting my site. I’ll be back with another card on Wednesday.
In the meantime, wherever you are in the world, stay safe, stay calm … and keep on crafting xxx
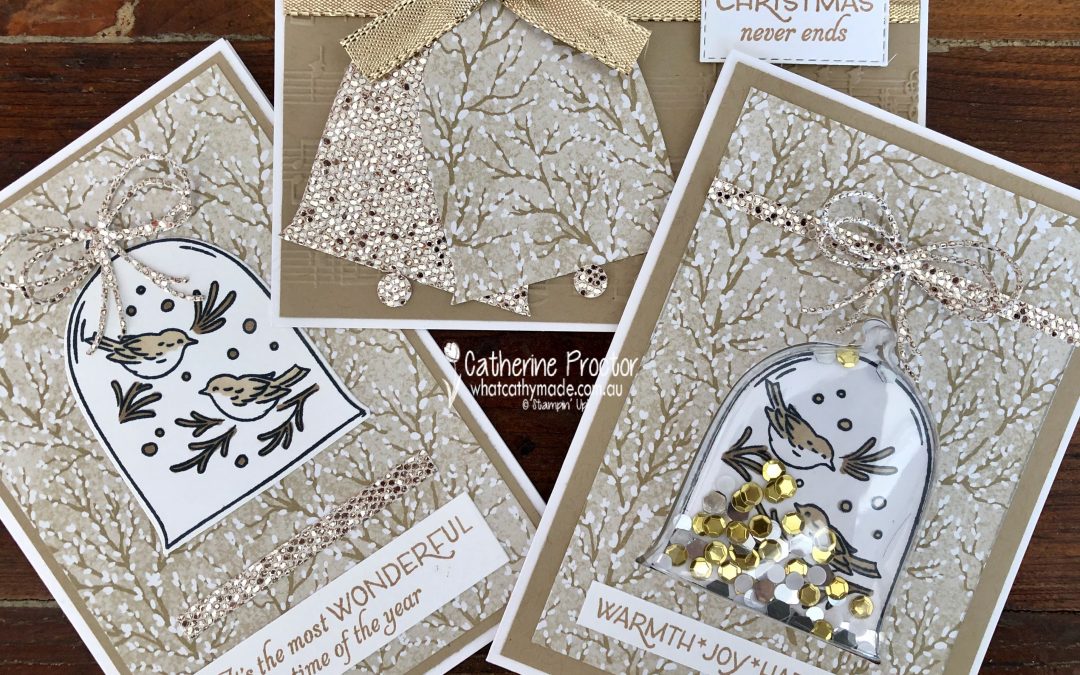
Hello crafters! I had planned to make just one card this week, but a simple mistake and a desire not to waste my craft materials actually led to three cards instead. I think I’ll claim that as a win instead of a loss!
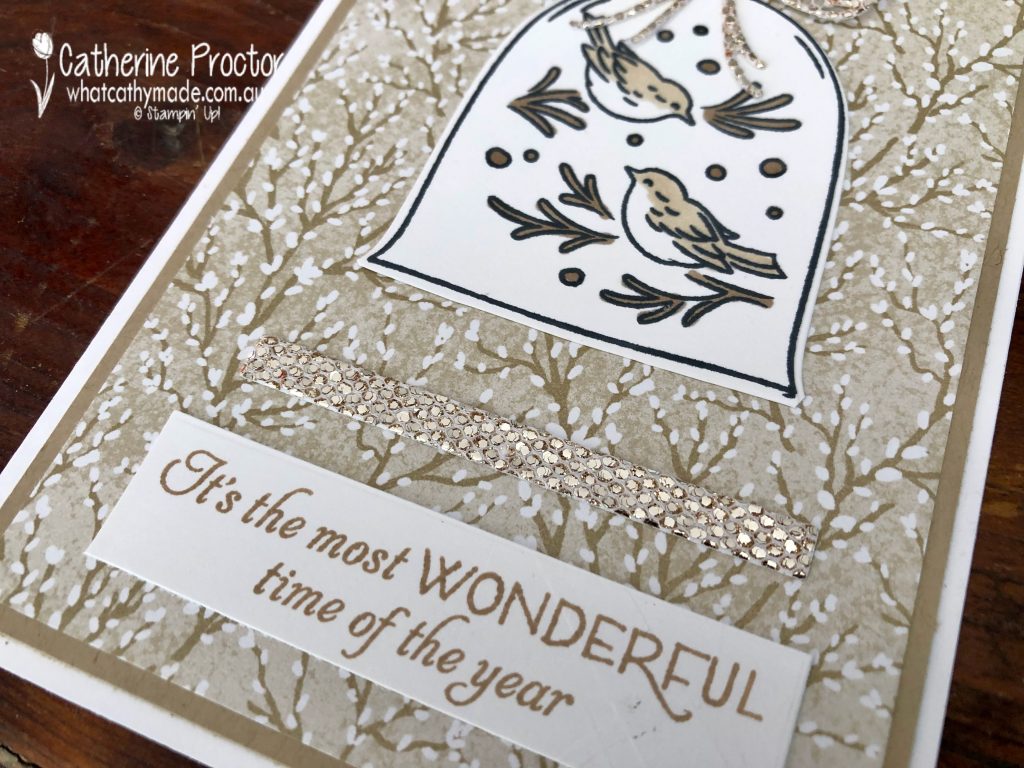
Originally, I intended to make a shaker card using the Christmas Cloche bundle, the Cloche Shaker Domes, the Be Dazzling DSP and this soft, snowy tree patterned paper from the Harvest Meadow DSP. Isn’t this pattern just stunning?
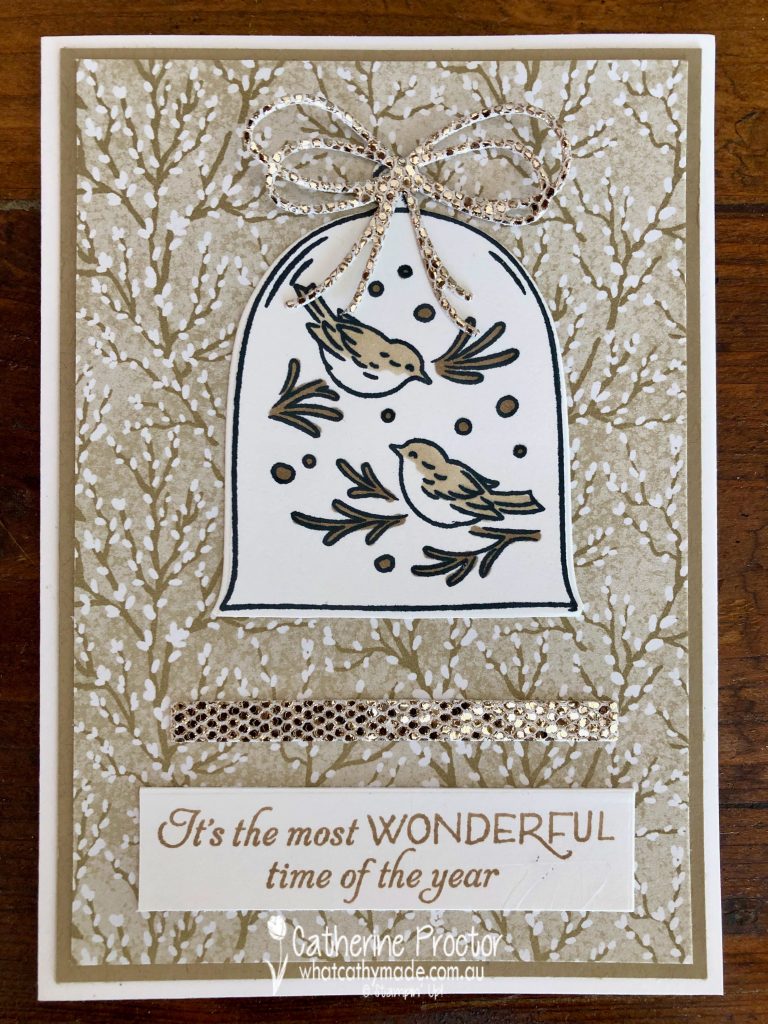
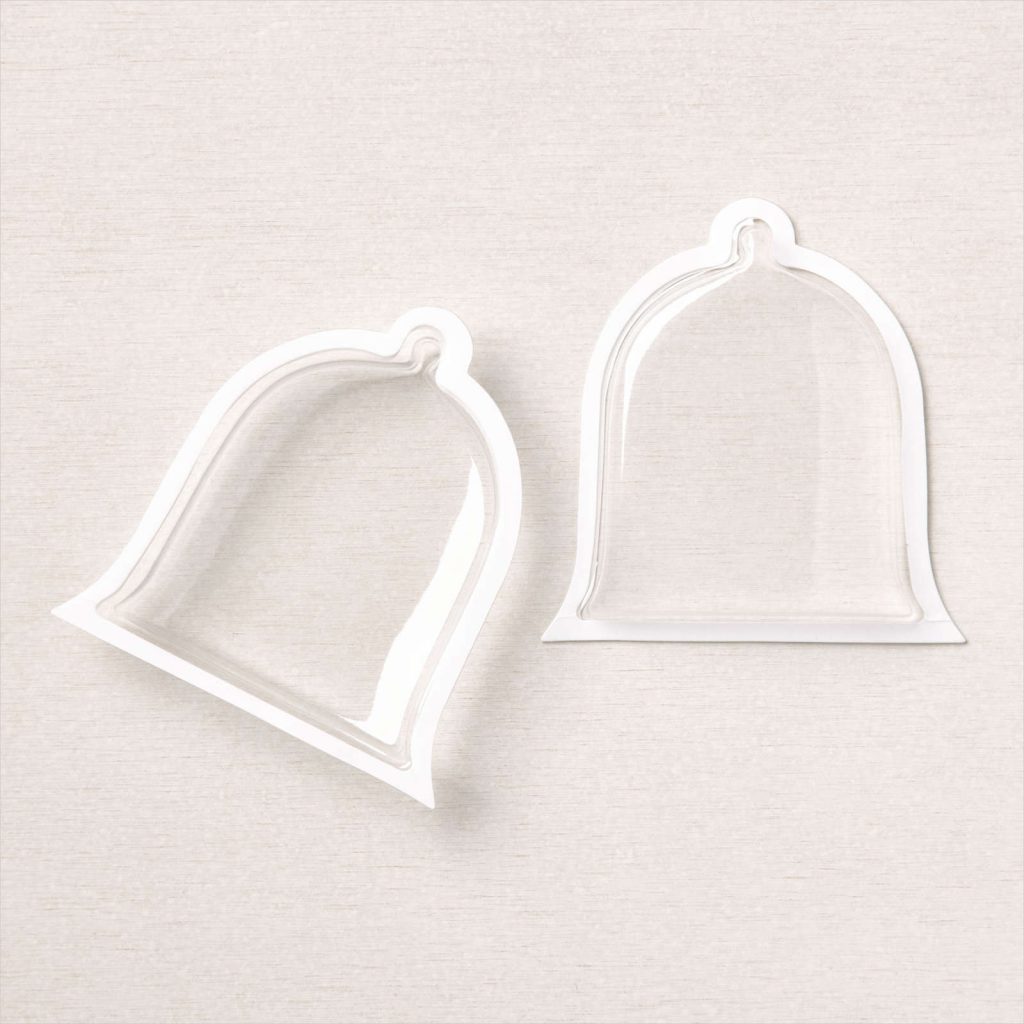
After stamping the cloche outline and the bird image from the Classic Cloche stamp set and colouring it in with my light and dark Crumb Cake Stampin’ blends, I die cut the image out using my Cloche die.
Unfortunately, I then glued the stamped and die cut image to the DSP layer that I had ALREADY ADHERED to my card front. I totally forgot that with a shaker card you use the DSP as the TOP layer to hide the self adhesive edges of the Cloche Shaker Domes!
So my shaker card became a 2D “postal version” of a shaker card instead, embellished with a Pierced Blooms Dies bow cut from the free SALE-a-bration Be Dazzled DSP.
I love these sentiments from the Classic Cloche stamp set. I’ve stamped them in Crumb Cake for each of my three cards, using a different sentiment for each card.
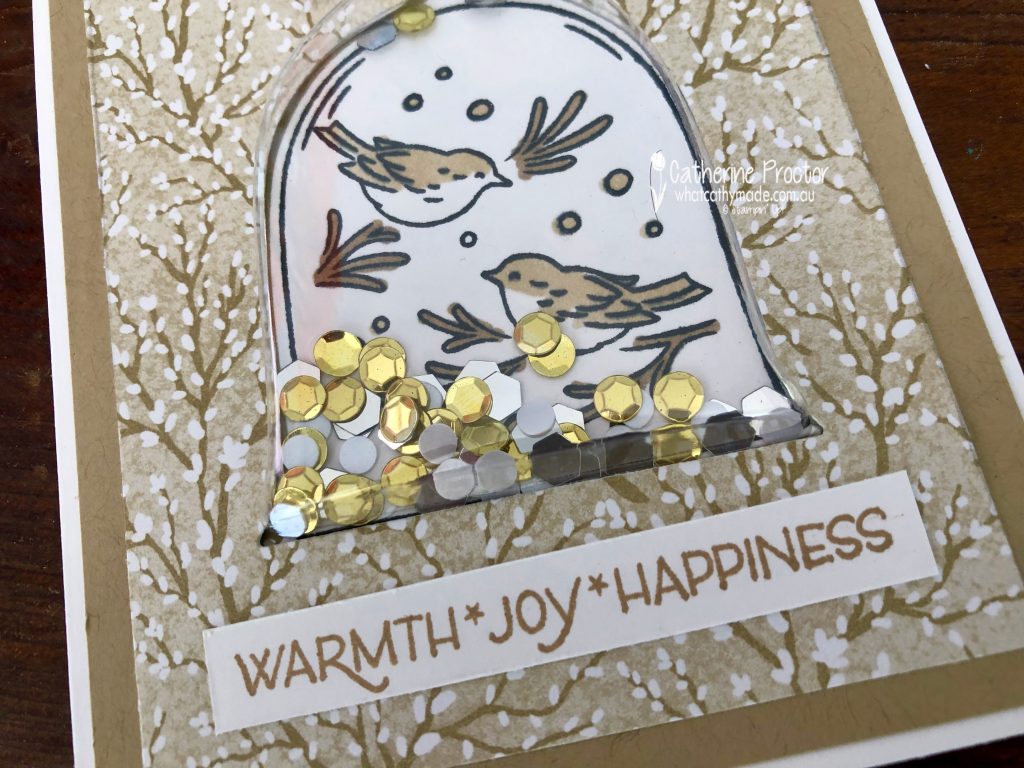
Take two and this time I remembered to use the cloche die to cut my DSP and adhere the DSP over the top of the card front AFTER I had adhered the Cloche Shaker Dome to the Crumb Cake card stock layer.
The shakers inside the Cloche Dome are the metallic gold and silver sequins from the Sequins For Everything embellishments.
So, why did I make a third card?
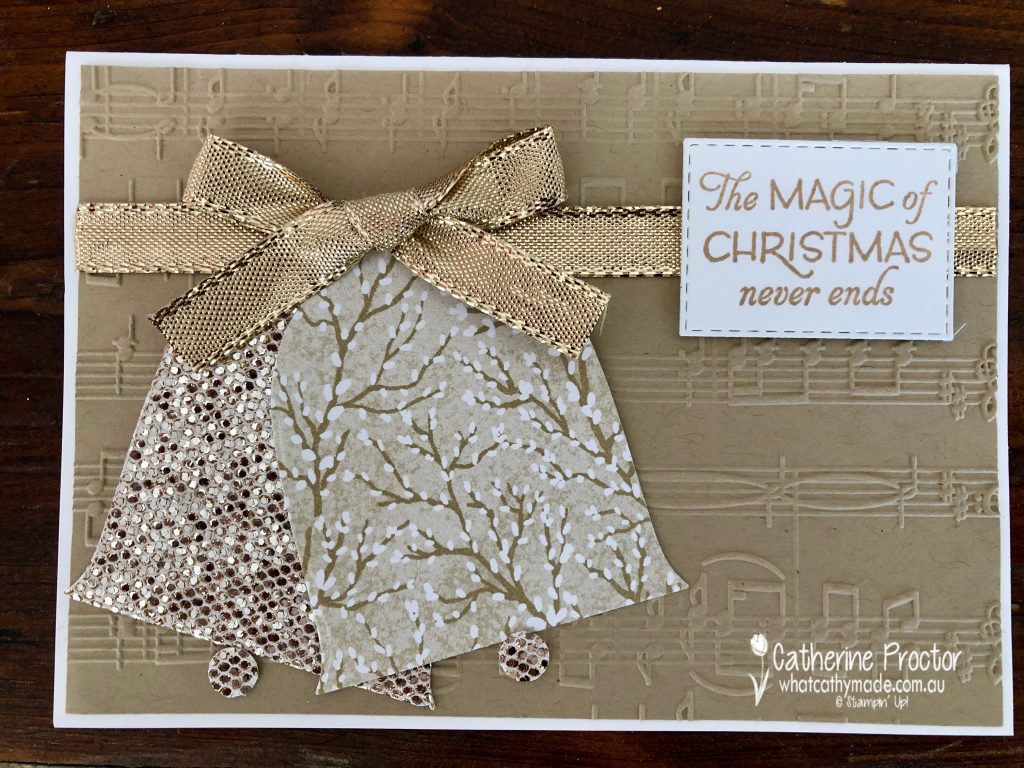
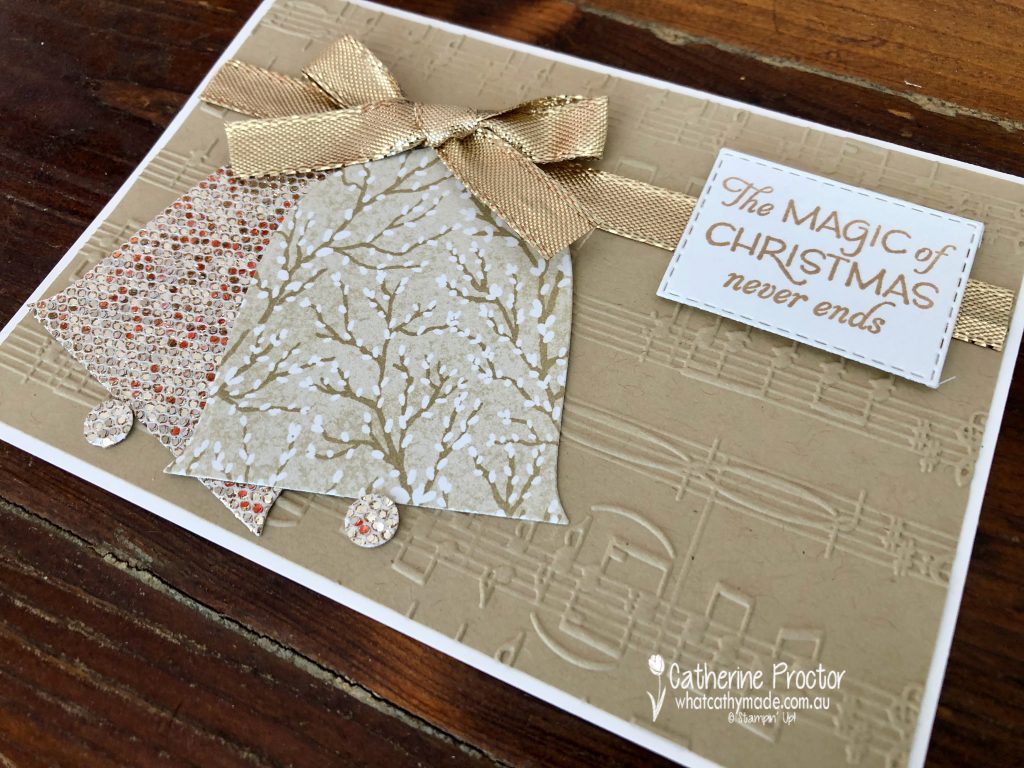
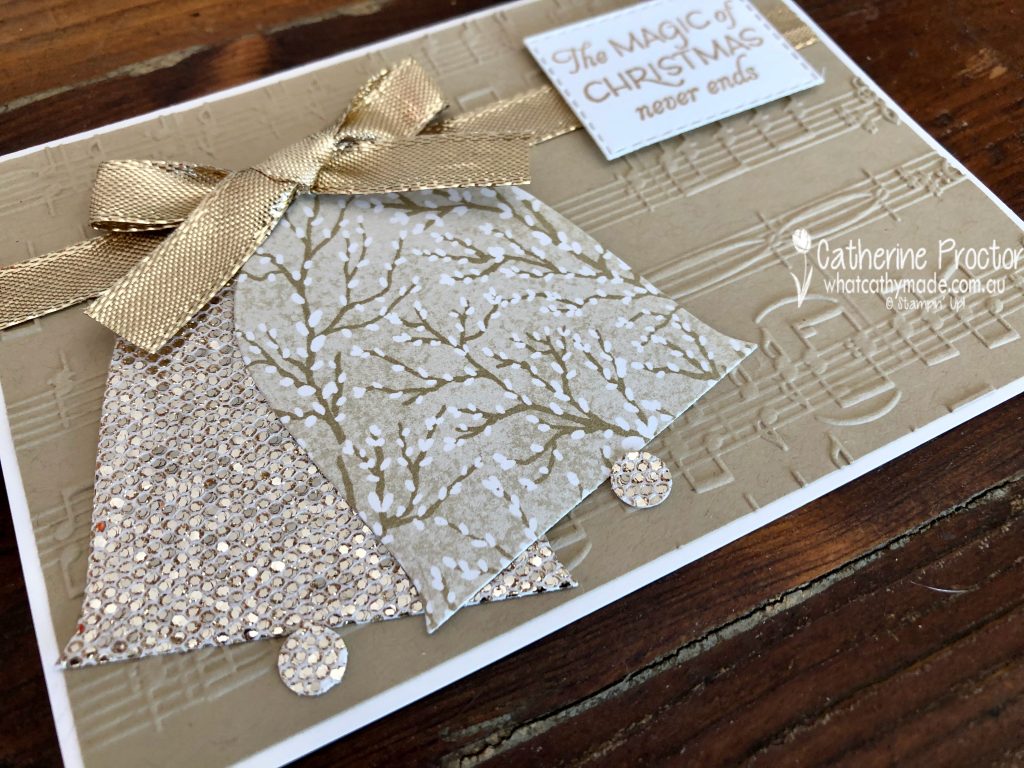
After I had die cut the opening for the Cloche Shaker Dome card I realised that the negative die piece looked just like a bell, so I die cut another “cloche bell” from the Be Dazzling DSP to match and made a quick musical card to not waste my scraps.
The Merry Melody 3D Embossing Folder was the perfect choice to emboss the Crumb Cake cardstock layer. In case you are wondering, the musical score is Joy to the World.
Die cut circles of the Be Dazzling DSP to create bell clappers make the bells more realistic.
Now it’s time to hop on over to our next participant, the lovely Tina Gillespie. I can’t wait to see what Tina shares with us today!
If at any time you find a broken link please head to the blog of this week’s host of The Heart Of Christmas Blog Hop, Sharon Davern, and she will have the list of all those participating.
You can purchase any of the products I’ve used tonight, here.
Thanks for visiting my site. I’ll be back with another card on Wednesday.
In the meantime, wherever you are in the world, stay safe, stay calm … and keep on crafting xxx
I love sheep! Growing up in the country, we always had a pet poddy lamb in our backyard. Poddy lambs are what lambs are called if they have either been orphaned or rejected by their mother and the local farmers would give them to us to hand raise as pets.
My brother and I would bottle feed the lambs and as they grew they would keep our lawn permanently mowed and let us ride them like horses and even dress them up in fancy dress clothes!
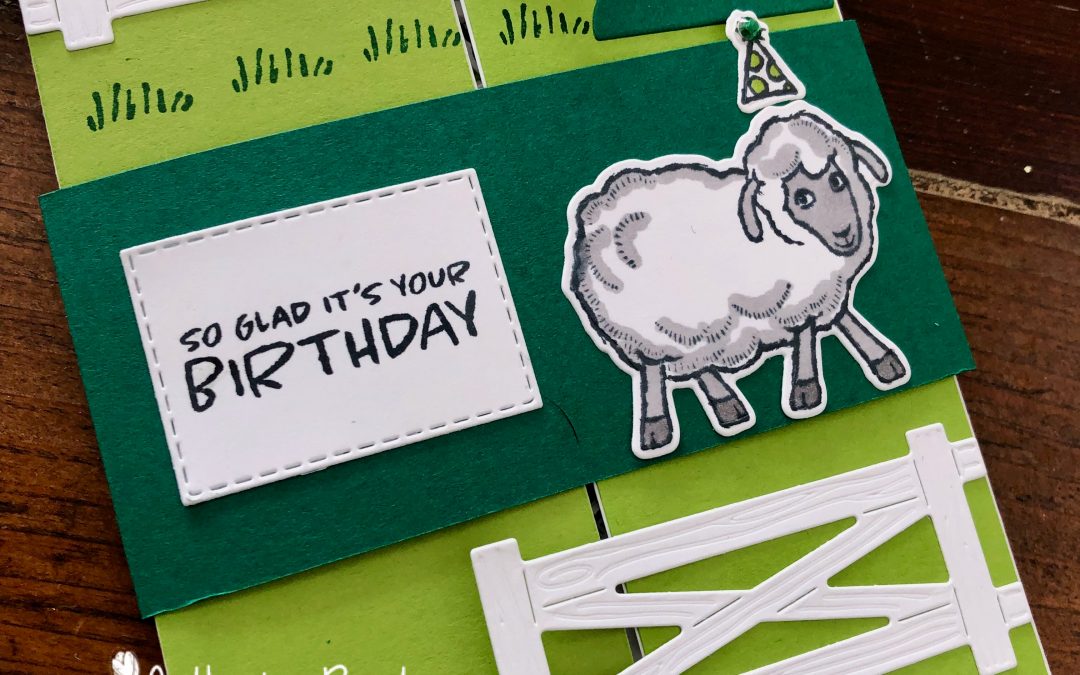
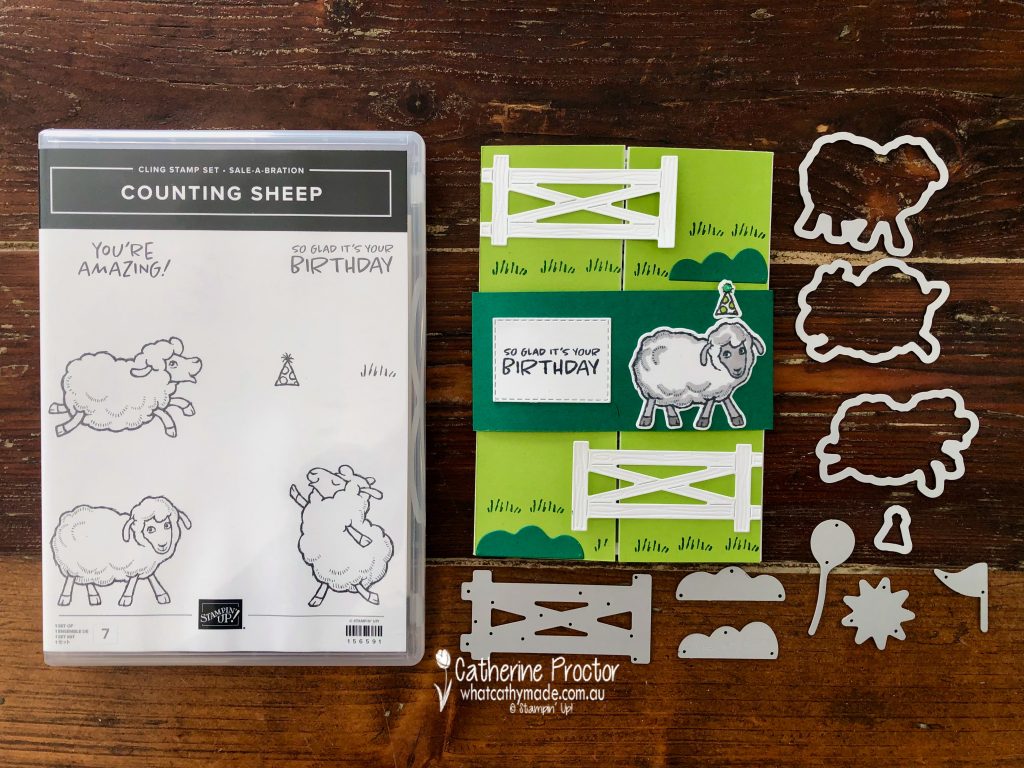
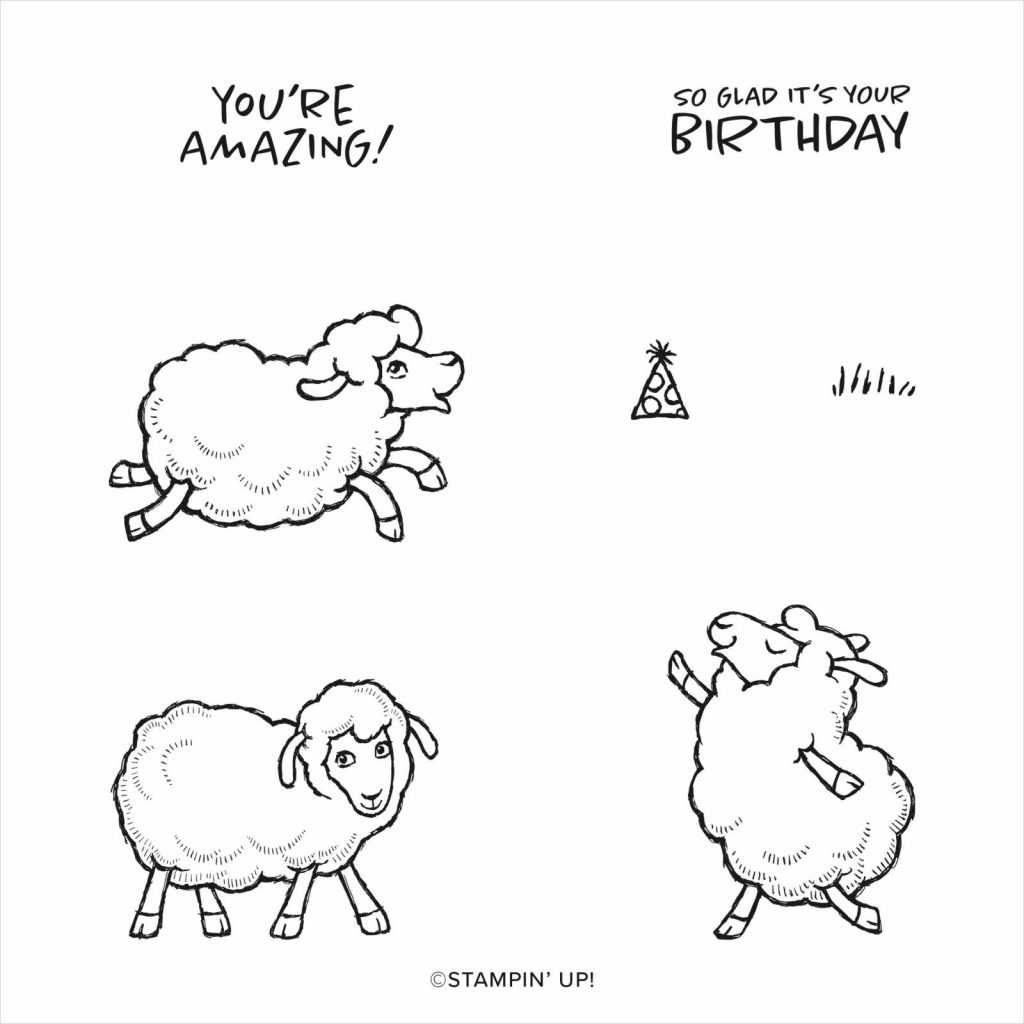
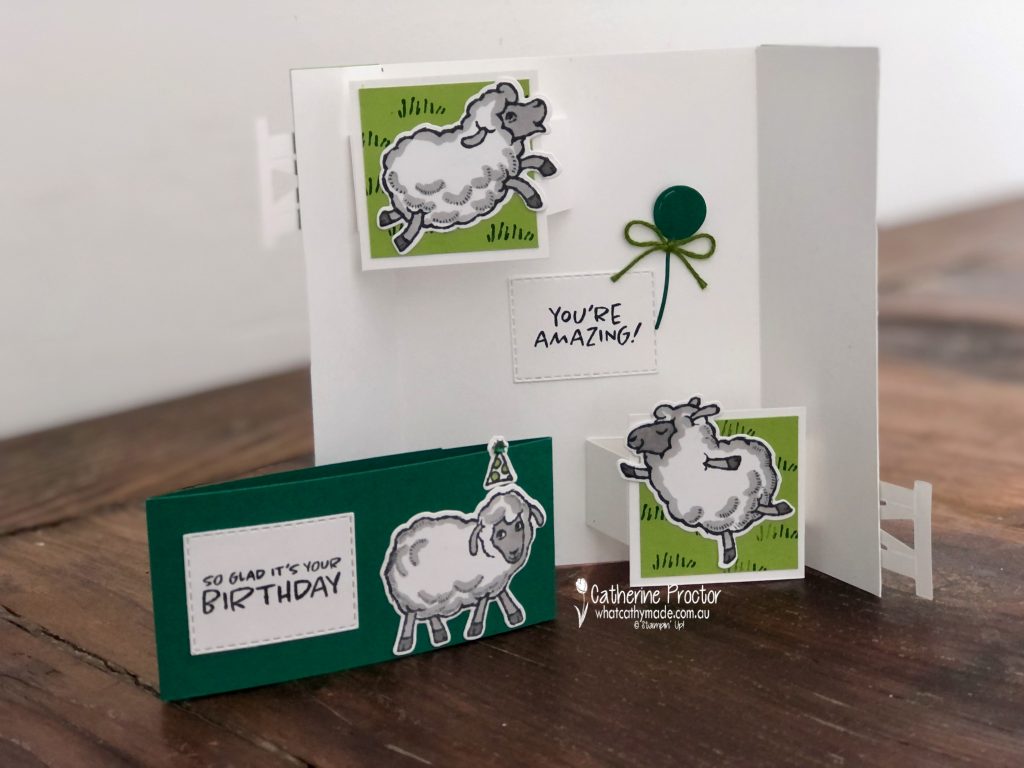
For this card I’ve used two FREE SALE-a-bration products: the Counting Sheep stamp set and the coordinating Sheep Dies. These adorable sheep are the perfect size for a Floating Gatefold Card. You could also use the penguins from the Penguin Place bundle or even the Peaceful Deer Bundle.
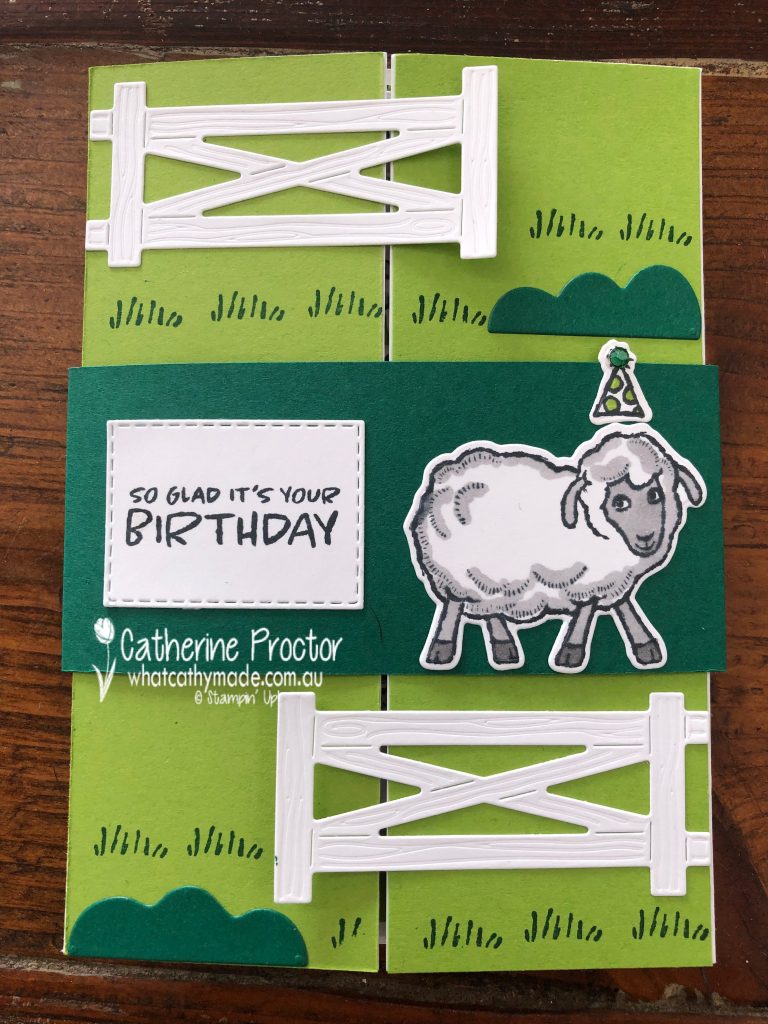
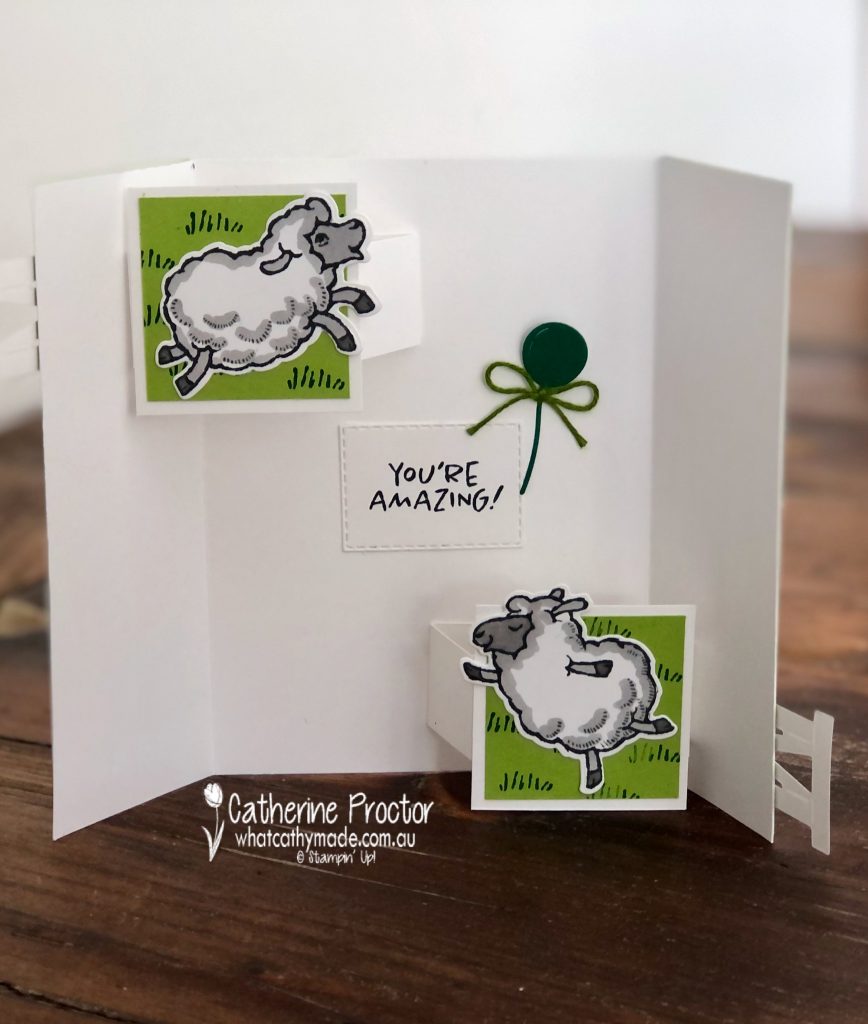
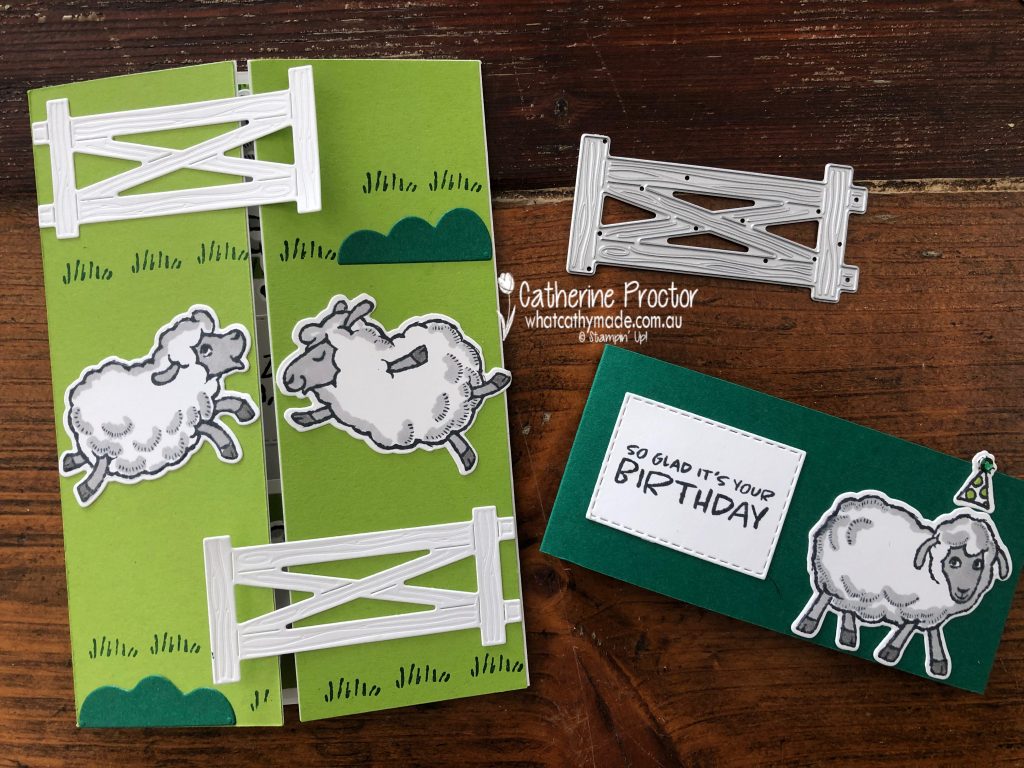
Here’s what the card looks like when closed with the belly band on (left photo) as well as on the inside of the card with the sheep popping up (right photo).
Because this card has pop up elements inside it is hard to keep it flat when the card is closed, which is why I decided to create a belly band. This card will easily fit into an standard envelope for posting but it was tricky to photograph it closed without the belly band on!
And here is another look at the inside. Because this is quite a busy card on the inside I’d probably write on the back panel instead.
Don’t these sheep just make you laugh!
If you would like the instructions on how to make this card, they are in the August Tutorial bundle, are available on my tutorial page.
Thanks for visiting my blog today. I’ll be back this week with some more Heart of Christmas inspiration and our weekly AWH Colour Creations Showcase on Wednesday.
If you live in Australia, you can find and purchase all these products in my Stampin’ Up! Online Store. Don’t forget to use my monthly Host Code (if your order is between $50 – $250) and I will send you a thank you gift the following month. If your order is over $250 don’t use the host code because you will qualify for your own stamping rewards.
My September Host Code is WVX3UYCR and it is valid until midnight September 30.
In the meantime, wherever you are in the world, stay safe, stay calm … and keep on crafting xxx
Hello to all my crafting friends! I’m back with another entry for the “G’day Fri’yay’ Card Making Challenges” Facebook group, a fortnightly Card Making Challenge with Aussie Themes.
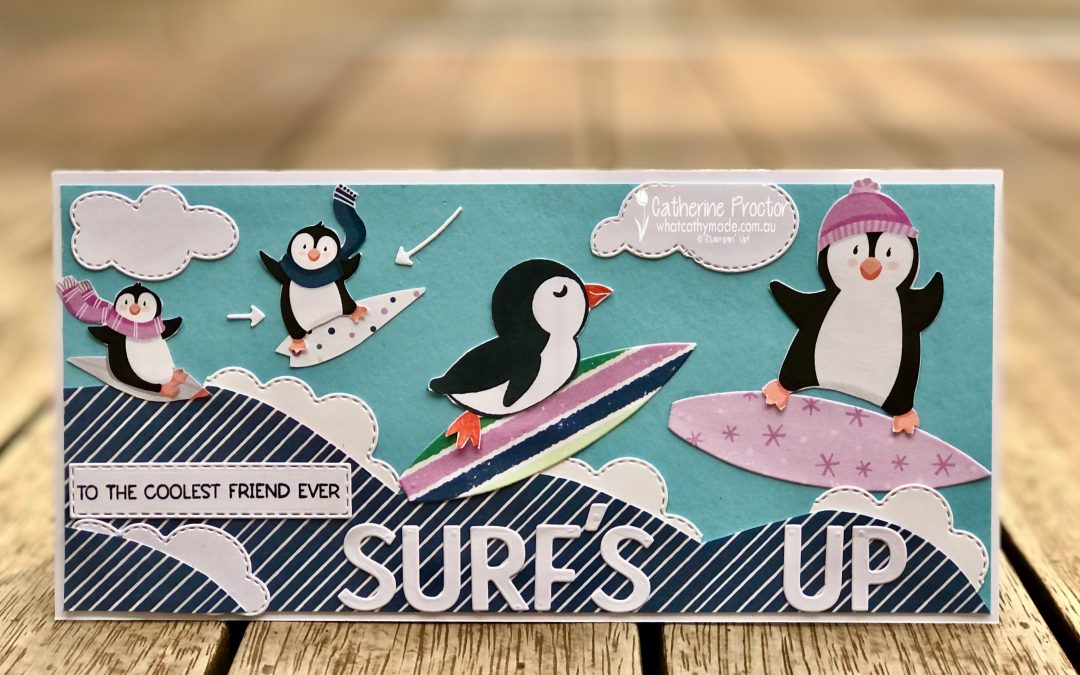
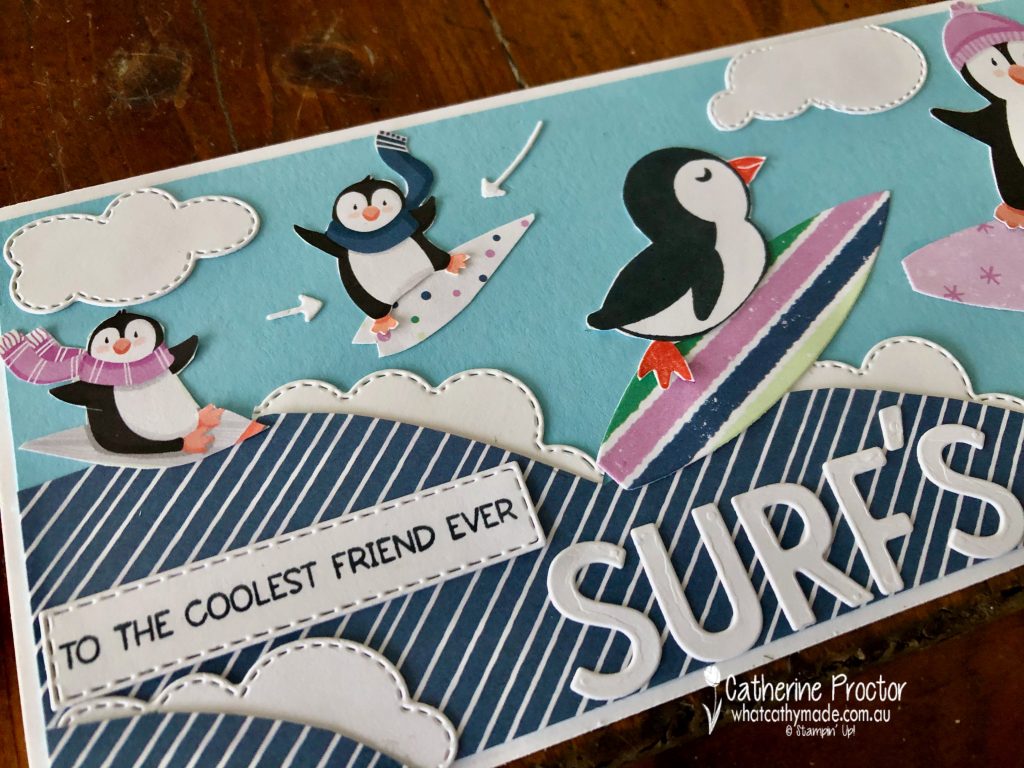
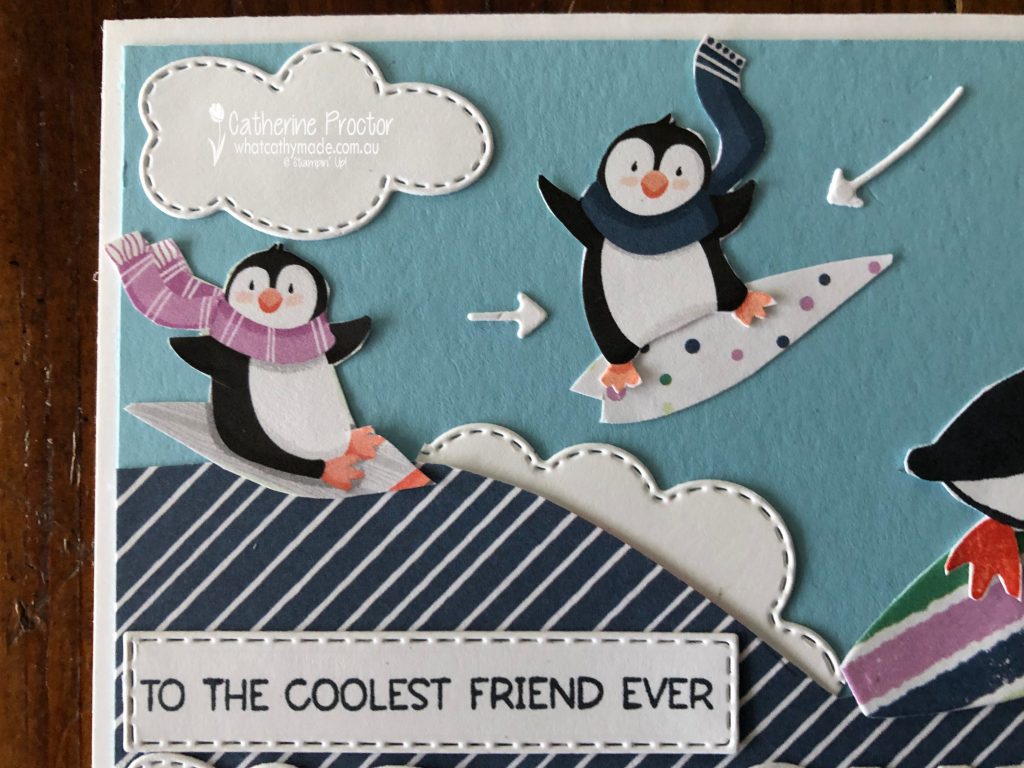
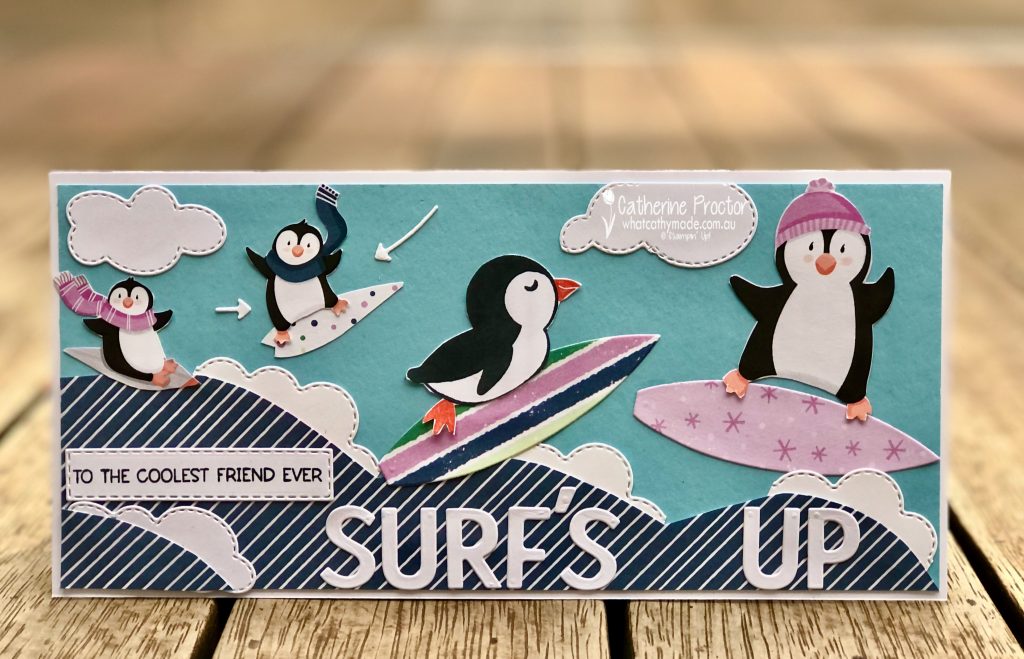
The theme for this challenge is “Surf’s UP!”. My husband and my sons are all obsessive surfers so I have a stack of surfing stamps and have made many a surfing card in my time, however, for this challenge I wanted to create a surfing card using non-surfing craft products.
Is it just me who gets a kick out of the idea that you might see penguins dressed in scarves and beanies out in the surf?
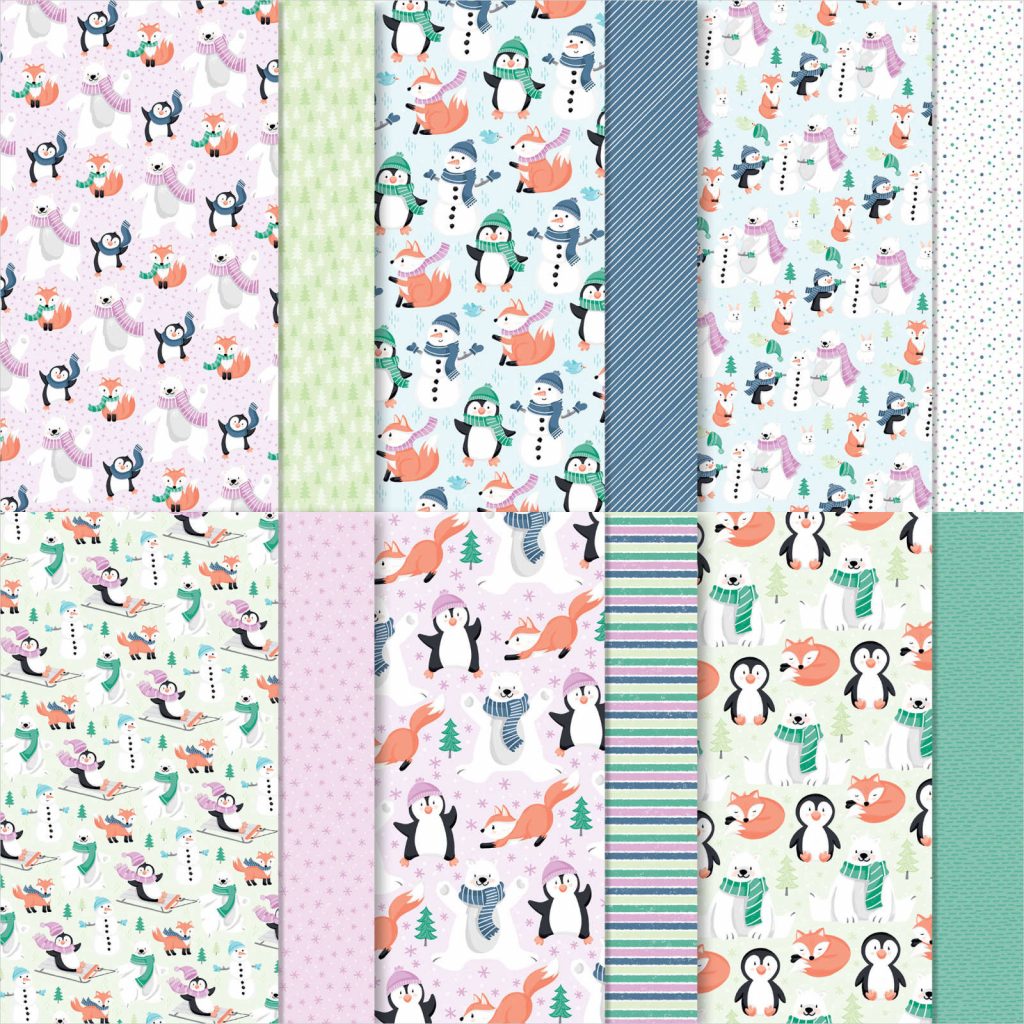
I know surfing is not the first thing that might spring to mind with the FREE SALE-a-bration DSP Penguin Playmates, but the stance and movement of these penguins reminded me of the way surfers hold their bodies while surfing.
The Misty Moonlight and white striped DSP was used make waves, with one of the Basic Border dies cut into smaller pieces to create whitewash foam on the edge of the waves.
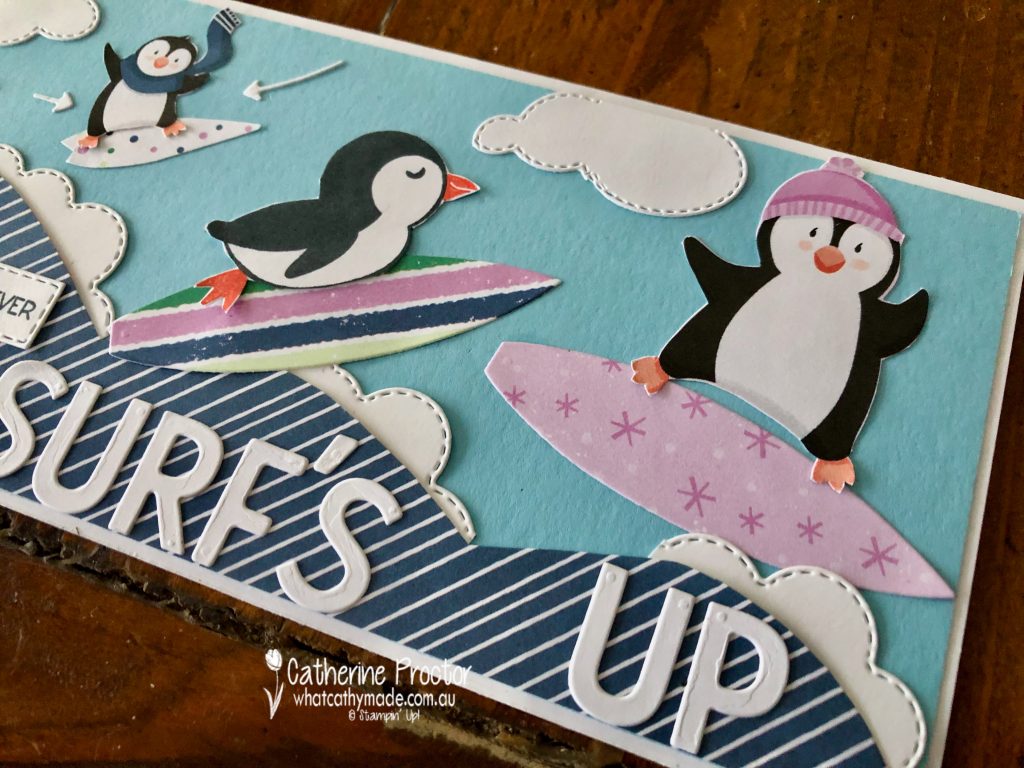
I did use a die from my stash to use some of the Penguin Playmates DSP to create the two larger surfboards. The two smaller surfboards were just hand trimmed from this DSP. The penguin who is bodyboarding was stamped and fussy cut – the others are all fussy cut from the same Penguin Playmates DSP.The little penguin getting air is my fave – let’s just crown him the “Gabriel Medina” of surfing penguins right now! I’ve used the arrow dies from the Give it a Whirl dies to draw attention to him (I’ve also used the cloud dies from the Give it a Whirl dies). This penguin really is the “coolest” of the penguins, hence the matching sentiment!
Playful Alphabet dies form the “Surf’s Up”, leaving you in no doubt that, believe it or not, these penguins are actually surfing, not skiing. I had so much fun making this card and I hope my surfing penguins put a smile on your face too!
Thanks for visiting my blog today. I’ll be back tomorrow with some more Heart of Christmas inspiration and on Wednesday our weekly AWH Colour Creations Showcase – we are creating projects with Crushed Curry this week.
When you shop online in my Stampin’ Up! Online Store don’t forget to use my monthly Host Code (if your order is between $50 – $250) and I will send you a thank you gift the following month. If your order is over $250 don’t use the host code because you will qualify for your own stamping rewards.
My August Host Code is AHQUWNVQ and it is valid until midnight August 31.
In the meantime, wherever you are in the world, stay safe, stay calm … and keep on crafting xxx
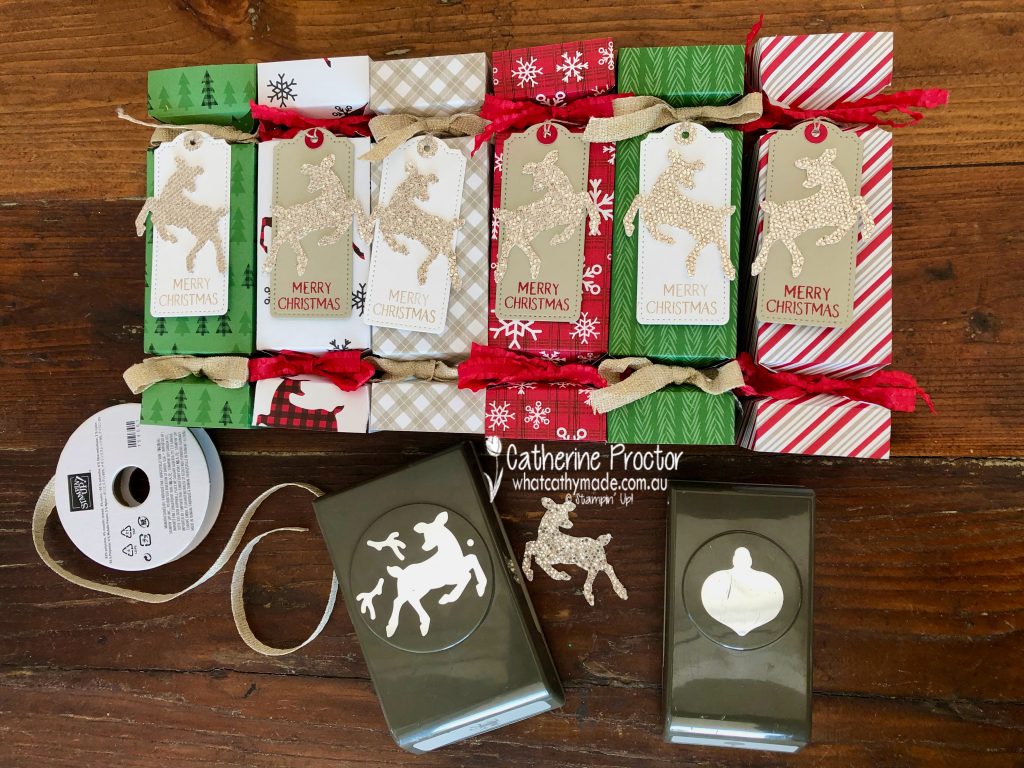
Do you use your Stampin’ Up! catalogues for inspiration? I find them such a wonderful source of ideas and this week I’ve taken my inspiration from the 2019 Stampin’ Up! Holiday catalogue.
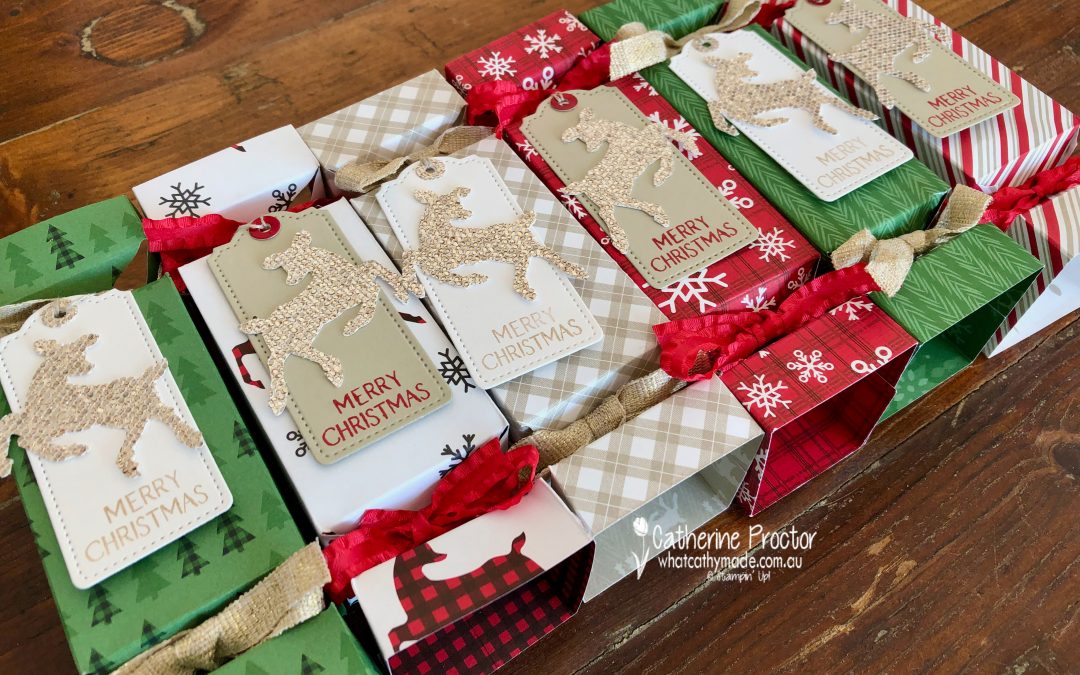
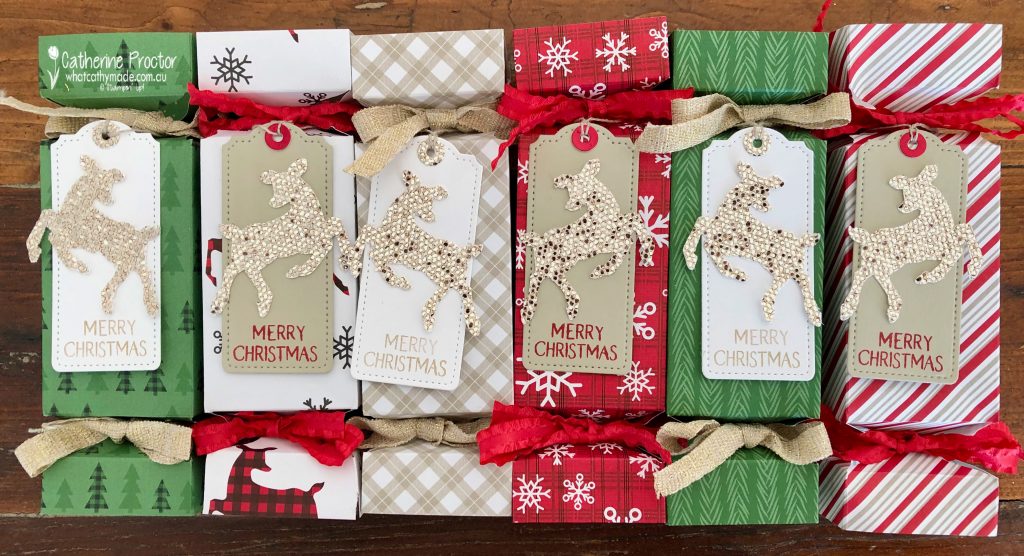
The 2019 Stampin’ Up! Holiday catalogue had very clever instructions on how to use your paper trimmer and the small Gleaming Ornaments Punch to make quick and easy Christmas crackers. As these ornament punches are currently available to purchase in the clearance rack (on sale for $35.40) I thought I would adapt this design and make a set of Christmas Crackers using the FREE SALE-a-bration Peaceful Prints DSP.
I’ve used 6 of the patterns from the Peaceful Prints DSP to make 6 crackers – I will make another 6 crackers using the reverse sides of this DSP before Christmas.
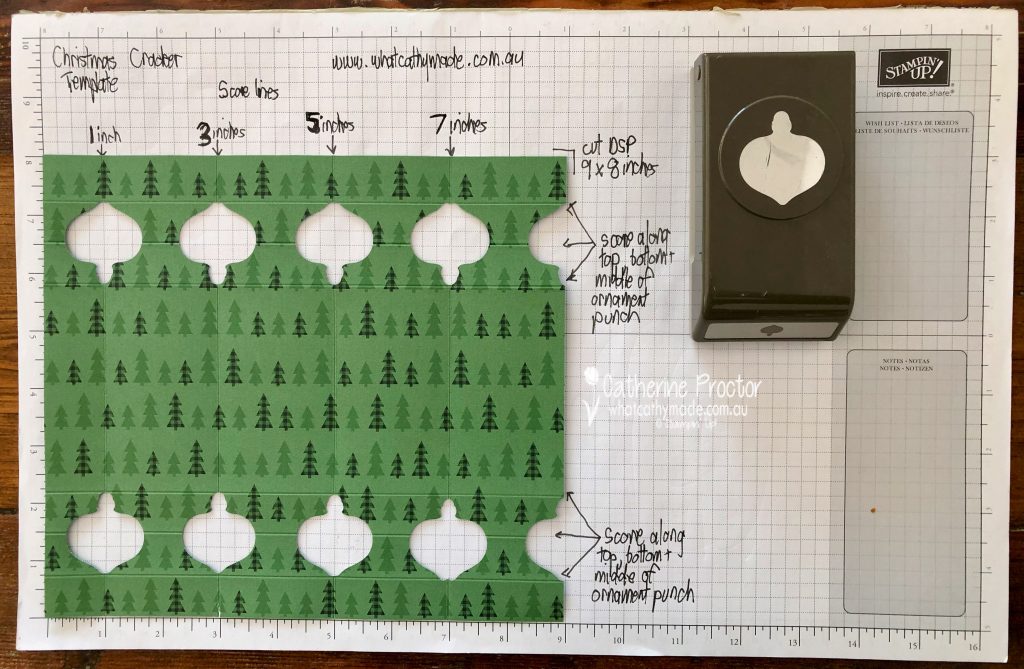
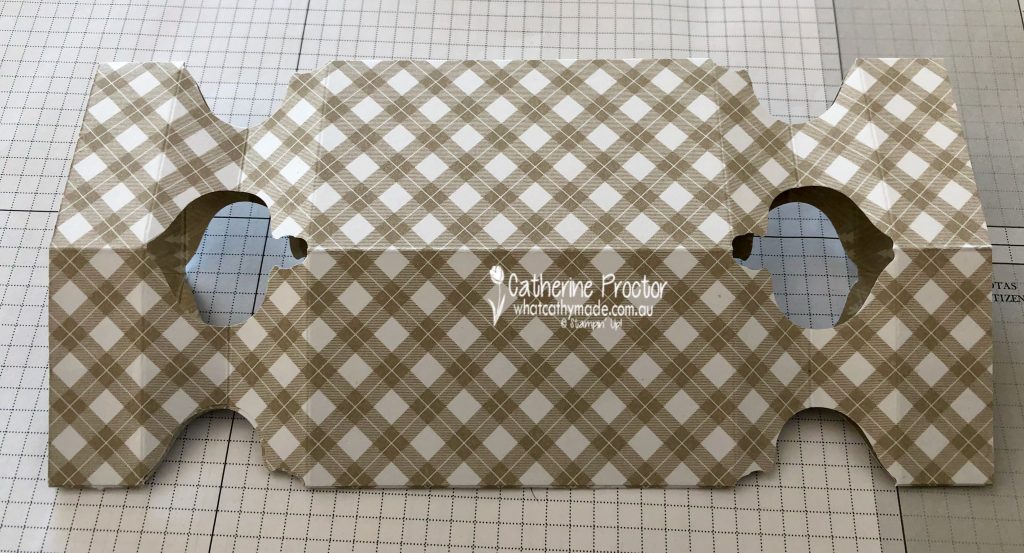
Here’s my template to make the crackers using the small ornament punch.
Trim a sheet of DSP to 9 x 8 inches
Score along the 8 inch side at 1 inch (this creates the flap for adhering the sides of the cracker together) and score again at 3, 5 and 7 inches
Fold along all these score lines
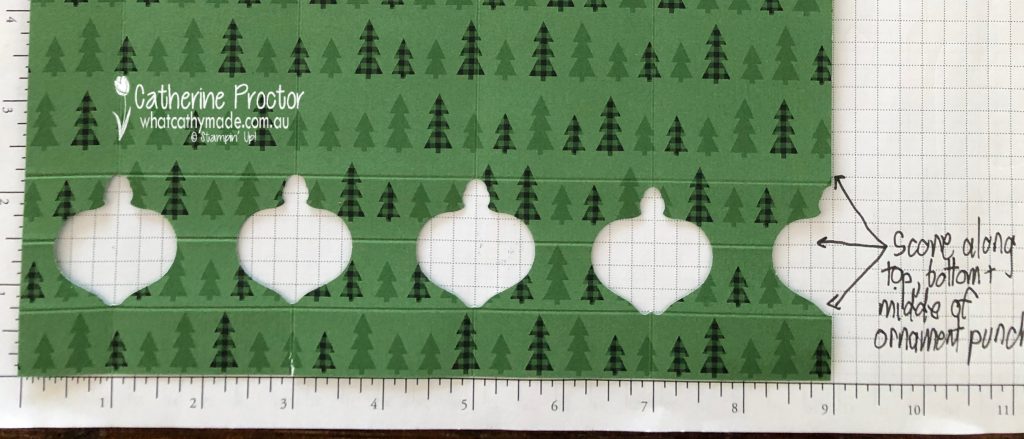
Fully insert small ornament punch to the edge of the DSP, ensuring the score line is in the centre of the ornament
Punch every score line at both ends of the DSP
Also punch at the 9 inch edge, lining up the centre of the punch with the edge of the DSP
Now score in the opposite direction, along the width of the cracker at the top, bottom and the centre of the punched out areas (see photo above) and then fold these score lines as per the photo below.
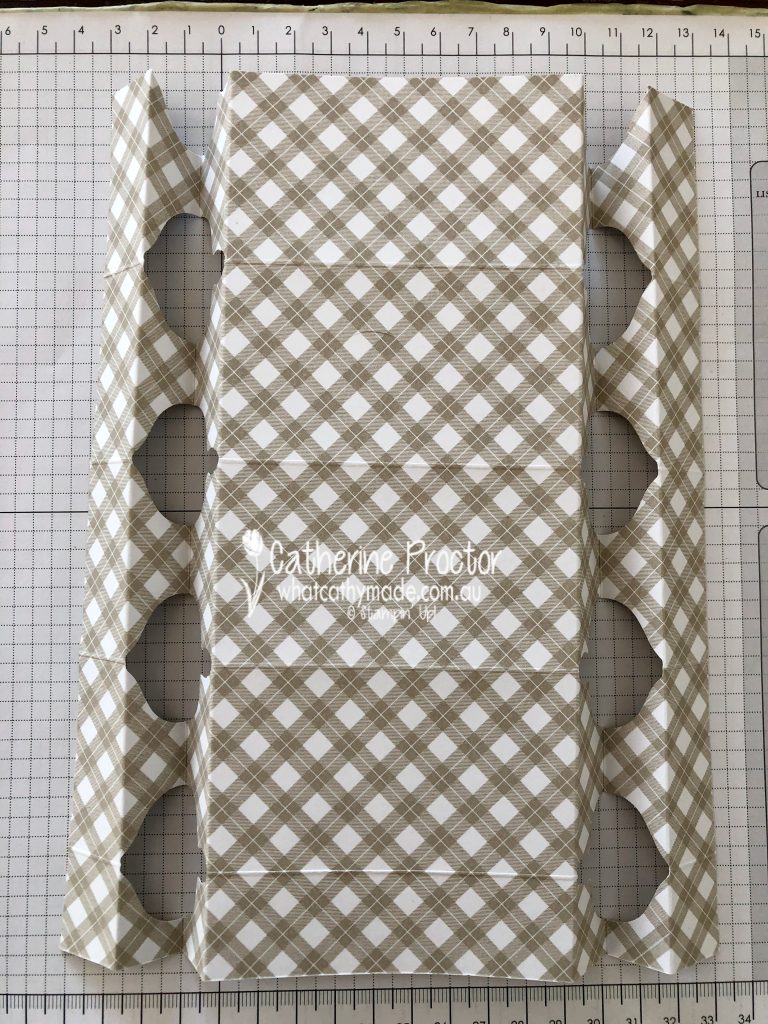
To assemble the cracker, fold up the 1 inch fold flap so that the DSP side that will be on the outside of the cracker is facing up.
Place Multipurpose Liquid Glue on this flap and fold over the cracker at the 5 inch fold, lining up the punched out areas. Press together to adhere.
Cut ribbon of choice into 14 inch (36 cm) lengths and tie into a bow at each end.
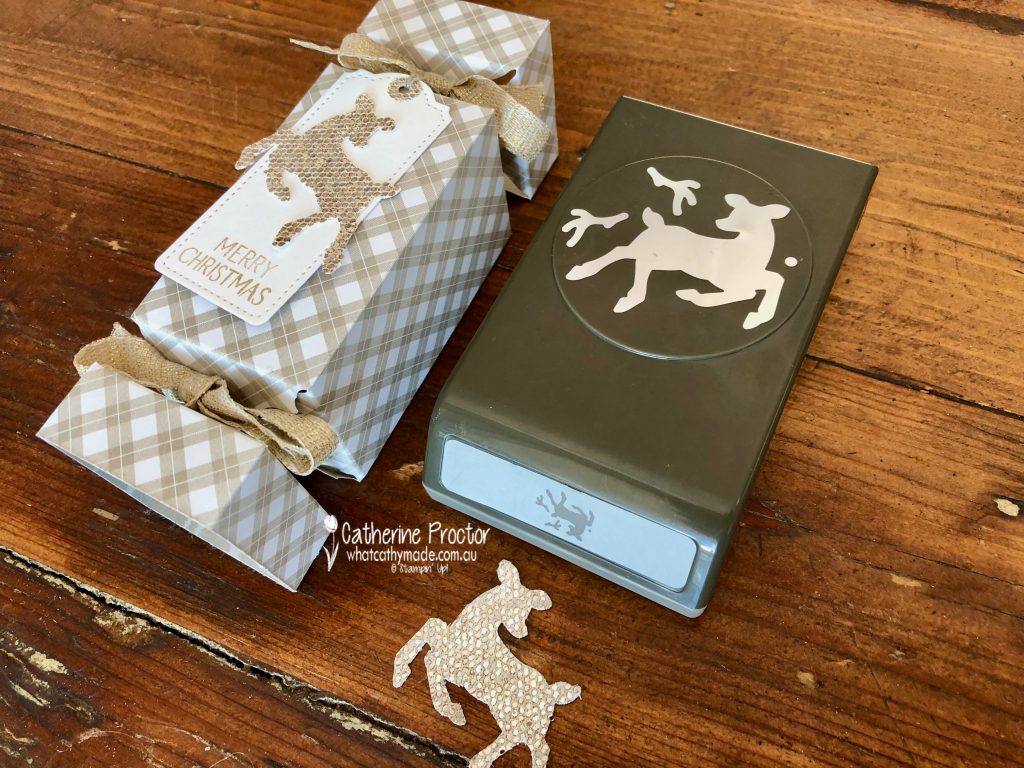
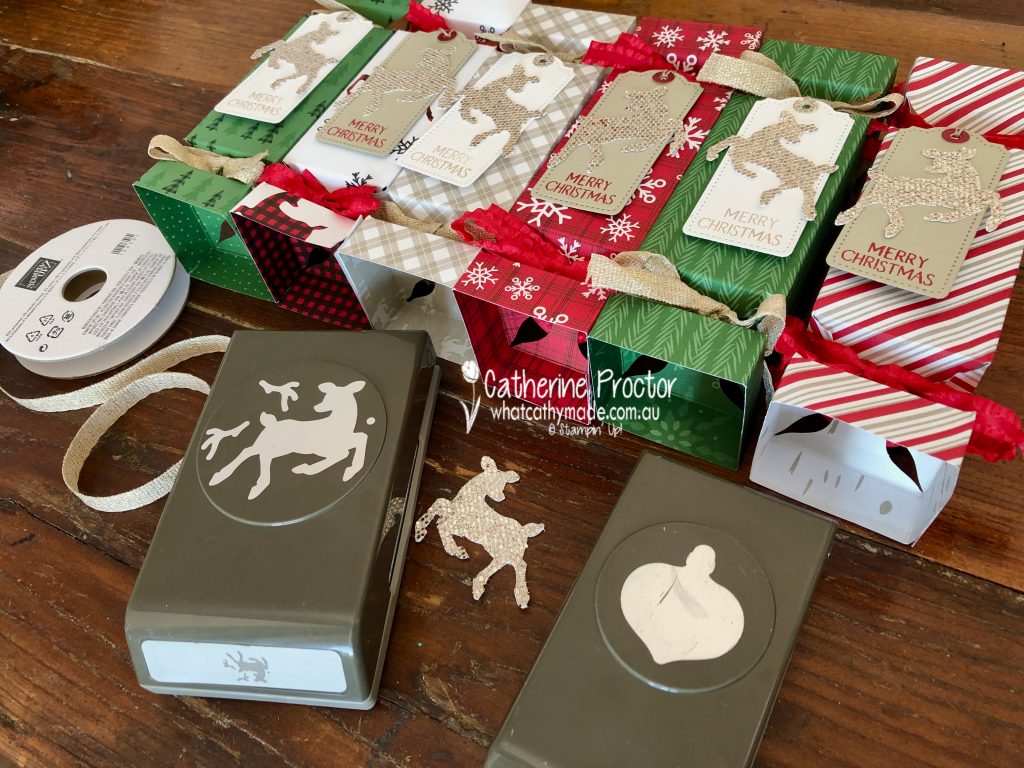
You can decorate the crackers any way you want. I used the Peaceful Deer bundle, the FREE SALE-a-bration Be Dazzling DSP and the Tailored Made Tags Dies to create coordinating deer tags for my crackers. I used some Sahara Sand twine to attach them to one end of the cracker, but you could also simply adhere them to the top of the cracker.
These crackers are empty right now because I am going to fill them with yummy treats closer to Christmas, such a Ferrero Rocher chocolate, Lindt Balls and little jokes. To fill them at a later time, simply untie the bow at one end, pop the treats inside and retie the bow.
You can make these Christmas crackers out of any DSP to match your Christmas table decoration.
Now it’s time to hop on over to our next participant, the incredible talented Michele Taylor. I wait to see what Michele shares with us today!
If at any time you find a broken link please head to the blog of this week’s Host of the Heart of Christmas Blog Hop, Sharon Davern, as she has the full list of links for everyone who is participating.
You can purchase any of the products I’ve used tonight here.
Thanks for visiting my site. I’ll be back with another card on Wednesday.
In the meantime, wherever you are in the world, stay safe, stay calm … and keep on crafting xxx
With our Art with Heart Team Christmas blog hop providing Christmas card inspiration for you every Monday night I should have all my Christmas cards made by December – I just need to remember to send them in time!
My pre-order of Christmas products from the July-December mini catalogue and the Sale-a-bration catalogue arrived this week. That’s right, Stampin’ Up! is holding TWO Sale-a-bration periods this year – this second Sale-a-bration period starts on August 3, the same day as the July-December mini catalogue.
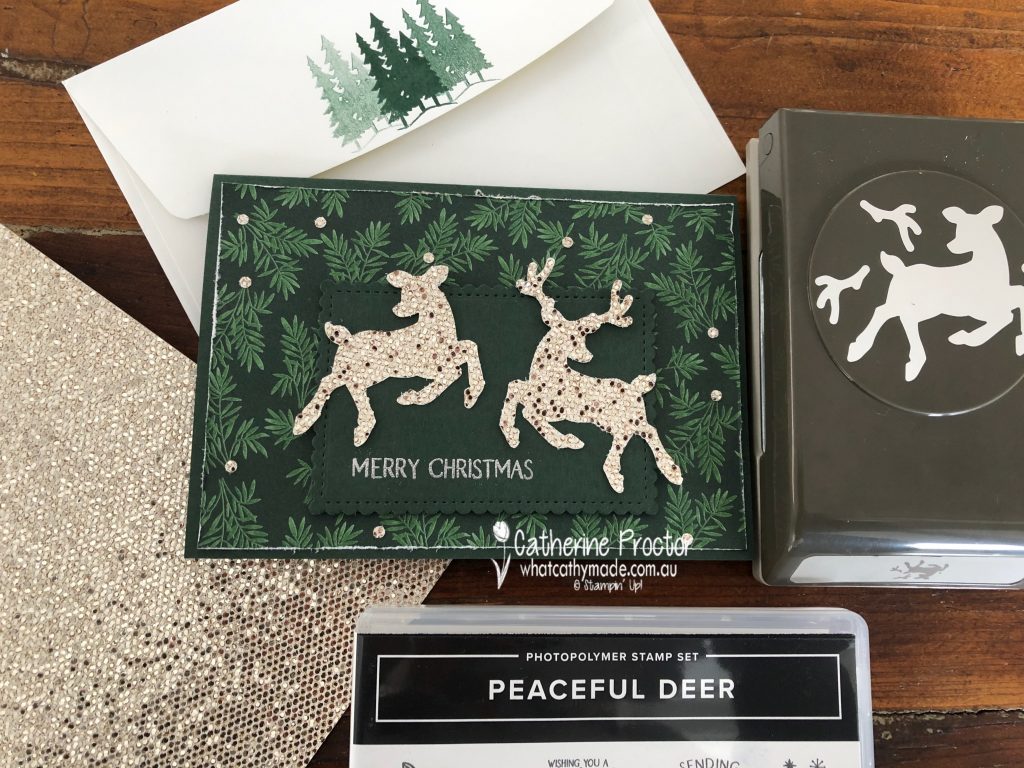
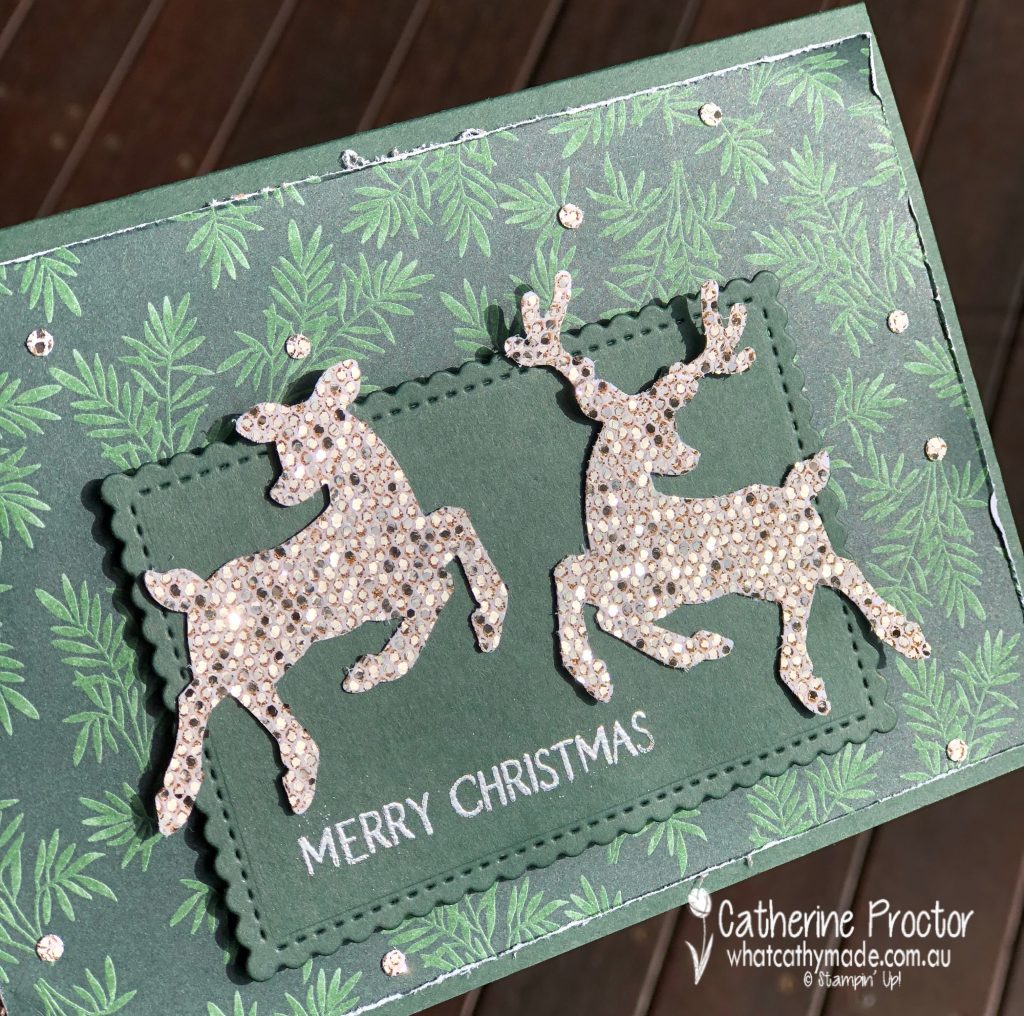
I’m so excited to share a card I made using one of these FREE Sale-a-bration products, the Be Dazzling 6″ X 6″ Specialty Paper.
Isn’t this Be Dazzling 6″ X 6″ Specialty Paper so stunning! It will definitely make any card feel extra special. The colour is hard to describe – it’s sort of a pale champagne colour that will coordinate with either silver or gold, as well as many of the neutrals, including Sahara Sand and Crumb Cake.
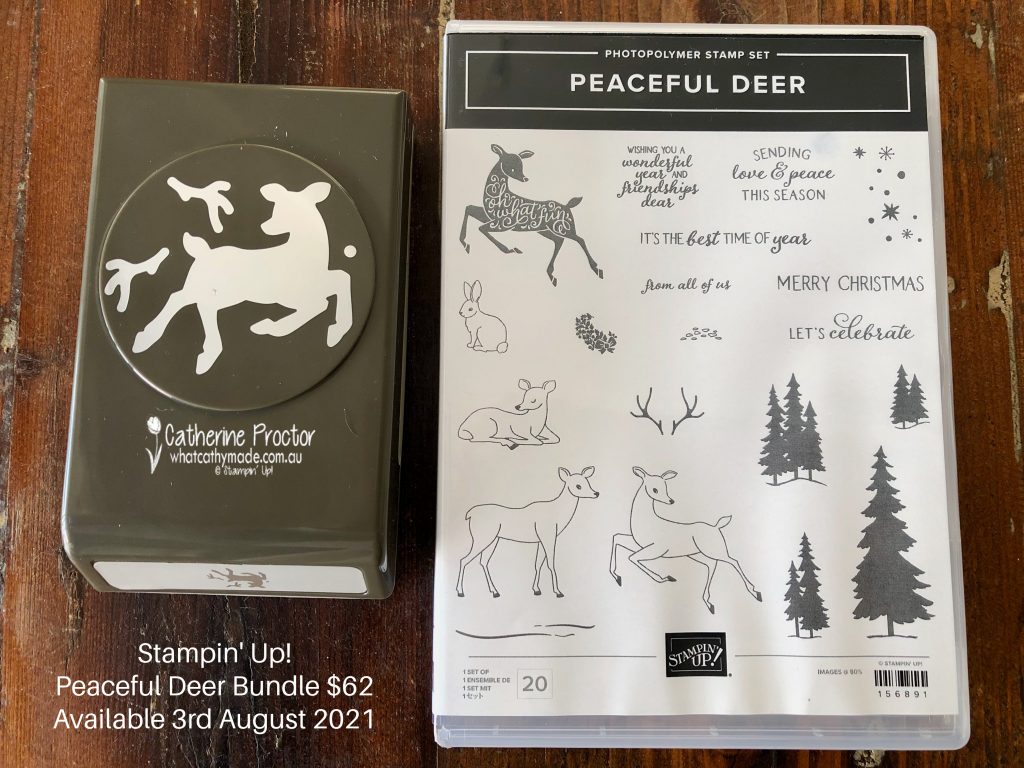
The other new products on this card are from the Peaceful Deer Bundle, which includes the Peaceful Deer Stamp Set and the Deer Builder Punch, both available from August 3.
At just $62 for the bundle, this is such an affordable and a versatile set. The Peaceful Deer Stamp Set has great sentiments and a good variety of images, including a deer that coordinates with the punch – perfect for crafters who don’t own a die cutting machine.
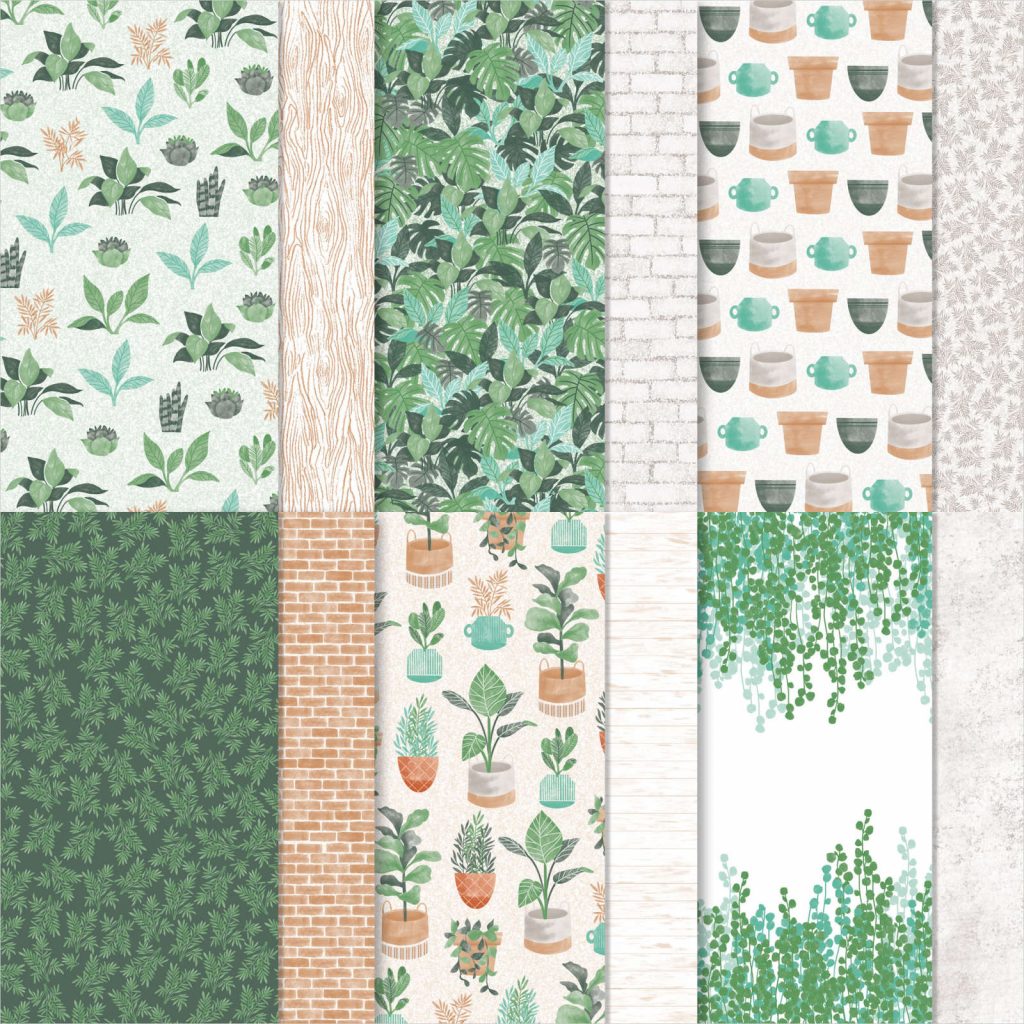
The beautiful Designer Series Paper I’ve used as my background is not a Christmas paper from the forthcoming July-December mini catalogue, however, I think it works really well on this card.
This Bloom Where You’re Planted Designer Series Paper is available now and on sale for $17.00 – I’ve used the sheet shown on the bottom left.
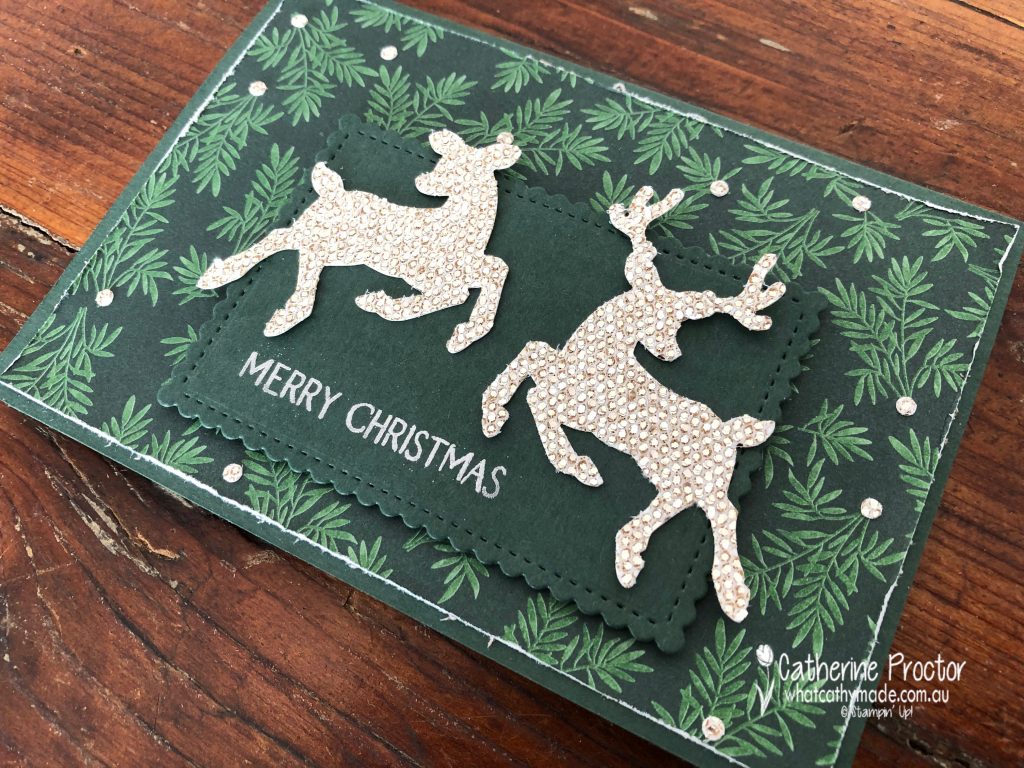
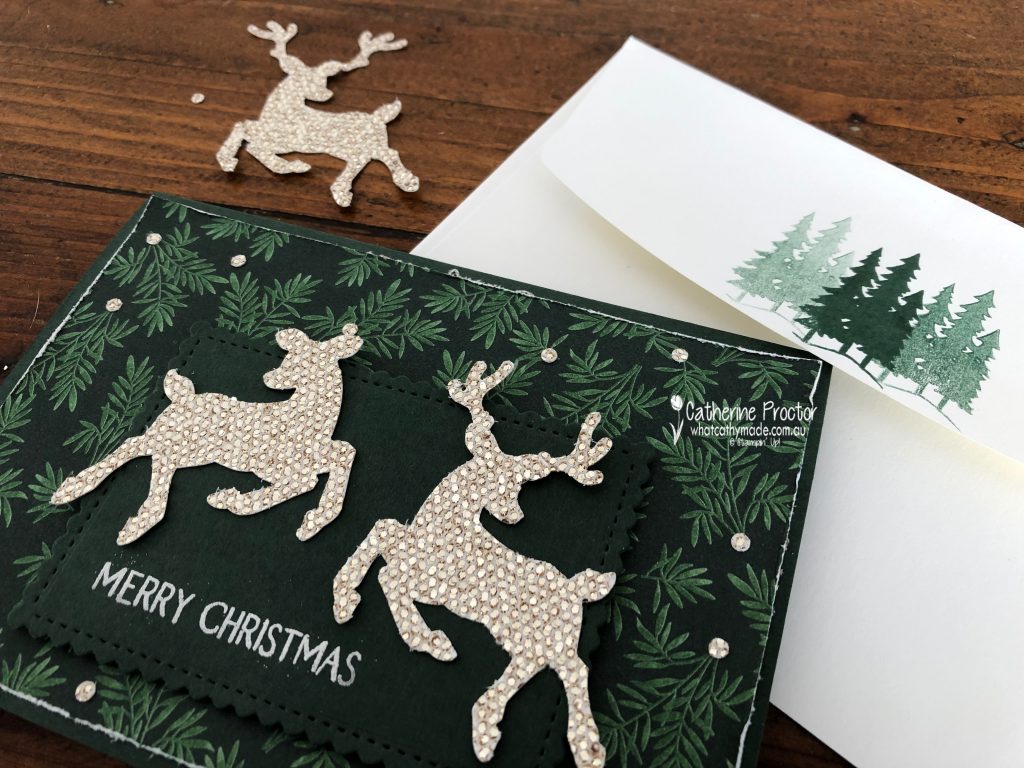
I wanted to add a few embellishments to my DSP as it is such a dark background. Looking at the scraps on paper on my craft desk I realised there is a very small circle shape in the Deer Builder Punch. I think it is meant to be the deer’s eye but I used it to punch out my own embellishments.
I love the effect of these embellishments – it’s a great way to use up the scraps! This photo – taken outside in a brief moment of sun on this rainy day – shows my embellishments close up, as well as how sparkly this paper is.
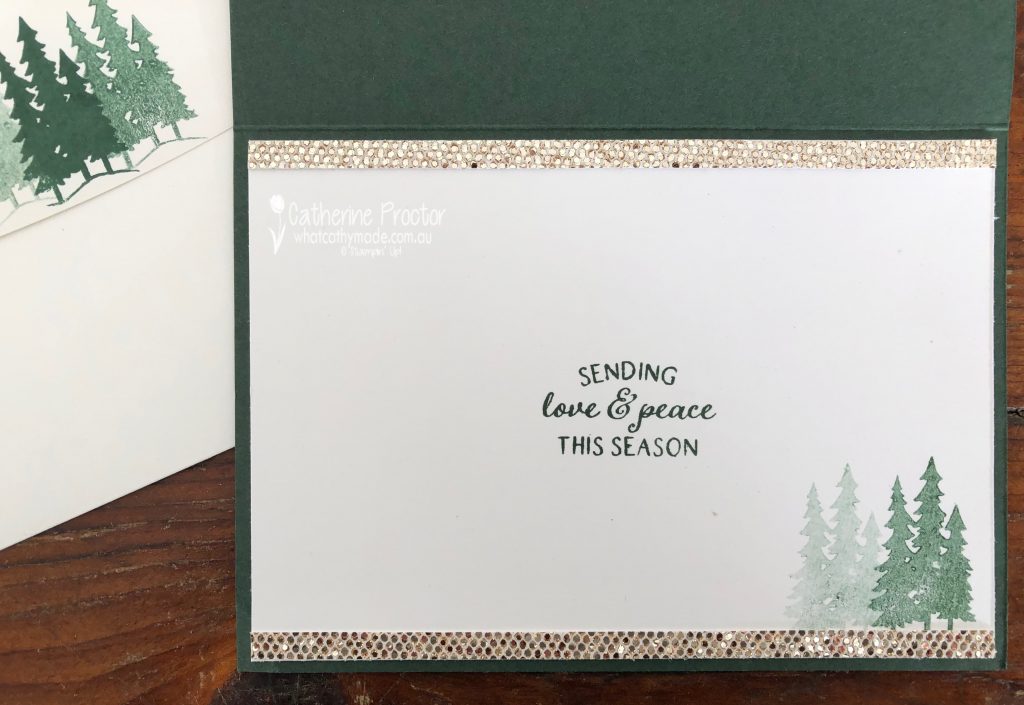
I stamped the inside of the card to match, using another sentiment and one of the tree stamps from the Peaceful Deer Stamp Set as well as adding a narrow strip of the Be Dazzling paper top and bottom.
To get the three shades of green for the trees on the back of the envelope flap, I stamped the tree stamp once at full strength in Evening Evergreen and then a second time and a third time without re-inking the stamp.
Now it’s time to hop on over to our next participant, the very talented, Sharon Davern. I wonder if she will share another fabulous fancy fold card with us?
If at any time you find a broken link please head to the blog of this week’s Host of the Heart of Christmas Blog Hop, Tina Gillespie, and she will have the list of all who are participating.
Thanks for visiting my site. I’ll be back with another card on Wednesday. If you’d like a copy of the forthcoming July-December mini catalogue and the Sale-a-bration catalogueplease get in touch.
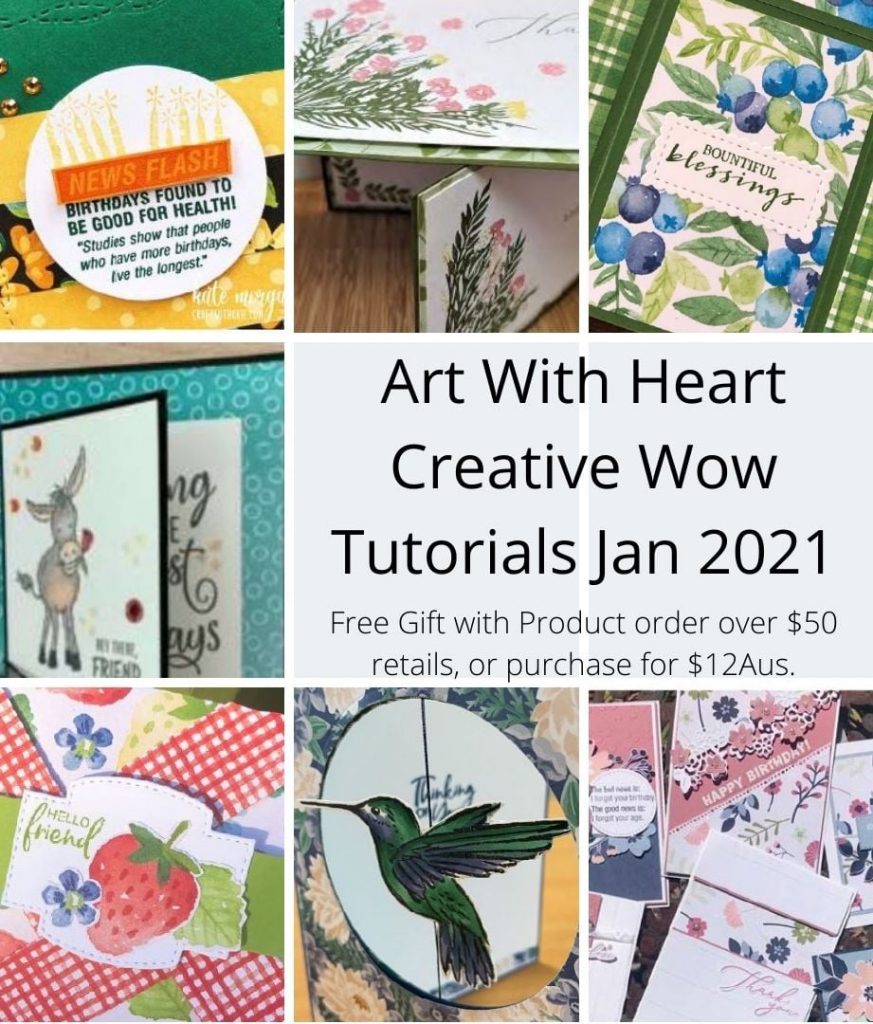
Today I’m sharing a project I made for the Creative Eight Tutorial group. This is the January bundle I am sharing with you today – I have to admit that I actually didn’t realise February had already started! We were all running a little late last month with our tutorials while getting back into the swing of things after a crazy December so please forgive my tardiness with sharing this with you.
Each month Creative Eight Tutorial group has a theme that we all create a project for. This month we are all using FREE products from the 2021 SALE a-bration! Catalogue that finishes at the end of February.
Here’s a sneak peek at all eight projects.
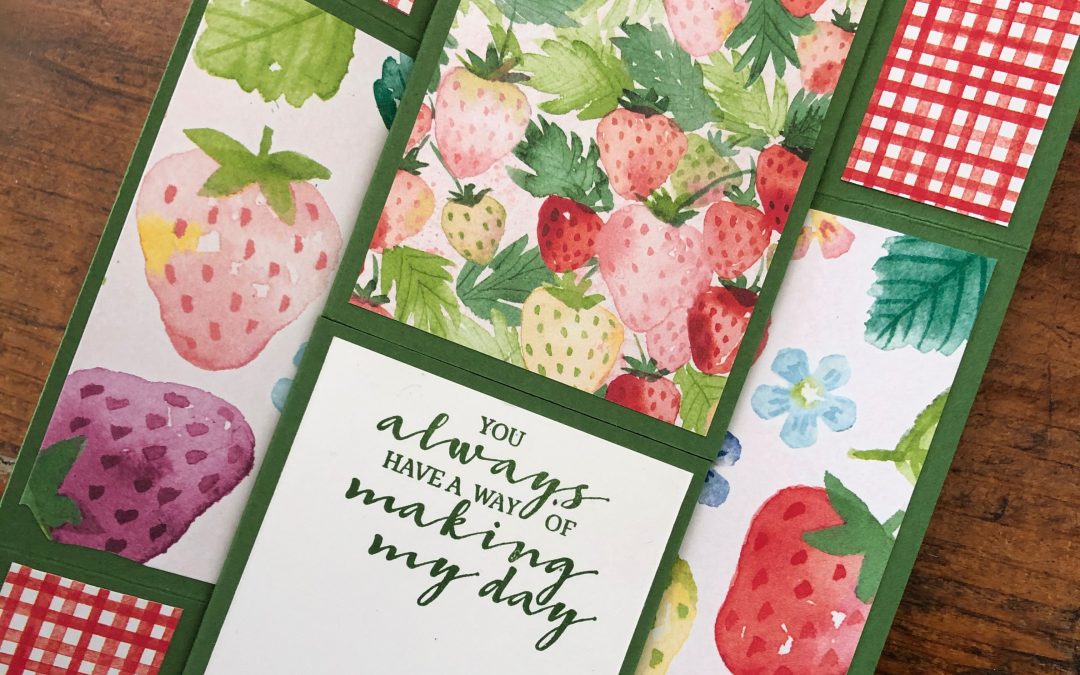
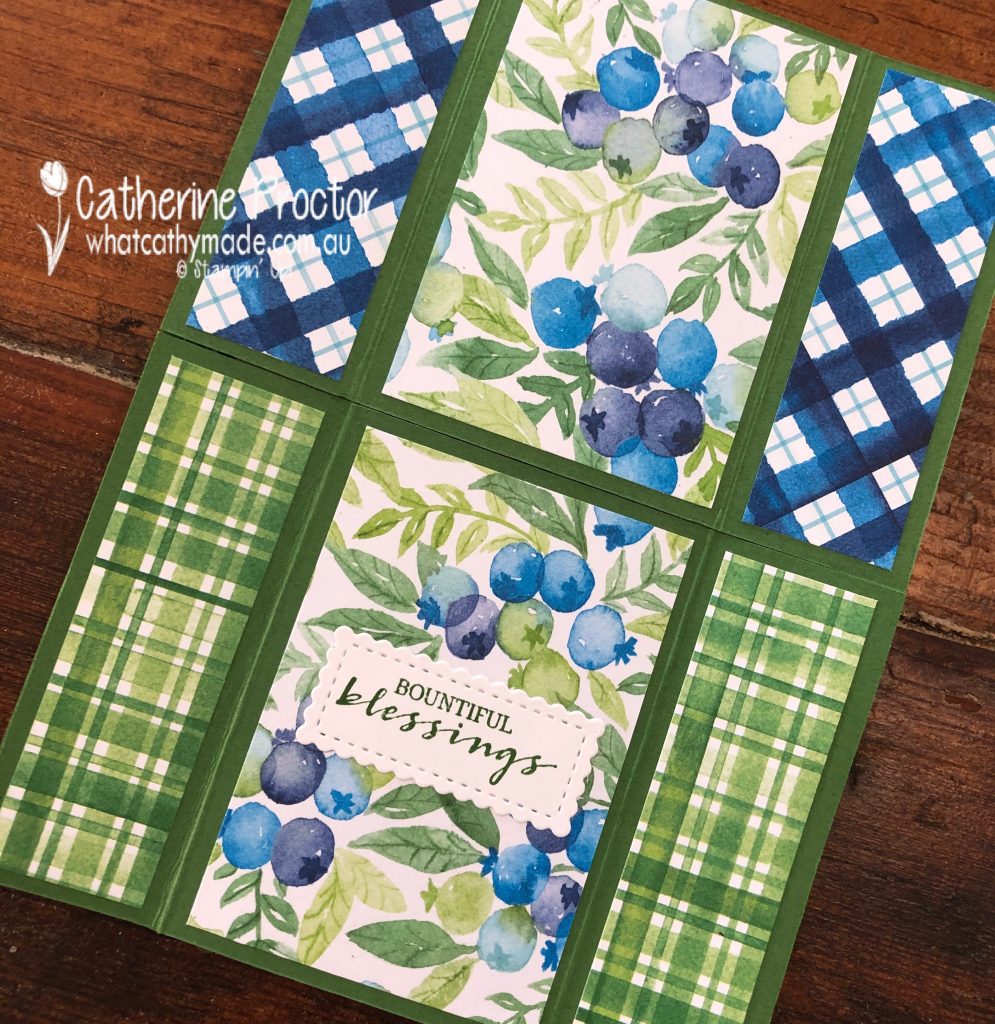
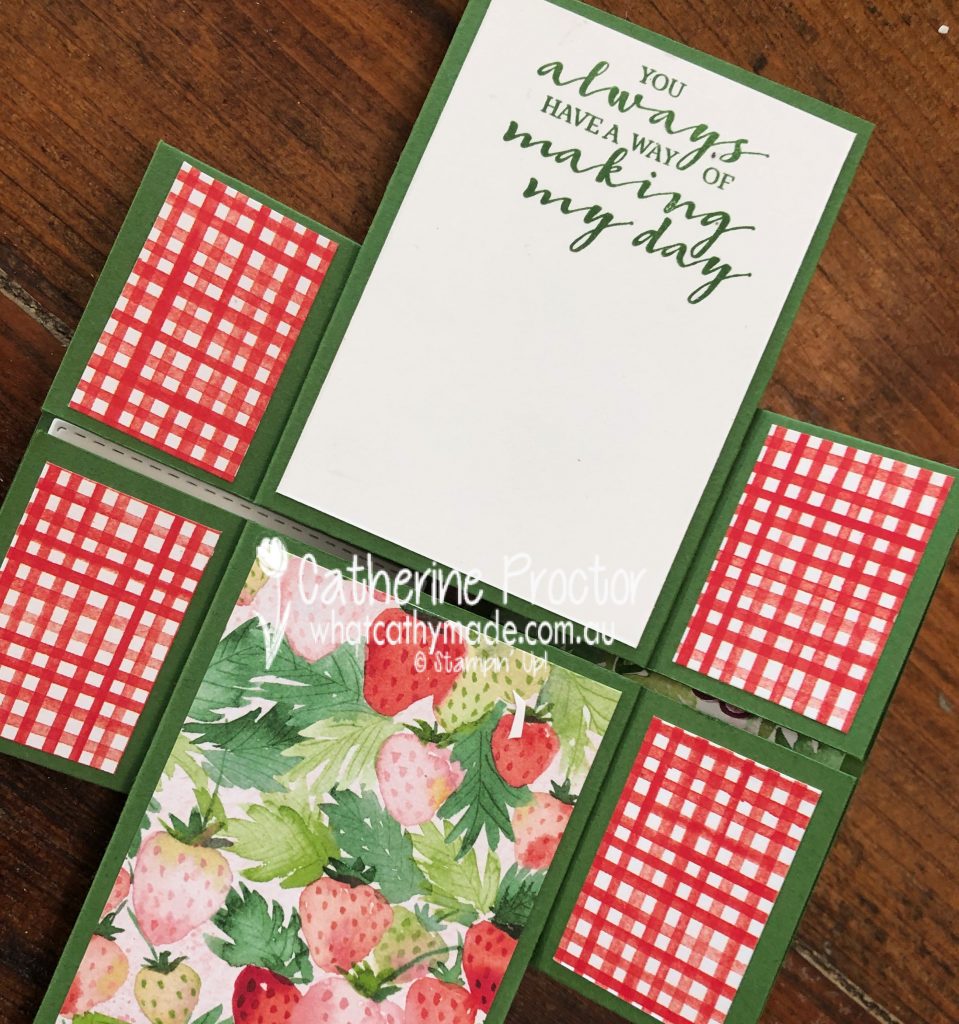
The project I created for this tutorial is a never ending infinity card.
There’s a story behind why I decided to create this never ending infinity card tutorial. If you’ve ever tired to make an infinity card before you’ll know that one of the trickiest things can be knowing which panels you can place your sentiments on so they appear the right way no matter which way your card is folded.
I actually had to remake this card four times because I couldn’t find a tutorial anywhere that told me how to do this. So, if you’re like me and you’d like to get it right the first time, not on the fourth attempt!, this tutorial is for you. That’s right, I’ve done all the hard work for you because my tutorial explains exactly how to get your sentiments right way up for ANY sized infinity card!
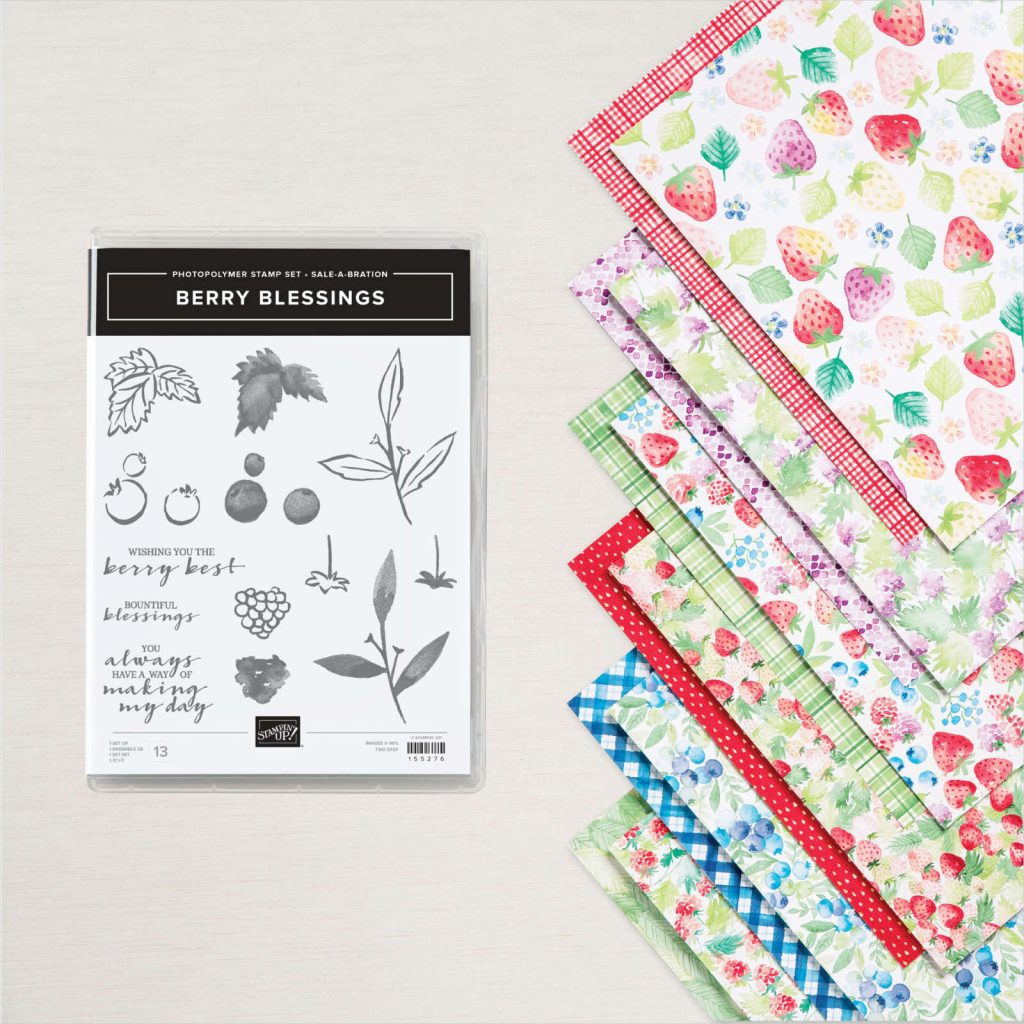
The stunning Designer Series Paper I’ve used for this card is called Berry Delightful and comes in a bundle with the Berry Blessings stamp set, which I used for the sentiments on the infinity card. You can earn this amazing bundle for FREE during SALE-a-bration if you spend over $180 in a single order.
This tutorial and the seven other amazing projects in the Creative Eight Wow bundle is available now for for Australian customers FREE with any purchase over $50 in my online store. Or, if you live overseas (or in Australia if you prefer to purchase the bundle ) it is available here to purchase for $12.
If you’d like me to post you your very own copy of the January – June 2020 mini catalogue, the 2020 Sale-a-bration catalogue, the 2020-21 Stampin Up! Annual Catalogue, the 2020-21 Beginners Brochure, or to simply find out about more about Stampin’ Up! contact me.
When you shop online in my Stampin’ Up! Online Store don’t forget to use my monthly Host Code (if your order is between $50 – $250) and I will send you a thank you gift the following month. If your order is over $250 don’t use the host code because you will qualify for your own stamping rewards.
My February 2021 Host code is ZYAR6HTF and it is valid until midnight February 28.
Would you like to get a 20% discount on everything you order? Click here to join my team:
Thanks for visiting my blog today. I’ll be back this Wednesday with the AWH Colour Creations Showcase – we are creating projects with Petal Pink this week..
In the meantime, wherever you are in the world, stay safe, stay calm…and keep on crafting xxx
Welcome back to our Colour Creations Showcase in 2021 as we continue our showcase of over 50 beautiful Stampin’ Up! colours in alpha order.
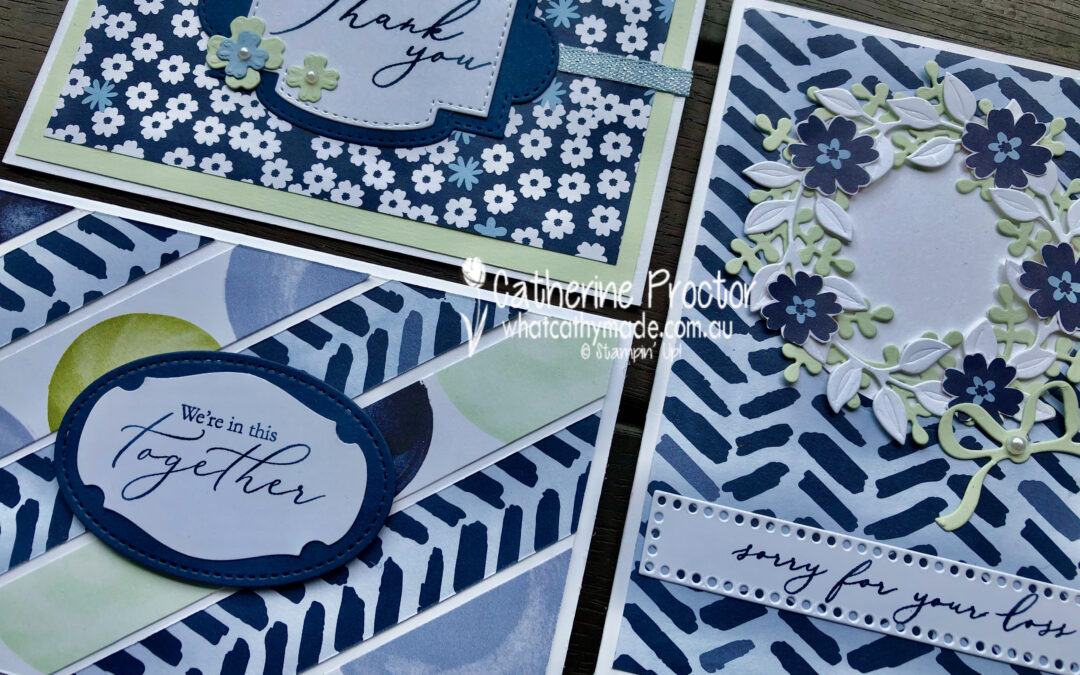
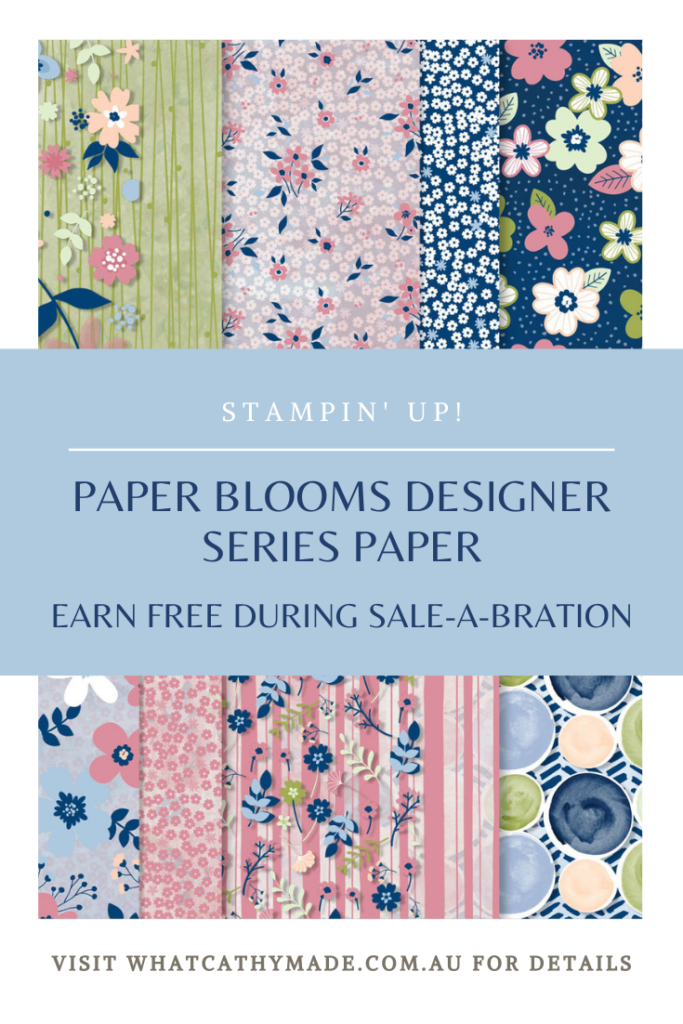
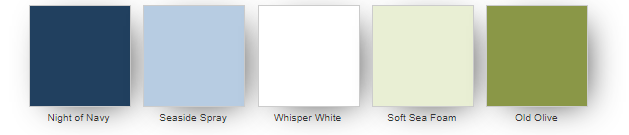
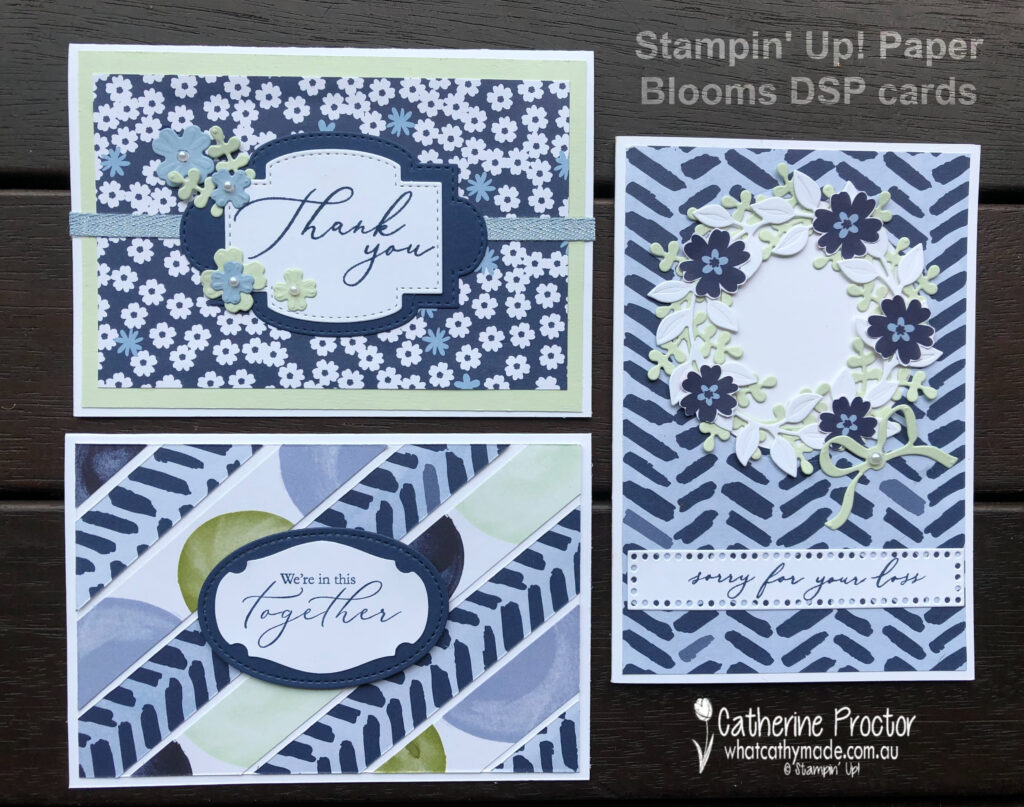
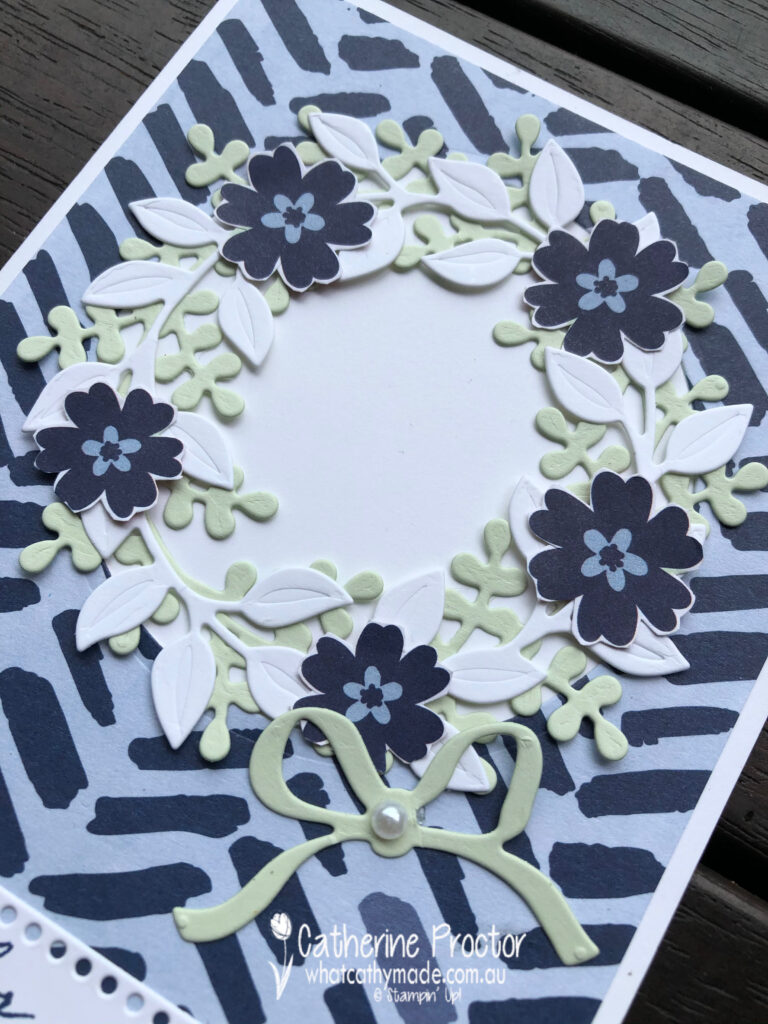
Night of Navy is one of my all time favourite colours and because it is a neutral it works so well with so many different colours. This week my colour combination was inspired by the stunning Paper Blooms DSP, one of the free SALE-a-bration items you can earn with any purchase over $90.
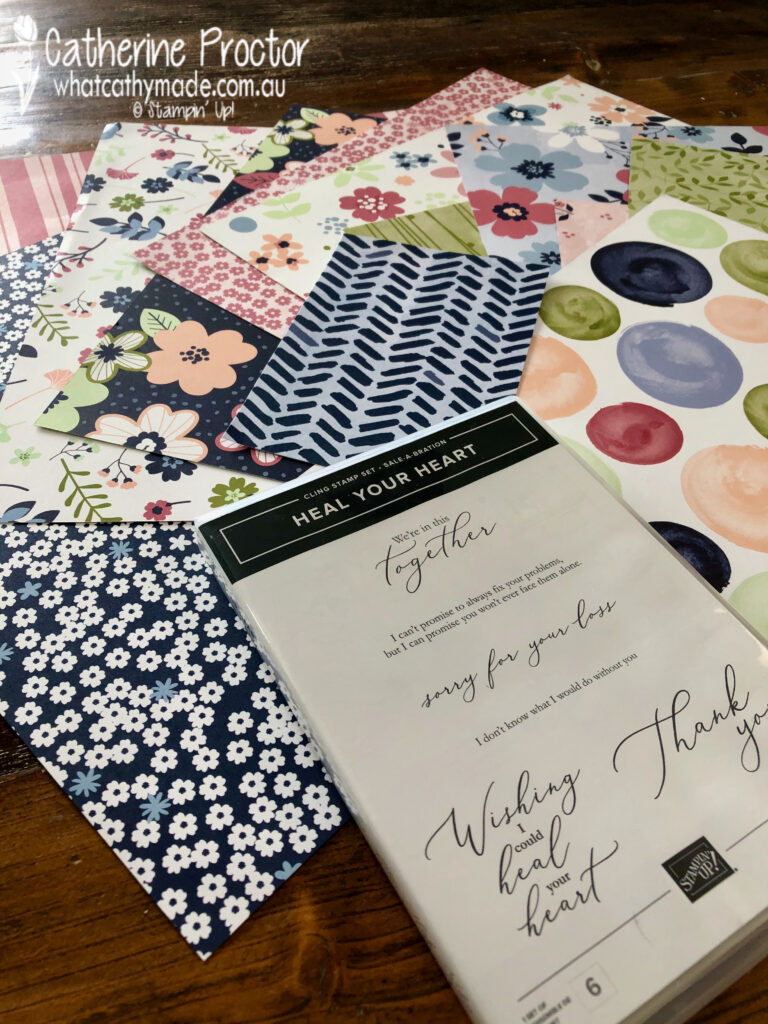
I made three cards today using the designer series papers in this pack that consist of mainly Night of Navy, Seaside Spray, Soft Sea Foam, Whisper White…and just a touch of Old Olive. Isn’t this such a soothing and relaxing colour combination?
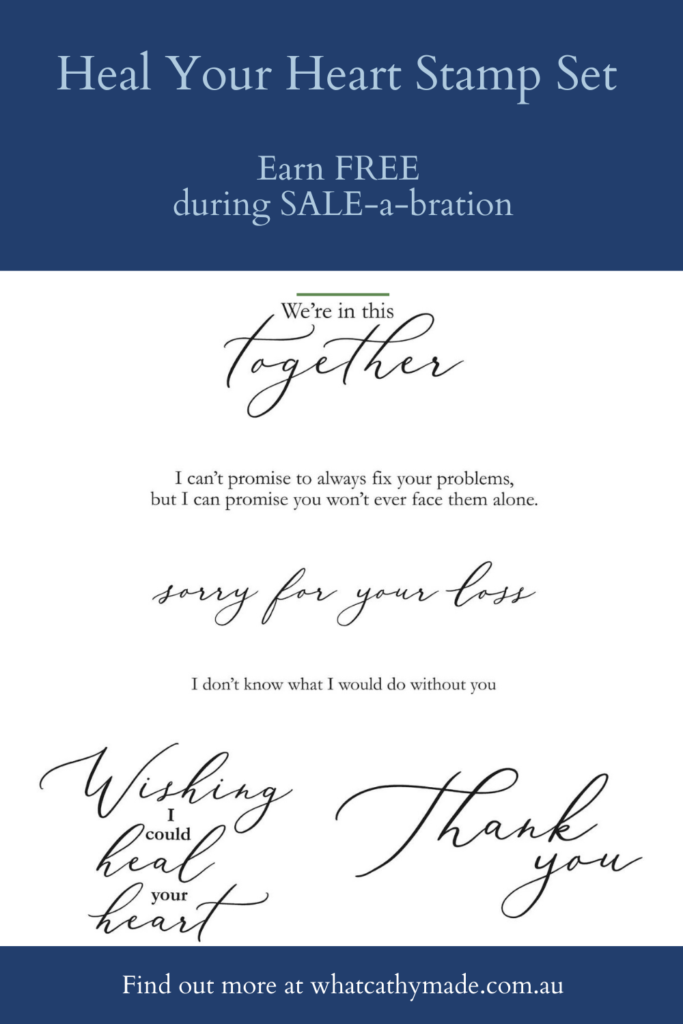
As well as the Paper Blooms DSP I’ve used another new SALE-a-bration product you can earn with any purchase of $90 or more – the “Heal Your Heart” stamp set.
What I like about this stamp set is the mix of fonts – I think it looks really visually appealing on a card.
Because there is a mix of large and small floral designs and more neutral graphic patterns I created three cards to show the different ways you can use this designer series paper to create both masculine and feminine cards.
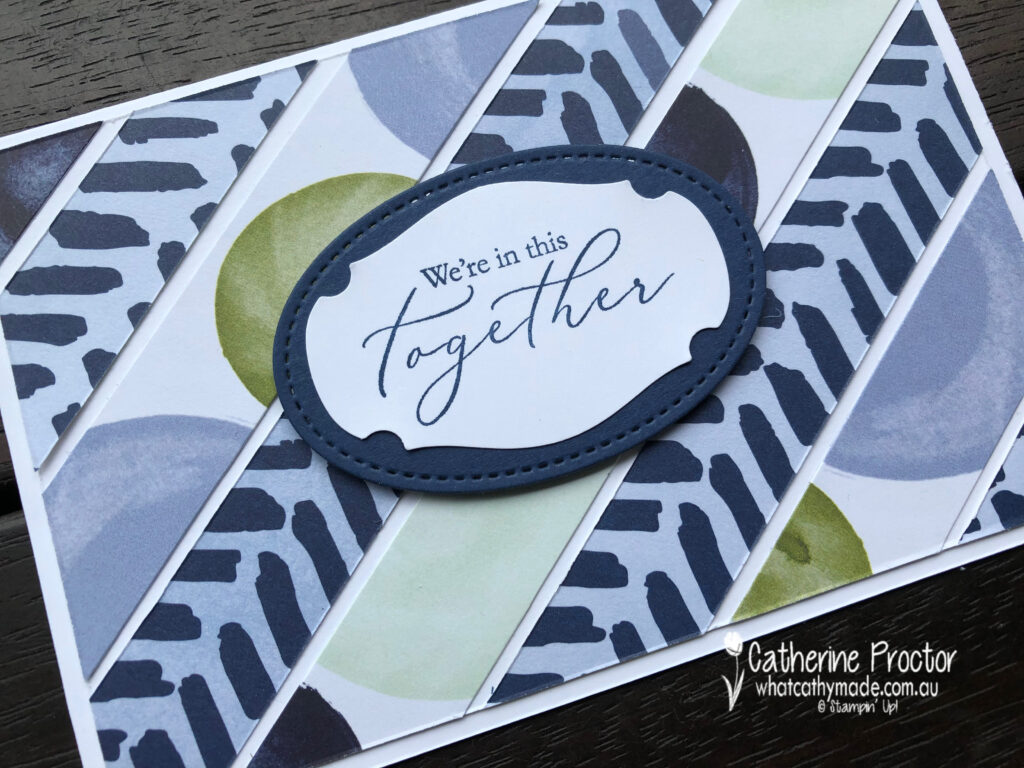
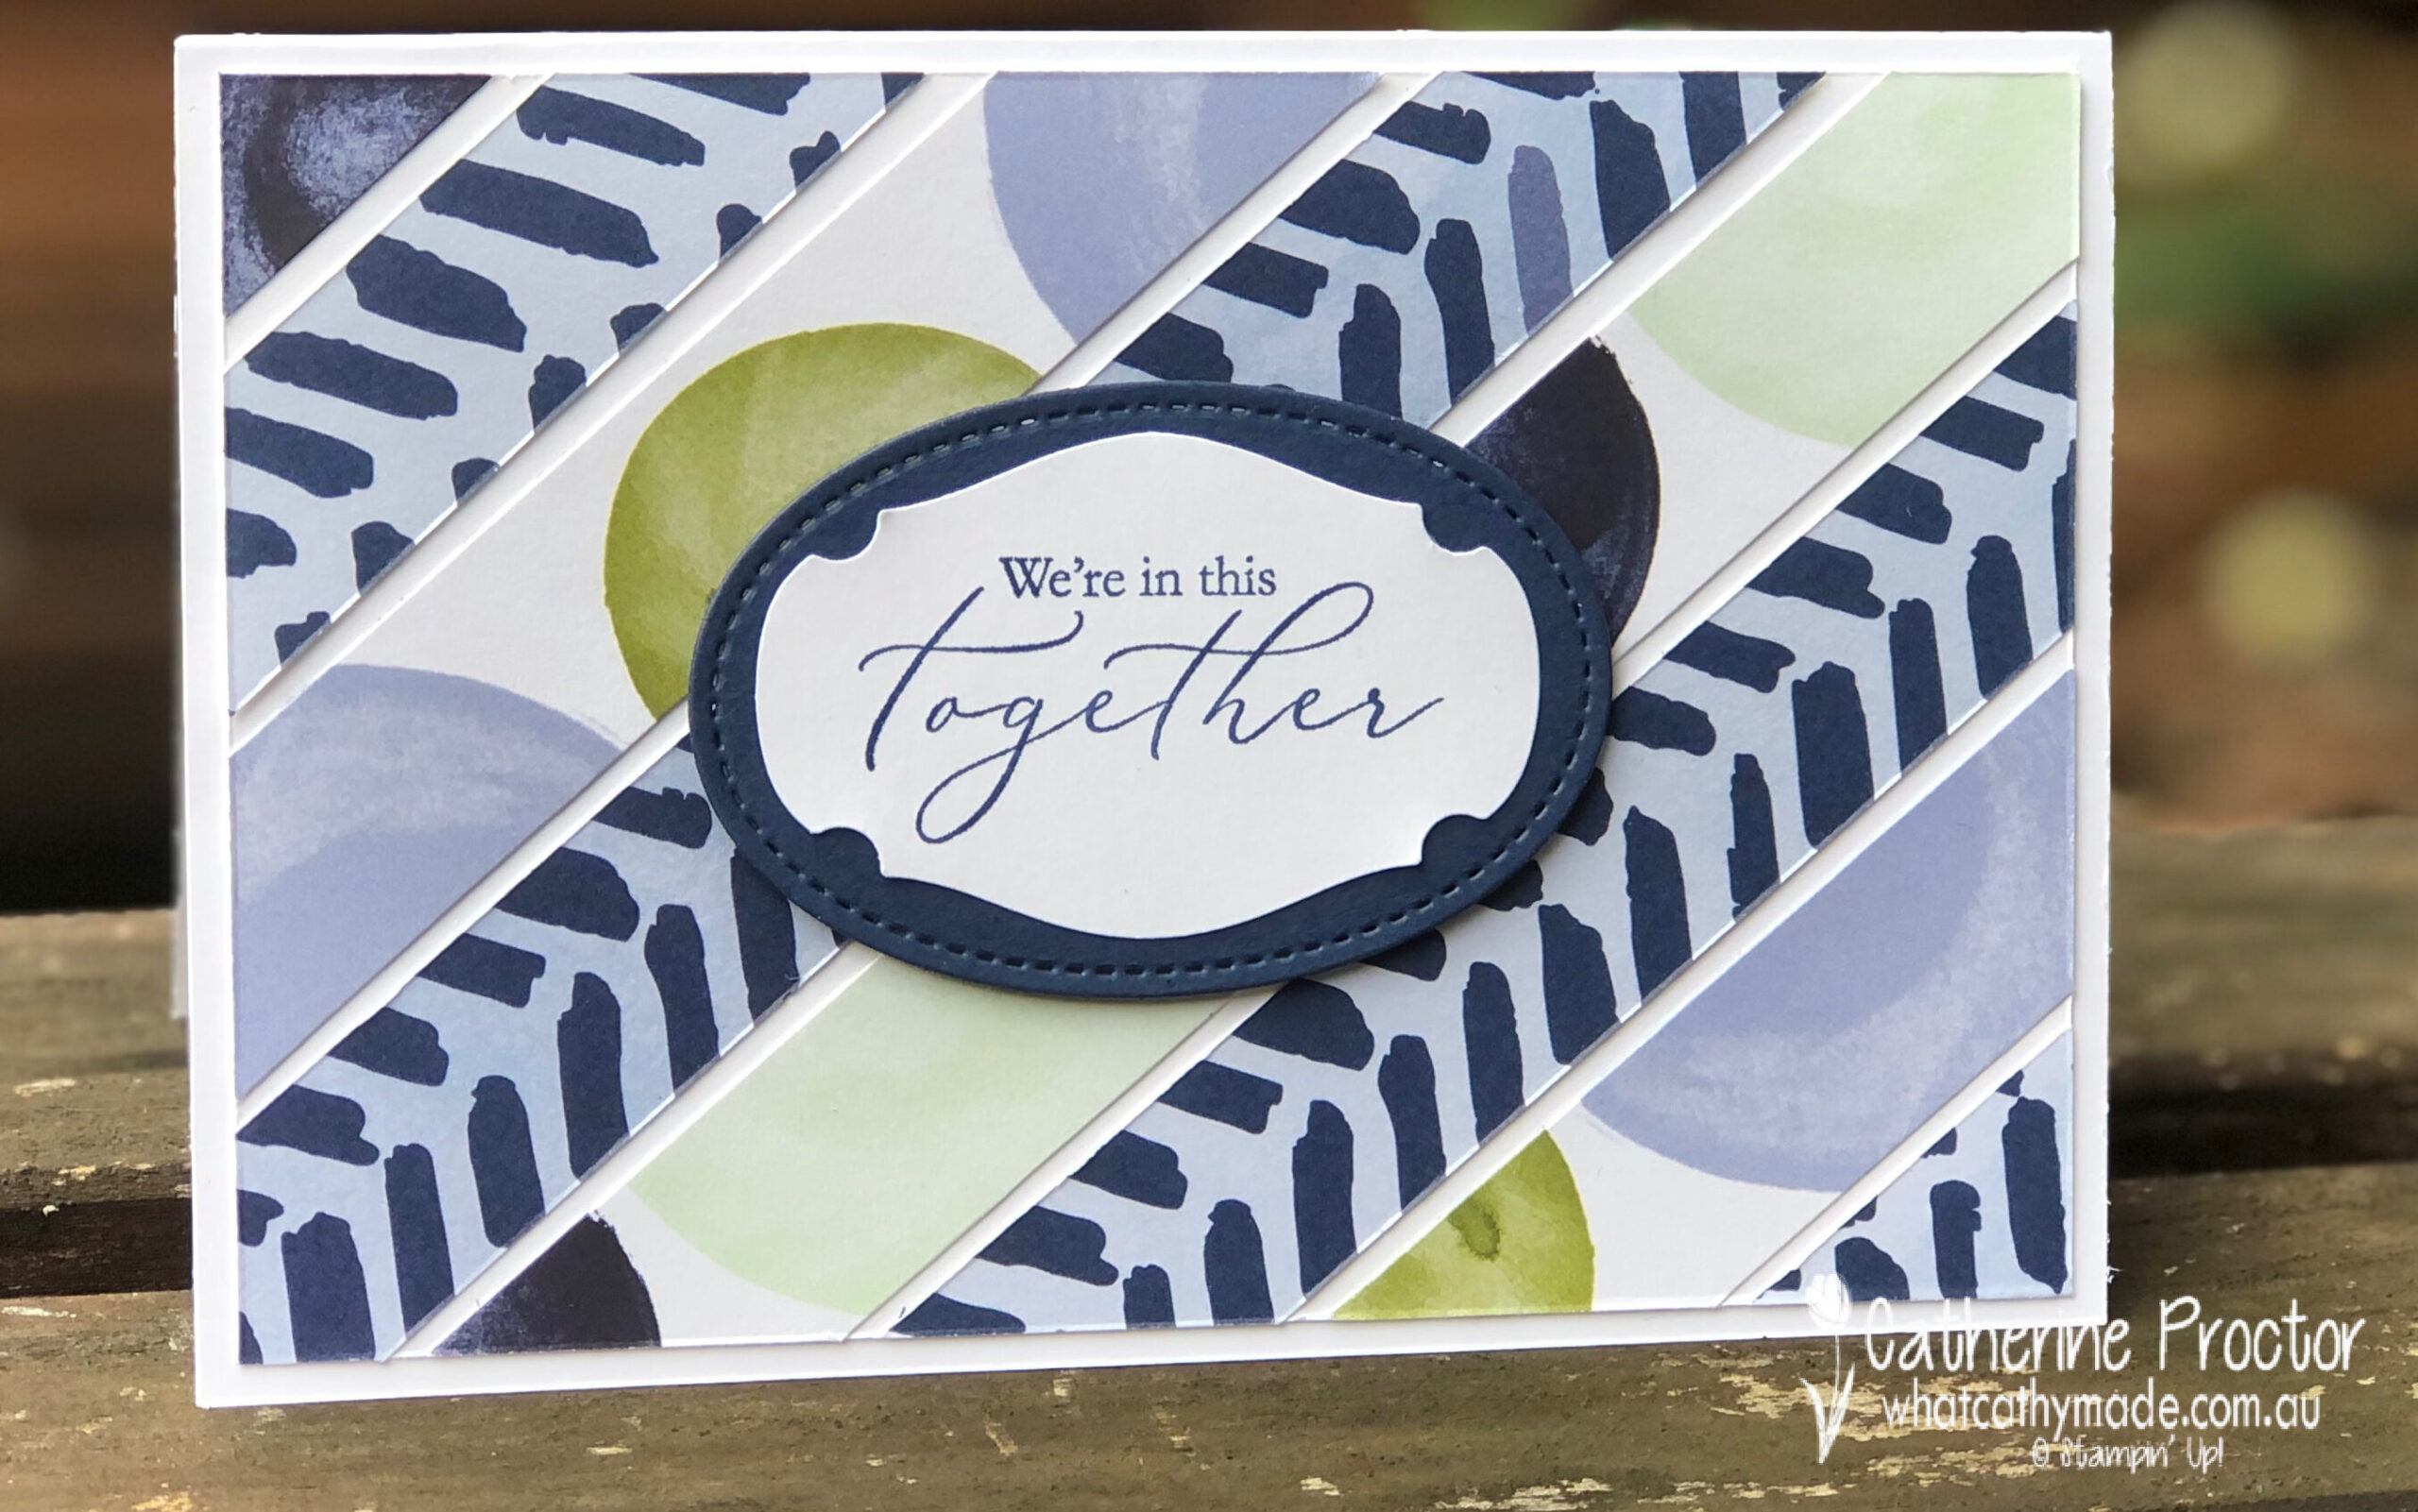
The first card was super easy to make using 2cm strips of DSP evenly spaced on an angle on a base piece of Whisper White card stock. Adding strips on an angle immediately creates visual interest.
Once I’d added all the strips I used my paper trimmer to trim the rectangle to measure 14.5 x 9.5cm and adhered it onto a 15 x 10 cm card base.
I wanted to keep this card quite neutral and masculine so I didn’t add any ribbon or flowers. The “We’re in this Together” sentiment is punched out with the story label punch and layered on top of a Night of Navy stitched oval.
My “Sorry for Your Loss” card was inspired by a series of cards created by a German Stampin’ Up! demonstrator who fussy cut the flowers out of the Paper Blooms DSP and used them with the Wreath Builder Dies.
I’ve come up with a much simpler version today that doesn’t require as many layers or as much fussy cutting.
This close up shows you the detail of the Night of Navy flowers I fussy cut for my wreath – these were actually super quick and easy to cut out using my paper snips.
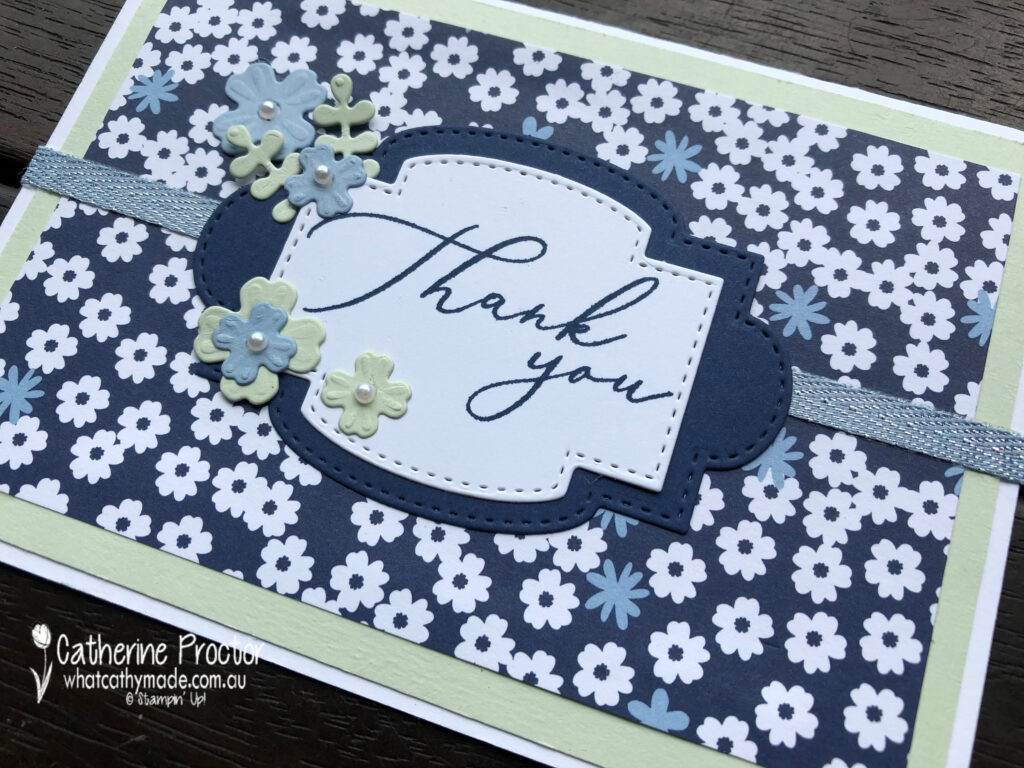
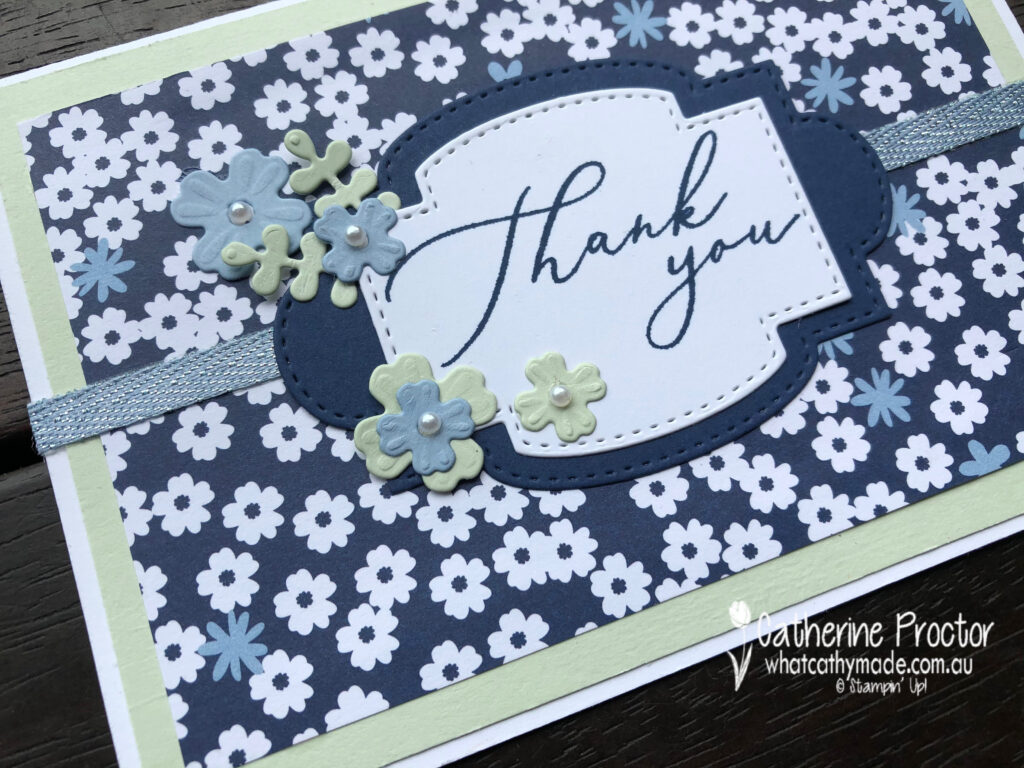
Probably my favourite stamp from the “Heal Your Heart” stamp set is the “Thank You” stamp with its large, elegant floral script. I decided make a super quick and easy thank you card with this sentiment, also adding a few left-over die cuts from my wreath card for extra dimension and interest.
The “Thank You” sentiment was die cut using the “Stitched So Sweetly” dies – I love how this sentiment and the pretty floral design of the DSP do all the work for you on this card.
I can’t wait to see what the rest of the Art With Heart team have created with Night of Navy today. Click on the links below to see what they’ve made.
If you’d like me to post you your very own copy of the January – June 2020 mini catalogue, the 2020 Sale-a-bration catalogue, the 2020-21 Stampin Up! Annual Catalogue, the 2020-21 Beginners Brochure, or to simply find out about more about Stampin’ Up! contact me.
When you shop online in my Stampin’ Up! Online Store don’t forget to use my monthly Host Code (if your order is between $50 – $250) and I will send you a thank you gift the following month. If your order is over $250 don’t use the host code because you will qualify for your own stamping rewards.
My January 2021 Host code is VWKV2Z69 and it is valid until midnight January 31.
Would you like to get a 20% discount on everything you order? Click here to join my team:
Thanks for visiting my blog today. I’ll be back soon with another craft project but in the meantime, wherever you are in the world, stay safe, stay calm…and keep on crafting!


 Designer Series Paper")
")


 Metallic Ribbon")

