I’m finally back with our Wednesday evening AWHT Colour Creations Hop and so glad you are here. In my absence we have made a change to how we are showcasing the full range of 50+ gorgeous Stampin’ Up! colours by moving from a blog hop to an Instagram hop.
I’ll continue to post my cards here as well, however if you want to follow along the blog hop you’ll need to visit my Instagram account 8pm on a Wednesday evening at @whatcathymade (https://www.instagram.com/whatcathymade/).
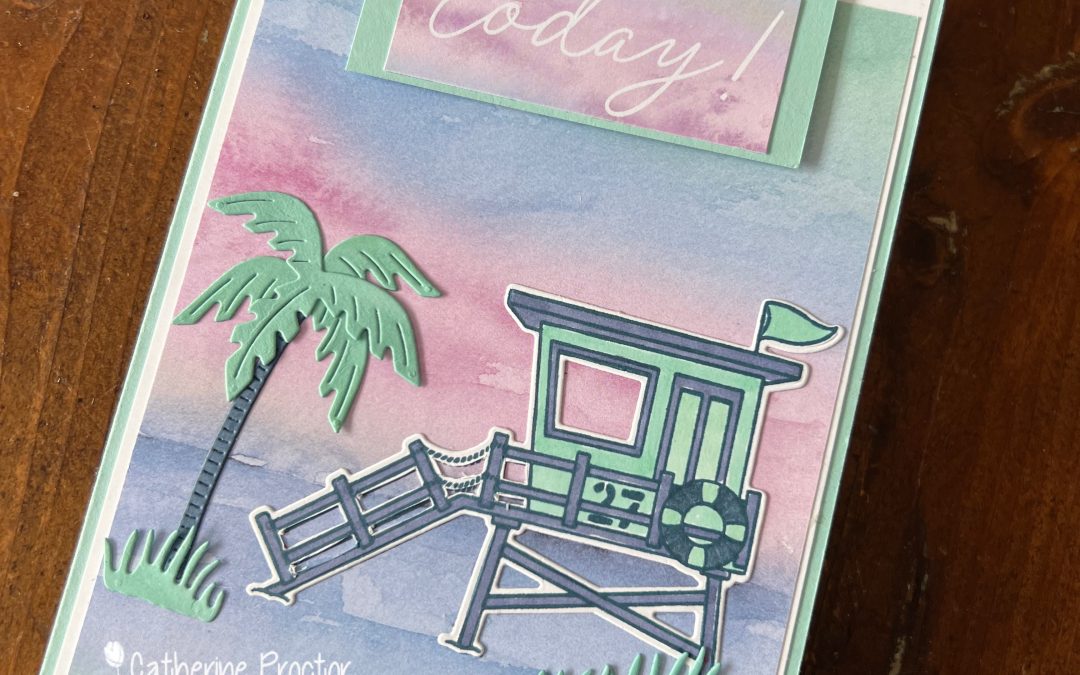
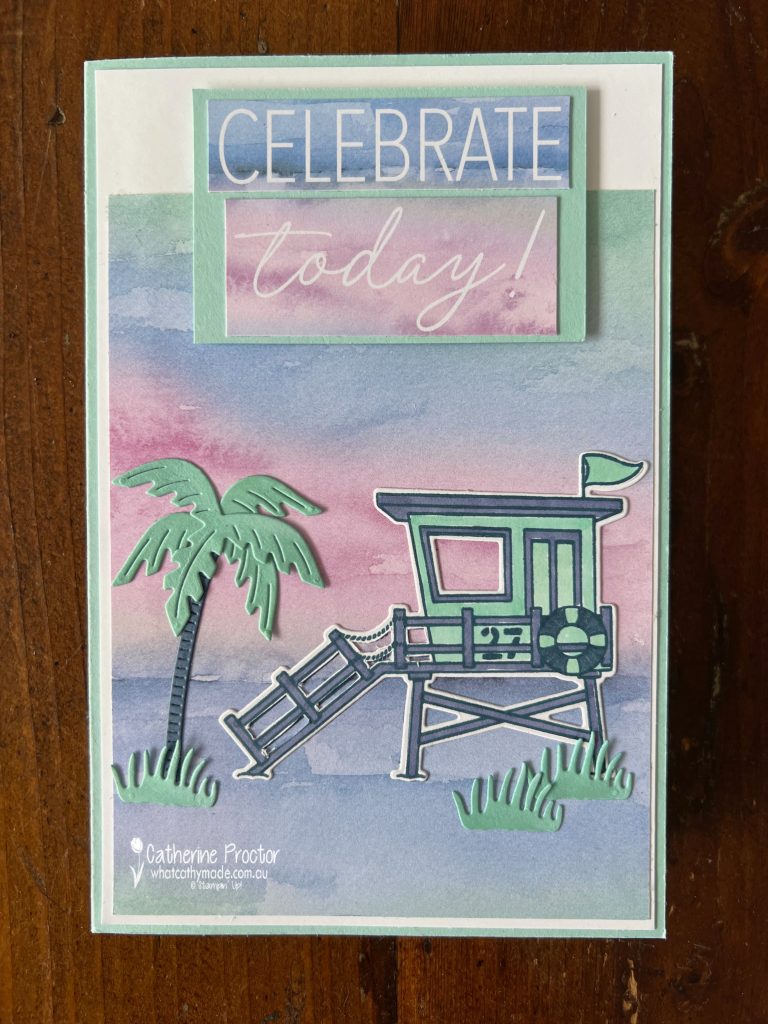
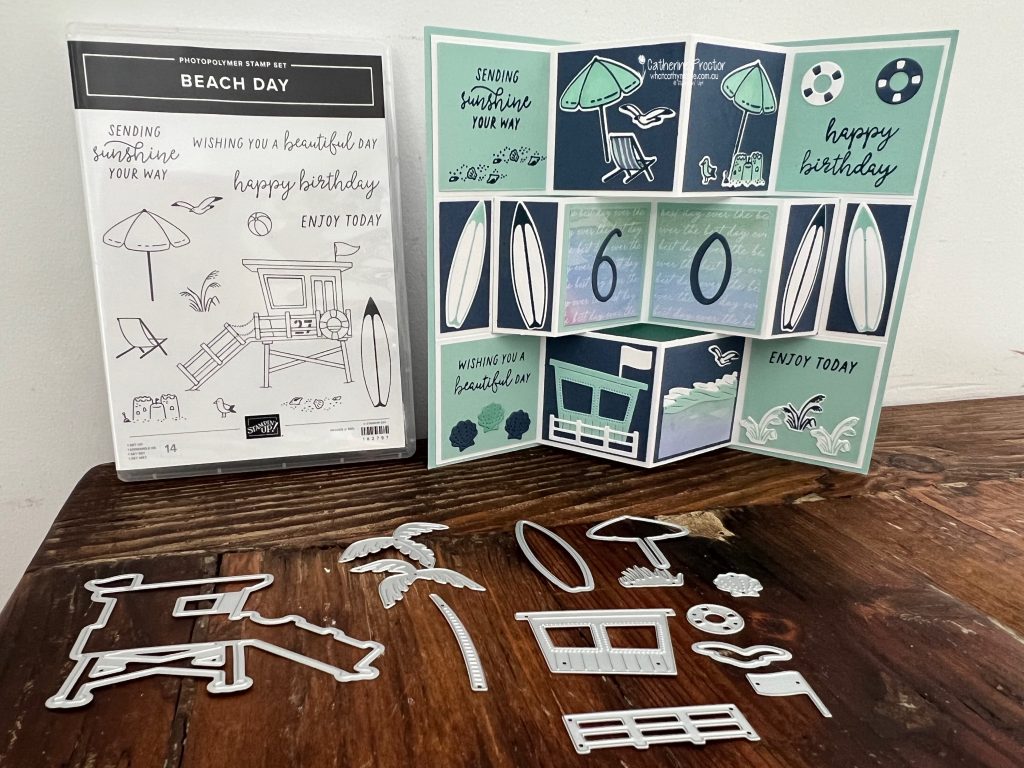
Our colour this week is Pool Party, a favourite colour of mine and just perfect for making a birthday card for my husband who turns 60 this week!
I’ve taken my colour combination from the sheet of gorgeous Thoughtful Journey 6″ x 6″ (15.2 x 15.2 cm) Designer Series Paper I’ve used for the front of the card, combining Pool Party with Misty Moonlight, Basic White and a touch of Petunia Pop.
My husband loves to surf so the Beach Days bundle was just perfect for his birthday card. And as it is a special birthday that ends with a zero I decided to make a fancy fold.
This short video shows you the magic that happens when you open up the card!
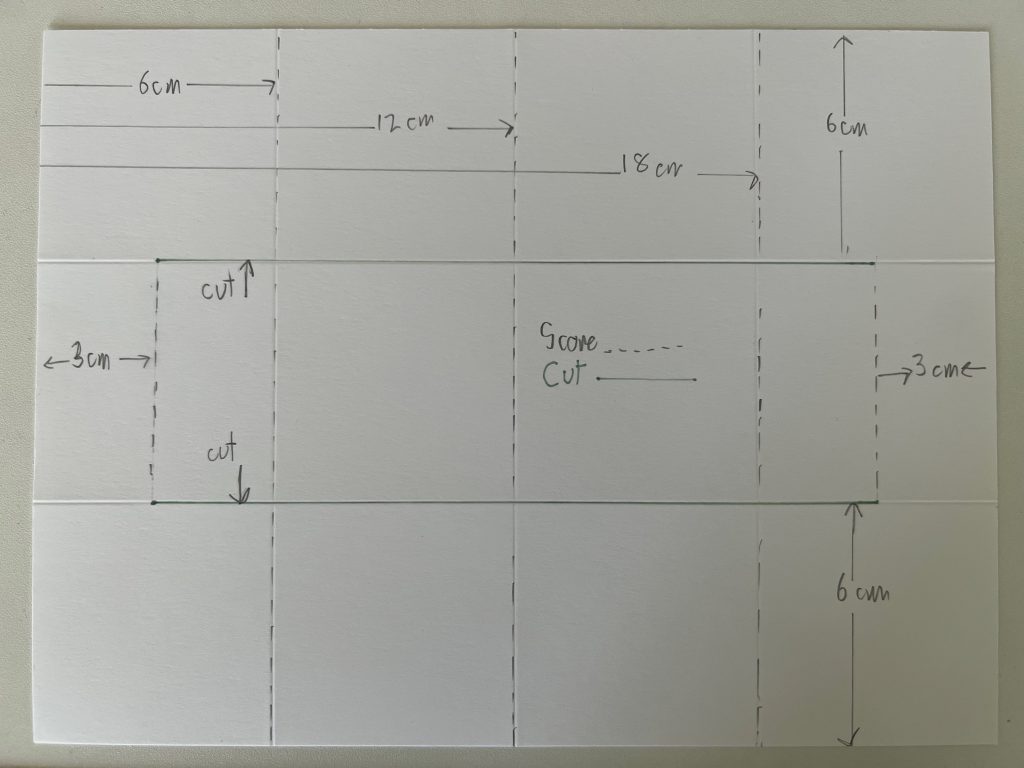
If you’ve never made a Trifold Shutter Card before, here’s a template I’ve created using metric measurements and A4 cardstock.
Trifold Shutter Card Template
Cut a piece of Pool Party cardstock (this is the outside card base) 24.5 cm wide x 18.5 cm high.
Score the outer card base at 12.25 cm along the 24.5 cm side and then fold in half along this score line.
Cut a Basic White inner card base (for the fancy fold) 24 cm wide x 18 cm high.
Score the inner card base at 12 cm and then fold in half along the score line.
Measure and draw with a pencil the cutting lines as per the template diagram below then carefully cut along these cutting lines.
Now measure and score all of the fold lines and then rub out any pencil marks.
Decorate each panel as desired.
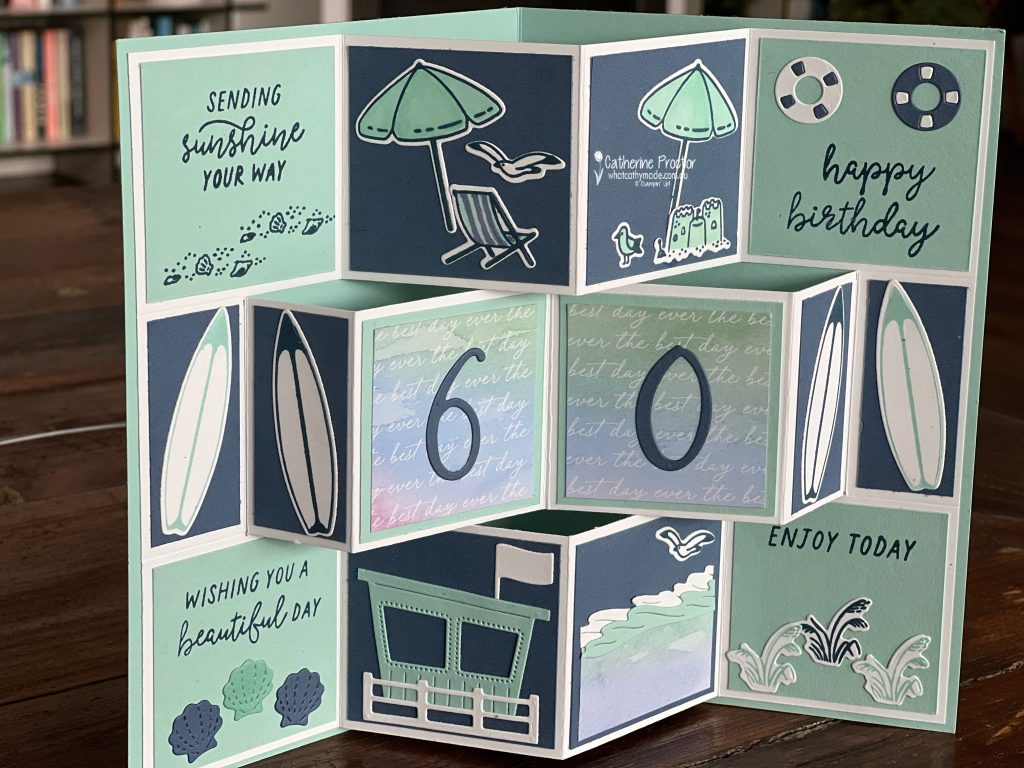
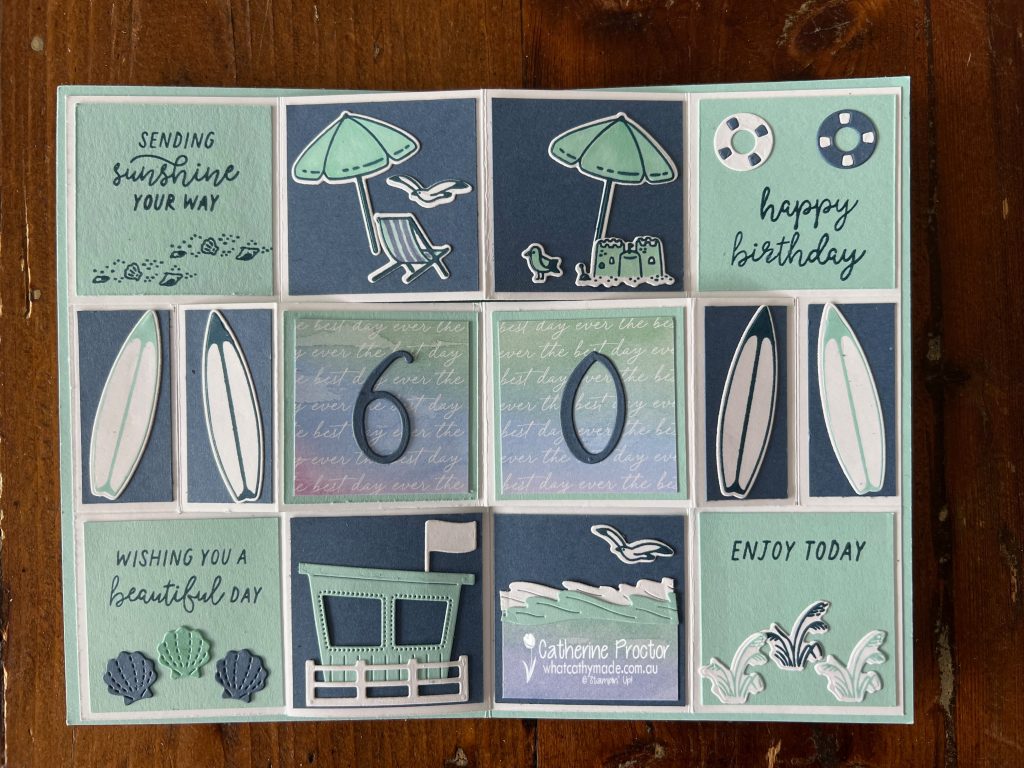
This photo shows the direction to fold the score lines. I cut the larger Pool Party and Misty Moonlight cardstock layers for the panels at 5.5cm square. The smaller cardstock panels behind the surfboards measure 5.5 x 2.5 cm.
I’ve decorated the inside of the card using stamps and dies from the Beach Days bundle.
Using Post It notes to mask off sections of my stamps as I inked them up (you then remove the Post It note before stamping), allowed me to stamp the “happy birthday” sentiment inside the card to fit onto one of the panels.
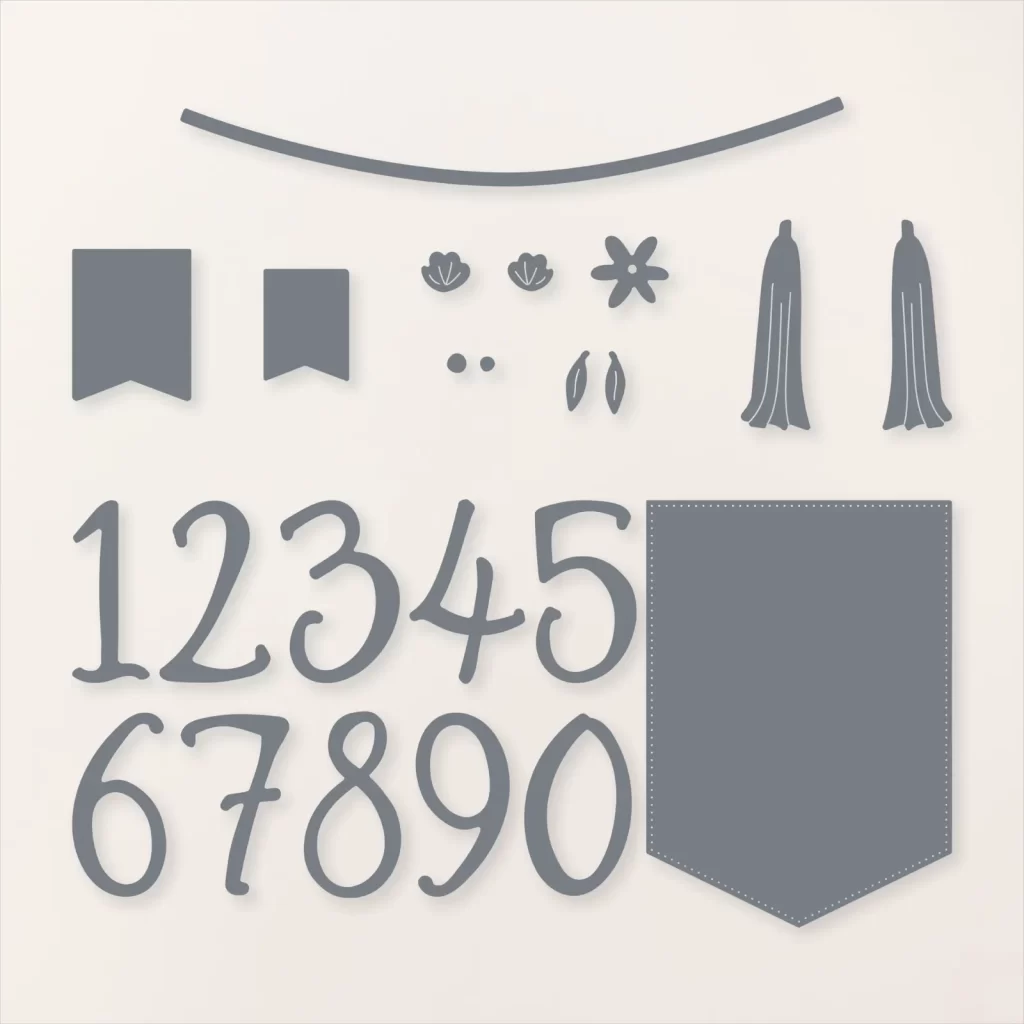
The 60 inside the card has been die cut using the brand new Birthday Celebration Dies.
After decorating the inside of your trifold shutter card, adhere it to the Pool Party card base. Make sure you only adhere the left and right sections of your fancy fold to the inside of your card base so the middle section of your trifold shutter card can open and close.
I’ve also used some of the Thoughtful Journey Memories & More Cards to decorate the front and the inside of the card and the handmade envelope.
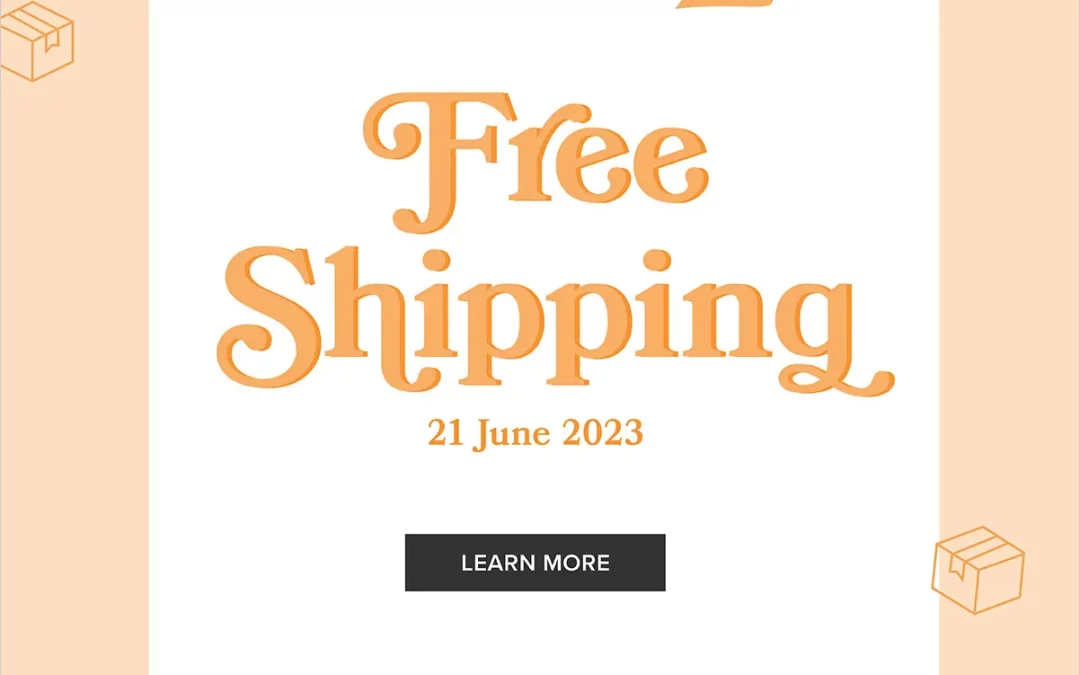
Stampin’ Up! is offering FREE SHIPPING on orders of $65 for ONE DAY ONLY on Wednesday, June 21st (tomorrow)!
The FREE SHIPPING offer is only for 24 hours on June 21 – don’t miss out!
You can order online here and use my current Host Code to receive a little gift: KA3KQRUX.
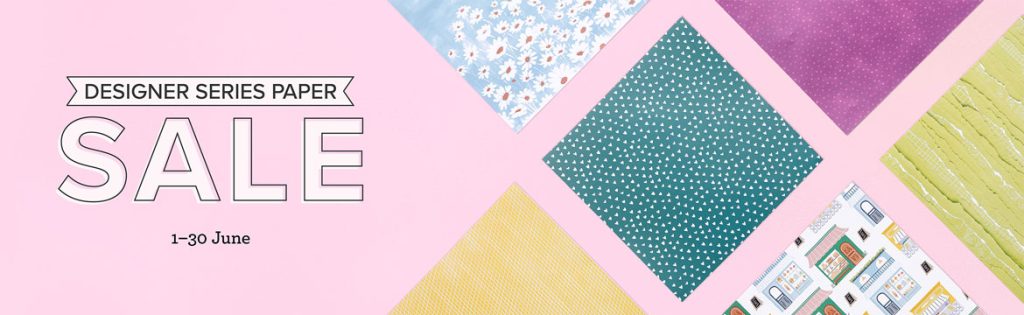
DON’T FORGET YOU CAN ALSO SAVE 15% ON SELECT DESIGNER SERIES PAPERS
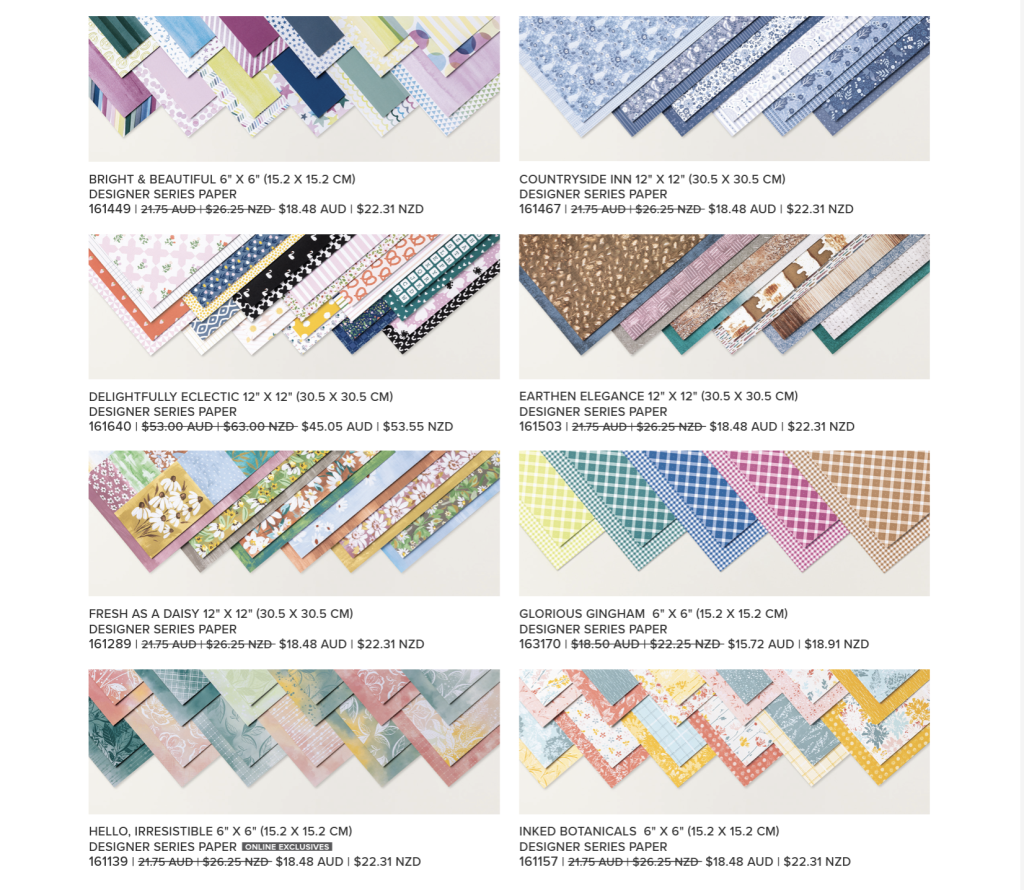
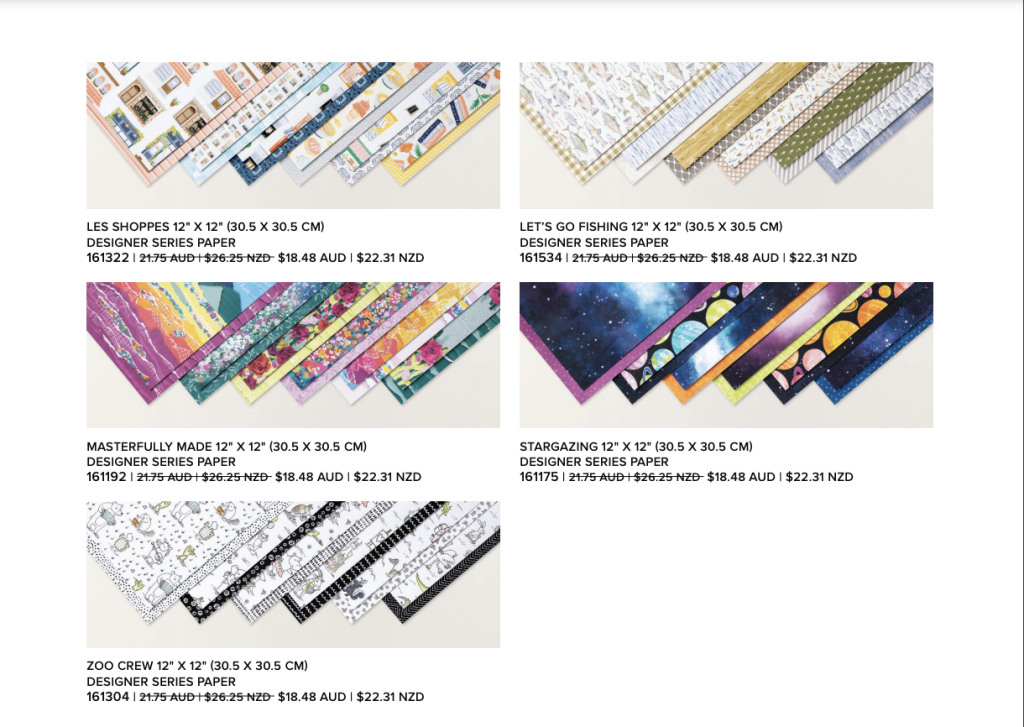
Until June 30 you can save 15% off selected designer series papers. Here is the full list of papers on sale. To purchase any of these designer series papers simply click on the images below.
I’ll be back tomorrow night at 8pm, when the Art With Heart Colour Creations team will be showcasing another brand new colour, Lemon Lolly.
I hope you can join me then! Until then, stay safe and keep crafting!
Happy first day of winter! Is it chilly where you are? I’m away in Yamba this week, 7 hours drive north of Sydney and it’s a bit cool at night but lovely and sunny and warm during the days. Perfect weather for crafting!
Instead of sending out a newsletter, I’ve decided to share all the exciting Stampin’ Up June 2023 Offers and New Products here. If you subscribe to my blog you’ll receive this as an email anyway.
SAVE 15% ON SELECT DESIGNER SERIES PAPERS
During 1–30 June, you can save 15% discount on a wide range of Designer Series Papers from the new 2023–2024 Annual Catalogue and Online Exclusives.
Whether you’re a scrapbooker, a card maker or simply a paper lover, this is a great time to stock up and save on gorgeous paper so you have artistic and versatile paper designs on hand for your next projects!
Here is the full list of papers on sale. To purchase any of these designer series papers simply click on the images below.
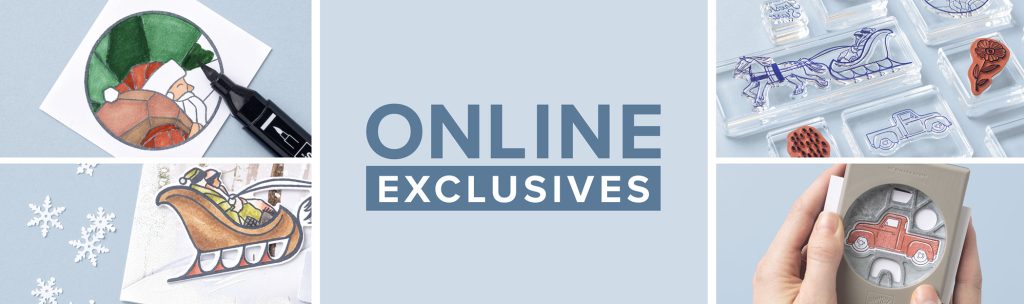
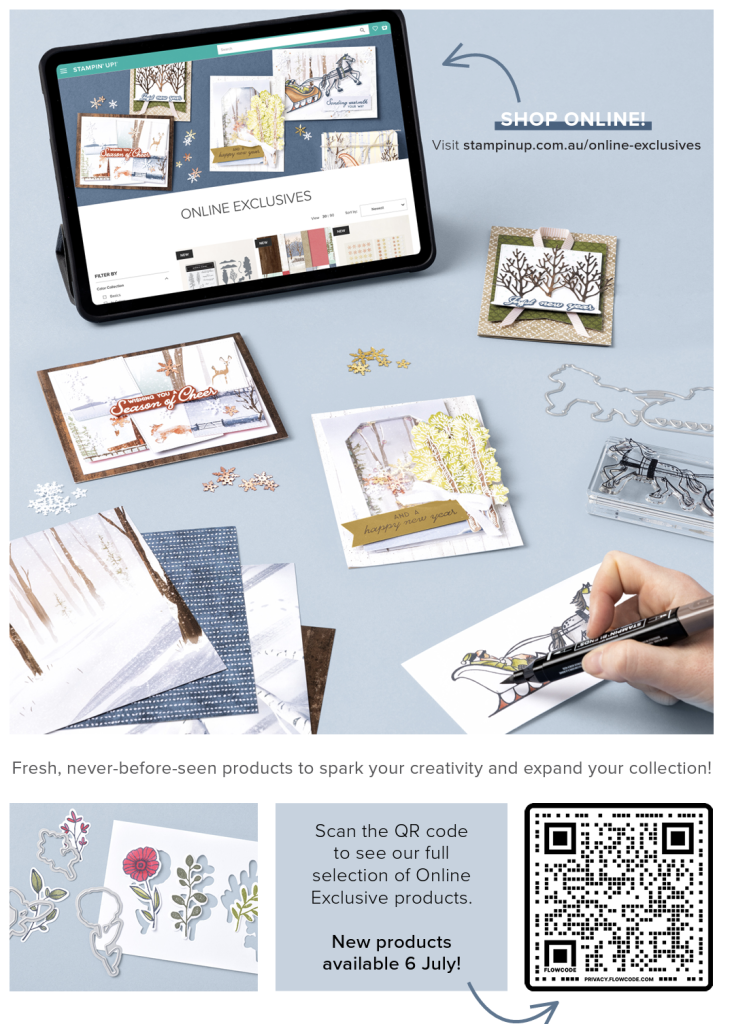
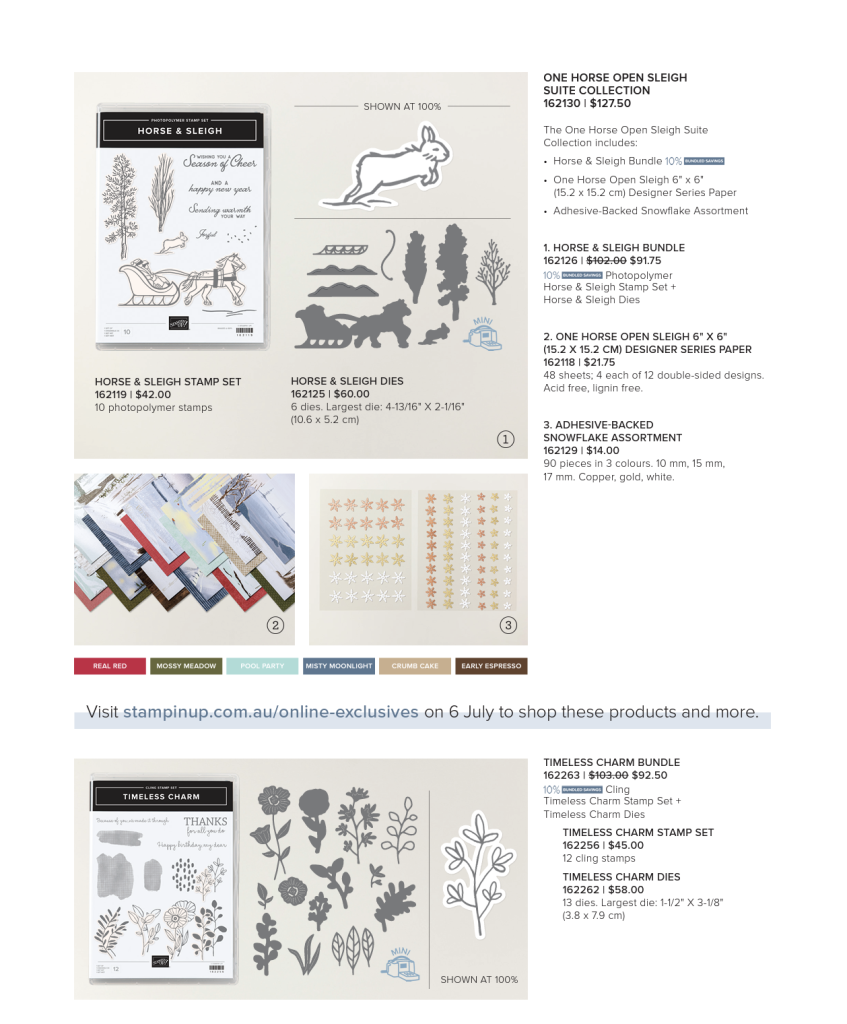
NEW SELECTION OF ONLINE EXCLUSIVES COMING SOON
From July 6, Stampin’ Up! will be releasing a new selection of online exclusives. You can order and see the current online exclusives here.
This flyer gives you a glimpse of what’s to come in July.
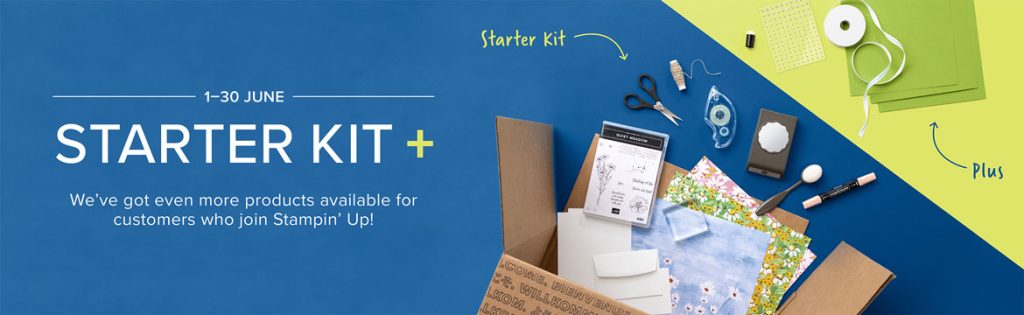
GET $169 OF STAMPIN’ UP! PRODUCTS FOR FREE WITH THE STARTER KIT!
Been thinking about becoming a Stampin’ Up! demonstrator?
June is a fabulous time to join Stampin’ Up! because you’ll get even more FREE products in your customisable Starter Kit.
Between 1–30 June, you’ll get $283 AUD worth of products for only $169 AUD + free business supplies + free shipping + all the fun being a part of Stampin’ Up!
That’s an additional $48 worth of free product on top of the normal joining offer!
As a demonstrator you get a 20% discount on all Stampin’ Up! products, including stamp sets, paper, and accessories. It’s a great way to support your love of stamping and paper crafting… and there’s no pressure to sell to anyone else if you’d just like to join for the discount.
You can find out more about joining Stampin’ Up! here.
I’ll be back next Wednesday, June 7, when the Art With Heart Colour Creations team will be showcasing a brand new colour, Azure Afternoon.
I hope you can join me then! Until then, stay safe and keep crafting!
My mum is an amazing paper quiller, knitter and paper crafter so the new Crafting With You bundle was just perfect for making her Mother’s Day card this year.
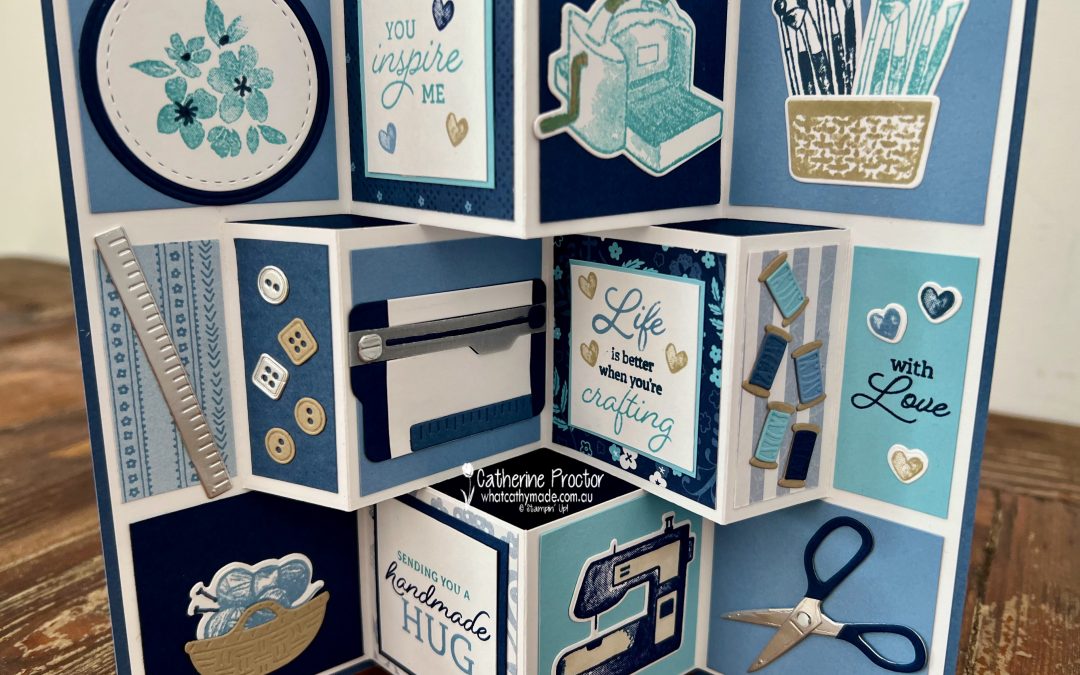
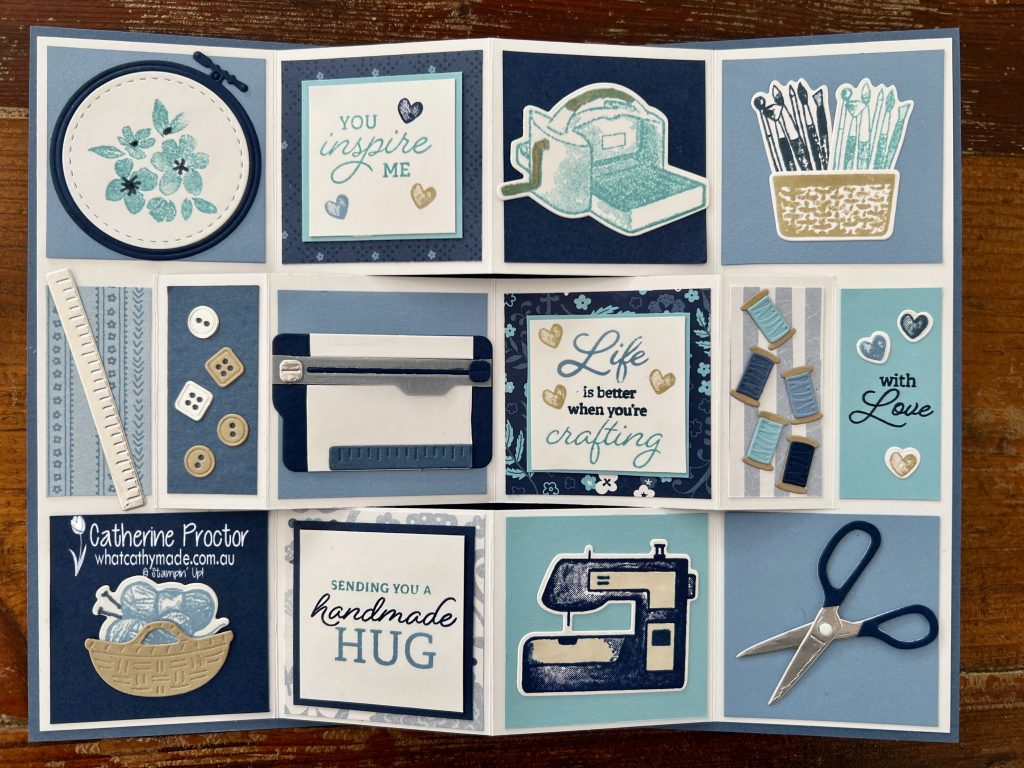
There are so many cute crafting elements in this stamp and die set. I wanted to include them all on the card so I made a Trifold Shutter Card.
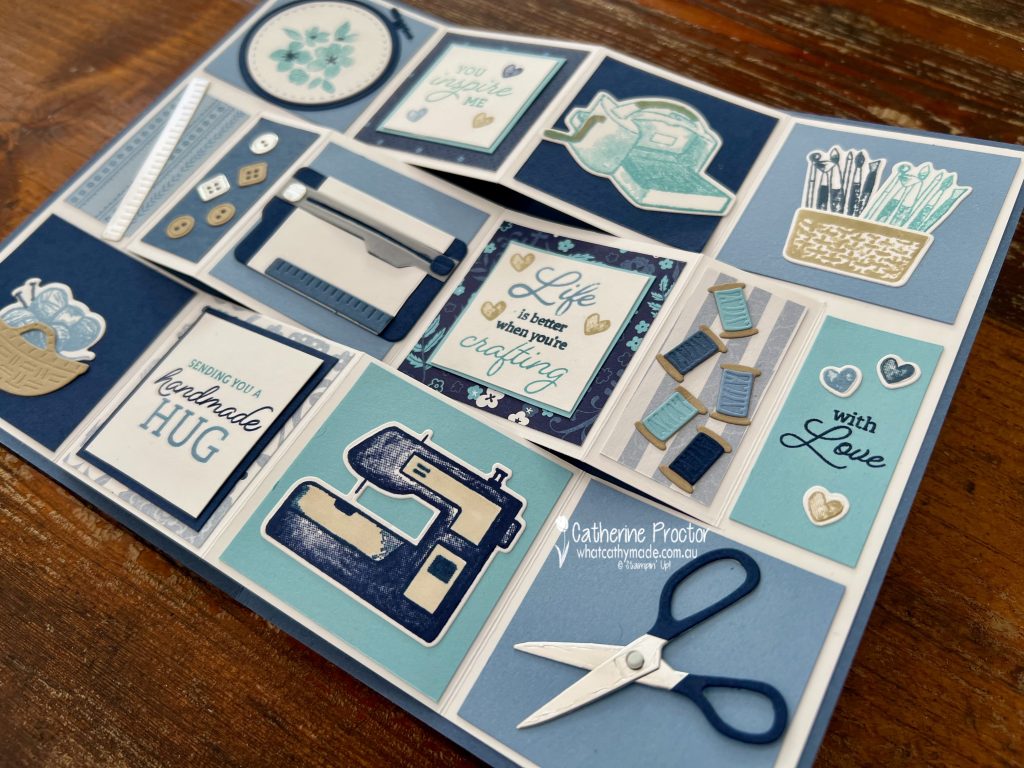
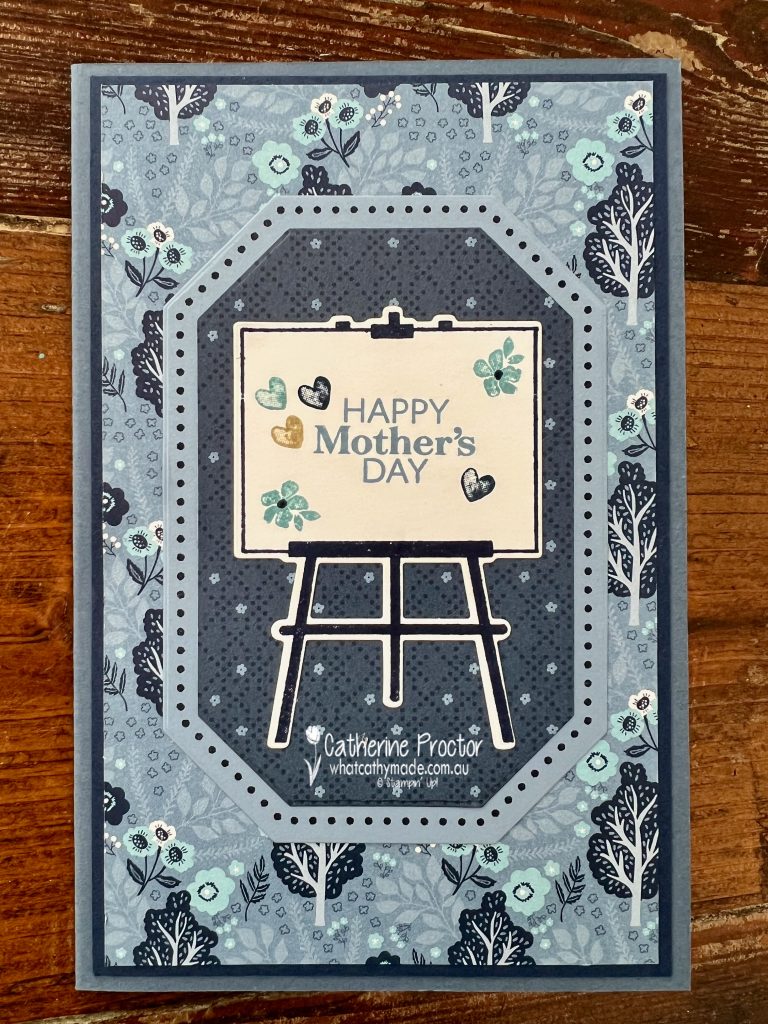
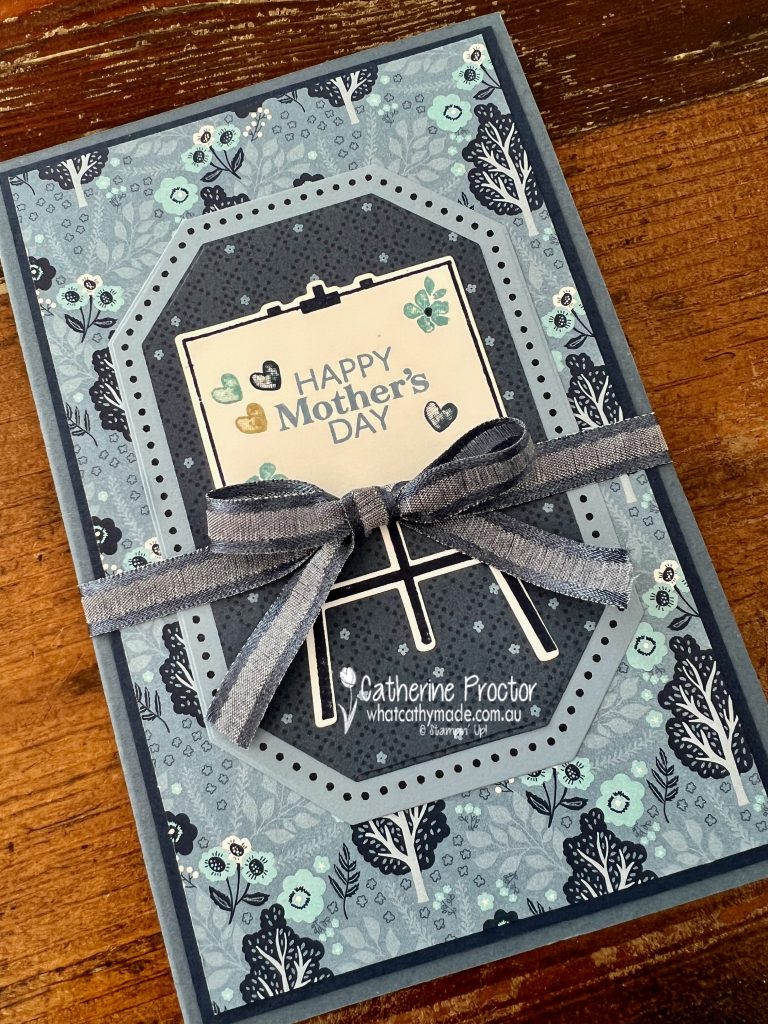
Here’s what it looks like closed.
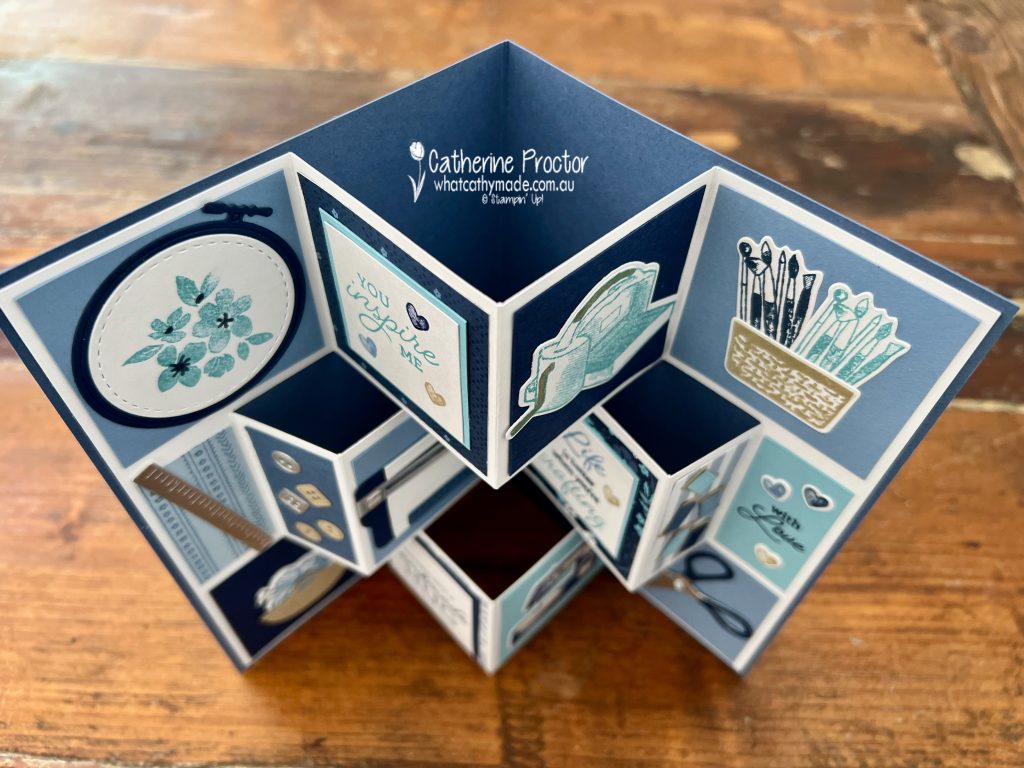
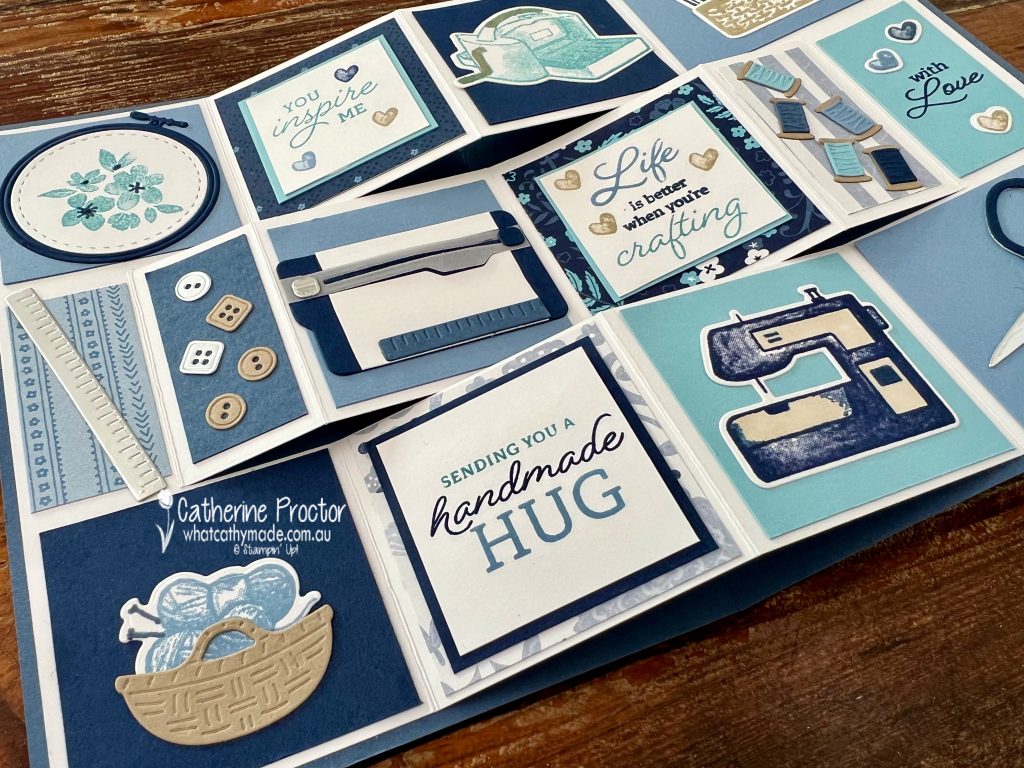
And here’s what it looks like inside the card!
If you’ve never made a Trifold Shutter Card before, here’s a template I’ve created using metric measurements and A4 cardstock.
Trifold Shutter Card Template
Cut a piece of Misty Moonlight cardstock (this is the outside card base) 24.5 cm wide x 18.5 cm high.
Score the outer card base at 12.25 cm along the 24.5 cm side and then fold in half along this score line.
Cut a Basic White inner card base (for the fancy fold) 24 cm wide x 18 cm high.
Score the inner card base at 12.25 cm and then fold in half along the score line.
Measure and draw with a pencil the cutting lines as per the template diagram below then carefully cut along these cutting lines.
Now measure and score all of the fold lines and then rub out any pencil marks.
Decorate each panel as desired.
Here’s what the Trifold Shutter Card looks like from above so you can see the direction to fold the score lines.
After decorating the inside of your trifold shutter card, adhere it to the Misty Moonlight card base. Make sure you only adhere the left and right sections of your fancy fold to the inside of your card base so the middle section of your trifold shutter card can open and close.
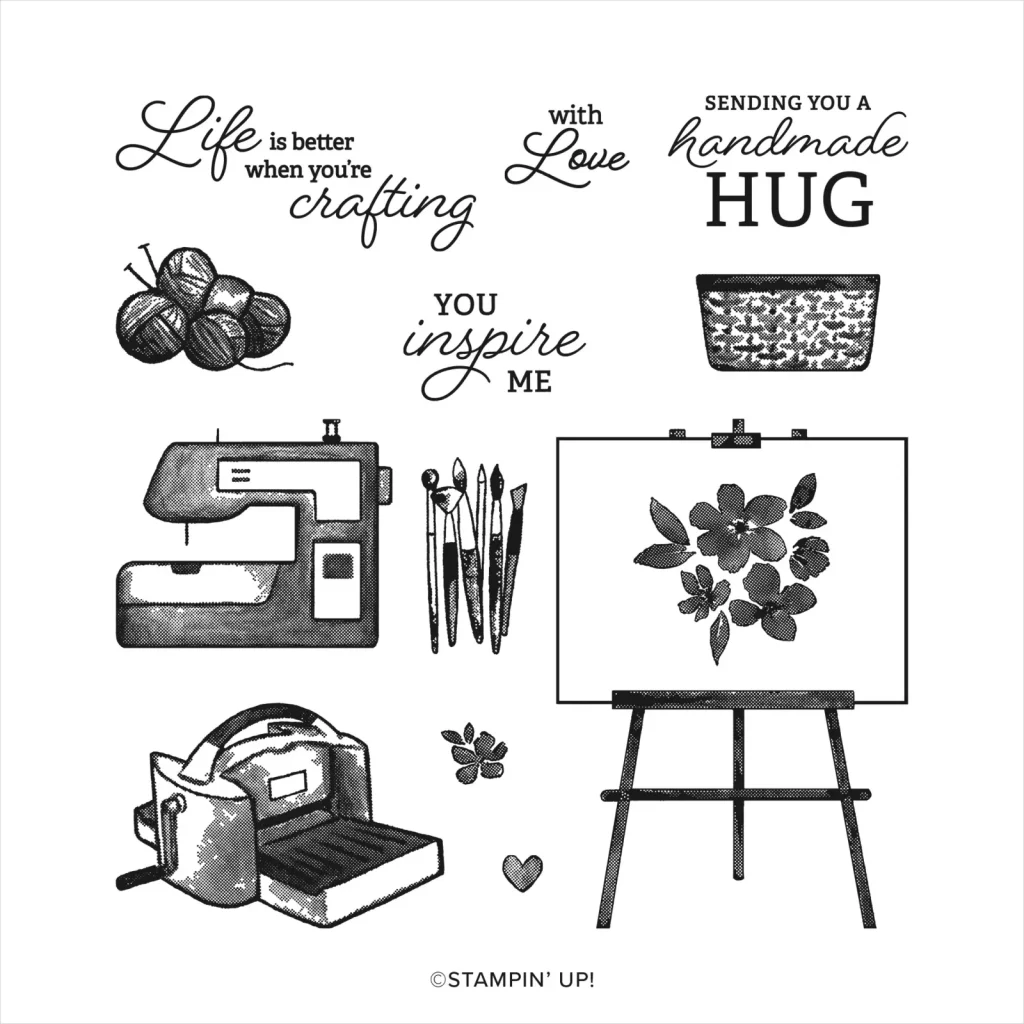
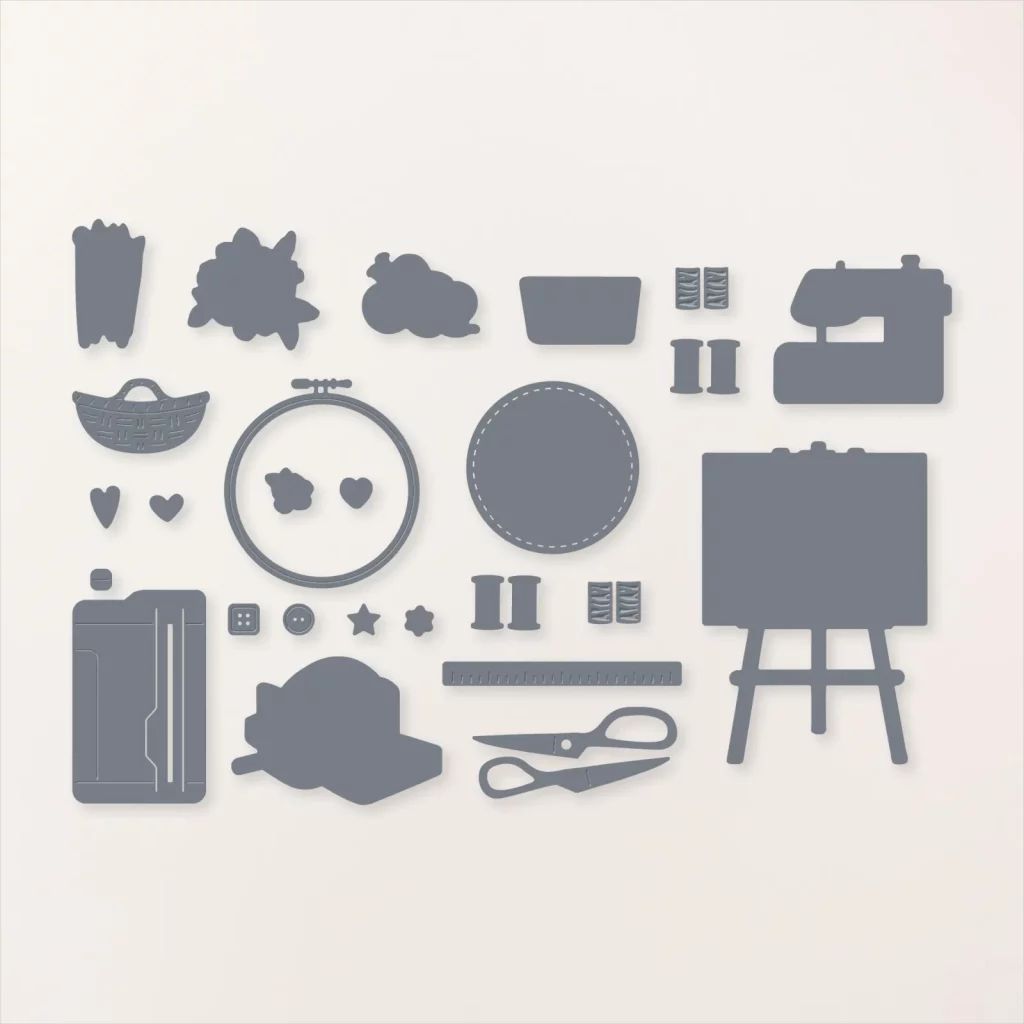
If you love crafting or miniatures you’re going to love the Crafting With You bundle. It includes stamps and/or dies for a Stampin’ Cut & Emboss Machine, a Paper Trimmer, a pair of scissors, embroidery hoop, ruler, spools of thread, knitting wool and needles, buttons, a sewing machine, paint brushes, baskets and more!
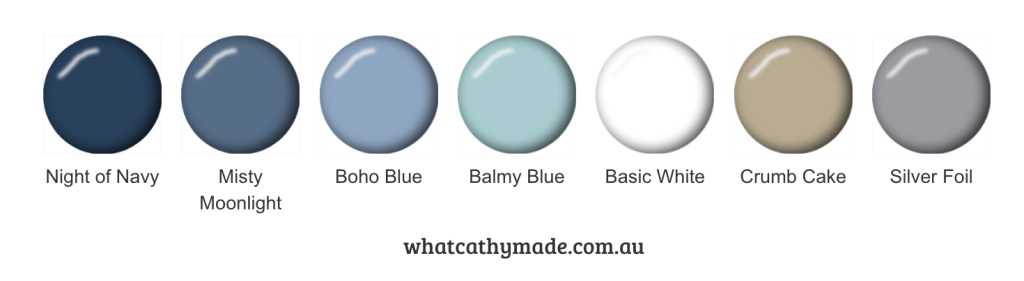
The colours in my card are the assorted blues used in the stunning Countryside Inn DSP, as well as Crumb Cake and silver foil. These are some of Mum’s favourite colours.
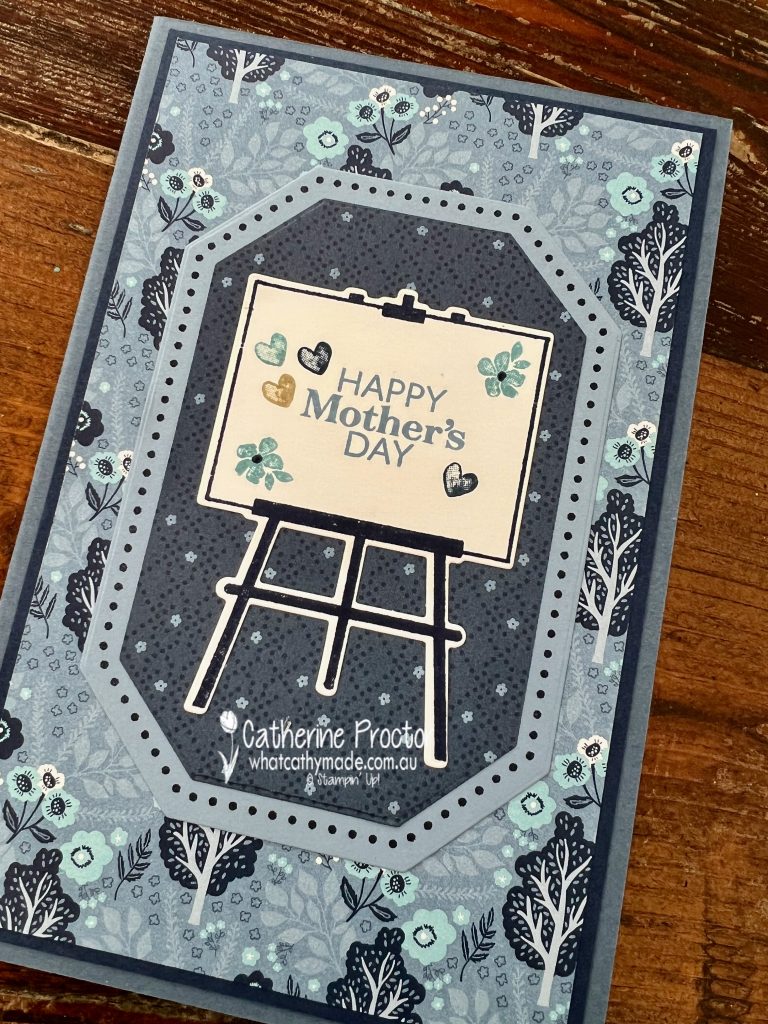
The front of the card features the Countryside Inn DSP, and the Countryside Corners bundle (stamps and dies). I used the art easel from the Crafting With You bundle to display my sentiment.
Don’t forget to use the stamp sets that come in kits on your other cards too. This “Happy Mothers Day” stamp is from the stamp set included in the Sentimental Rose All-Inclusive Card Kit.
As I was giving the card to my mum in person and it is so big, instead of making an envelope I simply tied a bow of the Night of Navy 3/8″ (1 cm) Bordered Ribbon around the card. This ribbon also helps to keep the card closed.
Using Post It notes to mask off sections of my stamps as I inked them up (you then remove the Post It note before stamping), allowed me to stamp some of the sentiments inside the card in a mix of blues.
It also allowed me to fit the “life is better when you’re crafting” sentiment onto one of the flaps of the fancy fold.
I’m so grateful for so many things about my mum, but especially for free rein she gave me from a very young age to pursue all my creative endeavours – cooking, sewing and any type of crafting!
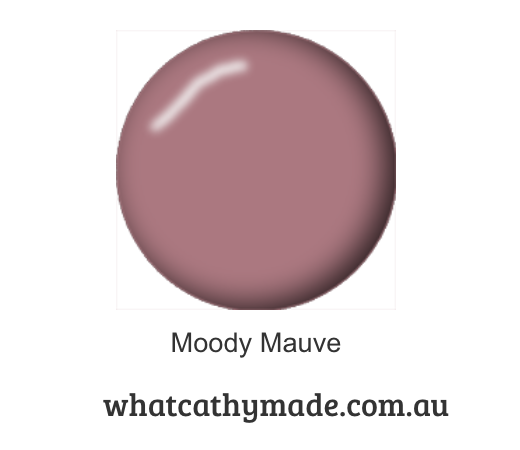
I’ll be back on Wednesday night with our weekly AWH Colour Creations blog. This week we are showcasing one of the new 2023-25 In Colours – Moody Mauve.
Have you seen Stampin’ Up!’s new online specials? You won’t find these products in any catalogue as they are exclusively online.
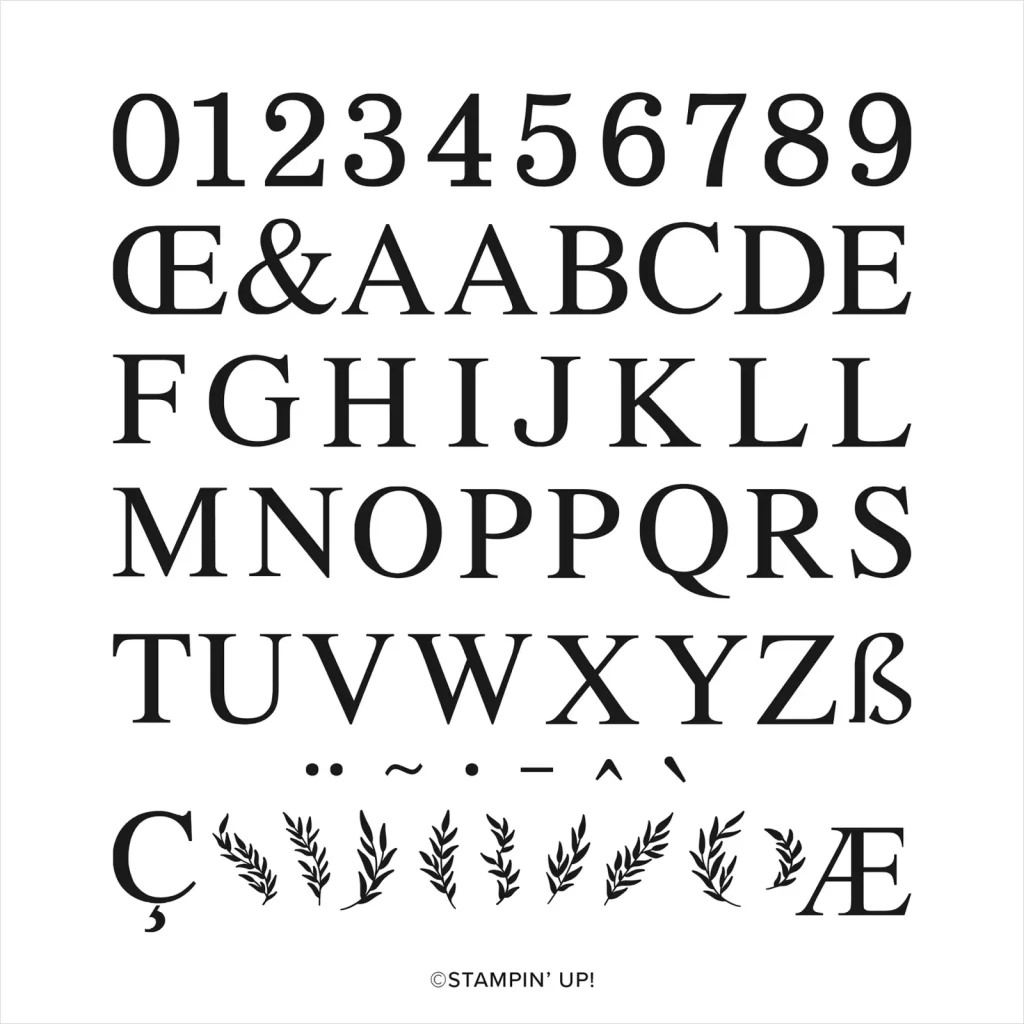
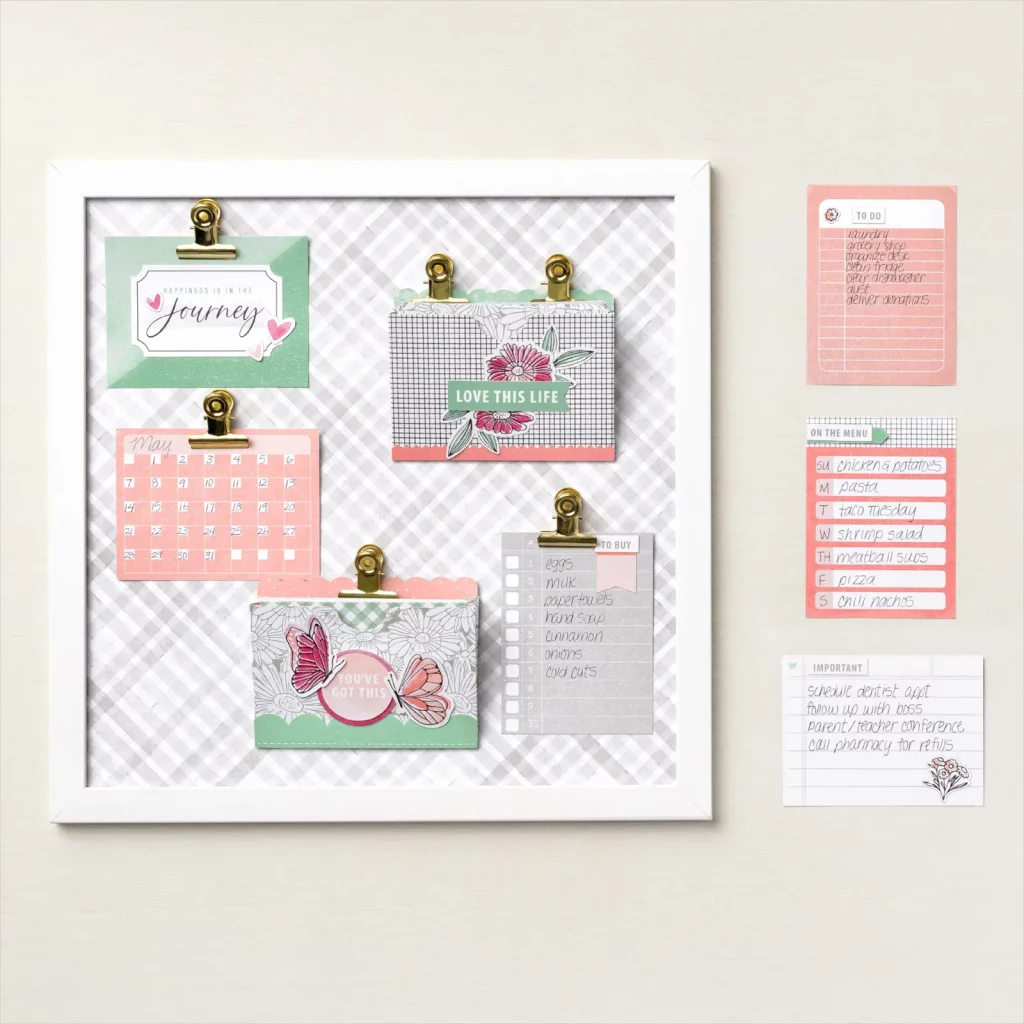
Today I wanted to share a project with you that used two of these online exclusives – the Classic Letters Stamp Set and one of the kits, the Celebrate Today Magnet Board.
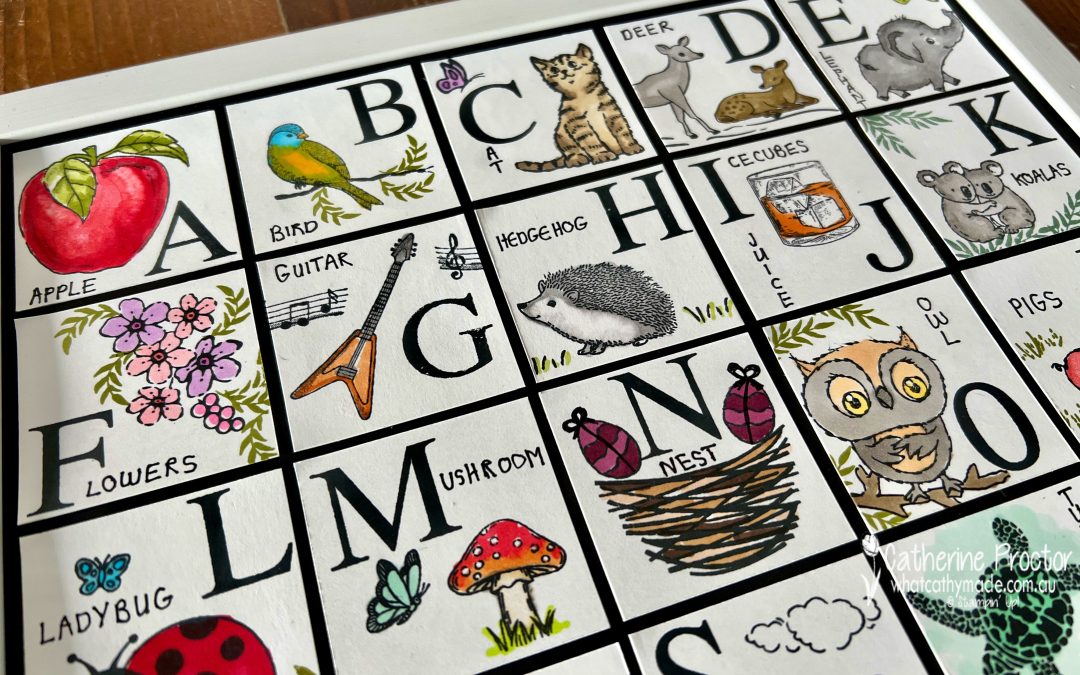
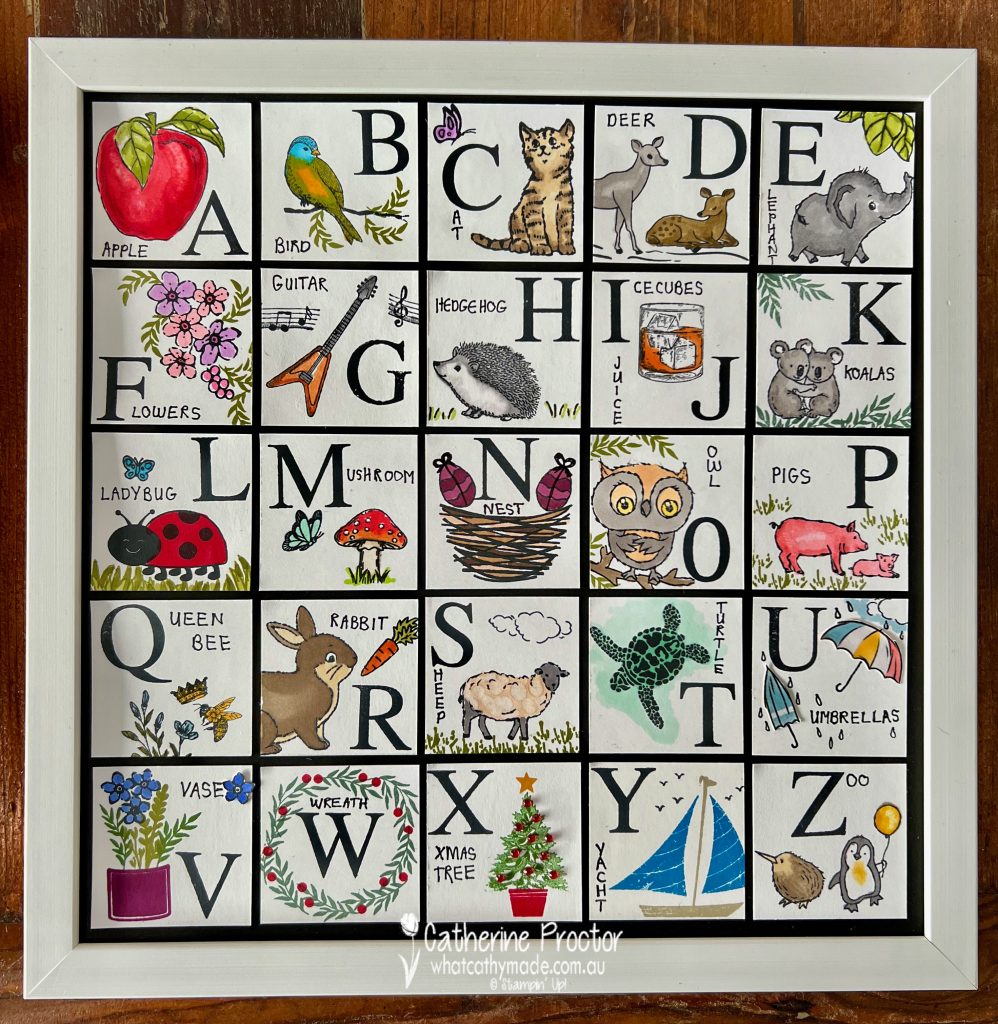
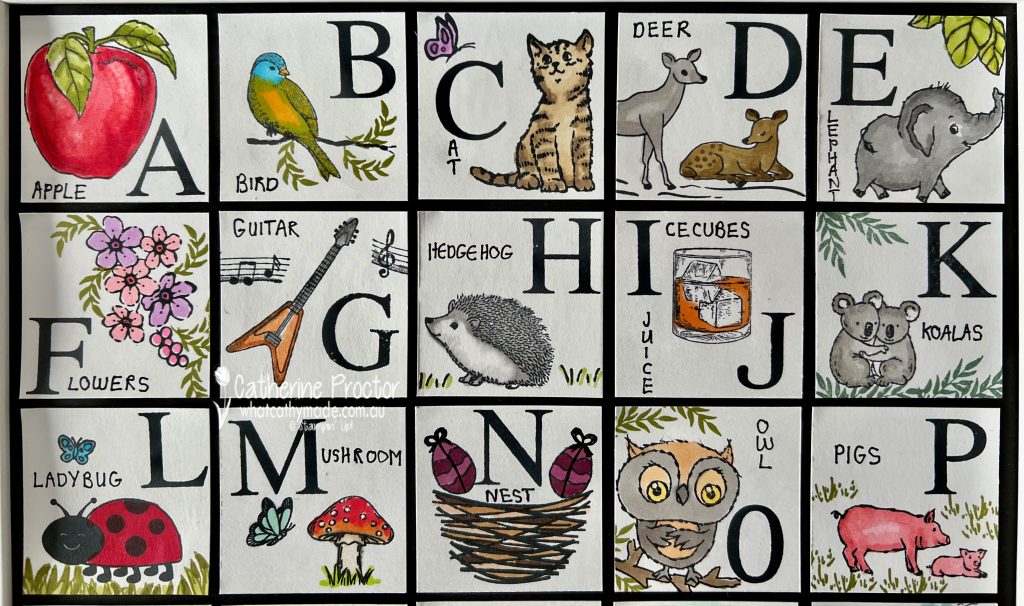
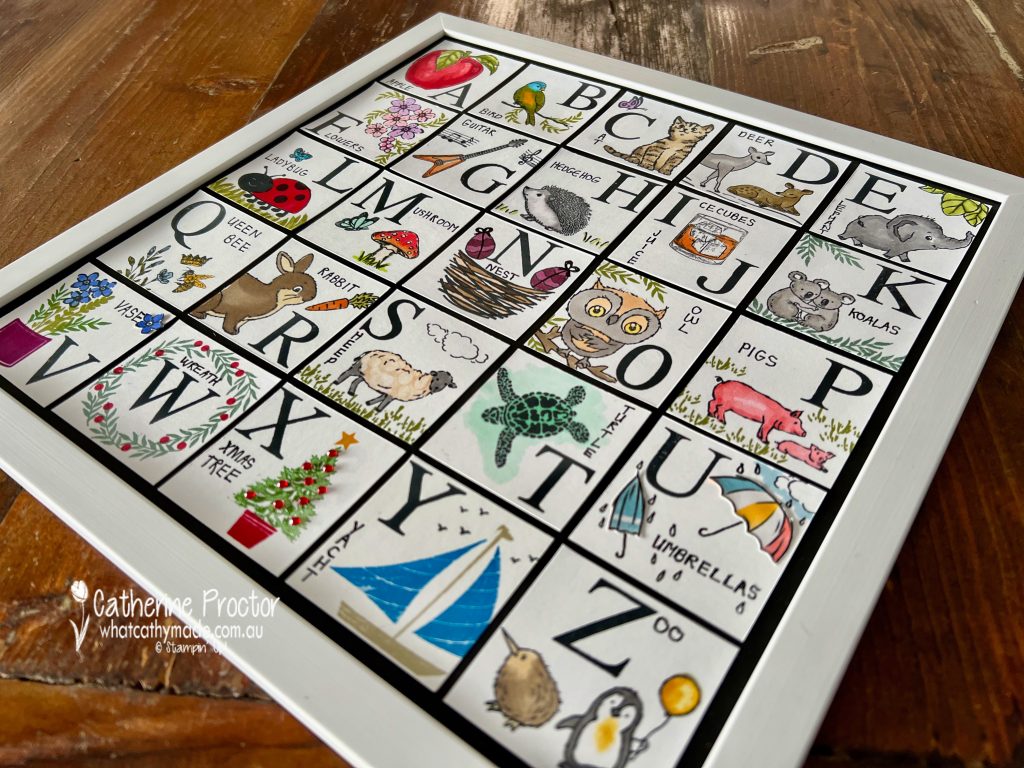
I’ve used both of these products, plus an wide assortment of stamp sets, dies, embellishments and ink to make an alphabet sampler.
At the time of publishing this blog post, all of these Stampin’ Up! products were current, bar one – the owl from the recent SALE-a-bration Adorable Owls stamp set. It was current when I began making this sampler!
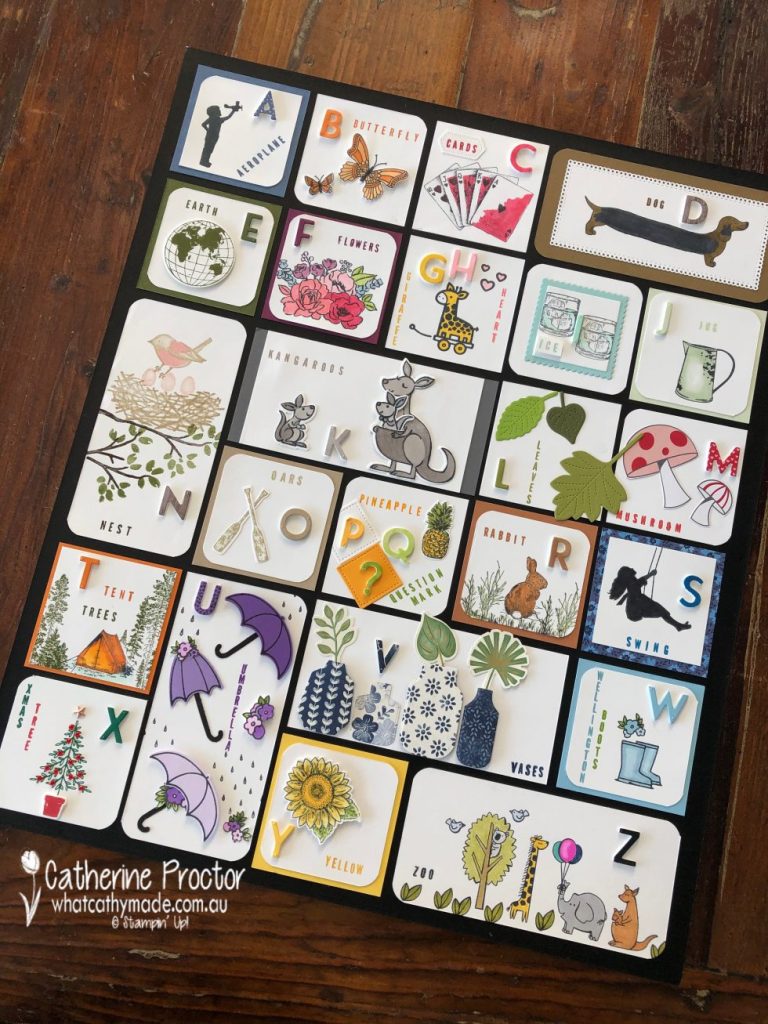
I’ve previously made a much larger alphabet sampler using the now retired Playful Alphabet Dies, however you could make it using the Alphabet à la Mode Dies instead.
A larger frame gives you a lot more creative licence with the way you lay out your sampler and the size of stamps and dies you can use, so if you’d like to make this larger alphabet sampler instead, you can read about how I made it here.
This smaller alphabet sampler was more of a challenge to make because I had to fit 26 letters onto a 12 x 12 inch piece of cardstock that could fit into the Celebrate Today Magnet Board Kit frame.
It took a bit of calculating, fiddling and adjusting, but I got there in the end!
Here’s how to make this smaller alphabet sampler.
Alphabet sampler instructions
Start with a frame that is designed to frame a 12 x 12 inch (30.5 x 30.5 cm) piece of cardstock – I used the one from the Celebrate Today Magnet Board and it measures 13 x 13 inches (33 x 33 cm).
You’ll also need a piece of 12 x1 2 inch (30.5 x 30.5 cm) cardstock as the backing layer. I think black is the best colour to make the alphabet squares really pop.
Most importantly, measure the dimensions INSIDE your frame so you can calculate the size of your alphabet squares. For the Celebrate Today Magnet Board the inside dimensions are 11.6 x 11.6 inches (29.5 x 29.5 cm).
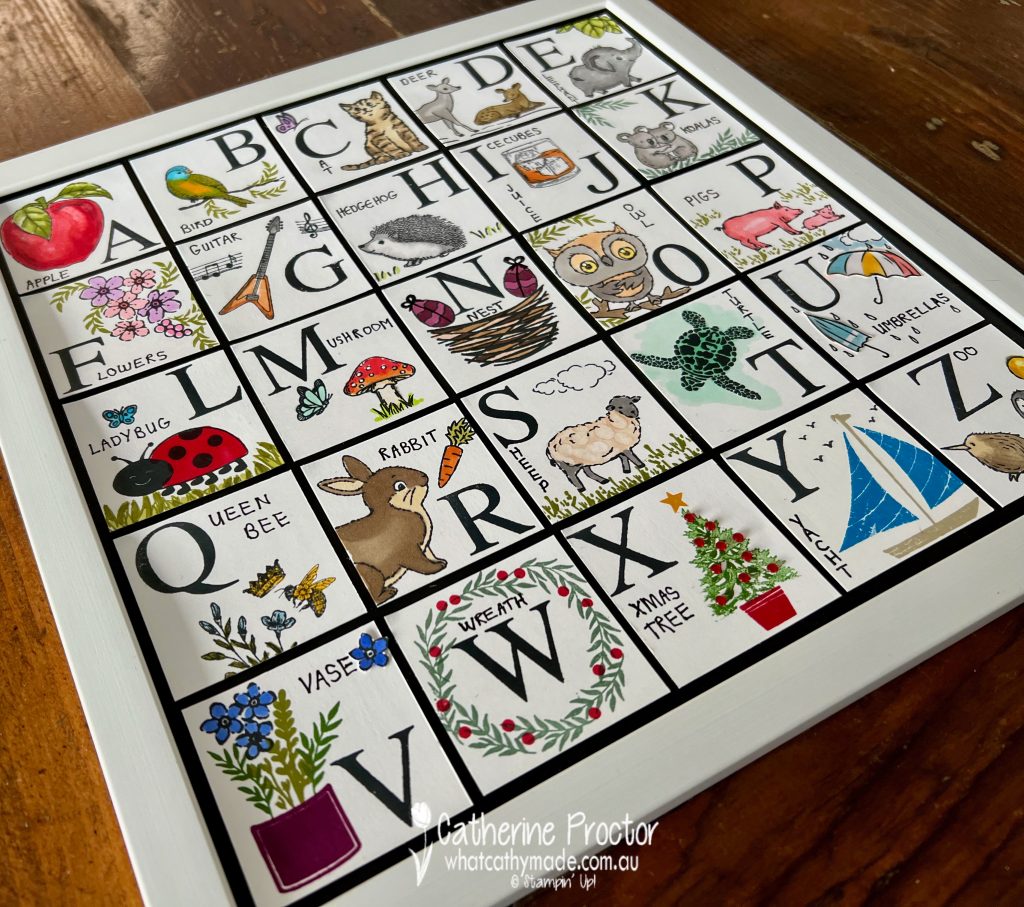
Now take a look at your stamp collection and make a list of the stamps you could use for each letter – it’s important to do this at this stage of your project as you’ll need to fit two of your letters on the one square in order to fit your alphabet sampler into this size of frame. So think about one image that could illustrate two letters of the alphabet that sit next to each other.
There are 26 letter in the alphabet – ideally I would have liked to have 6 letters across and 6 down (36 squares in total) for visual interest and to give me more room to play, however it would not have allowed for squares that were large enough to fit in a letter, a word and an image.
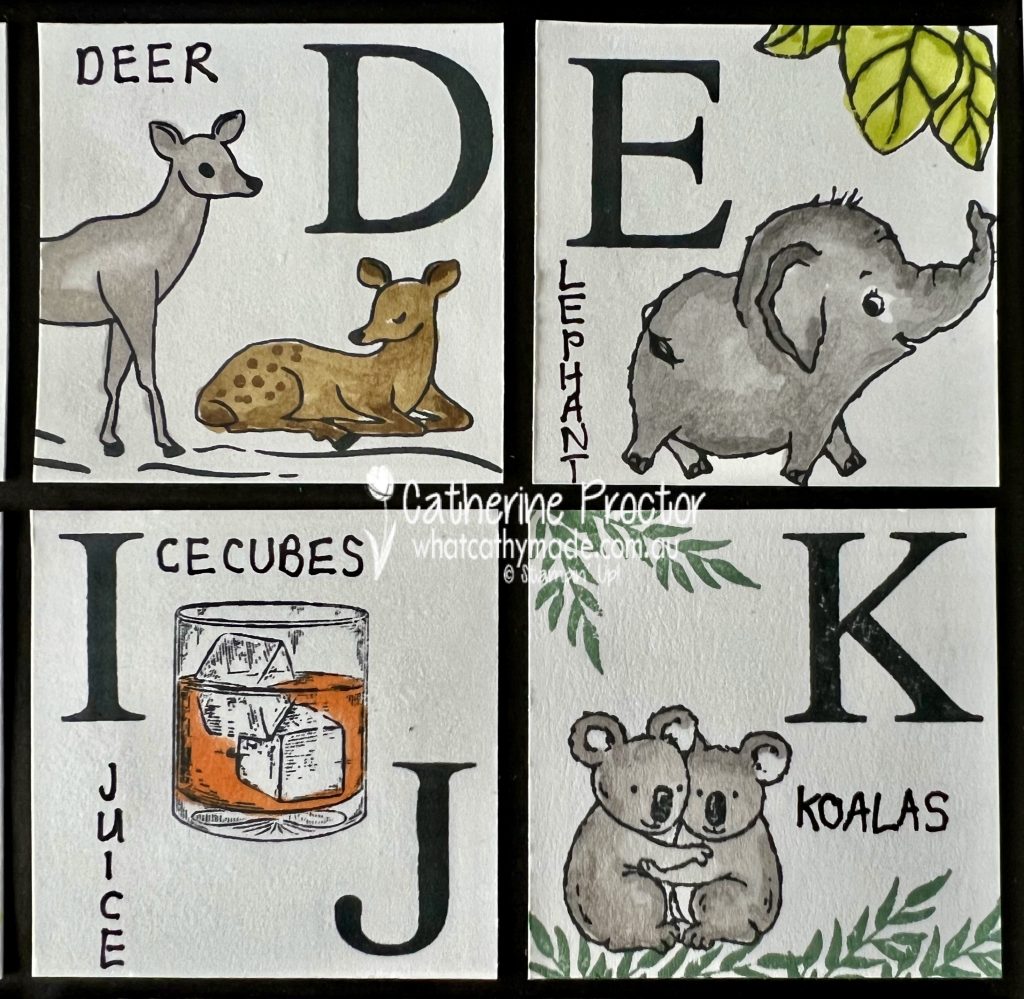
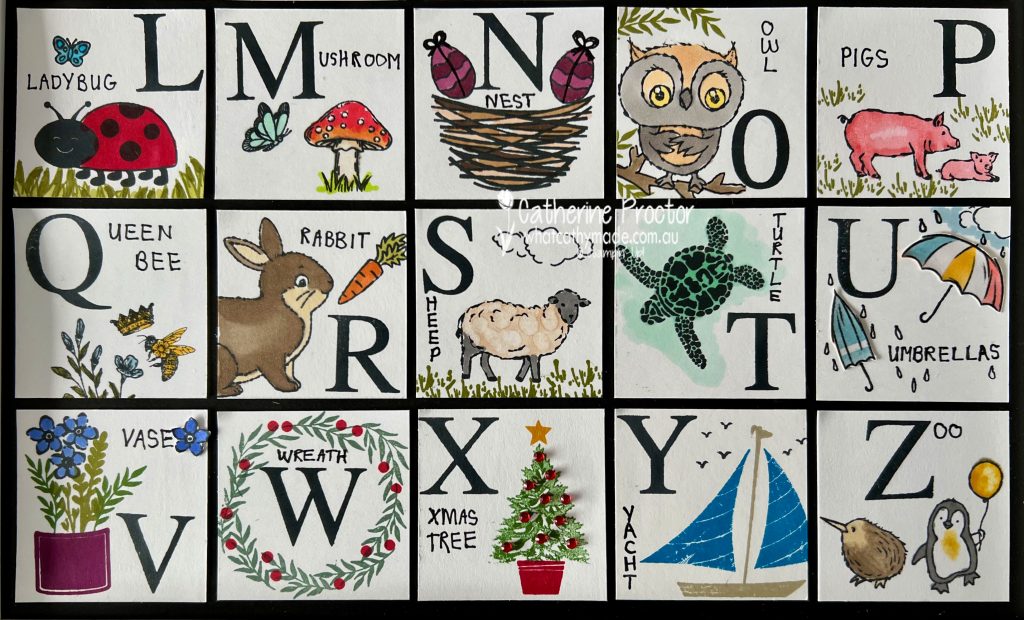
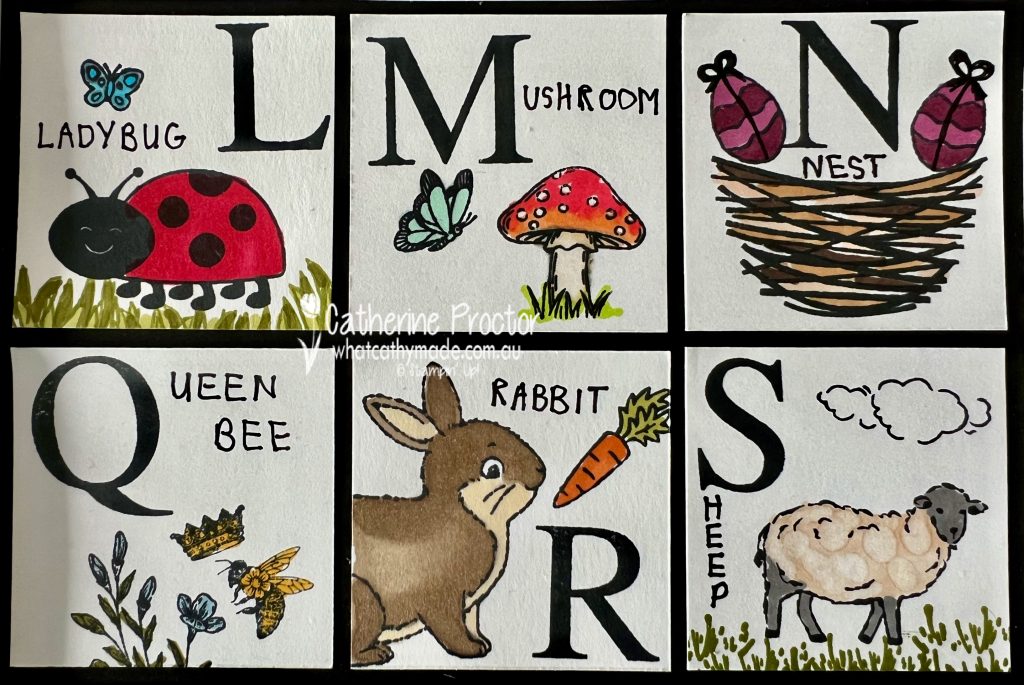
The solution? I decided on 5 squares across and 5 squares down (25 squares in total) and this meant I had to place 2 letters on the one alphabet square. I chose “I and J” for Ice and Juice – this allowed me to use the one image from Whiskey Business for both letters.
Each of my Basic White squares measure 5.5 x 5.5 cm – if you are calculating this in inches you could get away with slightly larger 2 1/4 inch squares for ease of measurement and cutting.
Just make sure that the size of your squares allows for enough room to show the backing cardstock – it really makes the alphabet squares pop!
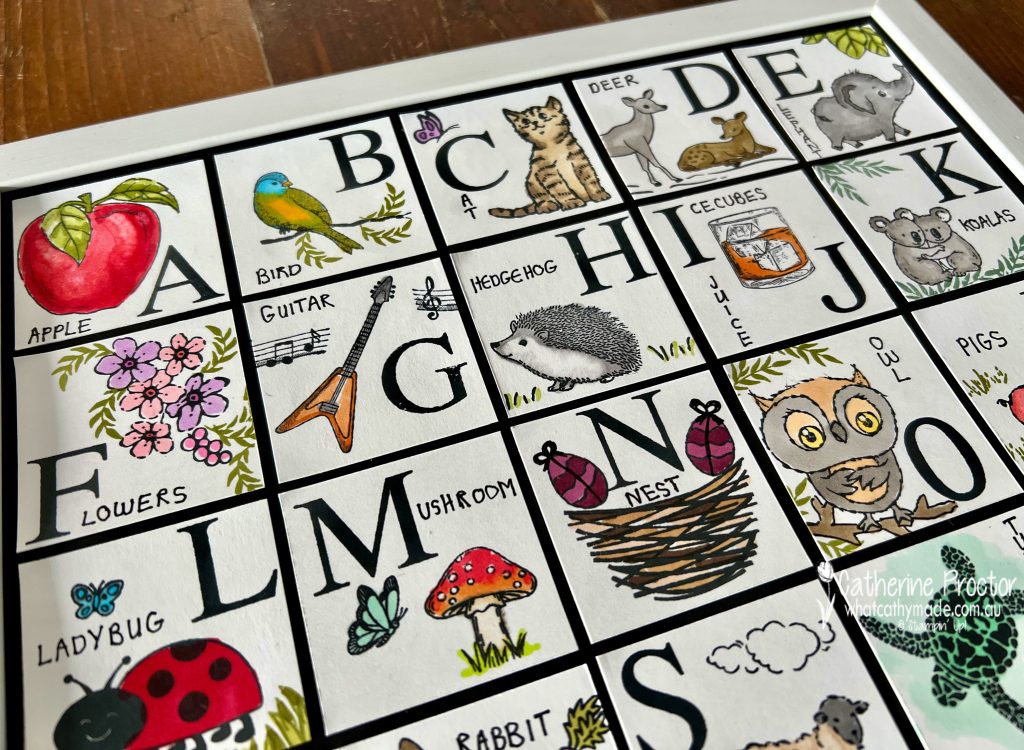
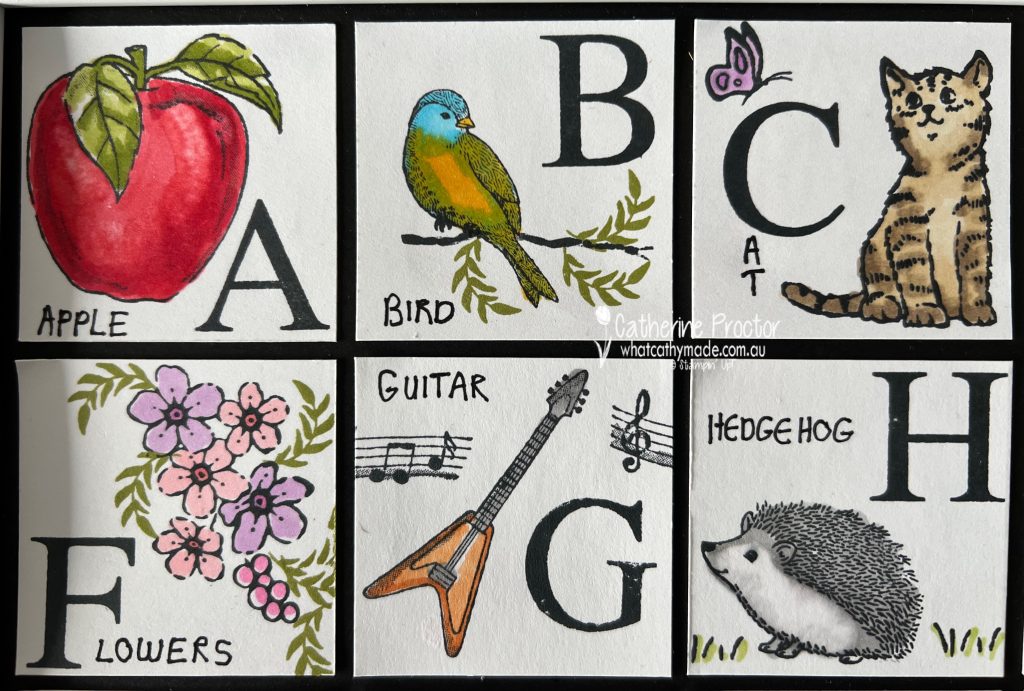
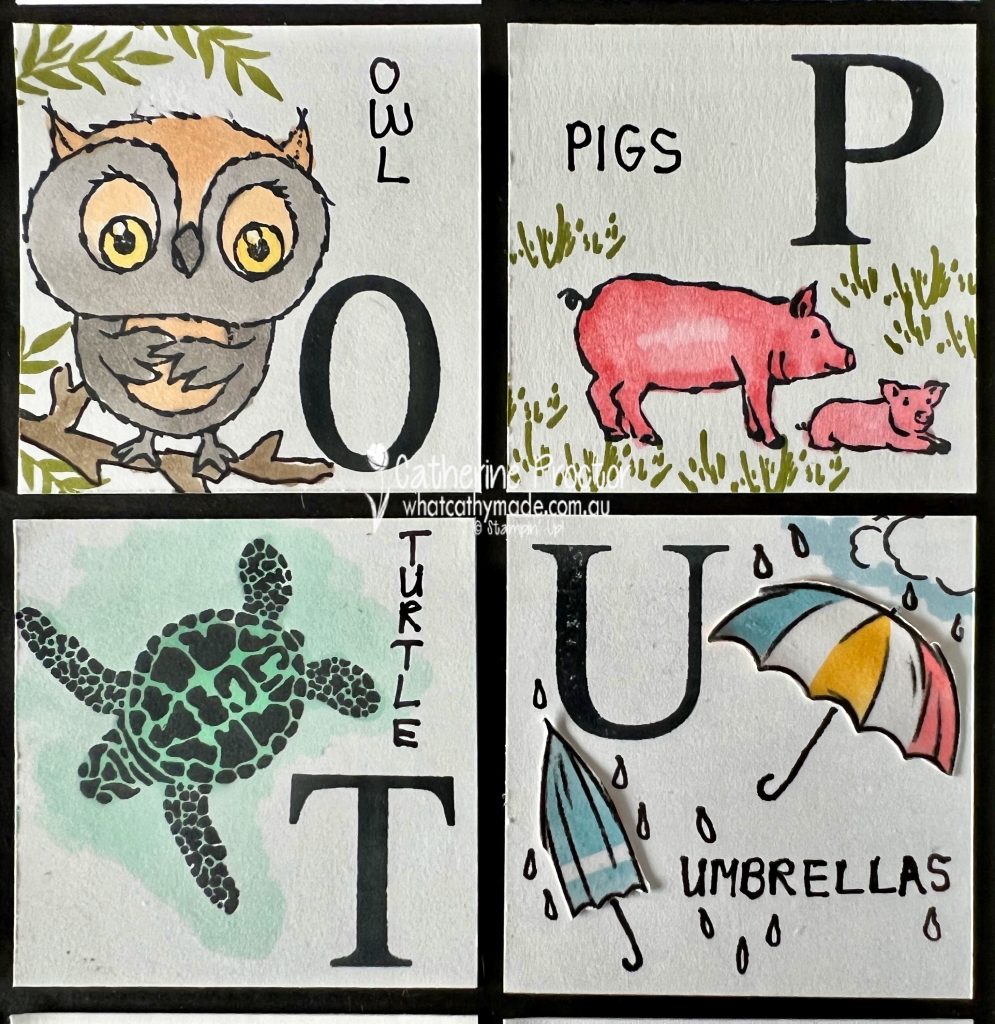
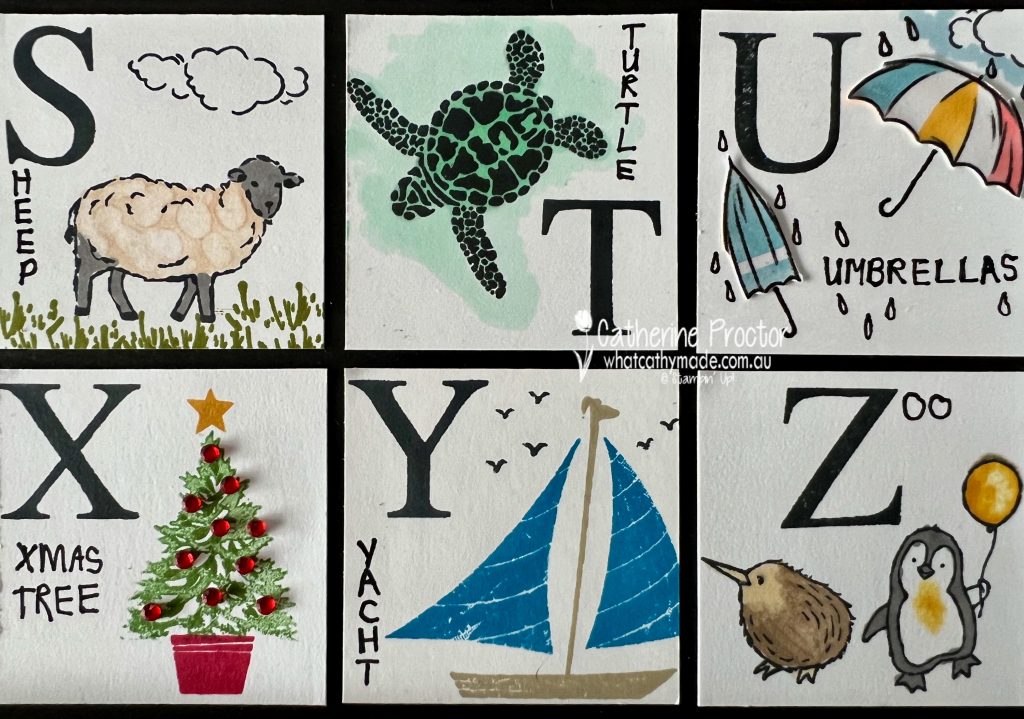
Here’s a closer look at each of the sections of the alphabet sampler.
Top half.
Bottom half.
These classic letters are the perfect size for this sampler and if you look closely you’ll also see I used the greenery flourishes from this stamp set in many of the squares as well.
I used a Stampin’ Write Marker in Basic Black to hand write the words so they were small enough to fit into the squares.
I’m a leftie and my handwriting is so messy – hopefully it adds to the handmade charm of the project!!!
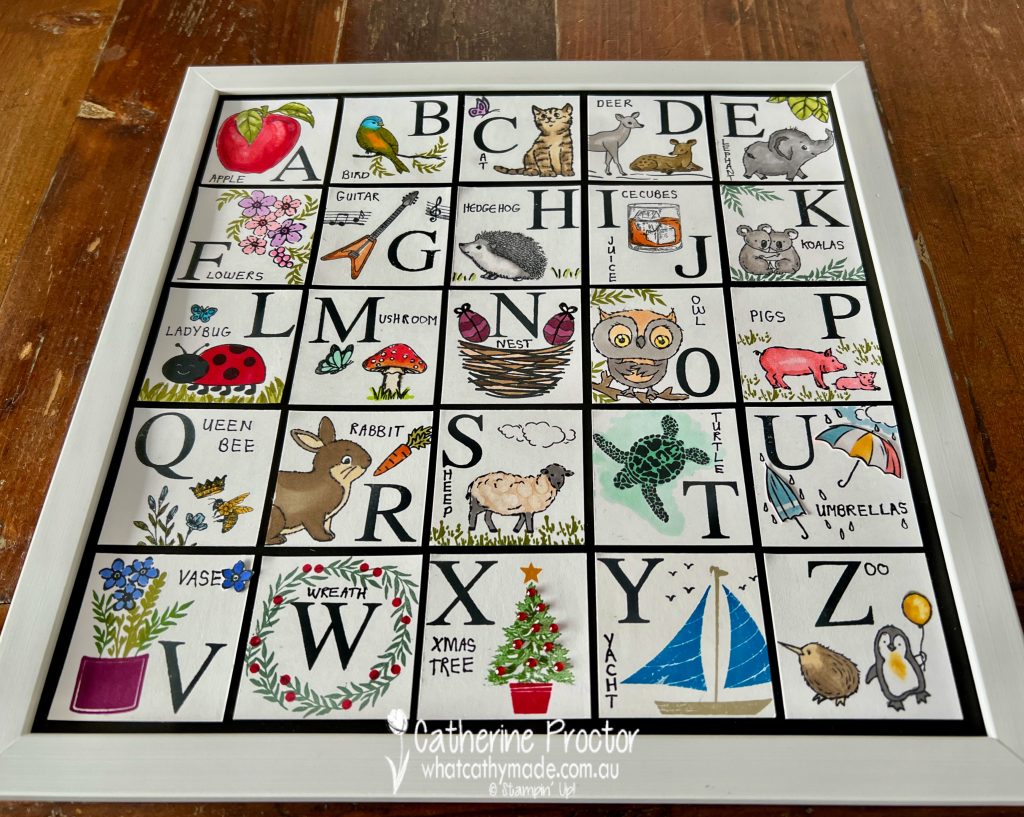
I also used the Basic Black Stampin’ Write marker to add details to some of the squares, including the rain drops on the umbrella square. I didn’t have an umbrella stamp so I fussy cut umbrellas from the “Rain or Shine” DSP and then hand drew the umbrella handles.
Other tips for making this style of sampler?
Stamp the letters in different positions on each square, ensuring they work with the shape and orientation of each image and that they are nicely distributed throughout the sampler.
Once you’ve stamped each letter and the image, make sure you “ground” each image by adding some extra details and context, such as flowers, butterflies, branches, grass or clouds to create a mini scene.
Before you adhere the letter squares to the 12 x 12 cardstock, colour the images, ensuring there is a variety of colour throughout the sampler.
Write the name of each letter image and add then your own doodling to add visual interest, such as the bows on the top of these easter eggs in the nest and the rain drops on the U for umbrella.
Finally, adhere the squares to your background cardstock once it is inside the frame so you can evenly space the squares in the space.
Start with the row across the top and down the left hand side – once these letter squares are in and evenly spaced it makes it so much easier to line up the rest of the squares.
This was such a fun project to make – I wanted to use these stamps and colours before many of them retire at the end of April. You can use whatever you have in your stamp collection.
I’ll be back this Wednesday April 5, with the AWH Colour Creations team to showcase one of the retiring core colours – So Saffron. I hope you can join us then.
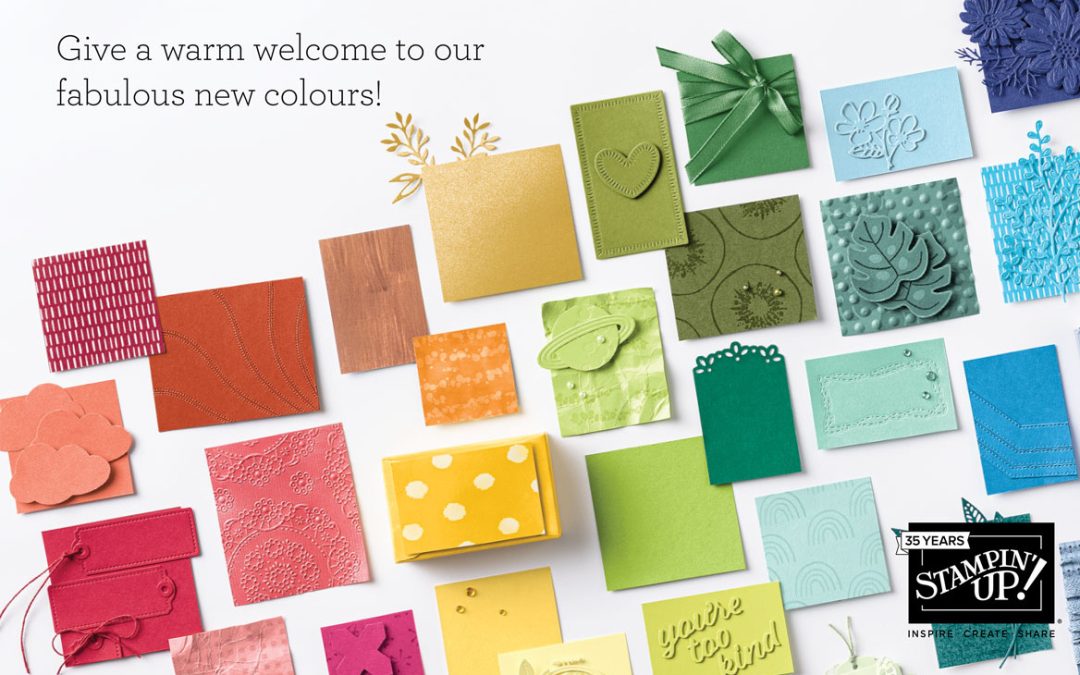
Stampin’ Up! have just announced a colour refresh that includes:
15 Core and In Colours retiring
15 new Stampin’ Up! colours – 10 new or returning core colours and In colours, as well as 5 new In Colours
They’ve also announced:
The retiring list from the 2022-23 Annual catalogue
The retiring list from the January – April Mini Catalogue.
Stampin’ Up! demonstrators have been able to view a PDF of the new 2023-24 Annual Catty online – there are so many fabulous new products coming for 2023-24!
Let’s take a closer look at each of these exciting changes!
2023-24 In Colours
Drum roll… are you ready to see the new 2023-24 colours? Aren’t they gorgeous! Do you already have a favourite?
New Core Colours
And here are the new core colours. Some of these colours might be familiar to you as they are returning In Colours: Berry Burst, Blueberry Bushell, Fresh Freesia, Lemon Lime Twist, Lost Lagoon and Pretty Peacock.
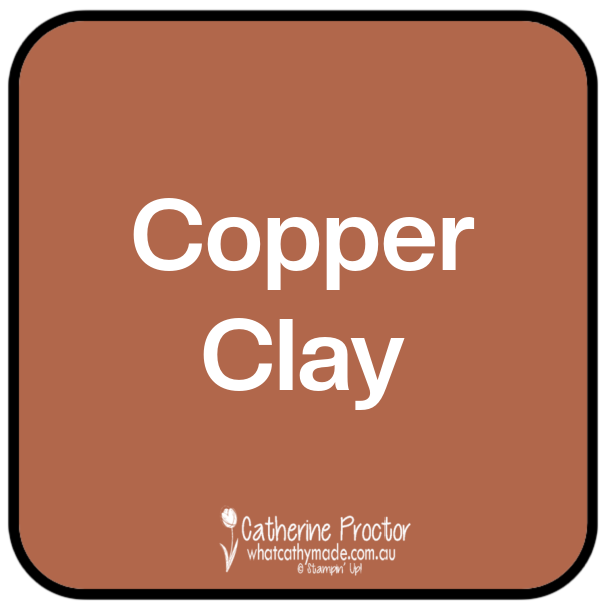
The other colours are brand new colours: Azure Afternoon, Bubble Bath, Lemon Lolly and Pecan Pie. Fresh Freesia is a current 2021-23 In Colour that has now been promoted to the core range of colours.
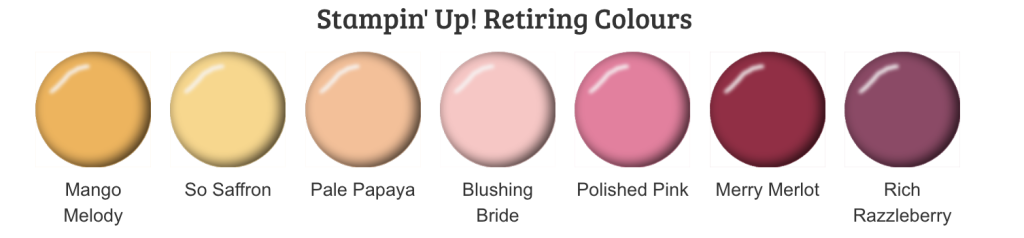
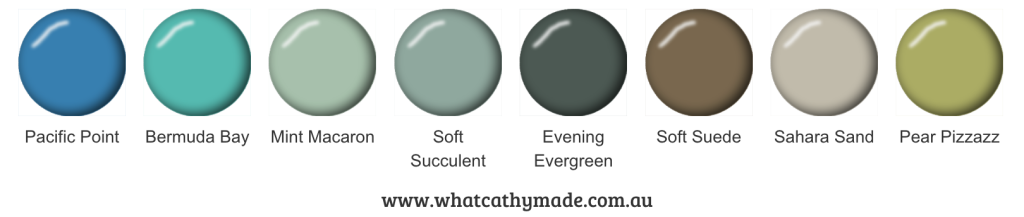
Retiring Colours
Sadly, it’s also time to say goodbye to 15 core colours and 4 of the 5 current In Colours – Fresh Freesia is returning as a core colour.
If you need to stock up on any ink, cardstock, markers or blends in these colours below you’ll need to do it sooner rather than later as they usually sell out before the end of the catalogue period.
Retiring products 2022-23 Annual catalogue & January – April 2023 Mini catalogue
You can order any of these last chance products from the Mini catalogue and the Annual Catalogue right, however the discounts listed do not apply until orders placed from the 4th April onwards.
Remember to start a new order on 4th April.
Sale starts: 4 April at 12:00 a.m. (AEST) and ends: 1 May at 11:59 p.m. (AEST)
Once these products are sold out they will be gone forever!
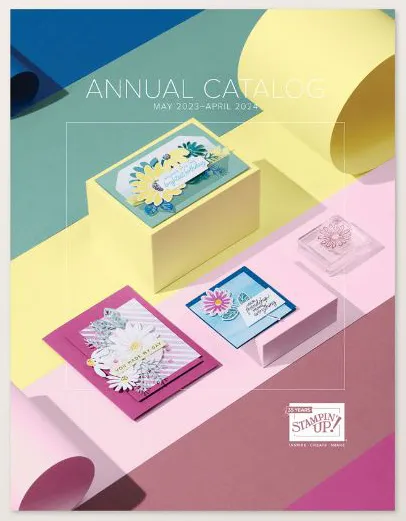
The new Stampin’ Up! catalog starts May 2, 2023, however, if you’d like to see it and order early during the demonstrator pre-order period, you are welcome to join my team and become a Stampin’ Up! demonstrator now!
Here’s the cover of the new Stampin’ Up! catty – let me know if you’d like me to post you your very own copy!
I’ll be back this Wednesday April 5, with the AWH Colour Creations team to showcase one of the retiring core colours – So Saffron. I hope you can join us then.
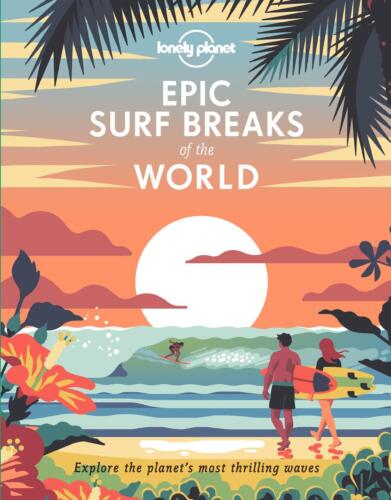
Last Friday my husband, Pete, celebrated his birthday and one of the books I gave him was the Lonely Planet Epic Surf Breaks of the World.
I knew Pete would love adding more surf breaks to his bucket list – as I type this blog he is surfing down the south coast – and I knew I’d love looking at the incredible illustrations by the illustrator, Ross Murray, like this one below.
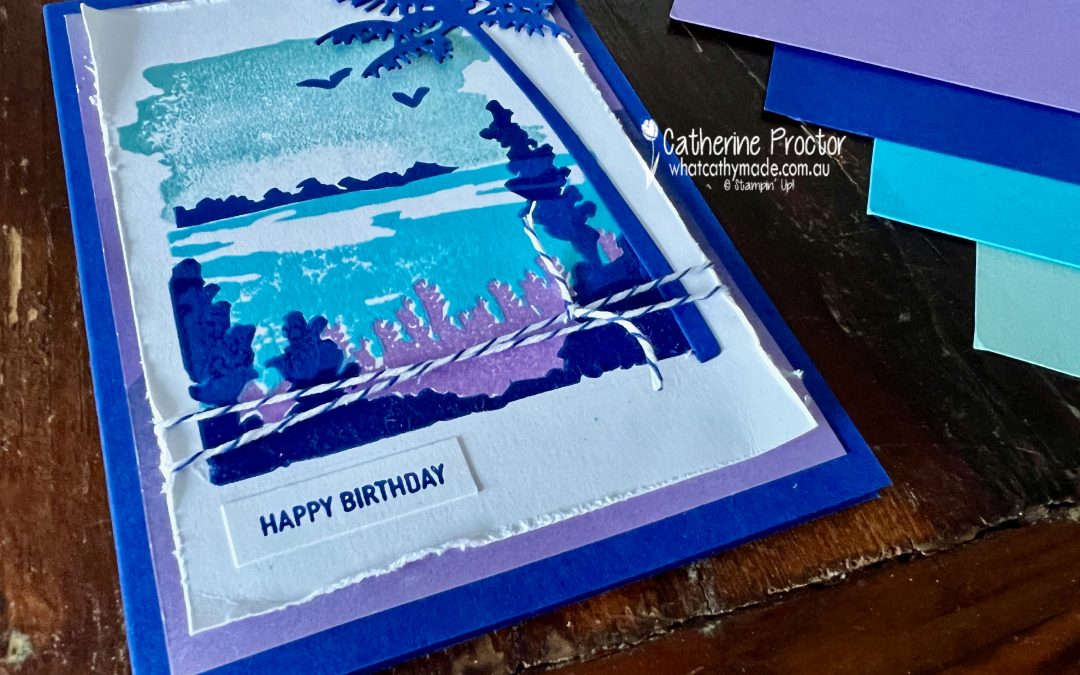
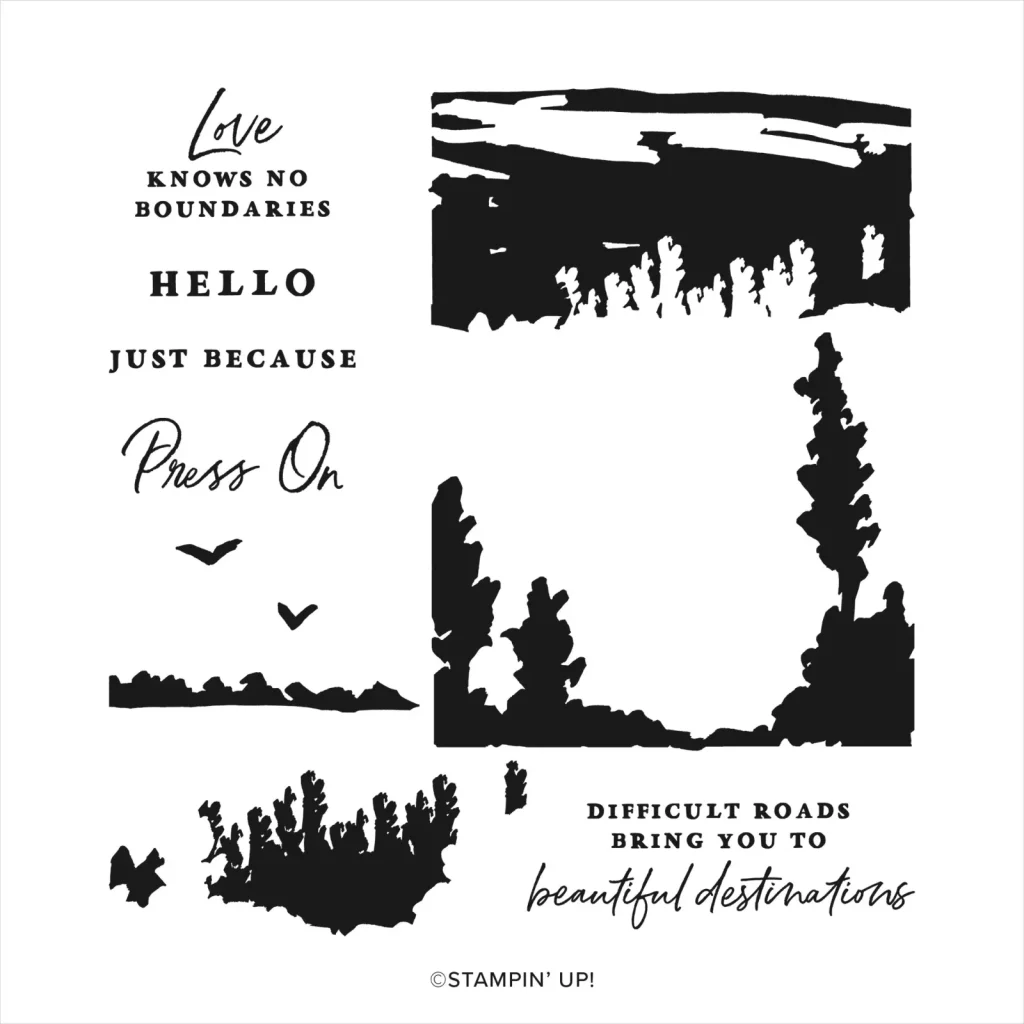
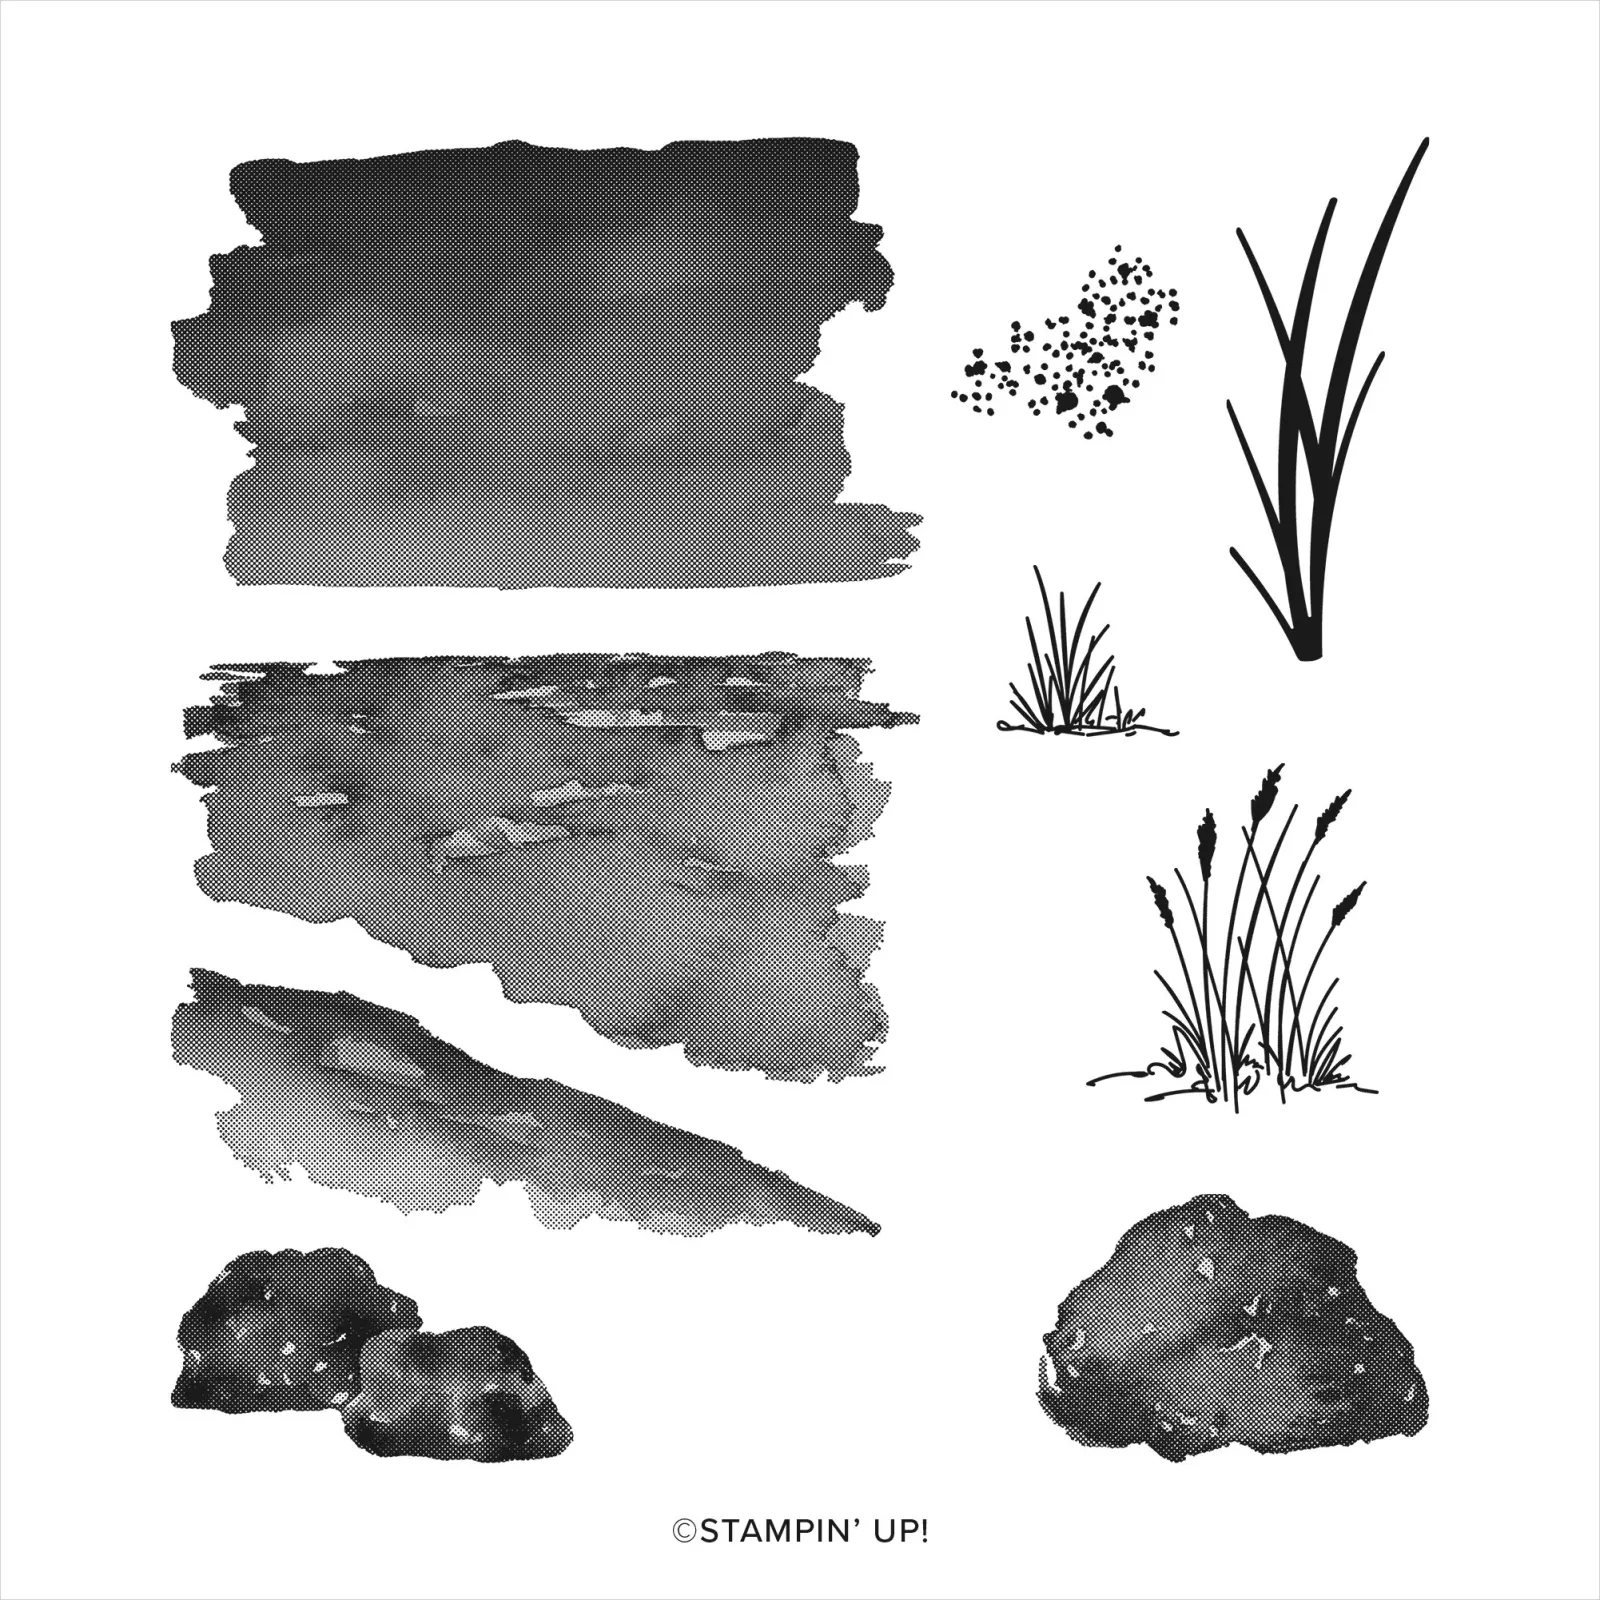
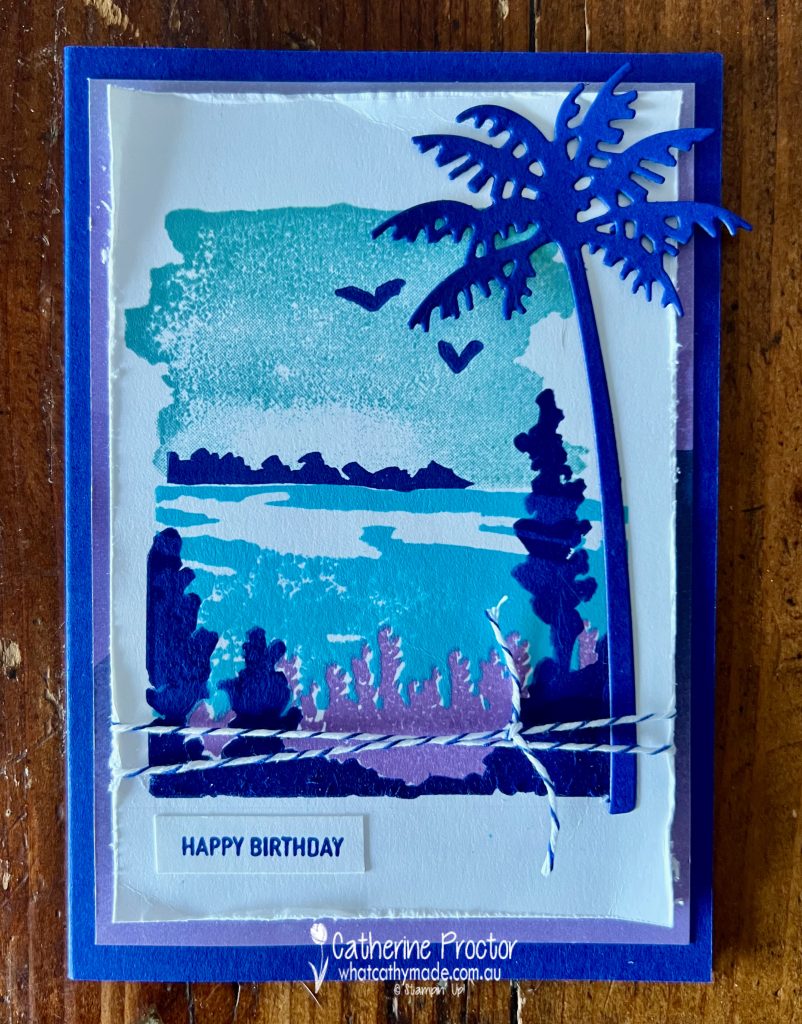
To make a matching card in a similar graphic style I used the Stampin’ Up! Picturesque stamp set, combined with one of the stamps from the Oceanfront stamp set. Thanks to Laurie Alexander, a USA Stampin’ Up! demonstrator who gave me the idea to combine the two sets.
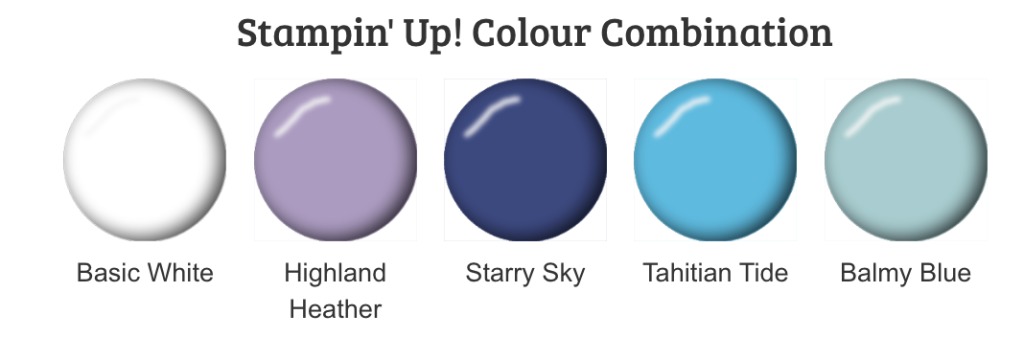
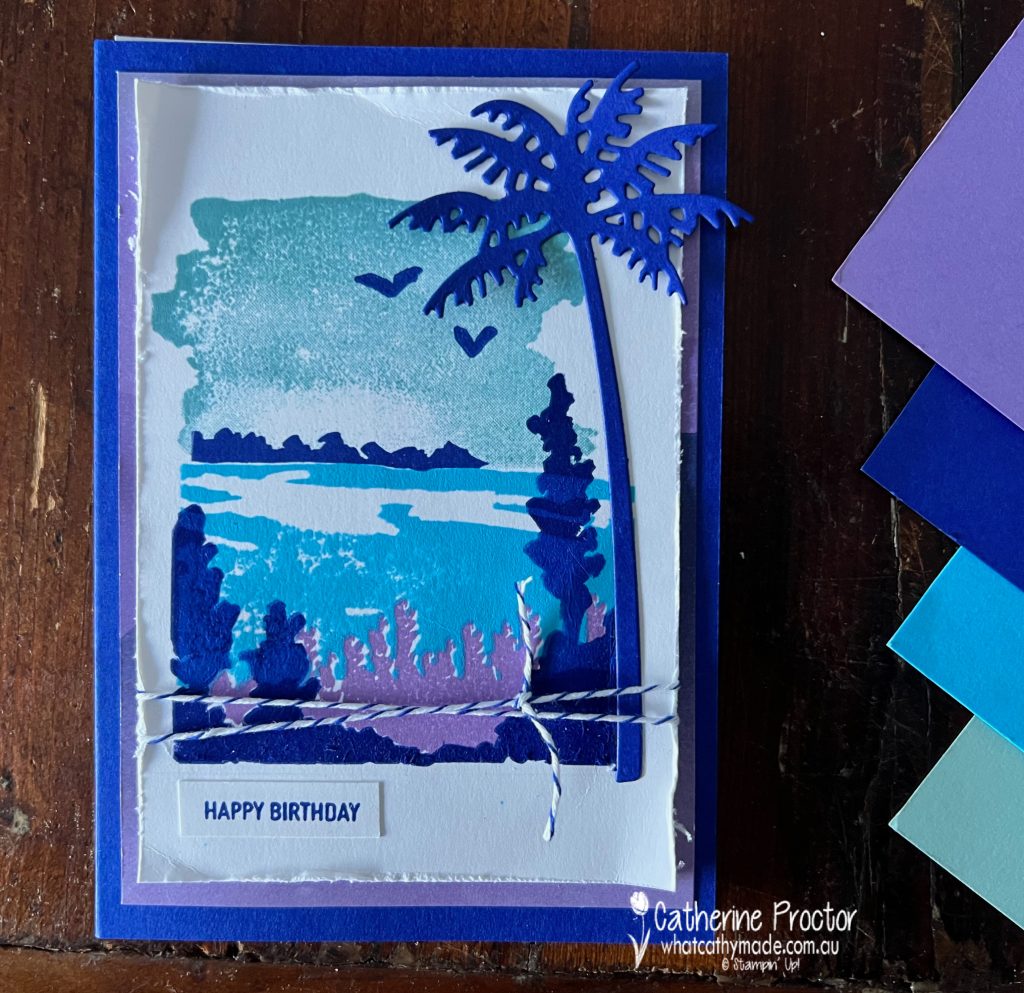
I chose a vibrant palette of blues and purples, however you can really use any colours with this graphic stamp set.
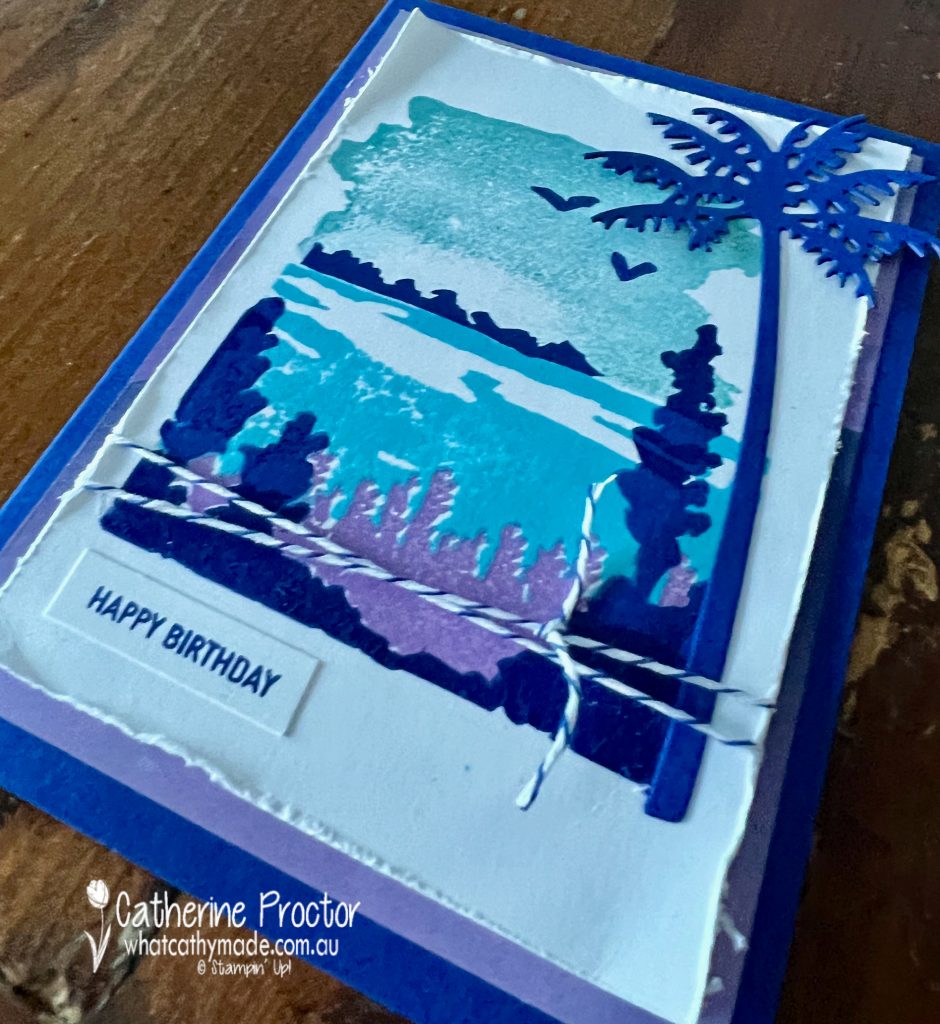
The colours are so vibrant in this card it was hard to take a good photo that didn’t look overexposed!
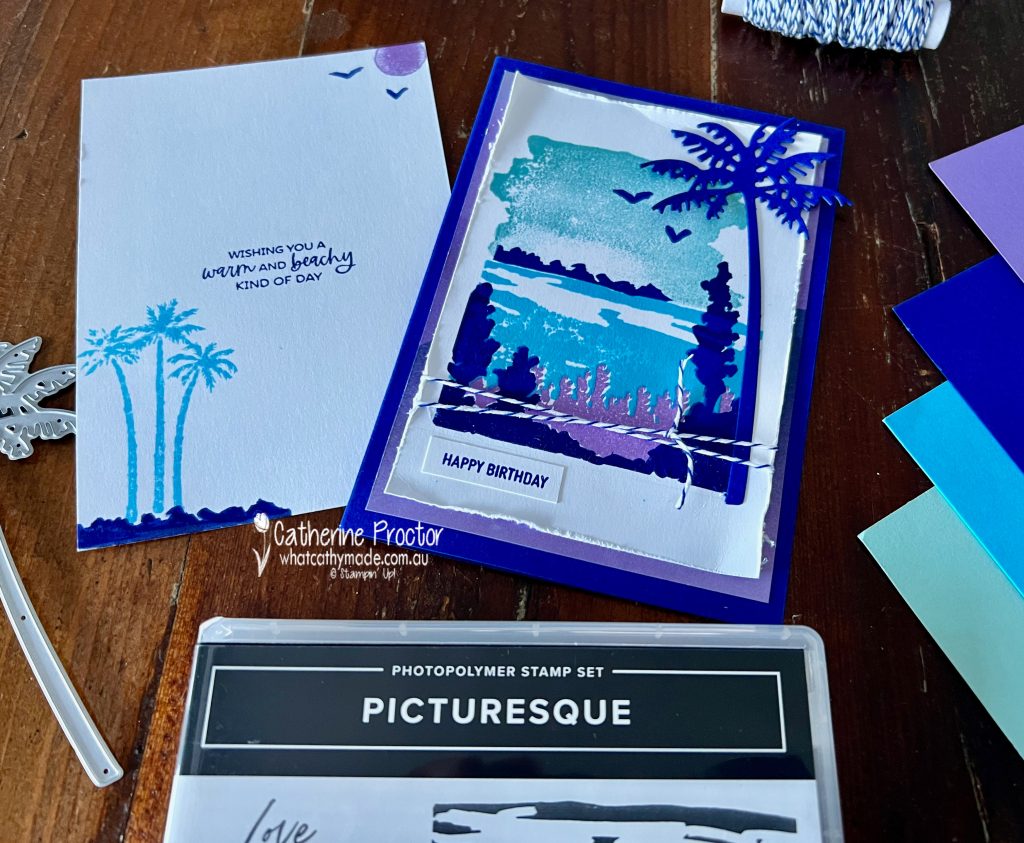
This stamp set is photopolymer, which makes it super easy to line up the layers of colour, however, the bottom stamp that I’ve stamped in Starry Sky can easily bend, so I used my grid paper in the Stamparatus to line up the stamp before stamping.
The Stamparatus is a must have for creating this type of landscape as you often have to go back a restamp the larger stamps to ensure saturation of colour and coverage.
Other products used include the large palm die from the Palm Dies, the happy birthday stamp from the new On The Ocean stamp set and some In Colour Starry Sky twine.
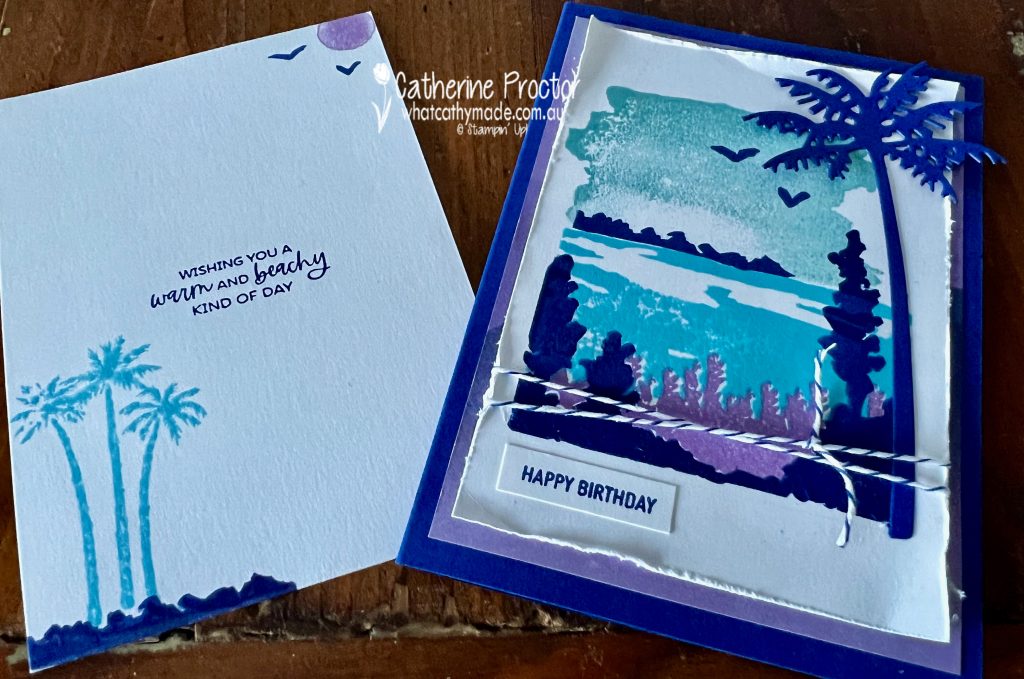
The inside of the card has a a palm stamp from the Paradise Palms Stamp Set, with a Highland Heather sun – why not!
I’ll be back this Wednesday March 1, with the AWH Colour Creations team to showcase Rich Razzleberry. I hope you can join us then.
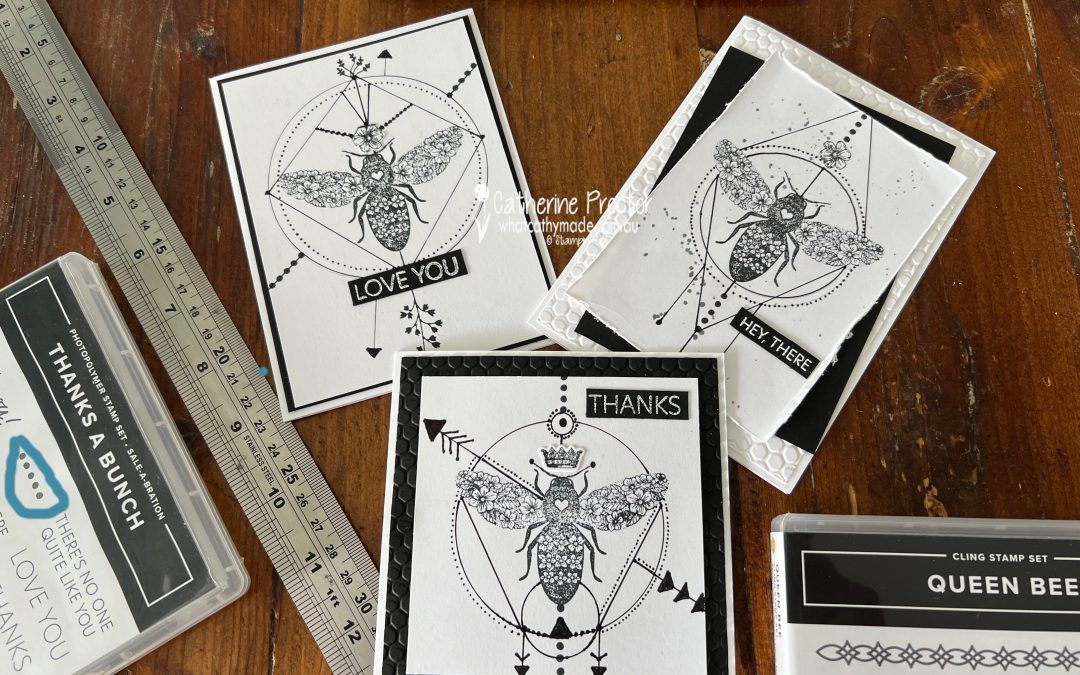
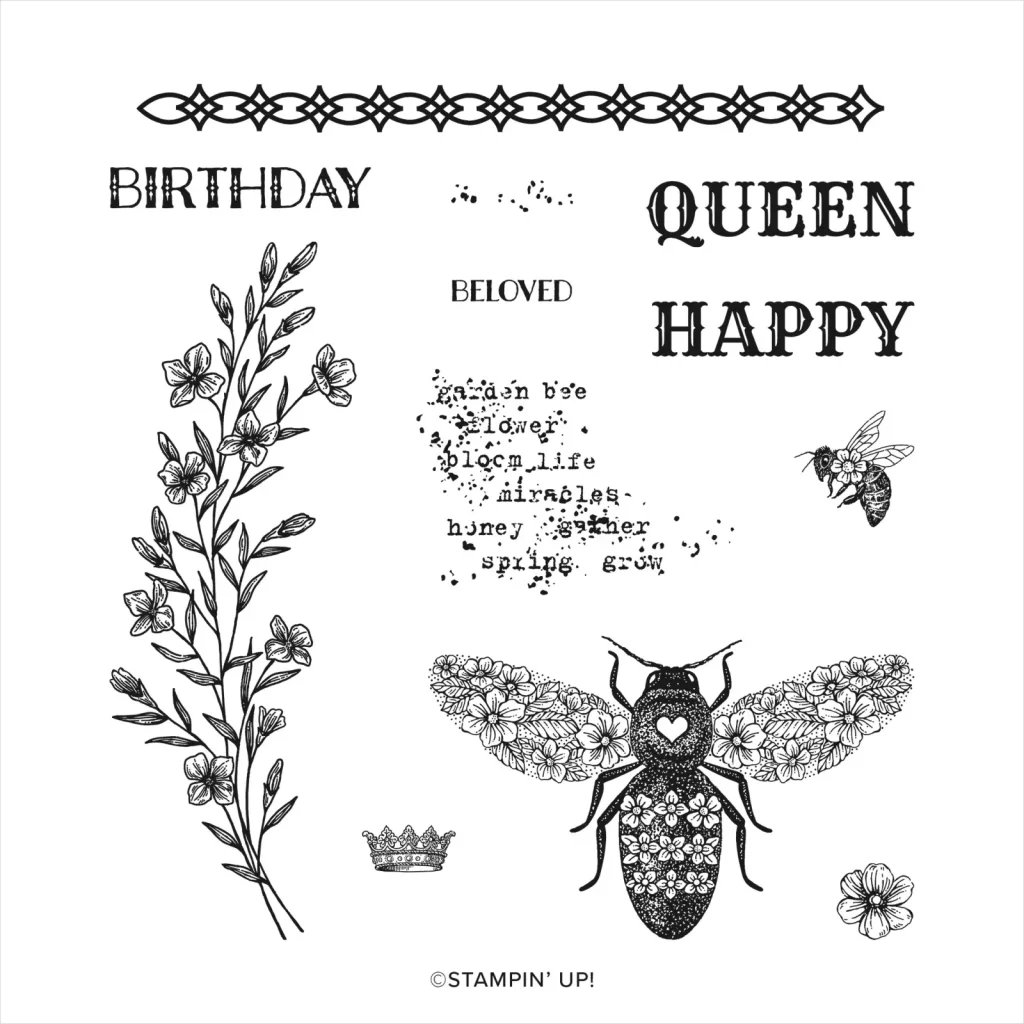
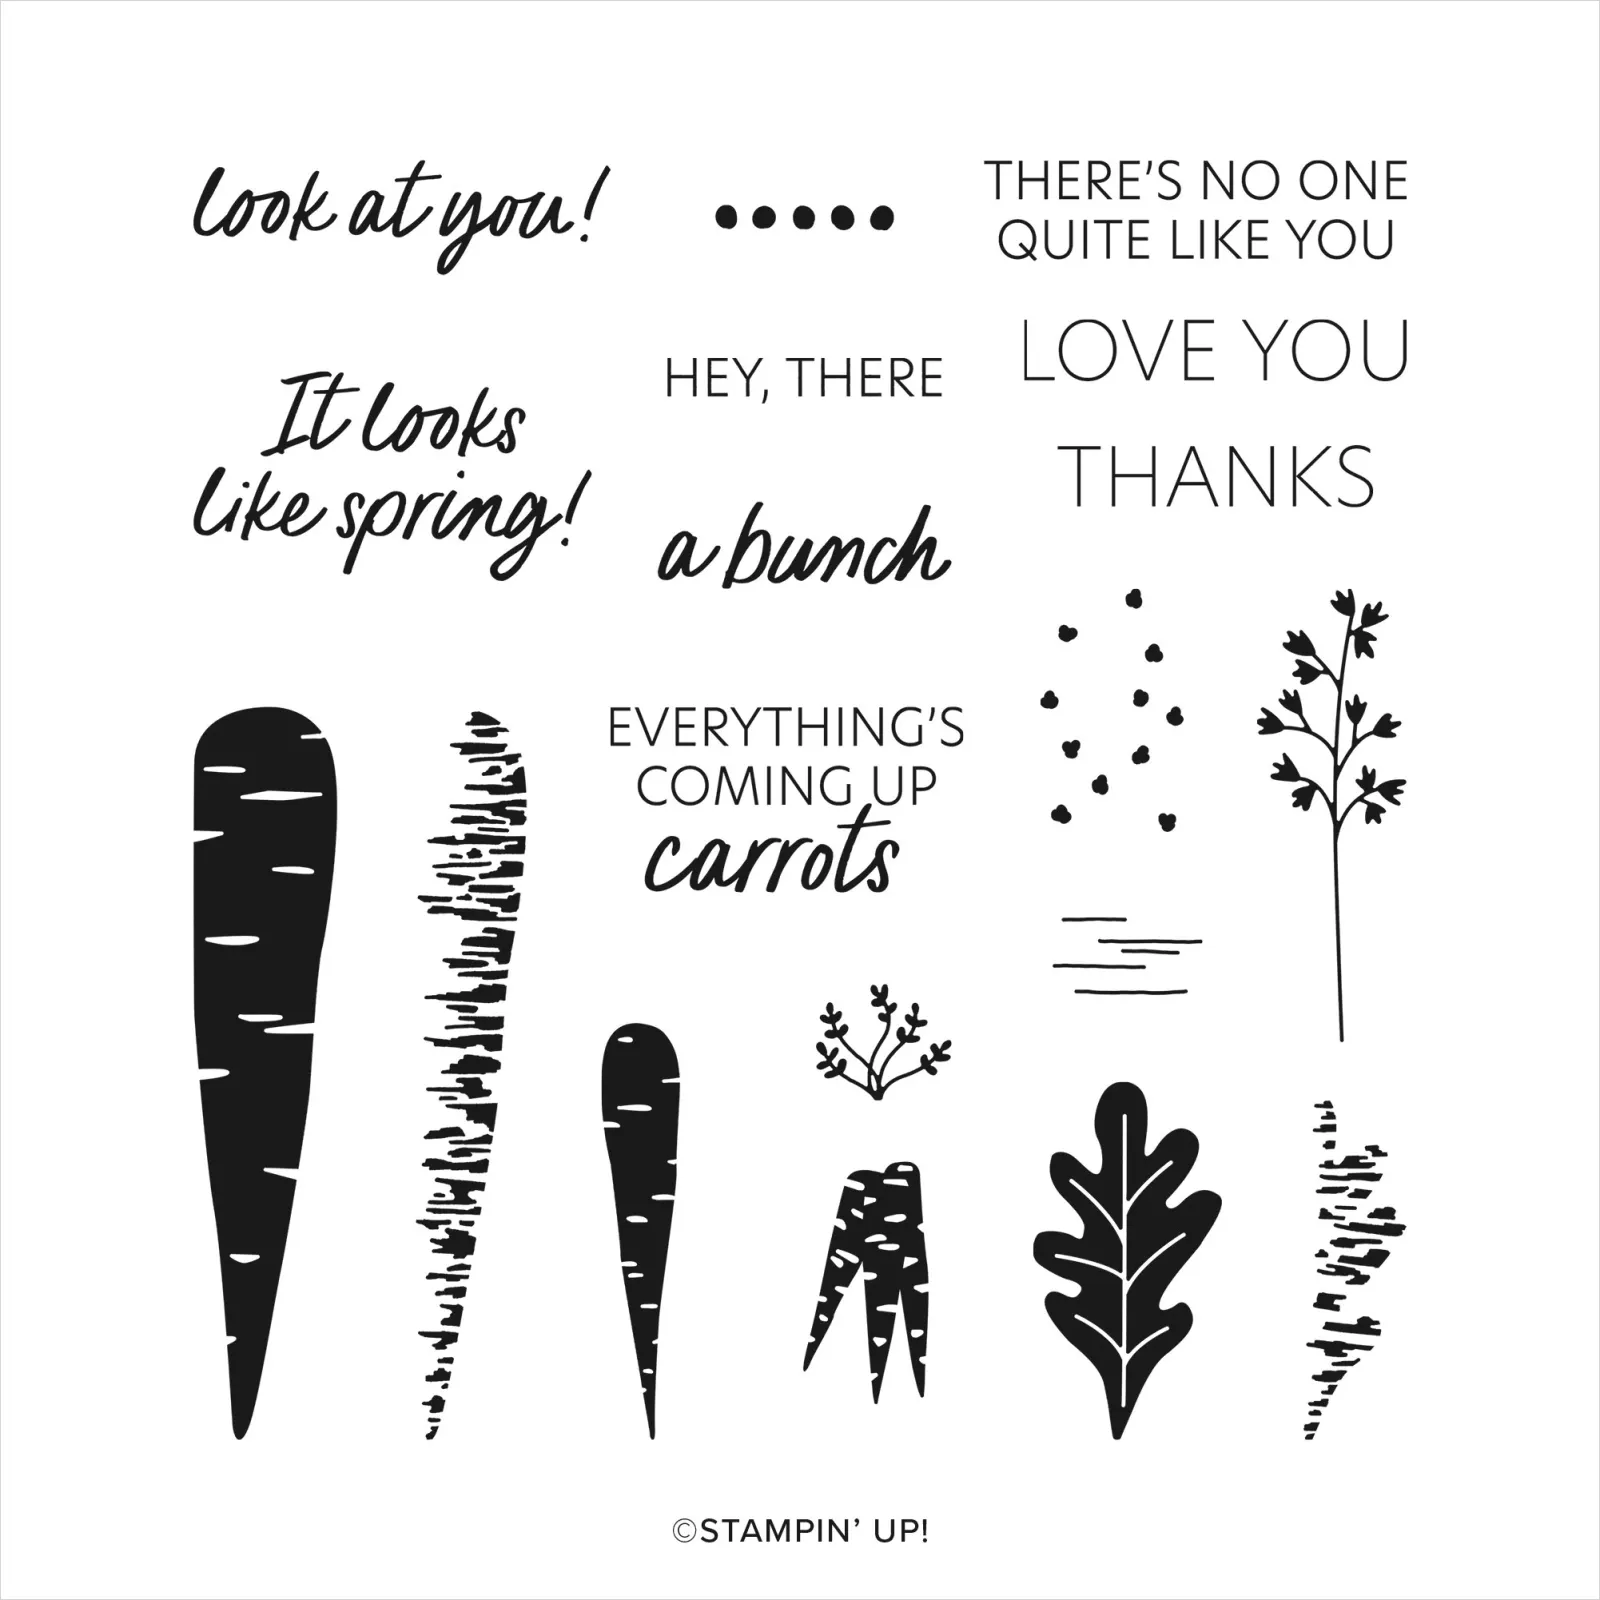
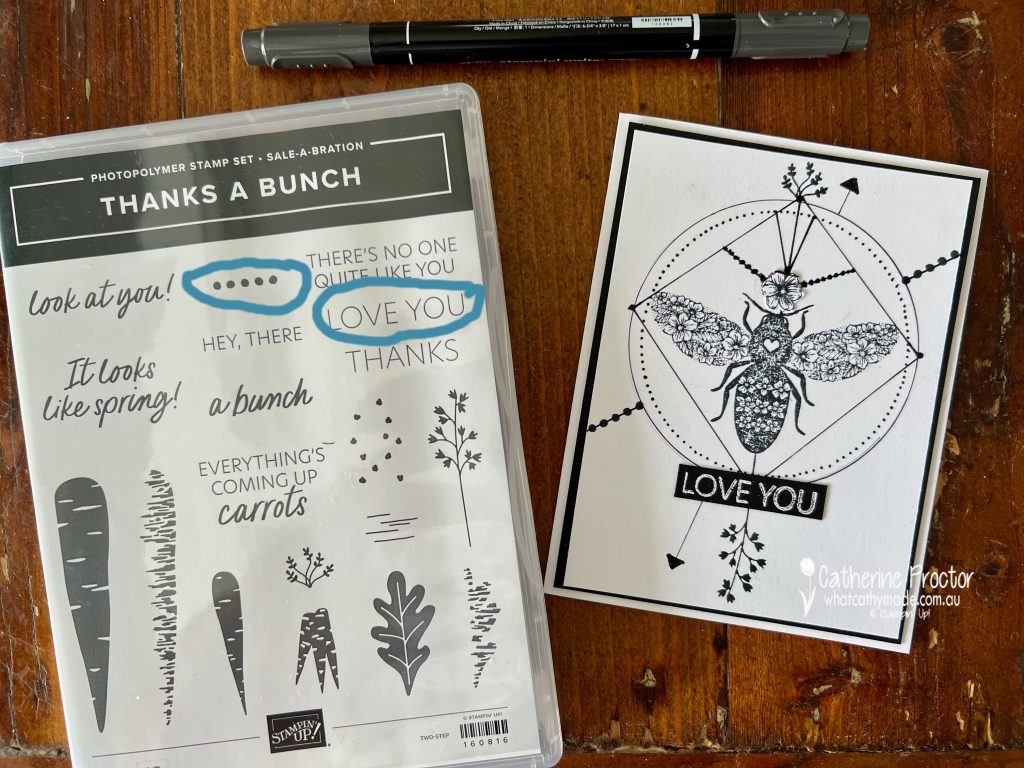
With only two days left until SALE-a-bration ends, I couldn’t resist sharing these three cards that bring together the Stunning Queen Bee stamp set with two of the FREE Sale-a-bration items: the Thanks a Bunch Stamp set and the Hive 3D embossing folder.
Thanks a Bunch Stamp SetHive 3D Embossing folder
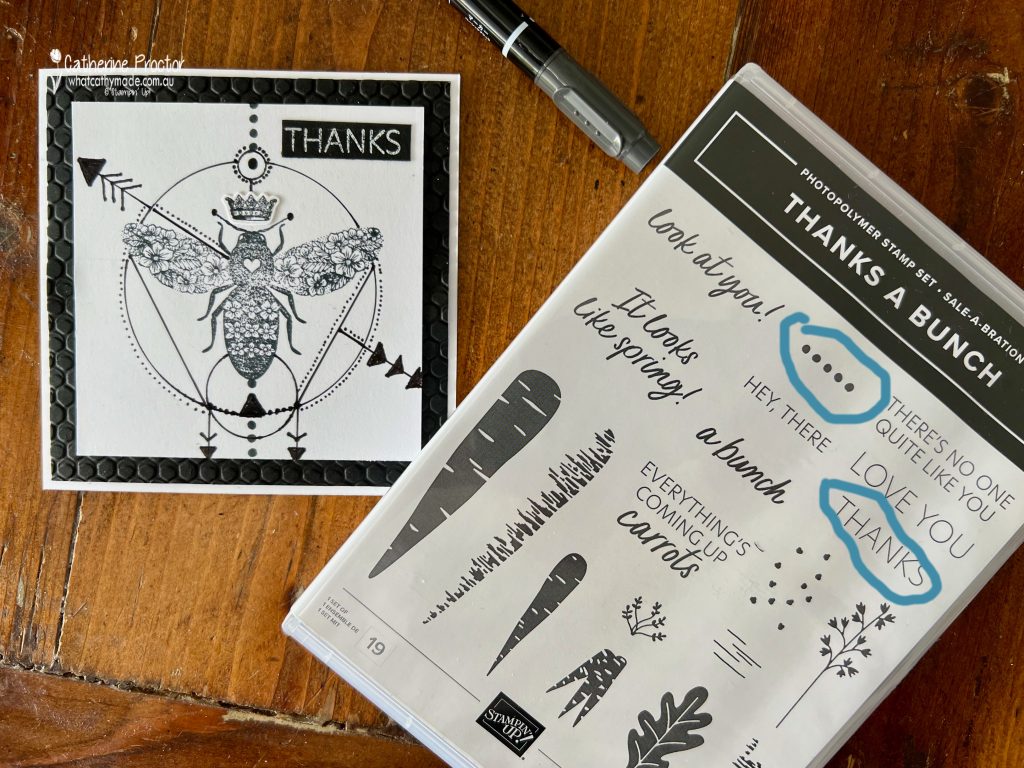
There’s a tiny stamp in the Thanks a Bunch stamp set that works really well on this graphic, tattoo style of card – the 5 dots in a row. I’ve used this dot stamp on all three cards below, along with other stamps from both stamp sets and freehand drawn lines using a ruler and a Black Stampin’ Write marker.
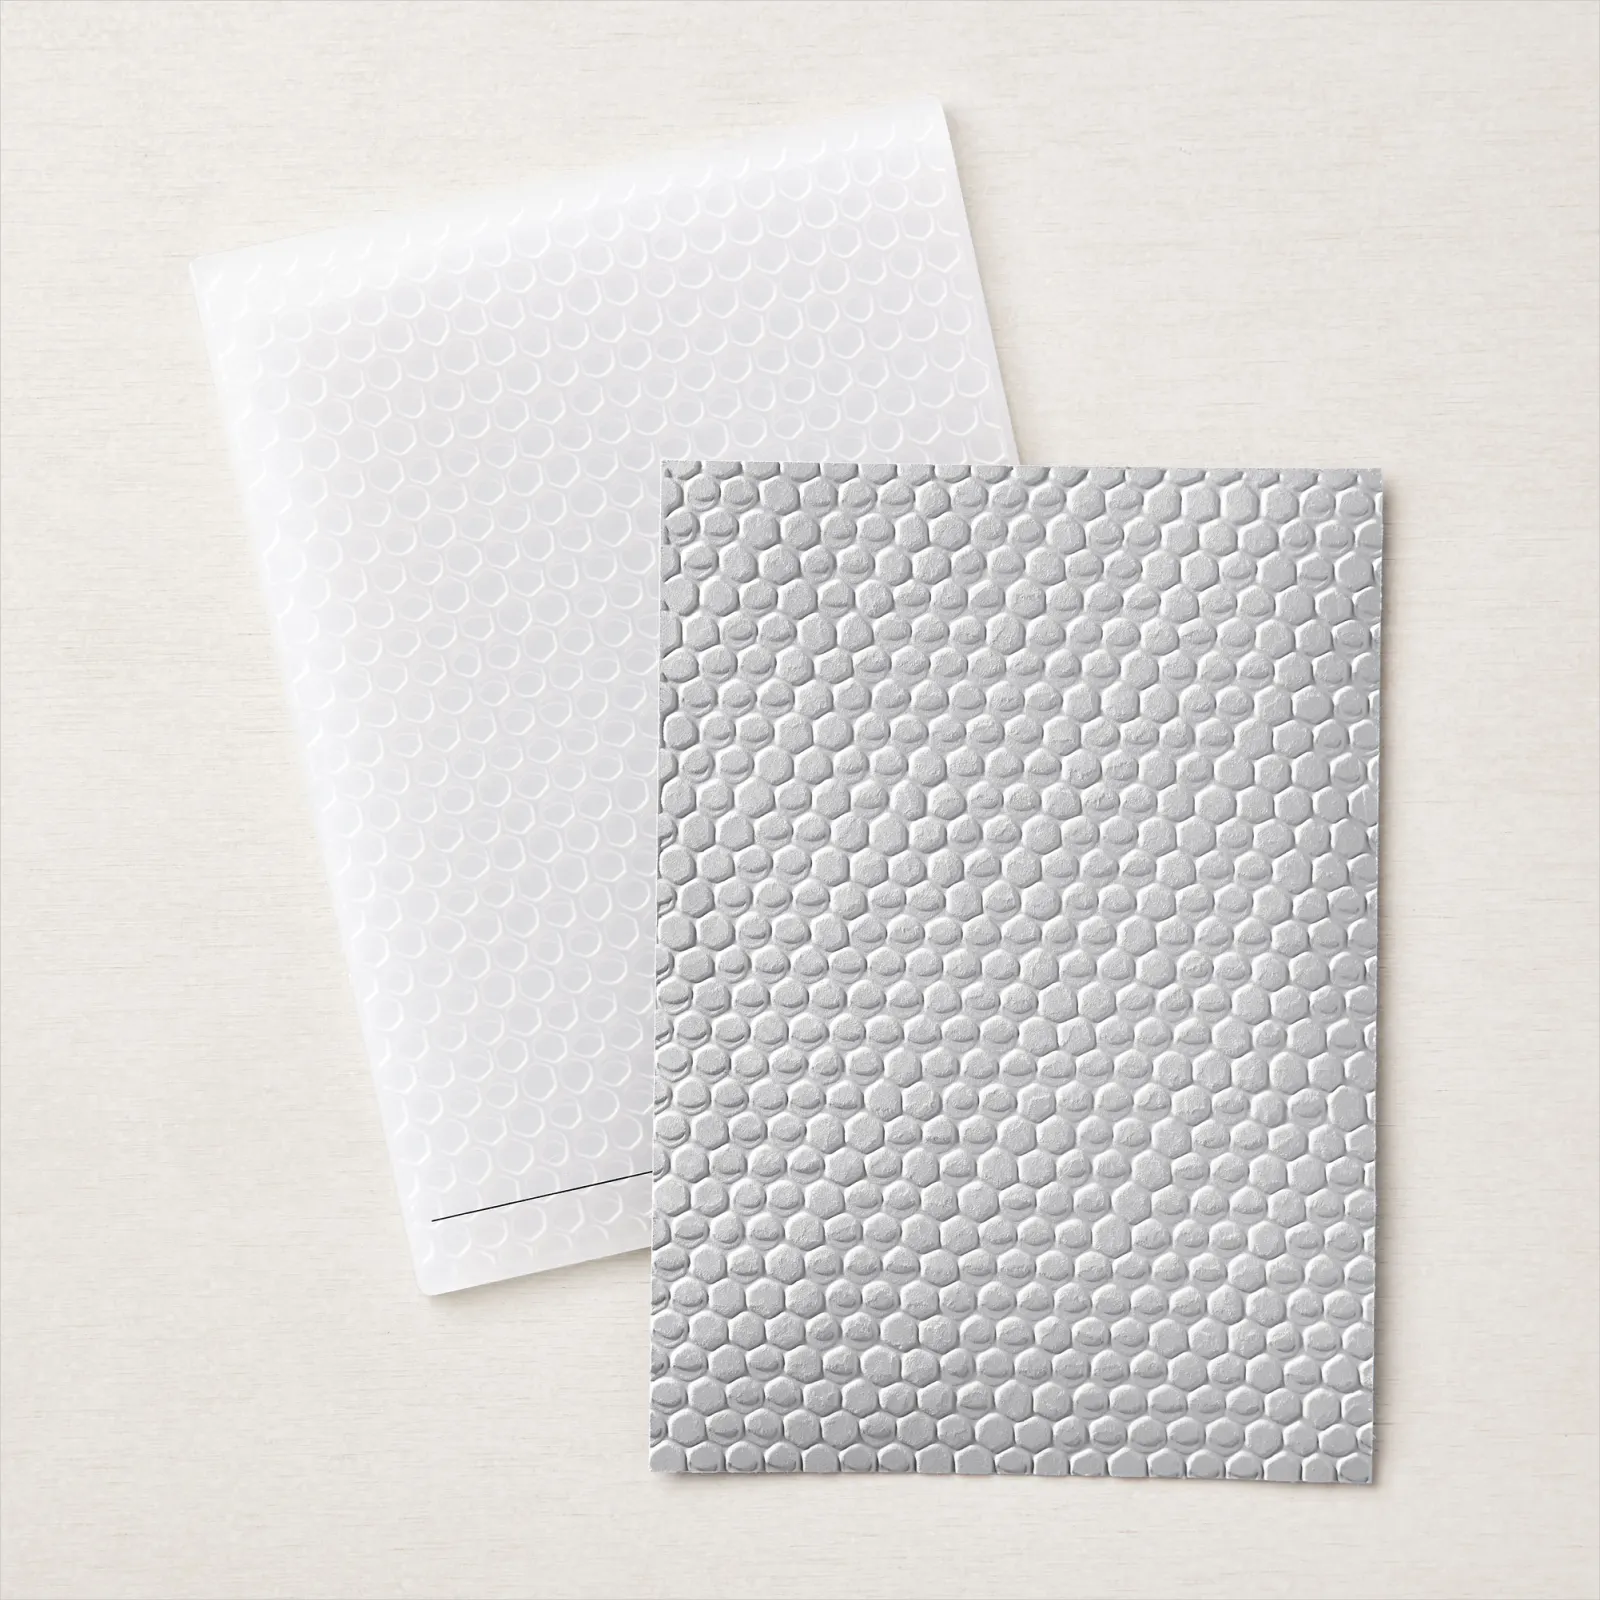
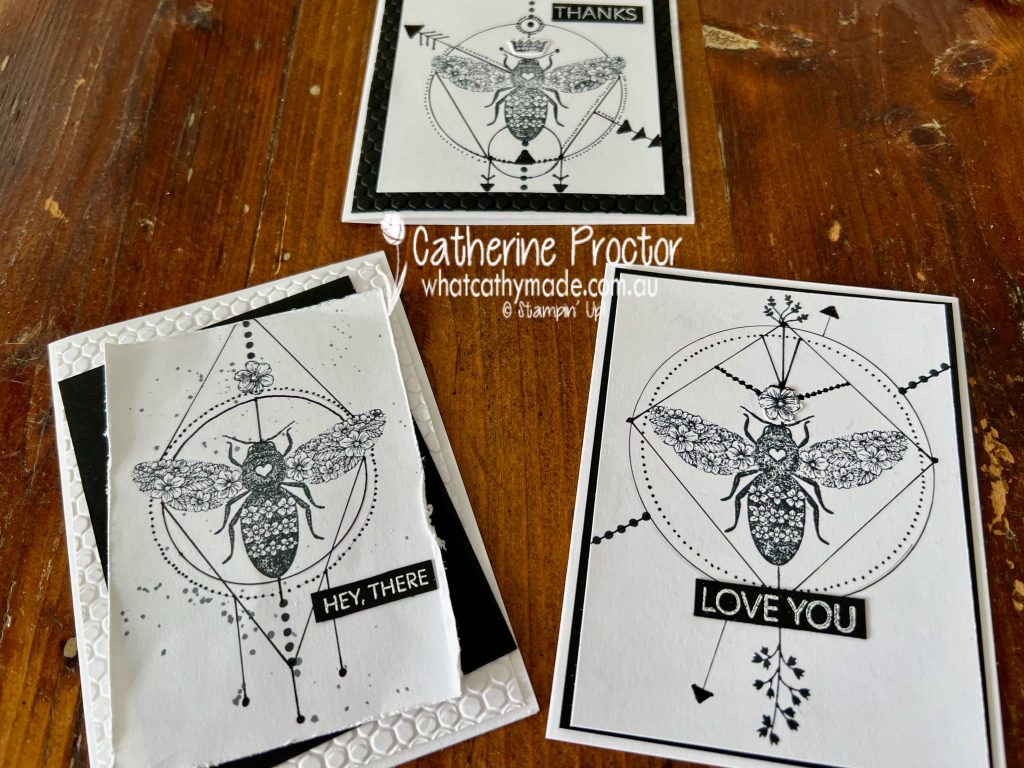
The square thanks card also uses the Hive 3D embossing folder as well as the large bee stamp, the crown stamp and the thanks sentiment from the Queen Bee stamp set.
The love you card also uses the two carrot tops from Thanks a Bunch.
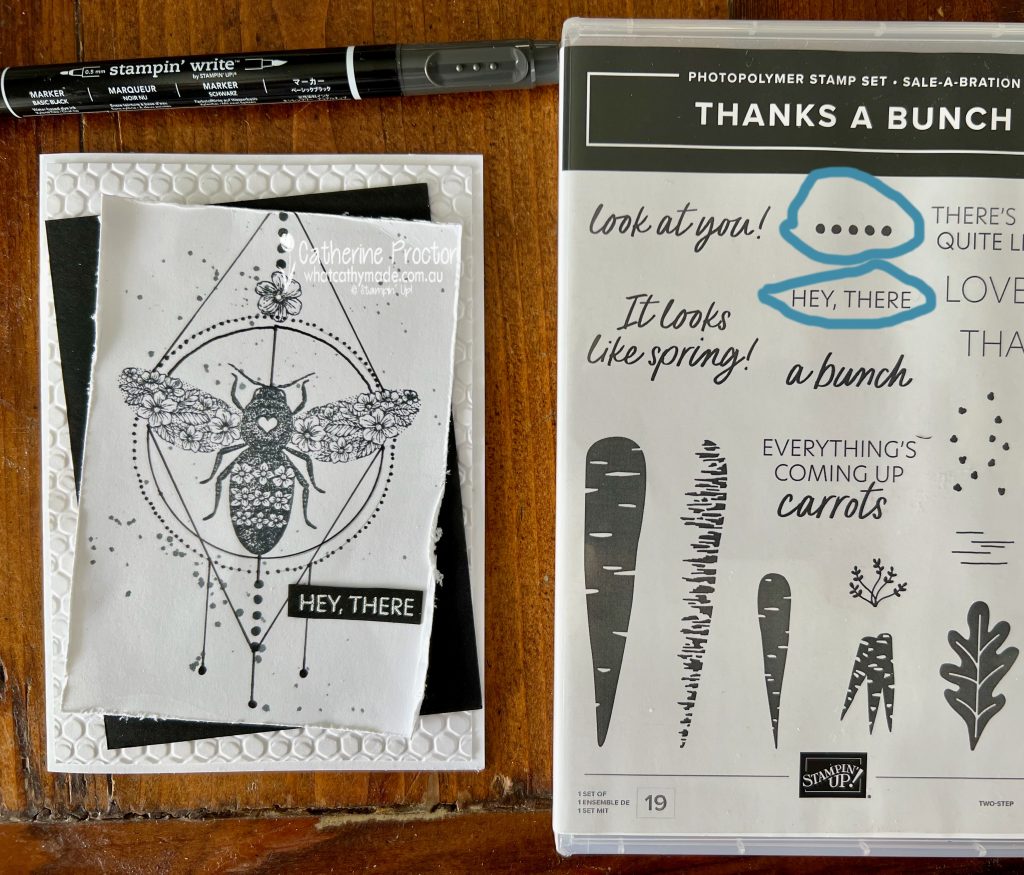
The Hey, There card also uses the bee stamp and the flower stamp from the Queen Bee stamp set, as well as the Hive 3D embossing folder.
I love the freedom this style of cardmaking gives me to take stamped images and take them to the next level.
Don’t forget that SALE-a-bration ends midnight tomorrow so don’t miss out if you would like to add any of these gorgeous products to your craft collection.
I’ll be back this Wednesday March 1, with the AWH Colour Creations team to showcase Real Red. I hope you can join us then.
Welcome to week thirty five of our Art With Heart 2022-23 Colour Creations blog hop. This is a weekly blog hop where we showcase the stunning range of Stampin’ Up! colours in alphabetical order over 12 months and this week we are featuring Pale Papaya from the 2021-23 In Colours.
The new January-April Mini Catalogue and SALE-a-bration Catalogue launched last week and one of the free SALE-a-bration items you can redeem for a $90 spend is the Thanks A Bunch stamp set.
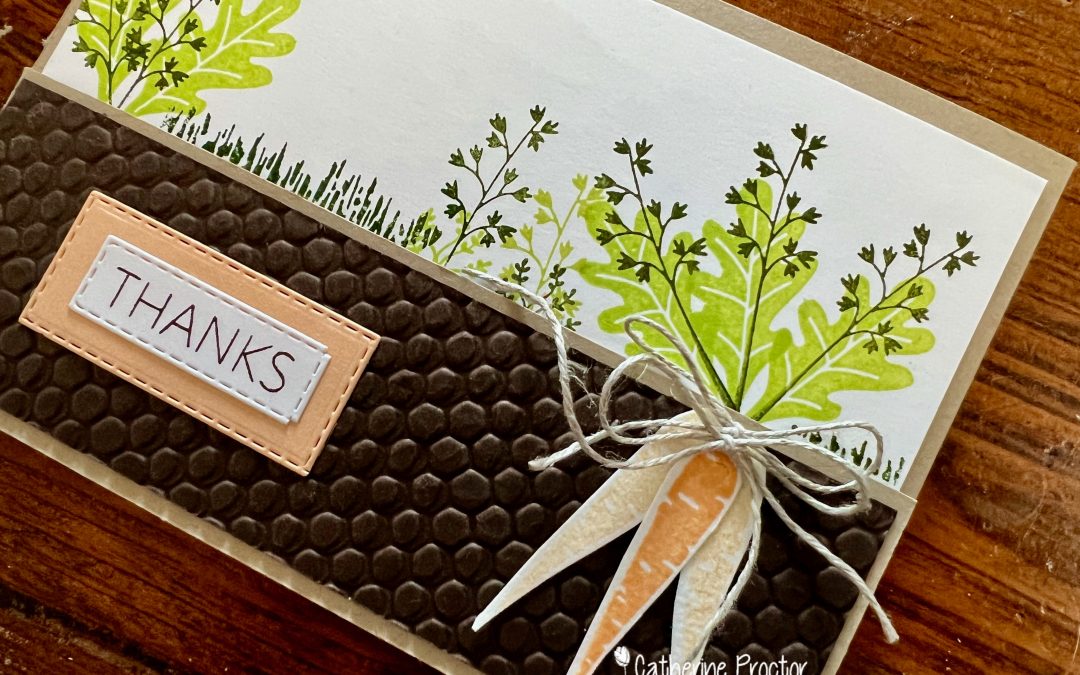
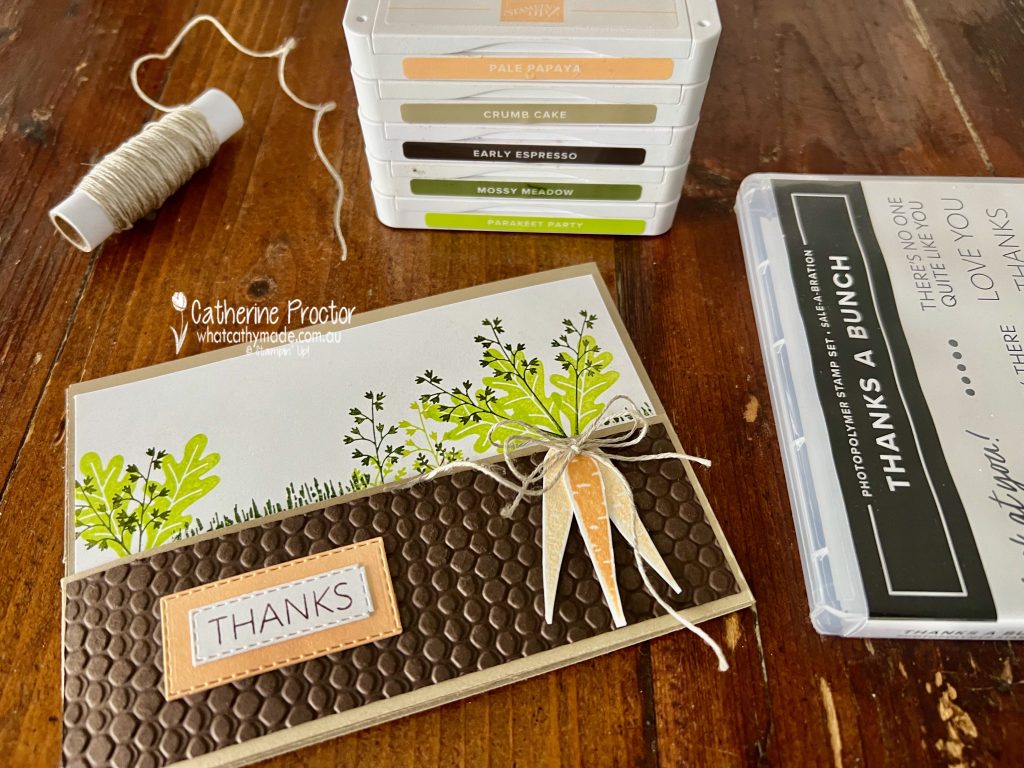
Pale Papaya is a great colour to use for carrots and I’ve used it both at full strength and stamped off once for the front of my split front, tri-fold fold card. Other colours used include Crumb Cake, Early Espresso, Mossy Meadow and Parakeet Party.
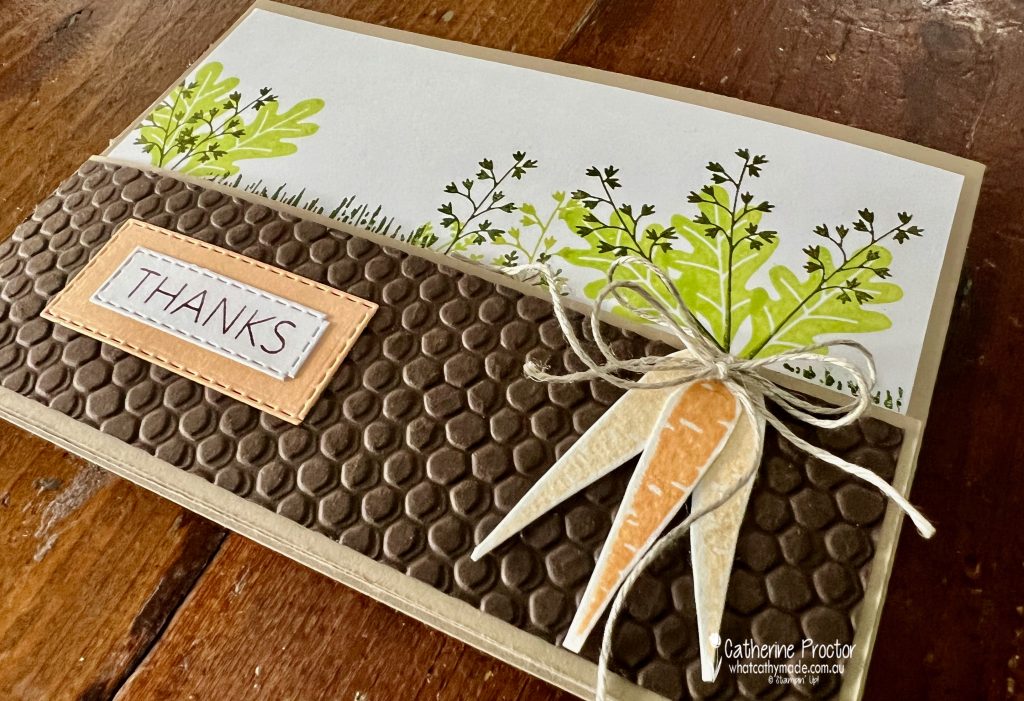
The Hive embossing folder was used to emboss Early Espresso cardstock to create soil for the front flap. As the split front, tri-fold fold card opens the layers of carrots are revealed.
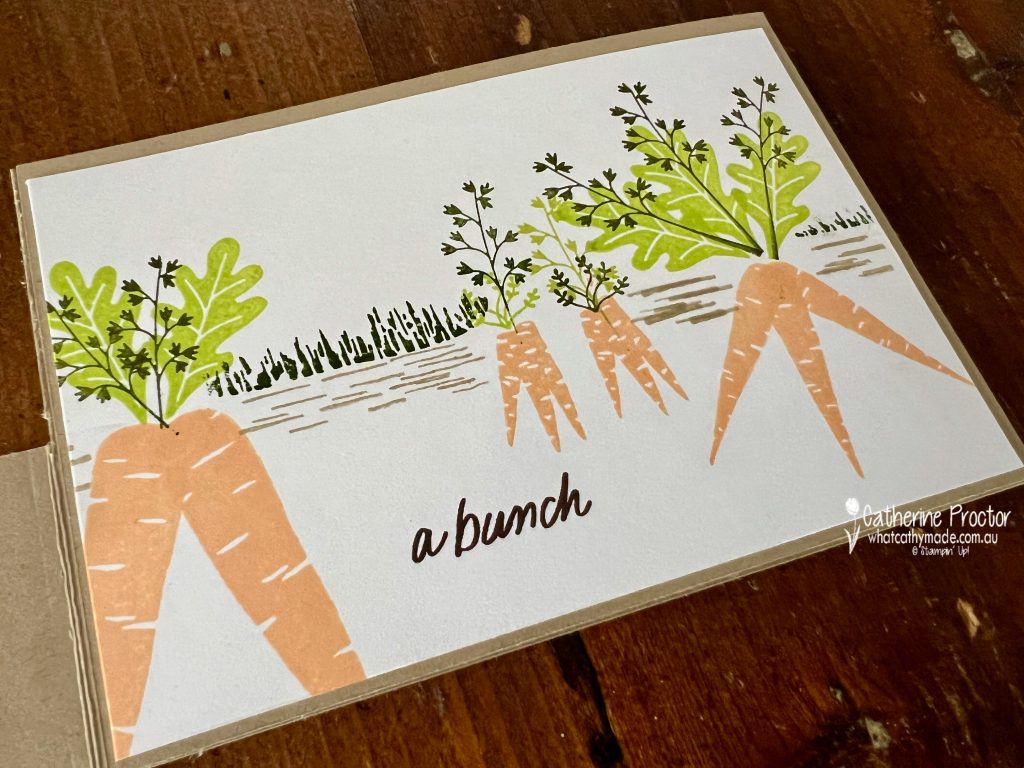
The middle flap shows carrots above and below the ground. One of the carrot shading stamps works really well to create grass once it is turned on its side.
Split front, tri-fold fold card instructions
Cut a sheet of A4 Crumb Cake cardstock at 10.5cm down the middle to divide into two long halves that each measure 21cm wide x 10.5 cm high.
Score both pieces at 14.8cm and fold in half along the score line to make two cards.
One of these cards will become the card base and the left split front panel, while the other card will be used for the right panel.
To create the left split front panel measure and cut off the top 5cm across the top of the left panel of one of the cards.
To create the right panel with the other card, measure 2 cm parallel to the middle score line and cut all the way down the card. You will now have a right panel with a 2cm wide flap which you use to adhere to the back of the right hand side of the card base.
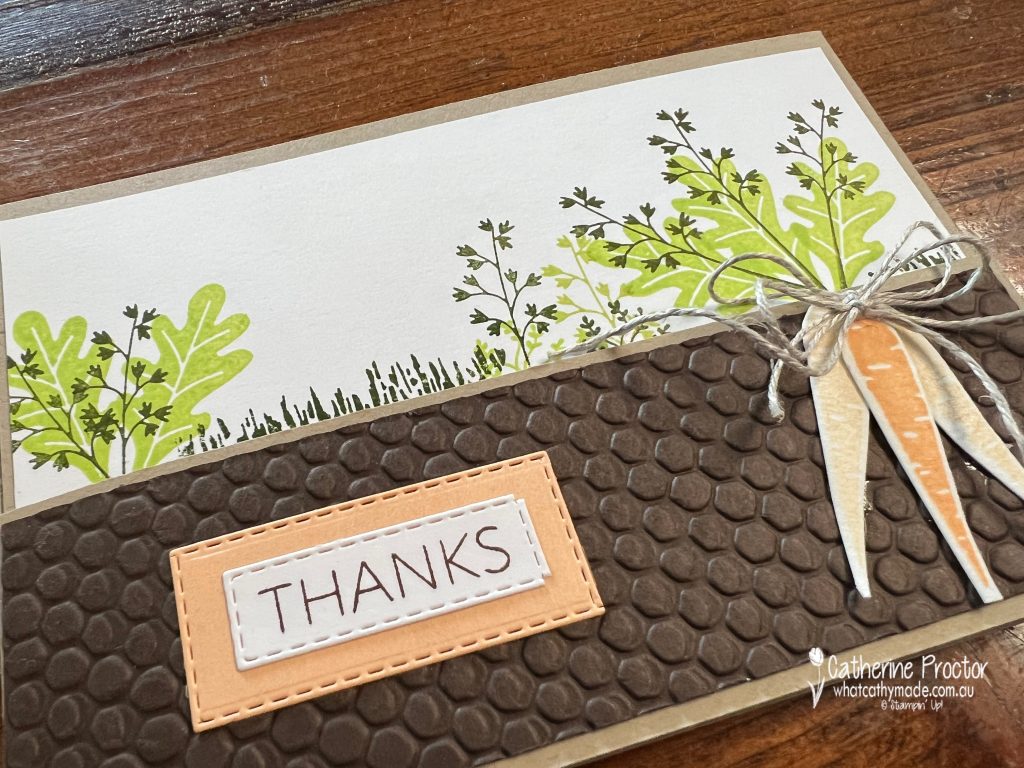
Fold the right flap over the card base and then fold the left split front panel over the right panel – I’ve adhered the embossed Early Espresso cardstock, the “Thanks” greeting and the bunch of tied carrots to the left split front panel.
Stamp and decorate the cardstock layers for your right card flap and card base BEFORE adhering to your split front, tri-fold fold card base.
All of the sentiments in this card are from the Thanks a Bunch stamp set, stamped in Early Espresso.
Now it’s time to hop on over to our next participant, the lovely Tina Gillespie – I can’t wait to see what Tina has made this week!
If at any time you find a broken link, you can find the complete list of all participants below.
If you live in Australia, you can find and purchase these products in my Stampin’ Up! Online Store once they are available to purchase tomorrow morning.
We’ll be back next Wednesday January 18 with projects showcasing one of the Subtles, Pear Pizzazz.
Welcome to week thirty four of our Art With Heart 2022-23 Colour Creations blog hop, our first hop for 2023!
This is a weekly blog hop where we showcase the stunning range of Stampin’ Up! colours in alphabetical order over 12 months and this week we are featuring Pacific Point from the Brights family.
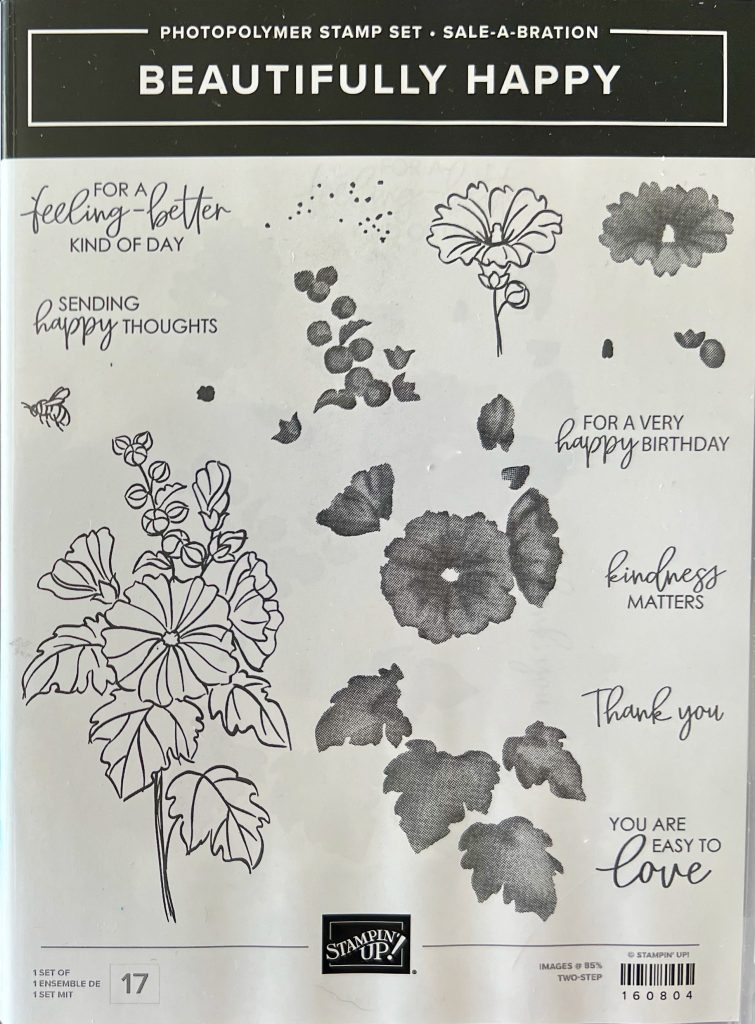
Tomorrow morning the new January-April Mini Catalogue and SALE-a-bration Catalogue are launched and one of the free SALE-a-bration items you can redeem for a $180 spend is the Beautifully Happy stamp set.
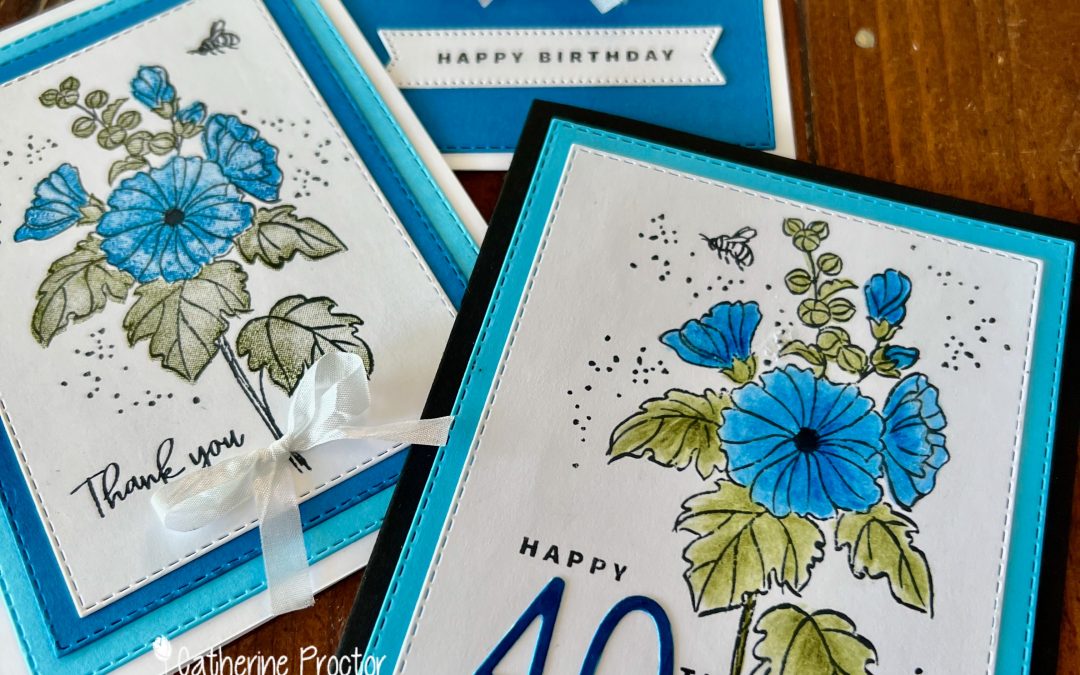
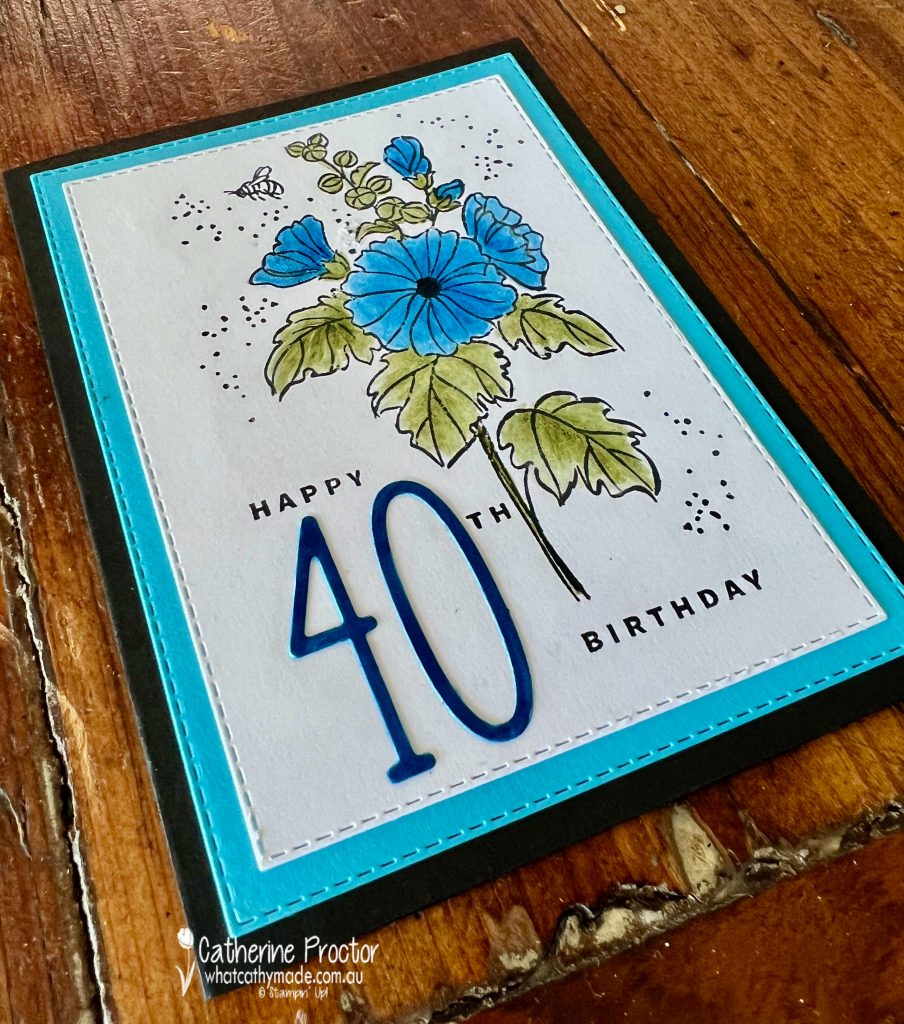
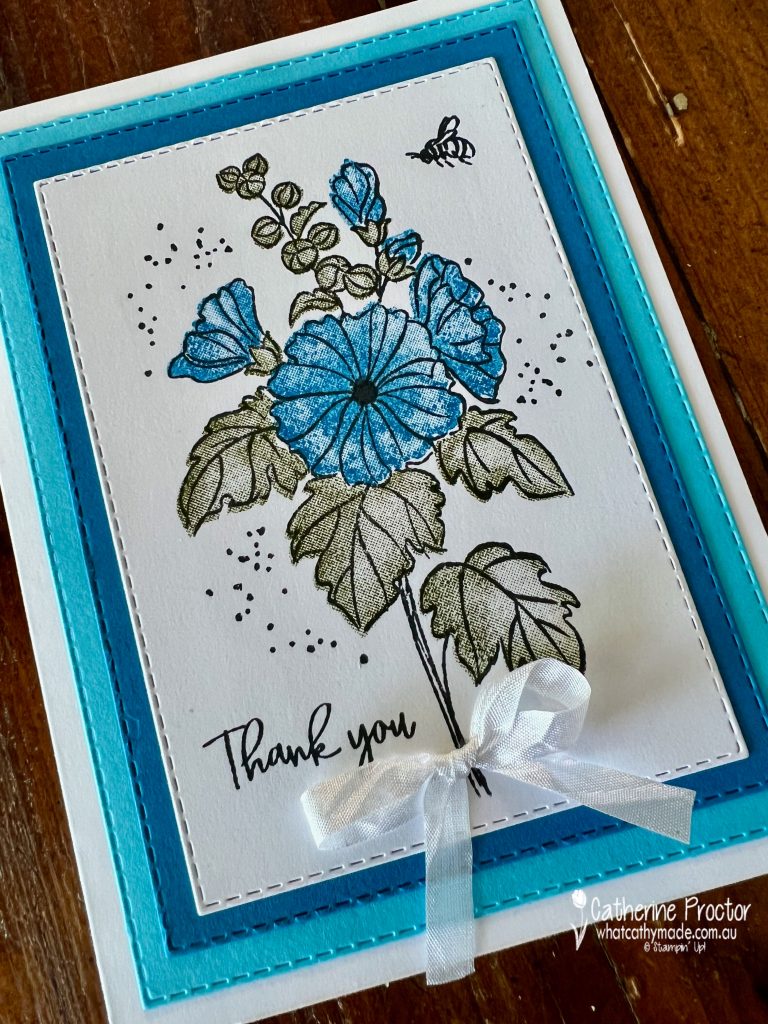
The Beautifully Happy stamp set is very versatile because it includes a good variety of sentiments, floral line drawings that can be coloured in, a “splatter” stamp, a tiny little bee stamp and “distinktive” stamps that allow you to stamp shaded colour inside the flowers and leaves instead of hand colouring.
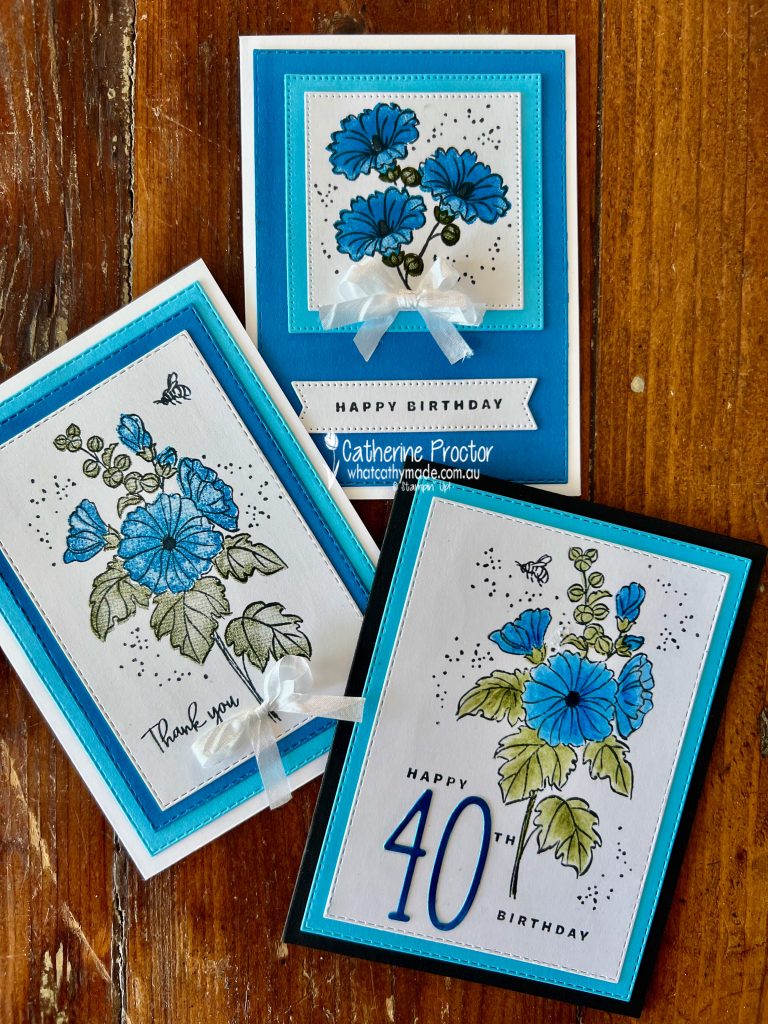
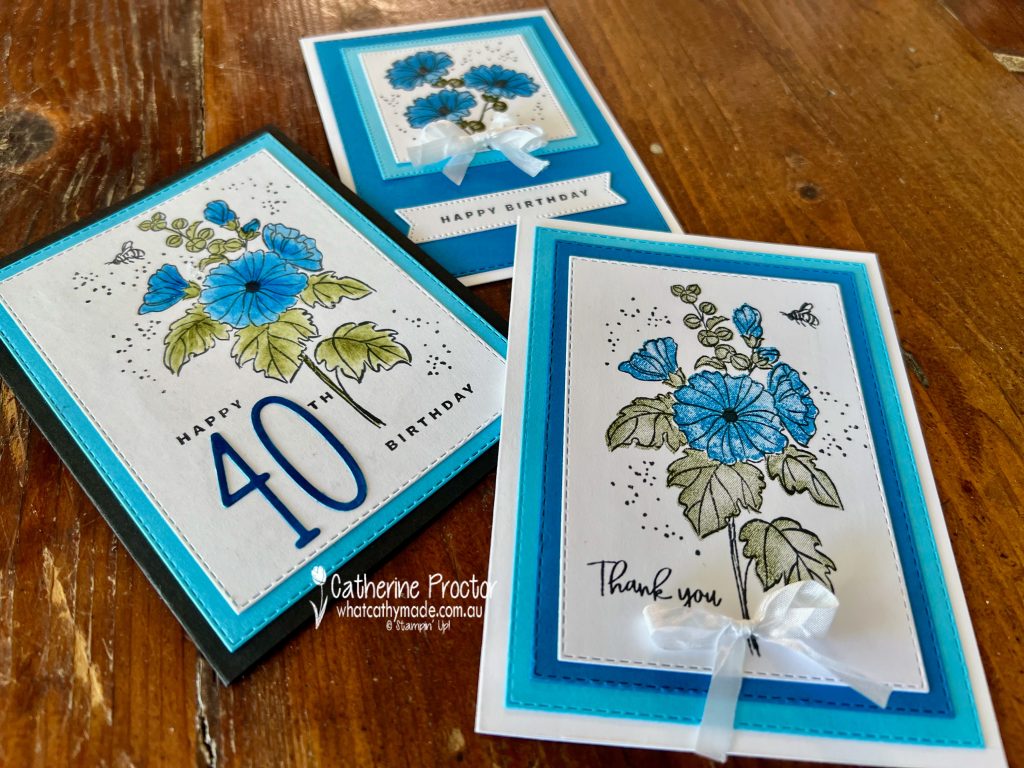
To show the versatility of this stamp set I have made three different cards using three different ways of colouring the stamped images. All three cards pair Pacific Point with Tahitian Tide – don’t these two blues look amazing together!
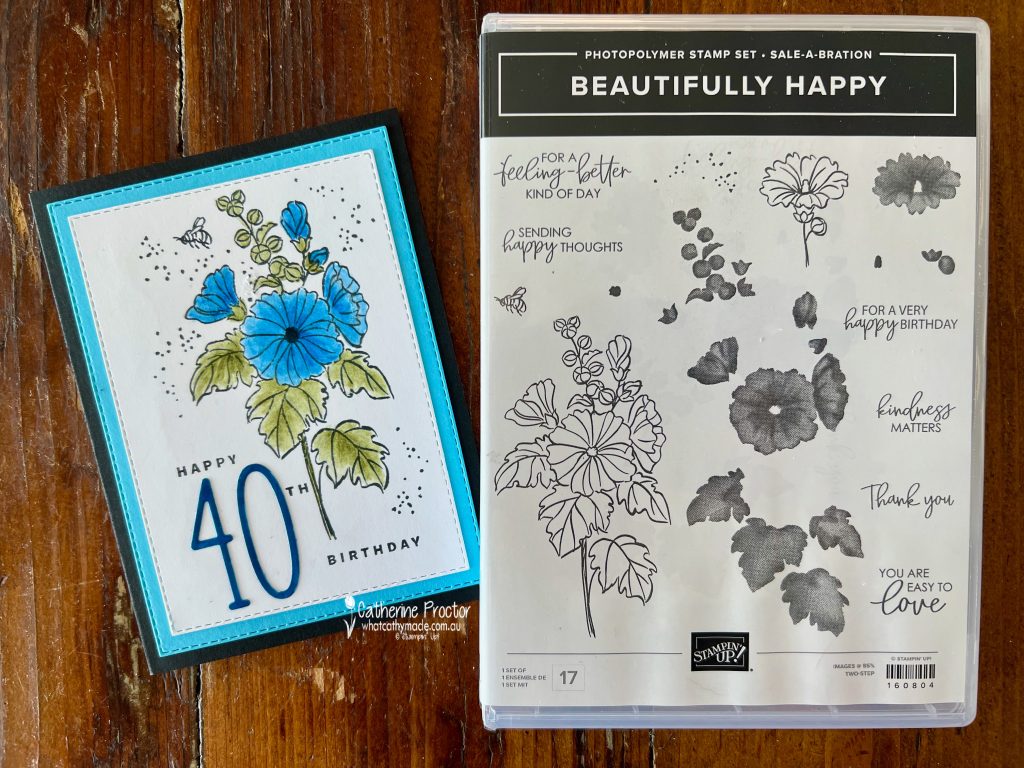
Card One is a birthday card for my sister-in-law who turns 40 next week. The 40 has been die cut with the new Alphabet A La Mode Dies and the “Happy Birthday” sentiment is from the Something Fancy stamp set, both available in the January-April mini catalogue.
I’ve coloured the flower and leaves using Pacific Point and Old Olive Watercolour Pencils, finally blending the watercolour pencil lines with a Blender Pen to smooth the colour out.
Stitched Rectangle dies create the card layers.
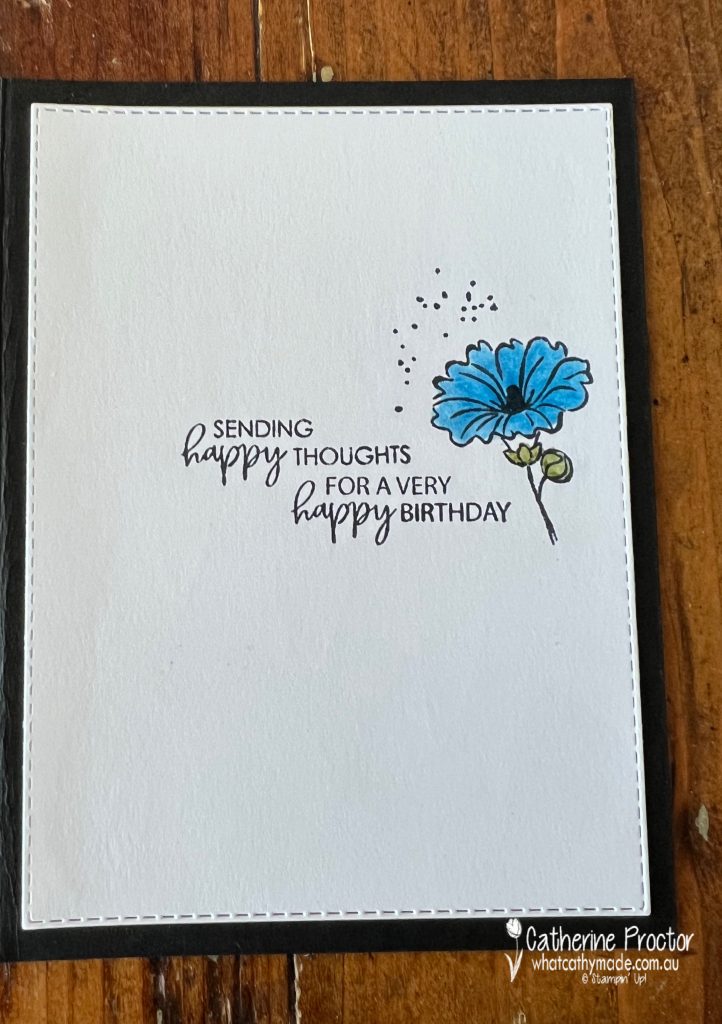
The inside of the card uses two of the sentiments from the Beautifully Happy stamp set. These sentiments are designed to be used on both the front and the inside of a card however I think they also work well when stamped together.
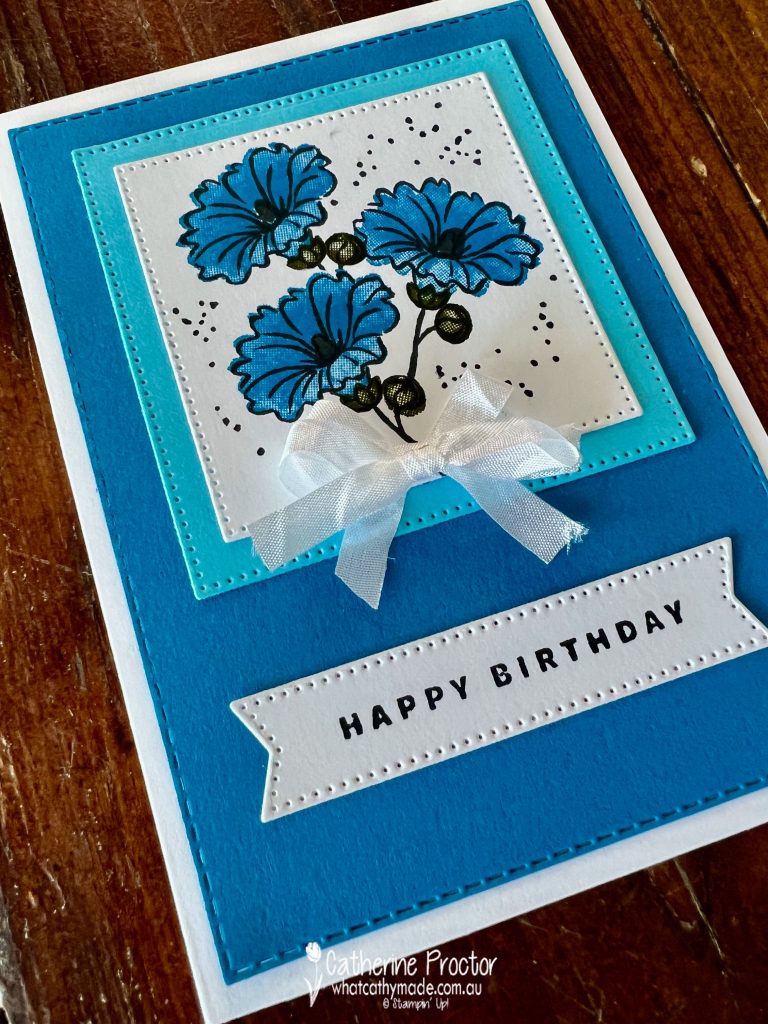
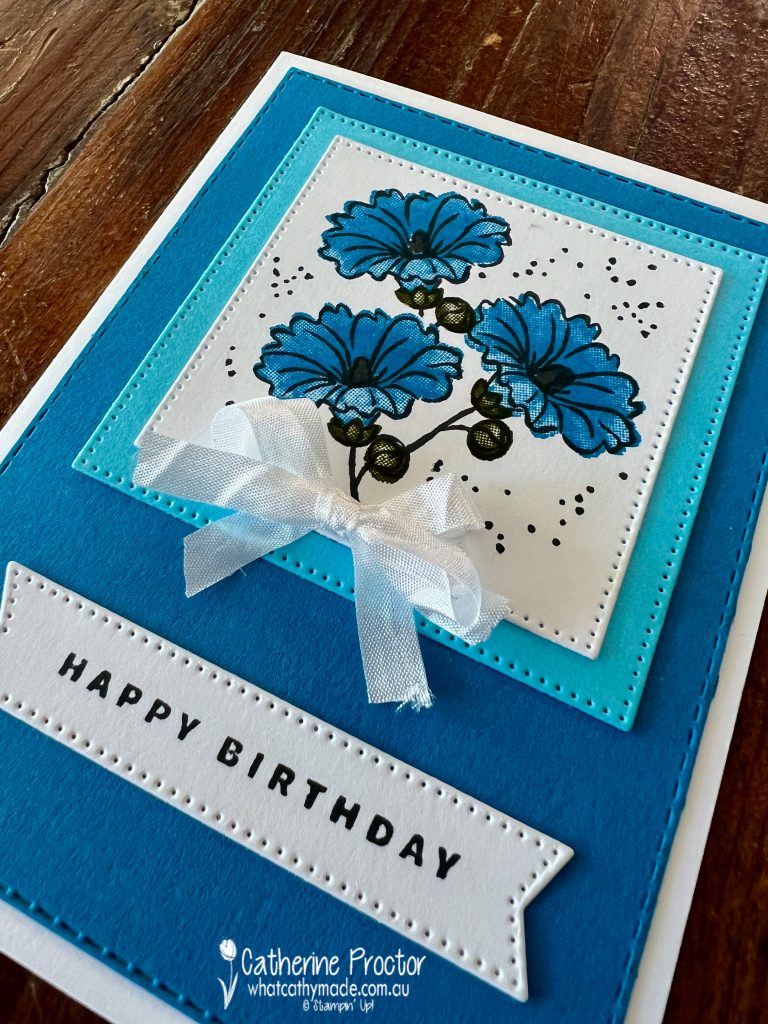
Card two is another birthday card that uses the smaller flower image, stamped three times. To colour these flowers I used the distinktive stamps from the Beautifully Happy stamp set, stamping both the Pacific Point and the Mossy Meadow ink at full strength.
The sentiment is the same “happy birthday” stamp from the Something Fancy stamp set that I used on the front of card one. Stylish Shapes dies cut the card front layers and the sentiment.
Card three is a thank you card that is coloured with the distinktive stamps, however this time the Pacific Point and the Mossy Meadow have been stamped off once onto scrap paper before stamping onto the card front.
Once again, the Stitched Rectangle dies create the front card layers.
I know I am going to get a lot of use from the Beautifully Happy stamp set as its variety of sentiments make it ideal for so many different occasions and it can be coloured in so many different ways.
Now it’s time to hop on over to our next participant, the lovely Tina Gillespie – I can’t wait to see what Tina has made this week!
If at any time you find a broken link, you can find the complete list of all participants below.
If you live in Australia, you can find and purchase these products in my Stampin’ Up! Online Store once they are available to purchase tomorrow morning.
We’ll be back next Wednesday January 11 with projects showcasing one of the 2021-23 In Colours, Pale Papaya.