Is Calypso Coral a colour that makes your heart smile?
A group of the Art With Heart Team is hopping through the Stampin’ Up! colours in alphabetical order and week 14 is all about Calypso Coral.
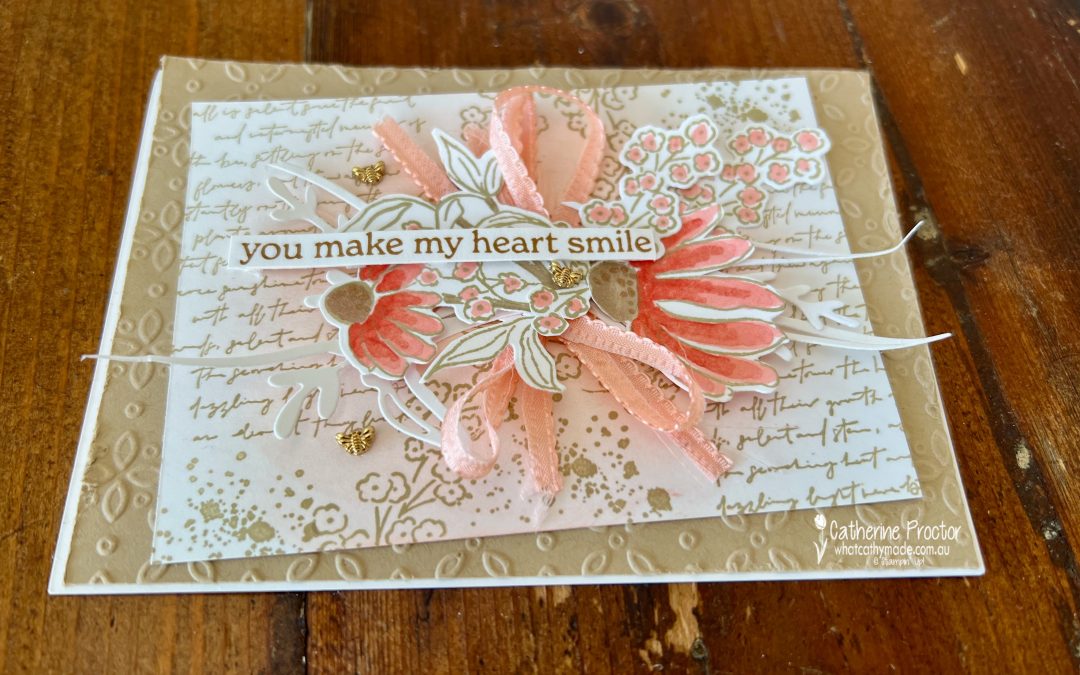
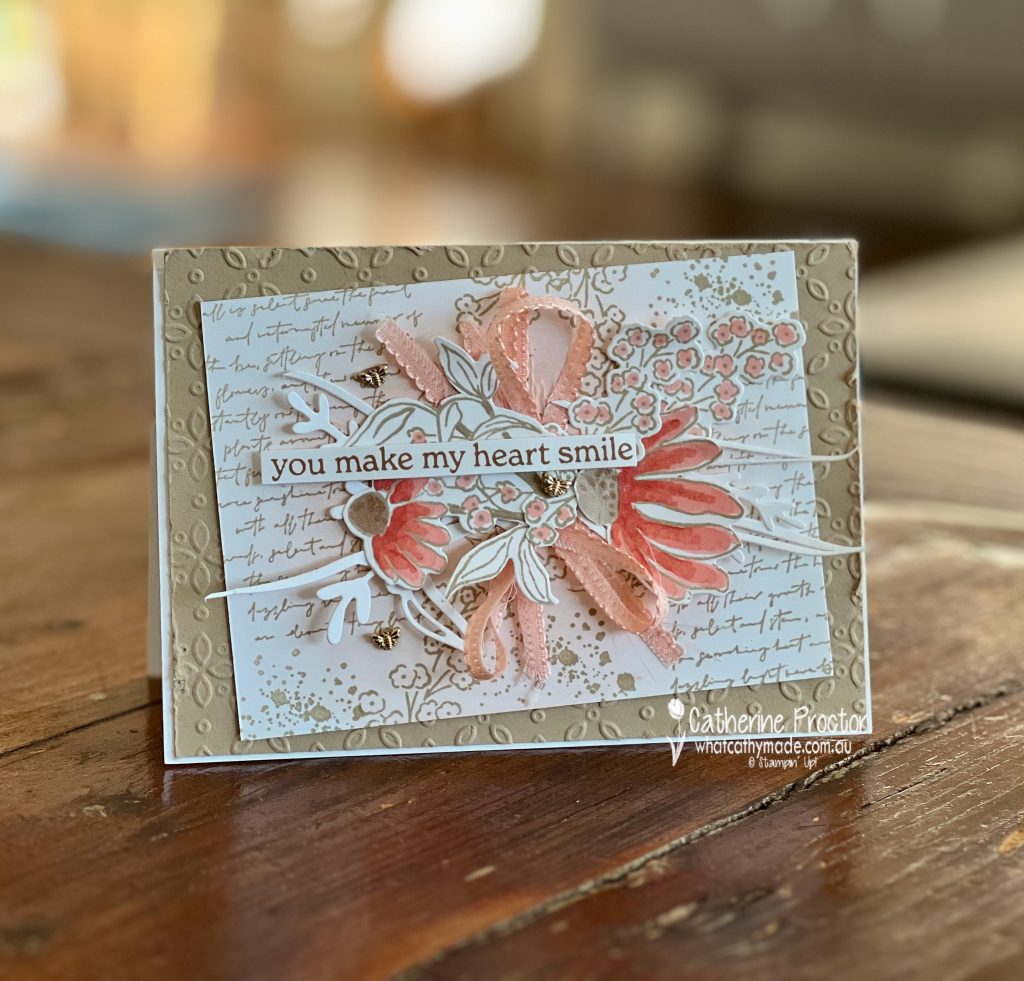
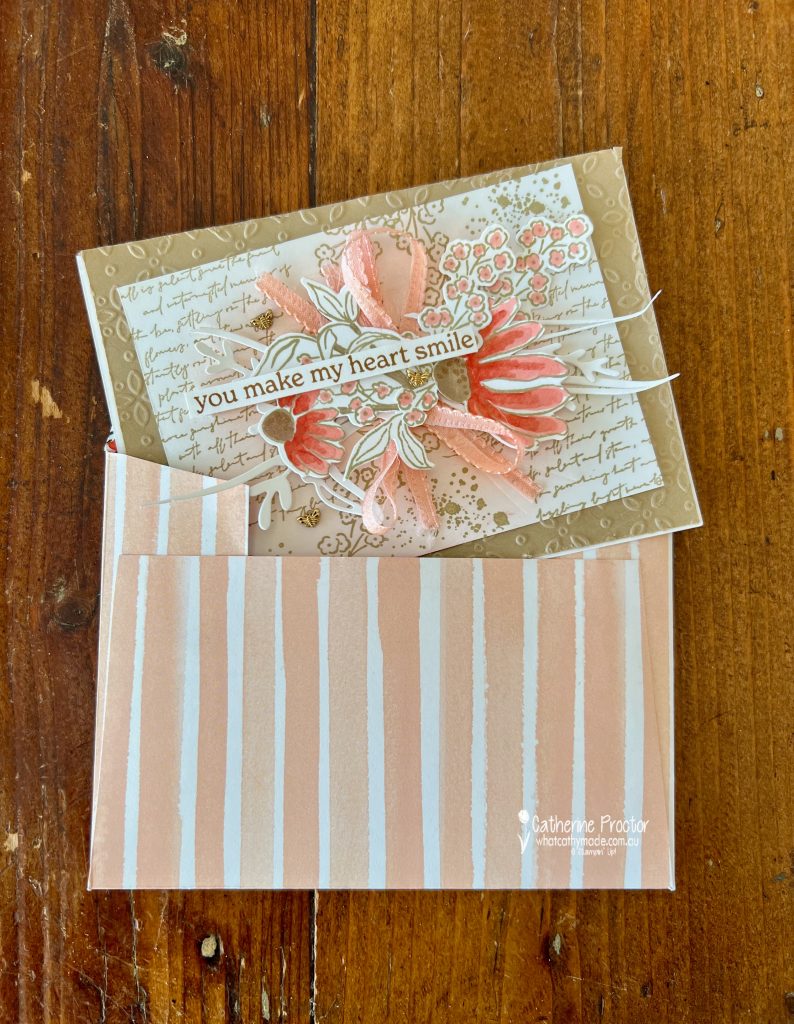
Here is my project, a shabby chic style birthday card (CASED from former Artisan team member, Tammy Wilson) that I specially created for my beautiful friend and longtime partner in crafting crime, Jenny Boffey @jenboff Boffey always makes me smile.
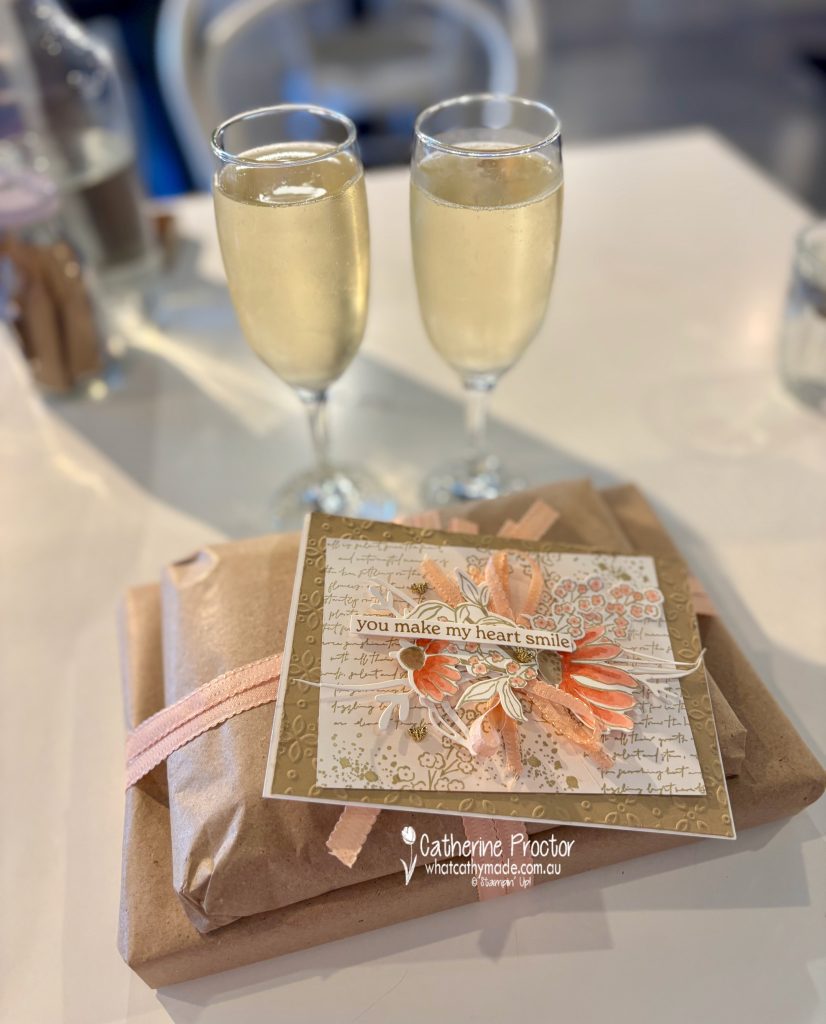
I had so much fun going out of my comfort zone to create this birthday card and I’m happy to say my Calypso Coral card definitely made Jenny smile.
We even managed to enjoy a sneaky lunchtime glass of bubbles together to toast her birthday!
How to make a shabby chic style birthday card
If you love the romantic, layered look of shabby chic cards, you can easily recreate this style using Stampin’ Up! products and a few mixed media techniques.
This card uses the Mixed Florals Bundle (Stamp Set and Dies), the Eyelet 3D Embossing Folder, the Elements of Text Stamp Set, the Scalloped Petal Pink Ribbon, Calypso Coral Ink, Blending Brush, Mixed Media Florals Dies, and Crumb Cake Cardstock and Ink to create a soft, vintage effect with plenty of texture.
Start by embossing Crumb Cake cardstock with the Eyelet 3D Embossing Folder to create a textured panel for your background. Layer this onto a Basic White card base for a clean edge.
Use various stamps from the the Elements of Text Stamp Set and the small floral stamp from the Mixed Florals Stamp Set stamped in Crumb Cake ink to add a script-style text pattern across the panel for a faded, old-paper feel. Use a blending brush
For the focal panel, stamp the largest floral image and the small floral stamp from the Mixed Florals Stamp Set in Crumb Cake and colour in with the Calypso Coral Stampin Blends. Die cut some Basic White cardstock using the large grass die.
Cut apart the large floral image and the grass die. Layer the flowers, foliage and ribbon together, to create a textured, “garden-style” arrangement.
Cut a piece of Petal Pink 3/8″ (1 cm) Scalloped Ribbon in half lengthway and add loops of Scalloped Petal Pink Ribbon between the flowers for extra softness and texture.
Finish the card by stamping the sentiment “you make my heart smile” (from the Layers of Beauty Stamp Set) in Pecan Pie ink and layering it across the floral cluster.
A few Tiny Bee Trinkets embellishments add a final touch of elegance.
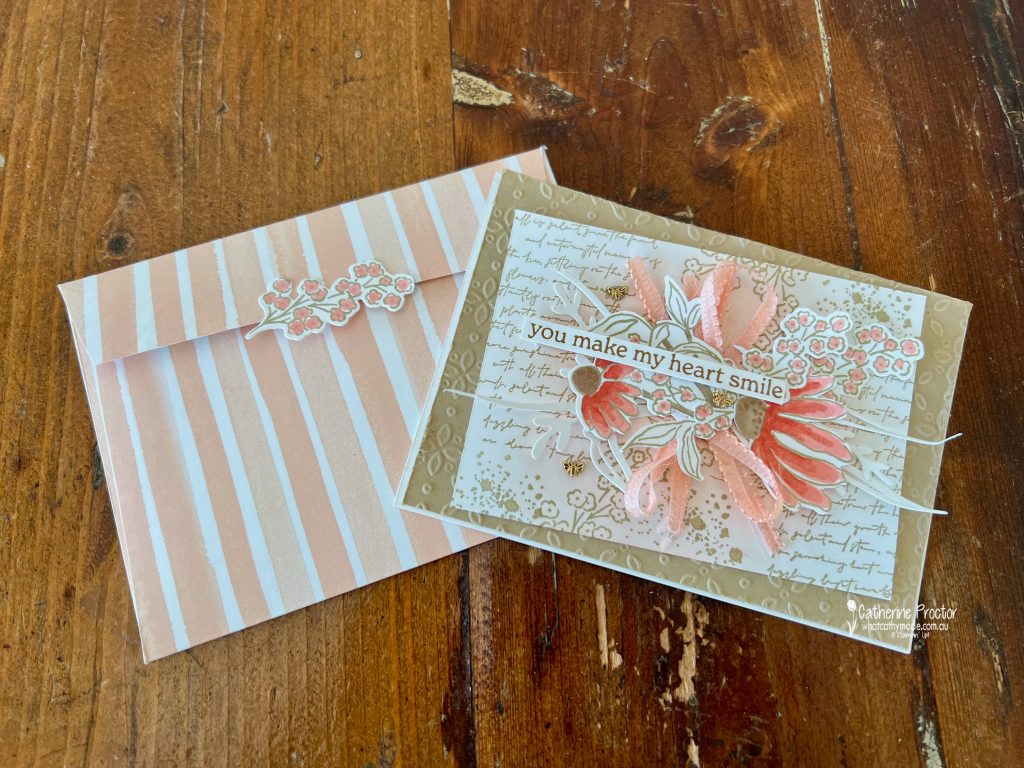
The handmade envelope was created using the Mixed Media Florals Designer Series Paper.
I used another small floral stamp from the Mixed Florals Stamp Set to create the closure on the back of the card. The “Happy Birthday” stamp is from the Birthday Celebration Stamp Set.
Take a look at some more Calypso Coral inspiration on our Insta Hop!
Our blog hop is now an Instagram hop but the good news is that you don’t need to have an Instagram account to view all of the other projects!
Simply copy any of the Insta handles below into a new search window to follow the Instagram hop at any point.
Next in our Hop is Andrea @andreaksargent. Be sure to check out her gorgeous project/s.
The full list of this week’s InstaHop is listed below:
Andrea @andreaksargent
Sharon @sharondaverncreates
Helen @apaperparadise
Rachel Woollard @handstamped_by_rachel
Rosa @hum.and.stamp
Kate @craftwithkate
Kirsty @crafty.littlemiss
Leanne @createwithleanne2
Theresa @teegeeinspirations
Vicki @vickiboucher
We’ll be back next Wednesday when we are showcasing Cherry Cobbler.I hope you can join us then!
Welcome to week five of our Art With Heart 2025-26 Colour Creations Insta hop!
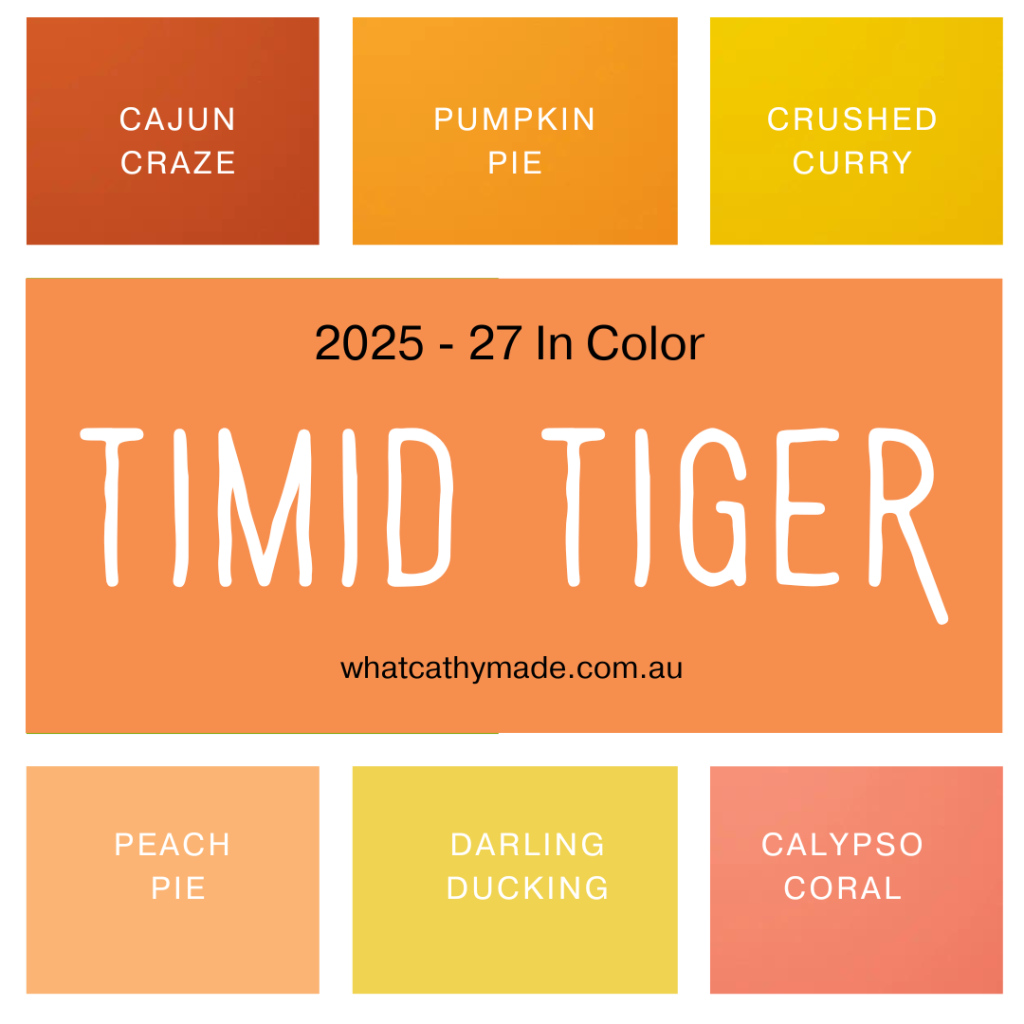
For the first five weeks of our AWH Colour Creations Insta Hop we are introducing the five new 2025-26 In Colors in alphabetical order and this week we are showcasing the final of the new InColors, Timid Tiger.
Here’s a graphic I created to show how Timid Tiger compares to the other oranges, peaches and yellows in the Stampin’ Up! range.
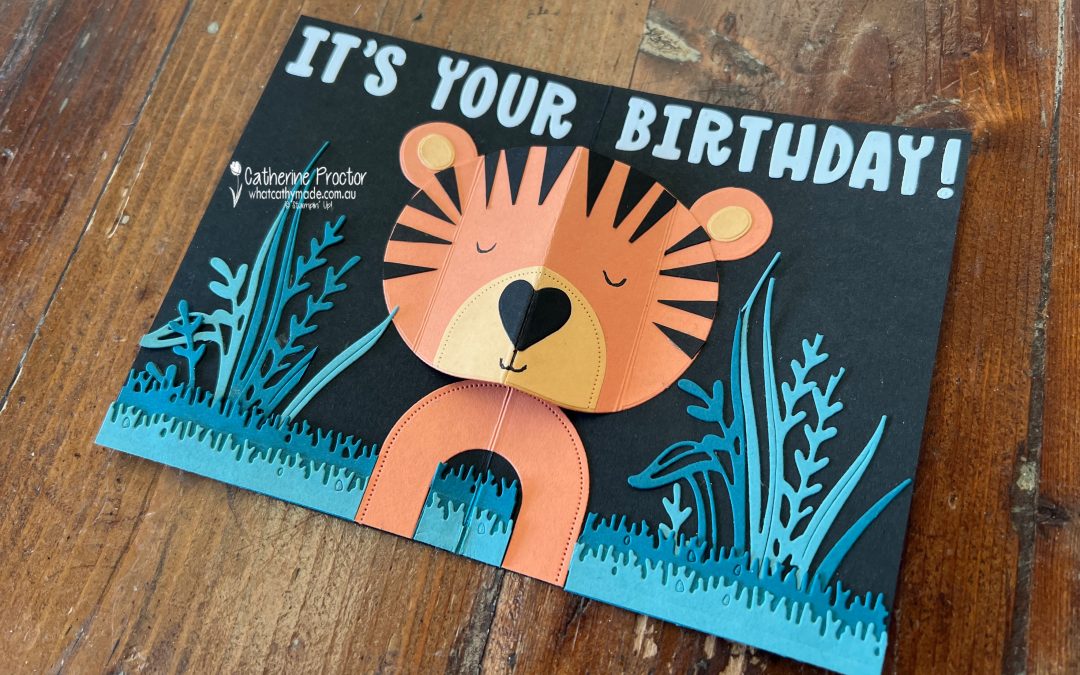
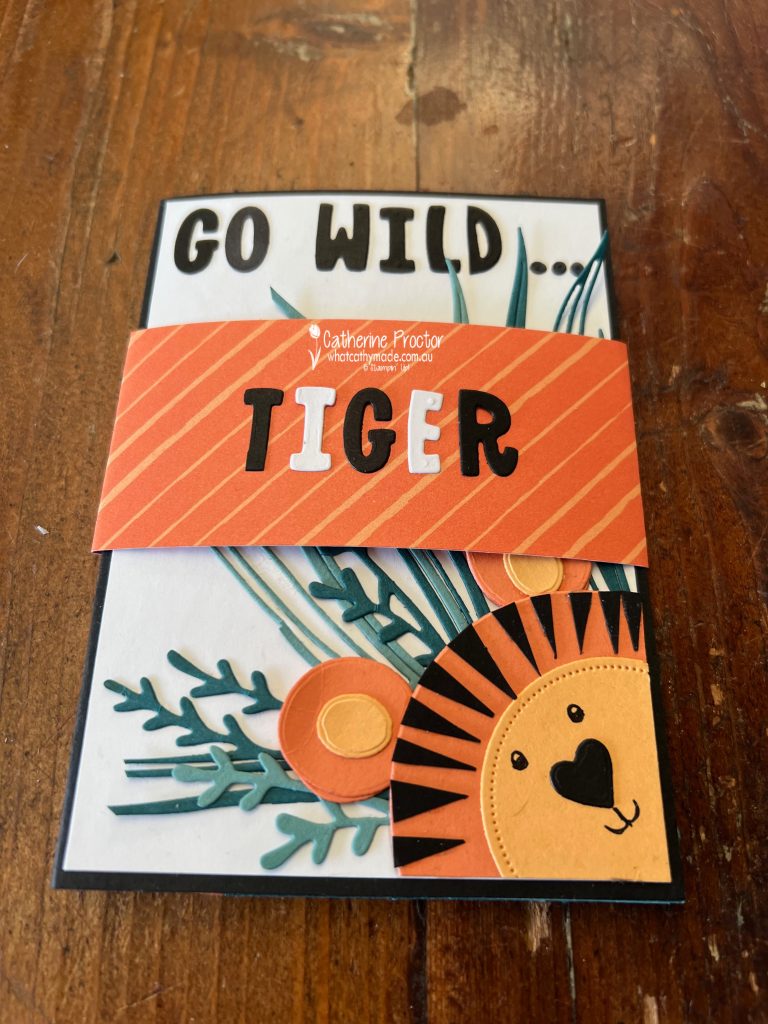
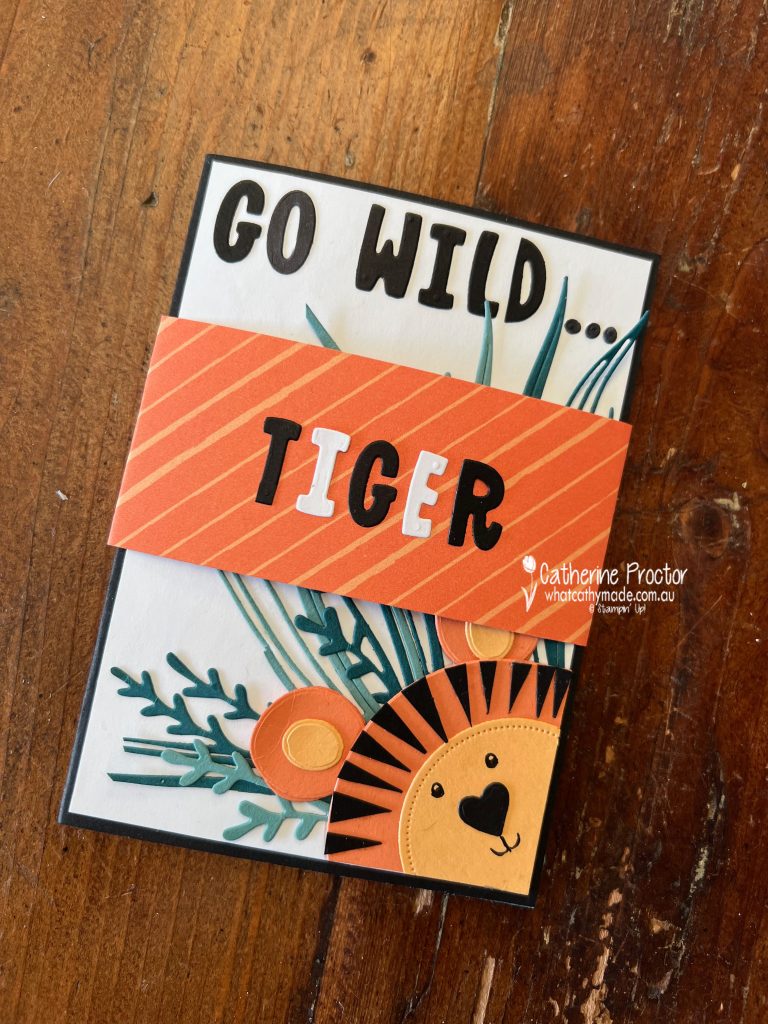
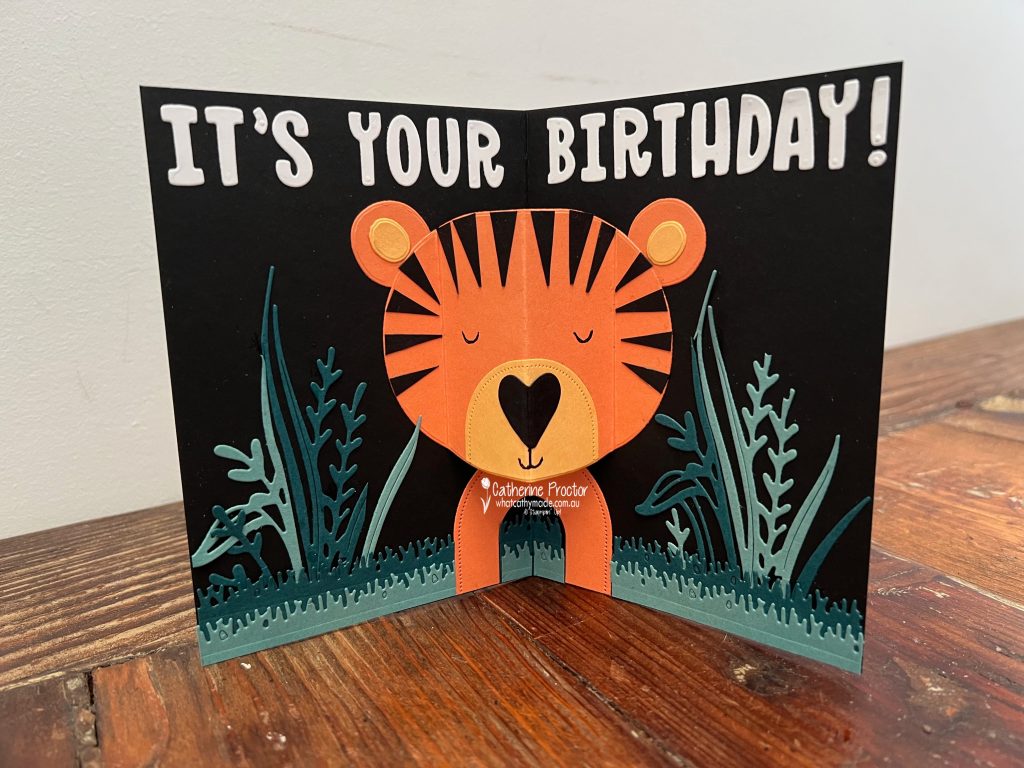
With a name as delightful as Timid Tiger, I couldn’t resist taking this colour very literally and making an interactive pop-up Timid Tiger birthday card.
Here is a closer look at the front of the card…
With the belly band on, holding the card closed…
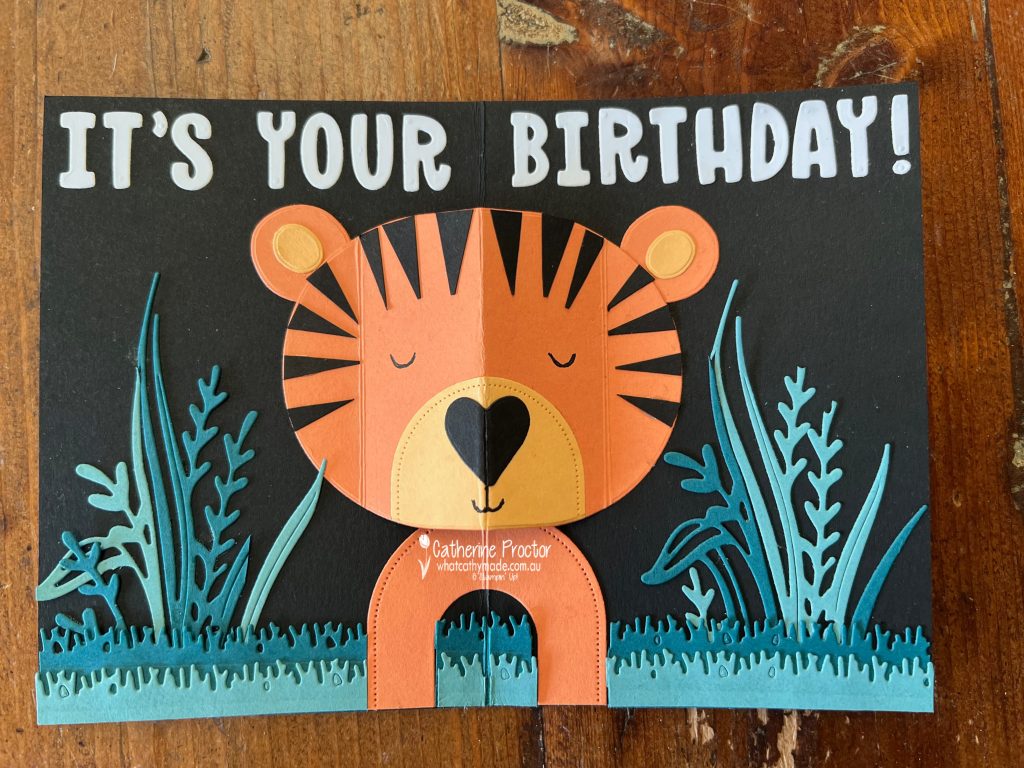
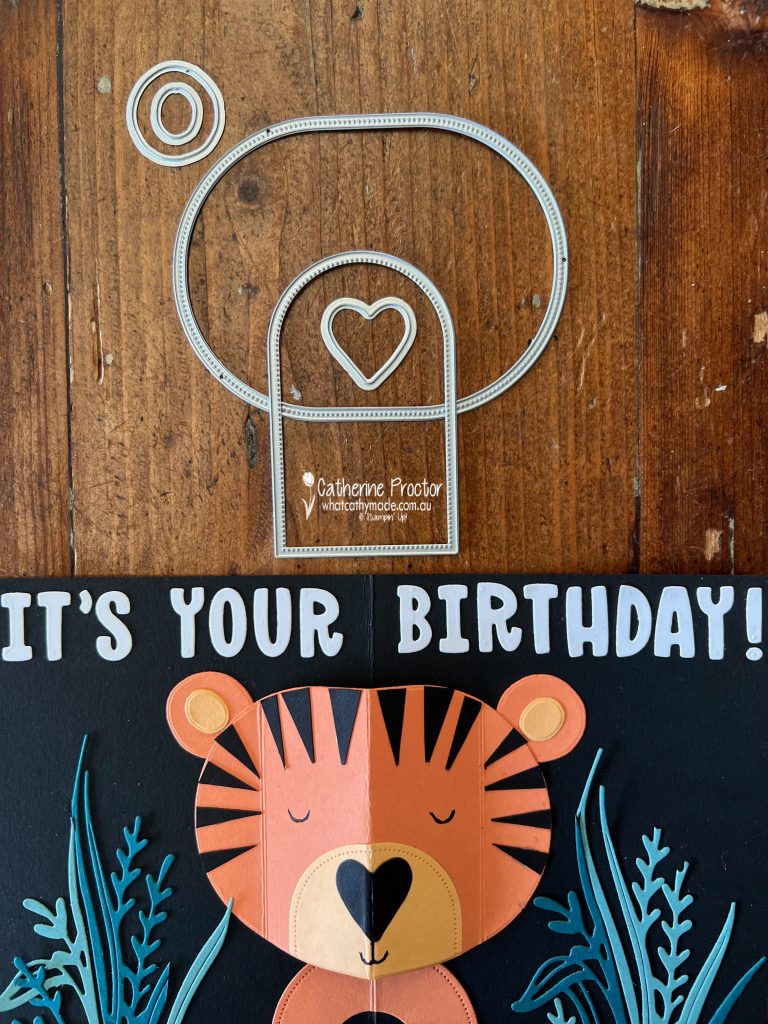
And the surprise pop-up tiger inside the card!
How to make a pop-up card using dies
For my colour combination I decided to Timid Tiger with Basic Black, Basic White, Peach Pie, Pretty Peacock and Lost Lagoon. I love this colour combination!
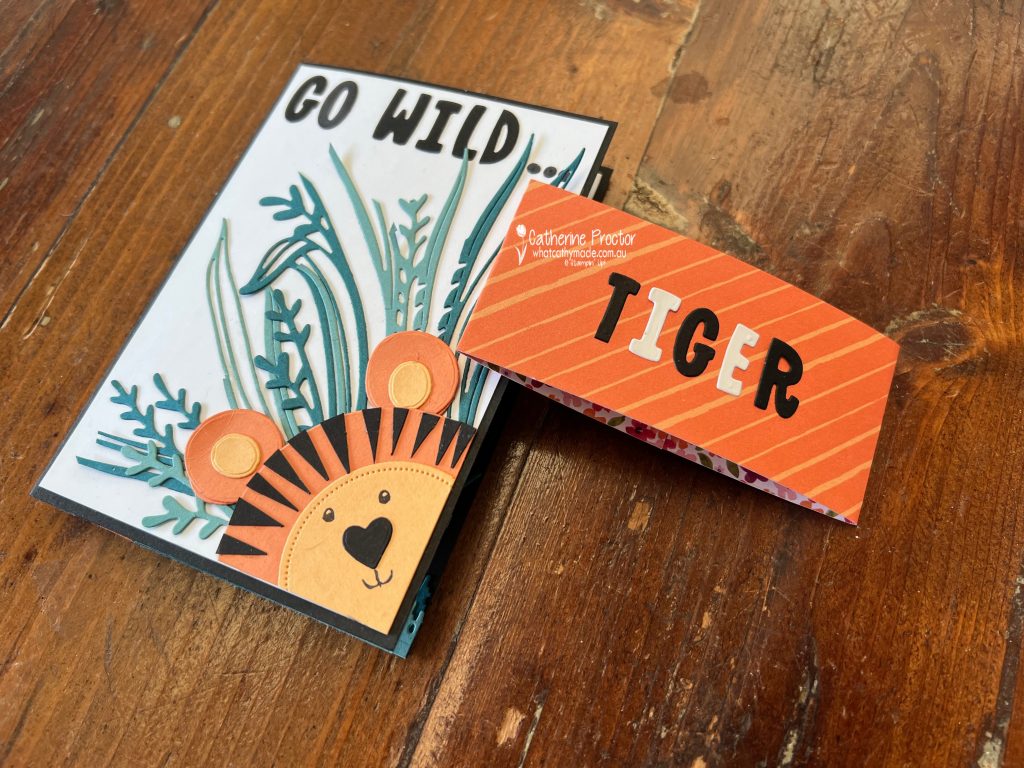
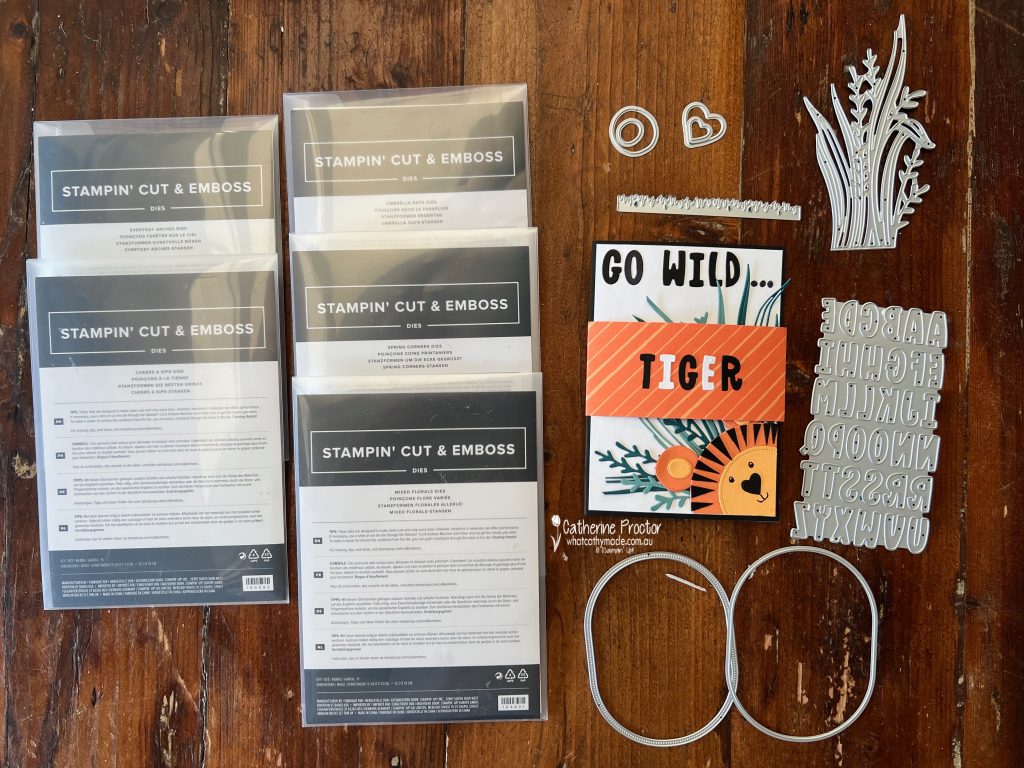
I don’t own a tiger stamp so I designed this card using the dies I had on hand, making it up as I went along. These are just some of the dies I used to make the card, however you can easily substitute with other products you own for this type of project.
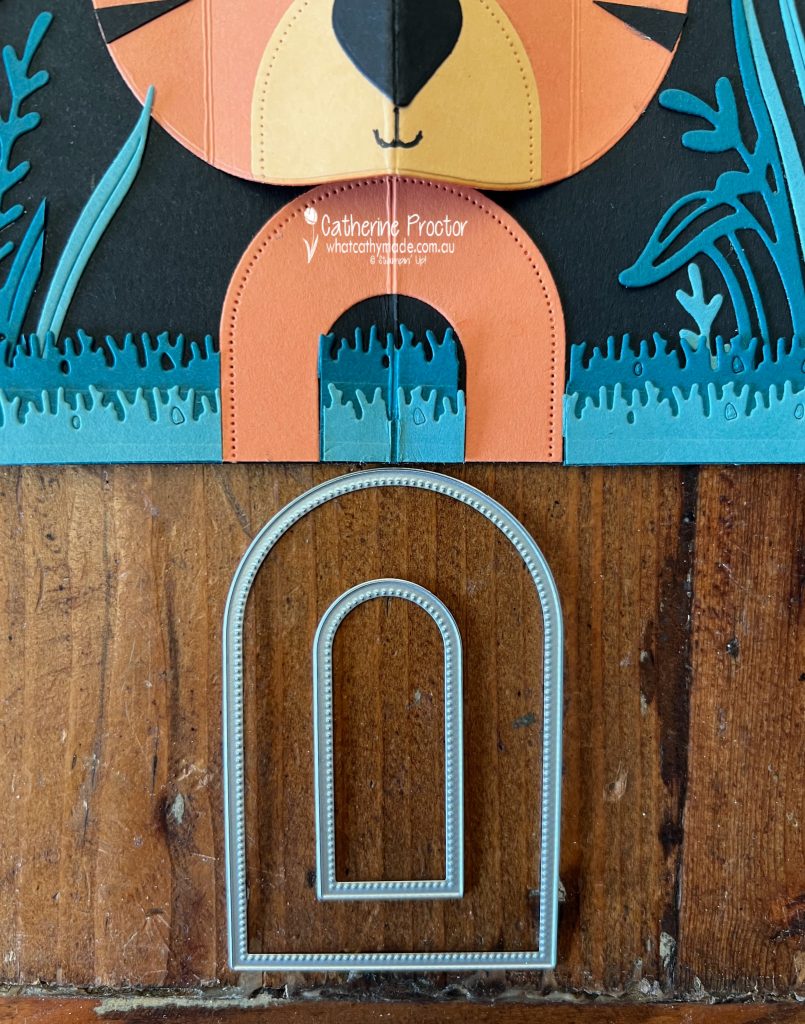
My tiger’s feet are die cut with two of the Everyday Arches Dies.
The tiger’s face is die cut with the large oval from the Impressions abloom Dies and the Everyday Arches Dies. The ears are two circles from the Cheers & Sips Dies and the nose is the larger heart from the Spring Corners Dies.
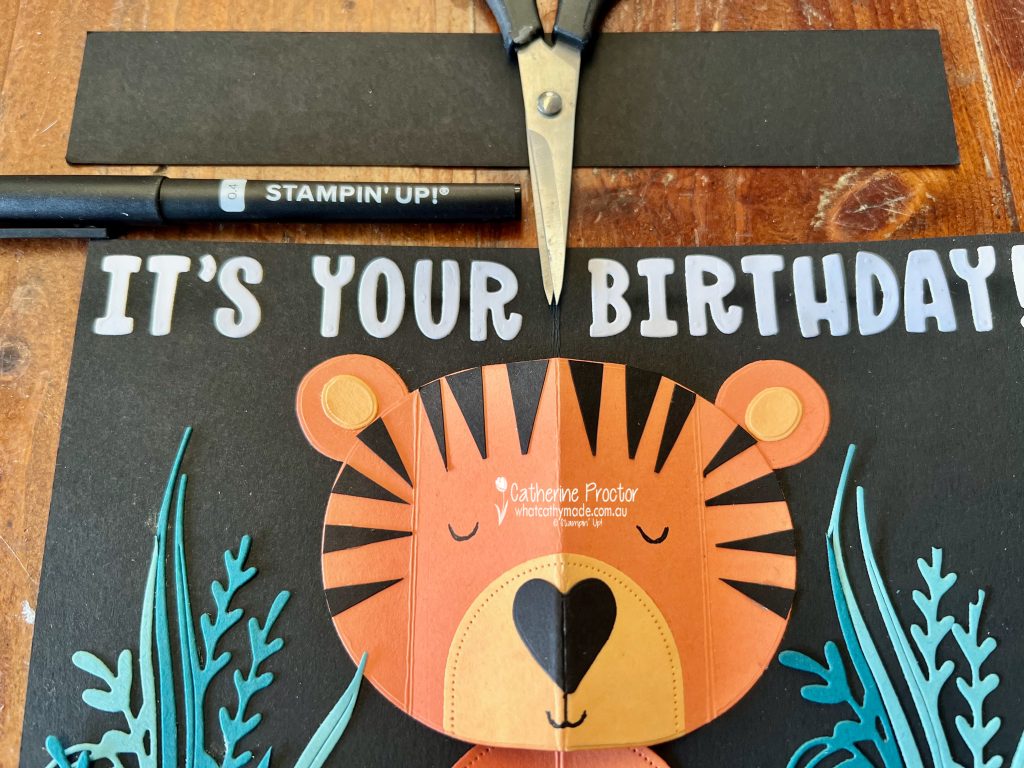
The tiger’s stripes are cut from Basic Black Cardstock using paper snips and the mouth and eyes are drawn using one of the new Black .04 Stampin’ Journalling Pens. Create and decorate the tiger’s face and ears before gluing it inside the card and do not adhere the ears to the face until the pop-up has been glued into place.
To make the tiger’s face pop up simply score the face down the centre (through the nose) and then score again approximately 2 cm (1 inch) in on both the left and the right side of the face.
Once these lines are scored add glue to the left and right sides of the outer score lines and adhere the tiger’s face to the inside of the card, aligning the centre of the tiger with the centre fold of the card.
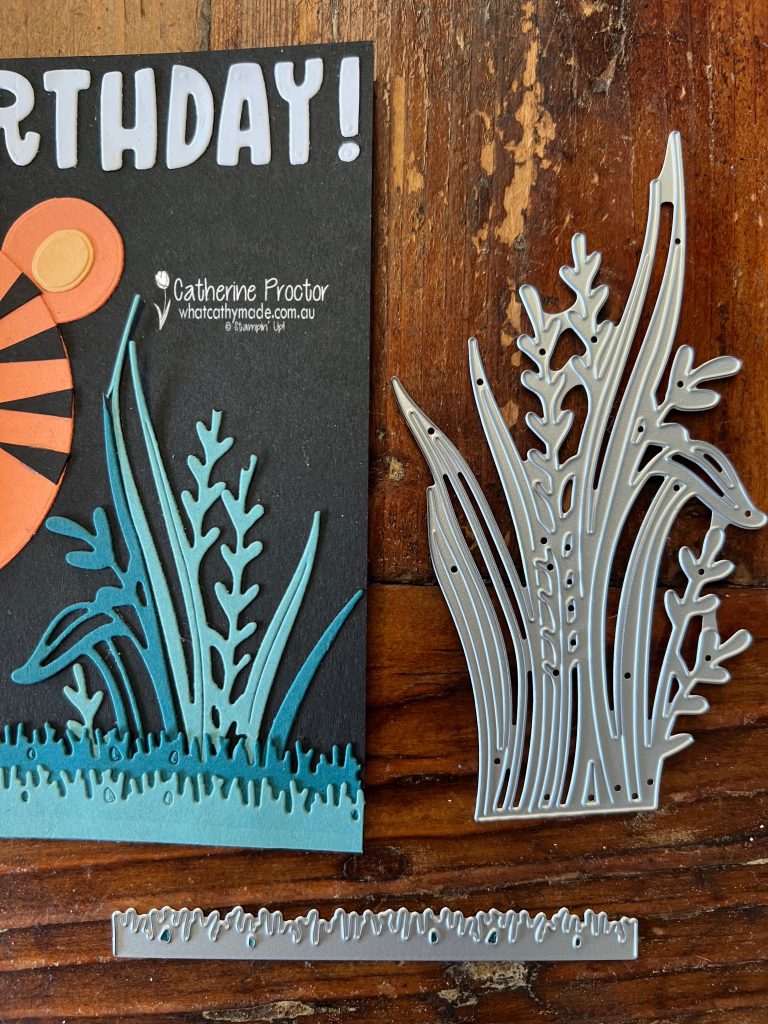
Finally, adhere the ears behind the head (before the glue sets) and then add the layers of die cut foliage and grass.
The foliage and grass uses dies from the Mixed Florals Dies and the Umbrella Days Dies.
The Mini Alphabet Dies are perfect for creating custom sentiments to fit any card! Always remember to add and adhesive sheet to the back of the cardstock BEFORE die cutting the letters out. This turns the letters into repositionable stickers and eliminates the need for messy glue.
This pop-up card stands up perfectly for display.
Take a look at some more Timid Tiger inspiration on our Insta Hop!
Our blog hop is now an Instagram hop but the good news is that you don’t need to have an Instagram account to view all of the other projects!
Simply copy any of the Insta handles below into a new search window to follow the Instagram hop at any point.
Next in our Hop is Rachel P @rachelpalmieristampin. Be sure to check out her gorgeous project/s.
The full list of this week’s InstaHop are listed below:
Rachel P @rachelpalmieristampin
Vicki @vickiboucher
Rachel W @handstamped_by_rachel
Kirsty @crafty.littlemiss
Andrea @andreaksargent
Kate @craftwithkate
Theresa @teegeeinspirations
Helen @apaperparadise
Cathy @whatcathymade – you are here!
Our AWH Colour Creations team will be back next Wednesday, 11th June, showcasing Azure Afternoon.