Welcome to week 13 of the Art with Heart Team Stampin’ Up! Heart of Christmas blog hop for 2024. I hope you we are continuing to inspiring you each week with our Christmas card ideas.
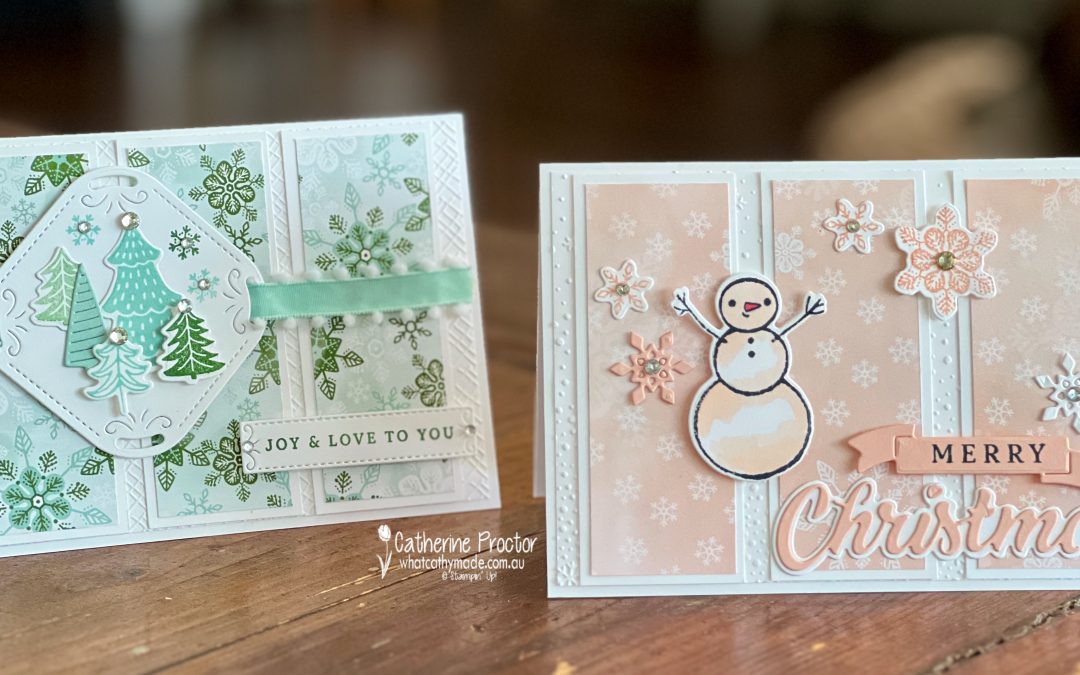
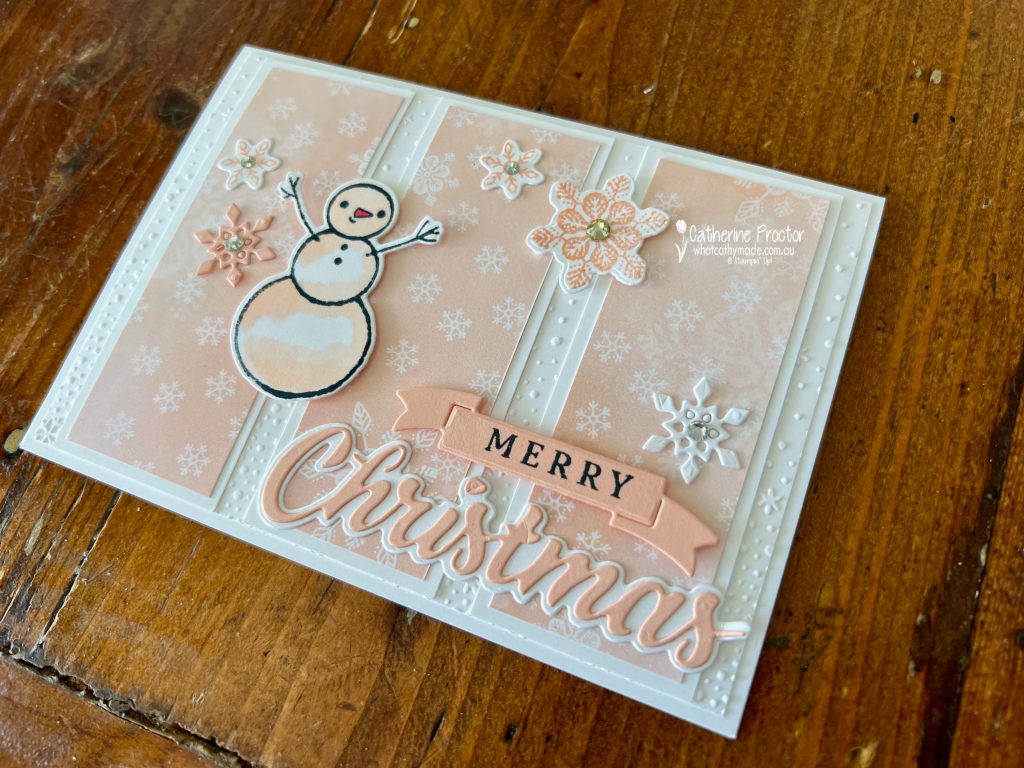
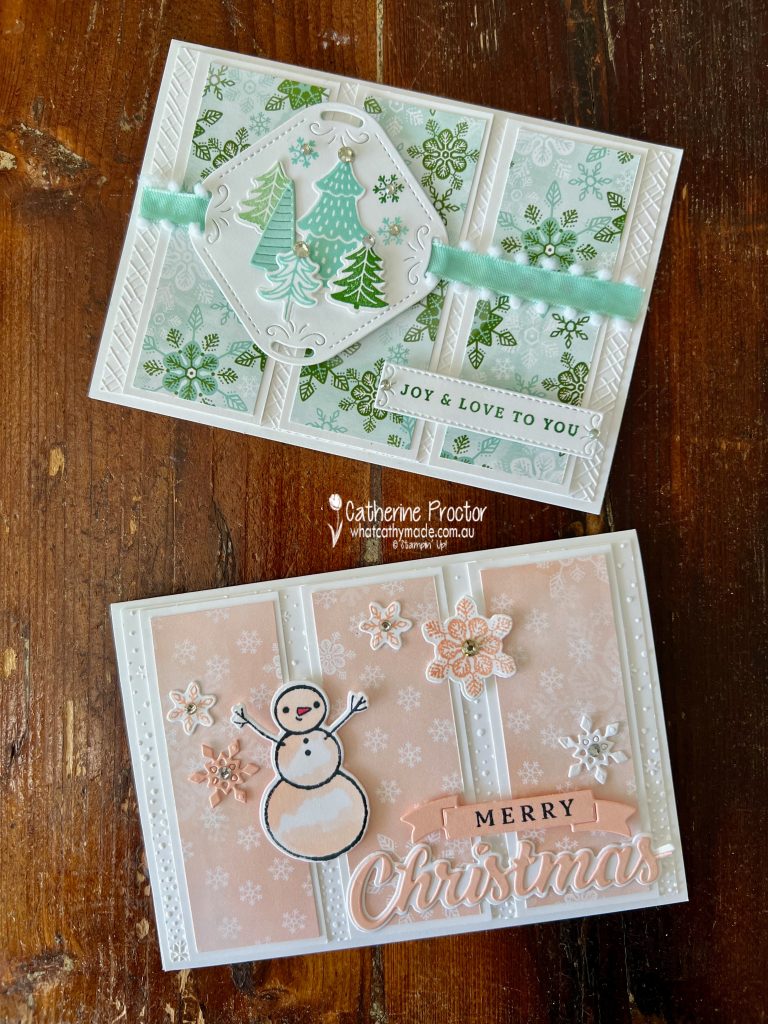
The Snowy Scenes Suite collection has so many different elements to play with I ended up creating two cards instead of one for tonight’s blog hop. Although they use the same layout, the colours are very different, drawn from the different DSP designs.
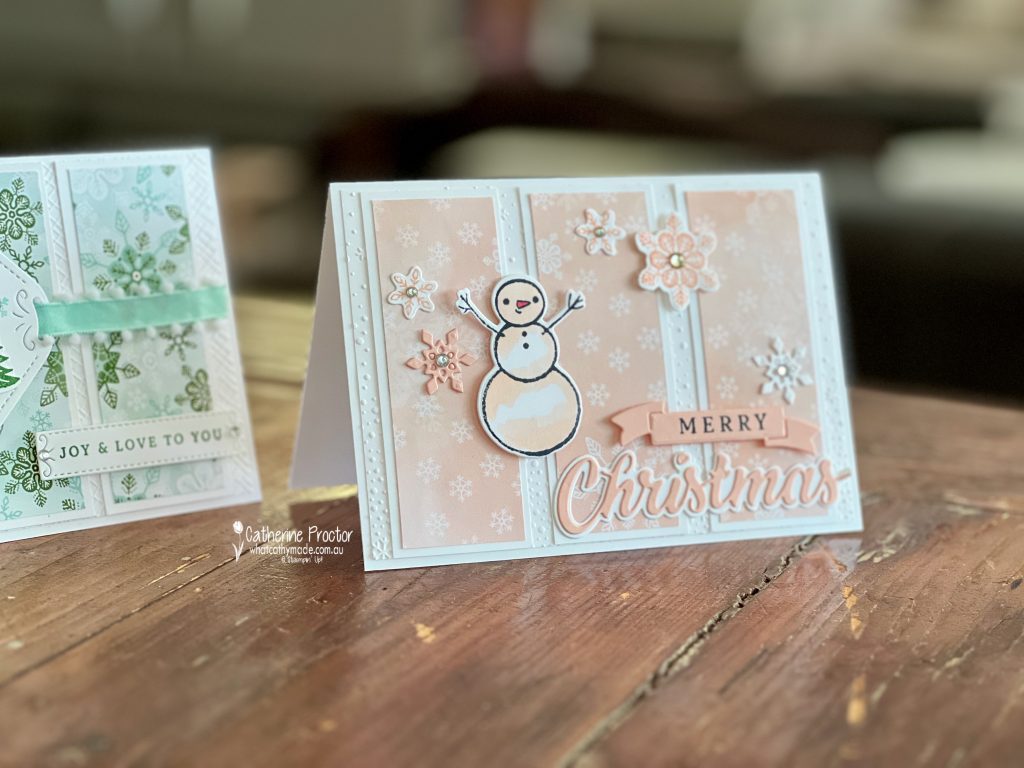
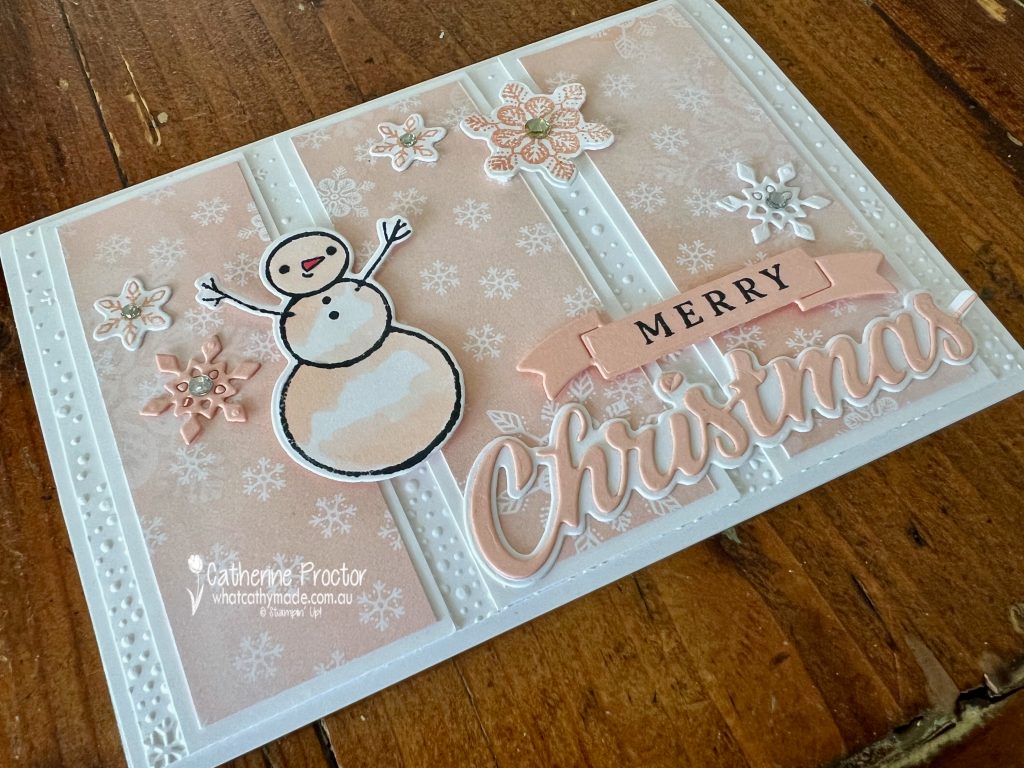
Card one features the soft Petal Pink paper from the Snowy Scenes DSP and the Snowflake Sky 3D Embossing Folder.
The Merry Christmas sentiment is created in Petal Pink, white and black, using stamps and dies from the Peaceful Season Bundle.
The snowman has been shaded using the light Petal Pink Stampin’ Blend with a tiny touch of Poppy Parade for the nose.
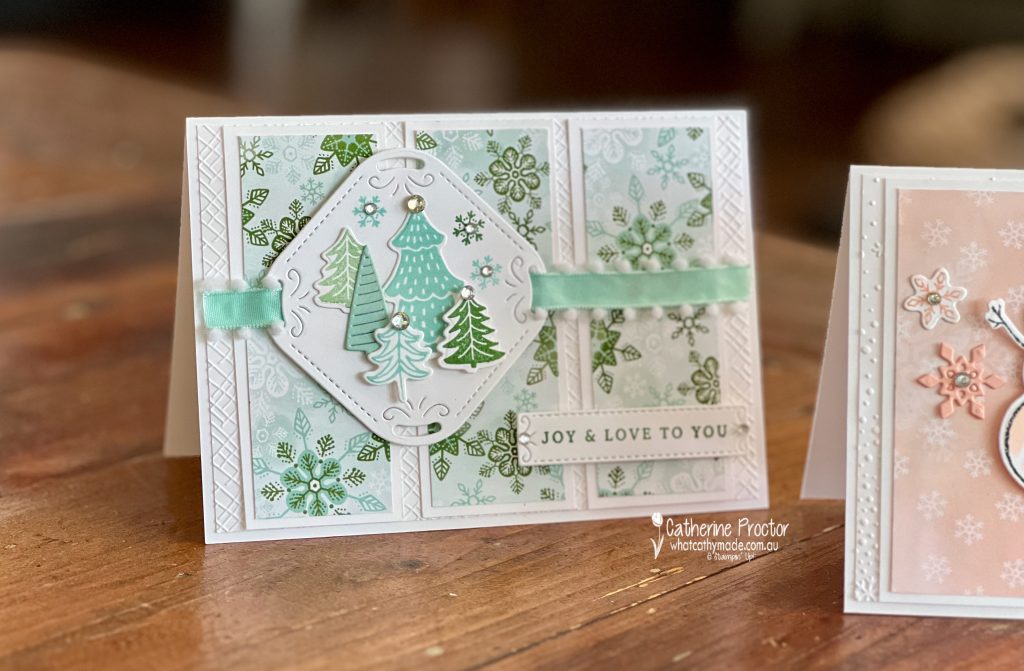
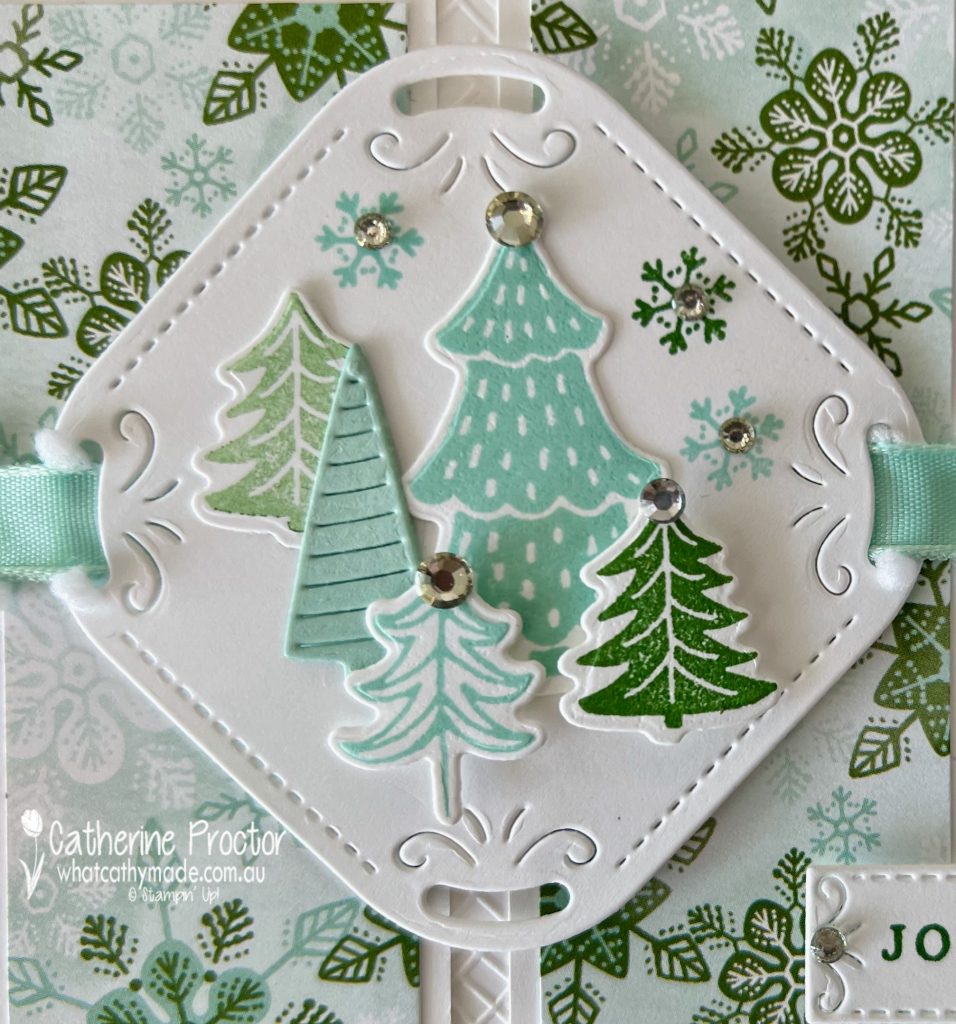
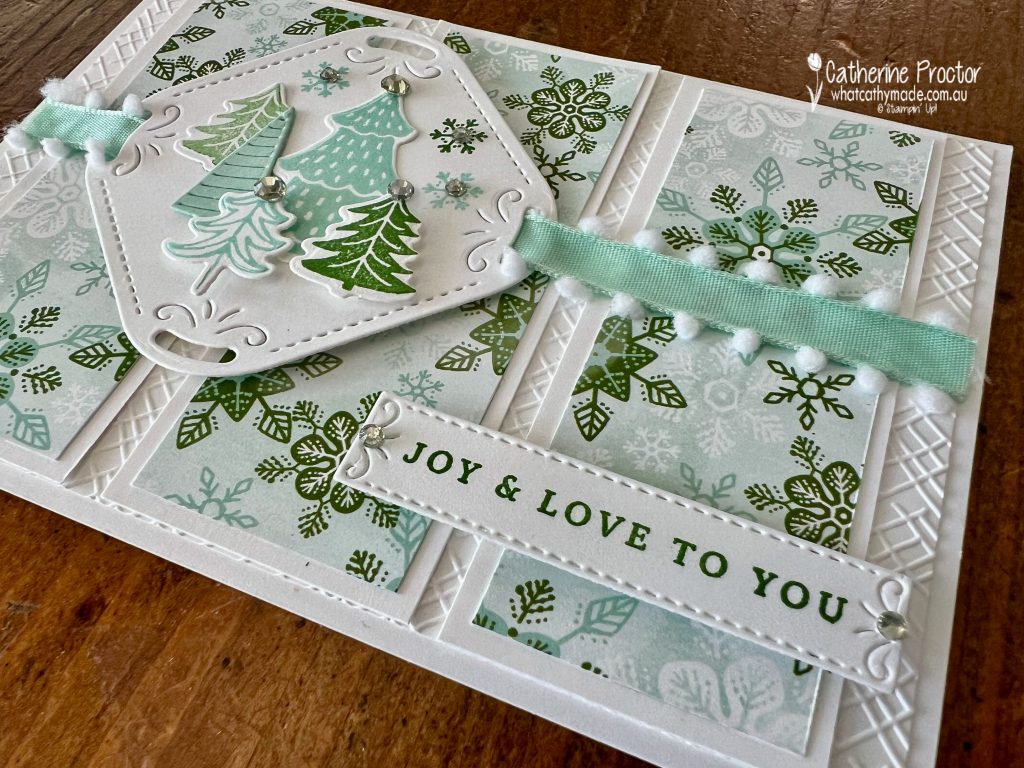
The colour scheme for card two is Pool Party and Garden Green, this time drawing inspiration from a different design in the Snowy Scenes DSP. The embossing folder is the crosshatch design from the Basics 3D Embossing Folders.
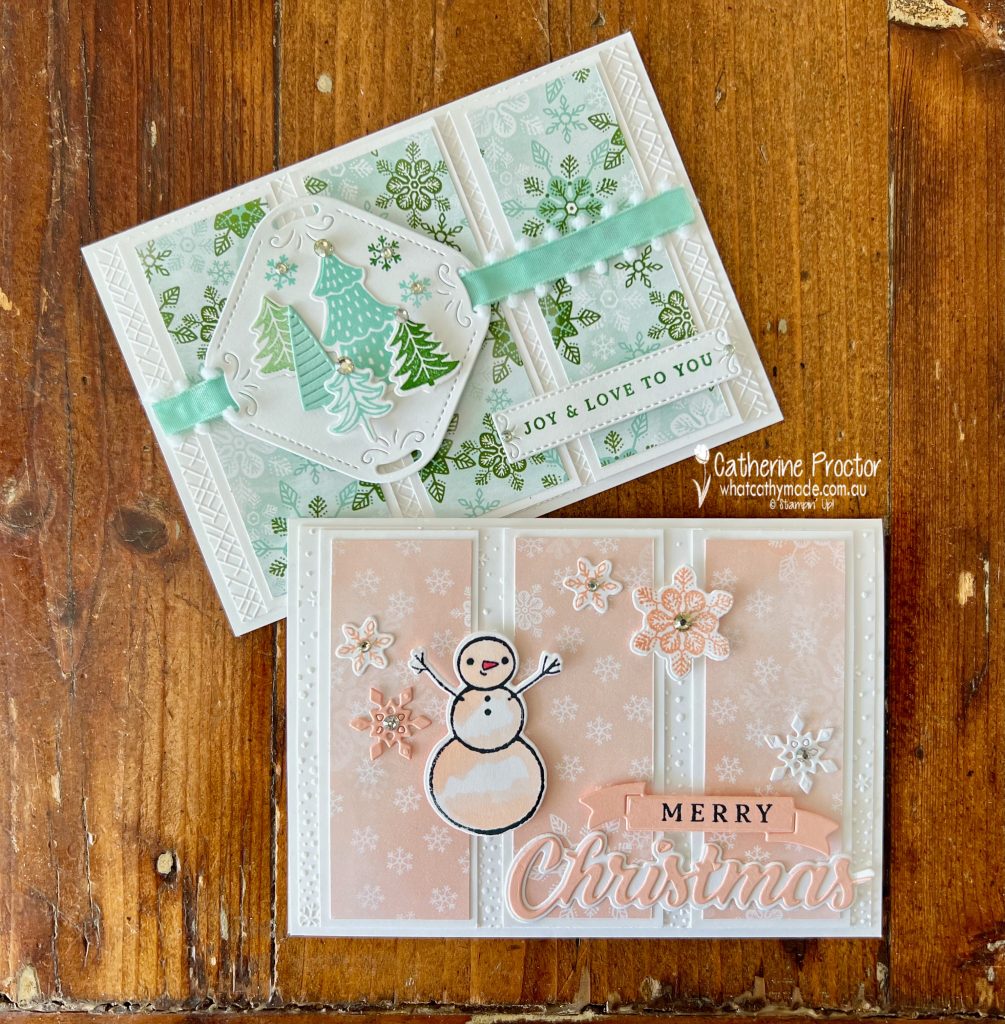
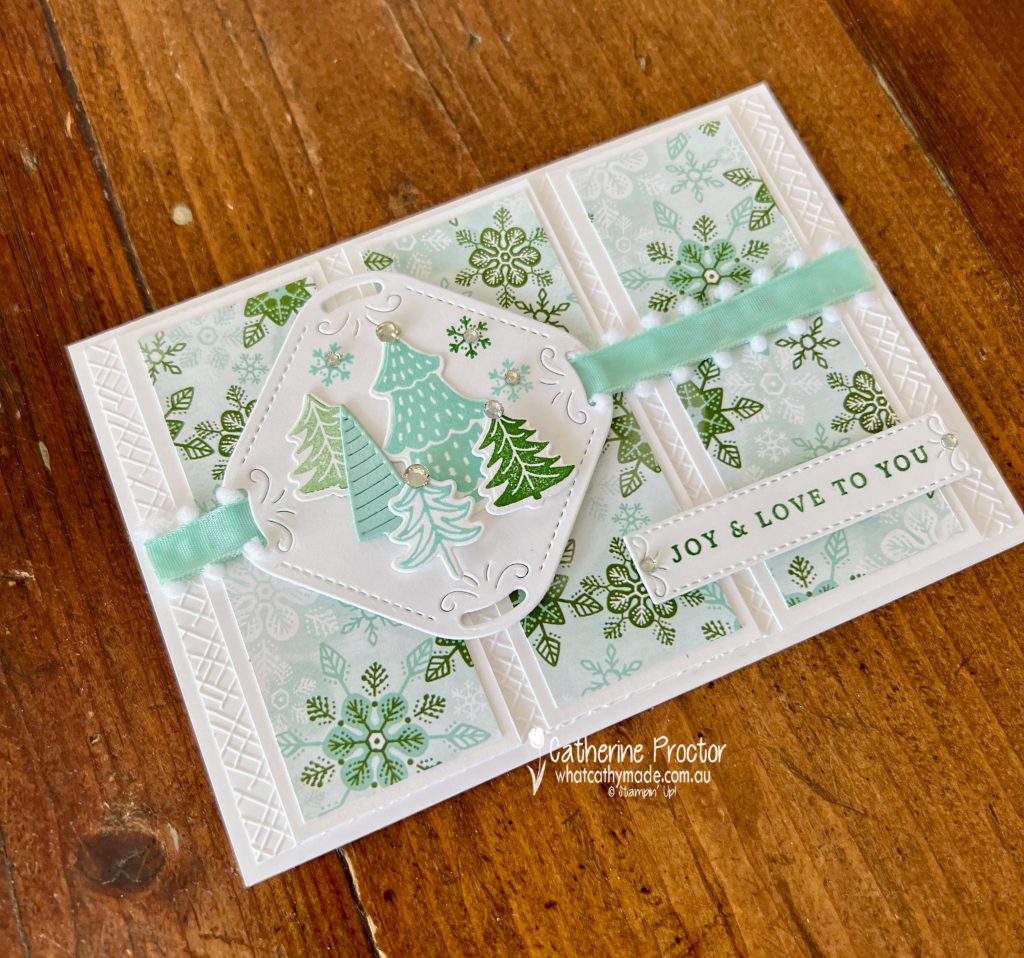
The large square label die from the Peaceful Season dies has slots that are designed for ribbon to be threaded through. I’ve cut a length of the Pool Party Pompom Ribbon to thread though the label. How cute is this ribbon!
Instead of a snowman as the focal image, for this card I’ve stamped and die cut an assortment of trees in Pool Party and Garden Green, arranging them onto the Peaceful Season’s label. I’ve also stamped a few snowflakes and added Rhinestone Basic Jewels.
The “Joy & Love to You” sentiment and label are stamped and die cut using the Peaceful Season Bundle bundle.
So, which design do you prefer? Although I’m more of a blue and a green girl, I actually think the lighter and less dominant Petal Pink DSP works better to make the focal image and sentiment really pop.
Now it’s time to hop in over to our next participant, the lovely Judy May. I can’t wait to see the project Judy has created this week!
If the next button link is not working or you’d like to see the entire list of participants go to Sharon Davern‘s blog. Sharon does an amazing job of hosting our Heart of Christmas blog every Monday.
Our AWH team will be back on Wednesday night, showcasing Gorgeous Grape, or you can enjoy some more Heart of Christmas inspiration next Monday night.
Welcome to week twenty-six of our Art With Heart 2024-25 Colour Creations blog hop!
This week we’re featuring Garden Green, a mid green from the Regals family. This colour was a bit of a challenge for me as my “go to” greens are always Mossy Meadow and Old Olive.
After my very non-traditional pink glimmer Christmas card I made for Monday night’s blog I’ve swung the pendulum 180 degrees and made two very classic Christmas cards.
(And yes, I will admit, I’ve managed to sneak in some Mossy Meadow and Old Olive too thanks to the stunning the Season of Green & Gold Specialty DSP!)
Most of these products are online exclusives, some available now (the Season of Green & Gold Specialty DSP, the Golden Greenery Bundle and the Greetings of the Season Bundle) and two of them (the Gold Twisted Thread and the Brushed Silver & Gold Foil Specialty Paper) will be available from the 5th November.
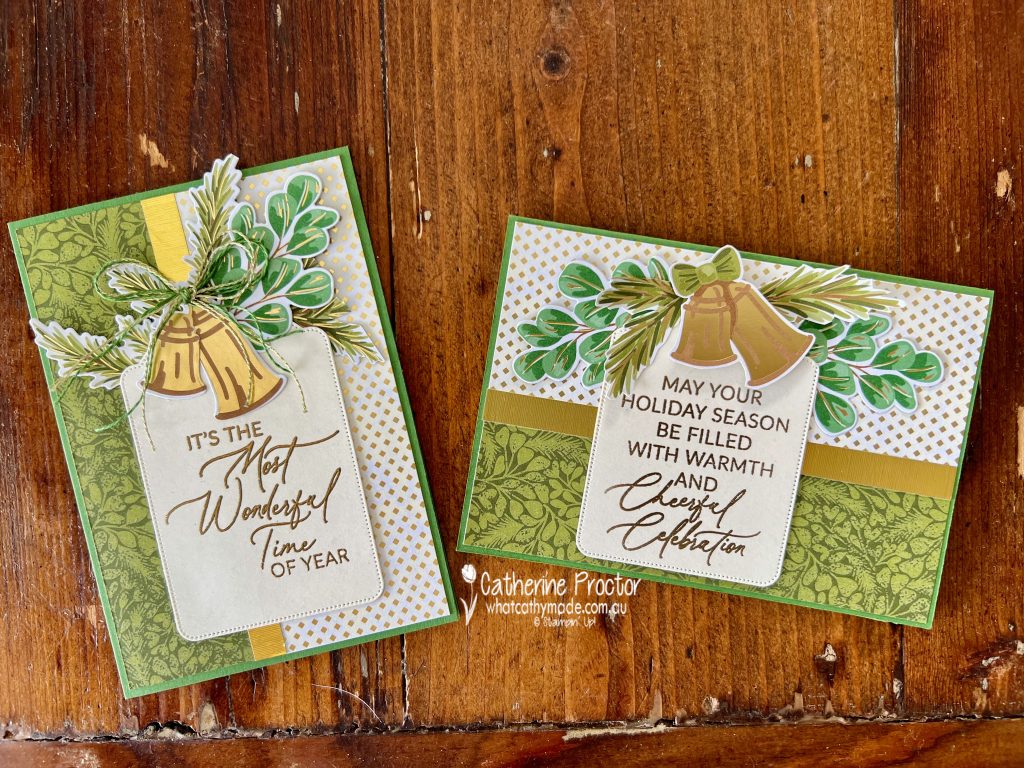
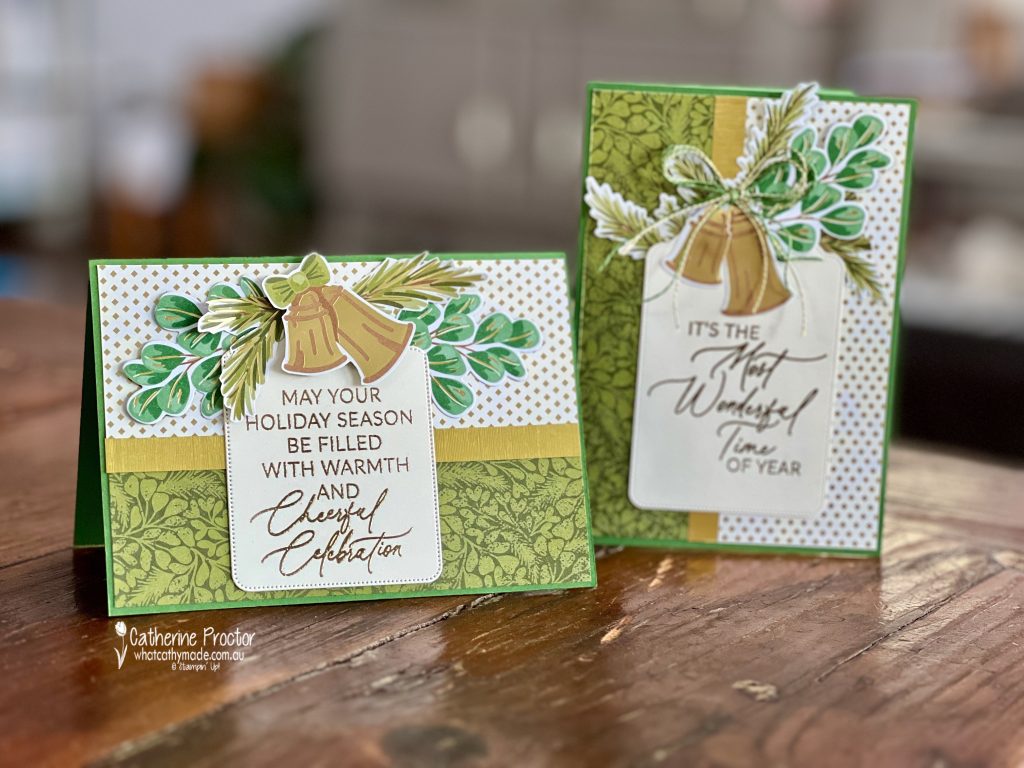
My colour combination is taken from the colours in the Season of Green & Gold Specialty DSP: Garden Green, Very Vanilla, Gold, Mossy Meadow, Old Olive and Pecan Pie.
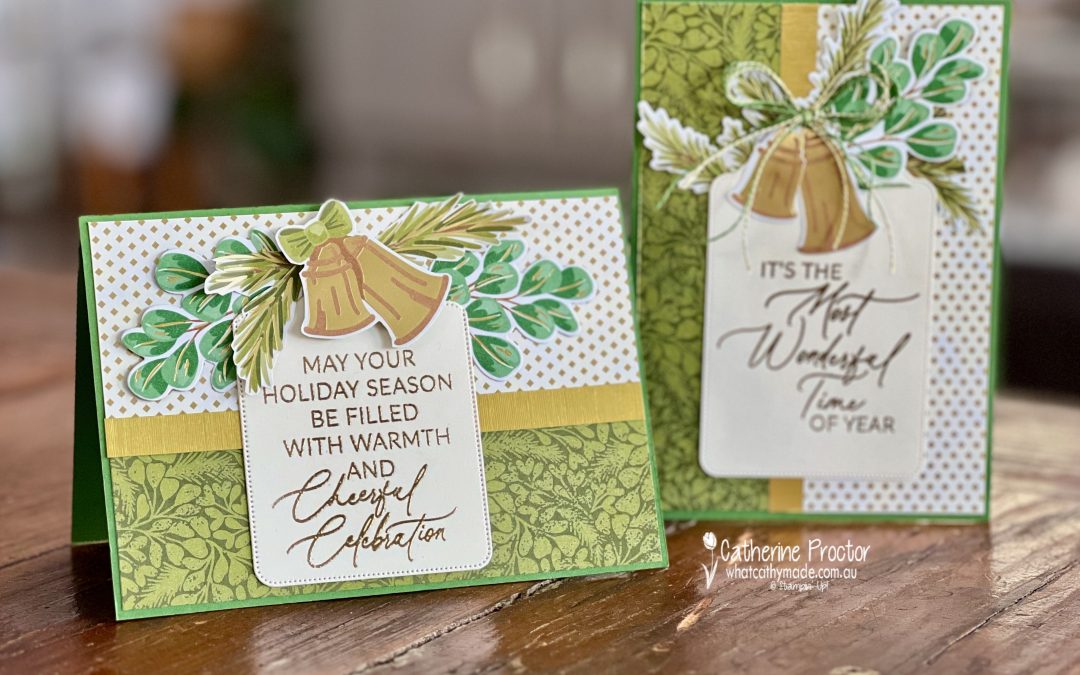
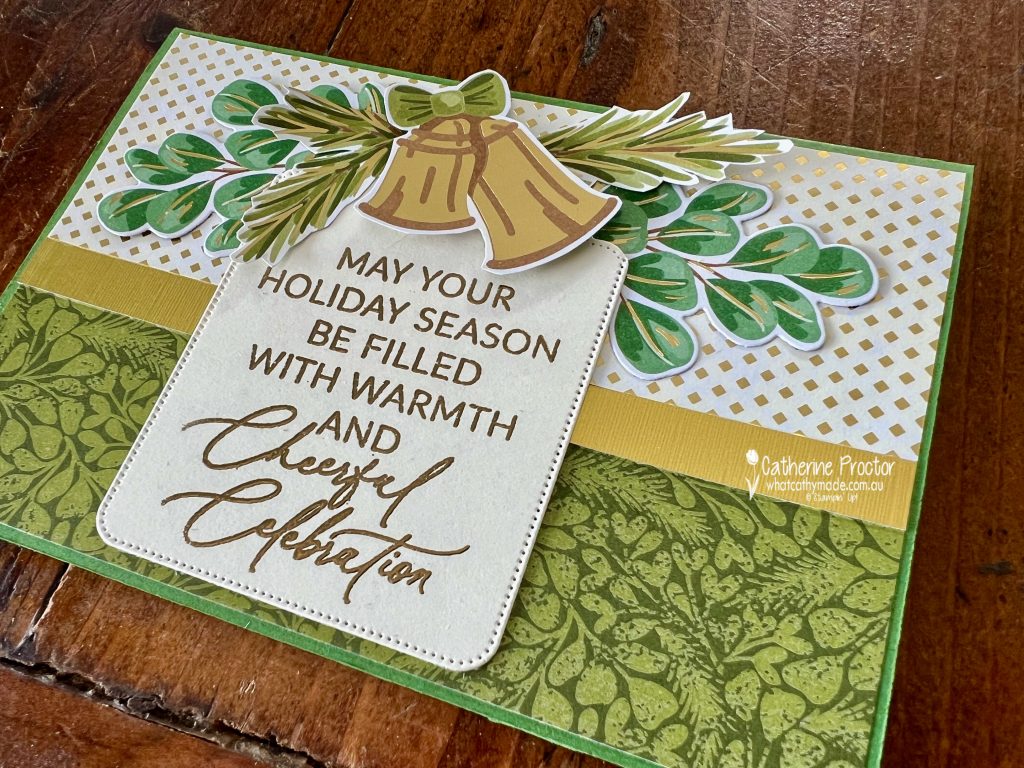
I’ve used the same strips of DSP and the new Gold Foil Specialty Paper on a Garden Green cardstock base for both cards. I arranged the DSP strips in a different order and made one vertical card and one horizontal card as the layout works equally well for both orientations.
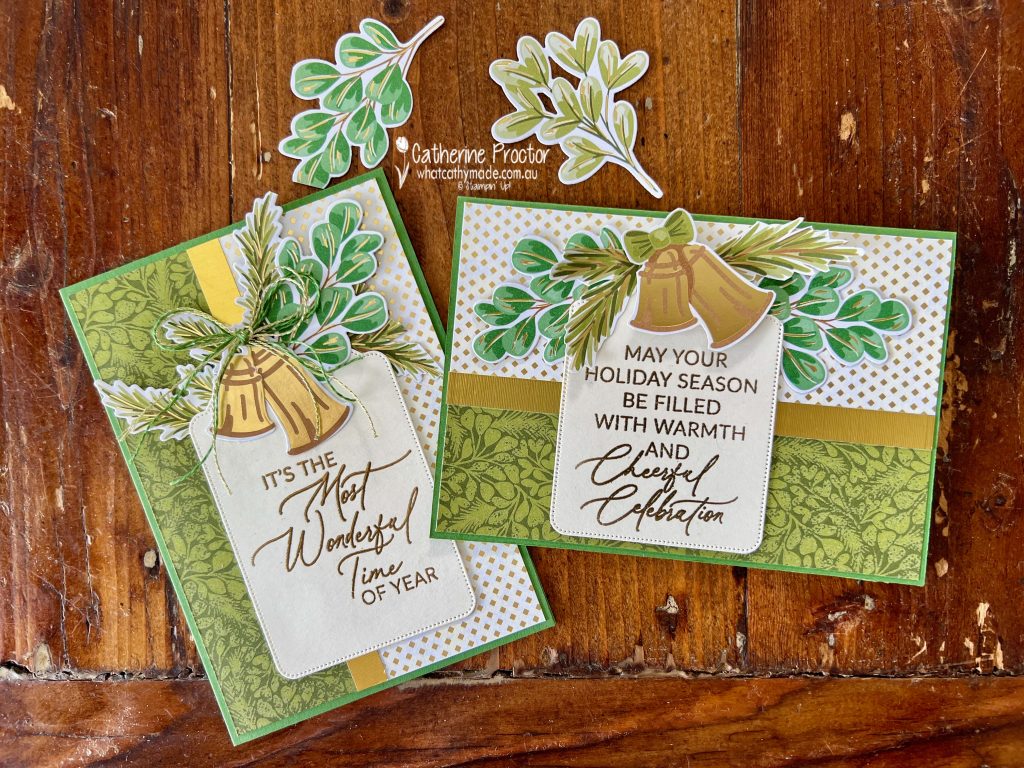
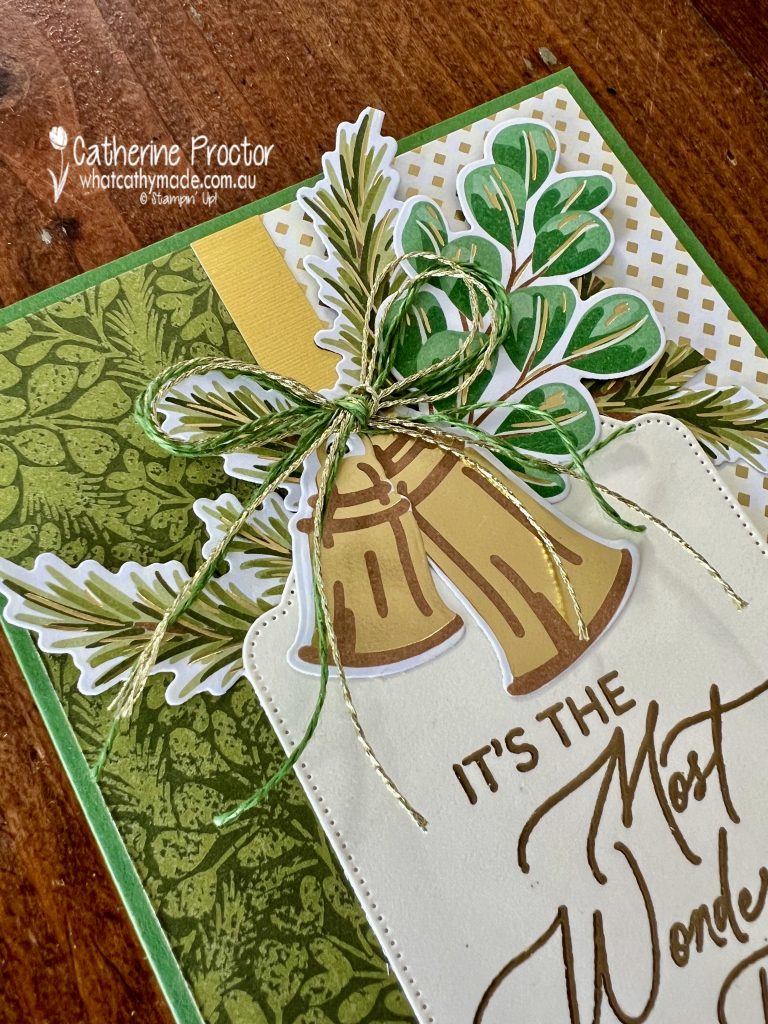
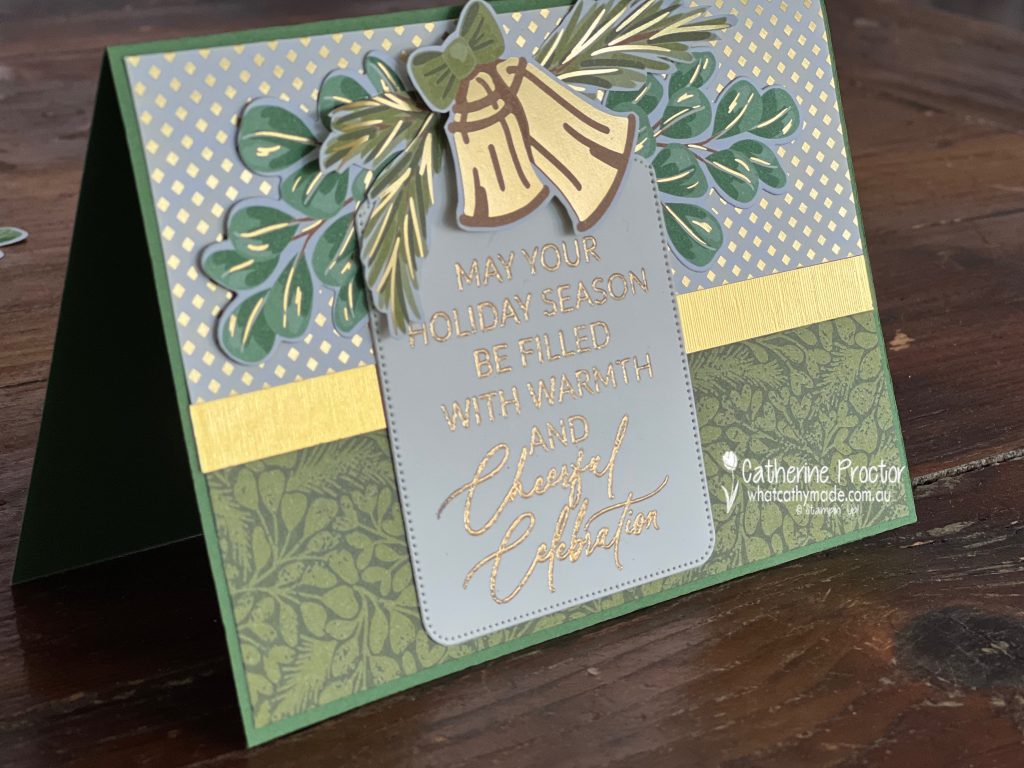
All of the greenery and the bells are cut from the Season of Green & Gold Specialty DSP. Some images have been die cut using the Golden Greenery Dies designed to cut certain shapes from the DSP, while others have been fussy cut using paper snips.
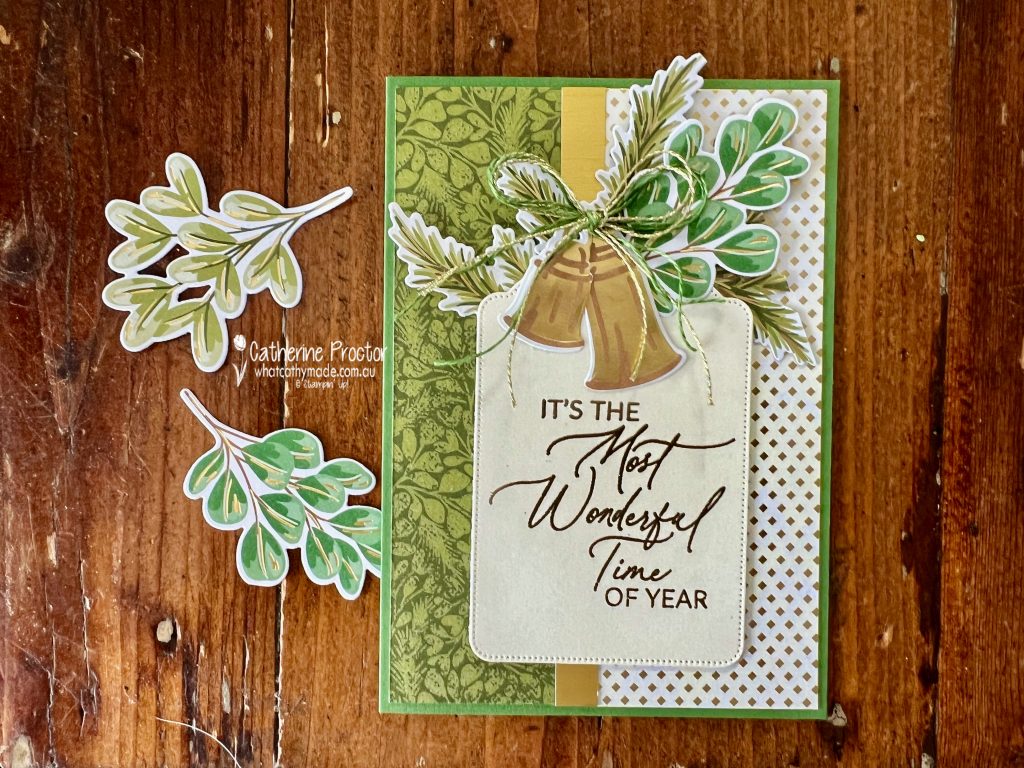
Card one has a double bow made from the Garden Green Natural Tones Linen Thread and the forthcoming Gold Twisted Thread.
Here’s a closer look at these gorgeous threads. They are both soft, small and easy to tie in a bow, just perfect for adding texture and interest to cards.
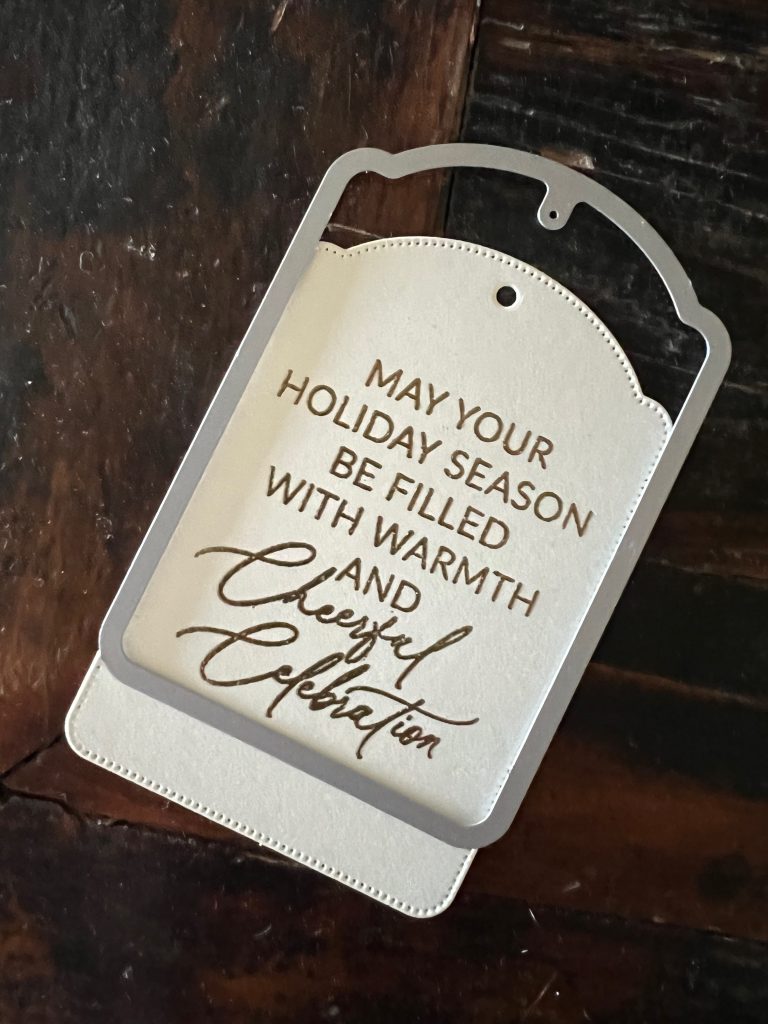
For both cards I die cut the sentiments using the largest die from the Greetings of the Season dies. I left it at full size for card one, however for card two I had to shorten the largest sentiment label from the Greetings of the Season dies to make it fit my horizontal design.
To do this I simply ran the sentiment label back through the Stampin’ Up! Stampin’ Cut & Emboss Machine, lining up the dotted border edge (you can feel the die “sit” into the groove of the existing dotted border edge) and positioning the base of the die higher up before partially die cutting it again.
Both the sentiments have been gold heat embossed onto Very Vanilla cardstock. I forget to use Very Vanilla cardstock but I really should do it more often as it gives cards such a classically elegant feel!
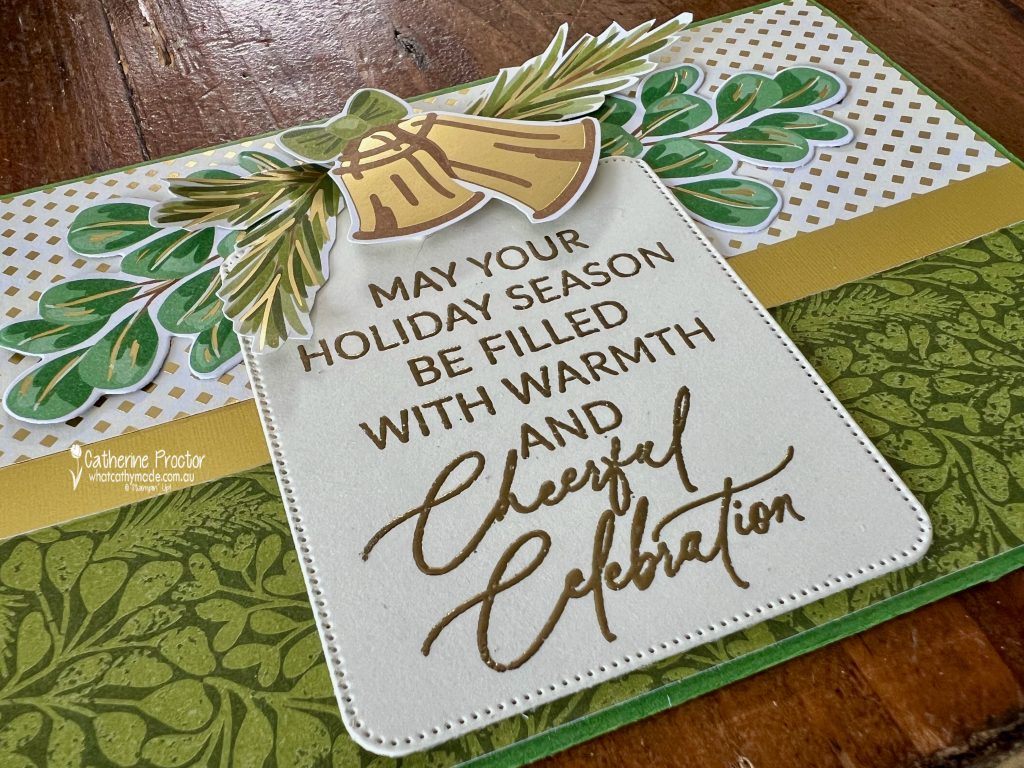
This slightly angled photo gives you an better idea of the beautiful gold foiling on this DSP.
If you’re looking for a layout that works well for mass producing cards I can highly recommend this one.
The stunning DSP really does all the work for you and apart from the heat embossed sentiments there is no other stamping needed on the front of the card!
Now it’s time to hop in over to our next participant, the lovely Amie McIlroy. I can’t wait to see what Amie has made this week!
If at any time you find a broken link, you can find the complete list of all participants below.
If you have any questions please contact me. Or you can find out more and order your Starter Kit here by scanning the QR code above with your phone.
The AWH Colour Creations team will be back next Wednesday 23rd October, showcasing Gorgeous Grape or you can join us on Monday night for some more Christmas inspiration.
Welcome to week 12 of the Art with Heart Team Stampin’ Up! Heart of Christmas blog hop for 2024. I hope you we are continuing to inspiring you each week with our Christmas card ideas.
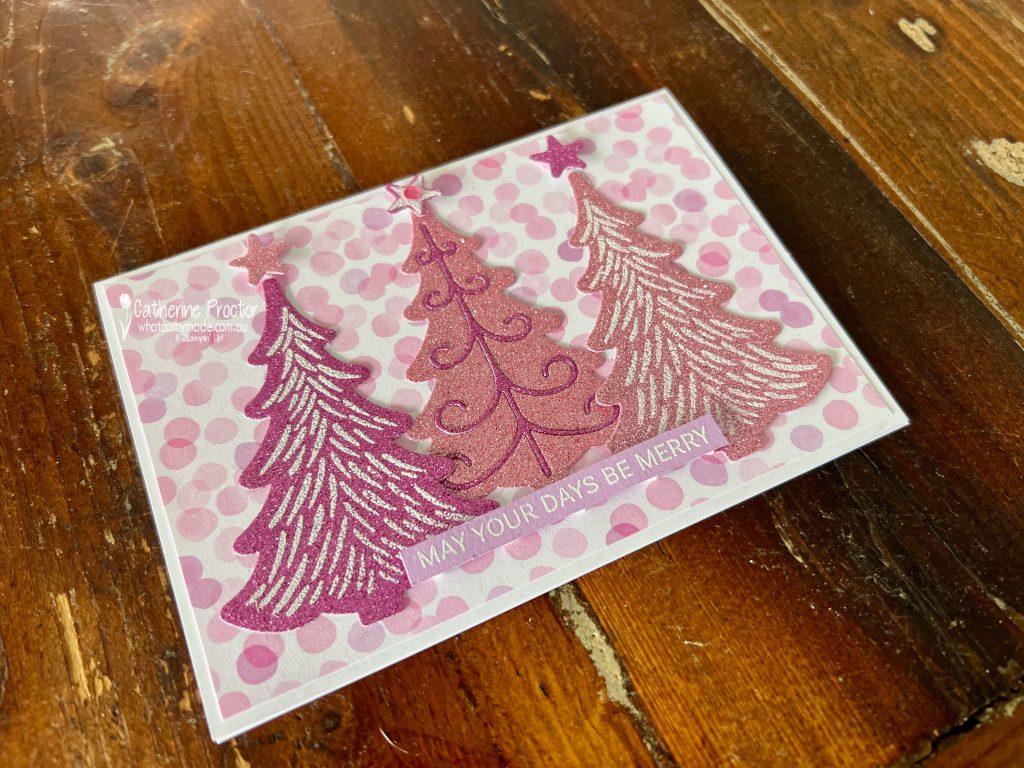
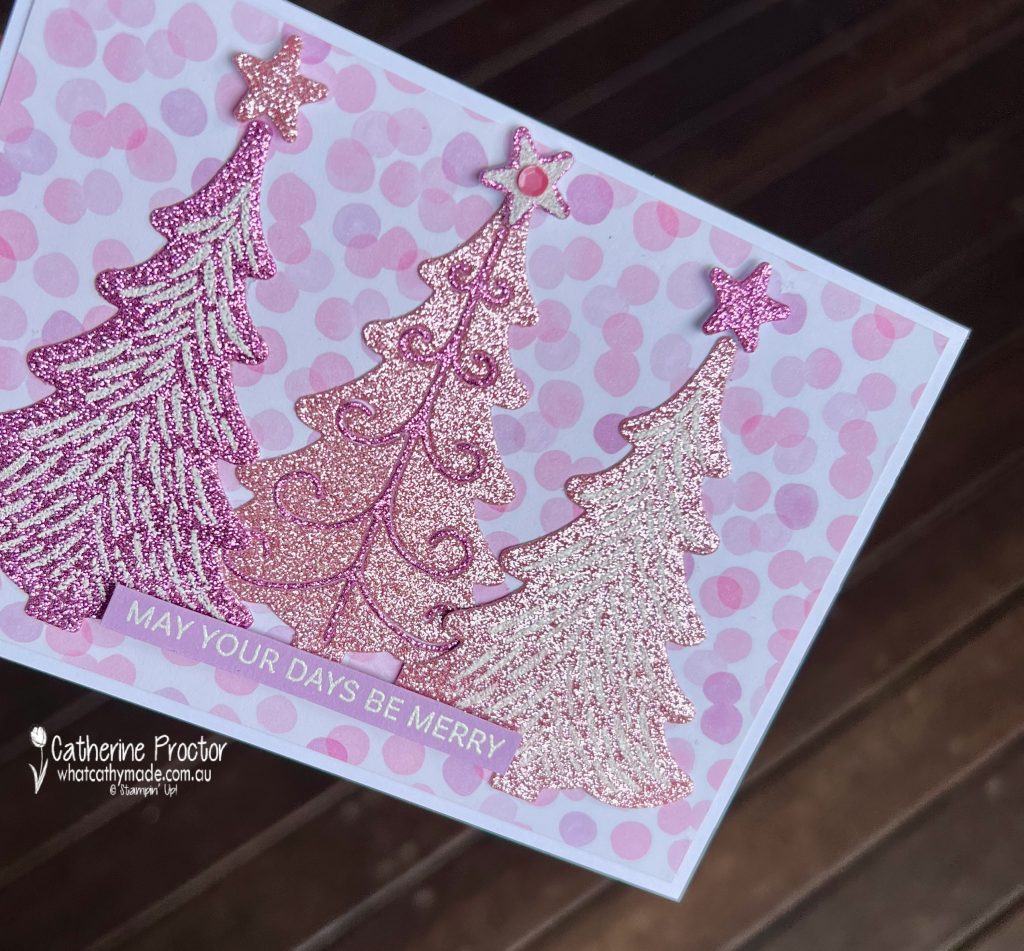
Warning – if you only like traditional Christmas cards in traditional colours, please turn away now! My card this week is very sparkly and definitely not traditional at all, but it features a super cool technique I had never heard of before and you might like to learn about too!
On a Facebook live last week, Stampin’ Up’s Sara Douglass demonstrated how to heat emboss glimmer paper. I had no idea glimmer paper could be heat embossed, but the technique is exactly the same as heat embossing any other type of paper.
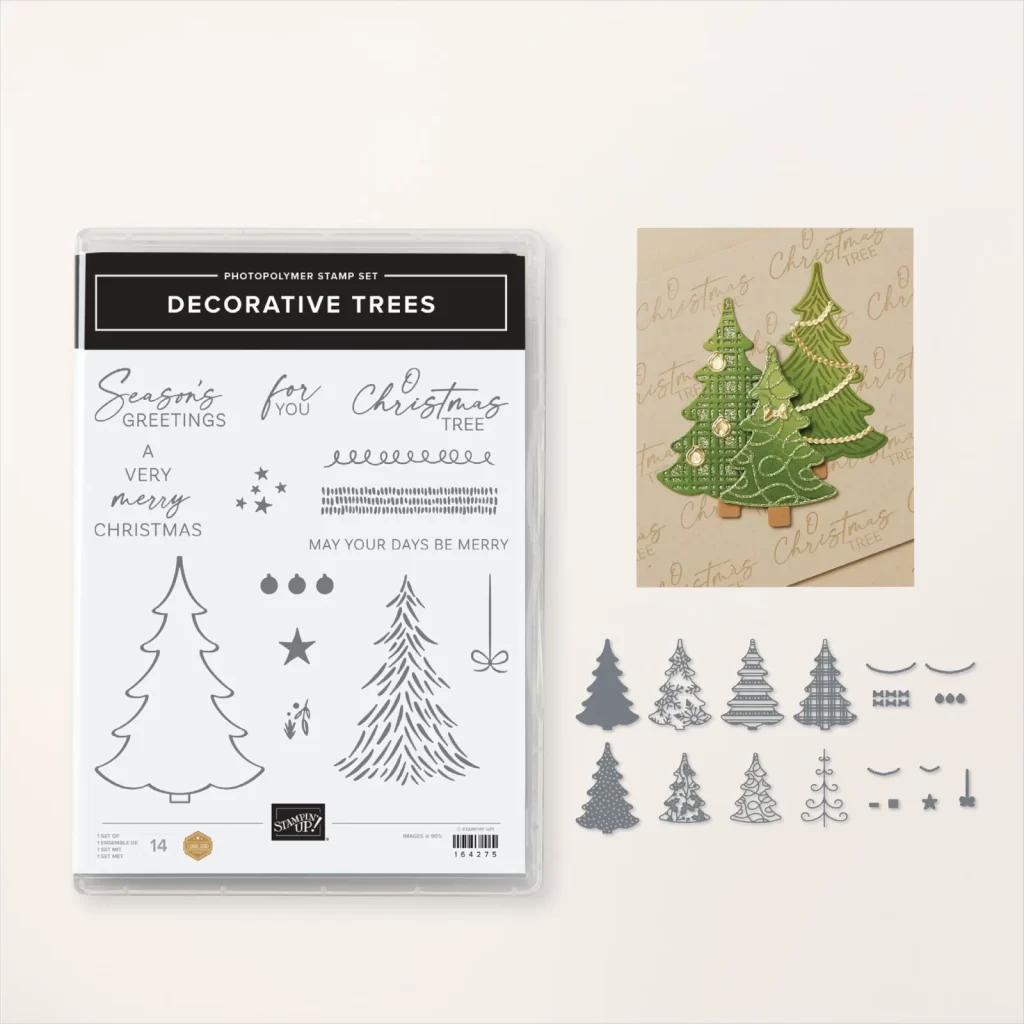
Both Sara and I used the Decorative Trees bundle for our projects.
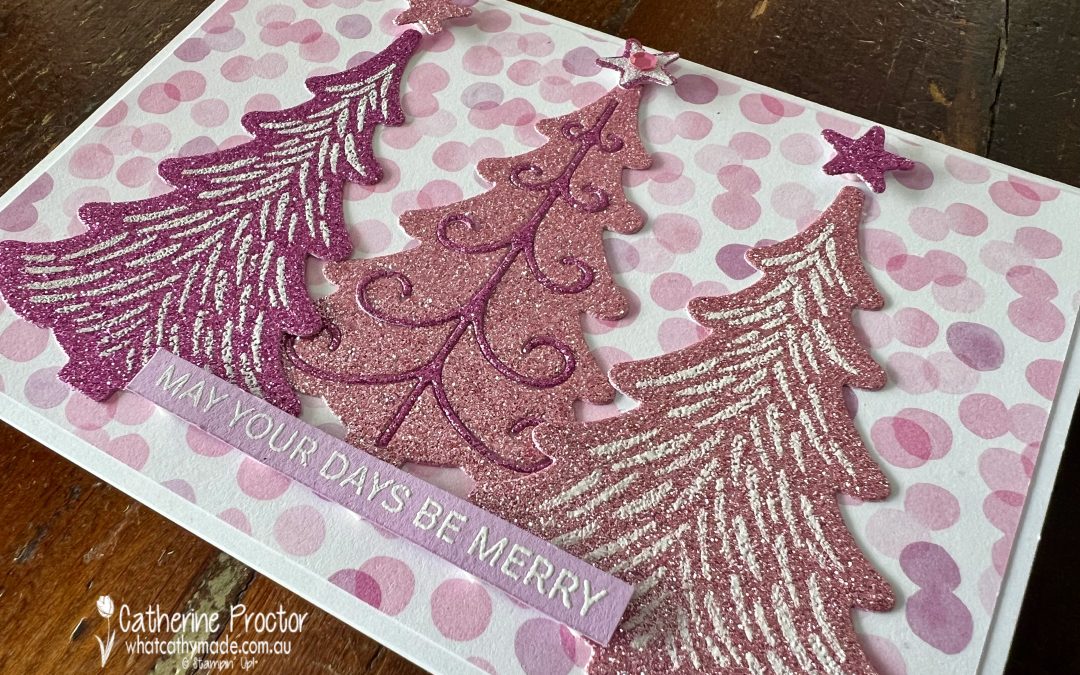
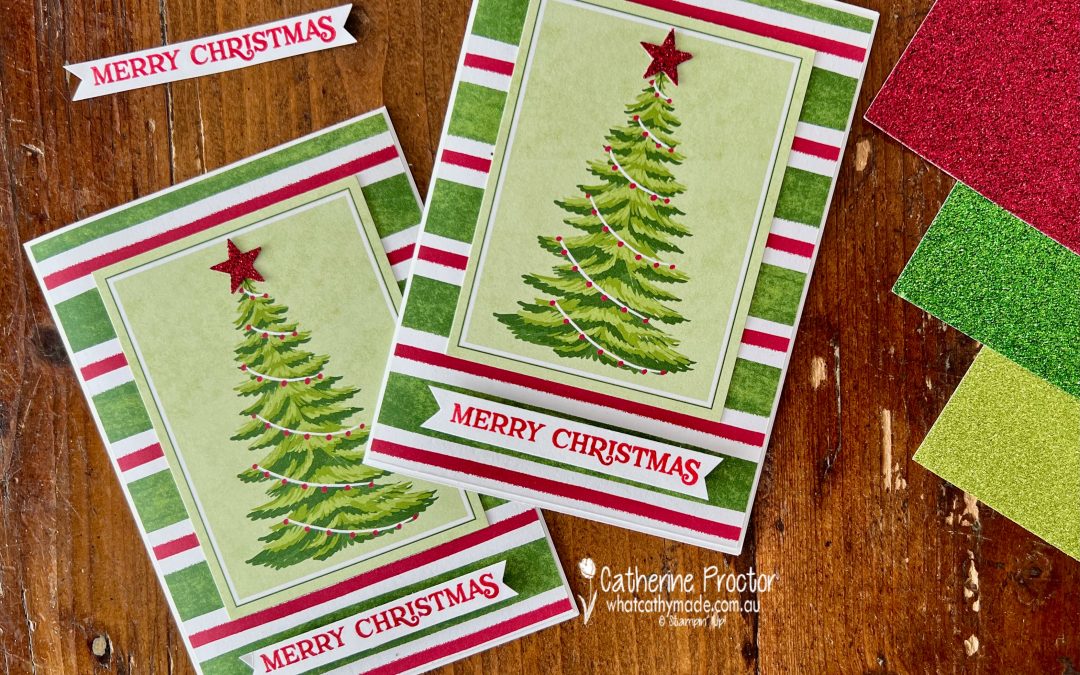
I decided to use the Petunia Pop and Pretty in Pink glimmer papers from the 2024–2026 In Color Glimmer Specialty Paper pack, heat embossed with white embossing powder. I layered my three trees over this delightful “bokeh effect” DSP pattern from the Bright & Beautiful 6″ x 6″ (15.2 x 15.2 cm) Designer Series Paper.
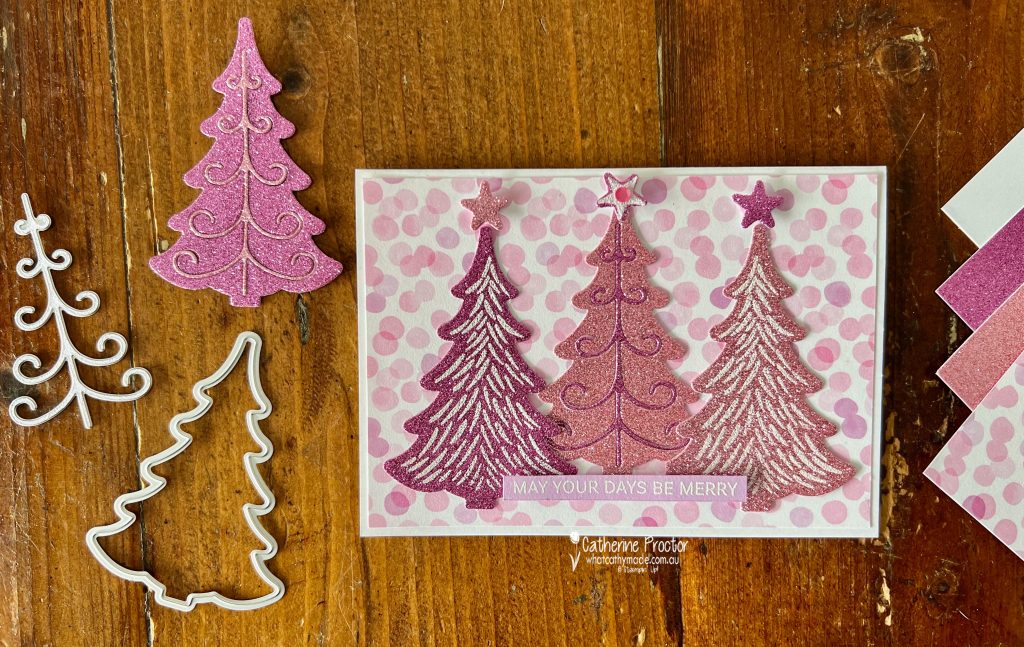
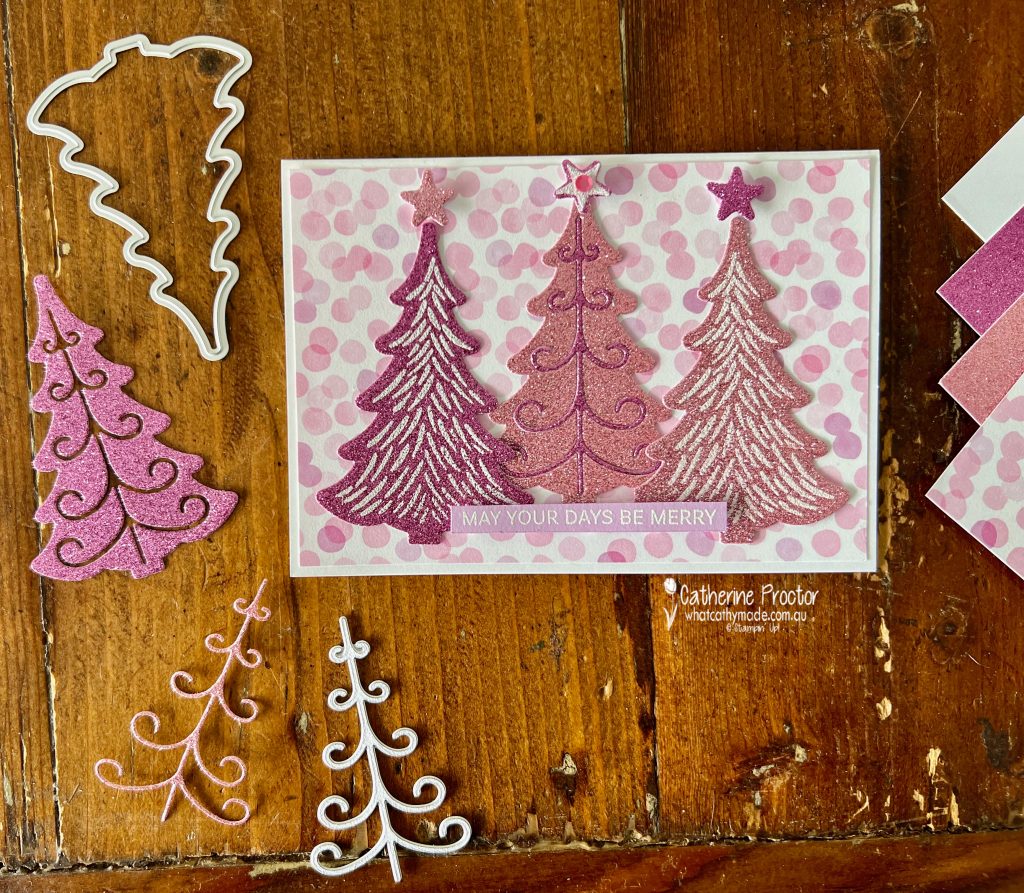
In addition to heat embossing I used the die inlay technique for the middle tree. This is where you die cut twice, laying the negative image from one colour inside the postive die cut image in a different colour.
As you can see in the photos above and below, the negative pieces create another die inlay tree I can use on another card.
The white heat embossed sentiment also comes from the Decorative Tree stamp set, stamped onto a strip of Petunia Pop card stock. Can you see the delightful sparkle this glimmer paper has?
The outside photo gives you a better idea of just how sparkly these glimmer papers are!
Now it’s time to hop in over to our next participant, the lovely Kate Morgan. I can’t wait to see the project Kate has created this week!
If the next button link is not working or you’d like to see the entire list of participants go to Sharon Davern‘s blog. Sharon does an amazing job of hosting our Heart of Christmas blog every Monday.
Our AWH team will be back on Wednesday night, showcasing Garden Green, or you can enjoy some more Heart of Christmas inspiration next Monday night.
Welcome to week twenty-five of our Art With Heart 2024-25 Colour Creations blog hop!
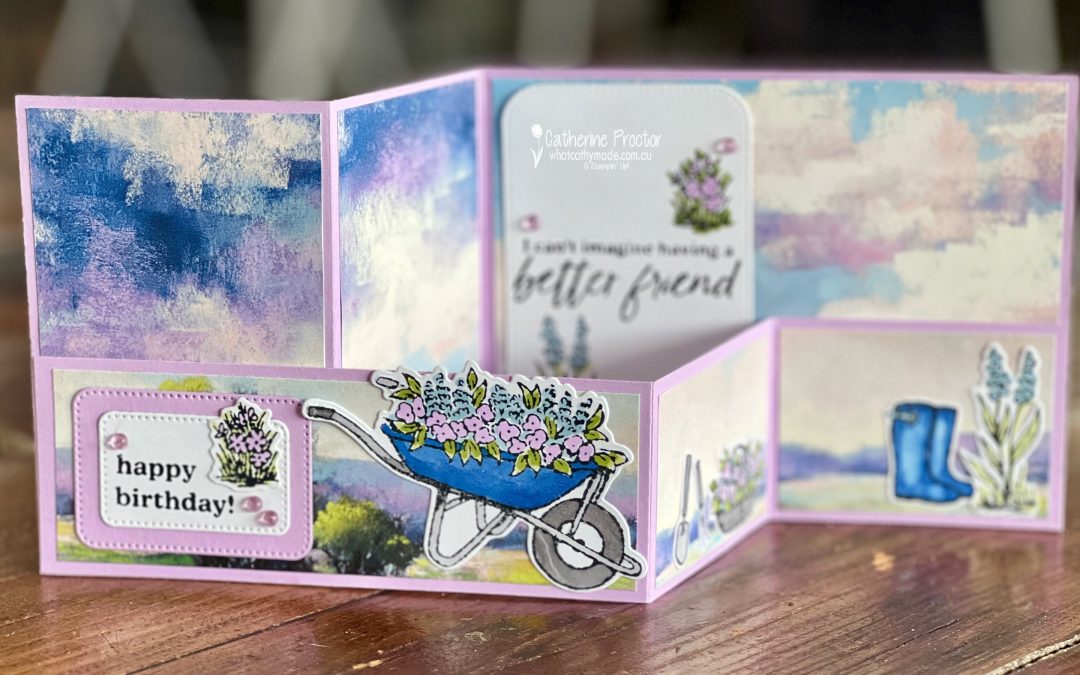
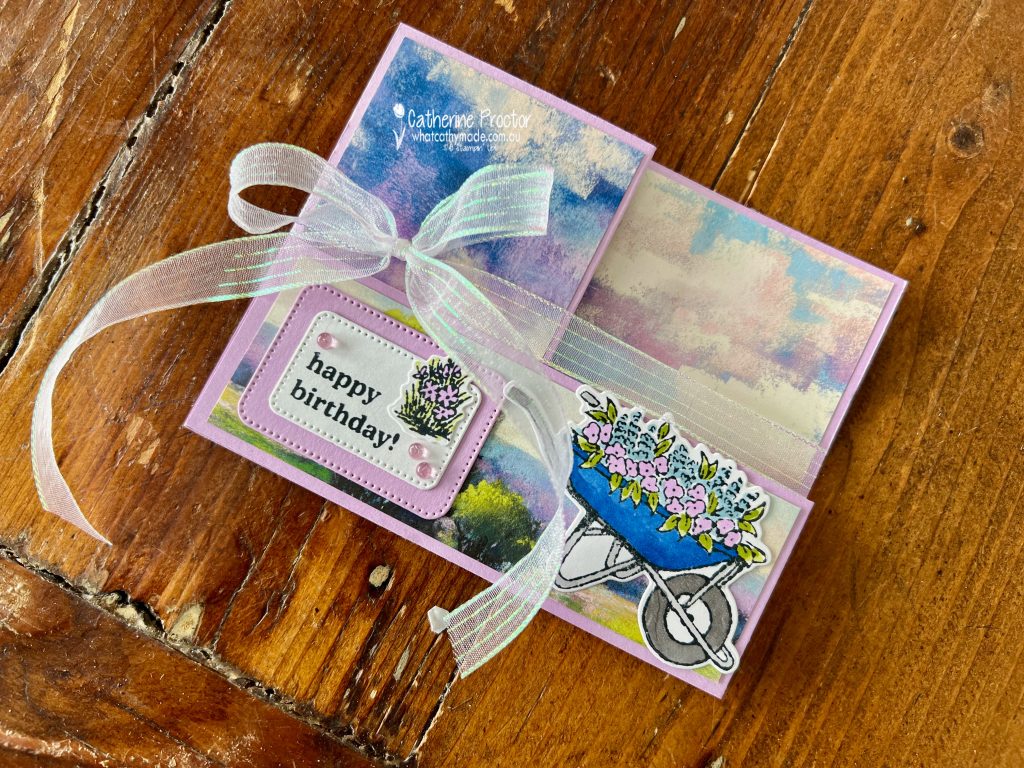
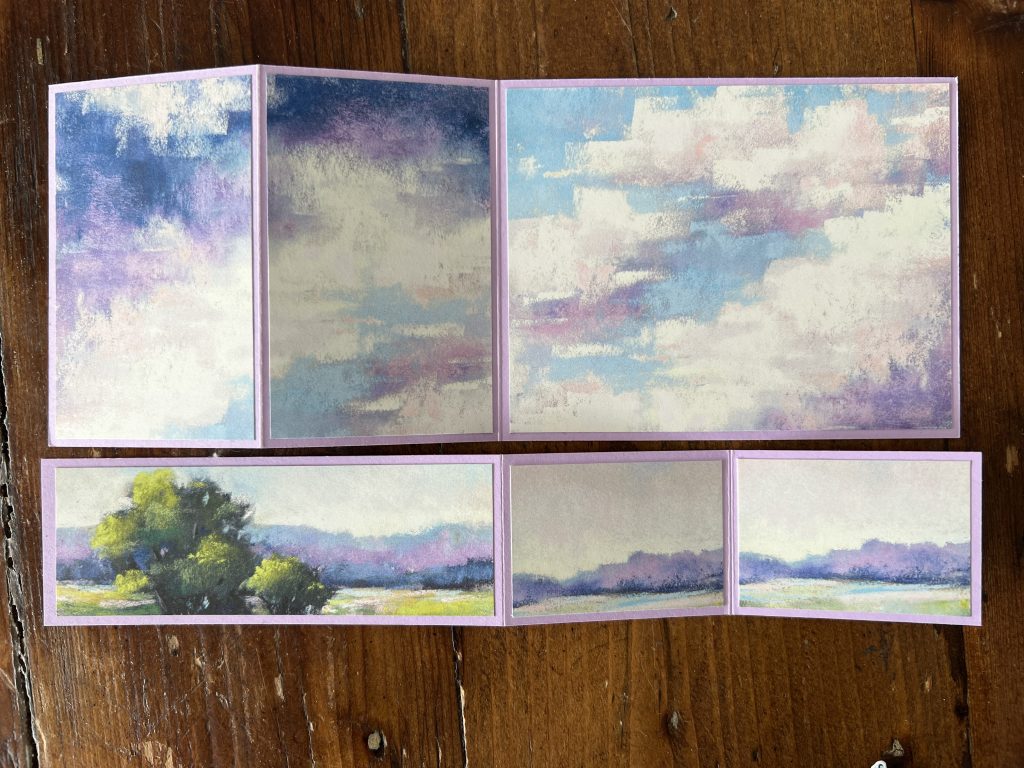
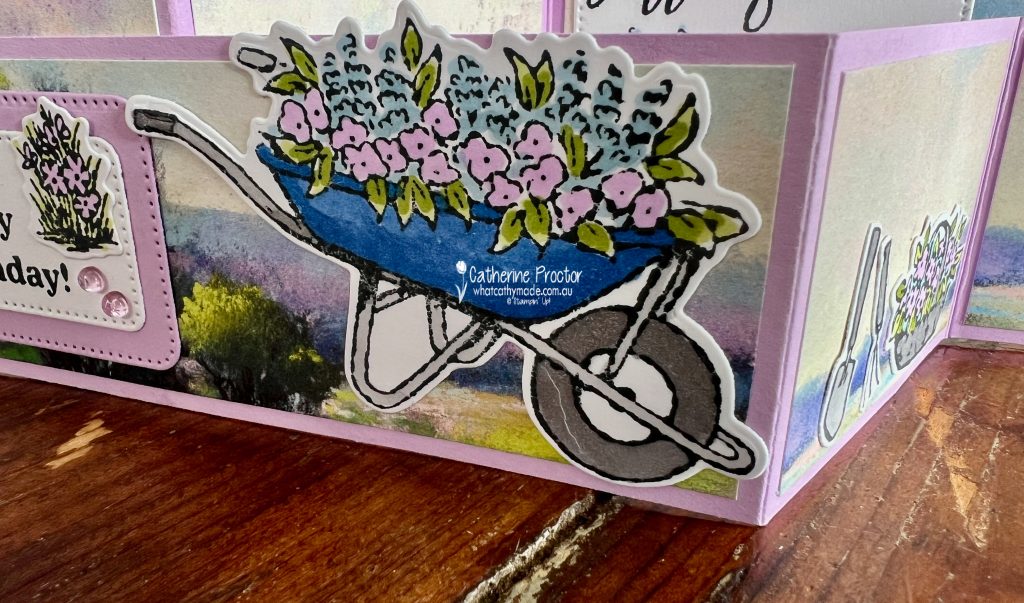
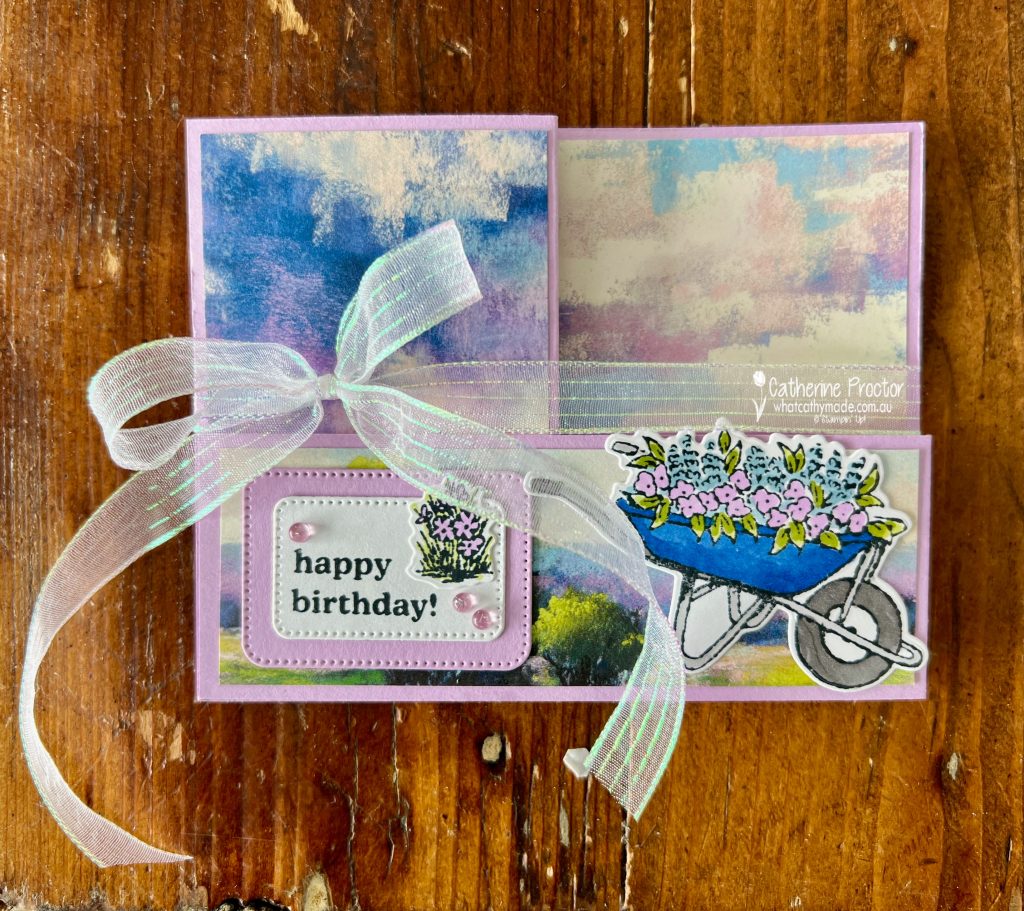
This week we’re featuring Fresh Freesia, a pink/lilac hue from the Subtles family and I’ve made a double Z fold card. Here it is lying flat and tied with a bow.
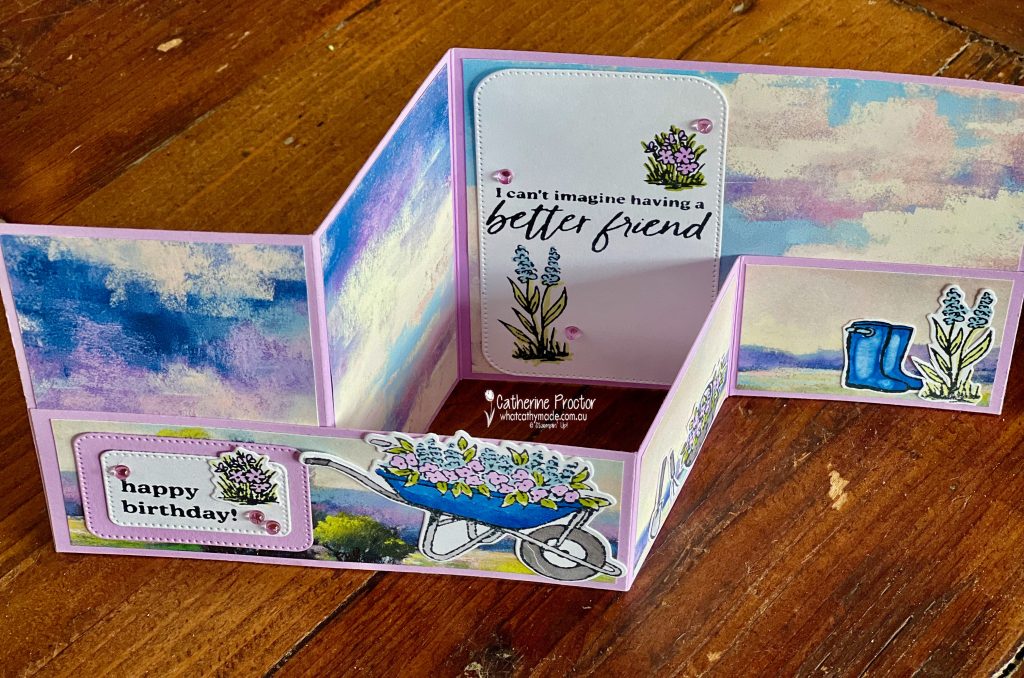
And here it is when opened up.
I was inspired to create this card by these beautiful DSP designs from the Meandering Meadows Designer Series Paper. I love the colour combination of Balmy Blue, Blueberry Bushel and Fresh Freesia in this watercolour sky!
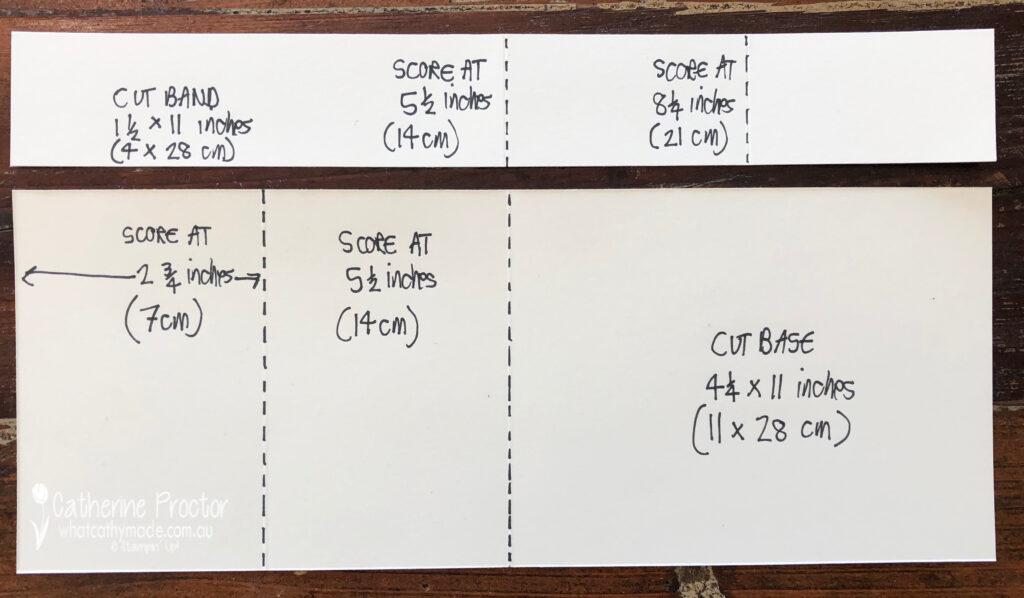
Here’s the metric template I use when making double Z fold cards – for this card I cut the Z fold band at 5 x 28cm before folding it.
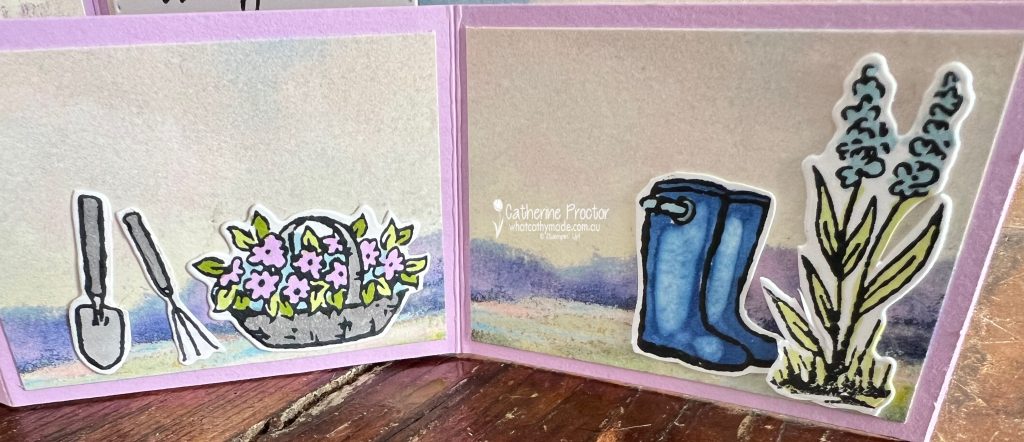
I’ve used Stampin’ Blends in Garden Green, Smoky Slate, Balmy Blue, Blueberry Bushel and Fresh Freesia to colour in stamped and die cut coordinating images from the Garden Meadow Bundle.
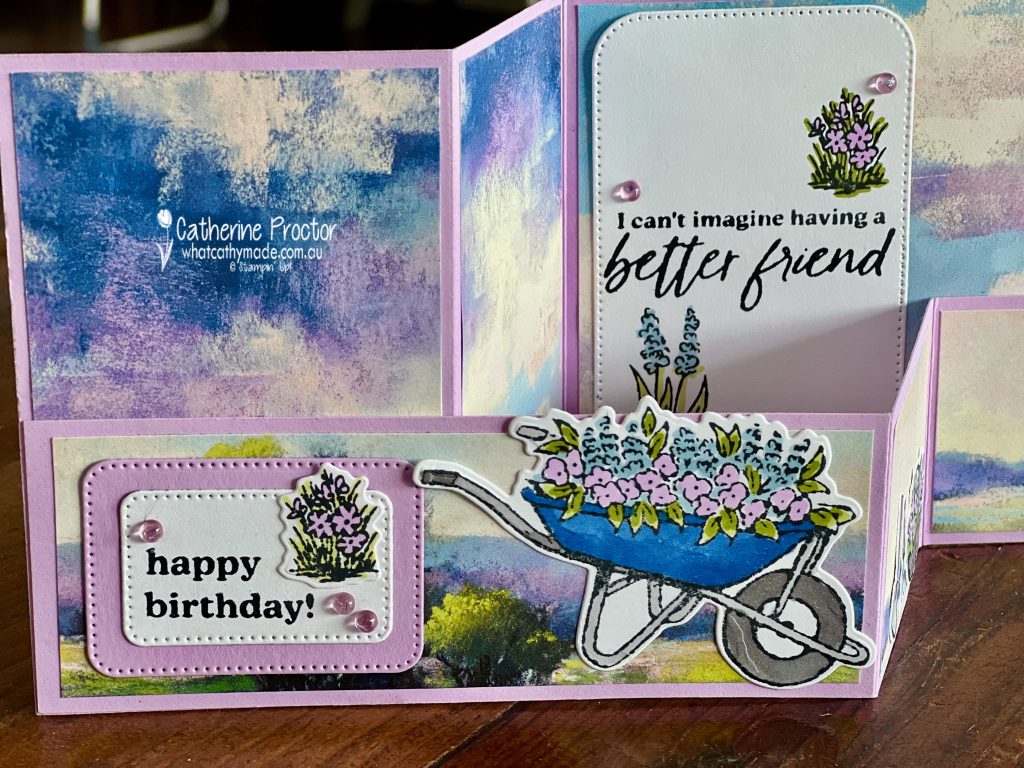
The sentiments on the front and inside of the card are onto labels cut from the Nesting dies. I elongated the inside sentiment panel using the partial die cut technique.
How cute is this wheelbarrow full of flowers?
To make the card lie flat when closed and add “pizzazz” I’ve tied an extravagant bow of Iridescent Ribbon around the Z fold.
The Fresh Freesia gems from the Tinsel Gems Three-Pack are finishing touch for both the front panel and the inside panel.
Now it’s time to hop in over to our next participant, the lovely Di Furniss I can’t wait to see what Di has made this week!
If at any time you find a broken link, you can find the complete list of all participants below.
If you have any questions please contact me. Or you can find out more and order your Starter Kit here by scanning the QR code above with your phone.
The AWH Colour Creations team will be back next Wednesday 23rd October, showcasing Garden Green or you can join us on Monday night for some more Christmas inspiration.
Welcome to week 11 of the Art with Heart Team Stampin’ Up! Heart of Christmas blog hop for 2024. I hope you we are continuing to inspiring you each week with our Christmas card ideas.
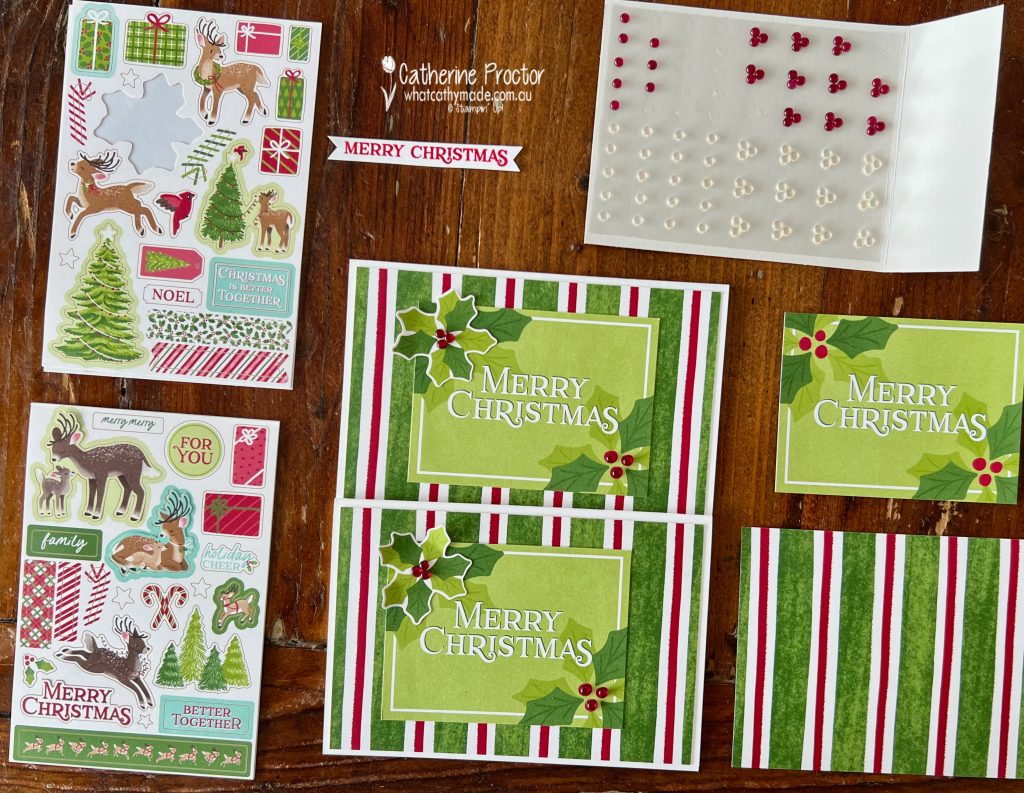
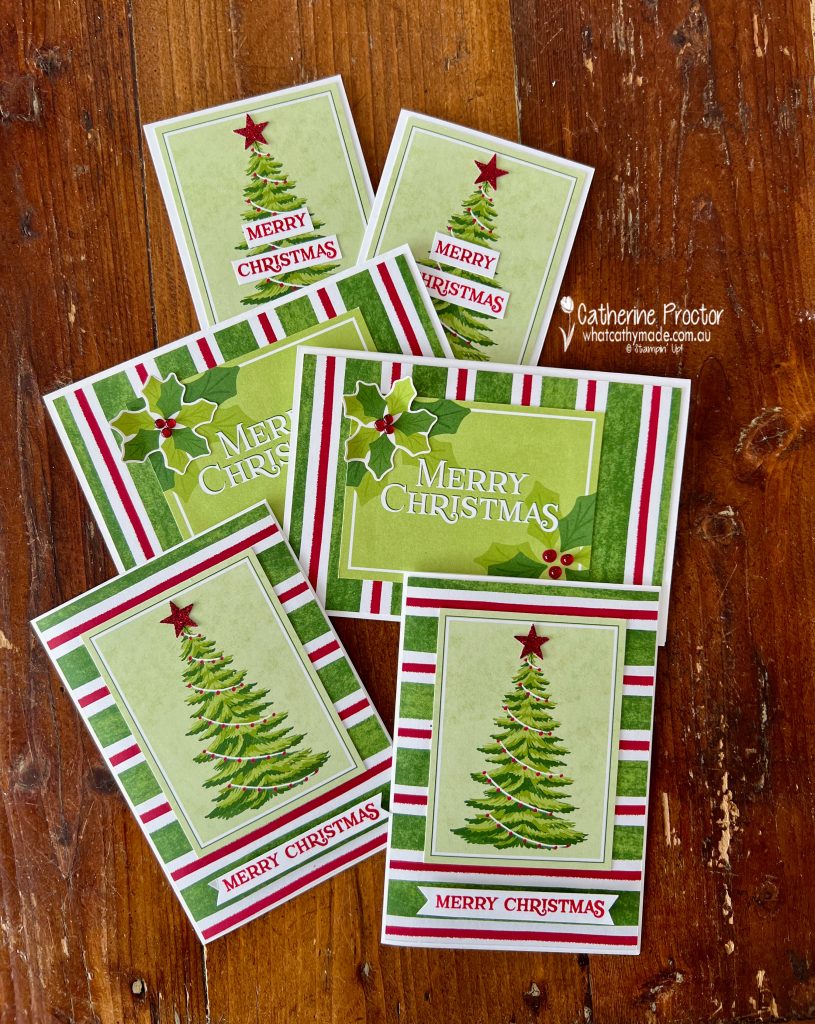
This week’s Christmas cards were quick and easy to make with the Reindeer Fun Memories & More pack that contains contains 54 double-sided printed cards and 4 sticker sheets.
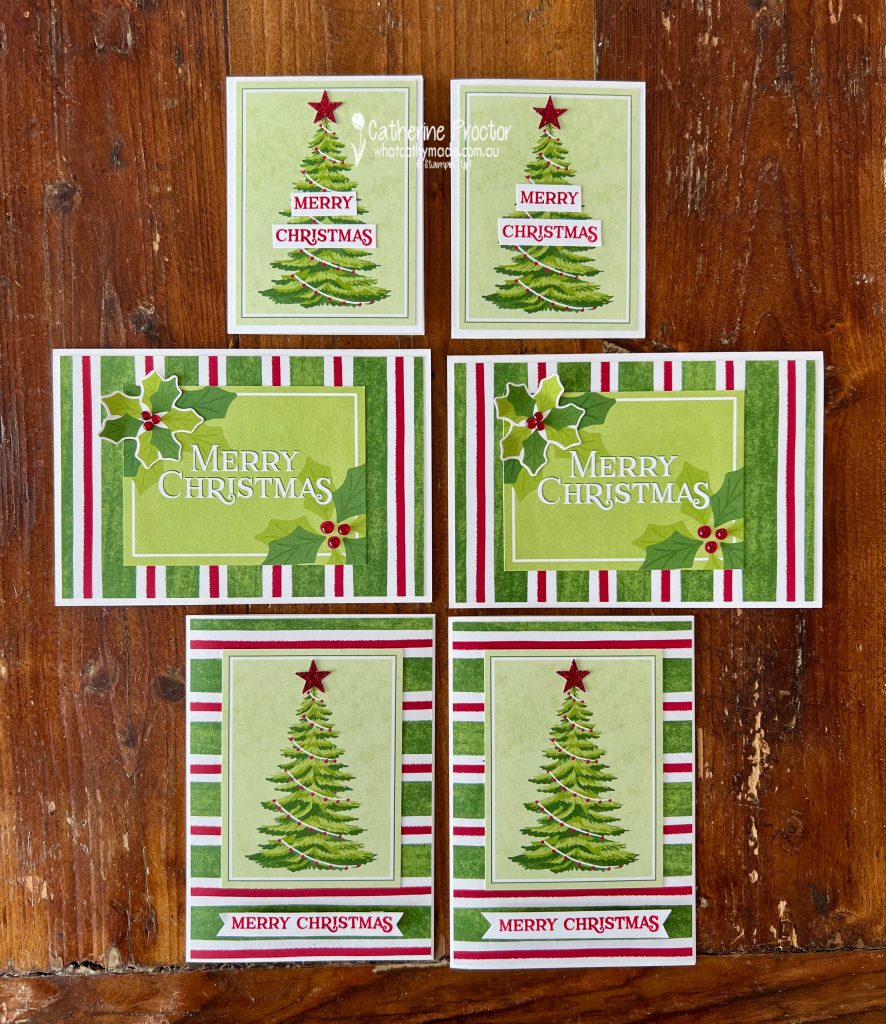
I had intended to make just one card but went on to make six cards, ideal for building up my Christmas stash!
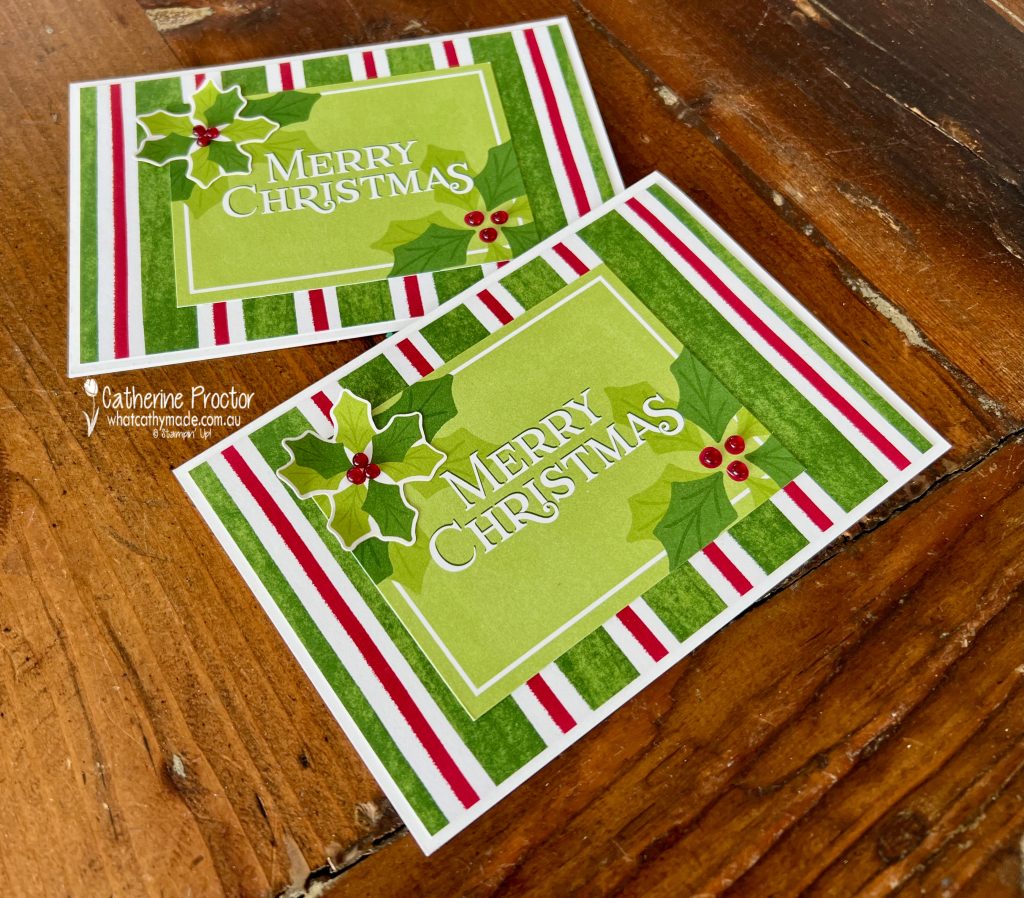
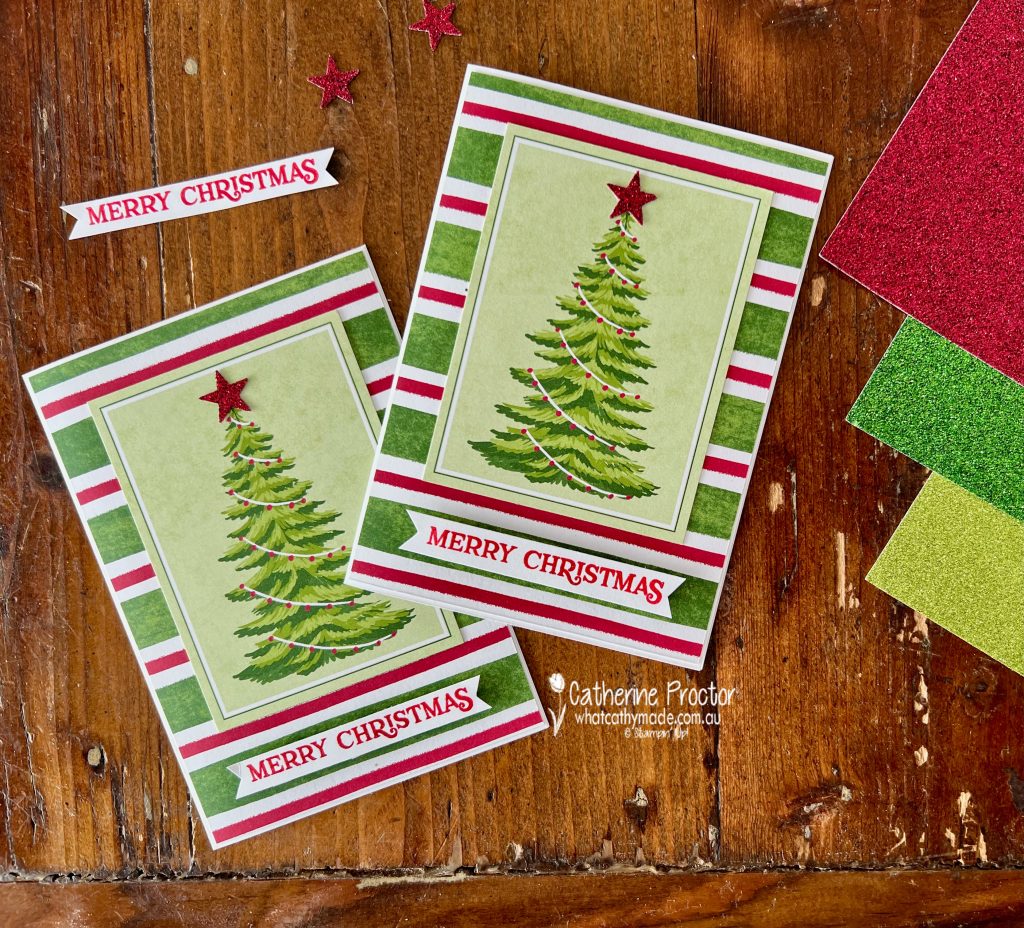
These first two “no-stamping” horizontal cards use the large Memories & More card bases that come in an envelope with smaller card bases and matching envelopes.
I’ve layered the 3″ x 4″ (7.6 x 10.2 cm) Merry Christmas cards over the striped 4″ x 6″ (10.2 x 15.2 cm) 18 cards.
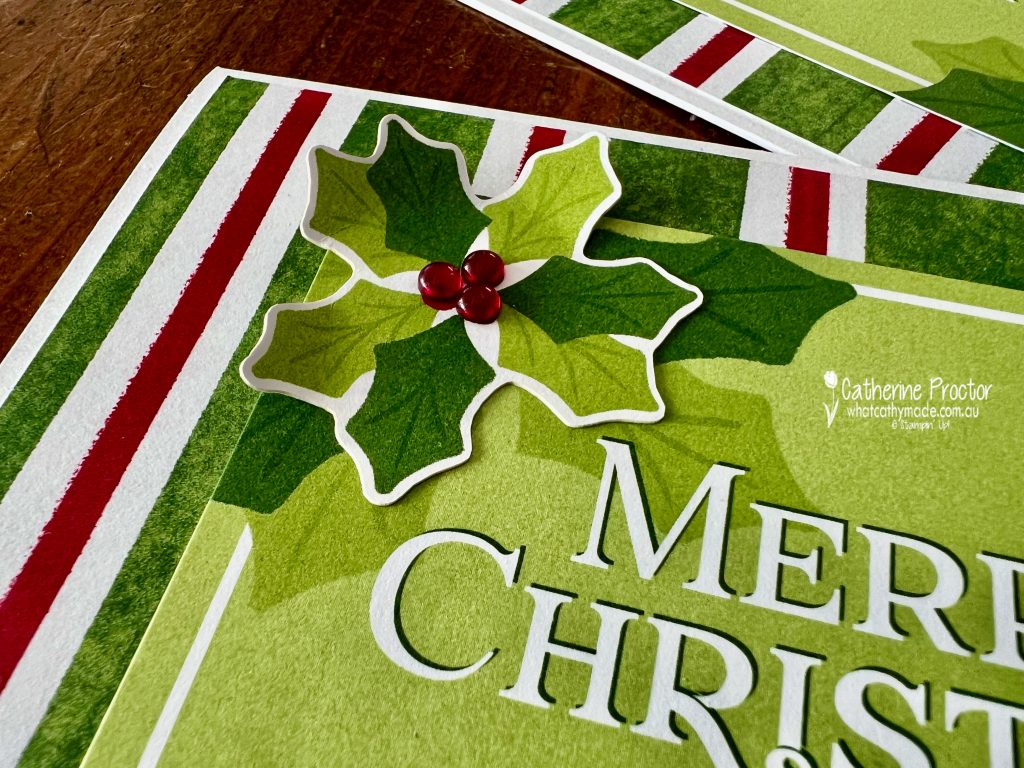
I’ve simply added a holly sticker and an assortment of Cherry Cobbler berries from the Cherry Cobbler & Pearl Adhesive-Backed Berries pack for extra dimension.
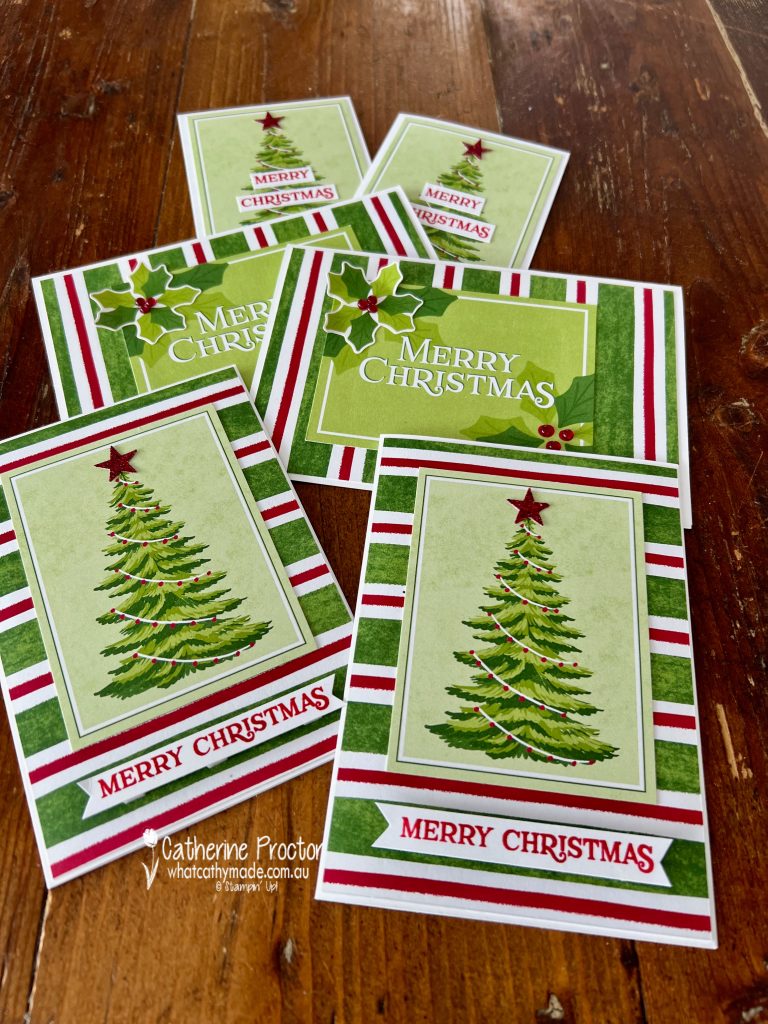
I’d run out of Memories & More large card bases to use for the next cards so I used our Australian half a sheet of A4 card bases instead.
It’s easy to make the Memories & More cards fit our Australian card bases. Simply trim a 5 mm section off the bottom of the striped Memories & More card. I’ve then adhered the small Christmas tree Memories & More card over the top of the striped large Memories & More card.
The Peaceful Evergreens Dies were used to die cut red stars from the Festive 12″ x 12″ (30.5 x 30.5 cm) Glimmer Paper to top the trees.
The “Merry Christmas” sentiment was stamped firstly onto the Versamark ink pad and secondly onto the Real Red ink pad BEFORE stamping onto Basic White card stock and being heat embossed using clear embossing powder.
This technique allows you to heat emboss in any colour without using a stamp positioning tool! Just remember to clean your stamp thoroughly every time AFTER you stamp onto the card stock if you are making multiple sentiments like I have done today.
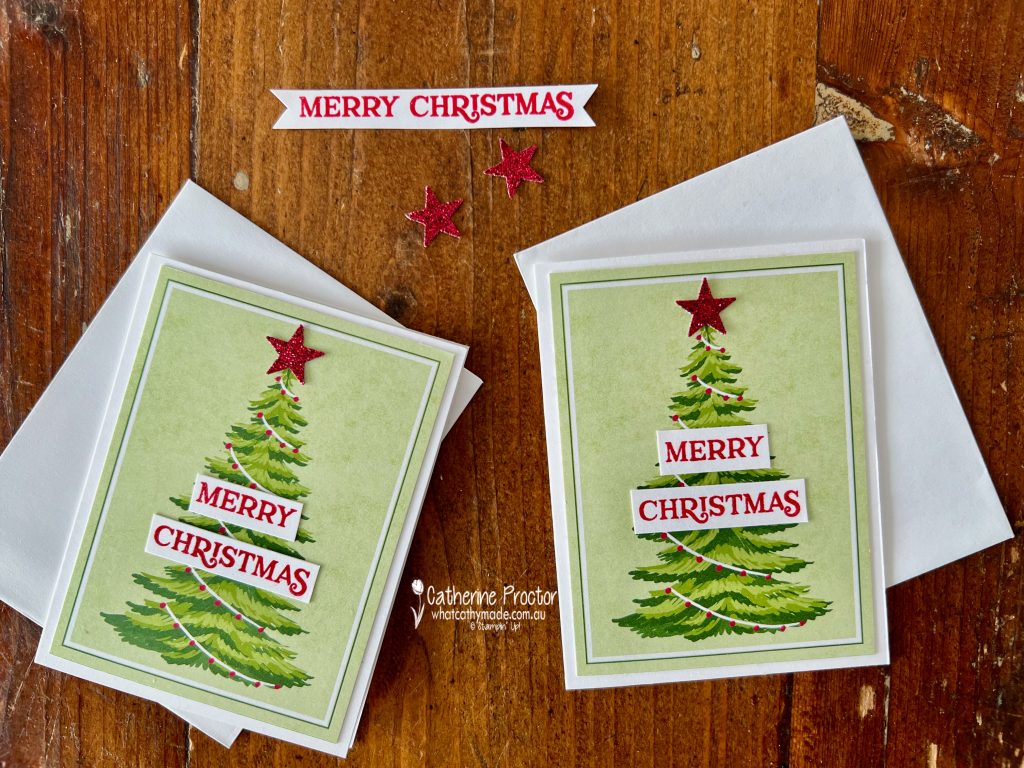
My final two cards use the small Memories & More card bases and the same small Christmas tree Memories & More cards from my second card design.
Once again they are topped with the red glimmer stars and have the red heat embossed sentiment from the Reindeer fun stamp set. I chopped the sentiment in half so it fitted across the Christmas trees.
I love how quick and easy it is to mass produce Christmas cards using the Memories & More card packs as well as the Memories & More card bases & envelopes!
Now it’s time to hop in over to our next participant, the lovely Sharon Davern. I can’t wait to see the project Sharon has created this week!
If the next button link is not working or you’d like to see the entire list of participants go to Sharon Davern‘s blog. Sharon does an amazing job of hosting our Heart of Christmas blog every Monday.
Our AWH team will be back on Wednesday night, showcasing Fresh Freesia, or you can enjoy some more Heart of Christmas inspiration next Monday night.