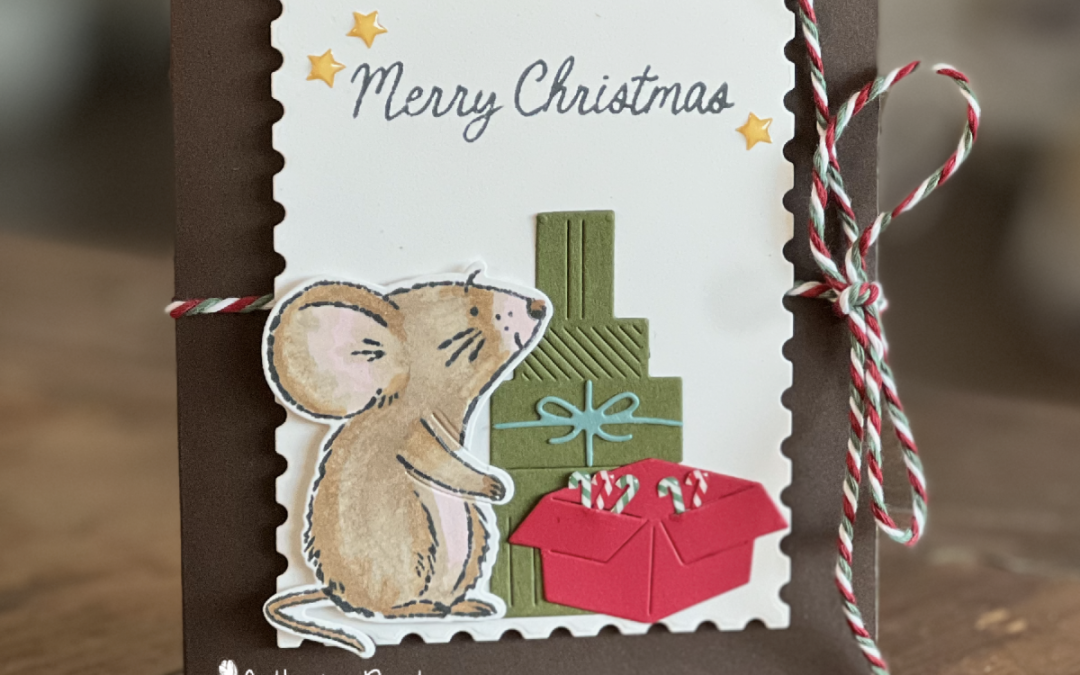
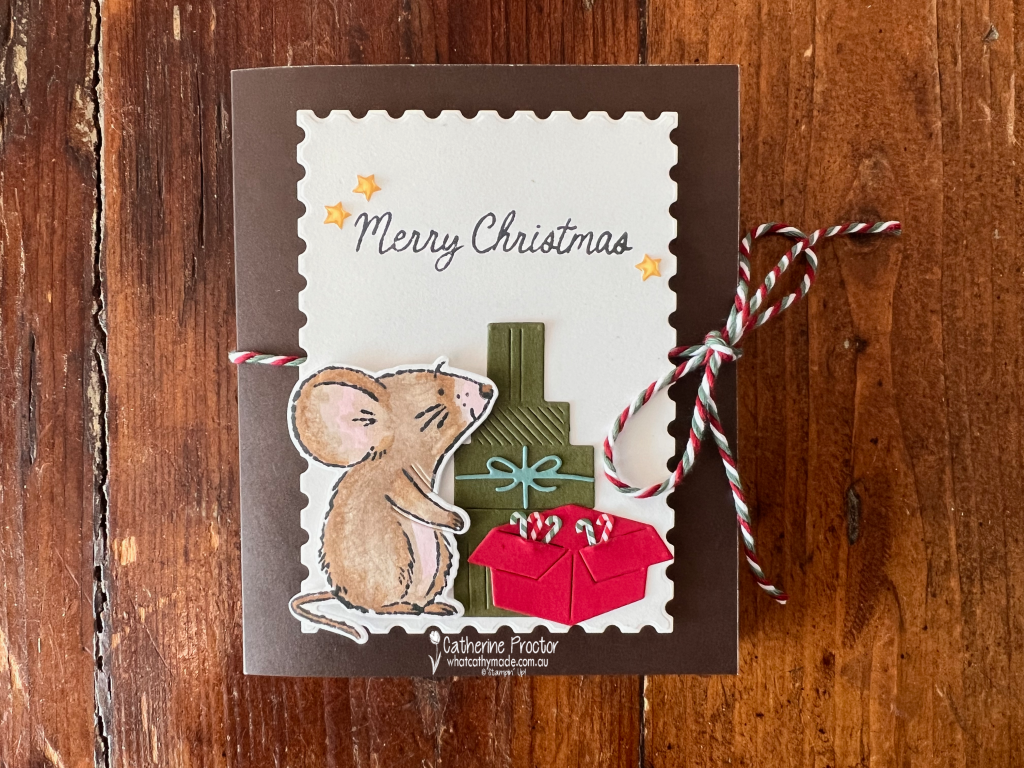
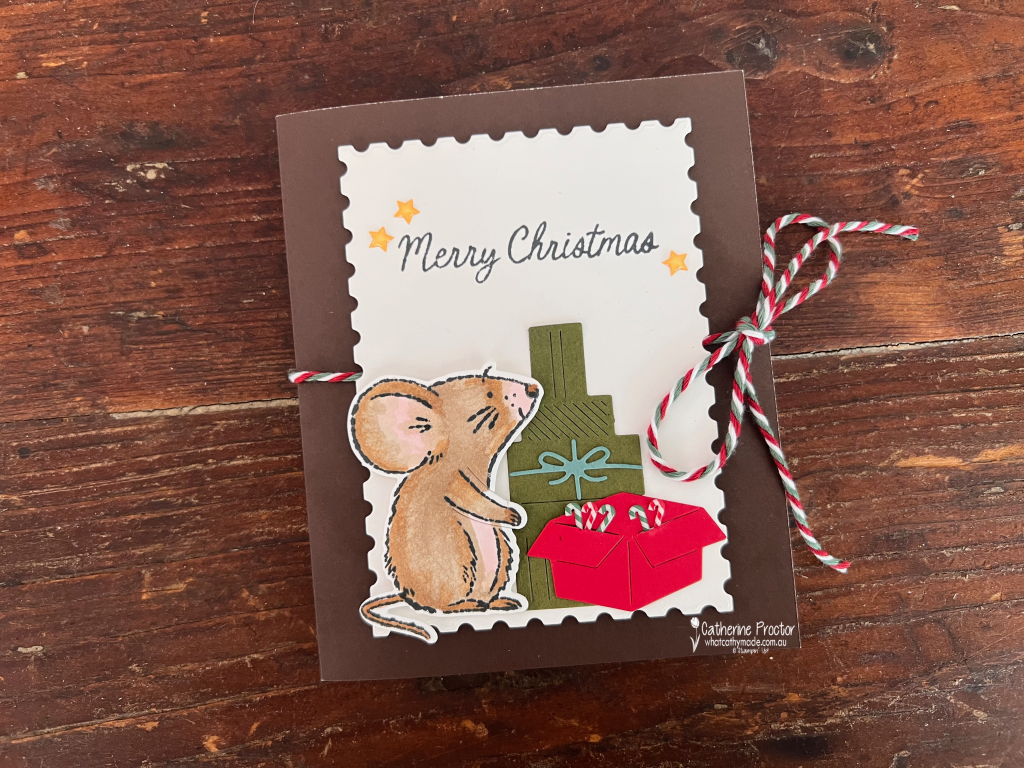
A cute Christmas mouse on the front, a whole festive scene inside! This week’s card has a little surprise waiting beneath its baker’s twine bow.
Welcome to Week 22 of the Art With Heart Team’s Colour Creations hop. We’re exploring the Stampin’ Up! colours in alphabetical order, and this week it’s Early Espresso.
This rich chocolate brown makes a beautiful base for my Christmas shadow box card, created using the A Little Christmas Suite Collection. Paired with crisp Basic White, festive reds and greens, and touches of soft blue, it gives the card a warm, cosy feel.
The shadow box frame is constructed from basic white card stock, sitting inside a card base made with Early Espresso Two-Tone Card stock.
A mouse with Christmas on its mind
How cute are these mice!
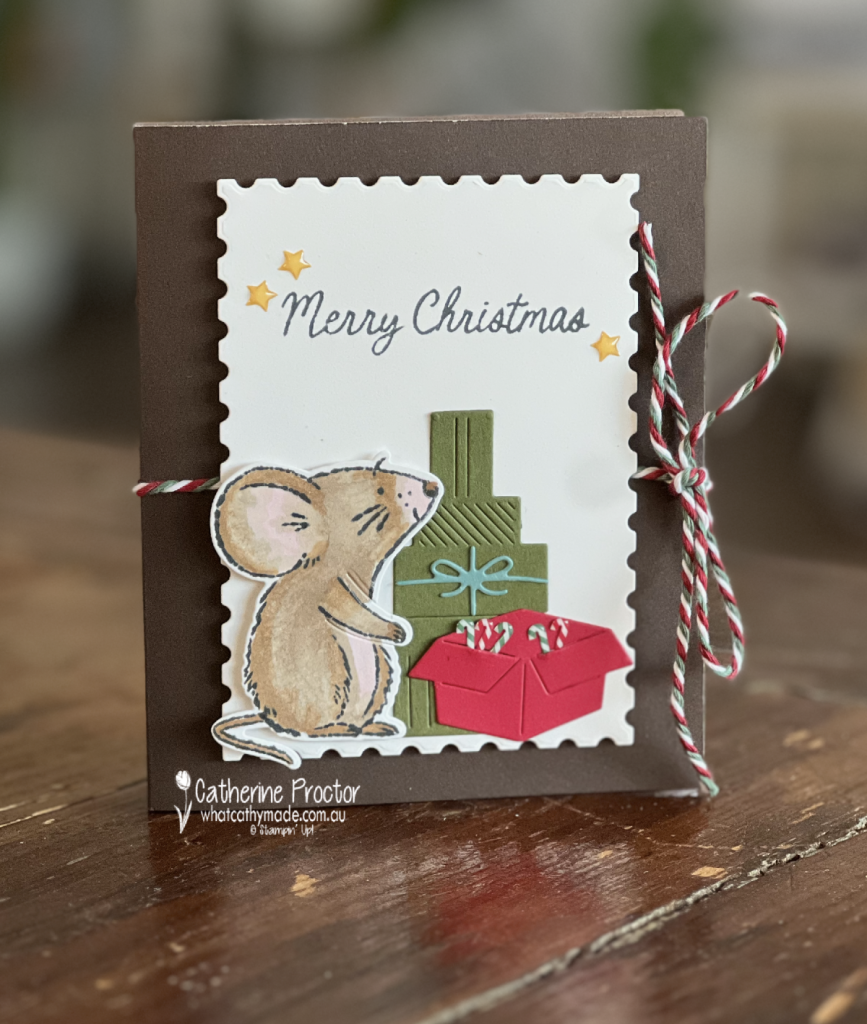
On the front, a little mouse looks up beside a stack of presents and an open red box filled with tiny candy canes. I love how the detailed die cuts bring these simple shapes to life, right down to the folds in the box and the ribbon on the gifts.
The Basic White panel, cut using the Perennial Postage Dies, provides a clean backdrop for the scene. A “Merry Christmas” sentiment and three Christmas Epoxy stars finish the panel, while the Multicolor Christmas Baker’s Twine ties the card closed like a little gift.
Untie the bow for a Christmas surprise
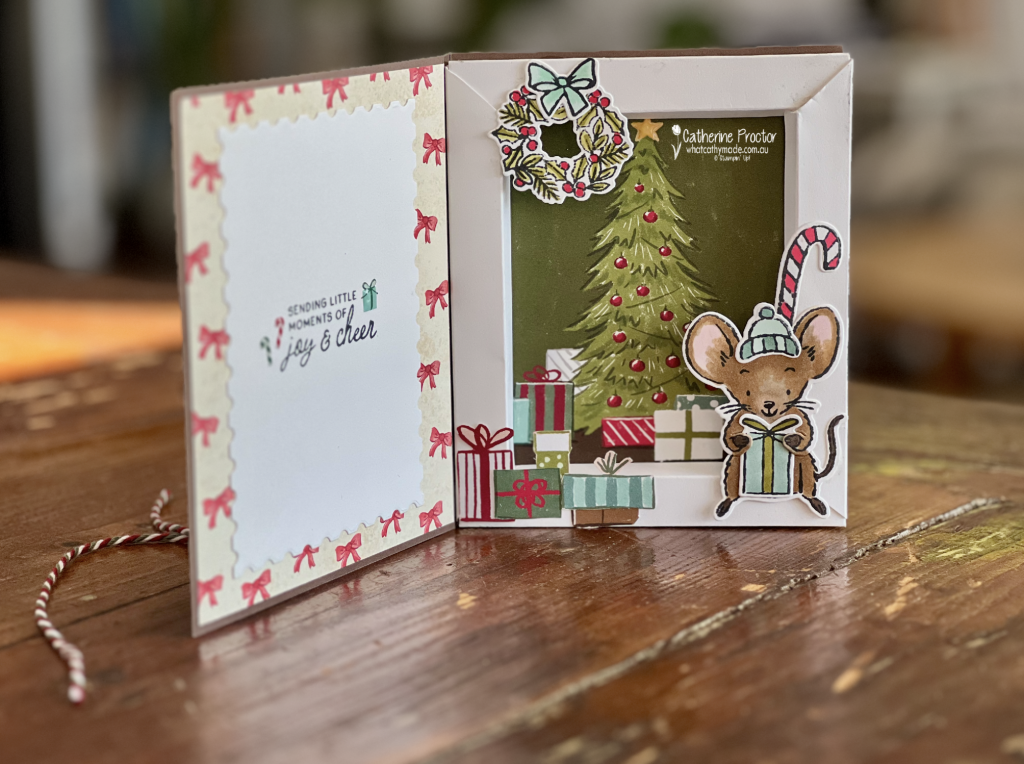
Open the card and there’s a miniature Christmas scene tucked inside a white shadow box frame.
The Christmas tree image is from the A Little Christmas Designer Series Paper and makes a lovely backdrop for the scene. I fussy cut presents from the same paper, arranging them around the tree and along the front of the frame to create extra depth.
Another little mouse, wearing a cosy hat and holding a gift, sits at the front, with a candy cane peeking up behind it. A wreath with a soft blue bow decorates the top corner.
I love the way the mouse, wreath and presents overlap the white frame. It makes the scene feel as though it’s spilling out of its little Christmas box!
On the inside cover, red bow-patterned Designer Series Paper surrounds another Basic White postage-edge panel. The sentiment, “Sending little moments of joy & cheer”, feels just right for this little Christmas world, with plenty of space left for a handwritten message.
Colouring the Christmas mice
I coloured the mice using light and dark Stampin’ Blends in Barely Blush, Old Olive, Crumb Cake and Pecan Pie, together with the Deep combo pack.
For the hats, candy canes, presents and other festive details, I took my colour inspiration from the A Little Christmas Designer Series Paper, using Lost Lagoon, Old Olive, Pool Party and Real Red.
Taking colour cues from patterned paper is one of my favourite ways to create a coordinated project. Here, the paper does double duty, providing both the Christmas tree backdrop and little presents to fussy cut and layer.
A suite full of little details
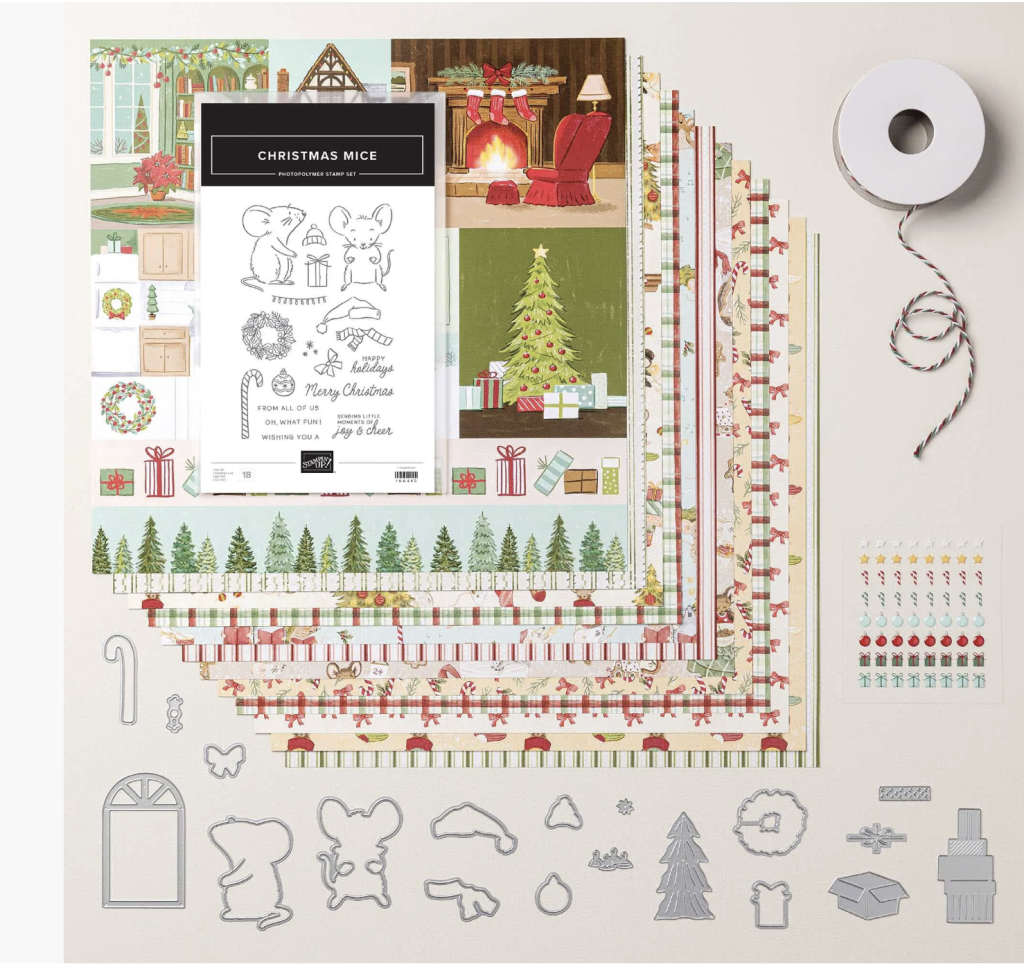
This project uses all five products from the A Little Christmas Suite Collection:
*Christmas Mice Photopolymer Stamp Set
*Christmas Mice Dies
*A Little Christmas Designer Series Paper
*Multicolor Christmas Baker’s Twine
*Christmas Epoxy Shapes
From the tiny candy canes to the cheerful mice, there are so many details to enjoy in this suite. And Early Espresso provides a lovely, warm foundation for them all.
Wouldn’t this be a fun little Christmas surprise to receive?
Take a look at some more Early Espresso inspiration on our Insta Hop!
Our blog hop is now an Instagram hop but the good news is that you don’t need to have an Instagram account to view all of the other projects!
Simply go to my Insta handle in a new search engine window to follow the Instagram hop: @whatcathymade.
Next week we are showcasing the dark brown neutral, Early Espresso.
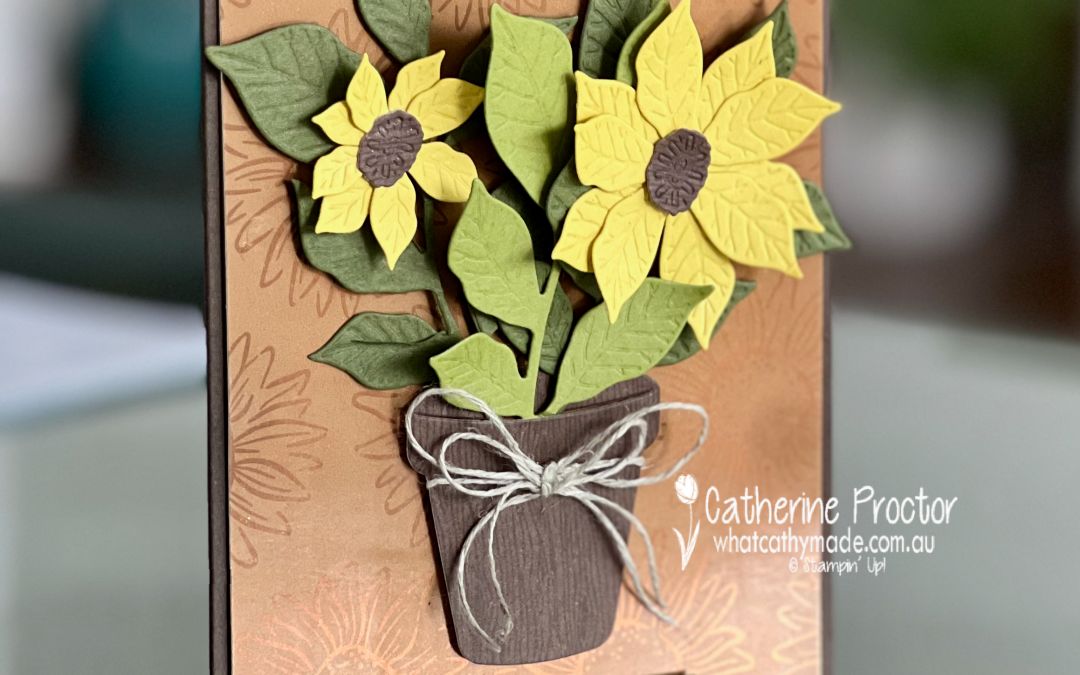
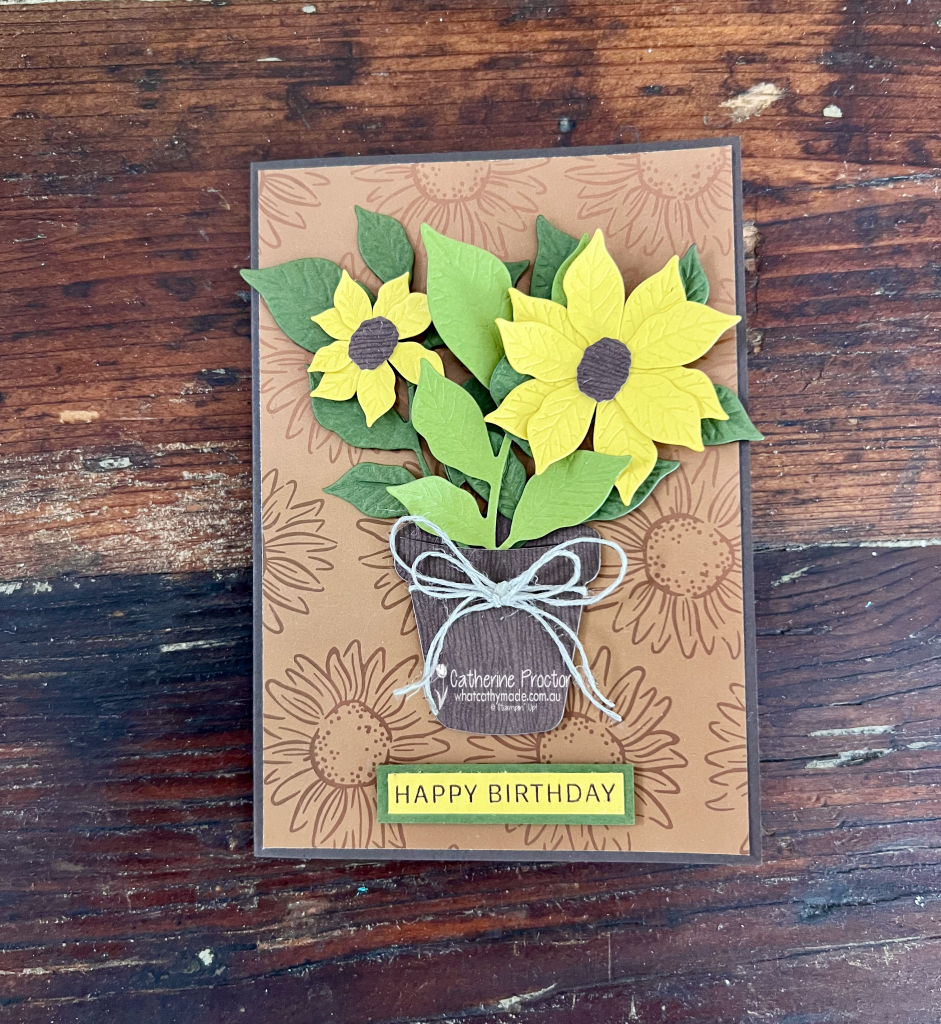
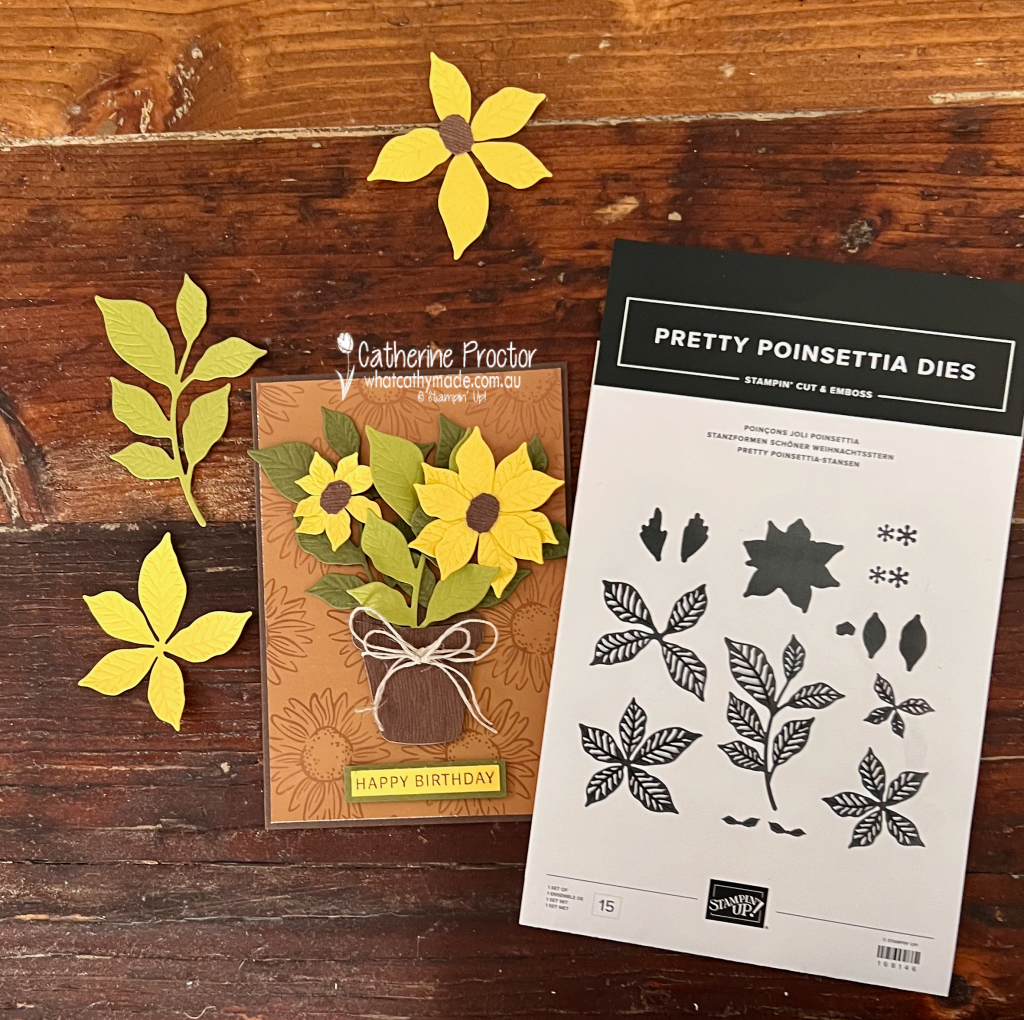
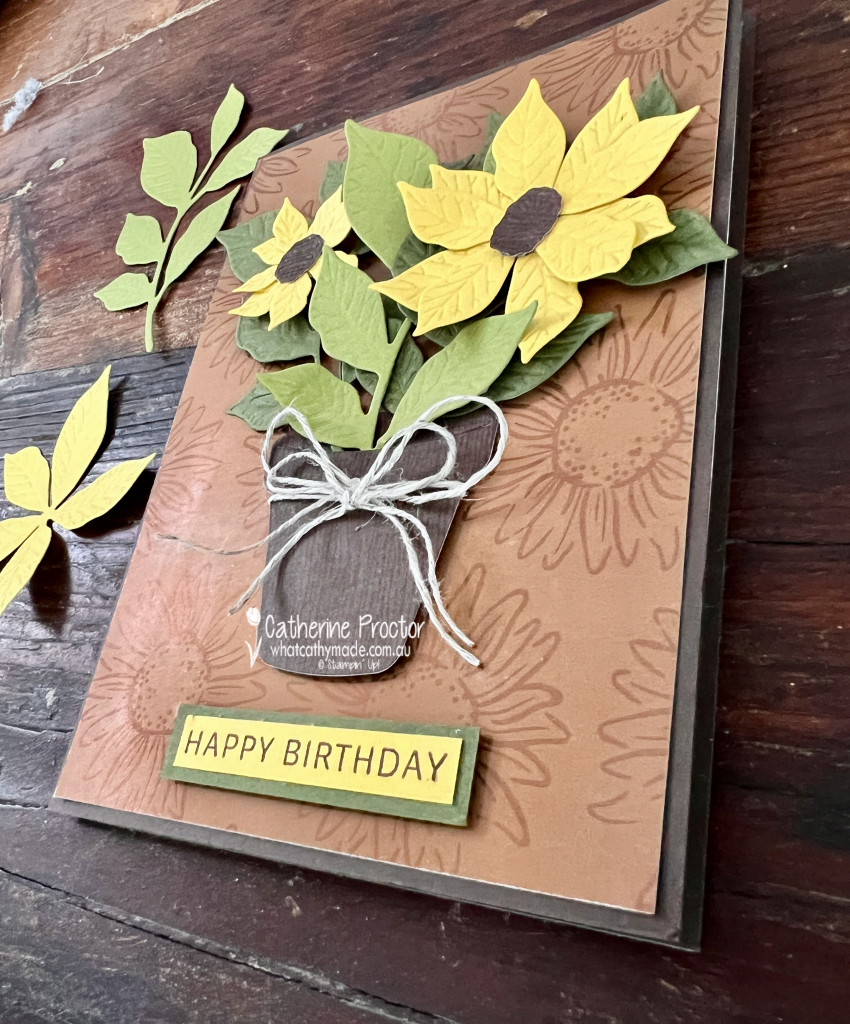
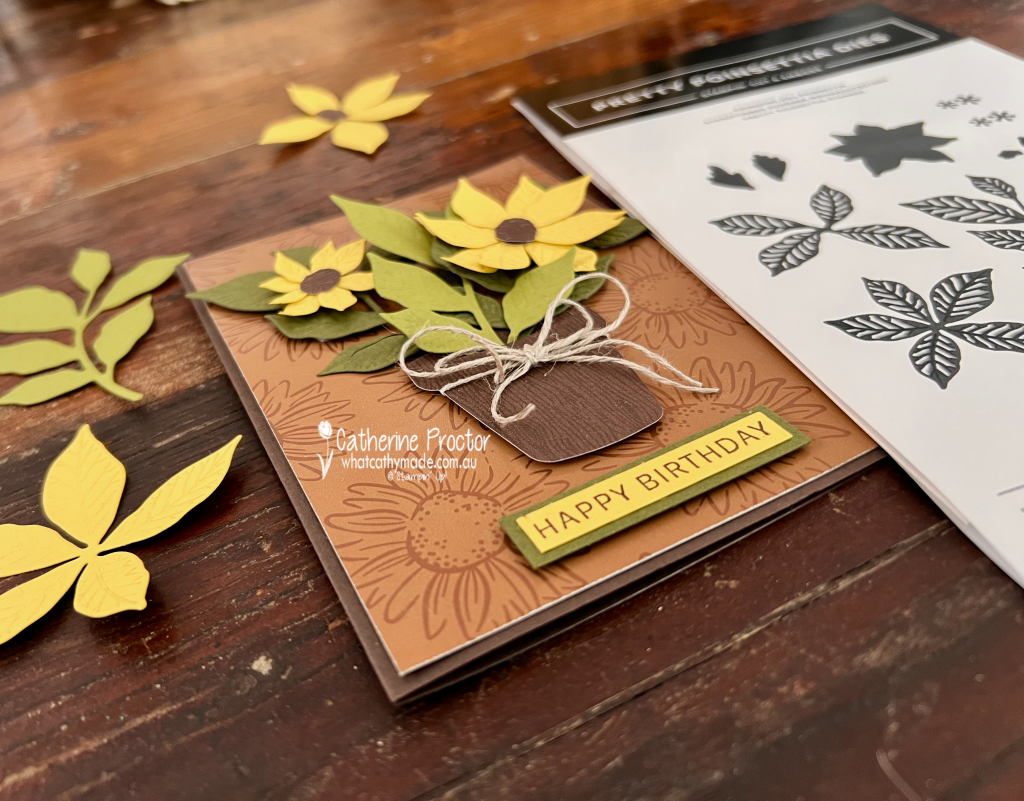
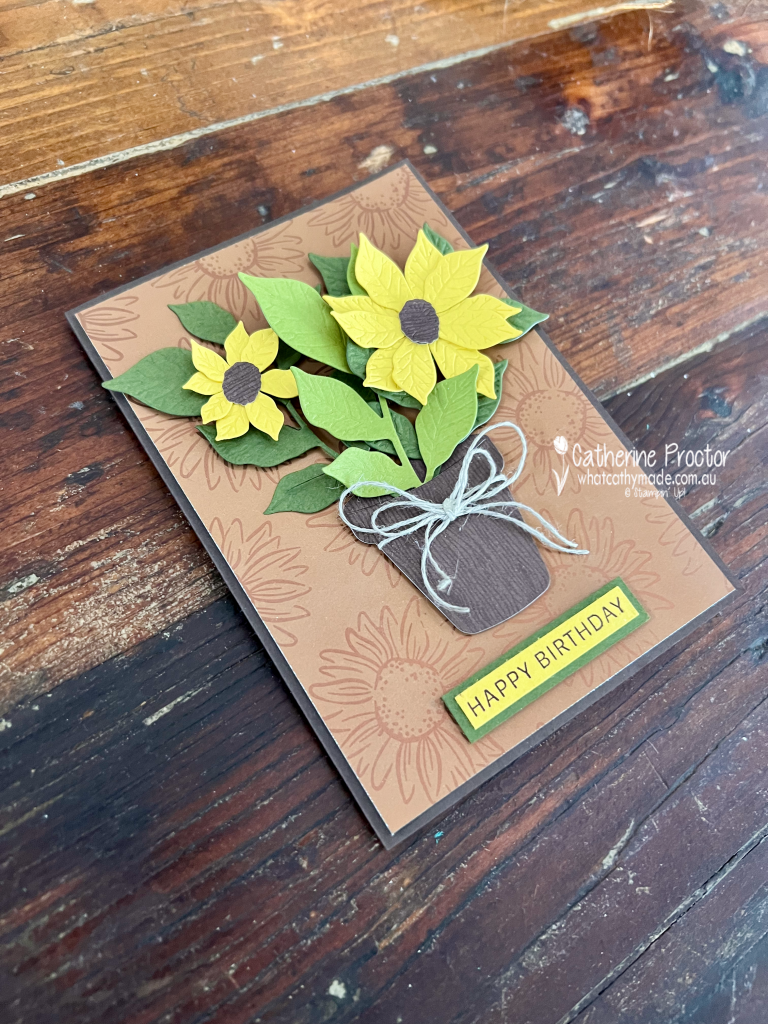
Who says a poinsettia die can’t be used to make a sunflower? Not me!
Welcome to Week 21 of the Art With Heart Colour Creations Blog Hop. This week we are showcasing Darling Duckling, a warm golden yellow that is perfect for creating cheerful sunflowers.
I’ve seen a few talented crafters use the Pretty Poinsettia Dies to create sunflowers, so I thought I would give it a go too.
My colour combination is:
Darling Duckling
Old Olive
Mossy Meadow
Early Espresso
Pecan Pie
Copper Foil
The Pretty Poinsettia Dies were used to create the two layered Darling Duckling sunflowers and much of the surrounding foliage. I used the Help Me Grow Dies for the flowerpot and the Early Espresso sunflower centres, cutting these pieces from the Wood Grain Wonders Designer Series Paper to give them plenty of natural texture.
For the background, I simply had to use the beautiful sunflower-patterned paper from the Radiant Foils Specialty Designer Series Paper. Its copper foil details add a lovely glow and complement the warm, earthy colours of the card perfectly.
The happy birthday sentiment is from the Lovely Arrangements Stamp Set. I stamped it in Early Espresso onto Darling Duckling cardstock, layered it onto Old Olive cardstock and added it to the card with Stampin’ Dimensionals.
A double Linen Thread bow tied around the flowerpot adds the finishing touch.
I love discovering unexpected ways to use my crafting supplies. The Pretty Poinsettia Dies might have been designed for Christmas projects, but with a change of colour and a little imagination, they can create the most cheerful sunflowers too.
Have you ever used a die to create something completely different from its original purpose?
Take a look at some more Darling Ducking inspiration on our Insta Hop!
Our blog hop is now an Instagram hop but the good news is that you don’t need to have an Instagram account to view all of the other projects!
Simply go to my Insta handle in a new search engine window to follow the Instagram hop: @whatcathymade.
Next week we are showcasing the dark brown neutral, Early Espresso.
It’s hard to believe we’ve reached Week 50 of our 2025–26 AWH Colour Creations hop, finishing with one of the retiring 2024–2026 In Colours Summer Splash.
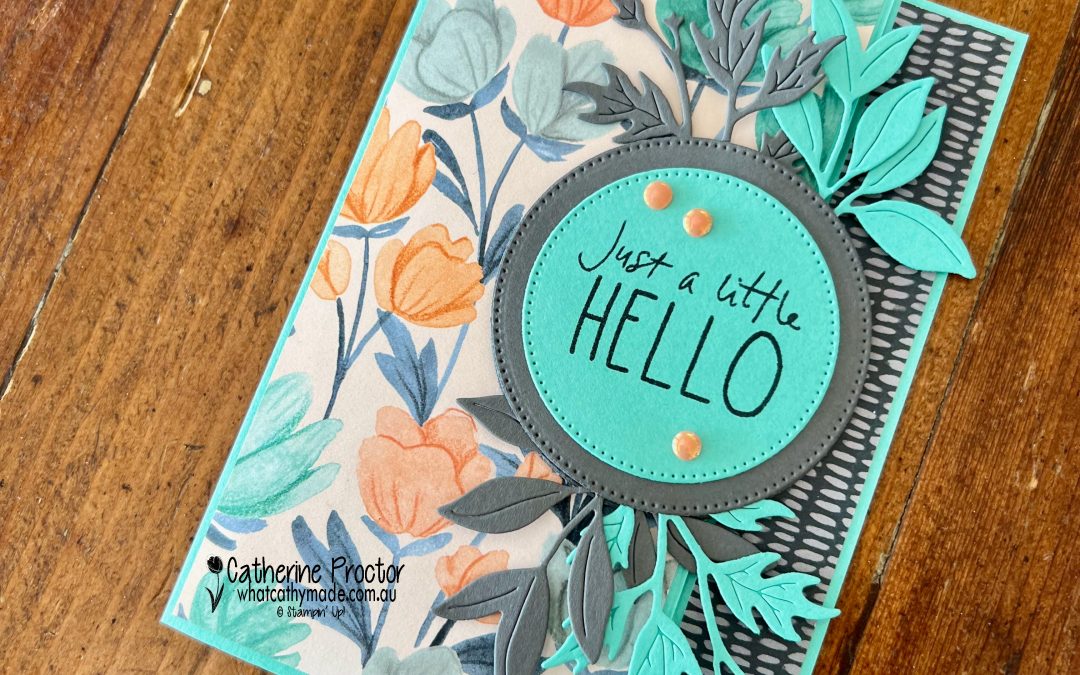
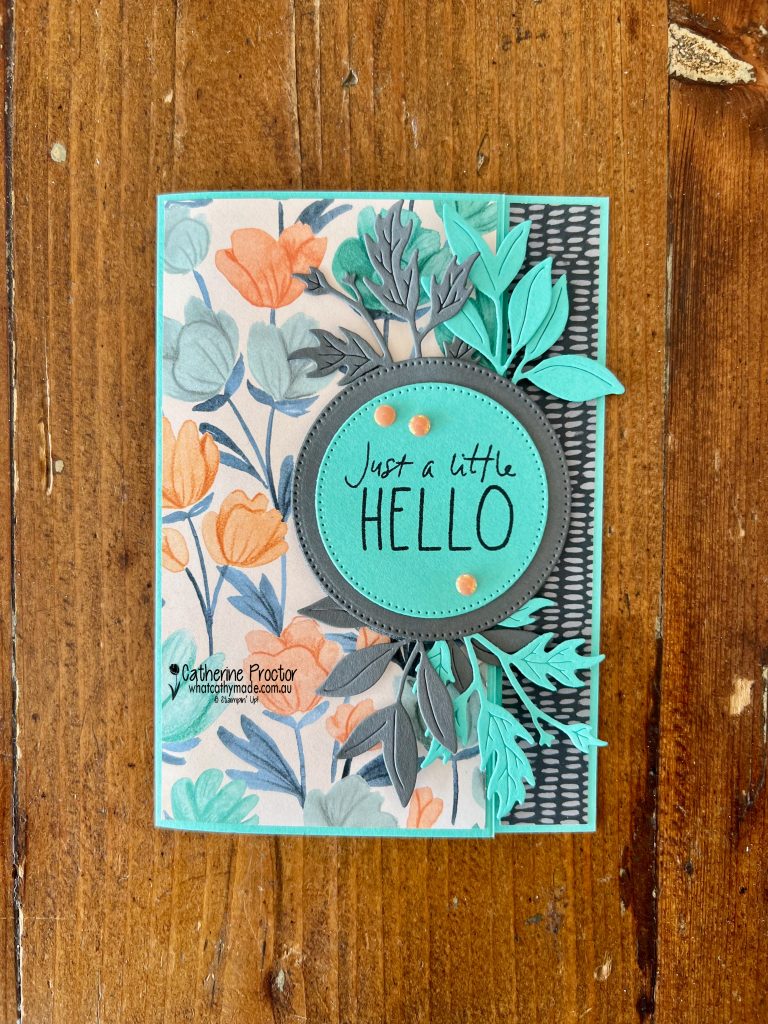
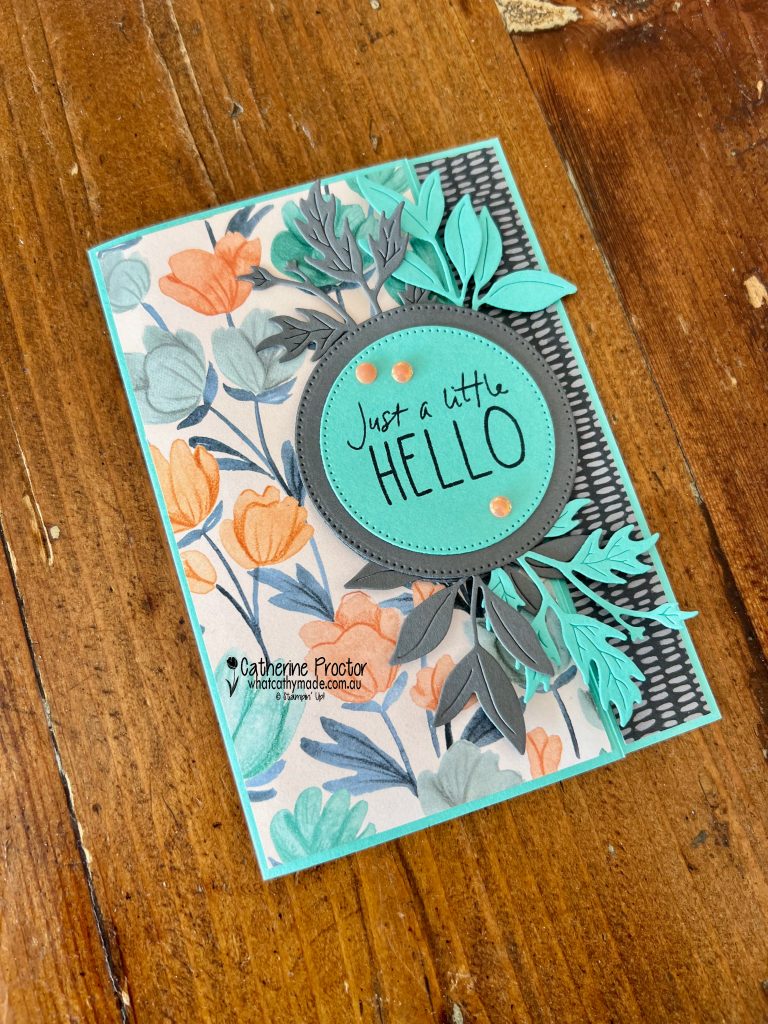
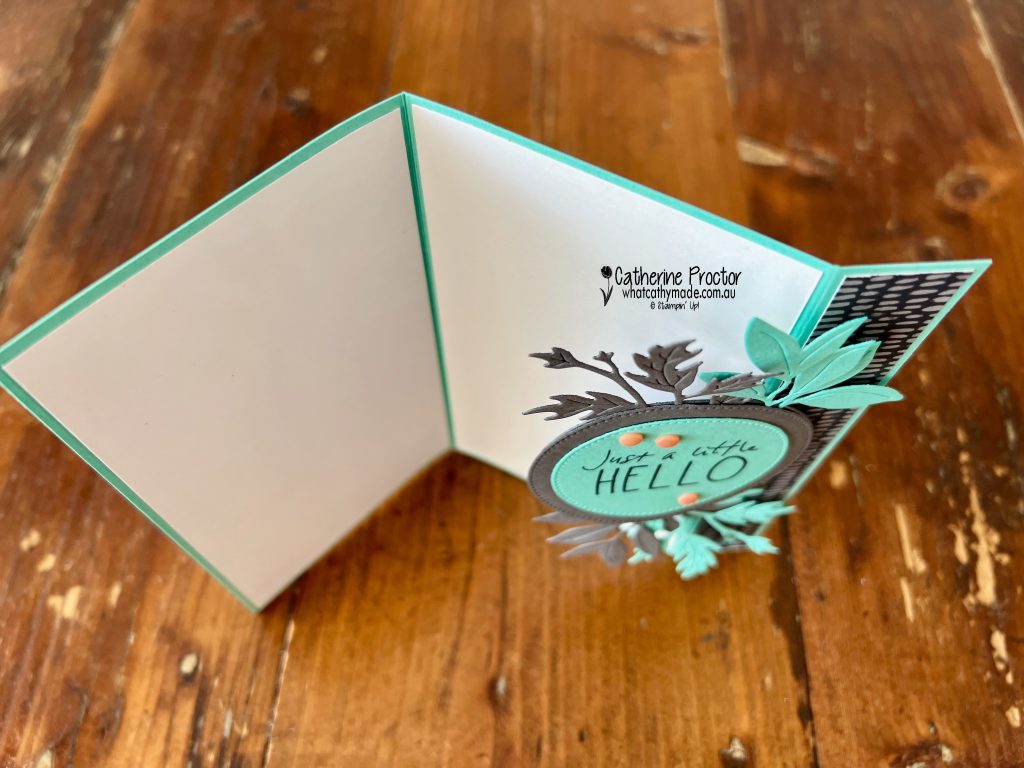
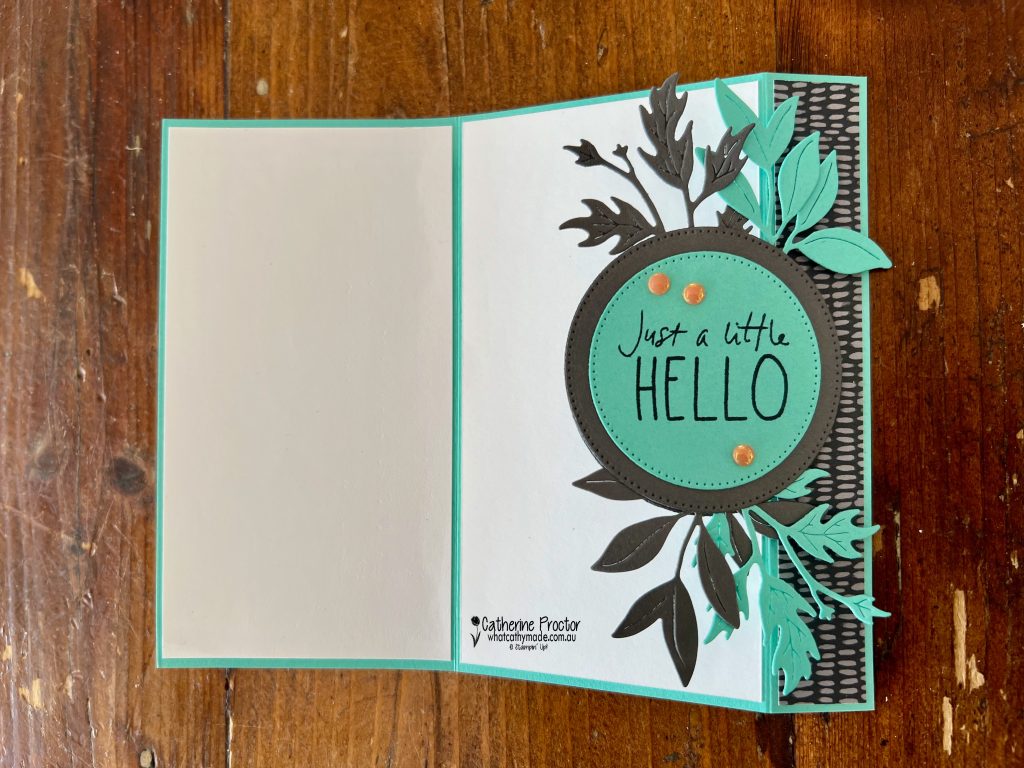
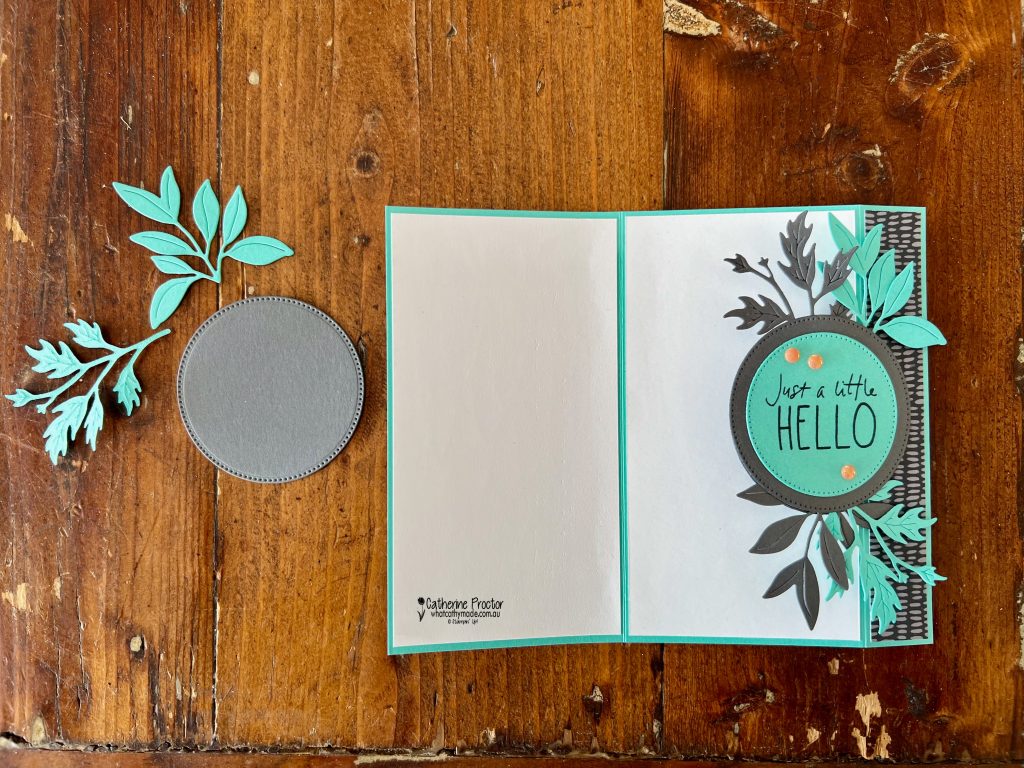
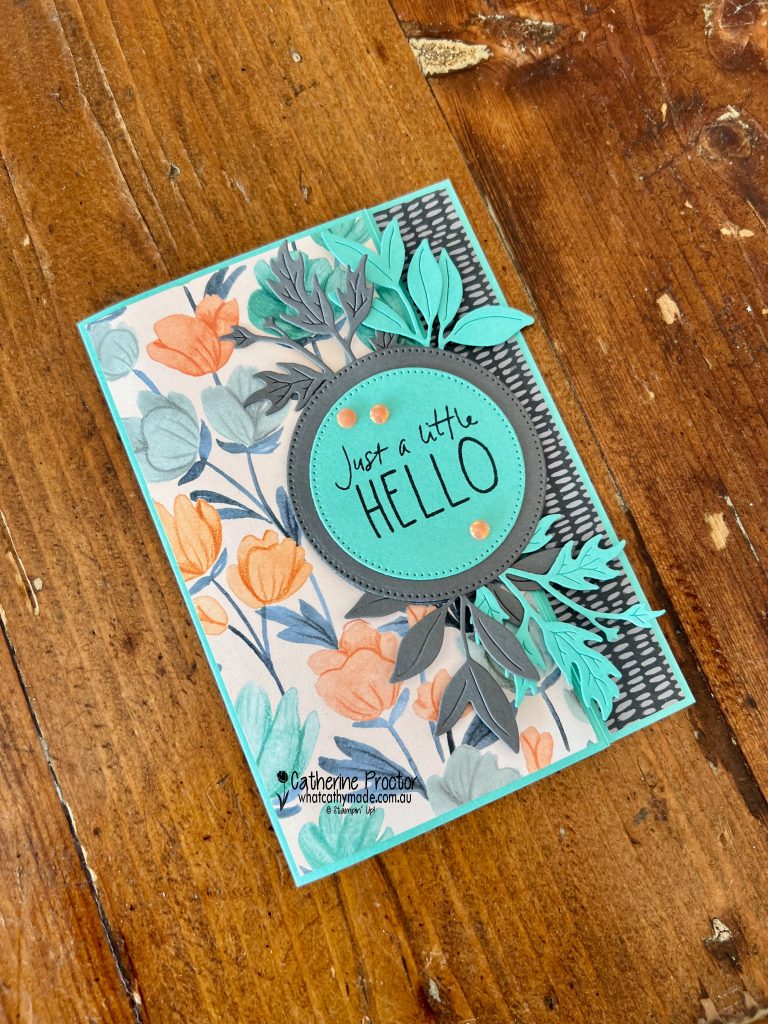
I wanted to create something a little interactive, so I made a side latch card featuring the beautiful Florals in Bloom 12″ x 12″ Designer Series Paper.
Inspired directly by the DSP, my colour combination pairs Summer Splash with Timid Tiger, Cloud Cover and Secret Sea.
The side latch mechanism keeps the card closed and adds a lovely dimensional focal point. I’ve simply layered die cut circles using the Stylish Shapes dies, however any die cut or punched shape will work.
The circular latch is layered with Summer Splash centre panel with the sentiment from the Cutest Crew stamp set. The slightly larger die-cut circles in Secret Sea hold the foliage and “lock” the card.
To add texture and movement, I used the Help Me Grow Dies to create layered foliage in Summer Splash and Secret Sea. These were tucked behind the circle latch to frame the sentiment and add interest.
Finally, I added a few Timid Tiger 2025–2027 In Colour Flat Pearls for a subtle pop of shine. They bring everything together without overwhelming the design.
Take a look at some more Summer Splash inspiration on our Insta Hop!
Our blog hop is now an Instagram hop but the good news is that you don’t need to have an Instagram account to view all of the other projects!
Simply go to my Insta handles in a new search engine window to follow the Instagram hop: @whatcathymade.
We kick off our 2026-27 Colour Creations hop next week, starting with the brand new 2026–27 In Colours:
Barely Blush
Crisp Cantaloupe
Golden Glow
Hydrangea Hue
Peaceful Pine
I can’t wait to start creating with these fresh new shades.
Thanks so much for following along this year. See you next week for a brand new colour journey.
This week for the Art With Heart Colour Creations Blog Hop we’re celebrating the soft and soothing Soft Sea Foam, one of those colours that pairs beautifully with just about anything, but really shines when combined with neutrals and soft florals.
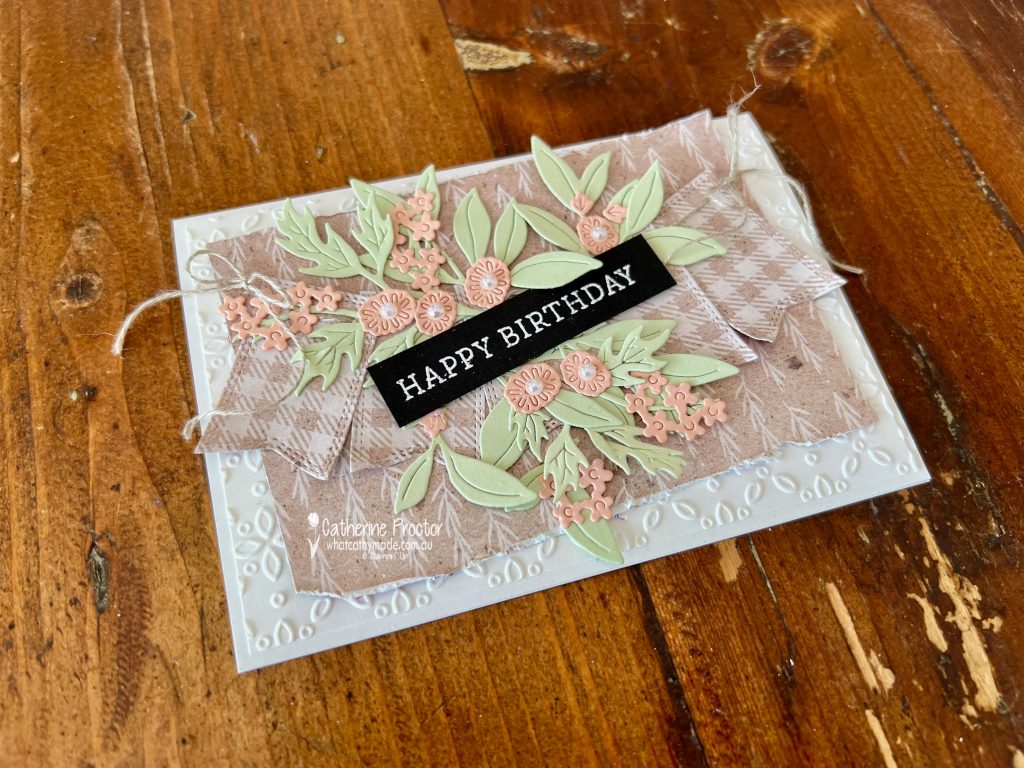
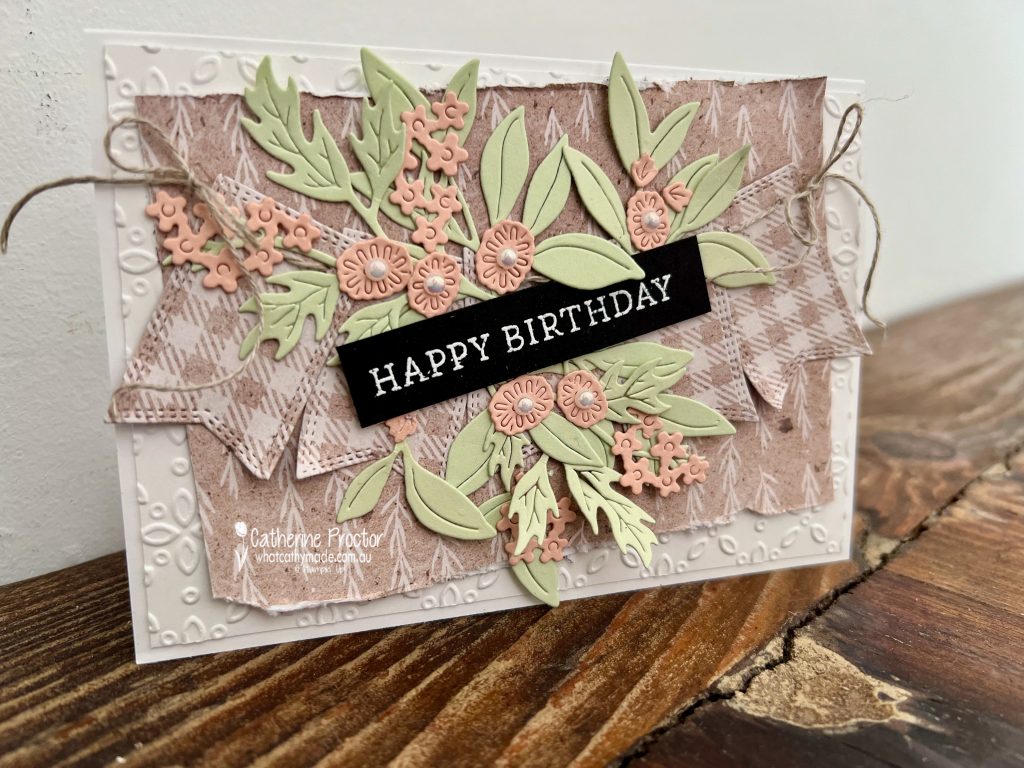
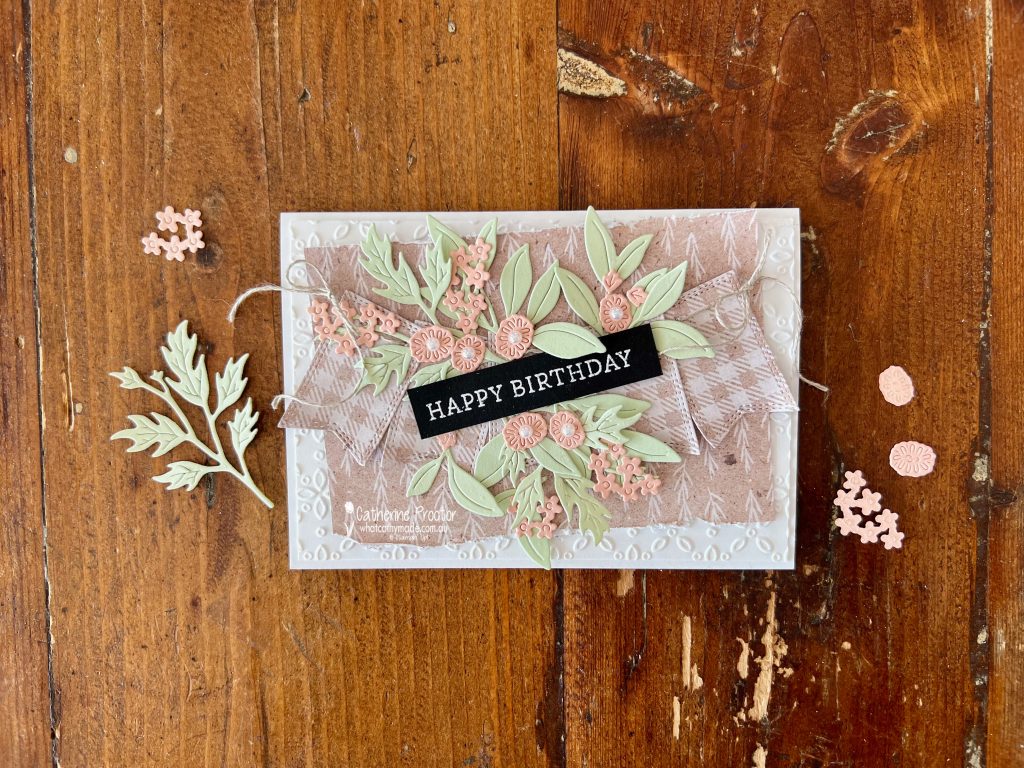
For my card this week, I’ve CASED a beautiful design by the Stampin’ Up! Artisan, Tammy Wilson (Stamps Paper Scissors). I absolutely loved her layout, colour combination and layered textures, and knew it would be perfect for showcasing Soft Sea Foam.
I’ve added my own twist to her card, using current products that I own: Perennial Lavender 12″ x 12″ DSP, Eyelet 3D Embossing Folder, Simply Said Stamp Set (all currently reduced and in the Last Chance section of the website) as well as the Nested Essentials Dies and the Help Me Grow dies.
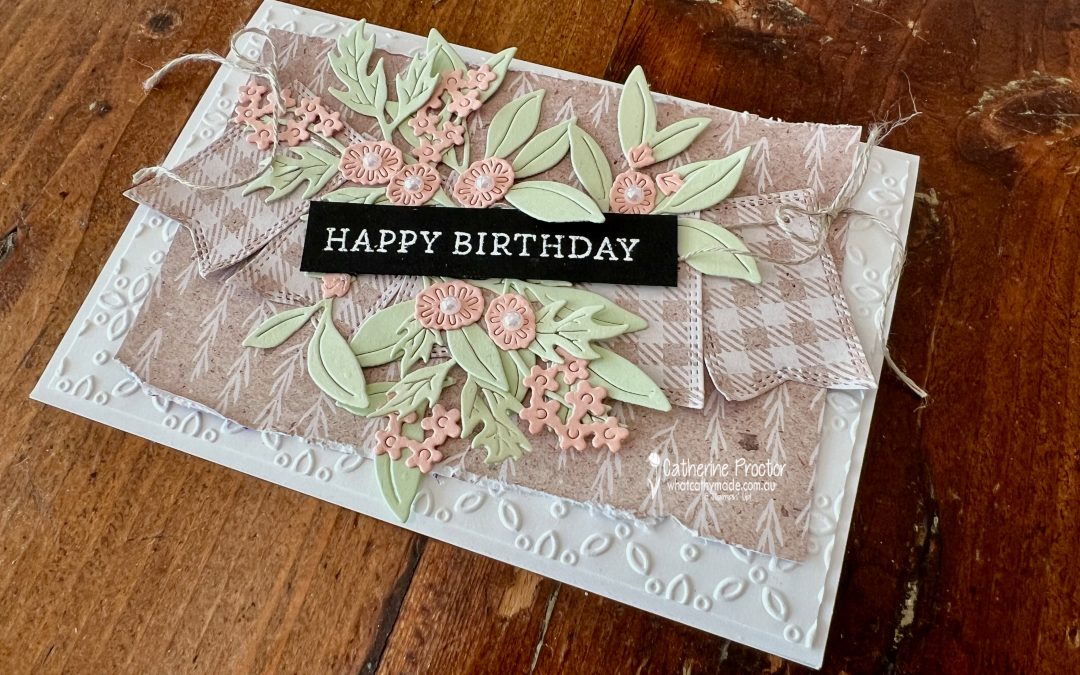
The base of my card starts with a Basic White layer embossed with the Eyelet 3D Embossing Folder. Over this, I added torn pieces of Crumb Cake Designer Series Paper from the Perennial Lavender 12″ x 12″ DSP and a sweet string of bunting made with the Nested Essentials Dies.
I created a string of little flags from the Crumb Cake check pattern in the from the Perennial Lavender 12″ x 12″ DSP, tying them together with linen thread (I pierced holes in the bunting flags using the Take My Pick tool).
The star of the show is the Soft Sea Foam foliage and Petal Pink flowers, both die cut using the Help Me Grow Dies. For a little sparkle, I finished the flowers with Iridescent Pearl Basic Jewels.
The sentiment is kept bold and simple to contrast the soft background. I heat embossed the “Happy Birthday” sentiment from the Simply Said Stamp Set in white onto Basic Black cardstock.
Take a look at some more Soft Sea Foam inspiration on our Insta Hop!
Our blog hop is now an Instagram hop but the good news is that you don’t need to have an Instagram account to view all of the other projects!
Simply go to my Insta handles in a new search engine window to follow the Instagram hop: @whatcathymade.
Thank you for joining me for Week 49 of Colour Creations. We’ll be back next Wednesday when we are showcasing our last colour for the 2025/26 Insta hop: Summer Splash. After that we will be starting all over again, beginning our 2026/27 hop with the new InColours.
For week 47 of the Art With Heart Colour Creations we’re celebrating Shy Shamrock, a soon to be retired 2024-26 InColour.
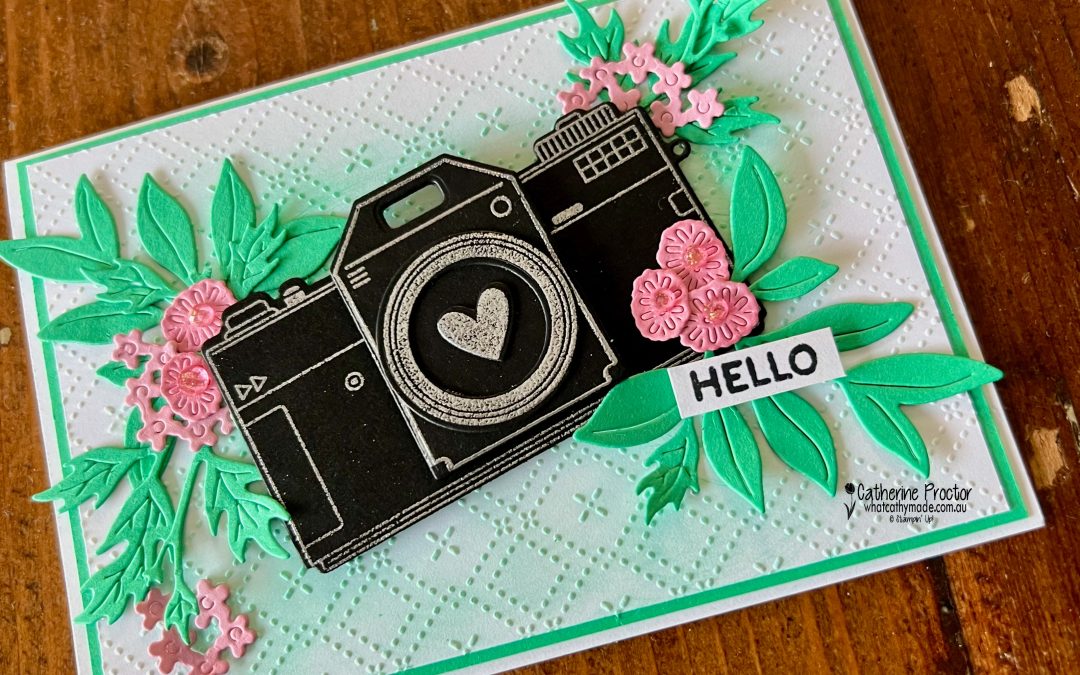
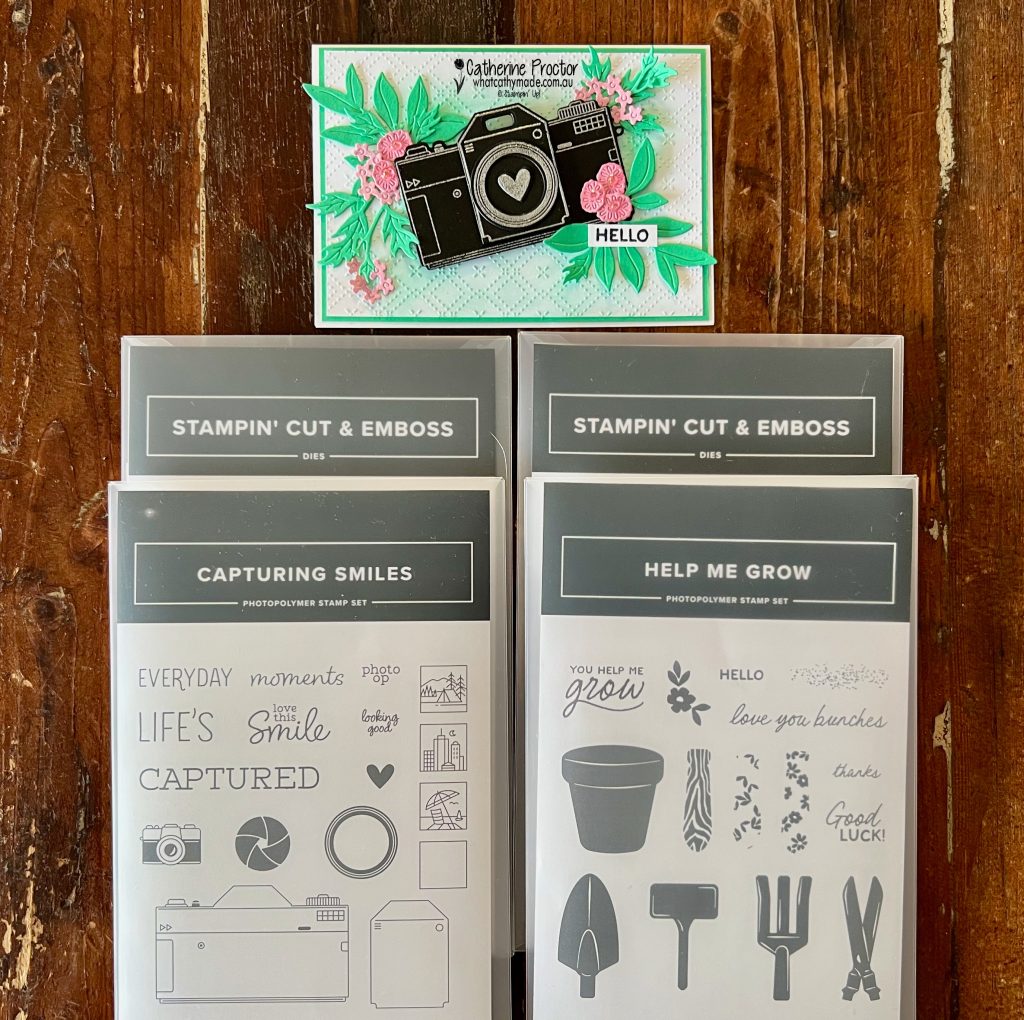
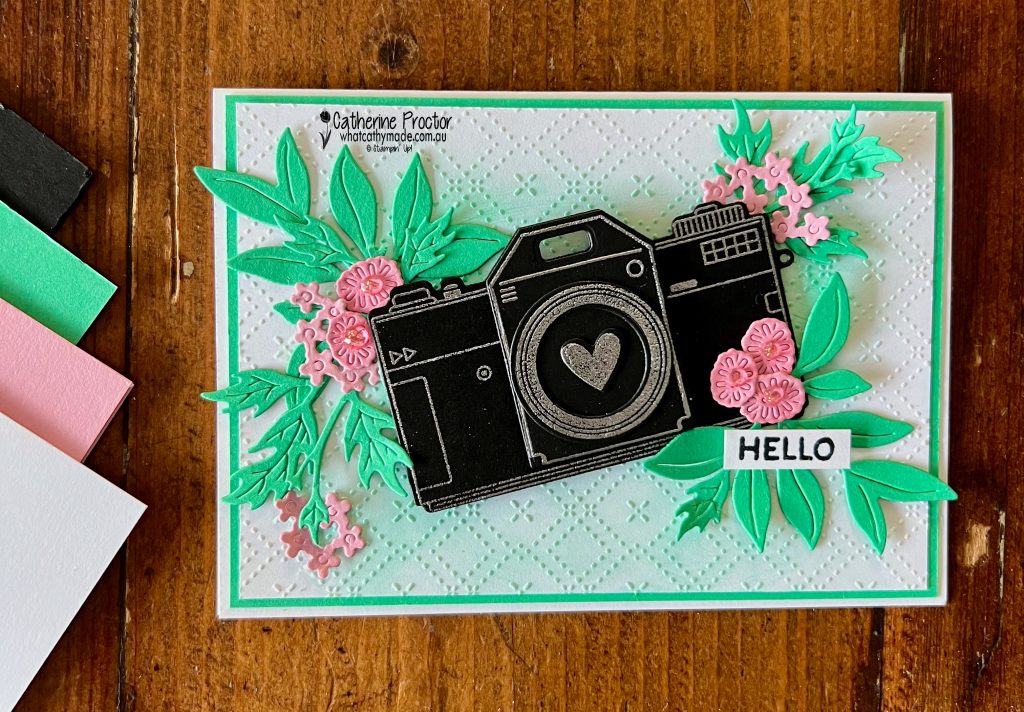
I’ve paired “something old” (the soon to be retired Shy Shamrock cardstock, Shy Shamrock ink and the Beautiful Patterns 3D Embossing Folder) with something new (the Capturing Smiles Bundle and the Help Me Grow Bundle), both March Online Exclusives products.
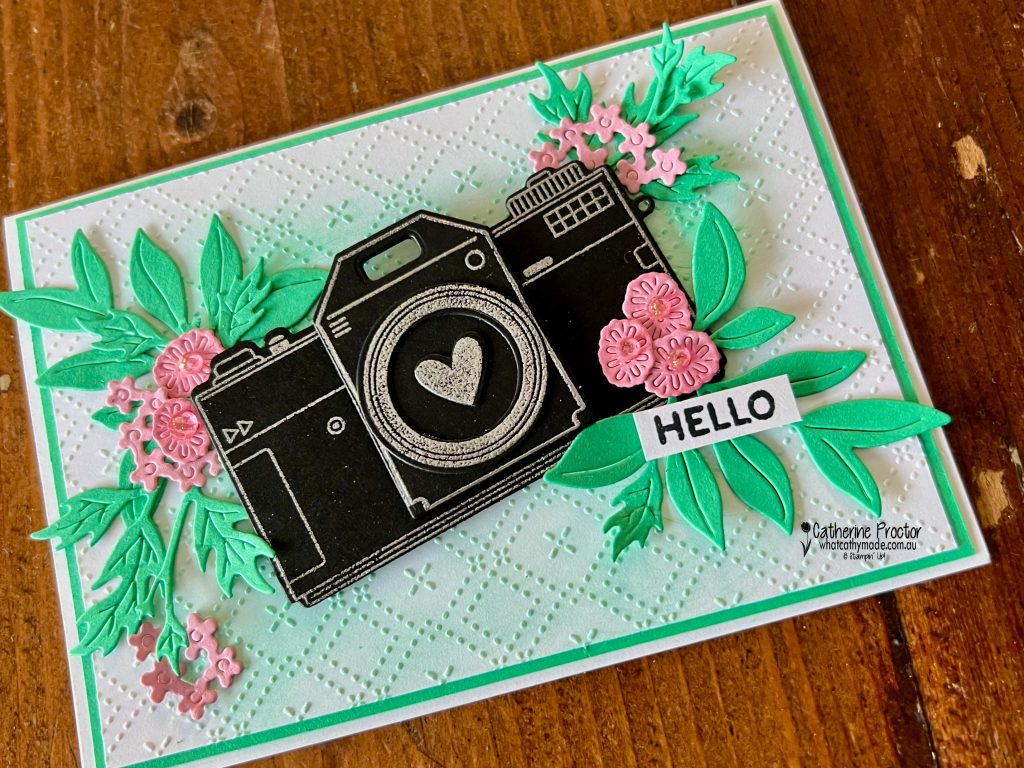
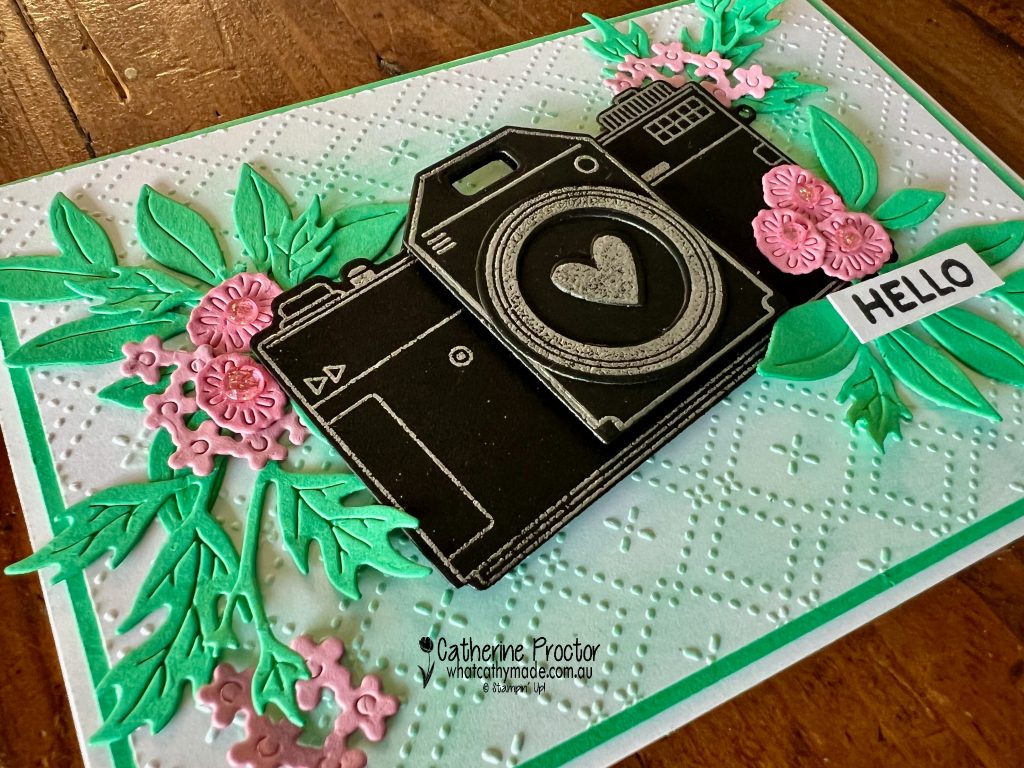
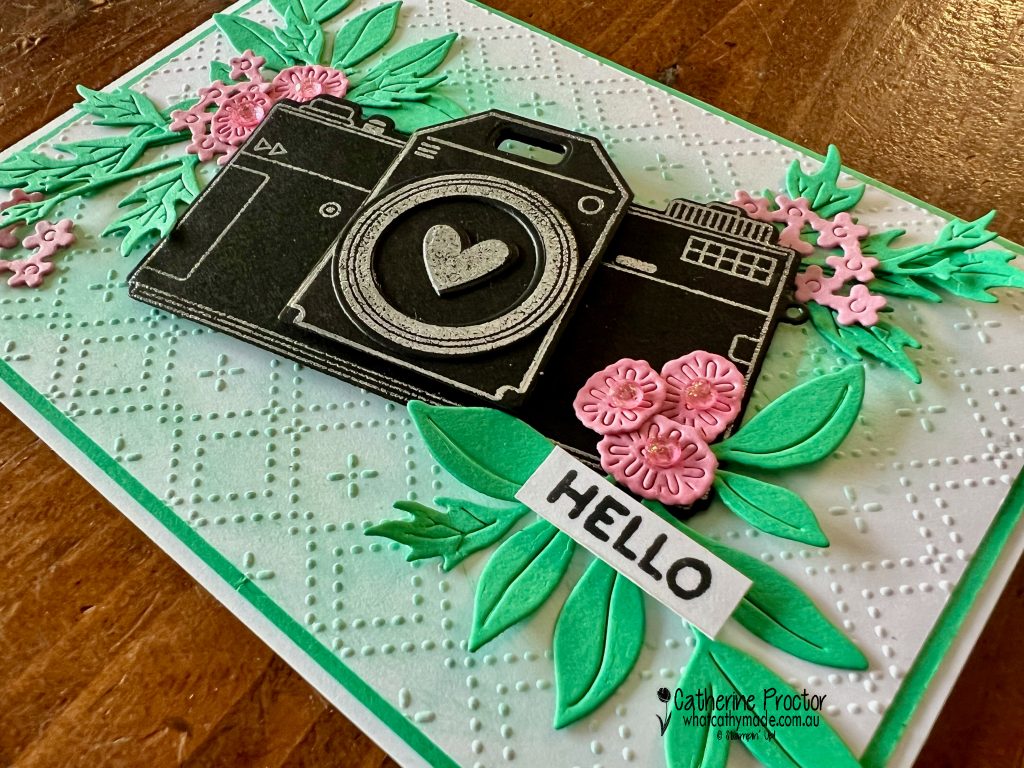
The background layer is embossed with the Beautiful Patterns 3D Embossing Folder and to enhance the texture, I used a blending brush to gently add Shy Shamrock ink over the raised design.
This simple technique really brings the pattern to life, highlighting all those gorgeous details without needing extra layers.
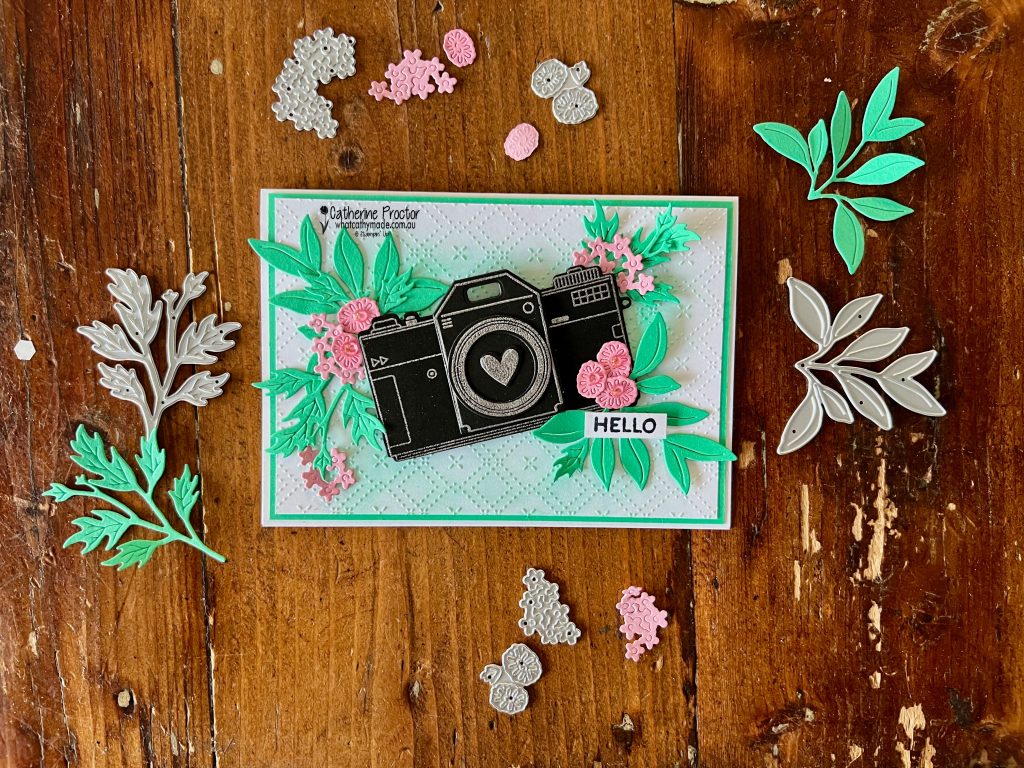
For the focal point, I stamped, heat embossed in silver and die cut several layers of black cardstock to create the cutest vintage camera, using the Capturing Smiles Bundle, heat embossing it on Basic Black cardstock.
The delicate flowers from the Help Me Grow Bundle are die cut in Pretty in Pink cardstock and I’ve added some Pretty in Pink ink with a blending brush.
This fresh green of the Shy Shamrock background layer and die cut leaves contrasts well with the softness of the Pretty in Pink flowers and the Basic Black camera with Silver embossing , all layered against an embossed layer of Basic White.
As the sentiments in the Capturing Smiles bundle are more suited to scrapbooking, I finished the card with a simple “hello” sentiment from the Help Me Grow bundle.
I also added a few Pretty in Pink embellishments from the soon to be retired Strawberry Slush & Pretty in Pink Gems.
Take a look at some more Shy Shamrock inspiration on our Insta Hop!
Our blog hop is now an Instagram hop but the good news is that you don’t need to have an Instagram account to view all of the other projects!
Simply copy any of the Insta handles below into a new search engine window to follow the Instagram hop at any point.
Next in our Hop is Helen @apaperparadise. Be sure to check out her gorgeous project/s.
The full list of this week’s InstaHop is listed below:
Helen @apaperparadise
Kirsty @crafty.littlemiss
Kate @craftwithkate
Cathy @whatcathymade – you are here.
Thank you for joining me for Week 47 of Colour Creations. We’ll be back next Wednesday when we are showcasing Smoky Slate. I hope you can join us then.
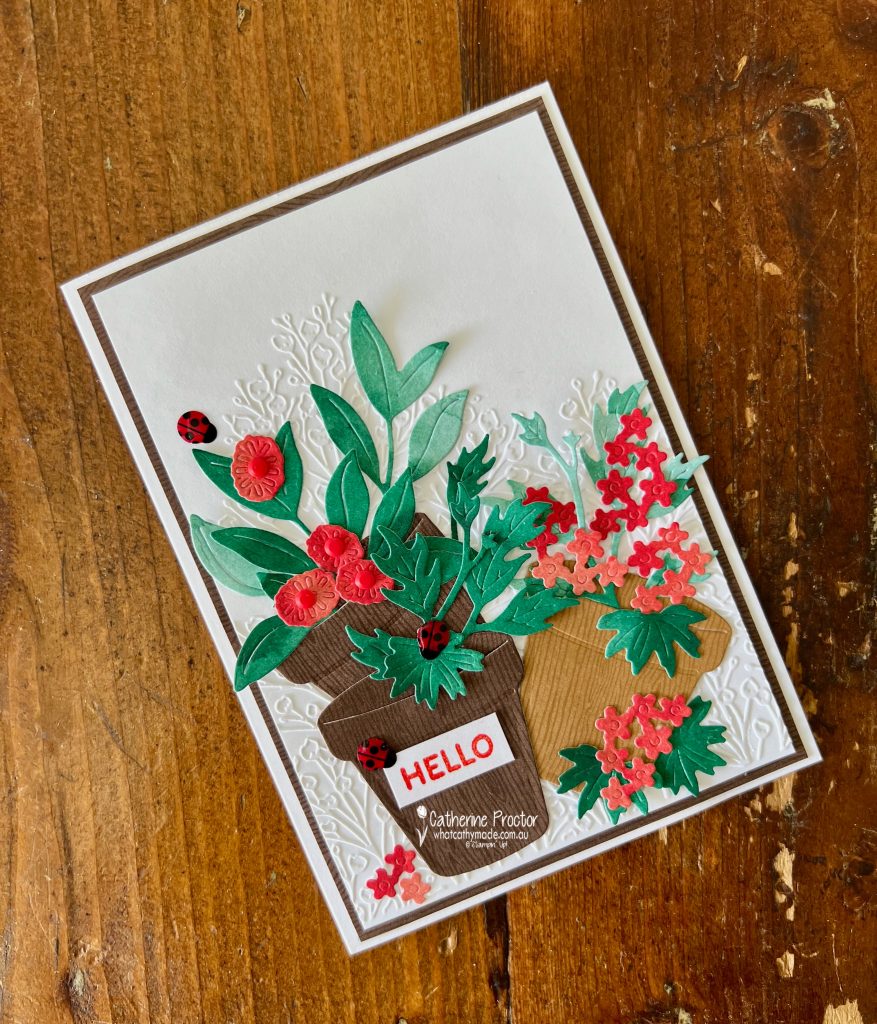
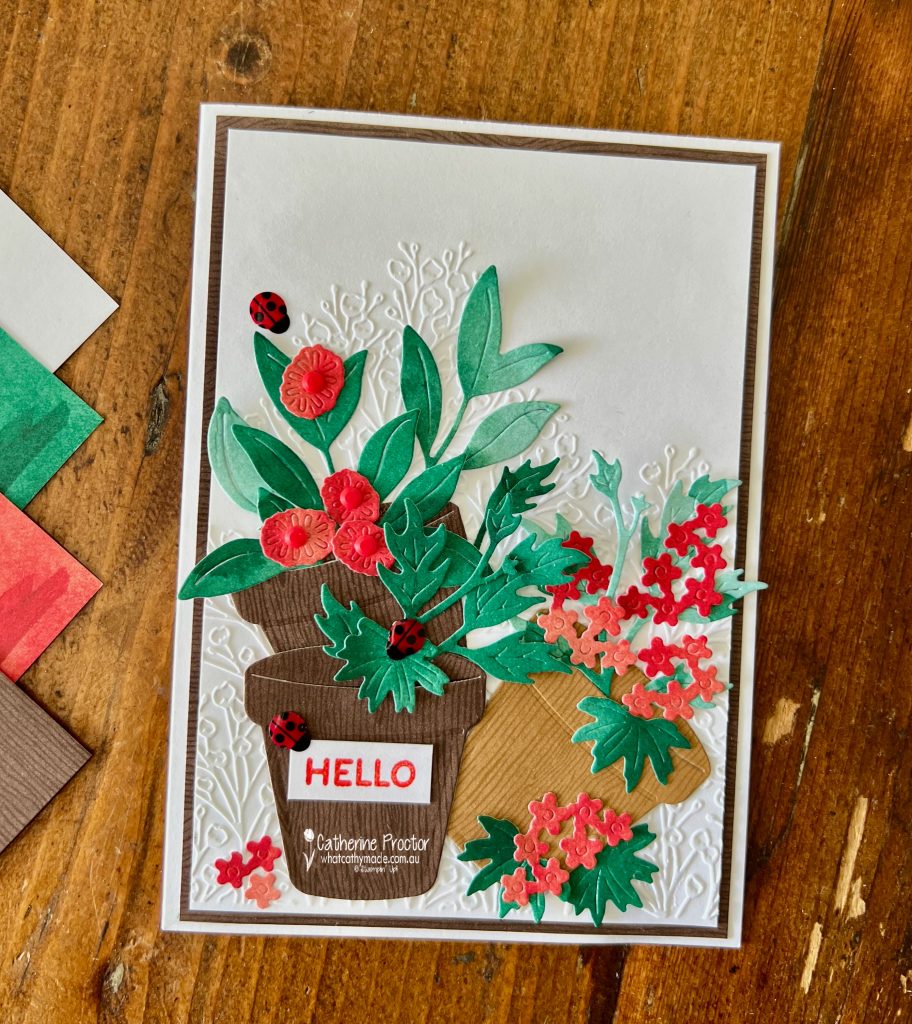
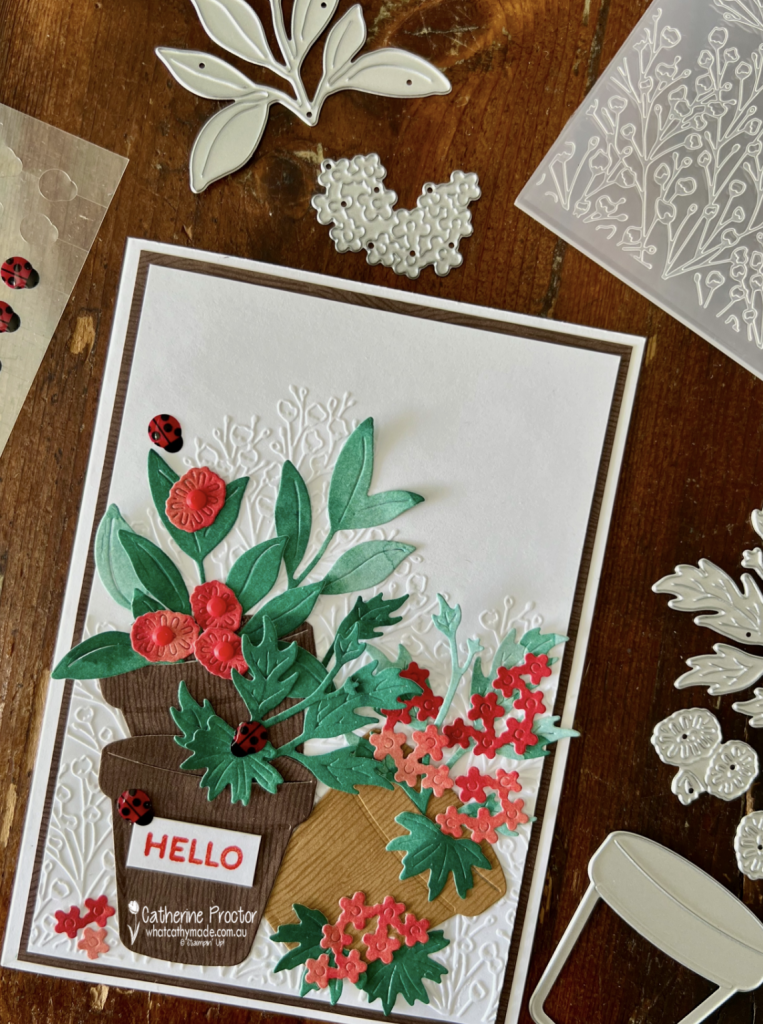
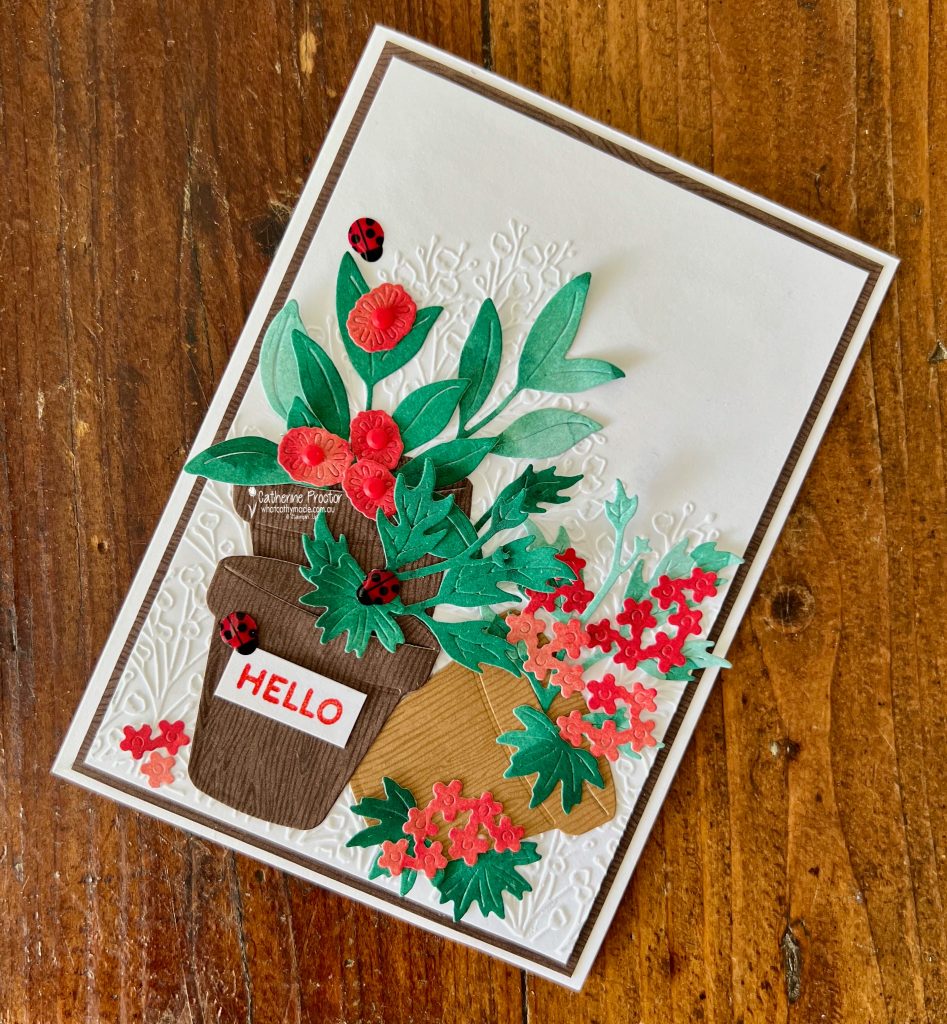
This week for Colour Creations we’re celebrating Poppy Parade, and I’ve created a layered garden scene using three brand new Online Exclusives that will be available to order from Tuesday 3 March:
Help Me Grow Bundle
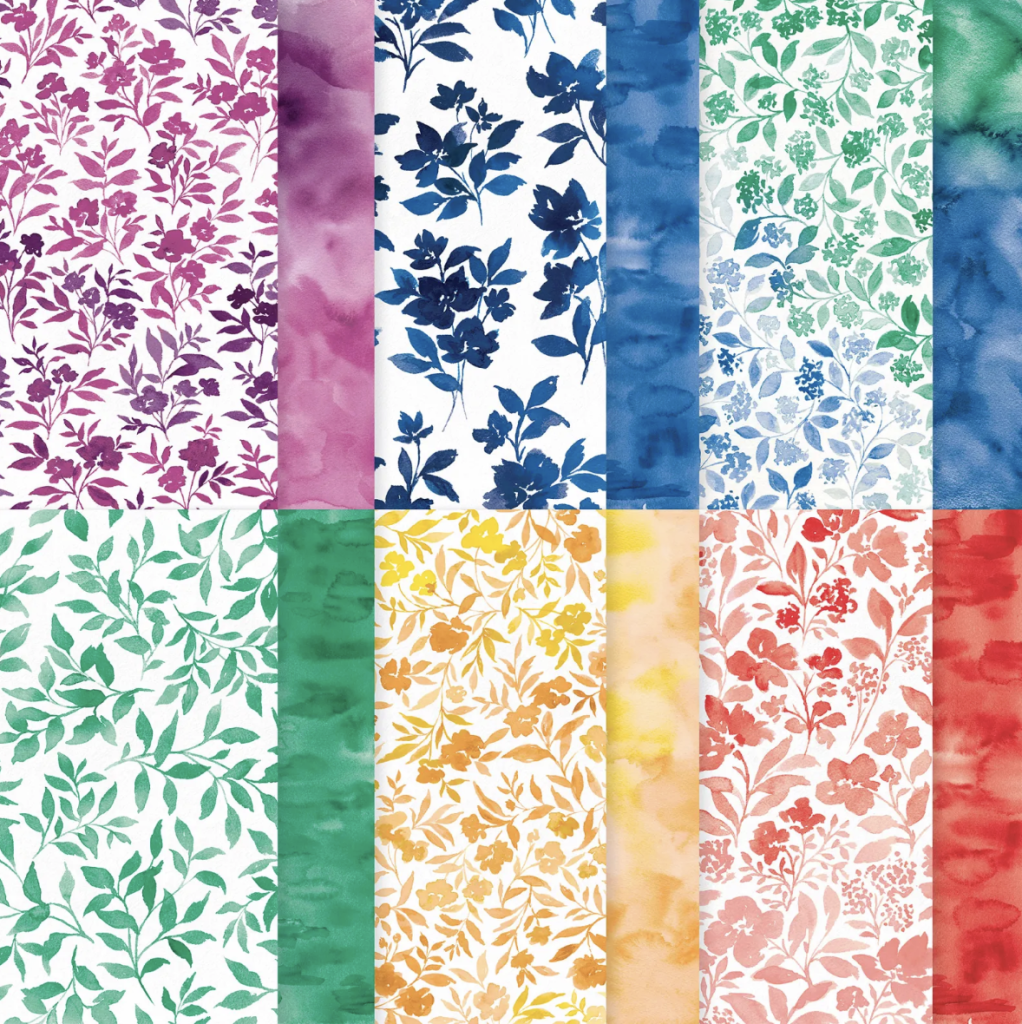
Garden Poetry 12″ x 12″ Designer Series Paper
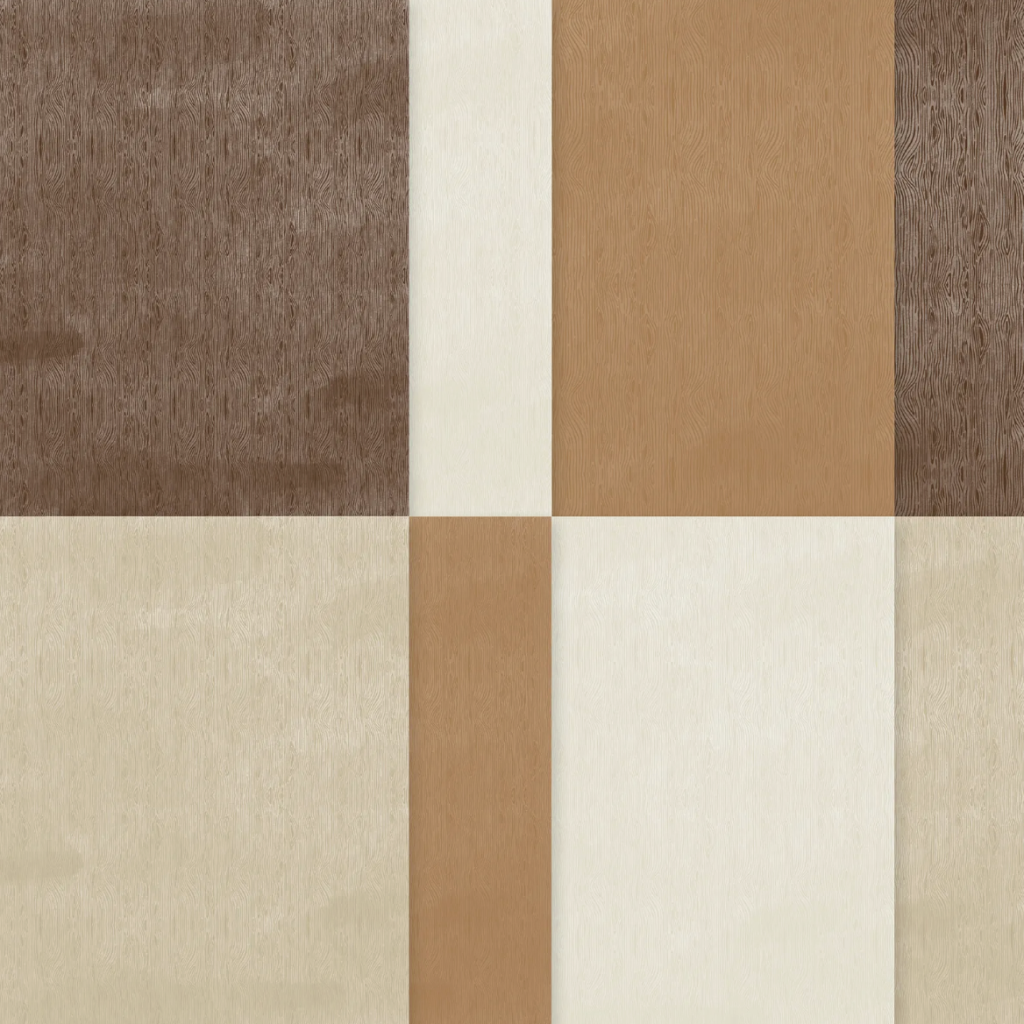
Wood Grain Wonders 12″ x 12″ Designer Series Paper
This all-purpose “hello” card was the perfect excuse to play with these exciting new goodies, as well as a fabulous embossing folder which is currently in the last chance section of the website.
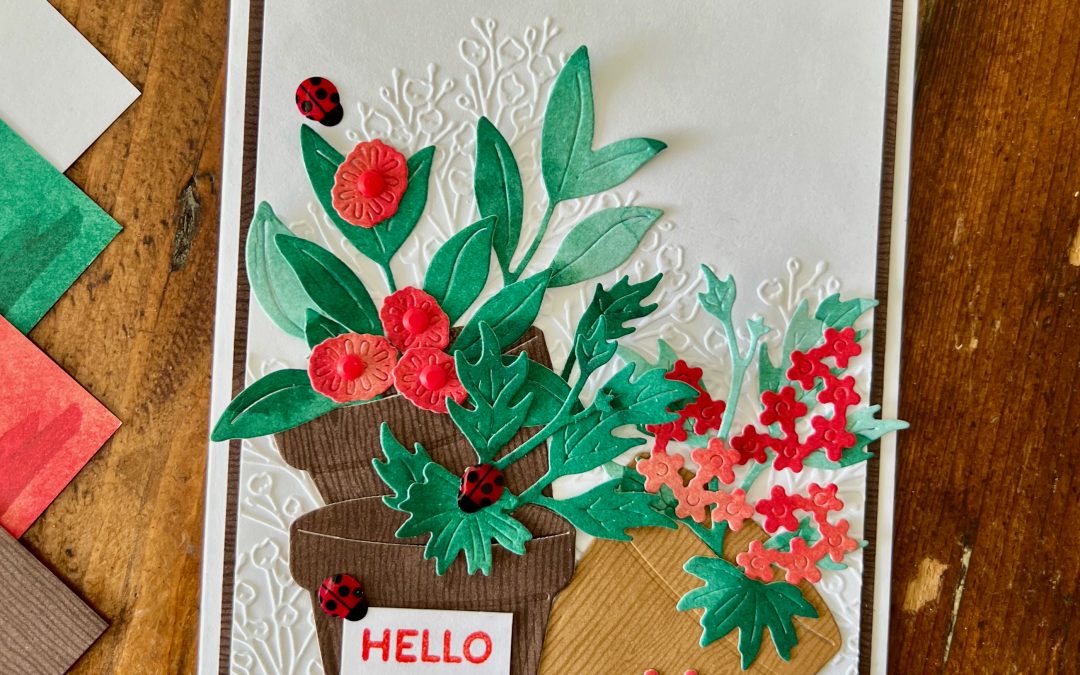
My colour combination of Poppy Parade, Shaded Spruce, Basic White, Early Espresso and Pecan Pie was inspired by the colours in the two Designer Series Papers I used for the card.
The Garden Poetry 12″ x 12″ Designer Series Paper gives the plant flowers and leaves a soft watercolour effect, so it looks hand coloured without any actual colouring.
I simply used the Help Me Grow dies to die cut the leaves and flowers from the Poppy Parade and Shaded Spruce patterns in the DSP.
The three plant pots from the Help Me Grow dies are cut from the timber patterns in the Wood Grain Wonders DSP, giving them beautiful warmth and realism.
Behind the garden scene, I added a panel embossed with the Pressed Flowers Embossing Folder. It gives the softest, delicate background texture without competing with the focal point. And at $7.70 on the Last Chance list, it’s an absolute steal.
The only stamping on the card is the simple “Hello” sentiment from the Help Me Grow stamp set.
I embellished the garden scene with three Ladybirds from the Ladybug Garden Epoxy Shapes and a few Poppy Parade Dear Dots in the centre of the flowers.
Take a look at some more Poppy Parade inspiration on our Insta Hop!
Our blog hop is now an Instagram hop but the good news is that you don’t need to have an Instagram account to view all of the other projects!
Simply copy any of the Insta handles below into a new search engine window to follow the Instagram hop at any point.
Next in our Hop is Kate @craftwithkate. Be sure to check out her gorgeous project/s.
The full list of this week’s InstaHop is listed below:
Kate @craftwithkate
Helen @apaperparadise
Kirsty @crafty.littlemiss
Rachel @rachelpalmieristampin
Cathy @whatcathymade – you are here!
Thank you for joining me for Week 41 of Colour Creations. We’ll be back next Wednesday when we are showcasing Pretty In Pink. I hope you can join us then.