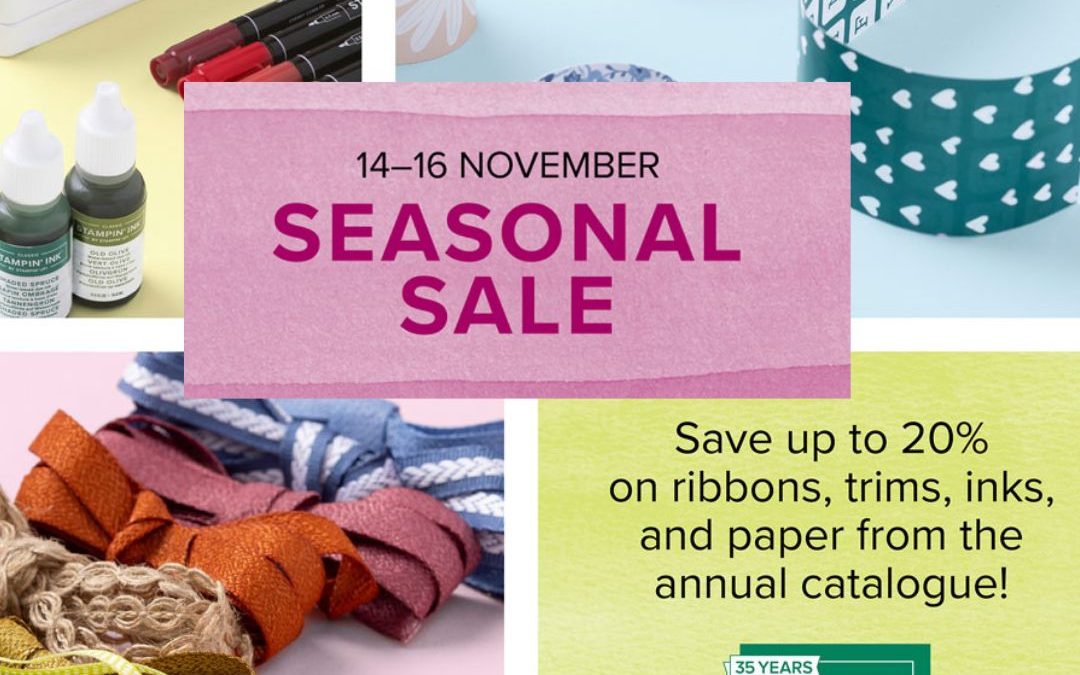
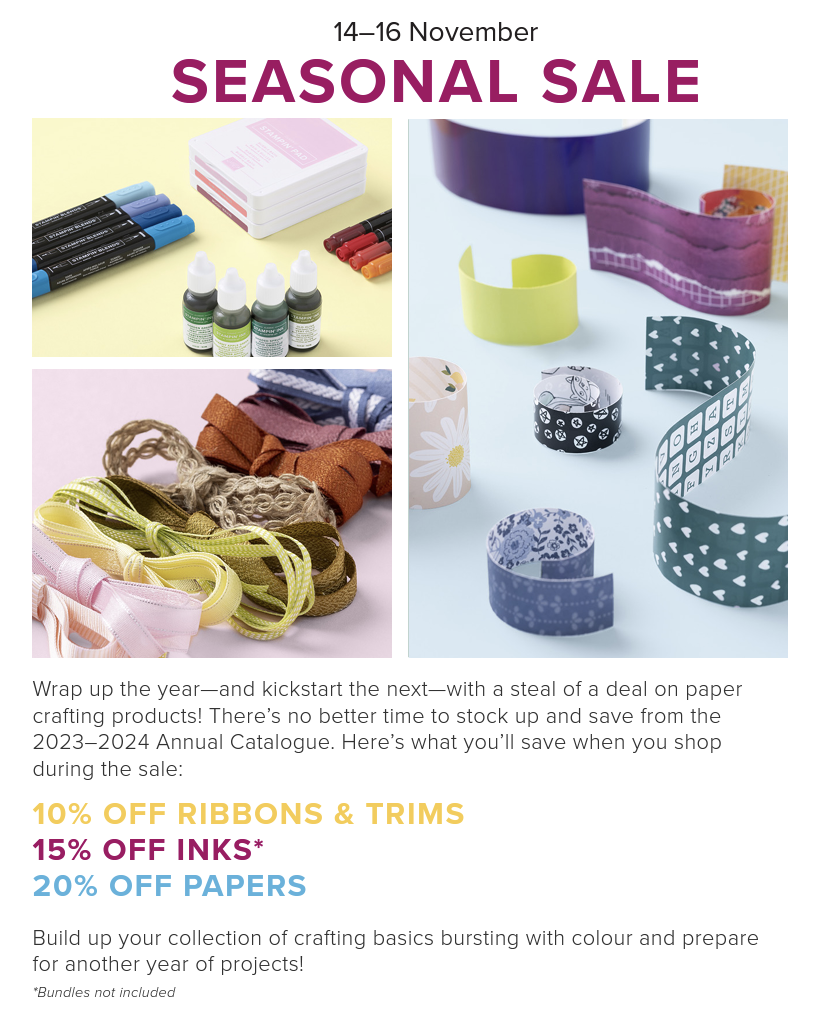
Have you had your eye on any basics from the Stampin’ Up! Annual Catalogue such as cardstock, ink pads, ink refills, paper, cards and envelopes and markers?
Well you won’t want to miss the Stampin’ Up! Three Day Seasonal Sale!
It starts today and finishes midnight Thursday November 16th.
You will enjoy the following discounts on items from the 2023-24 Stampin’ Up! Annual Catalogue:
10% off ribbons and trims.
15% off inks, including pads, refills, markers, and blends. (Ink pad bundles are not included, however marker packs are.)
20% off papers, including cardstock, specialty paper and Designer Series Paper.
Please note: Some items may sell out due to high demand. The discount will automatically be applied to qualifying items that are in stock. Backorders are not available.
Don’t forget to use my November Host Code DHGMKS9Y if your order is between $50 and $250. If your order is over $250 don’t use the host code because you will receive your own hostess rewards to redeem for free product.
I’ll be back tonight at 8pm with a new card to share, when our Art With Heart Colour Creations team will be showcasing Highland Heather.
Welcome to week twenty eight of our Art With Heart 2023-24 Colour Creations blog hop!
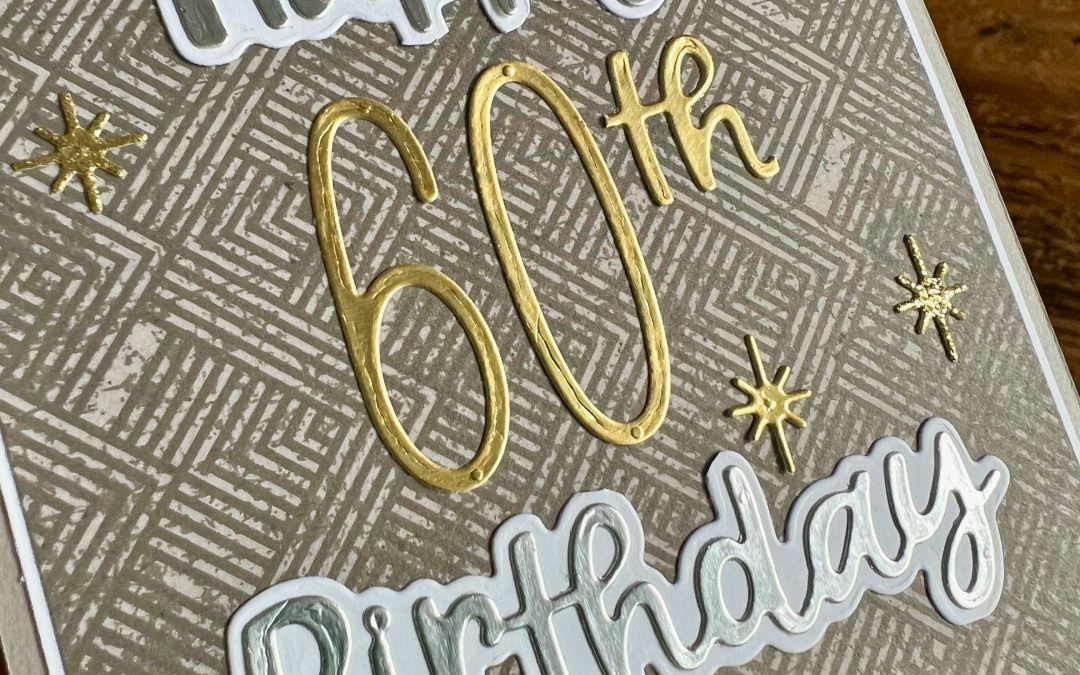
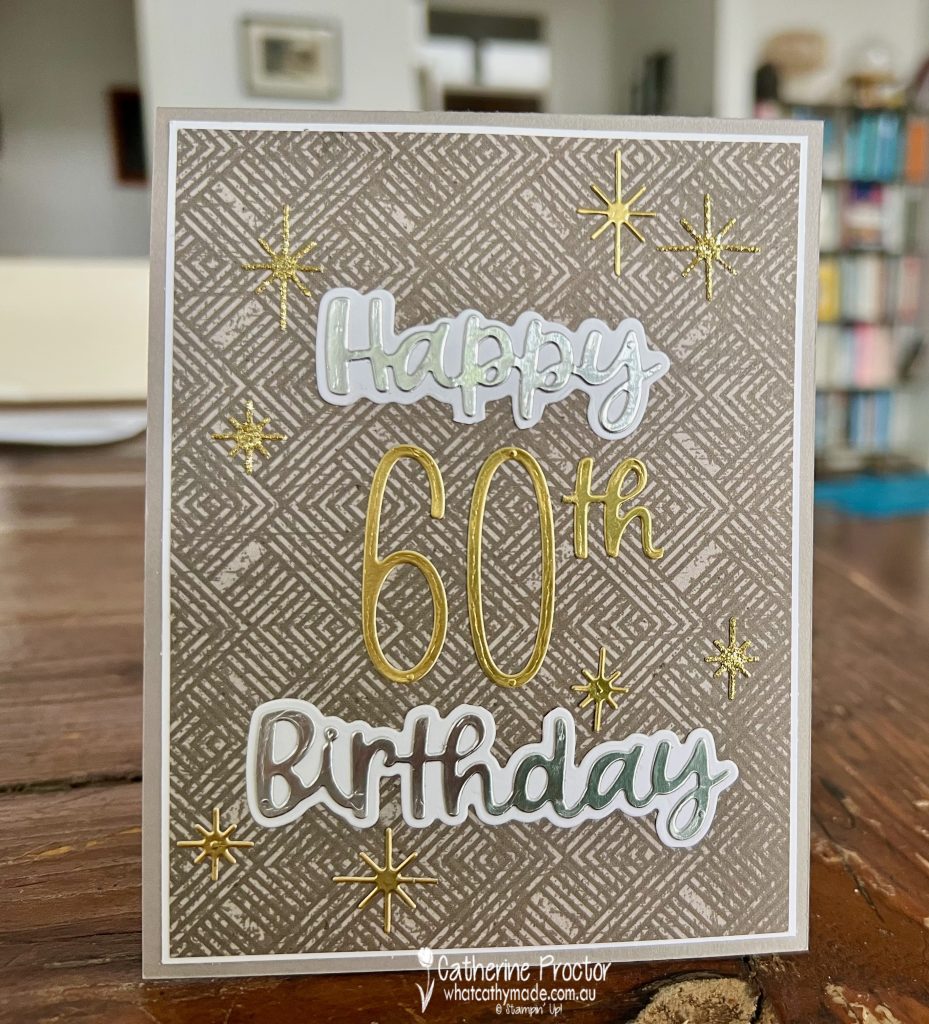
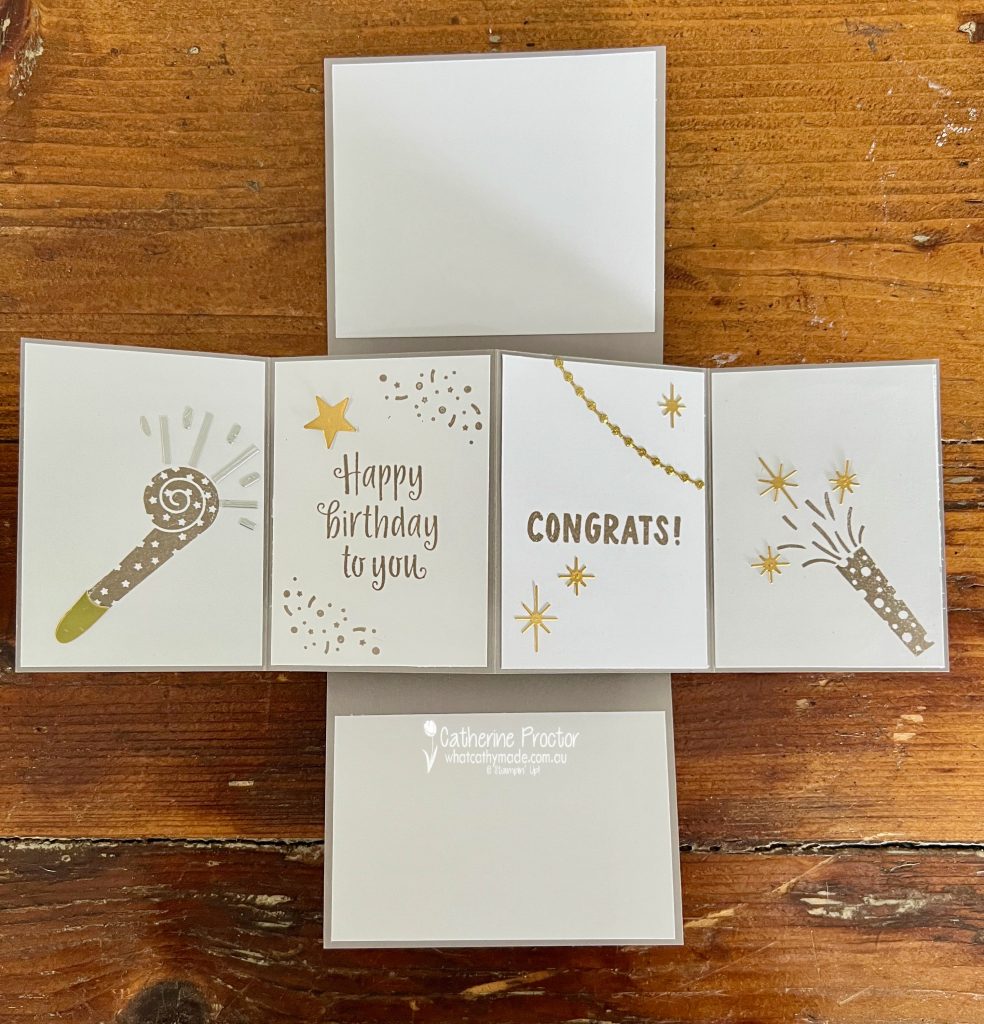
This week we are showcasing Grey Granite, a brownish grey that is part of the neutrals family. Gray Granite is a wonderful colour for masculine cards or nature scenes and today I’ve used it to create a birthday card for my brother-in-law.
Gray Granite goes really well with both silver and gold, so it was the ideal colour to us as a card base for a special ‘twist and pop’ 60th birthday card.
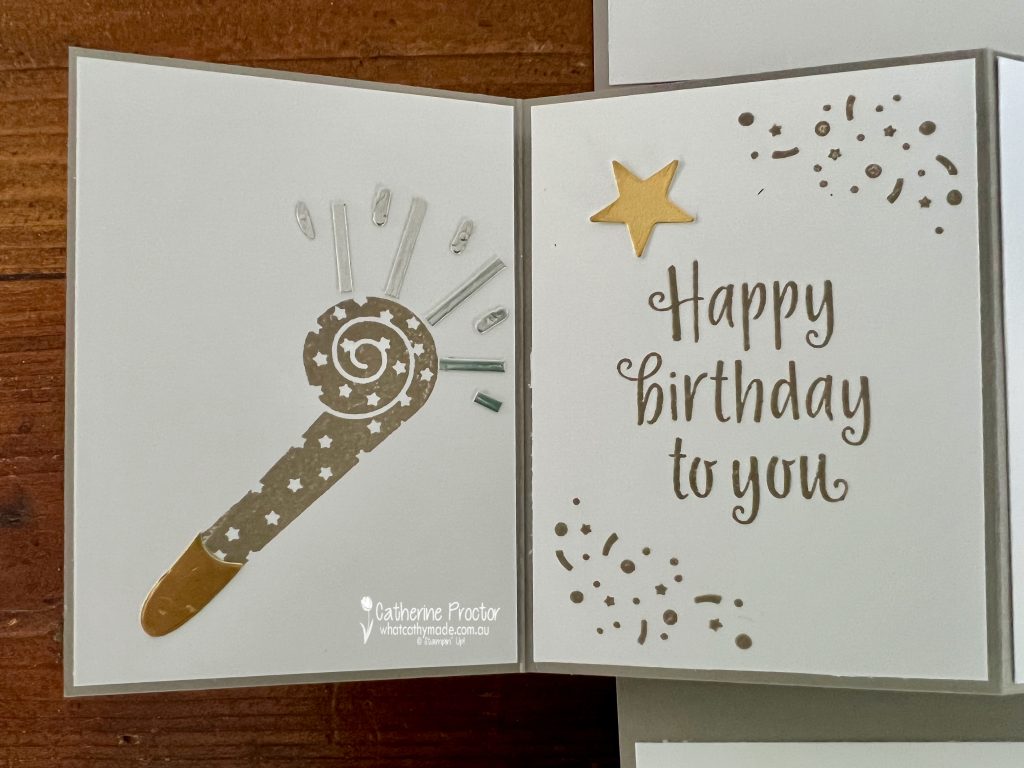
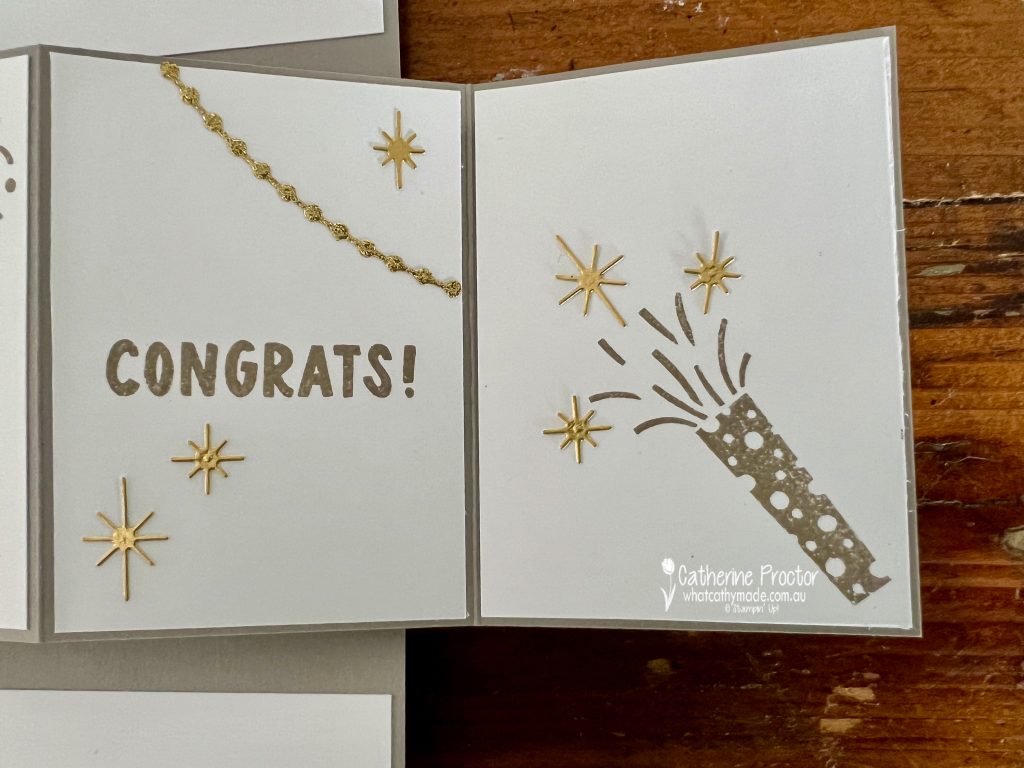
Here’s what the card looks like inside when it is opened up.
Here’s a short video to show how it pops up to reveal the lovely surprise inside.
The four pop-up panels have been stamped in Gray Granite with images and sentiments from the the Year to Celebrate Stamp Set.
Gold and silver foil embellishments have been die cut using the Merries Tree dies.
Now it’s time to hop on over to our next participant, the lovely Kate Morgan – I can’t wait to see what Kate has made this week!
If at any time you find a broken link, you can find the complete list of all participants below.
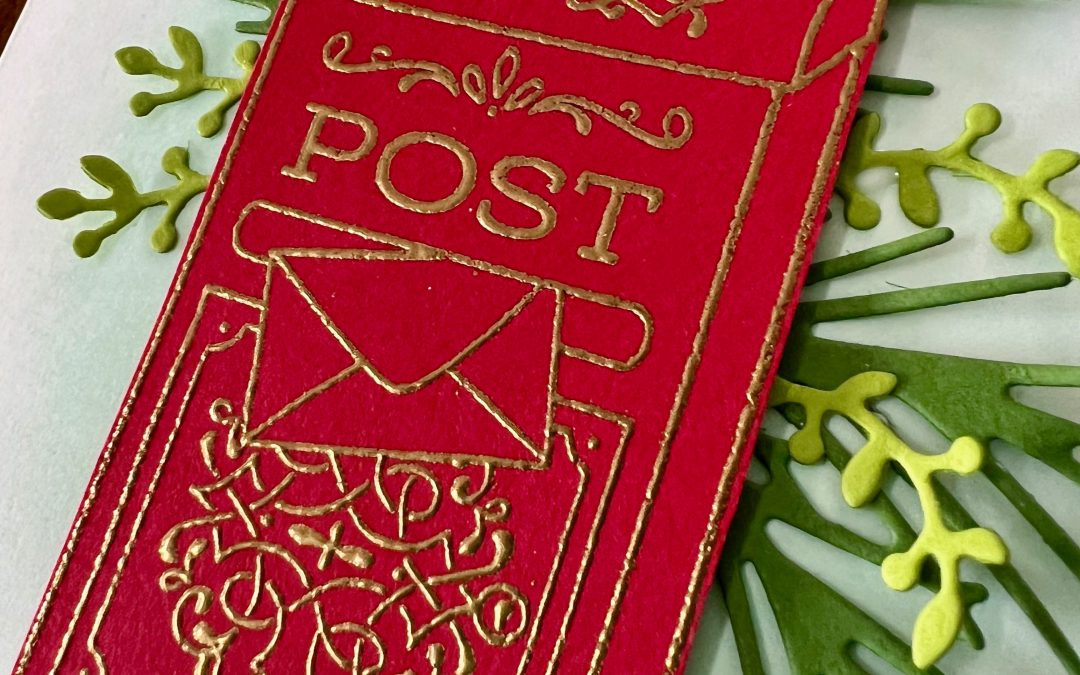
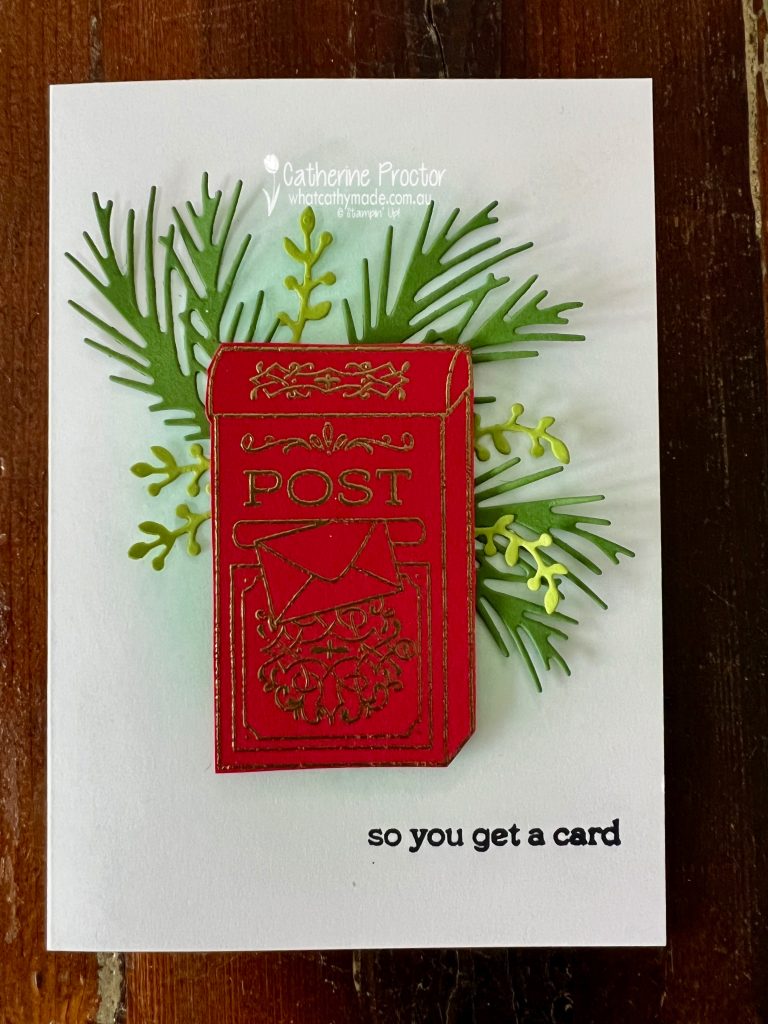
The challenge for Day 8 of the #30DayChristmasCardMakingChallenge is called ‘Christmas Letters’.
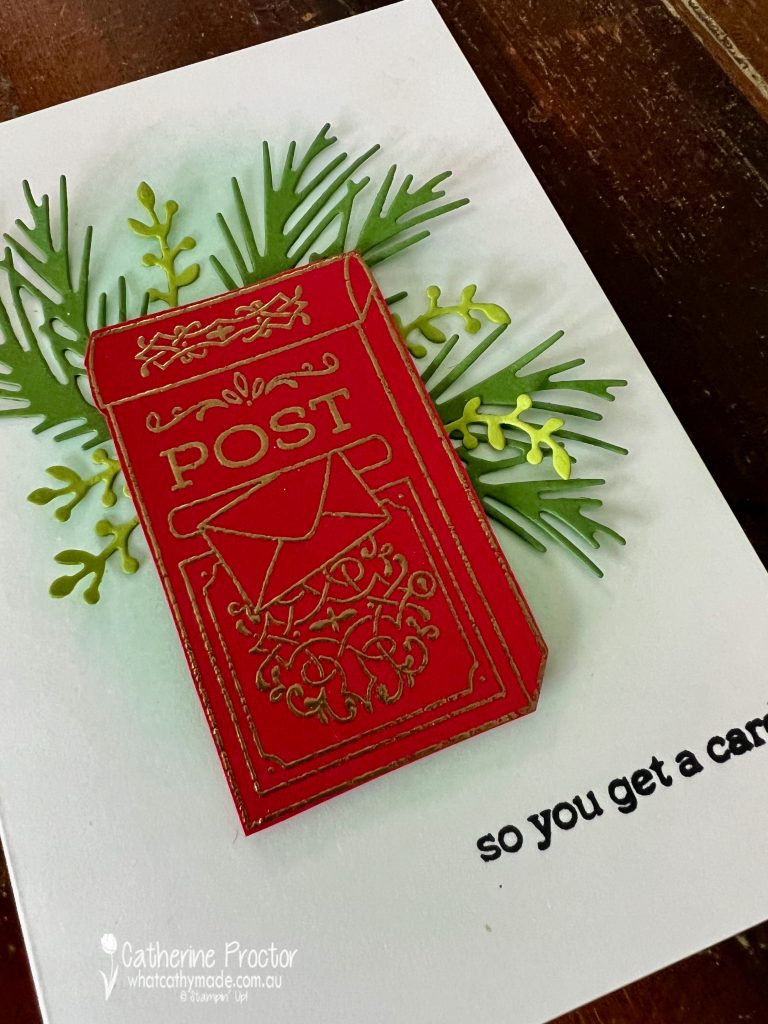
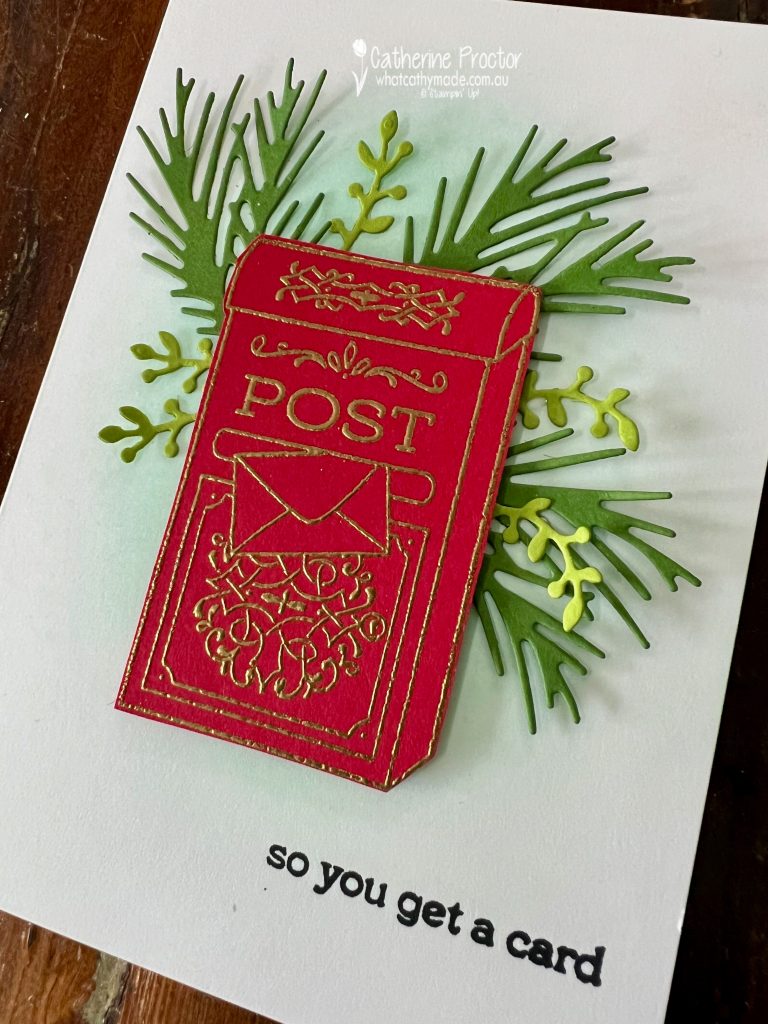
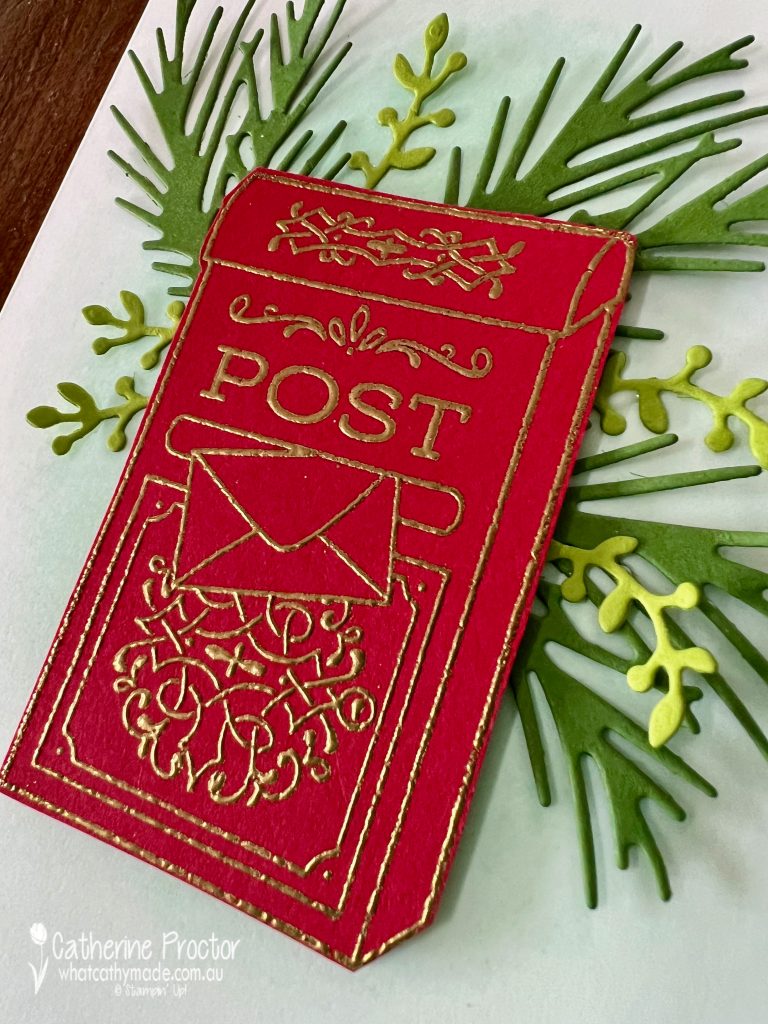
I’ve used the gorgeous letter box from the Stamped with Love Stamp Set, stamped in versmark onto Real Red card stock and heat embossed with gold emboss powder.
The Joy of Noel Dies were used to die cut Garden Green and Old Olive cardstock to create the greenery behind the letterbox.
Before I adhered the letterbox and the foliage to the front of the card, I used a Blending Brush to add some Pool Party ink to the card base.
I thought a very modern sentiment in a typewriter font would work well with all the white space on this card, so I’ve used the ‘so you get a card’ sentiment from the ‘Just My Type’ stamp set.
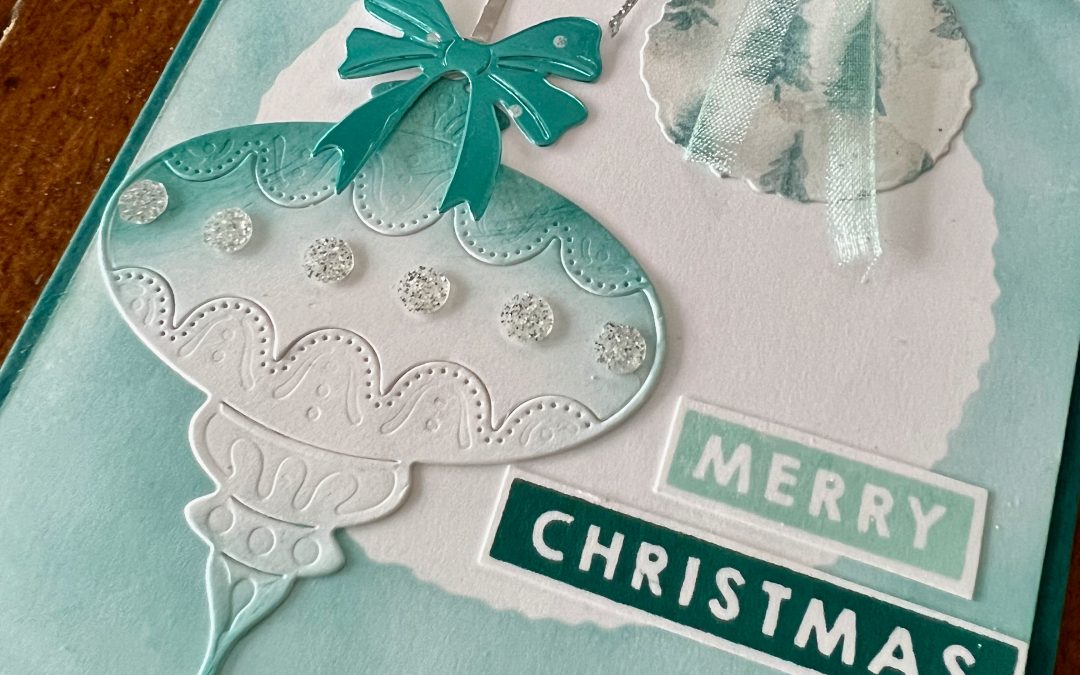
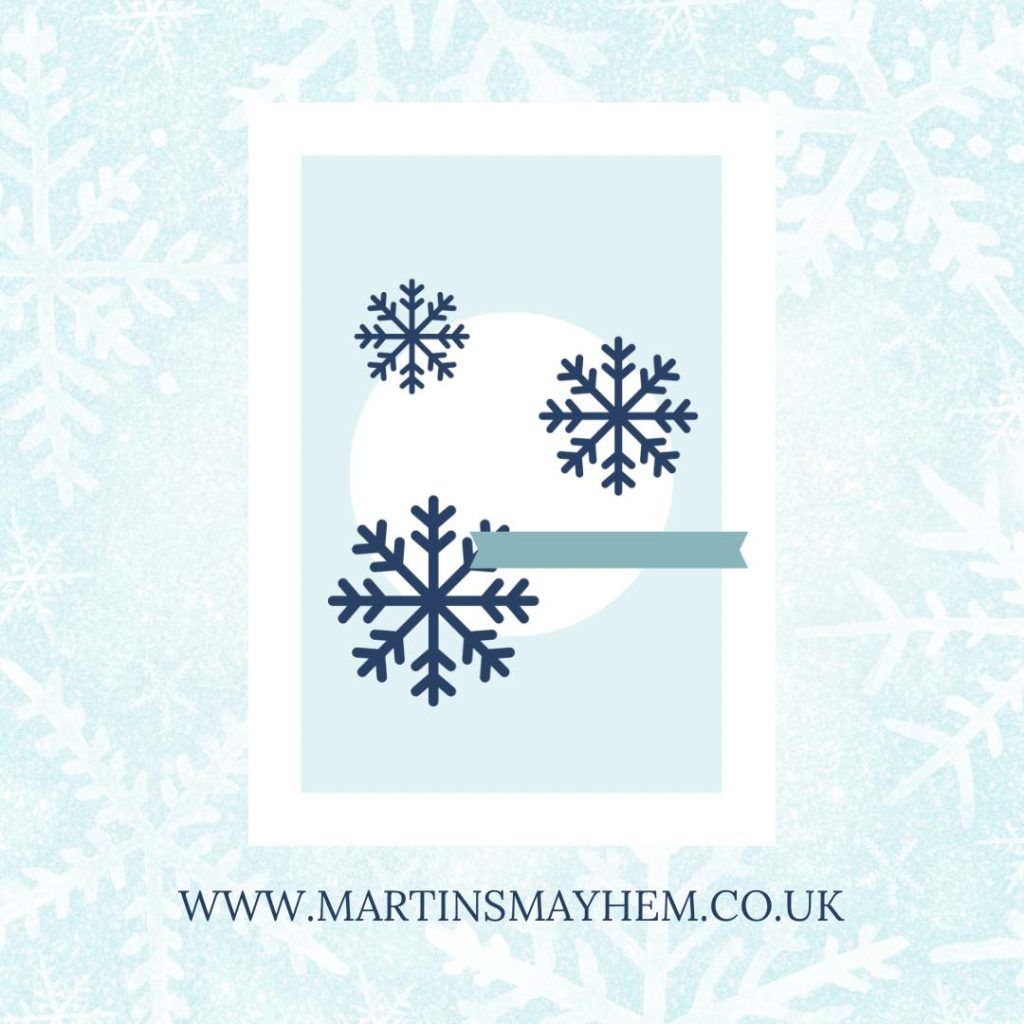
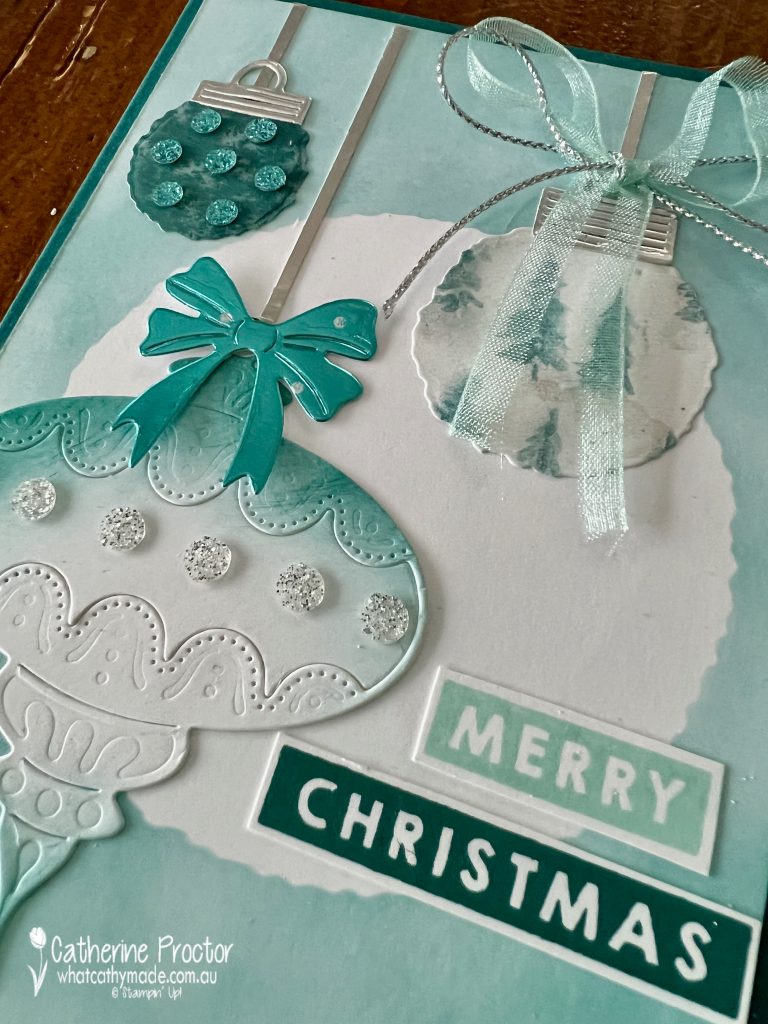
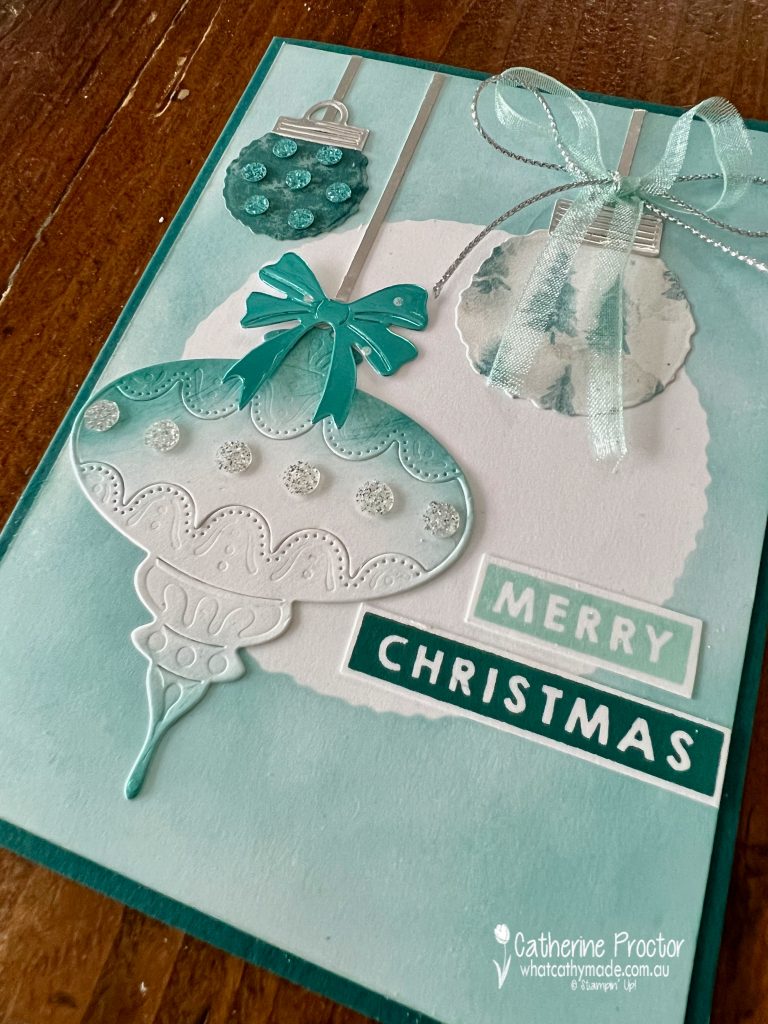
The challenge for Day 5 of the #30DayChristmasCardMakingChallenge is the following sketch.
I’ve used the Deckled Circles dies and the Handcrafted Elements Dies to create three Christmas ornaments.
The background of this card has been created using a blending brush and Pool Party ink. The embellishments are the gorgeous Adhesive-Backed Glitter Sequins.
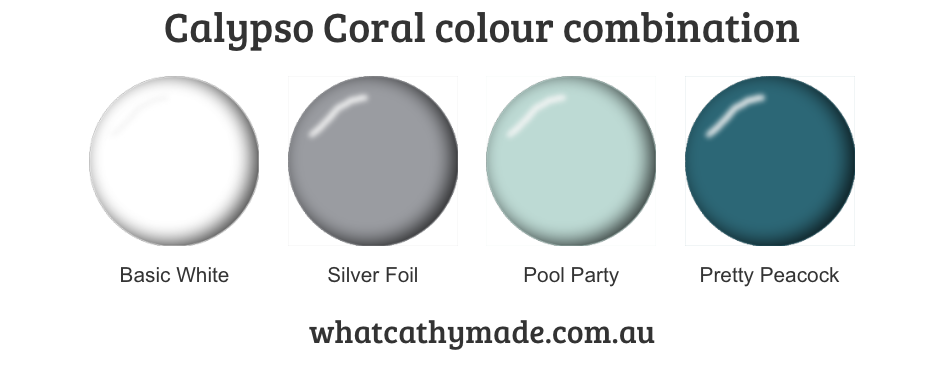
Pretty Peacock card stock and ink, silver foil and Snowflake Magic 12″ x 12″ (30.5 x 30.5 cm) Specialty Designer Series Paper all combine beautifully for a monochrome effect.
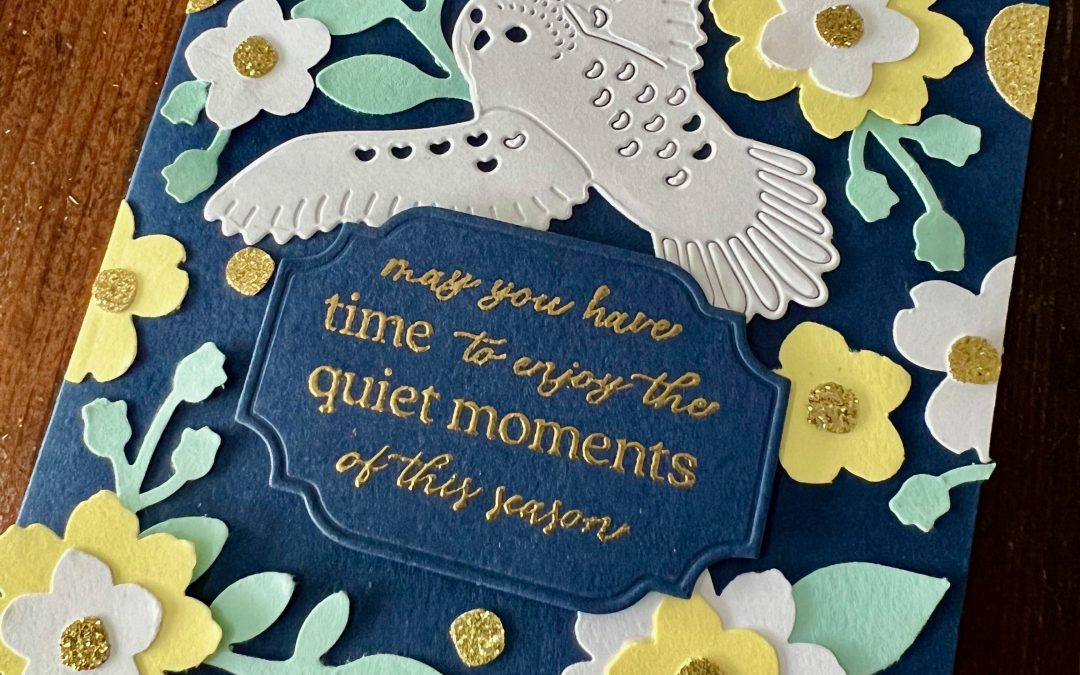
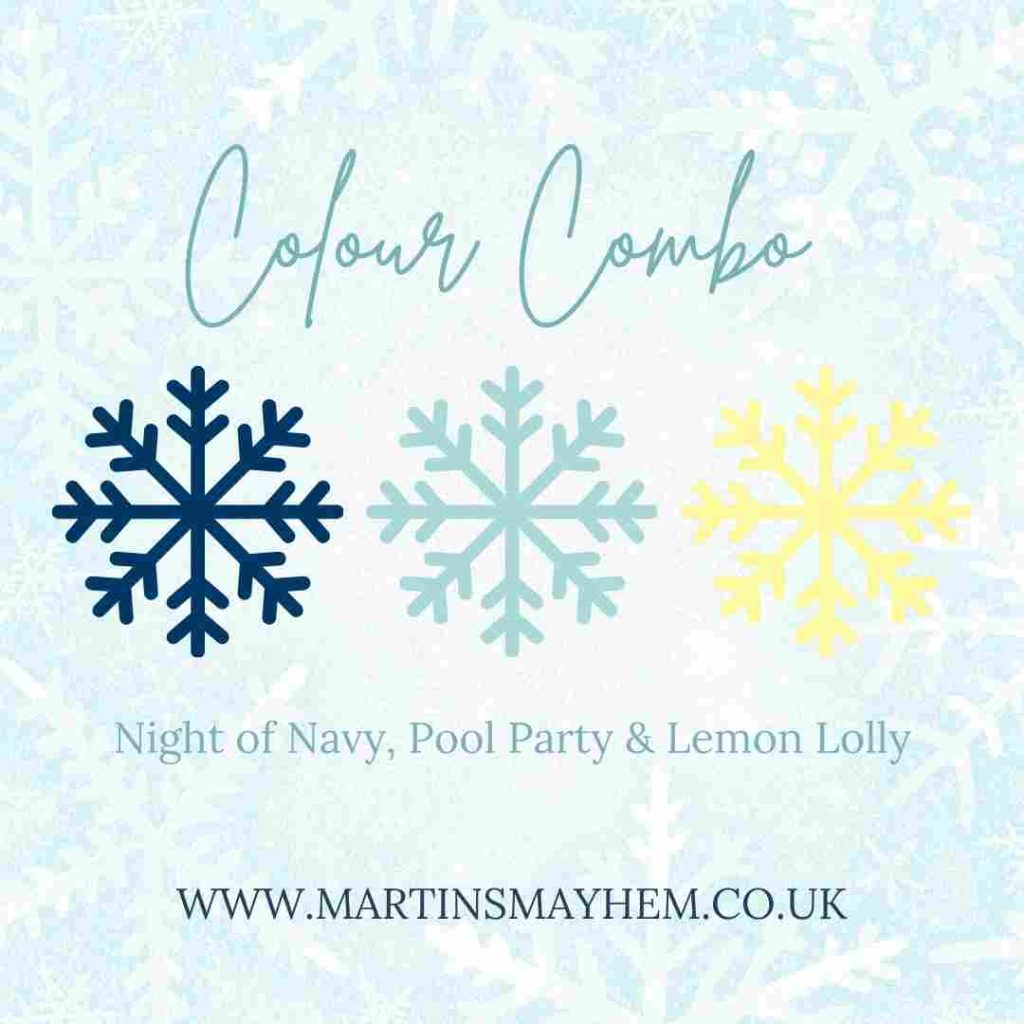
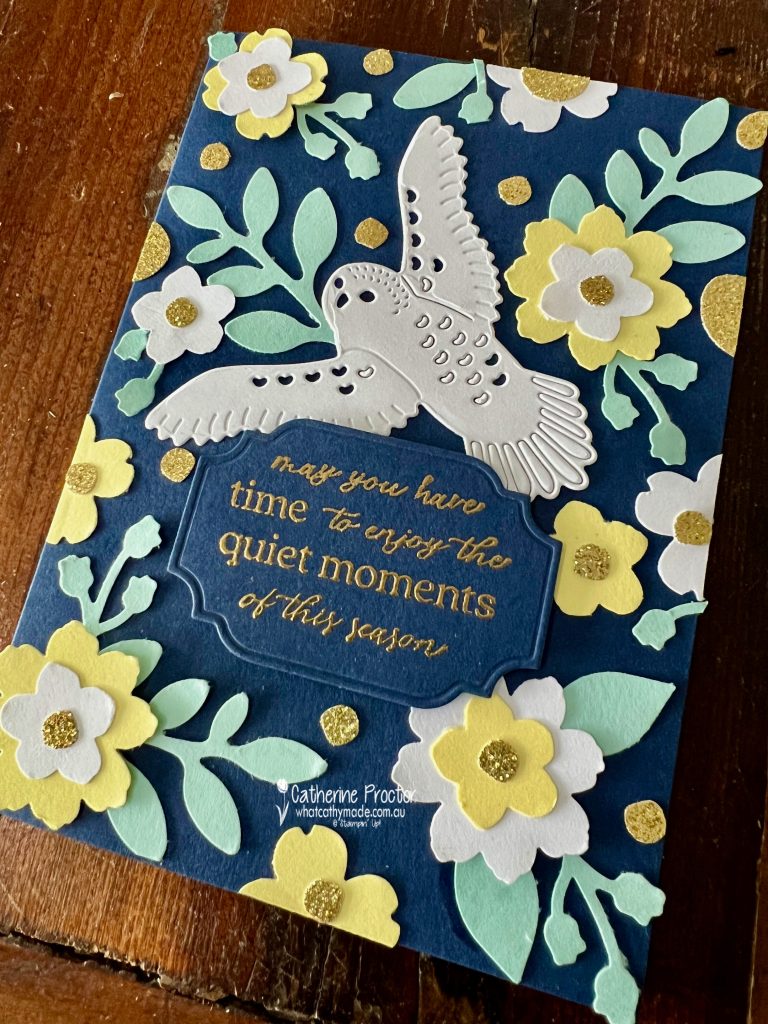
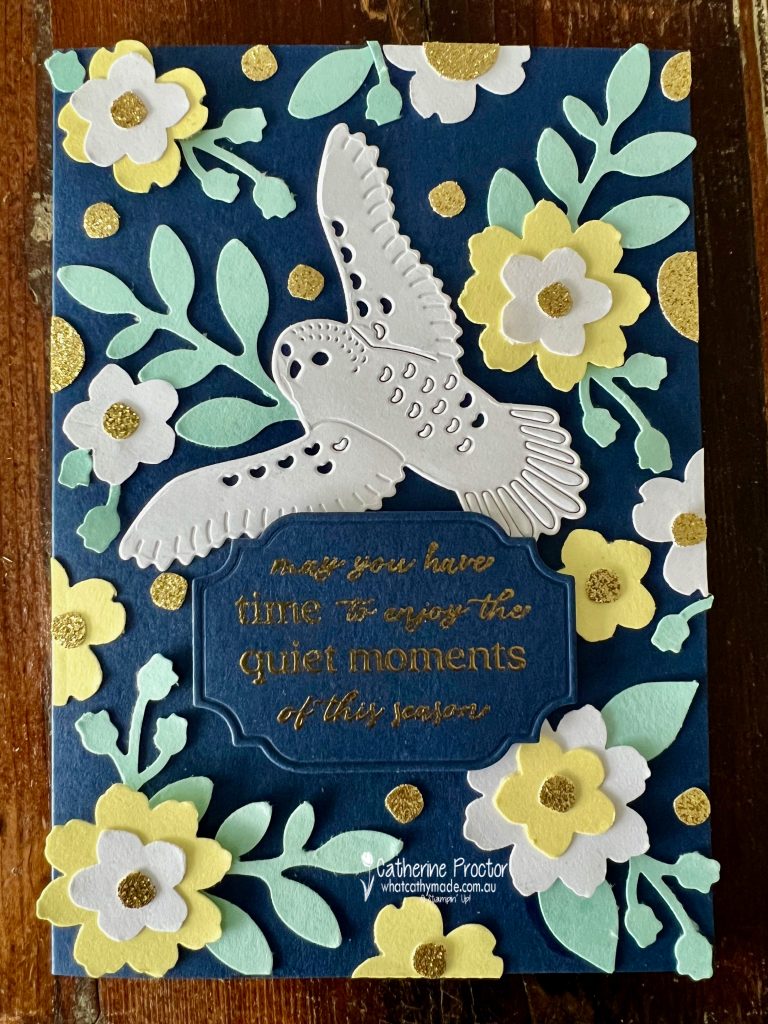
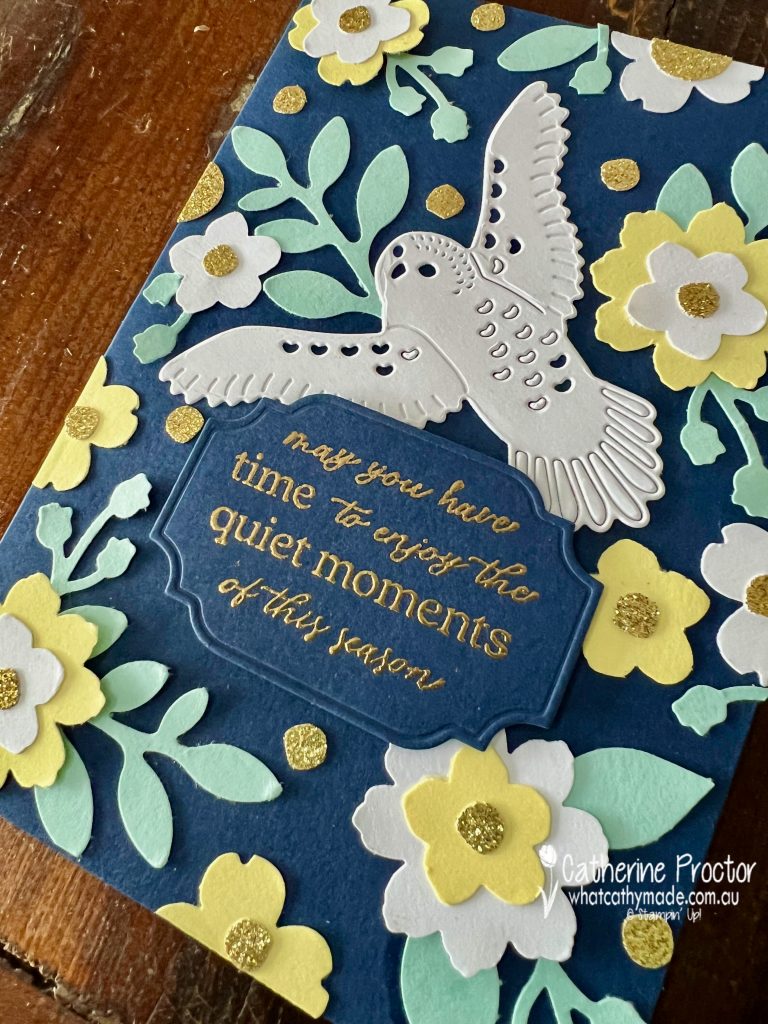
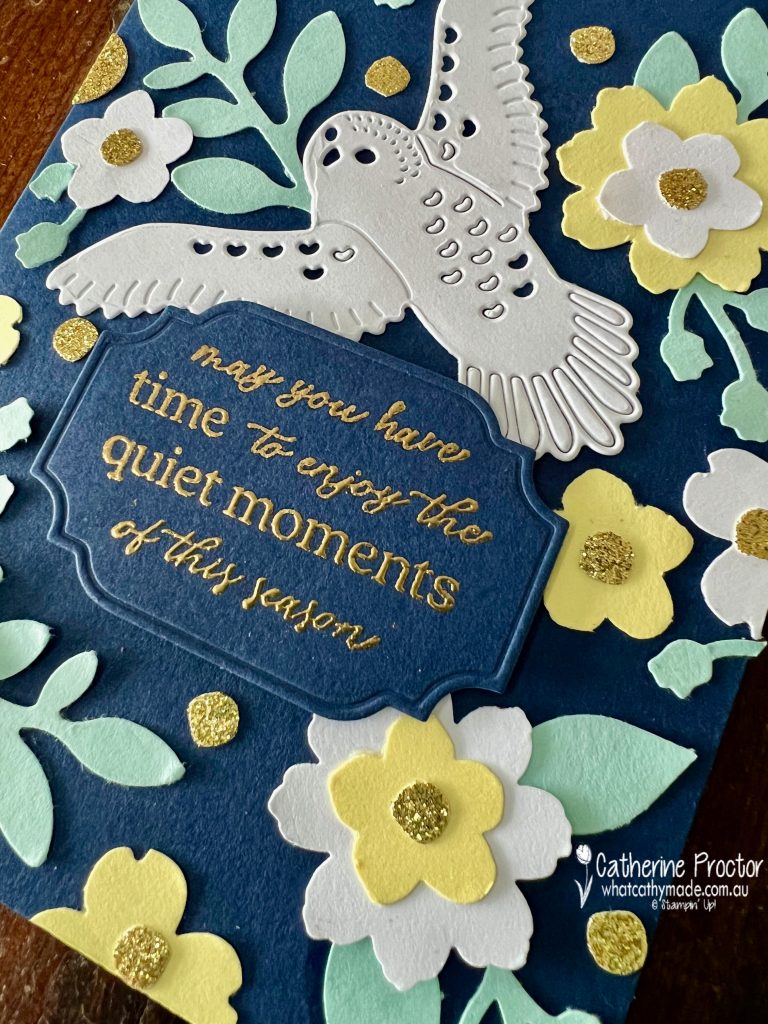
The challenge for Day 4 of the #30DayChristmasCardMakingChallenge is the following colour combination: Night of Navy, Pool Party and Lemon Lolly.
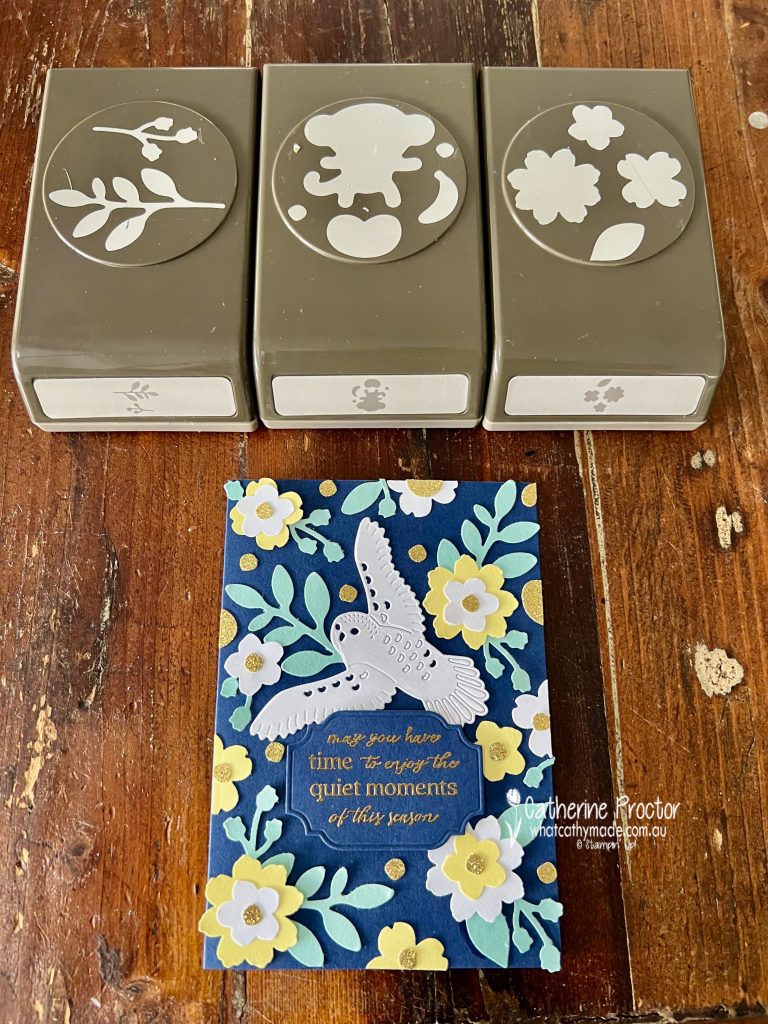
Night of Navy is such a great neutral for making other colours pop, so I’ve used it for my card base and created a Christmas card that uses the Winter Owl dies and three different punches. Can you guess which three punches I’ve used for this card?
The Pool Party elements are punched using the Bough Punch, the Lemon Lolly and Basic White flowers are punched using the Petal Park Builder Punch, while the Gold Adhesive-Backed Glimmer Paper Embellishments were punched using the Monkey Builder Punch.
I adhered the owl and the gold embossed sentiment first and filled in the rest of the card with the punched shapes.
I would never have used this colour combination, but I love how a challenge can push you out of your comfort zone!
Don’t you just love this sentiment from the Winter Owls stamp set. It makes me feel so calm.