Welcome to week six of our Art With Heart 2025-26 Colour Creations Insta hop!
This week we’re celebrating the vibrant and cheerful Azure Afternoon — a bold, bright blue that just sings on a handmade card. It also happens to be one of my favourite colours in the Stampin’ Up! palette.
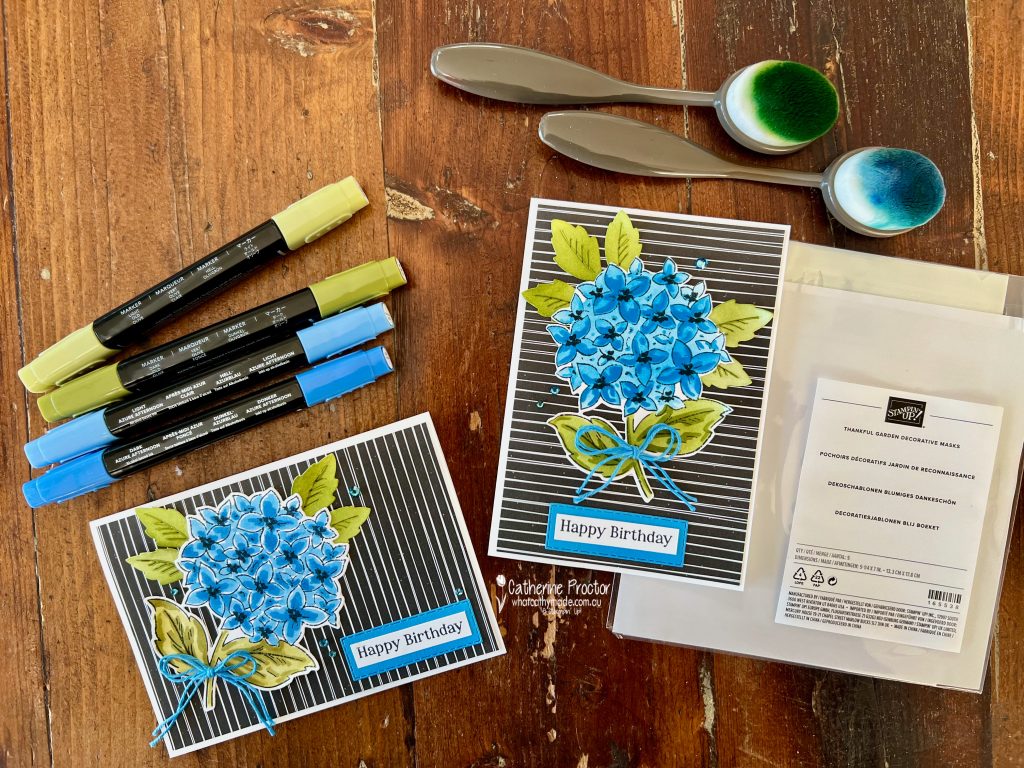
Blending Brushes with Masks or Stampin’ Blends?
Using blending brushes and Stampin’ Blends actually makes looks like I’ve used an assortment of different blue inks to create my hydrangeas.
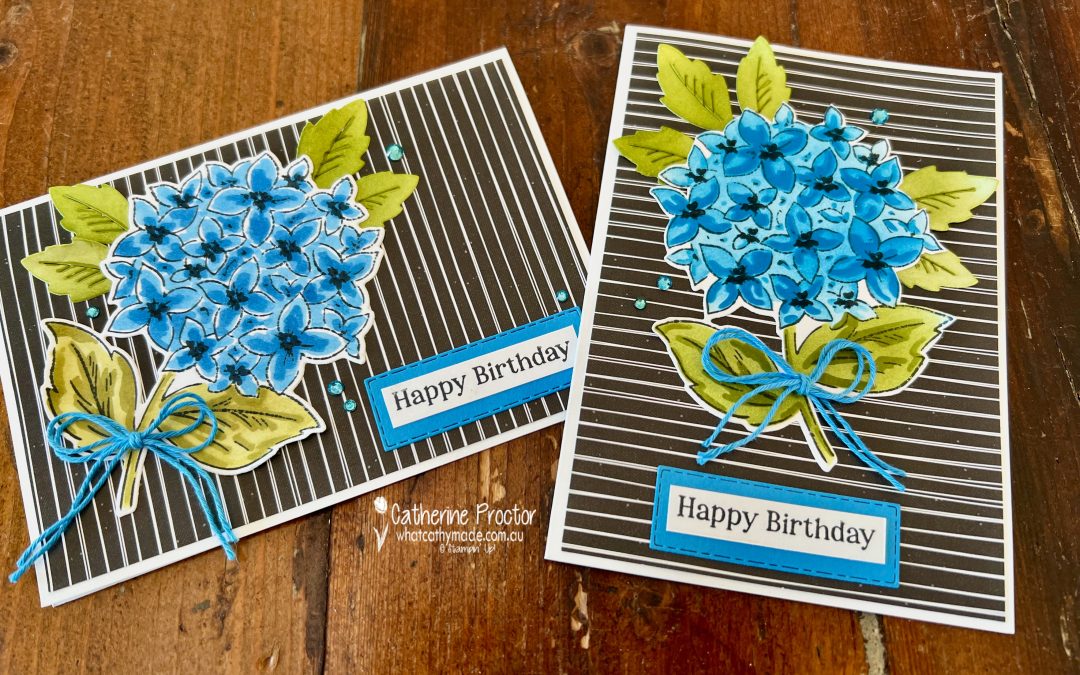
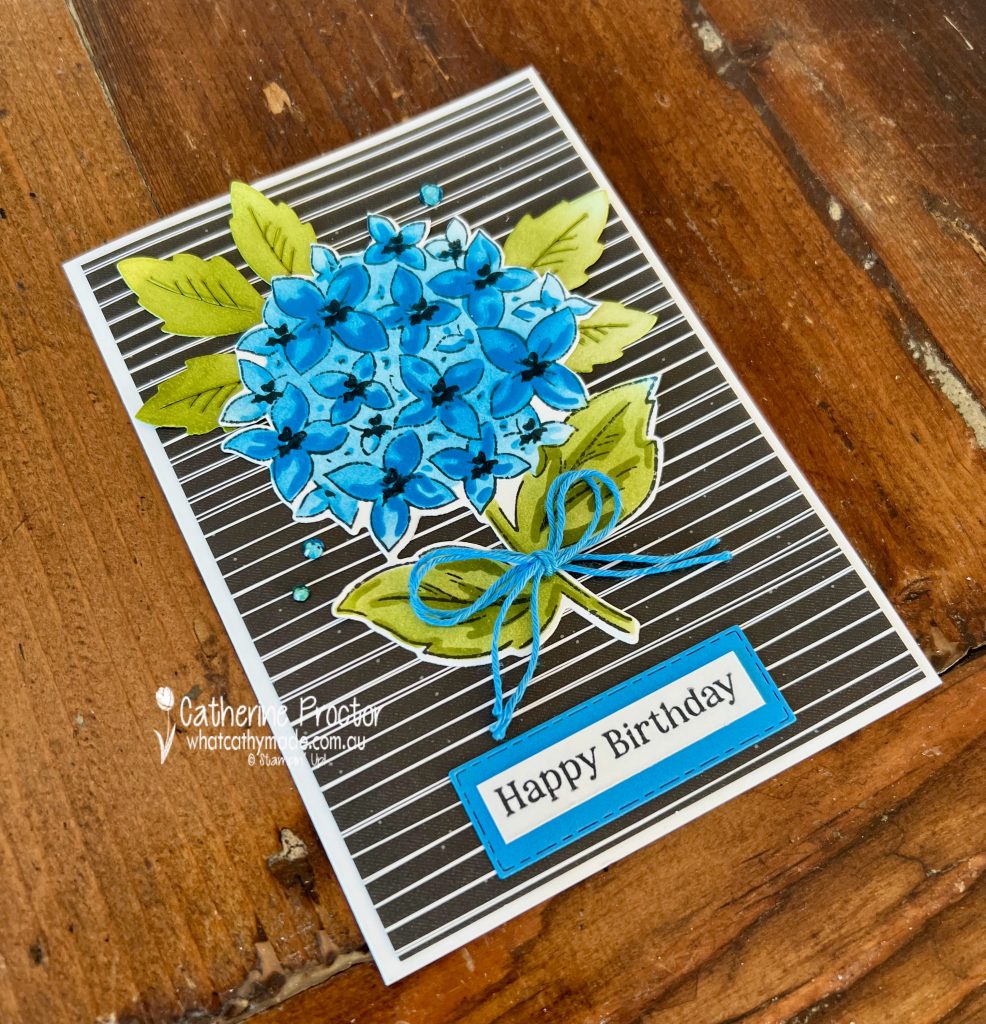
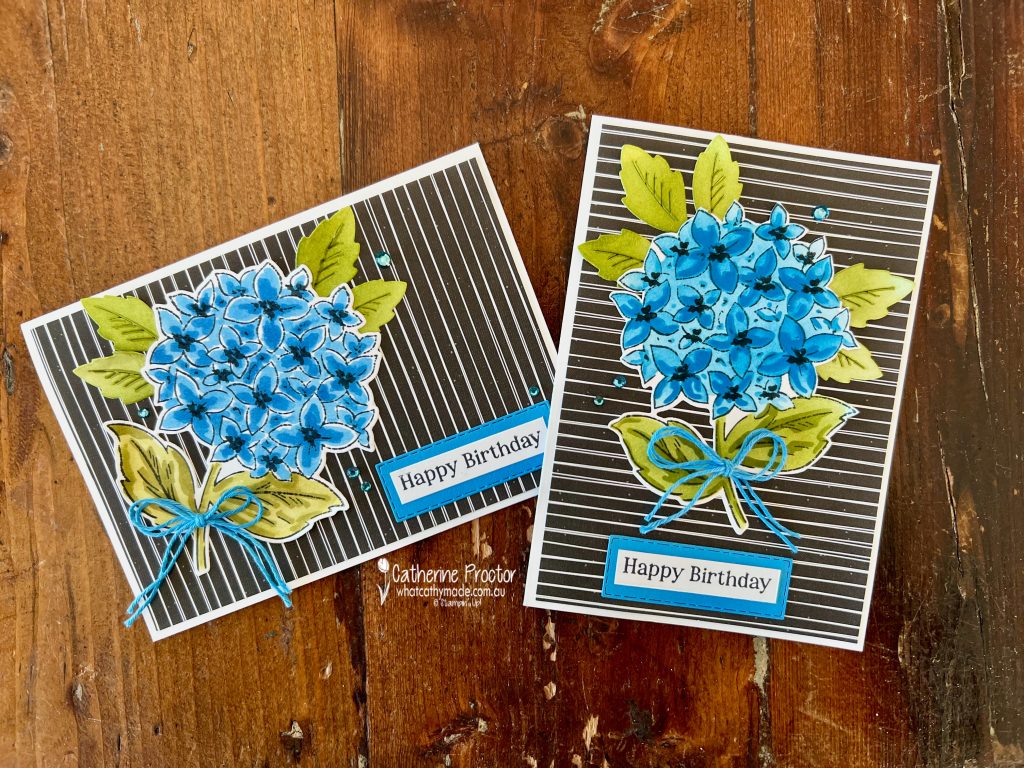
Both cards start with half a A4 sheet of Basic White cardstock (folding in half) and topped with a layer of black and white striped DSP from the Lovely Garden 12″ x 12″ Designer Series Paper.
The hydrangeas on both cards are from the Thankful Garden stamp set, stamped in Tuxedo Black Memento and die cut using the Thankful Garden dies.
Layering Masks and Blending Brushes
Card one is a vertical Happy Birthday card that uses the blending brushes and the Thankful Garden Decorative Masks to softly colour the petals and background.
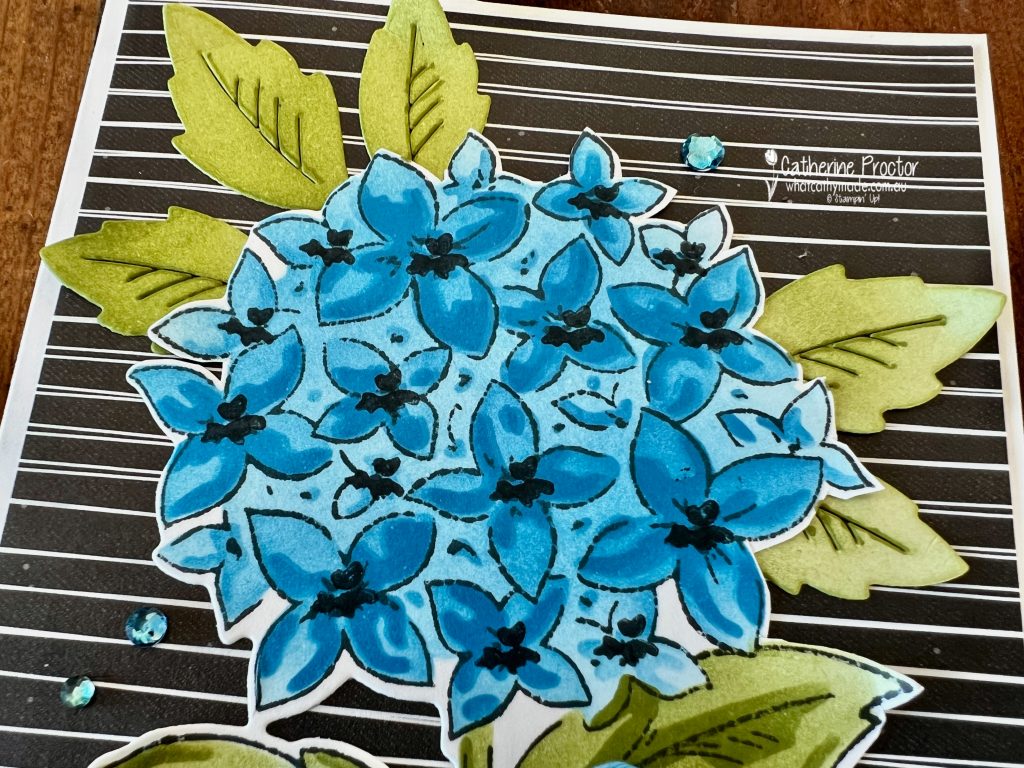
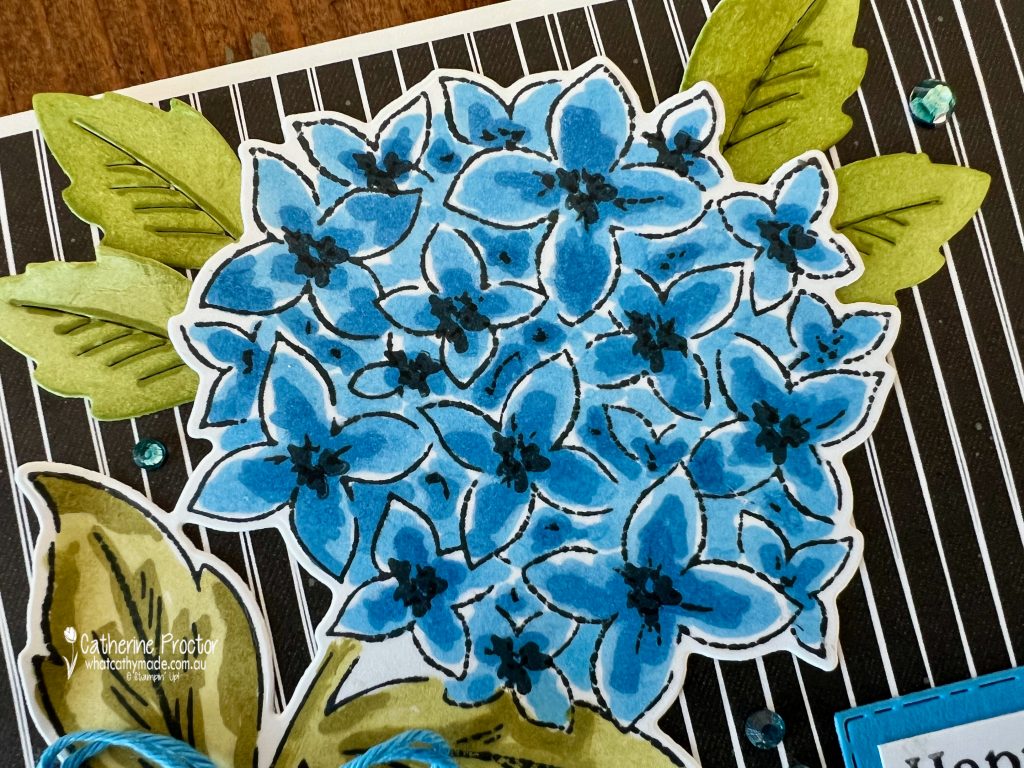
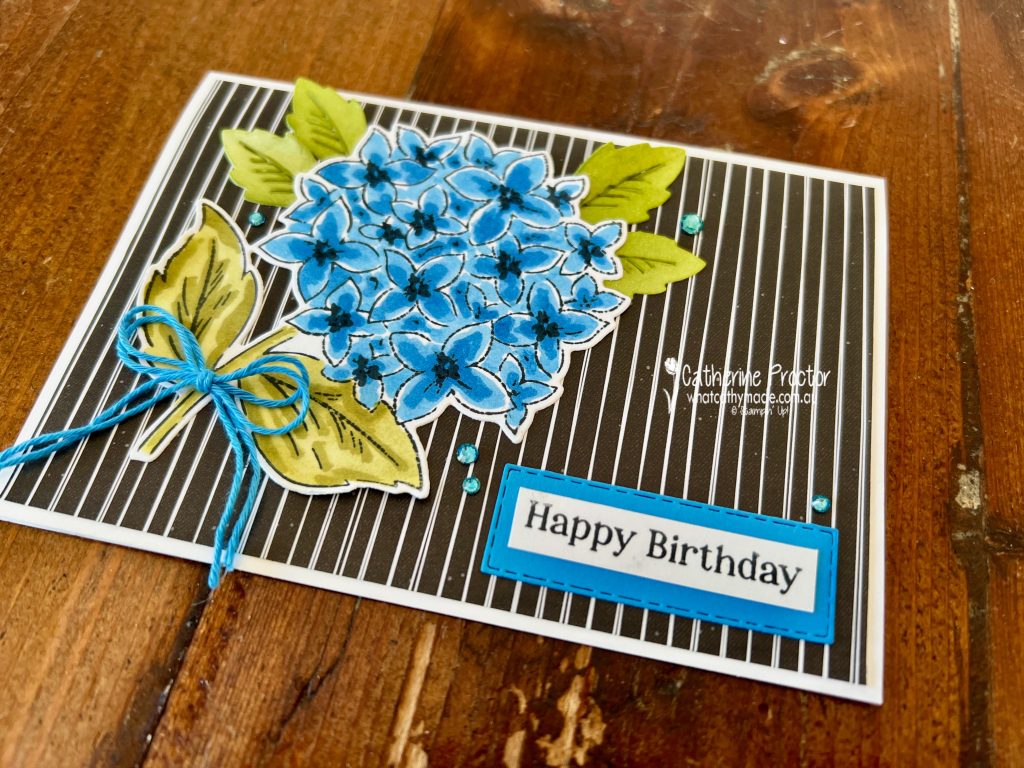
Here’s a close-up so you can see the detail. All three layers of the hydrangea are coloured using Azure Afternoon. The black stamens at the centre of the card are a tiny stamp in the Thankful Garden stamp set.
I love the different layers of intensity these layering masks give to the flower!
Card Coloured With Stampin’ Blends
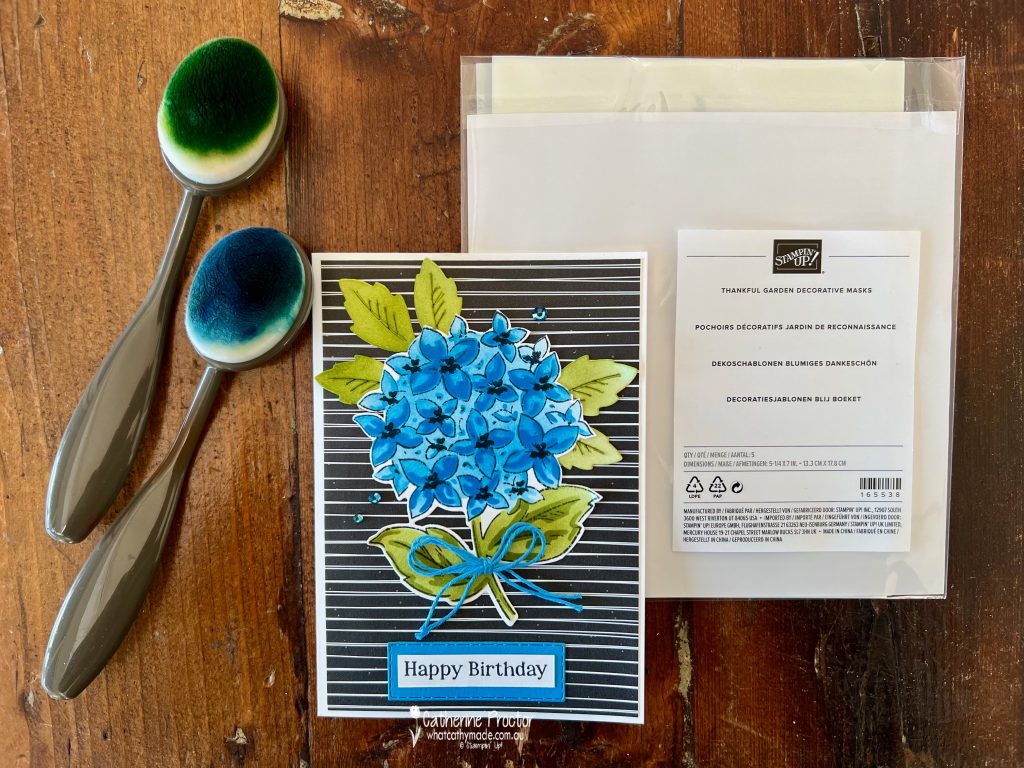
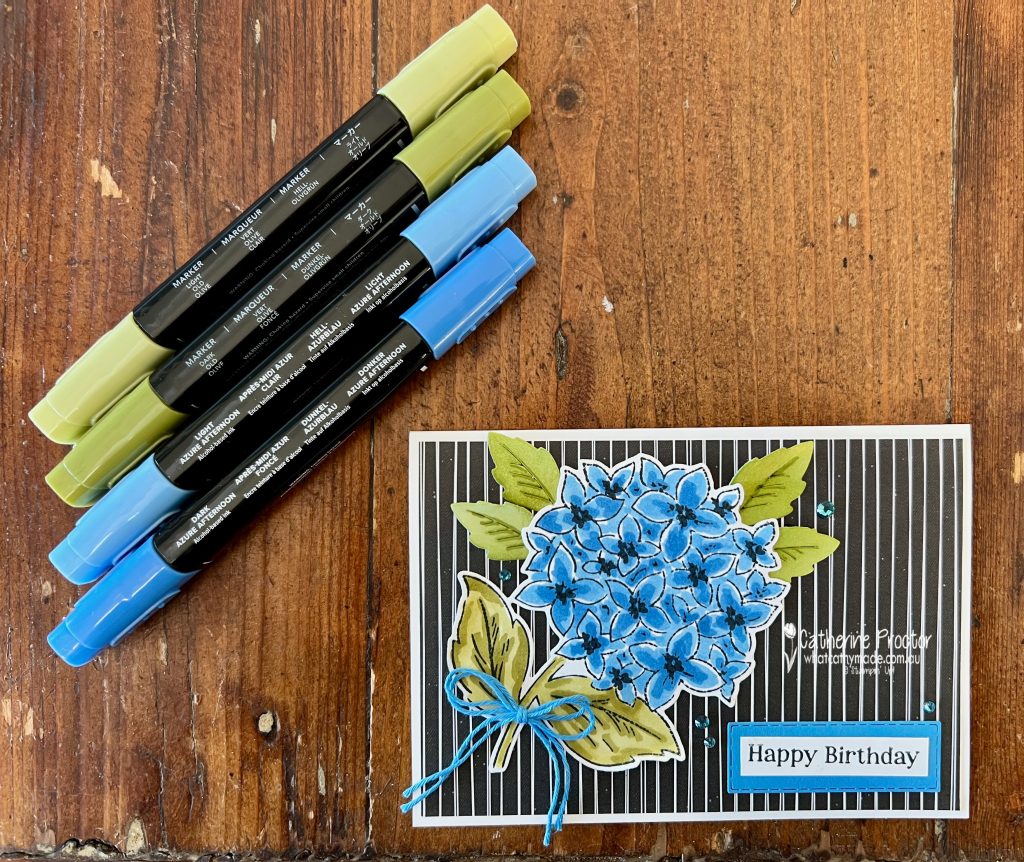
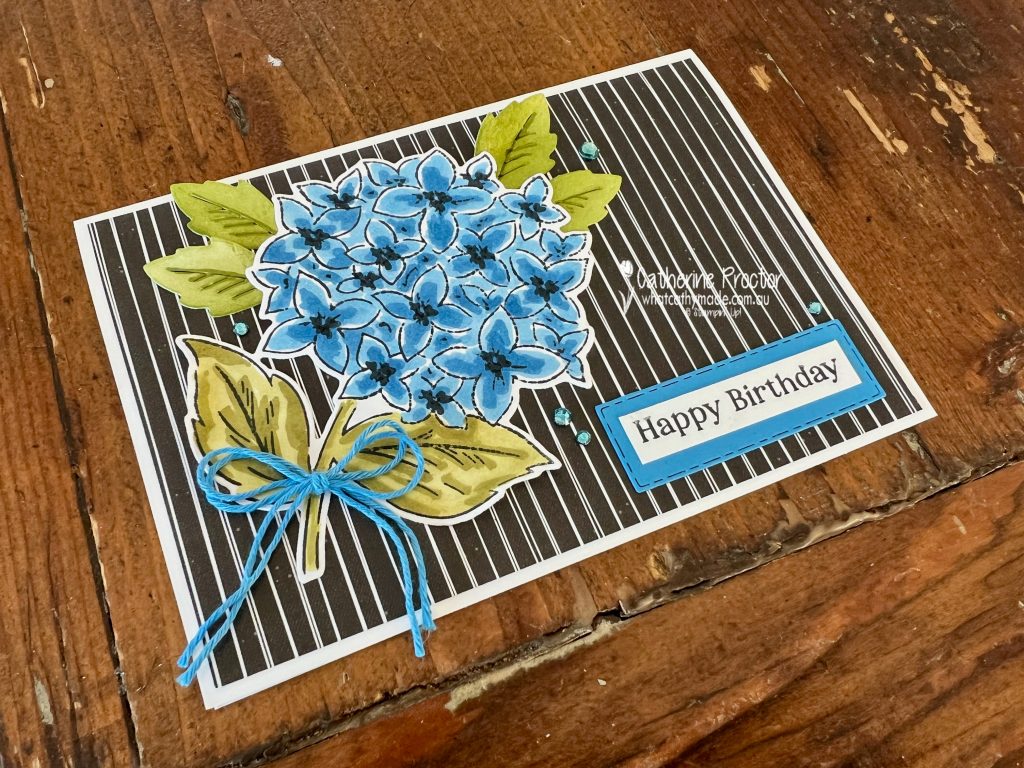
Card two is a horizontal card that uses Stampin’ Blends in Azure Afternoon and Old Olive for a more vibrant, hand-coloured look.
Here’s a close-up so you can see the detail.
On both cards the extra Old Olive leaves behind the flowers are die cut from Basic White card stock that I’ve then coloured using blending brushes, adding extra detail with the dark Old Olive Stampin’ Blend.
The Azure Afternoon twine is from the Pack Your Bags Twine 3-Pack and the sparkling embellishments are Rhinestone Basic Jewels coloured using the dark Azure Afternoon Stampin’ Blend.
The cute little “Happy Birthday “sentiment is from the Charming Duck Pond Stamp Set which is on sale right now in the Last Chance section of the website. The Azure Afternoon layer behind the sentiment is die cut with the Textured Notes Dies.
Take a look at some more Azure Afternoo inspiration on our Insta Hop!
Our blog hop is now an Instagram hop but the good news is that you don’t need to have an Instagram account to view all of the other projects!
Simply copy any of the Insta handles below into a new search window to follow the Instagram hop at any point.
Next in our Hop is Kate @craftwithkate. Be sure to check out her gorgeous project/s.
The full list of this week’s InstaHop are listed below:
Kate @craftwithkate
Kirsty @crafty.littlemiss
Rosa @hum.and.stamp
Rachel P @rachelpalmieristampin
Vicki @vickiboucher
Leanne @createwithleanne2
Rachel W @handstamped_by_rachel
Andrea @andreaksargent
Cathy @whatcathymade – you are here!
Our AWH Colour Creations team will be back next Wednesday, 18th June, showcasing Balmy Blue.
Welcome to week five of our Art With Heart 2025-26 Colour Creations Insta hop!
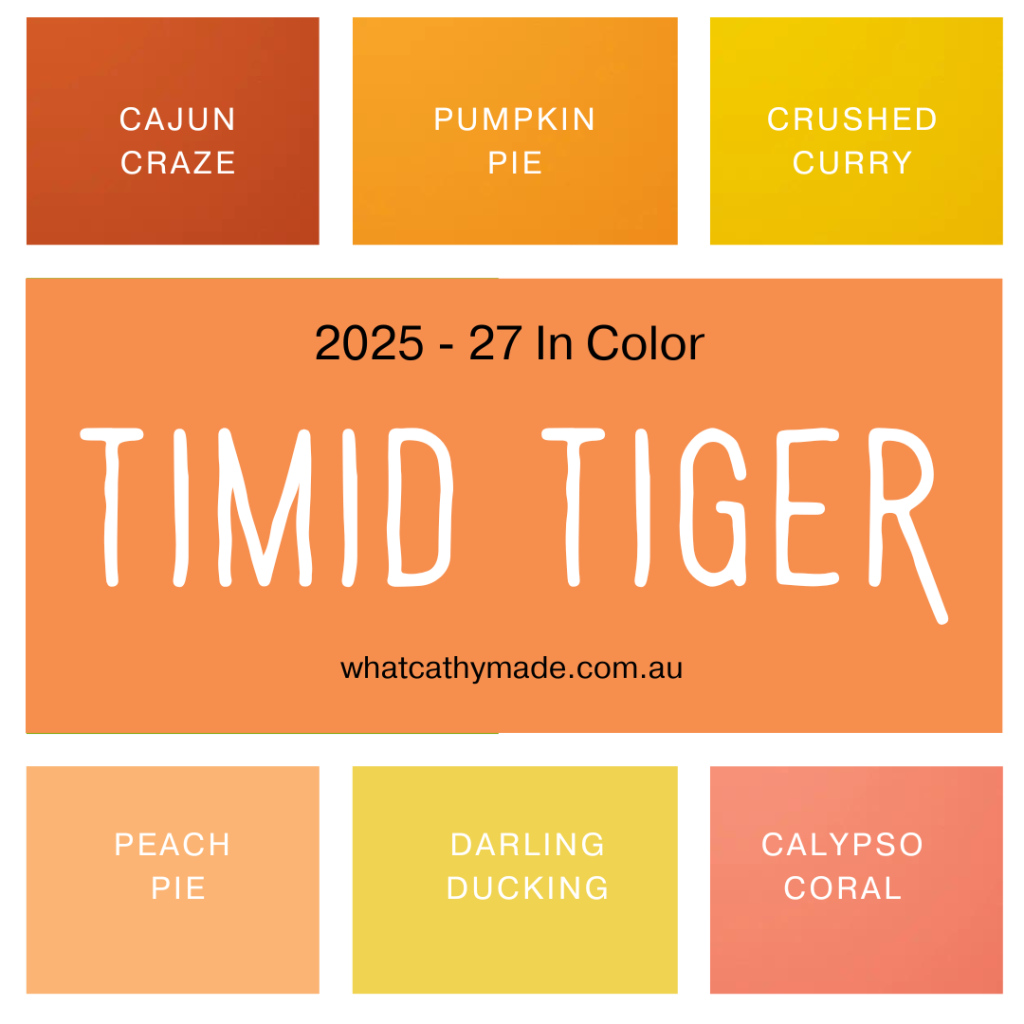
For the first five weeks of our AWH Colour Creations Insta Hop we are introducing the five new 2025-26 In Colors in alphabetical order and this week we are showcasing the final of the new InColors, Timid Tiger.
Here’s a graphic I created to show how Timid Tiger compares to the other oranges, peaches and yellows in the Stampin’ Up! range.
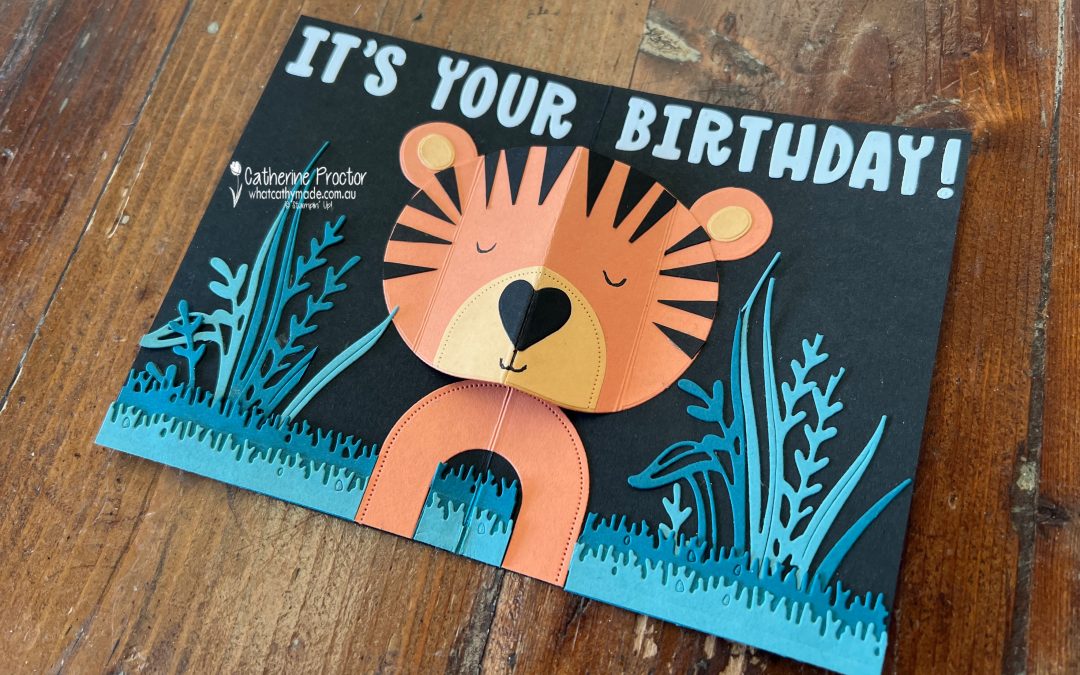
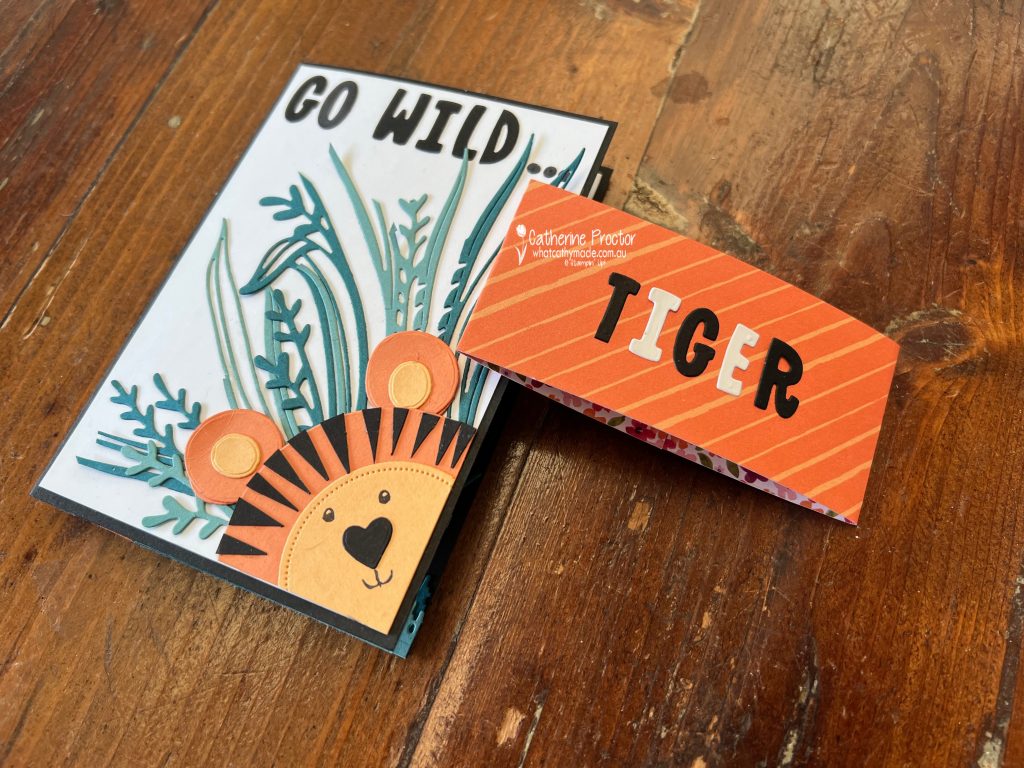
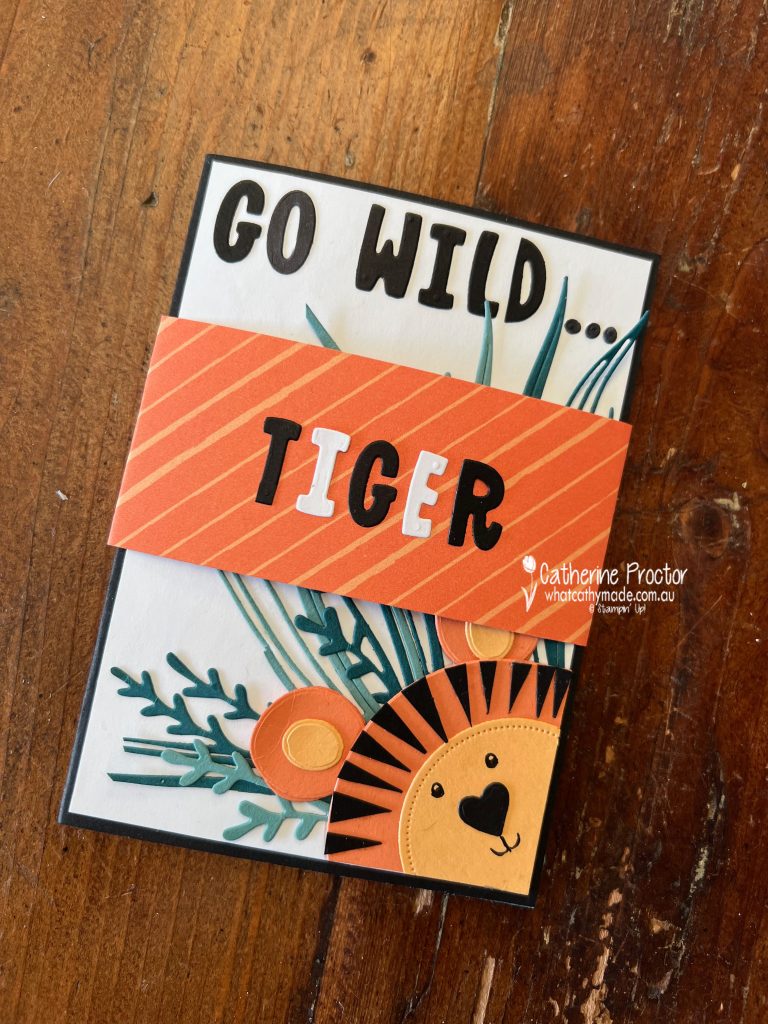
With a name as delightful as Timid Tiger, I couldn’t resist taking this colour very literally and making an interactive pop-up Timid Tiger birthday card.
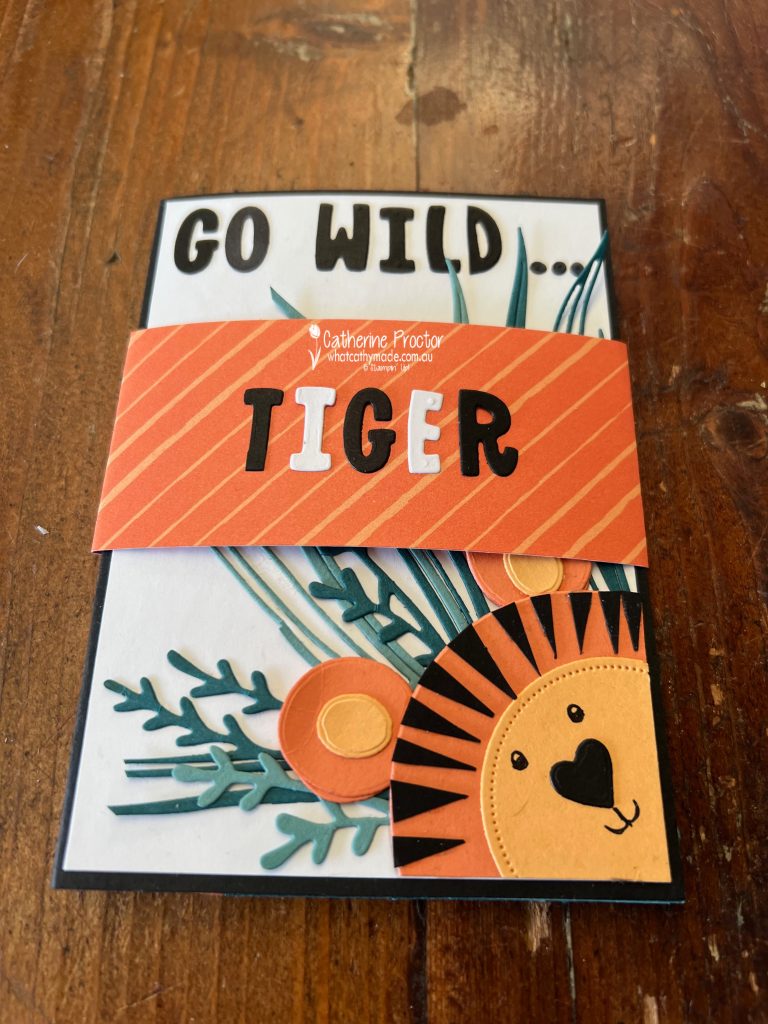
Here is a closer look at the front of the card…
With the belly band on, holding the card closed…
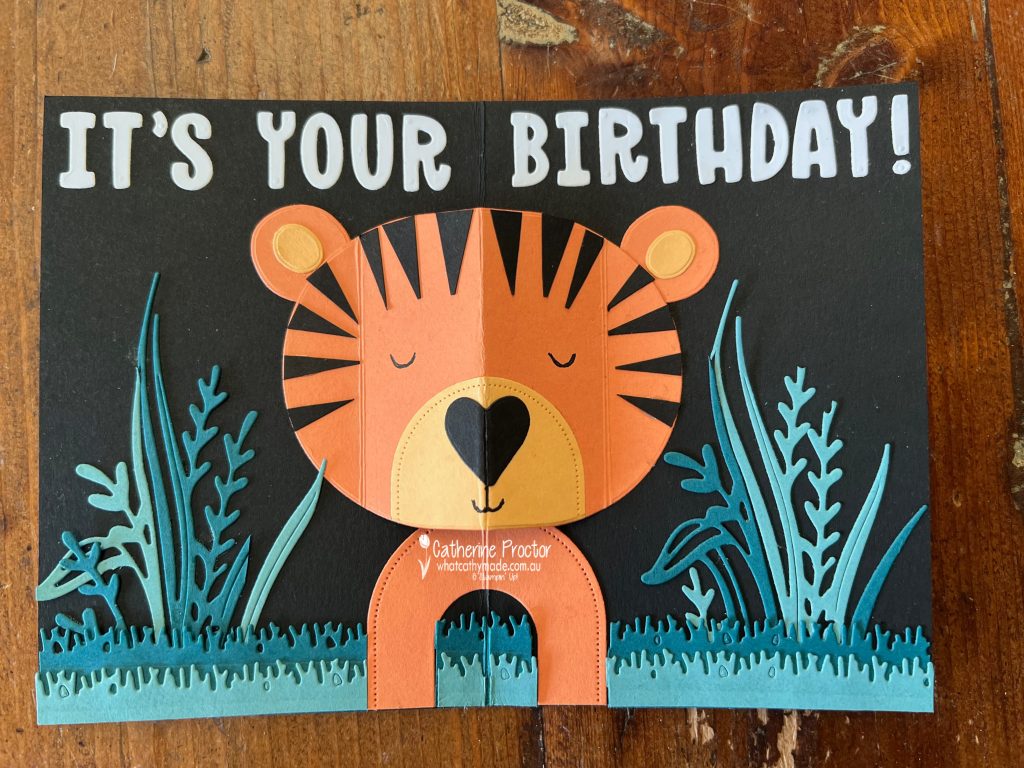
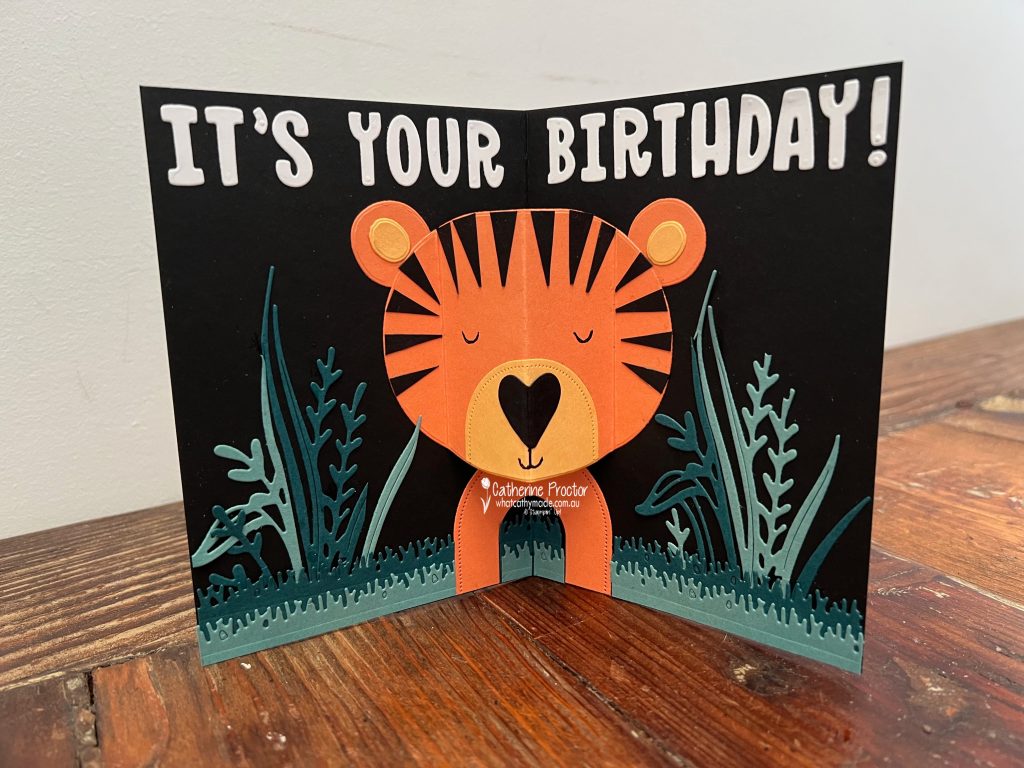
And the surprise pop-up tiger inside the card!
How to make a pop-up card using dies
For my colour combination I decided to Timid Tiger with Basic Black, Basic White, Peach Pie, Pretty Peacock and Lost Lagoon. I love this colour combination!
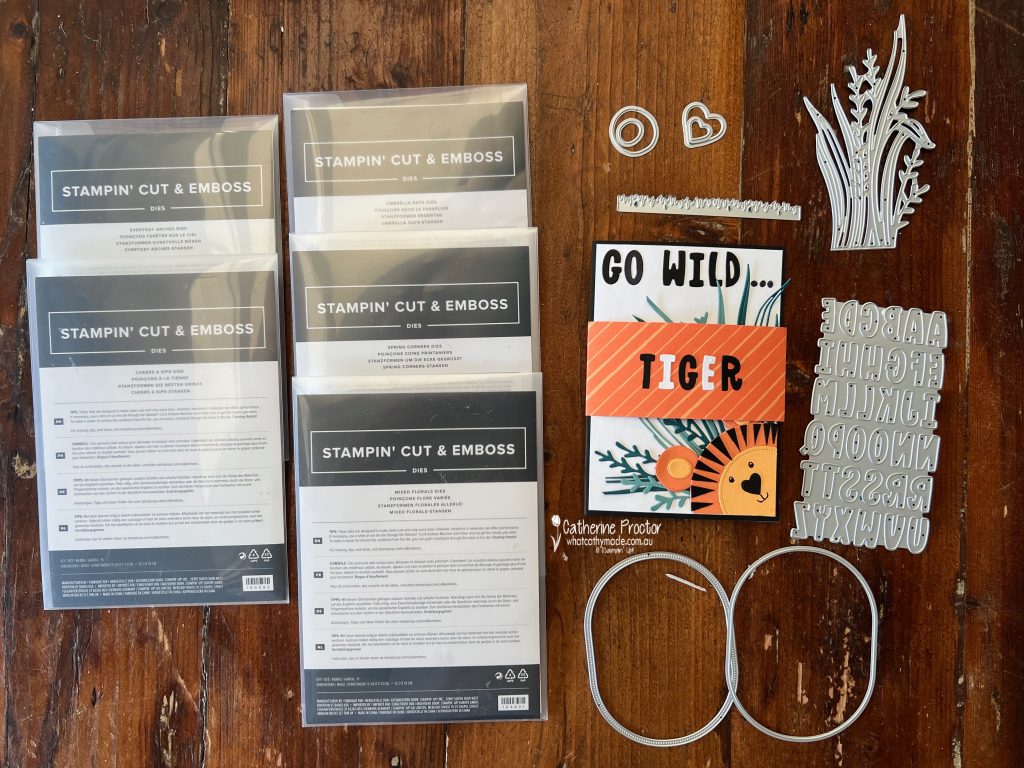
I don’t own a tiger stamp so I designed this card using the dies I had on hand, making it up as I went along. These are just some of the dies I used to make the card, however you can easily substitute with other products you own for this type of project.
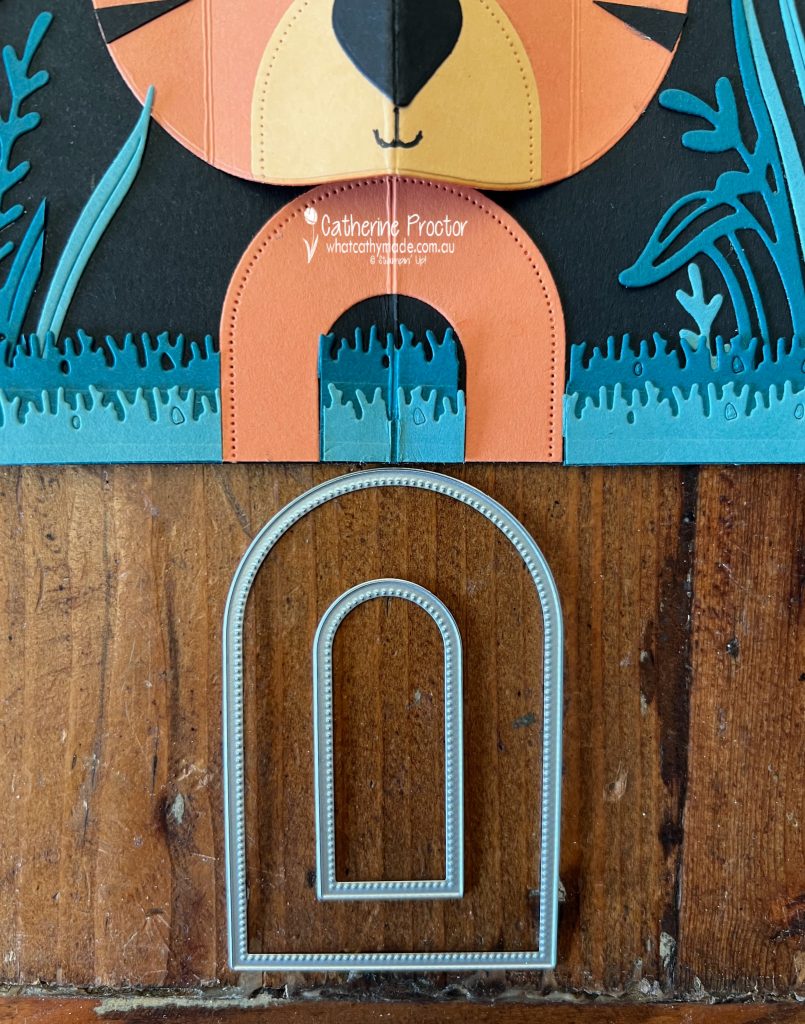
My tiger’s feet are die cut with two of the Everyday Arches Dies.
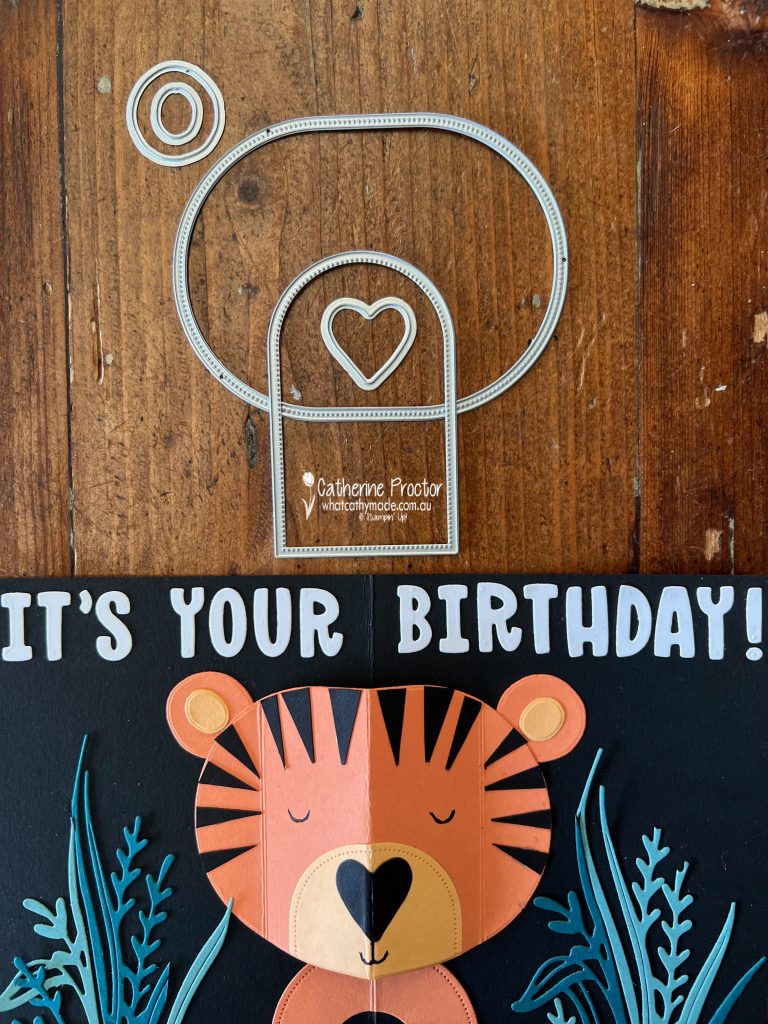
The tiger’s face is die cut with the large oval from the Impressions abloom Dies and the Everyday Arches Dies. The ears are two circles from the Cheers & Sips Dies and the nose is the larger heart from the Spring Corners Dies.
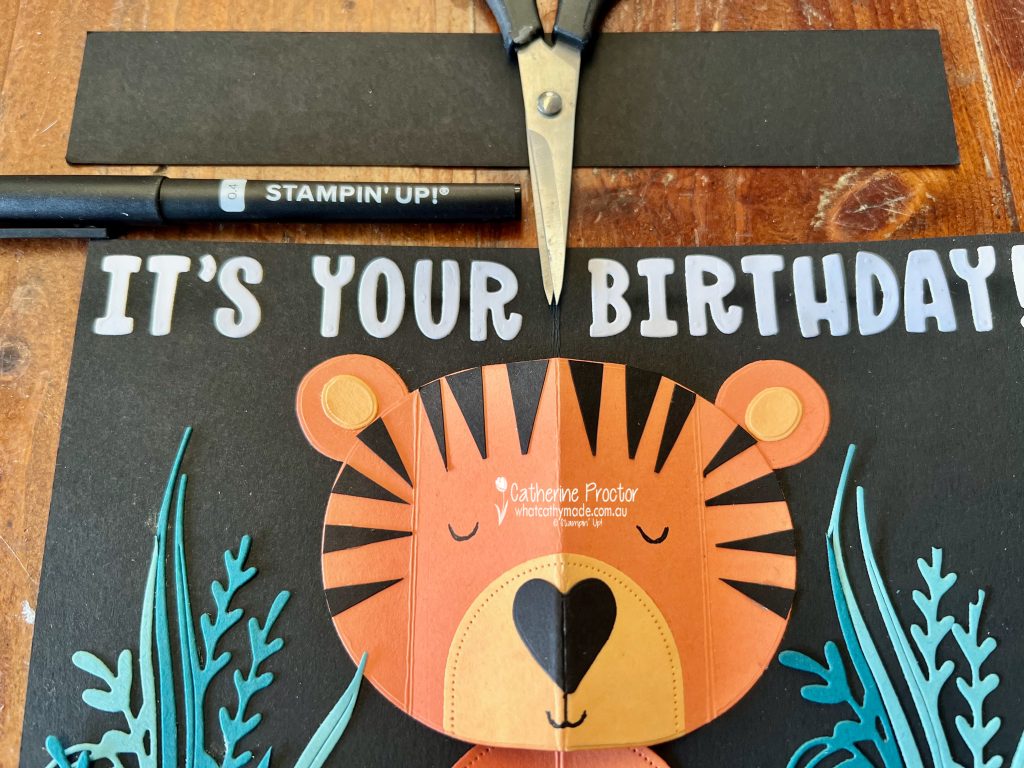
The tiger’s stripes are cut from Basic Black Cardstock using paper snips and the mouth and eyes are drawn using one of the new Black .04 Stampin’ Journalling Pens. Create and decorate the tiger’s face and ears before gluing it inside the card and do not adhere the ears to the face until the pop-up has been glued into place.
To make the tiger’s face pop up simply score the face down the centre (through the nose) and then score again approximately 2 cm (1 inch) in on both the left and the right side of the face.
Once these lines are scored add glue to the left and right sides of the outer score lines and adhere the tiger’s face to the inside of the card, aligning the centre of the tiger with the centre fold of the card.
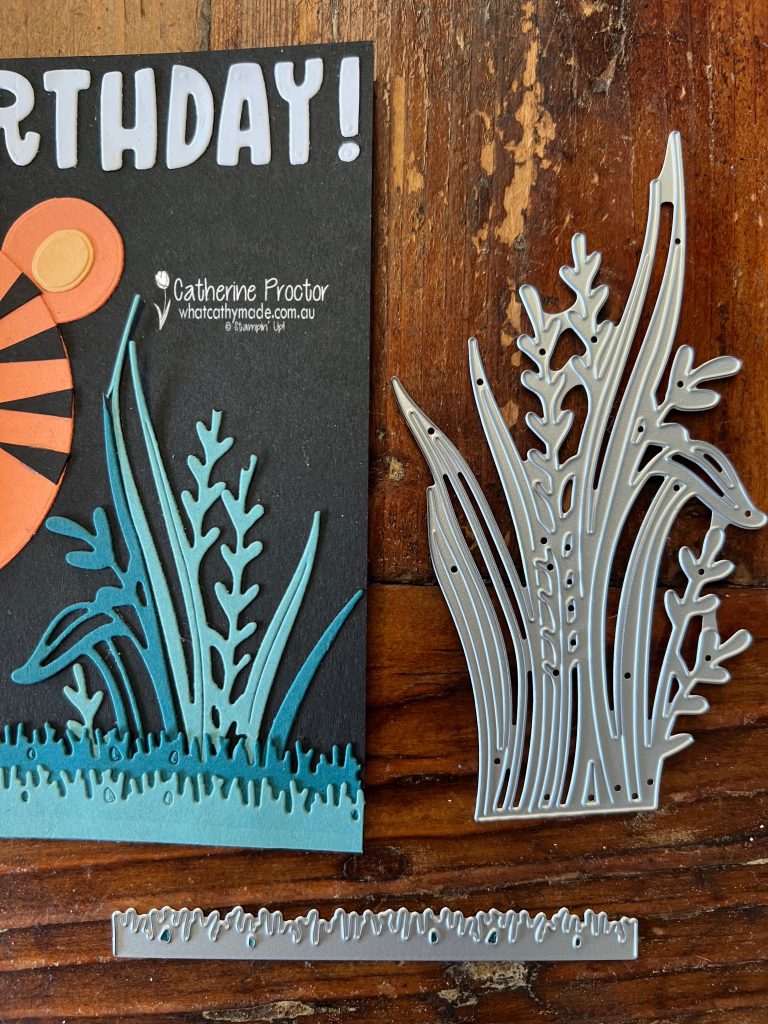
Finally, adhere the ears behind the head (before the glue sets) and then add the layers of die cut foliage and grass.
The foliage and grass uses dies from the Mixed Florals Dies and the Umbrella Days Dies.
The Mini Alphabet Dies are perfect for creating custom sentiments to fit any card! Always remember to add and adhesive sheet to the back of the cardstock BEFORE die cutting the letters out. This turns the letters into repositionable stickers and eliminates the need for messy glue.
This pop-up card stands up perfectly for display.
Take a look at some more Timid Tiger inspiration on our Insta Hop!
Our blog hop is now an Instagram hop but the good news is that you don’t need to have an Instagram account to view all of the other projects!
Simply copy any of the Insta handles below into a new search window to follow the Instagram hop at any point.
Next in our Hop is Rachel P @rachelpalmieristampin. Be sure to check out her gorgeous project/s.
The full list of this week’s InstaHop are listed below:
Rachel P @rachelpalmieristampin
Vicki @vickiboucher
Rachel W @handstamped_by_rachel
Kirsty @crafty.littlemiss
Andrea @andreaksargent
Kate @craftwithkate
Theresa @teegeeinspirations
Helen @apaperparadise
Cathy @whatcathymade – you are here!
Our AWH Colour Creations team will be back next Wednesday, 11th June, showcasing Azure Afternoon.
Welcome to week four of our Art With Heart 2025-26 Colour Creations Insta hop!
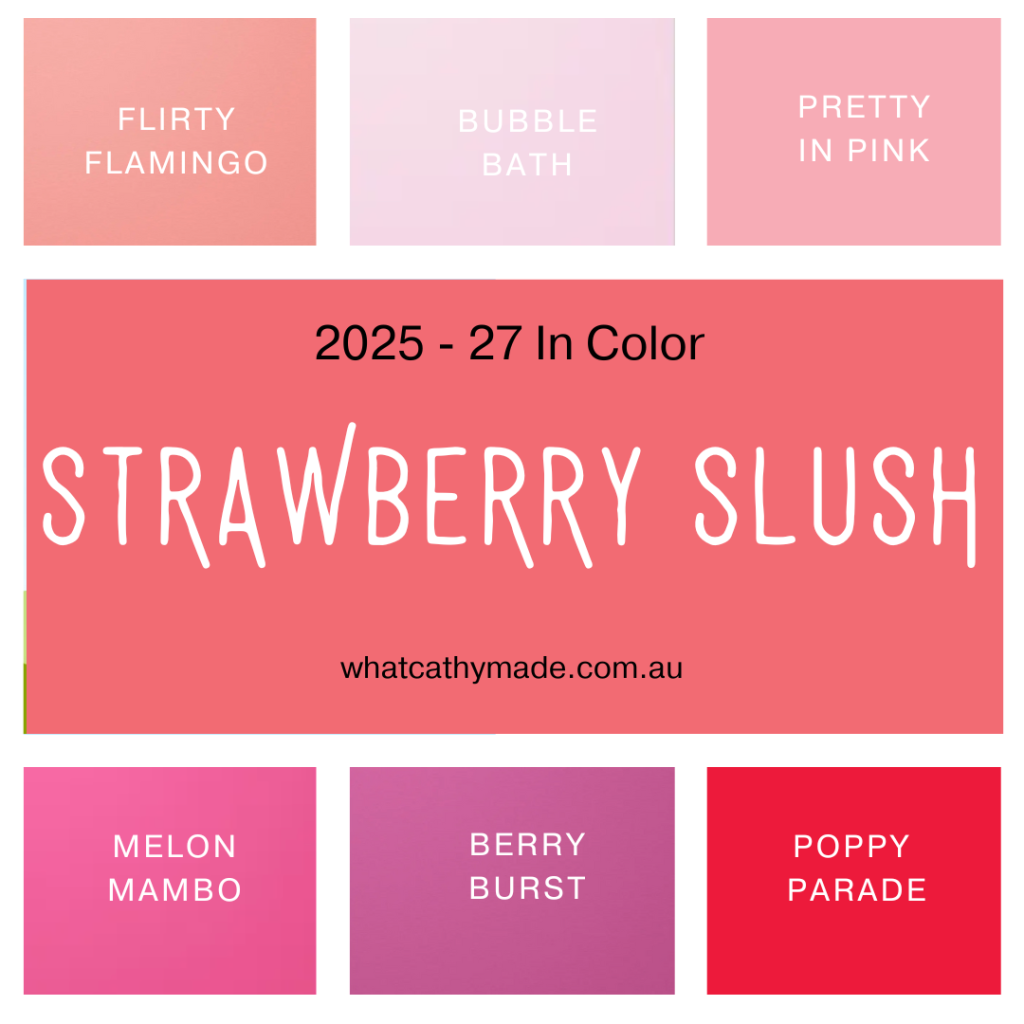
For the first five weeks of our AWH Colour Creations Insta Hop we are introducing the five new 2025-26 In Colors in alphabetical order and this week we are showcasing Strawberry Slush.
Here’s a graphic I created to show how Strawberry Slush compares to the other pinks in the Stampin’ Up! range.
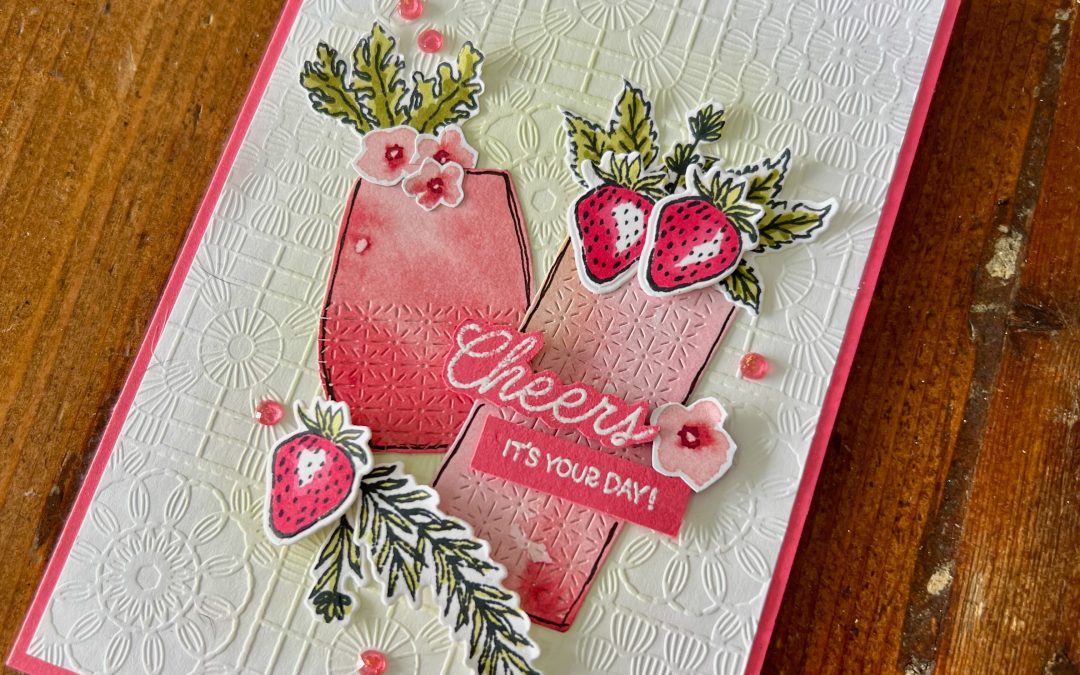
I’ve CASED the design of my card from a stunning Pretty Peacock card I saw created by Kim Gibbons Fee (a UK Stampin’ Up! demonstrator) in the Crafty Carrot Co Facebook group.
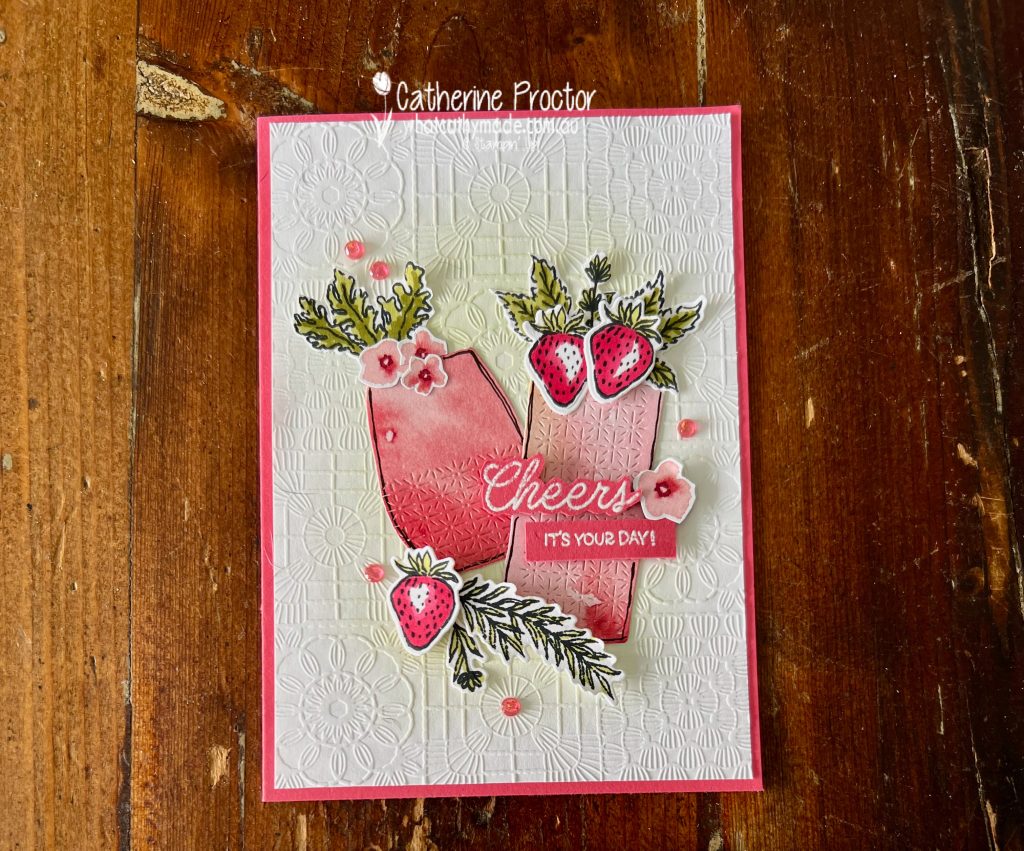
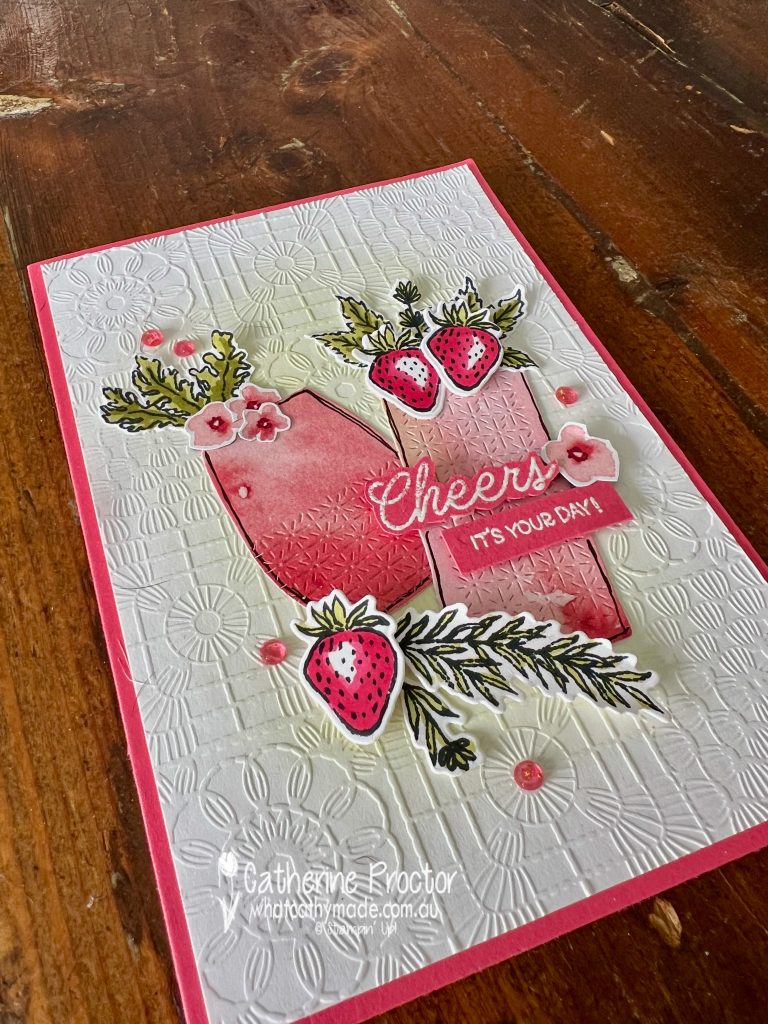
I started with a Strawberry Slush card base and a layer of Basic White cardstock embossed with the Cute Crochet embossing folder (currently on sale in the last chance section of the store) as I don’t have the Glass & Gardens Embossing Folders included in the Celebratory Sips Suite.
I’ve used a large blending brush to apply a soft layer of Old Olive ink to the embossed white cardstock layer.
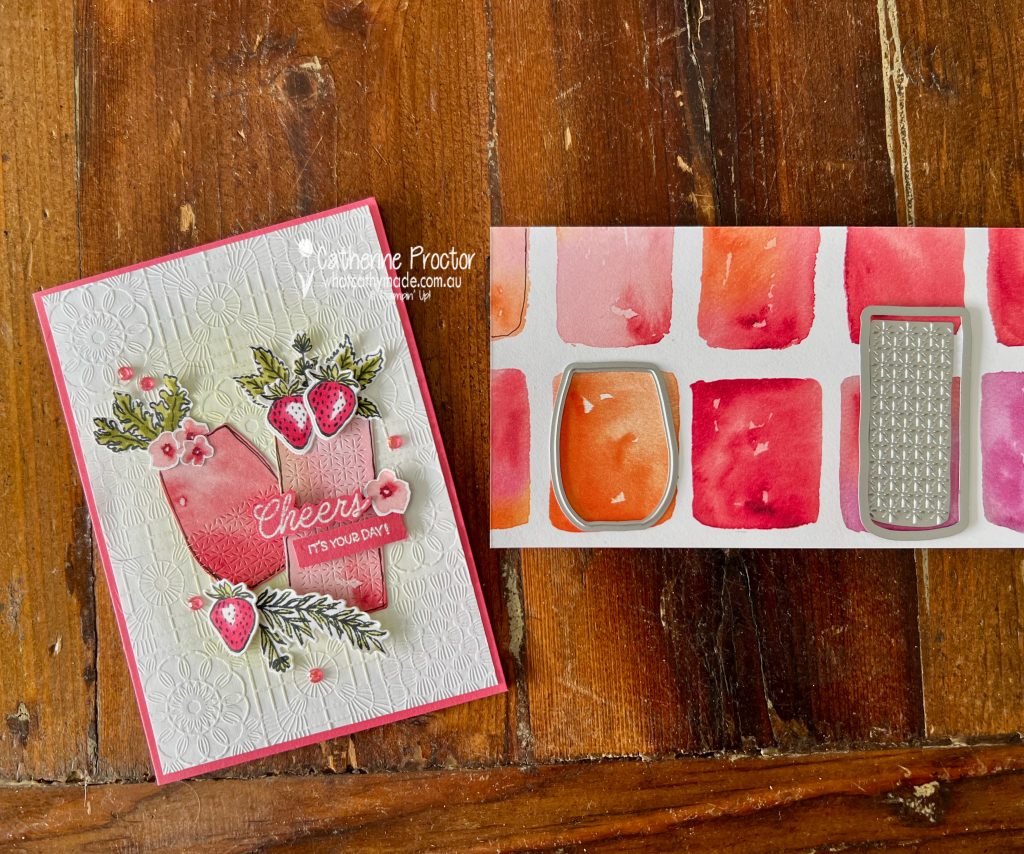
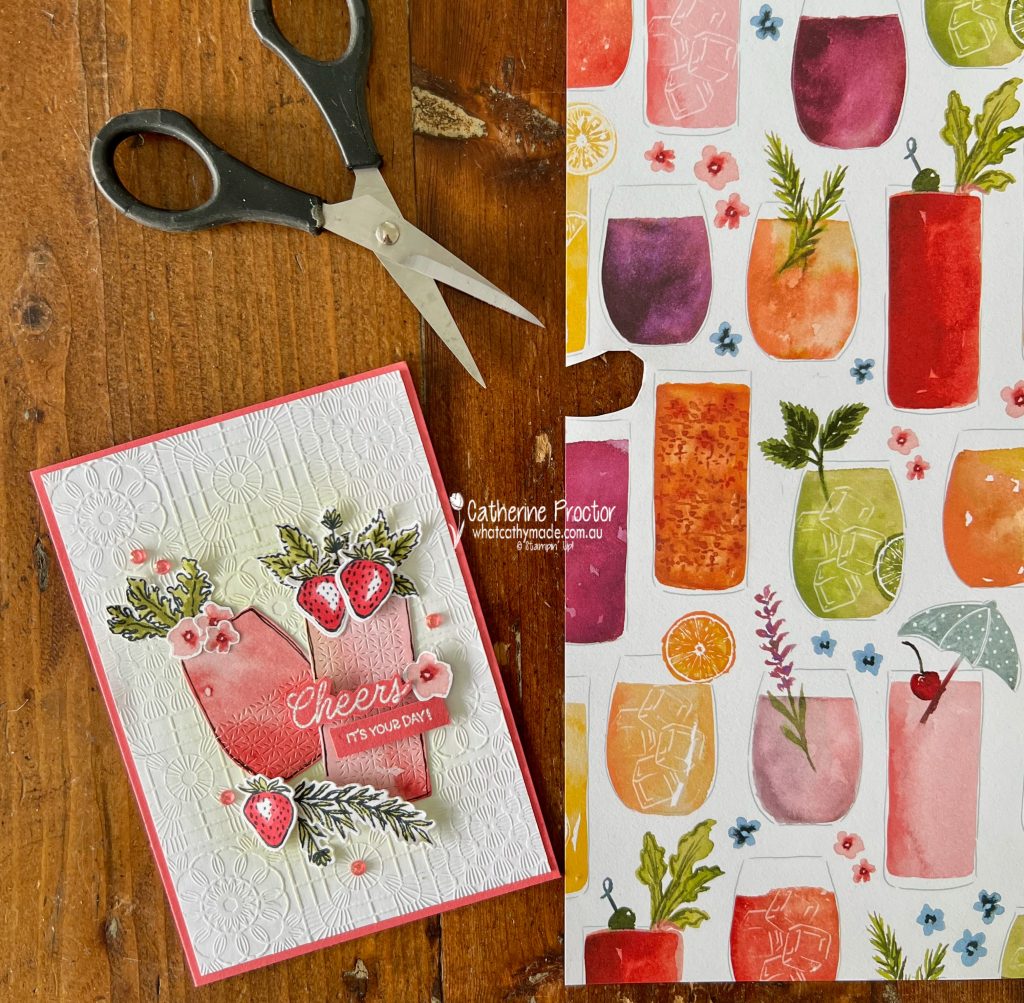
The two embossed glasses were created using the Cheers & Sips Dies to die cut and emboss water coloured images from the Celebratory Sips 12″ x 12″ (30.5 x 30.5 cm) Designer Series Paper.
This die set includes the cutest little embossing die to give the effect of a cut crystal glass!
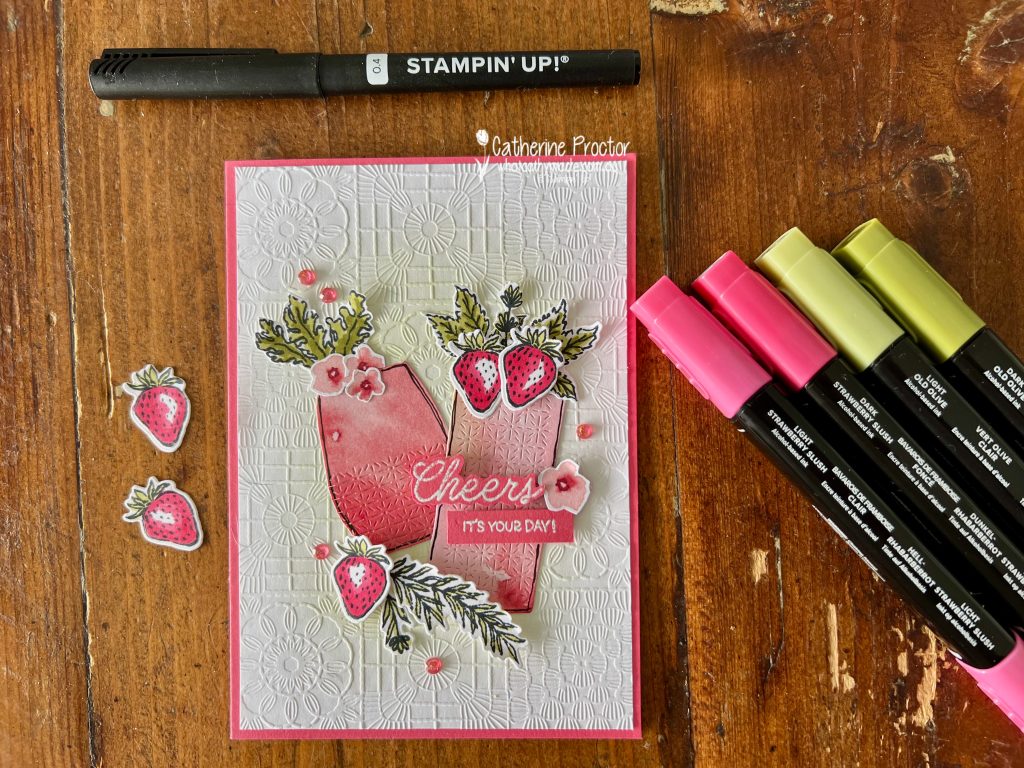
After die cutting and embossing the two glasses from the DSP I decided they needed an outline so I hand drew around each glass using one of the new Black .04 Stampin’ Journalling Pens.
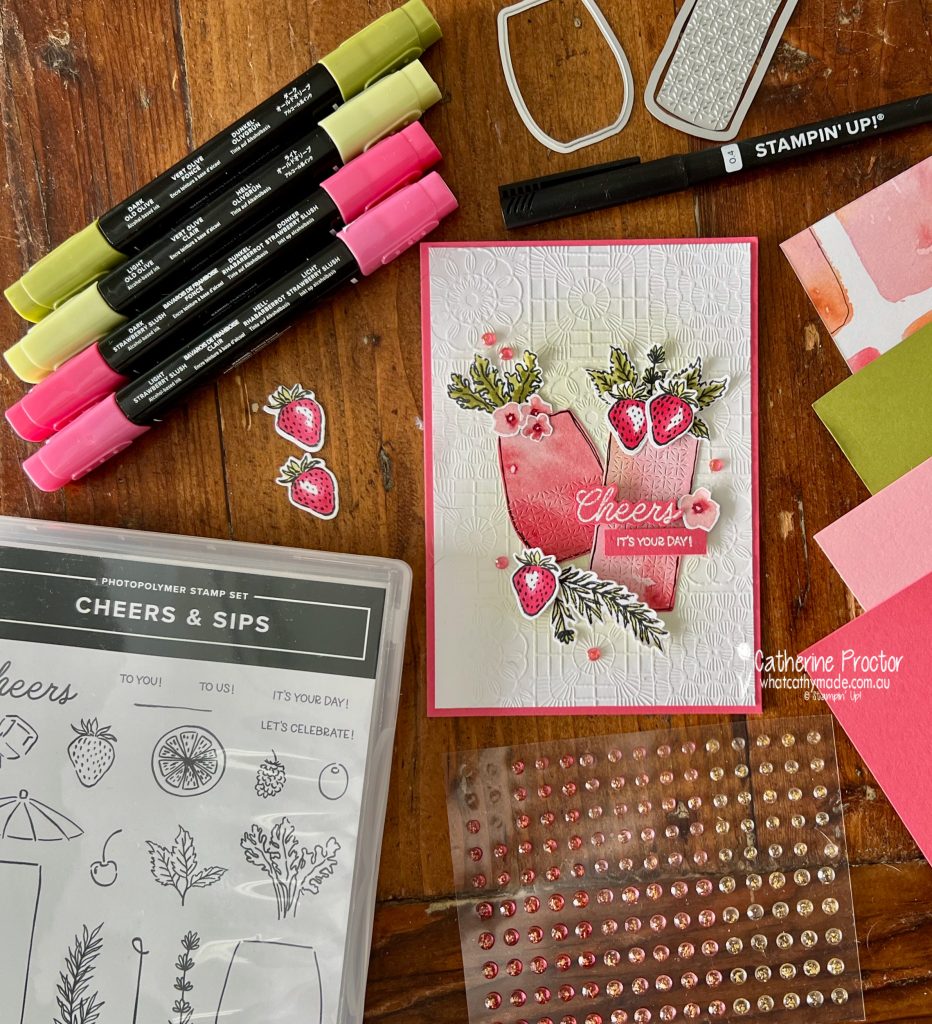
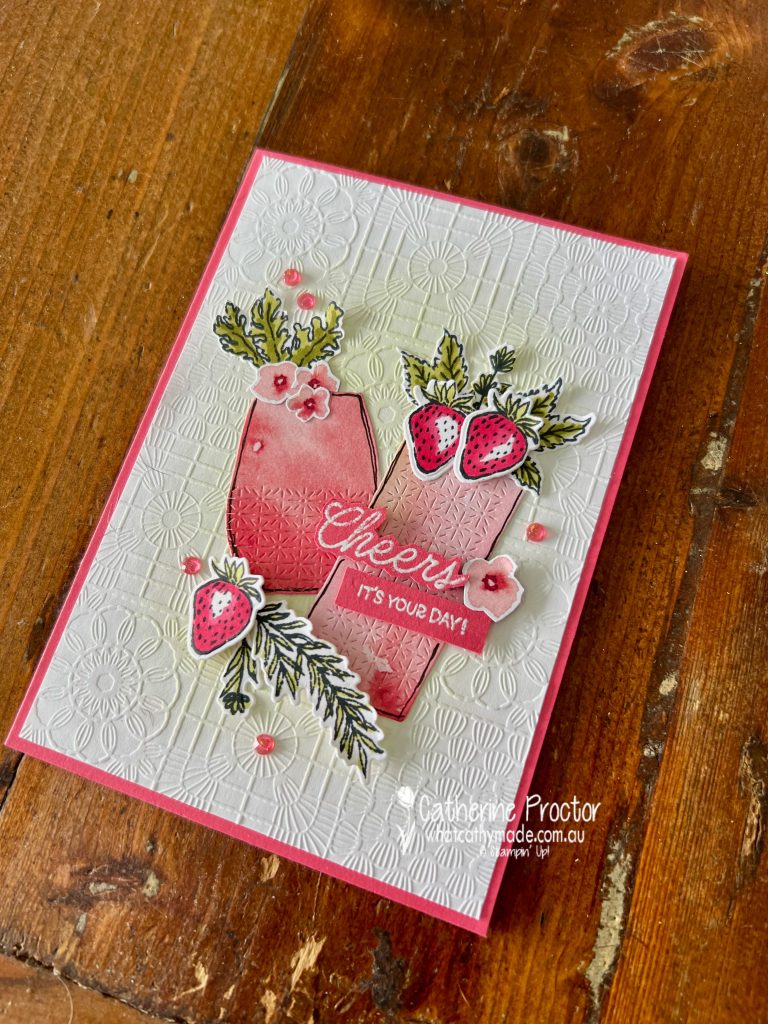
The strawberry and foliage stamps are from the Cheers & Sips stamp set, stamped in Memento Ink and coloured using Strawberry Slush and Old Olive Stampin’ Blends.
Strawberry Slush & Pretty in Pink Gems add a touch of sparkle.
The tiny flowers are fussy cut from another sheet of the Celebratory Sips 12″ x 12″ (30.5 x 30.5 cm) Designer Series Paper.
Two different stamps from the Cheers & Sips Stamp Set were white heat embossed on Strawberry Slush cardstock to create the “Cheers It’s Your Day!” sentiment.
Don’t forget to hop through the rest of the Art With Heart team to see more stunning Strawberry Slush projects!
Our blog hop is now an Instagram hop but the good news is that you don’t need to have an Instagram account to view all of the other projects!
Simply copy any of the Insta handles below into a new search window to follow the Instagram hop at any point.
Next in our Hop is Michele @taylormadedesigns58. Be sure to check out her gorgeous project/s.
The full list of this week’s InstaHop are listed below:
Michele @taylormadedesigns58
Rachel P @rachelpalmieristampin
Kirsty @crafty.littlemiss
Kate @craftwithkate
Rachel W @handstamped_by_rachel
Andrea @andreaksargent
Claire @clairedalycreates
Leanne Mitchell @createwithleanne2
Vicki @vickiboucher
Theresa @teegeeinspirations
Rosa @hum.and.stamp
Helen @apaperparadise
Cathy @whatcathymade – you are here!
The AWH Colour Creations team will be back next Wednesday, 4th June, showcasing the last of the five new 2025-26 In Colors, Timid Tiger.
Welcome to Week 3 of the brand new 2025-26 AWH Colour Creations Insta Hop!
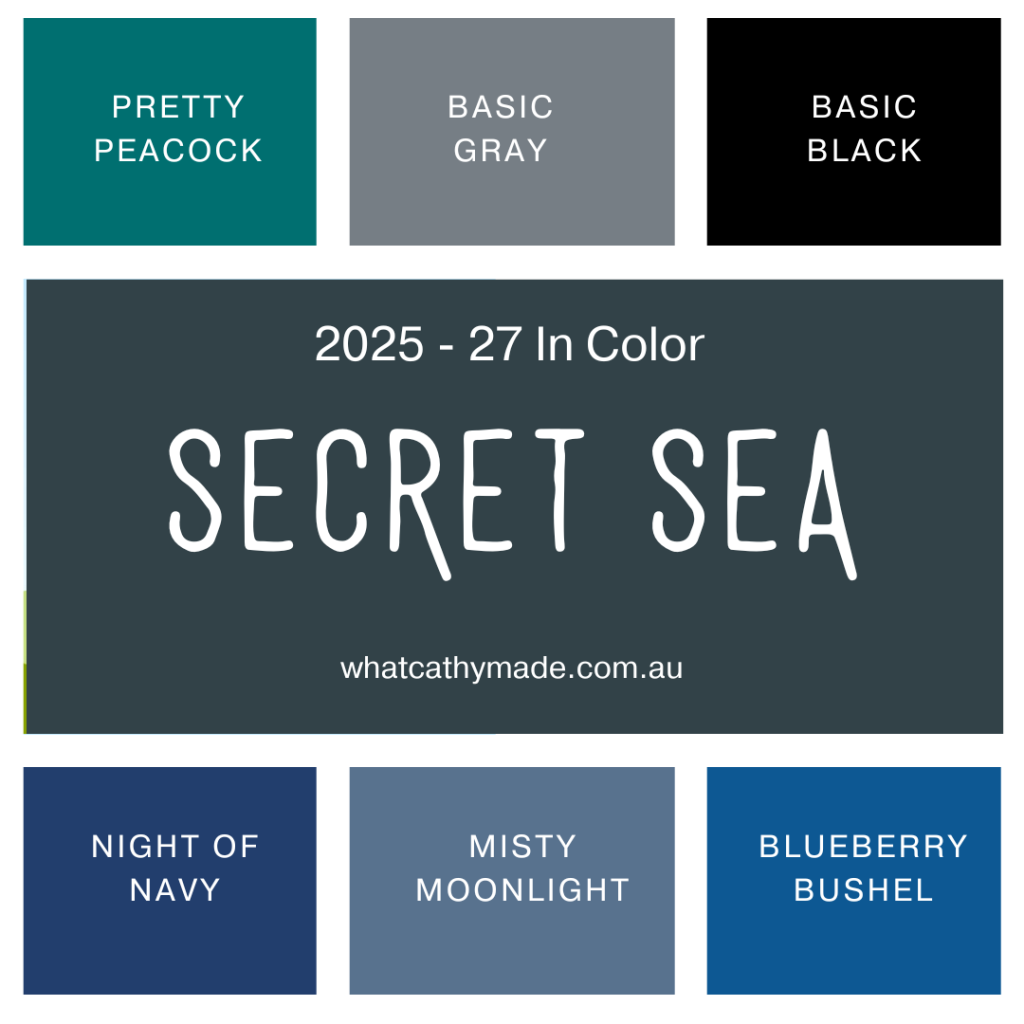
For the first five weeks of our AWH Colour Creations Insta Hop we are introducing the five new 2025-26 In Colors in alphabetical order and this week we are showcasing Secret Sea.
Secret Sea is a very dark blue-grey-green neutral colour that works beautifully with both warm and cool tones. Here’s a graphic I created to show how Secret Sea compares to the other dark blues and, grays and greens in the Stampin’ Up! range.
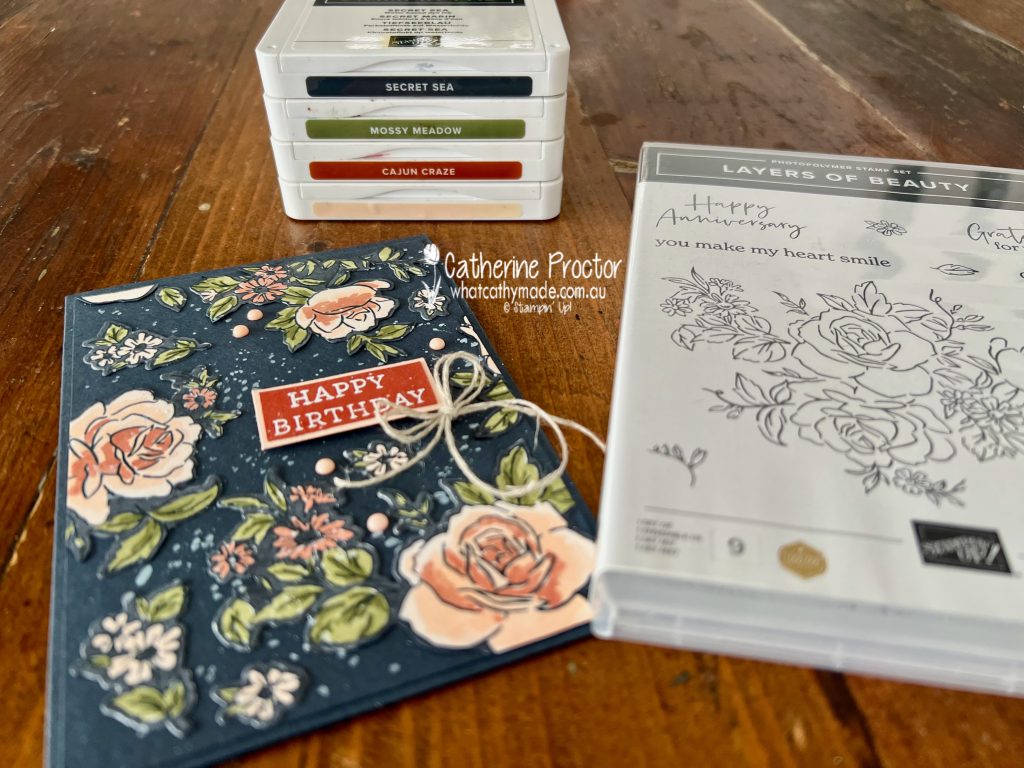
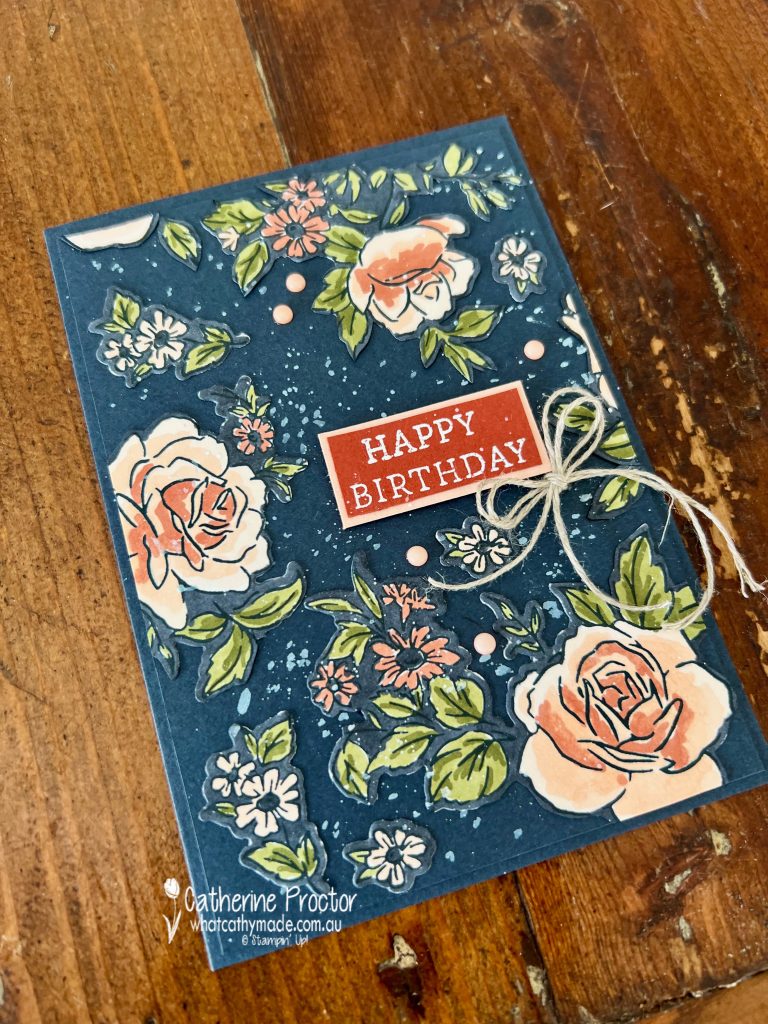
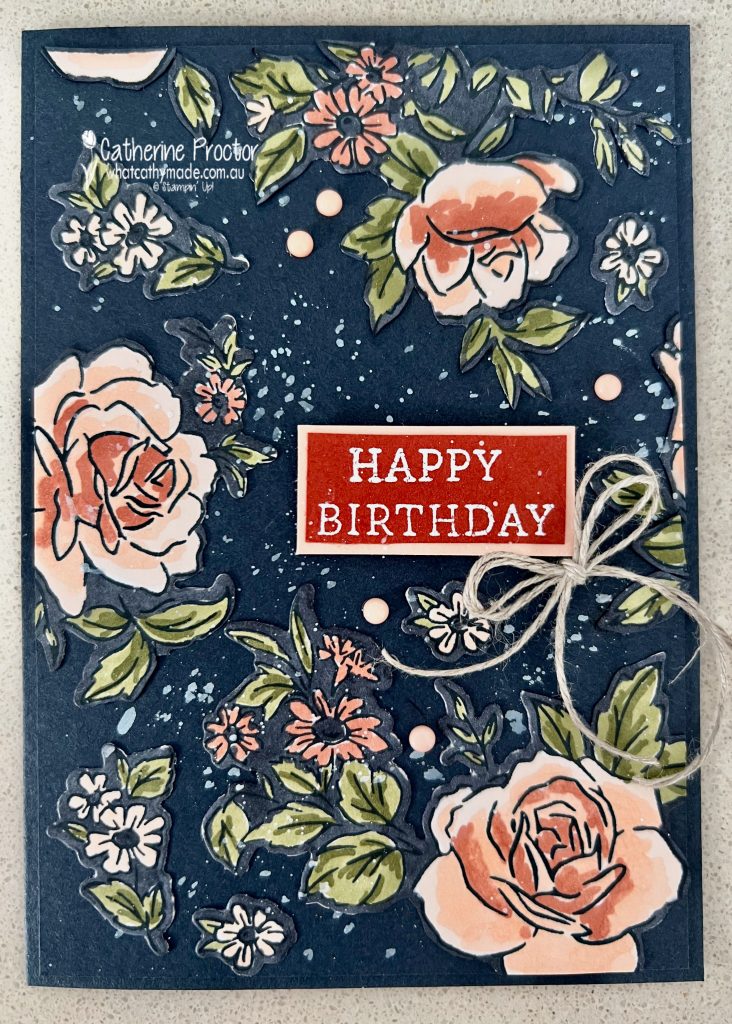
For this week’s project, I was inspired by the colour combination in the Boho Vibes DSP and so I’ve paired Secret Sea with Mossy Meadow, Petal Pink, and a pop of Cajun Craze for contrast.
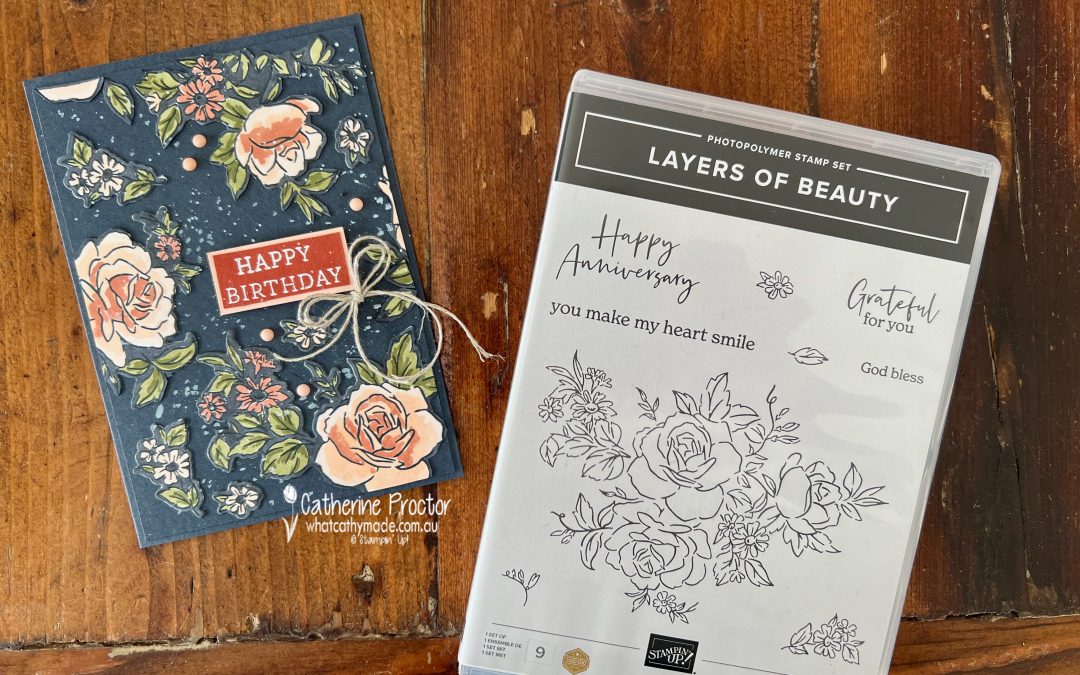
Secret Sea provided the perfect dark background to highlight the stunning floral imagery in the Layers of Beauty bundle.
For this card I didn’t use the masks included in the bundle. I stamped the floral and leaf images from the Layers of Beauty stamp set in Secret Sea and then coloured the images using Stampin’ Blends in:
Petal Pink (flowers)
Cajun Craze (floral centres and smaller flowers)
Mossy Meadow (leaves and foliage)
Once coloured, I die cut the entire panel using the coordinating Layers of Beauty dies and then cut the large floral image into three smaller pieces.
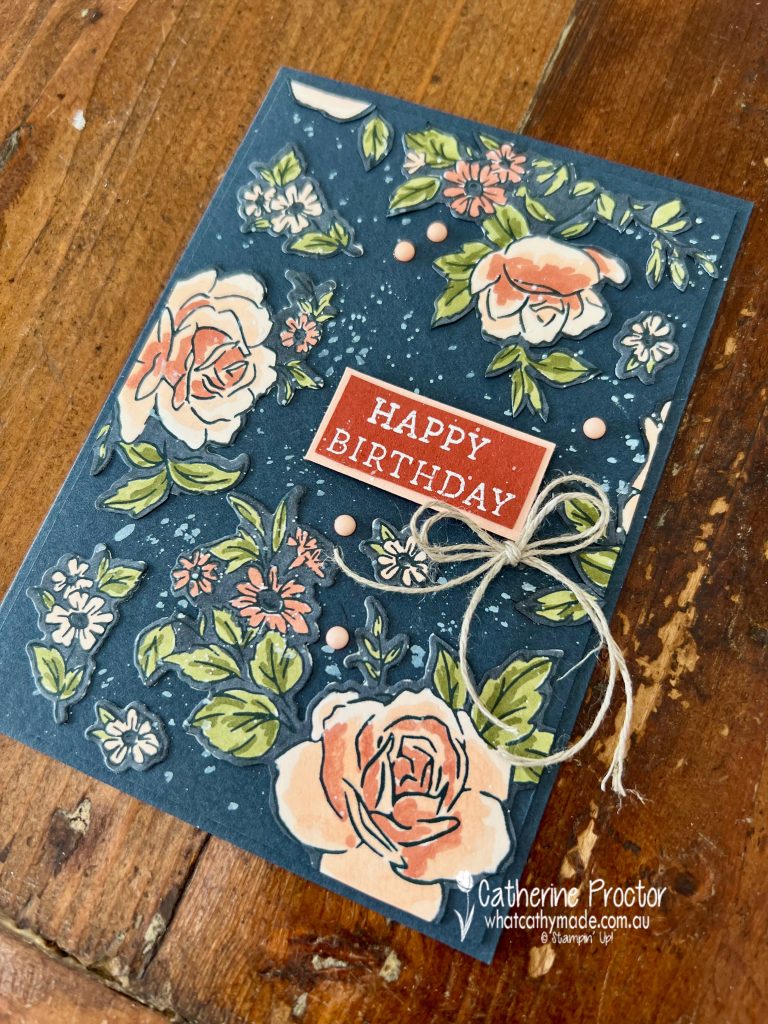
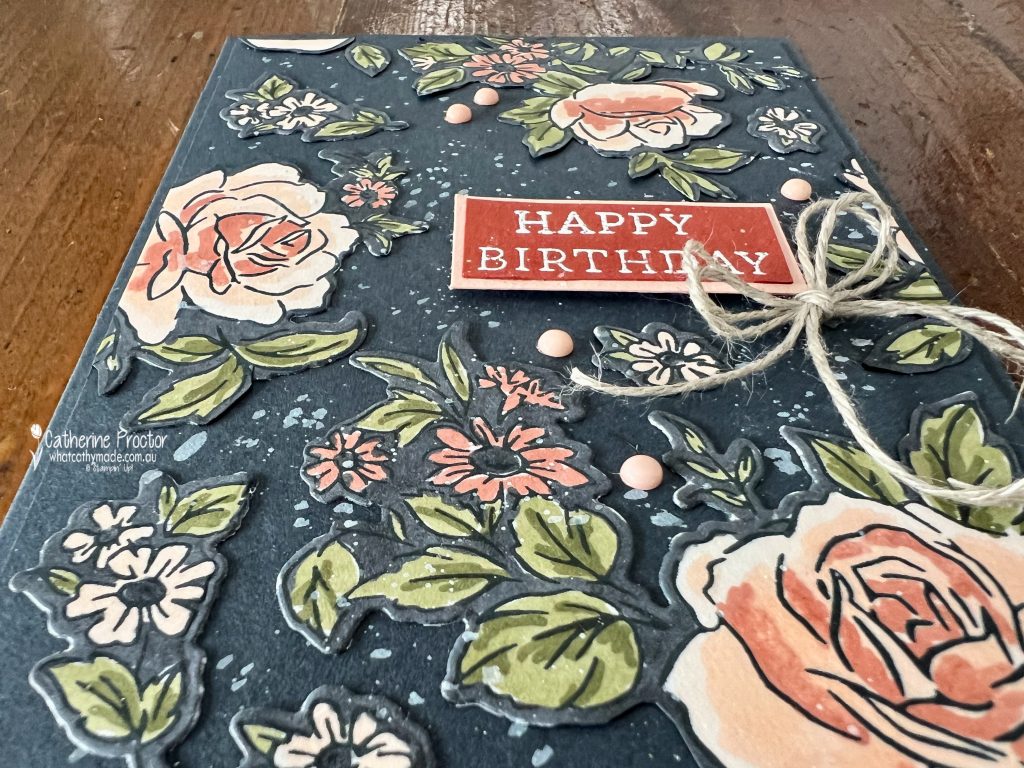
I layered the die cut pieces back onto a Secret Sea base to create a beautiful tone-on-tone effect with added dimension. You can really see the shadow and lift in the close-up photos!
TOP TIP – I used my Secret Sea Stampin’ Blend to colour the white cardstock edges of the die cut flowers and leaves.
To tie everything together, I used a splatter effect across the background – created by flicking watered-down Whisper White craft ink with a brush – for added texture.
The “Happy Birthday” sentiment comes from the Simply Said stamp set. I stamped it in Versamark Ink, heat embossed with WOW white embossing powder onto Cajun Craze card stock.
I backed the sentiment with Petal Pink cardstock to help it pop against the darker tones of the Secret Sea cardstock.
A bow of natural linen thread and a scattering of Petal Pink opaque dots adds softness and ties in with the colour palette.
The Petal Pink embellishments are from the Muted Palette Dots, which are part of the Boho Vibes Suite Collection.
Secret Sea is definitely a keeper in my craft stash. I love how it allows warmer tones like Cajun Craze and Petal Pink to shine.
Don’t forget to hop through the rest of the Art With Heart team to see more stunning Secret Sea projects!
Our blog hop is now an Instagram hop but the good news is that you don’t need to have an Instagram account to view all of the other projects!
Simply copy any of the Insta handles below into a new search window to follow the Instagram hop at any point.
Next in our Hop is Michele @taylormadedesigns58. Be sure to check out her gorgeous project/s.
The full list of this week’s InstaHop are listed below:
Michele @taylormadedesigns58
Kirsty @crafty.littlemiss
Andrea @andreaksargent
Vicki @vickiboucher
Leanne Mitchell @createwithleanne2
Theresa @teegeeinspirations
Kate @craftwithkate
Rachel W @handstamped_by_rachel
Rachel P @rachelpalmieristampin
Rosa @hum.and.stamp
Helen @apaperparadise
Cathy @whatcathymade – you are here!
If you live in Australia, you can find and purchase the products I’ve used for my card in my Stampin’ Up! Online Store.
I’ll be back next Wednesday night with Week 4 of our 2025 – 2026 AWH Colour Creations Insta hop when we will be showcasing Strawberry Slush, another of the 2025 – 27 InColours.
Welcome to Week 2 of the brand new 2025-26 AWH Colour Creations Insta Hop!
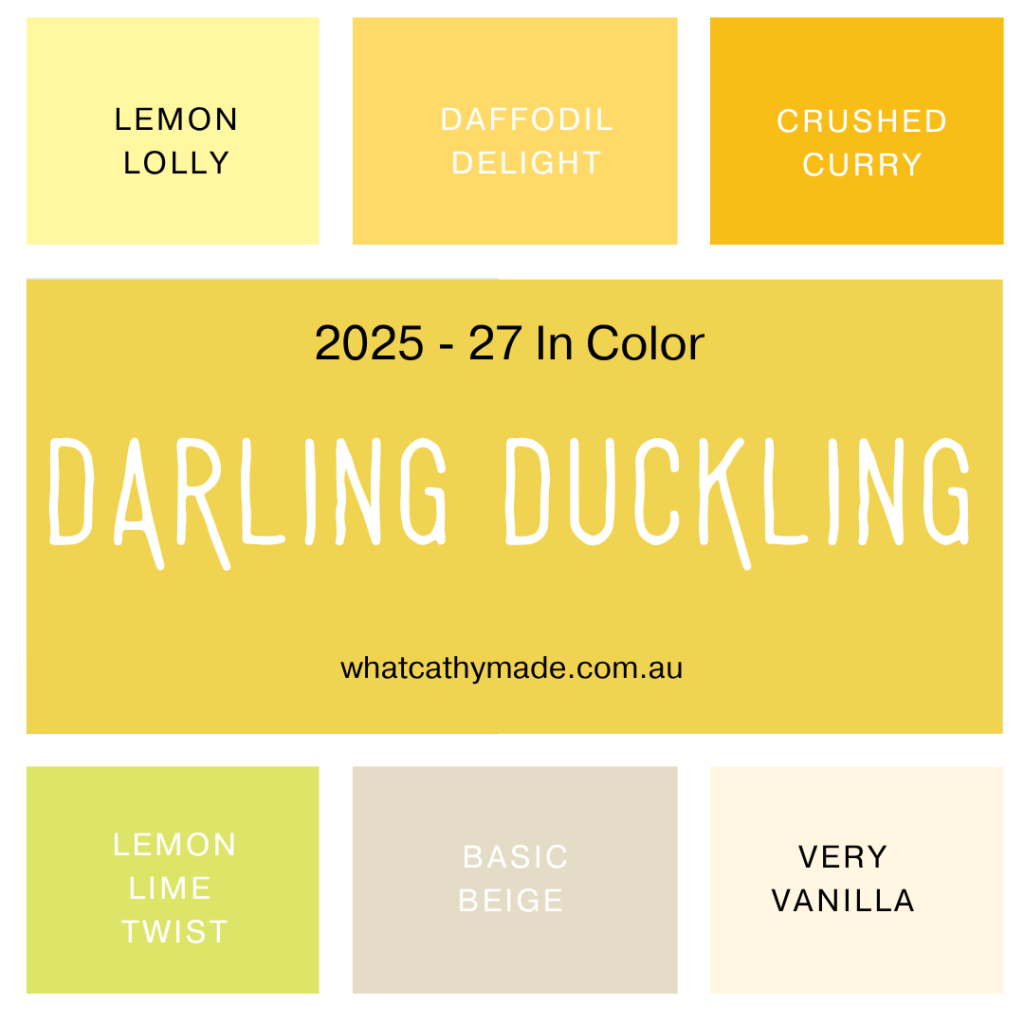
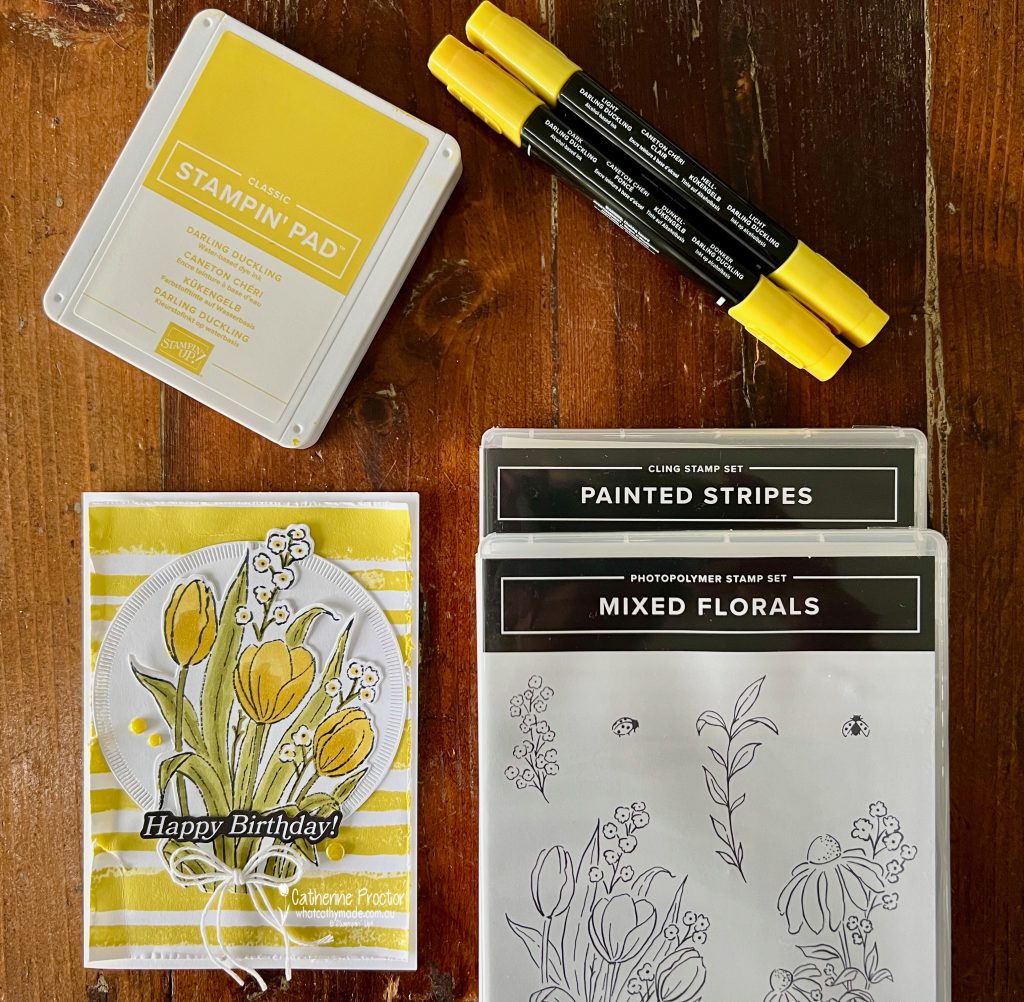
For the first five weeks of our AWH Colour Creations Insta Hop we are introducing the five new 2025-26 In Colors in alphabetical order and this week we are showcasing Darling Ducking.
Here’s a graphic I created to show how Darling Ducking compares to the other yellows and light greens in the Stampin’ Up! range.
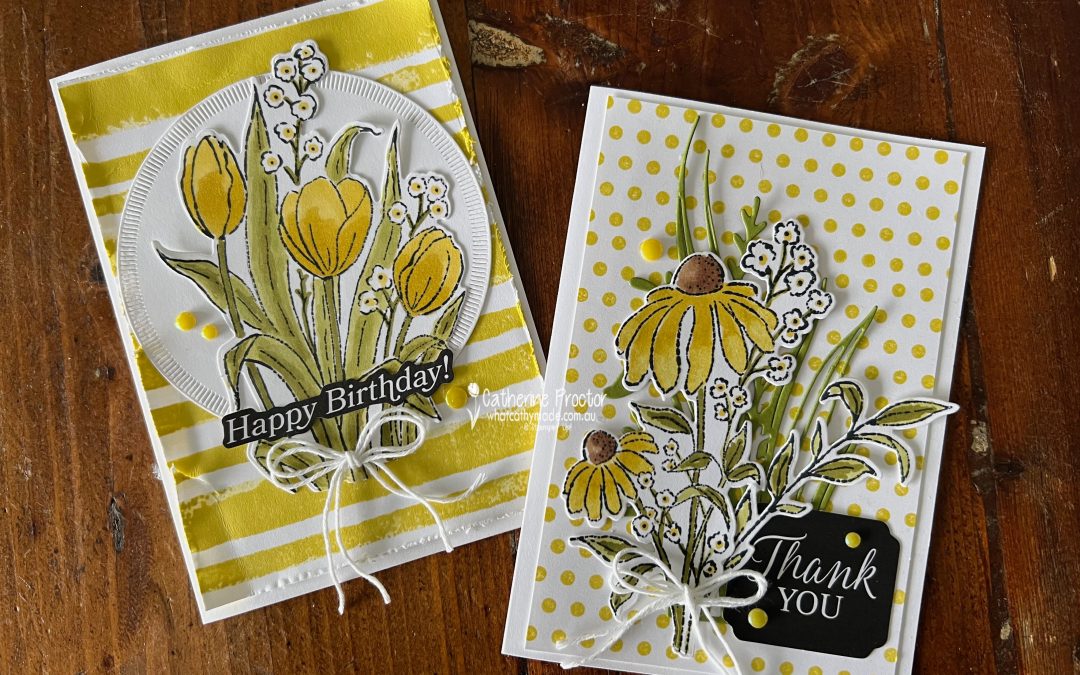
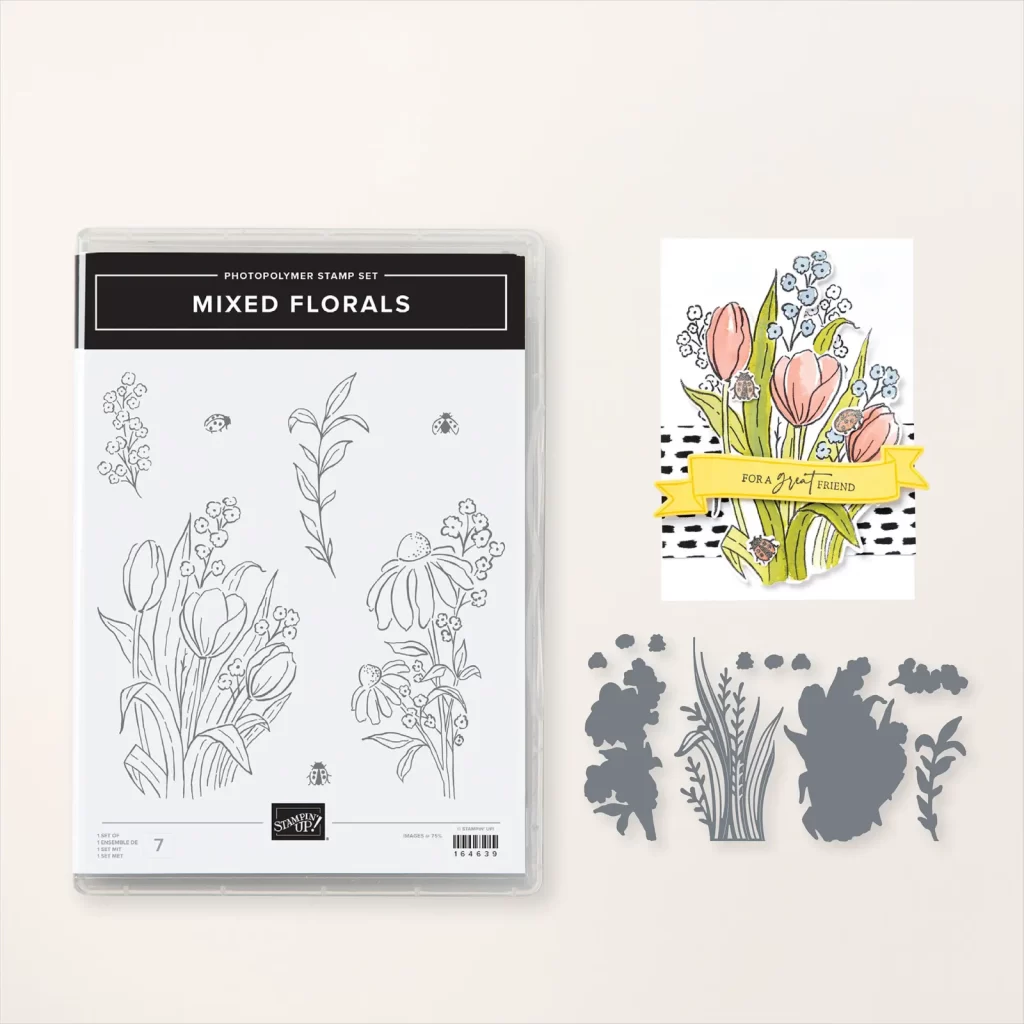
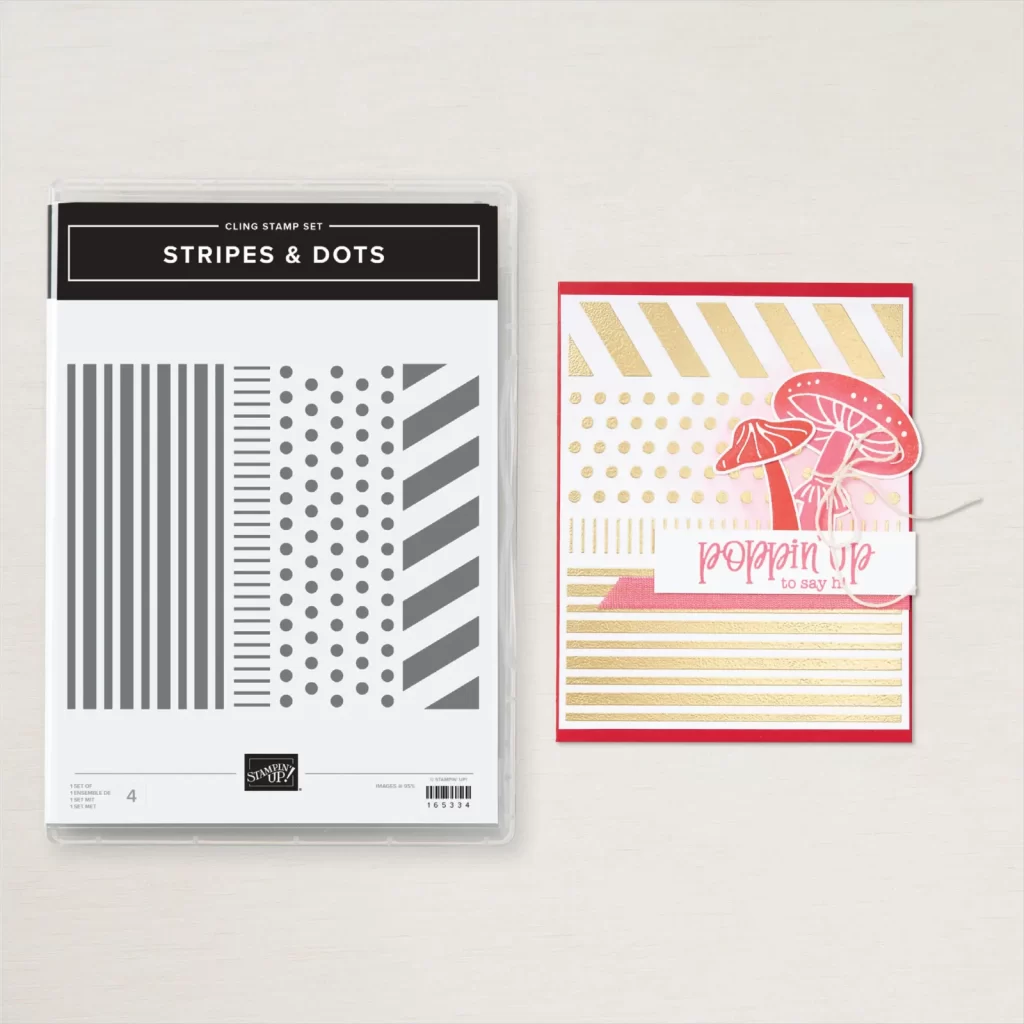
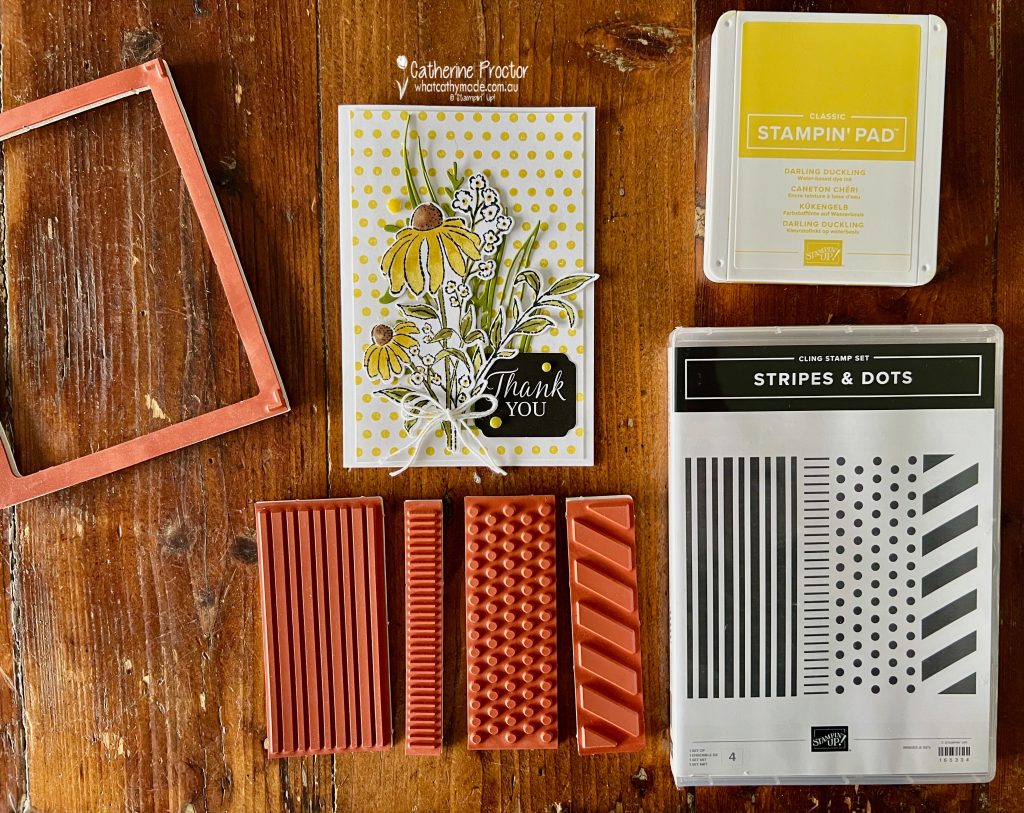
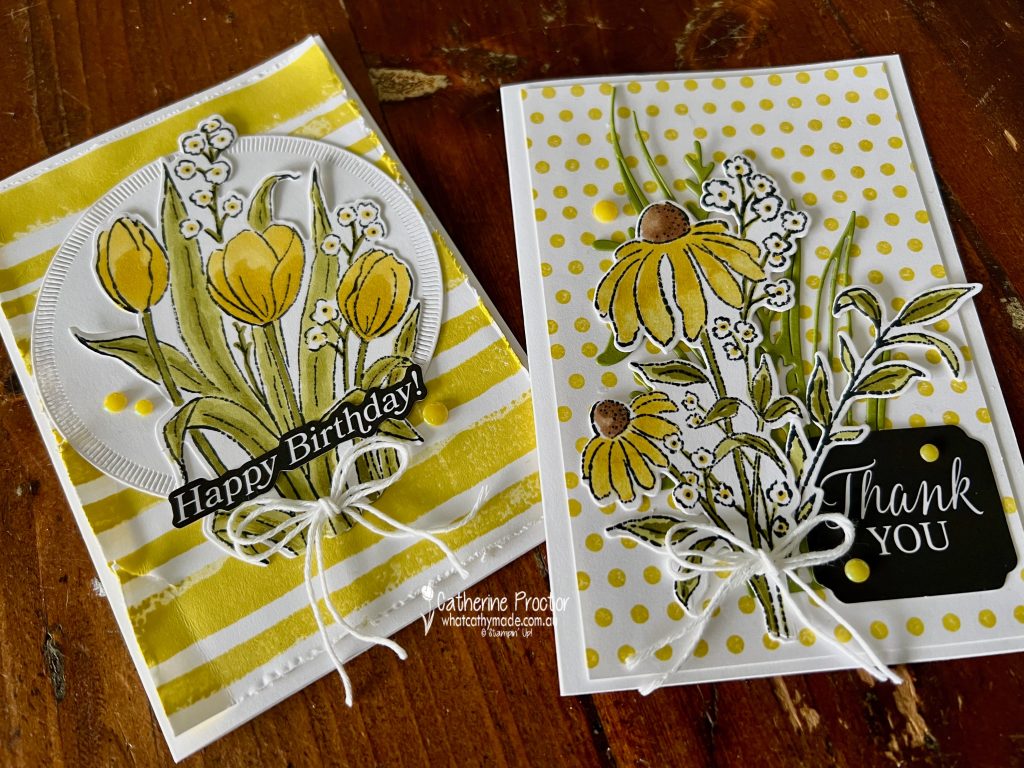
My two cards this week both use the Online Exclusive Mixed Florals bundle along with two fabulous new background stamps I’ve used to hand make my own patterned background: the Painted Stripes stamp set and the Stripes & Dots stamp set.
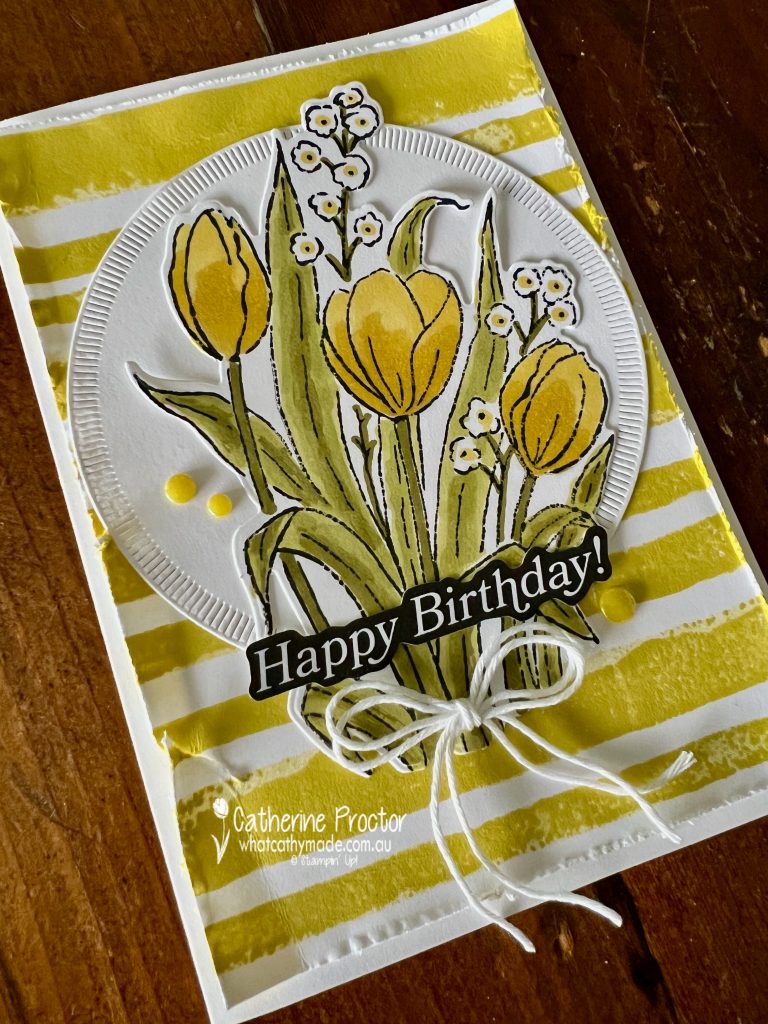
Card one is a birthday card with a striped background created using the Painted Stripes stamp set.
I love these bold stripes of yellow created using just the one stamp!
The daffodil and baby’s breath image is also one stamp coloured using Stampin’ Blends in Darling Ducking and Old Olive.
The white circle layer is die cut using the largest Spotlight on Nature Circle dies.
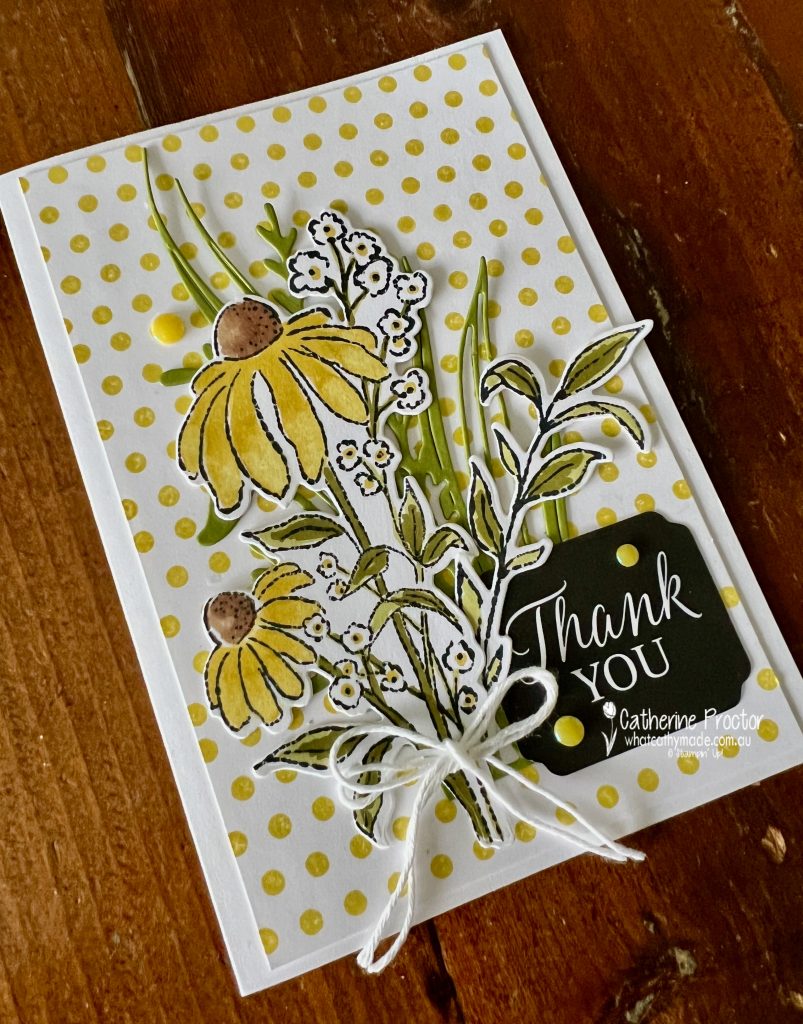
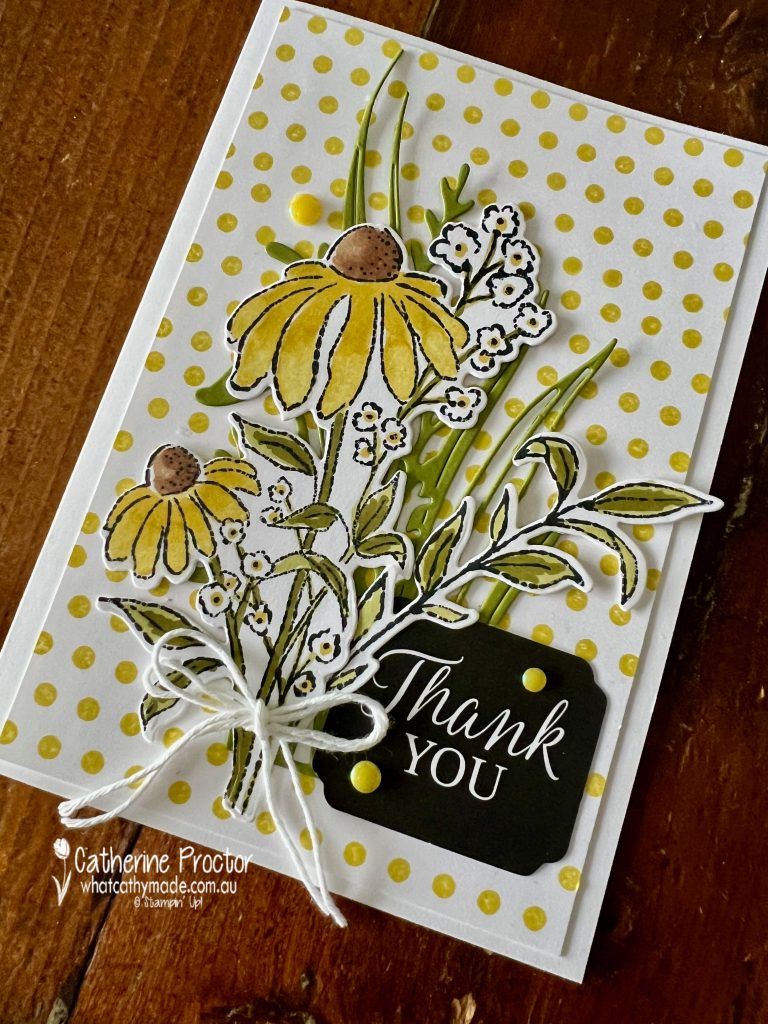
Card two uses the dotted stamp from the Stripes & Dots stamp set. This stamp can be used as either one single stamp set or split into four different stamps than can used in a variety of ways.
I’ve simply repeated the dotted stamp to create the spotty background layer.
This thank you card was coloured using the same Stampin’ Blends in Darling Ducking and Old Olive.
Both cards use sentiments from the Greetings for All Mix & Match Ephemera Pack, 2025–2027 In Color Flat Pearls and White Bakers Twine.
Our blog hop is now an Instagram hop but the good news is that you don’t need to have an Instagram account to view all of the other projects!
Simply copy any of the Insta handles below into a new search window to follow the Instagram hop at any point.
Next in our Hop is Kate @craftwithkate. Be sure to check out her gorgeous project/s.
The full list of this week’s InstaHop are listed below:
Kate @craftwithkate
Kirsty @crafty.littlemiss
Vicki @vickiboucher
Andrea @andreaksargent
Helen @apaperparadise
Rachel W @handstamped_by_rachel
Leanne Mitchell@createwithleanne
Rosa @hum.and.stamp
Cathy @whatcathymade
If you live in Australia, you can find and purchase the products I’ve used for my card in my Stampin’ Up! Online Store.
I’ll be back next Wednesday night with Week 3 of our 2025 – 2026 AWH Colour Creations Insta hop when we will be showcasing Secret Sea, another of the 5 brand new InColours.