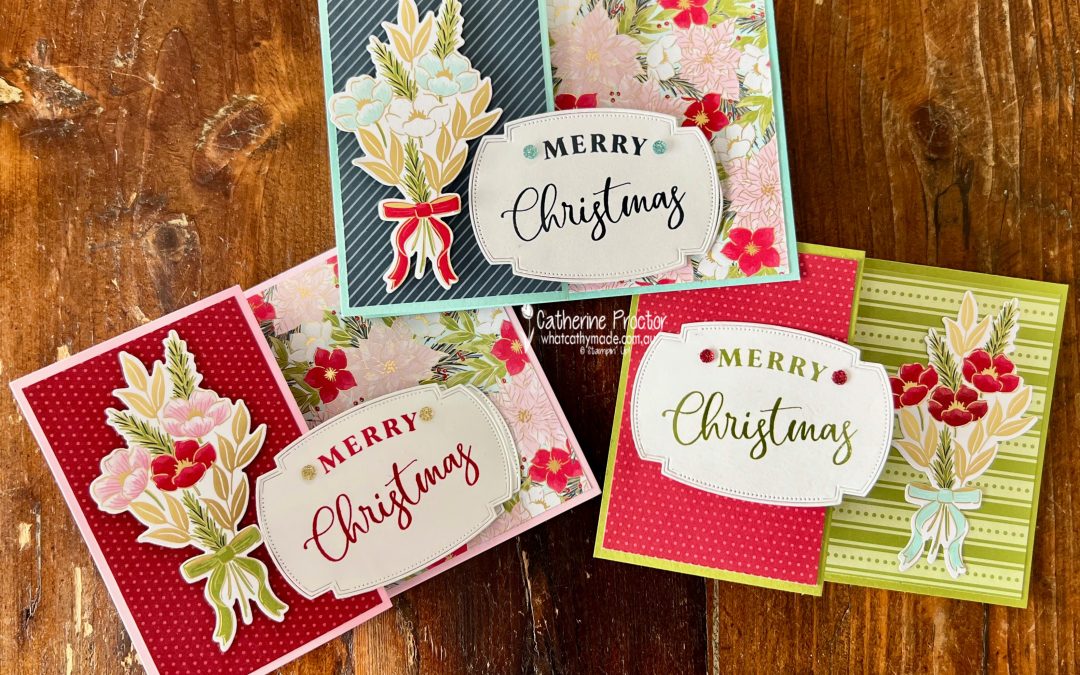
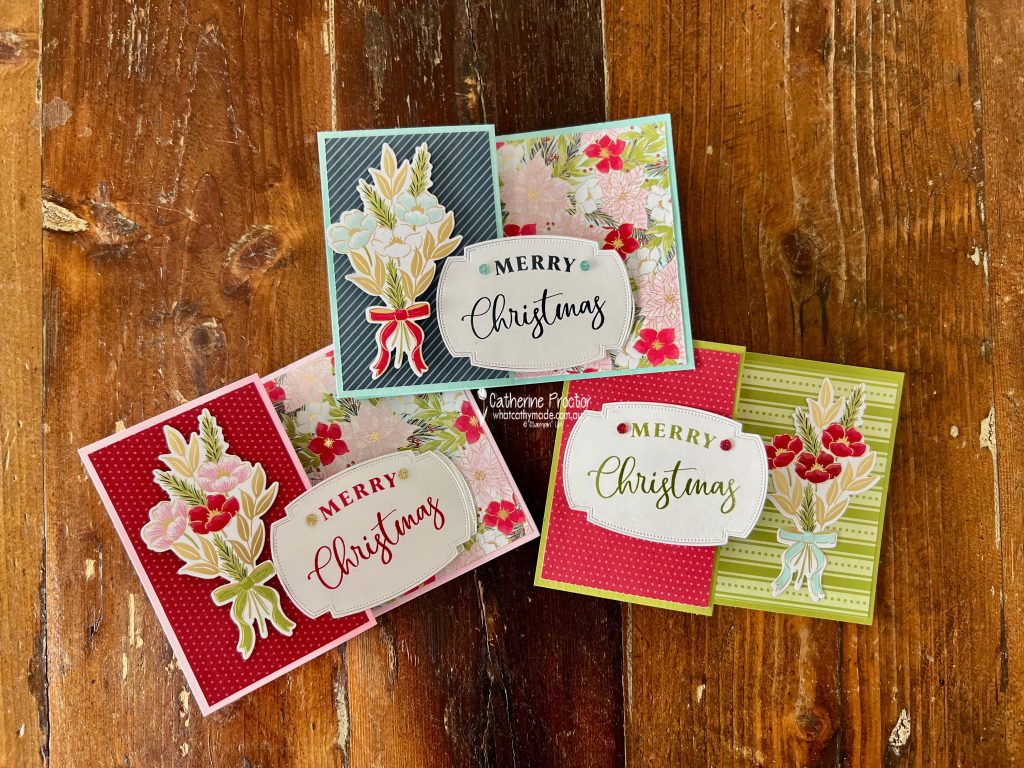
For week five of the 2025 Heart of Christmas blog hop I’ve made three more cards using products from the gorgeous gold foiled Traditions of Christmas Suite.
All three cards are a simple fancy fold created by cutting a sheet of A4 cardstock in half lengthways, trimming each piece of cardstock to 10.5 cm x 28cm. I scored and folded each card base at 14 cm and 21 cm.
The three different colours I’ve used for the cardstock bases all come from colours in the Traditions of Christmas Specialty DSP.
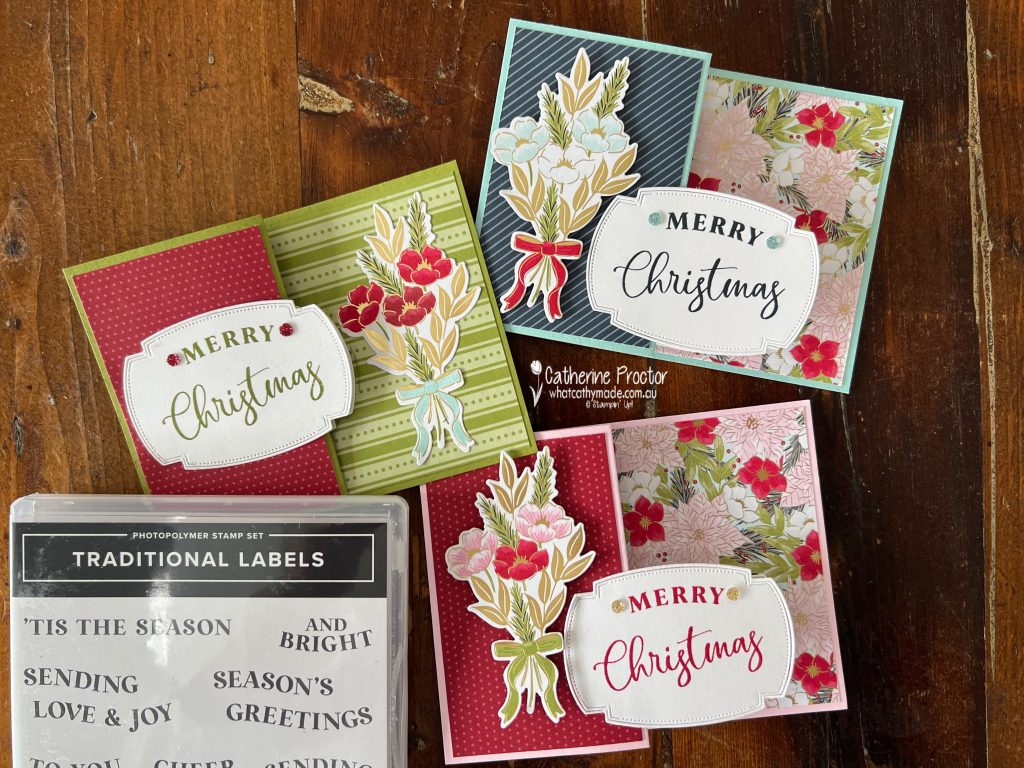
Card One – Real Red and Bubble Bath
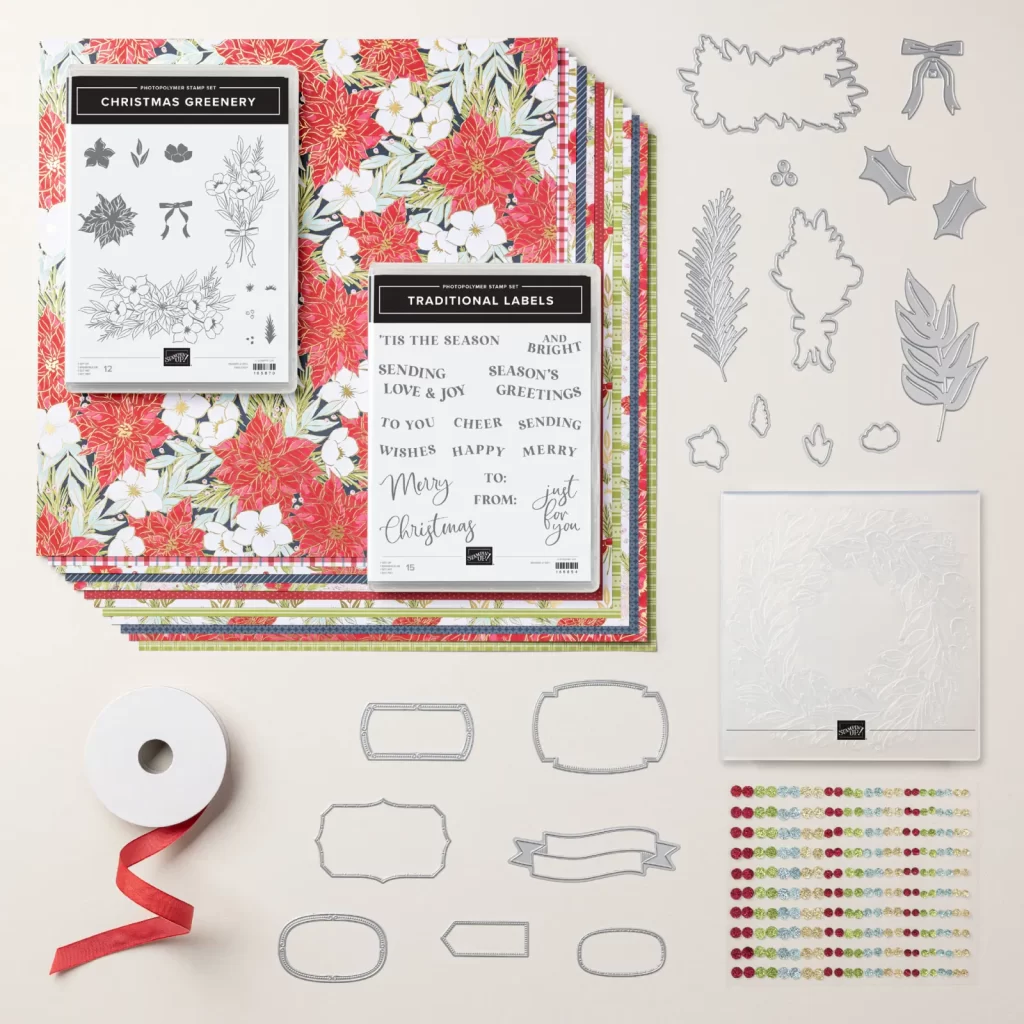
I’ve used Bubble Bath cardstock to pick up the pink in the Traditions of Christmas Specialty DSP, die cut using the Christmas Greenery Dies, part of the Traditions of Christmas Suite Collection.
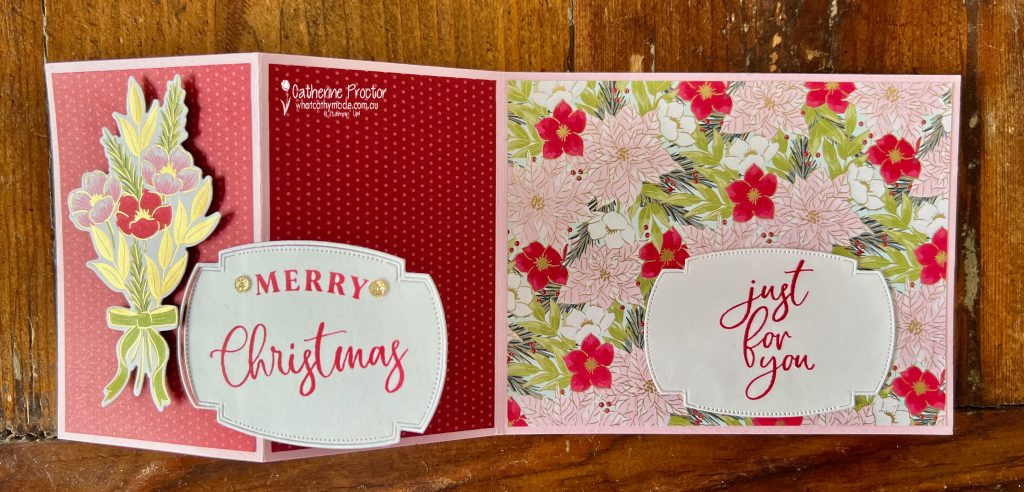
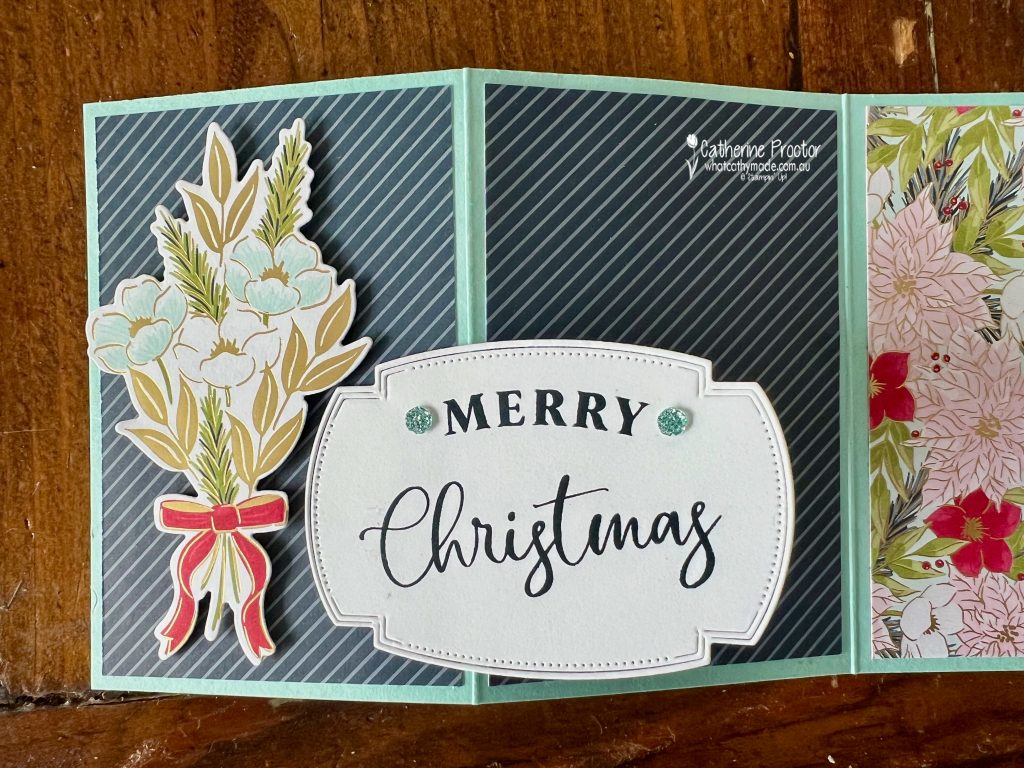
Here’s what the card looks like when opened up. I’ve used the Traditional Labels dies to stamp and die cut the sentiment. There is a white panel on the back of the card for writing a message.
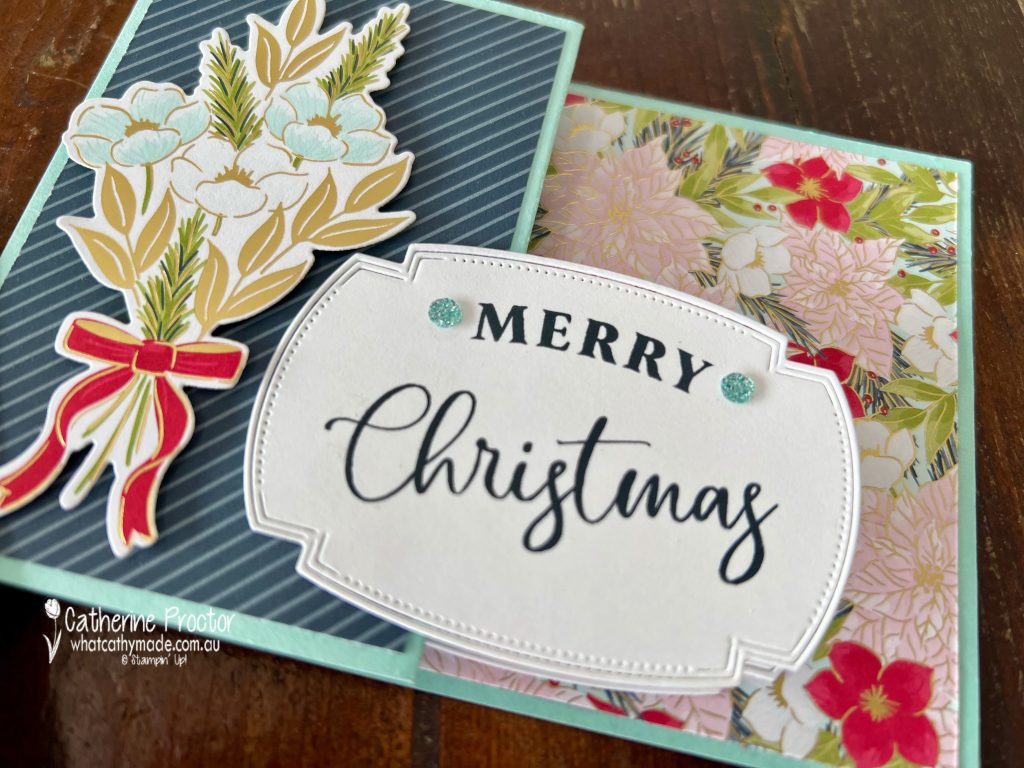
Card Two – Pool Party and Secret Sea
Card two picks up the two blues in the flower bouquet and the all over floral pattern DSP. Just like the first card, I’ve used embellishments from the Traditional Sparkling Sequins.
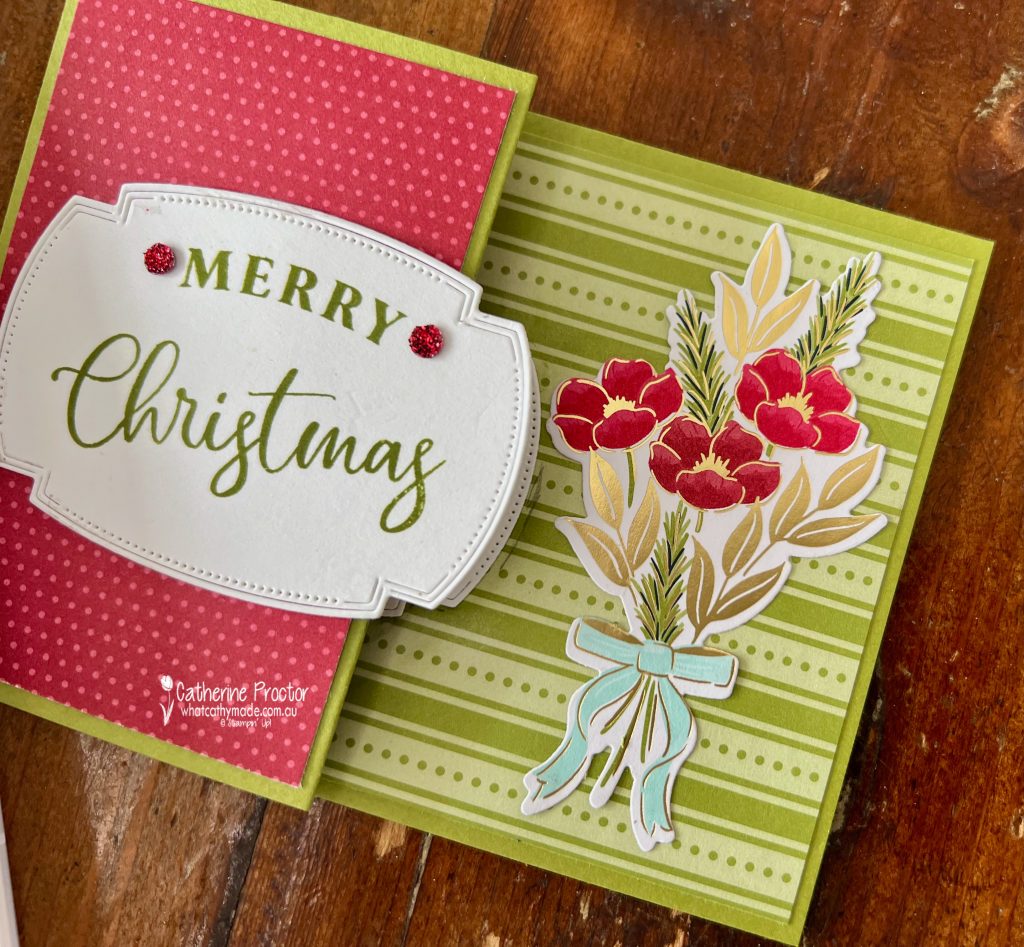
Card Three – Old Olive and Real Red
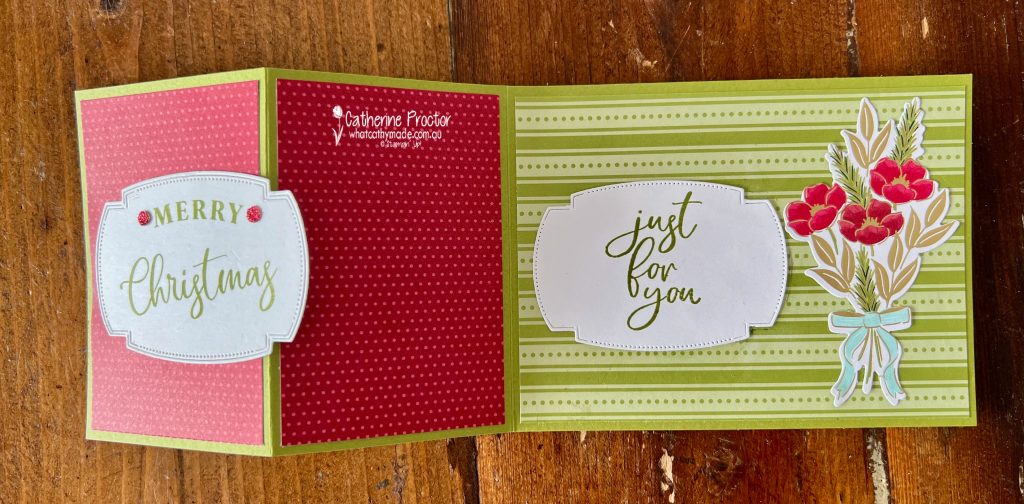
As the Old Olive DSP on the right hand side of the card is “less busy” and the all over floral design on the first two cards, I’ve moved the bunch of flowers to the other side of this card.
For all three cards I’ve lined up the position of the front sentiment label to cover the inside sentiment label. Do you have a favourite colour/design?
Take a look at some more Christmas Card inspiration on our Heart of Christmas blog hop!
Now it’s time to hop in over to our next participant, the lovely Judy May. I can’t wait to see what Judy has made this week!
If the next button link is not working or you’d like to see the entire list of participants go to Sharon Davern‘s blog. Sharon does an amazing job of hosting our Heart of Christmas blog every Monday.
Our AWH team will be back on Wednesday night, showcasing Fresh Freesia on our Insta Hop. I hope you can join us then!
It’s week four of the 2025 Heart of Christmas blog hop and just over 13 weeks until Christmas. Have you started making your Christmas cards yet?
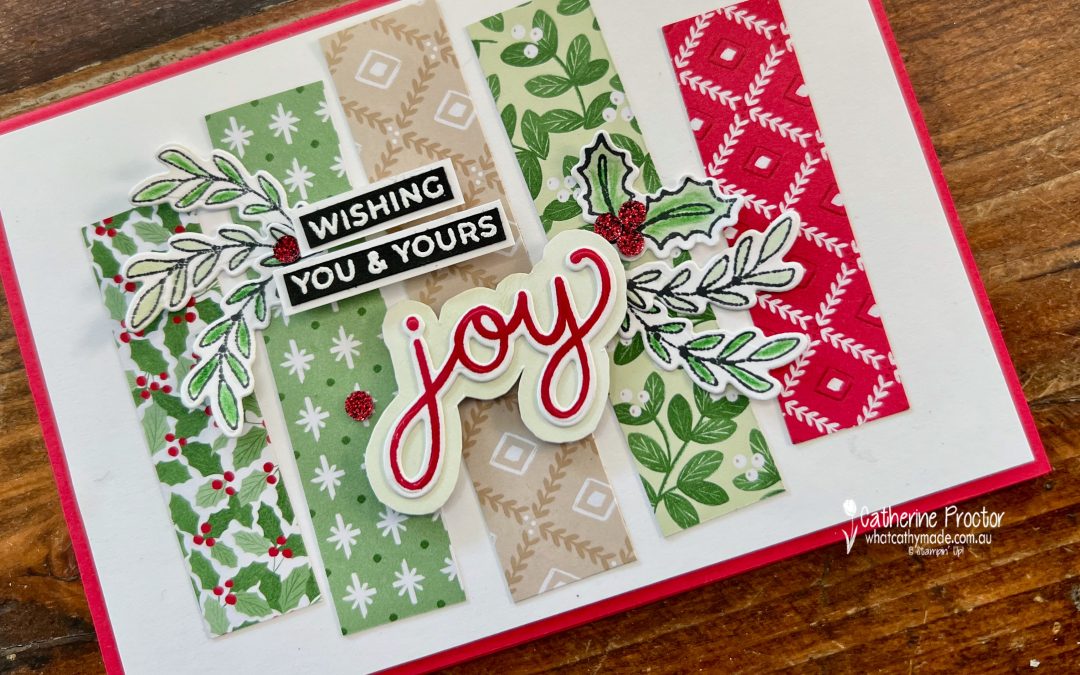
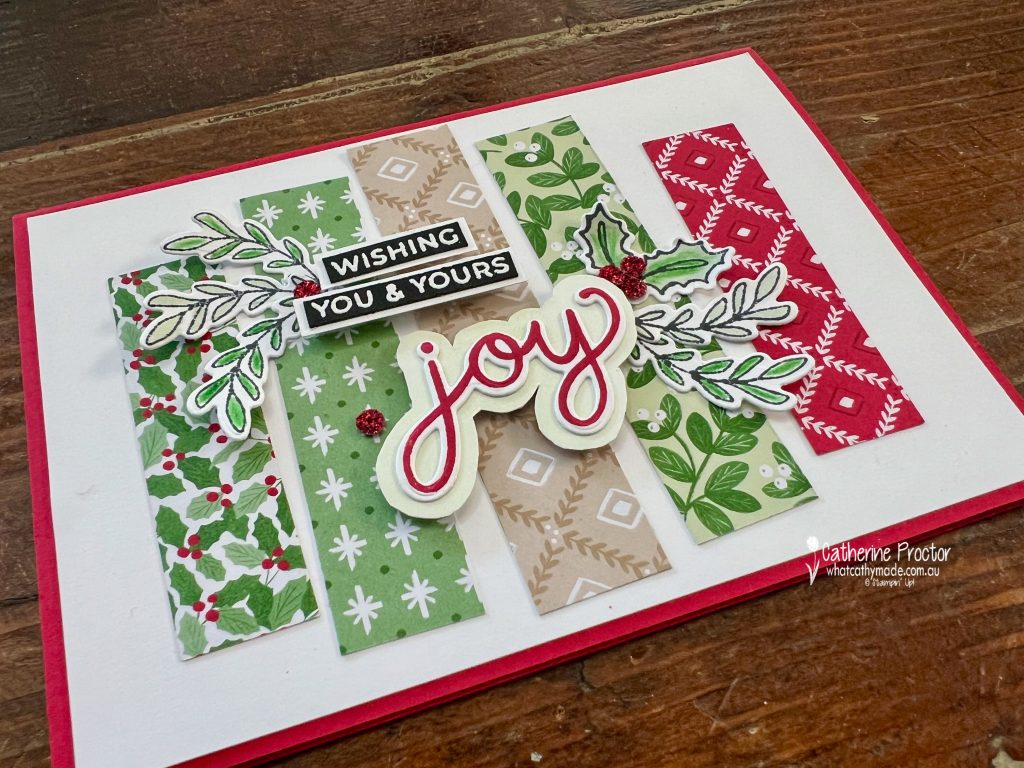
For this week’s card I wanted to create a card that highlighted the gorgeous variety of patterns in the Christmas Tags & More DSP while also making the sentiment as the star of the card.
The “strip technique” (I’m not sure of its official name, but this is what I call it!) is great for mass production of cards as it really maximises your DSP and is so quick and easy to create. I cut strips approximately 2 cm wide and lined them up across a panel of Basic White cardstock on a Real Red cardstock base.
The two strips on either end are pre-cut strips from the Christmas Tags & More DSP.
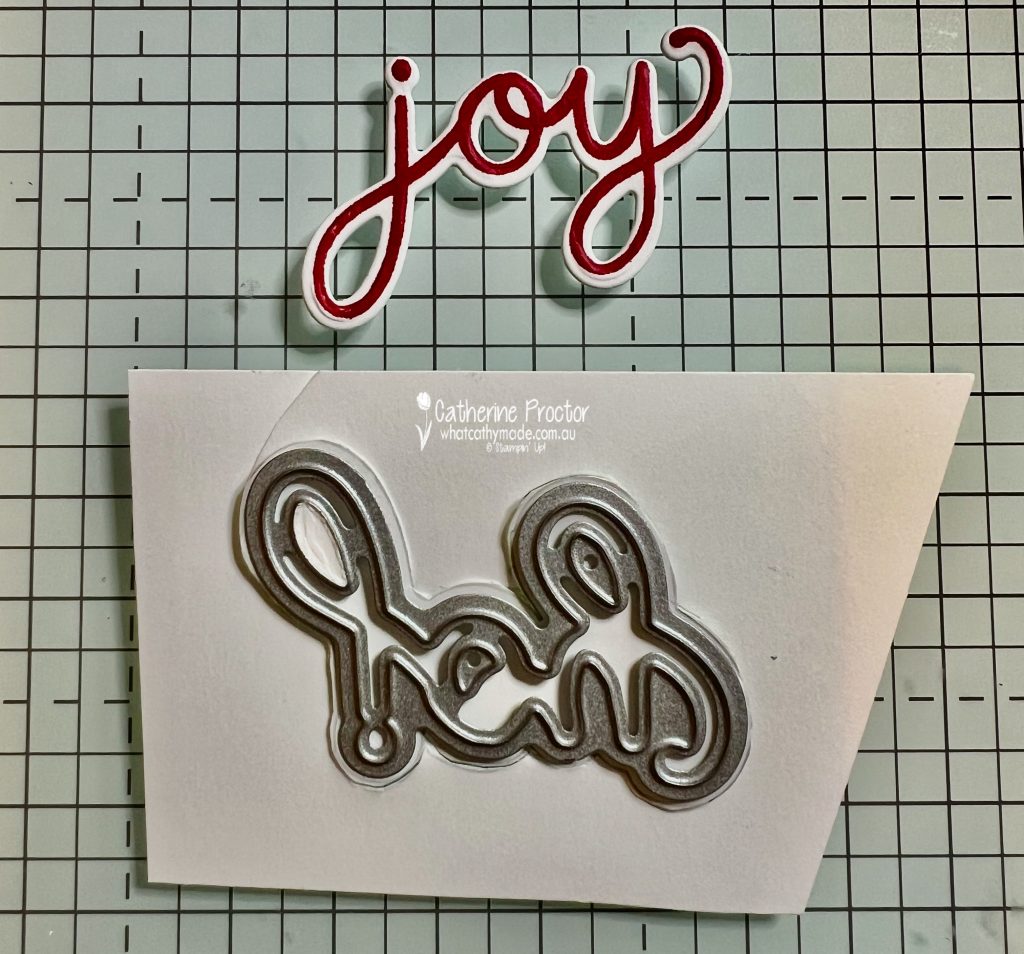
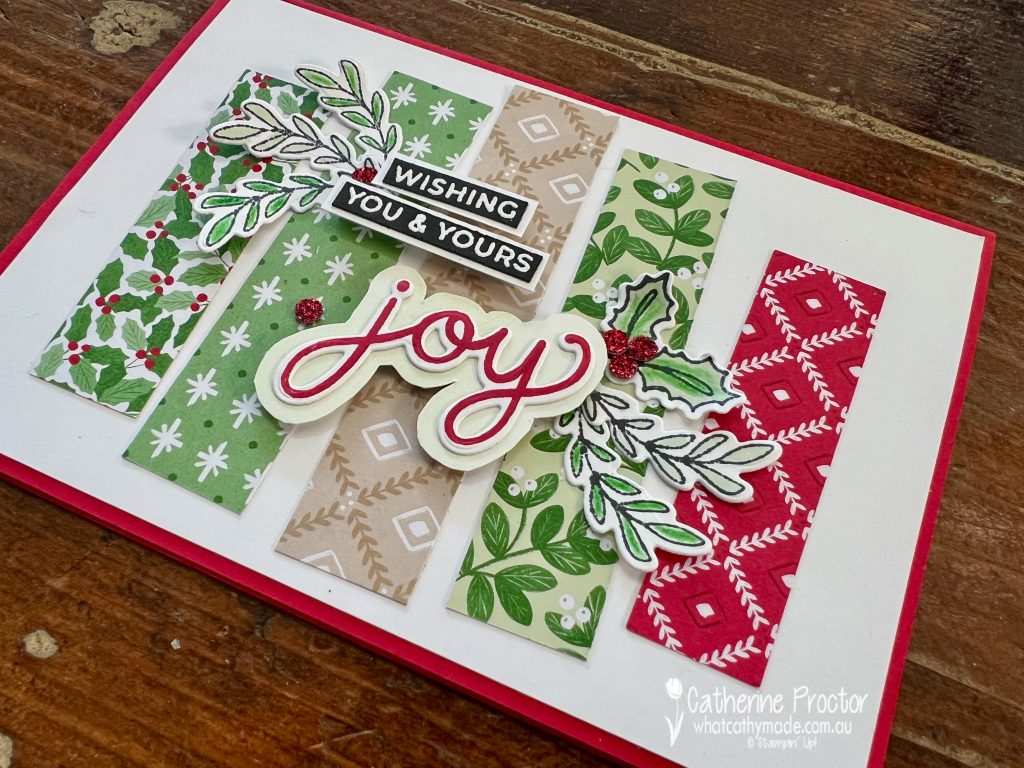
The word joy is stamped in Real Red using the Jolly Holly Bundle and cut out with the matching die.
To give the sentiment extra dimension, I used a blending brush to add Soft Sea Foam ink to a scrap of Basic White cardstock. I then flipped the cardstock over, traced around the joy die on the reverse side of the cardstock, and fussy cut it out by hand. This creates a soft backing layer that makes the word pop against the patterned background.
This backing layer makes the word “joy” pop against the patterned background. I also added a white heat embossed greeting “Wishing You & Yours” stamped onto Basic Black cardstock, layered onto a strip of Basic White cardstock for extra detail.
The holly and foliage were stamped in Memento Black Ink and coloured with Stampin’ Blends in Real Red and Soft Sea Foam Stampin’ Blends.
Since there isn’t a Stampin’ Blend in Garden Green, I used a Garden GreenWatercolour Pencil add some of the darker Christmas green. The leaves and berries were then cut with the coordinating Jolly Holly dies and arranged around the sentiment for balance.
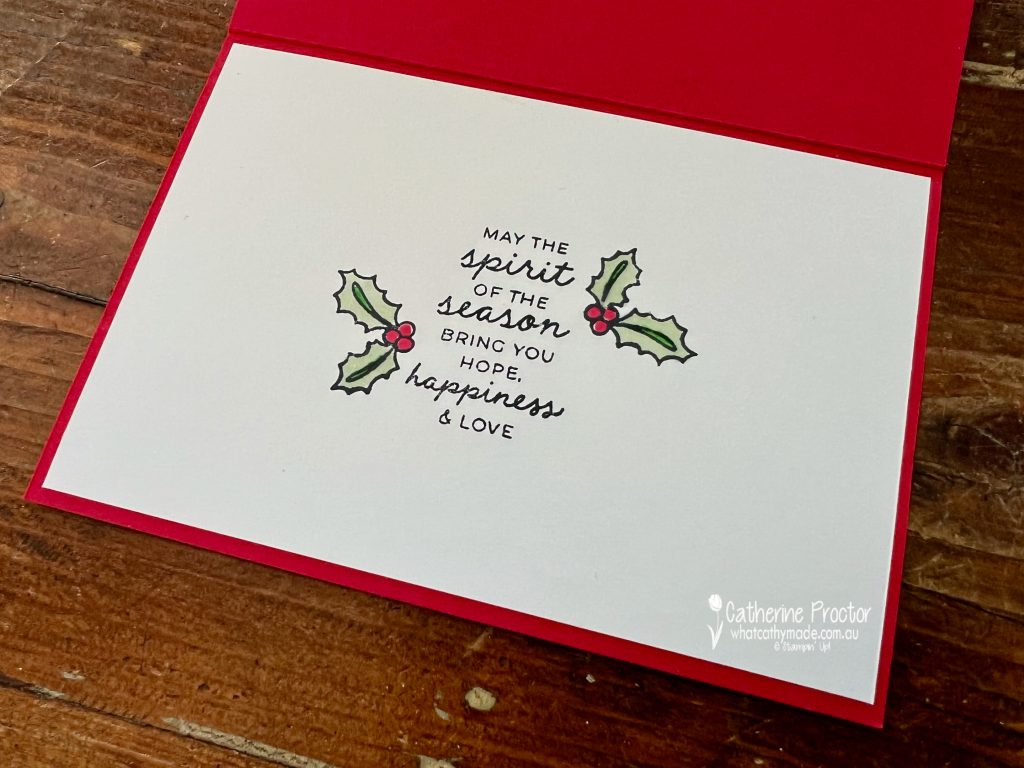
Inside the card I’ve stamped another sentiment from the Jolly Holly stamp set and added two more holly leaves coloured in to match the holly on the front of the card.
To finish the card, I adhered a few red Traditional Sparkling Sequins, the perfect way to add a little shimmer and bling without overwhelming the design.
Take a look at some more Christmas Card inspiration on our Heart of Christmas blog hop!
Now it’s time to hop in over to our next participant, the lovely Sharon Davern. I can’t wait to see what Sharon has made this week!
If the next button link is not working or you’d like to see the entire list of participants go to Sharon Davern‘s blog. Sharon does an amazing job of hosting our Heart of Christmas blog every Monday.
Our AWH team will be back on Wednesday night, showcasing Flirty Flamingo on our Insta Hop. I hope you can join us then!
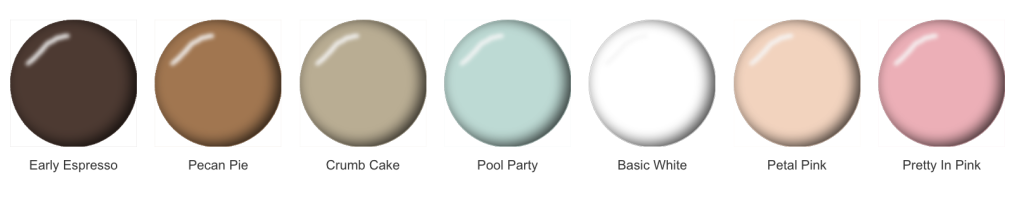
This week the Art With Heart team is showcasing Early Espresso, the richest brown in the Stampin’ Up! Neutrals family. I love how this deep, warm neutral can work as a strong base colour while also adding contrast and depth to lighter shades.
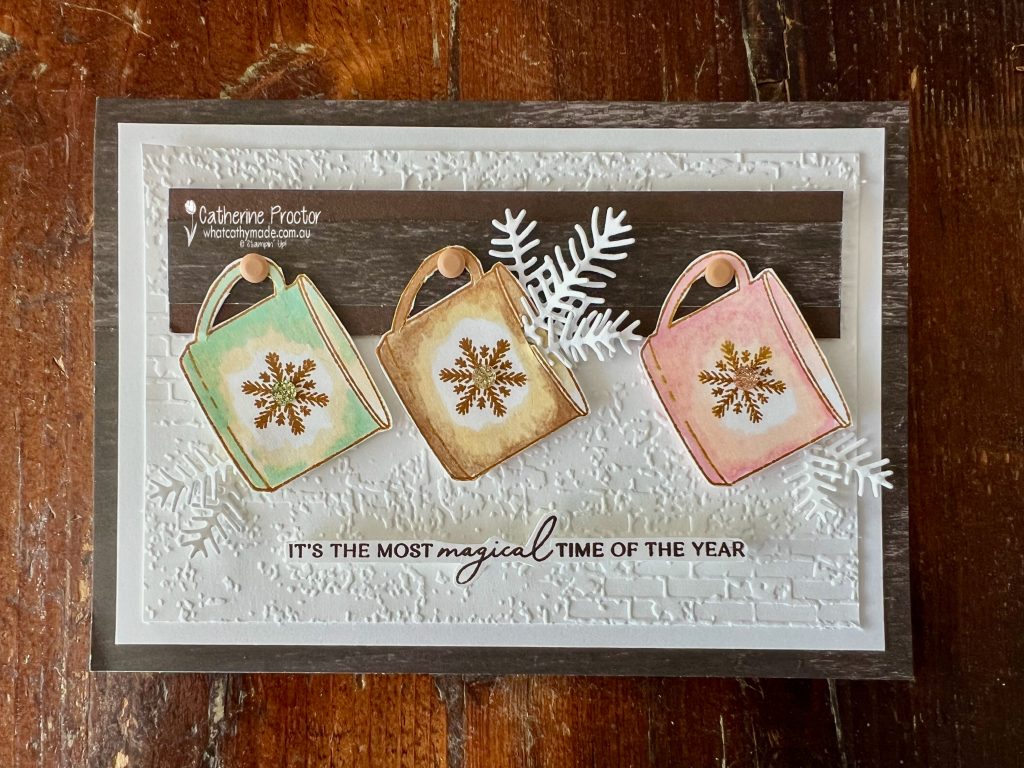
For this card I’ve paired Early Espresso with softer colours: Pool Party, Crumb Cake, Pretty in Pink, Petal PInk and Pecan Pie.
My card was inspired by a gorgeous housewarming card created by former Artisan, Tammy Wilson. Tammy used the Weekend Adventures Stamp Set and I realised that although this stamp has been designed for memory keeping, it also works really well for cardmaking too. It might have accidentally fallen into my card when I placed my next order, LOL!
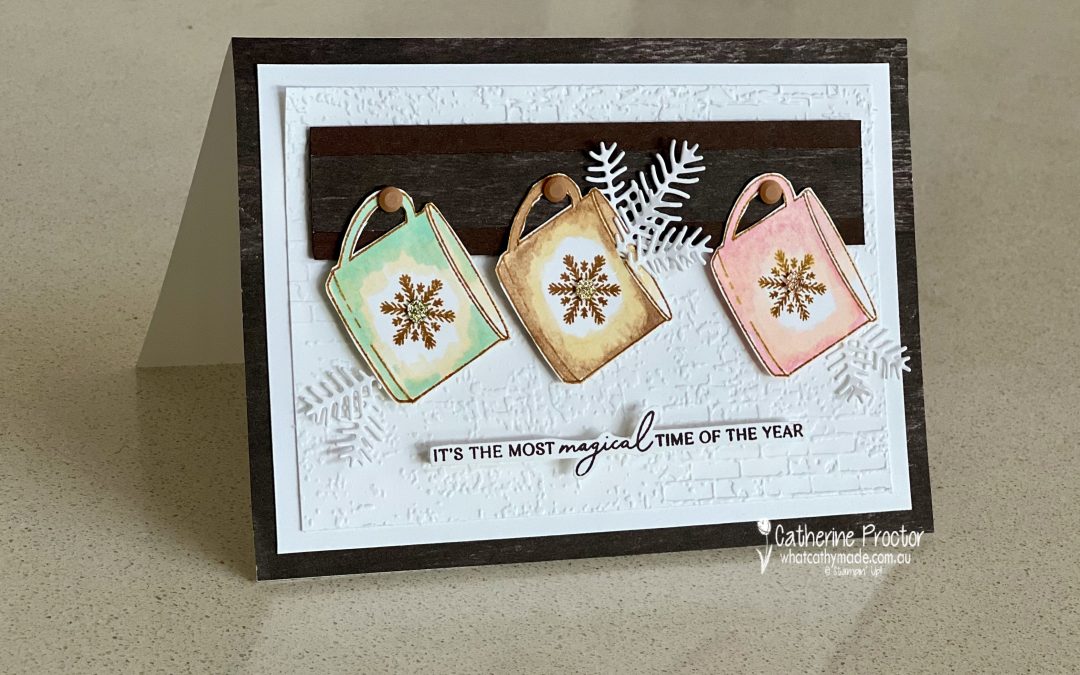
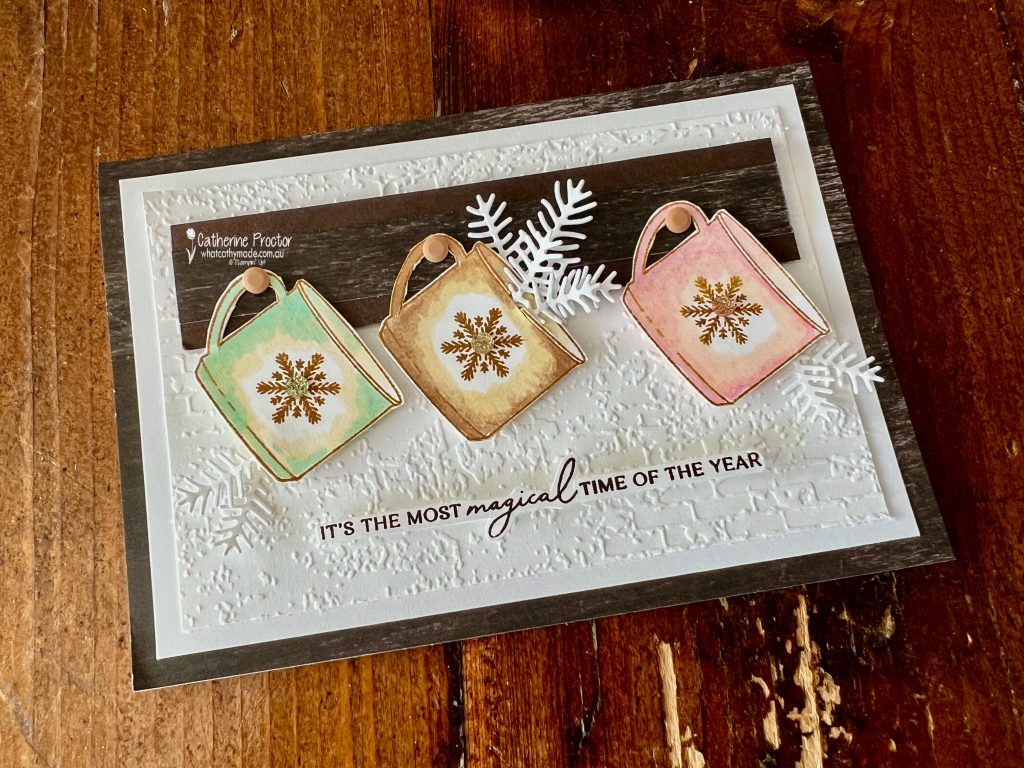
I CASED Tammy’s idea of idea of creating a mug rack with hooks, but instead of a housewarming card, I stamped my mugs with snowflakes from the Delicate Pines stamp set to create a soft country Christmas vibe.
How to make my Early Espresso Country Christmas card
The “mug rack” and card base feature the Country Woods DSP, perfect for creating that timber look. Each mug is “hung” on a Neutral Matte Dot, acting as little hooks.
The card front is embossed with the Exposed Brick EF, giving subtle texture and a rustic feel. The “It’s the most magical time of the year” sentiment on the front comes from Delicate Pines Stamp Set, stamped in Early Espresso.
I stamped the mugs from the Weekend Adventures stamp set using the Saddle Brown Stazon ink and coloured in using the following Stampin’ Blends:
Left mug: Pool Party + Light Crumb Cake
Middle mug: Pecan Pie + Light Crumb Cake
Right mug: Light Pretty in Pink + Petal Pink
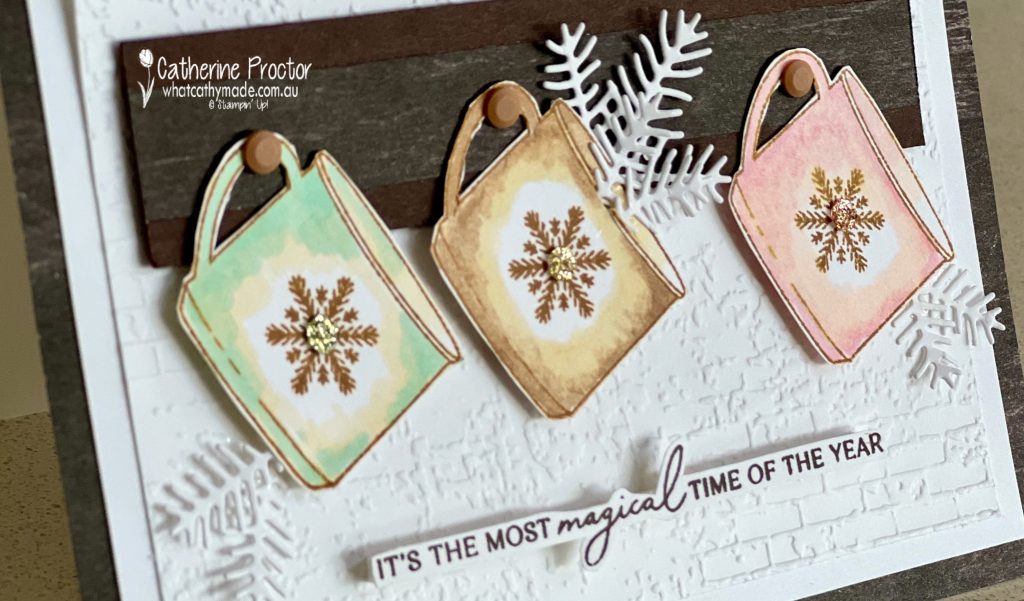
The snowflakes are also stamped using Saddle Brown Stazon, with Traditional Sparking Sequins adding a touch of sparkle in the centres for that frosty, magical feel. Die cut greenery adds dimension and uses dies from the Delicate Pines dies.
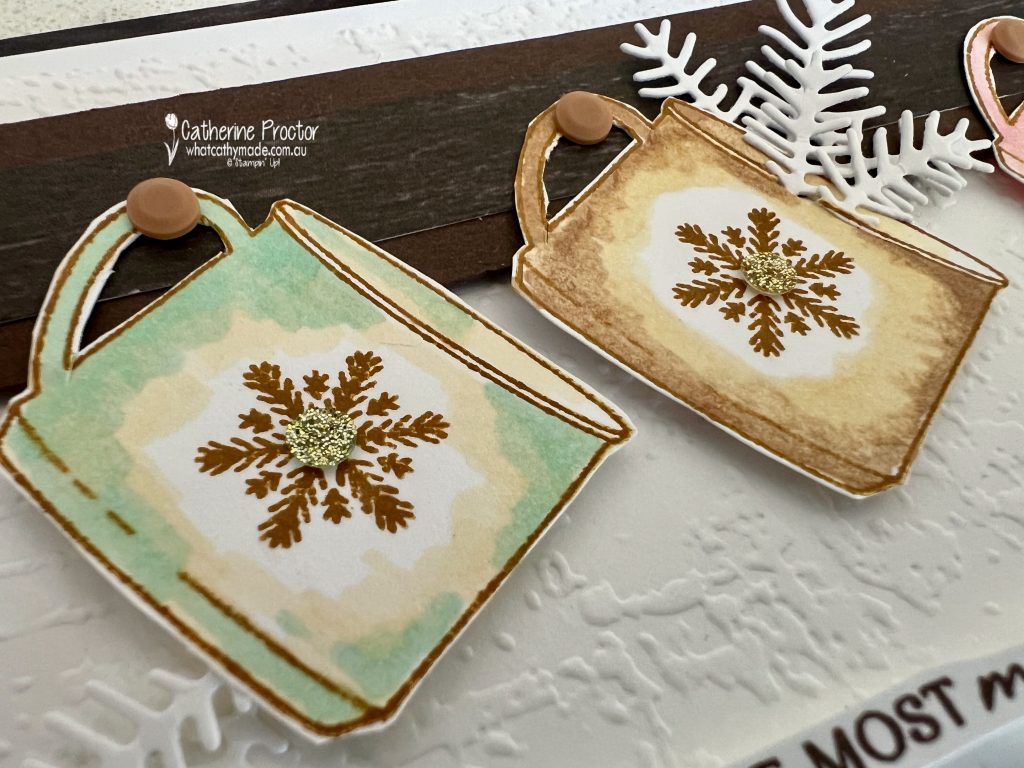
Fussy Cutting the Mugs
Taking the extra time to fussy cut really makes the mugs pop, and the open handles add a professional finish.
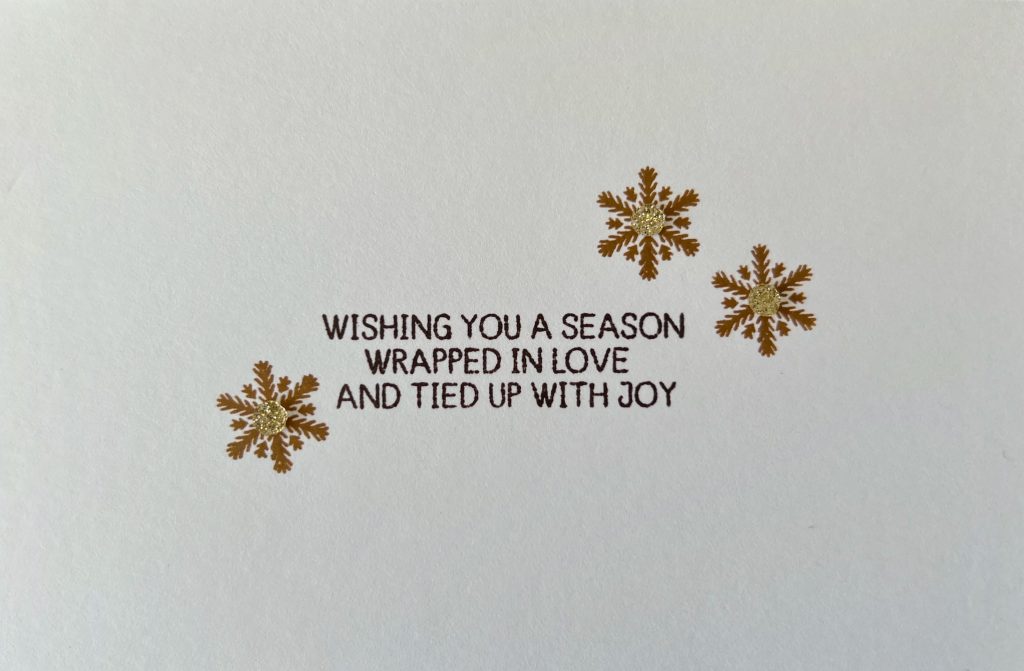
Inside, I stamped a message from Gift of Joy: “Wishing you a season wrapped in love and tied up with joy” with additional stamped snowflakes for decoration.
This was such a fun project to make, and it really shows how versatile Early Espresso can be for Christmas crafting. It pairs effortlessly with both pastels and warm tones, giving a grounded, cosy vibe.
Take a look at some more Early Espresso inspiration on our Insta Hop!
Our blog hop is now an Instagram hop but the good news is that you don’t need to have an Instagram account to view all of the other projects!
Simply copy any of the Insta handles below into a new search engine window to follow the Instagram hop at any point.
Next in our Hop is Kate @craftwithkate. Be sure to check out her gorgeous project/s.
The full list of this week’s InstaHop is listed below:
Kate @craftwithkate
Andrea @andreaksargent
Kirsty @crafty.littlemiss
Helen @apaperparadise
Sharon @sharondaverncreates
Leanne @createwithleanne2
Claire @clairedalycreates
Rachel @rachelpalmieristampin
Theresa @teegeeinspirations
Cathy @whatcathymade – you are here!
We’ll be back next Wednesday when we are showcasing Flirty Flamingo.
Looking for some more Christmas card inspiration?
Our Heart of Christmas blog hop is back for 2025 and we will go live at 8pm (EAST) every Monday night with Christmas card inspiration. This hop is a traditional blog hop (not an Insta Hop) so you can see all of the team’s creations by reading my blog and clicking through to the next person .
Are you ready for some more Christmas crafting inspiration?
It’s week three of the 2025 Heart of Christmas blog hop and our Art With Heart team have plenty more inspiration for your Christmas projects.
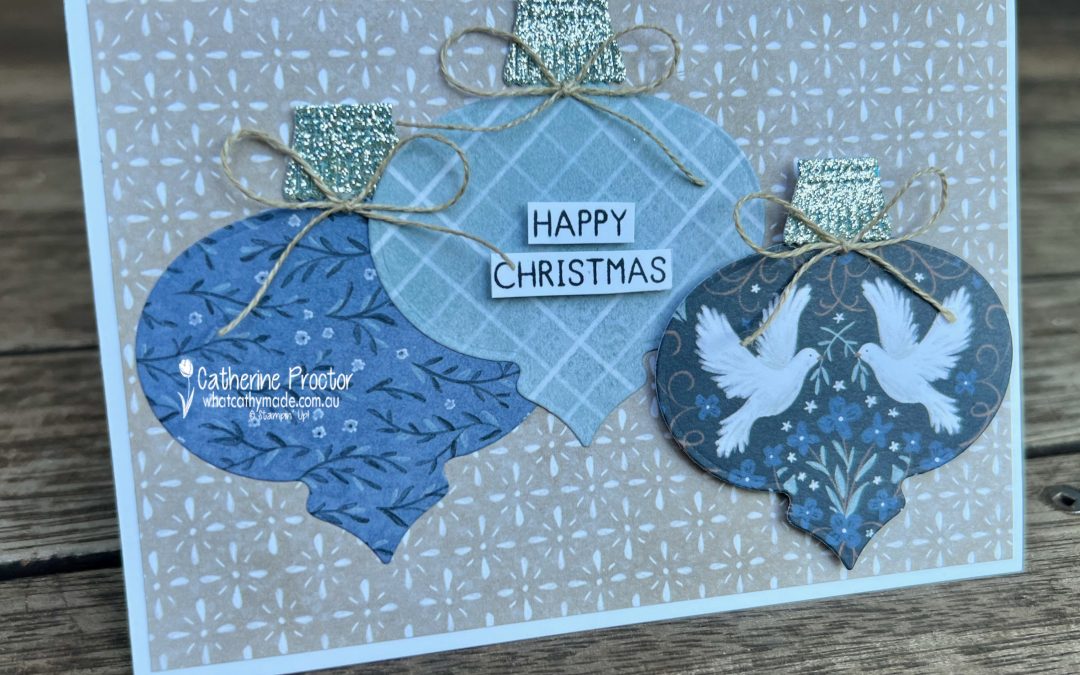
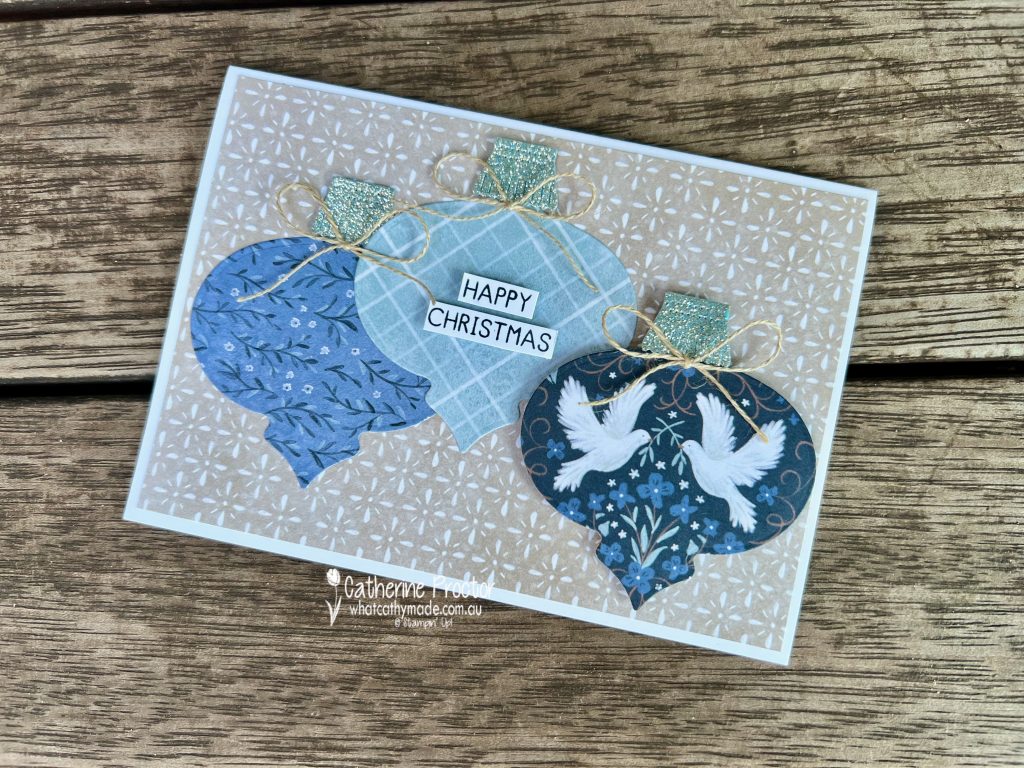
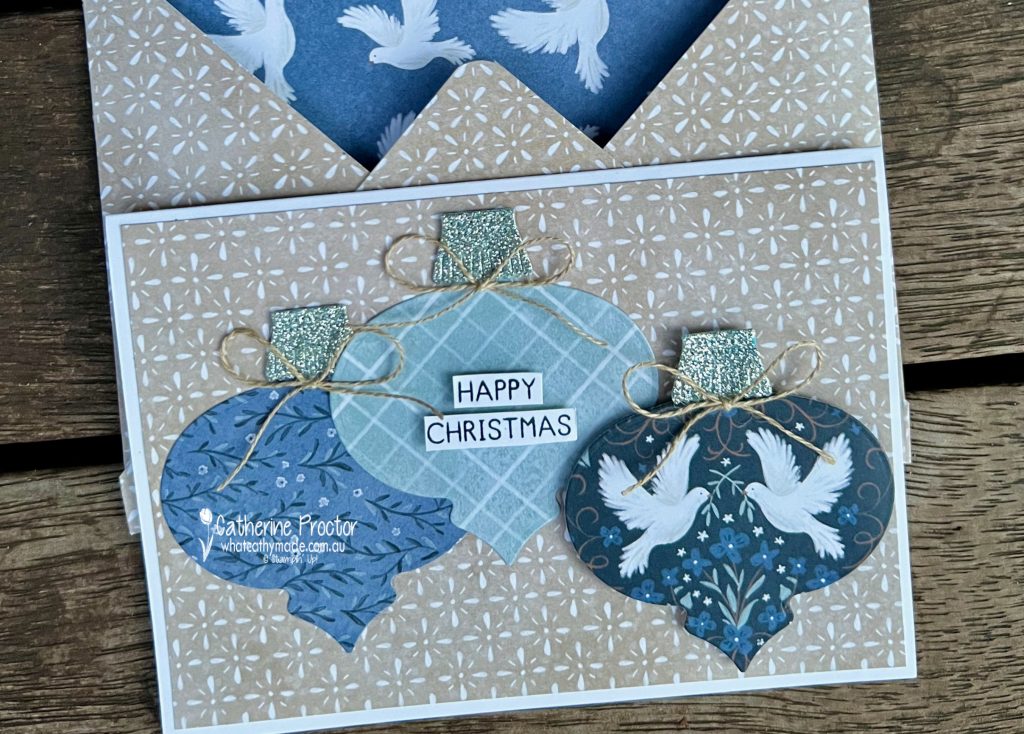
My Christmas card this week combines products from the Peaceful Garden Suite Collection and the Modern Christmas Suite. I love it when products from different suites work so well together!
The Ornamental Christmas dies are part of the Modern Christmas Suite and they include two large Christmas bauble dies with ornament cap dies, just perfect for showcasing beautiful patterns in DSP.
I’ve seen a few Christmas cards that have used the Bauble Blooms Dies with the Peaceful Garden 12″ x 12″ (30.5 x 30.5 cm) Designer Series Paper, so I thought I’d see if it also worked with the Ornamental Christmas dies and I’m really happy with the result!
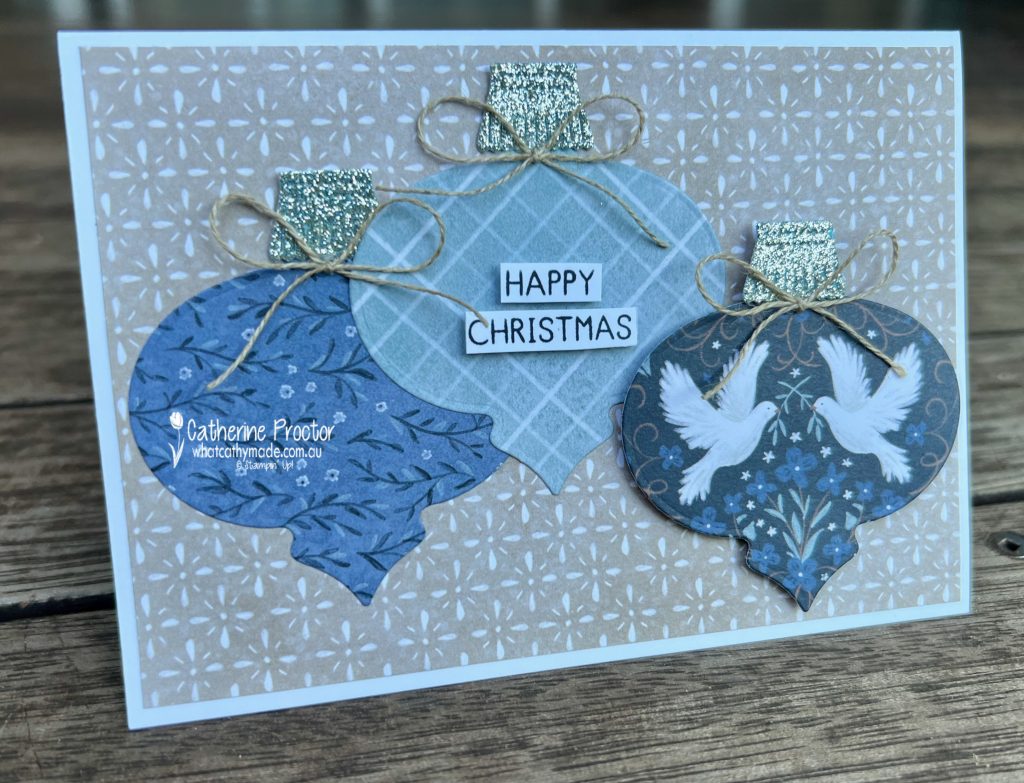
I’ve used the ornament cap dies to die cut the Peaceful Garden 12″ x 12″ (30.5 x 30.5 cm) Glimmer Paper, adding a touch of shimmer to my Christmas card. I had to photograph my card outside this week to capture the glimmer – I think this photo shows it the best.
Such a pretty card deserves a handmade envelope, so I made one using the Peaceful Garden 12″ x 12″ (30.5 x 30.5 cm) Designer Series Paper .
The “Happy Christmas” sentiment is stamped in Secret Sea using a sentiment from a gorgeous stamp set called the Gift of Joy Stamp Set.
Take a look at some more Christmas Card inspiration on our Heart of Christmas blog hop!
Now it’s time to hop in over to our next participant, the lovely Sharon Davern. I can’t wait to see what Sharon has made this week!
If the next button link is not working or you’d like to see the entire list of participants go to Sharon Davern‘s blog. Sharon does an amazing job of hosting our Heart of Christmas blog every Monday.
Our AWH team will be back on Wednesday night, showcasing Early Espresso on our Insta Hop. I hope you can join us then!
It’s week two of the 2025 Heart of Christmas blog hop and hopefully our Art With Heart team will provide you with plenty more inspiration for your Christmas projects.
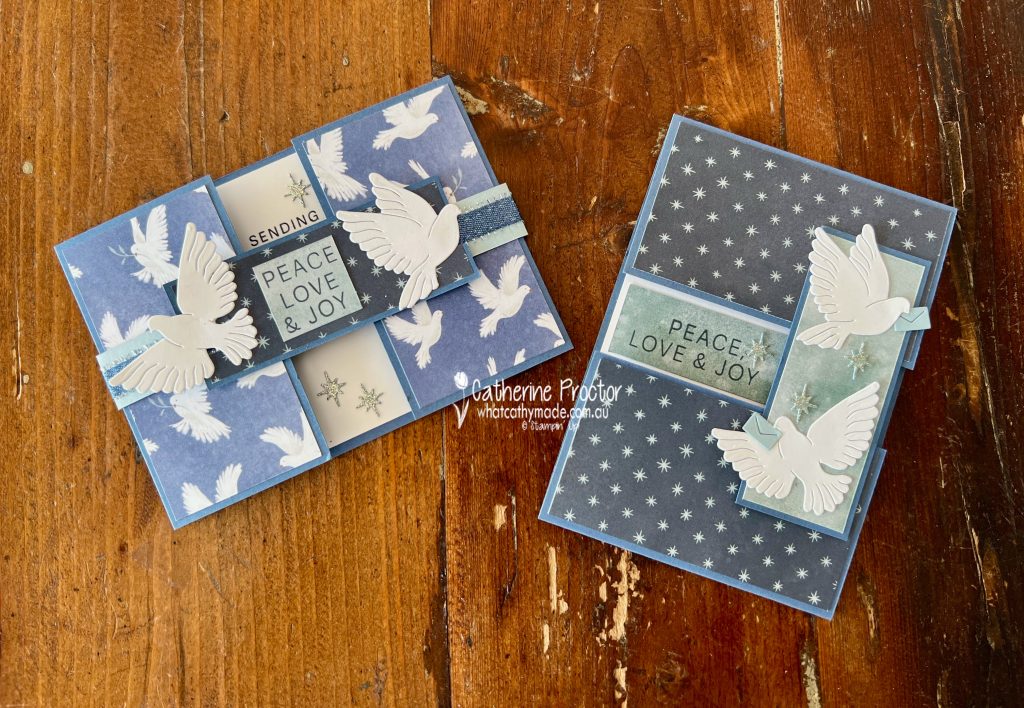
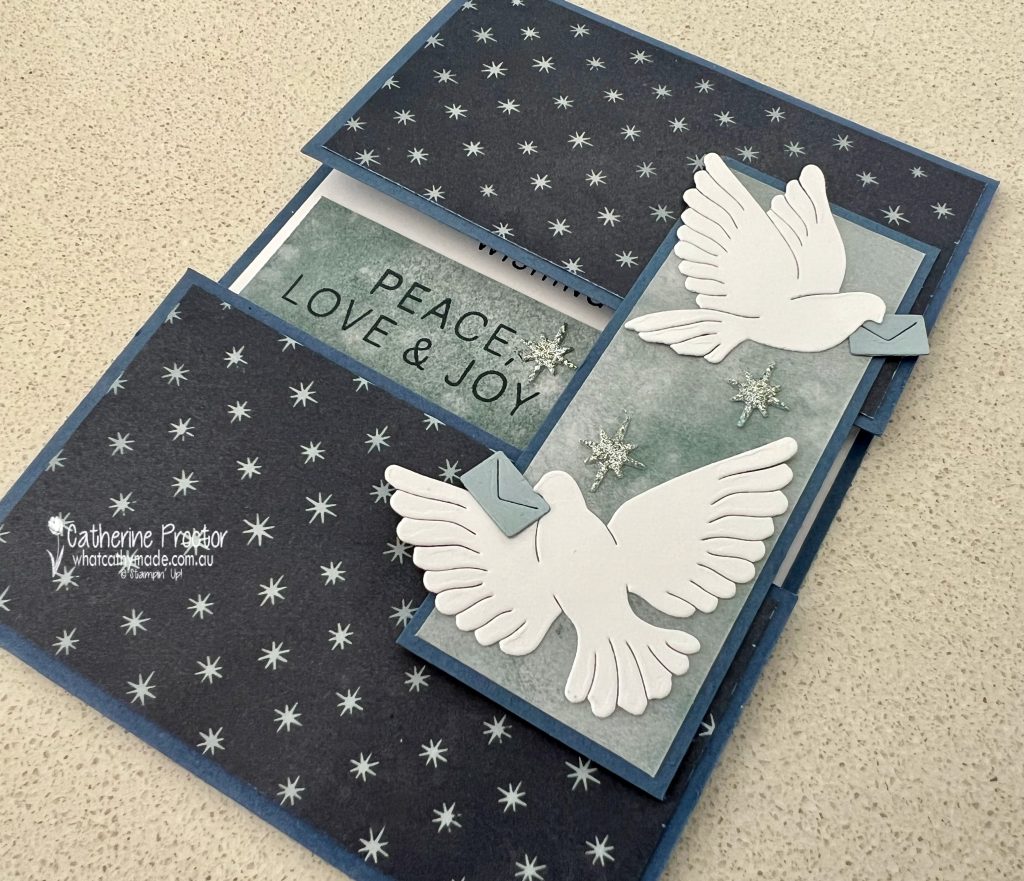
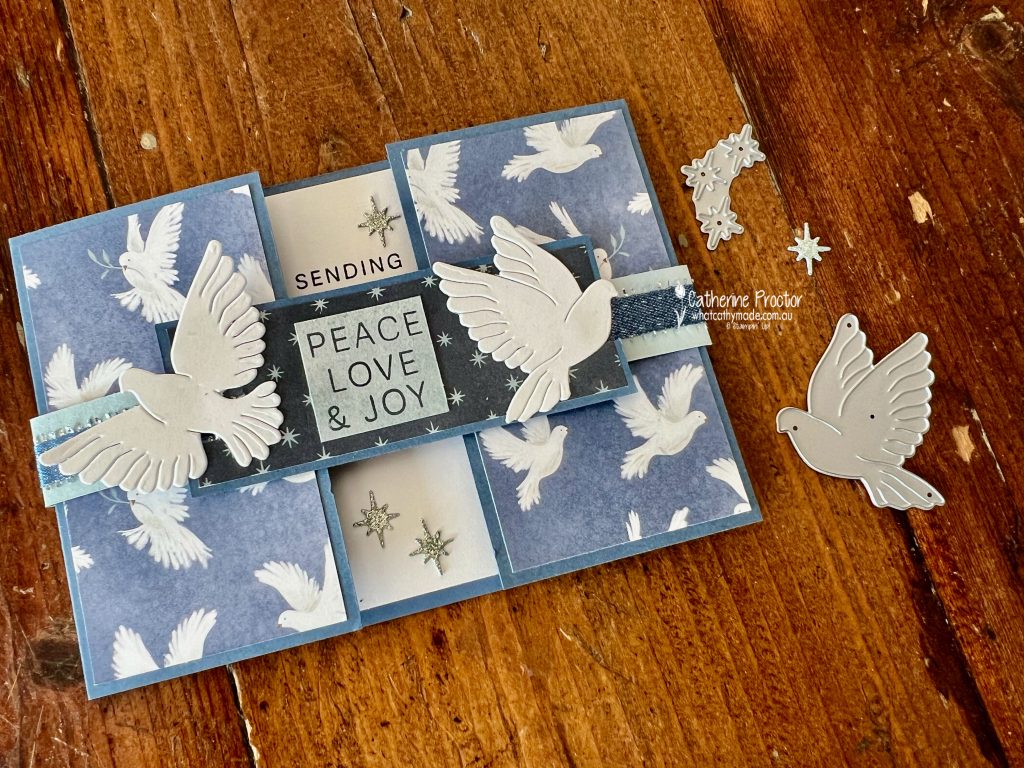
This week I’ve created two gatefold cards using products from the Peaceful Garden Suite Collection. One is a vertical gatefold card and the other is a horizontal gatefold card.
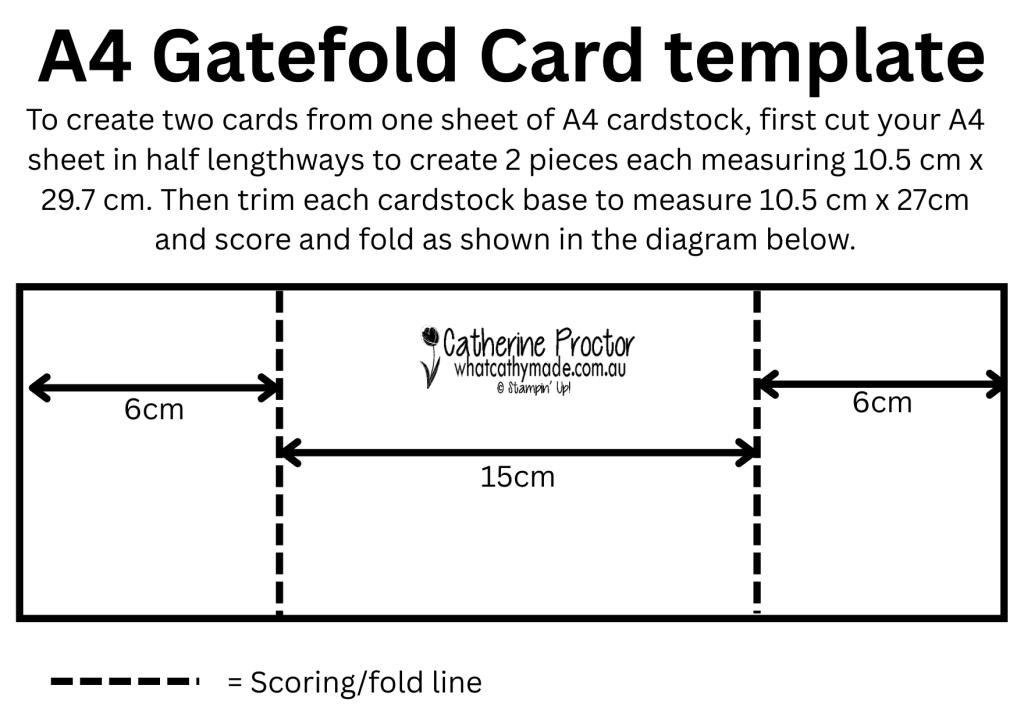
This is the template I’ve created to show you how I made two gatefold cards from one sheet of Misty Moonlight cardstock. For both cards I’ve designed the fold so it reveals the middle of the inside layer of the card, even when the card is closed.
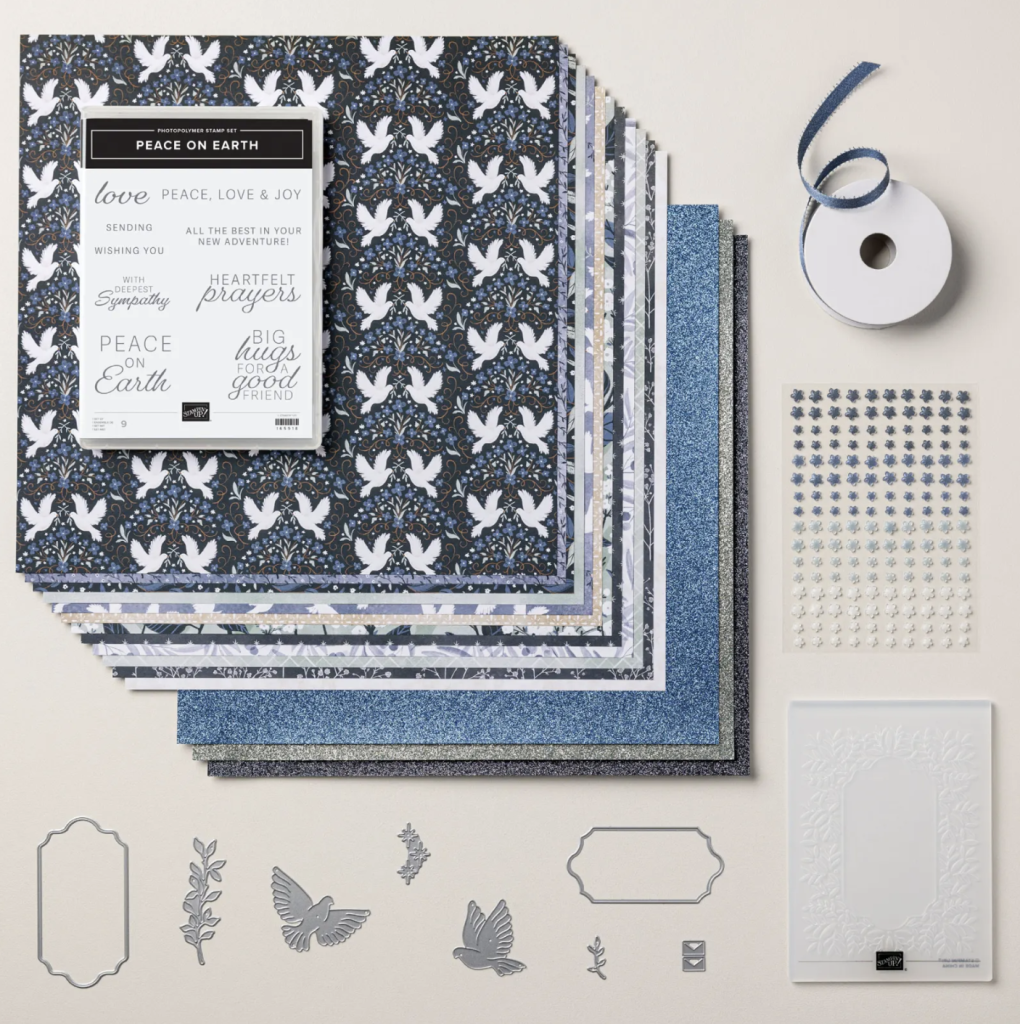
All of the DSP, glimmer foil, embellishments, sentiments and ribbon used on both these cards comes from the Peaceful Garden Suite, which you’ll find in the September – December 2025 Catalogue.
Card 1 – Vertical Gatefold Card
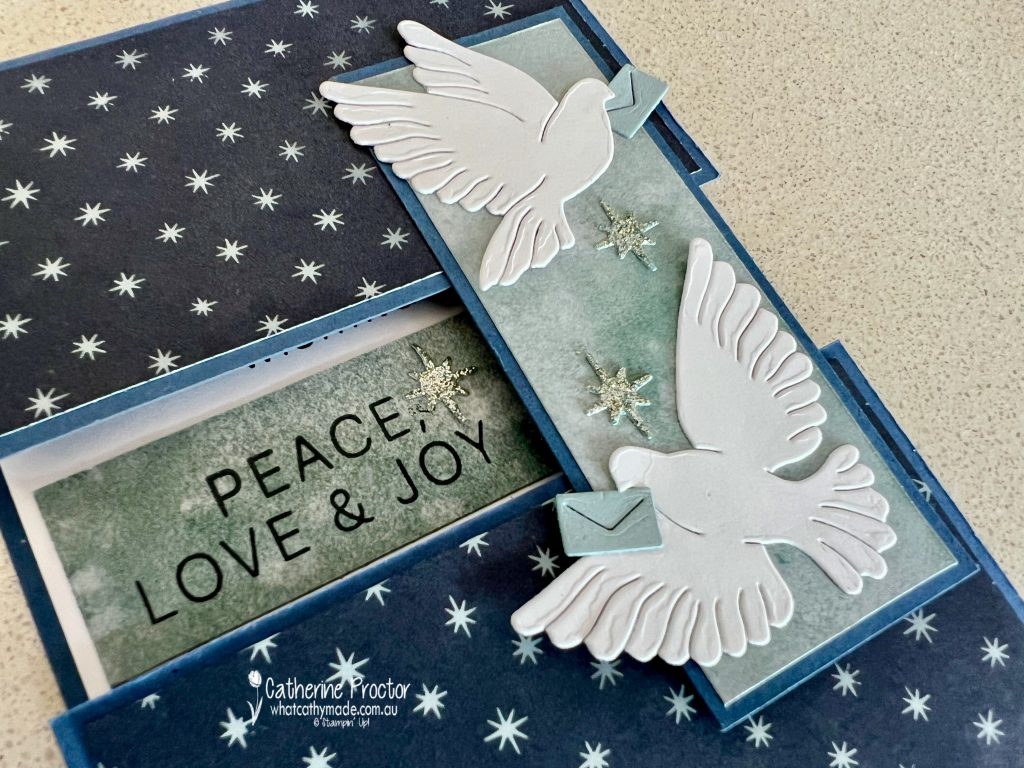
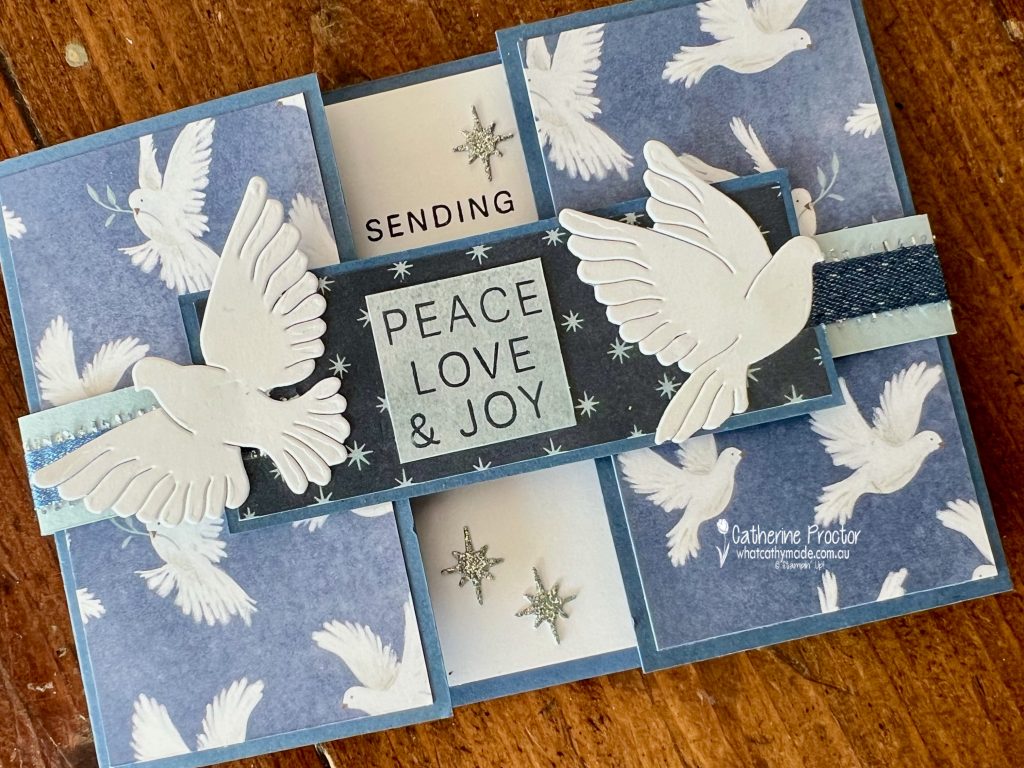
This starry Secret Sea/Cloud Cover DSP is my favourite DSP design from the Peaceful Garden 12″ x 12″ (30.5 x 30.5 cm) Designer Series Paper and it pairs perfectly with the other Cloud Cover DSP I’ve used for the inside sentiment and the side layering piece with the doves.
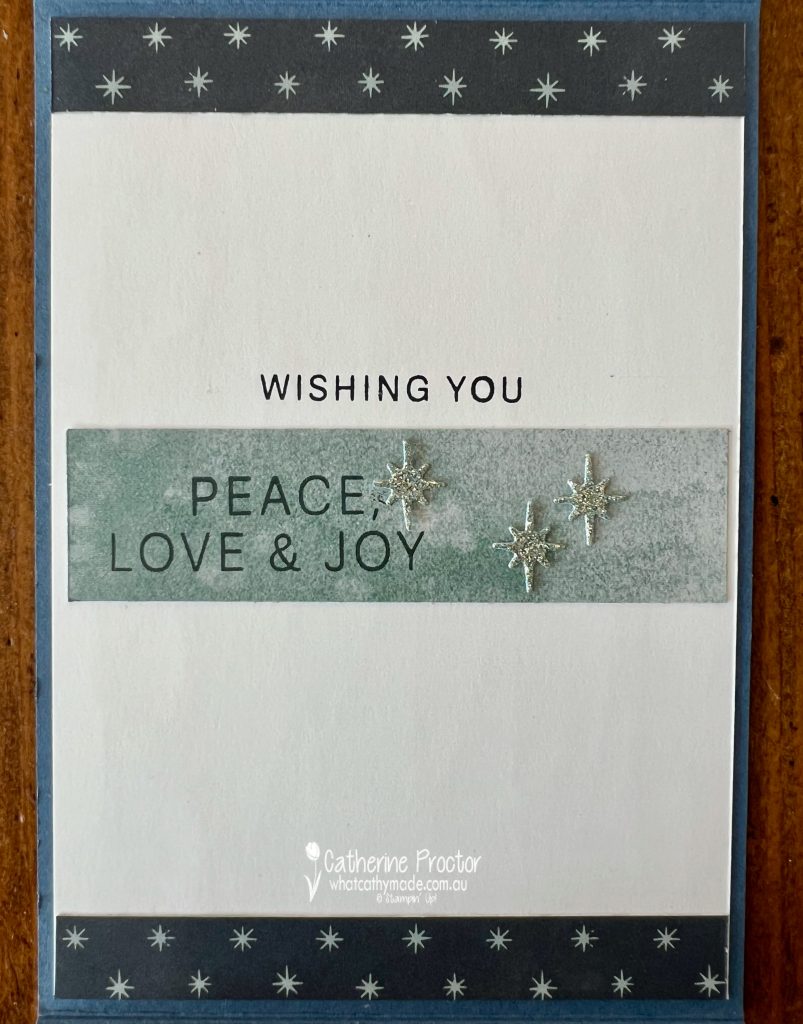
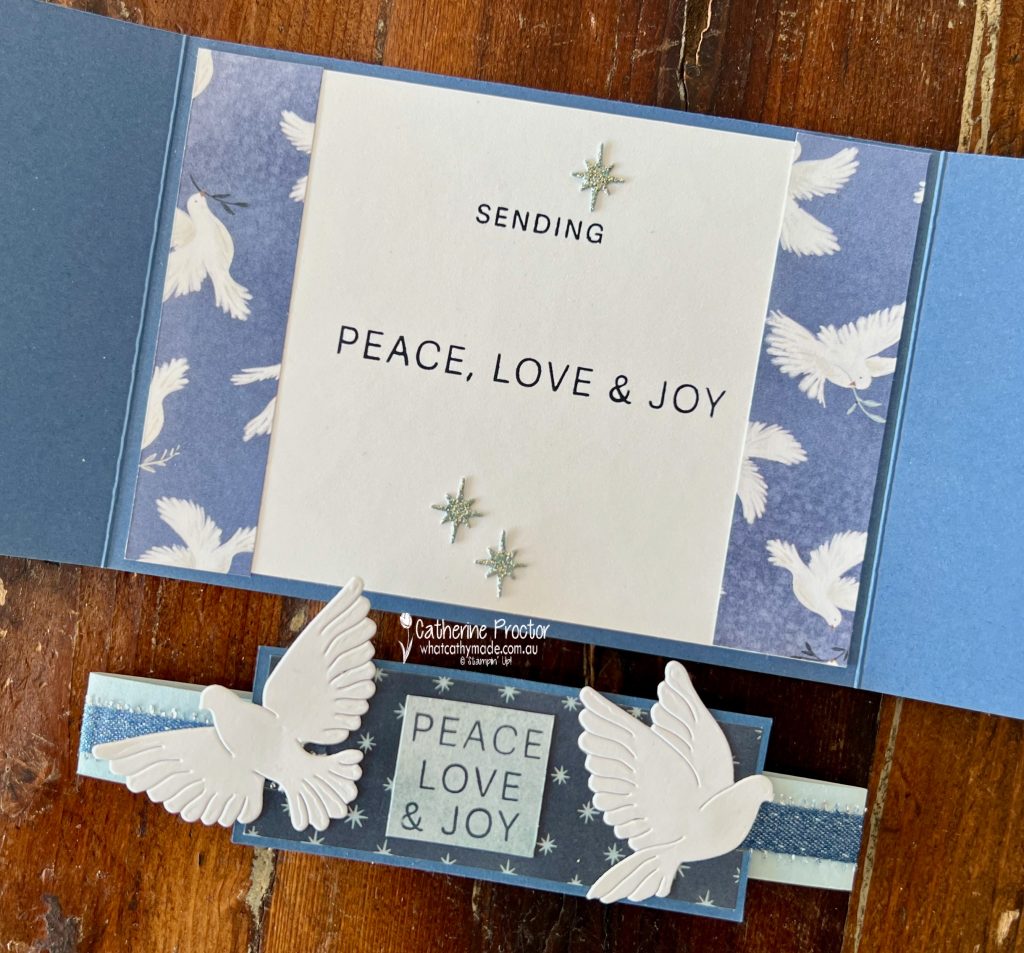
I have to admit I had originally stamped the sentiment directly onto the inside Basic White cardstock panel, however I accidentally smudged some ink so I covered it up with a strip of DSP and I really like the effect!
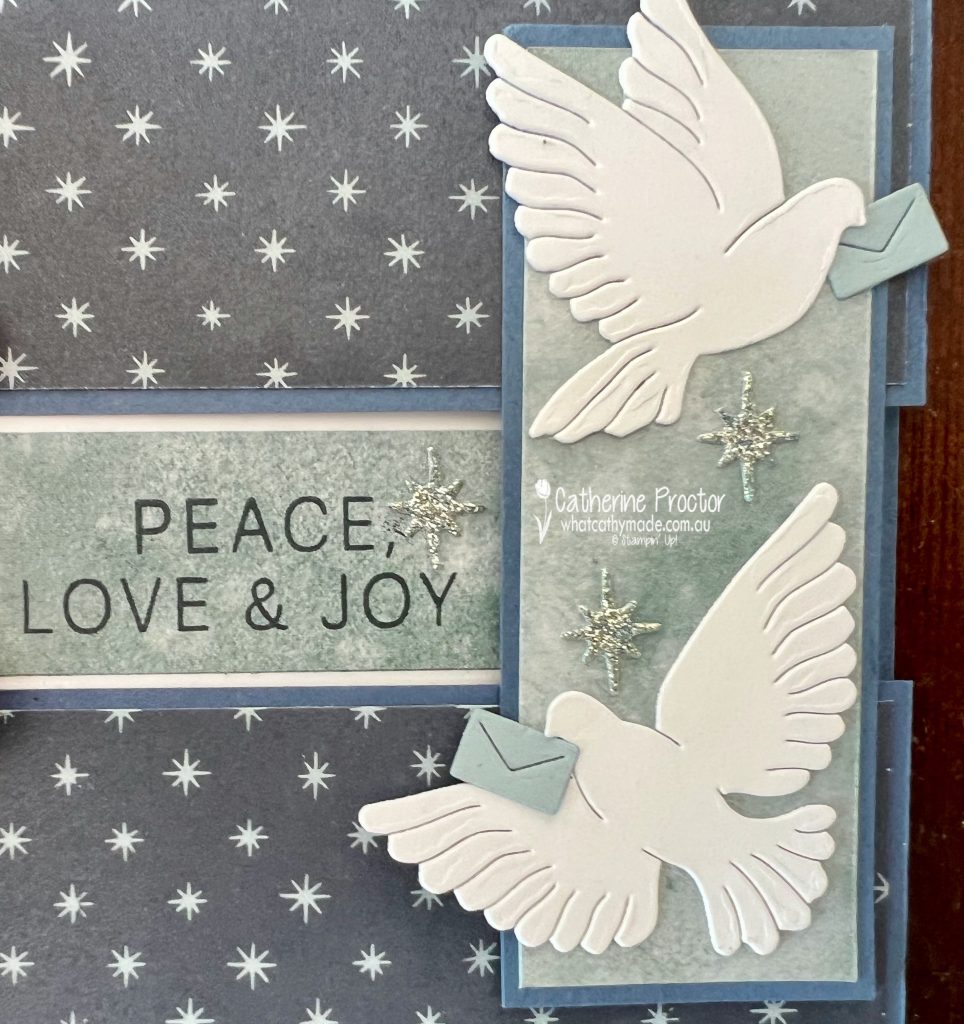
For both cards I’ve die cut the Peaceful Garden 12″ x 12″ (30.5 x 30.5 cm) Glimmer Paper using the star dies from the Peace on Earth Bundle to create my embellishments.
The other die I love in this bundle is the tiny envelope die that fits in the doves’ mouths. I die cut it from Cloud cover cardstock for card one.
Here’s what the card looks like when you open it up. I simply used a single glue dot to hold closed the side layering piece with the doves.
Card 2 – Horizontal Gatefold Card with a Belly Band
Card two has exactly the same measurements for the card base as card one, however it has been flipped vertically and a belly band has been added to secure it closed.
I created the belly band using a strip of cloud cover cardstock and a length of the Misty Moonlight & Silver Edged 1/2″ (1.3 cm) Ribbon from the Peaceful Garden Suite,
Here’s what the card looks like on the inside with the belly band removed.
For both cards I stamped the sentiments in Secret Sea, sometimes just partially stamping the “Peace, Love & Joy” sentiment to make it fit into my design.
Take a look at some more Christmas Card inspiration on our Heart of Christmas blog hop!
Now it’s time to hop in over to our next participant, the lovely Kate Morgan. I can’t wait to see what Kate has made this week!
If the next button link is not working or you’d like to see the entire list of participants go to Sharon Davern‘s blog. Sharon does an amazing job of hosting our Heart of Christmas blog every Monday.
Our AWH team will be back on Wednesday night, showcasing Daffodil Delight on our Insta Hop. I hope you can join us then!
Our Art With Heart, Heart of Christmas team are back for 2025 and hoping to provide plenty of inspiration for the next sixteen weeks with our Heart of Christmas blog hop!
In just two days time the new September – December 2025 Mini Catalogue (AKA the Christmas Catty), the September Online Exclusives and three new kits are being released.
My two cards for week 1 use dies from the Annual Catalogue as well as products from the September Online Exclusives: the Modern Christmas Suite collection and the Elegant Pine Snowflake suite.
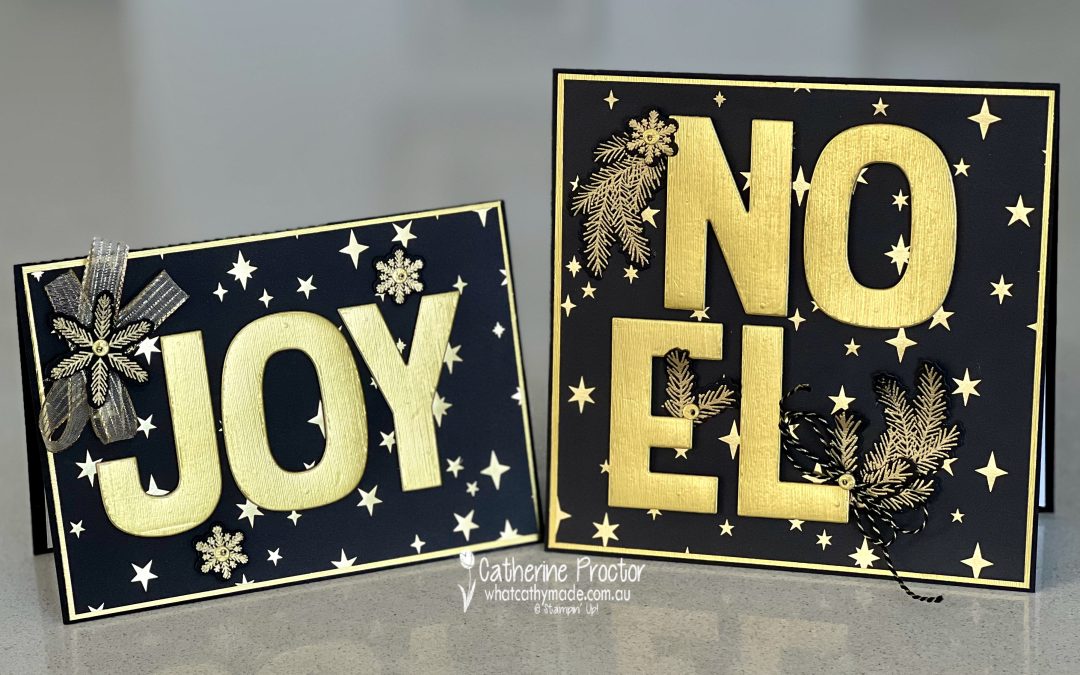
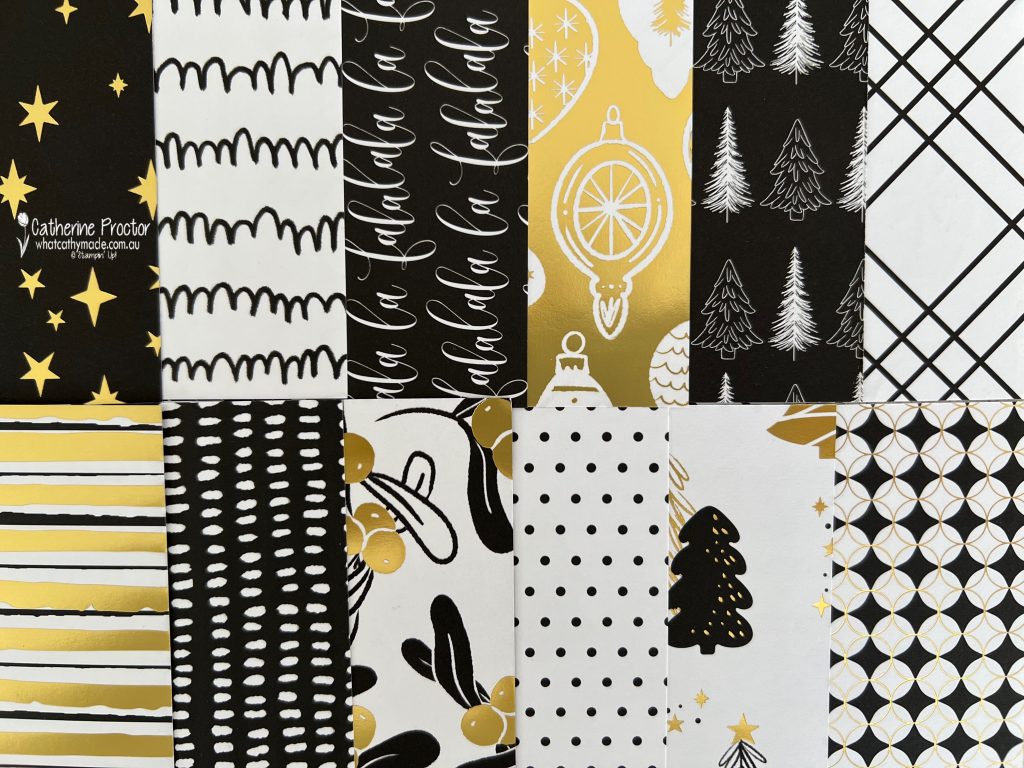
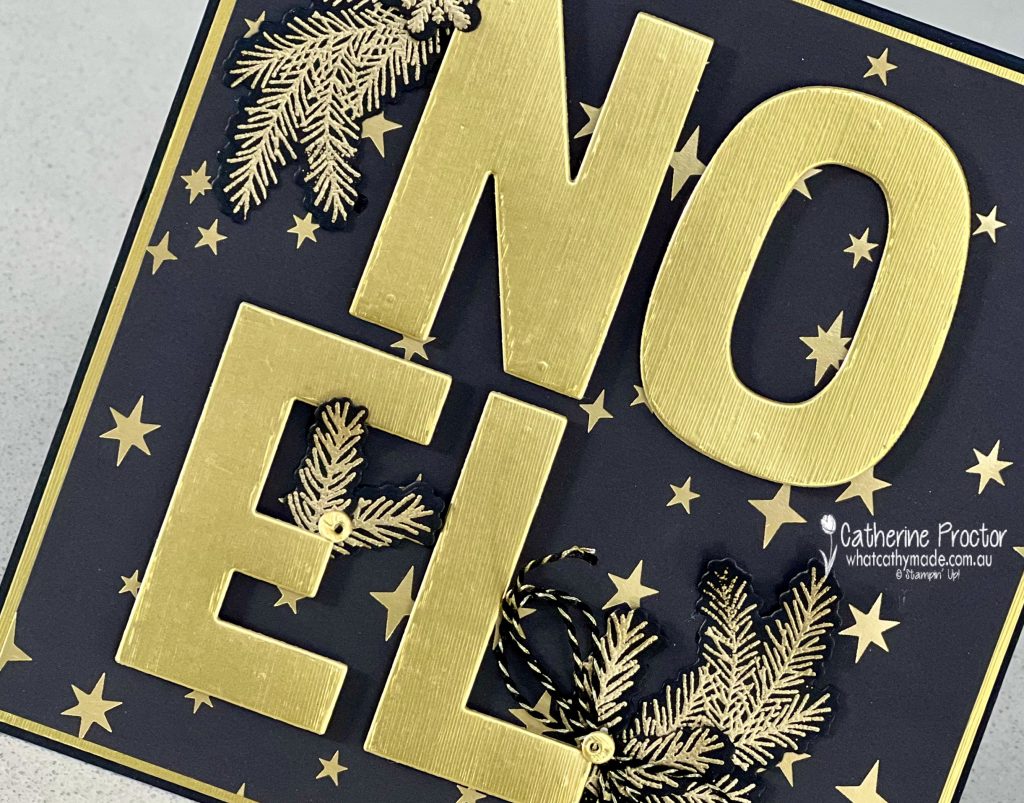
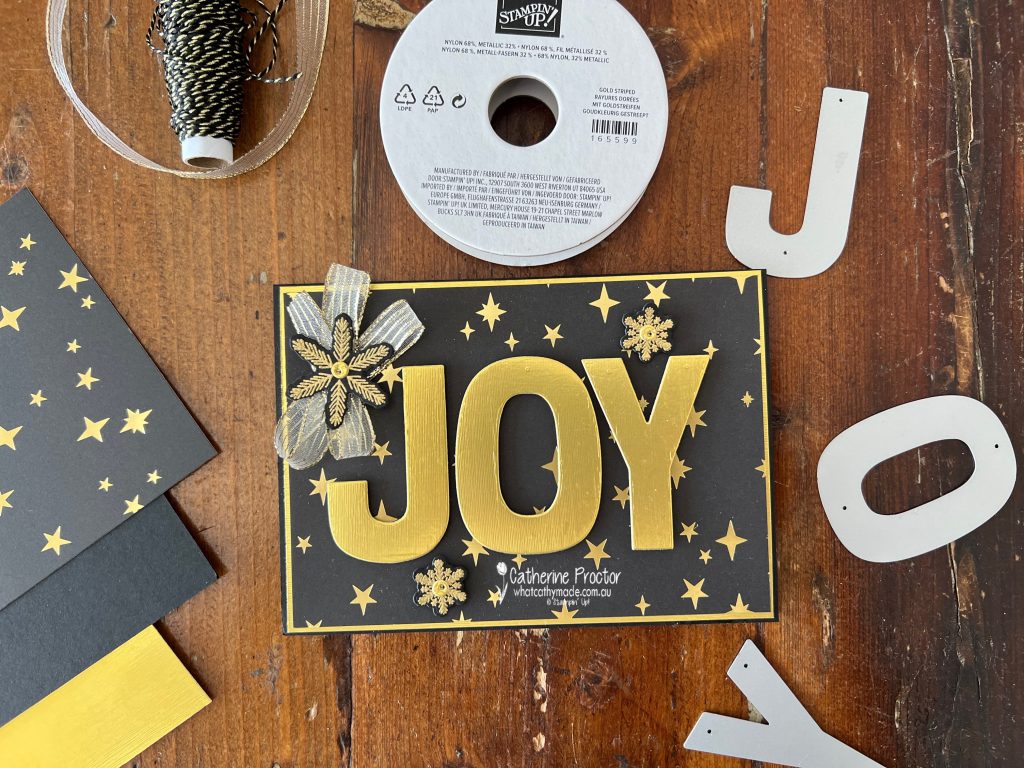
Both cards use the foiled gold star pattern from this gorgeous Modern Christmas 12” X 12” (30.5 X 30.5 Cm) Specialty Designer Series Paper and the Party Alphabet Dies to die cut gold foil letters.
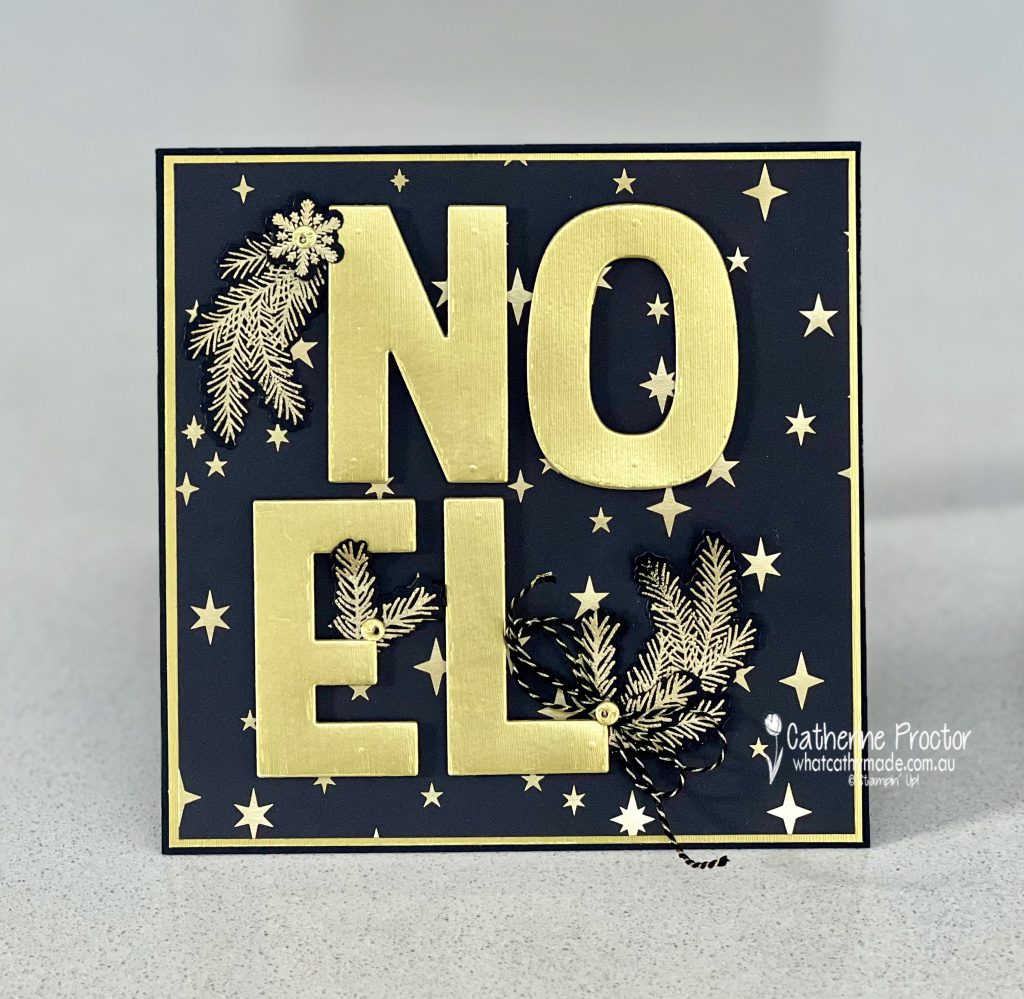
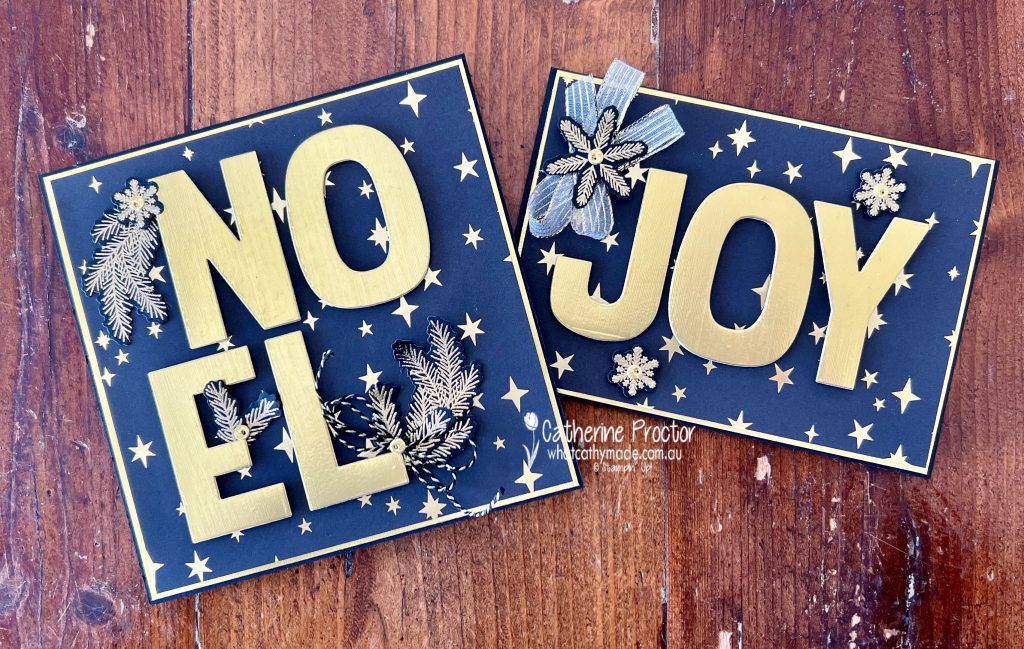
Card 1 – Noel
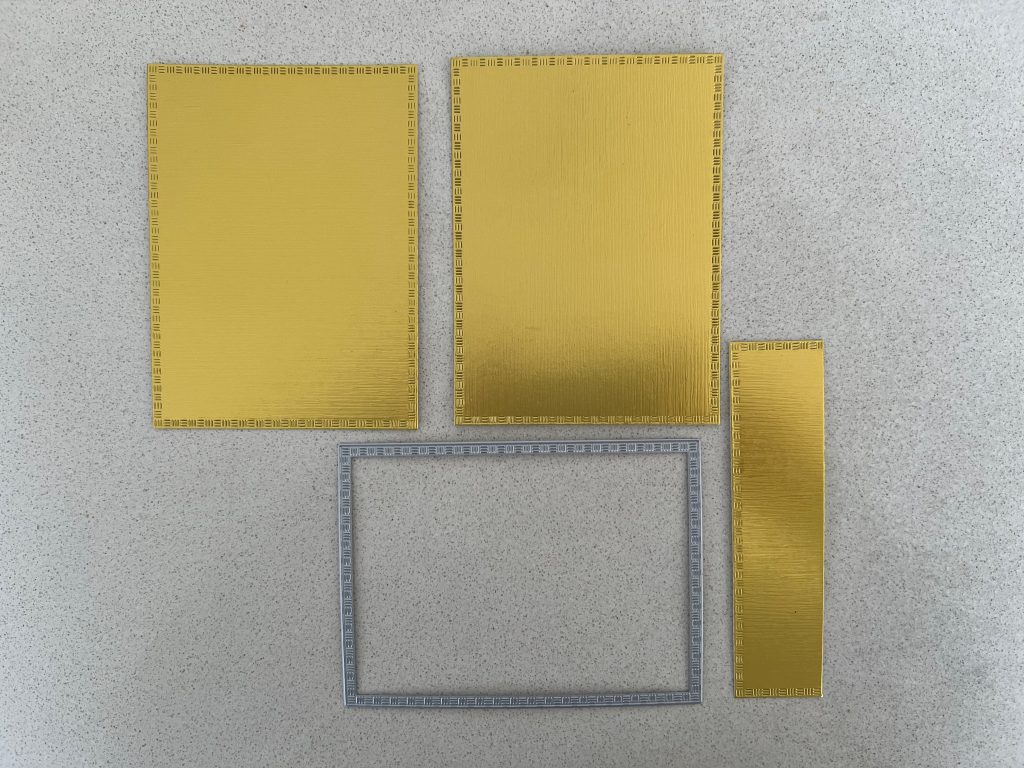
When creating the square gold foil mat under the DSP layer I like to use large dies to cut our the inside of the foil layer so I don’t waste all that foil. Look at how much foil I have left over!
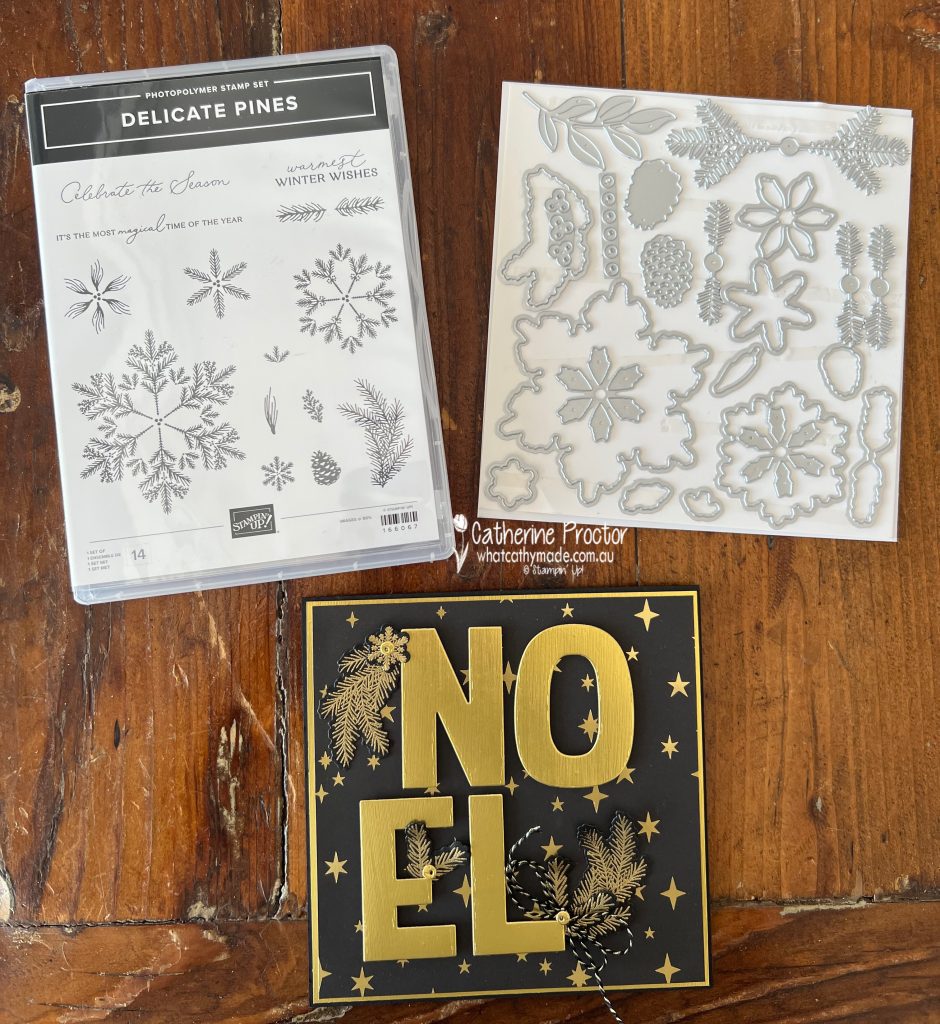
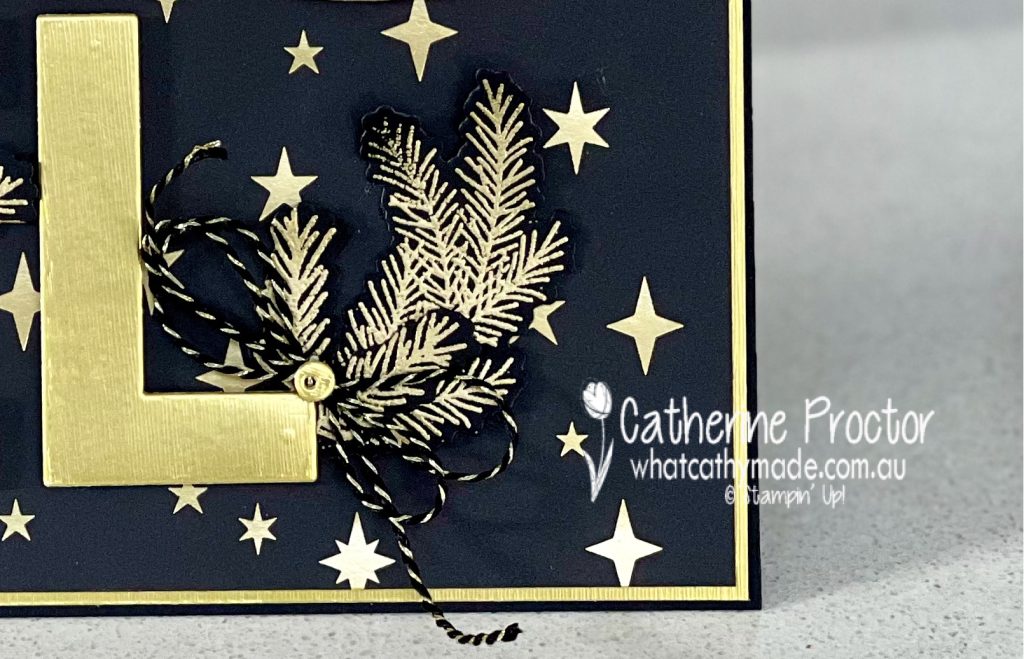
Both cards have foliage embellishments created using the Delicate Pines Bundle, another Online Exclusive being released on September 3.
If you take a close look at my cards you can see I’ve used the berry die (it cuts six tiny berries at once) to embellish the middle of the gold heat embossed foliage pieces.
The black and gold twine for the bow is from the Black & White & Gold Bakers Twine pack, part of the Modern Christmas Suite. It’s a bit hard to see in these photos, but it is just the perfect finishing touch in real life.
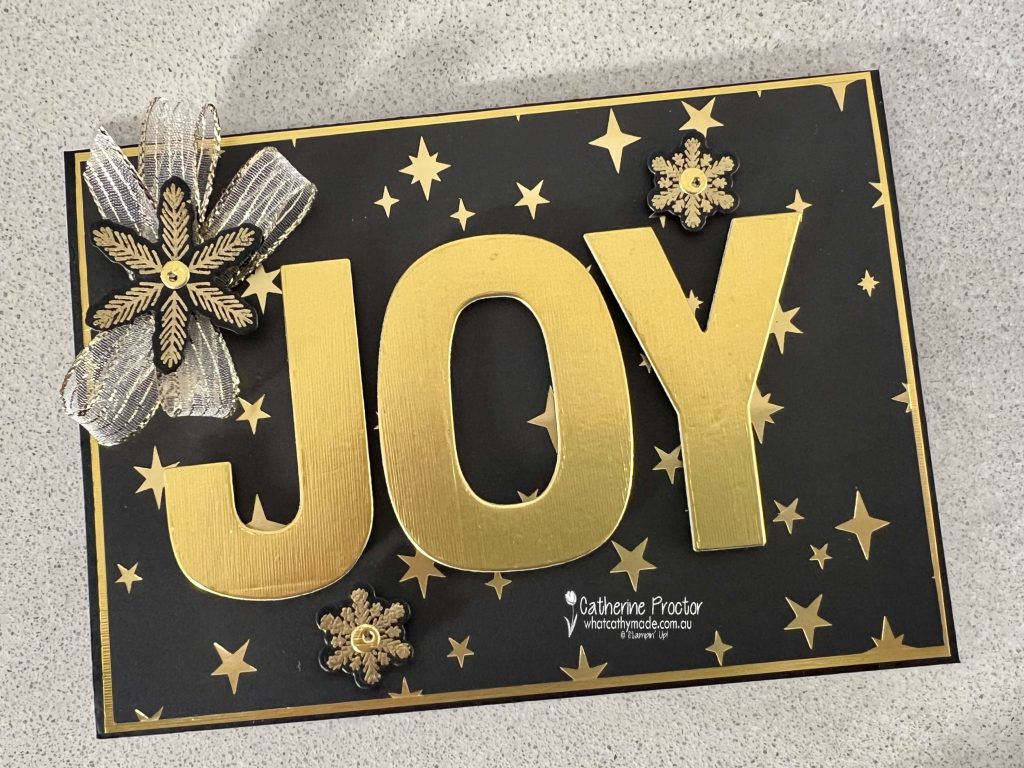
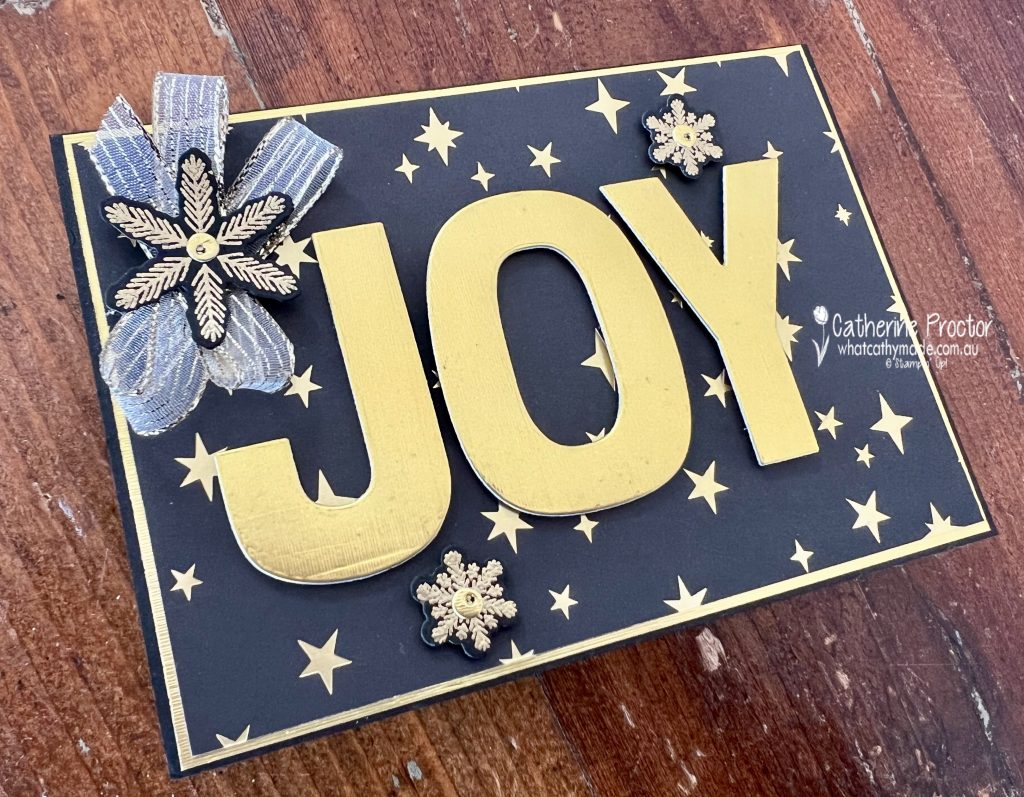
Card 2 – Joy
Card two uses all the same products as card one with th exception of the twine. Instead of the black & gold twine I’ve used the Gold Striped 3/8″ (1 cm) Mesh Ribbon.
While the Party Alphabet dies are perfect for banners, home decor pieces and scrapbooking, they are also fabulous for modern and graphic cards.
Words such as “Joy”, “Noel”, “Happy”, “Hi”, “Hugs” , “Love”, “Merry” and more can be cut using these dies to create hi impact cards.
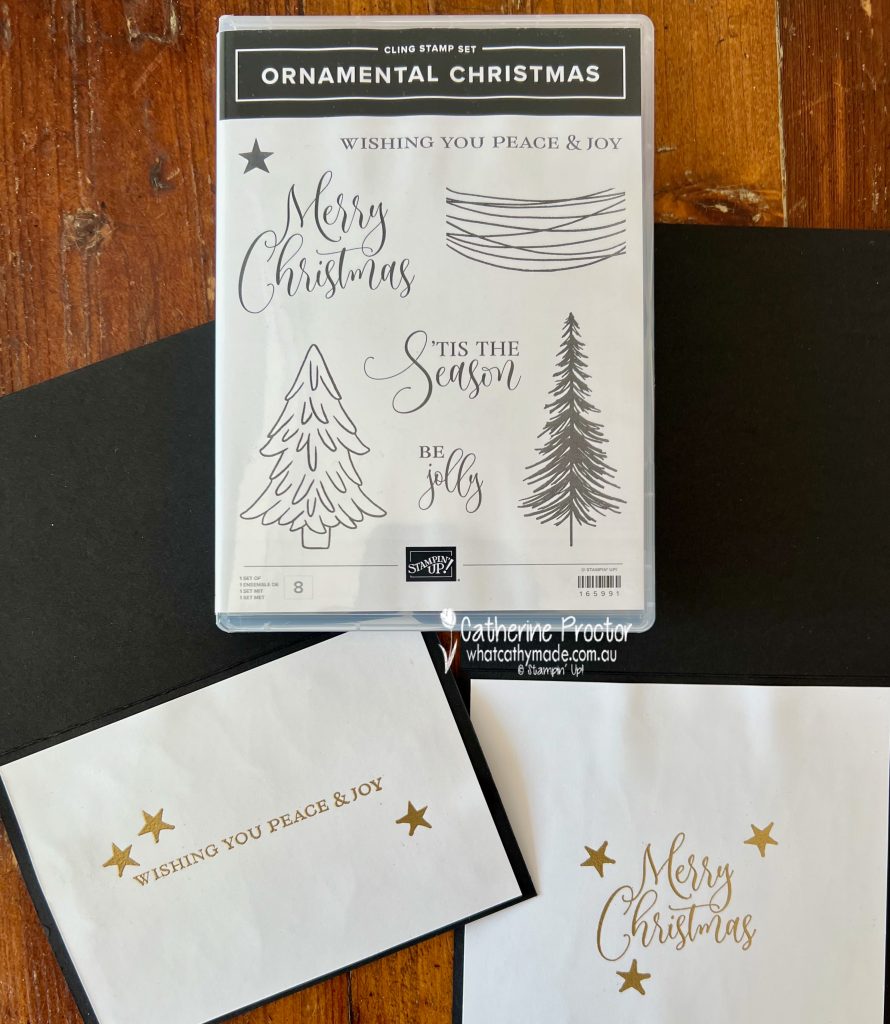
I haven’t forgotten the inside of the cards. I’ve gold heat embossed two of the sentiments from the Ornamental Christmas stamp set. The Ornamental Christmas stamp set is part of the Ornamental Christmas Bundle in the Modern Christmas Suite (online exclusive).
Take a look at some more Christmas Card inspiration on our Heart of Christmas blog hop!
Now it’s time to hop in over to our next participant, the lovely Kate Morgan. I can’t wait to see what Kate has made this week!
If the next button link is not working or you’d like to see the entire list of participants go to Sharon Davern‘s blog. Sharon does an amazing job of hosting our Heart of Christmas blog every Monday.
Our AWH team will be back on Wednesday night, showcasing Crushed Curry on our InstaHop. I hope you can join us then!
I’ve been missing in action the past month, but I was determined to join in the hop this week as it is the very last Heart of Christmas hop for the year. Sharon has done an amazing job hosting our Christmas blog. Thank you Sharon!
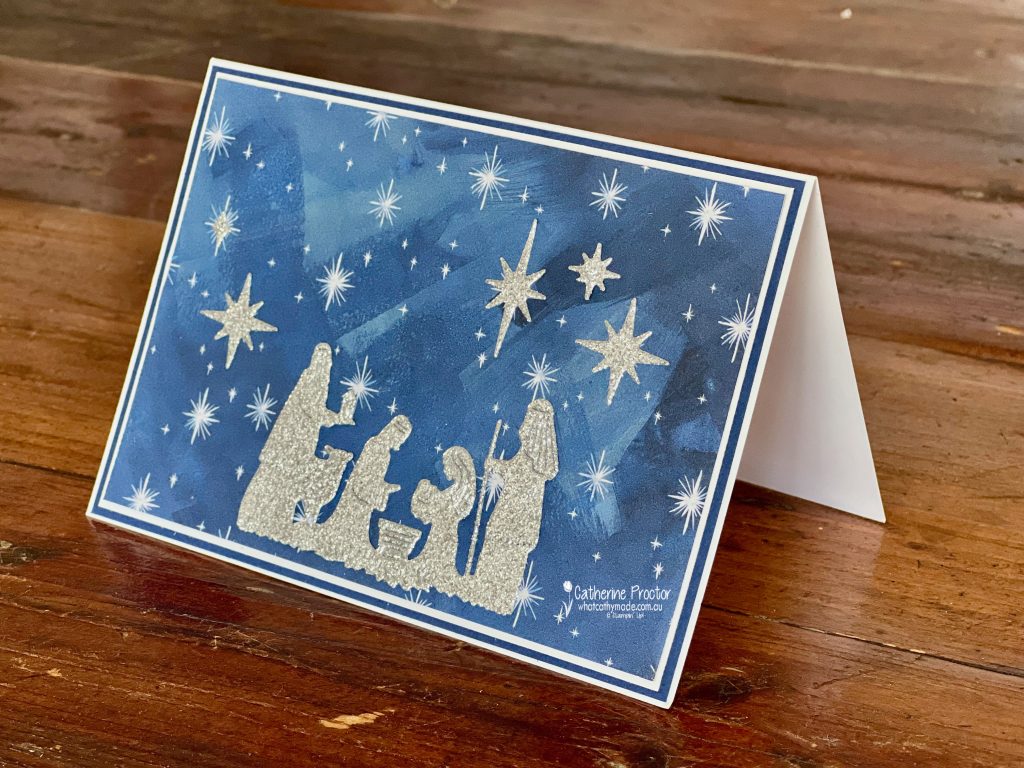
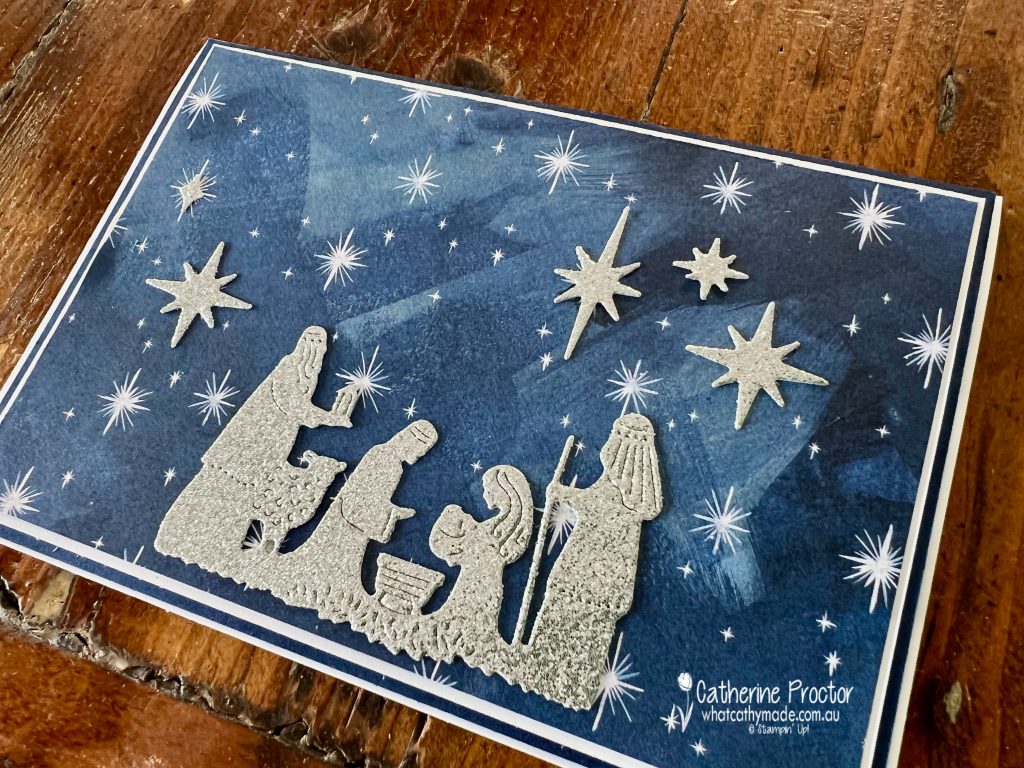
After attempting to make a fancy fold that did not work at all, here is super quick and easy Christmas card instead!
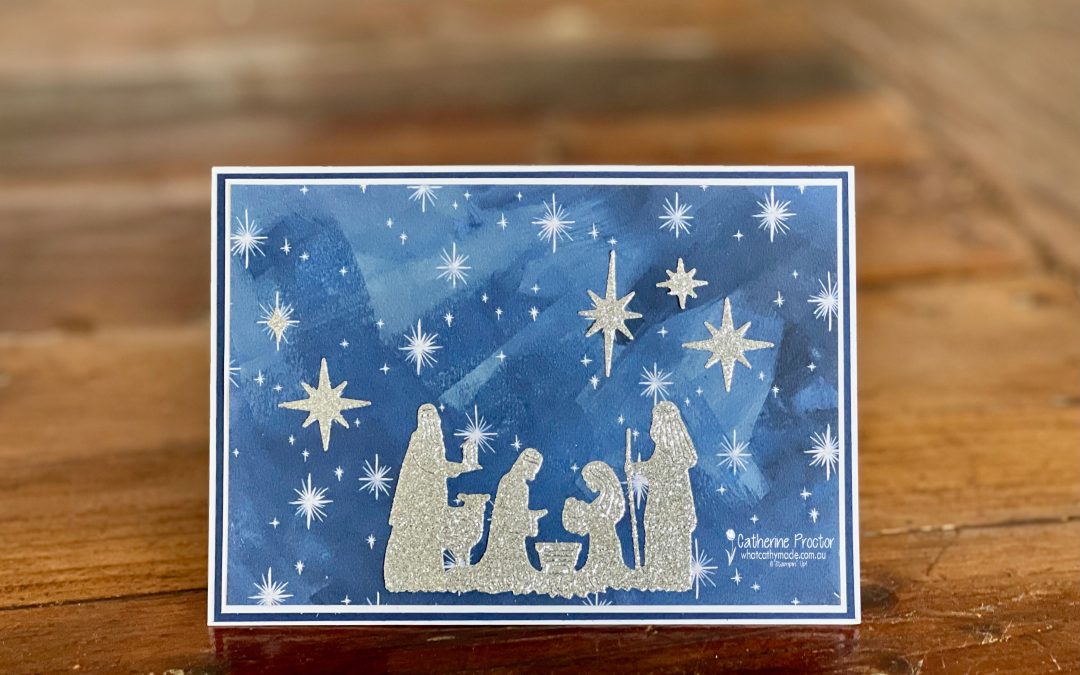
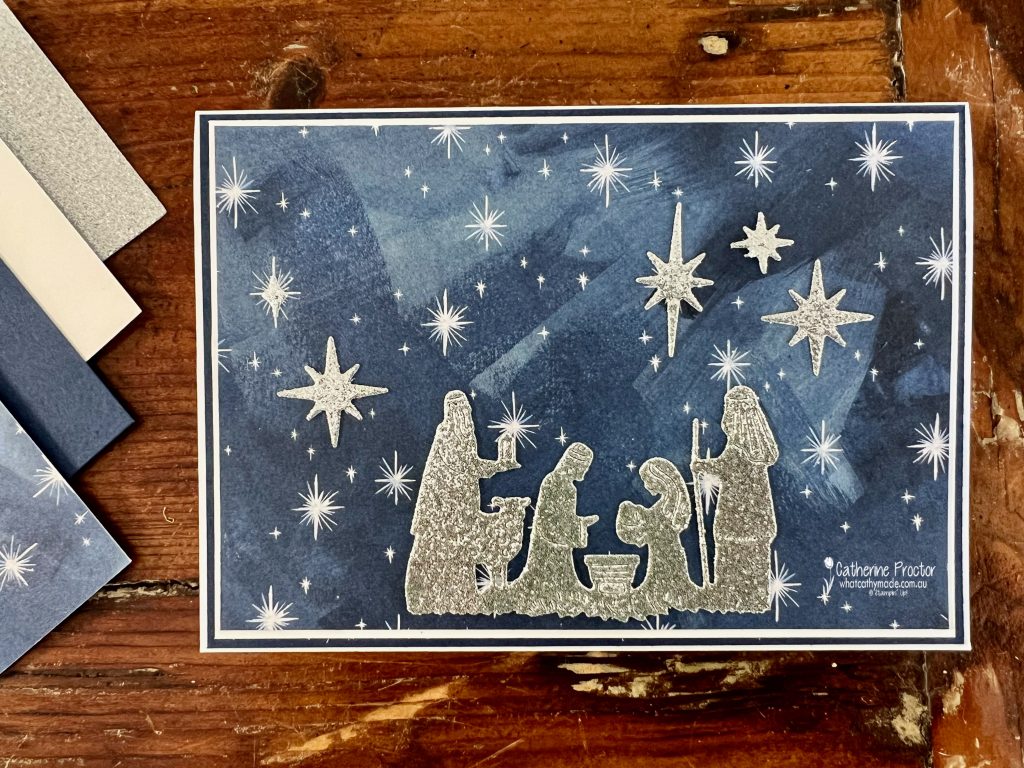
The O Holy Night Designer Series Paper forms the perfect background for this simple nativity scene. I’ve paired it with Silver Adhesive-backed Glimmer Paper, Night of Navy card stock and Basic White card stock.
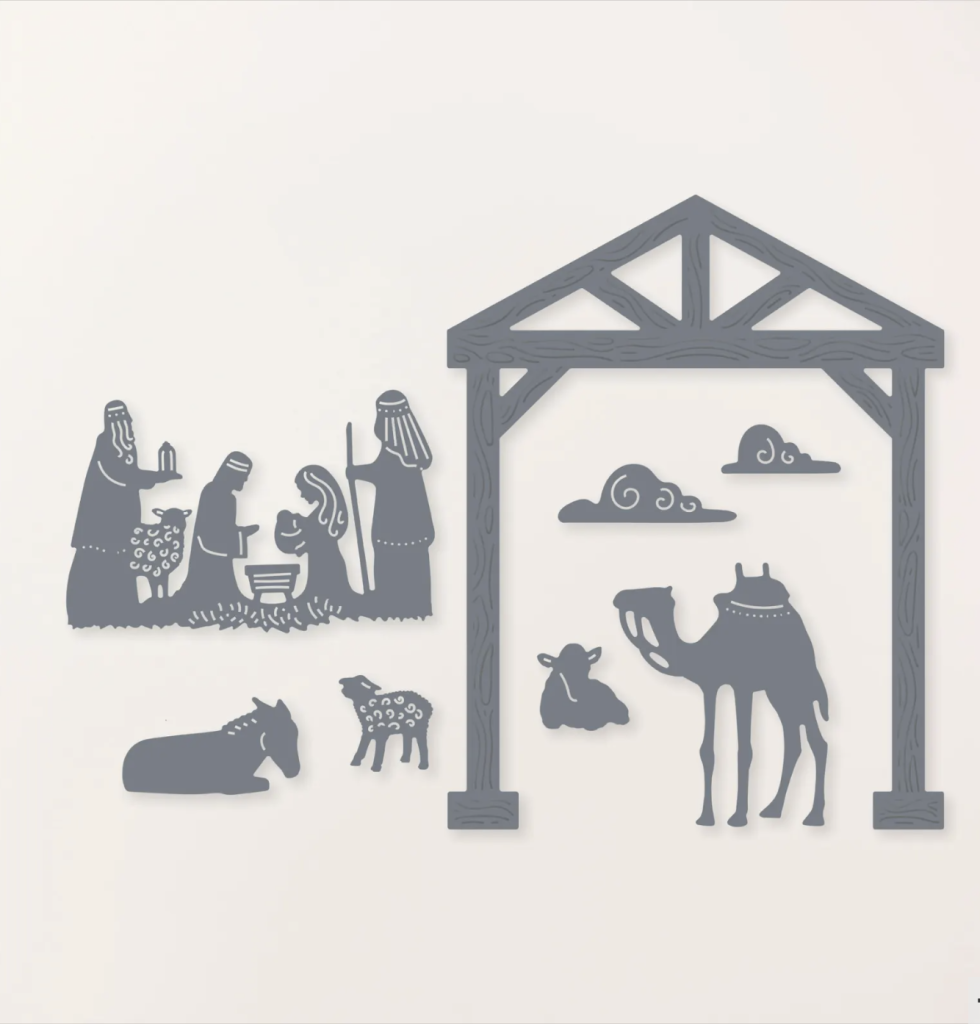
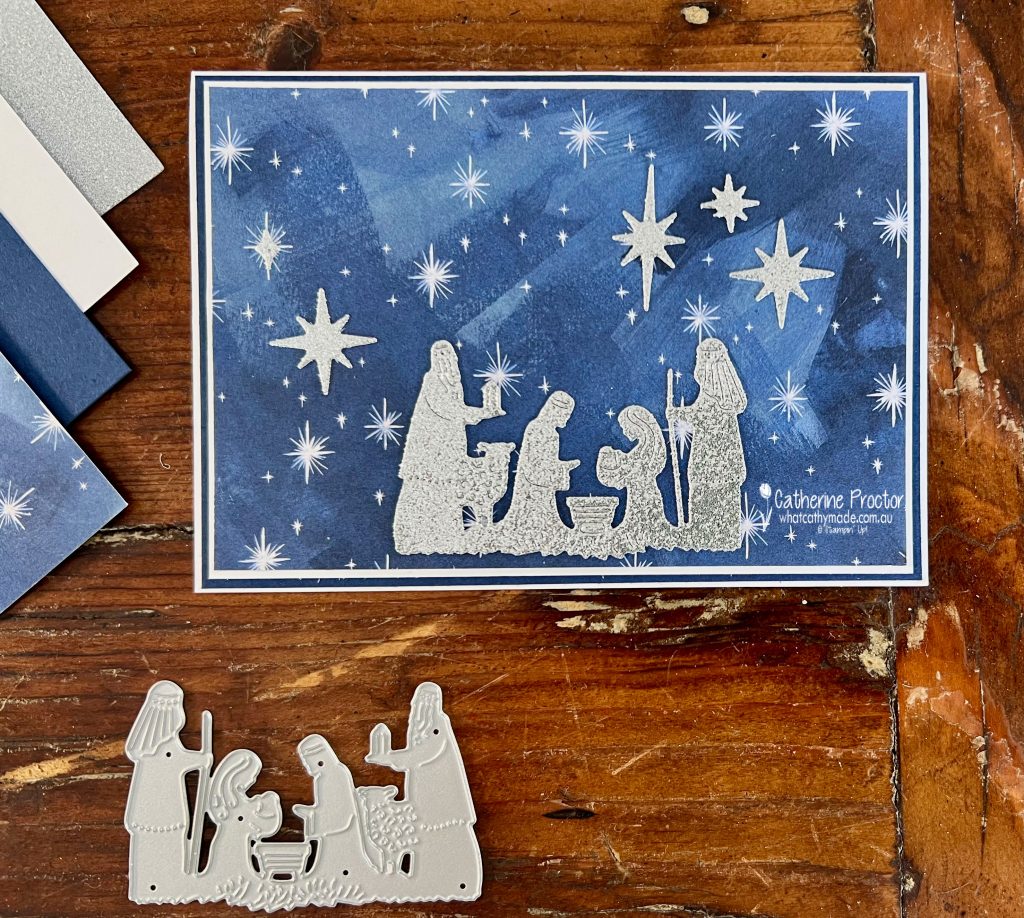
I love the amount of detail in this nativity die from the Night Divine dies.
The Silver Adhesive-backed Glimmer Paper makes working with these detailed dies a breeze – there is no need to muck around with glue.
The glimmery stars in the sky are die cut using the dies from the Stars at Night Hybrid Embossing Folder set.
If you have a pack of the O Holy Night Designer Series Paper and a pack of the Silver Adhesive-backed Glimmer Paper (online only) this design would be ideal for mass production of Christmas cards.
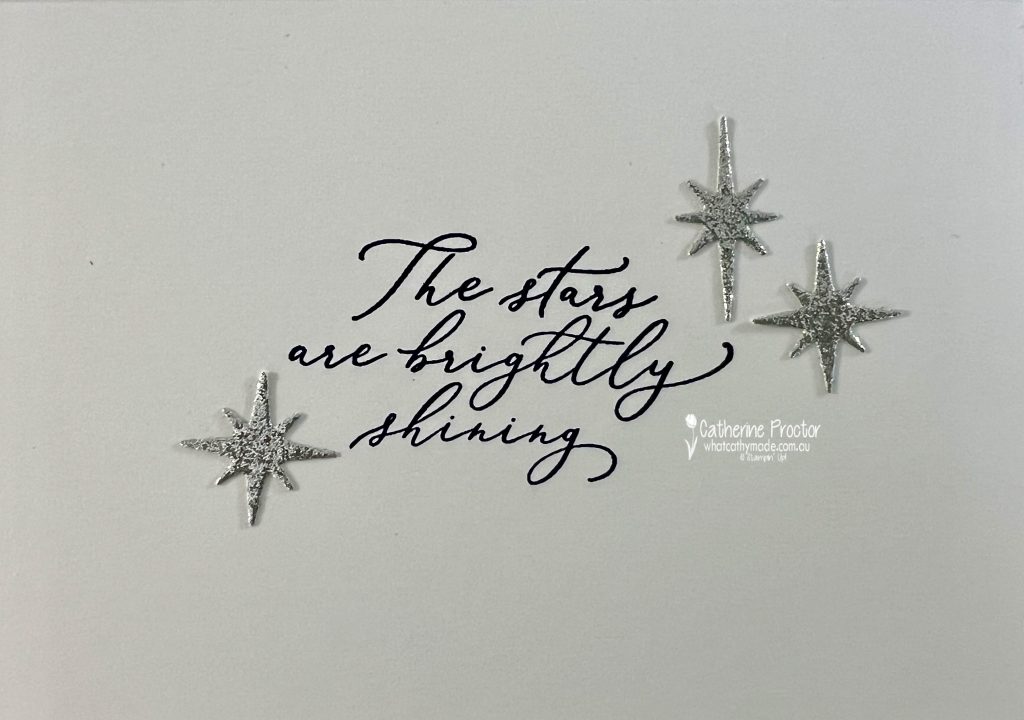
A few extra die cut stars complete the inside of the card.
Now it’s time to hop on over to our next participant, the lovely Judy May. I can’t wait to see what Judy has made this week.
If at any time you find a broken link, you can find the complete list of all participants on Sharon Davern’s blog.
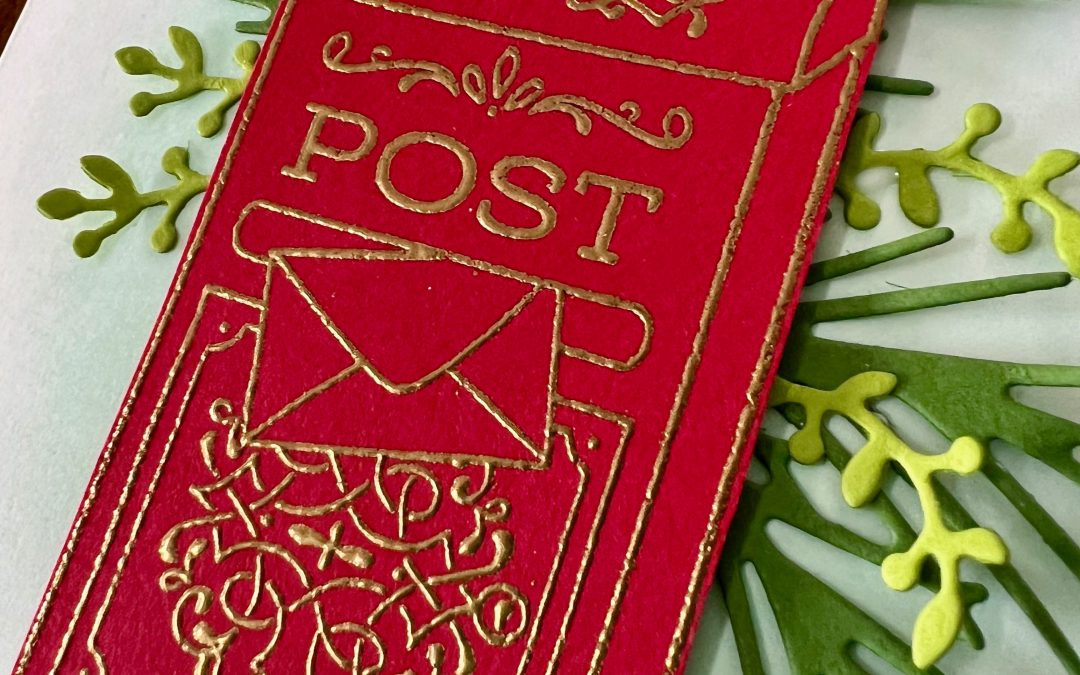
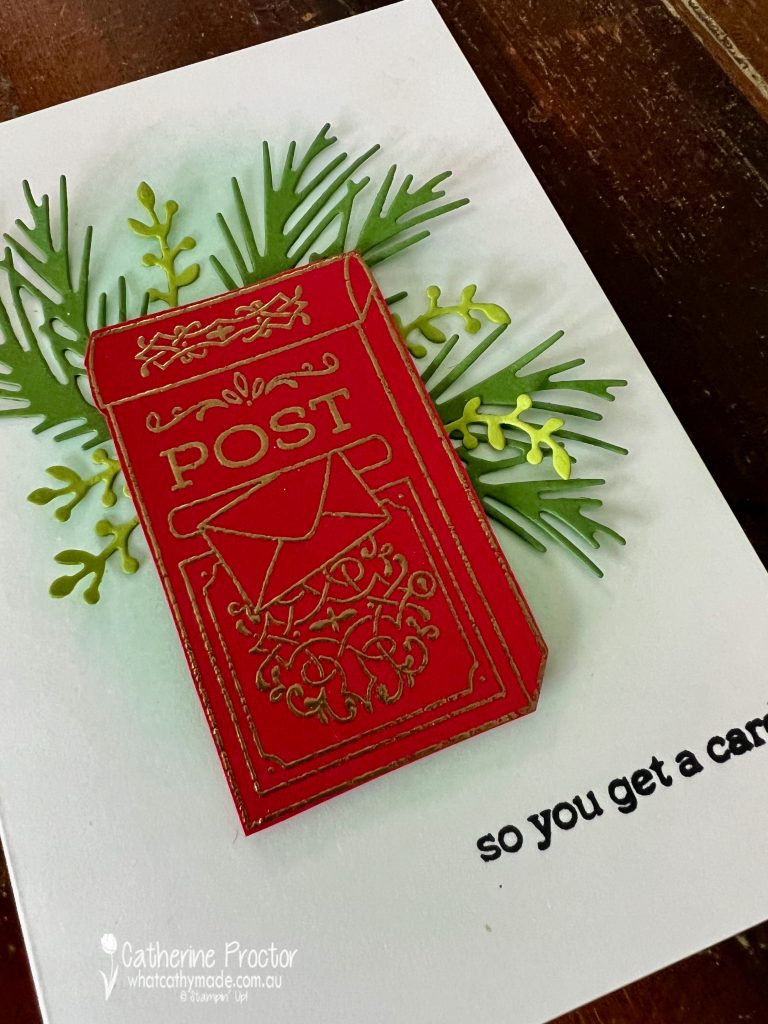
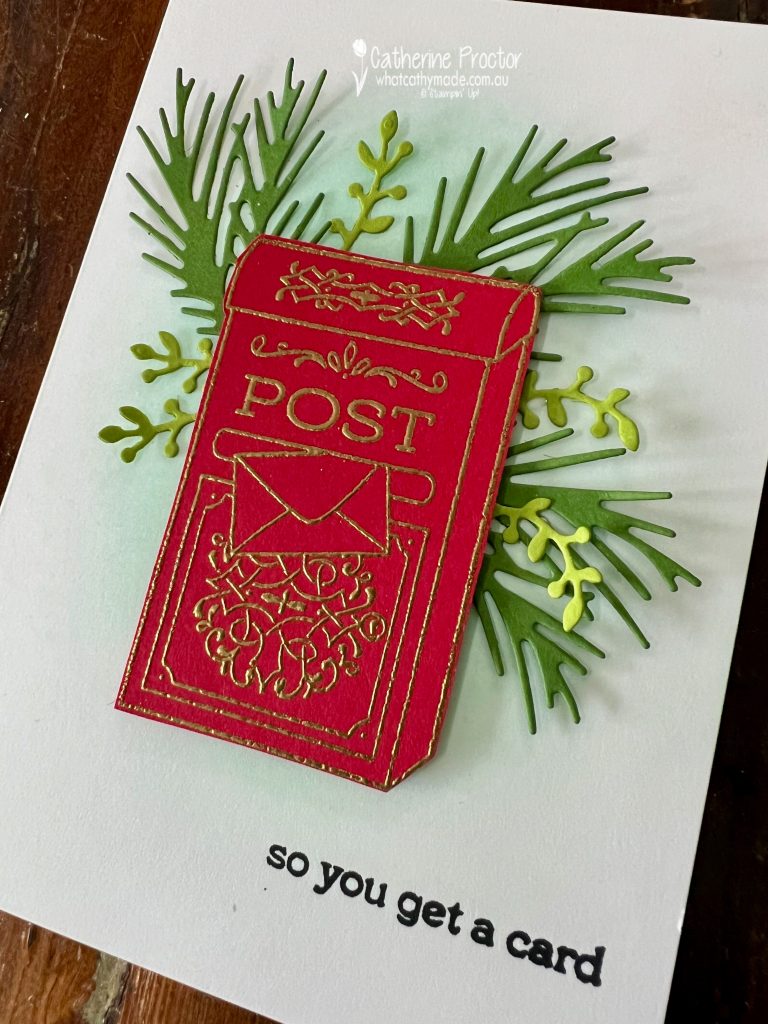
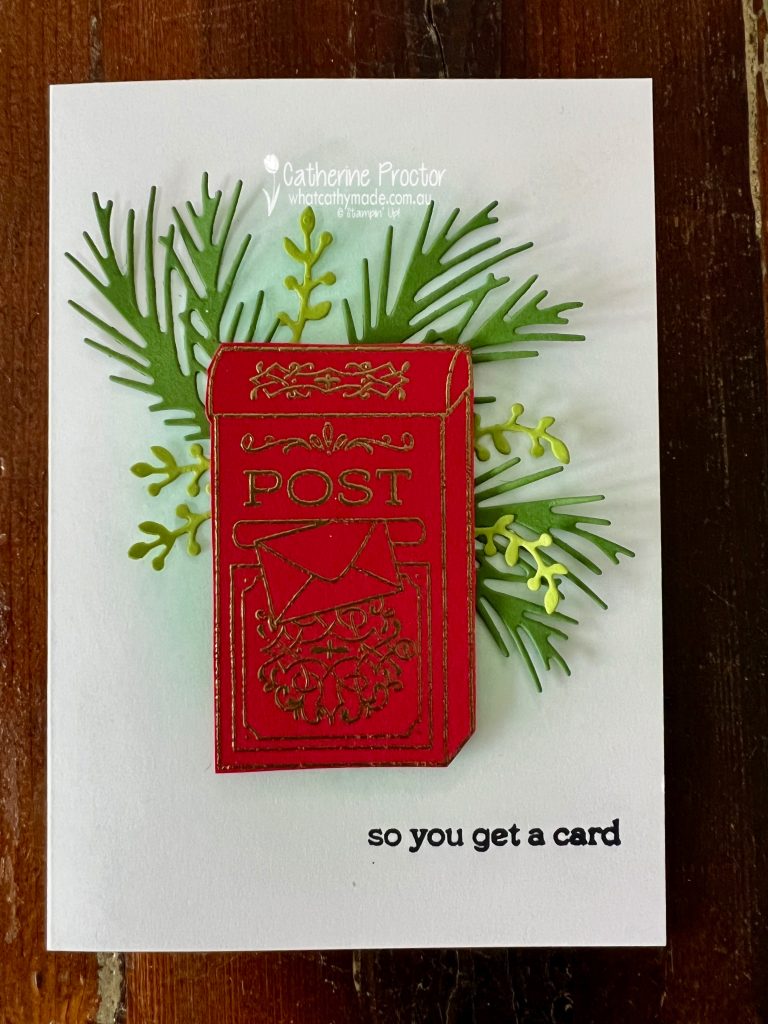
The challenge for Day 8 of the #30DayChristmasCardMakingChallenge is called ‘Christmas Letters’.
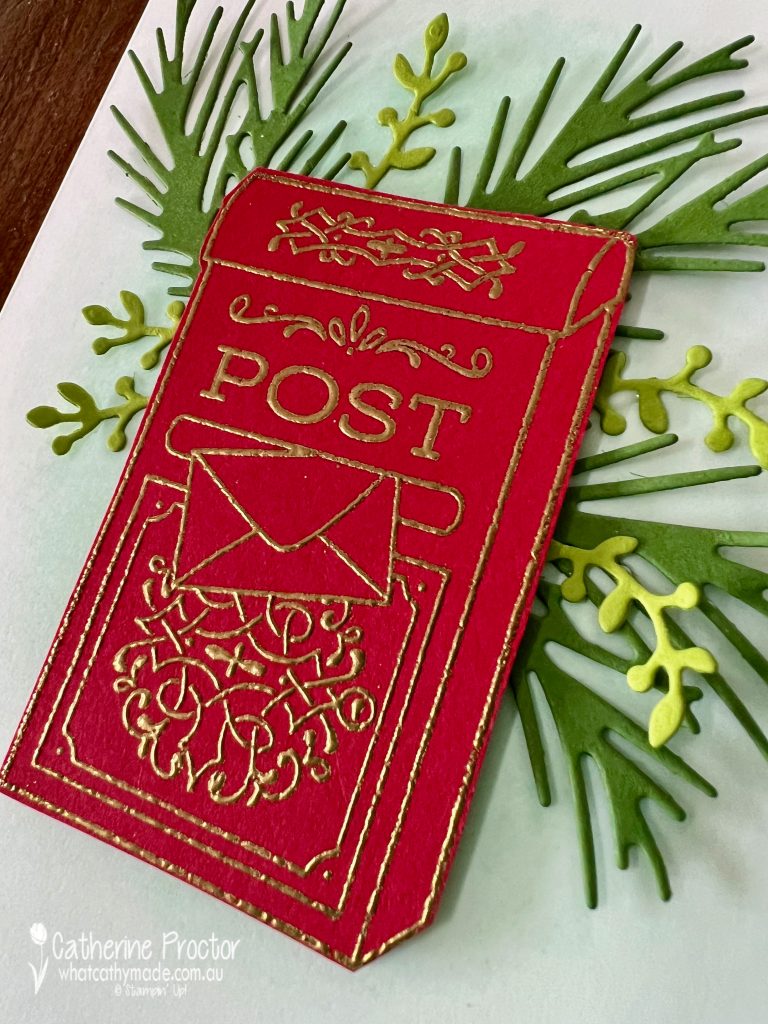
I’ve used the gorgeous letter box from the Stamped with Love Stamp Set, stamped in versmark onto Real Red card stock and heat embossed with gold emboss powder.
The Joy of Noel Dies were used to die cut Garden Green and Old Olive cardstock to create the greenery behind the letterbox.
Before I adhered the letterbox and the foliage to the front of the card, I used a Blending Brush to add some Pool Party ink to the card base.
I thought a very modern sentiment in a typewriter font would work well with all the white space on this card, so I’ve used the ‘so you get a card’ sentiment from the ‘Just My Type’ stamp set.
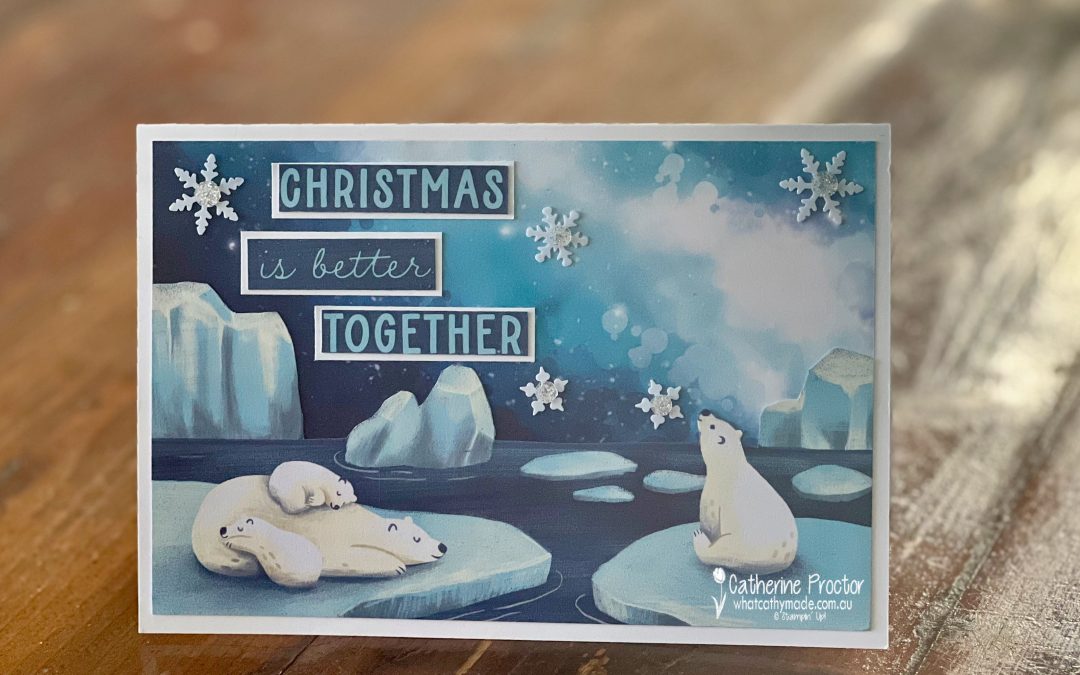
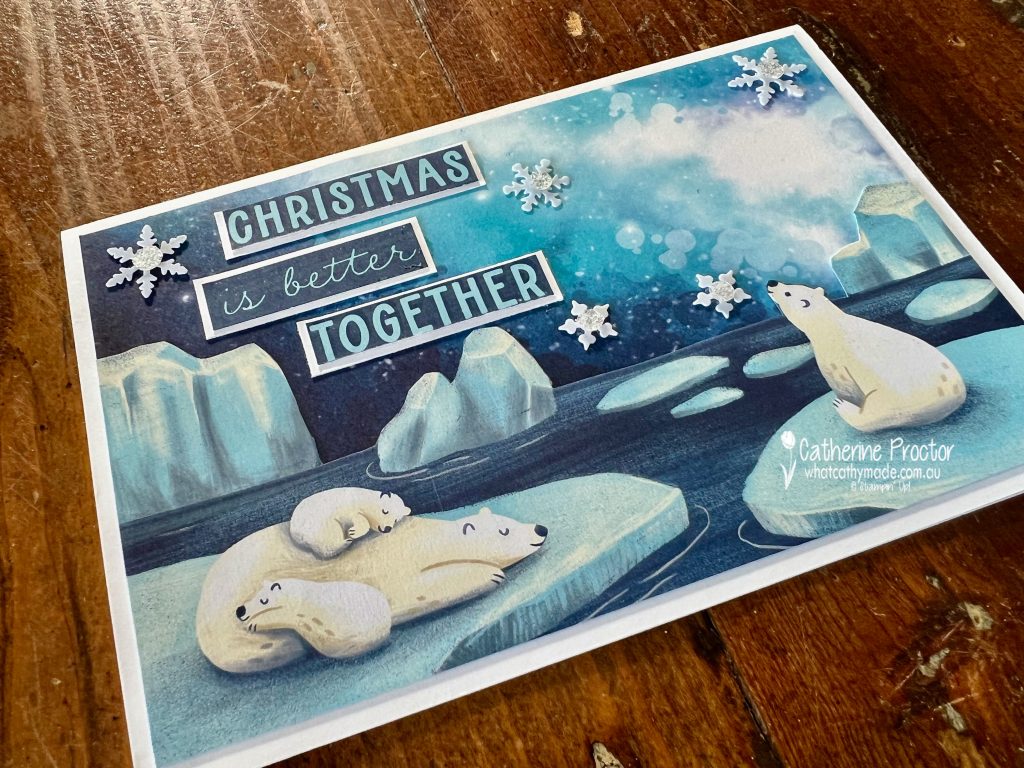
The challenge for Day 2 of the #30DayChristmasCardMakingChallenge is ‘Frosty Air’.
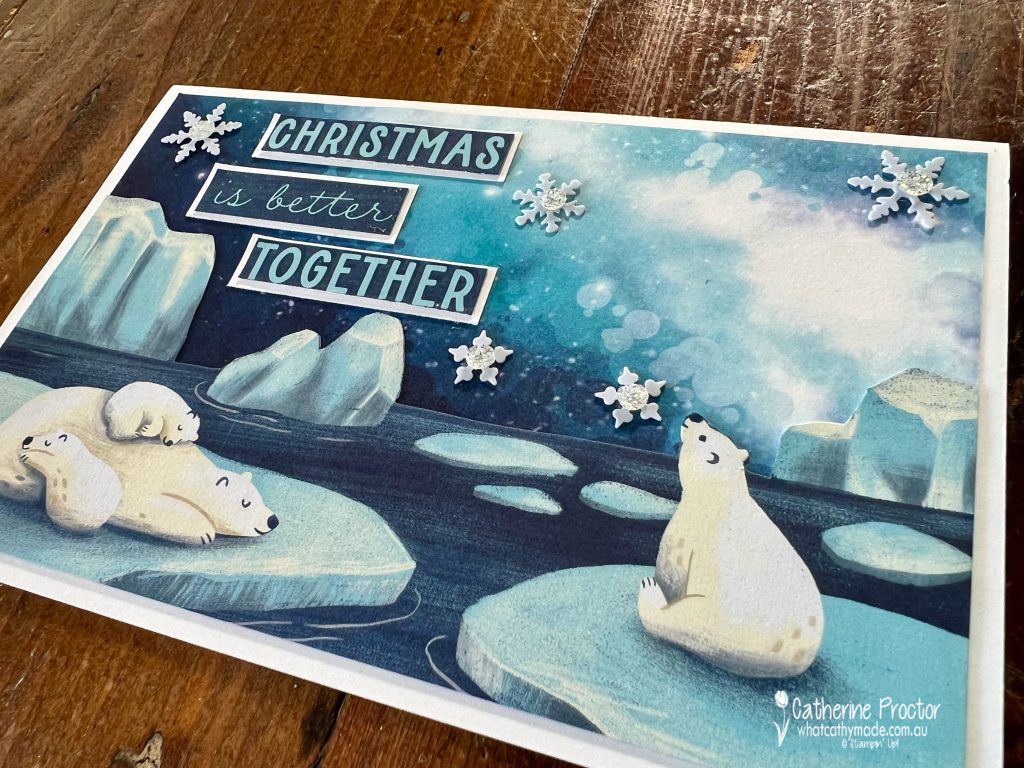
Can you get any more frosty than a family of polar bears relaxing on an ice shelf with snowflakes falling?
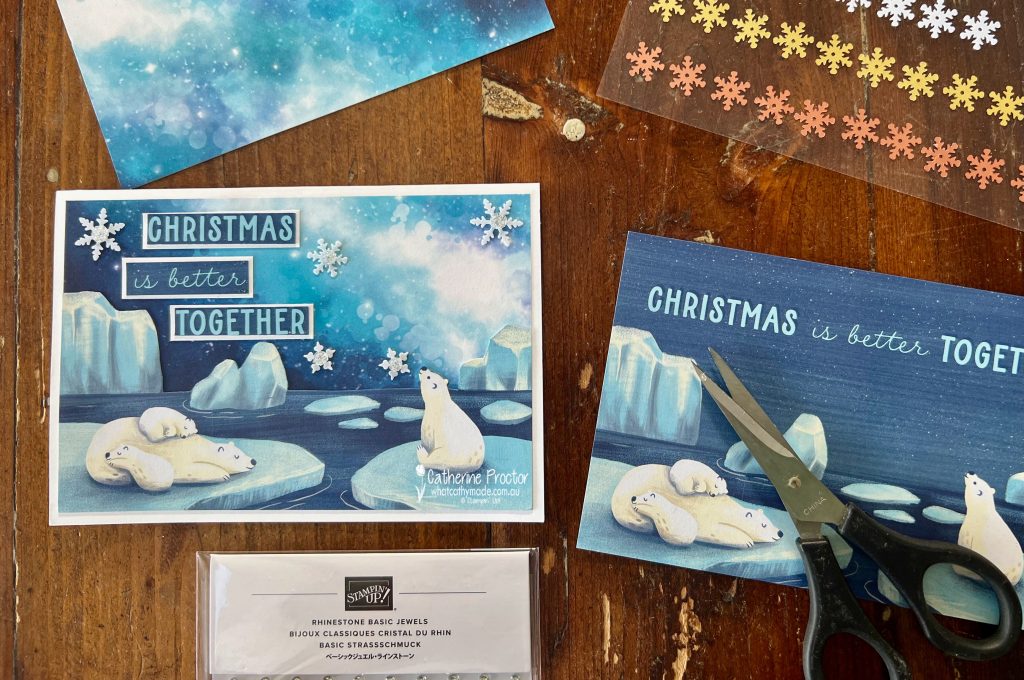
This simple, no stamping card uses the Stargazing Designer Series Paper for the frosty sky and a card from the Beary Christmas Memories & More Card Pack, fussy cut with paper snips.
The ‘Christmas is better together’ sentiment has been cut with the paper trimmer from the M&M card and mounted onto some Basic White cardstock scraps.
Adhesive snowflakes and rhinestone gems add an extra touch of frostiness to this winter scene.
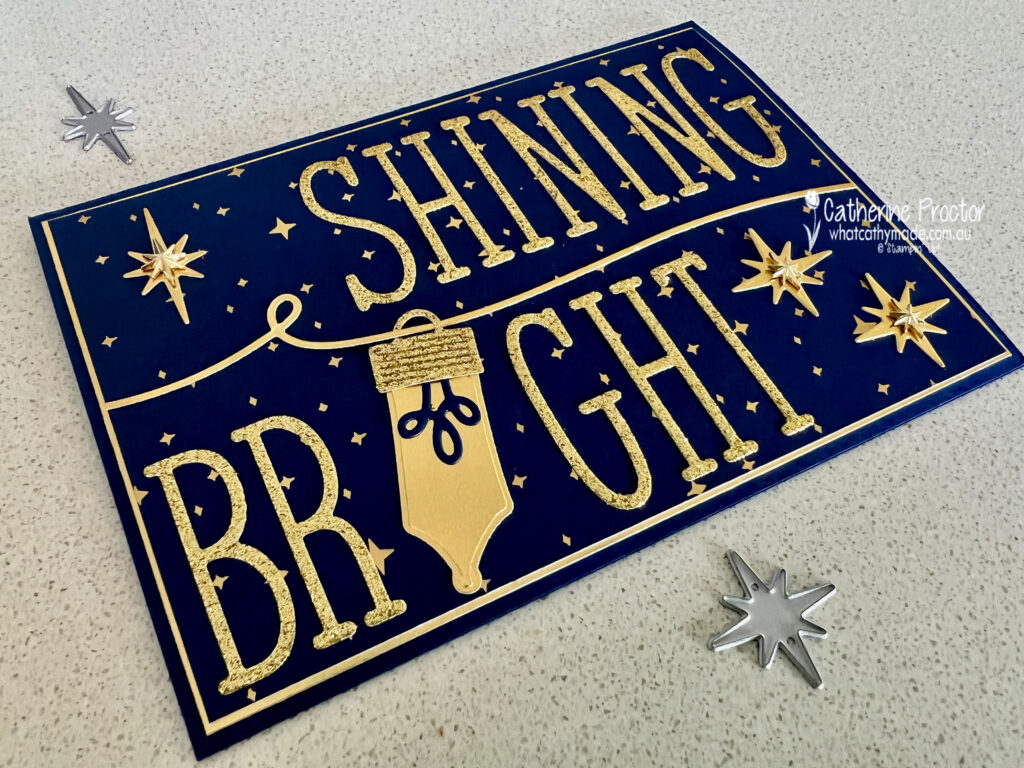
The #30DayChristmasCardMakingChallenge is a global challenge hosted by UK Artisan Stampin’ Up! demonstrator, Martin Stone, and the challenge for Day 1 is “Shining Bright”.
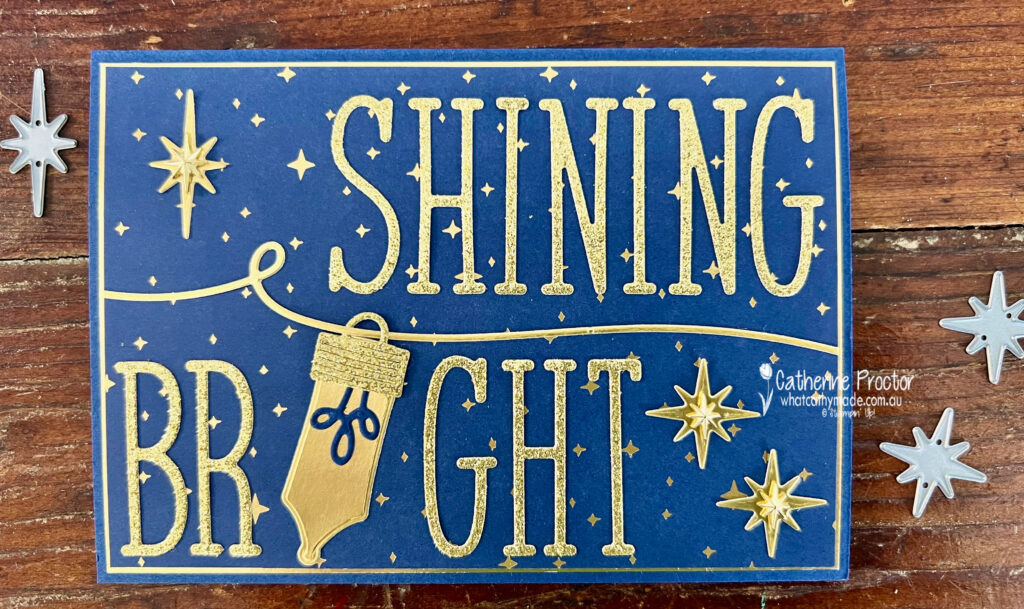
I’ve taken today’s challenge very literally, creating a Night of Navy and Gold card that uses the Shining Brightly Specialty Designer Series Paper, Adhesive Backed star trinkets, Alphabet a la Mode dies and the Merry & Bright dies.
The ‘Shining Bright’ sentiment was die cut using an exciting new online only product, Silver & Gold 12″ x 12″ (30.5 x 30.5 cm) Adhesive-backed Glimmer Paper. As soon as I die cut the letters out they became repositionable stickers – what a game changer!
The stars were die cut from gold foil that had first been attached to an adhesive sheet. No mess and no fuss!
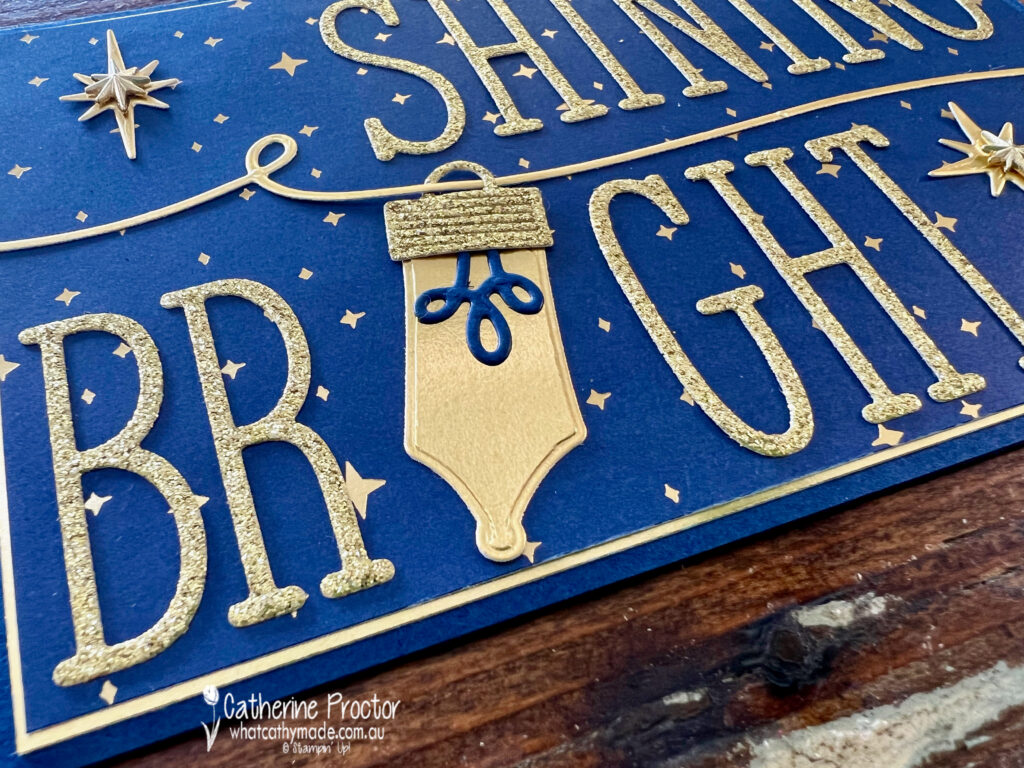
Instead of the letter ‘I’ in ‘Bright’ I die cut one of the Christmas light bulbs from gold foil, adding a Night of Navy filament.
Adhesive Backed star trinkets add dimension to all three gold stars.
I’ll be back tonight with a Granny apple Green card for our Art With Heart Colour Creations blog, then I have another card to share with you for Day 2 of the 30 Day Christmas Card Making Challenge.
Wherever you are in the world, keep on crafting xxx