Welcome to Week 13 of the Heart of Christmas blog hop.
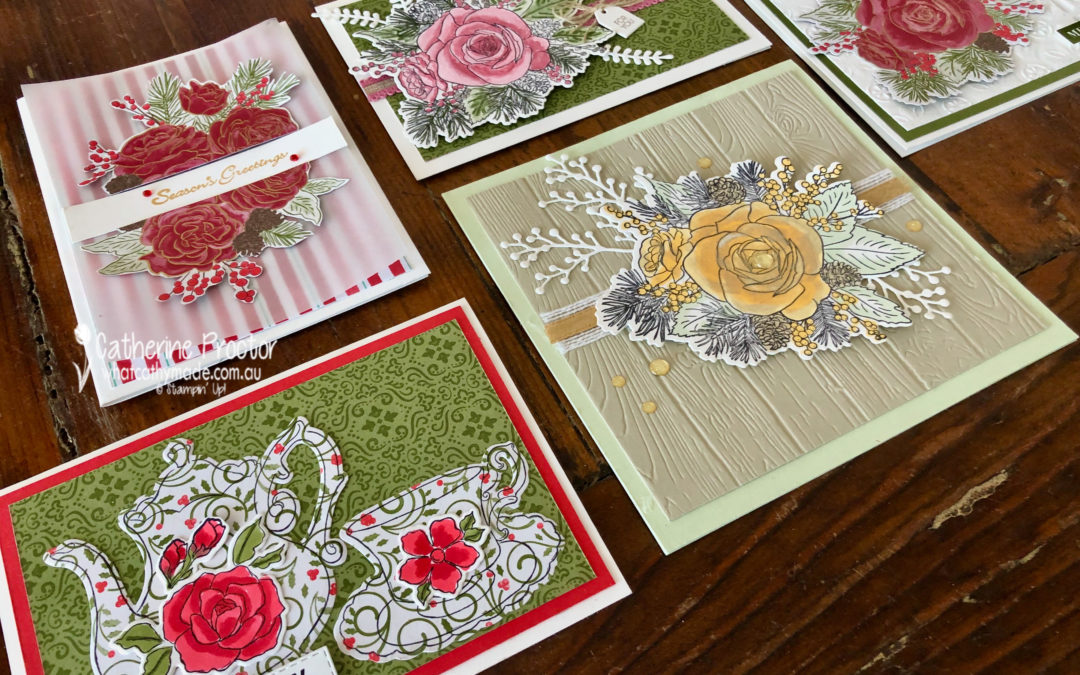
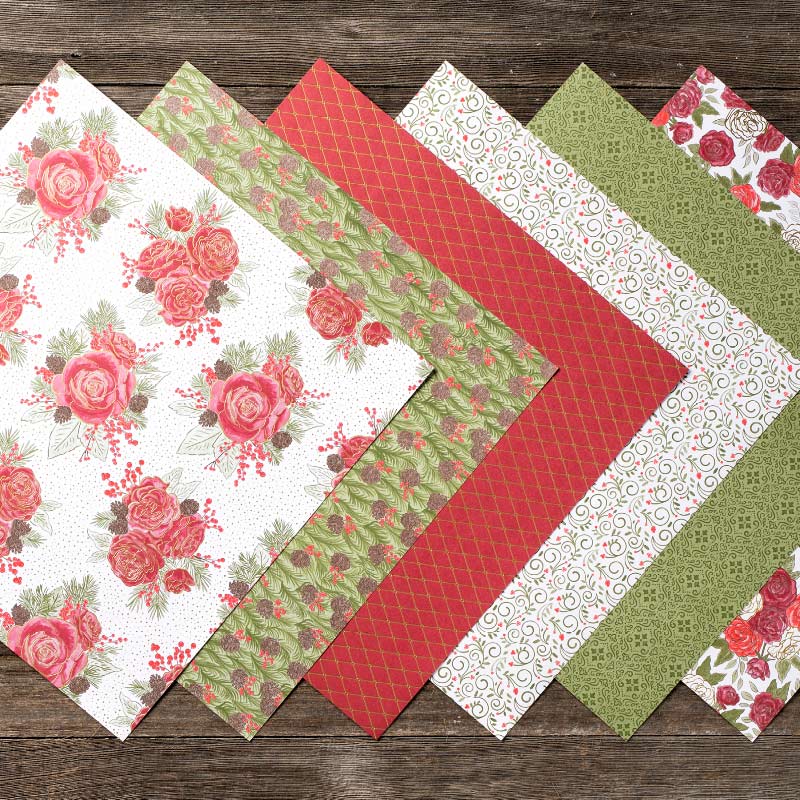
This week I’m sharing with you a variety of cards I’ve made using Stampin’ Up!’s brand new “Christmastime Is Here Suite”.
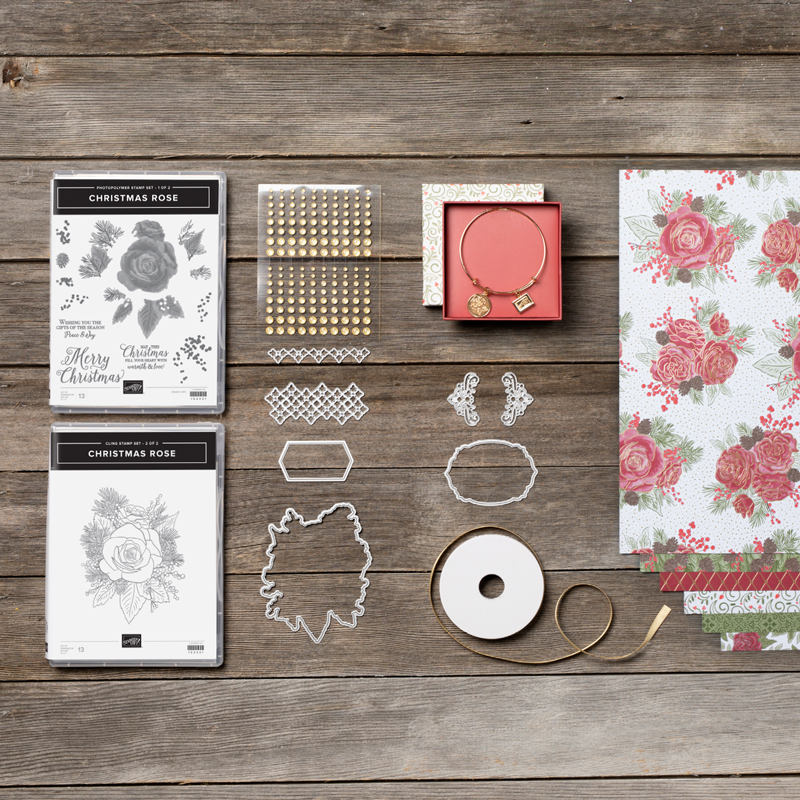
This suite is not in the Holiday Catalogue, but you can order it online here.
All of the products in the suite can either be ordered together or individually. This video gives you closer look.
Yes this is a Christmas suite, but the DSP patterns and the rose themed stamps and dies are also ideal for a variety of cards, including Christmas, birthday, Mother’s Day, thank you and sympathy cards.
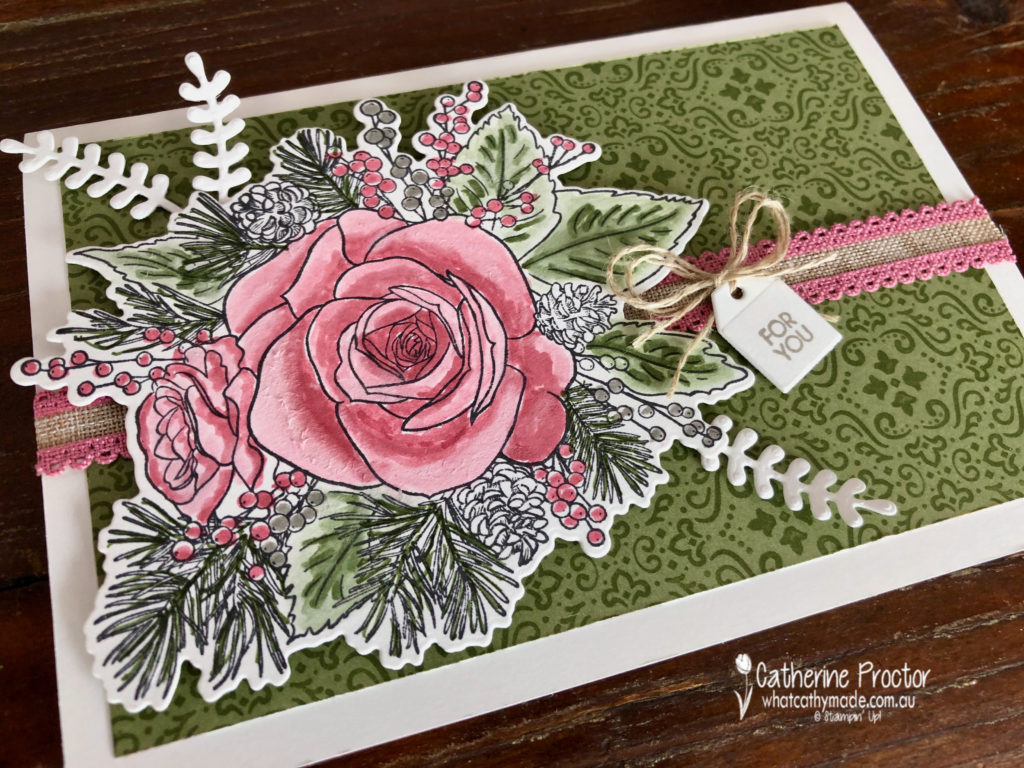
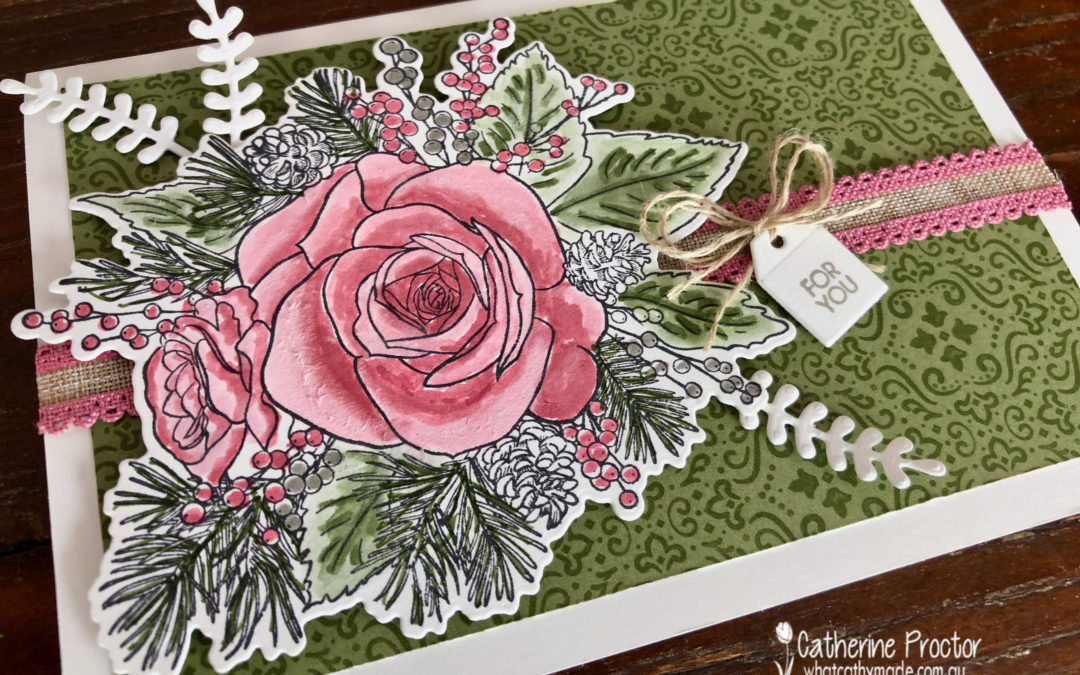
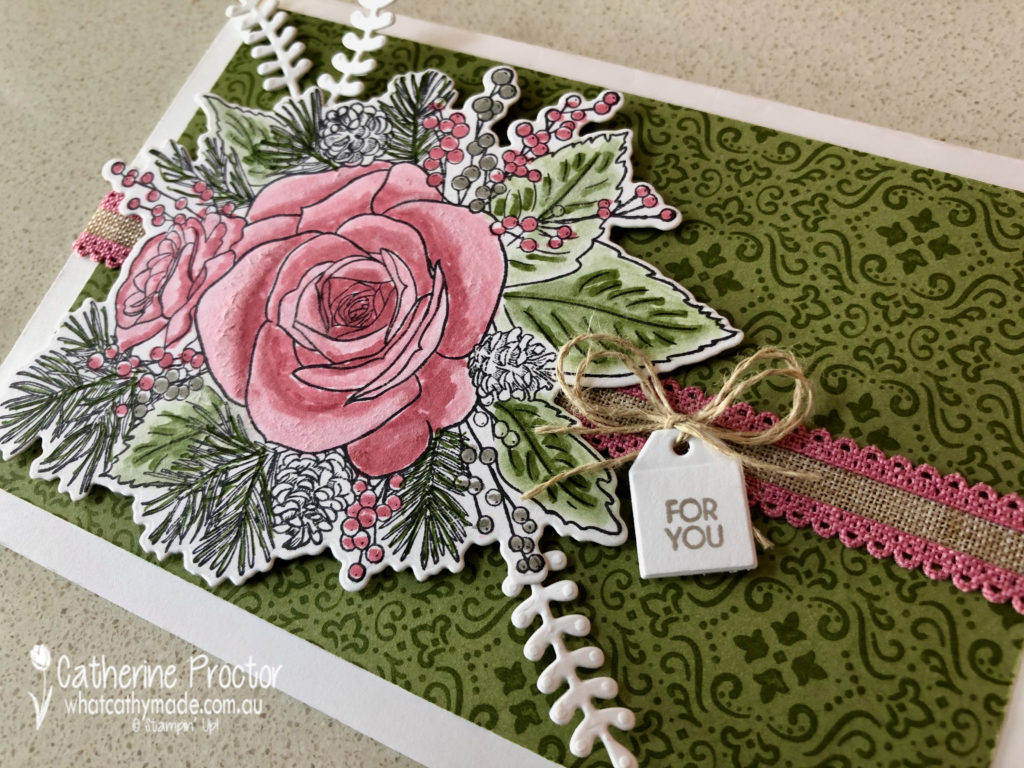
Card one is a “for you” card that I shared in a blog last week. Here it is again in case you missed it.
After stamping the rose image in Memento ink onto Whisper White card stock I used my marker pens in Rococo Rose, Mossy Meadow and Gray Granite to colour directly onto the stamped image and then I blended using the clear blender pen, NOT the stampin blends.
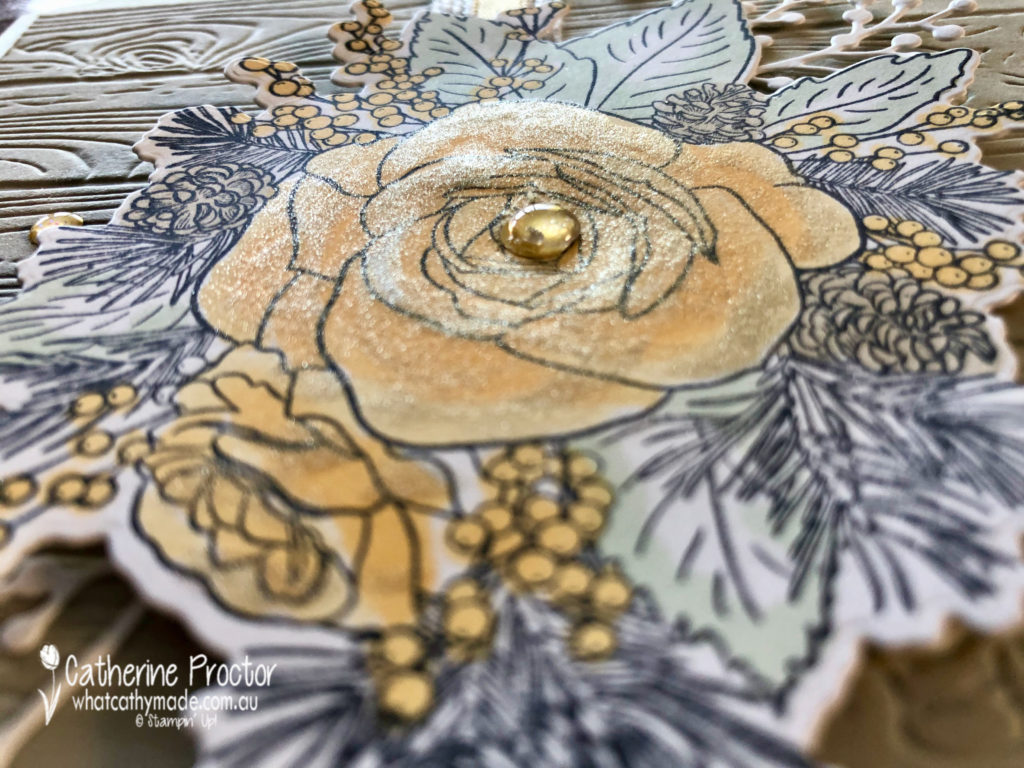
Card two uses exactly the same stamped image but colouring in with soft saffron and soft sea foam it gives it a totally different effect.
This time I made a square card and mounted the image onto a piece of Sahara Sand, embossed with the pinewood embossing folder.
I’ve also used the Gold 1/4″ (6.4 mm) Shimmer Ribbon and Gold Glitter Enamel Dots from the suite as well as branches die cut in Whisper White using the Frosted Bouquet dies.
I finished of with some Wink of Stella but did go a teeny weeny bit overboard, making my card very glittery!
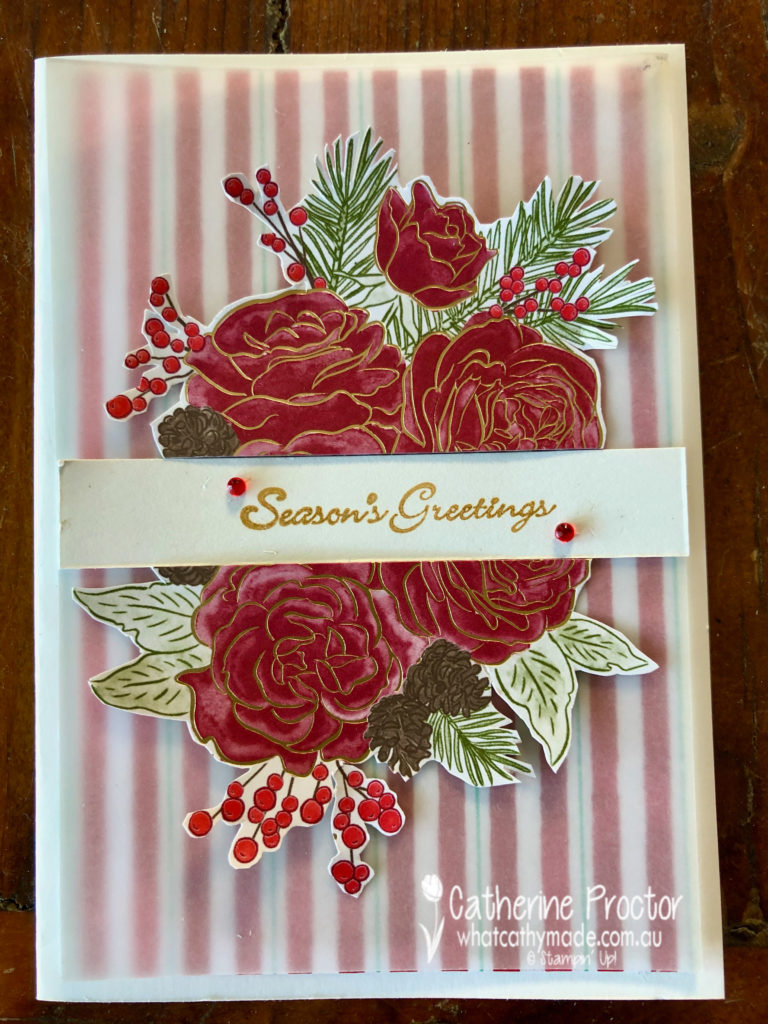
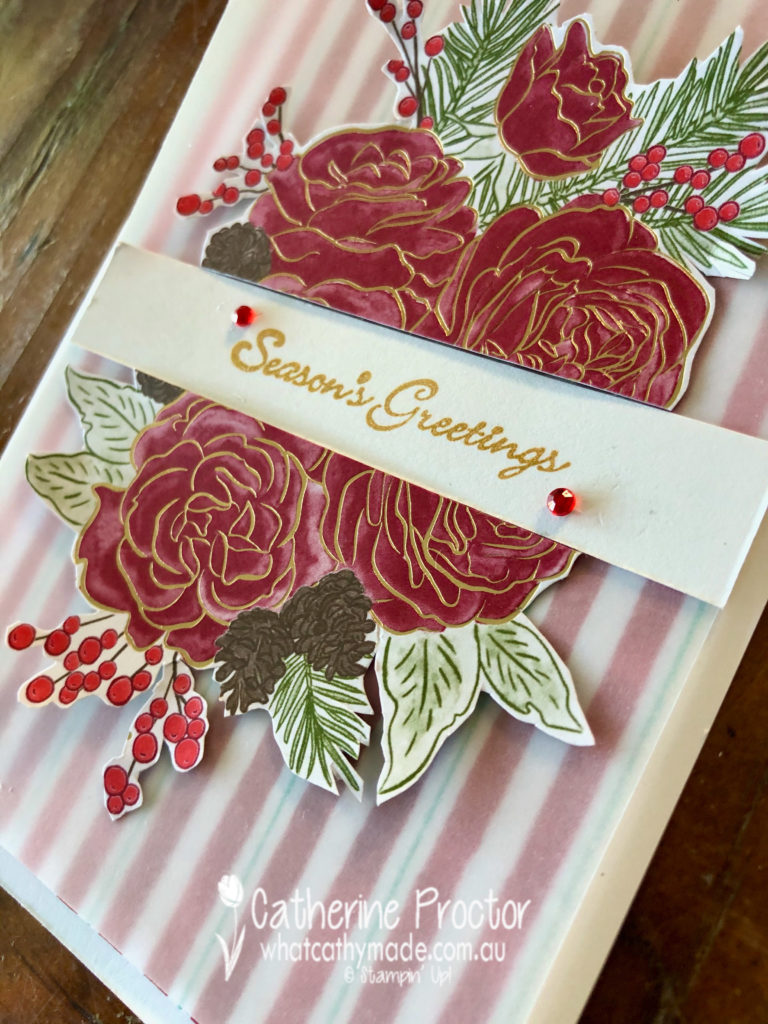
Card three is a Christmas card that uses a piece of Let it Snow DSP, overlaid with vellum. I fussy cut the image from the Christmastime is Here DSP, before cutting it in half to sit either side of the “Seasons Greetings” sentiment from Itty Bitty Christmas stamped in gold.
Red Rhinestones add a touch of bling and cover a smudge of ink!!!!
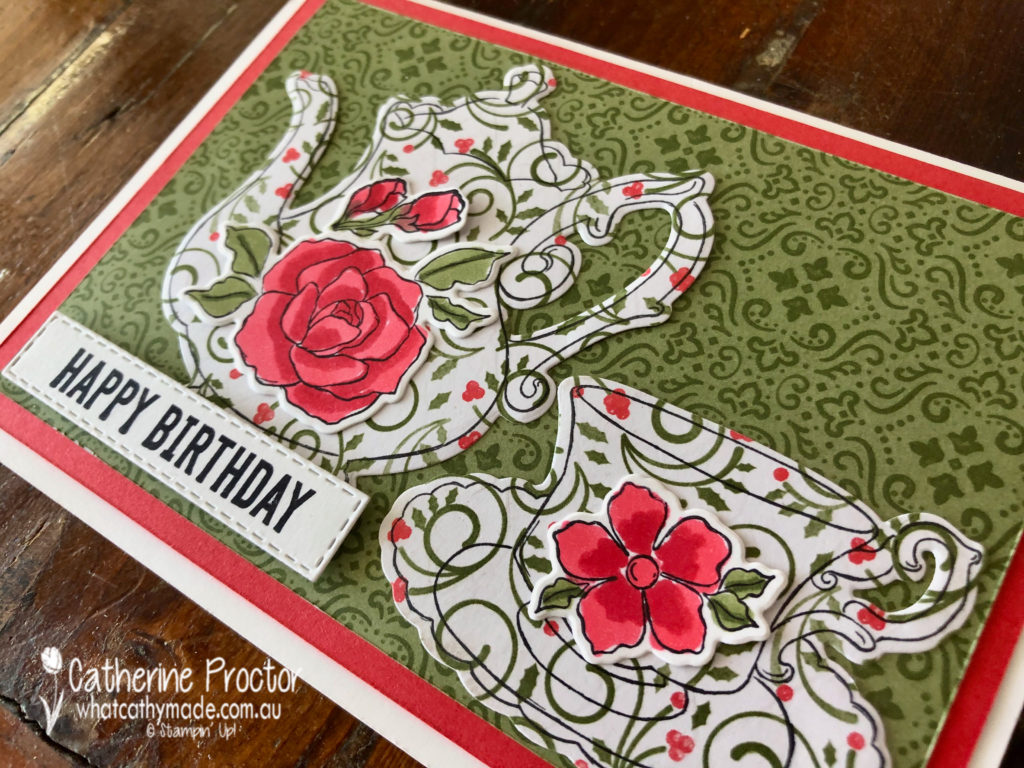
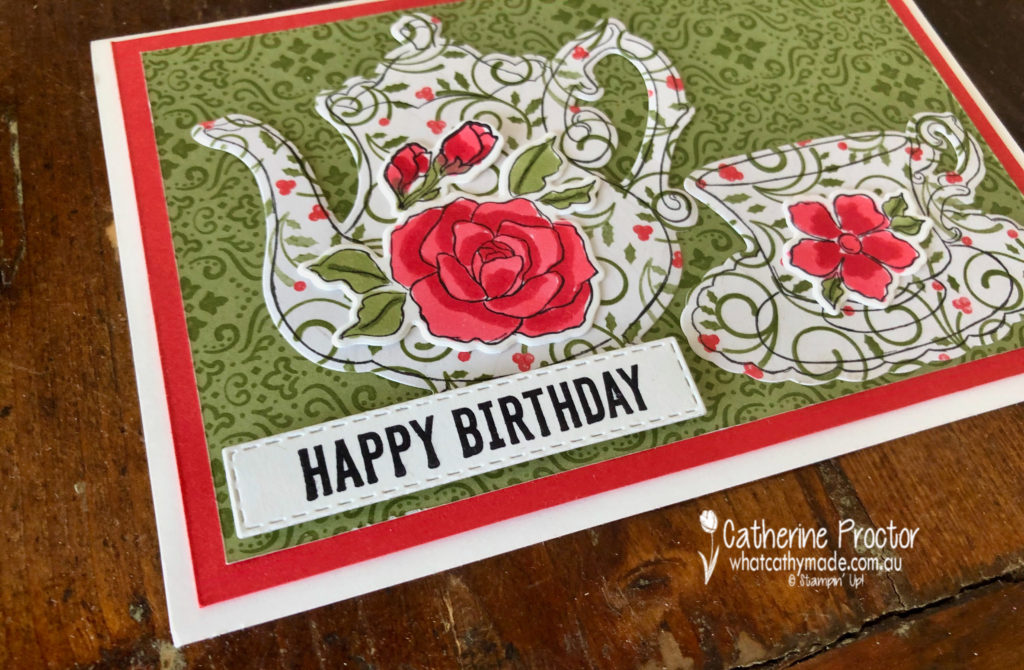
Card four uses two different patterns from the Christmastime Is Here DSP to make a birthday card that could very easily be used as a Mother’s Day card if I changed the sentiment.
I picked up on the Poppy Parade and the Mossy Meadow colours in the DSP and used my blender pens in these colours to colour in stamped flowers from the Tea Together stamp set. The teapot, cup and saucer were also stamped from this set and then all cut out using the matching dies.
The happy birthday sentiment is from the Itty bitty Birthdays stamp set die cut out with my stitched rectangle dies.
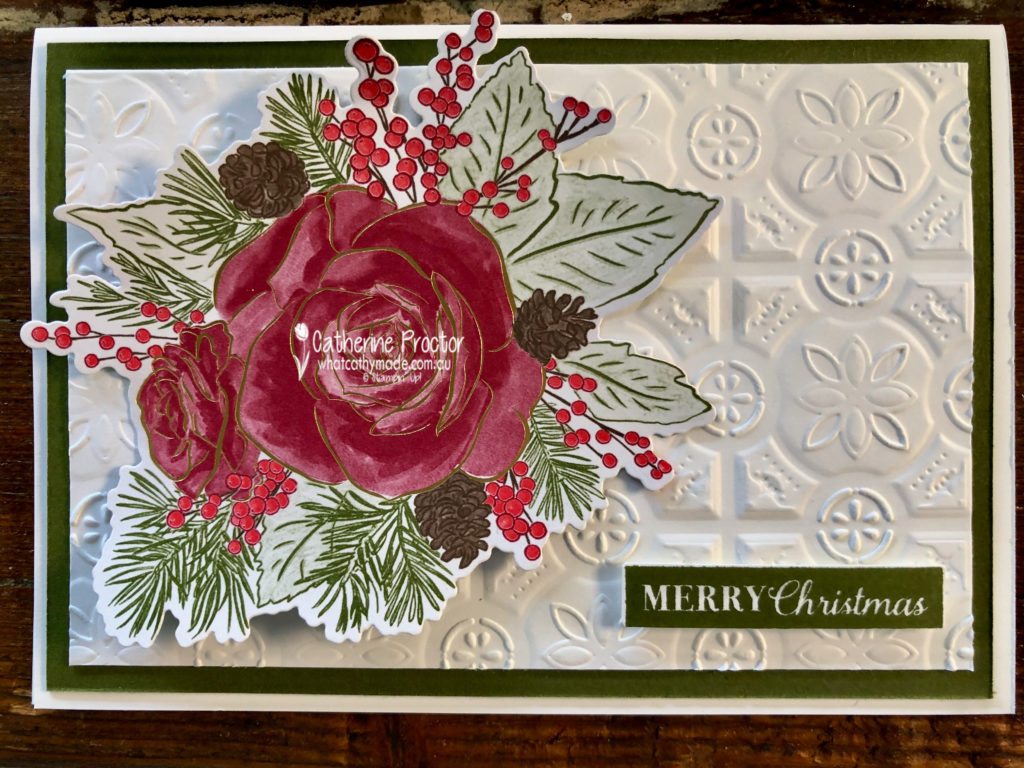
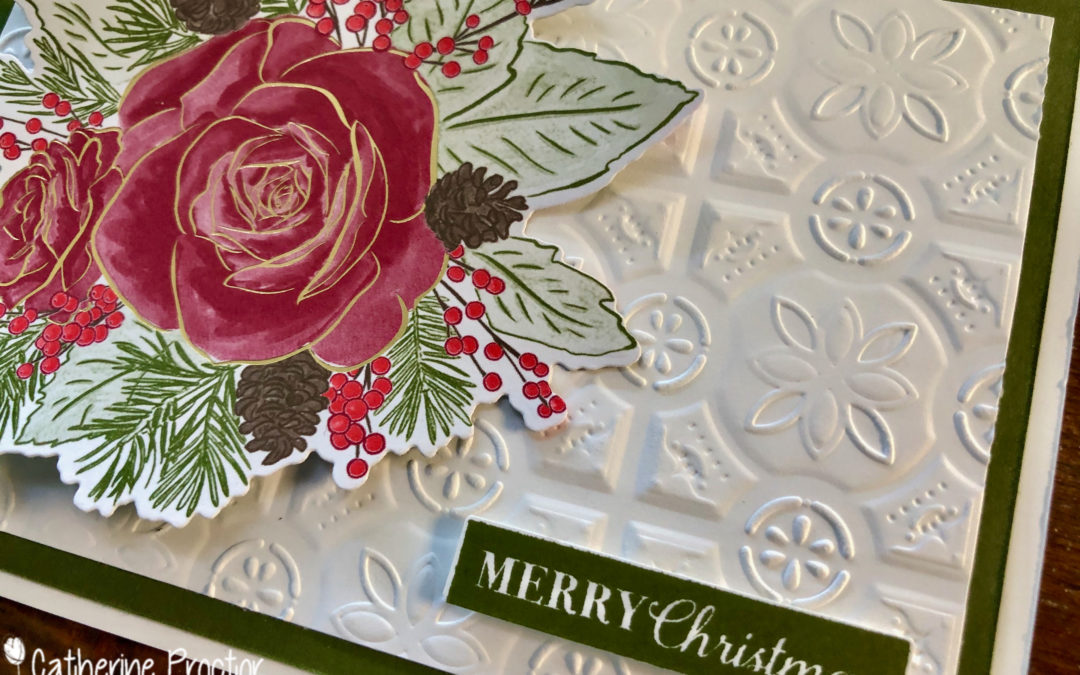
My final card is another one I shared with you last week and perhaps the most traditional of the lot – a Merry Christmas card.
I simply die cut out the image from the DSP , using the same die that I used to cut out my stamped rose in the other cards. Very quick and super easy.
The lovely Judy May is hosting our Heart of Christmas blog hop this week – to see what the rest of the team have made this week you can visit Claire’s page here.
To purchase any of the products I used in this project you can shop with me here.
If you’d like me to post you your very own copy of the brand new 2019 Stampin Up! Holiday Catalogue, the 2019-20 Stampin Up! annual catalogue or to simply find out about more about Stampin’ Up! contact me.
Welcome to week twelve of the 2019 Heart of Christmas blog hop.
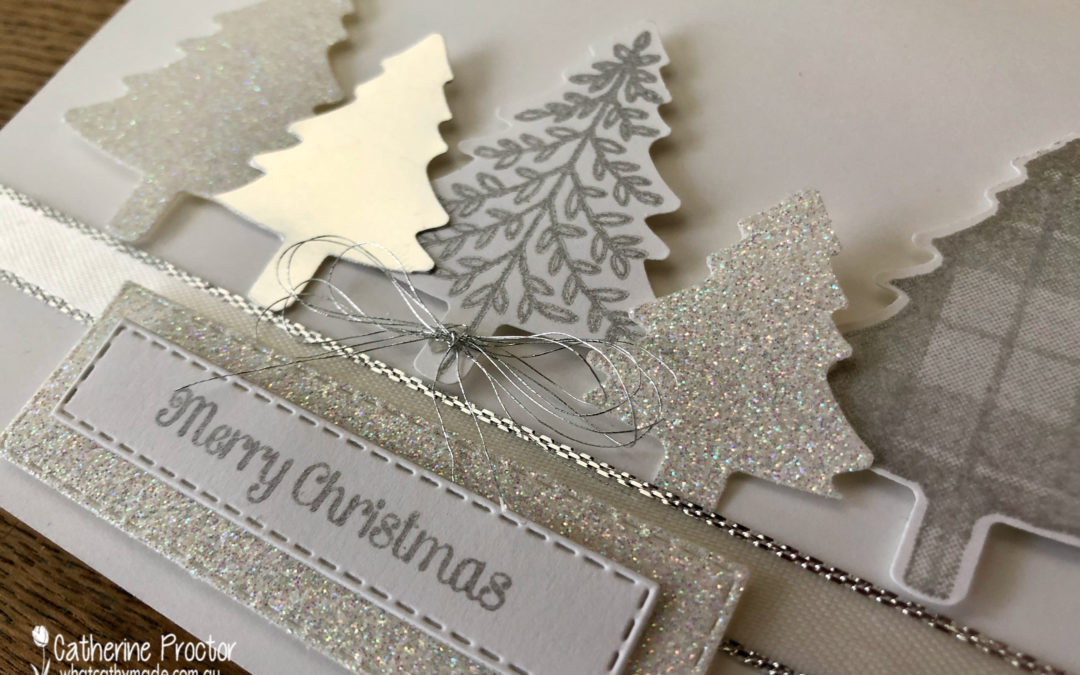
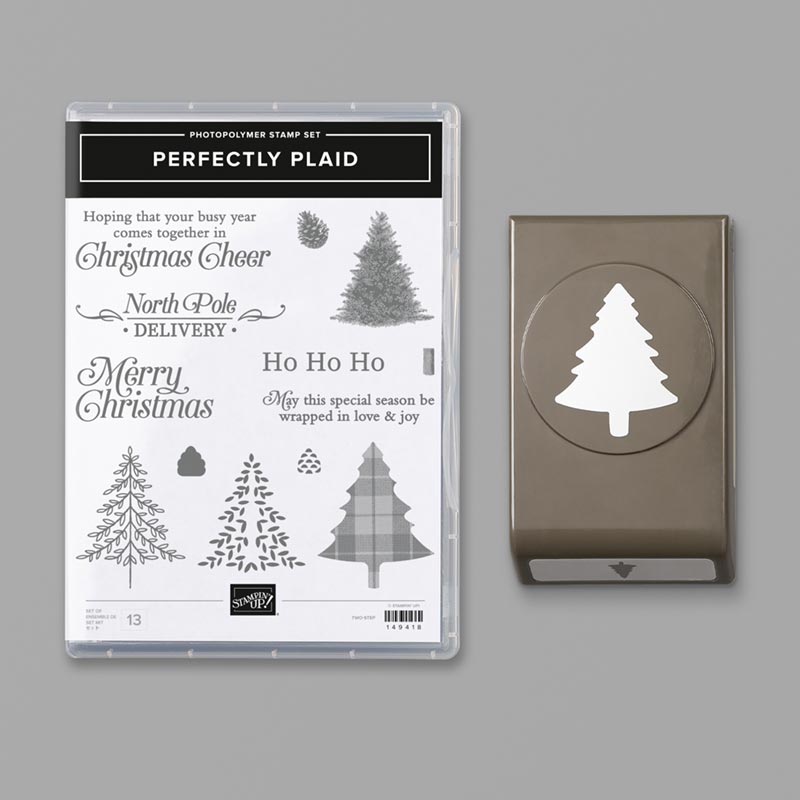
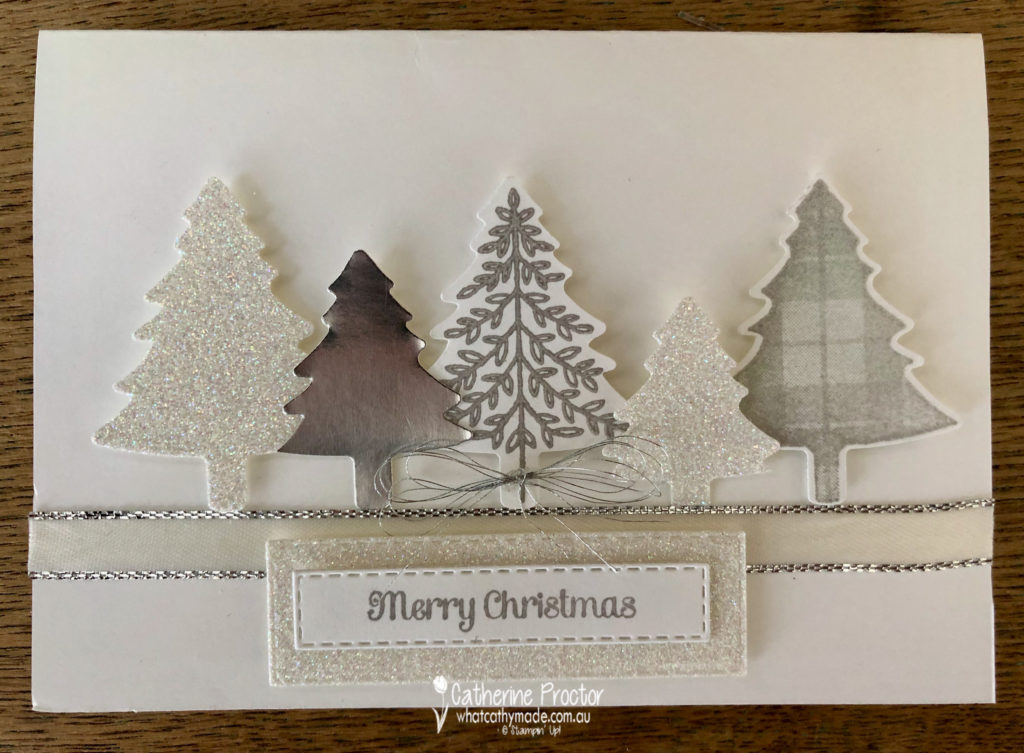
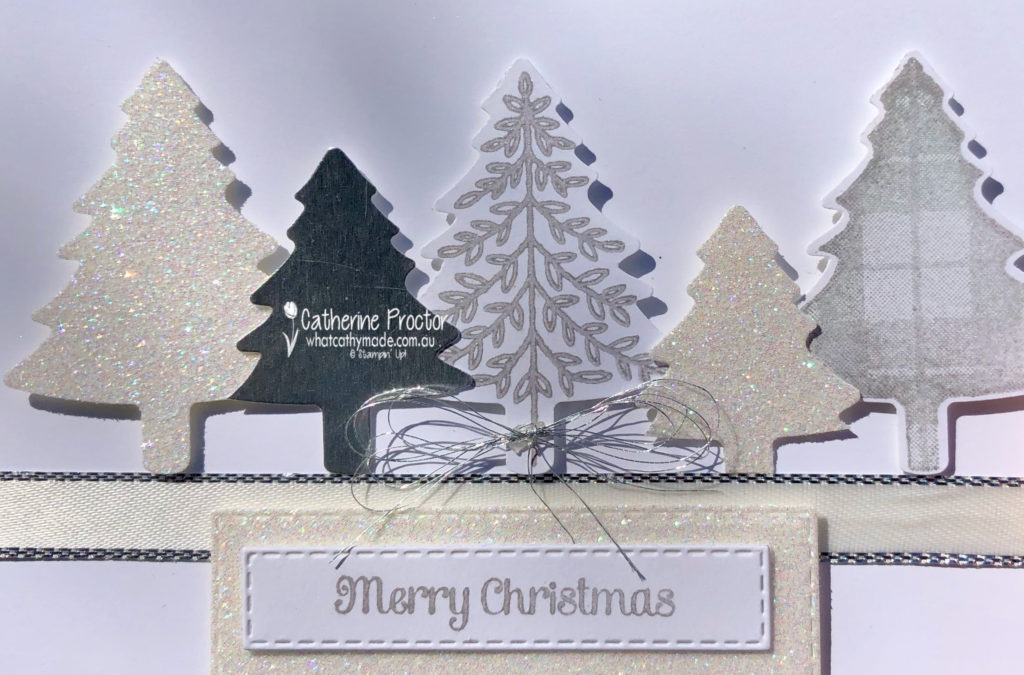
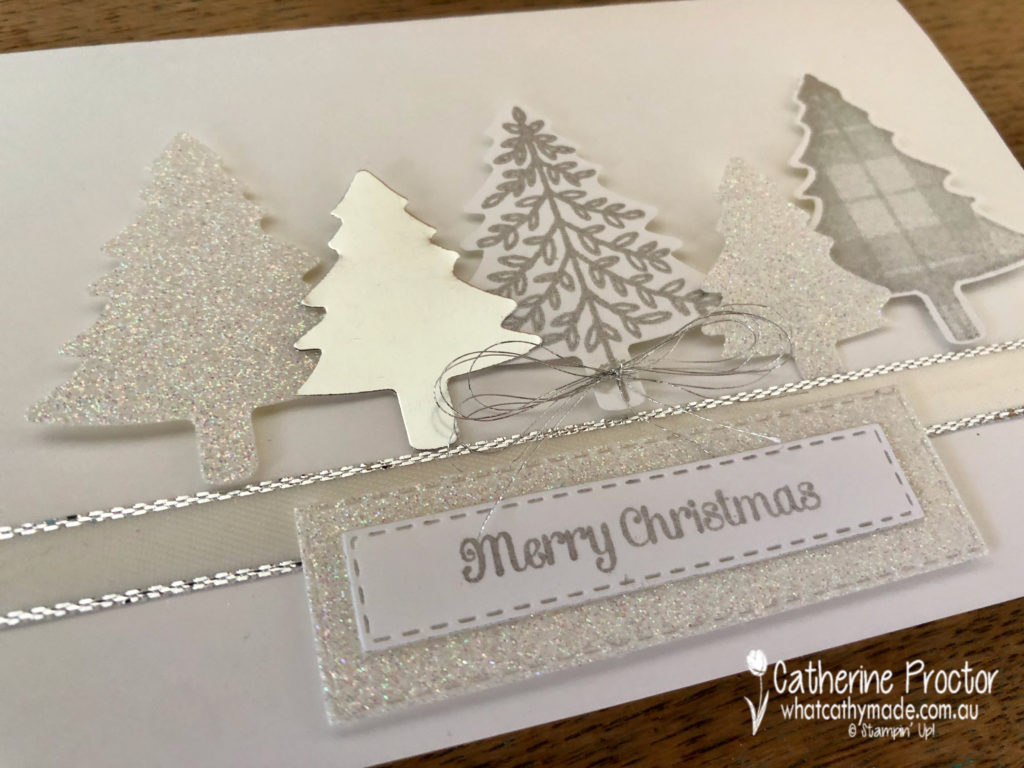
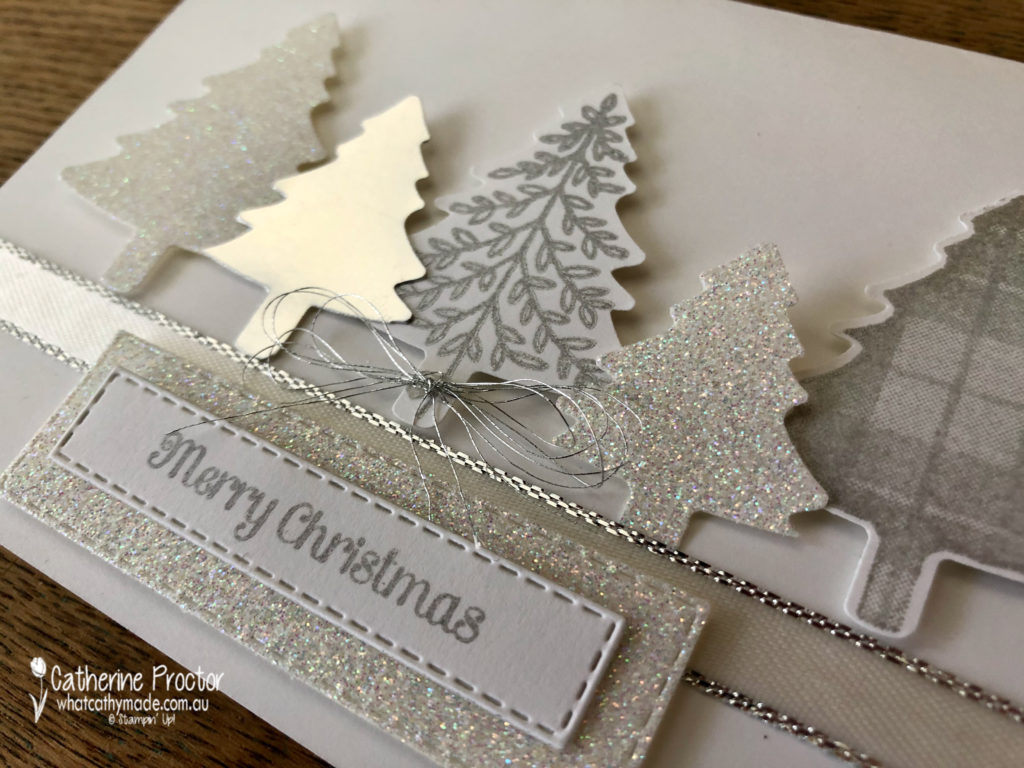
This week I’ve used the Perfectly Plaid Bundle (which includes the Pine Tree Punch and its co-ordinating Perfectly Plaid Photopolymer Stamp Set) to make a silver and white Christmas card.
I’ve used two neat little tricks that you may not realise you can do with your punches and your stamp sets.
The secret to both my tricks…Post It notes!
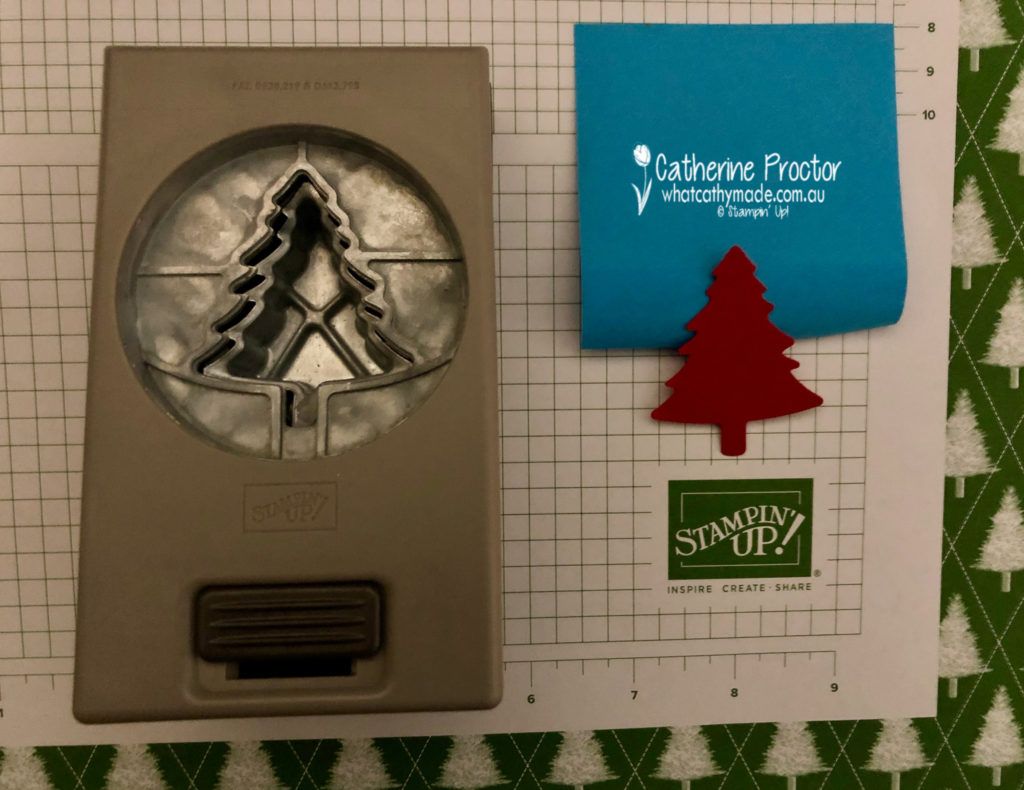
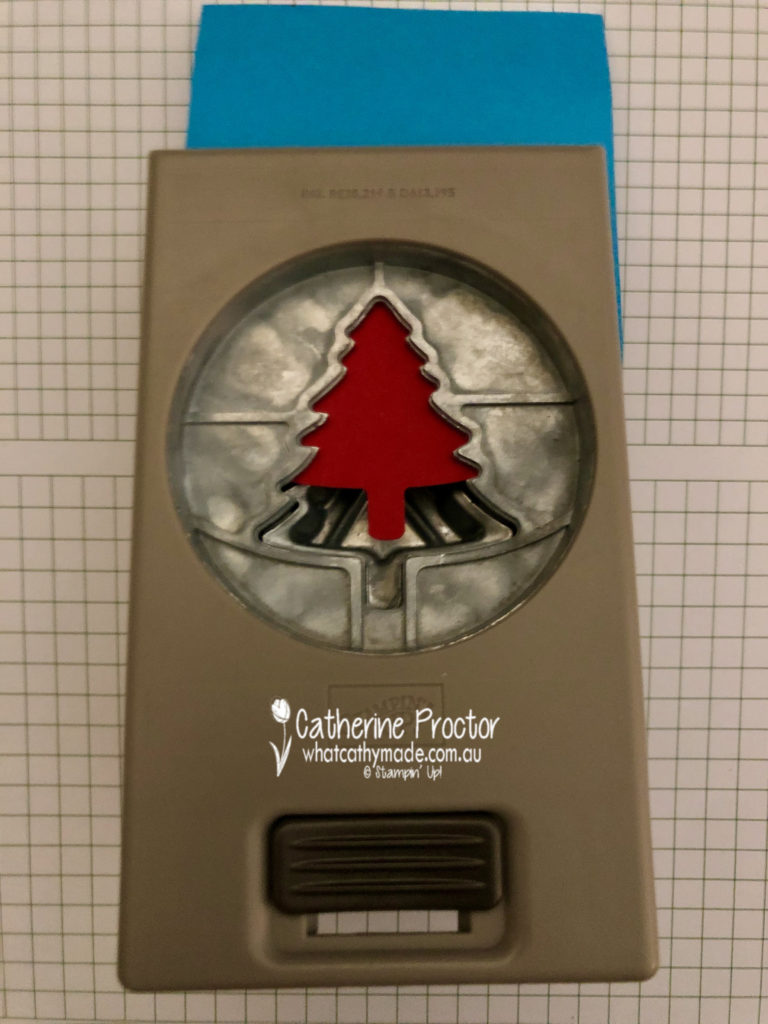
Did you notice the two smaller trees sitting between the three larger trees on my card? All five trees have been punched using the same Pine Tree Punch, so how did I get two different sizes?
After I punched my tree out I placed the tip of the tree onto the sticky part of a post it note.
The post it note gives me something to hold so I can place the punched tree back into the punch, line it up again and then punch out a smaller tree from the same shape.
The photo below shows how I did this.
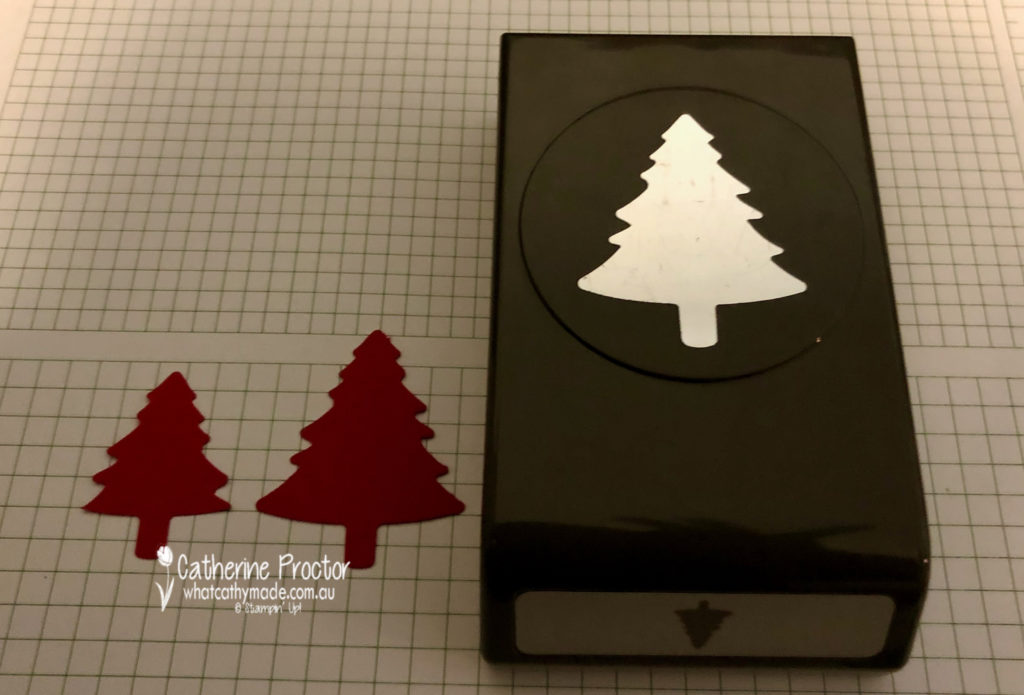
Here’s how the two punched shapes look side by side. On the right is the tree punched out once and on the left is the smaller tree created by punching the shape out twice. How cool is that!
As well as different sized trees I used a mixture of papers for my card today, stamping two of them in the Silvery Shimmer Delicata Metallic Ink before punching them out as well as using silver foil sheets and shimmery white cardstock. I love the look of silver and white together.
My card is finished off with a strip of Silver 3/8″ Metallic-Edge Ribbon and a Merry Christmas sentiment stamped in Silvery Shimmer Delicata Metallic Ink onto Whisper White cardstock.
I die cut my sentiment with the smallest Stitched Shape Rectangle and layered it over a rectangle of shimmery white card stock die cut out with the next largest Stitched Shape Rectangle.
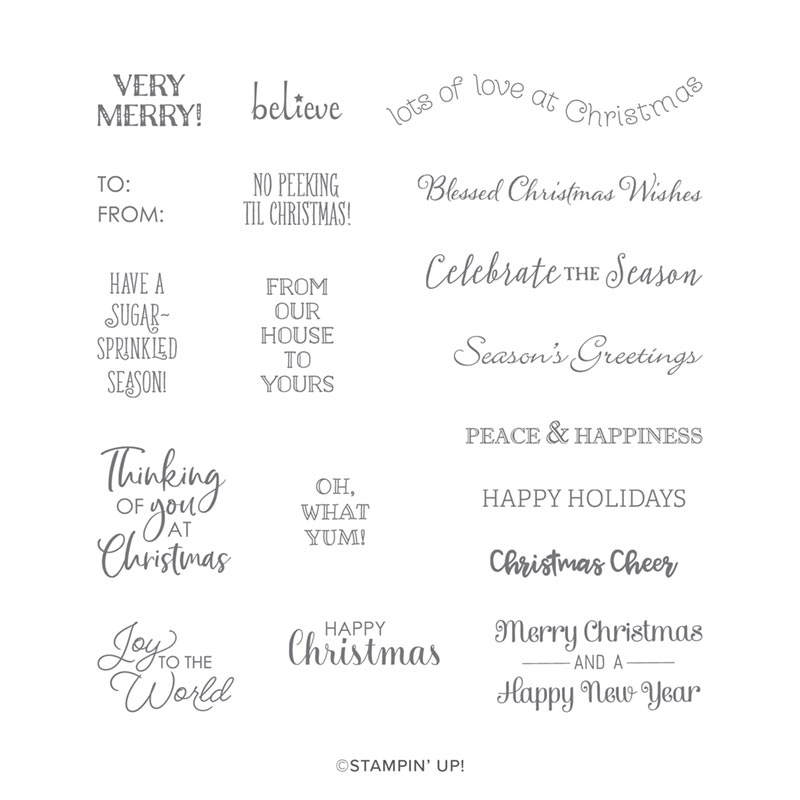
My second cool technique using Post It notes on this card is masking the sentiment for my card.
If you look at the images on the Itty Bitty Christmas stamp set below you’ll see the bottom right sentiment says “Merry Christmas and a Happy New Year” but I only wanted to stamp the Merry Christmas for this card.
I covered up the “and a Happy New Year” section of the sentiment with a post it note BEFORE I inked up my stamp and then removed the post it note before stamping onto the card stock. This ensured I only stamped the “Merry Christmas” section of the sentiment.
A bow of silver thread completes my silver and white Christmas card.
The lovely Claire Daly is hosting our Heart of Christmas blog hop this week – to see what the rest of the team have made this week you can visit Claire’s page here.
To purchase any of the products I used in this project you can shop with me here.
If you’d like me to post you your very own copy of the brand new 2019 Stampin Up! Holiday Catalogue, the 2019-20 Stampin Up! annual catalogue or to simply find out about more about Stampin’ Up! contact me.
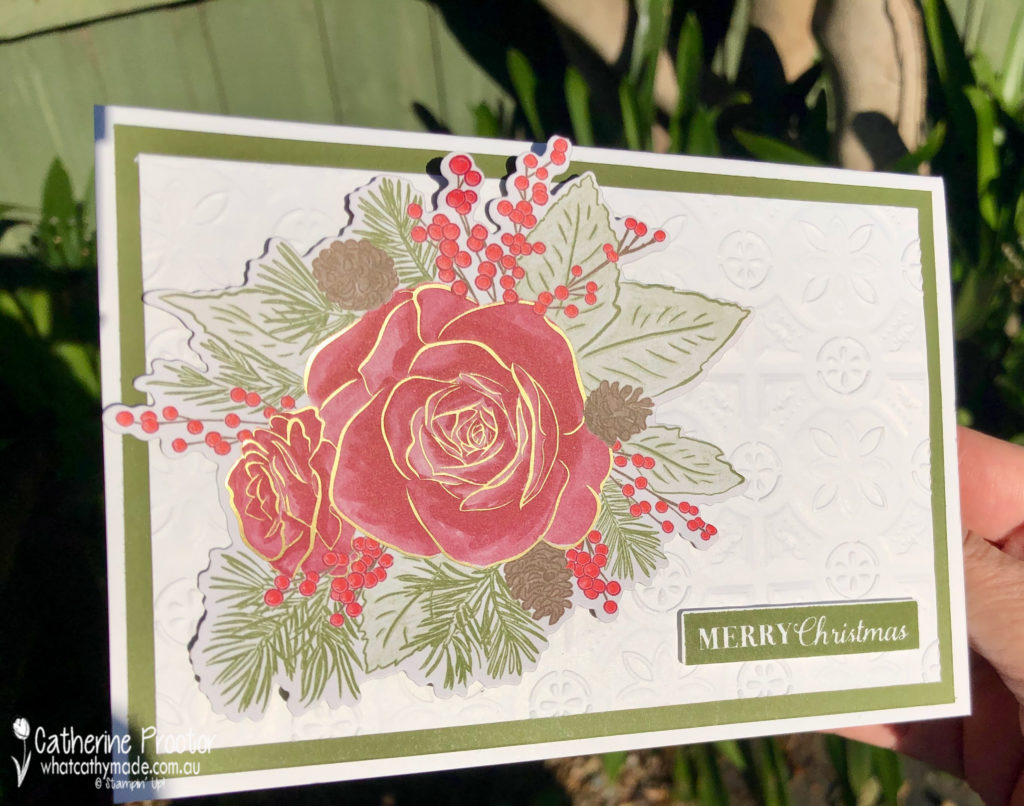
Last week I shared a birthday card with you that I’d made using some of the products from Stampin” Up!’s brand new “Christmastime Is Here Suite” and today I have another card to show you, this time using the Designer Series Paper from this suite
Did you know that just like many other Stampin’ Up! suites there are images on this Designer Series Paper that are designed to be cut out with one of the dies? What a timesaver and just perfect if you don’t enjoy colouring!
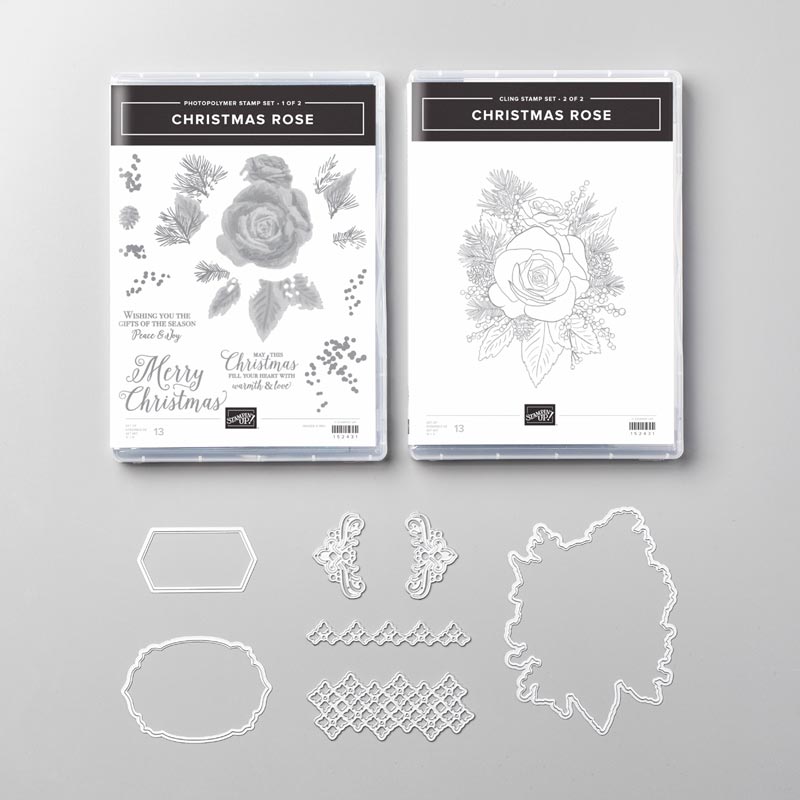
If you take a look at the image below you’ll see the die on the bottom right not only matches the co-ordinating stamp above it…it also cuts one of the images from the DSP.
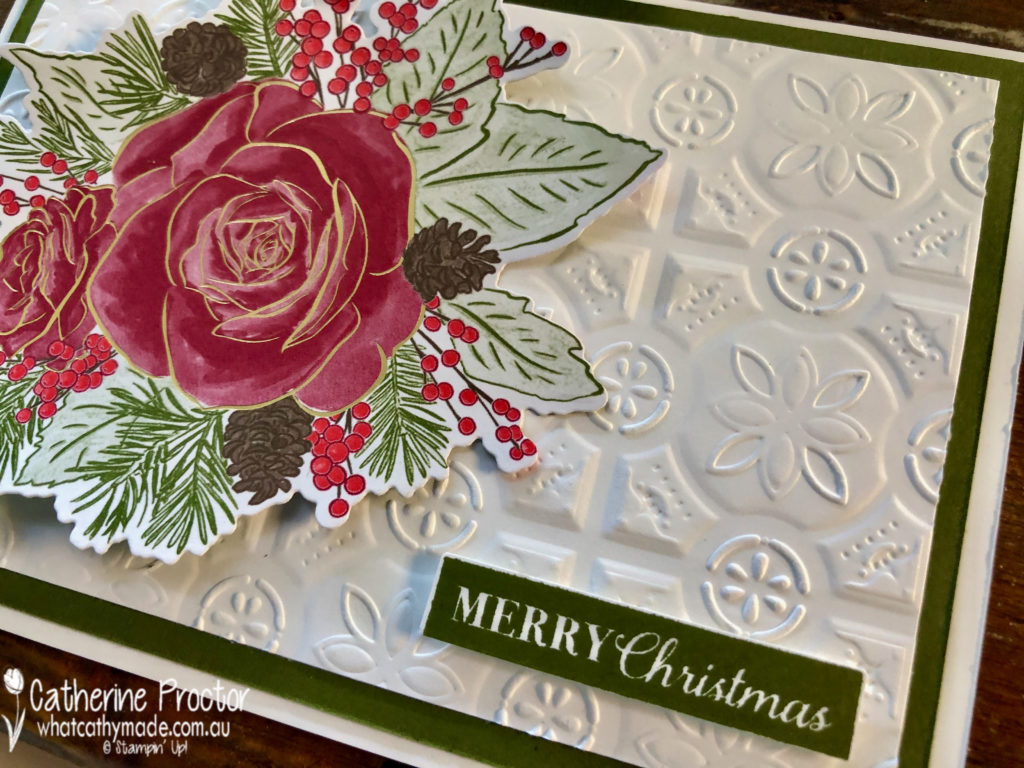
So for my card today I simply die cut out the image from the DSP, used my bone folder to curl up the sides and mounted it onto some Whisper White paper that I had embossed using the Tin Tile Embossing folder.
Does card making get any easier than this?
This suite is not in the Holiday Catalogue because it is a special release, but you can order it online here. All of the products can either be ordered together or individually. This video gives you closer look at all the goodies you get in this suite, including a gorgeous gold bangle in it’s own gift box to either keep for yourself or give to a special friend.
Just in case you missed my post last week, I actually used the same die to cut out a Christmas Rose stamped image and I coloured it in with non Christmas colours to make a birthday card.
Both of these card could work as a thank you card, a Mother’s day card, an engagement card or even a sympathy cards depending on the sentiment you pair with the rose.
Today I’ve stamped the “Merry Christmas” sentiment from the Christmas Gleaming stamp set in Mossy Meadow.
Here’s an outside shot to show you the gold foiling on the DSP, shimmering in the sunlight.
I’ll be sharing some more cards I’ve made with suite over the next few week, so keep a look out for my posts.
To purchase any of the products I used in this project you can shop with me here.
If you’d like me to post you your very own copy of the brand new 2019 Stampin Up! Holiday Catalogue, the 2019-20 Stampin Up! annual catalogue or to simply find out about more about Stampin’ Up! contact me.
Christmas is coming faster than you think (it’s less than 8 weeks to go!!!) and Stampin” Up!’s brand new “Christmastime Is Here Suite” has just been released today.
You won’t find this suite in the Holiday Catalogue because it is a special release, but you can order it online here. All of the products can either be ordered together or individually. This video gives you closer look at all the goodies you get in this suite, including a gorgeous gold bangle in it’s own gift box to either keep for yourself or give to a special friend.
What I love about this suite is its versatility. Yes, it is a Christmas suite but it’s also perfect for birthdays, which is why I decided to make a birthday card to share with you today.
After stamping the largest image in Memento ink onto Whisper White card stock I used my marker pens in Rococo Rose, Mossy Meadow and Gray Granite to colour directly onto the stamped image, creating the darker shades.
I then used a blender pen (the clear blender pen, NOT the stampin blends) to take colour off the nib of my markers and coloured in the rest of the image. Colouring with the blender pen provides the lighter shades of these colours.
Isn’t the background designer series paper in Mossy Meadow so elegant? It’s one of the DSPs from this stunning suite.
I really wanted to use Rococo Rose to colour my rose so it would co-ordinate with the Scalloped linen ribbon. The “For You” sentiment and the die cut white branches sitting behind the rose are from the Beautiful Bouquet stamp set and its co-ordinating Bouquet Bunch Dies, finished off with a little double bow of Linen Thread.
I’ll be sharing some more cards I’ve made with suite over the next few week, so keep a look out for my posts.
To purchase any of the products I used in this project you can shop with me here.
If you’d like me to post you your very own copy of the brand new 2019 Stampin Up! Holiday Catalogue, the 2019-20 Stampin Up! annual catalogue or to simply find out about more about Stampin’ Up! contact me.