Welcome to week 19 of the Art With Heart Colour Creations Blog Hop!
This week we are showcasing one of the Regal Colours: Garden Green.
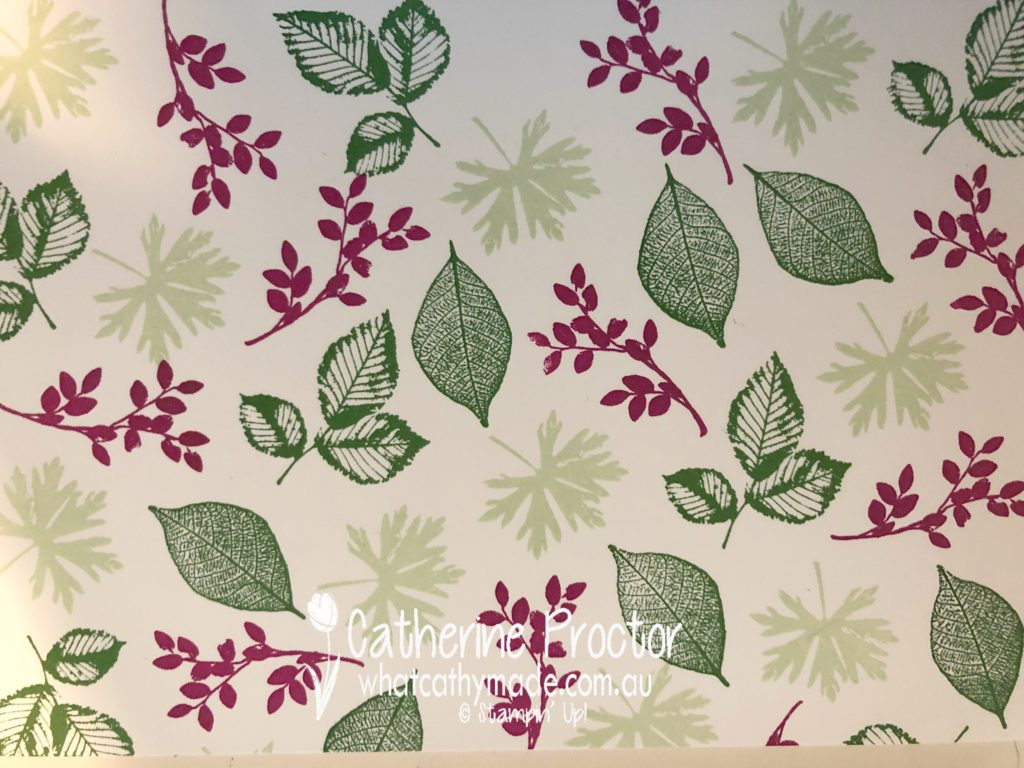
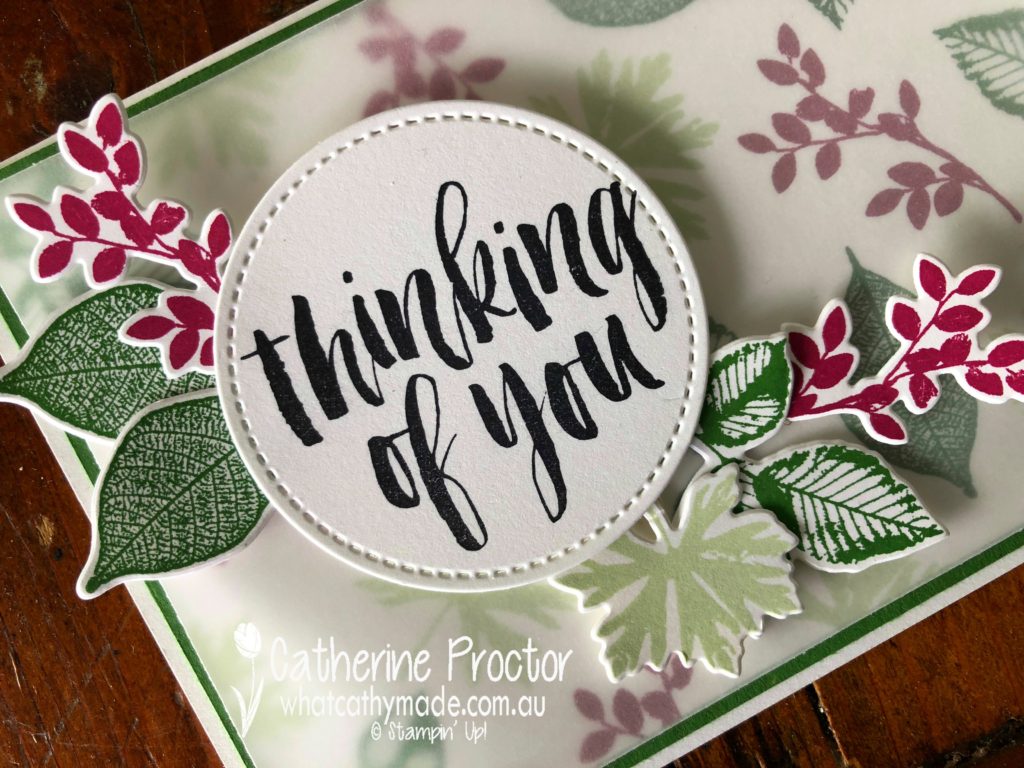
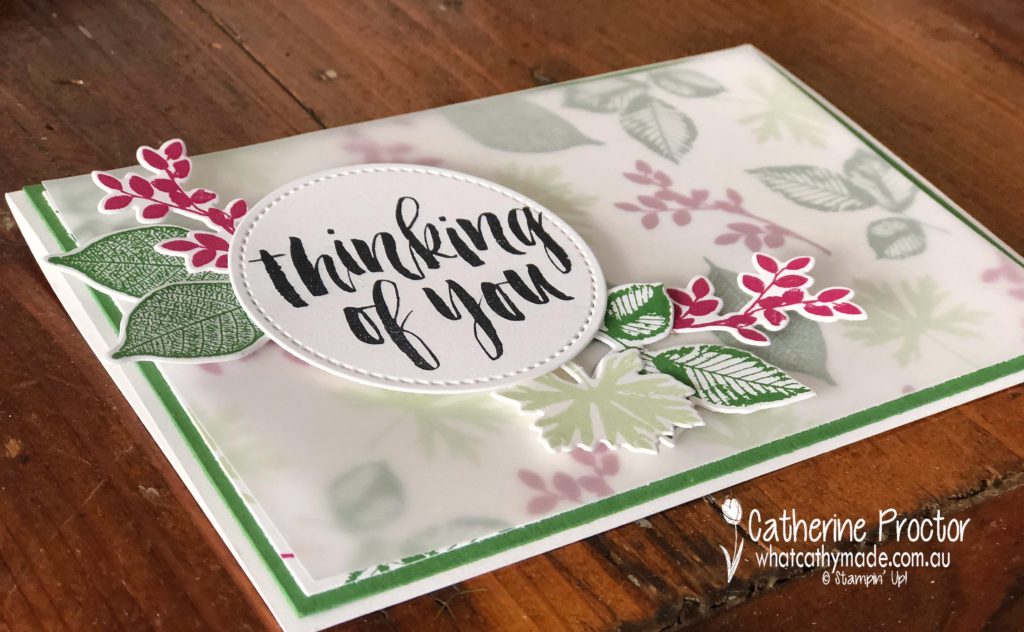
I couldn’t find a Designer Series Paper I wanted to use for my card this week so I began by making my project by making my own.
I used an A4 sheet of Whisper White cardstock, the “Rooted in Nature” stamp set and I stamped 4 of the images using Garden Green, Soft Seafoam and Berry Burst.
Doesn’t this colour combination and pattern look so pretty? It was super easy to create and I really just stamped randomly all over the paper.
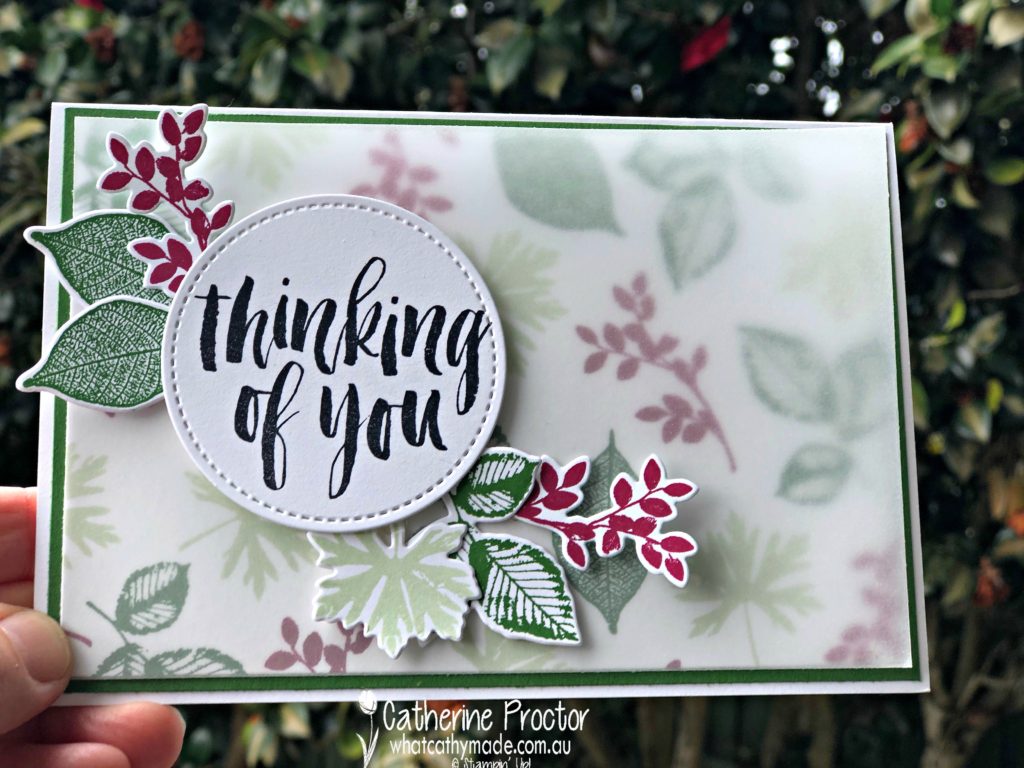
Once I’d created my sheet of DSP I used some scrap cardstock to stamp out some more images to decorate the top of my card and then I ran them through my Bigshot using the matching Natures Roots Framelits dies. Here they are on top of my finished card.
The “Thinking of You” sentiment is also from the Rooted in Nature stamp set. I stamped it in black before die cutting it out using one of the Stitched Shapes framelit circle dies.
My homemade DSP was cut to size and mounted onto some GardenGreen cardstock and then I softened the entire card by laying a piece of vellum over the DSP and under the sentiment and die cut pieces.
Creating my own DSP this week has really inspired me to do this more often, trying out different combinations of colours and stamp sets!
To see what the rest of the team have made click on the links below.
Thanks for hopping along with us today. To purchase any of the products I used in this project you can shop with me here. Or if you’d like me to post you your very own copy of the 2018-2019 annual catalogue or find out about more about Stampin’ Up! contact me.
Next Tuesday we’ll be showcasing one of the new Brights Colours: Gorgeous Grape!
Welcome to week 16 of the Art With Heart Colour Creations Blog Hop!
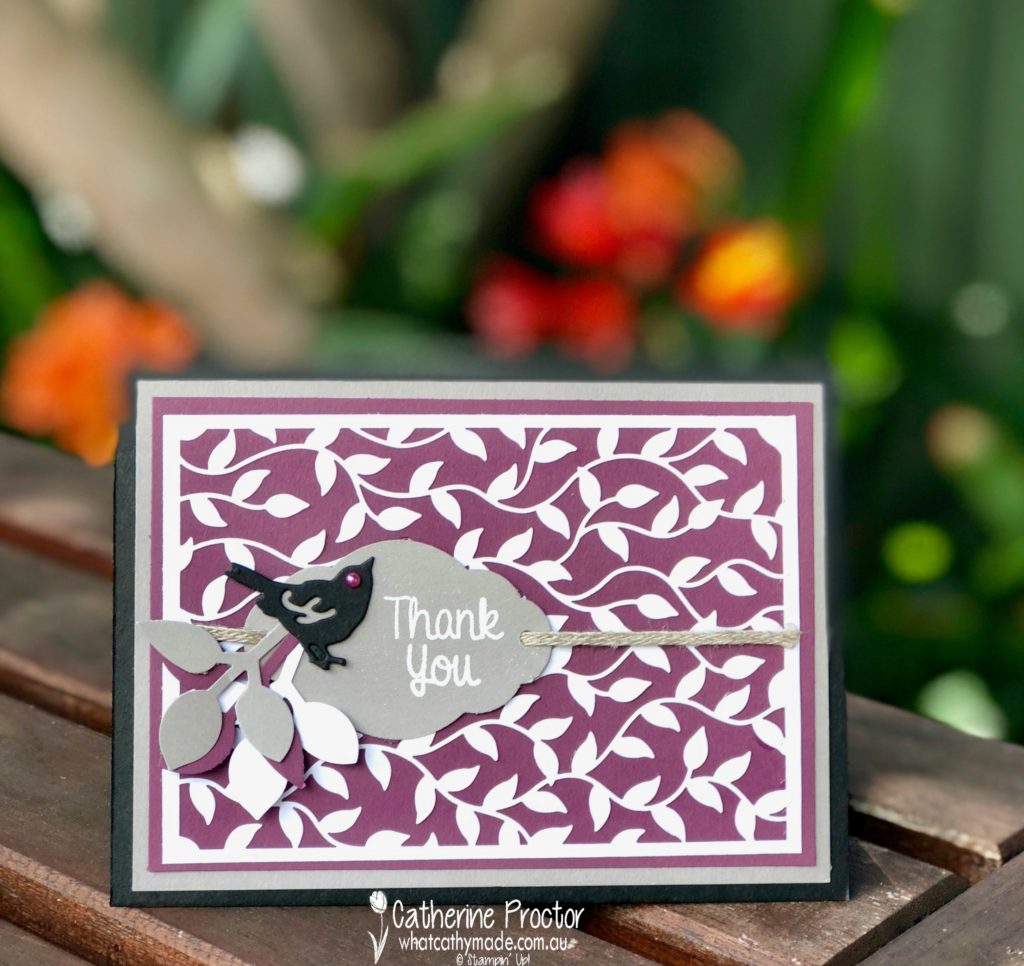
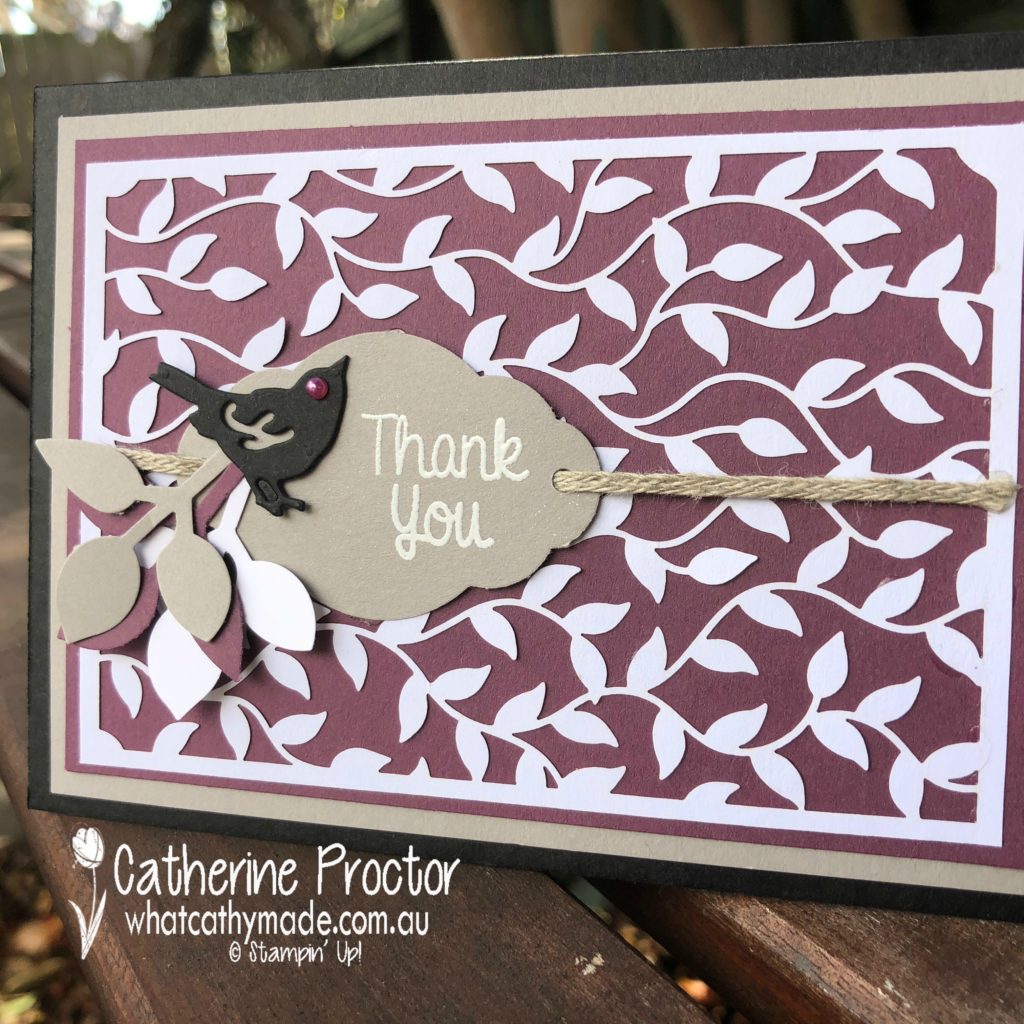
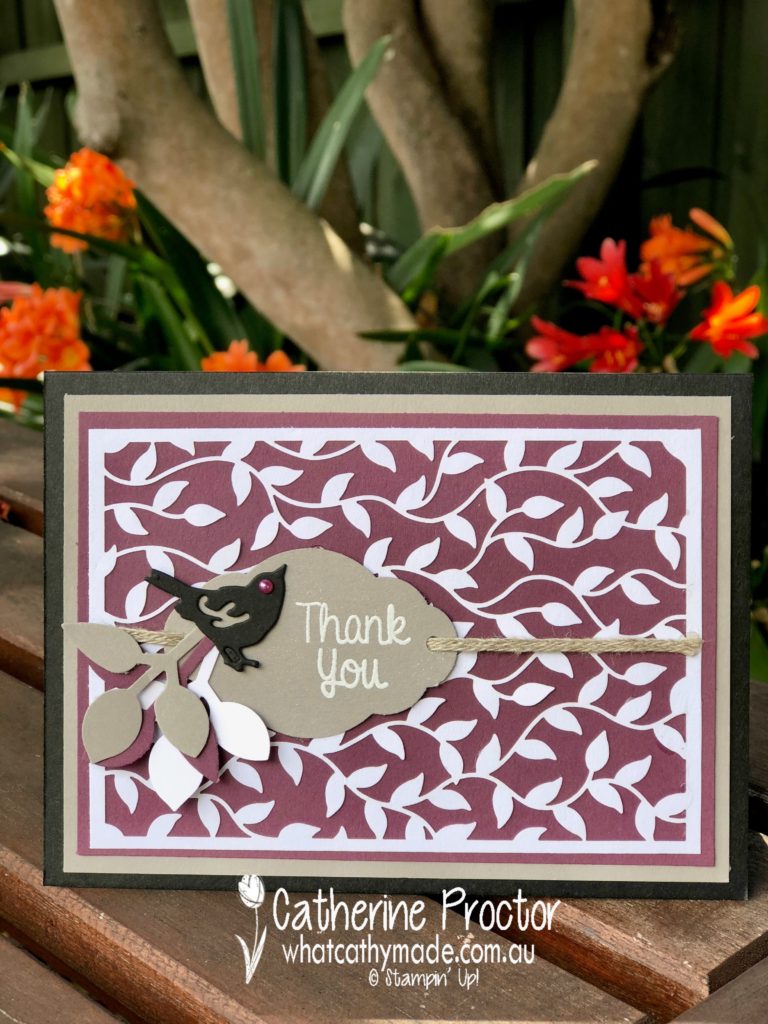
This week we are showcasing one of the 2017-2019 in colours: Fresh Fig.
For my Fresh Fig card, I used some of the stunning Delightfully Detailed Laser-Cut Specialty Paper, which is Very Vanilla on one side and Whisper White on the other. I love both Very Vanilla and Whisper White with Fresh Fig but I decided to use the Whisper White for my card today.
I used the leaf punch to continue the leaf theme of the Delightfully Detailed Laser-Cut Specialty Paper and then topped my card off with a little bird die cut from the Birds and Blooms thinlits. My little bird’s eye is a Rich Razzleberry pearl from the Share What You Love Artisan Pearls.
Gray Granite is rapidly becoming one of my most used neutral colours, and I’ve used it here along with Basic Black for my punched out leaves. Gray Granite is also is the colour of the braided linen trim, that I’ve used across the front of the card. The name of this ribbon can be a little confusing because the Stampin’ Up! linen thread is closer to Crumb Cake in colour, but this Braided Linen Trim is much closer to Gray Granite.
To see what the rest of the team have made click on the links below.
Thanks for hopping along with us today. To purchase any of the products I used in this project you can shop with me here. Or if you’d like me to post you your very own copy of the 2018-2019 annual catalogue or find out about more about Stampin’ Up! contact me.
Next Tuesday we’ll be showcasing one of the Regal Colours: Garden Green
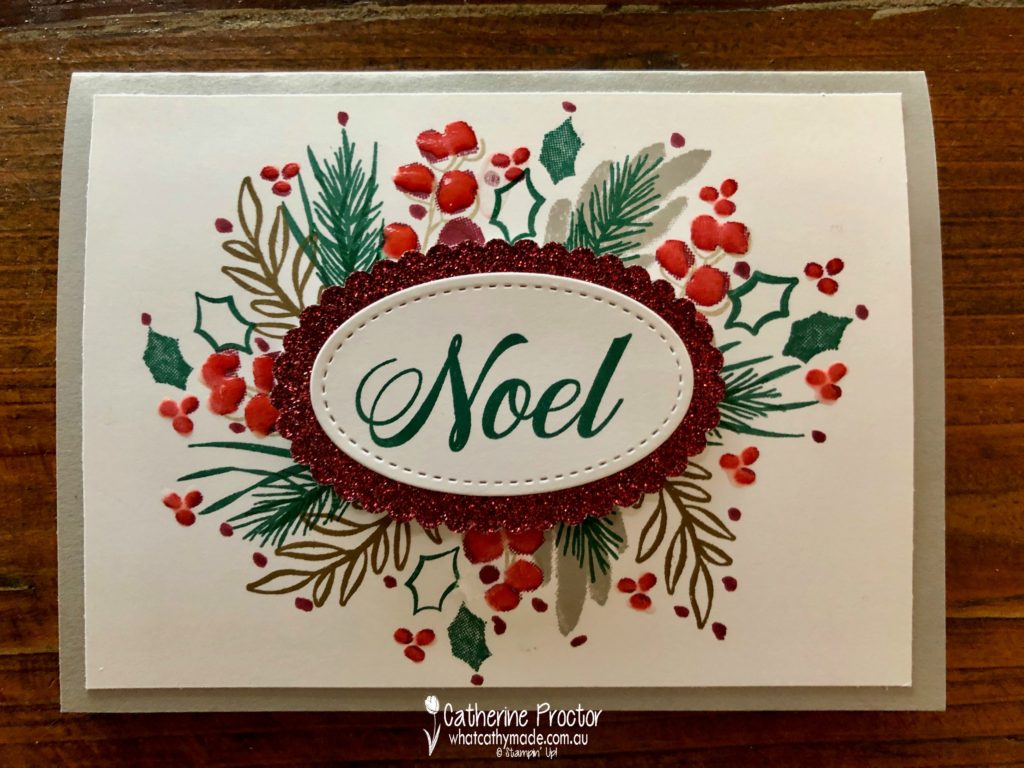
Welcome to week 7 of our Art With Heart, Heart of Christmas blog hop.
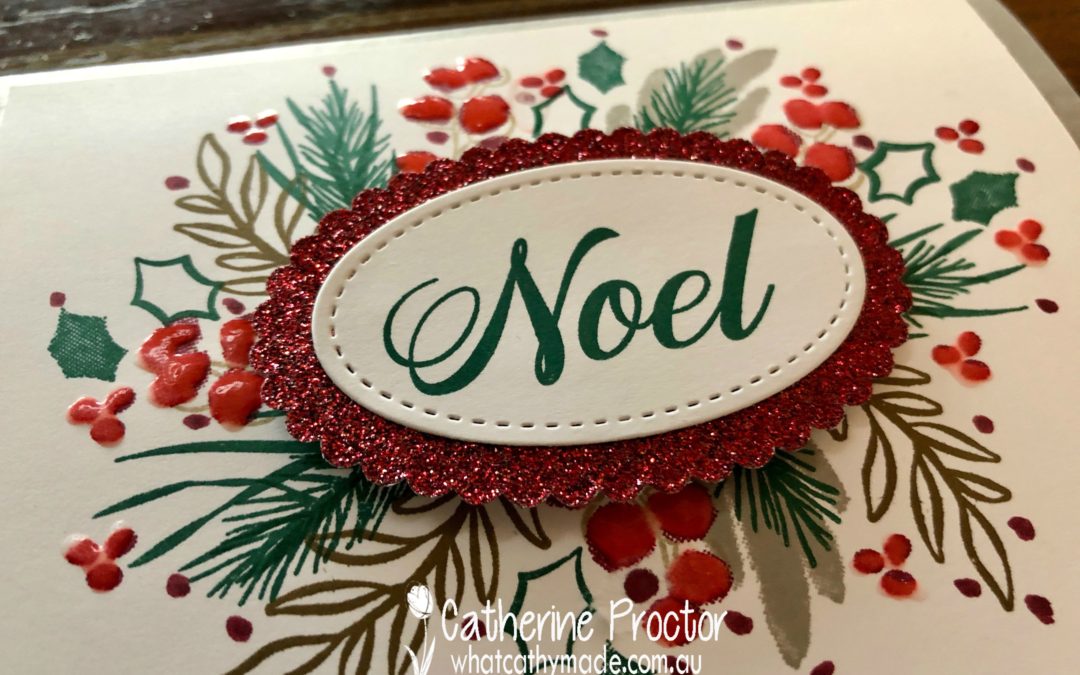
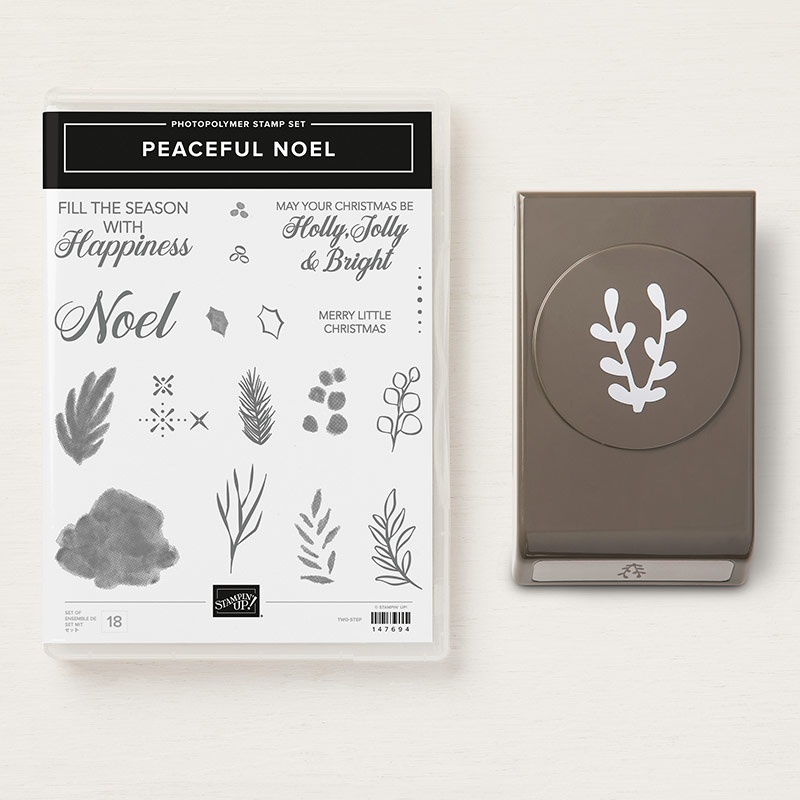
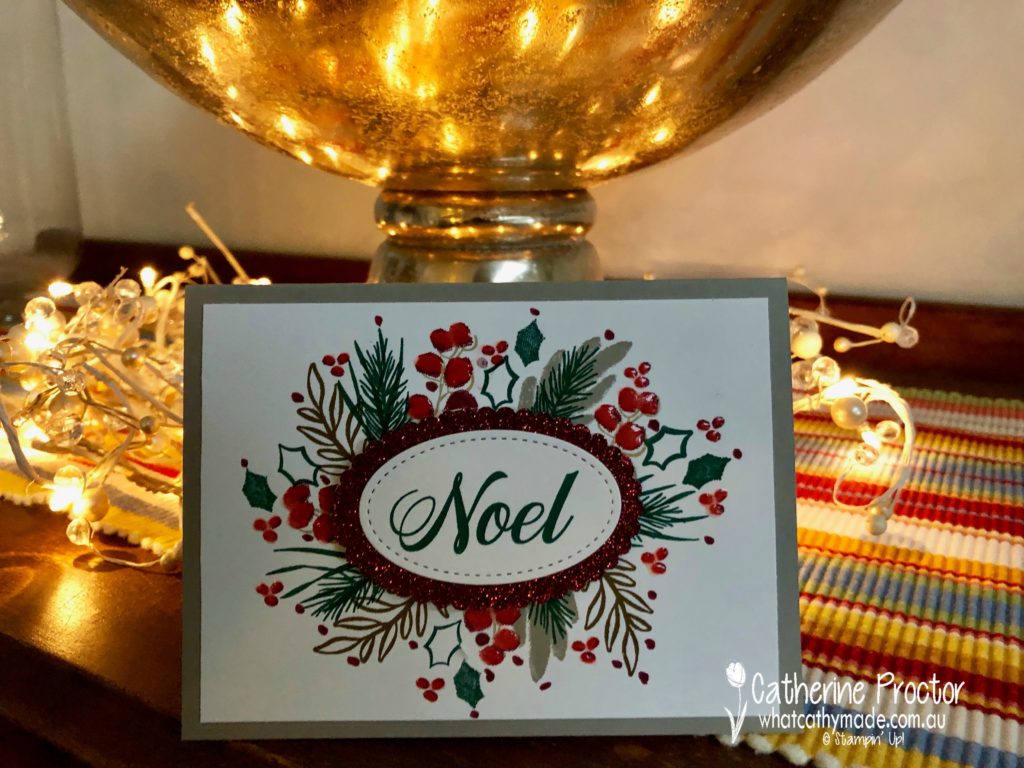
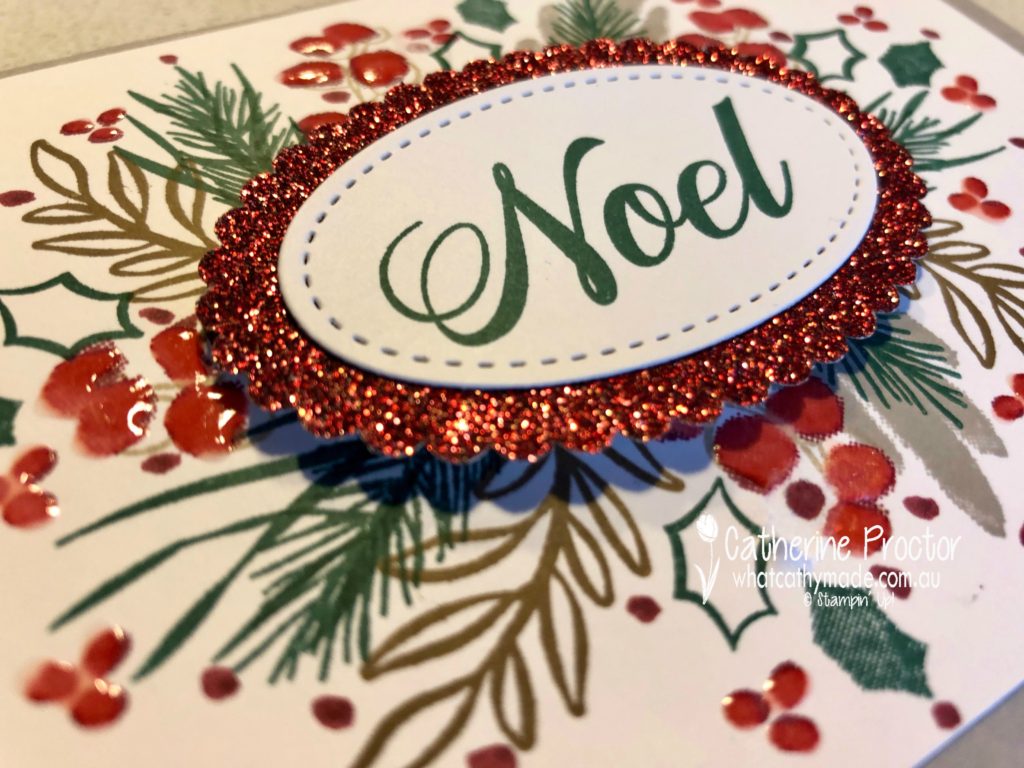
The stamp set I’ve used for this week’s Heart of Christmas project, Peaceful Noel, is such a beautiful stamp set and it comes with a matching punch called the sprig punch, that actually looks a lot like antlers!
I was going to use both the sprig punch and the Peaceful Noel stamp set for my card today but there was so much lovely detail in just the stamping on its own I decided to save the punch for another project.
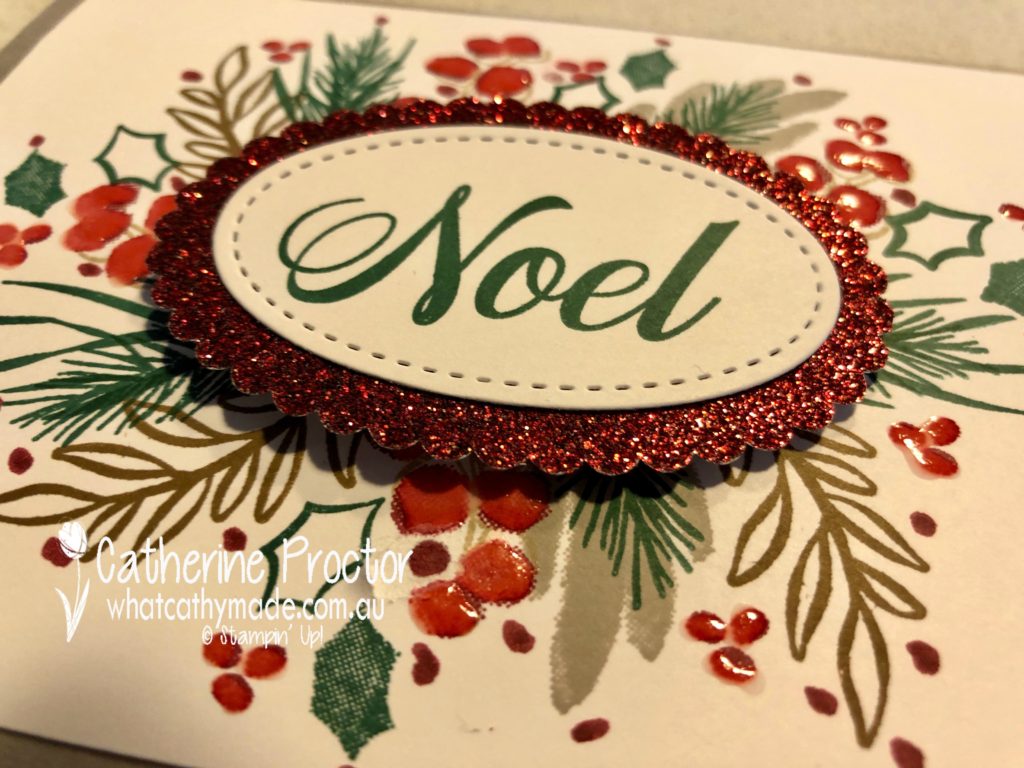
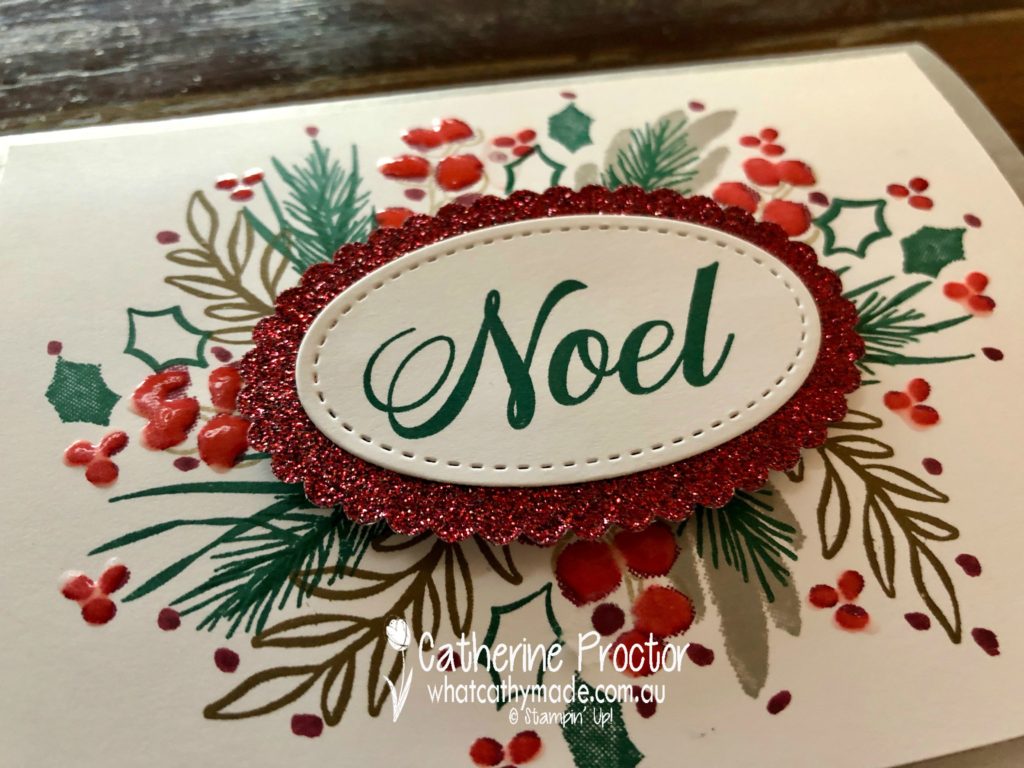
The ink colours I used for this card were the same stunning colours used in the Joyous Noel Suite: Gray Granite, Merry Merlot, Sahara Sand, Soft Suede, Tranquil Tide and Whisper White.
I used the outline of a small oval as my stamping guideline to stamp around and I just randomly started stamping, adding different colours and patterns as I went along. I then decided to add some more dimension to the Merry Merlot berries by covering them with a layer of fine-tipped glue. I love how this makes them shine!
Speaking of shine…how beautiful is this Merry Merlot glimmer paper! I die cut it out on the Big Shot with a layering oval die, then layered the Noel sentiment on top, after cutting it out with a Stitched Shapes oval die.
The base of the card is simply a piece of Gray Granite cardstock. Despite my love of Crumb Cake I must admit this colour comes a pretty close second as a neutral that works with so many different colours.
To see what the rest of the team have made this week hop over to the lovely Claire Daly’s blog.
To purchase any of the products I used in this project you can shop with me here. Or if you’d like me to post you your very own copy of the 2018-2019 annual catalogue or find out about more about Stampin’ Up! contact me.
Welcome to week 16 of the Art With Heart Colour Creations Blog Hop!
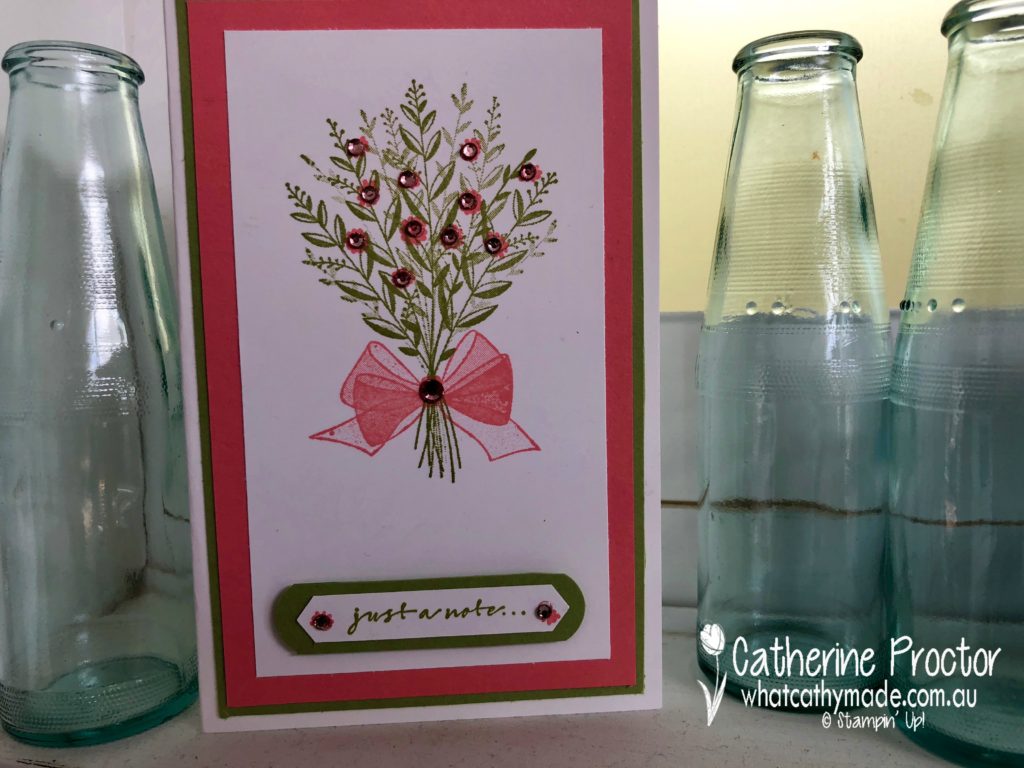
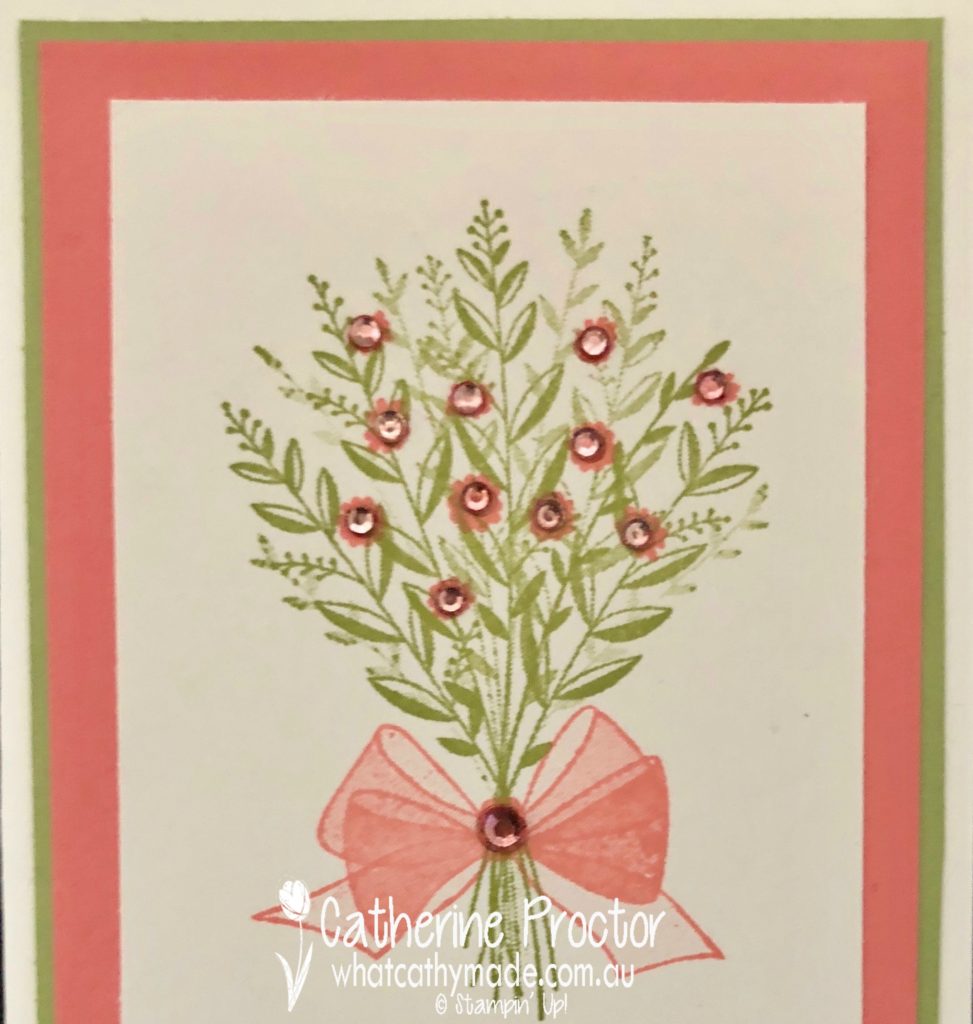
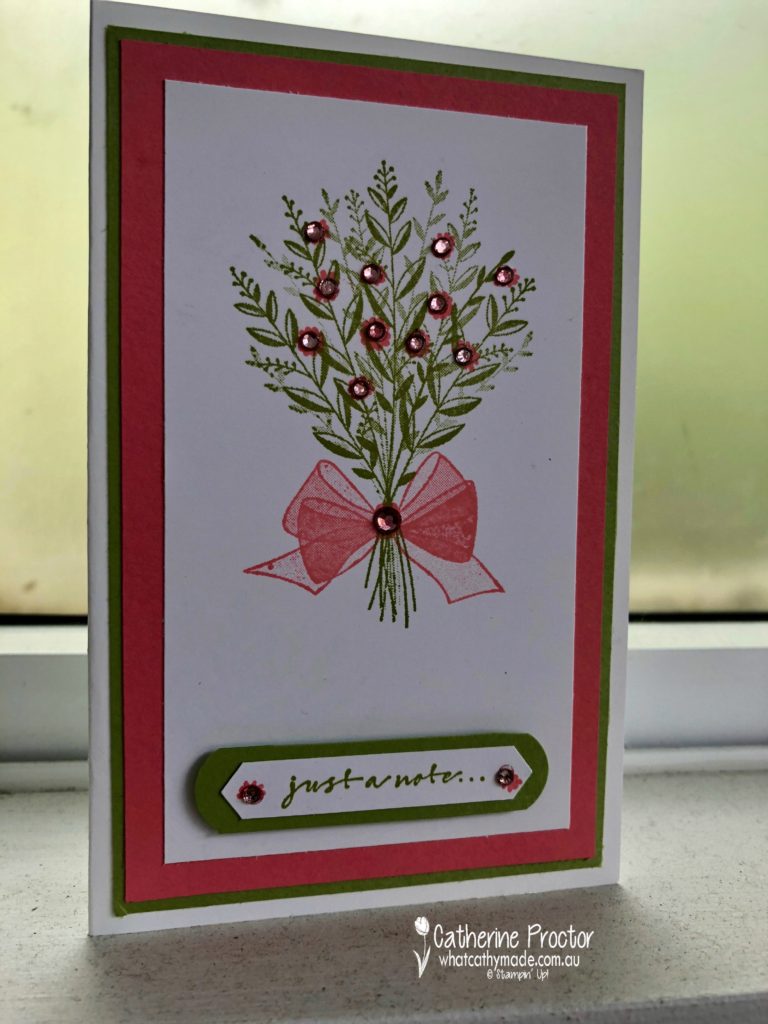
This week we are showcasing one of the brights: Flirty Flamingo!
For my Flirty Flamingo card I’m using one of the loveliest stamp sets from the 2018 Holiday Catalogue: Wishing You Well. This stamp set can be used for Christmas cards, sympathy cards or even for “just a note” cards you might want to send to somebody for a variety of reasons.
Wishing You Well is a “distinctive” stamp set, which means it adds monochromatic dimension by creating different opacities in a single stamped image. This provides a realistic depth and intensity to the image and gives a lovely watercoloured look…without any of the hard work!
Although Flirty Flamingo is a bright colour, I love the look of it with one of the subtle colours: Pear Pizzaz.
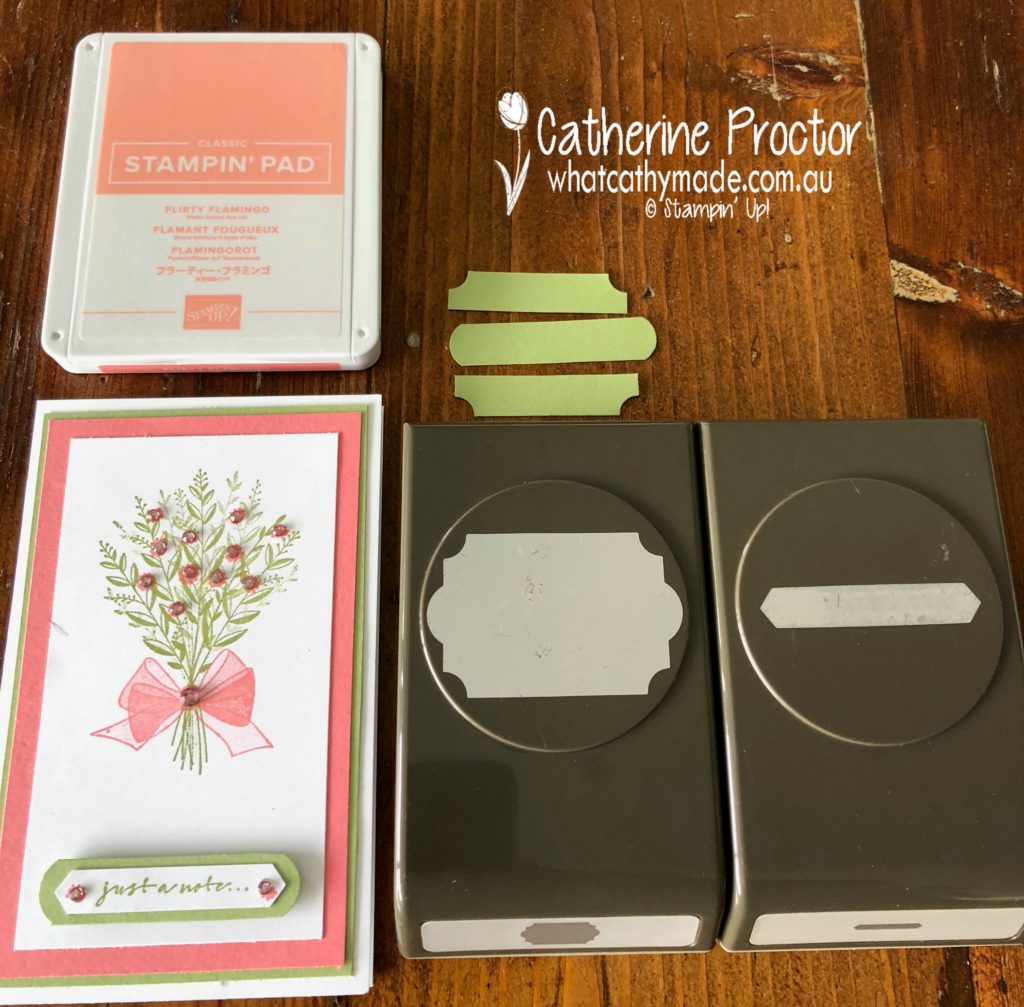
I’ve added some bling to this card by using my Dark Flirty Flamingo Blender Pen to colour in some Clear Rhinestone Jewels.
The sentiment has been stamped and then layered using two punches. The Classic Label punch punched out the Whisper White layer onto which the sentiment was stamped onto, then I also punched out some Pear Pizzaz cardstock using the Pretty Label punch to add some more dimension. The photo below shows how I cut off the top and the bottom of the Pretty Label shape to make a long rounded rectangle shape.
I just love the soft watercolour look this distinctive stamp set gives…with very little work on my behalf!
To see what the rest of the team have made click on the links below.
Thanks for hopping along with us today. To purchase any of the products I used in this project you can shop with me here. Or if you’d like me to post you your very own copy of the 2018-2019 annual catalogue or find out about more about Stampin’ Up! contact me.
Next Tuesday we’ll be showcasing one of the 2017-19 In Colours: Fresh Fig!
Tonight the Art with Heart team are sharing creative projects featuring the 2018 Holiday Catalogue.
We hope our blog hop inspires you to get creative and make some fabulous Christmas creations. If you would like a copy of the Holiday Catalogue, contact any of the girls on the blog hop and we will get in touch with you.
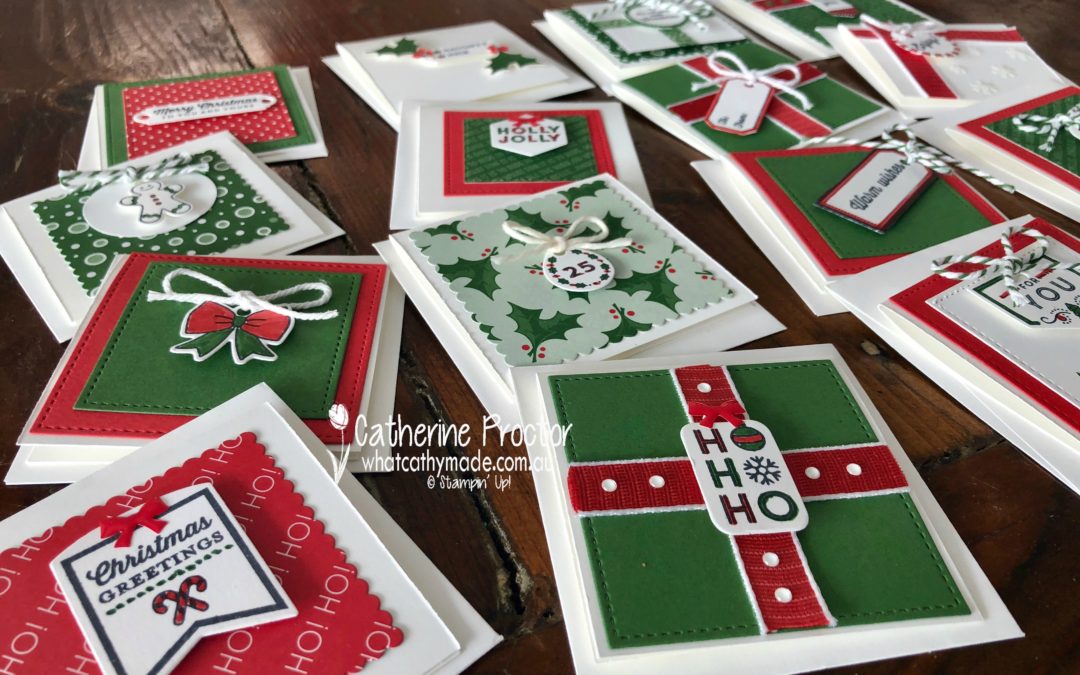
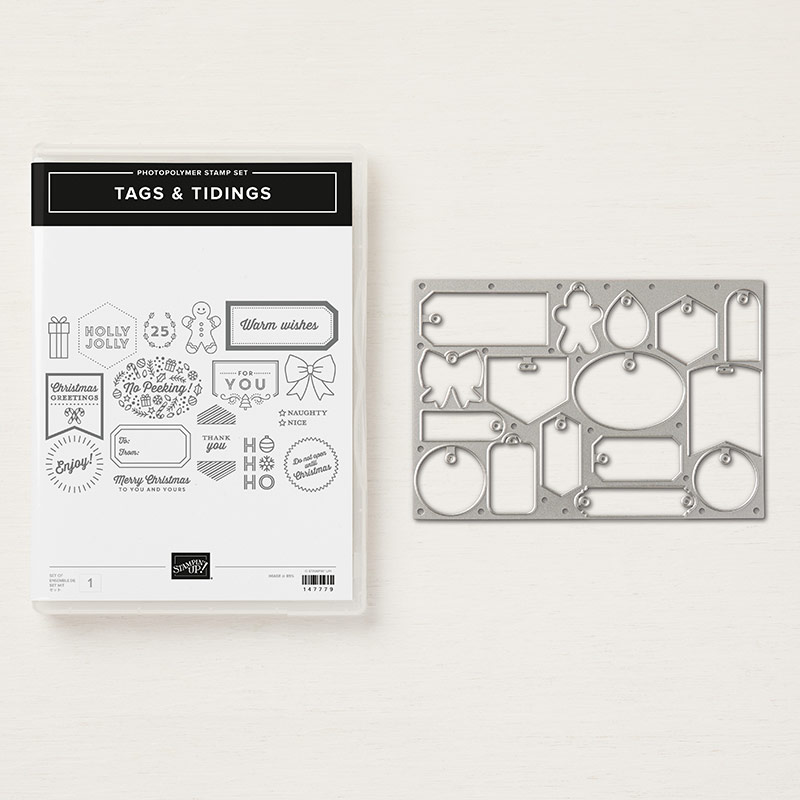
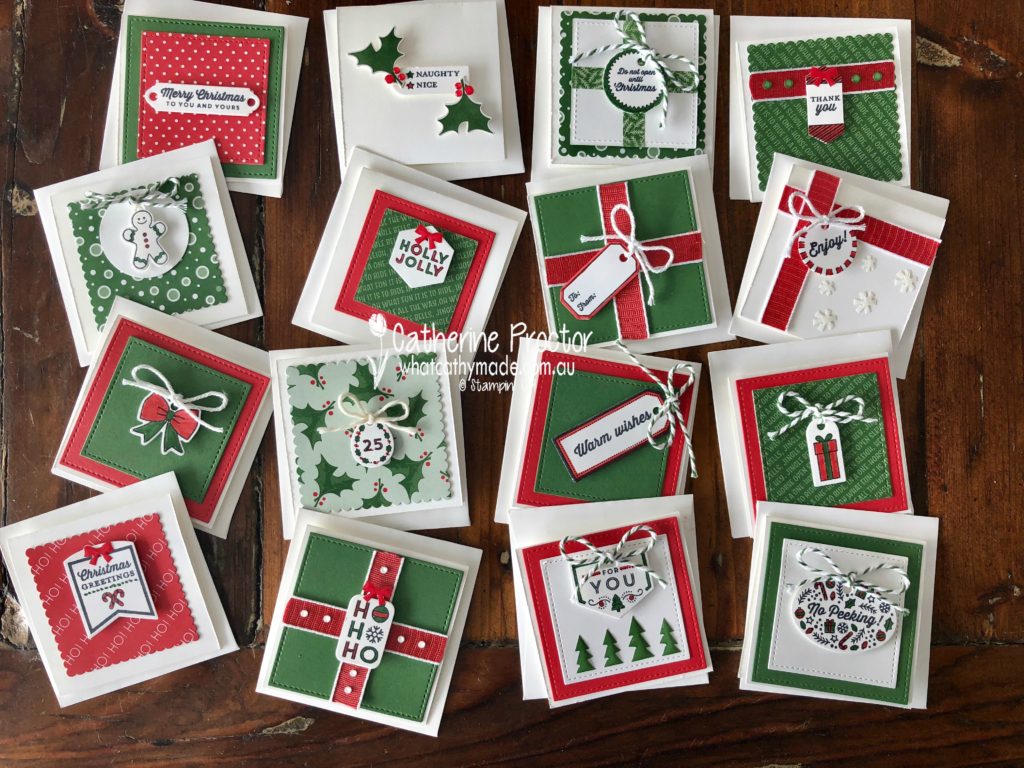
Tonight I’m showcasing the cutest bundle from the Holiday Catalogue: Tags & Tidings. What’s so special about this bundle is that it is one stamp and one die, allowing you to make 16 tags at one time! How clever is that?
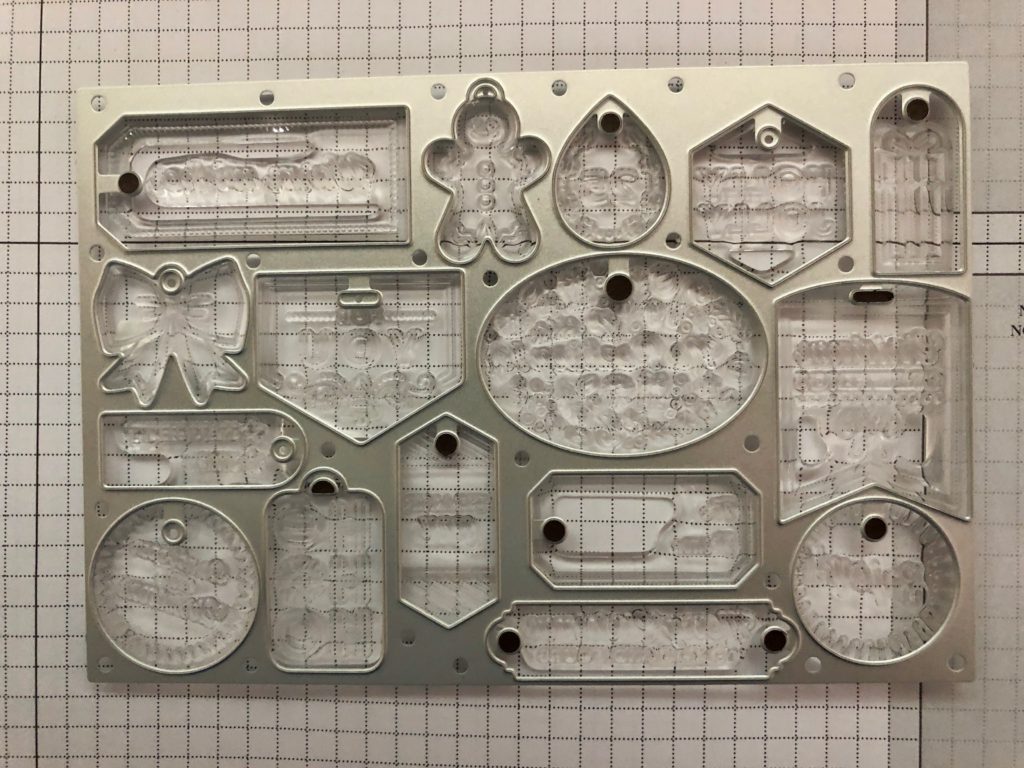
There are a couple of tricks to using this bundle. Firstly, I used the die to ensure my stamp was correctly aligned before I stamped it and secondly, I highly recommend using the Stamparatus when stamping such a large stamp.
Here’s how to use the die to align the stamp. I turned it upside down (so the side you stamp on is facing upwards) and ensure the stamp fits into the die. This ensures that your stamped images will fit exactly into the die shapes when you run it through the Big Shot.
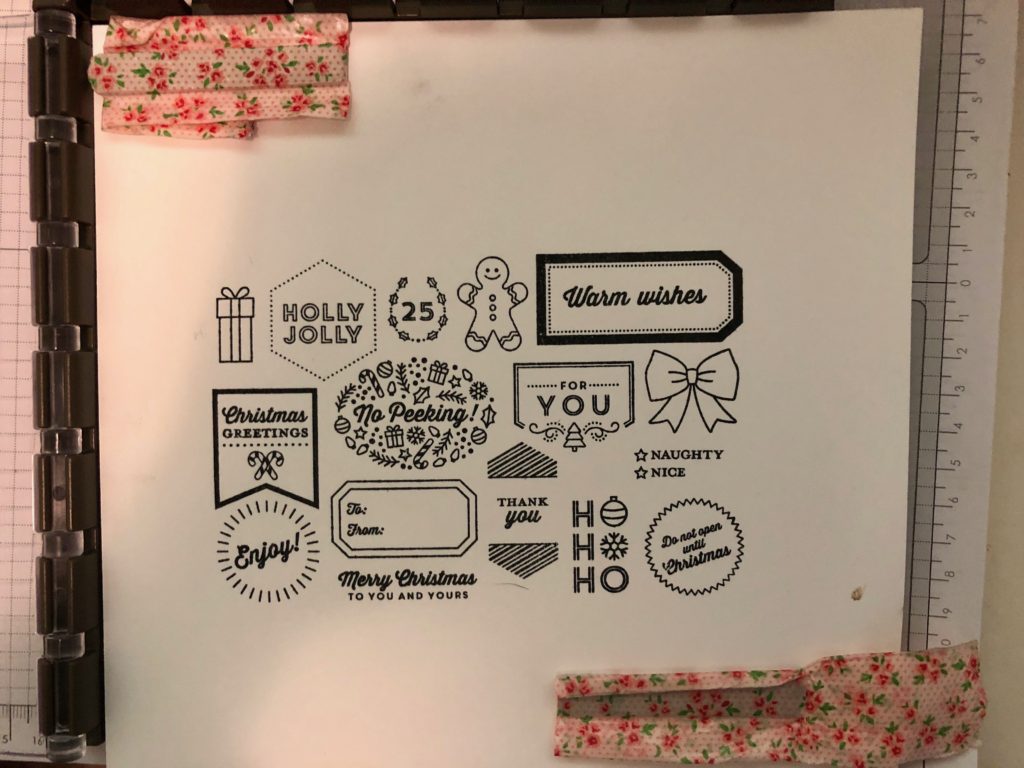
And here’s the perfect image you get when you stamp with the Stamparatus…
Oh, and one more trick…I use washi tape to cover and protect my Stamparatus magnets (see my photo above), AND to hold the die in place over my stamped image before I cut it with my Big Shot (I forgot to take a photo of this bit).
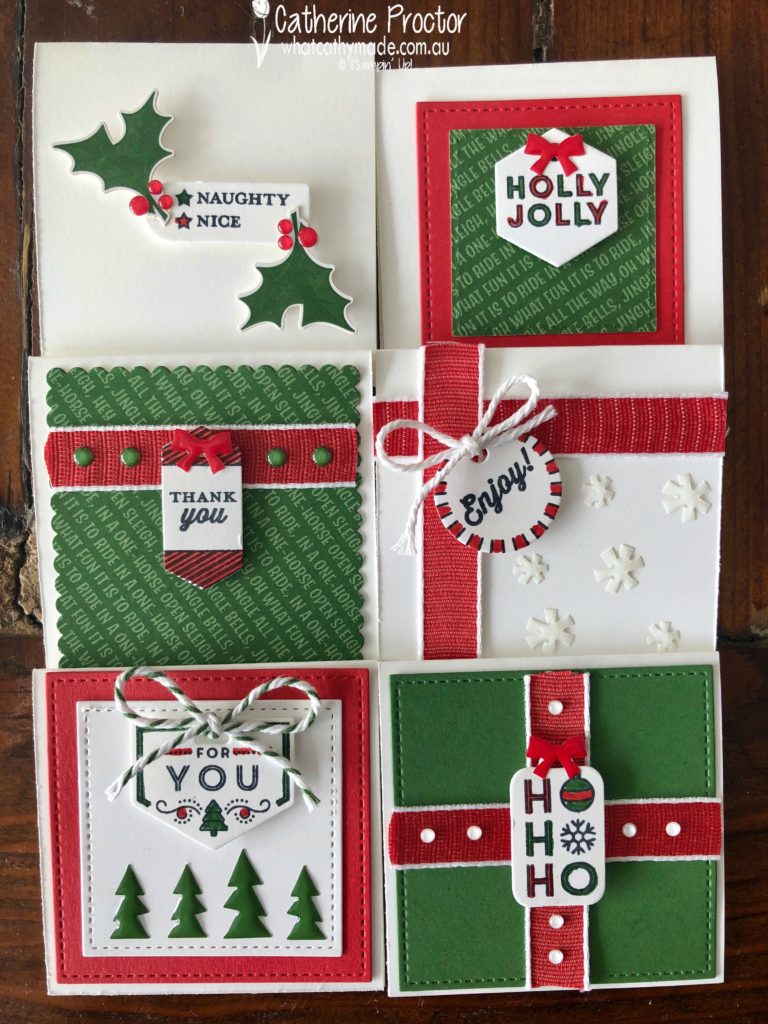
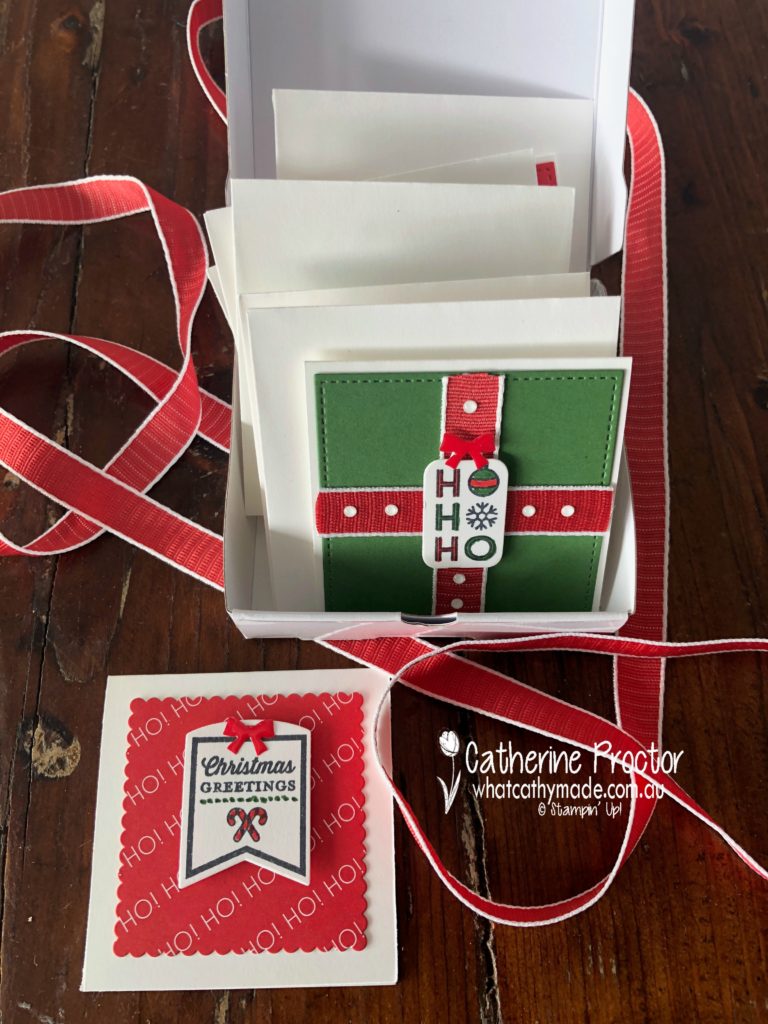
I coloured these images in using myGarden Green and Poppy Parade Markers and then turned them into mini gift cards. Check out all the cards that this one stamp makes…16 of them!!!
Because these tags are teeny tiny, I decided to turn them into gift cards that would fit into Stampin’ Up!’s 3 x3 inches envelopes by firstly making Whisper White card bases slightly smaller than the envelopes.
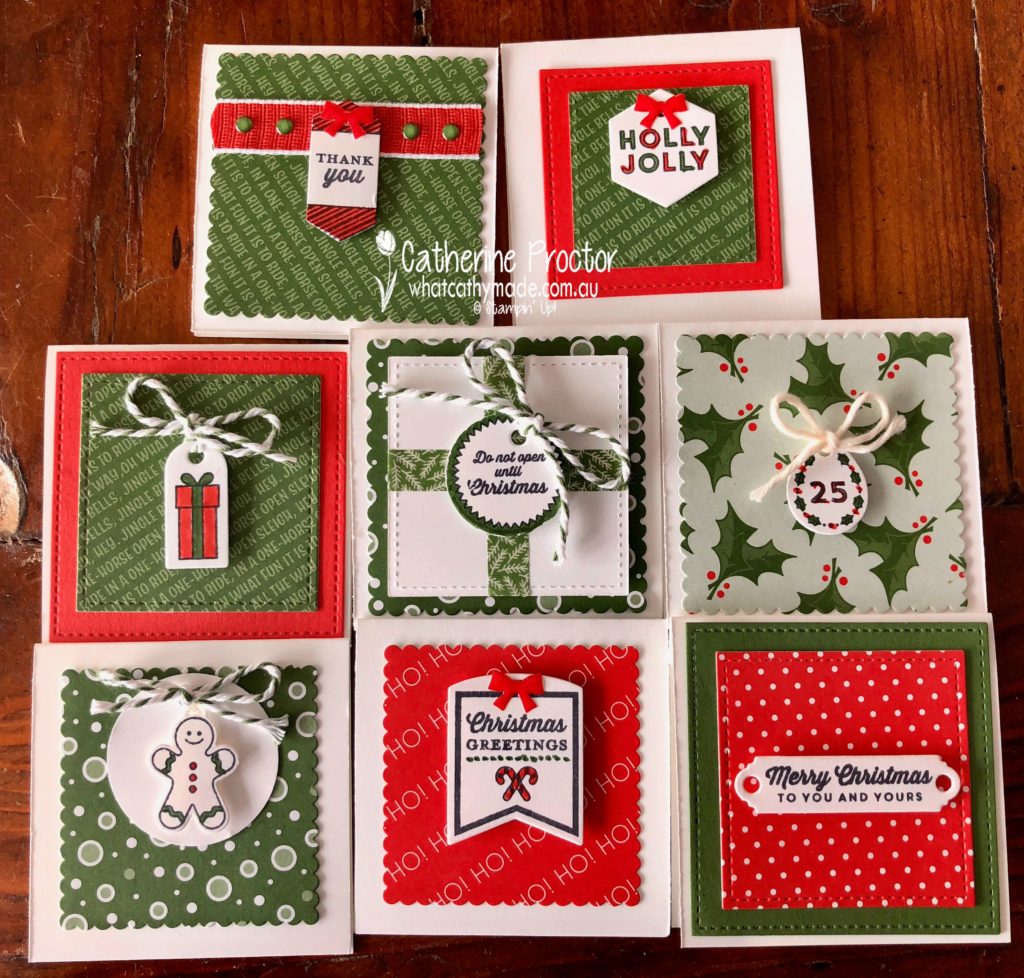
I used the layering square framelits and the Stitched shape framelits to cut different sized squares of Garden Green and Poppy Parade cardstock with my Big Shot and then I also die cut some squares out of the Santa’s Workshop Memories and More Cards.
The gift cards below are the ones where I used the Memories and More Cards as DSP. It’s a great way to add some extra pattern and interest to your cards.
To embellish my cards I used Garden Green bakers twine, Whisper White bakers twine (although looking at my photos above I can see I accidentally used Very Vanilla bakers twine on one of the cards, Whoops!!!), Poppy Parade 1/2″ Textured Weave Ribbon, stickers from the Santa’s Workshop Memories and More Cards and the darling little Santa’s Workshop Enamel Shapes.
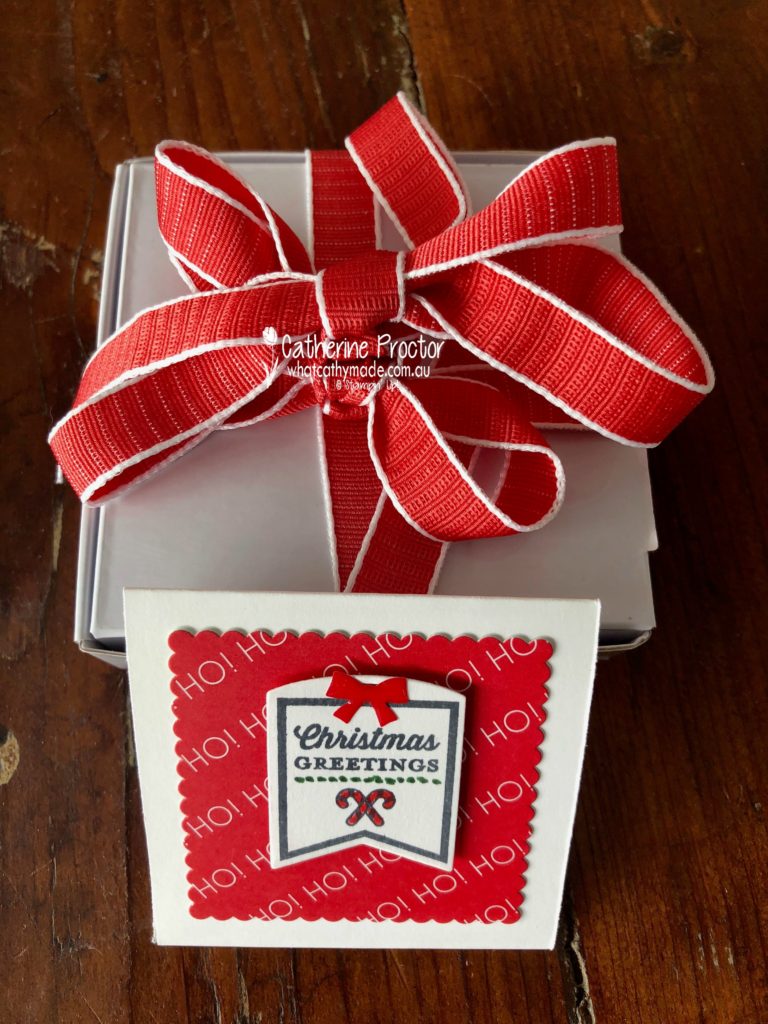
I’ll present these gift cards as little gifts, packaged up six at a time (with their matching envelopes), in our Stampin’ Up! pizza boxes…all tied up with a bow and using one of the gift cards as the card to go with the box of cards.
Now it’s time to hop on over to our next participant, the very talented, Rachel Woollard.
If you find a broken link or have come to this blog hop from a different entry point, you can view the participants below: