Welcome to week six of our 2020-2021 Art With Heart Colour Creations Showcase.
Each week various members of our Art With Heart Colour Creations team will be bringing you weekly colour inspiration as we showcase our range of over 50 beautiful Stampin’ Up! colours in alphabetical order.
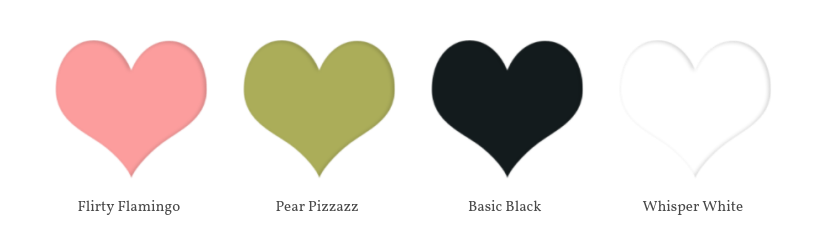
Week 16 – Flirty Flamingo
Week 16 brings us to Flirty Flamingo – a bright happy pink with a touch of orange in it. I tried to make a card using Flirty Flamingo with some of the blues but it just wasn’t working for me so I went back to the drawing board and started again with this colour combination.
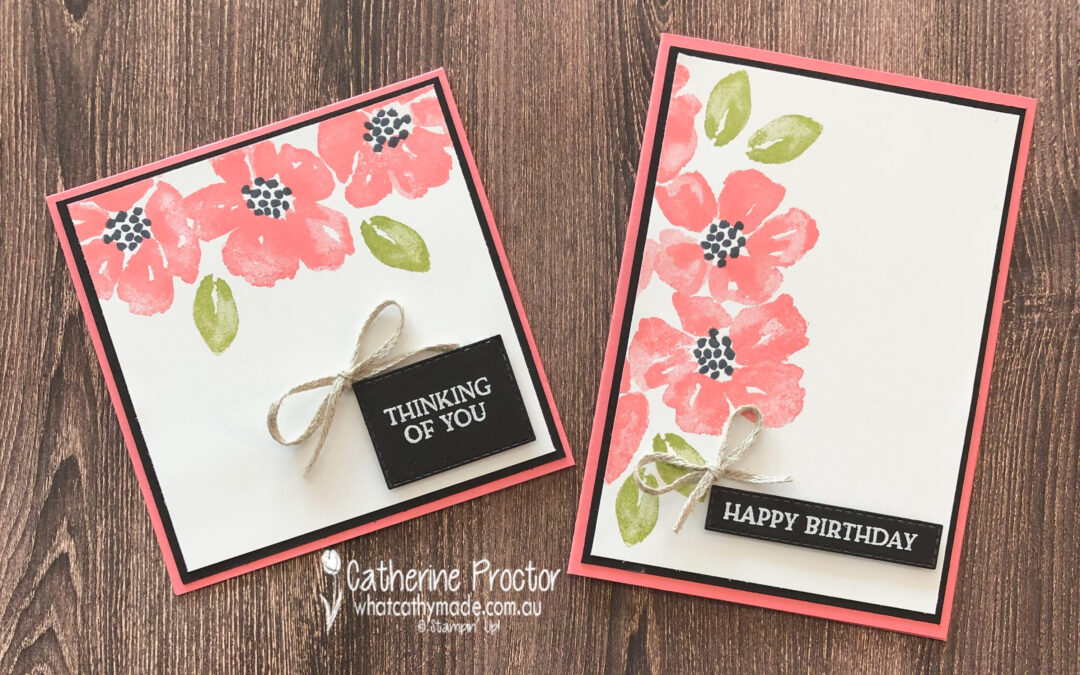
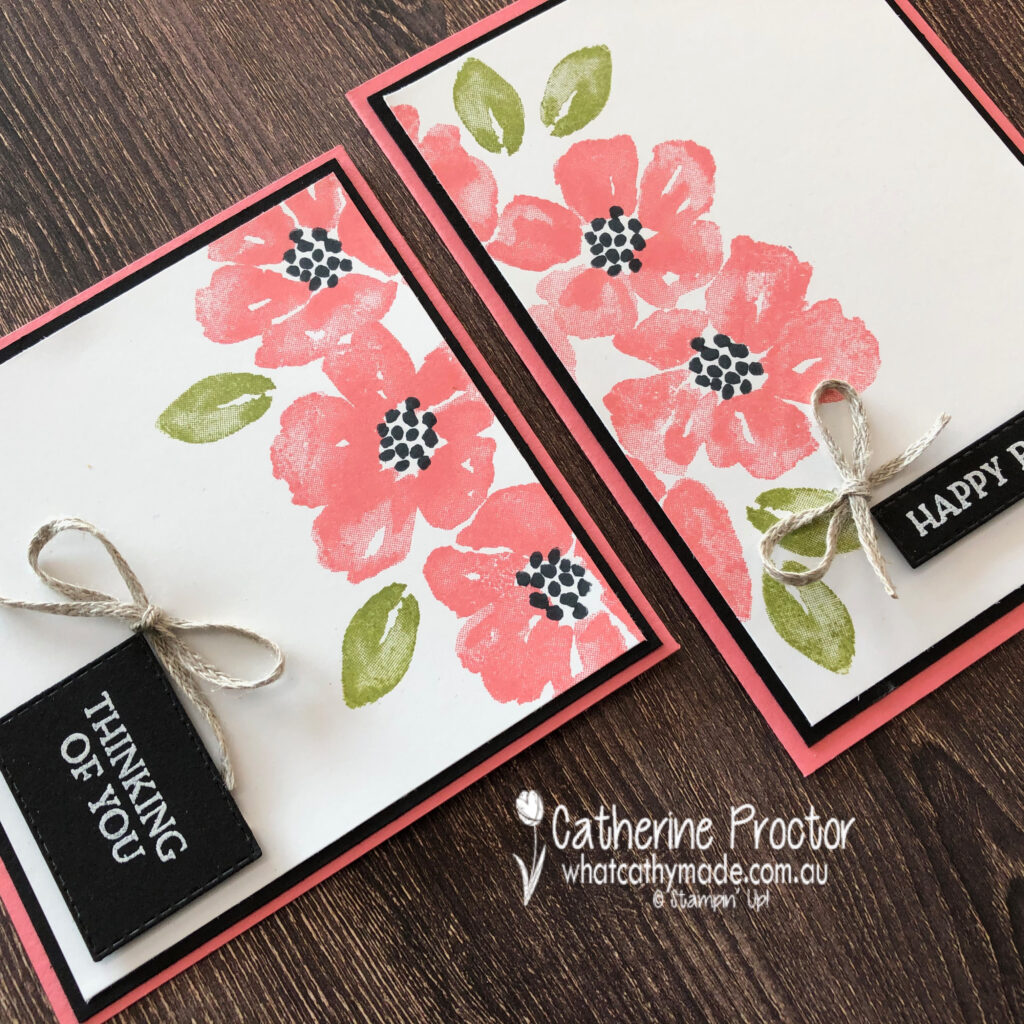
Have you ever tried the split card technique? It’s a quick and easy way to create more cards in less time and it also gives your cards that lovely stamped off to the edge effect.
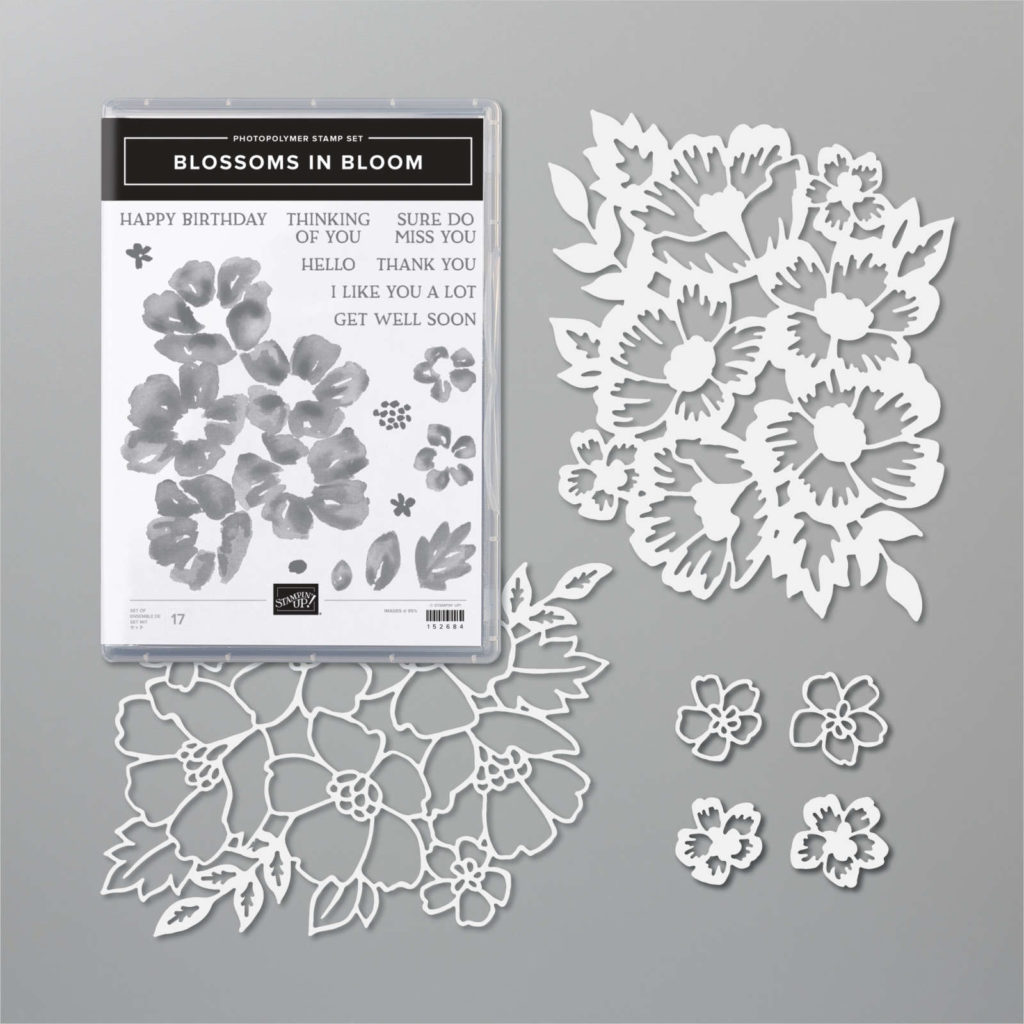
To create the split card technique you can either use die cut images adhered to a card stock layer or you can stamp directly onto your card stock. I’m doing the easiest version today – using stamped images from the Blossoms in Bloom stamp set, but these co-ordinating Many Layered Blossoms dies would also work really well.
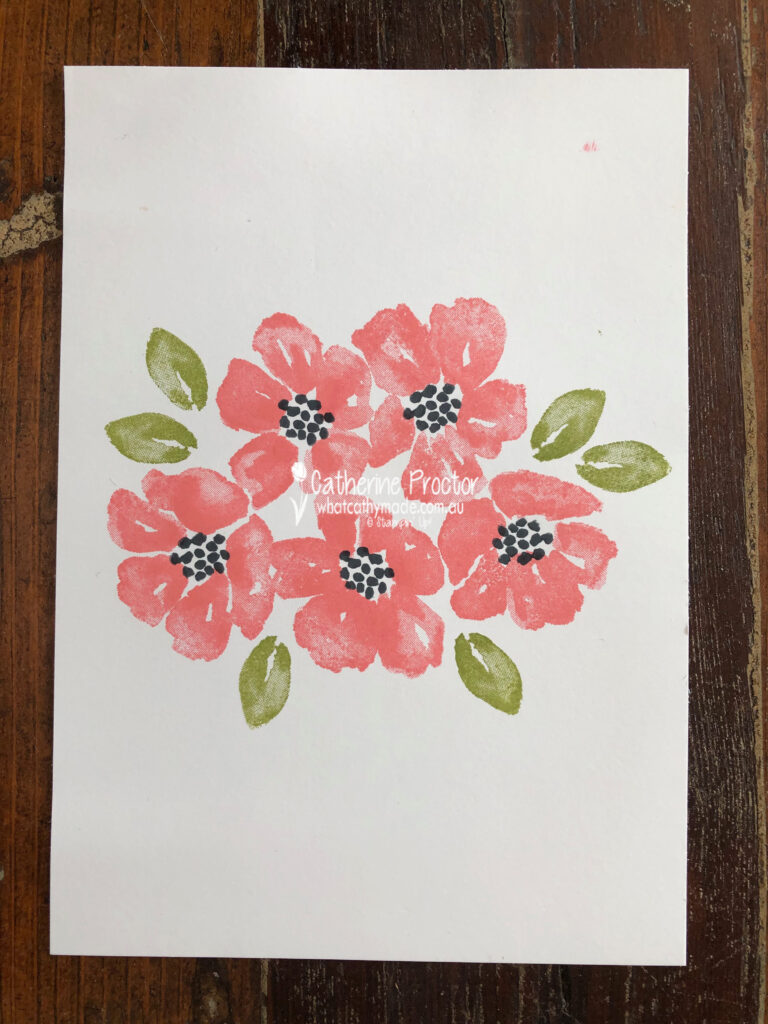
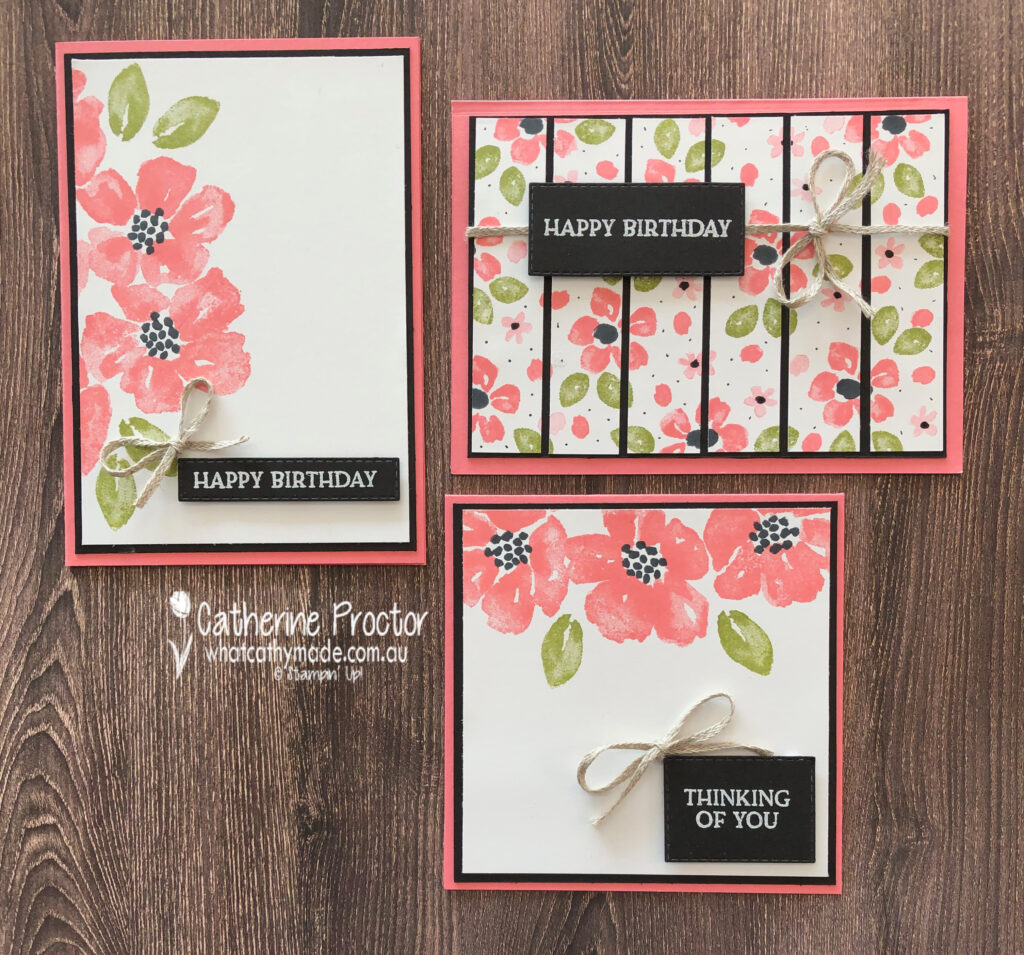
Begin by cutting an A4 sheet of Whisper White in half and then stamping the main image into the centre of the card stock. My large floral image was stamped in Flirty Flamingo, with just a few Pear Pizzaz leaves stamped around the flowers and Basic Black flower centres stamped in Tuxedo Memento.
This large floral stamp is ideal because it covers a large surface area with a single stamp and it’s a non-geometric floral image, which is easiest to work with using the split card technique.
To create two cards I simply cut my image in half and then decided how best to use each half . This photo shows you where I cut the image and how the two sides of the card stock line up.
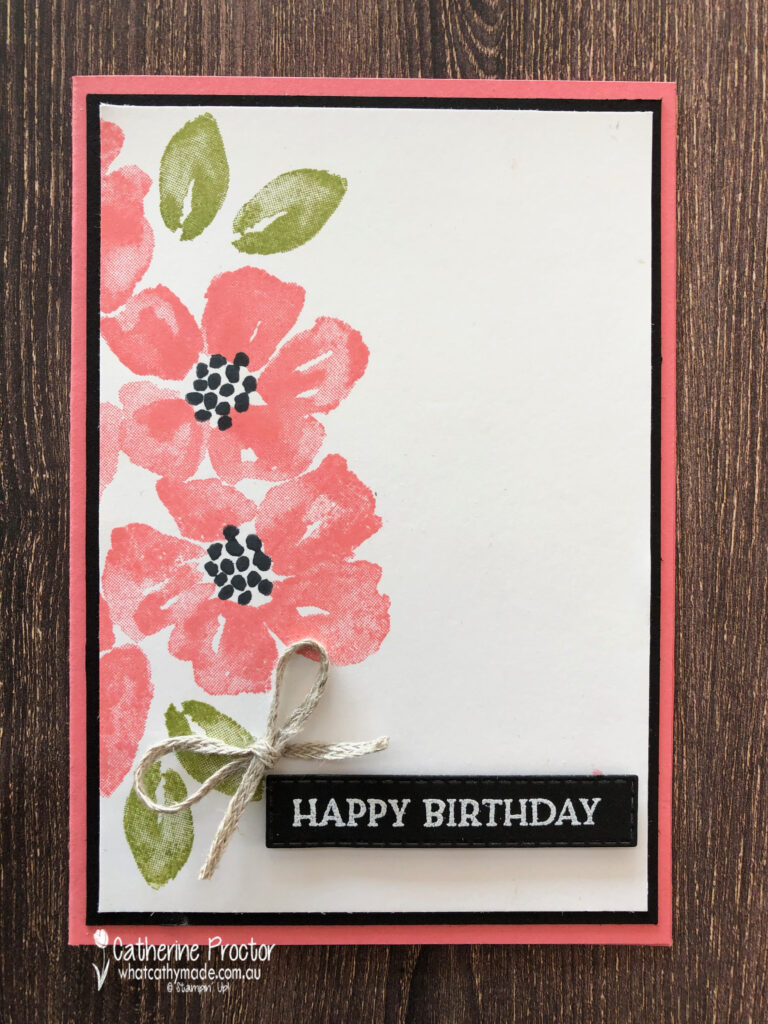
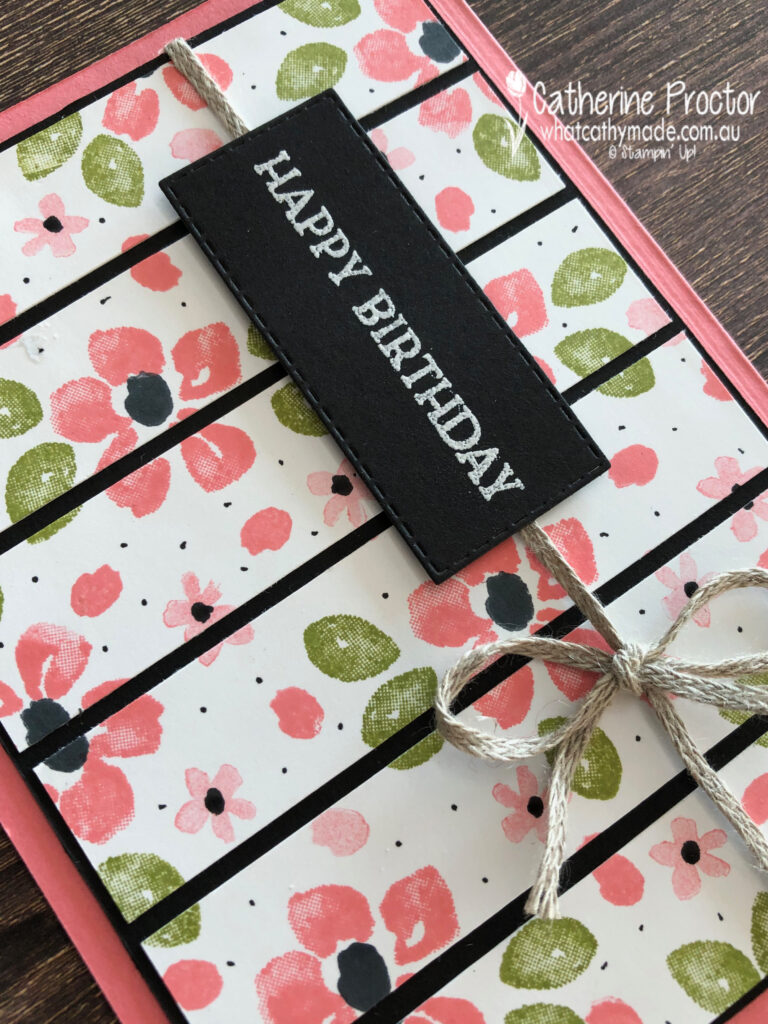
For the happy birthday card I trimmed the stamped image to 9.5 x 13.8 cm before mounting it on a 10 x 14.2 cm Basic Black card stock layer. The card base is an A4 sheet of Flirty Flamingo card stock cut in half and then folded in half.
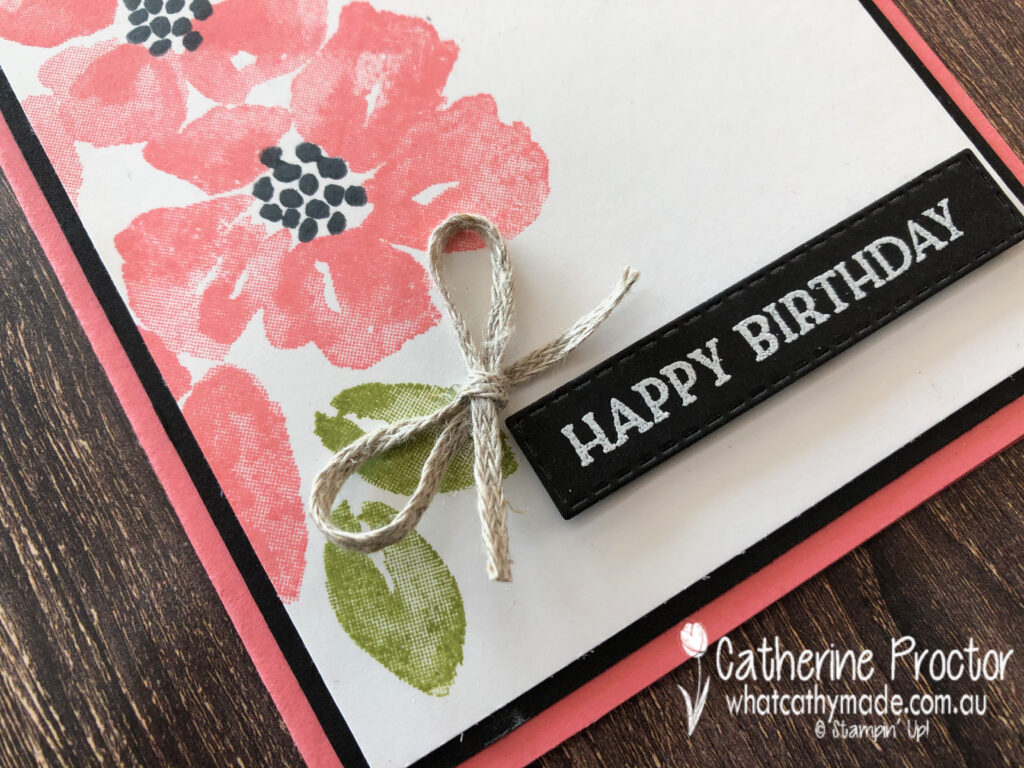
The Happy Birthday sentiment was stamped in versamark ink, before adding white embossing power, setting with a heat tool and die cutting using a Stitched Rectangle die.
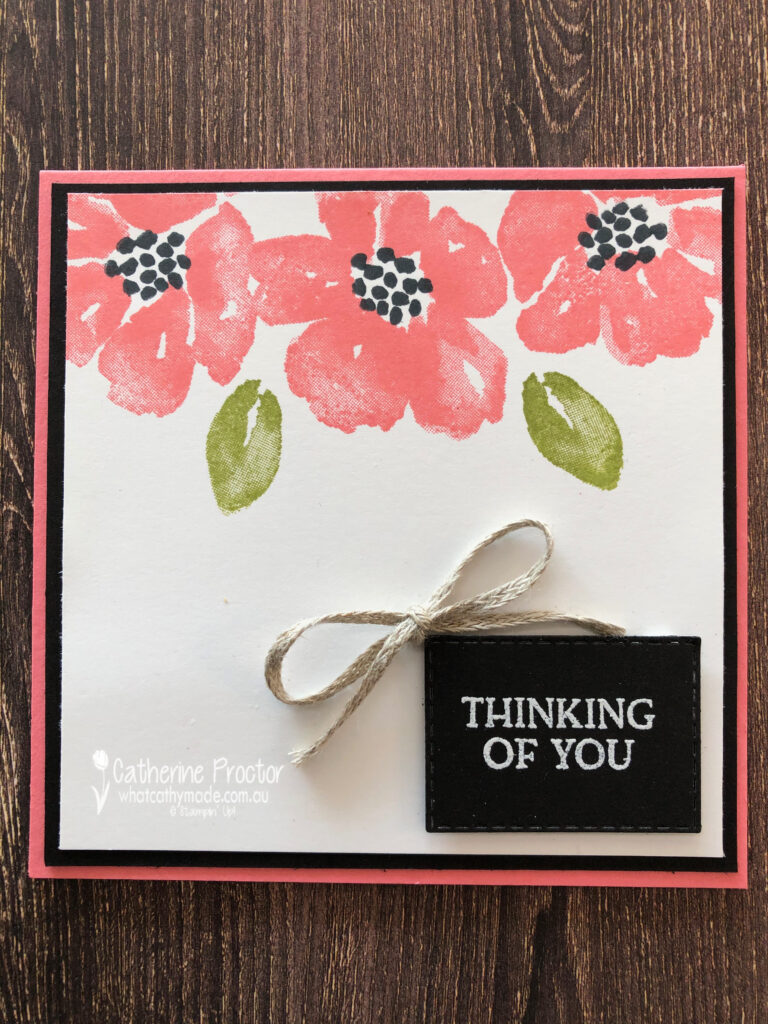
I trimmed my second half of my stamped card stock to 10.5 x 10.5cm and rotated the image to the top of the card this time before mounting it onto a 11 x 11cm Basic Black card stock layer. The card base is an 11.5 x 11.5 cm square of Flirty Flamingo card stock.
The Thinking of You sentiment was stamped in versamark ink, before adding white embossing power, setting with a heat tool and die cutting using a different Stitched Rectangle die.
Like the Happy Birthday card this card was finished with a bow of Braided Linen Trim.
Just for fun I made a third card, creating my own DSP with the same colours as the other cards, but this time using the smaller stamps in the Blossoms in Bloom stamp set.
Those tiny black dots and the centres of the smaller flowers were created using my Basic Black Stampin’ Write Marker. The smaller flowers are a lighter pink than the larger flowers because I stamped off the Flirty Flamingo ink once before stamping on the card stock.
Like the two split cards, my homemade DSP Happy birthday card was finished off with a bow of Braided Linen Trim and the sentiment created with heat embossing.
I can’t wait to see what the rest of the Art With Heart team have created with Flirty Flamingo today. Click on the links below to see what they’ve made.
Next Wednesday we’ll be showcasing one of the Regal family: Garden Green. We hope you can join us all then.
To purchase any of the products featured in today’s post, simply contact your Stampin’ Up! demonstrator, any of the ladies in the AWH Colour Creations Showcase or click on the product links below.
If you’d like me to post you your very own copy of the August -December 2020-21 Stampin Up! Catalogue, the 2020-21 Stampin Up! Annual Catalogue, the 2020-21 Beginners Brochure, or to simply find out about more about Stampin’ Up! contact me.
In the meantime, wherever you are in the world, stay safe, stay calm…and keep on crafting xxx
Welcome to the Monthly Art With Heart Creative Showcase. Tonight we’re sharing some ideas for masculine cards, something I know many of us can find challenging to make.
I recently made two masculine cards I’d like to share with you: the card I made for my dad’s birthday in July and the card I made last week for him for Father’s Day.
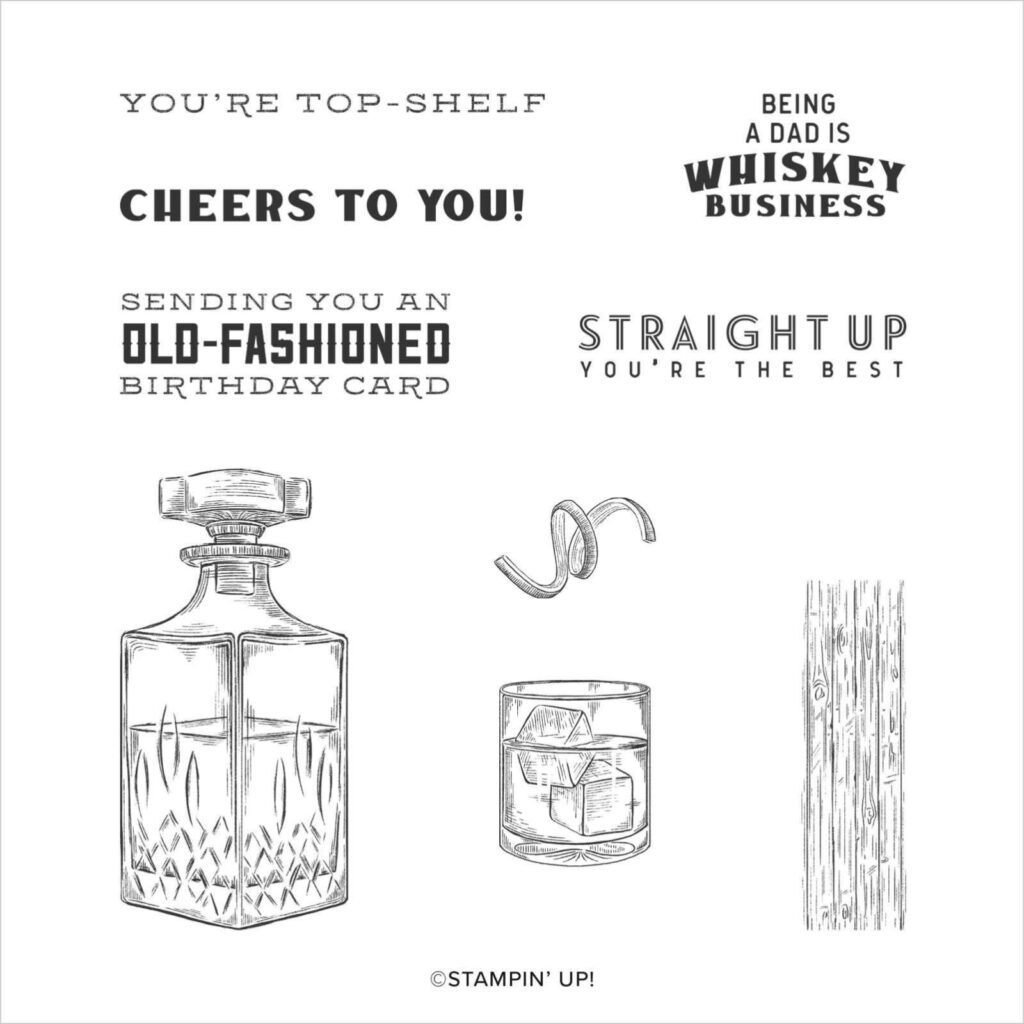
My dad is not a typical card game/car/fishing/treking/BBQ/sport kind of a dad and that can make designing masculine cards for him quite tricky. But there are two Stampin’ Up! stamp sets that perfectly matched the gifts I was giving to my dad: Whiskey Business and Press On.
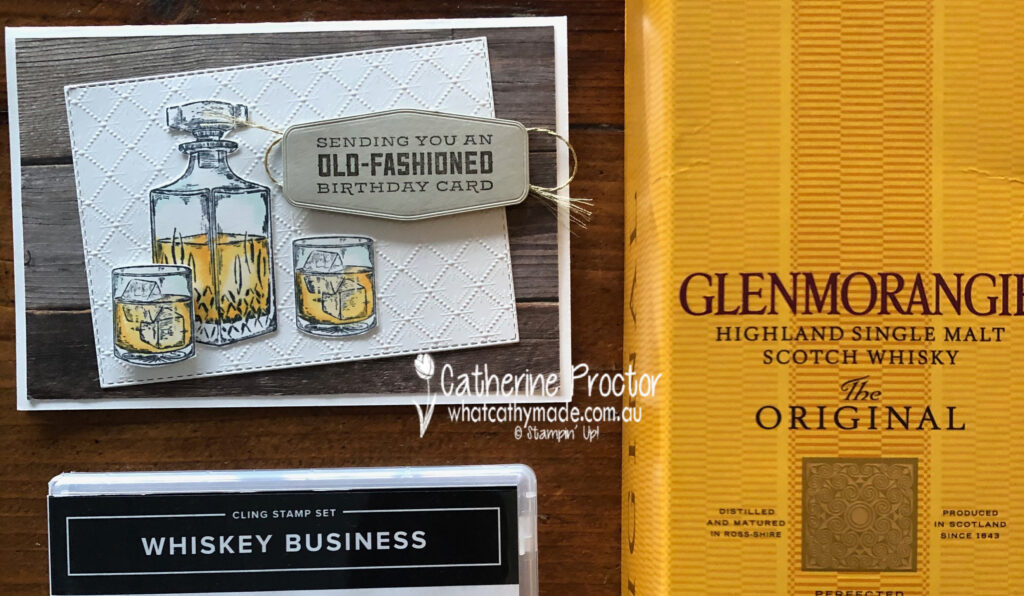
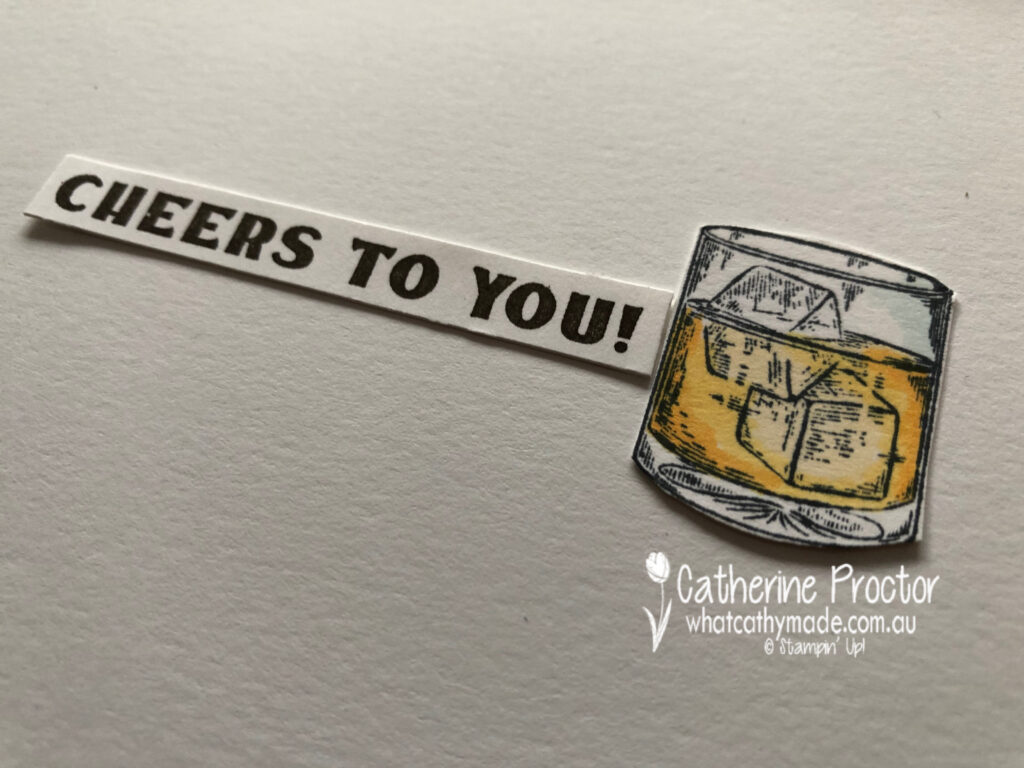
For Dad’s birthday card I used the Whiskey Business set… no prizes for guessing what I gave him for his birthday!
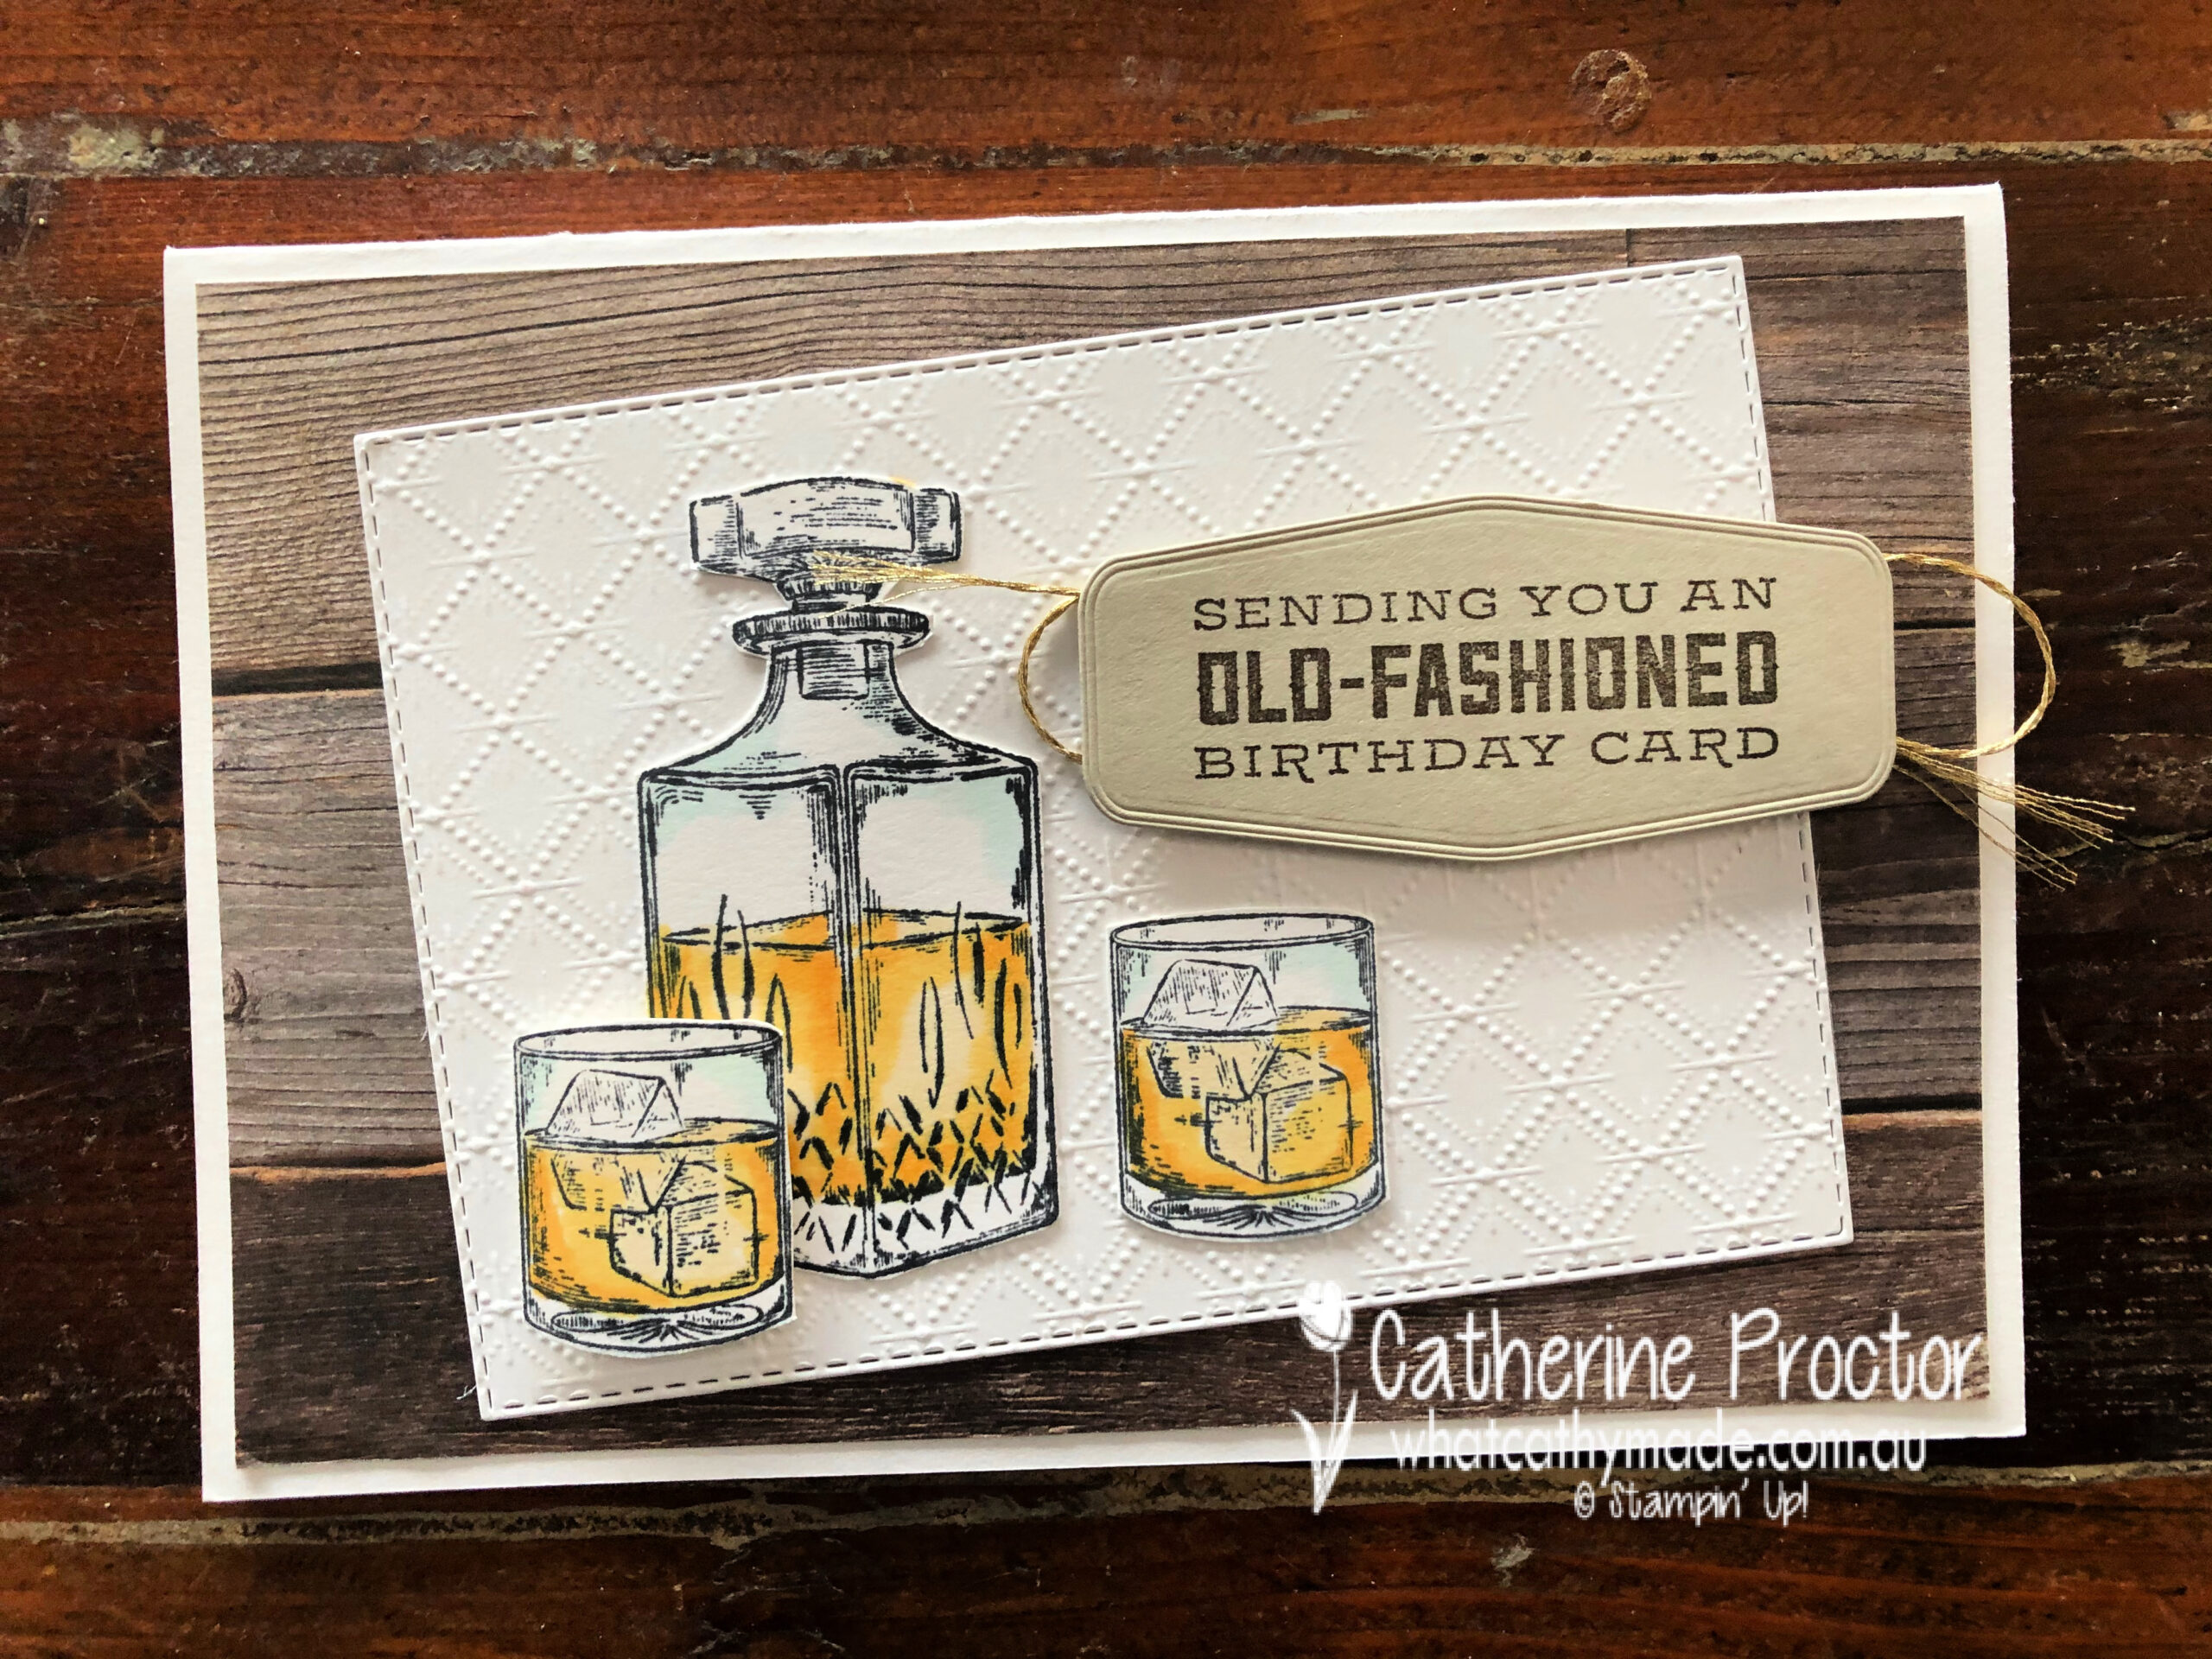
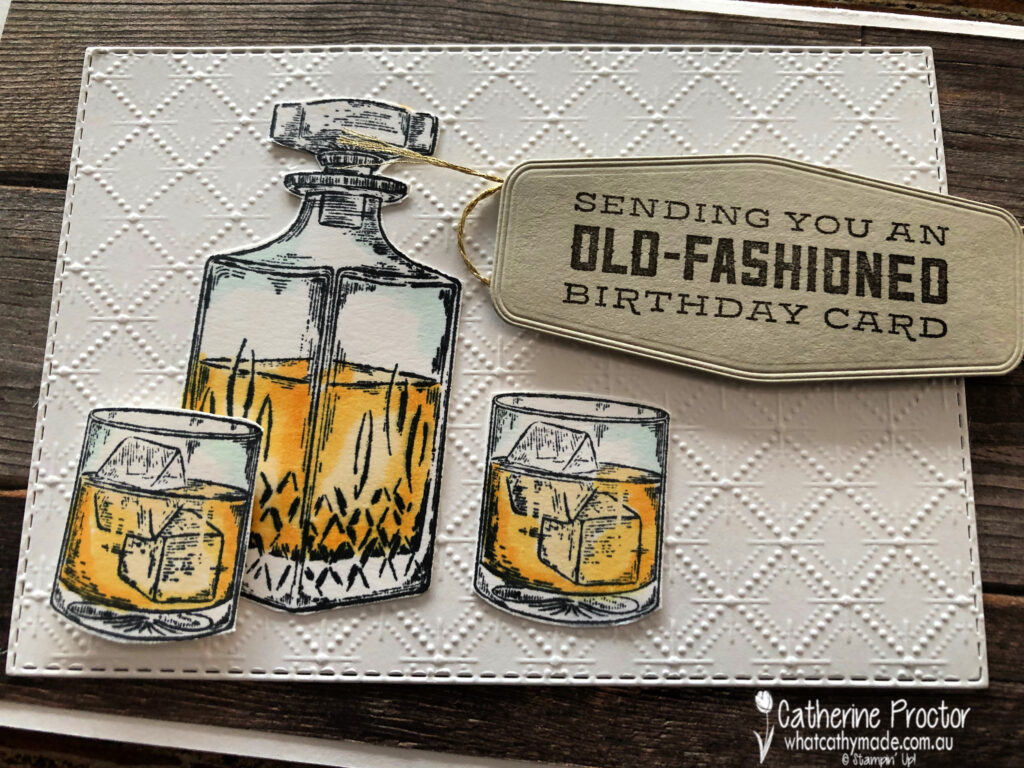
This card was CASED from the design of the card on page 33 of the Annual Catalogue but I made a few changes to make it my own. I just had to use the Dainty Diamonds embossing folder to emboss the Whisper White card stock because it looks just like the pattern in the cut crystal that the Whiskey decanter and whiskey glasses are made of.
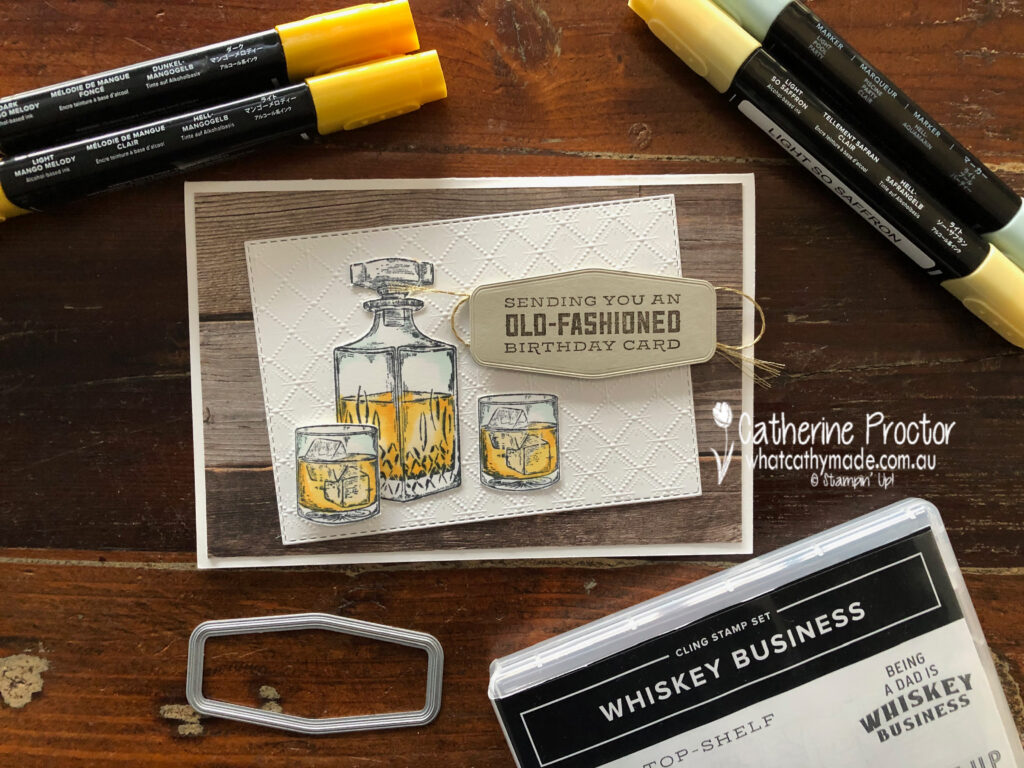
The detailed line drawings of the Whiskey Business are so realistic and the Stampin’ Blends make it so easy to bring these stamps to life. I’ve used light Pool Party for the crystal, and light So Saffron, light Mango Melody and dark Mango Melody for the whiskey.
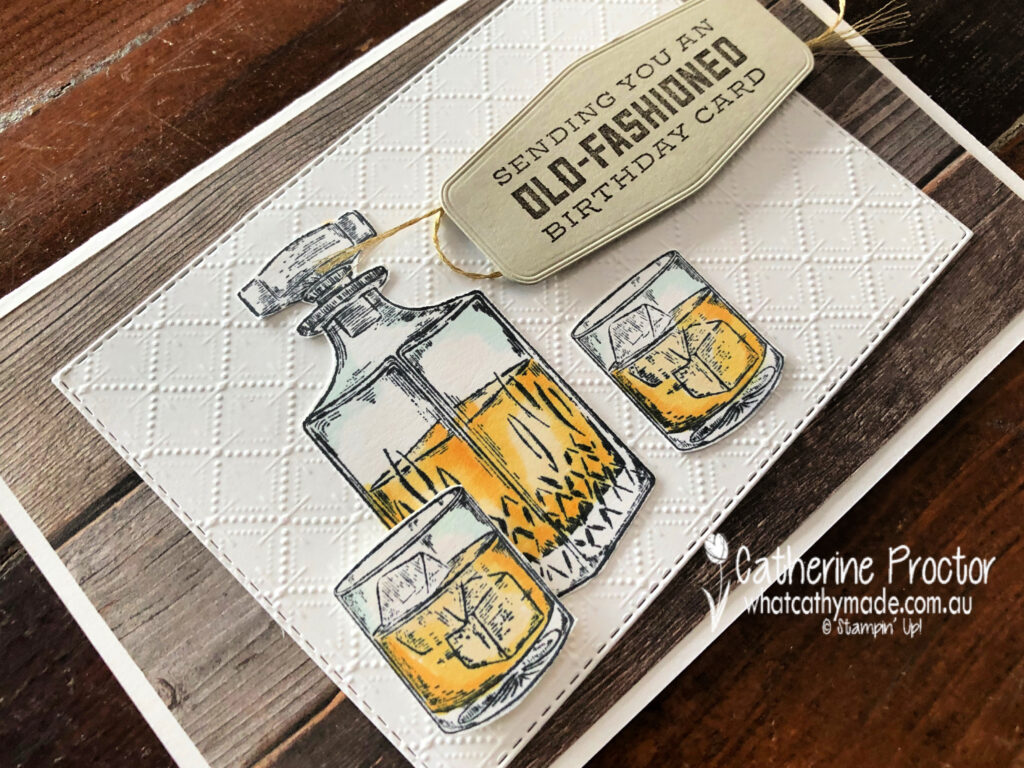
Here’s a close up showing the detail in this stamp set. I simply fussy cut my decanter and glasses using my paper snips before adhering them to the embossed Dainty Diamonds layer.
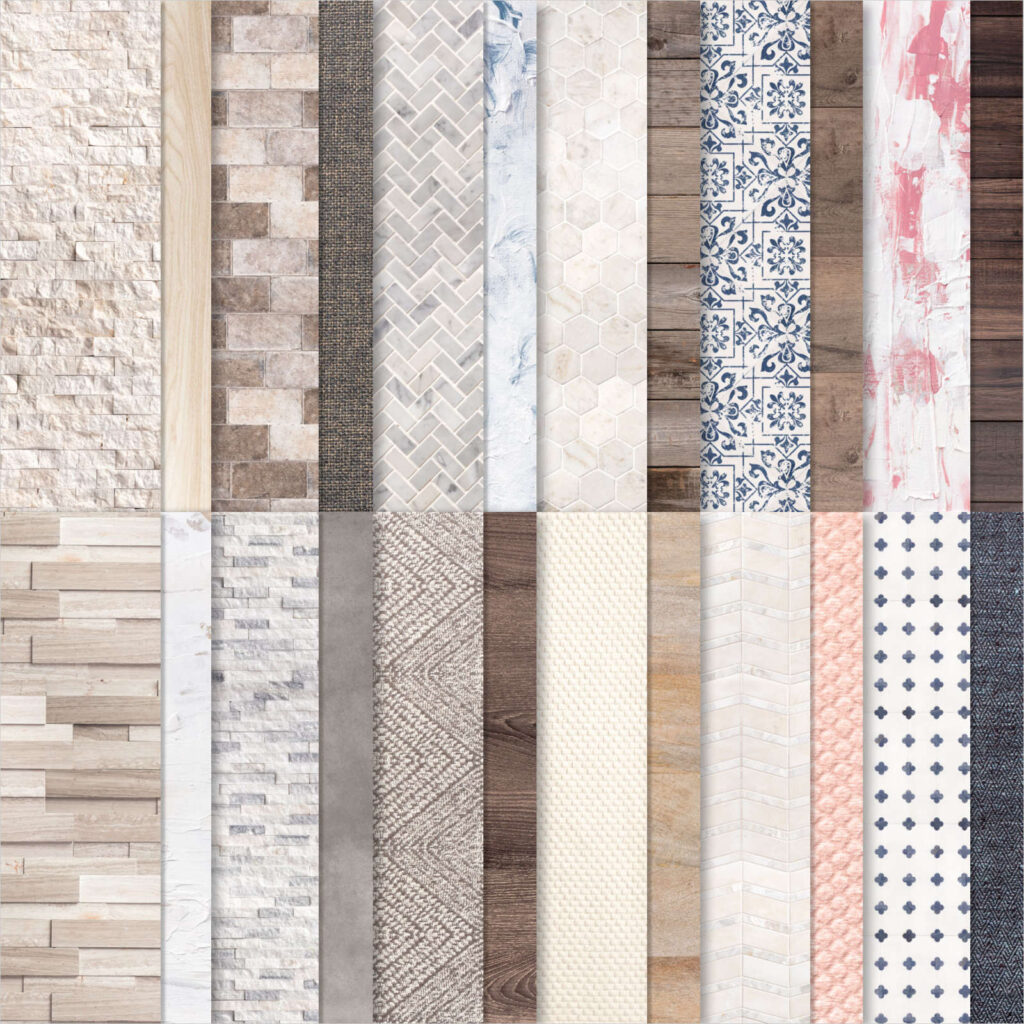
Speaking of realistic – how amazing is this wood patterned DSP from the In Good Taste DSP! All of this patterned paper was created from photographs of actual wood, stone, textiles, etc and it’s just perfect for masculine cards.
And finally, here’s the inside of the card.
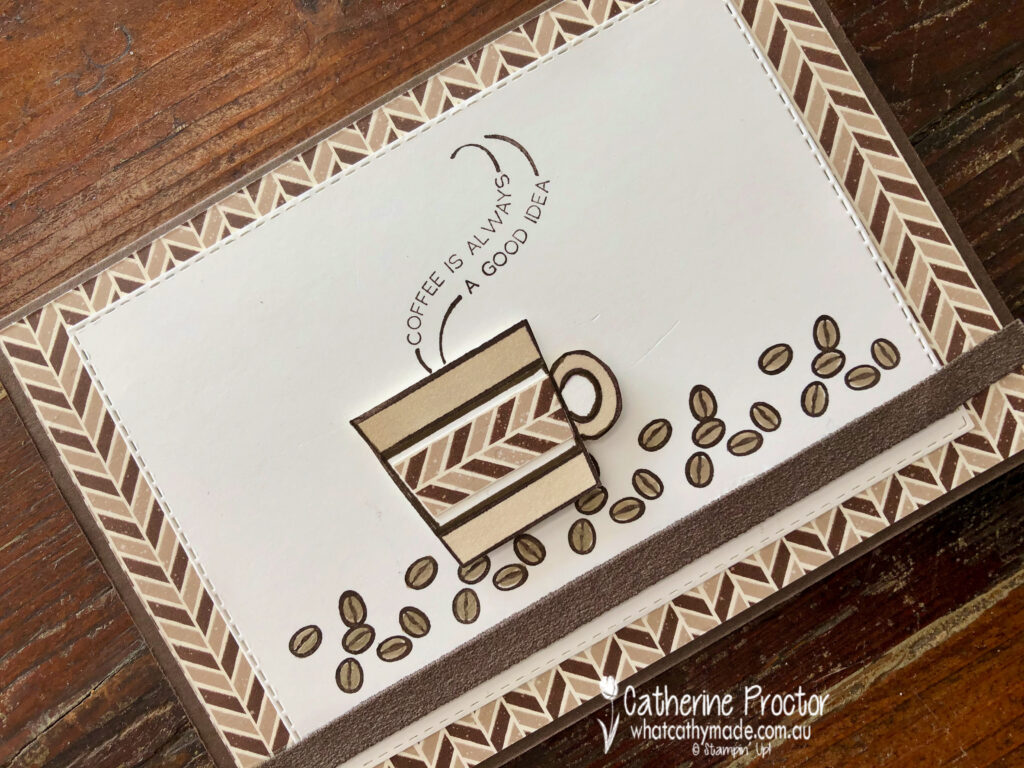
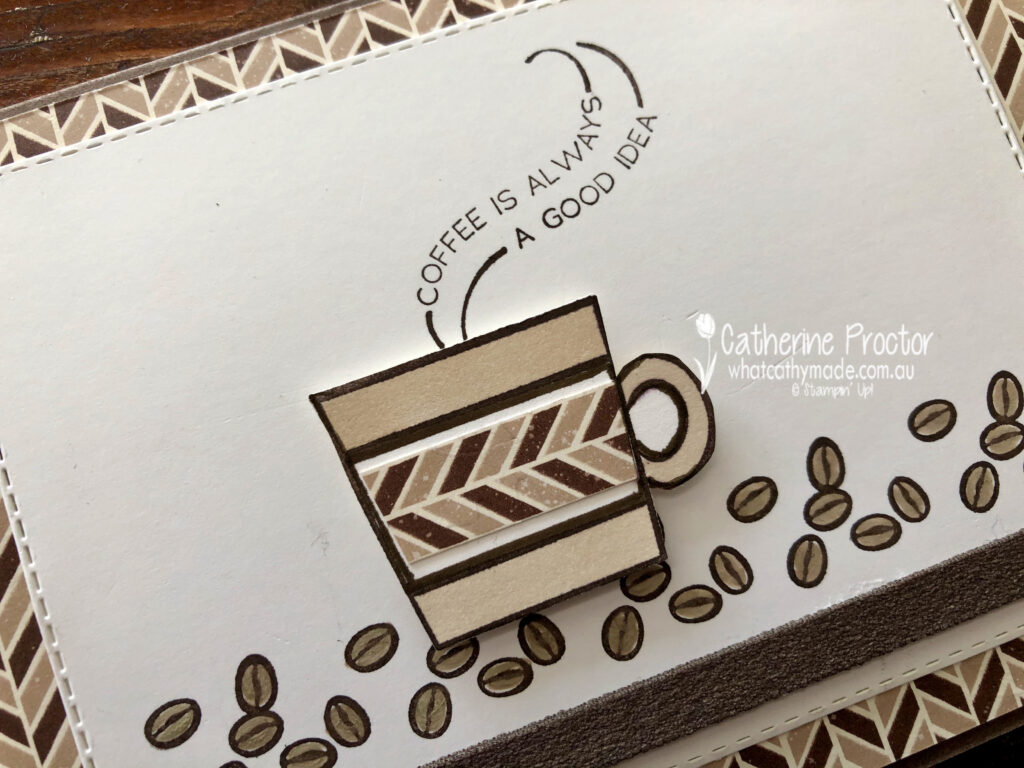
For my second card I’m sharing the one I made for Father’s Day to accompany a coffee machine and coffee, which is why I decided to use the Press On stamp set.
I kept this card very neutral, using coffee shades (Early Espresso and Crumb Cake) with Whisper White.
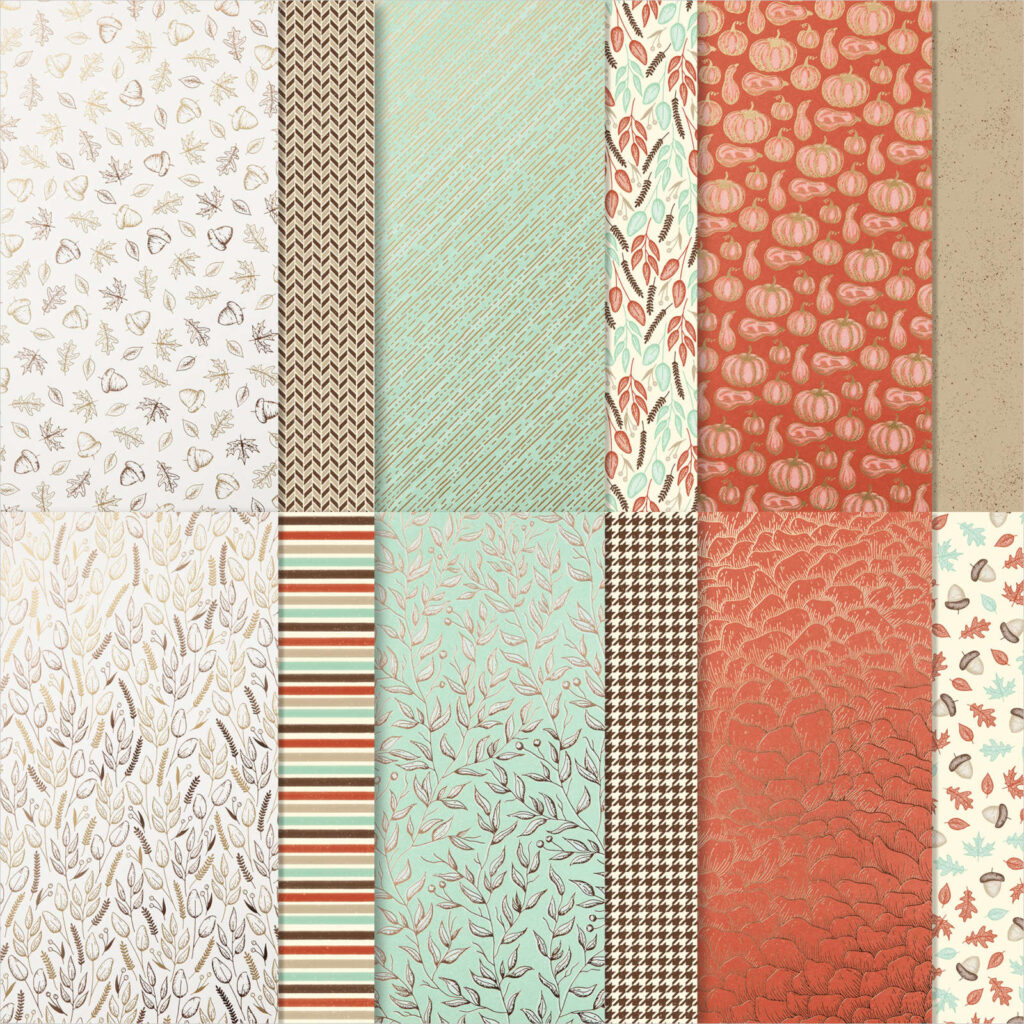
The lovely masculine chevron DSP is one you might have overlooked – I certainly did! This DSP is part of the Gilded Autumn specialty DSP which is found on page 45 of the August – December 2020 Mini Catalogue.
The coffee cup and beans were stamped in Early Espresso before being coloured in using Crumb Cake Stampin’ Blends and a Crumb Cake Stampin’ Write marker for the coffee beans.
The strip of early espresso faux suede ribbon along the base of the card co-ordinated perfectly and added a luxurious texture to the card.
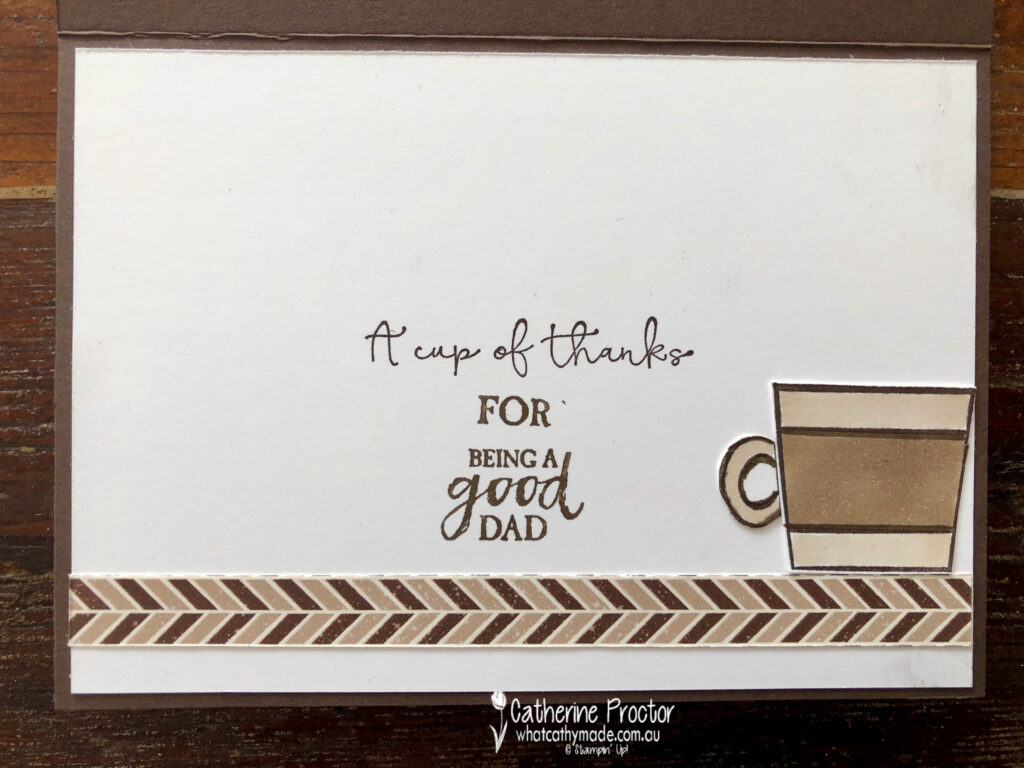
Inside my card I used a variety of sentiments to create a meaningful Father’s Day message – I’m not sure if it really worked, but my dad seemed to appreciate it and that’s what really counts.
To see more masculine card inspiration from the AWH Team head back to Rachel‘s page as she is hosting our monthly blog hops.
To purchase any of the products I’ve used in my cards tonight simply click on the phots of the products below.
If you’d like me to post you your very own copy of the August – December 2020 Mini Catalogue, the 2020-21 Stampin Up! Annual Catalogue, the 2020-21 Beginners Brochure, or to simply find out about more about Stampin’ Up! contact me.
Welcome to week fifteen of our 2020-2021 Art With Heart Colour Creations Showcase.
Each week various members of our Art With Heart Colour Creations team will be bringing you weekly colour inspiration as we showcase our range of over 50 beautiful Stampin’ Up! colours in alphabetical order.
Week 15 – Early Espresso
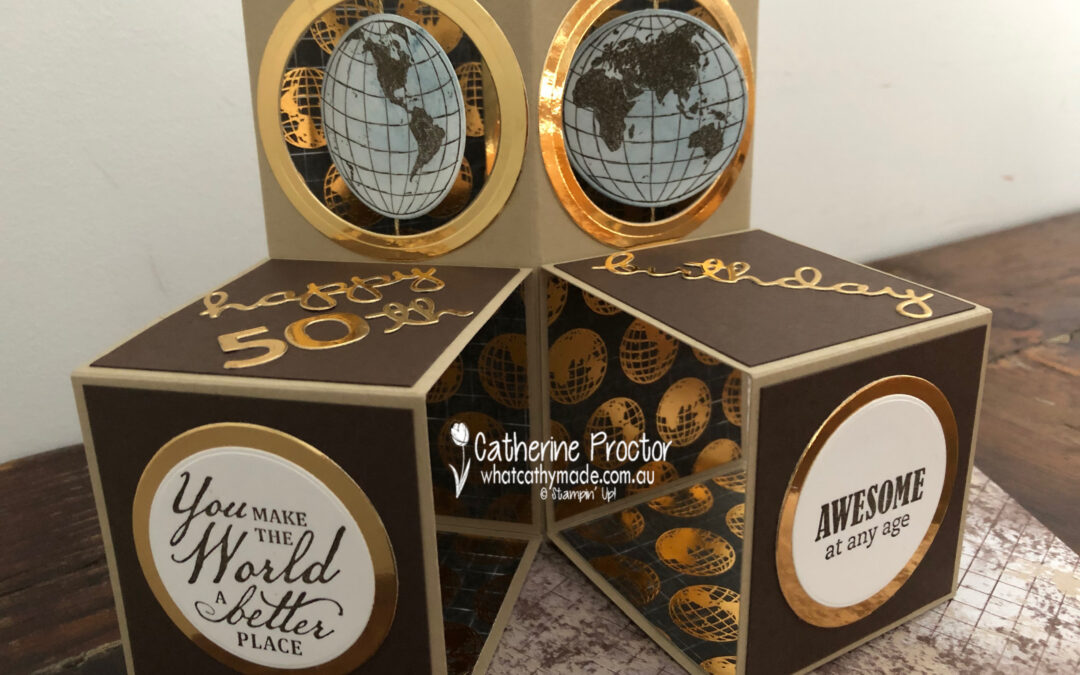
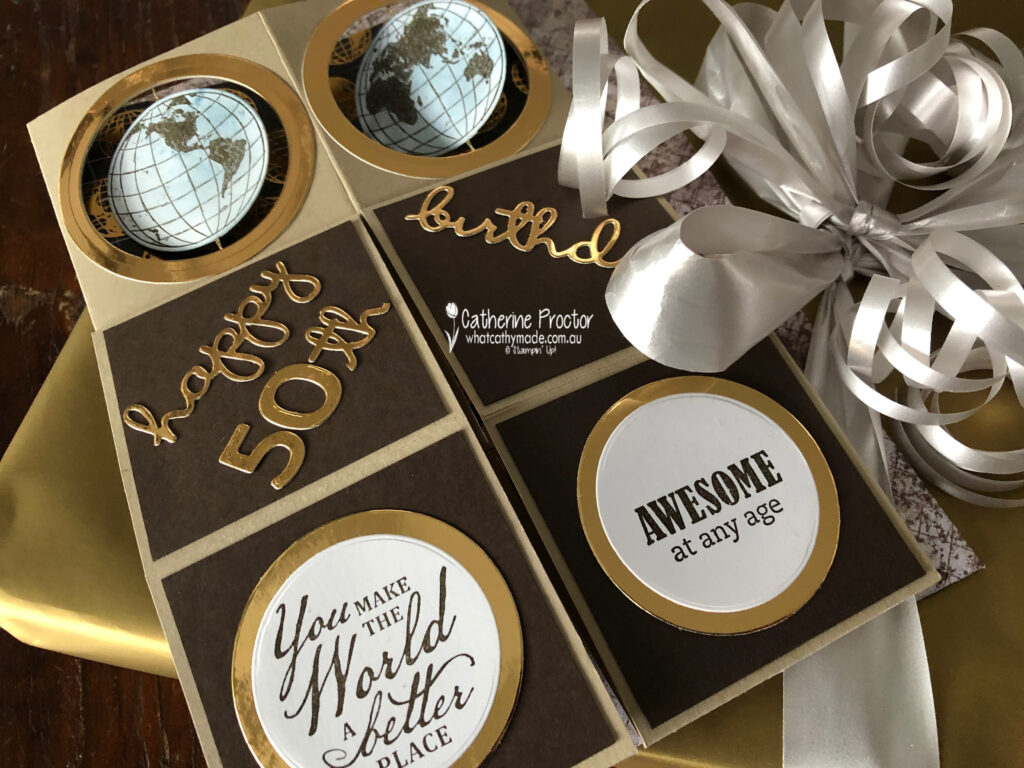
I actually made this special card in July for my brother’s 50th birthday but I waited until tonight to share it with you because it features the rich dark chocolate brown of Early Espresso…a colour that is just perfect for male cards.
I love using Early Espresso with other neutral colours and especially with foils – Early Espresso really makes foils pop. For my card today I’ve paired Early Espresso with Crumb Cake, Brass Foil, Whisper White and just a touch of Misty Moonlight.
I wanted to make a birthday card that moved for my brother because he used to be an engineer but I couldn’t find a pattern for a combined spinner and triple cube card so I designed one myself.
This 30 second video shows you how my double spinner triple cube pop-up card goes from lying flat in an envelope to popping up with spinning globes – it’s such a cool card to make if you love cards that move, like I do!
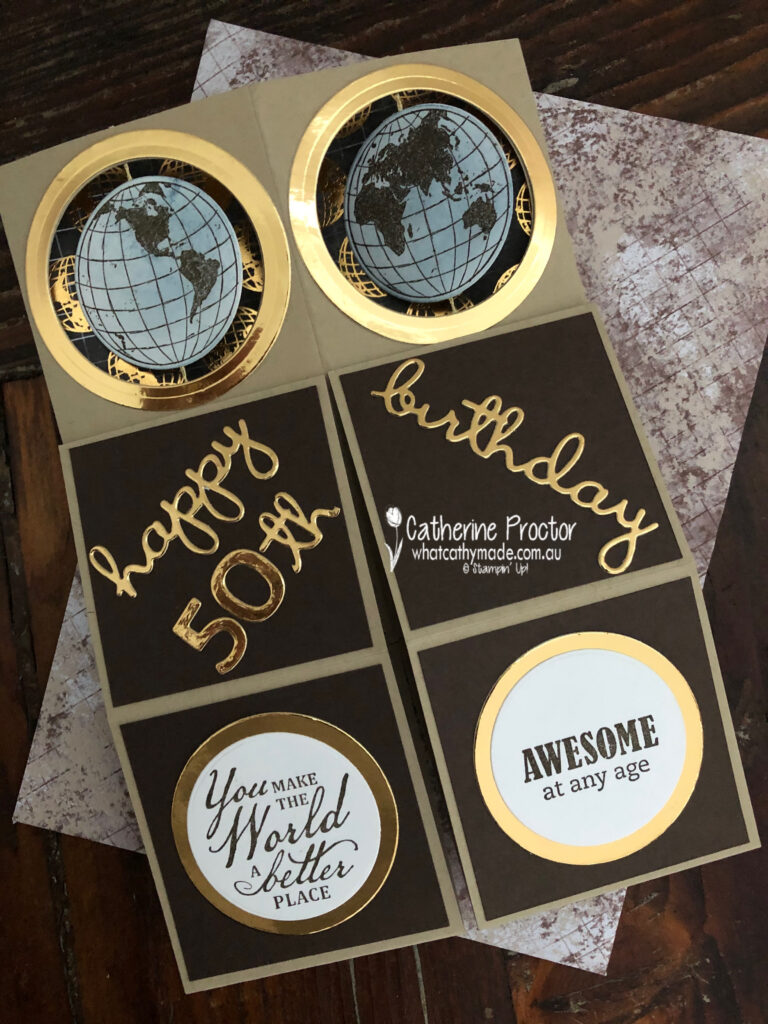
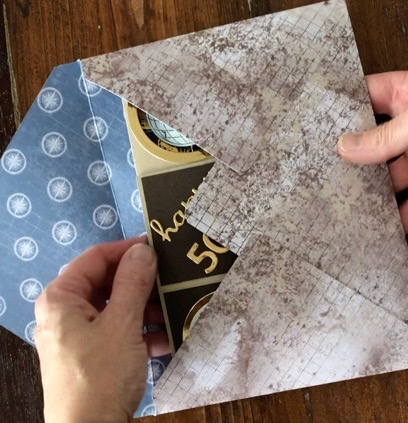
Here’s a close up of what the double spinner triple cube pop-up card looks like lying flat to slip inside an envelope.
And here’s how to make the card.
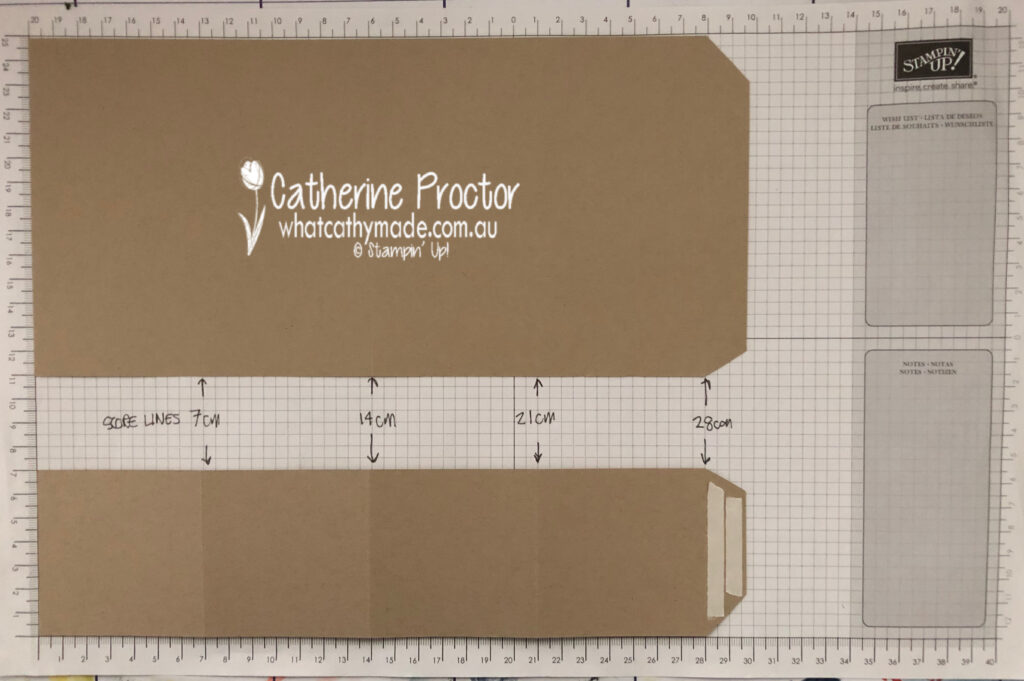
Triple Cube Instructions
Use your trimmer to score an A4 piece of Crumb Cake card stock at 7cm, 14cm, 21cm and 28cm and then cut across the A4 sheet at 7cm along the 21cm side as shown in photo above.
Trim another A4 piece of Crumb Cake card stock at 7cm x 29.7cm and score at 7cm, 14cm, 21cm and 28cm (this piece is identical to the smaller rectangle in the photo above).
You will now have one larger 14cm x 29.7cm rectangle and two smaller 7cm x 29.7cm pieces. Bevel the side flap of all three rectangle pieces and adhere Tear & Tape to the beveled edges.
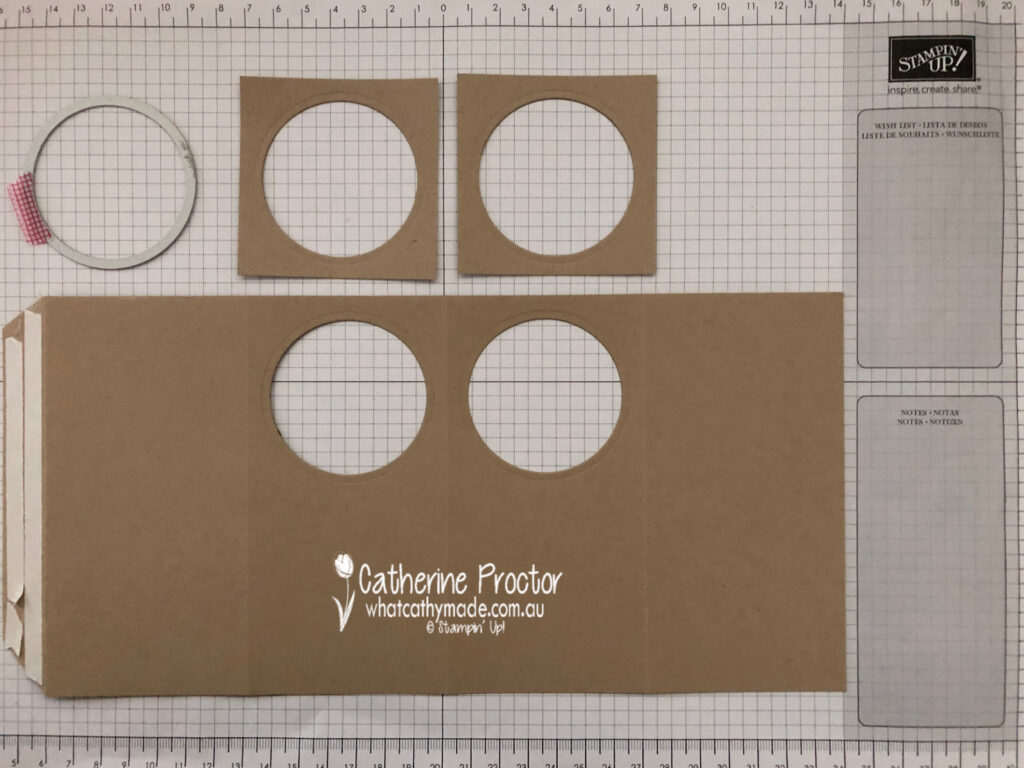
Double Spinner Instructions
Create the holes for the two spinner mechanisms by cutting two 7x7cm squares of Crumb Cake card stock and laying them over the top of the two centre panels of the largest rectangle. Use a layering circle die in the centre of the 7cm square pieces to cut through both layers of card stock.
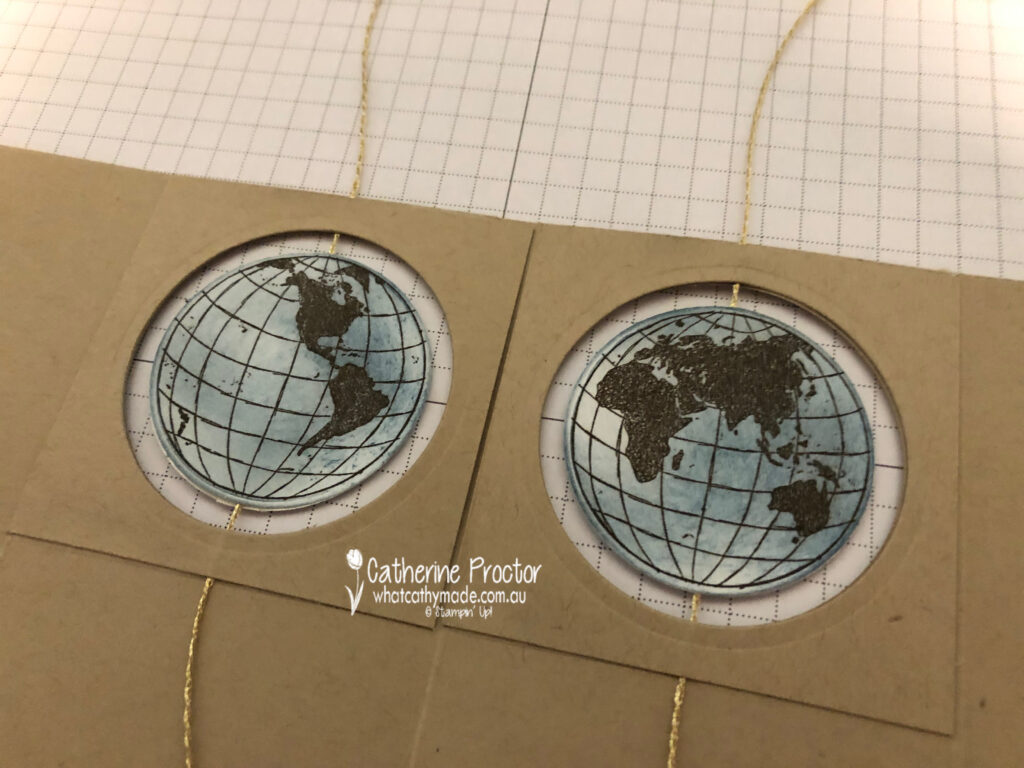
Stamp four globes in Early Espresso onto Whisper White card stock – two of each side of the world. Die cut these four globe pieces with the matching circle die. Use a sponge dauber to gently shade some Misty Moonlight ink onto the globes.
Carefully lay a strip of Tear & Tape from the north pole to the south pole on two of the globes and lay a piece of gold trim (from the Forever Greenery trim pack) along the Tear & Tape. Glue the other side of the globe together – you will now have two complete double-sided globes.
Align the globes onto the card base and glue the 7x7cm square of Crumb Cake to the inside of the card base to hold the spinner globes in place as shown in the photo below. Cut off the excess gold trim.
Double Spinner Triple Cube Pop-up Card Assembly and Decoration
Fold the large cube card base and the two smaller cube bases, closing them into cube shapes by removing the Tear & Tape to adhere the sides of the cubes together.
Use multipurpose glue or Tear & Tape to attach the two smaller cubes to the bottom front of the larger spinner cube base as shown below.
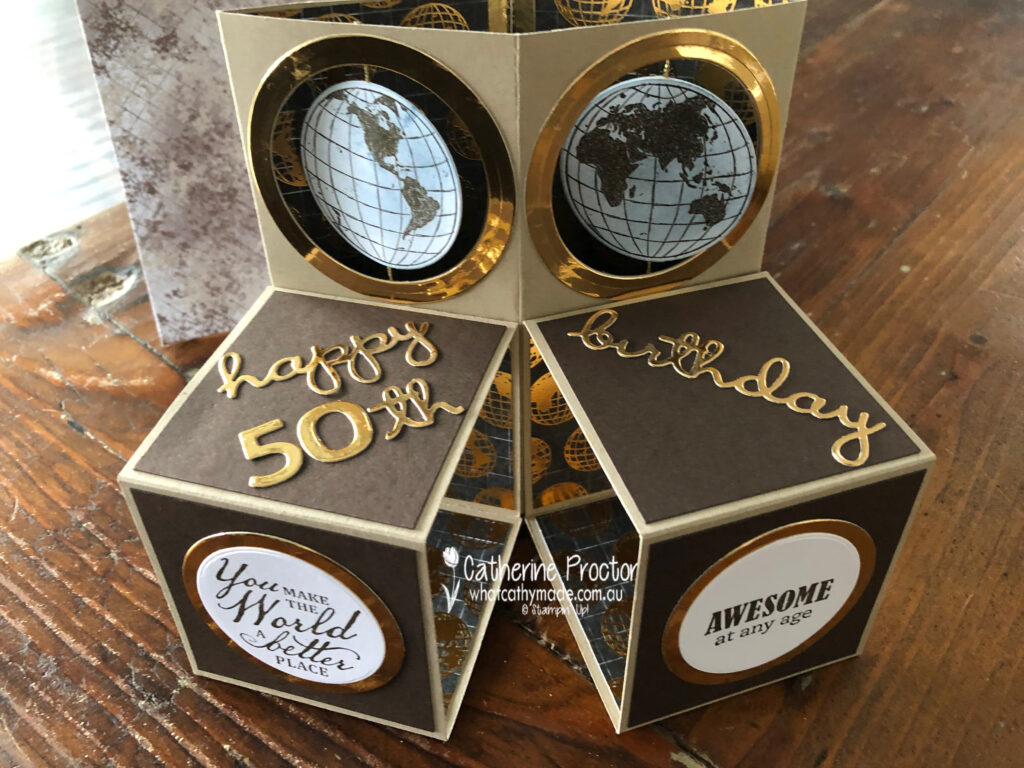
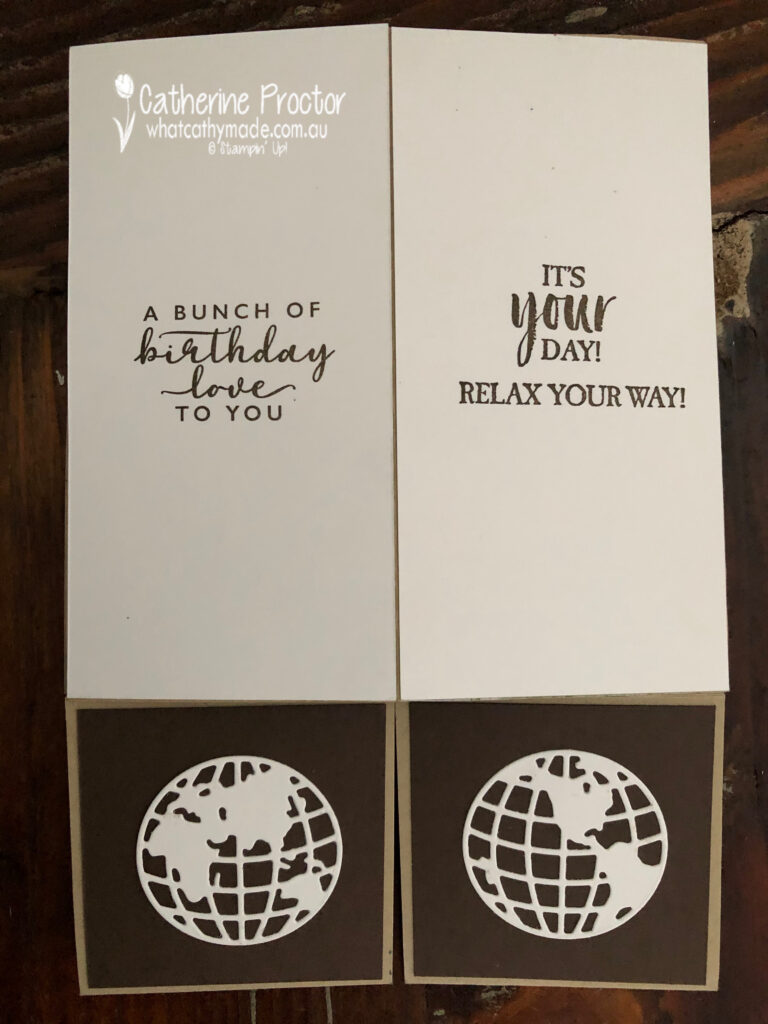
Die cut six 6.5 x 6.5cm squares of Early Espresso card stock and attach to the outer squares of the two smaller cubes. Decorate with sentiments of your choice – I’ve stamped my sentiments in Early Espresso onto Whisper White card stock.
Other decorations on the spinner cube include brass foil circles die cut using the layering circle dies, squares of the World of Good DSP and “Happy 50th birthday” greeting die cut from brass foil with the Well Written dies and the Playful Alphabet Dies.
The back side of my card has Whisper White panels to write a message on and more globes die cut using the World Map dies.
Finally, I used another sheet of the World of Good DSP to make a simple co-ordinating envelope.
I can’t wait to see what the rest of the Art With Heart team have created with Early Espresso today. Click on the links below to see what they’ve made.
Next Wednesday we’ll be showcasing one of the Brights family: Flirty Flamingo. We hope you can join us all then.
To purchase any of the products featured in today’s post, simply contact your Stampin’ Up! demonstrator, any of the ladies in the AWH Colour Creations Showcase or click on the product links below.
If you’d like me to post you your very own copy of the August – December 2020 Mini Catalogue, the 2020-21 Stampin Up! Annual Catalogue, the 2020-21 Beginners Brochure, or to simply find out about more about Stampin’ Up! contact me.
In the meantime, wherever you are in the world, stay safe, stay calm…and keep on crafting xxx
Welcome to week fourteen of our 2020-2021 Art With Heart Colour Creations Showcase.
Each week various members of our Art With Heart Colour Creations team will be bringing you weekly colour inspiration as we showcase our range of over 50 beautiful Stampin’ Up! colours in alphabetical order.
Week 14 – Daffodil Delight
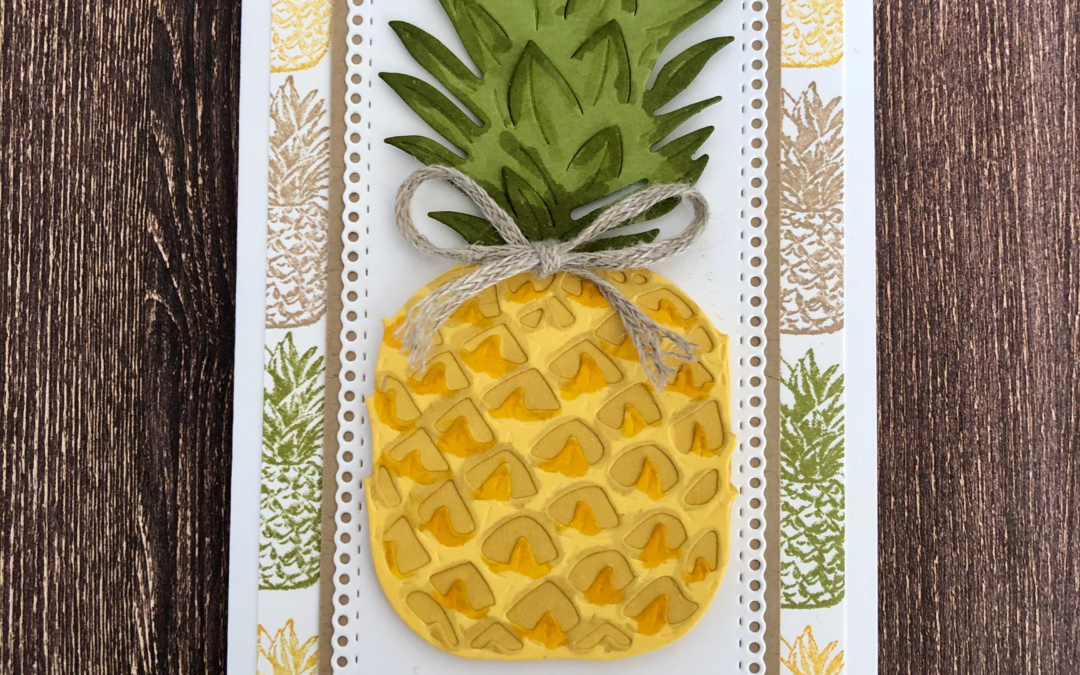
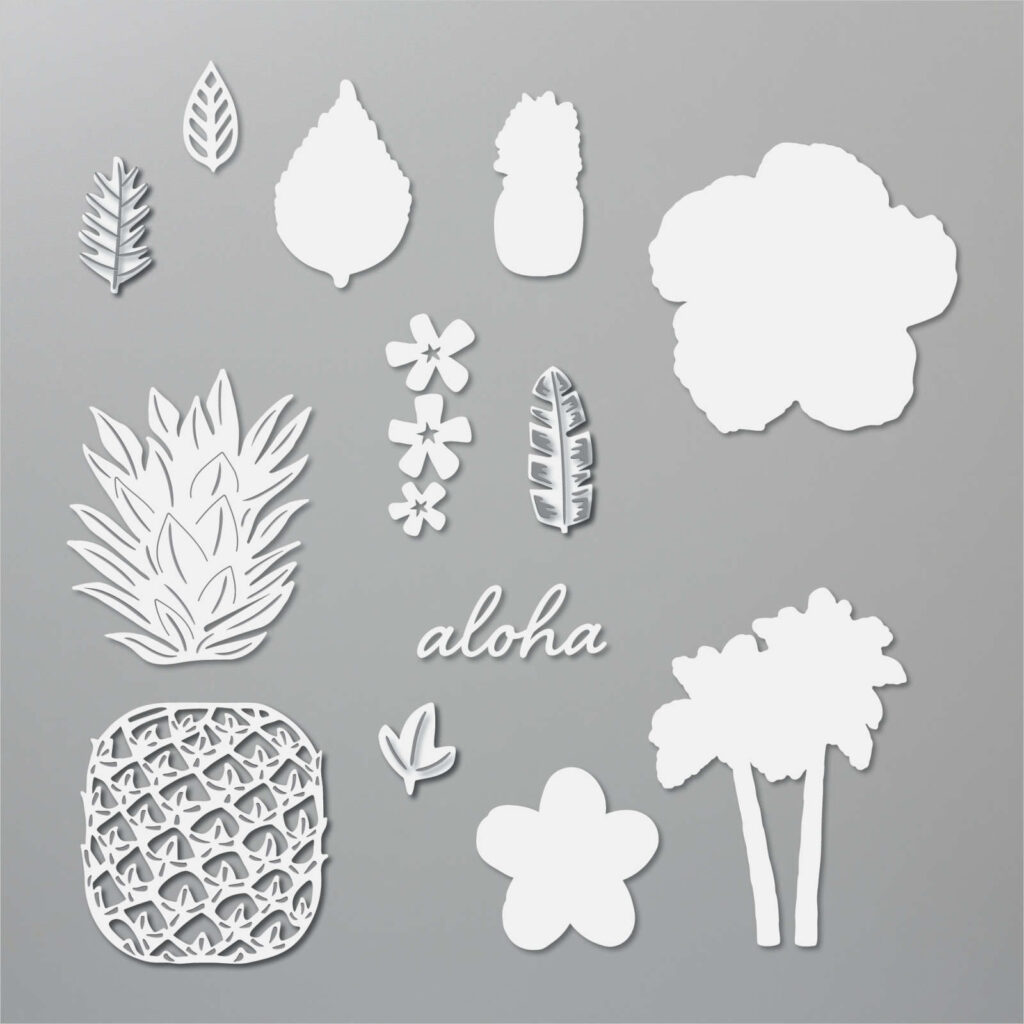
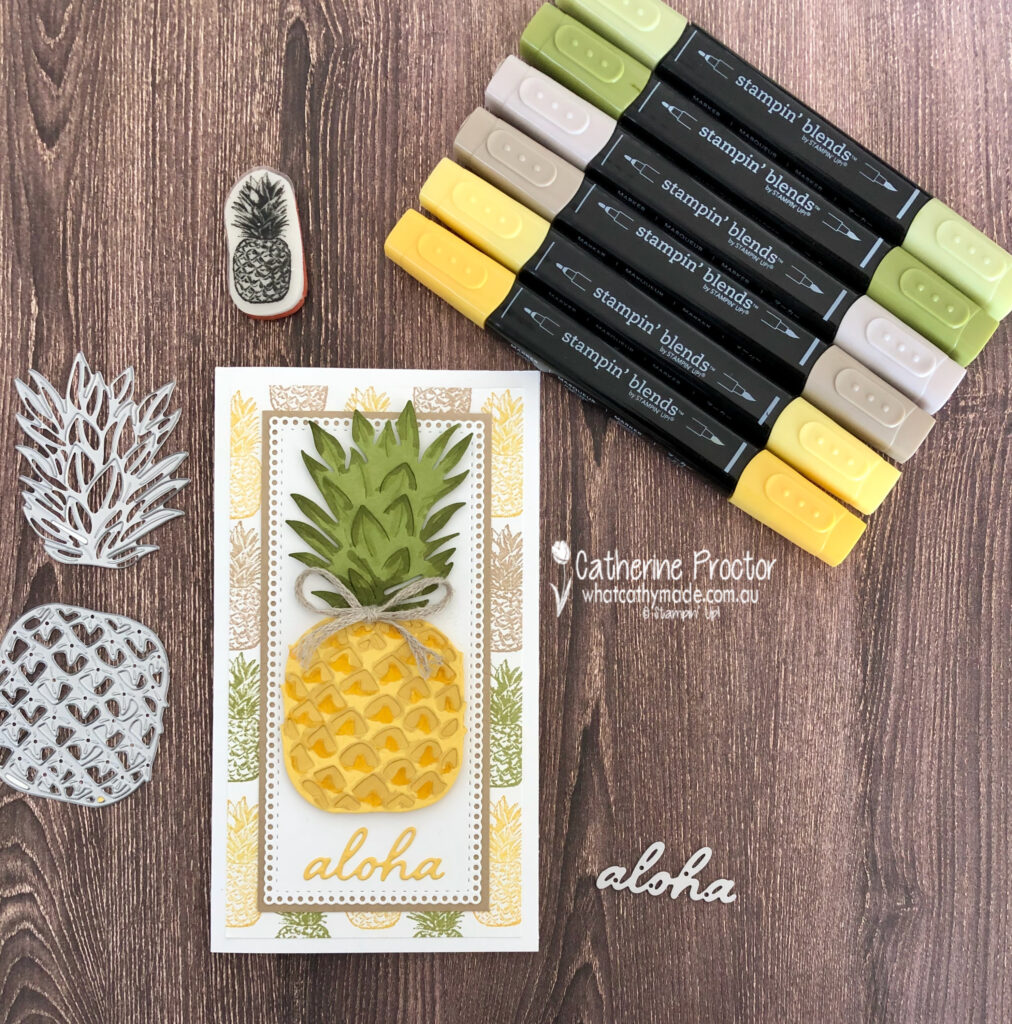
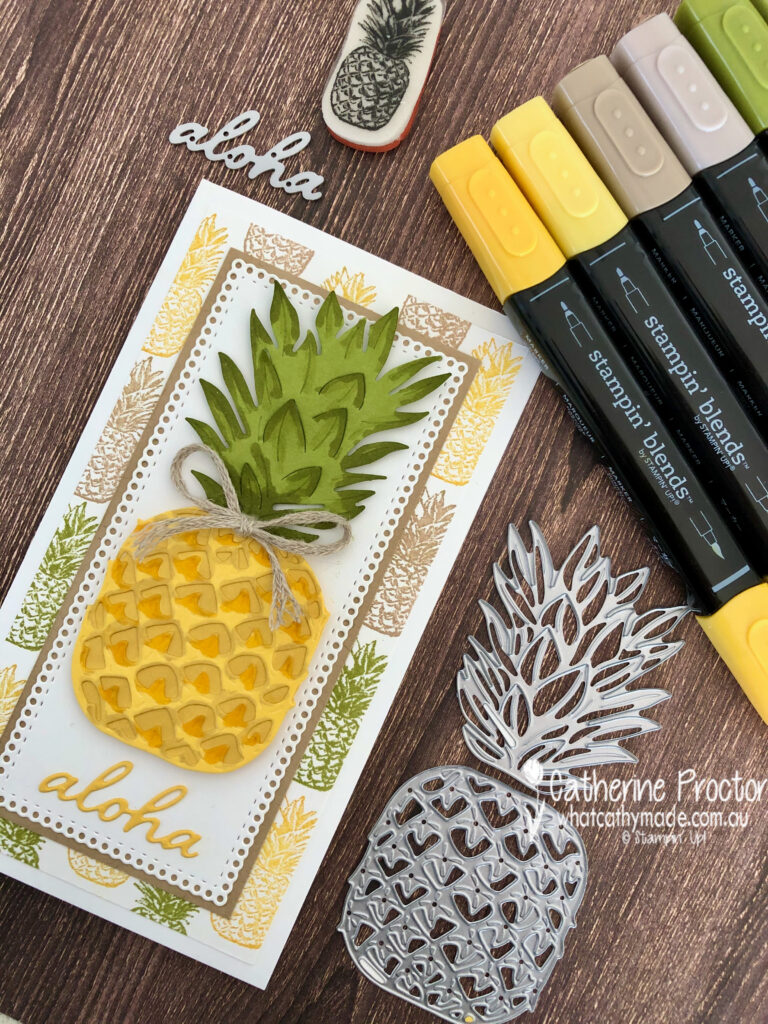
It’s the first week of spring here in Australia so I wanted to make a sunny, happy card using Daffodil Delight. And if there was ever a sunny happy stamp set that was begging to be inked up with Daffodil Delight it’s the Timeless Tropical stamp set with its co-ordinating In the Tropics dies.
Originally I had intended to make a card by water colouring the hibiscus and the frangipani stamp set but when I opened my stamp I realised I had never used the the pineapple die and little pineapple stamp – and I knew they would look great in Daffodil Delight too.
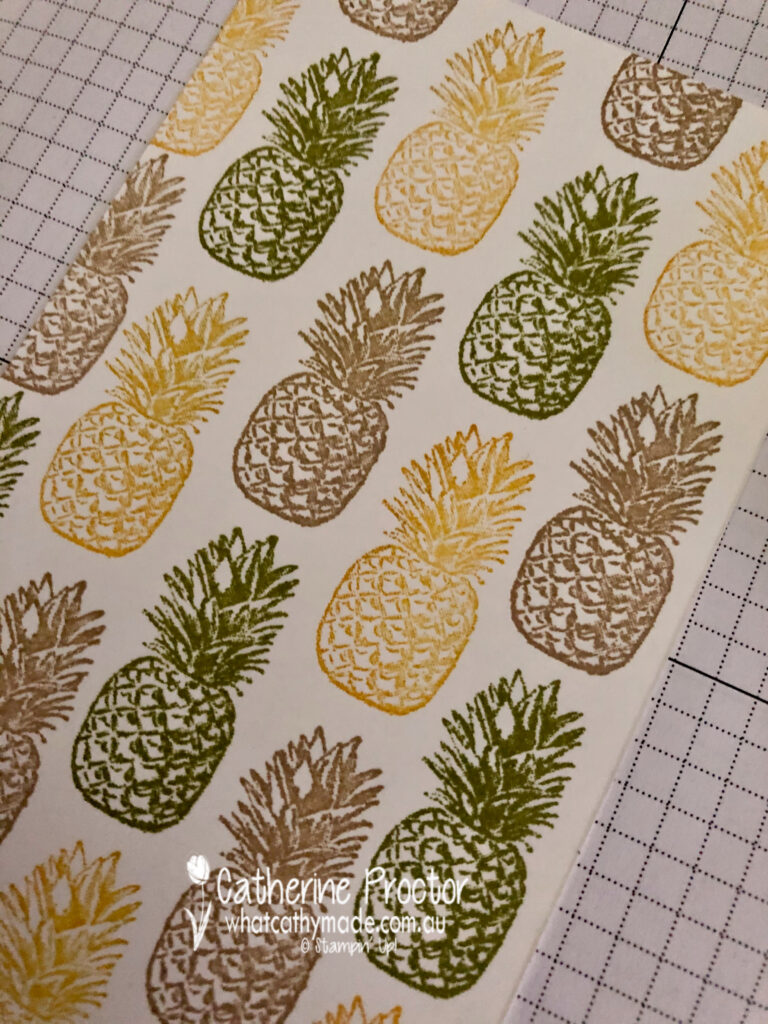
I began by creating a piece of homemade DSP for my background layer using Whisper White card stock.
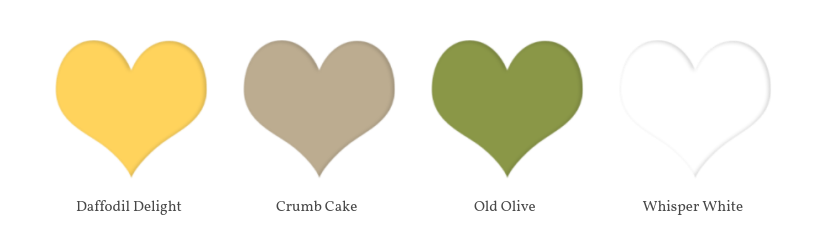
This homemade DSP was quick and easy to do using just the one small pineapple stamp inked up with the following colour combination: Daffodil Delight, Old Olive and Crumb Cake.
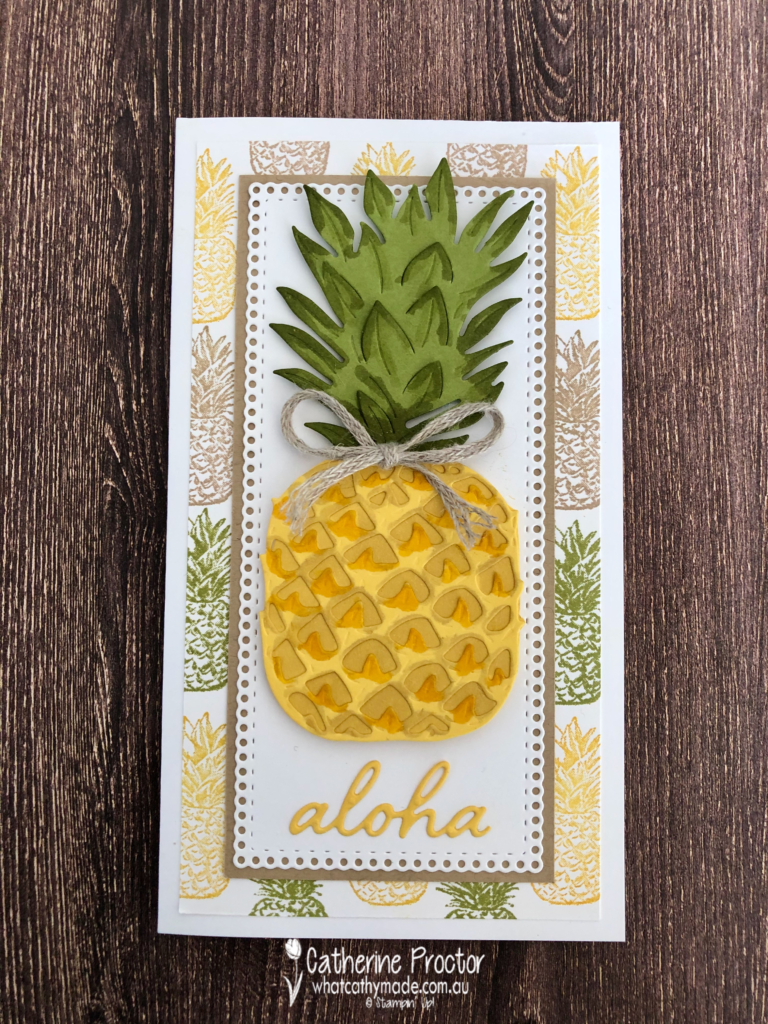
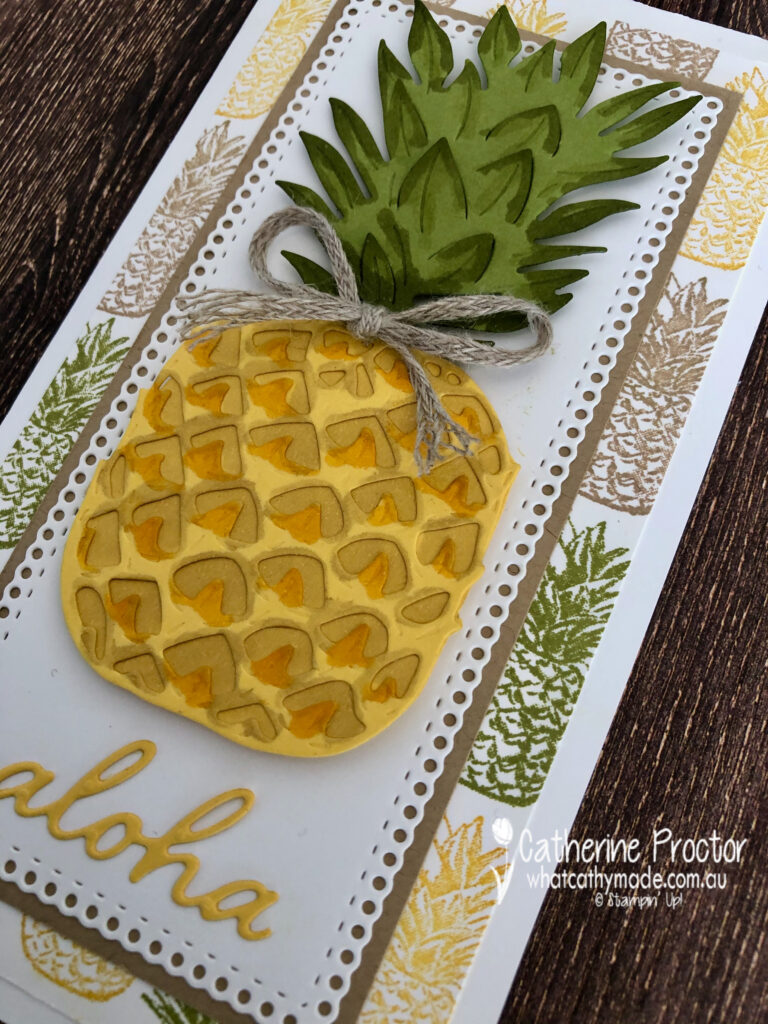
The body of the pineapple was created in two layers: die cutting the pineapple in Daffodil Delight card stock and then tracing around the outline of this pineapple die and fussing cutting the die shape out of another piece of Daffodil Delight card stock to layer under the die.
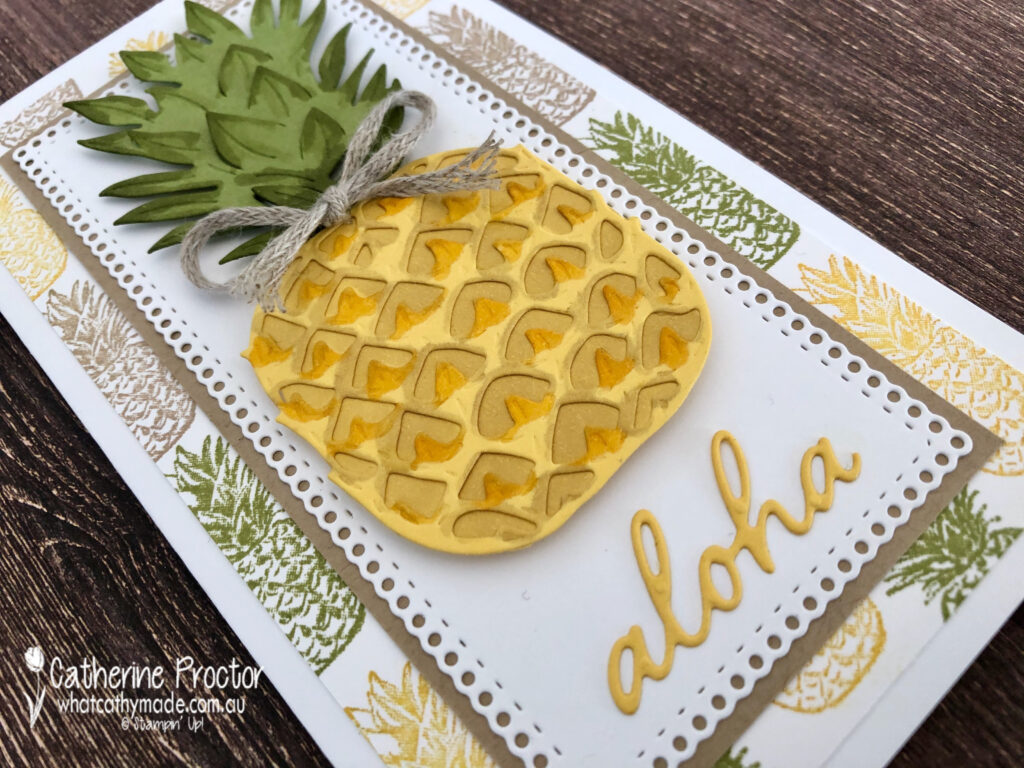
Having a second layer of Daffodil Delight card stock allowed me to use my Daffodil Delight and Crumb Cake Stampin’ Blends to colour inside the holes of the top layer pineapple die to highlight the “knobbly” bits on the pineapple.
Don’t you love the way this highlights the texture of the pineapple?
The leafy pineapple top was die cut from Old Olive card stock and I used my light and dark Old Olive Stampin’ Blends to add colour variation and texture to it as well.
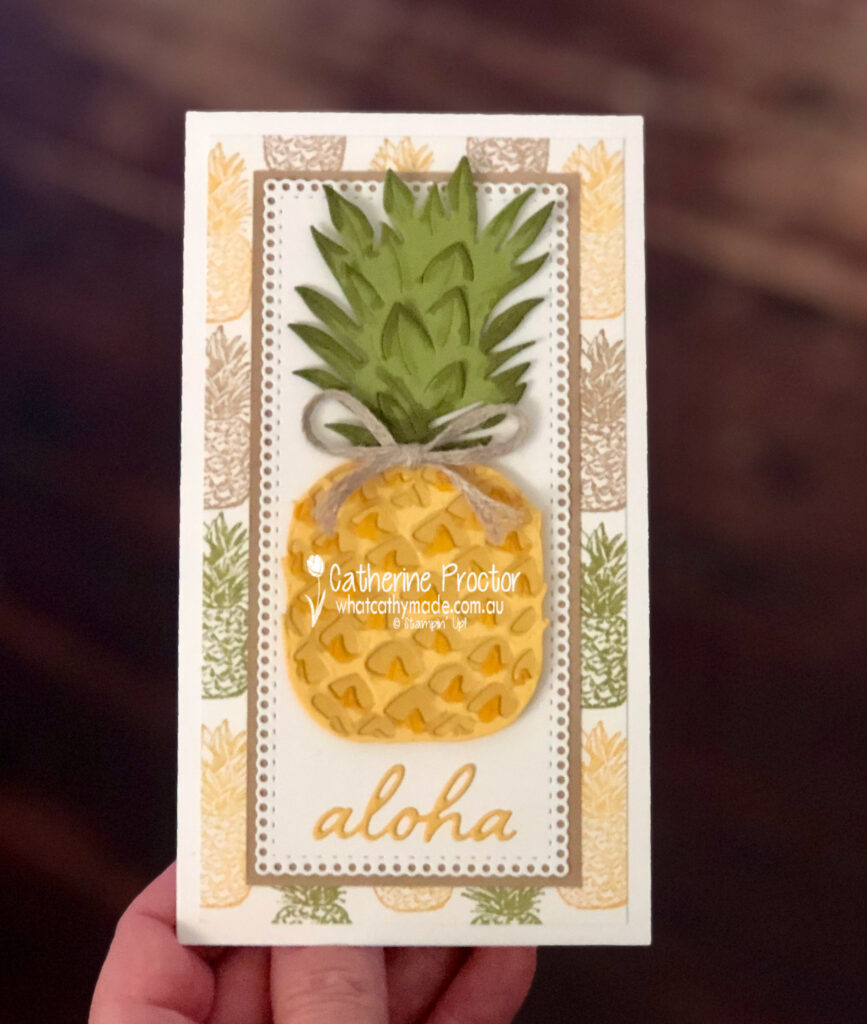
The Whisper White card stock layer the pineapple is adhered to is die cut with a long rectangle die from the Ornate layers dies and it’s just perfect for the size of the pineapple.
Did you realise the In the Tropics dies include a gorgeous little “Aloha” greeting die? I’ve found the best way to cut and adhere this die is by first cutting a rectangle of card stock slightly larger than the Aloha die and then attaching this card stock to some adhesive sheet.
Once you die cut the Aloha sentiment the adhesive sheet helps keep the word straight, as well as providing the easiest way to adhere it to a card.
The final touch for my pineapple card is a simple bow made from Braided Linen Trim with the ends frayed.
I can’t wait to see what the rest of the Art With Heart team have created with Daffodil Delight today. Click on the links below to see what they’ve made.
If you’d like me to post you your very own copy of the August–December 2020 Mini Catalogue, 2020-21 Stampin Up! Annual Catalogue, the 2020-21 Beginners Brochure, or to simply find out about more about Stampin’ Up! contact me.
In the meantime, wherever you are in the world, stay safe, stay calm…and keep on crafting xxx
This week’s CASEing the Catty #CTC382 challenge is to case your favourite bundle from the 2020 August – December Mini Catalogue.
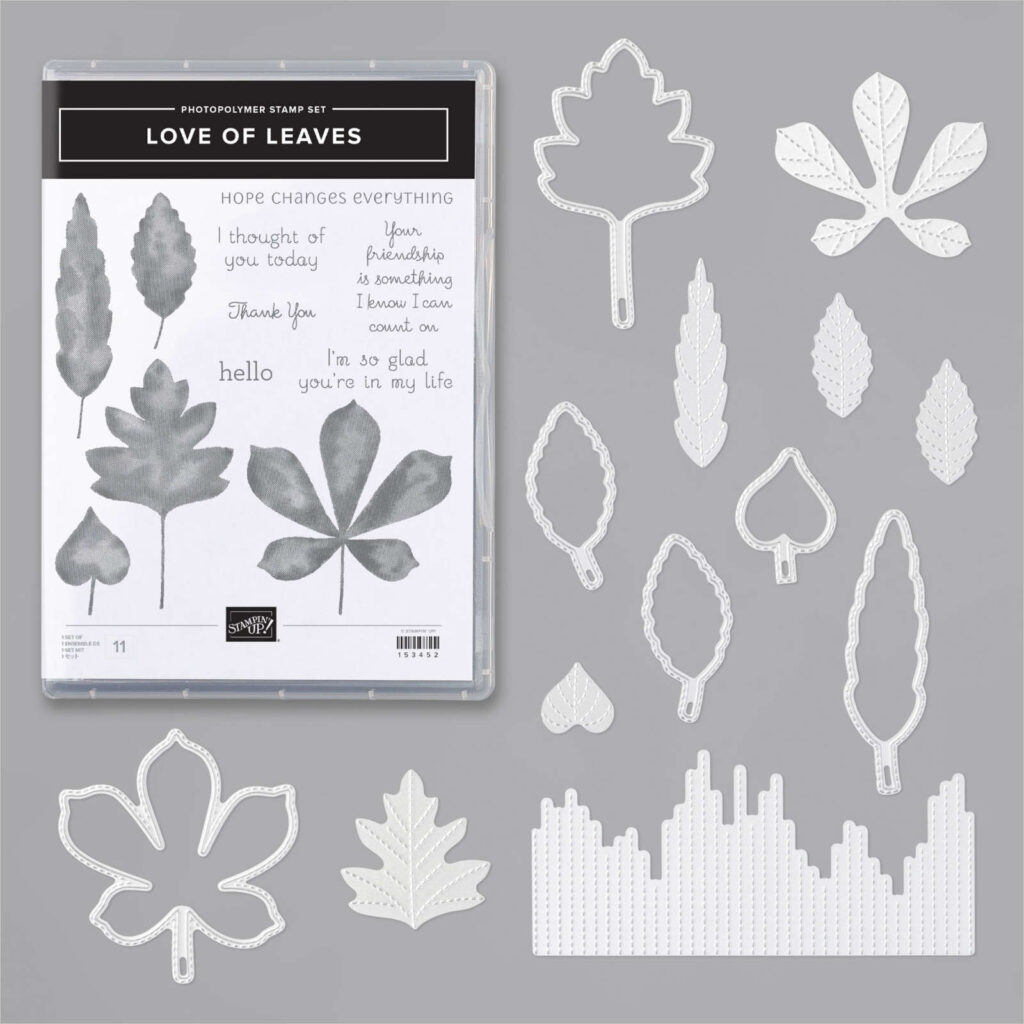
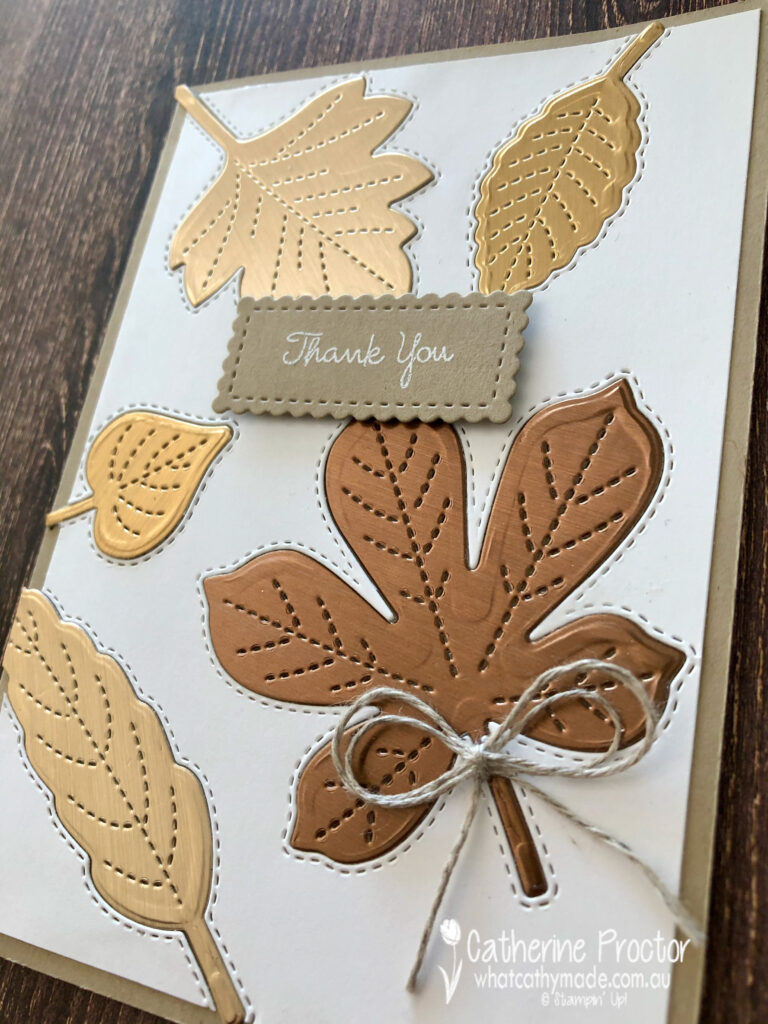
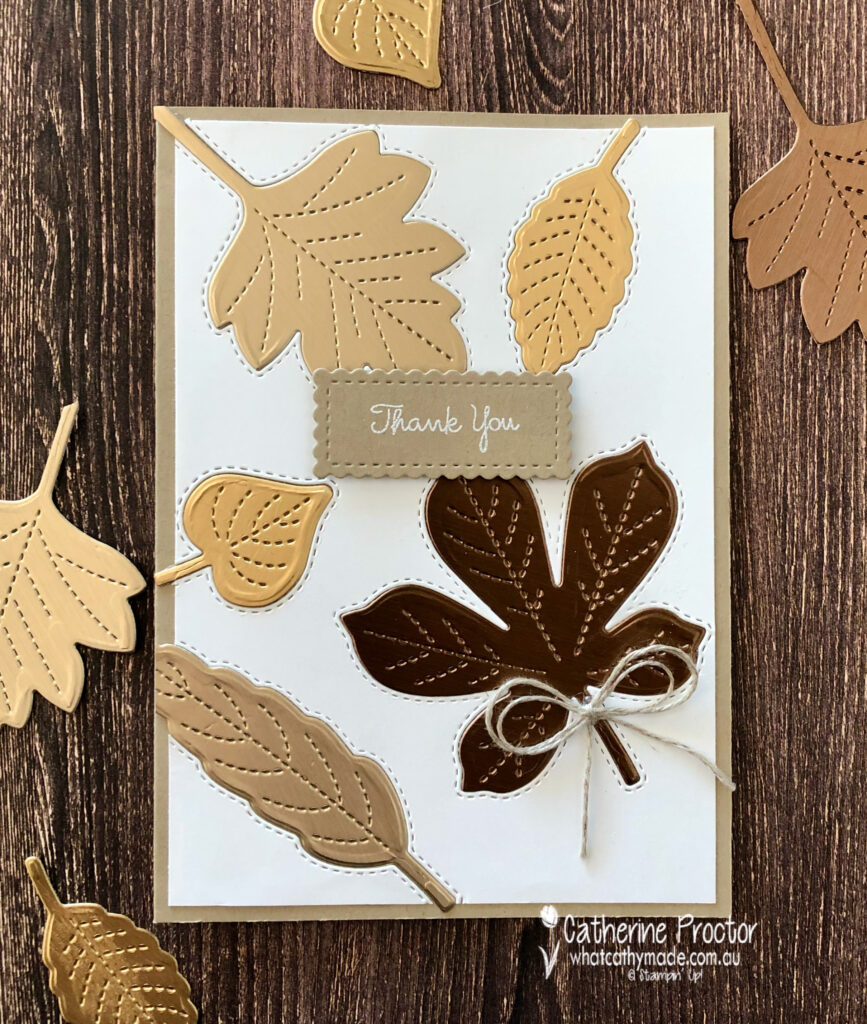
I have so many favourites in this catalogue but in the end I decided to use a bundle I hadn’t played with yet: the Love of Leaves bundle.
This is the card design I decided to CASE – it’s on page 74 of the 2020 August – December Mini Catalogue.
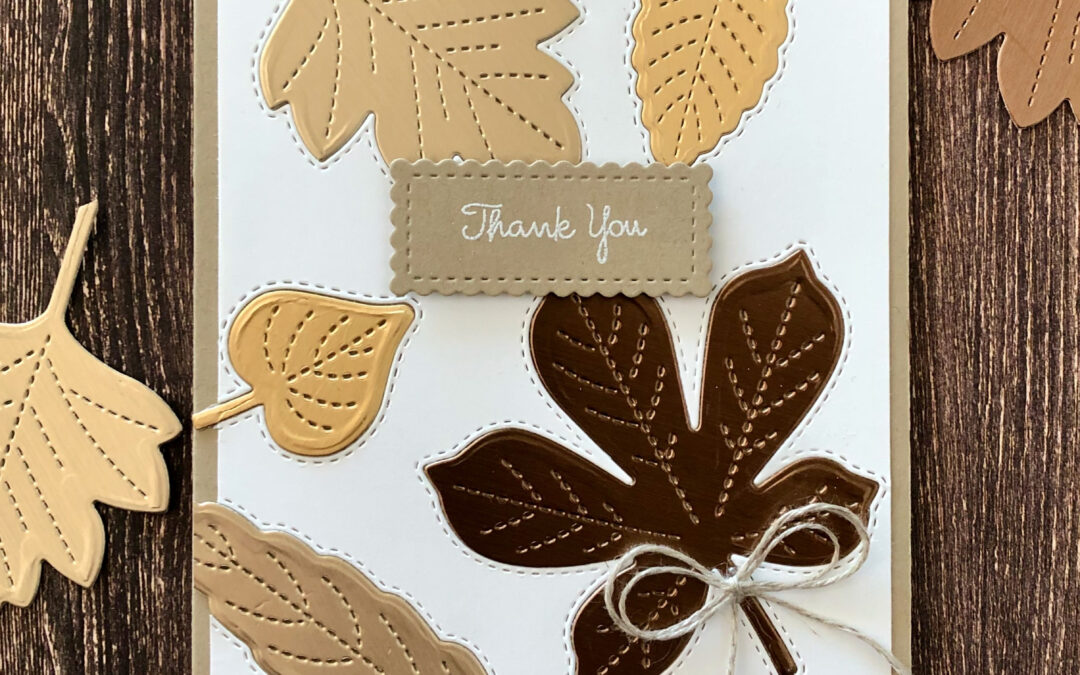
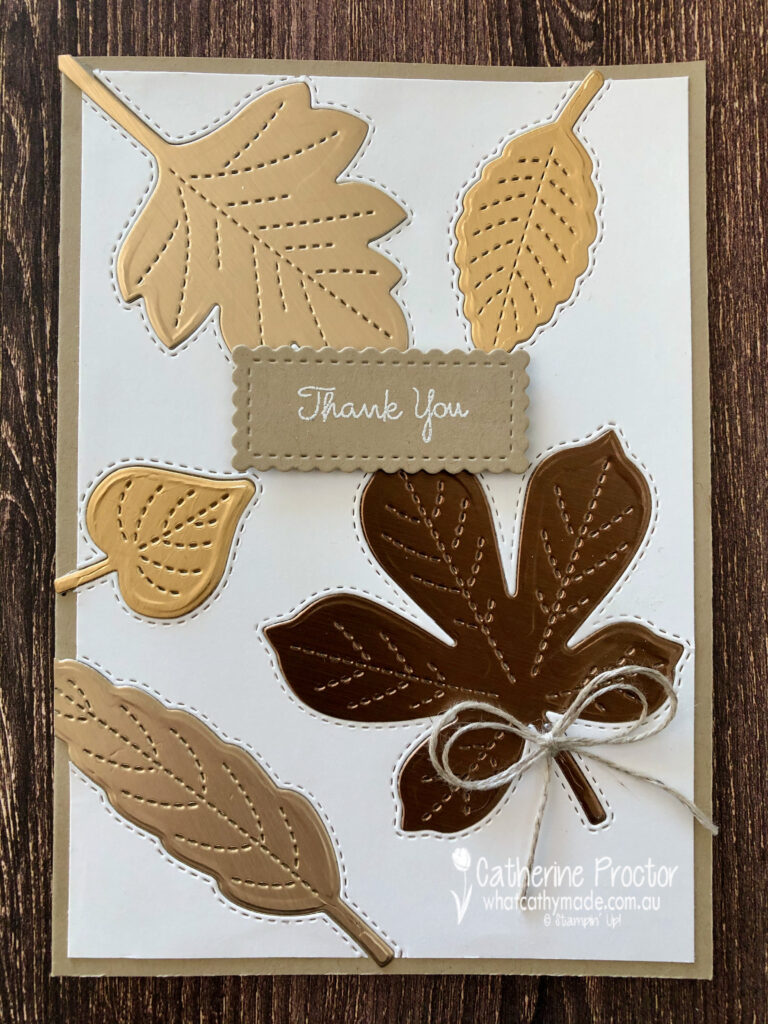
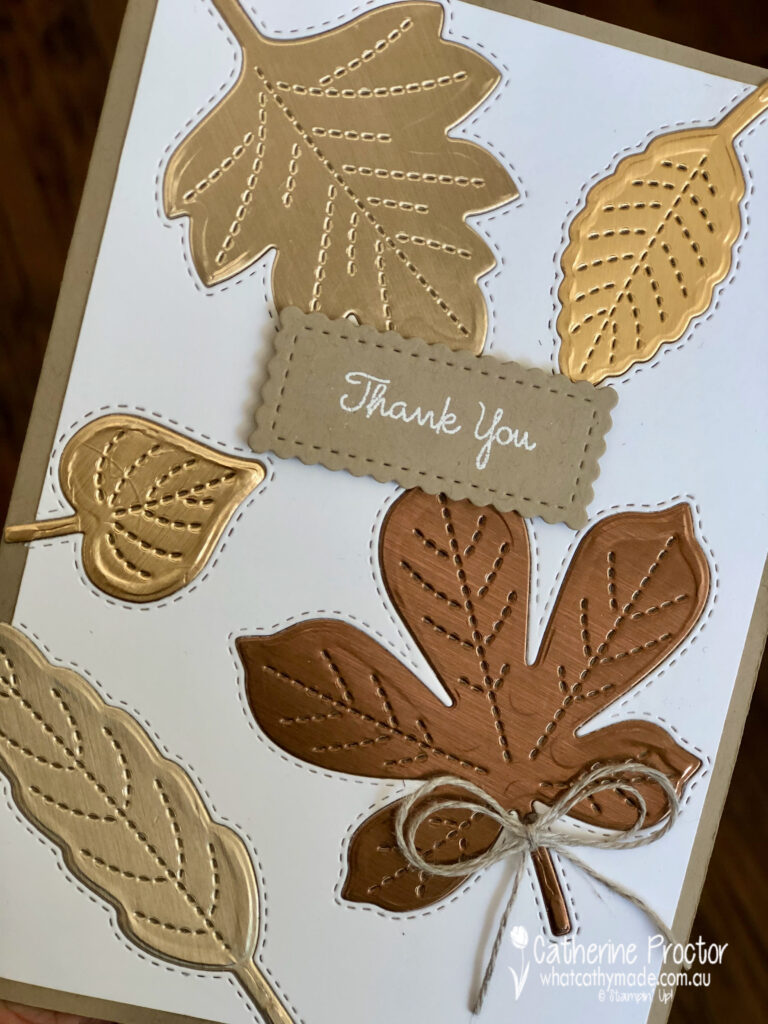
My card is the same basic layout but I’ve used the die inlay technique to insert the die cut shapes into the card front instead of layering them on top.
I cut my leaves out of the beautiful brushed metallic cardstock instead of the coloured and stamped leavers in the sample I CASED.
This angle better shows the soft sheen of this card stock.
I’ve used all three colours of brushed metallic cardstock: bronze, copper and gold.
The sentiments and fonts in the Love of Leaves stamp set are incredible. I’ve white heat embossed the little Thank You for my card today.
To purchase any of the products featured in today’s post, simply click on the product links below.
If you’d like me to post you your very own copy of the the August – December 2020 Mini Catalogue, the 2020-21 Stampin Up! Annual Catalogue, the 2020-21 Beginners Brochure, or to simply find out about more about Stampin’ Up! contact me.
In the meantime, wherever you are in the world, stay safe, stay calm…and keep on crafting xxx

")


 Braided Linen Trim")


")


 Faux Suede Trim")


")


")


")


