The new July-December 2021 Mini Catalogue and SALE-a-bration catalogues go live tomorrow so I’m sharing another card that uses some of these beautiful Christmas products.
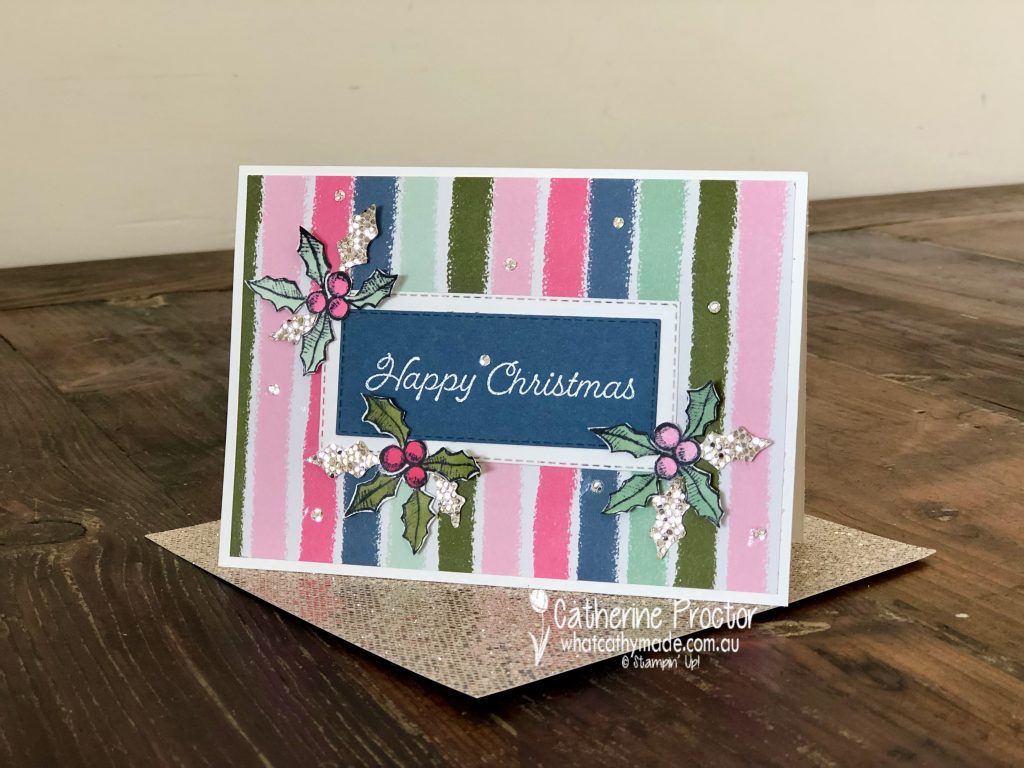
I’m not really a sparkly girly girl at all but I just can’t stop using this FREE Be Dazzling specialty designer paper from the SALE-a-bration catalogue. I’ve taken a zillion photos of my card to show you just how gorgeous this Be Dazzling specialty designer paper is!
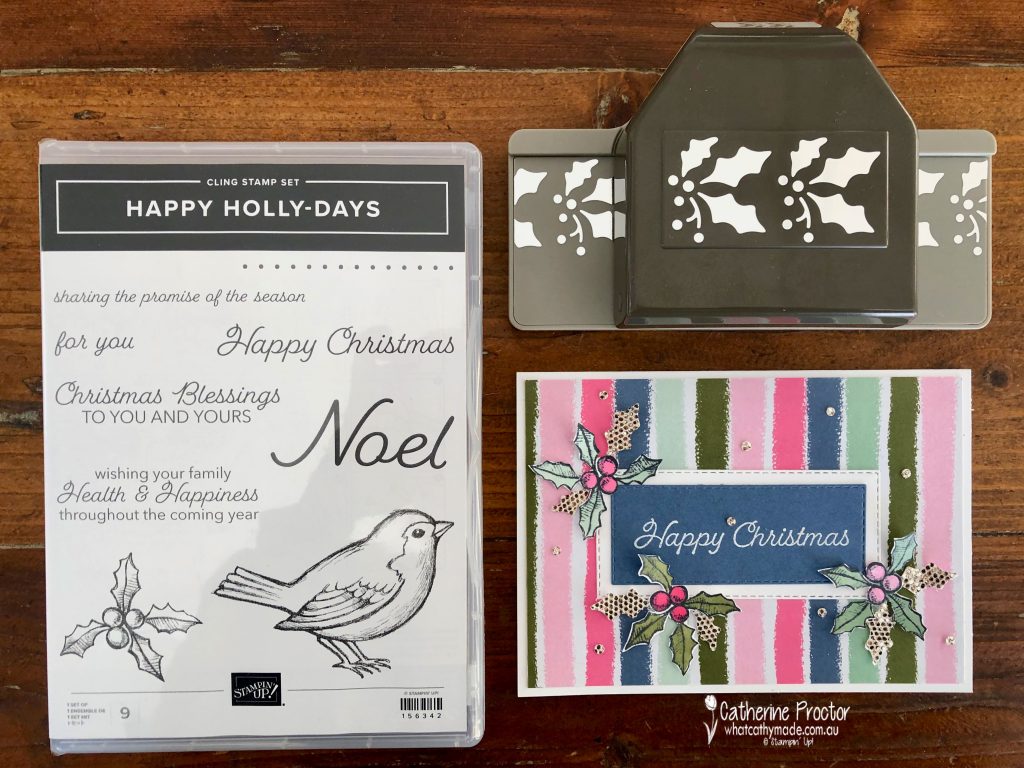
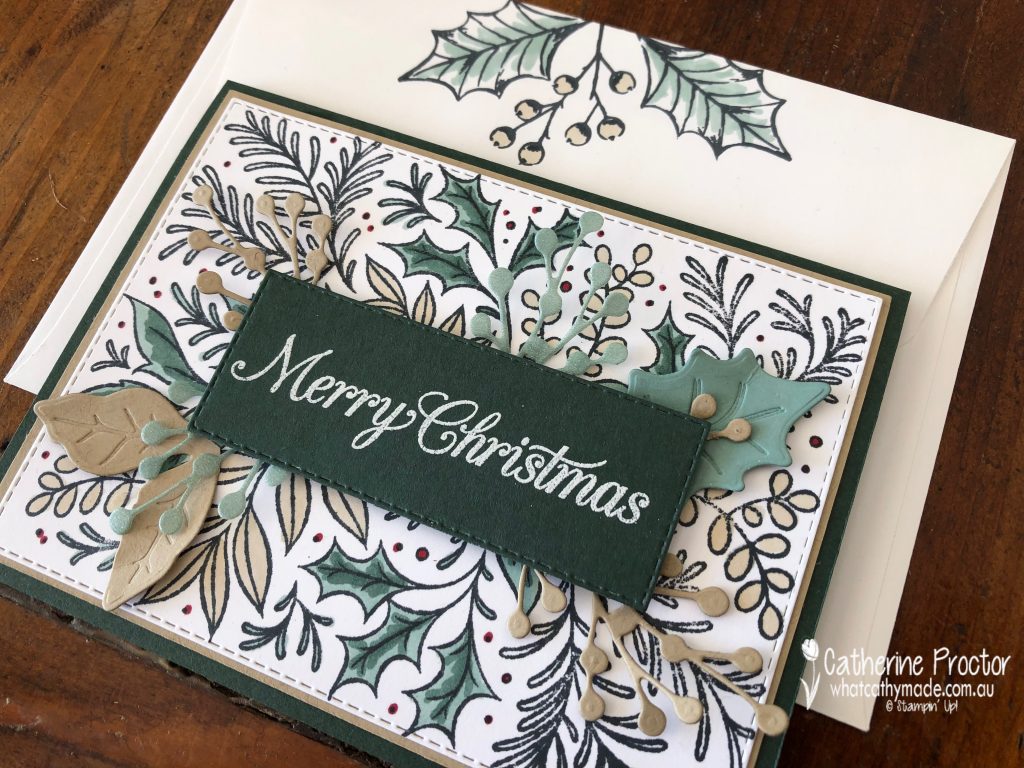
I’ve also used one of my favourite bundles from the July-December 2021 Mini Catalogue – the Happy Holly-Days Bundle. Last week I shared this card with you that featured the adorable bird coloured in – this week I’ve used the holly stamp and the Holly Border Punch from the Happy Holly-Days Bundle.
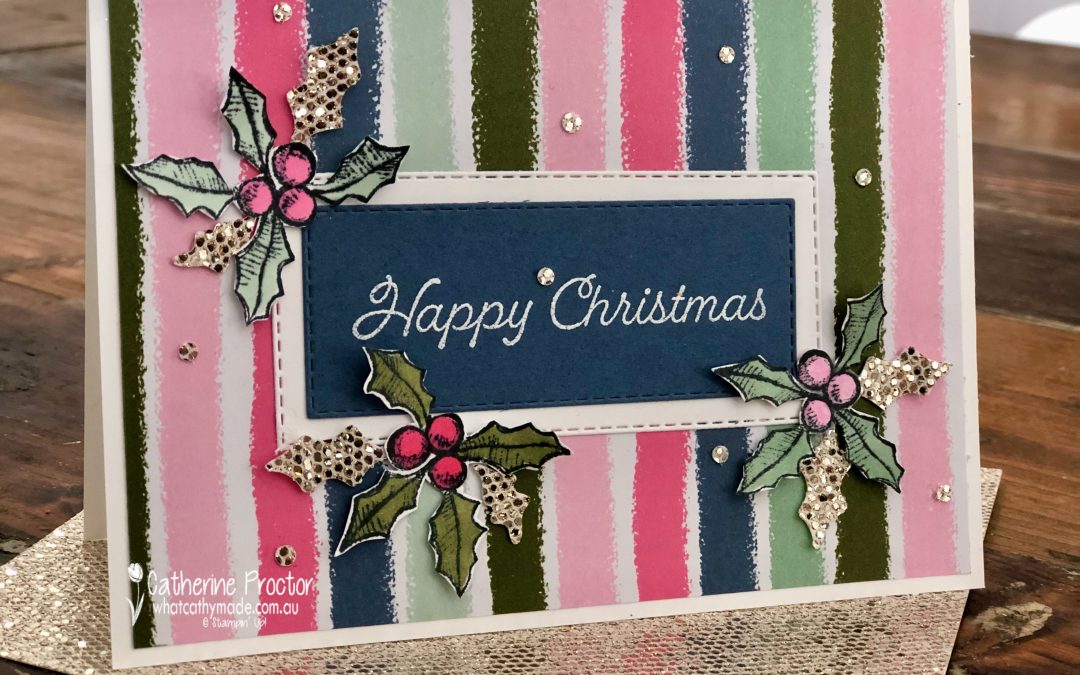
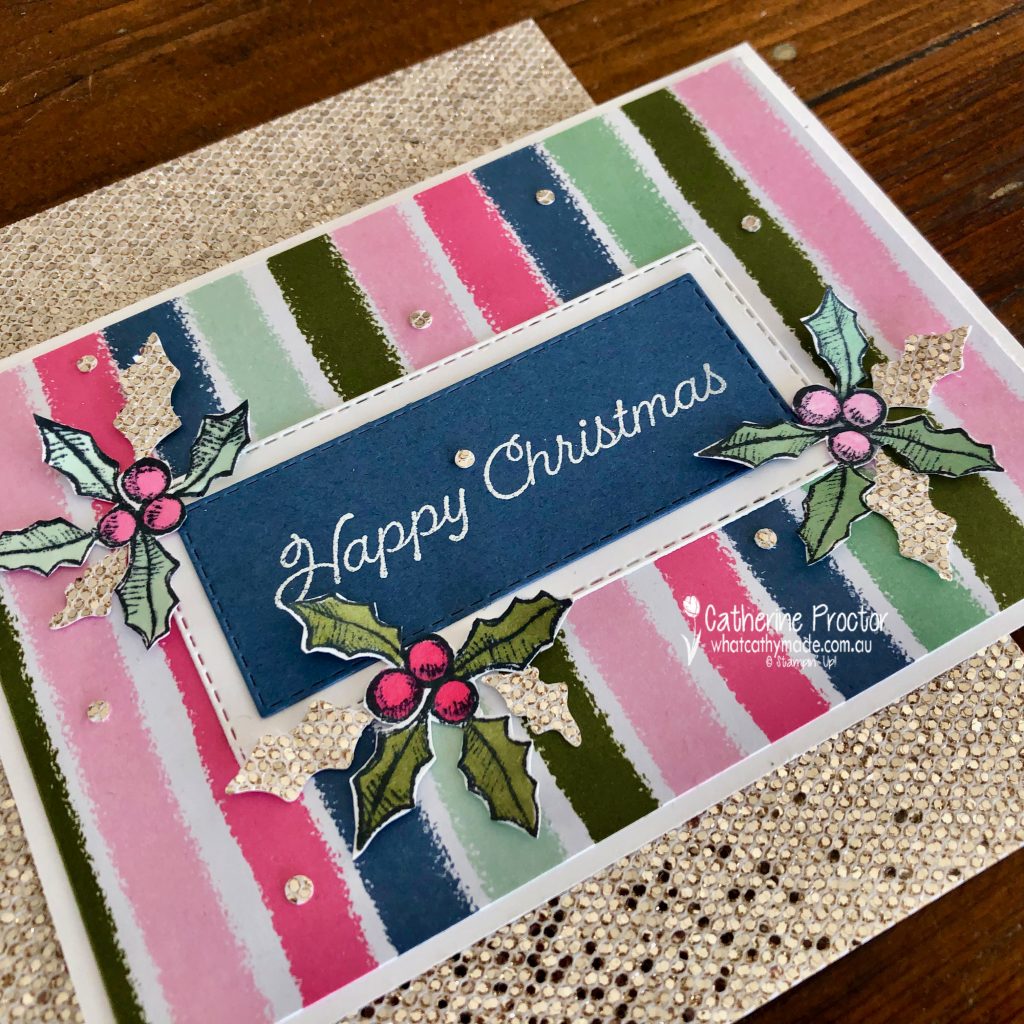
What’s that stunning striped Designer Series Paper I hear you cry? It’s my favourite DSP from the new July-December 2021 Mini Catalogue, called Whimsy & Wonder Designer Series Paper.
I cannot begin to tell you how stunning this DSP is. The colour combination is: Polished Pink, Blushing Bride, Mossy Meadow, Mint Macaron, Misty Moonlight and Iridescent. It is foiled on one side, with gorgeous background patterns (like the stripes I’ve used today) on the other side.
This card layout would work with any Designer Series Paper – just pick up the colours in the DSP for when you colour in the holly. I used light and dark Polished Pink, Mossy Meadow and Mint Macaron blends to colour the holly and then I fussy cut it out. If you don’t enjoy fussy cutting just use the holly punch to punch out cardstock in colours that co-ordinate with your DSP.
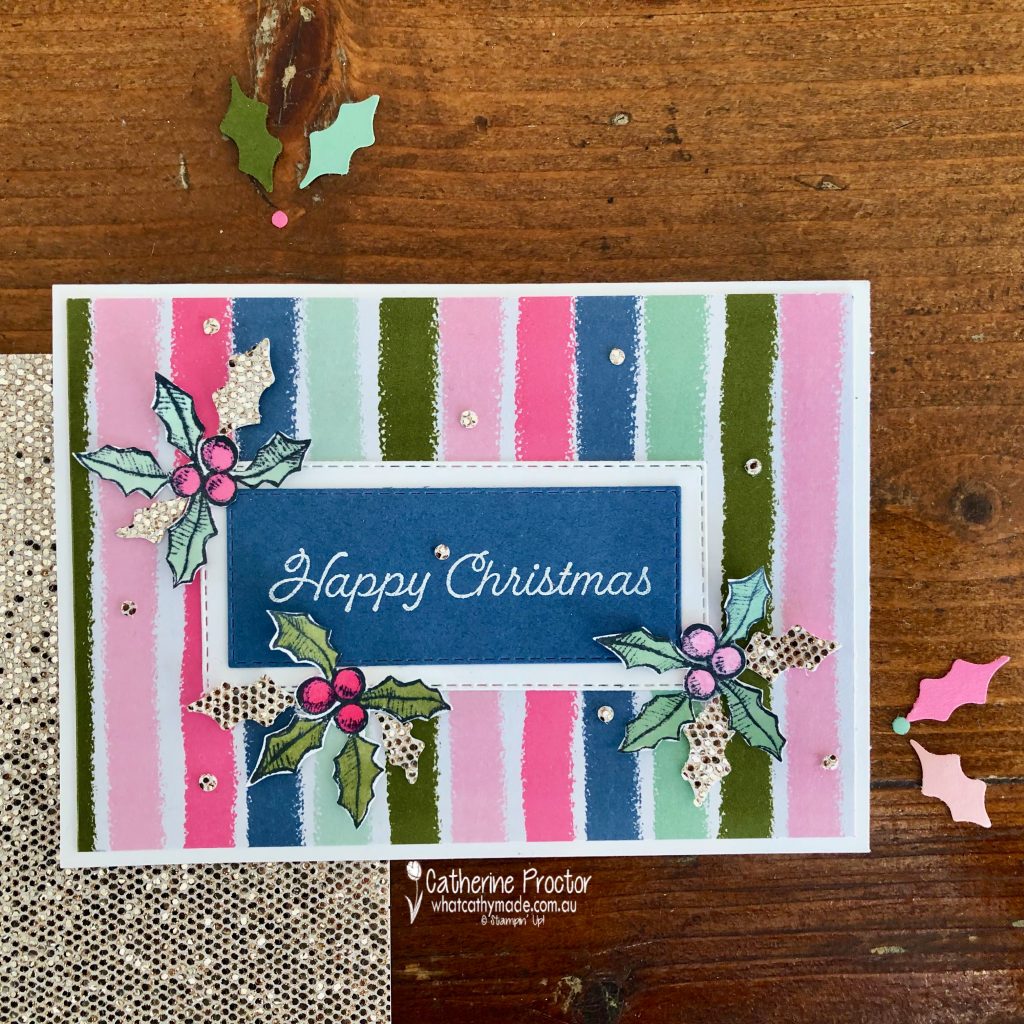
An added bonus of this punch is the little dots it punches out – don’t waste them! Just like I did with the Deer Builder punch on this card, I’ve used these dots as tiny embellishments.
These tiny dots can be tricky to adhere as they are so small. I find the easiest way to do this is to place a small amount of multipurpose glue onto the silicon mat and then insert the sharp tip of your “Take your Pick” tool into the glue. Use this tip with the glue to pick up the back of the embellishment, place it on your card and gently press down as you slide the “Take your Pick” tool out from under the embellishment.
Now it’s time to hop on over to our next participant, the incredible talented Theresa Gerrard. I wait to see what Theresa shares with us today!
If at any time you find a broken link please head to the blog of this week’s Host of the Heart of Christmas Blog Hop, Rachel Woollard, and she will have the list of all who are participating.
Thanks for visiting my site. I’ll be back with another card on Wednesday. If you’d like a copy of the forthcoming July-December mini catalogue and the Sale-a-bration catalogueplease get in touch.
I’m loving the challenge of creating a Christmas card each week and I hope you’re being inspired to create some too.
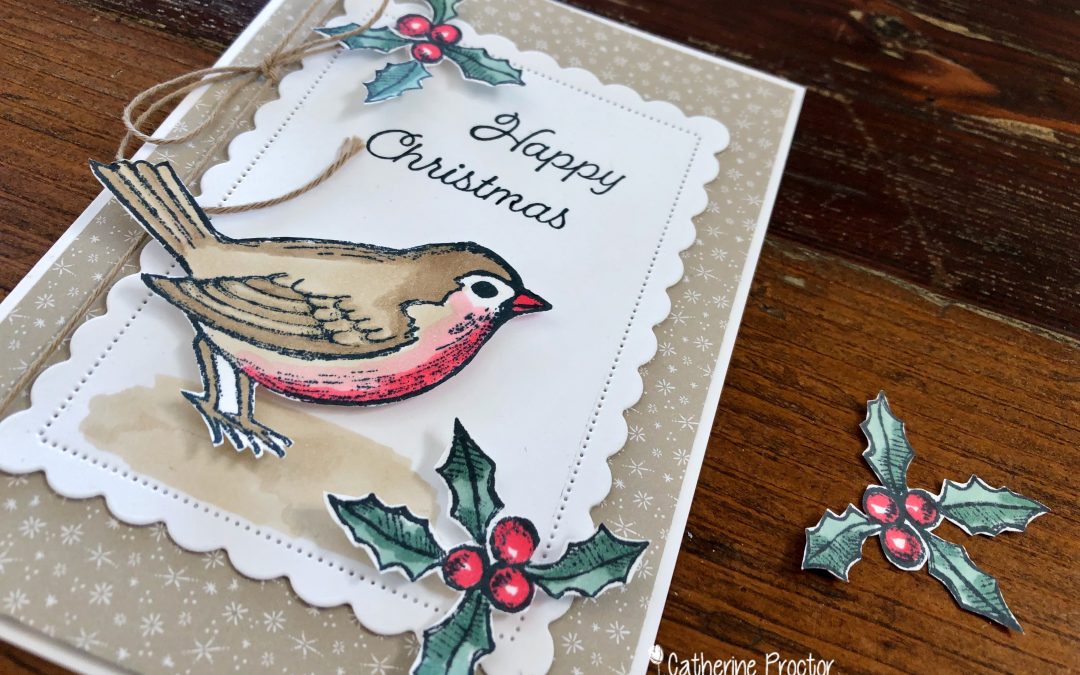
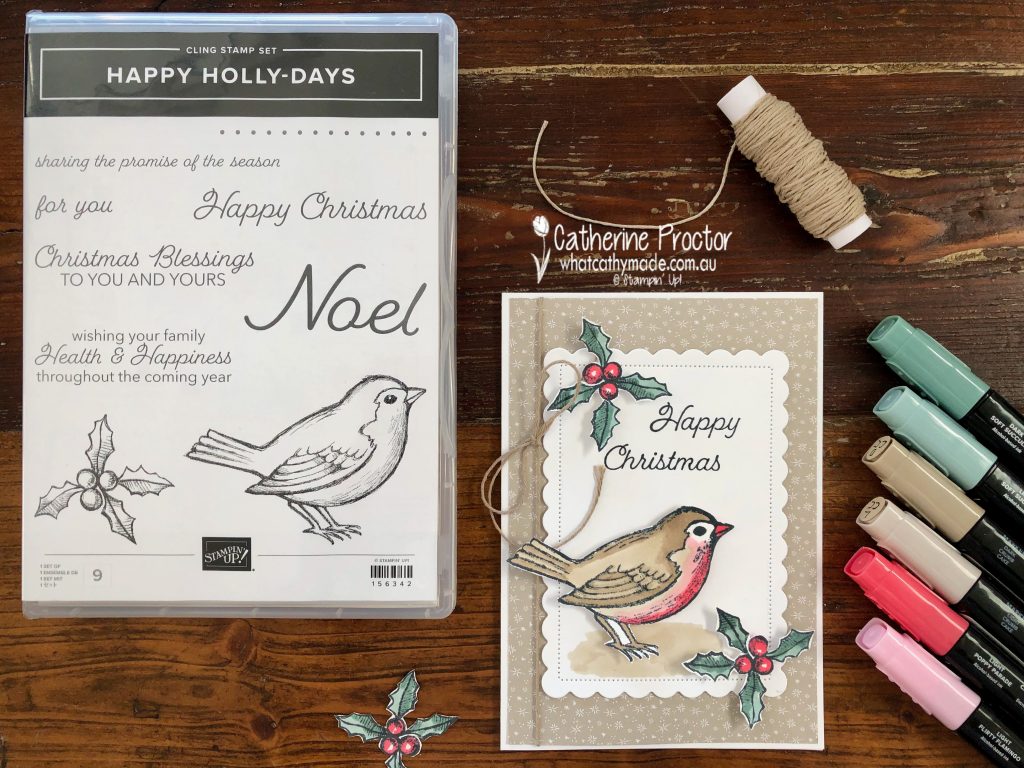
If you enjoy colouring techniques the Happy Holly-Days stamp set from the forthcoming July-December 2021 mini catalogue is a must!
Both this bird stamp and the holly stamp could be coloured using a variety of watercolour techniques or the Stampin’ Up! watercolour pencils, but for my card today I’ve quickly coloured the images in using our Stampin’ Blends.
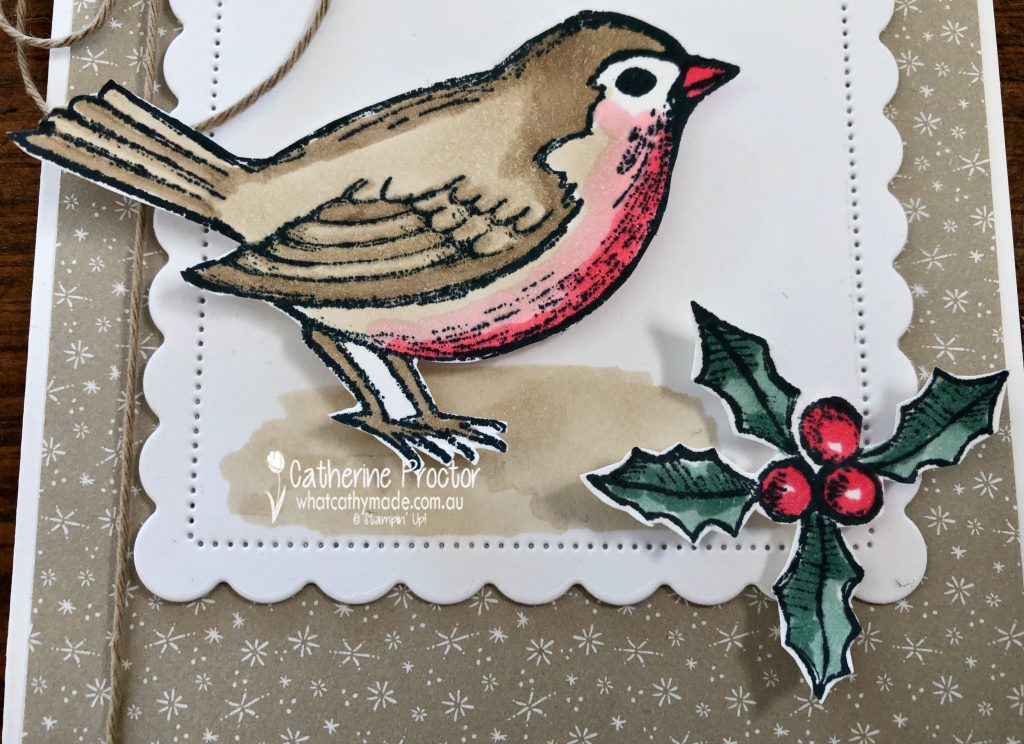
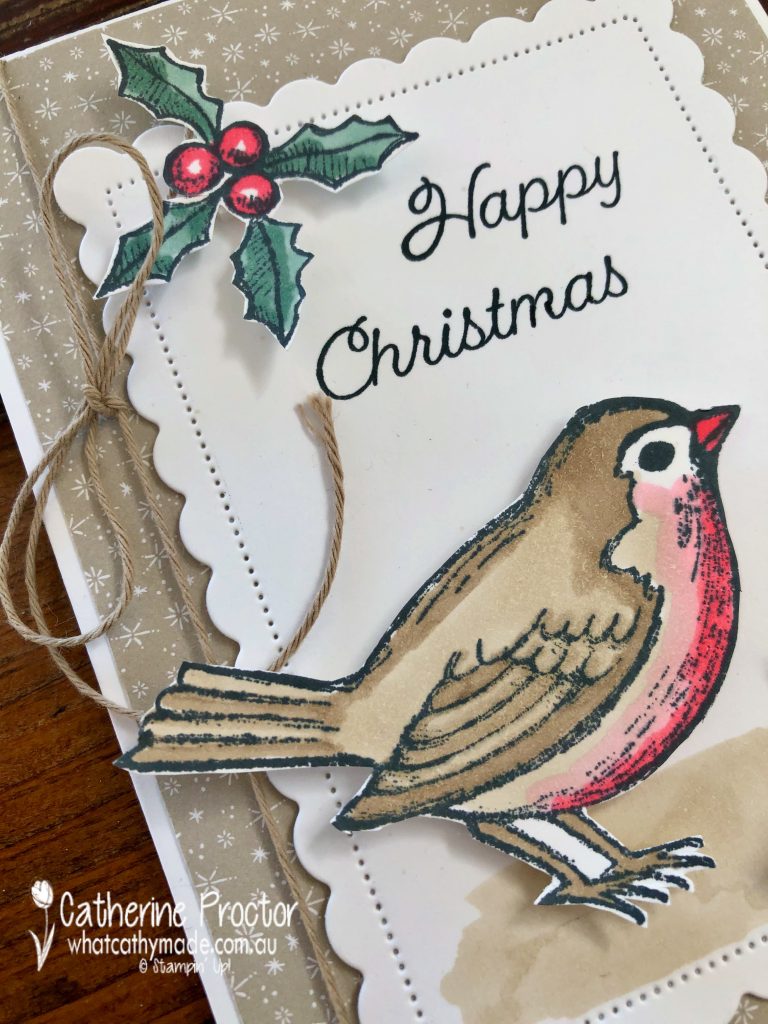
The holly is coloured in using light and dark Soft Succulent and light Poppy Parade Stampin’ Blends, while the bird is coloured with Light and dark Crumb Cake, light Flirty Flamingo and light Poppy Parade Stampin’ Blends…love this colour combination!
Basic Black
Crumb Cake
Sahara Sand
Soft Succulent
Flirty Flamingo
Poppy Parade
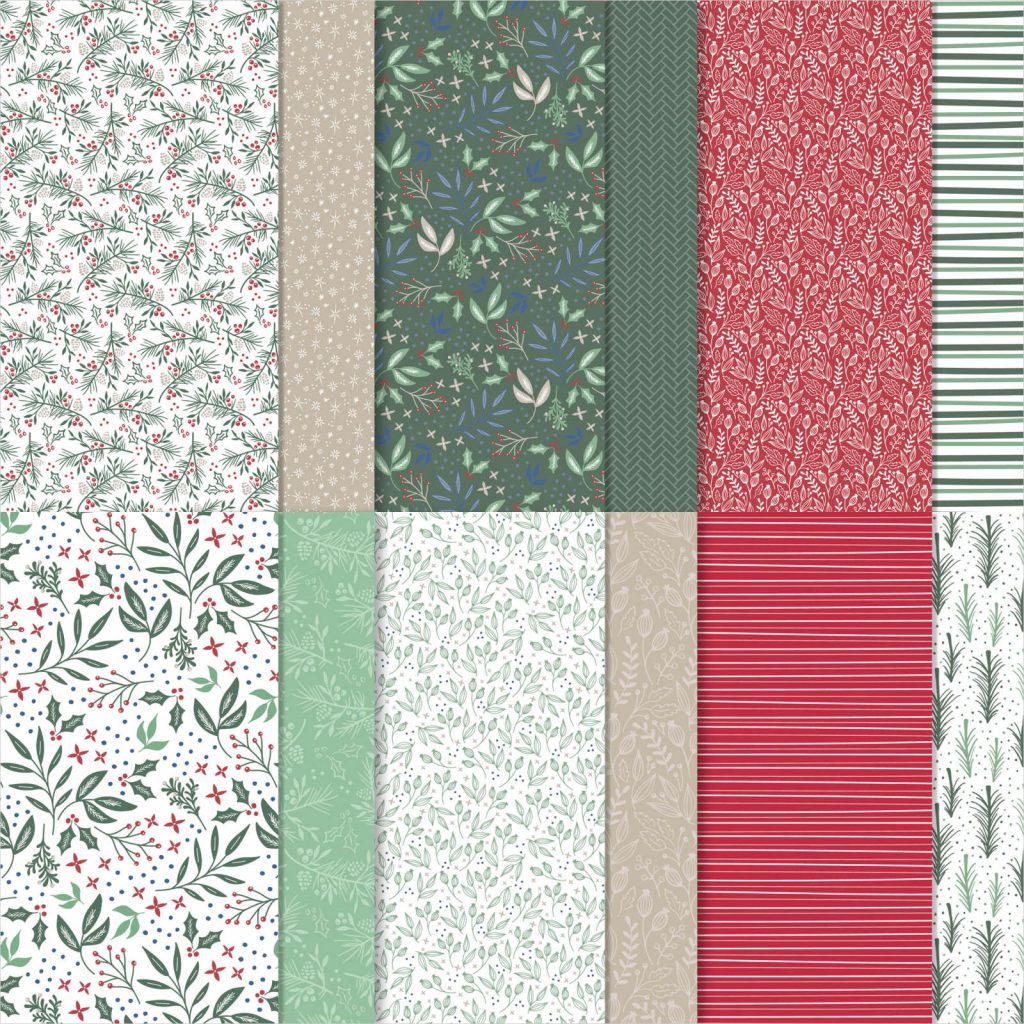
The softly patterned Sahara Sand DSP is from the Tidings of Christmas 6″ x 6″ Designer Series Paper – on sale until August 2.
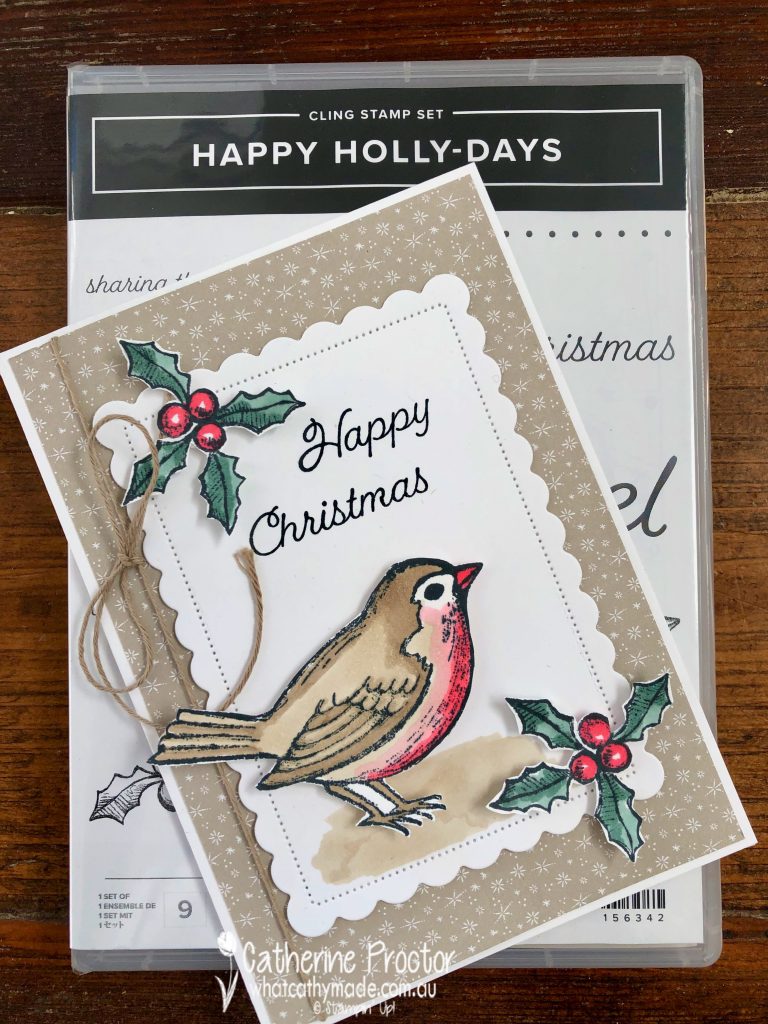
It was very easy to fussy cut both the bird and the holly. This Happy Holly-Days stamp set is actually part of a bundle with the holly border punch, but I only used the stamp set on this card.
To ‘anchor’ the bird onto the card I used the light Crumb Cake Stampin’ Blend on the Basic White cardstock layer that has been die cut using the second largest Scalloped Contour die.
I inked up the word ‘Happy’ from the “Happy Christmas’ sentiment and stamped it first and then inked and stamped the word ‘Christmas’ below it. Crumb Cake twine wrapped around the card and tied into a soft bow finishes off the card.
Now it’s time to hop on over to our next participant, the very talented Ros Davidson – I can’t wait to see what Ros shares with us today.
If at any time you find a broken link please head to the blog of this week’s Host of the Heart of Christmas Blog Hop, Tina Gillespie, and she will have the list of all who are participating.
Thanks for visiting my site. I’ll be back with another card on Wednesday. If you’d like a copy of the forthcoming July-December mini catalogue and the Sale-a-bration catalogueplease get in touch.
Are you ready for some more Christmas inspiration?
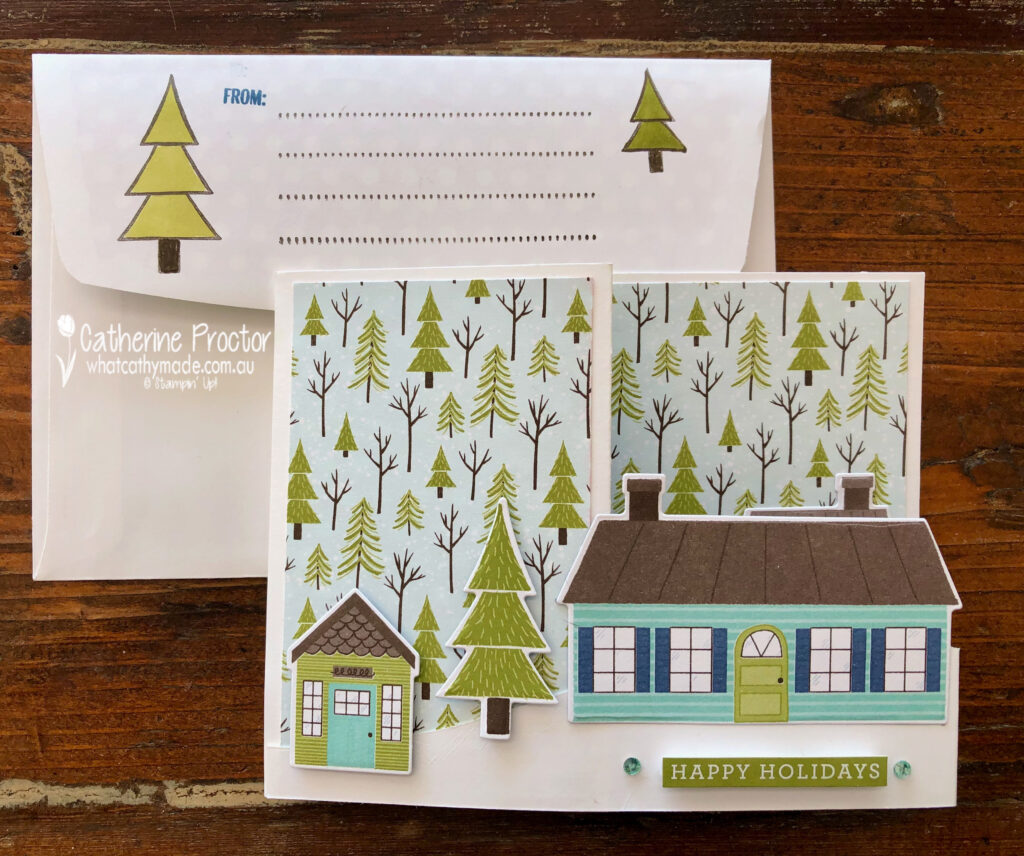
It’s pretty cold here in Sydney at the moment so I’ve made a very wintery card for you today using a new bundle from the forthcoming July-December Mini catalogue.
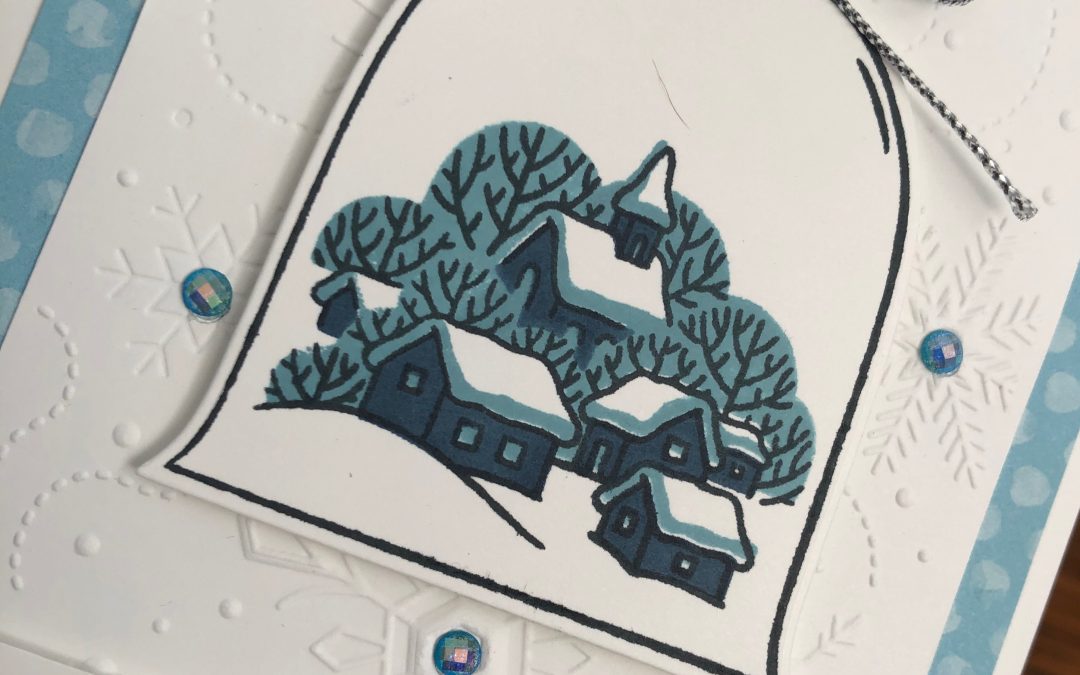
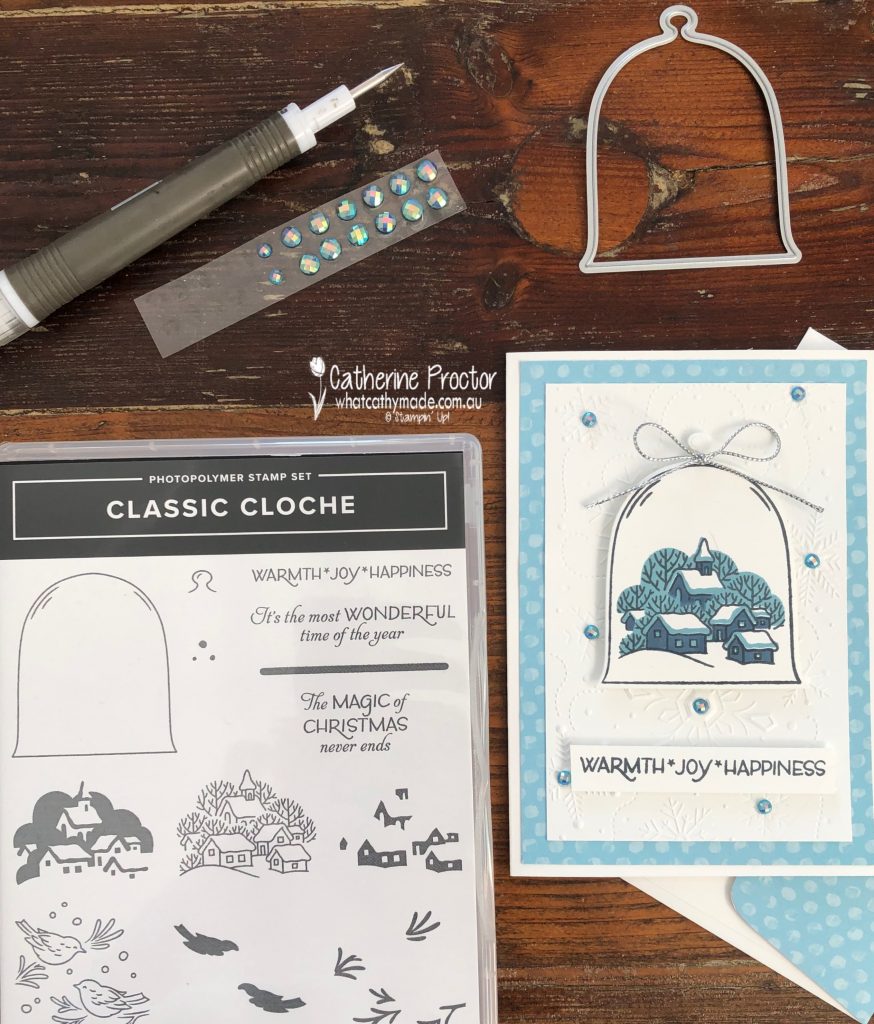
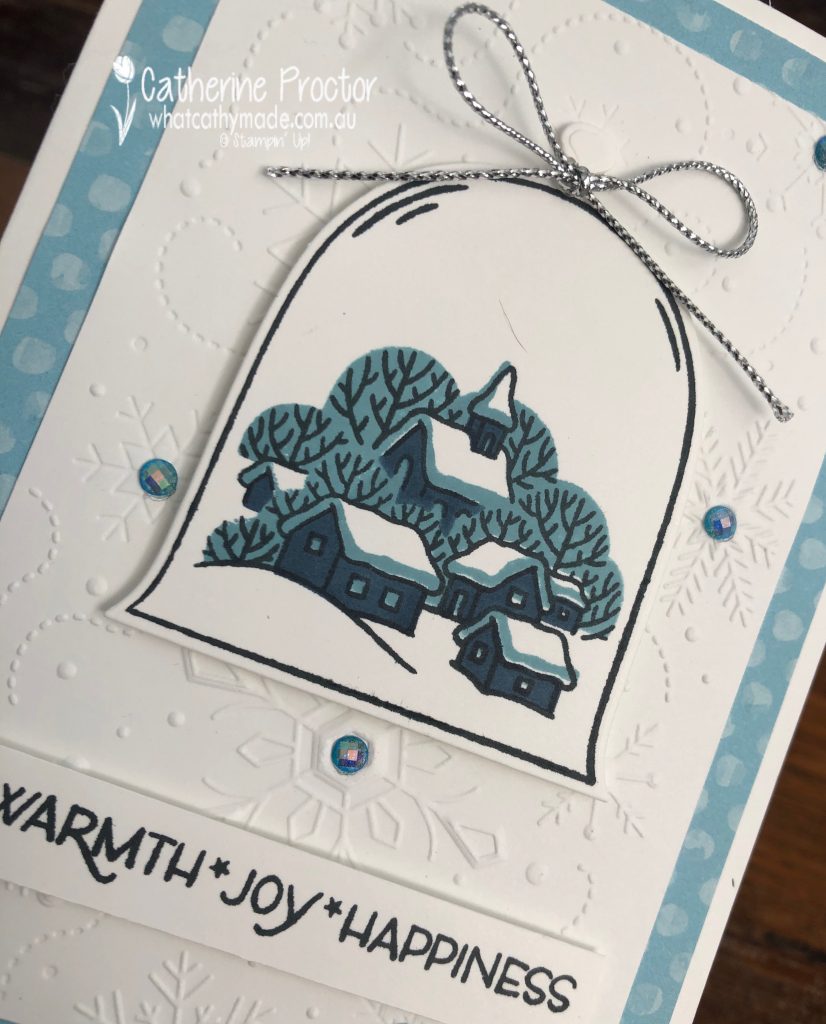
I have to confess this card wasn’t meant to be this simple – I had intended to make a shaker card using the new cloche shaker domes that match the Classic Cloche bundle but I forgot to order them! Luckily, this bundle really lends itself to both simple and more complex cards.
I fell in love with this little snowy town which is why this bundle made it to the very top of my wish list. There is also an adorable pair of birds sitting on branches in the stamp set and plenty of dies to create different scenes – I’ve only used the cloche die in this this card and I can’t wait to play with the other dies on some more Christmas cards soon.
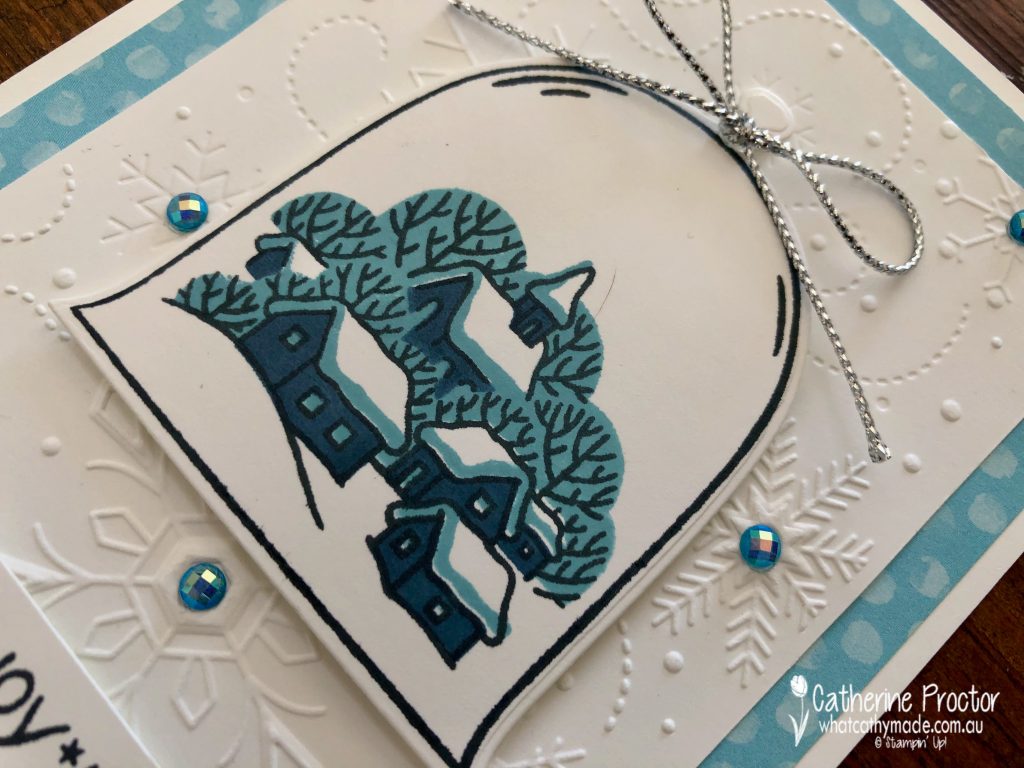
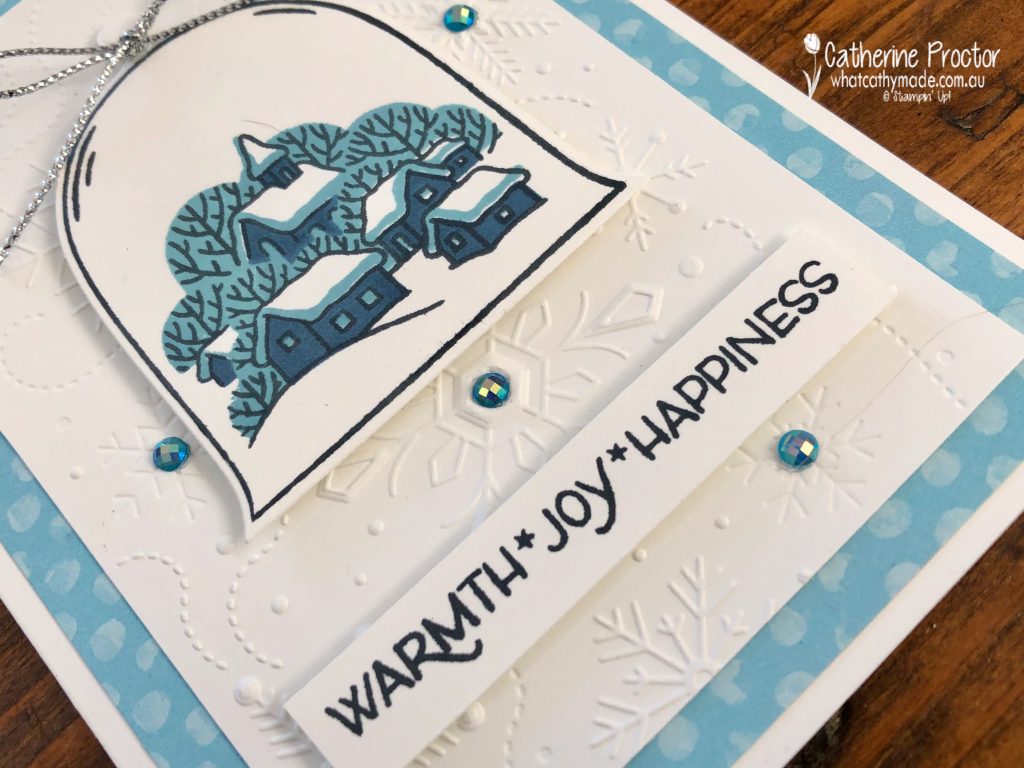
The little village image can either be used on its own and hand coloured, or you can use the 3 layer stamps as it I’ve done in this card. I stamped the cloche outline stamp and the village line image stamp in Tuxedo Memento, the background stamp in Balmy Blue and the stamp that shades the houses in Misty Moonlight.
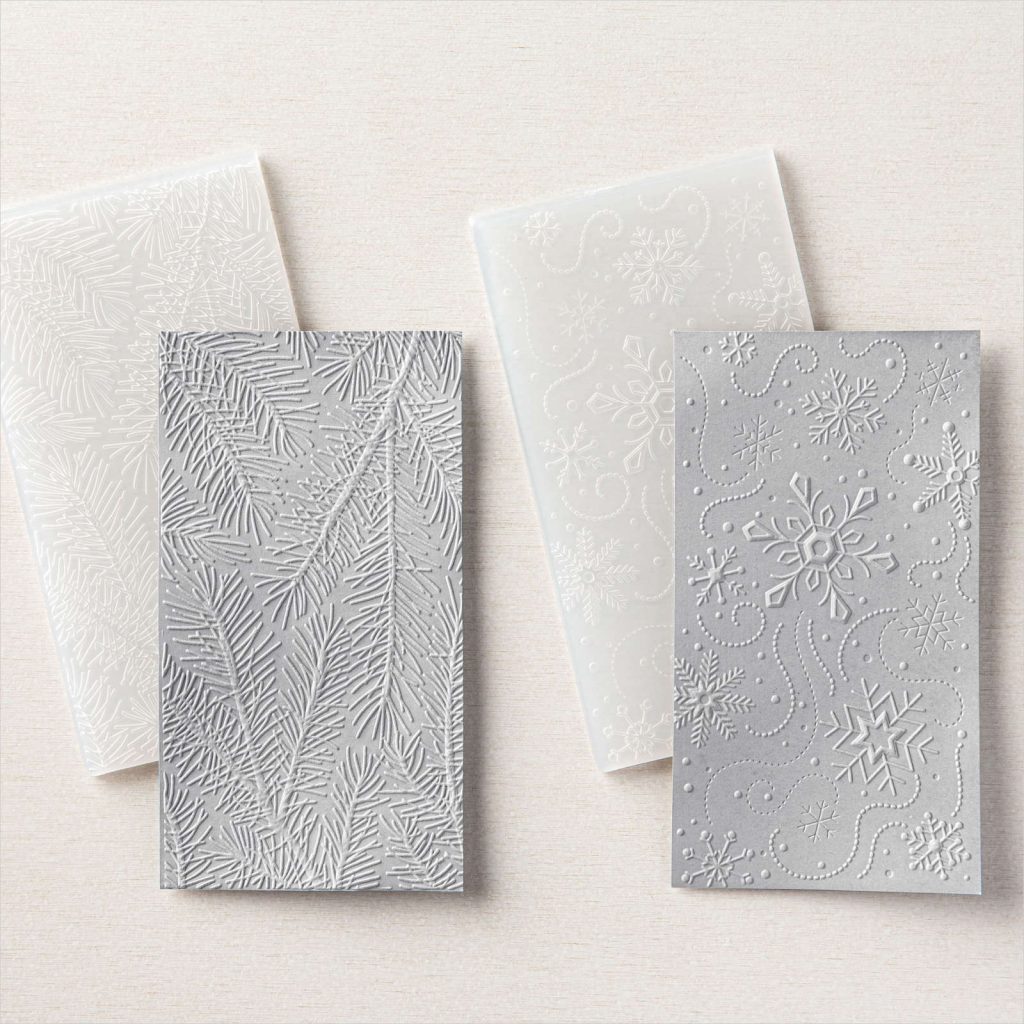
The Wintry embossing folder was the perfect background layer for my snowy village. This embossing folder is available now and it is one of a pack of two – they will be getting a lot of use on my Christmas cards this year.
The Balmy Blue Adhesive-Backed Gems were the perfect embellishment to highlight the middle of the snowflakes on the embossed layer.
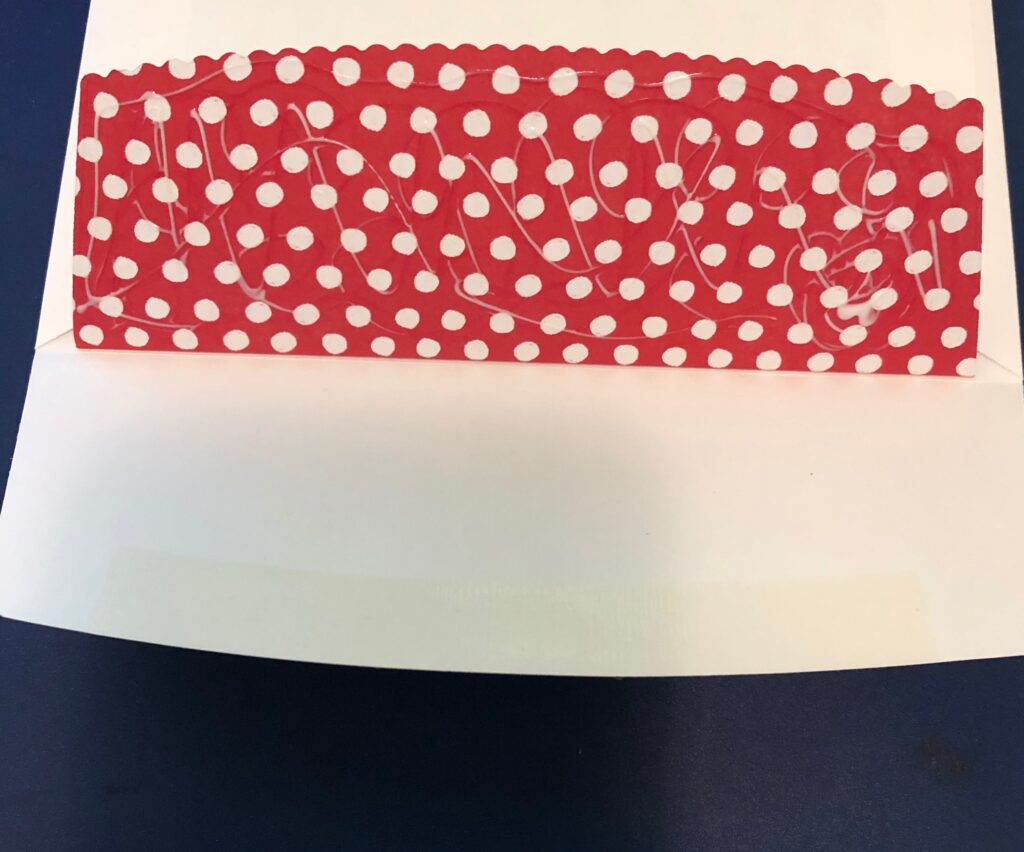
You don’t always have to use Christmas paper to make a Christmas card – this spotted DSP is from the You’re a Peach Designer Series Paper (currently on sale) and it reminded me of snowflakes! I really love this sentiment from the Classic Cloche stamp set.
Now it’s time to hop on over to our next participant, our very talented Art With Heart team leader, Claire Daly. I can’t wait to see what Claire shares with us today.
If at any time you find a broken link please head to the blog of this week’s Host of the Heart of Christmas Blog Hop, Sharon Davern, and she will have the list of all who are participating.
Thanks for visiting my site. I’ll be back with another card on Wednesday. If you’d like a copy of the forthcoming July-December mini catalogue and the Sale-a-bration catalogueplease get in touch.
With our Art with Heart Team Christmas blog hop providing Christmas card inspiration for you every Monday night I should have all my Christmas cards made by December – I just need to remember to send them in time!
My pre-order of Christmas products from the July-December mini catalogue and the Sale-a-bration catalogue arrived this week. That’s right, Stampin’ Up! is holding TWO Sale-a-bration periods this year – this second Sale-a-bration period starts on August 3, the same day as the July-December mini catalogue.
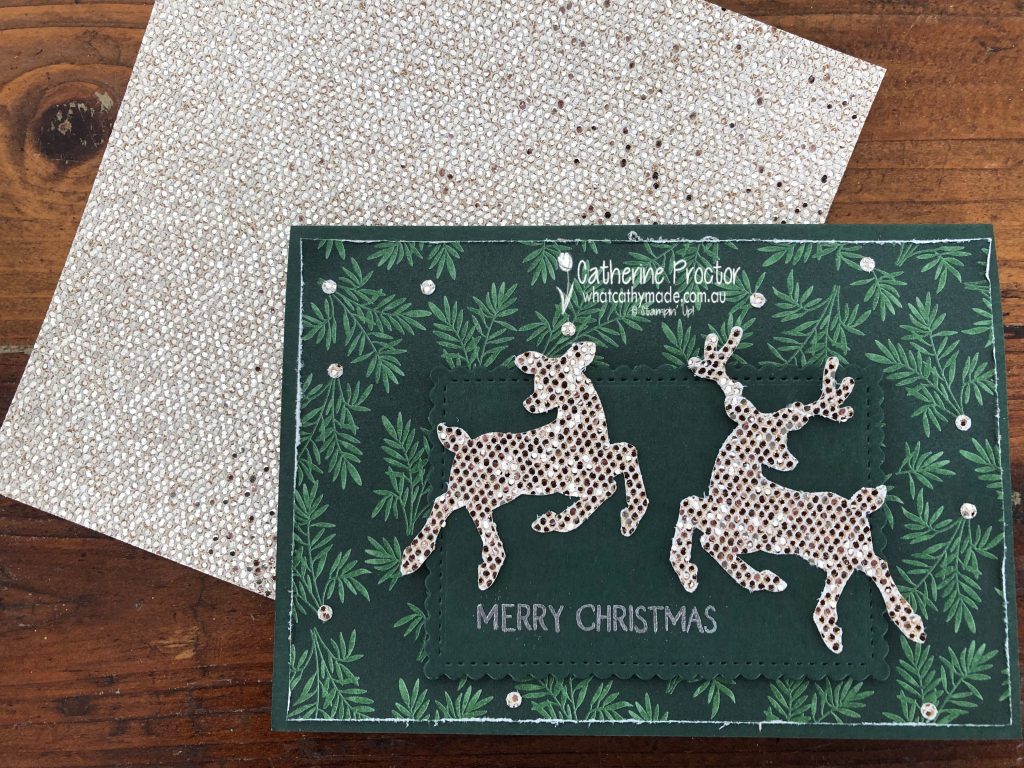
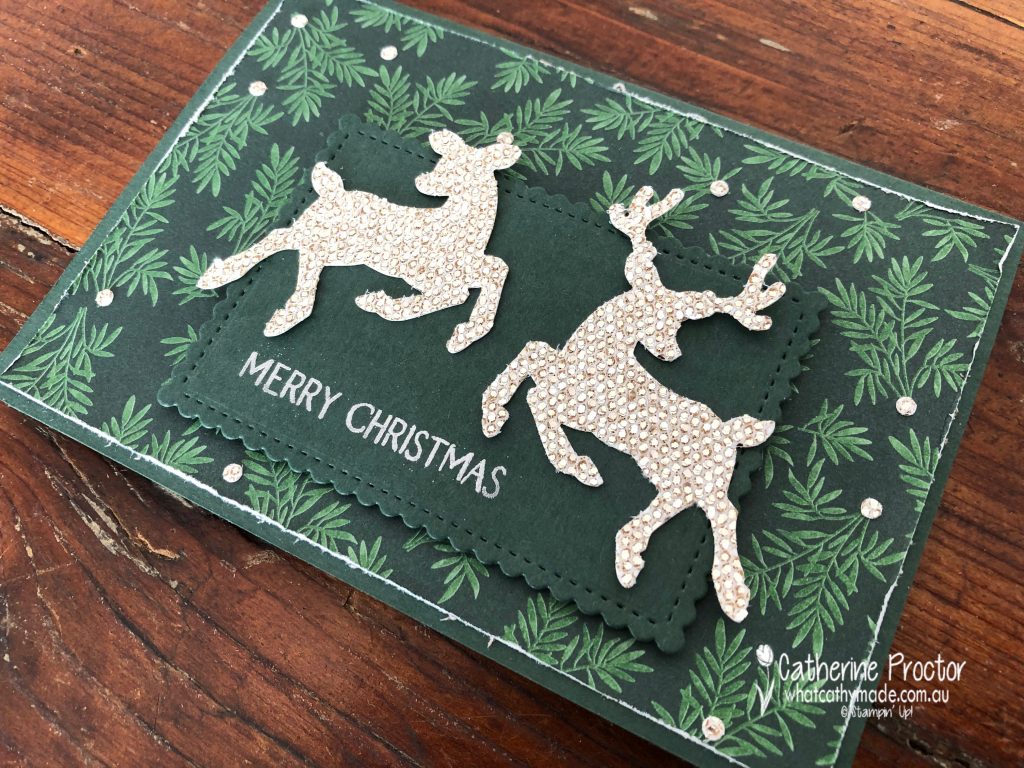
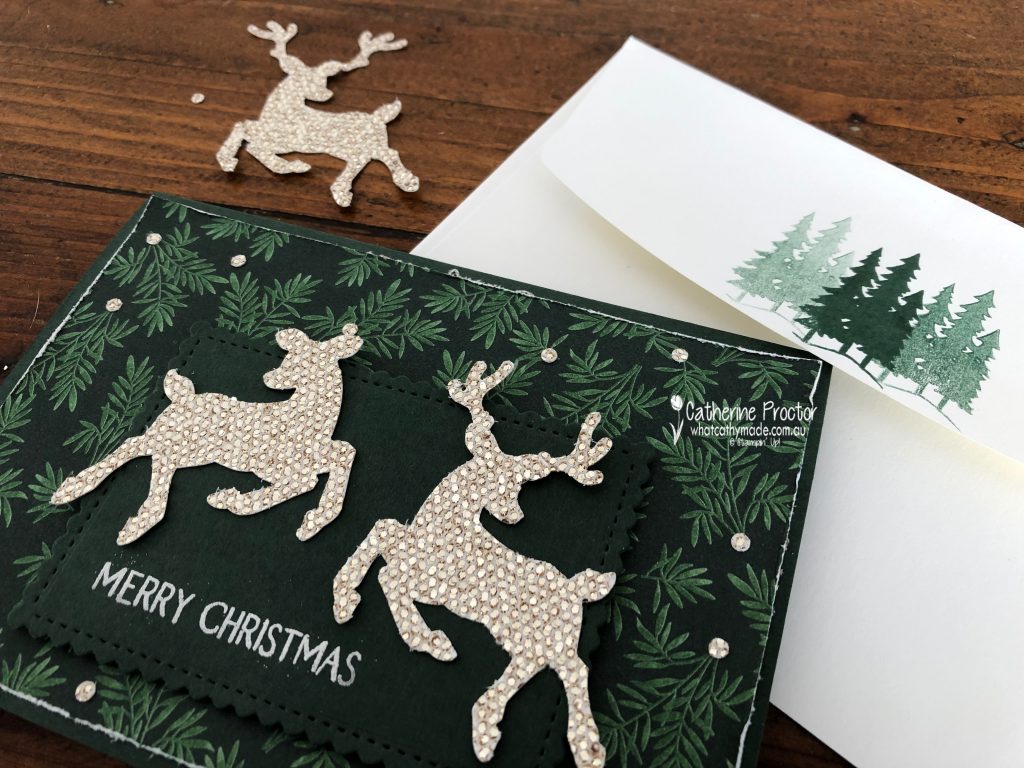
I’m so excited to share a card I made using one of these FREE Sale-a-bration products, the Be Dazzling 6″ X 6″ Specialty Paper.
Isn’t this Be Dazzling 6″ X 6″ Specialty Paper so stunning! It will definitely make any card feel extra special. The colour is hard to describe – it’s sort of a pale champagne colour that will coordinate with either silver or gold, as well as many of the neutrals, including Sahara Sand and Crumb Cake.
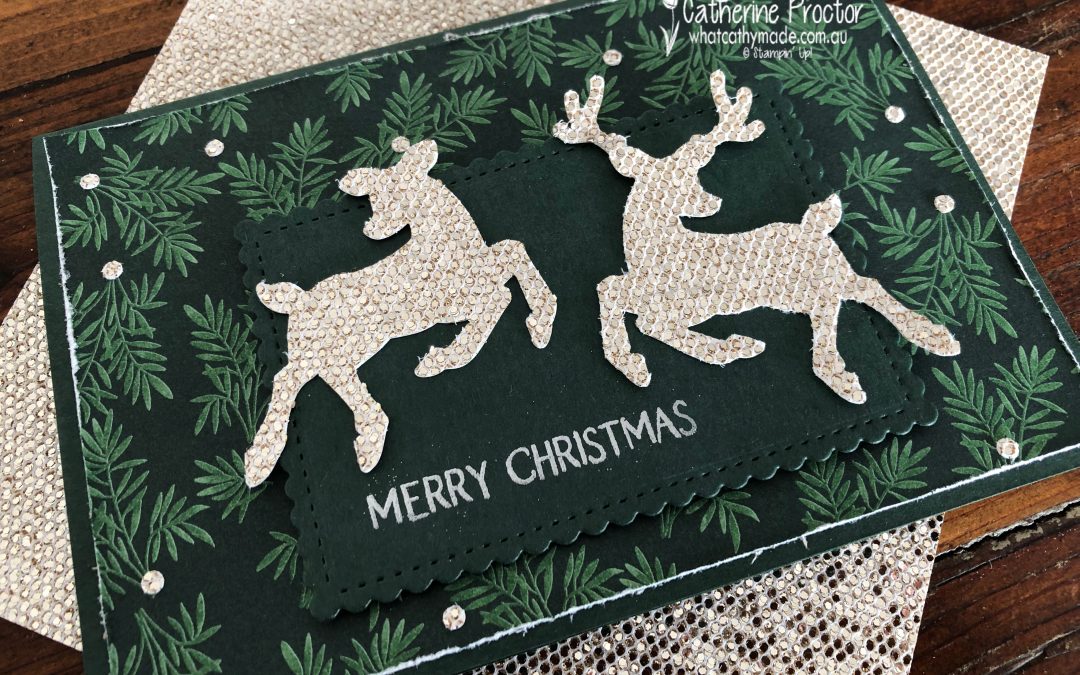
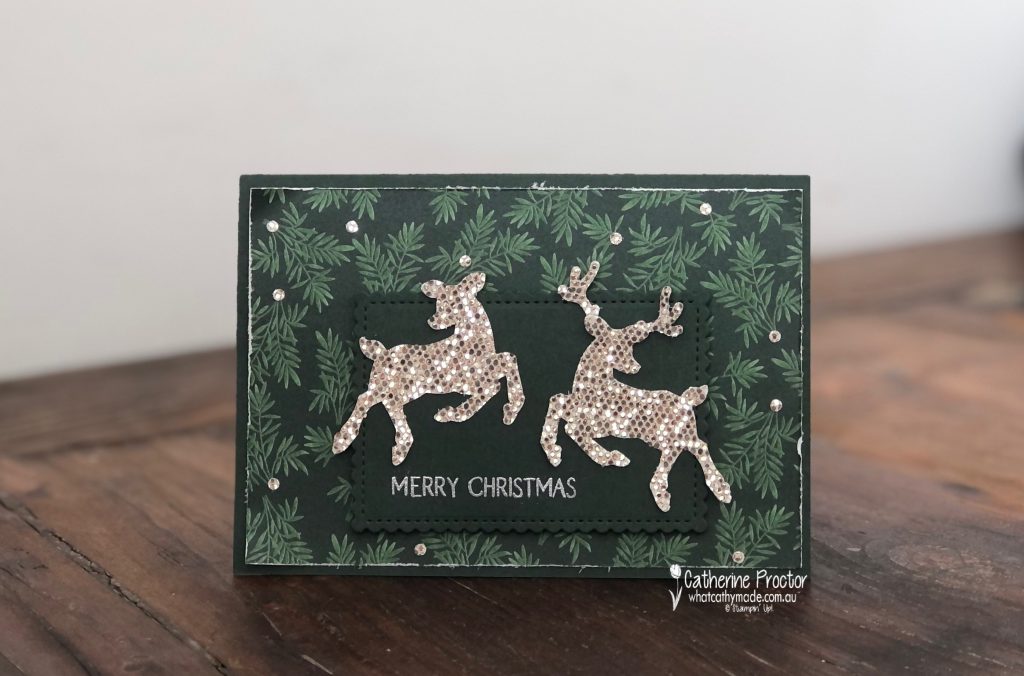
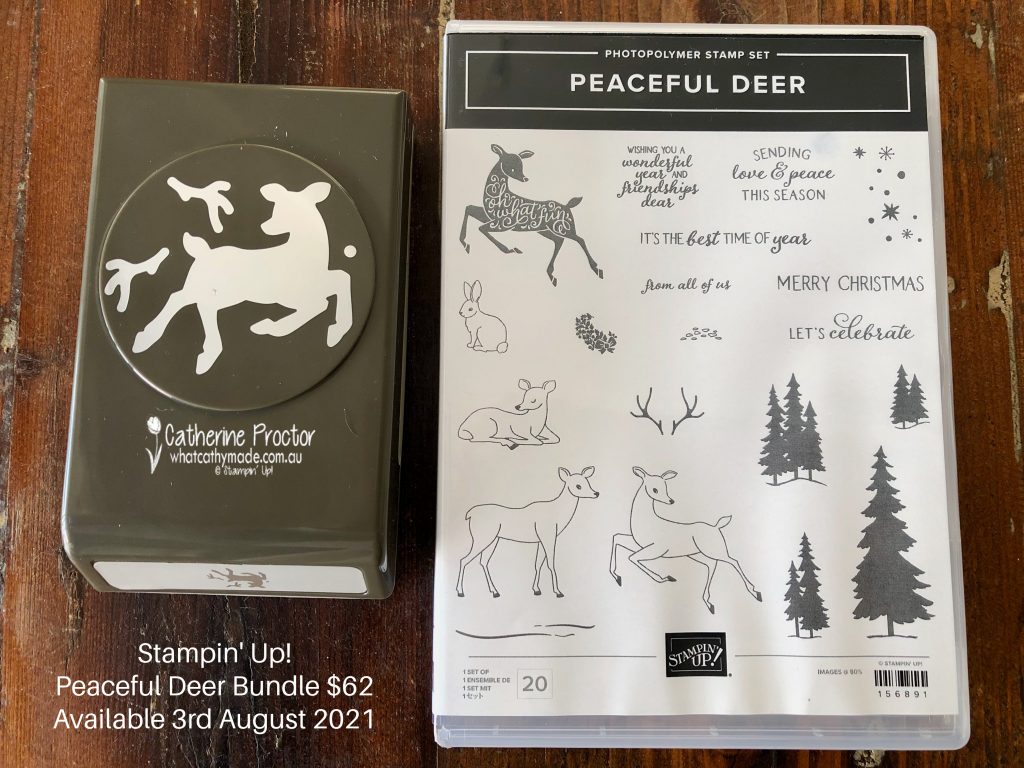
The other new products on this card are from the Peaceful Deer Bundle, which includes the Peaceful Deer Stamp Set and the Deer Builder Punch, both available from August 3.
At just $62 for the bundle, this is such an affordable and a versatile set. The Peaceful Deer Stamp Set has great sentiments and a good variety of images, including a deer that coordinates with the punch – perfect for crafters who don’t own a die cutting machine.
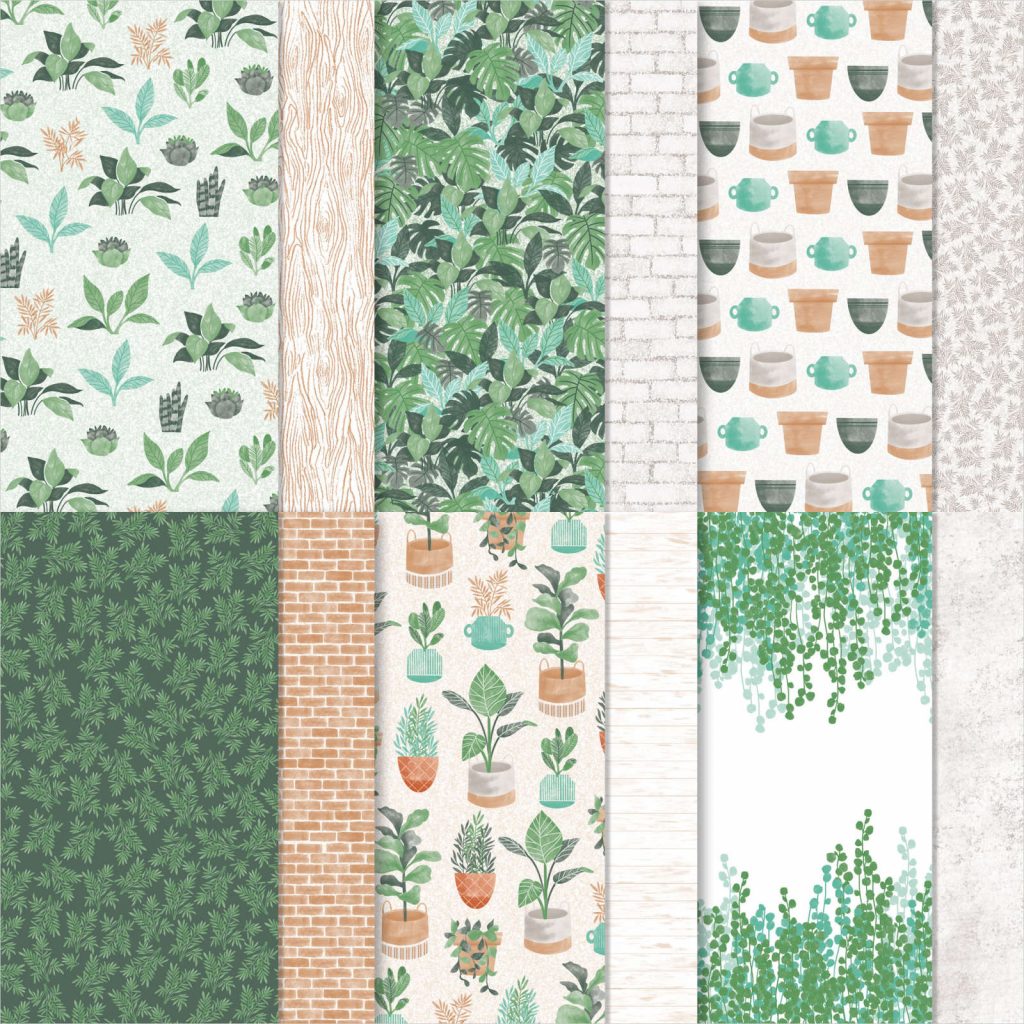
The beautiful Designer Series Paper I’ve used as my background is not a Christmas paper from the forthcoming July-December mini catalogue, however, I think it works really well on this card.
This Bloom Where You’re Planted Designer Series Paper is available now and on sale for $17.00 – I’ve used the sheet shown on the bottom left.
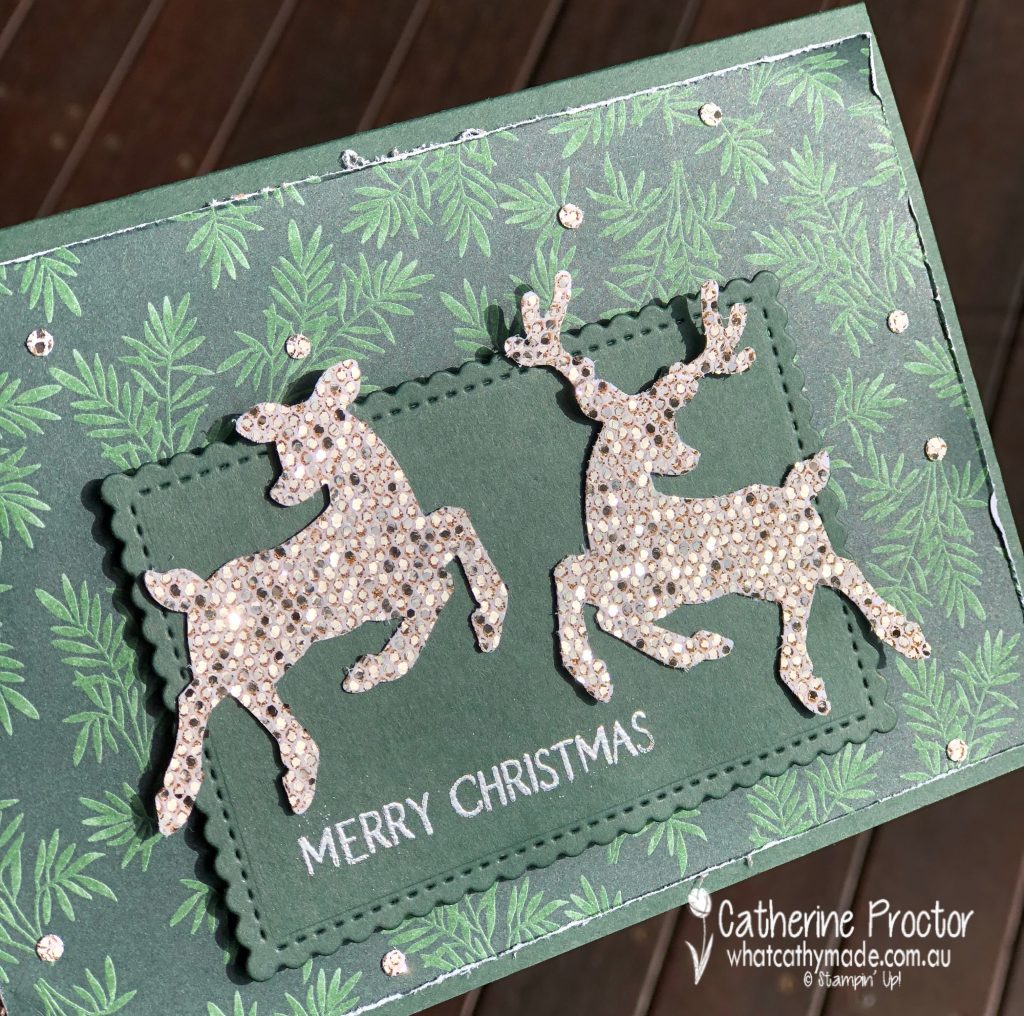
I wanted to add a few embellishments to my DSP as it is such a dark background. Looking at the scraps on paper on my craft desk I realised there is a very small circle shape in the Deer Builder Punch. I think it is meant to be the deer’s eye but I used it to punch out my own embellishments.
I love the effect of these embellishments – it’s a great way to use up the scraps! This photo – taken outside in a brief moment of sun on this rainy day – shows my embellishments close up, as well as how sparkly this paper is.
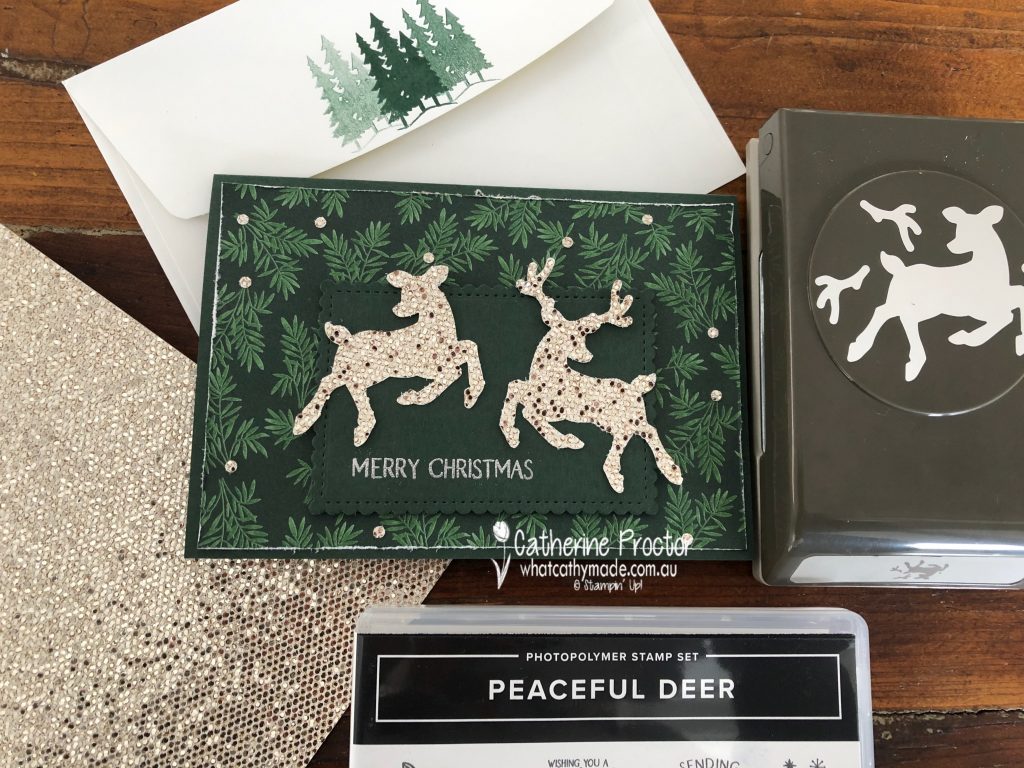
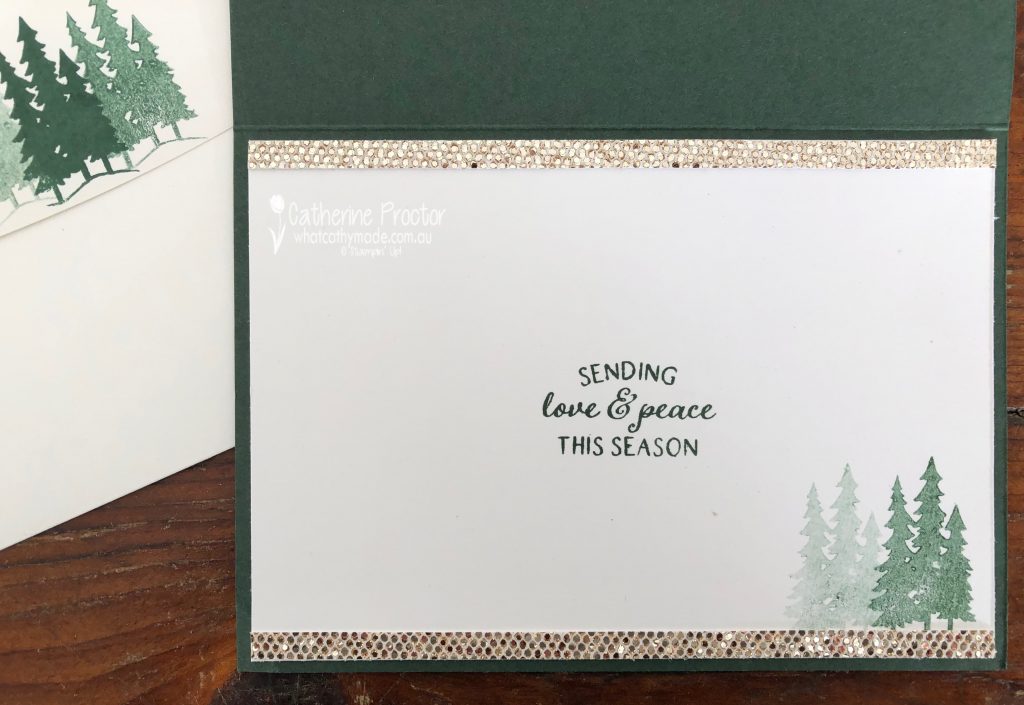
I stamped the inside of the card to match, using another sentiment and one of the tree stamps from the Peaceful Deer Stamp Set as well as adding a narrow strip of the Be Dazzling paper top and bottom.
To get the three shades of green for the trees on the back of the envelope flap, I stamped the tree stamp once at full strength in Evening Evergreen and then a second time and a third time without re-inking the stamp.
Now it’s time to hop on over to our next participant, the very talented, Sharon Davern. I wonder if she will share another fabulous fancy fold card with us?
If at any time you find a broken link please head to the blog of this week’s Host of the Heart of Christmas Blog Hop, Tina Gillespie, and she will have the list of all who are participating.
Thanks for visiting my site. I’ll be back with another card on Wednesday. If you’d like a copy of the forthcoming July-December mini catalogue and the Sale-a-bration catalogueplease get in touch.
I know it’s only July, but in this house it’s beginning to feel a lot like Christmas!!!
Why, you may ask? Well firstly, it’s Week One of our Heart of Christmas blog hop for 2021, yeah!
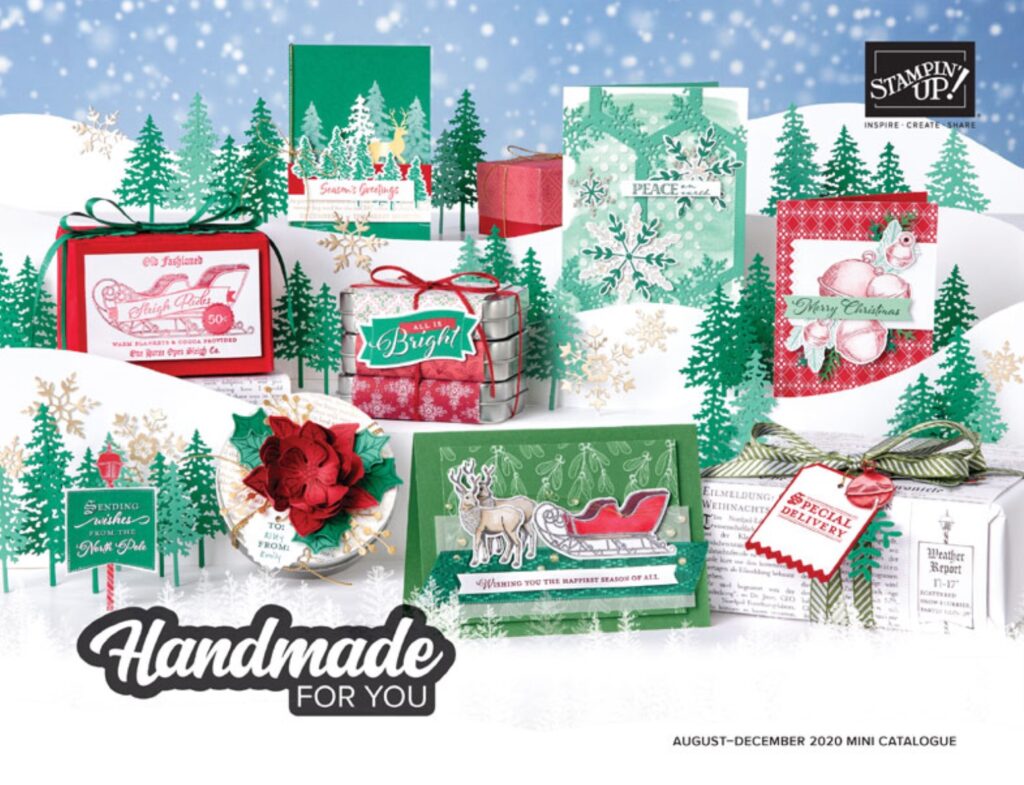
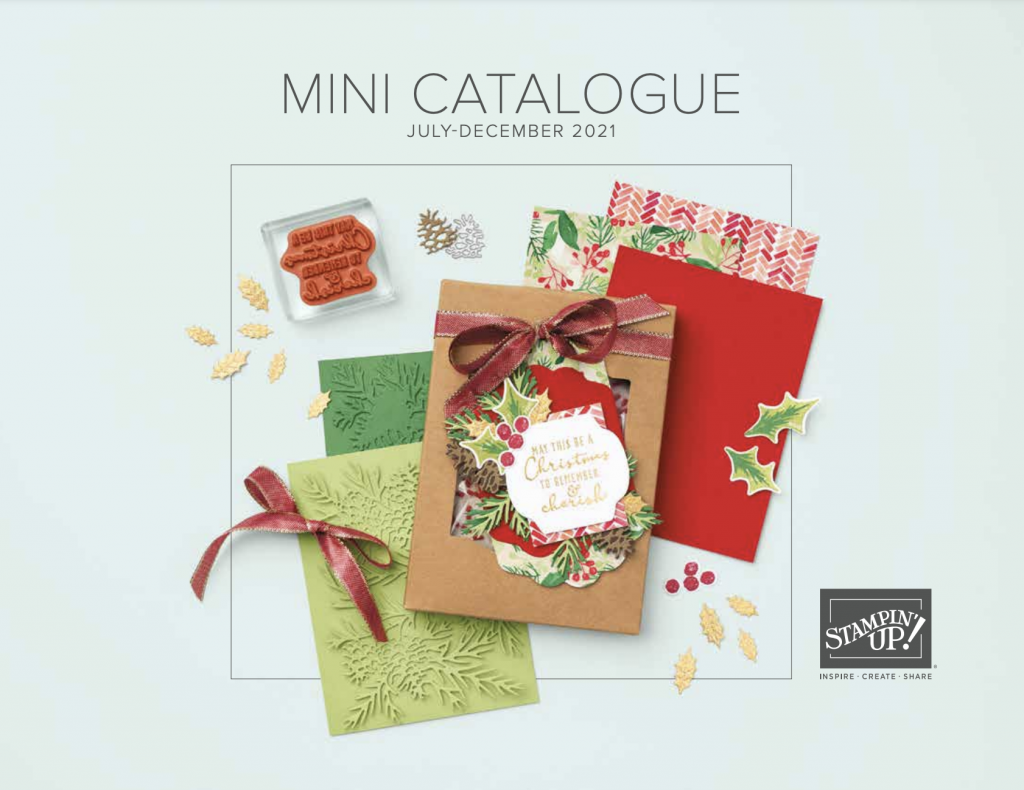
And secondly, as a Stampin’ Up! demonstrator I’ve already got my hands on the brand new July-December mini catalogue, jam packed with lots of beautiful Christmas products! My pre-order will be arriving in the next few days, so watch this space for upcoming sneak peeks. Here’s the cover…
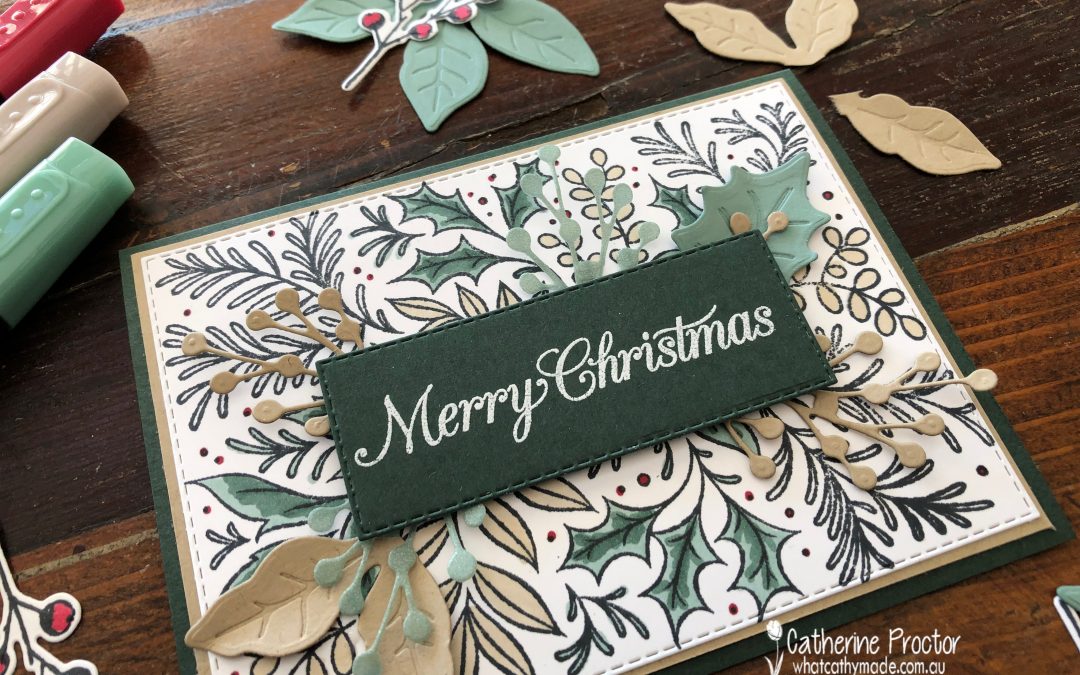
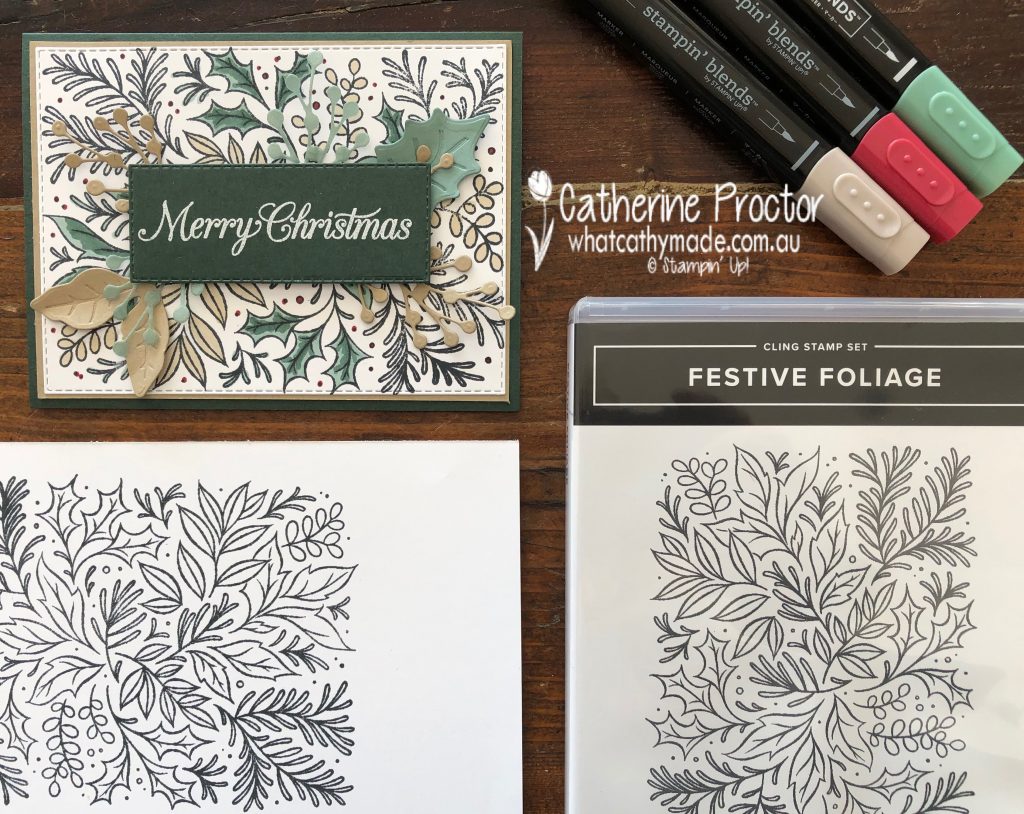
For tonight, I’ve made a card that uses two products you can already get your hands on. Festive Foliage is a brand new background stamp set from the 2021-22 Annual Catalogue (p90) and the Poinsettia Petals Photopolymer Stamp Set (p92) and coordinating Poinsettia dies (p165) which have carried over from last year’s Holiday catalogue.
This Festive Foliage background stamp is a great alternative to using DSP because with a single stamp (I always use my Stamparatus for stamping background stamps) you get a large image that covers an entire layer. You can either stamp this image in any coloured ink and leave it uncoloured OR colour it in with blends, markers, pencils, pastels or even watercolour it using water painters and inks. TIP – don’t forget to use Stayzon ink instead of Memento ink if you are water colouring.
I’ve stamped in Memento and then coloured the image in with Evening Evergreen, Real Red, Crumb Cake and Soft Succulent dark and light Stampin’ Blends.
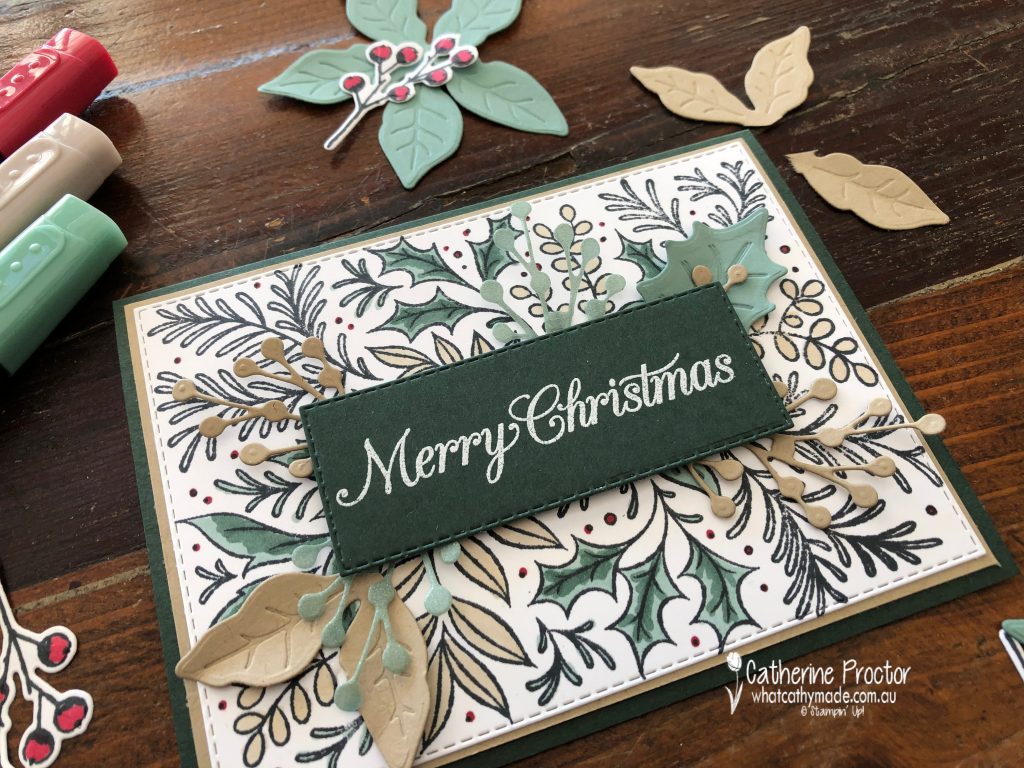
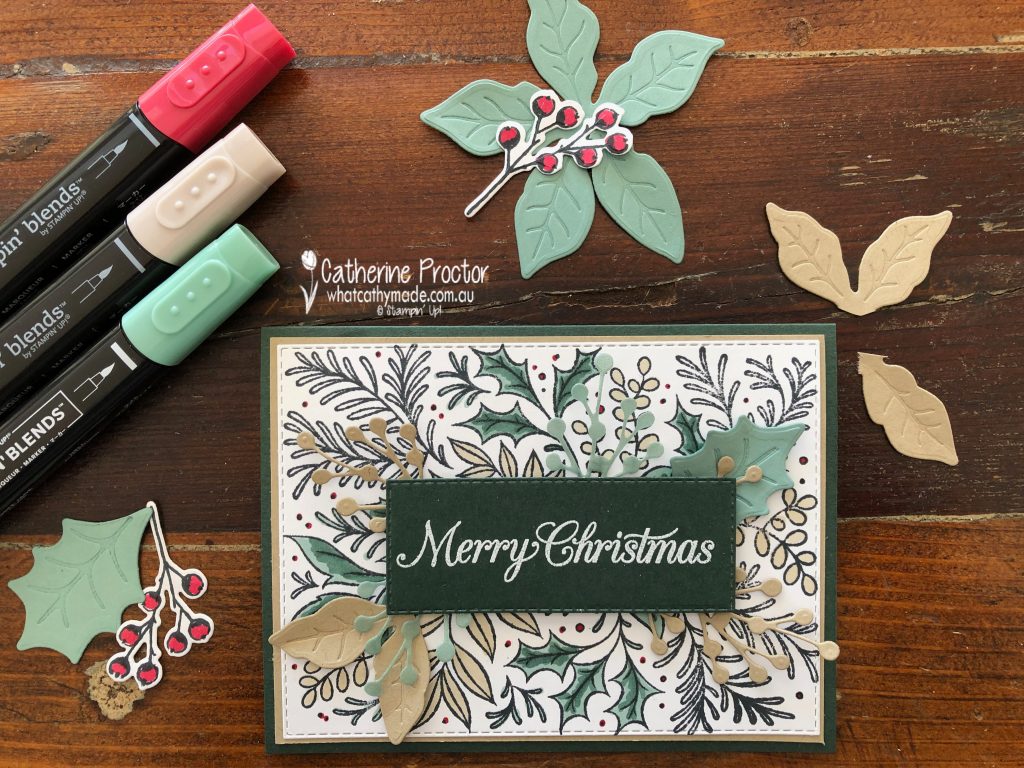
To add layers, textures and a sentiment to my card, I chose the Poinsettia Petals Photopolymer Stamp Set and coordinating Poinsettia dies as the images and die shapes work so well with the Festive Foliage stamp set.
I’ve die cut flowers and leaves and strategically placed them under the sentiment to add a bit of dimension to the card WITHOUT covering all of the lovely hand coloured background image. Some of the flower petals I used as leaves by tearing them off the main flower.
It’s hard to see in my photos, but I’ve used the new Soft Succulent 2021–2023 In Color Shimmer Vellum for the green sprigs – it adds such a lovely subtle shimmer to my card. This photo from a Annual catalogue gives you a better idea of the shimmer.
Finally, the Poinsettia Petals Photopolymer Stamp Set was perfect for decorating the inside of my card and the back flap of my envelope too.
Now it’s time to hop on over to our next participant, the very talented, Claire Daly.
If you find a broken link or have come to this blog hop from a different entry point, you can view the full list of participants on Sharon Davern’s blog.
To purchase any of the products used in my cards today you can add them to your cart here.
Welcome to week twenty-six of our 2020-2021 Art With Heart Colour Creations Showcase.
Each week various members of our Art With Heart Colour Creations team will be bringing you weekly colour inspiration as we showcase our range of over 50 beautiful Stampin’ Up! colours in alphabetical order.
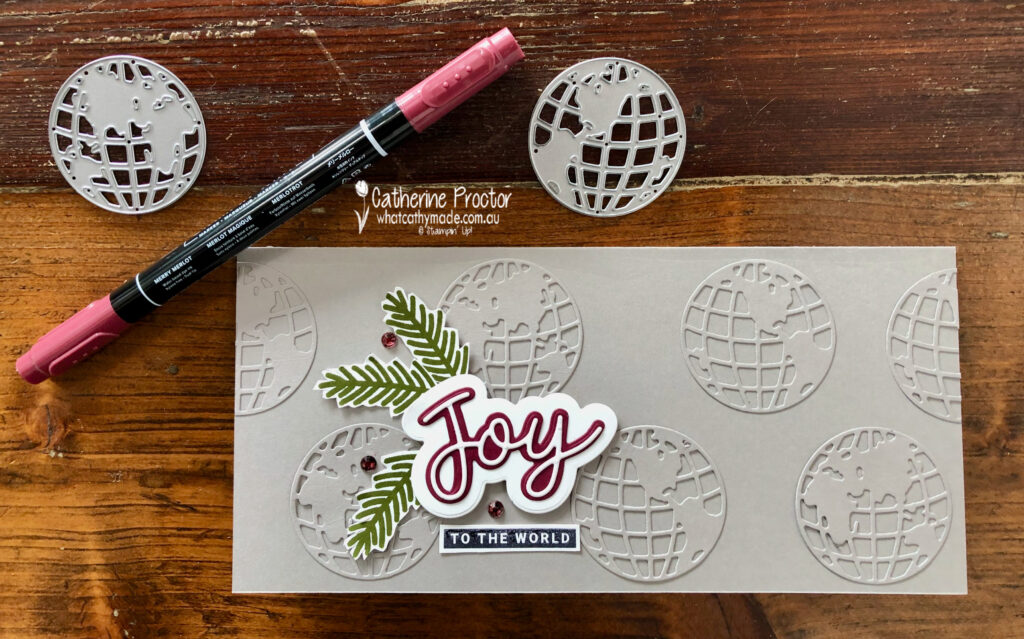
Week 26 – Merry Merlot
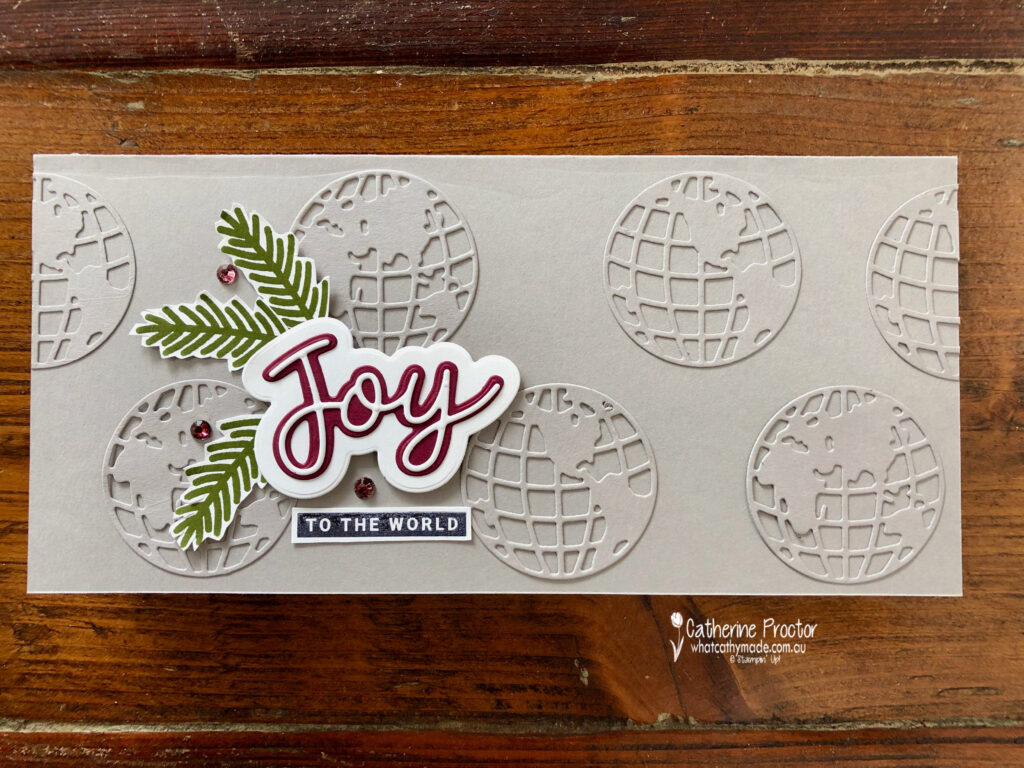
Hello crafters. This week I’m sharing a Christmas card I’ve made using an entirely neutral colour palette – I really love any combination of neutrals together on a card.
Merry Merlot is our colour for this week and I’ve only used a tiny bit of it on my card because it is a very rich colour. Hopefully I’ve used enough to show you how nicely it pairs with these other neutrals.
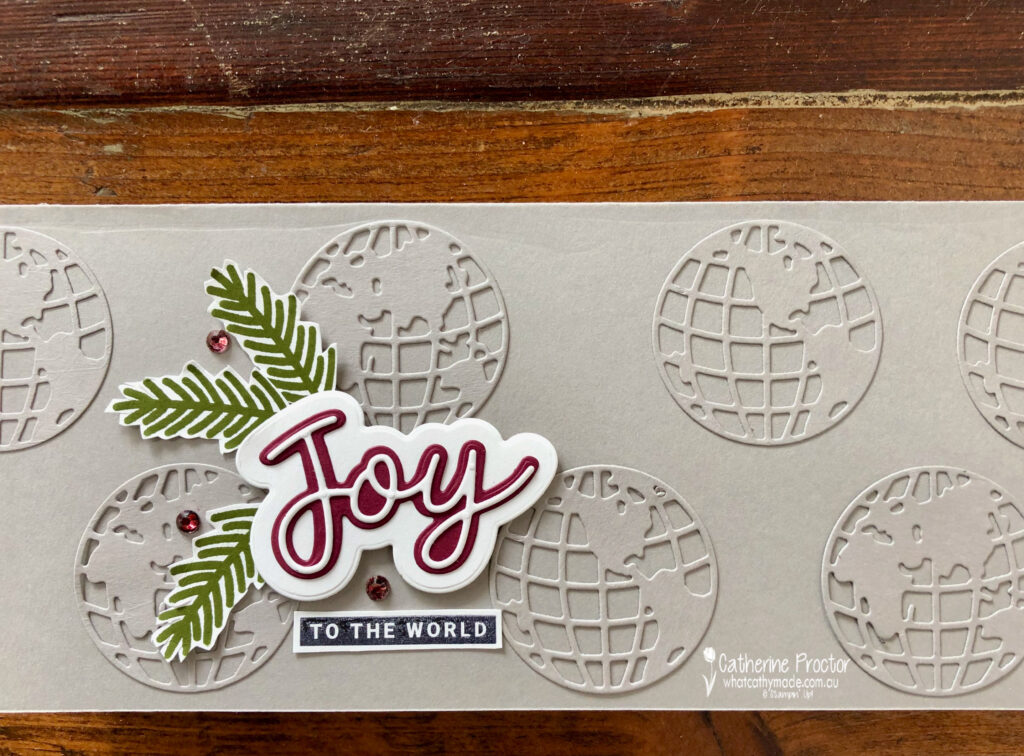
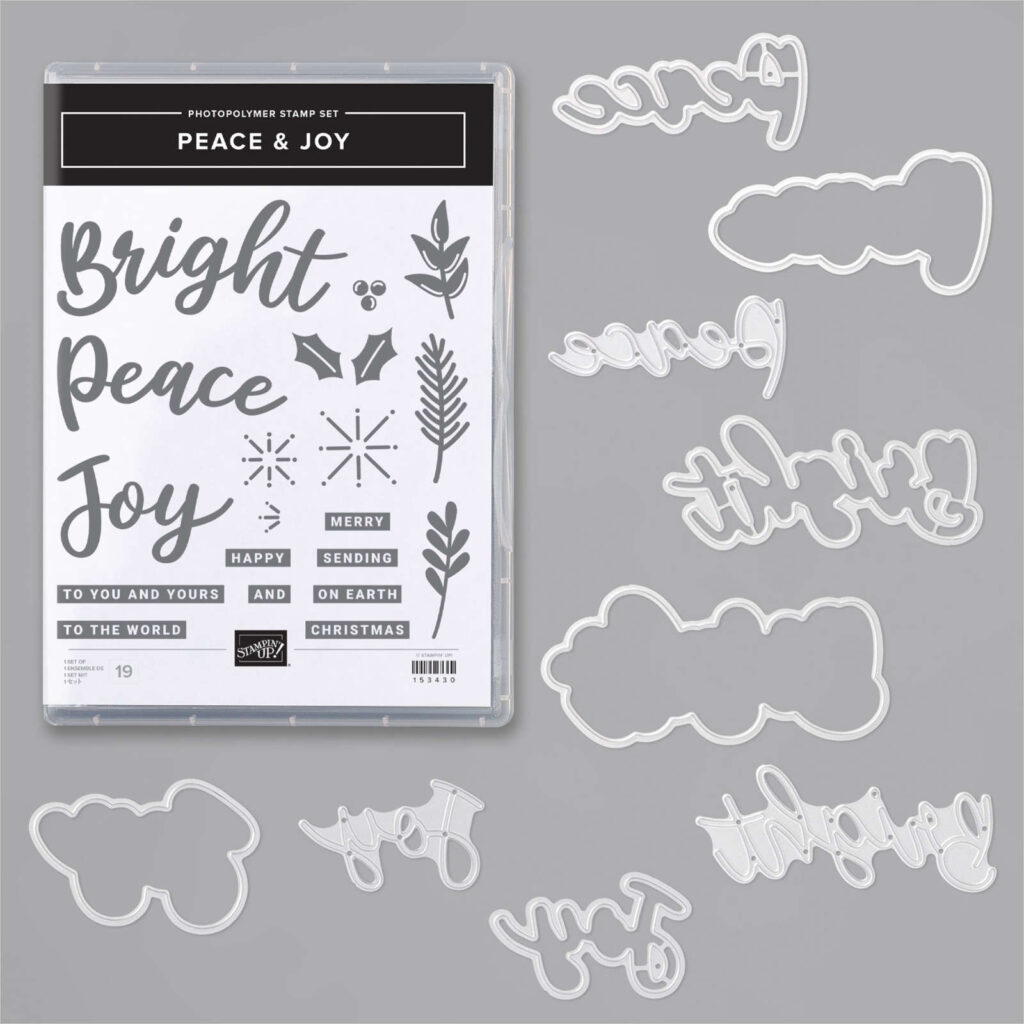
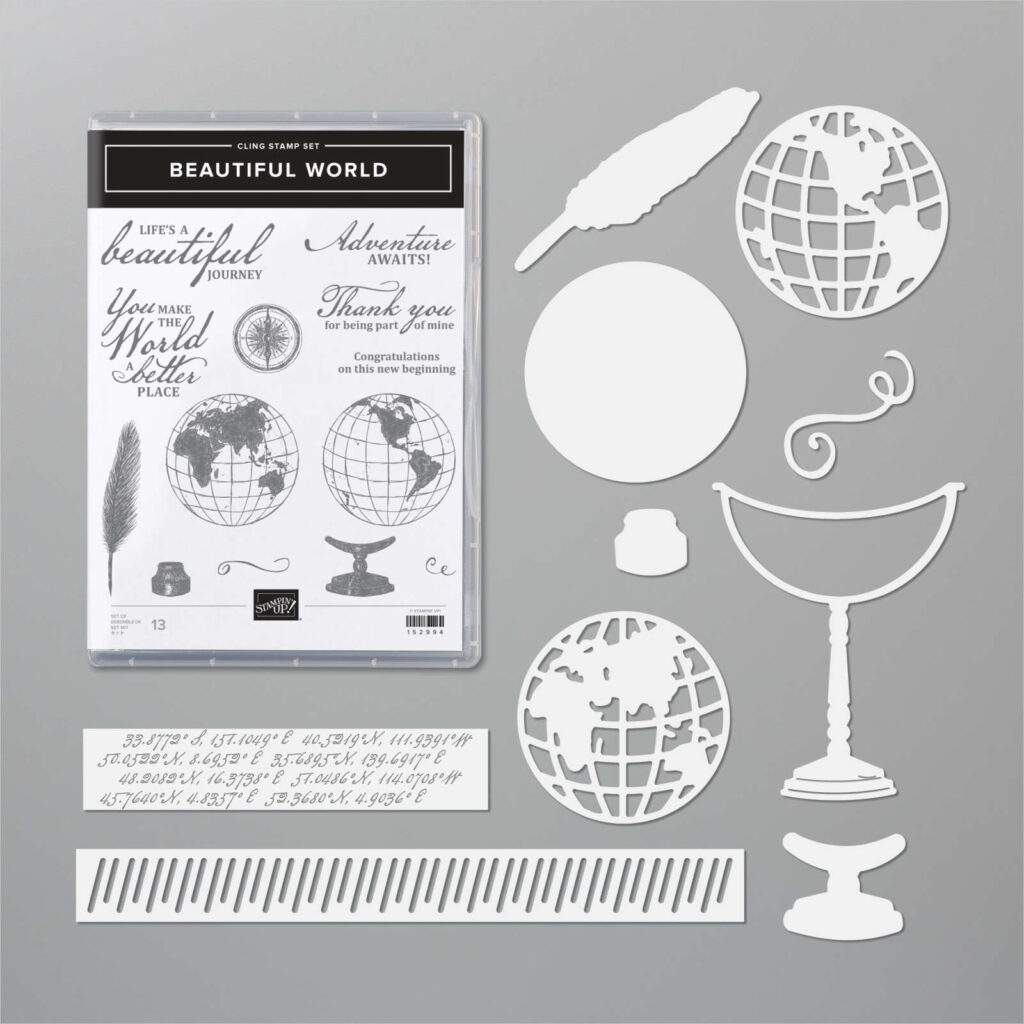
If there ever were two bundles just crying out to be used together it’s the Beautiful World bundle on p26 of the annual catalogue and the Peace & Joy bundle on page 18 of the August to December Mini catalogue. I love how Stampin’ Up! co-ordinate their products right through their range.
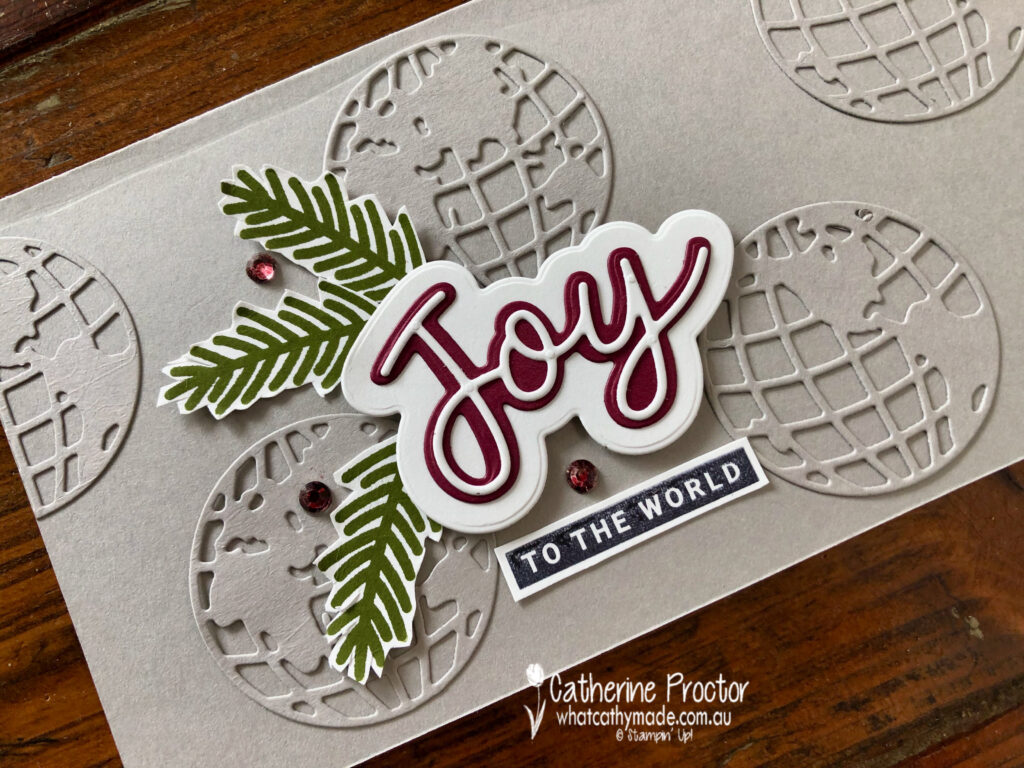
The “faux embossed” background of my Gray Granite slimline card was easy to make using the globe dies and adhesive sheets. Just remember to attach a sheet to the back of your card stock before you die cut. Next time I make this card I think I’ll add more globes and space them more closely together for even greater impact.
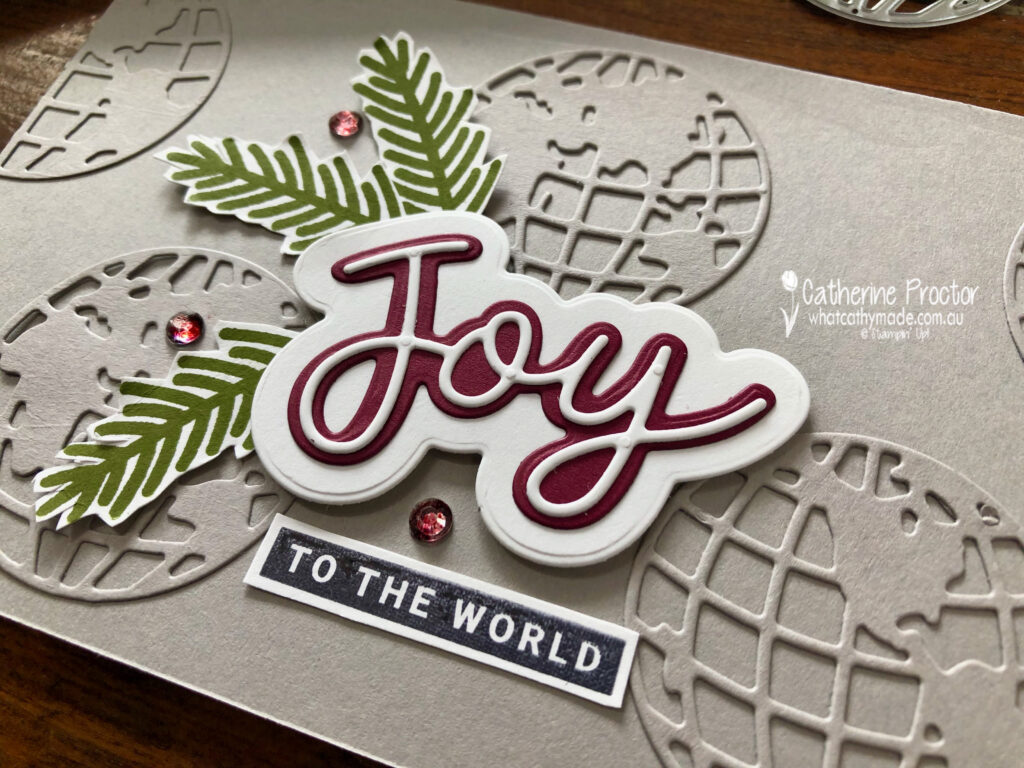
The joy sentiment uses all three joy die cuts from the Peace & Joy bundle. Adding adhesive sheet to the card stock for the thinest joy on the top layer makes it easy to adhere.
Apart from the middle layer of the joy sentiment the other touch of Merry Merlot on the card is the Rhinestone Basic Jewels which I have coloured using my Merry Merlot Stampin’ Write Marker.
The pine fronds were stamped in Mossy Meadow and fussy cut out using my paper snips.
I can’t wait to see what the rest of the Art With Heart team have created with Merry Merlot today. Click on the links below to see what they’ve made.
If you’d like me to post you your very own copy of the August–December 2020 Mini Catalogue, 2020-21 Stampin Up! Annual Catalogue, the 2020-21 Beginners Brochure, or to simply find out about more about Stampin’ Up! contact me.
In the meantime, wherever you are in the world, stay safe, stay calm…and keep on crafting xxx
Welcome to the Heart of Christmas 2020 where the Art with Heart team share their Christmas inspiration with you on the third Monday of each month.
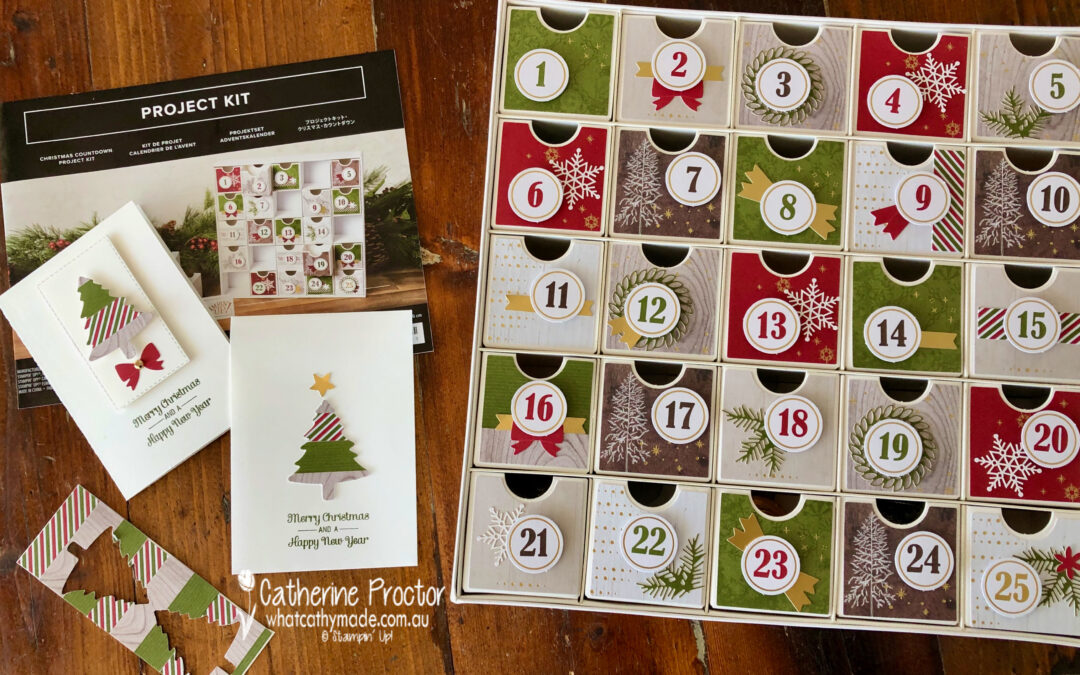
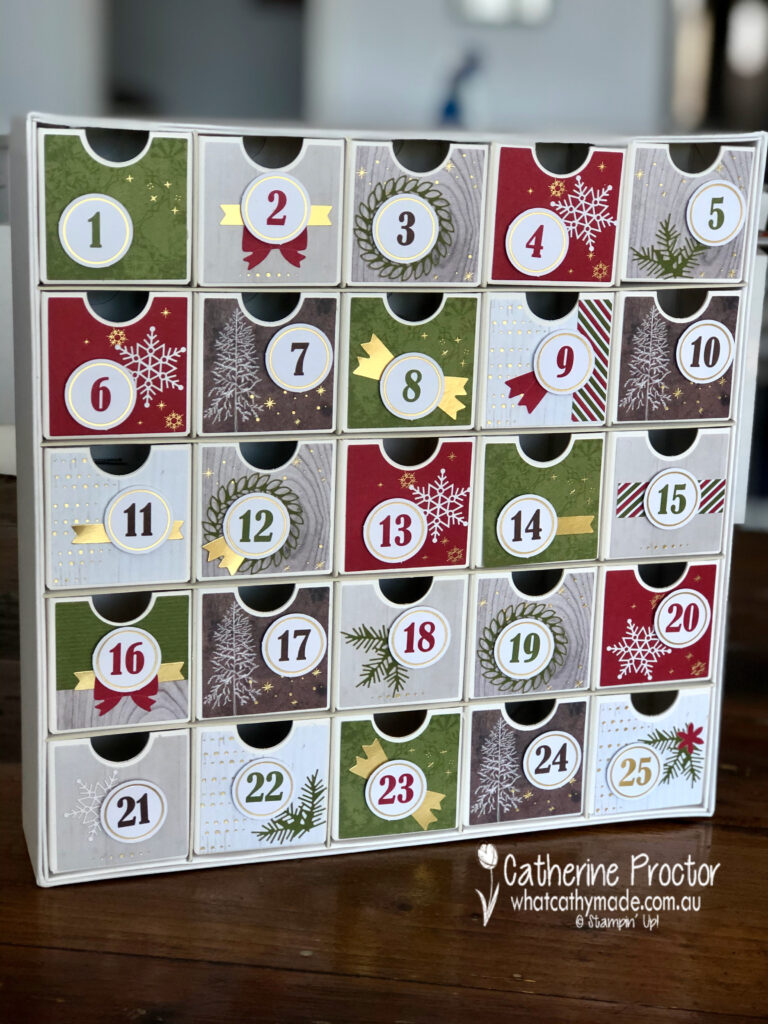
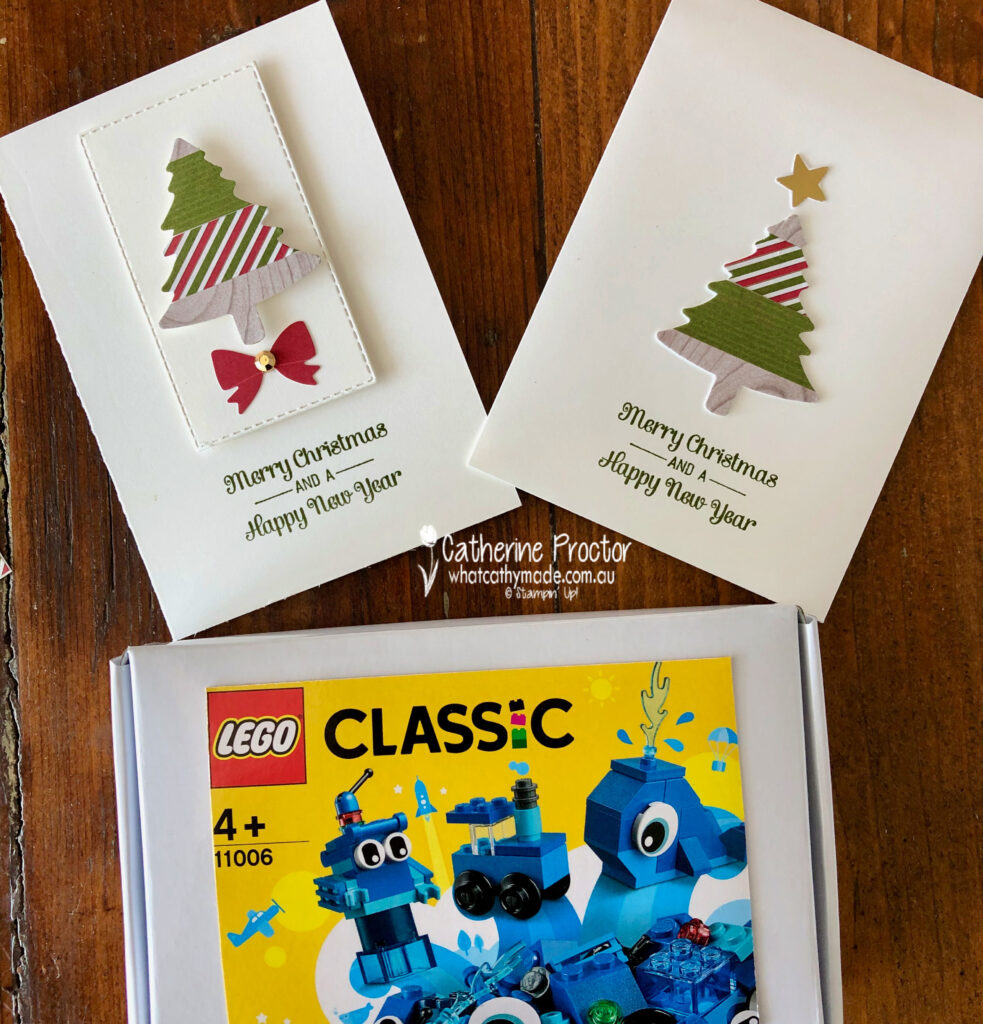
Today I’m sharing with you an advent calendar that I made for my 4 year old niece – it is the Christmas Countdown kit. Advent calendars are a tradition in our family, in fact last year my boys turned 18 and 21 and it was the first Christmas they didn’t have an advent calendar!
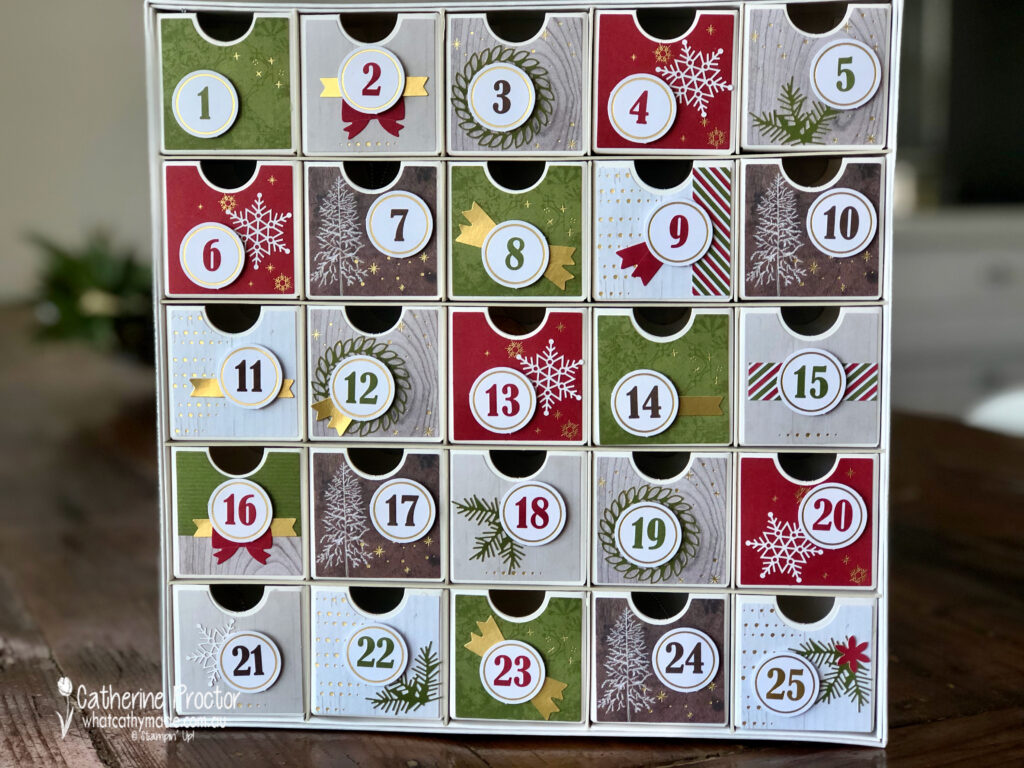
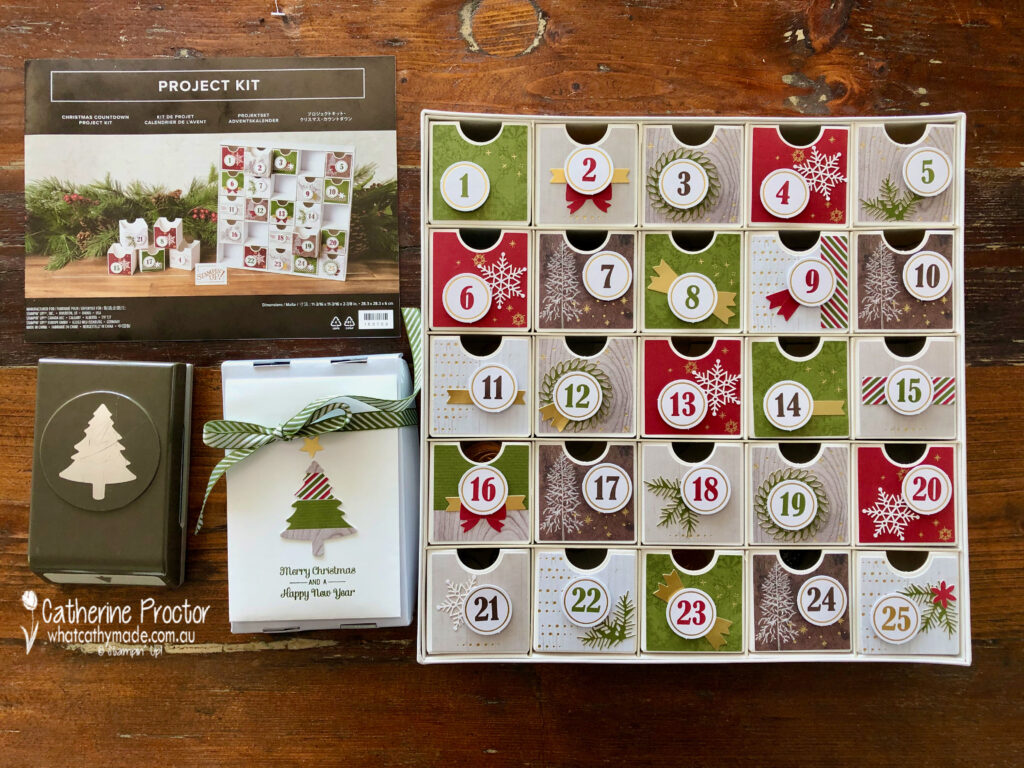
This advent calendar was so easy to make using the Christmas Countdown kit. All I needed was some adhesive because the kit includes the paper for the front of the drawers, the numbers and stickers to personalise each drawer.
The big decision with a refillable advent calendar is what to put inside the drawers. My boys would receive a gold coin and a chocolate coin each day. On Christmas Eve we would go shopping and they would use half their coins to buy a gift for their brother and then we would visit a local street renowned for their Christmas lights where my boys would donate the rest of their coins to a charity.
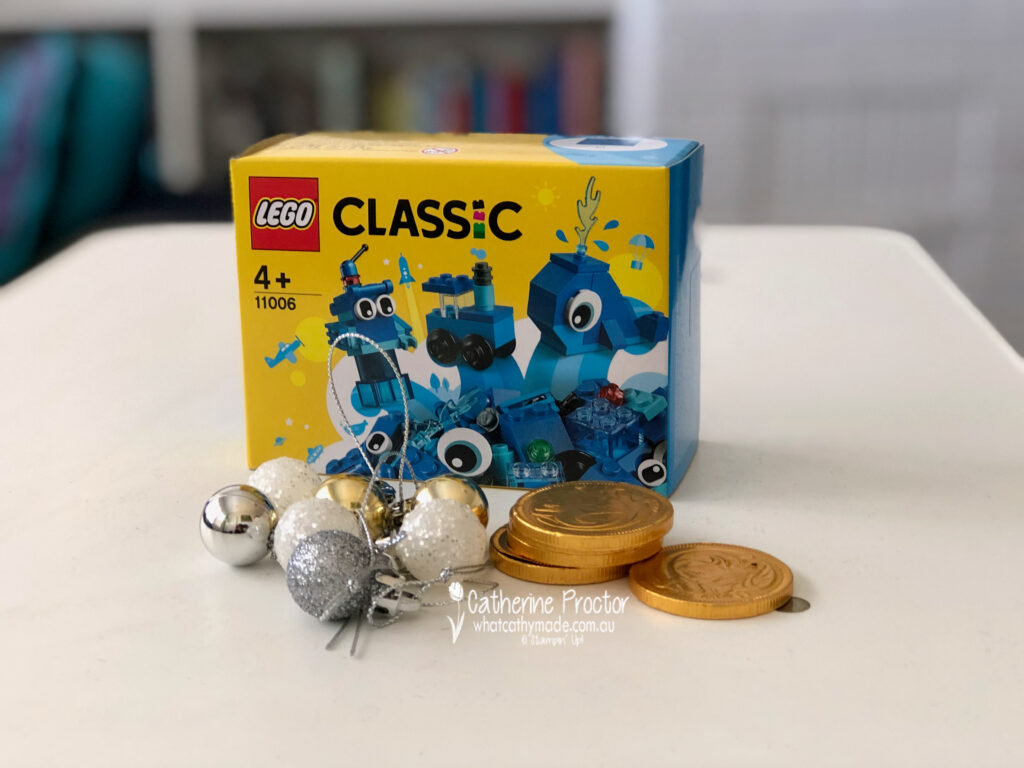
For my niece I’ve mixed things up a bit. She is just getting into LEGO so I bought a little LEGO set for her and split the pieces between 1/3 of the drawers, filling the other drawers with baubles to hang on her Christmas tree and of course some chocolate coins!
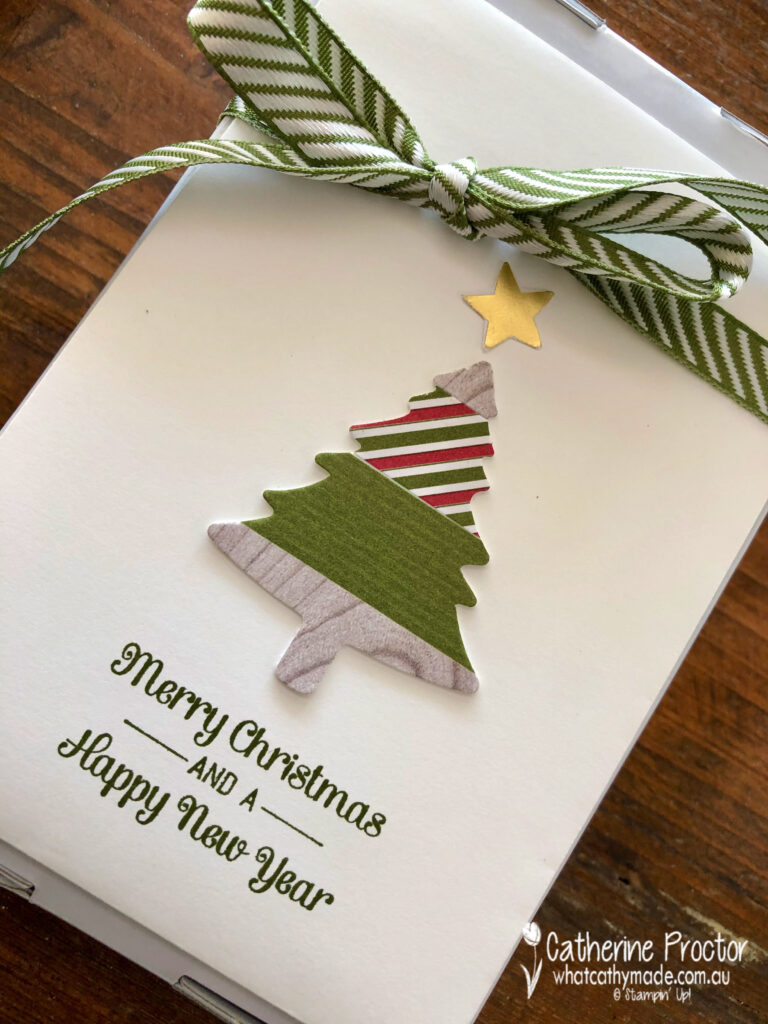
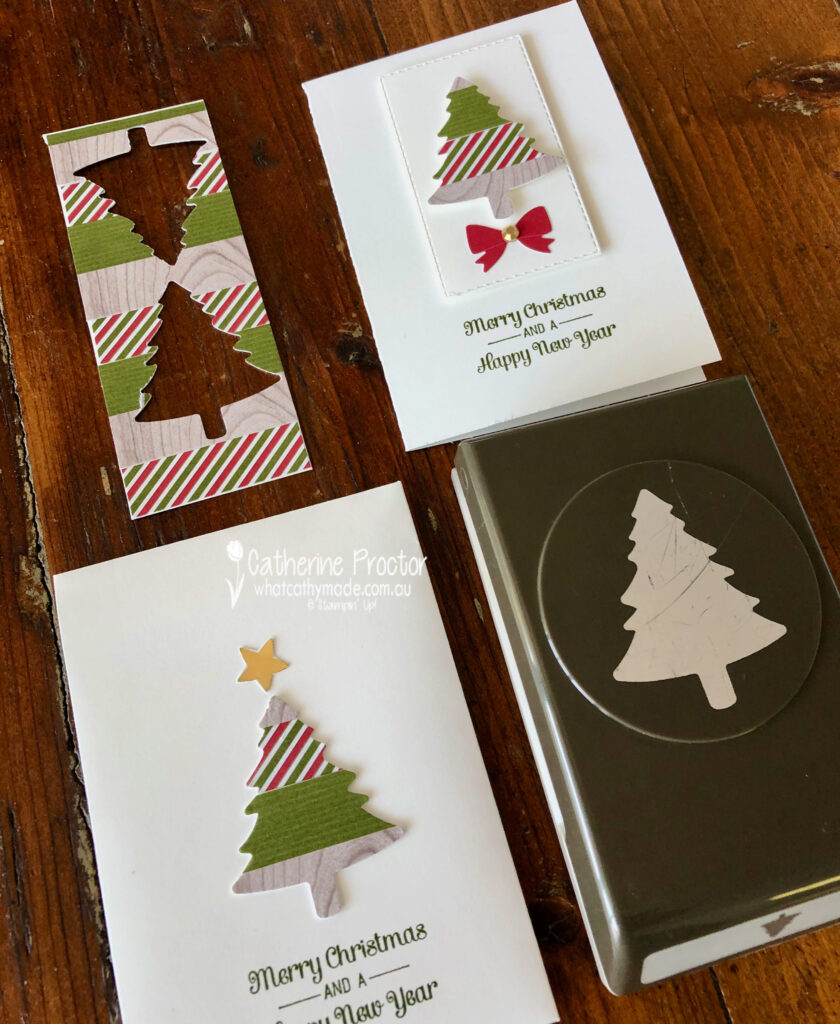
As this will be my niece’s first ever advent calendar and I won’t be there to explain the concept to her I made a matching card and envelope to go with the calendar. I used the left over stickers and paper drawer fronts to decorate my card and envelope.
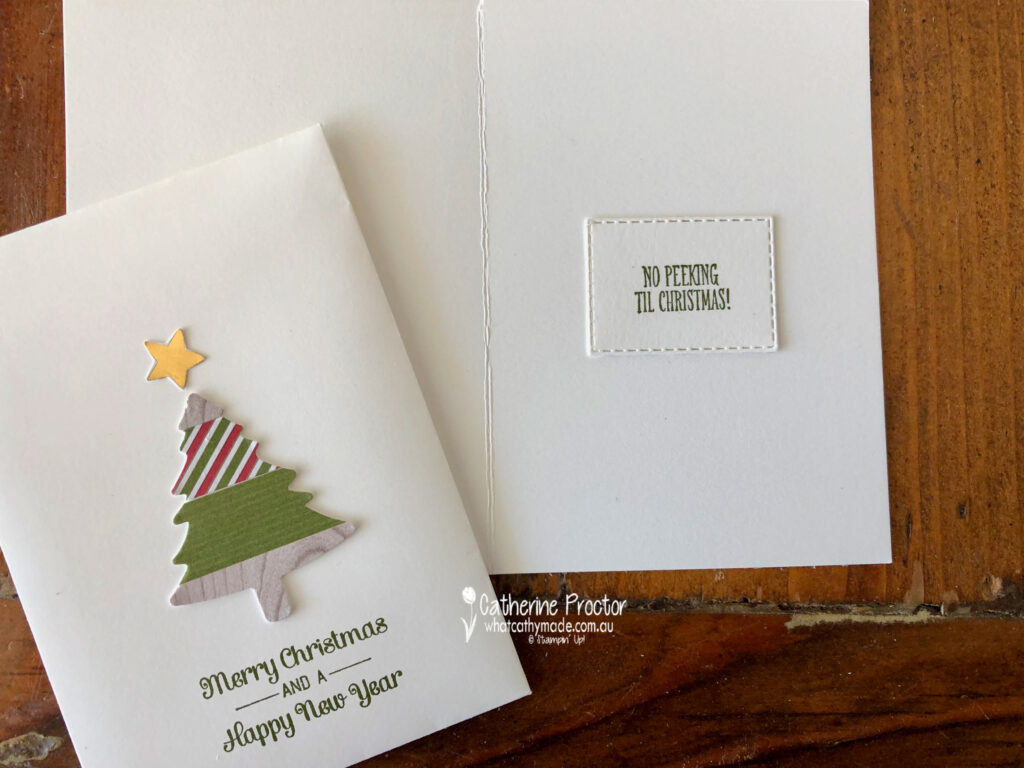
The tree for the envelope and the card is made by adhering the stickers and paper to some card stock and then punching it out with the tree punch. I’ve also punched out the star from the die cuts included in the kit and used a red bow sticker, also included in the kit.
I don’t want my niece to lose her tiny LEGO pieces so I cut out the front of the LEGO box and stuck it to a mini Paper Pumpkin box. Inside the box I put the LEGO instructions and a ziplock bag to keep everything safe.
Here’s the inside of the card – the “no peeking” sentiment comes from the Itty bitty Christmas stamp set, as does the sentiment on the front of the card.
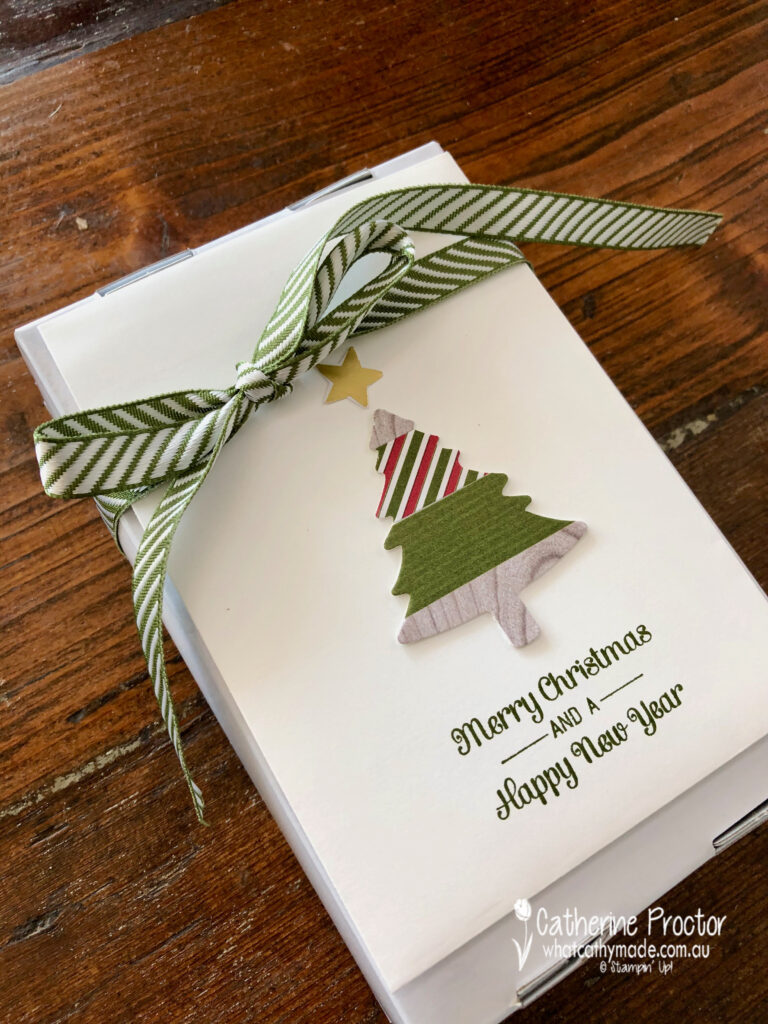
Once I’d written inside the card and explained the concept of an advent calendar to my niece, I placed the card on top of the mini Paper Pumpkin box and tied them together with the Mossy Meadow diagonal striped ribbon.
I’m so excited to be carrying on this Christmas tradition in our family with this beautiful Christmas advent calendar.
The lovely Judy May is hosting our Heart of Christmas showcase this year. To see the other Christmas creations go back to Judy’s post.
If you’d like me to post you your very own copy of the August – December Mini catalogue (AKA the Holiday Catalogue), the 2020-21 Stampin Up! Annual Catalogue, the 2020-21 Beginners Brochure, or to simply find out about more about Stampin’ Up! contact me.
In the meantime, wherever you are in the world, stay safe, stay calm…and keep on crafting xxx
Click on the photos below to purchase the items to make this Advent Calendar and matching card.
Welcome to the Heart of Christmas 2020 where the Art with Heart team share their Christmas inspiration with you on the third Monday of each month.
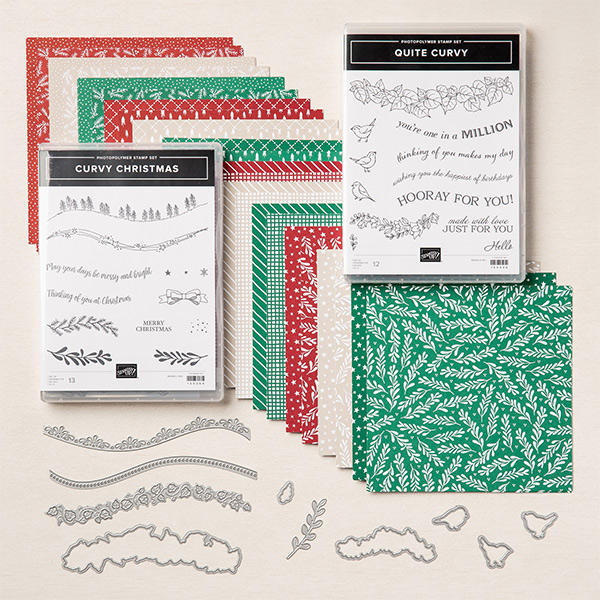
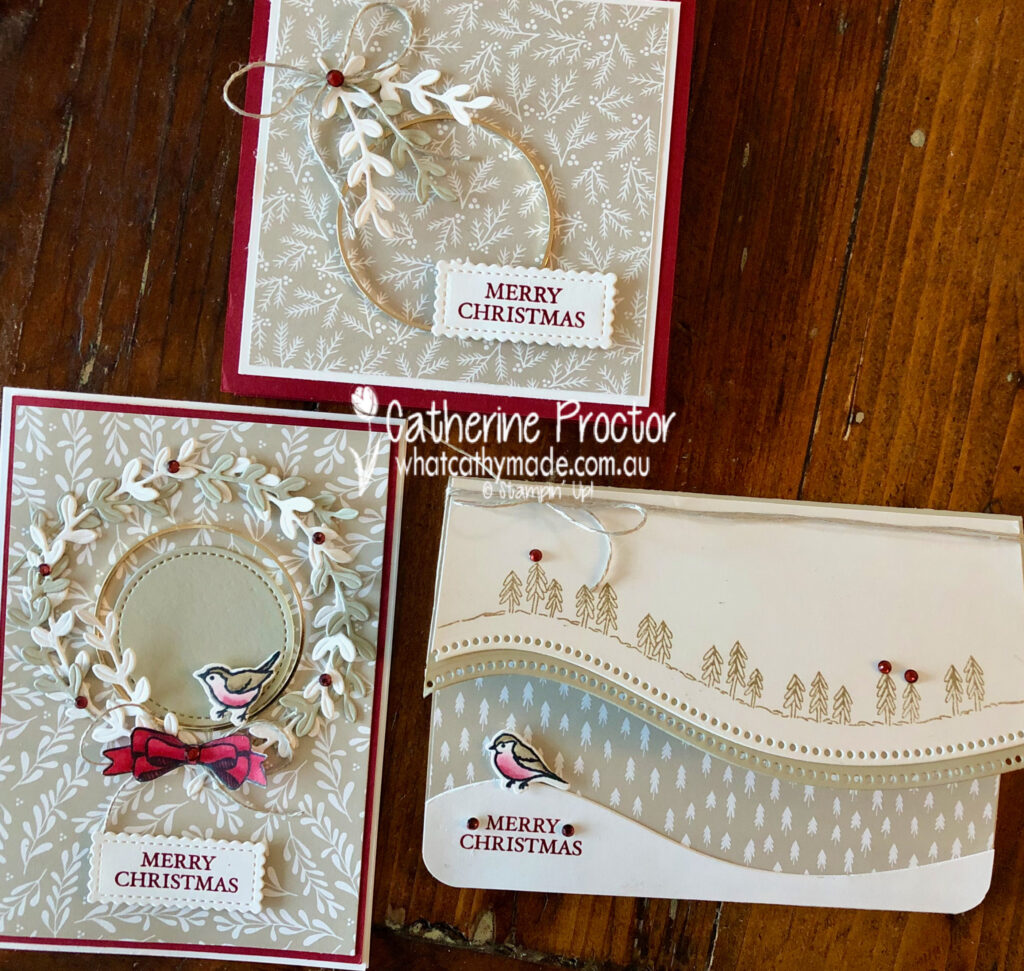
Today I’m sharing with you three cards that feature a brand new suite of products that will be available to purchase from 3rd November: the Curvy Celebrations bundle.
You can purchase these products together as a bundle and get 10% off or you can purchase these products individually.
Quite Curvy Stamp Set
Curvy Dies
Curvy Christmas Stamp Set
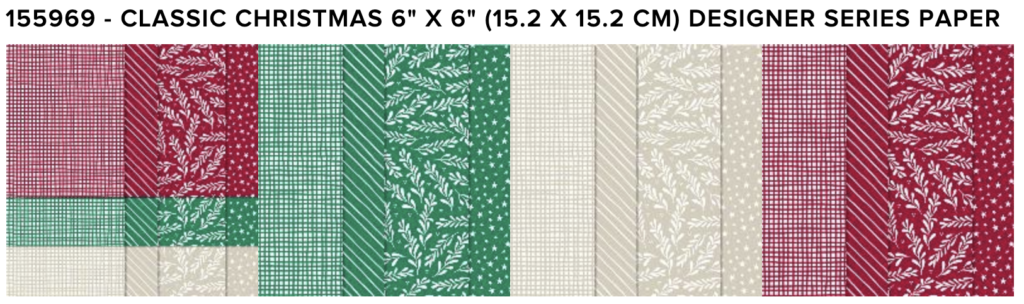
Classic Christmas 6″ x 6″ (15.2 x 15.2 cm) Designer Series Paper
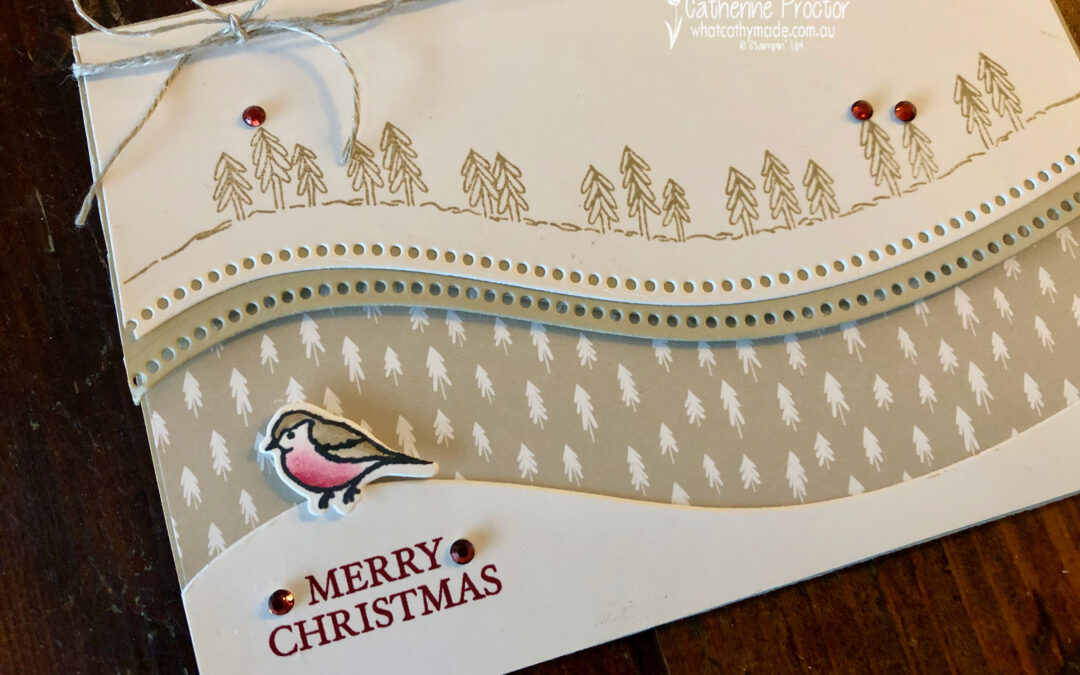
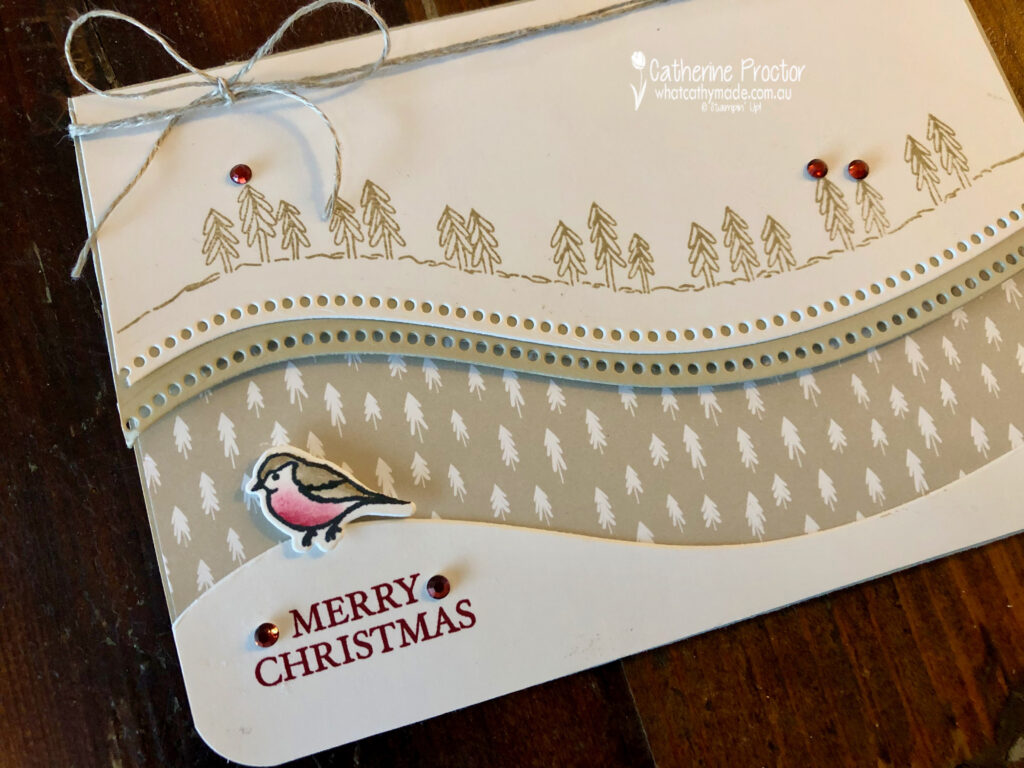
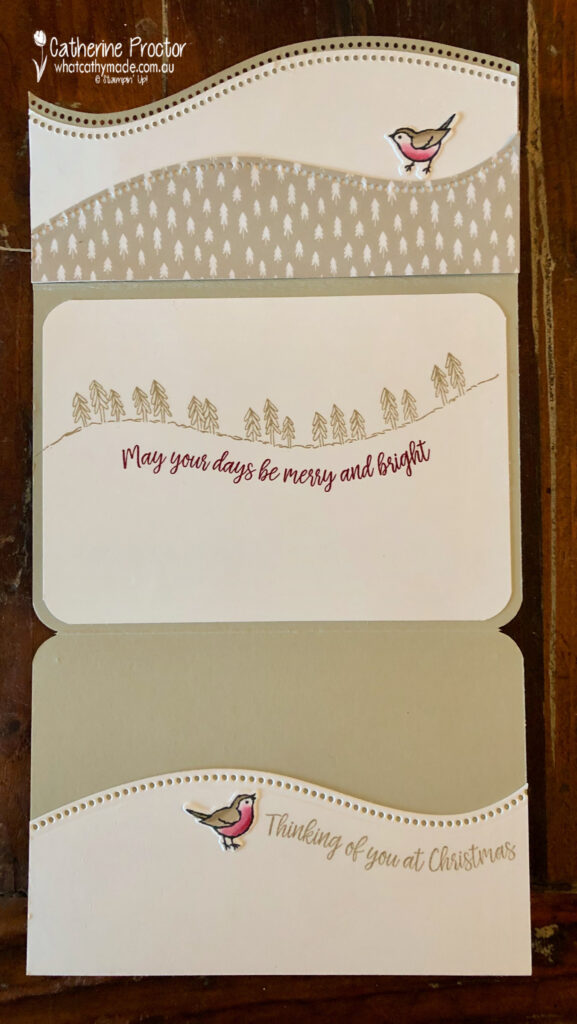
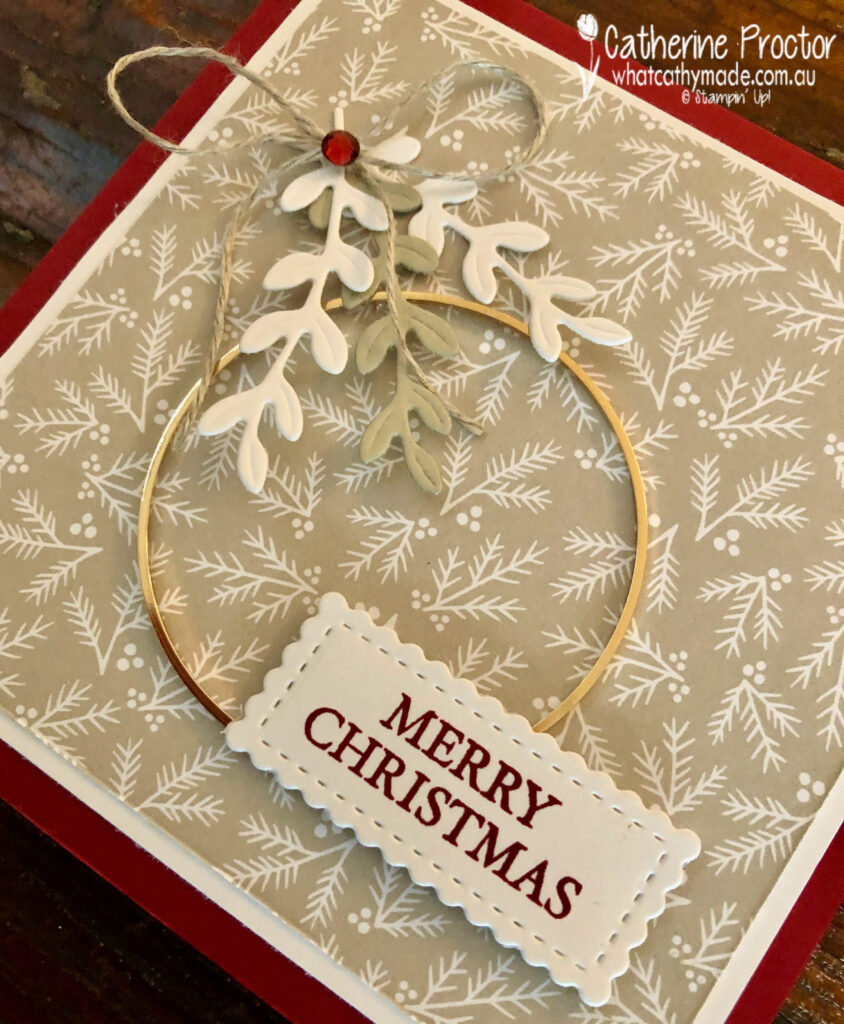
My first card is a simple folded card that uses one of the curvy dies to cut the card stock and the Classic Christmas 6″ x 6″ (15.2 x 15.2 cm) Designer Series Paper.
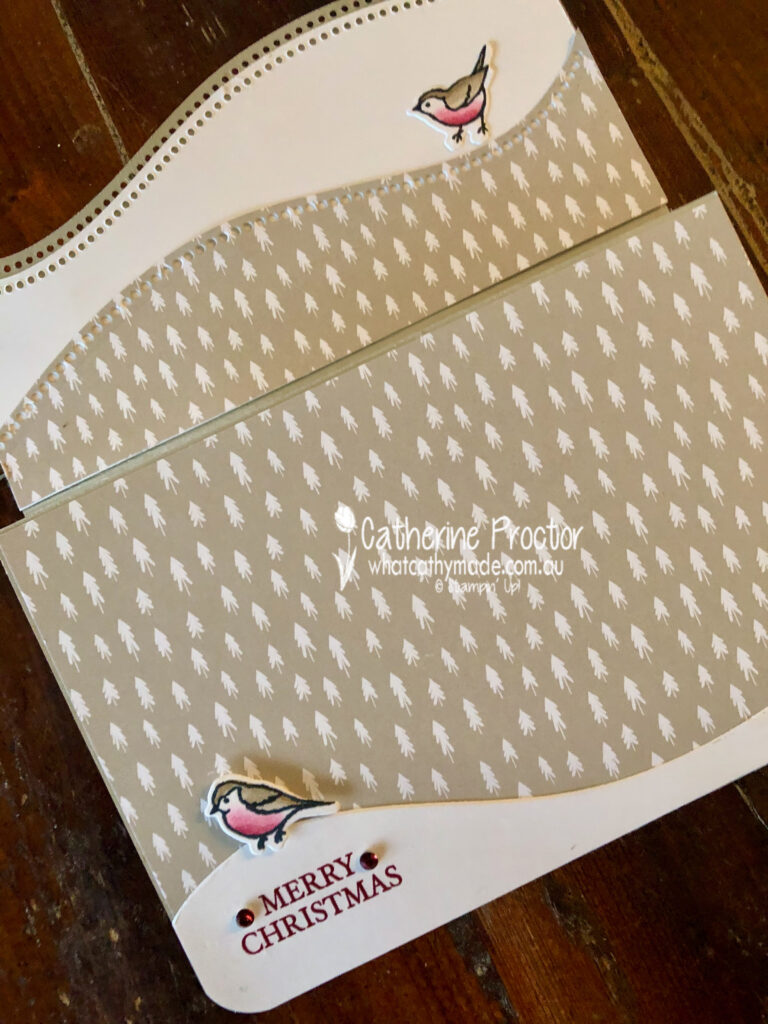
Here is it folded up.
Unfolded once.
And fully opened up.
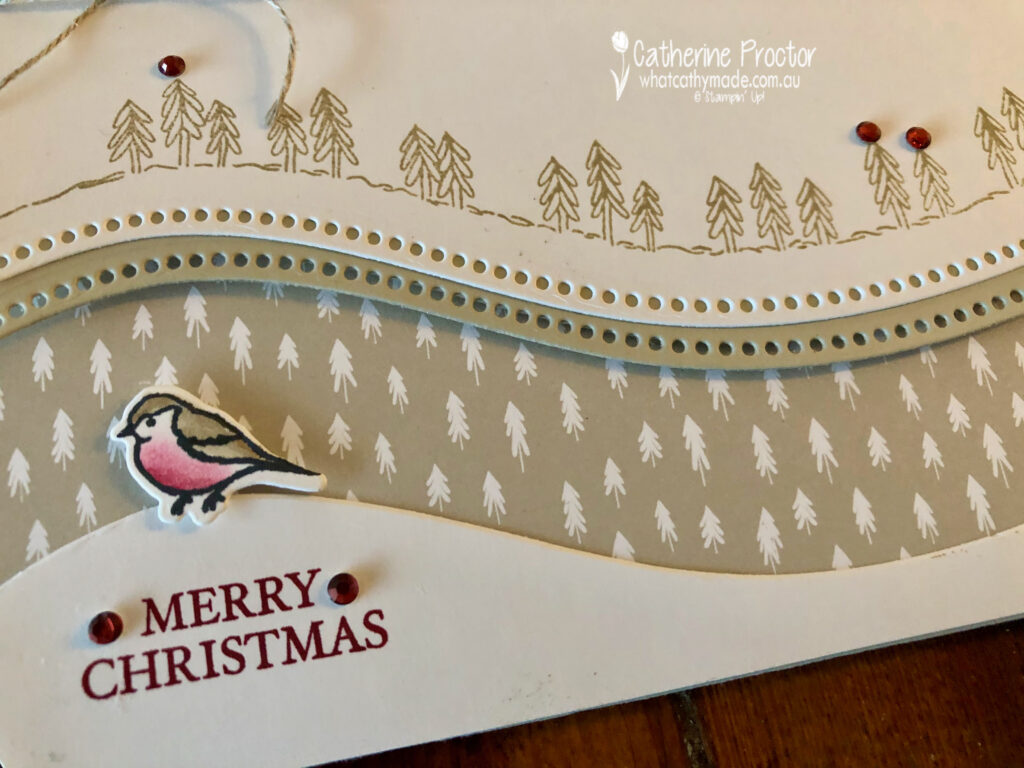
Look at this beautiful Designer Series Paper and the detail in these Curvy Dies. I’ve used the Sahara Sand tree pattern DSP for this card because it matches the Curvy Tree Stamp – how cute is this line of trees!
I really love this DSP – it comes in Sahara Sand, Cherry Cobbler and Shaded Spruce, 48 sheets of double-sided patterned paper; with 4 each of 12 designs.
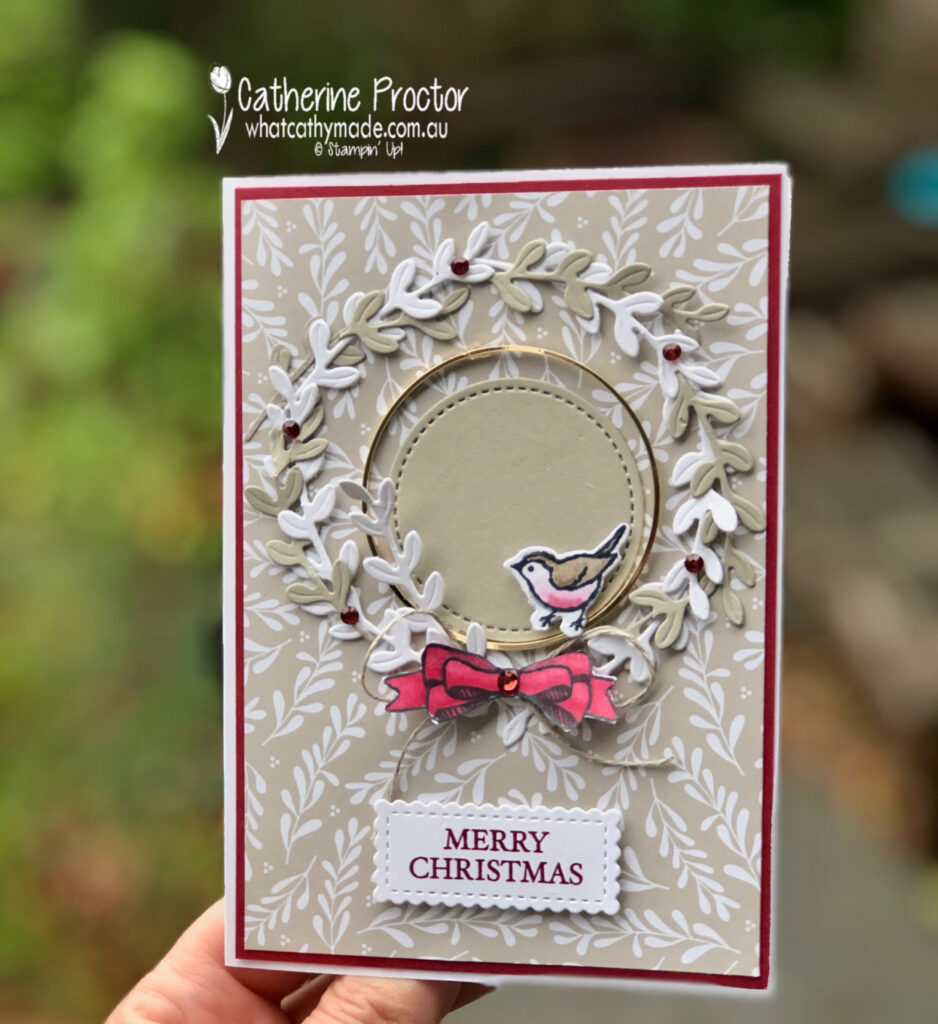
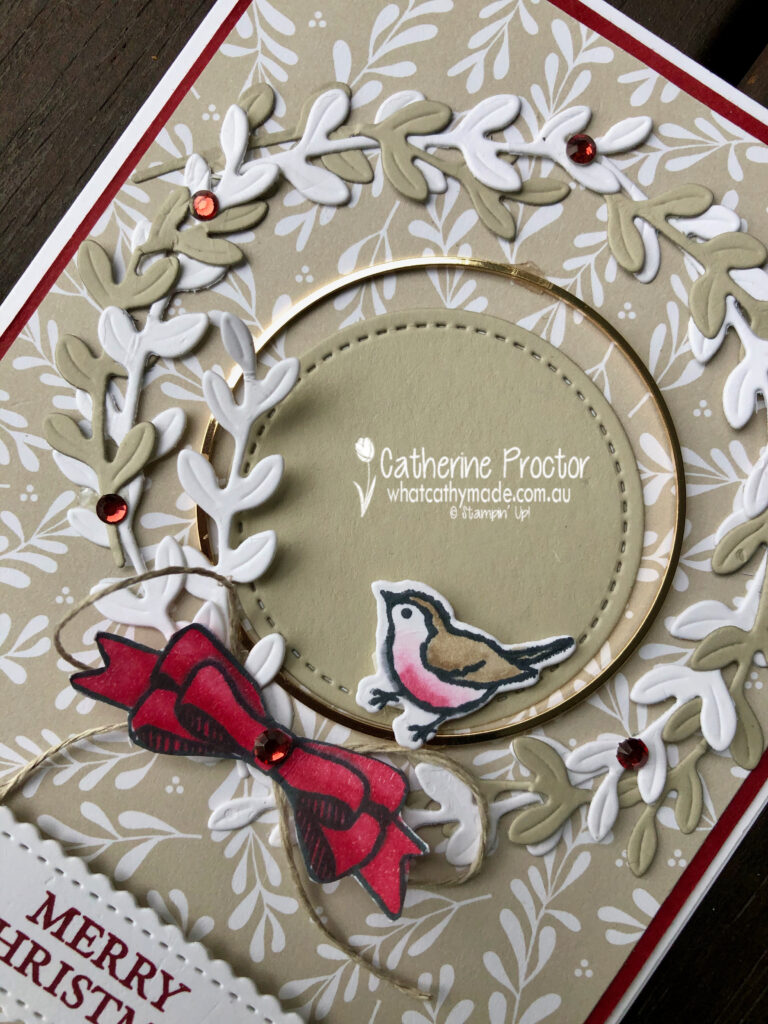
For my next card I used the sprig die to cut out Sahara Sand and Whisper White card stock sprigs to make a wreath.
My little red robin was coloured in using Crumb Cake and Cherry Cobbler Stampin’ blends and the bow was coloured in with Cherry Cobbler Stampin’ blends before fussy cutting out with my paper snips. Holiday Rhinestone Jewels add a touch of bling.
Lastly, for the square card I also used the Gold Hoop embellishments and the sprig dies.
There’s just so many possibilities with this amazing suite!
The lovely Judy May is hosting our Heart of Christmas showcase this year. To see the other Christmas creations go back to Judy’s post.
If you’d like me to post you your very own copy of the August – December Mini catalogue (AKA the Holiday Catalogue), the 2020-21 Stampin Up! Annual Catalogue, the 2020-21 Beginners Brochure, or to simply find out about more about Stampin’ Up! contact me.
In the meantime, wherever you are in the world, stay safe, stay calm…and keep on crafting xxx
Welcome to the Heart of Christmas 2020 where the Art with Heart team share their Christmas inspiration with you on the third Monday of each month.
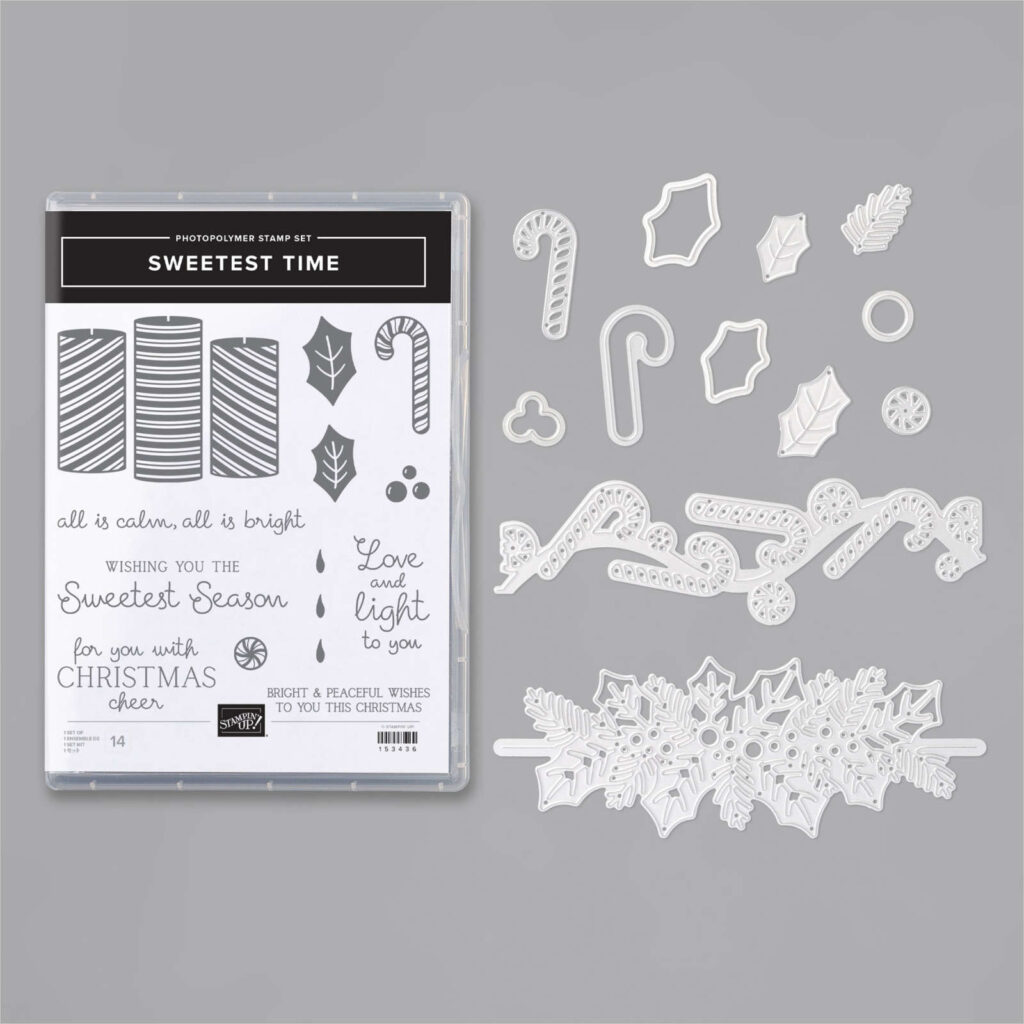
Today I’m sharing with you two cards that feature both the Sweetest Time bundle and the Peace & Joy Bundle from the Stampin’ Up! August – December mini catalogue.
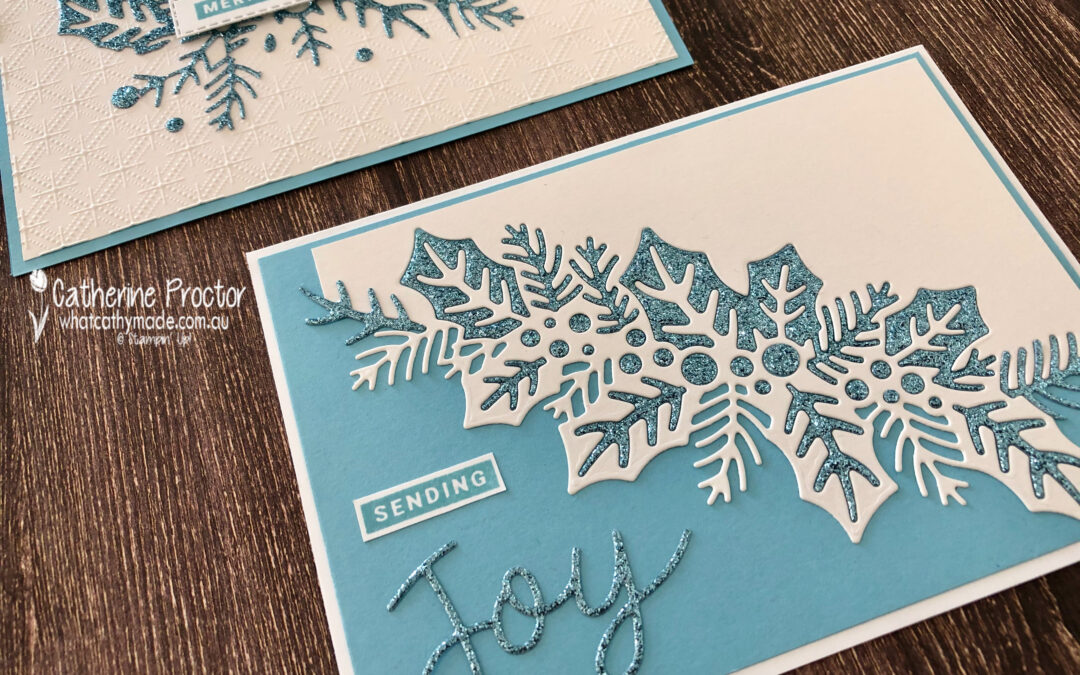
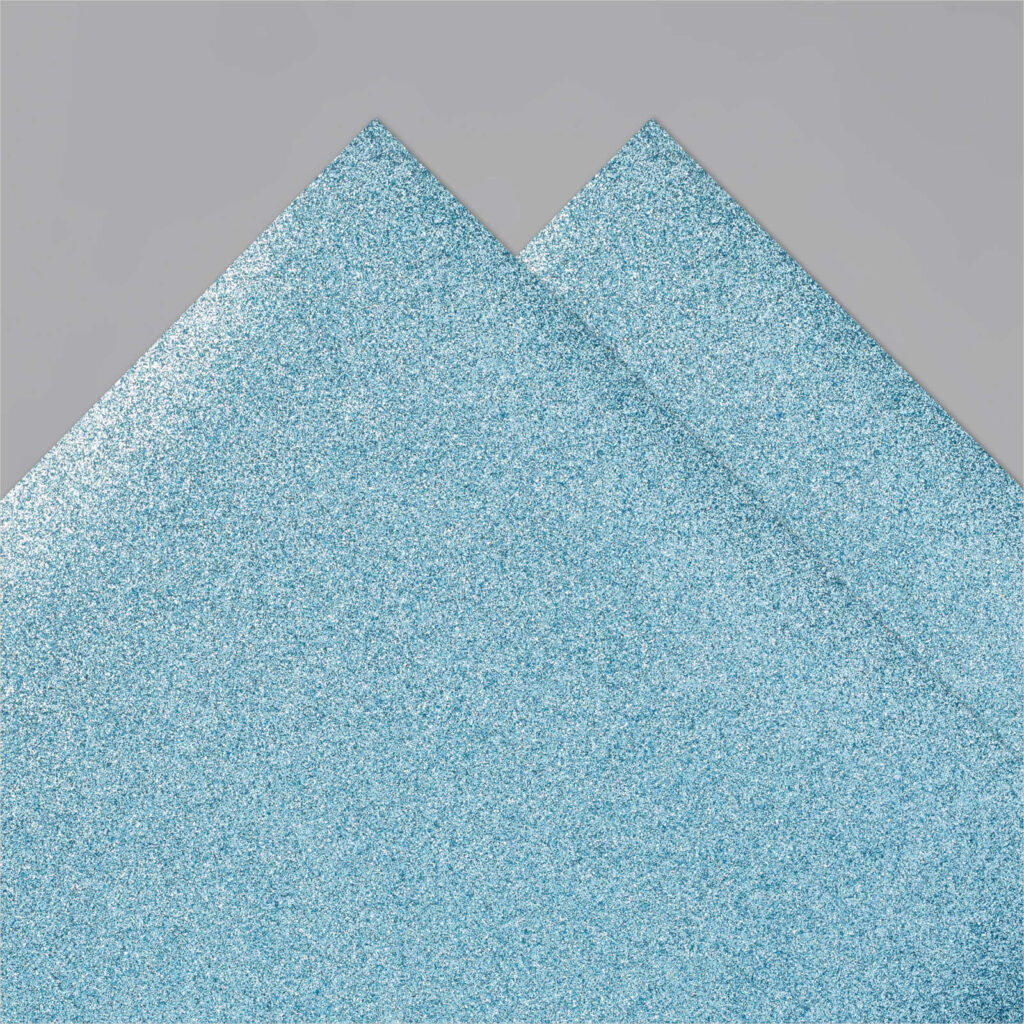
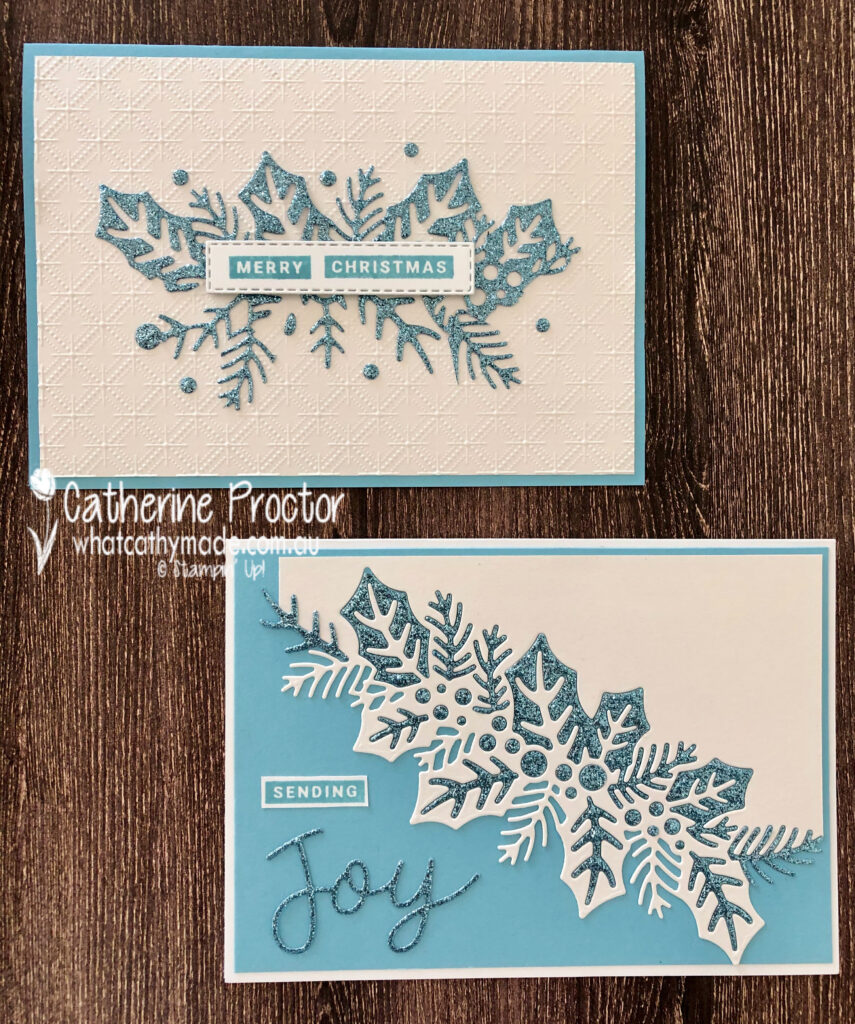
I love large die images like these because they make for quick and easy cards that look super impressive, especially when you make them using a specialty paper like this stunning Balmy Blue glimmer paper! Isn’t this paper just the bomb!
Before cutting this paper with the largest of the Sweetest Borders dies and the smallest “joy” die from the Joy dies I attached a section of adhesive sheet to the back of my glimmer paper – it makes adhering the pieces to your card front a breeze.
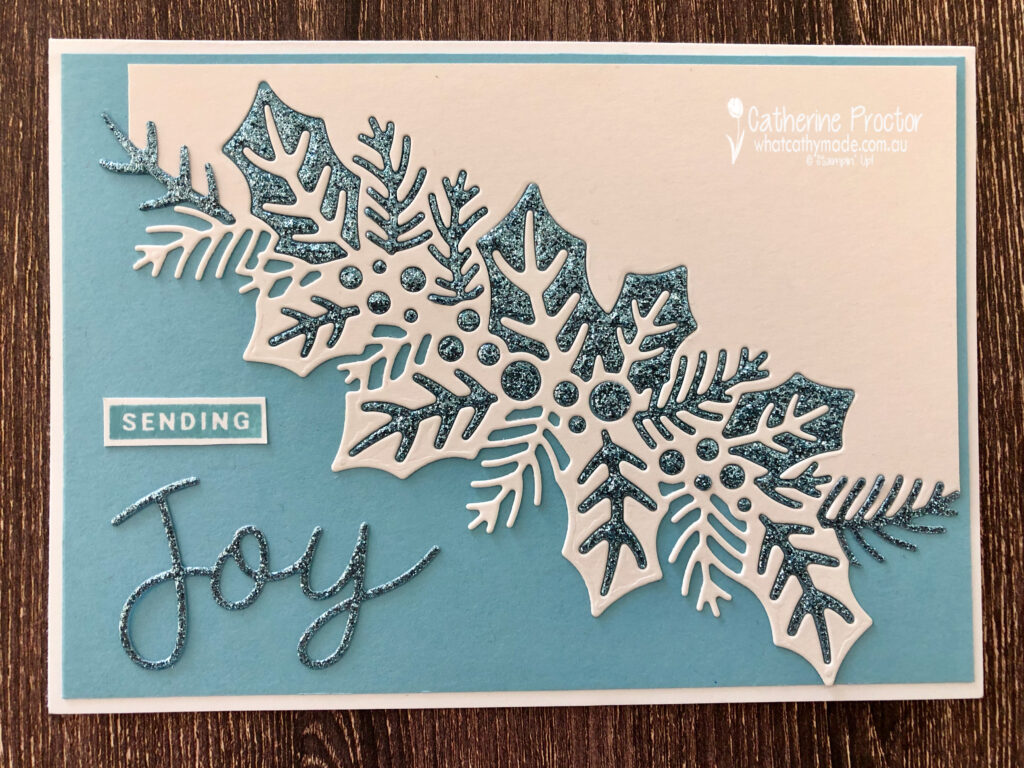
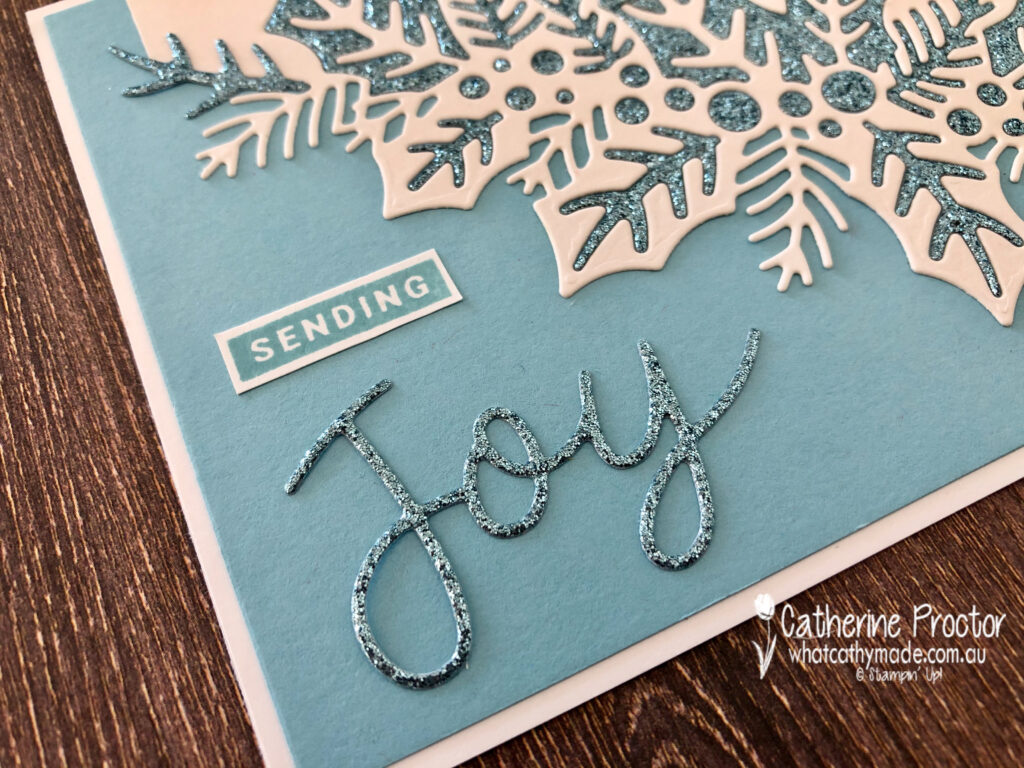
To create my “Sending Joy” card, I began with a Whisper White card base (half of an A4 piece folded in half) topped with a 14.5 x 10 cm layer of Balmy Blue card stock.
I then used the large holly sprig die to cut both a piece of Whisper White card stock and a piece of Balmy Blue glimmer paper – make sure you save all of the Balmy Blue glimmer paper scraps when you remove the die cut paper from the die.
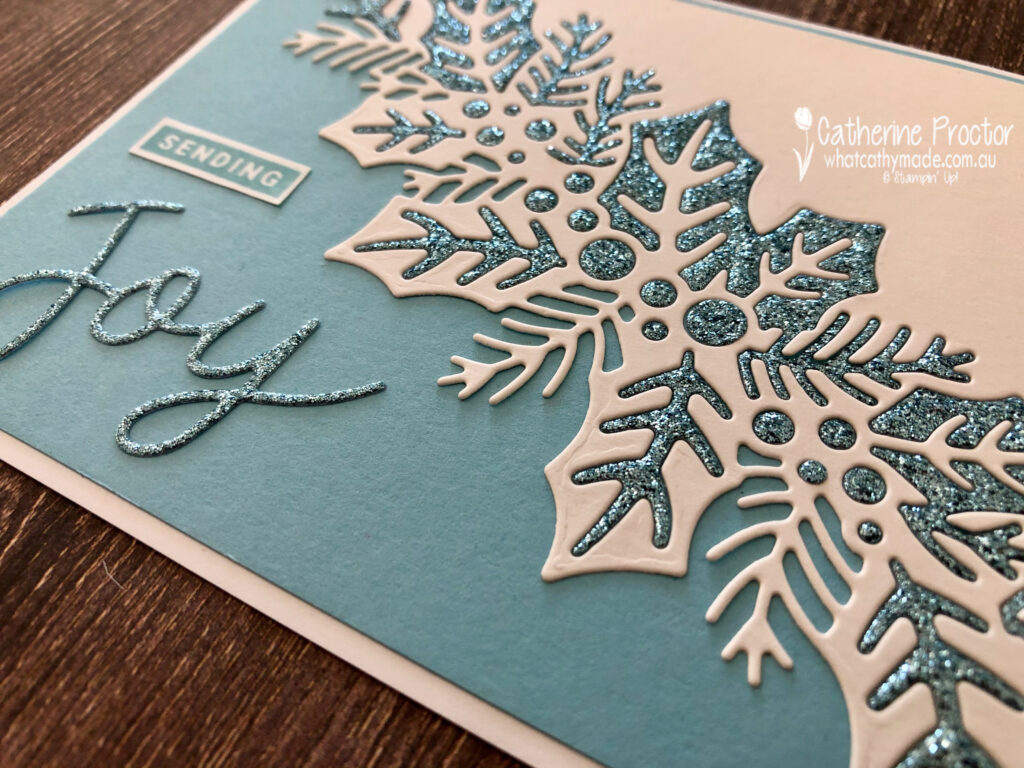
After adhering and trimming the die cut piece of Whisper White card stock to the Balmy Blue card stock layer I carefully filled in the negative gaps in the die cut image with my Balmy Blue Glimmer paper pieces. The angle of this photo shows you just how sparkly this paper is.
Before die cutting the smallest “joy” die from the Joy Dies I attached a section of adhesive sheet to the back of my glimmer paper – it really helps to keep the true shape of this thin word die. The sentiment is stamped in Balmy Blue from the Peace & Joy stamp set.
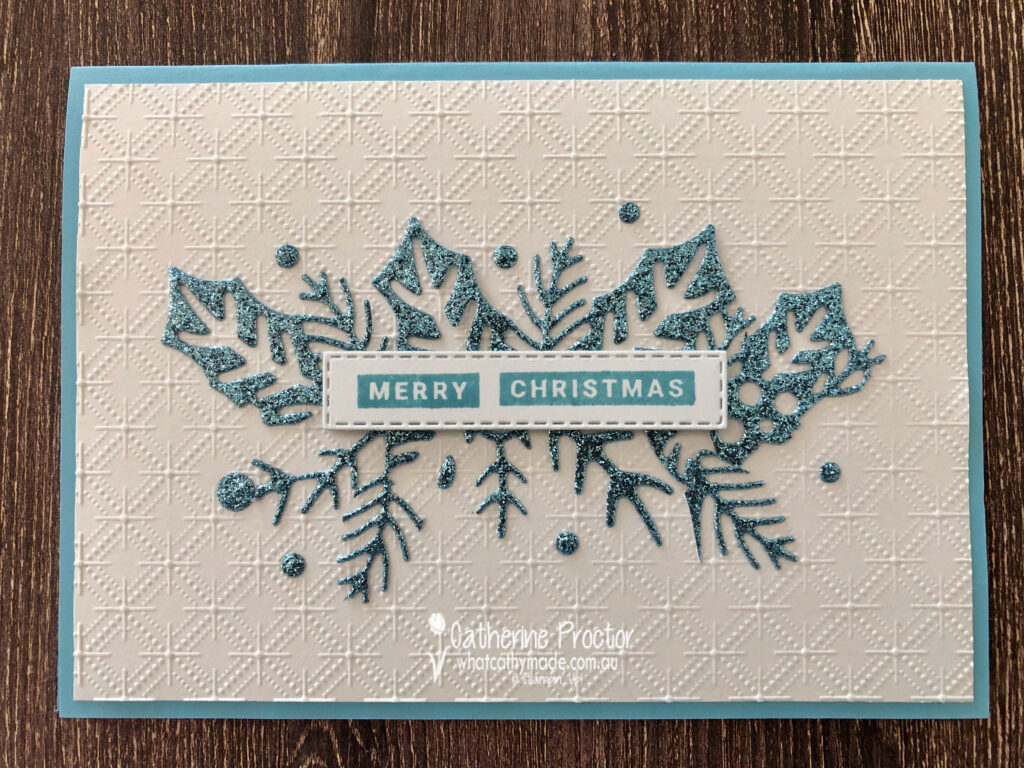
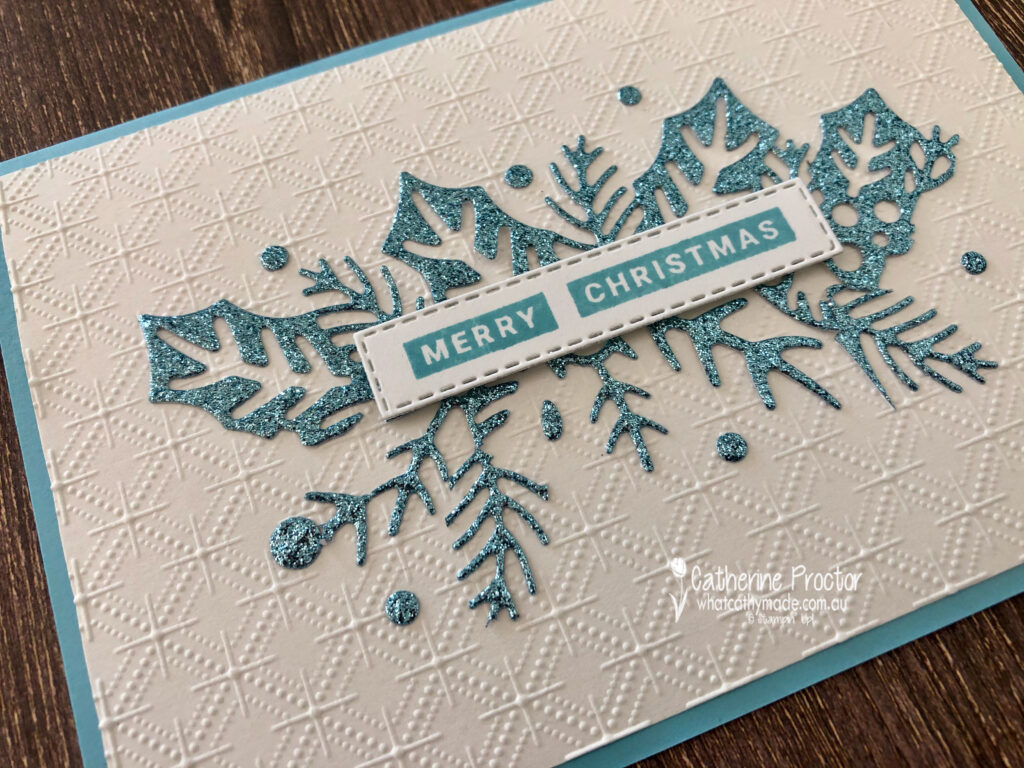
My Merry Christmas card was quickly created from the leftover Balmy Blue glimmer paper die cuts – it seemed such a shame to waste them!
Because there was so much white space on this card I thought it needed some subtle texture and once again the Dainty Diamonds embossing folder was just perfect for the job.
I trimmed the die cut Balmy Blue glimmer paper and re-arranged the pieces to get a central image I was happy with – this is so easy to do when it’s cut on an adhesive sheet. Extra dots were cut die cut from scraps of Balmy Blue glimmer paper and scattered around my card.
I love getting two cards from one die cut – I think I might be mass producing these two designs for my Christmas cards this year!
The lovely Judy May is hosting our Heart of Christmas showcase this year. To see the other Christmas creations go back to Judy’s post.
To purchase any of the products featured in today’s post, simply contact your Stampin’ Up! demonstrator, any of the ladies in the AWH Colour Creations Showcase or click on the product links below.
If you’d like me to post you your very own copy of the August – December Mini catalogue (AKA the Holiday Catalogue), the 2020-21 Stampin Up! Annual Catalogue, the 2020-21 Beginners Brochure, or to simply find out about more about Stampin’ Up! contact me.
In the meantime, wherever you are in the world, stay safe, stay calm…and keep on crafting xxx
Welcome to the Heart of Christmas 2020 where the Art with Heart team share their Christmas inspiration with you on the third Monday of each month.
Today I’m sharing with you a card that features some adorable new products from the Stampin’ Up! August – December mini catalogue.
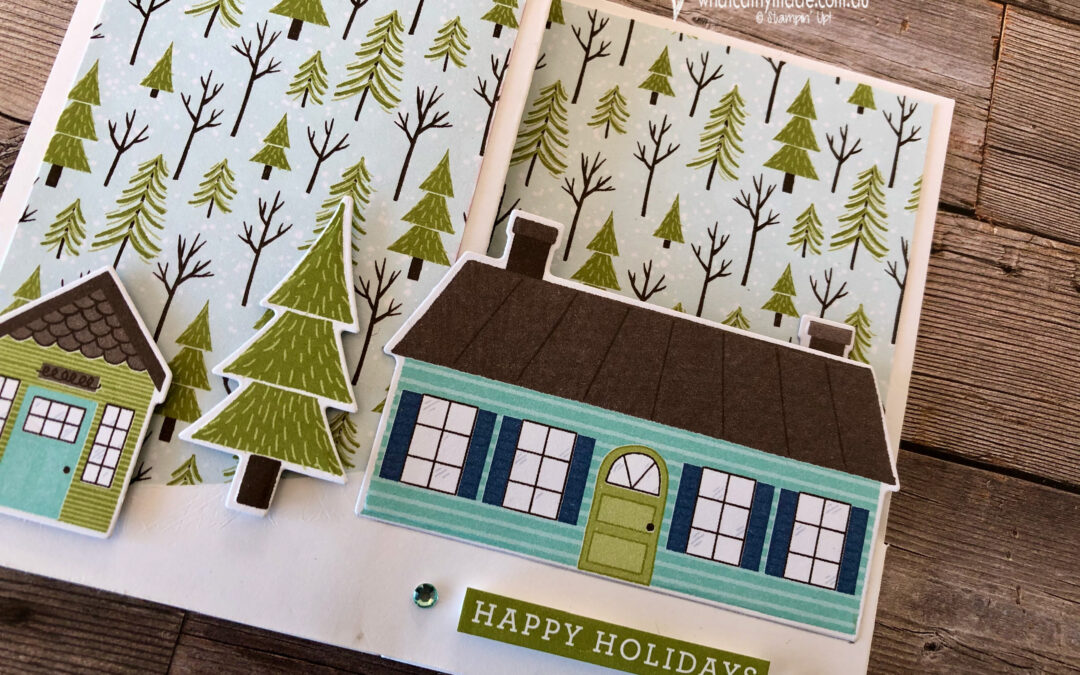
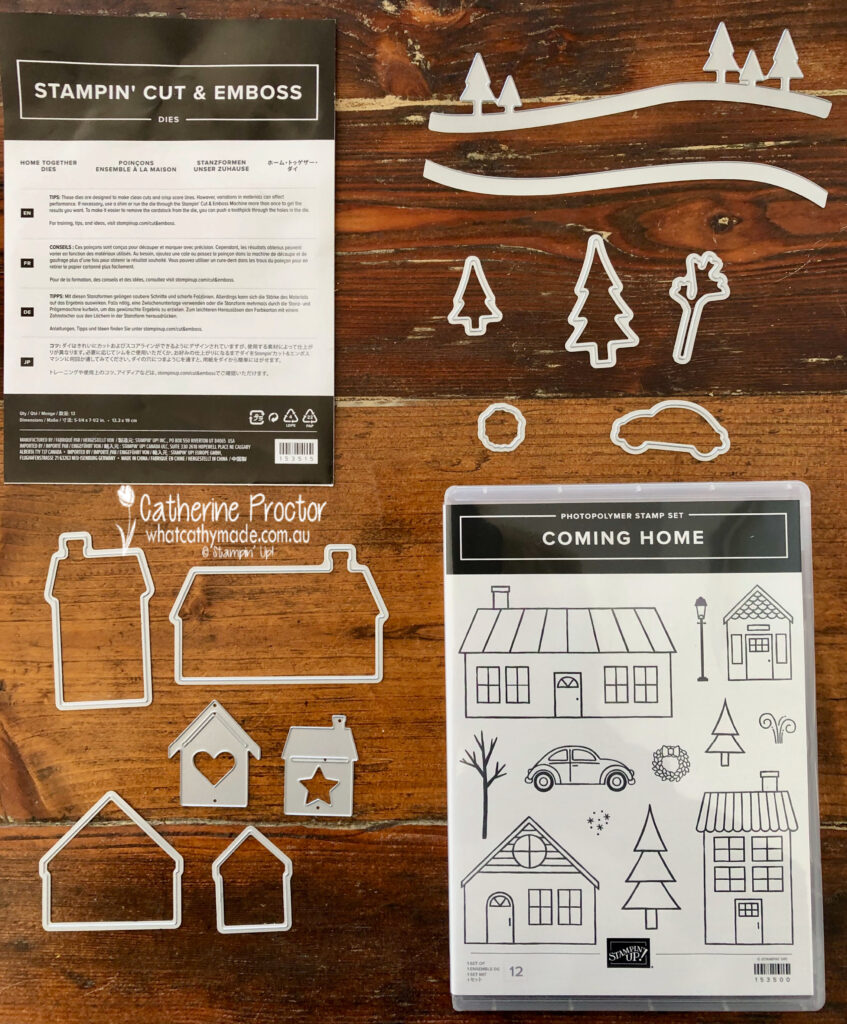
The Coming Home Bundle is part of the Trimming the Town Suite and one of my favourite items in the catalogue.
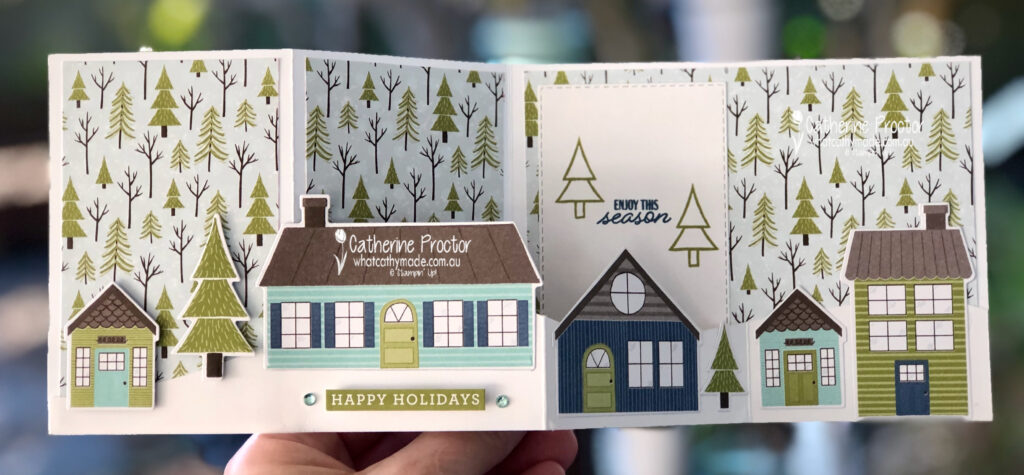
Last month I shared a blue, silver and white card I made using the Home Together dies, but this week I’ve used the same dies in a different way to create a double Z fold card.
A double Z fold card is one of the simplest and most versatile fancy folds you can make…and it always looks impressive!
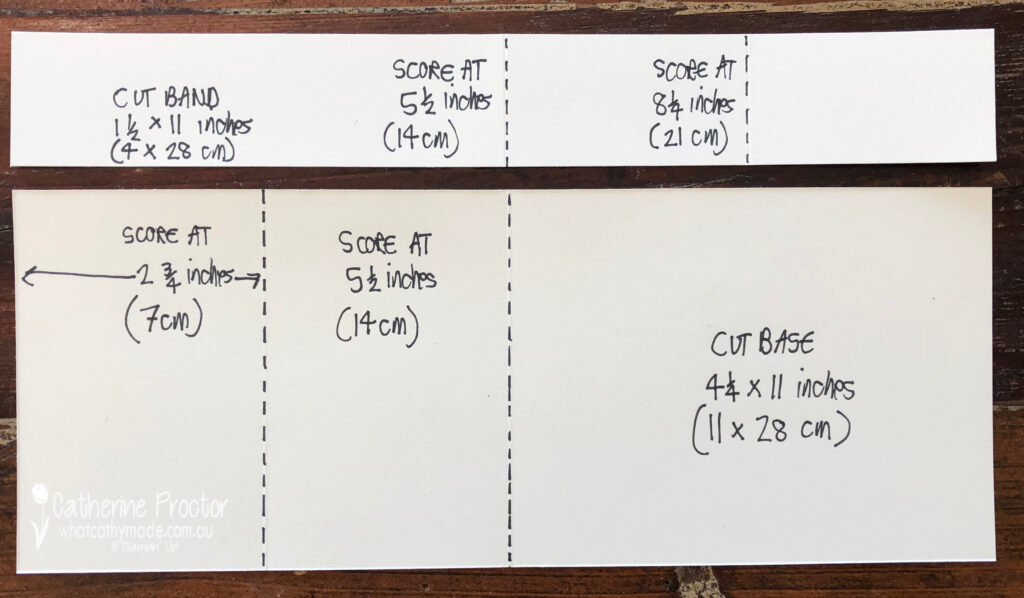
Here are the measurements for the card base and band, although you can make the band what ever width you want and position it at any height you prefer depending on the type of effect you want.
Double Z fold card template
Once I’d cut and scored my base and band I used the long curved line die to die cut my band, creating a hilly base for my houses to sit on.
This is how I cut the 5 1/2 inch (14cm) front section of the band.
And this is how I cut the remaining two sections – I die cut them laying flat, not folded.
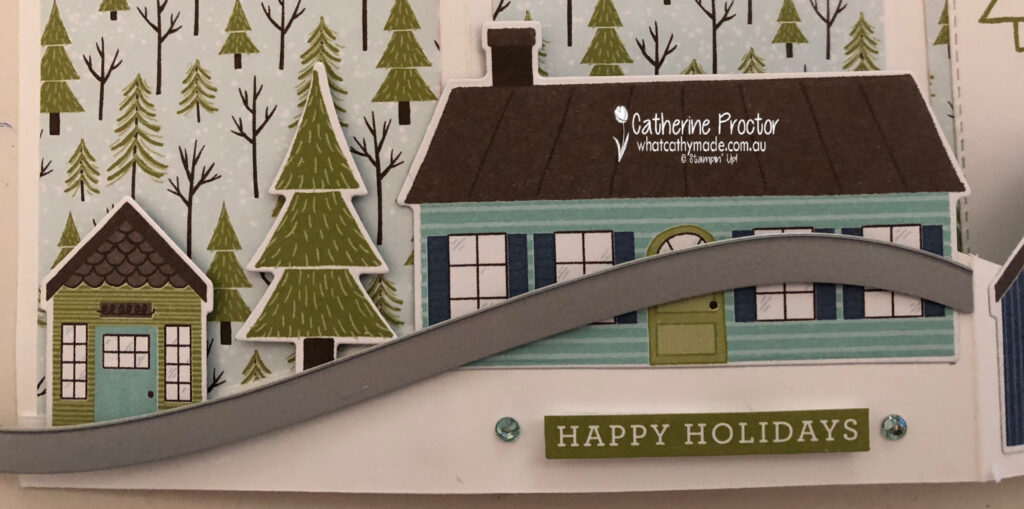
Before you attach your band to your card attach the DSP layer to the inside back of your card base. Attach the band and then work out exactly where you want the the little houses and trees to sit.
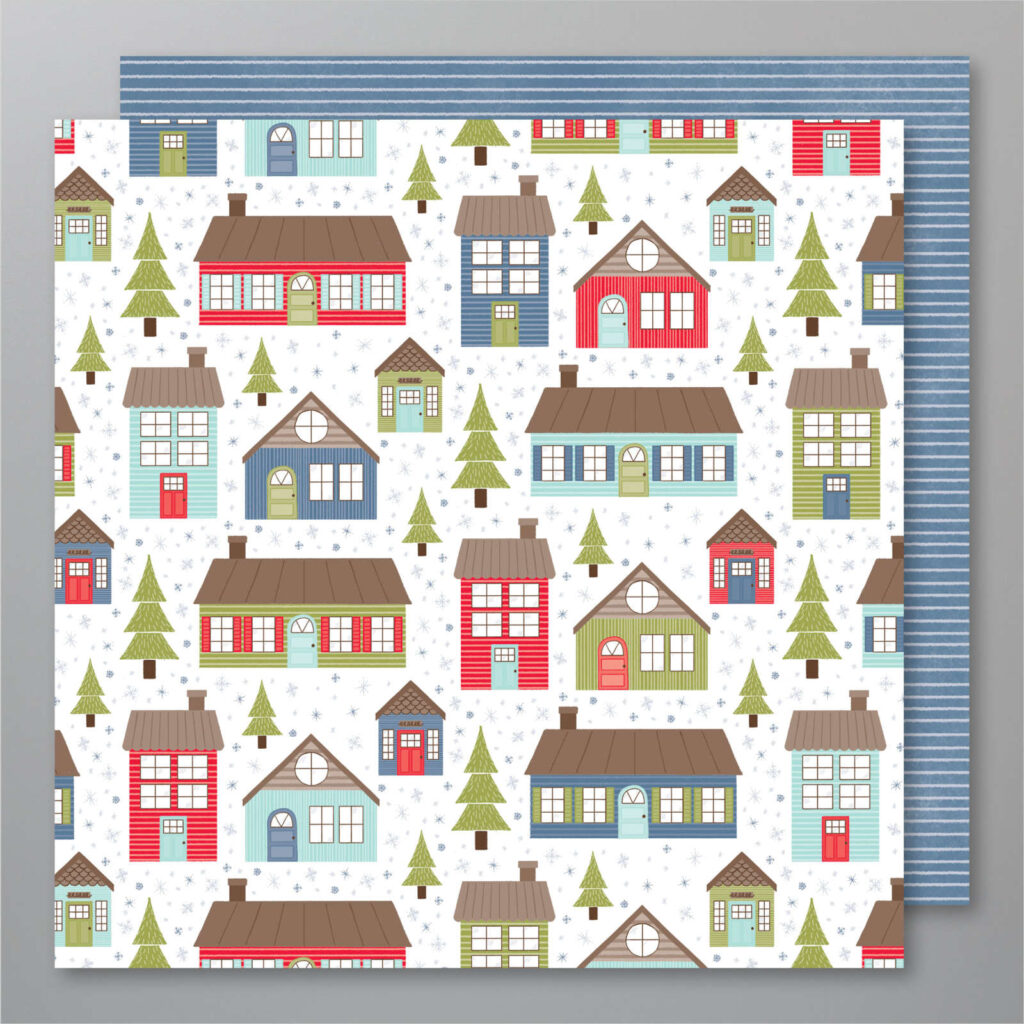
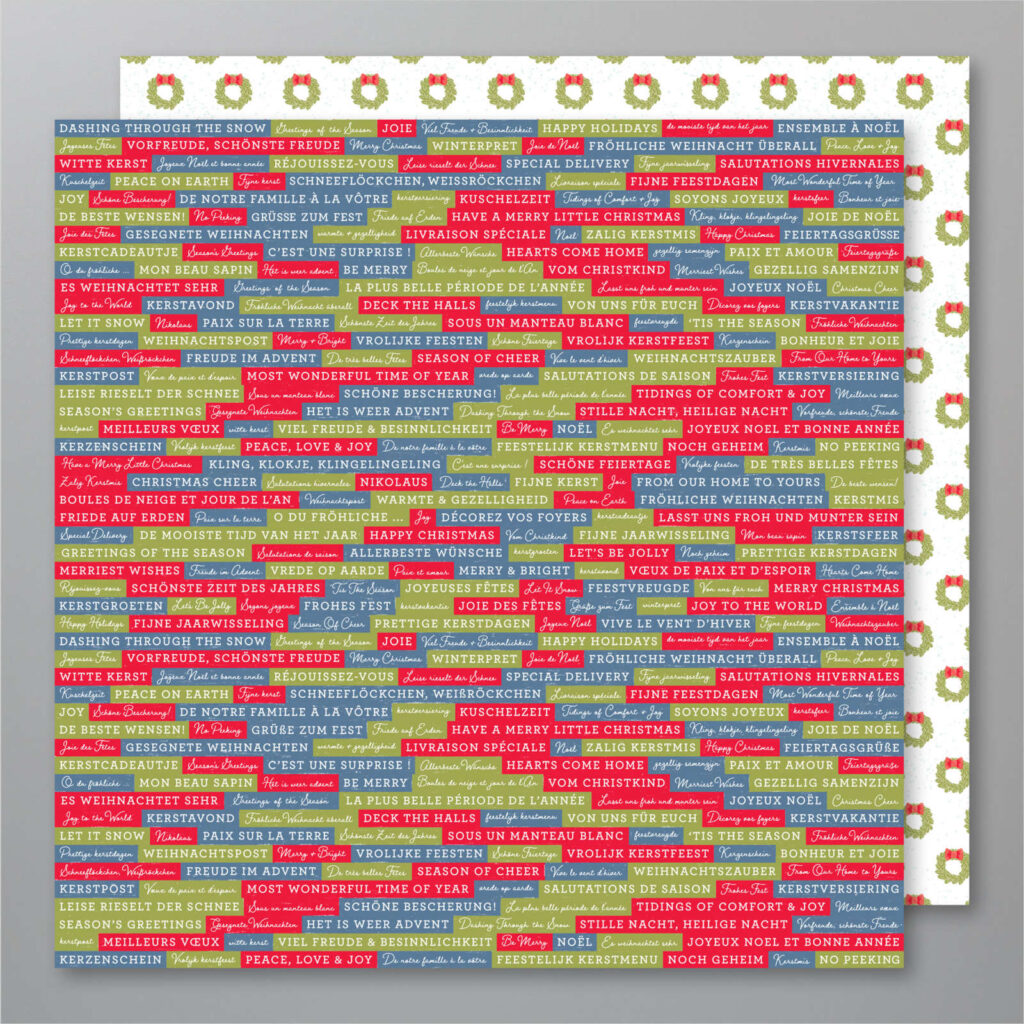
Did you realise the dies in this bundle cut out the trees and houses from the Trimming the Town Designer Series Paper? I just love this for quick and easy card making – it’s this sheet that co-ordinates with the dies.
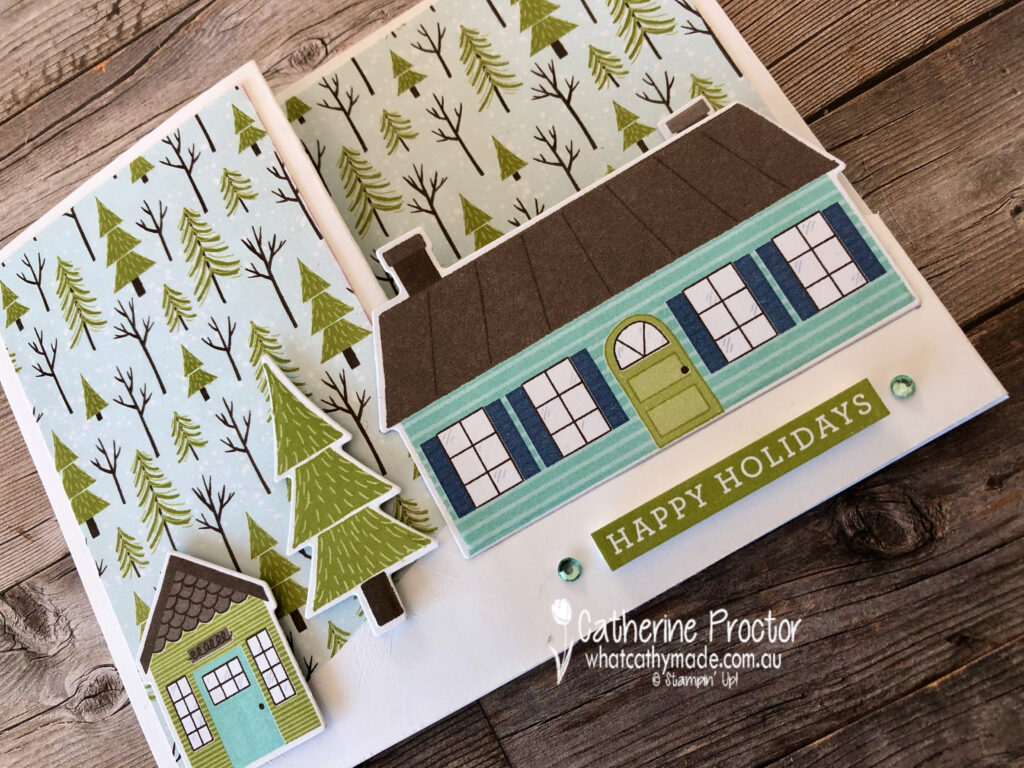
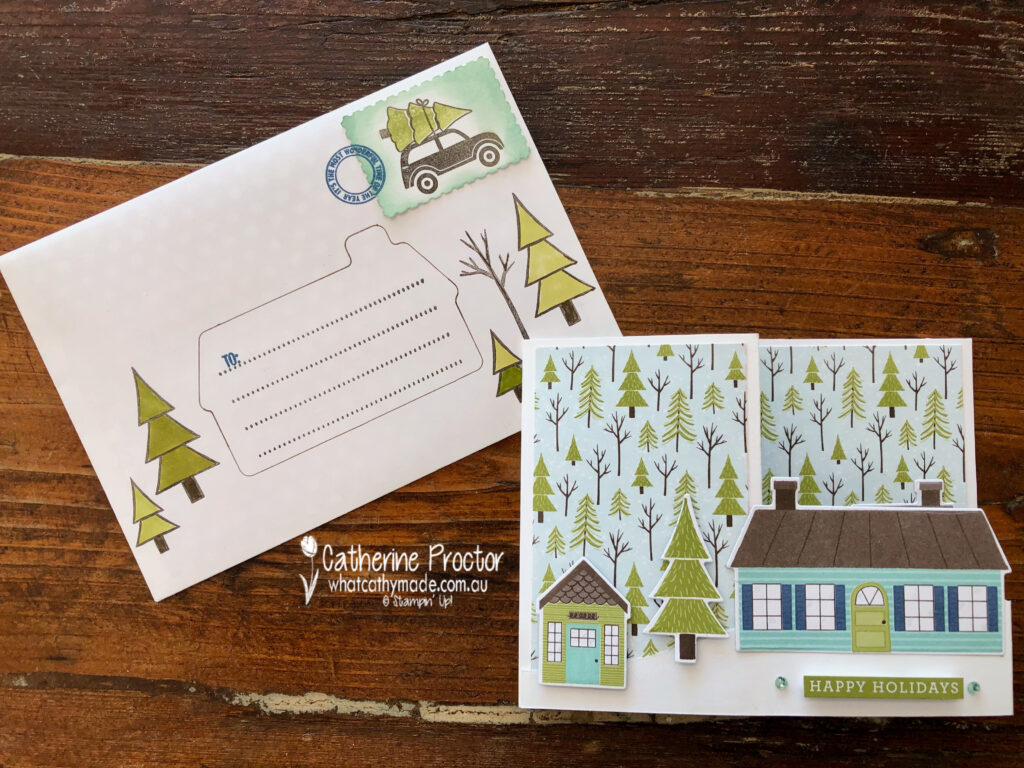
I decided to narrow my colour palette to just Early Espresso, Misty Moonlight, Pool Party and Old Olive for this card. I then lined up my die cut houses and trees to ensure they looked good both when the card is closed and when it is open.
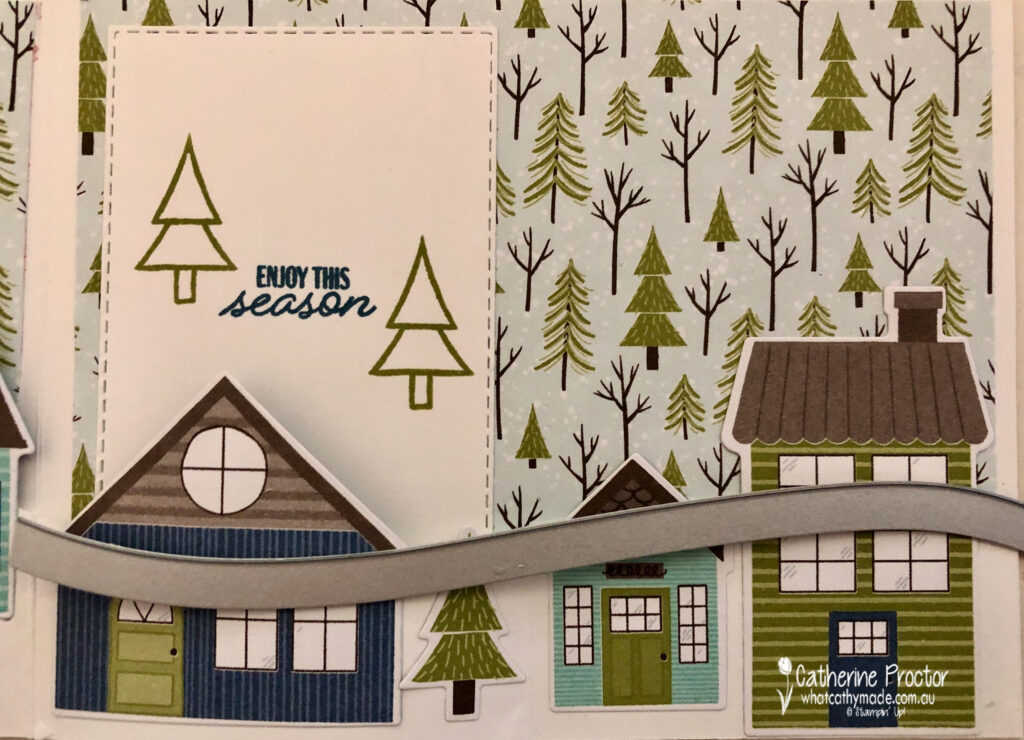
Here’s how it looks closed.
Standing up…
And fully open…
The sentiment inside and the little trees are stamped from the Coming Home stamp set but the cute “Happy Holidays” sentiment on the front of the card is cut from this sheet of DSP in the the Trimming the Town Designer Series Paper.
This DSP has sentiments in other languages too, which is great for overseas relatives!
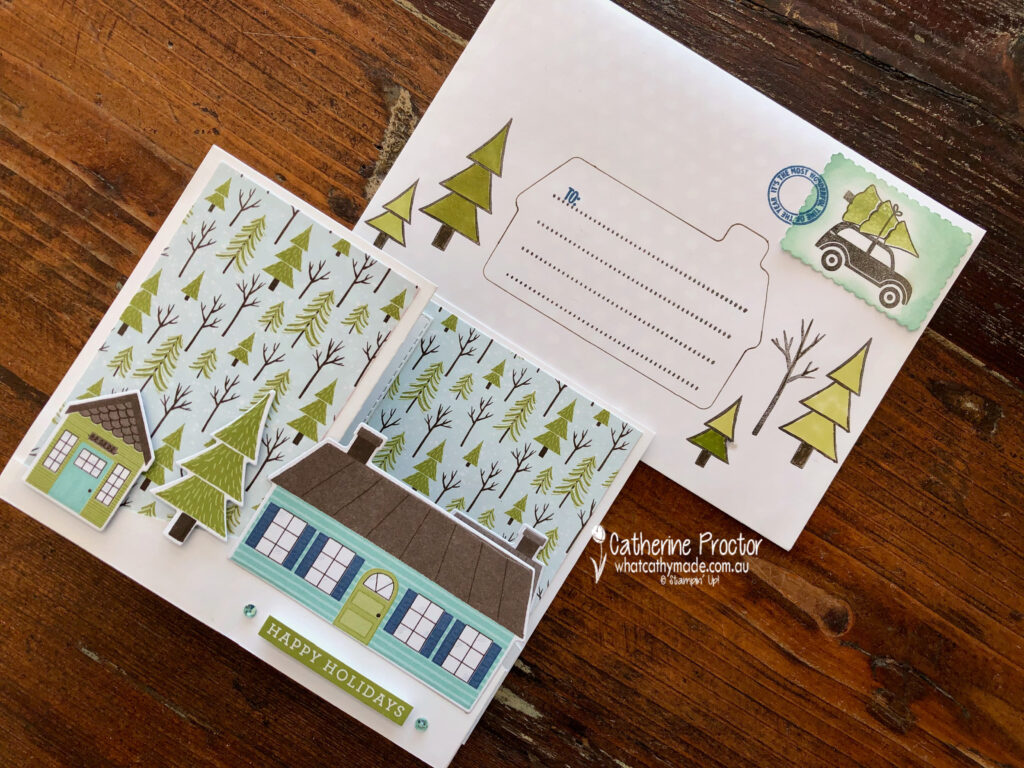
I wanted to make a special envelope for this special card and try my hand at some snail mail art, also known as mail art or envelope art. This is where you decorate an envelope to match a card and it’s so much fun!
I used a C6 Whisper White envelope, which is the perfect size for my Double Z Fold card.
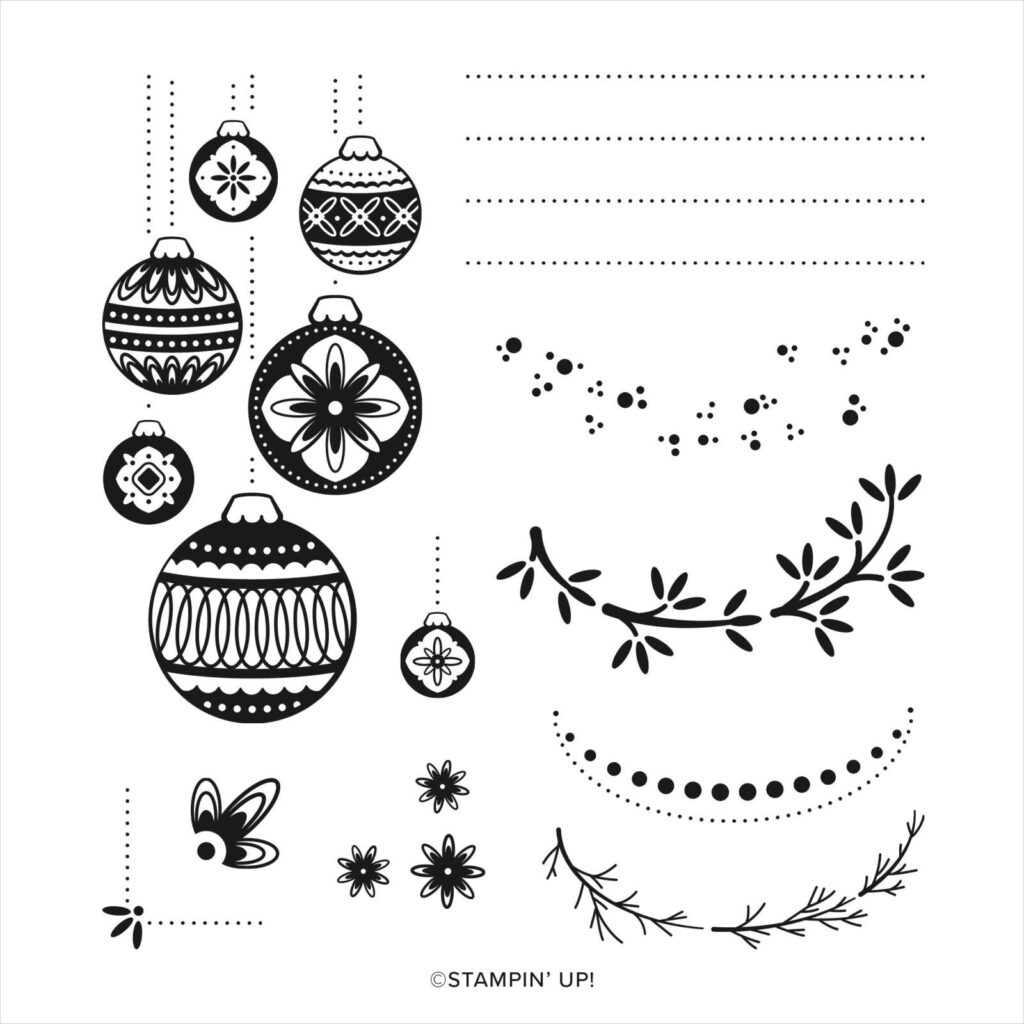
The address panel was created by using an Early Espresso marker to trace around the largest house die. The dotted lines for the address are in the Ornamental envelope Stamp set.
I also stamped and coloured in some tress from the Coming Home stamp set using my Old Olive bends.
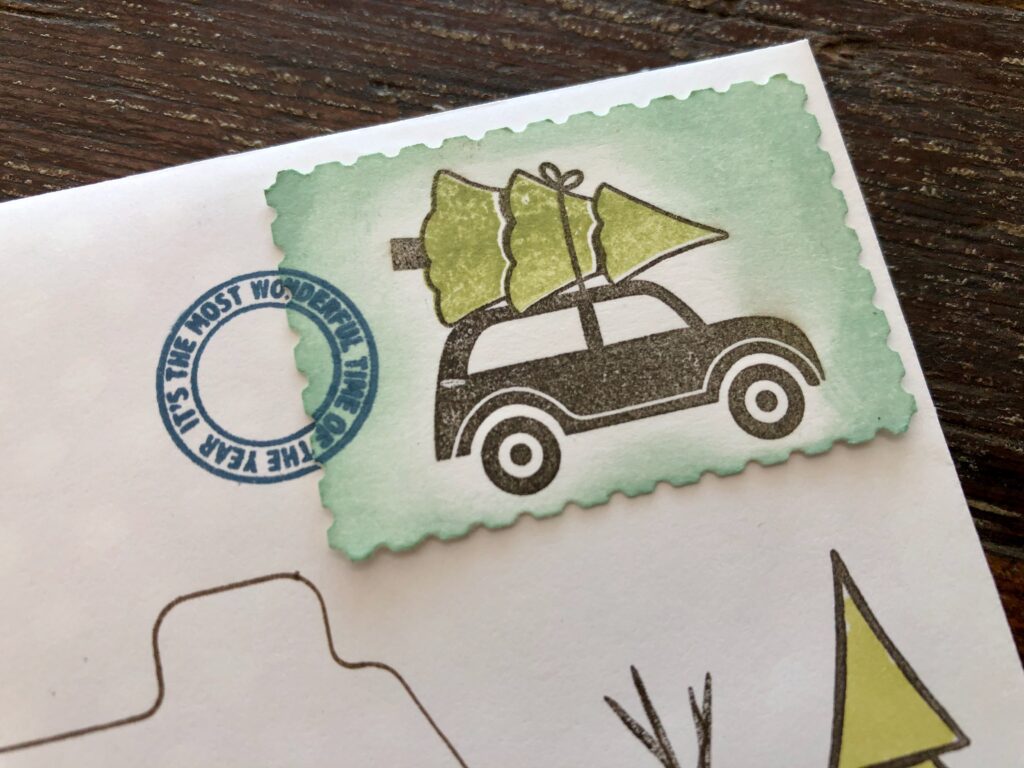
The postage stamp was created using the Festive Post stamp set and matching Rectangular Festive Postage Stamp Punch.
Pool Party was sponged around the outside of the postage stamp to give a vintage look.
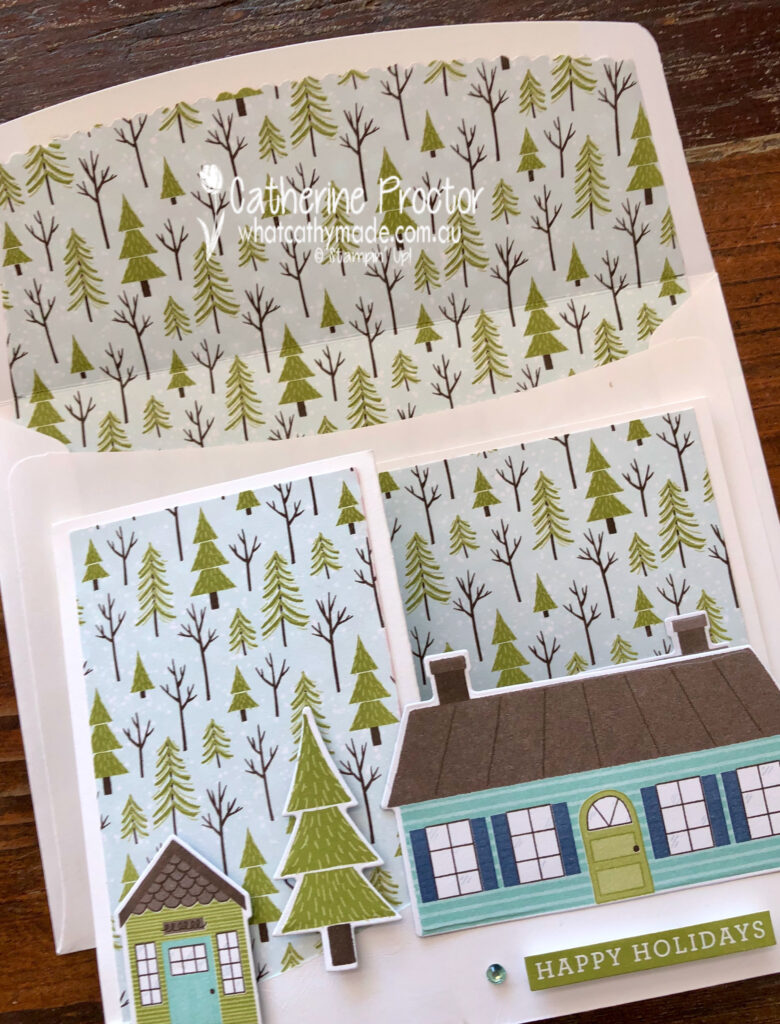
The inside of my envelope has been lined using matching DSP, die cut with the Envelope dies that coordinate with the Ornamental Envelopes Stamp set.
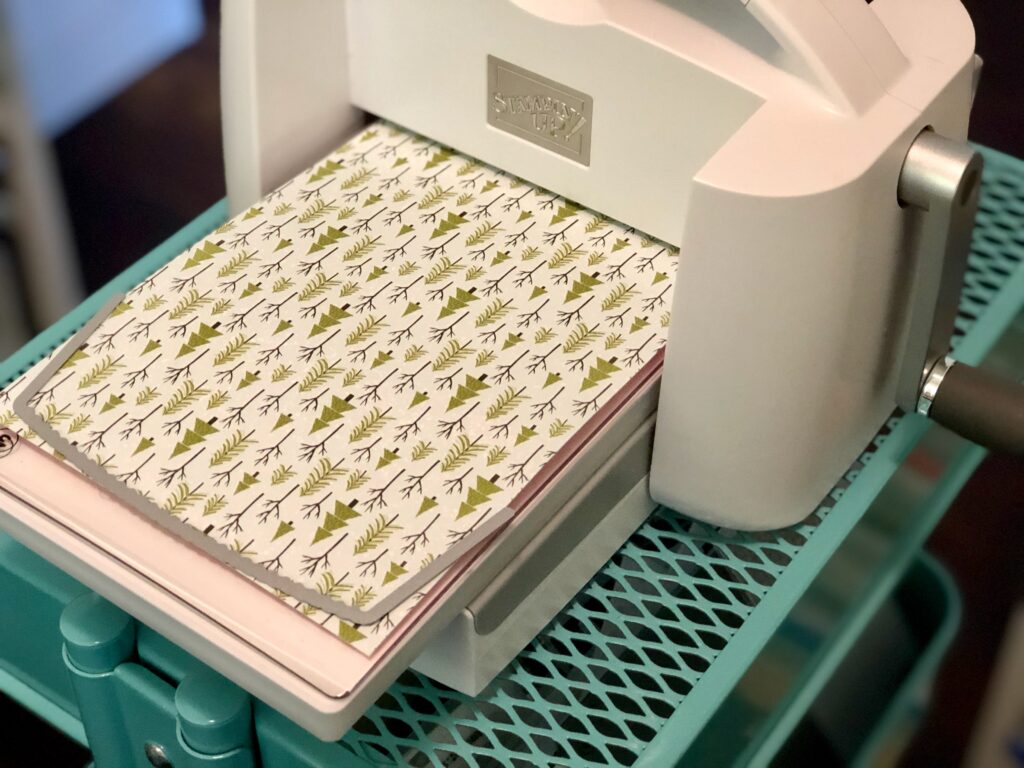
The C6 envelope takes the widest envelope liner die – cut a strip of DSP 15cm wide and then line up the die at the top of your insert.
Here it is being cut out on my new Stampin’ Cut & Emboss Machine – I love how well this machine cuts! It will be available to purchase from September.
Fold your insert so it lines up with the fold of the envelope and then all you need to do is trim the length to fit inside the envelope and glue the top flaps together.
You glue on the reverse pattern of your DSP lining.
The final touch was to embellish the outside back flap of my envelope to match the front of the envelope and the card.
I’ve had so much fun creating this fancy fold card and creating some snail mail envelope art!
The lovely Judy May is hosting our Heart of Christmas showcase this year. To see the other Christmas creations go back to Judy’s post.
To purchase any of the products featured in today’s post, simply contact your Stampin’ Up! demonstrator, any of the ladies in the AWH Colour Creations Showcase or click on the product links below.
If you’d like me to post you your very own copy of the August – December Mini catalogue (AKA the Holiday Catalogue), the 2020-21 Stampin Up! Annual Catalogue, the 2020-21 Beginners Brochure, or to simply find out about more about Stampin’ Up! contact me.
In the meantime, wherever you are in the world, stay safe, stay calm…and keep on crafting xxx


")


")