Your Christmas countdown continues – it’s exactly 10 weeks today until Christmas Day!
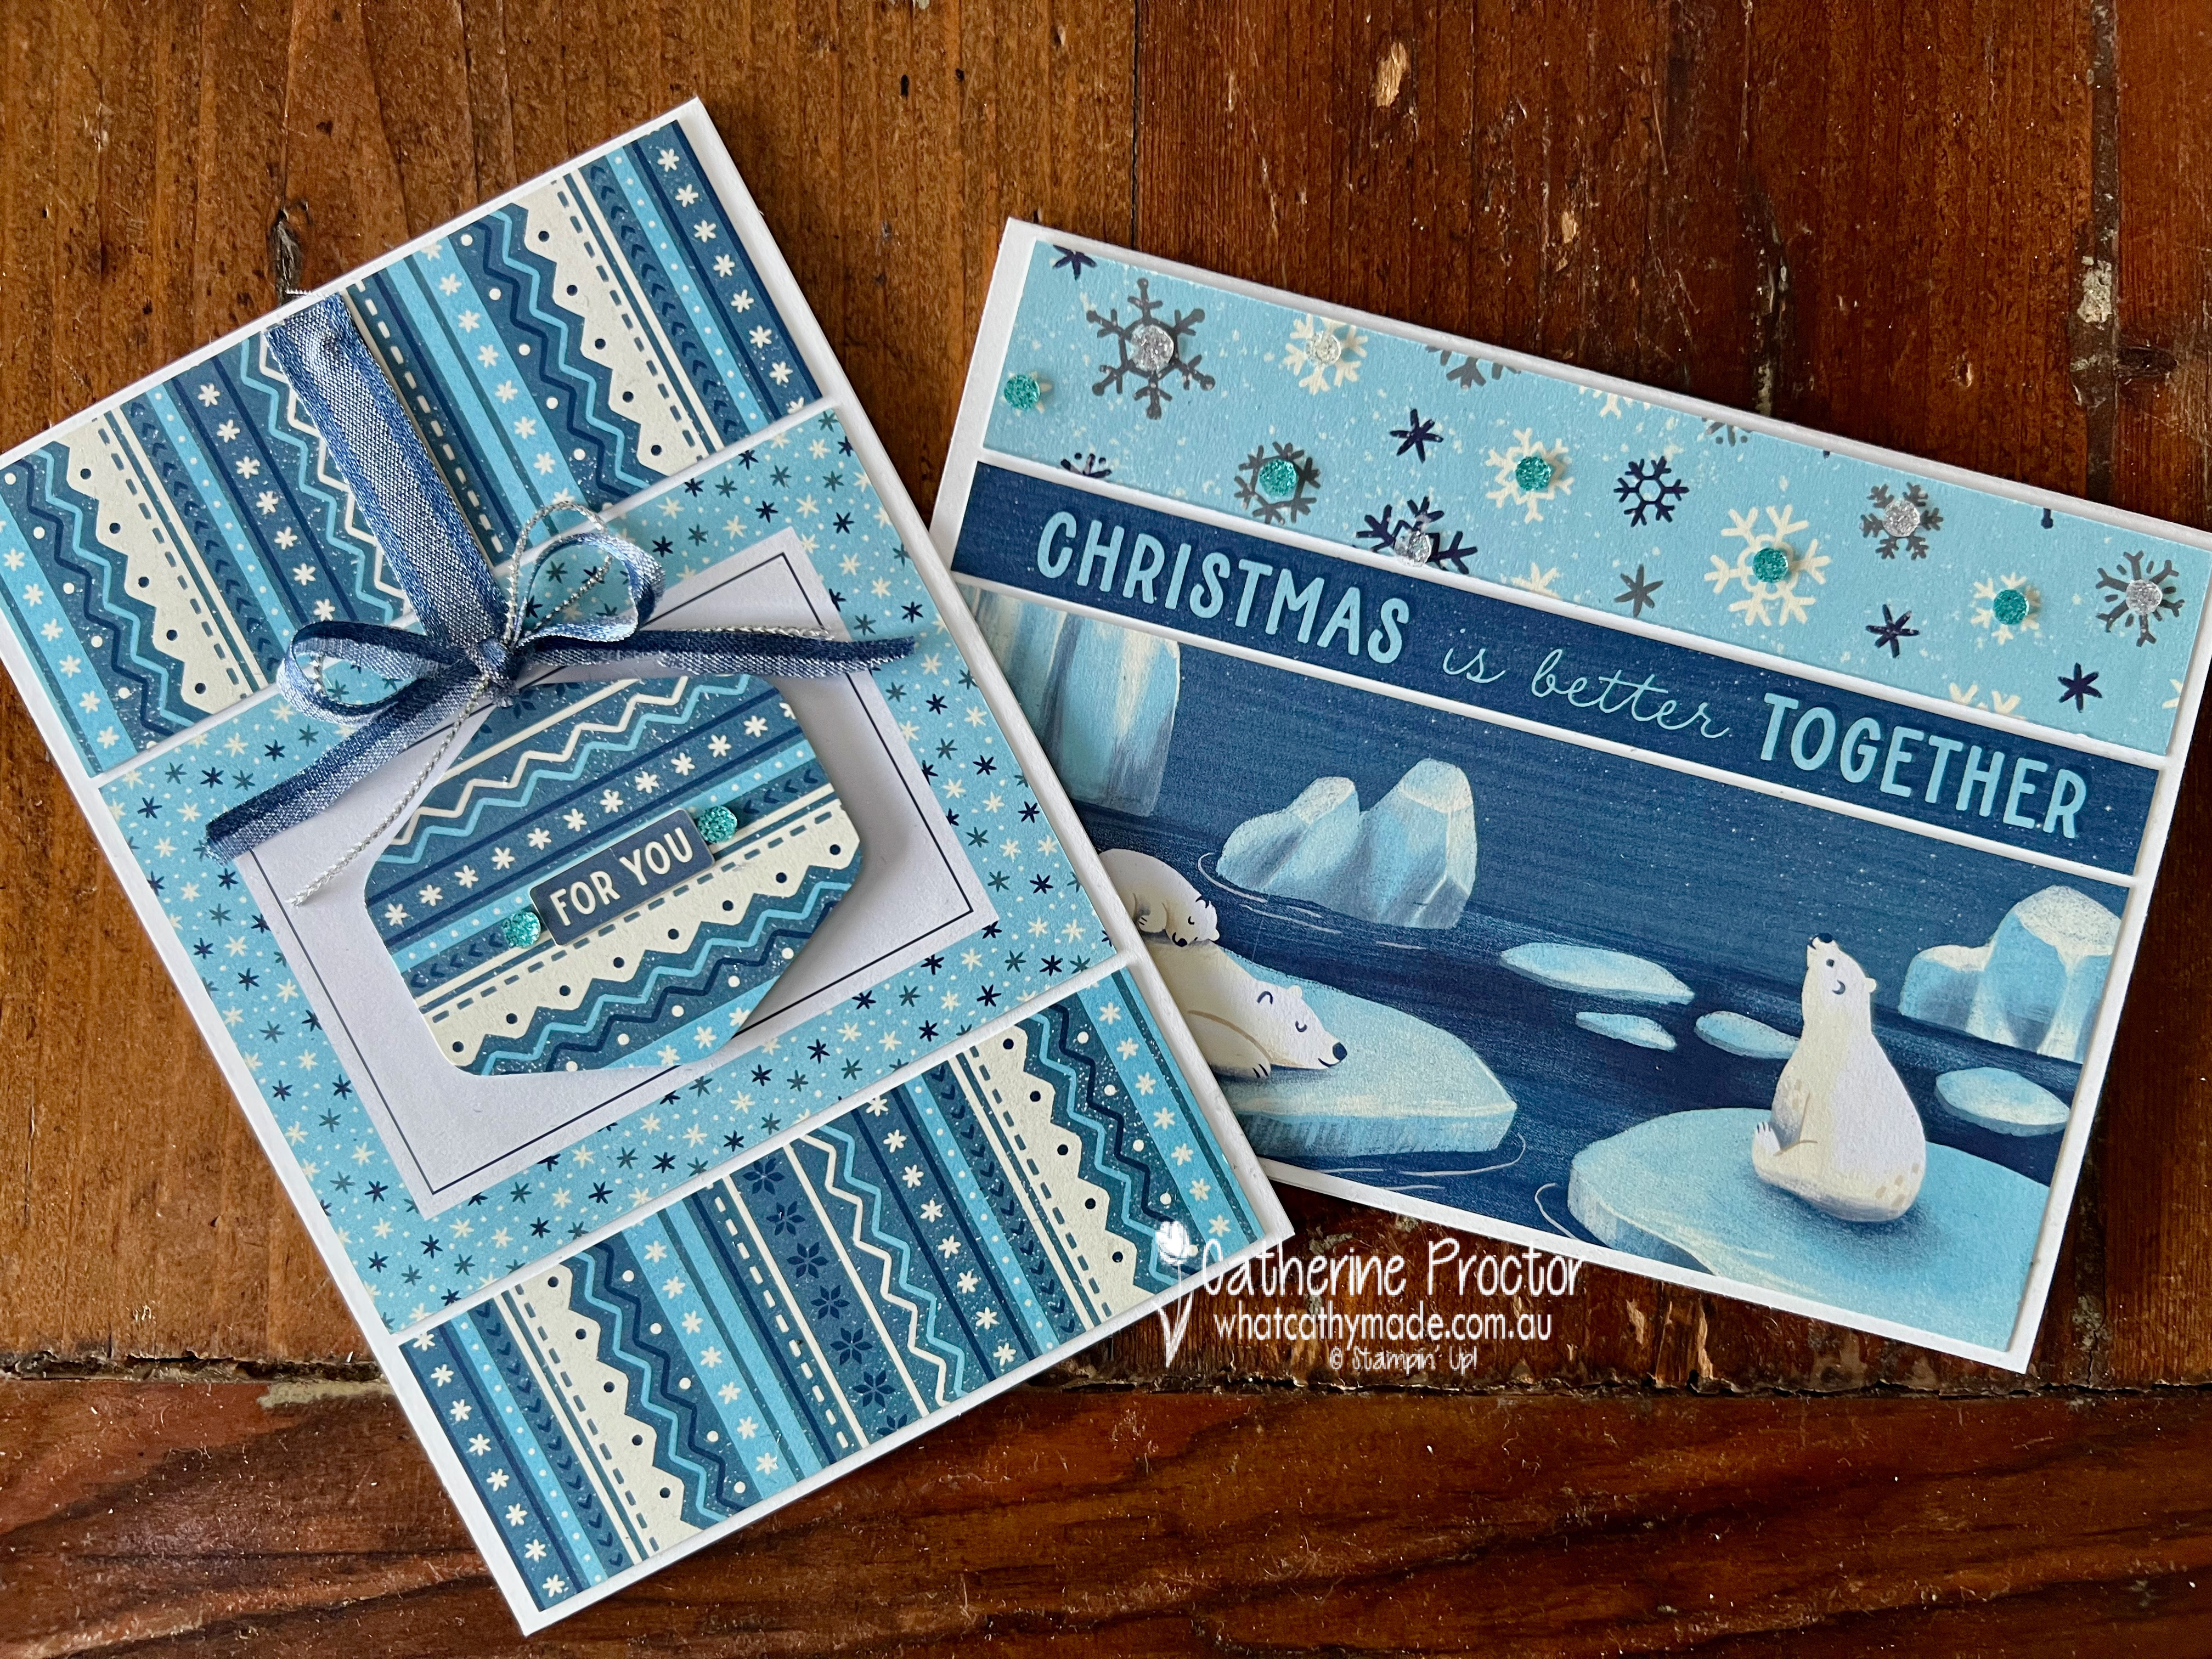
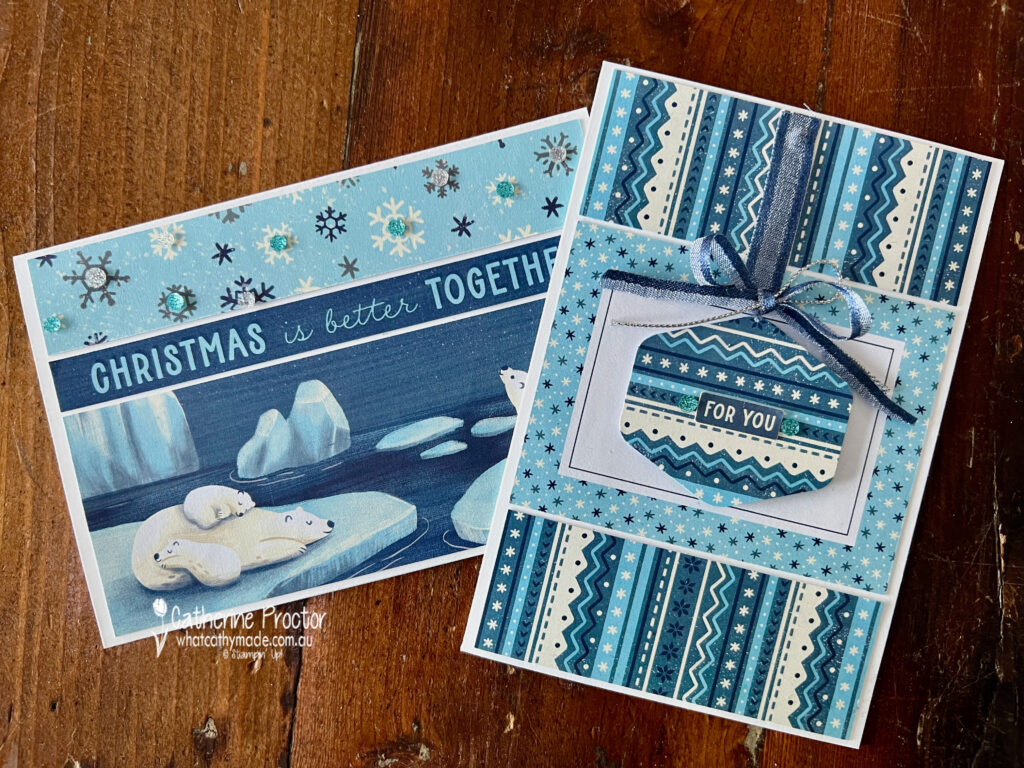
I’ve been missing in action the past few weeks, so I’m super excited to be back this week with a couple of super quick and easy ‘no stamping’ cards that use the Beary Christmas Memories & More Card Pack.
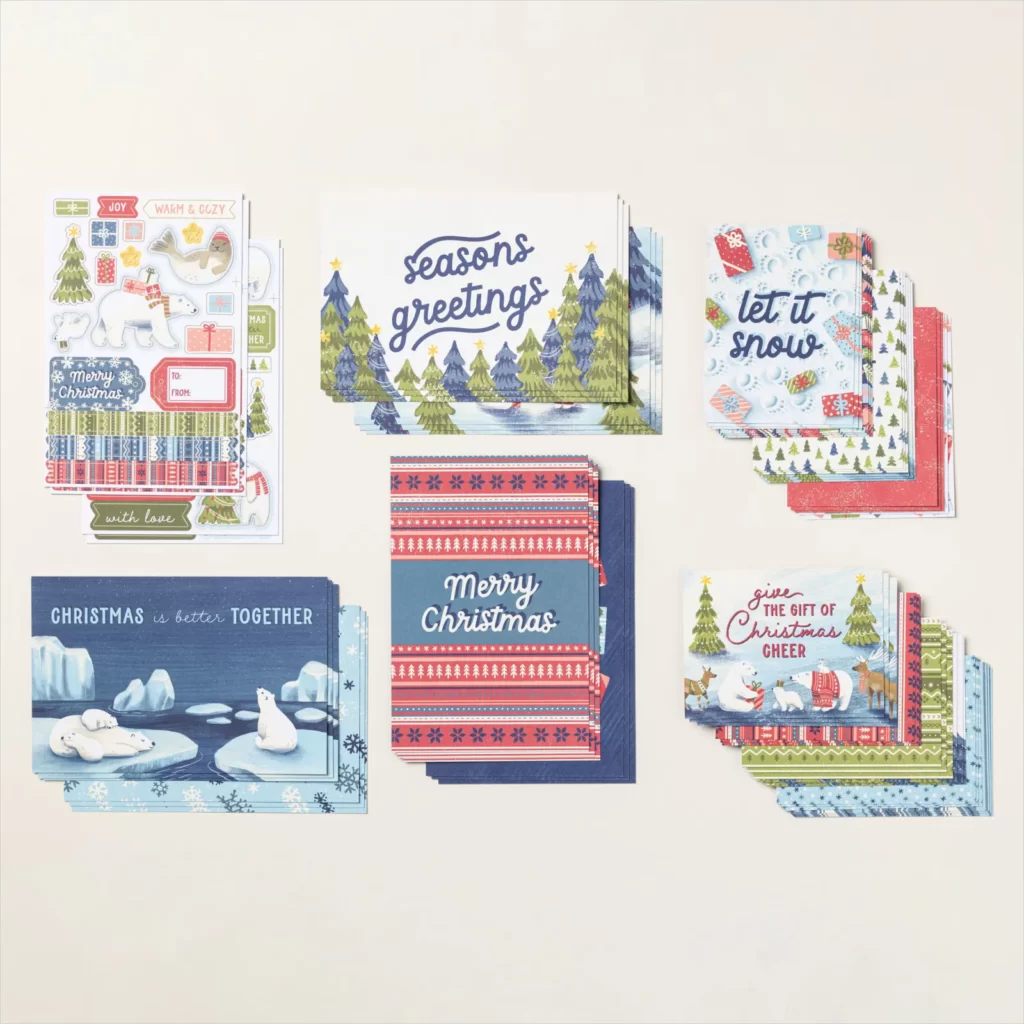
At just $17.50 for 54 cards the Beary Christmas Memories & More Card Pack is a simple, affordable and easy way to get crafting this Christmas season!
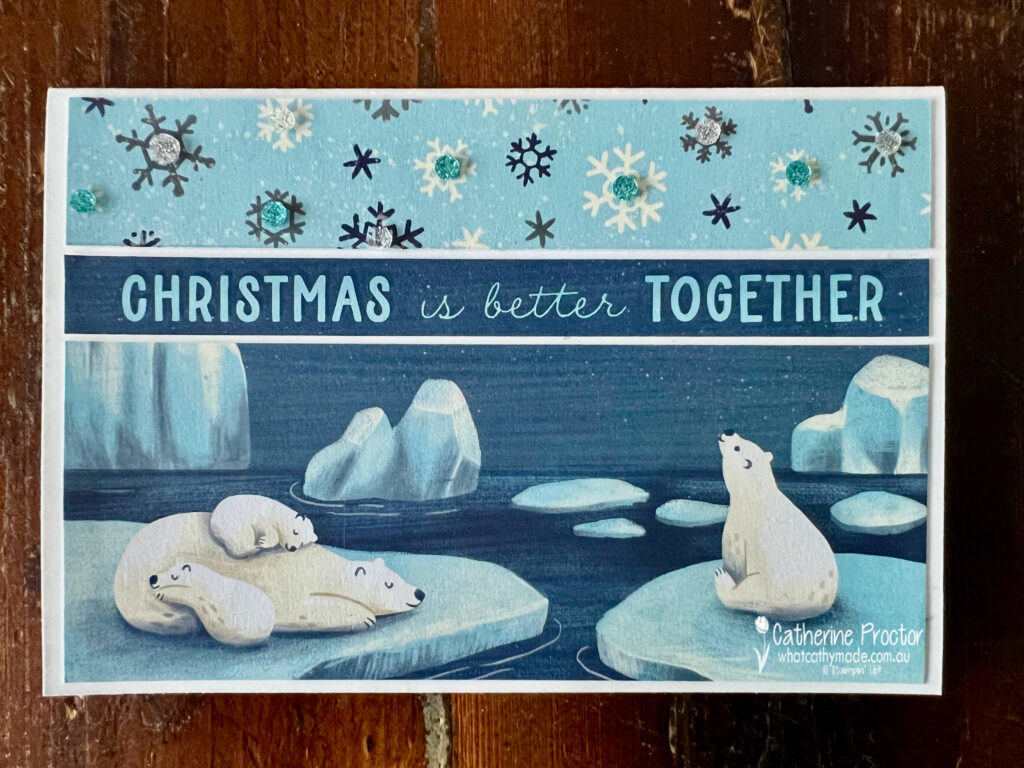
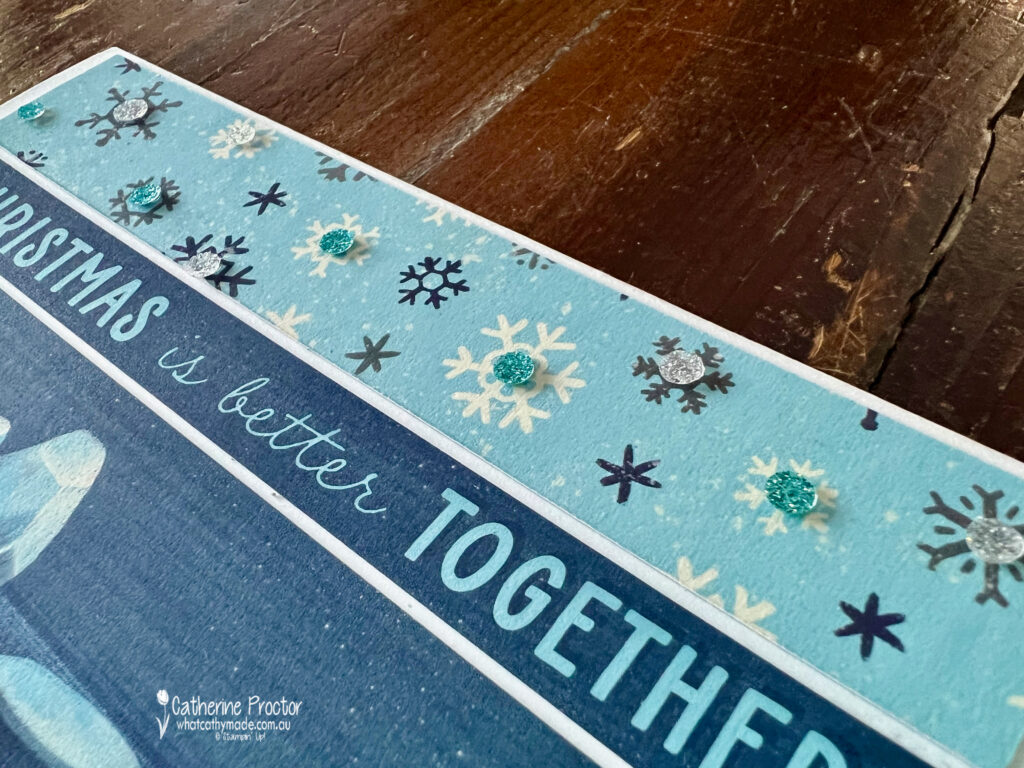
Card one could not be simpler. I made two horizontal cuts across this adorable image of the polar bear family relaxing on ice platforms and icebergs.
I attached the three strips onto a Memories and More card base, leaving a narrow space between strips and flipping the top panel over to create a sky full of snowflakes.
To add extra sparkle I added some Adhesive-Backed Glitter Sequins – these are my fave embellishments. This card was completed in a matter of minutes!
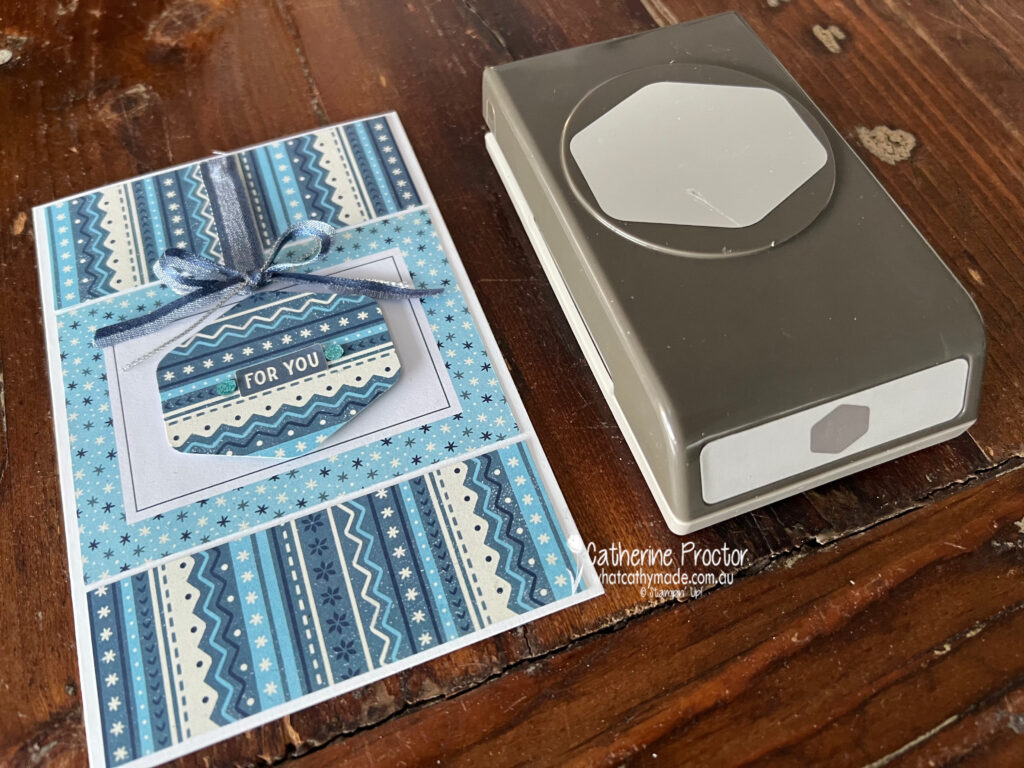
Card two uses the Beary Christmas Memories & More Card Pack as well as a brand new online exclusive product, the Heartfelt Hexagon Punch.
As soon as I received this punch I knew it would be the perfect shape to create an ornament card!
The centre of the card is a smaller Memories & More Card, with the reverse side of the same Memories & More Card attached to the top and the bottom of the card.
The “For you” sentiment is a sticker form the sticker sheets also included in the Memories & More Card.
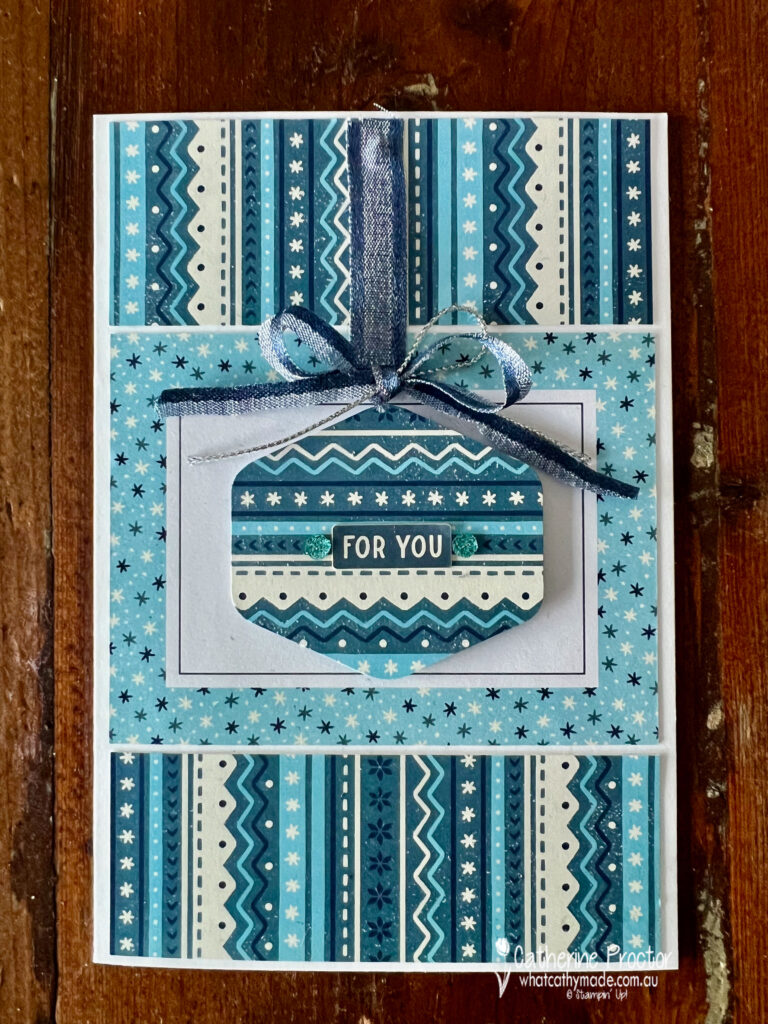
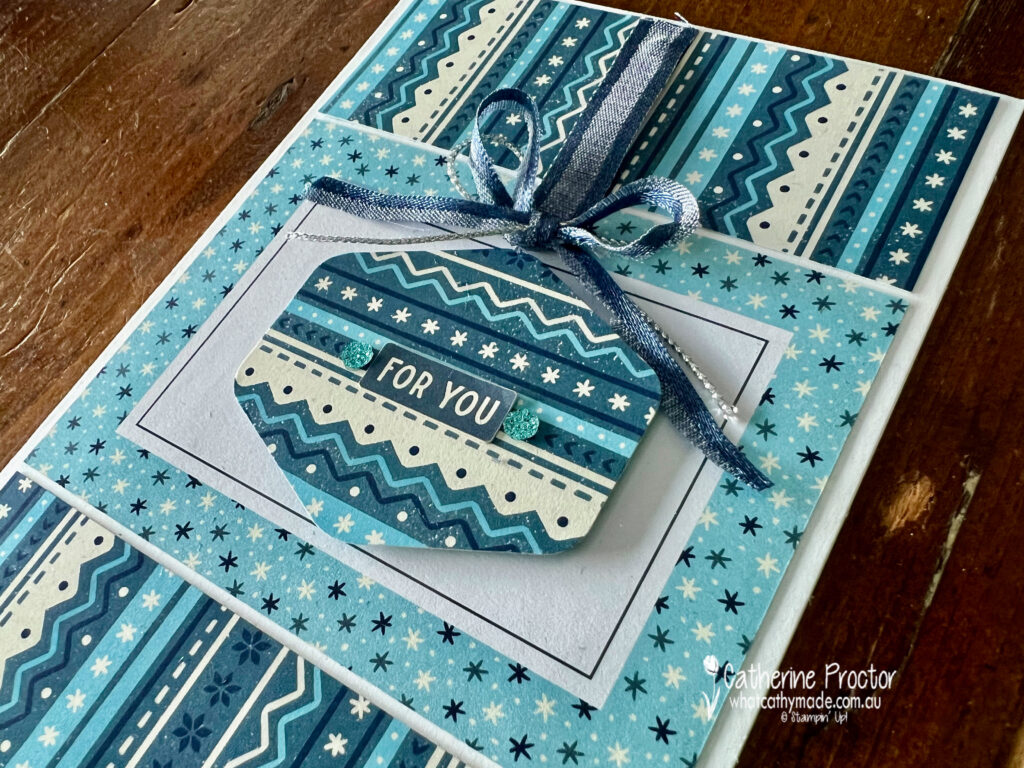
I could have used several different ribbons to create the ornament hanger and bow, however I settled on the Night of Navy 3/8″ (1 cm) Bordered Ribbon, cut in half lengthways for the bow tied with the silver metallic Simply Elegant Trim as well.
I love this colour combination of different blues/silver/white, as well as how quick and easy these cards were to create!
Now it’s time to hop on over to our next participant, the lovely Theresa Gerrard I can’t wait to see what Theresa has made this week.
If at any time you find a broken link, you can find the complete list of all participants on Sharon Davern‘s blog. Sharon does an amazing job hosting our Christmas blog every year.
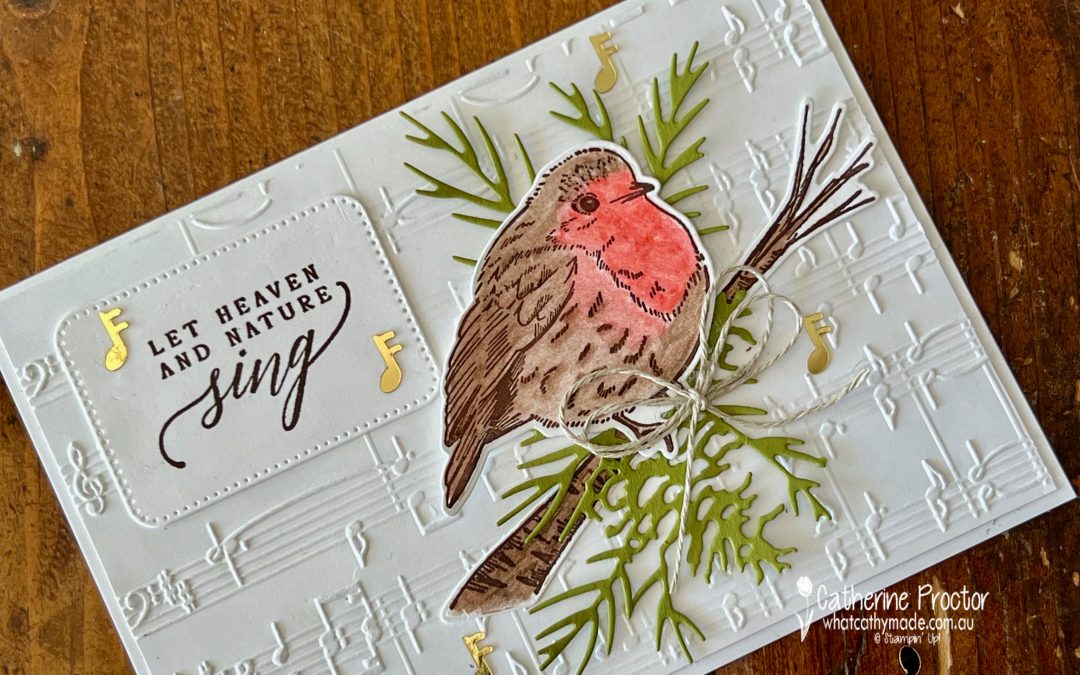
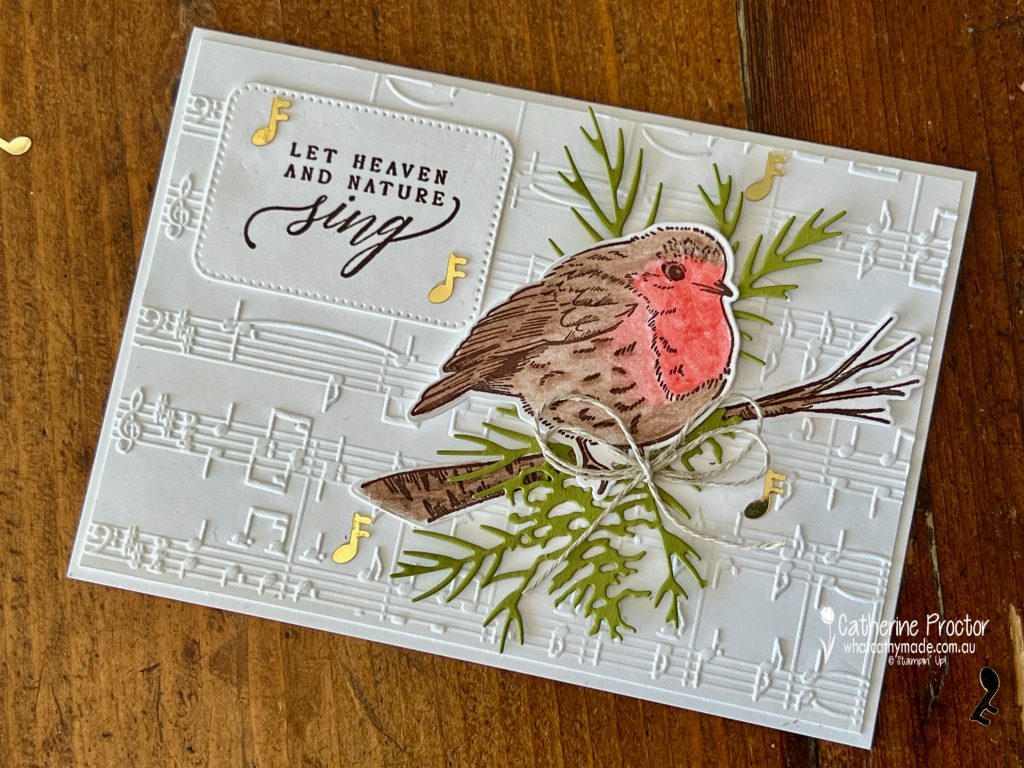
Welcome to week twenty two of our Art With Heart 2023-24 Colour Creations blog hop! This week we are showcasing Early Espresso, a a rich dark brown from the neutrals family.
Early Espresso is a wonderful neutral that really makes other colours pop. It’s also fabulous for wood and nature themed cards, like the Christmas card I’ve made for this week’s hop.
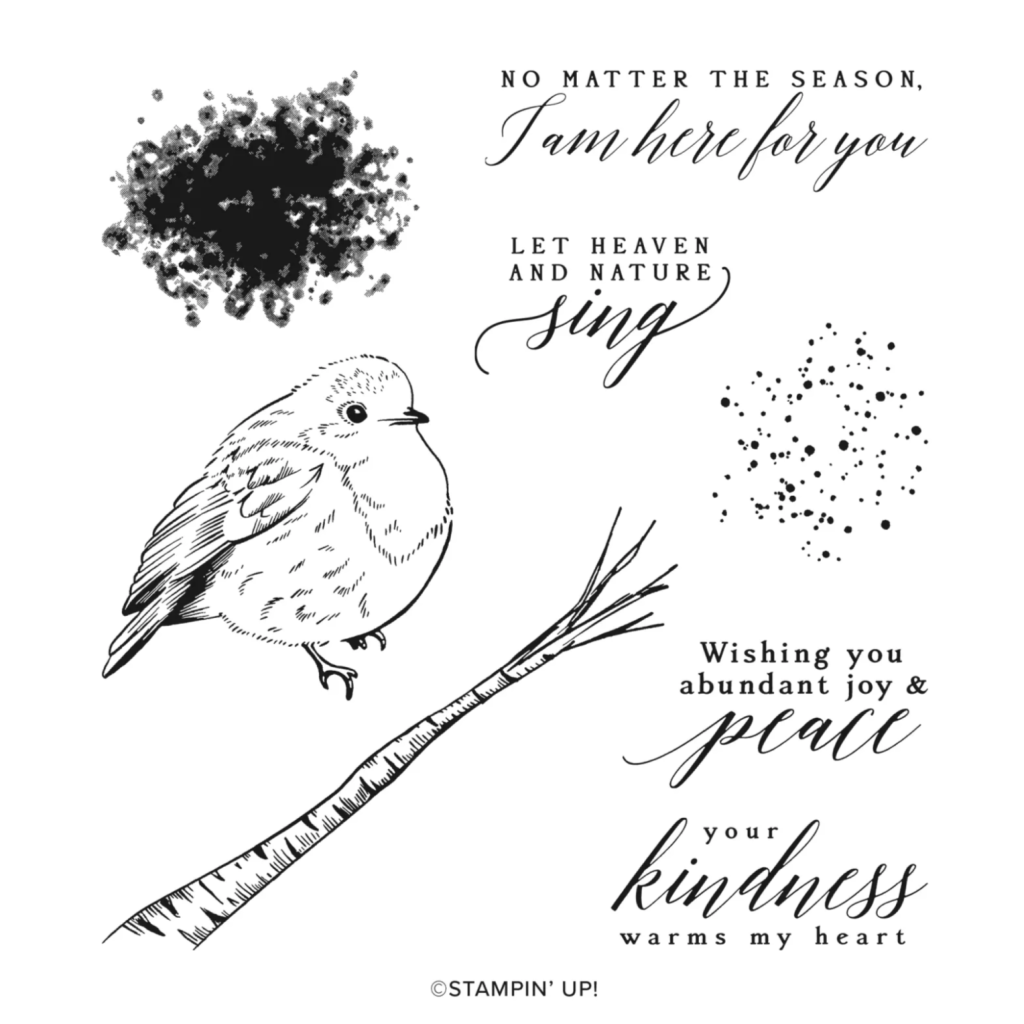
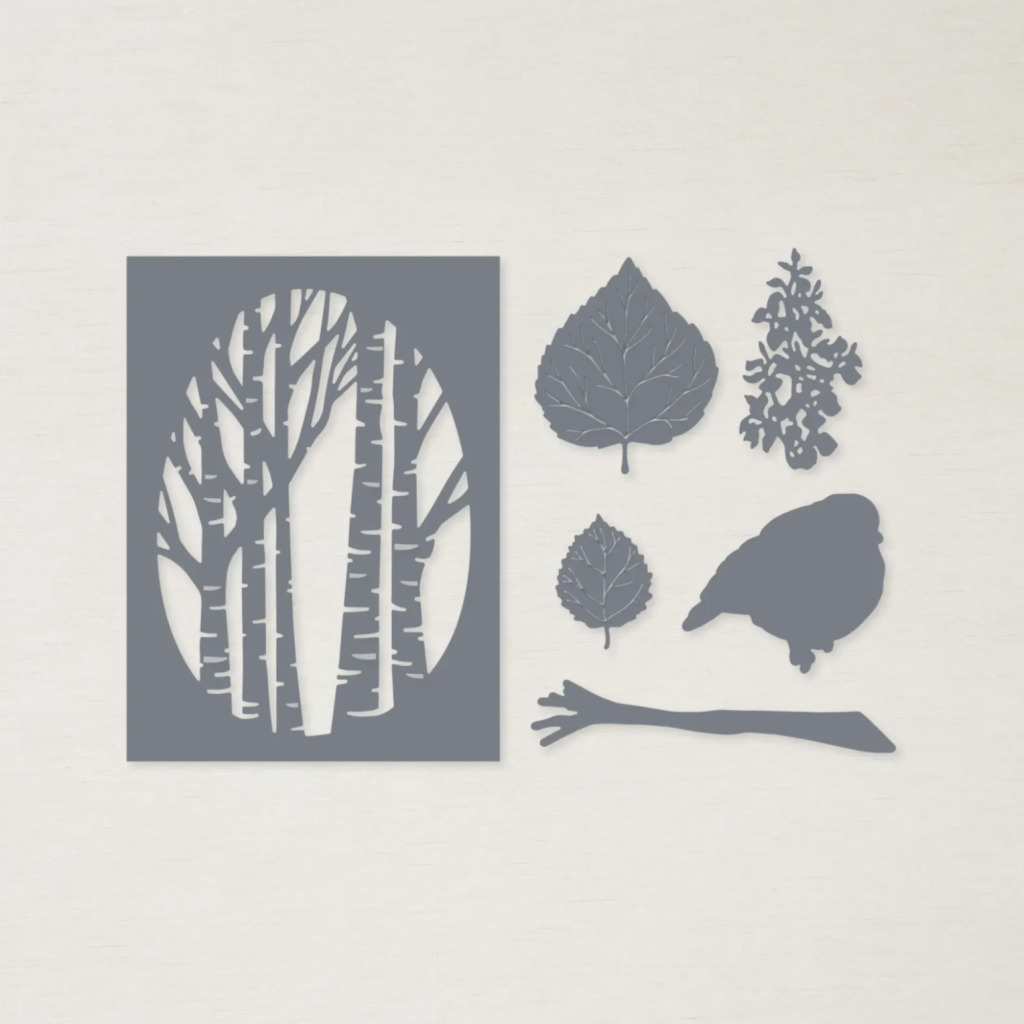
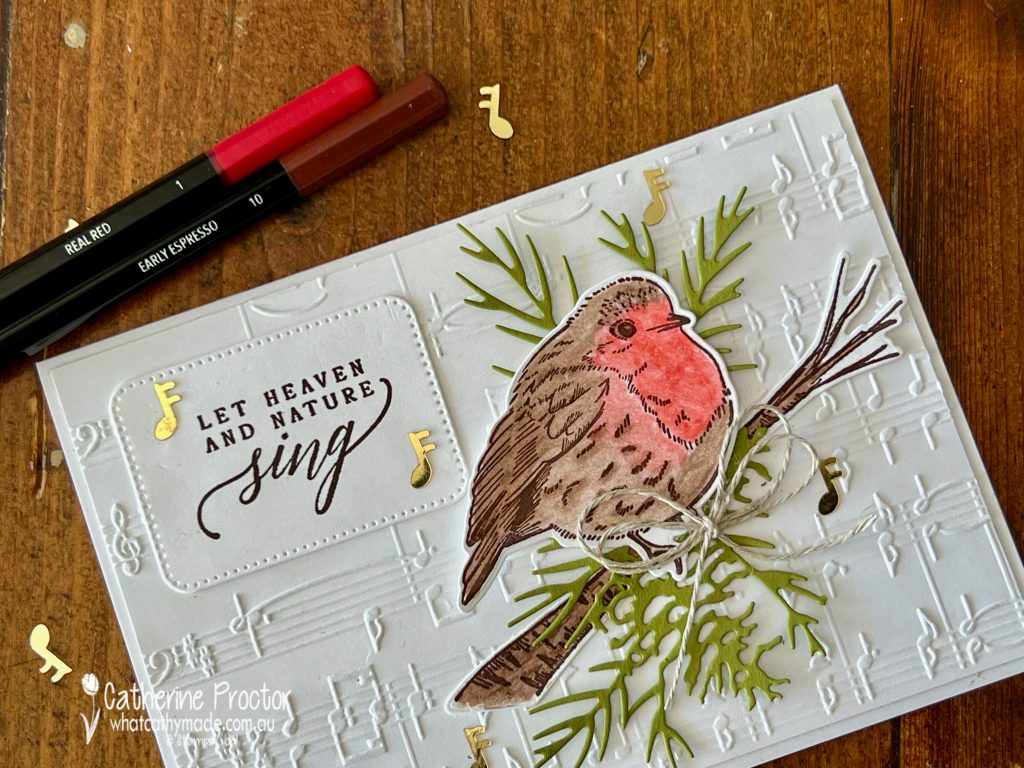
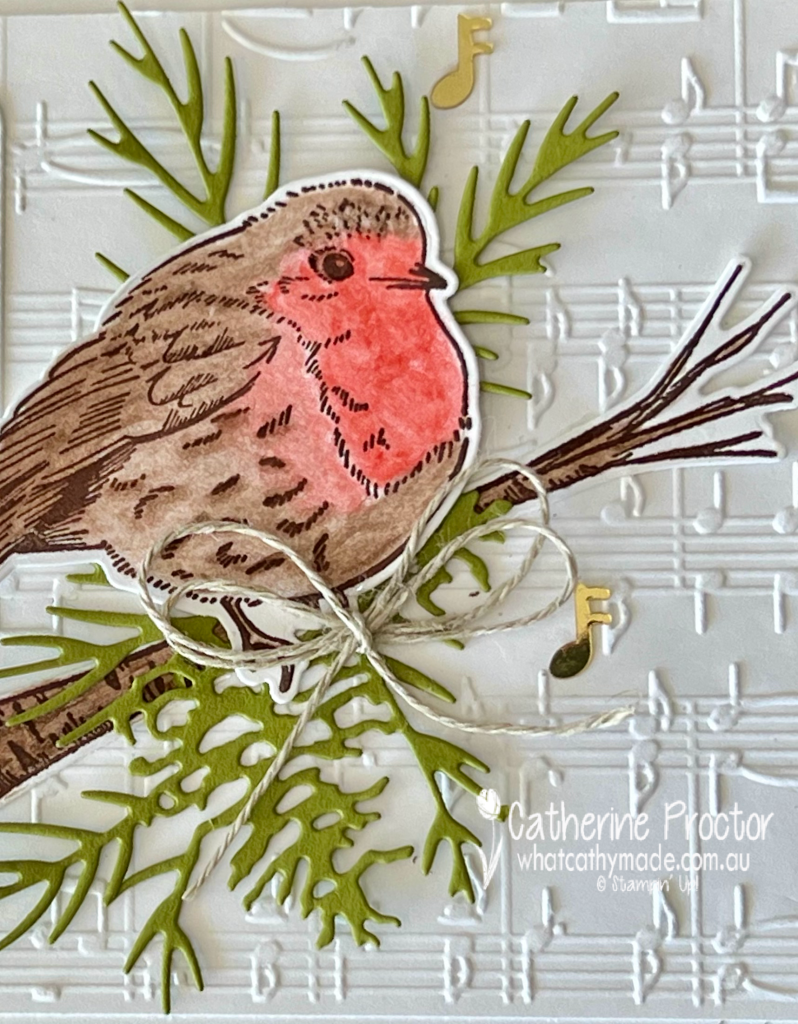
The bird and the branch stamp are from the “Perched in a Tree” stamp set, stamped in Early Espresso ink as is the “Let Heaven and Nature Sing ” sentiment. With this sentiment I just had to use the Merry Melody embossing folder too!
The bird and tree trunk were then die cut using the coordinating Aspen Tree Dies.
I coloured the bird and the tree branch using watercolour pencils, then blended the colouring in with a blender pen to make the colours smooth.
The Old Olive cardstock foliage is created using one section of the Christmas Pinecone Dies and the final touches are a bow of linen thread and a few music notes from the Loose Holly Gems & Sequins.
Now it’s time to hop on over to our next participant, the lovely Kate Morgan – I can’t wait to see what Kate has made this week!
If at any time you find a broken link, you can find the complete list of all participants below.
Your Christmas countdown continues – it’s exactly three months or 13 weeks today until Christmas Day!
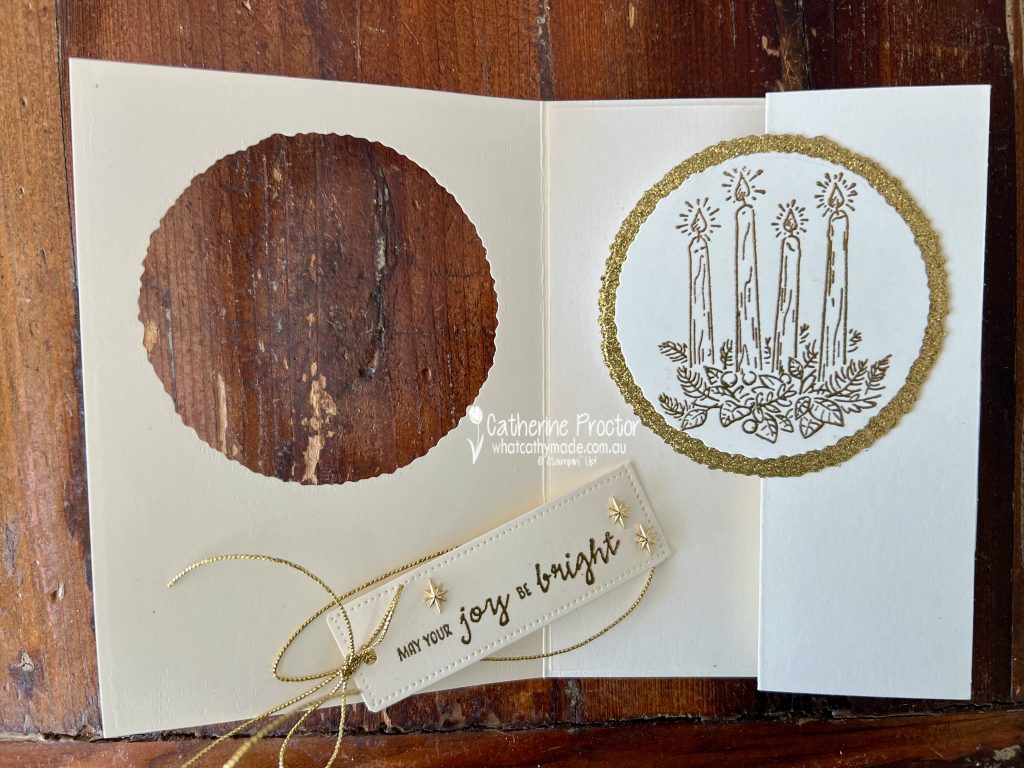
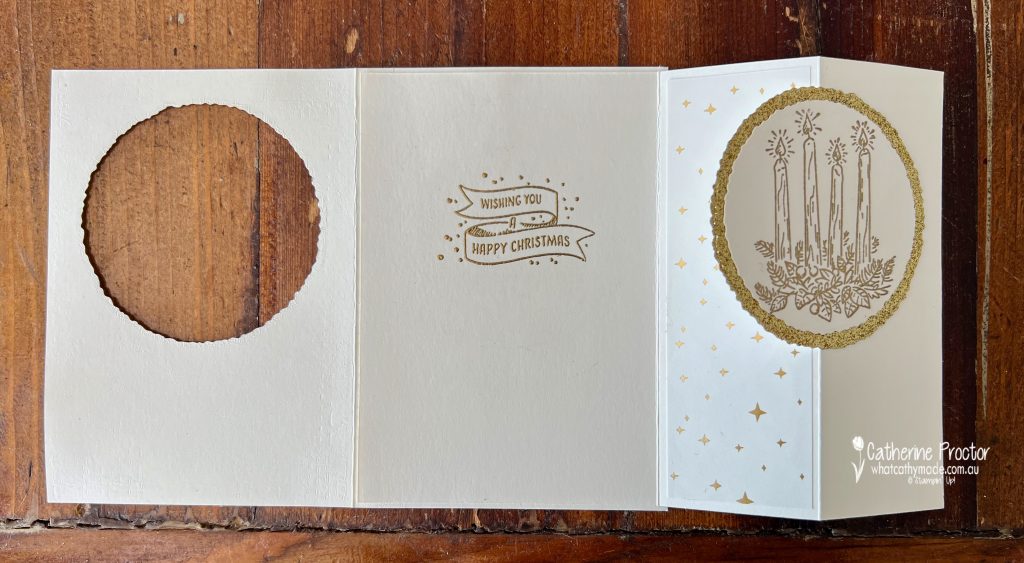
This week’s Christmas card is a fancy fold card – I’m not 100% sure of the name, however think it could be called a peek a boo flap card? Here’s a short video to show you how it works.
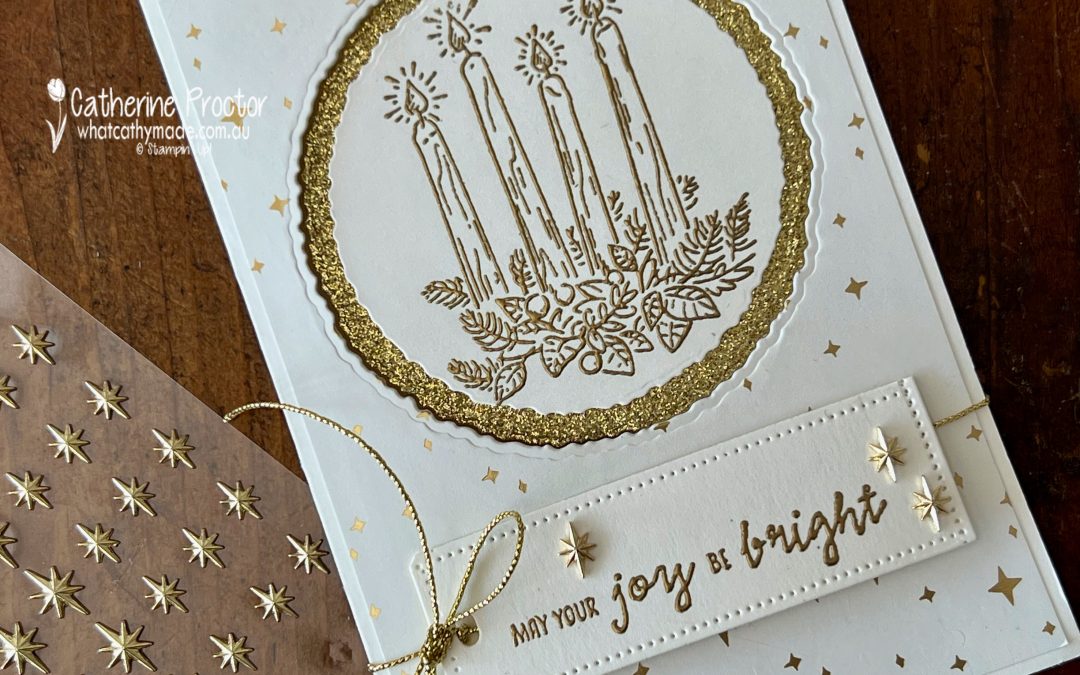
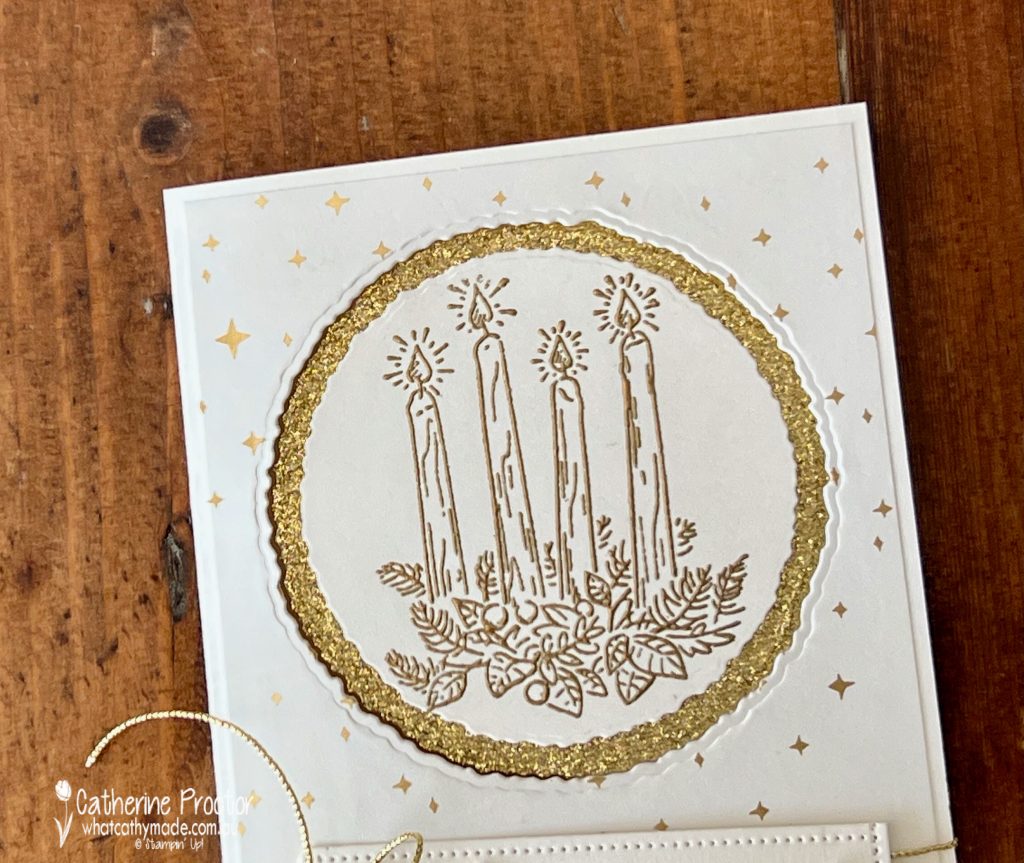
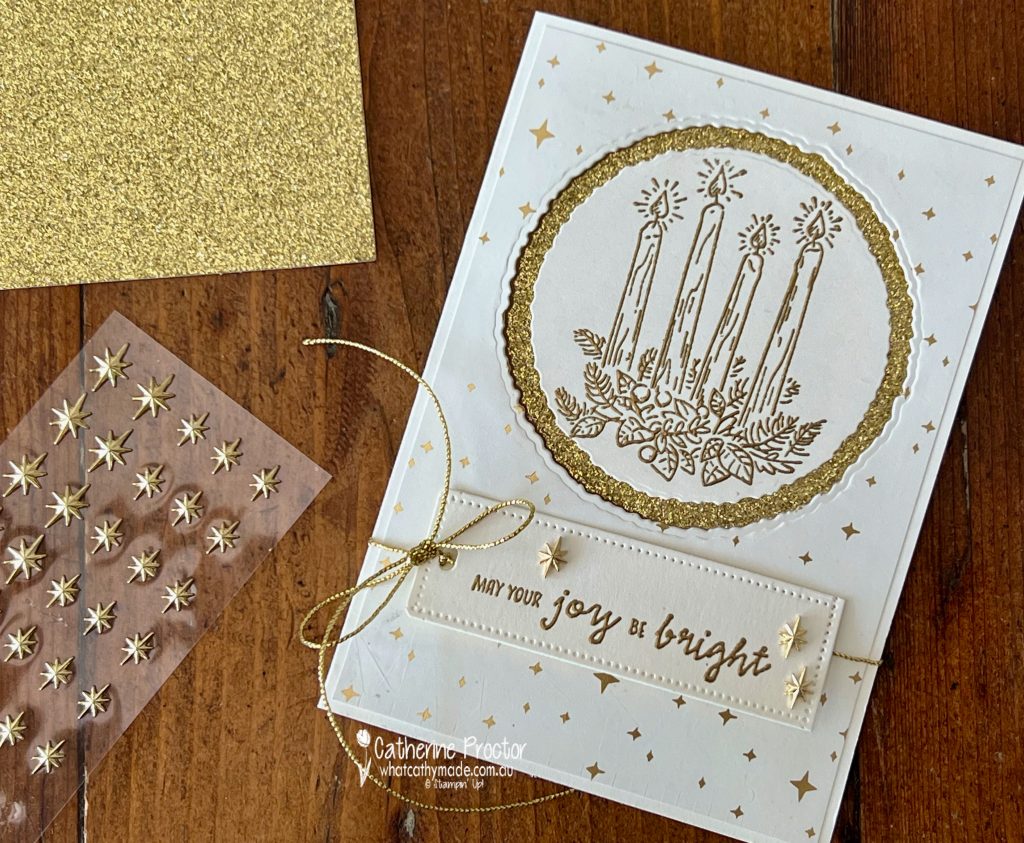
As you probably know, I love monochromatic cards. I’ve taken the colour scheme for my card from the stunning gold and Very Vanilla Shining Brightly 12″ x 12″ (30.5 x 30.5 cm) Specialty Designer Series Paper I’ve used on the front of the card and also inside it too.
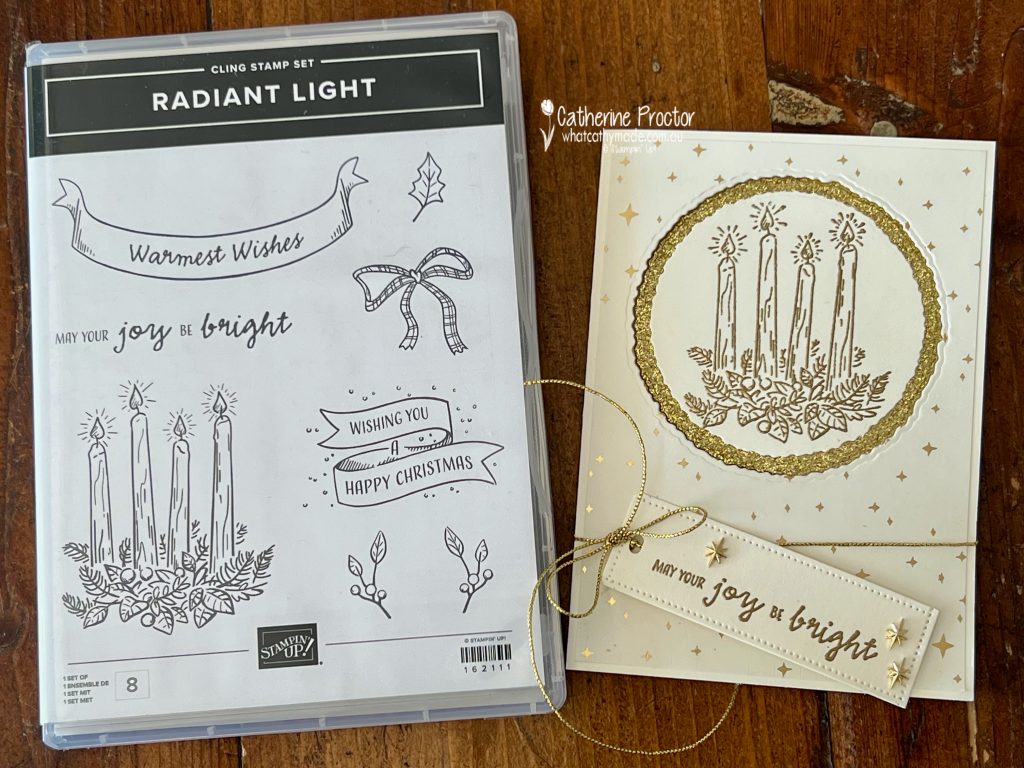
The gorgeous candle image and both sentiments are all from the Radiant Light stampset.
The gold heat embossed candle image and the gold glimmer circle layer behind it are both die cut using the new Decked Circle Dies.
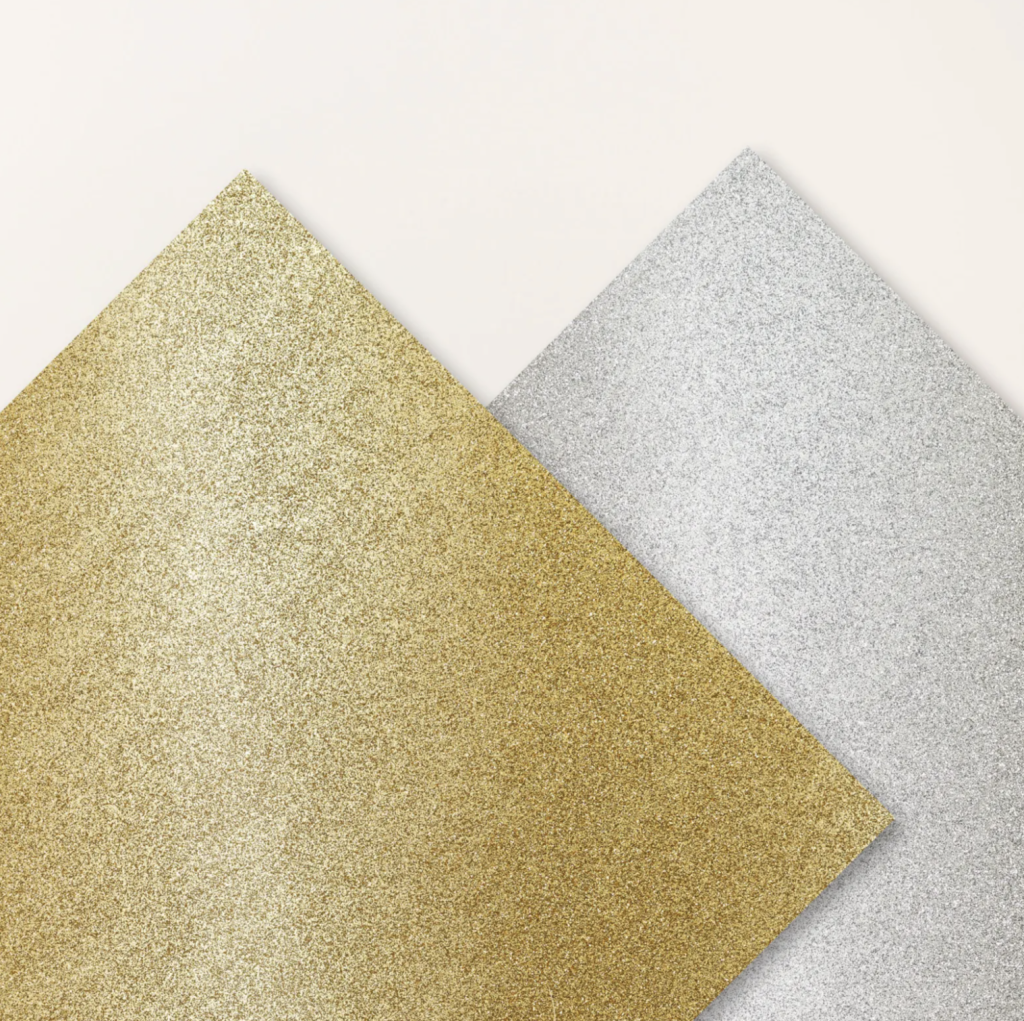
The Silver & Gold 12″ x 12″ (30.5 x 30.5 cm) Adhesive-backed Glimmer Paper is self adhesive and it is a brand new online only release.
Here’s what the card looks like partially opened…
Here’s what the card looks like fully opened…
The Adhesive-Backed Star Trinkets on the front tag sentiment pick up the stars in the DSP – the perfect embellishment!
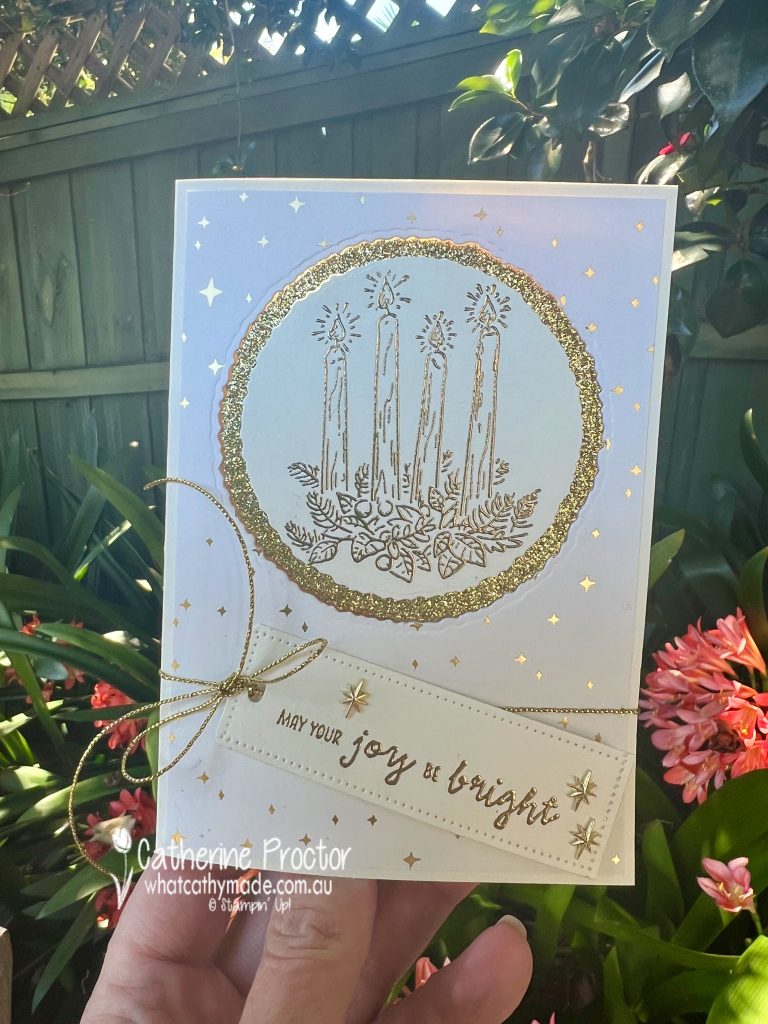
It’s so hard to photograph the glorious sparkly gold elements in my card so I also took a photograph outside in my garden.
Now it’s time to hop on over to our next participant, the lovely Caroline Manwaring. I can’t wait to see what Caroline has made this week.
If at any time you find a broken link, you can find the complete list of all participants on Sharon’s blog.
I’ll be back on Wednesday with the AWH Colour Creations blog where we will be showcasing Early Espresso – I’ve made another Christmas card for Wednesday night’s blog!
Your Christmas countdown continues – it’s 15 weeks today until Christmas Day!
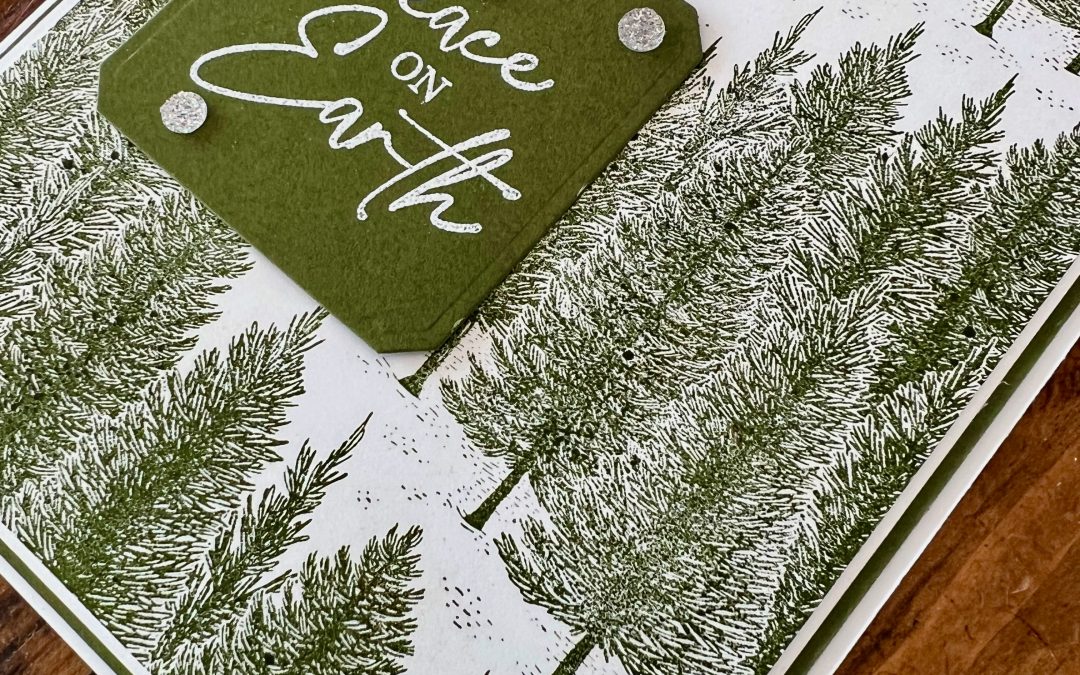
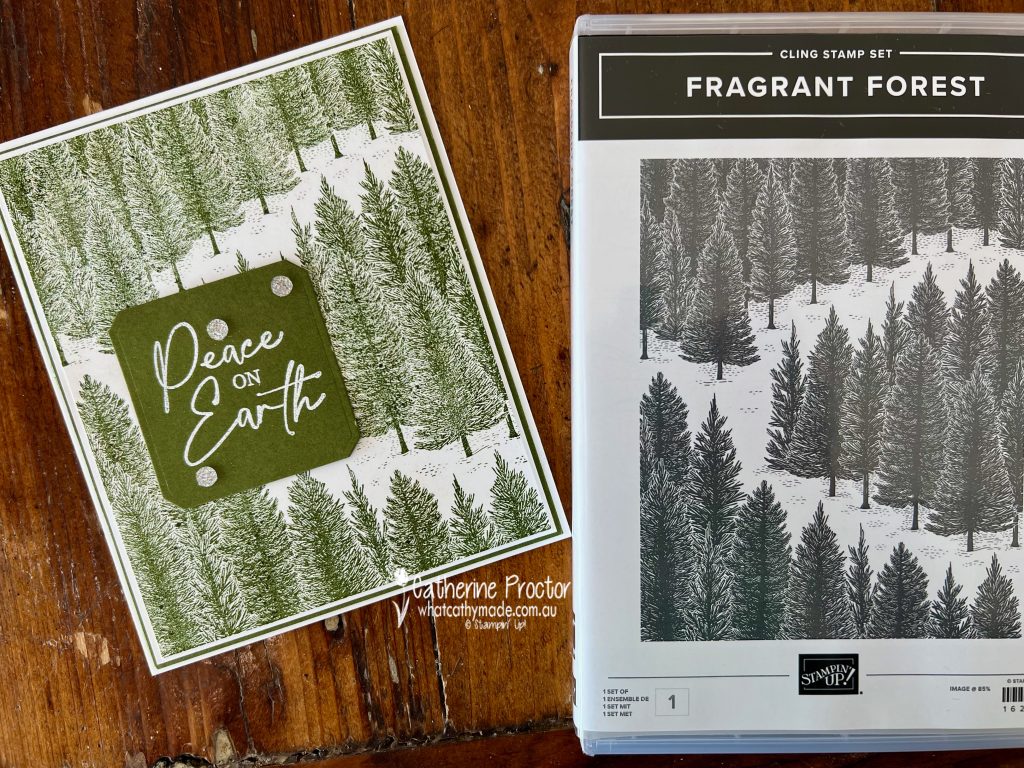
This week’s Christmas card couldn’t be simpler. I’ve used the new Fragrant Forest stamp – a background stamp that’s quite frankly just too gorgeous to cover up!
I’ve stamped this stamp in Mossy Meadow onto Basic White cardstock adding a Mossy Meadow Sentiment label as I love monochromatic cards.
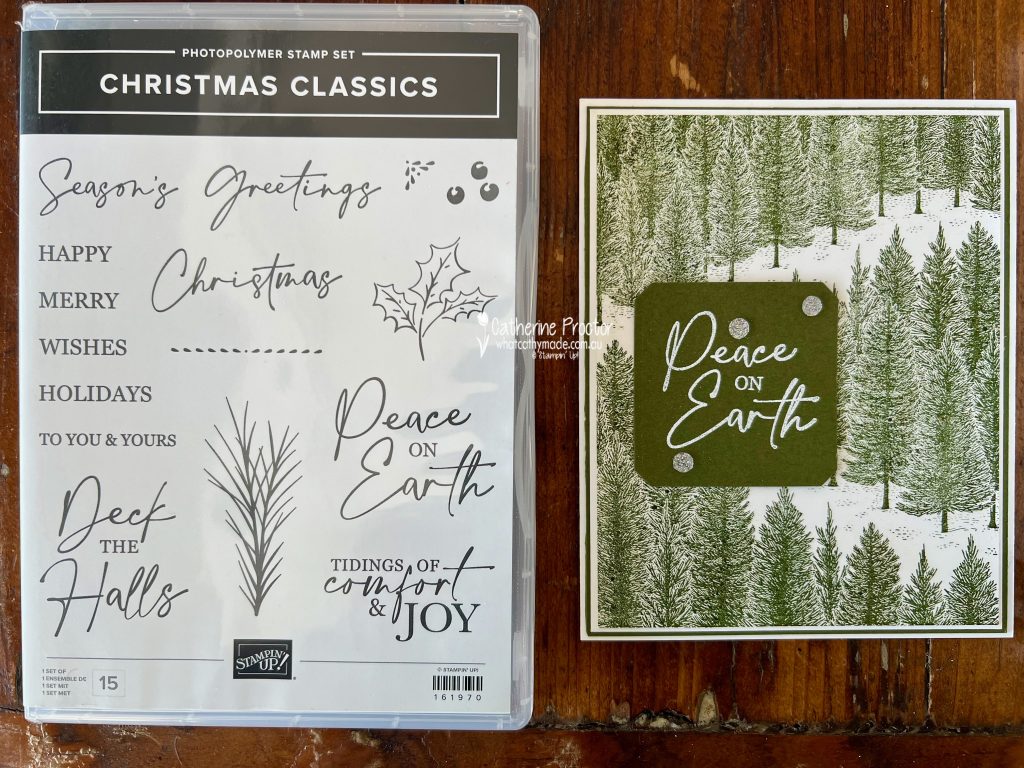
The Fragrant Forest background stamp works with any Christmas sentiment. I’ve stamped and embossed two different sentiments from the Christmas Classics stamp set, however, I can’t decide which one I prefer.
Card one is a smaller sentiment I’ve fussy cut around – I like that this smaller sentiment shows more of the background imagery.
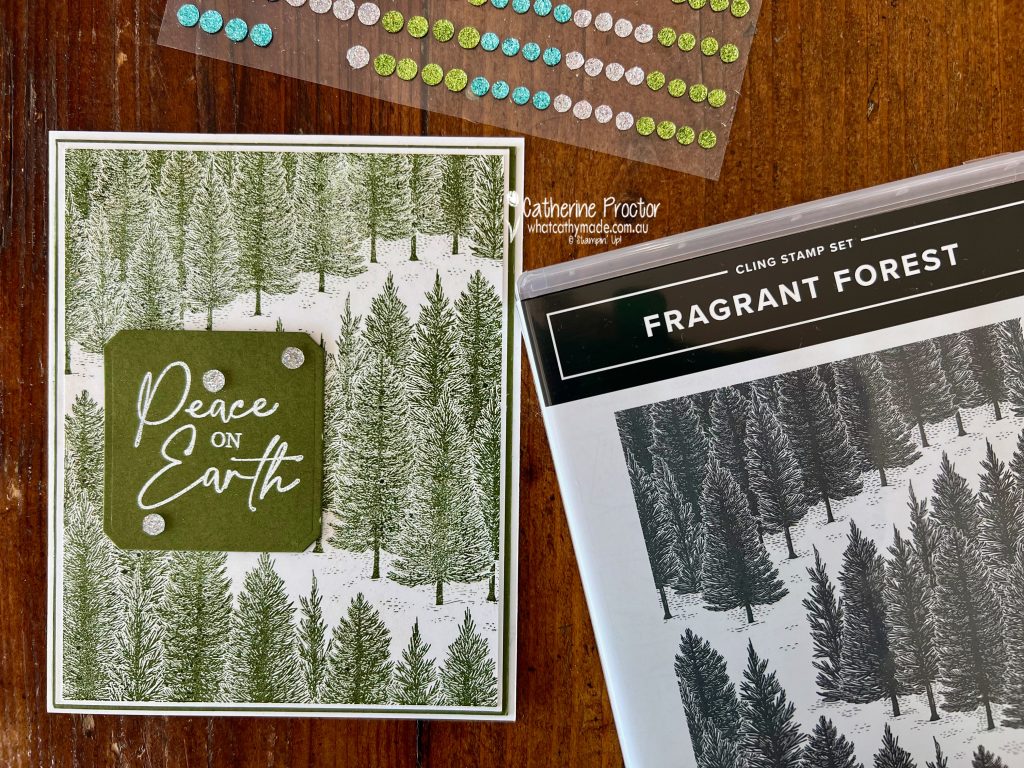
Card two has a larger sentiment, die cut using the rounded square die from the Christmas Classics Dies. I like that the larger sentiment allows room for a bit of bling.
The Adhesive-Backed Glitter Sequins are my favourite embellishment from this catalogue!!!
Which sentiment do you think works best?
Now it’s time to hop on over to our next participant, the lovely Sharon Davern. I can’t wait to see what Sharon has made this week.
If at any time you find a broken link, you can find the complete list of all participants onSharon‘s blog.
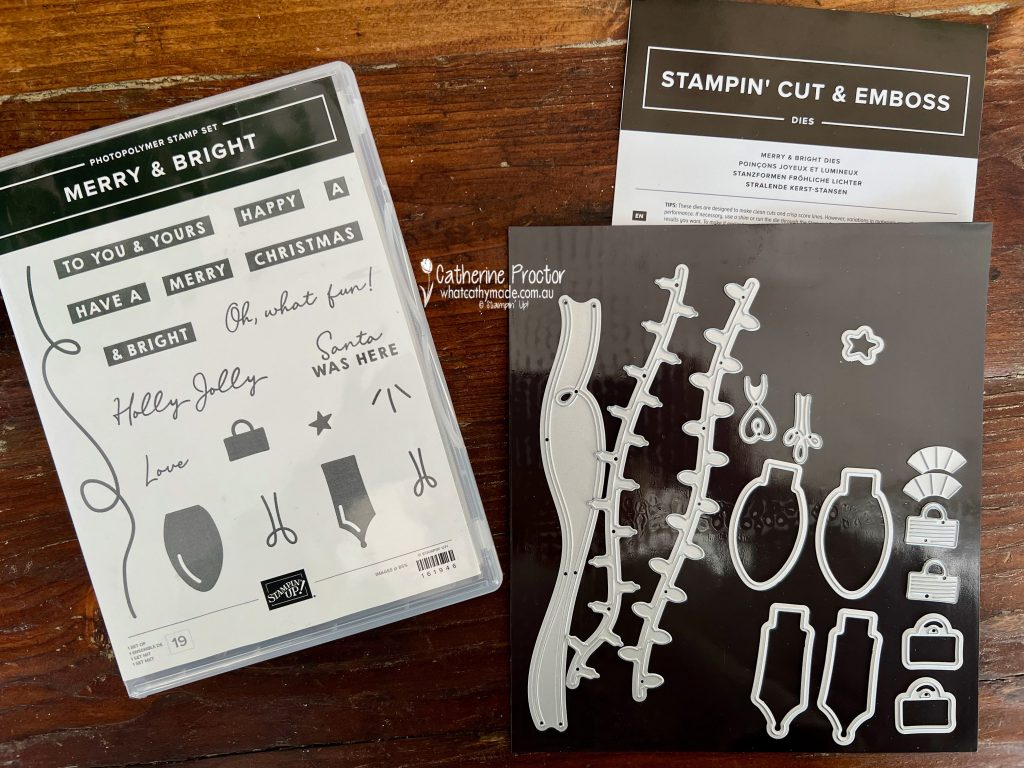
Your Christmas countdown continues – it’s 16 weeks today until Christmas Day! And in even more exciting news, it’s only two days until the Stampin’ Up! September December Mini Catalogue goes live and you can purchase the Merry & Bright bundle.
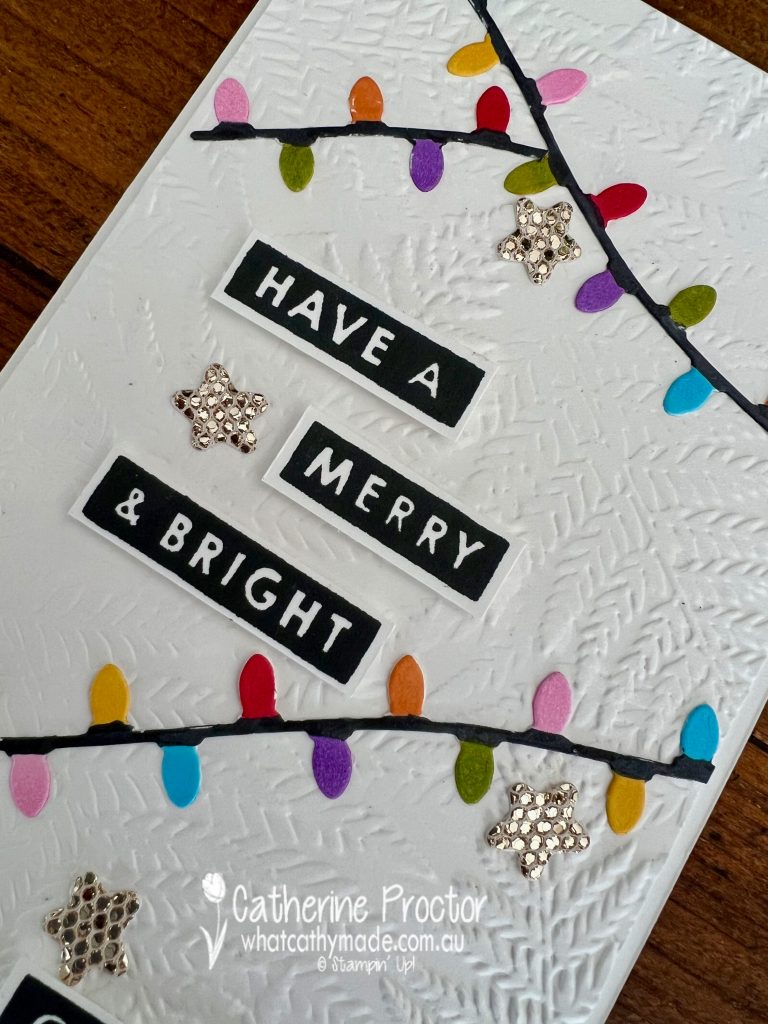
Sometimes the dies in a bundle can be overlooked if they don’t have a matching stamp set, and to honest, I don’t think I realised the Merry & Bright bundle included these two strings of Christmas lights until my delivery arrived!
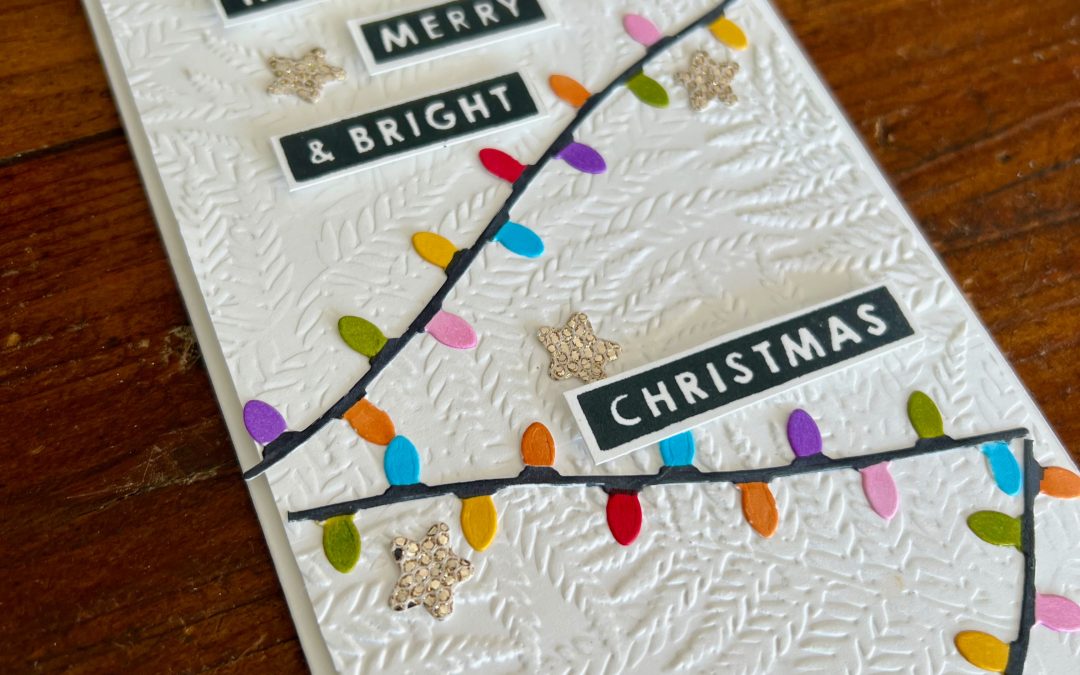
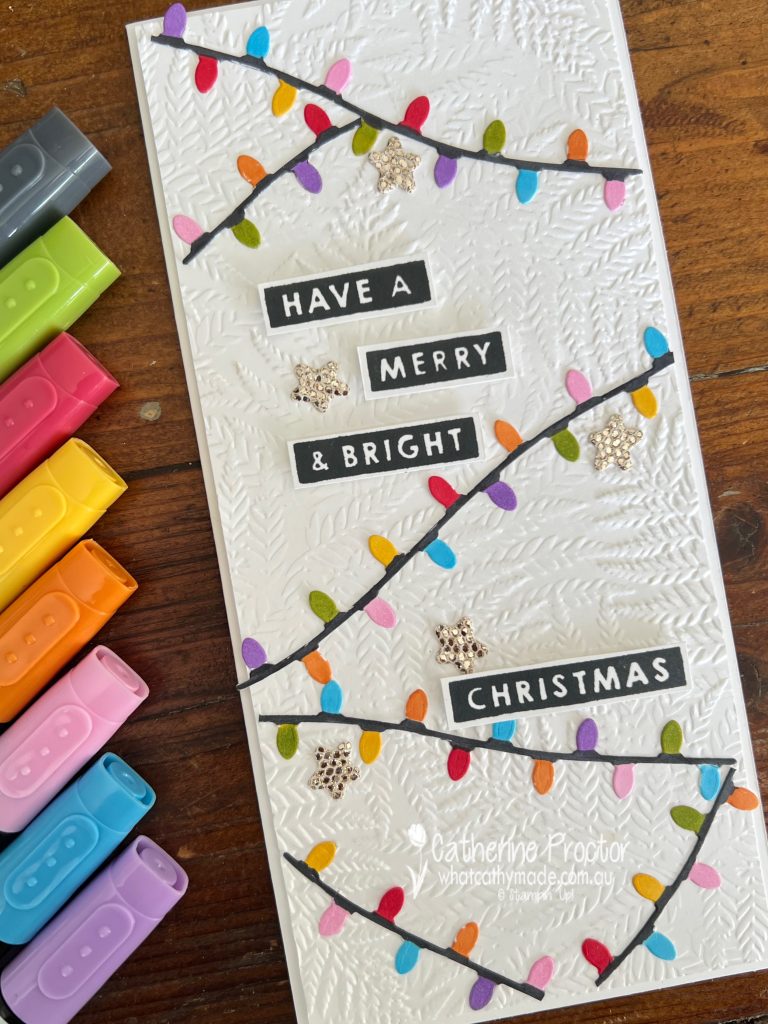
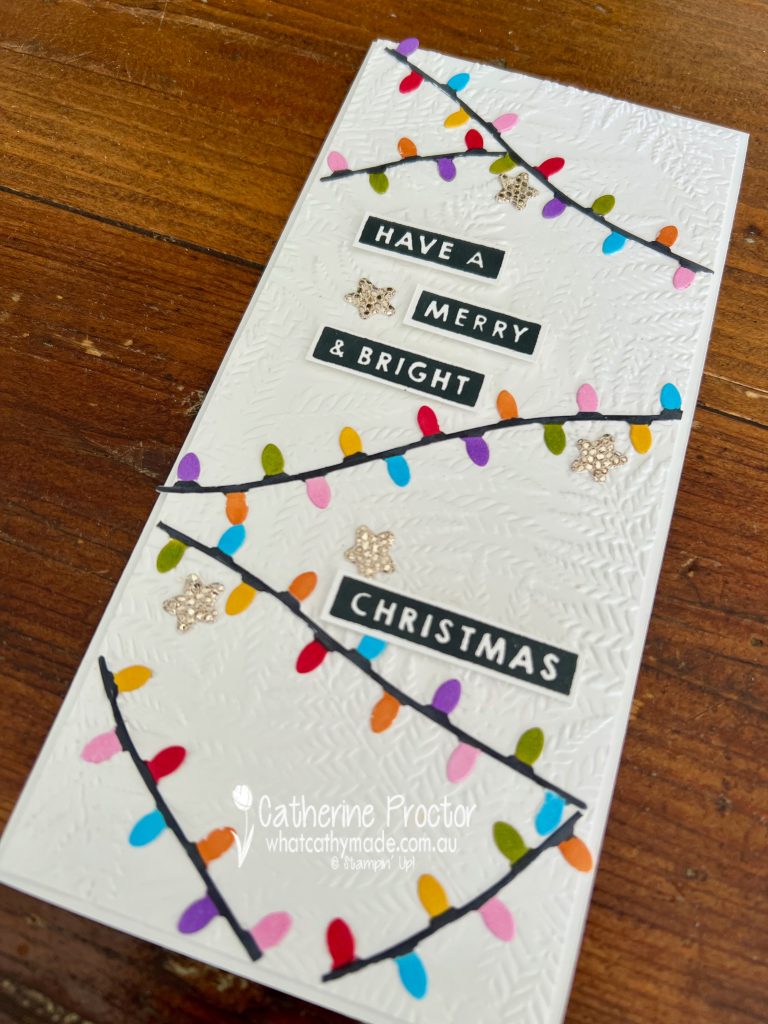
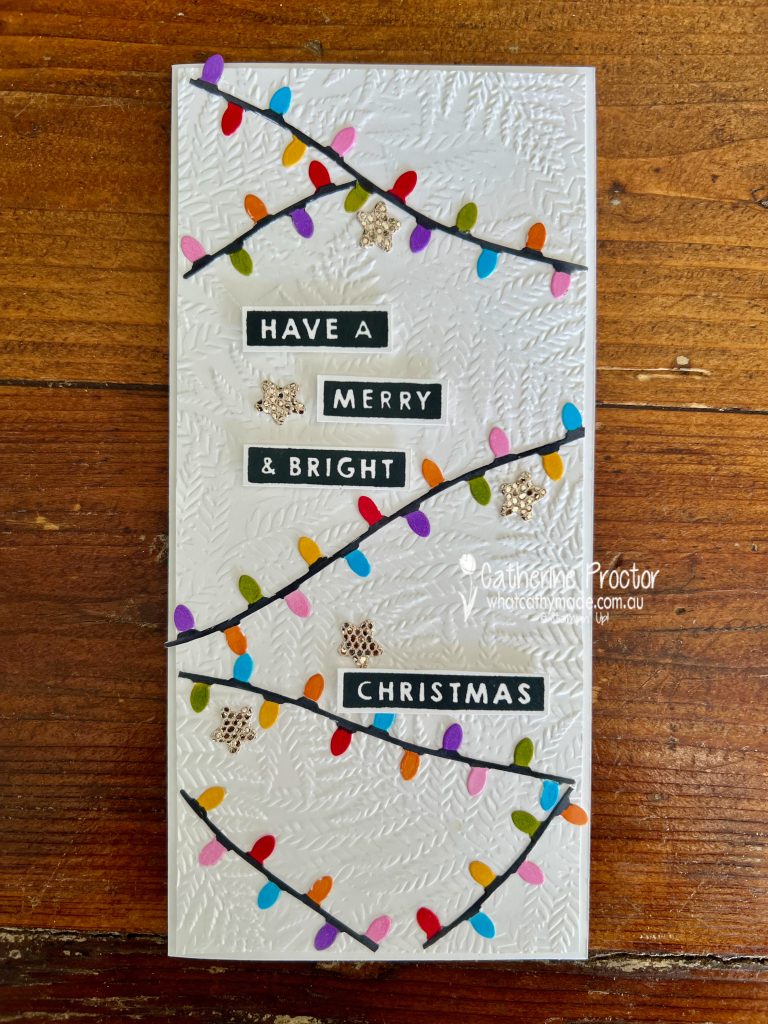
I’ve used the die with the more rounded light bulb to create this slimline card. Four “string of Christmas lights” dies were die cut from Basic White cardstock and then coloured in with a variety of Stampin’ Blends.
The top layer of the card was embossed using the Fern 3D embossing folder to mimic the branches of a Christmas tree.
Using the star die in the Merry & Bright bundle, I die cut a few stars from the More Dazzle Specialty paper.
The sentiment is from the Merry & Bright stamp set, stamped in Memento Tuxedo black for contrast against the white card base and card front layer and and the bright colours of the Christmas lights.
Now it’s time to hop on over to our next participant, the lovely Rosa Leyden. I can’t wait to see what Rosa has made this week.
If at any time you find a broken link, you can find the complete list of all participants on Sharon’s blog.
The Christmas countdown continues – it’s 18 weeks today until Christmas Day! Have you started making Christmas cards yet?
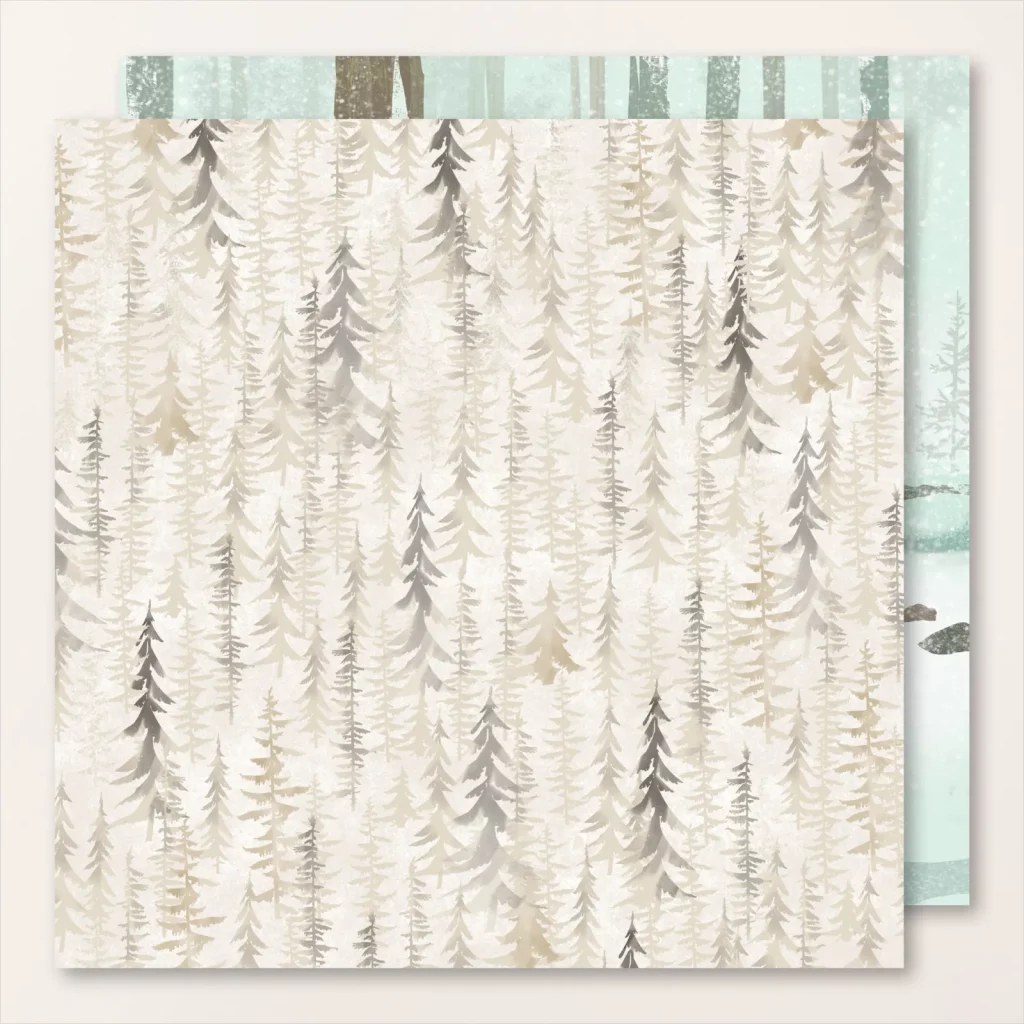
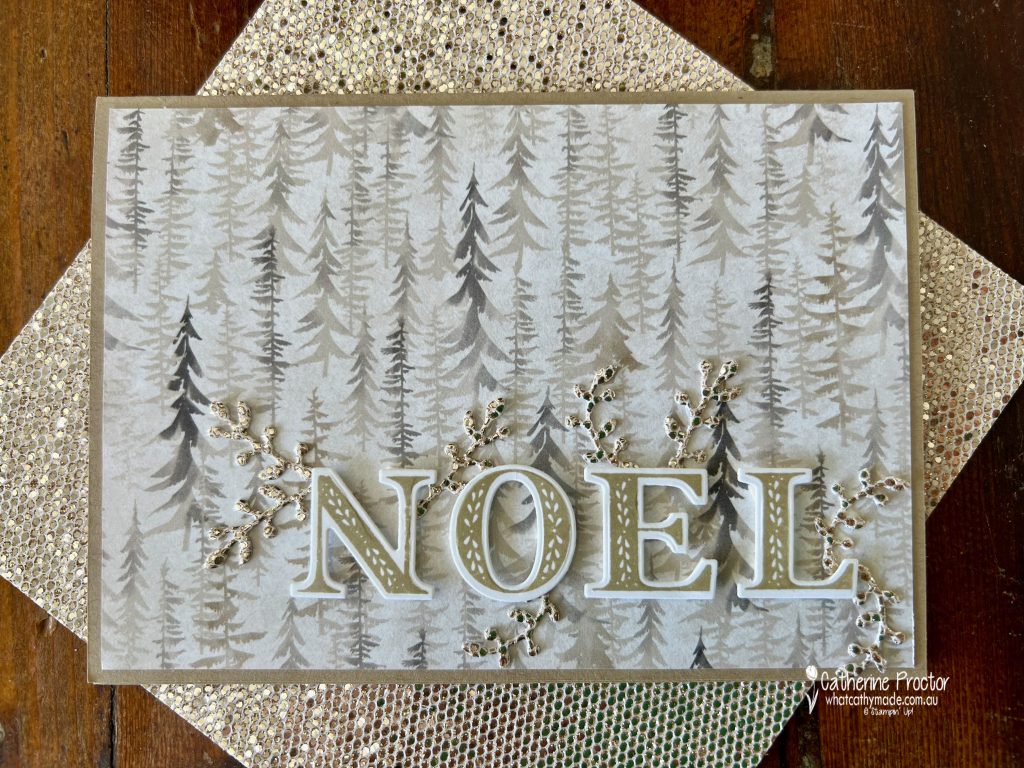
This week I was short of time so I’m following the example of my friend, Tina Gillespie, by creating a 20 minute card. It was this beautiful One Horse Open Sleigh 6″ x 6″ DSP that also inspired the fast and simple card – I just didn’t want to cover it up too much!
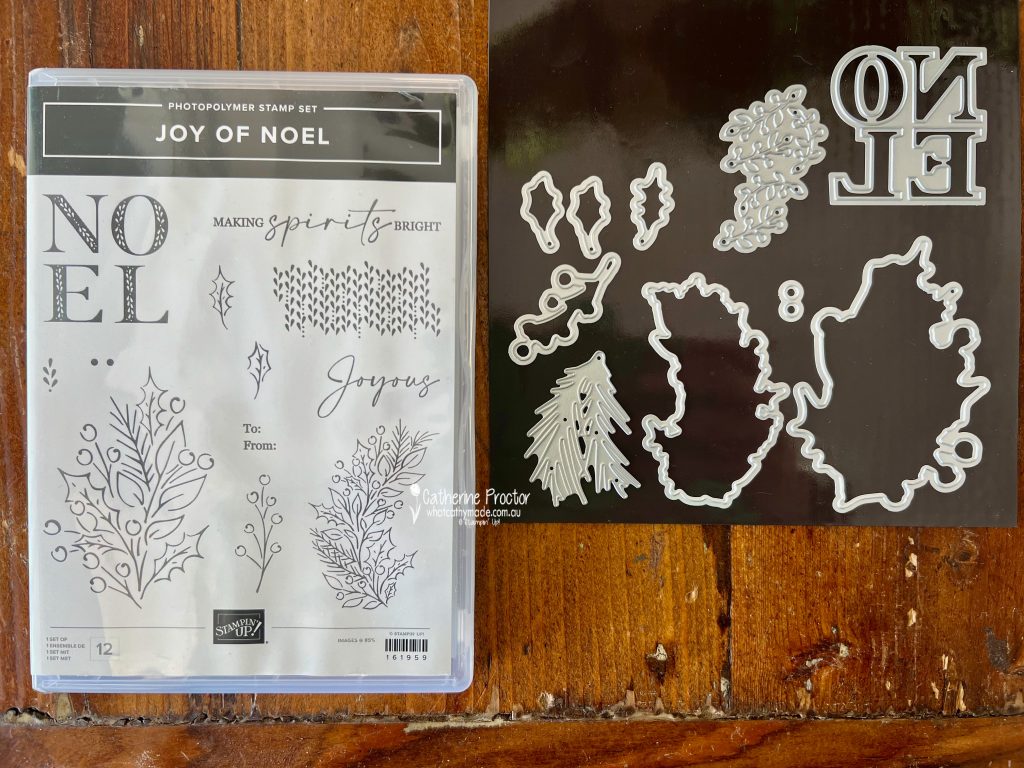
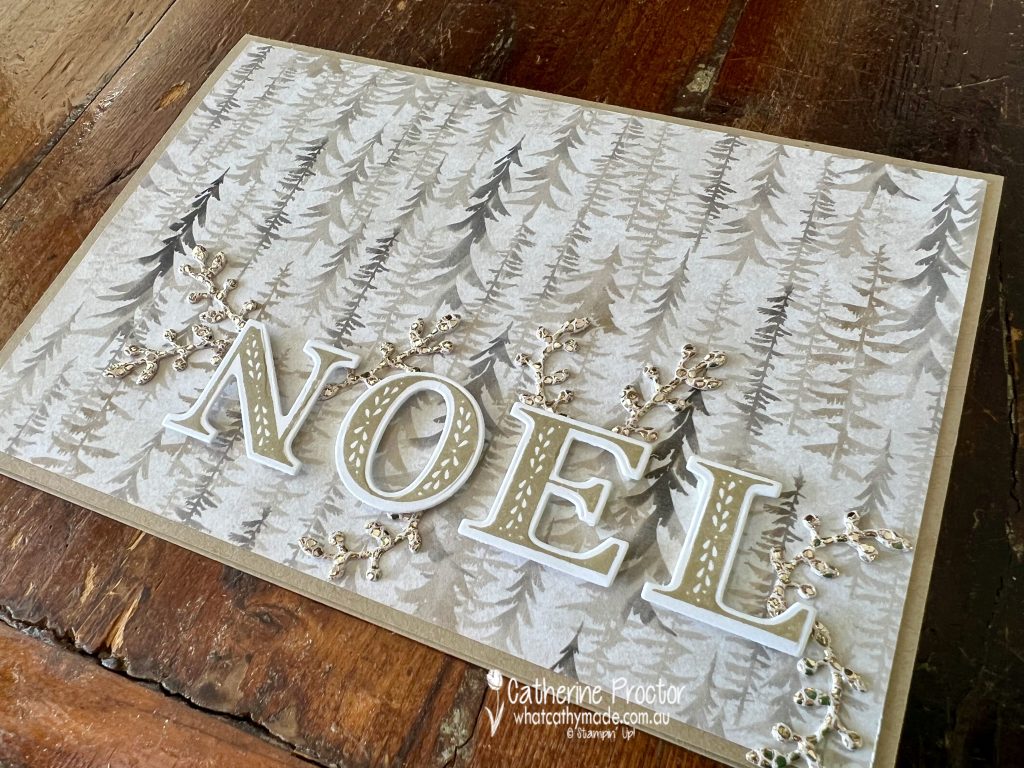
The Joy of Noel bundle will be available to purchase from September 3 – it was the large Noel sentiment with matching dies that tipped this bundle into my shopping cart!
I stamped the NOEL in Crumb Cake, die cut it out and used mini dimensionals to adhere the letters to the One Horse Open Sleigh 6″ x 6″ DSP.
Instead of adding an embellishment for a touch of sparkle, I used a die from the Joy of Noel dies to cut some fronds from the More Dazzle Specialty paper.
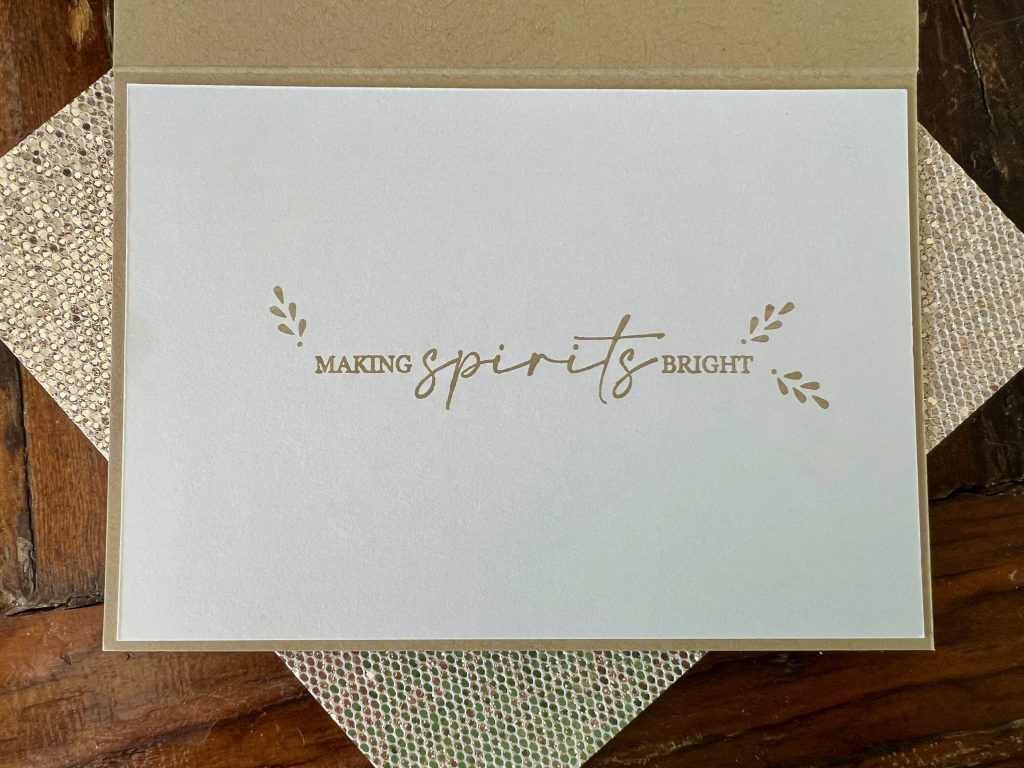
I kept the inside of the card simple too, with Crumb Cake stamped sentiments from the Joy of Noel stamp set.
Now it’s time to hop on over to our next participant, the lovely Sharon Davern. I can’t wait to see what Sharon has made this week.
If at any time you find a broken link, you can find the complete list of all participants on Sharon’s blog.
The Christmas countdown continues – it’s 19 weeks today until Christmas Day! Have you started making Christmas cards yet?
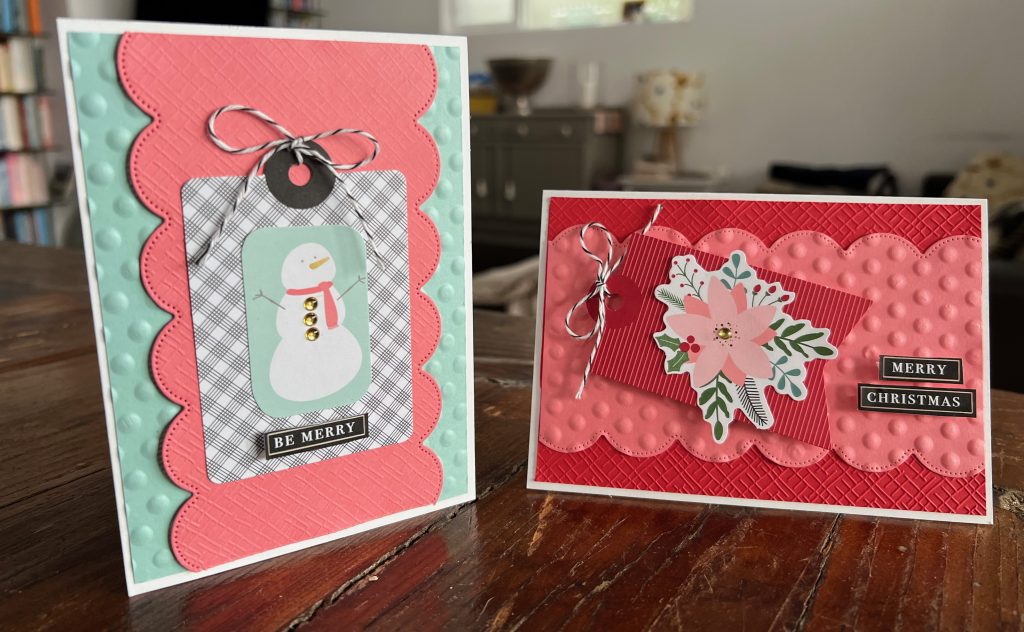
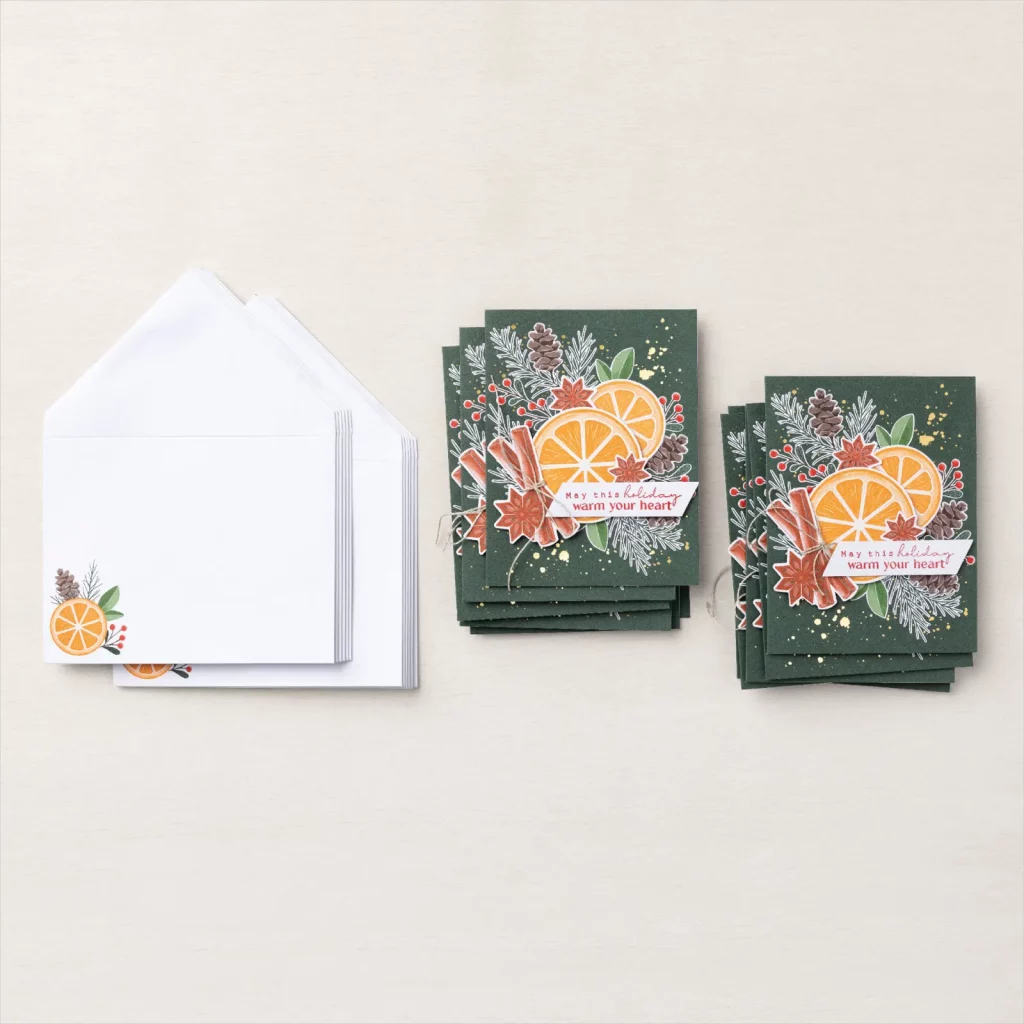
Tonight I’m sharing some ideas on ways to use some of the Stampin’ Up! Christmas kits as they are all discounted for the month of August, so now’s the perfect time to purchase a Christmas kit.
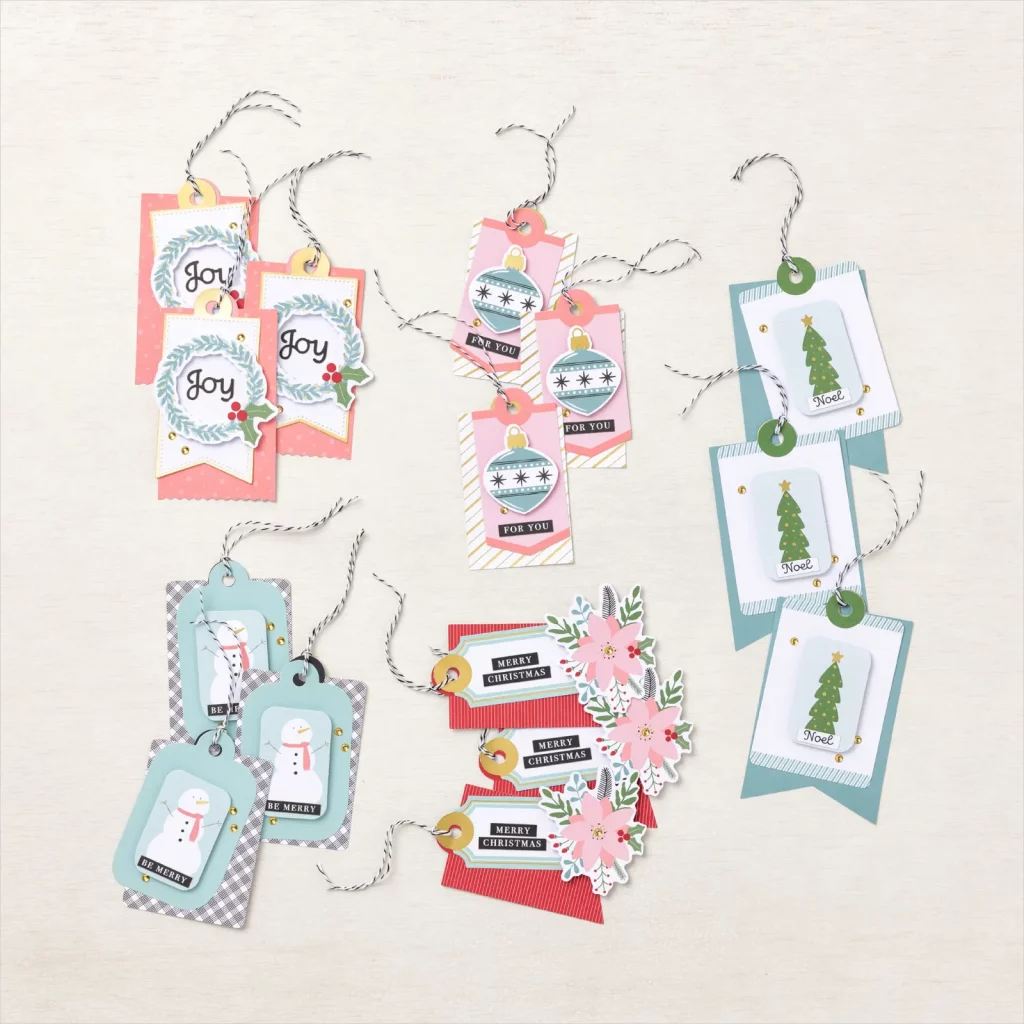
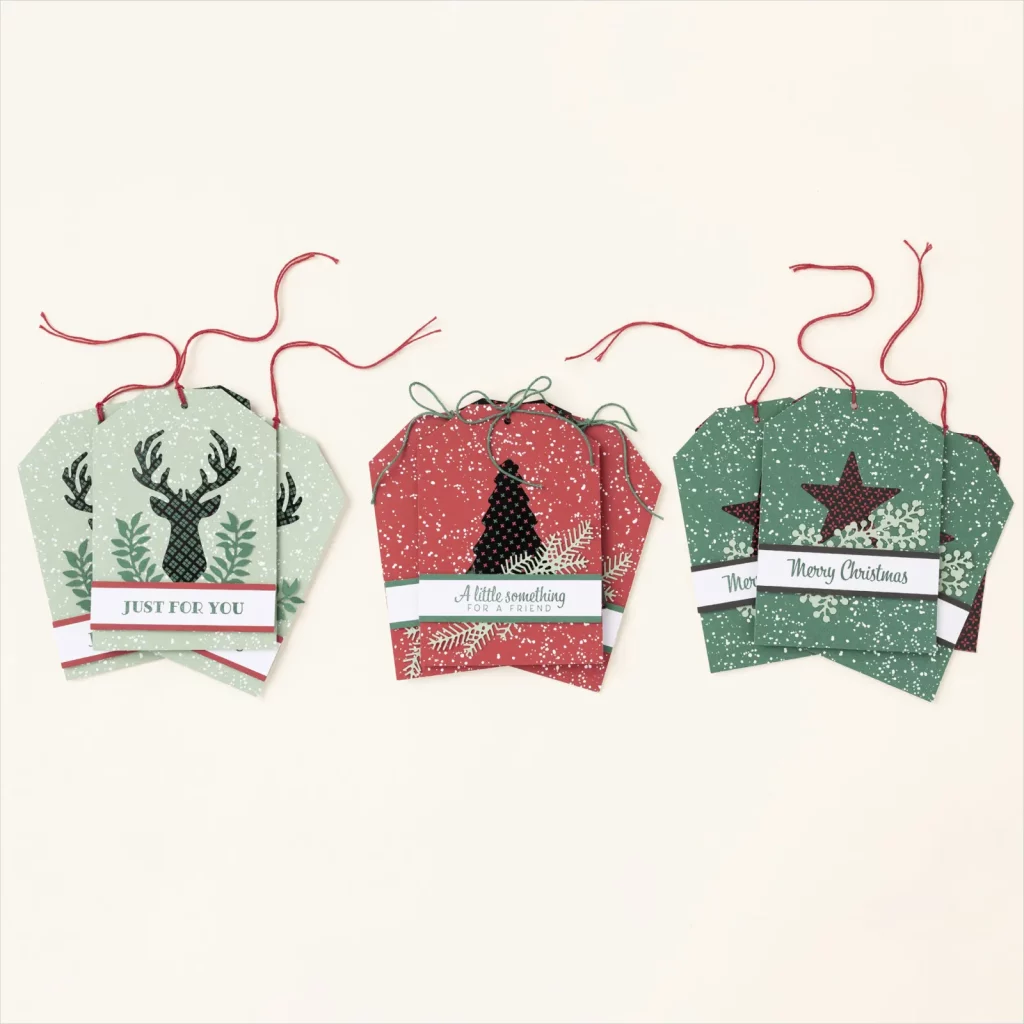
Currently, there are 5 kits to choose from and the kit I’ve used to create my cards today is the latest Stampin’ Up! kit, Festive Tags.
There is no stamping required to makes these tags and the sentiment pieces come in several languages.
I was lucky enough to watch Sara Douglass, Stampin’ Up! CEO, demonstrate this in person at a 35 for 35 event last month and she gave us all some samples to take home.
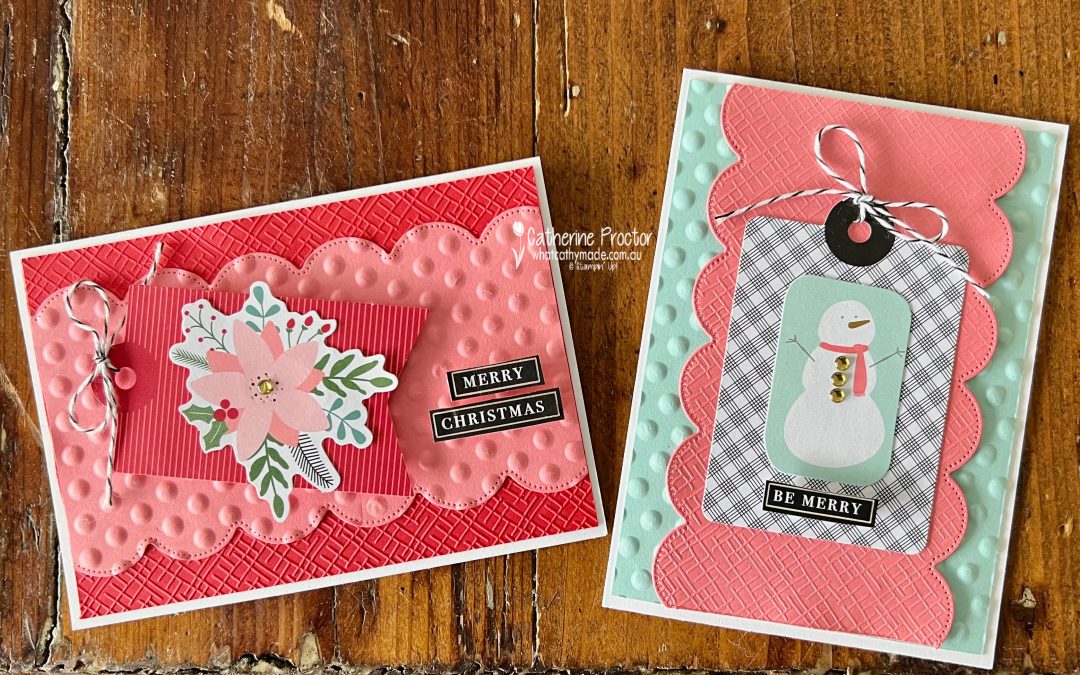
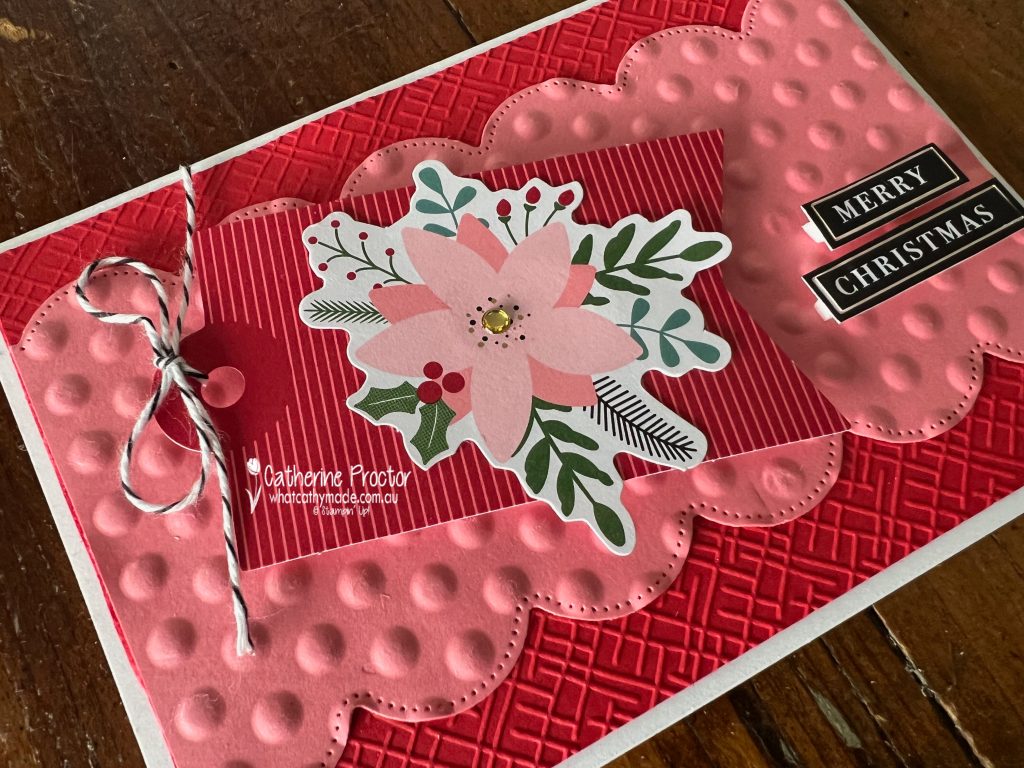
Although this is a tag kit, I’ve turned my sample tags into cards, by using a few extra supplies in the same colours used in the kit.
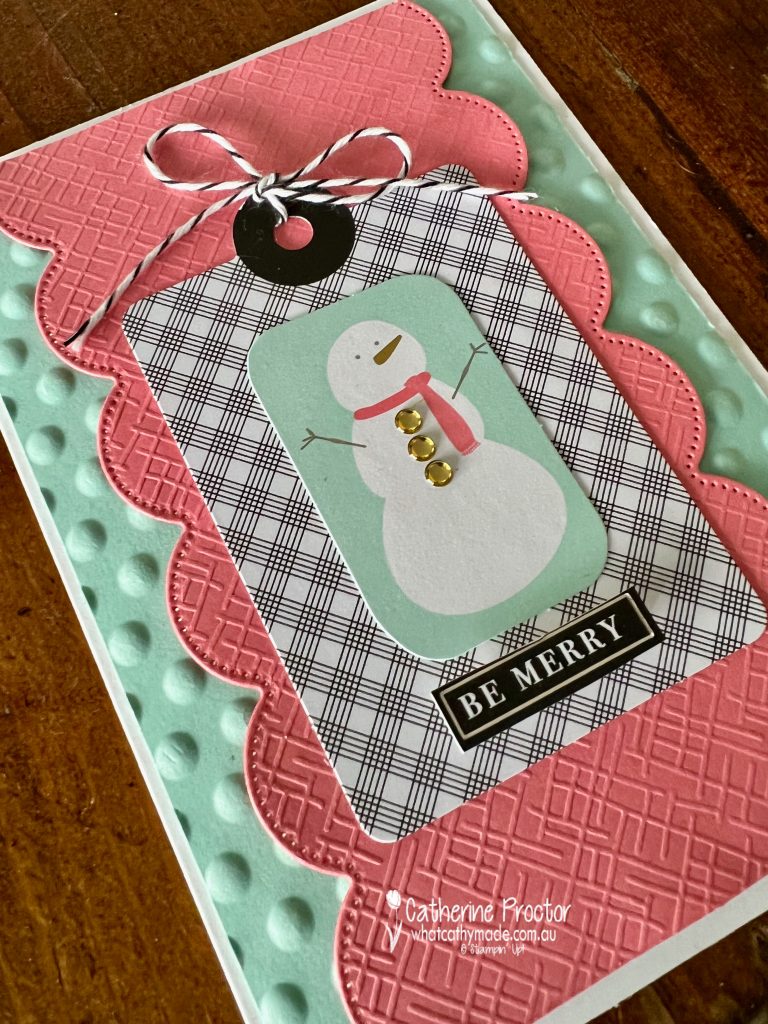
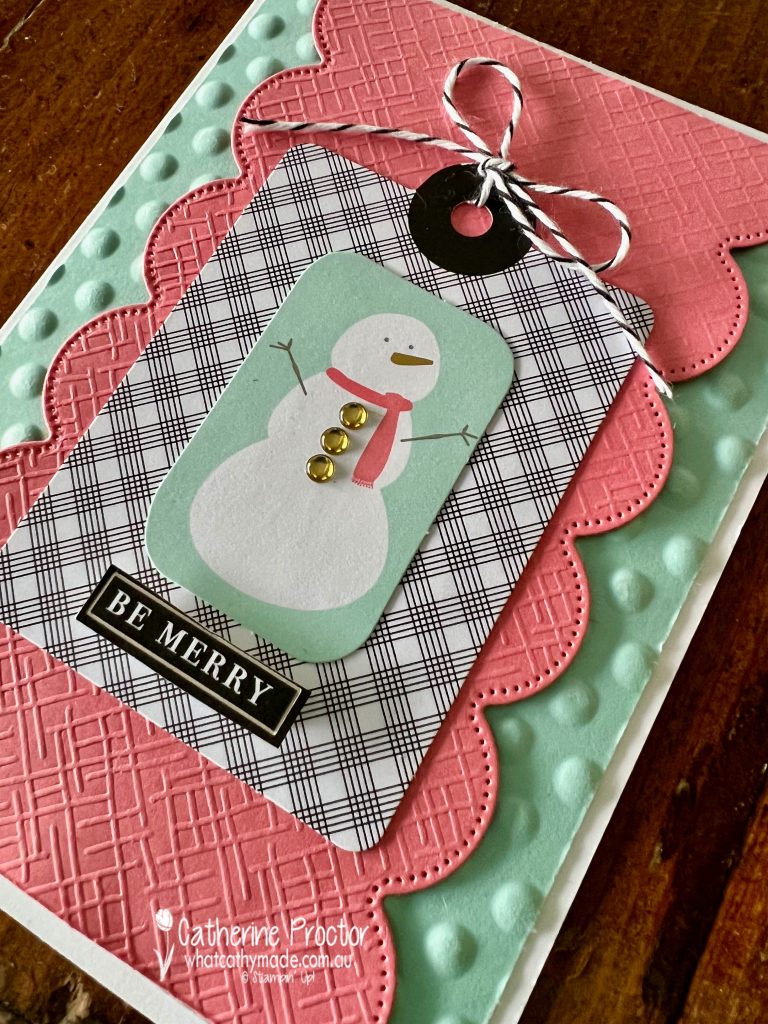
For the snowman card, I’ve embossed a layer of Pool Party card stock using the circles embossing folder from the Basics Embossing folders (online only).
The layer of Flirty Flamingo has been embossed using the crosshatch embossing folder from the Basics Embossing folders and a scalloped border die cut with the Scalloped Layers dies.
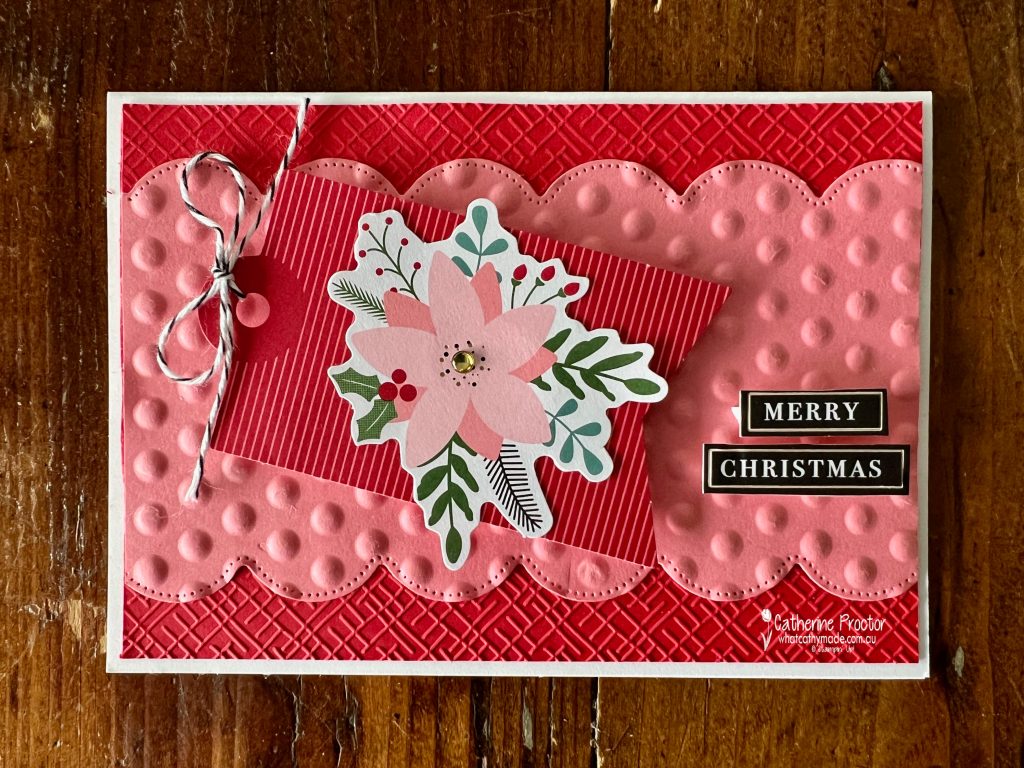
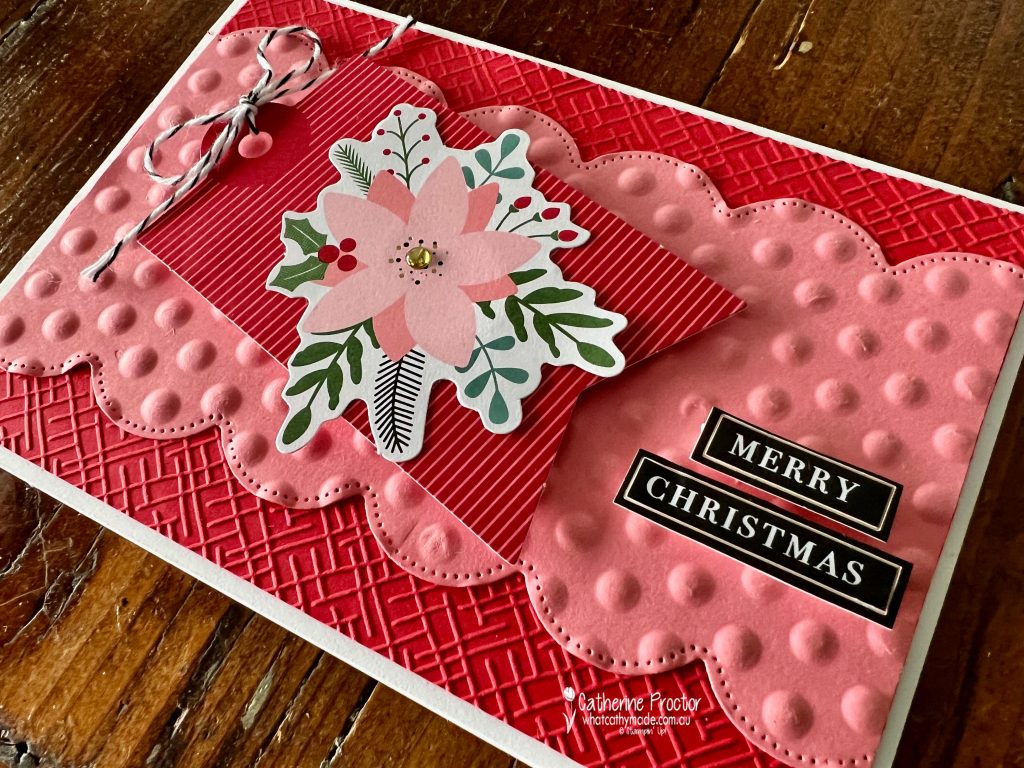
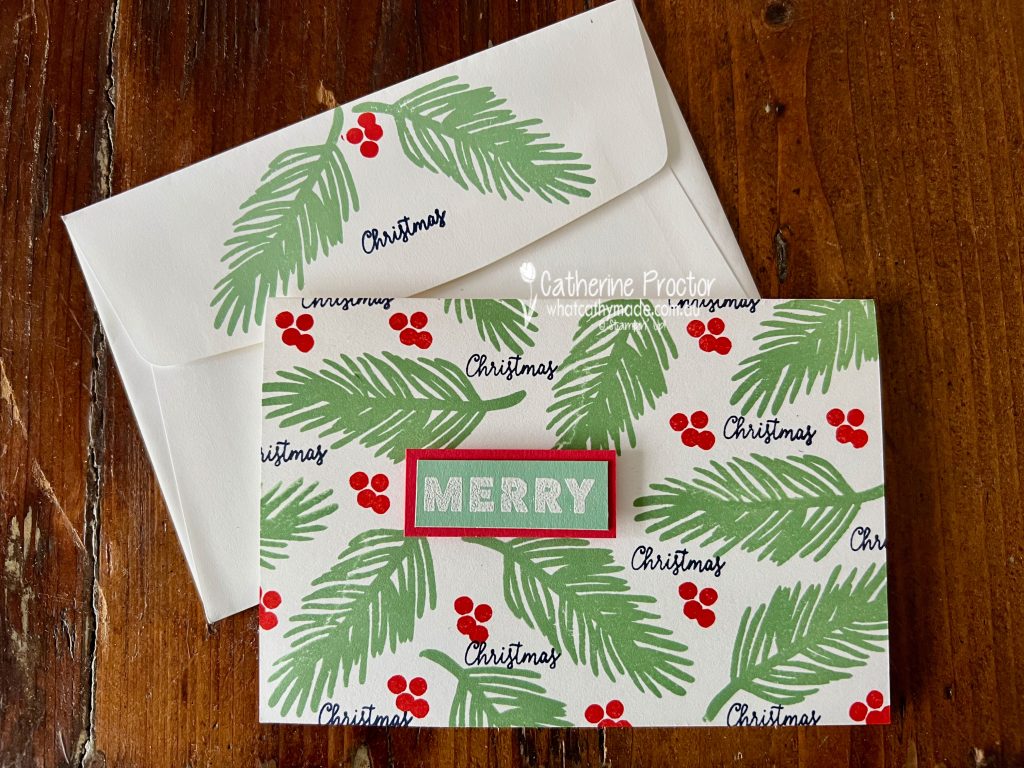
The floral Christmas card uses the same embossing folders and the Scalloped Layers dies to emboss and die cut Real Red and Flirty Flamingo card stock.
I love Flirty Flamingo and Real Red together!
The rest of the elements on my cards are all from the Festive Tags kit.
Some of the other Stampin’ Up! Christmas kits also have stamp sets, acrylic blocks and ink spots included.
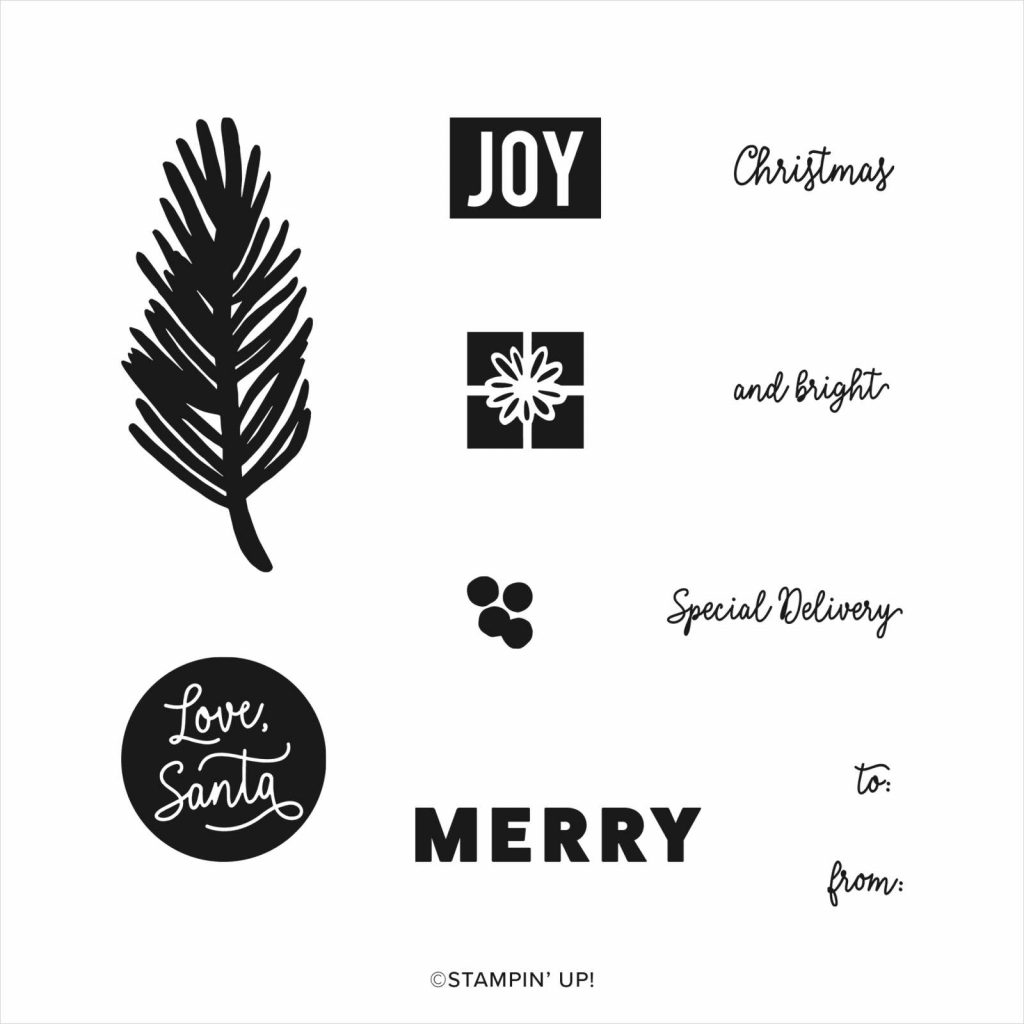
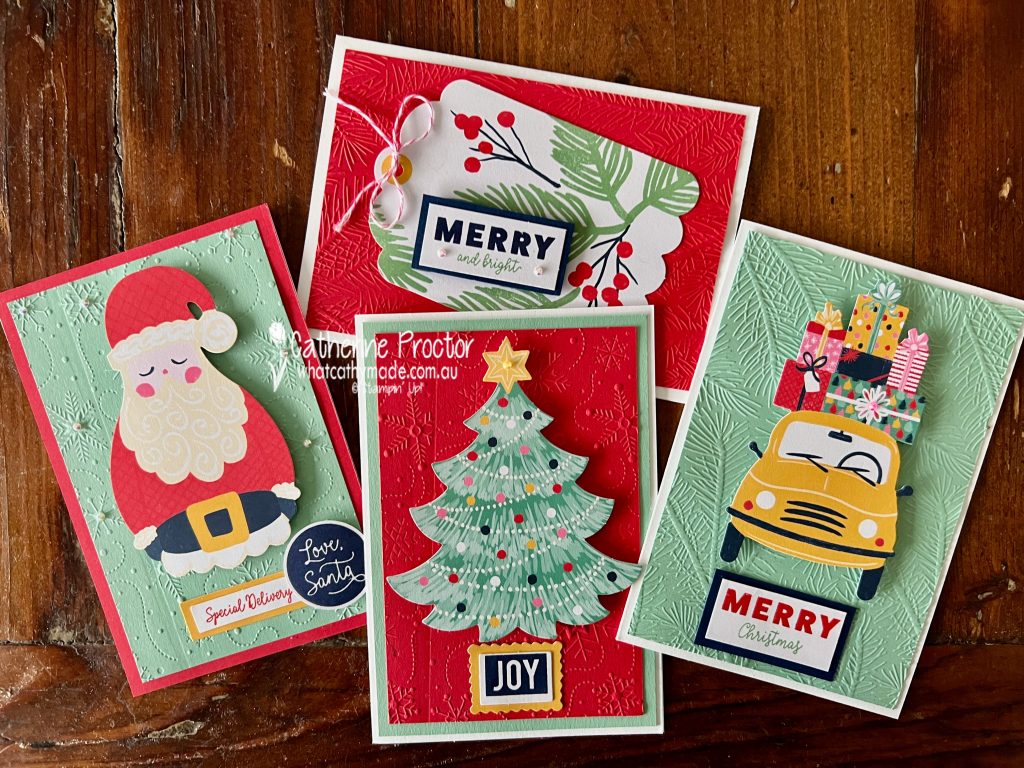
The Love, Santa Tag Kit makes very large tags and it has a fabulous stamp set too.
Here are variations on this kit I’ve previously shared – four cards using the tags, as well as another card with matching envelope using just the stamp set.
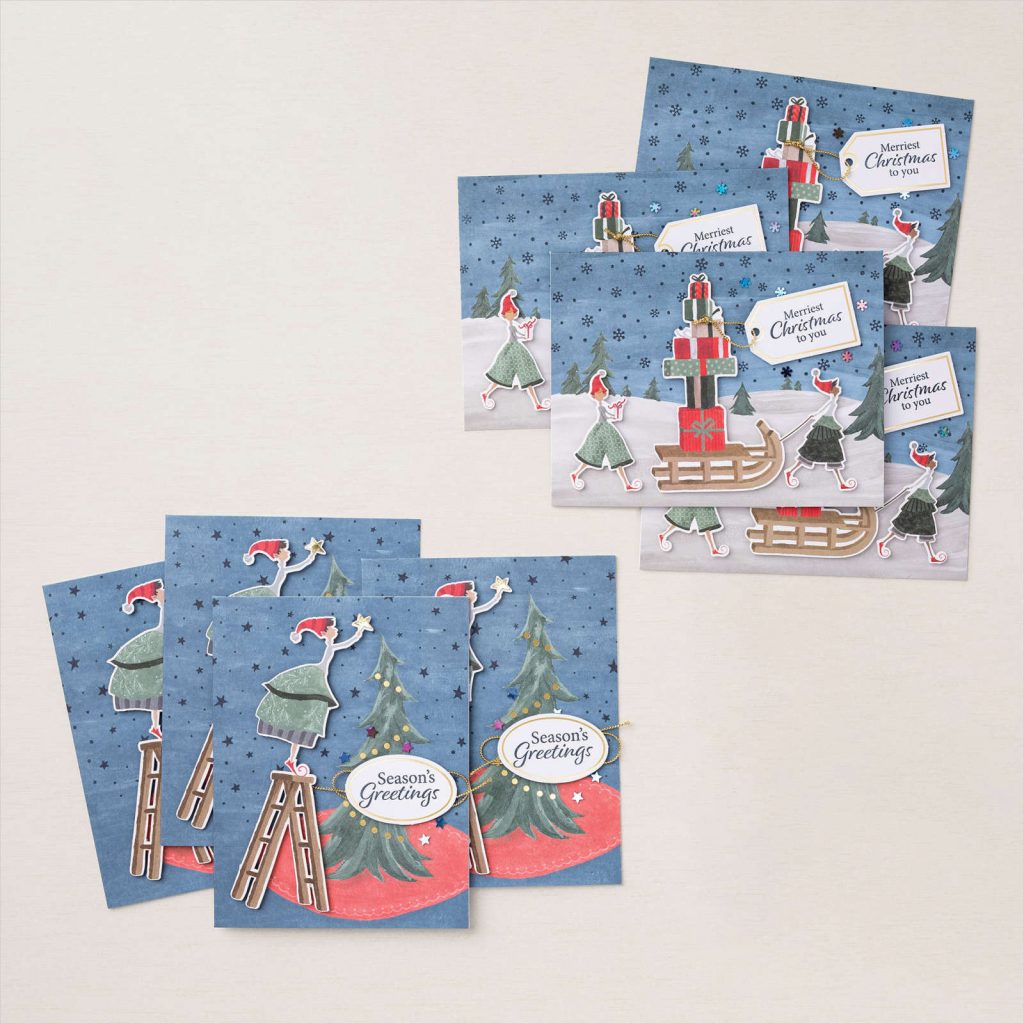
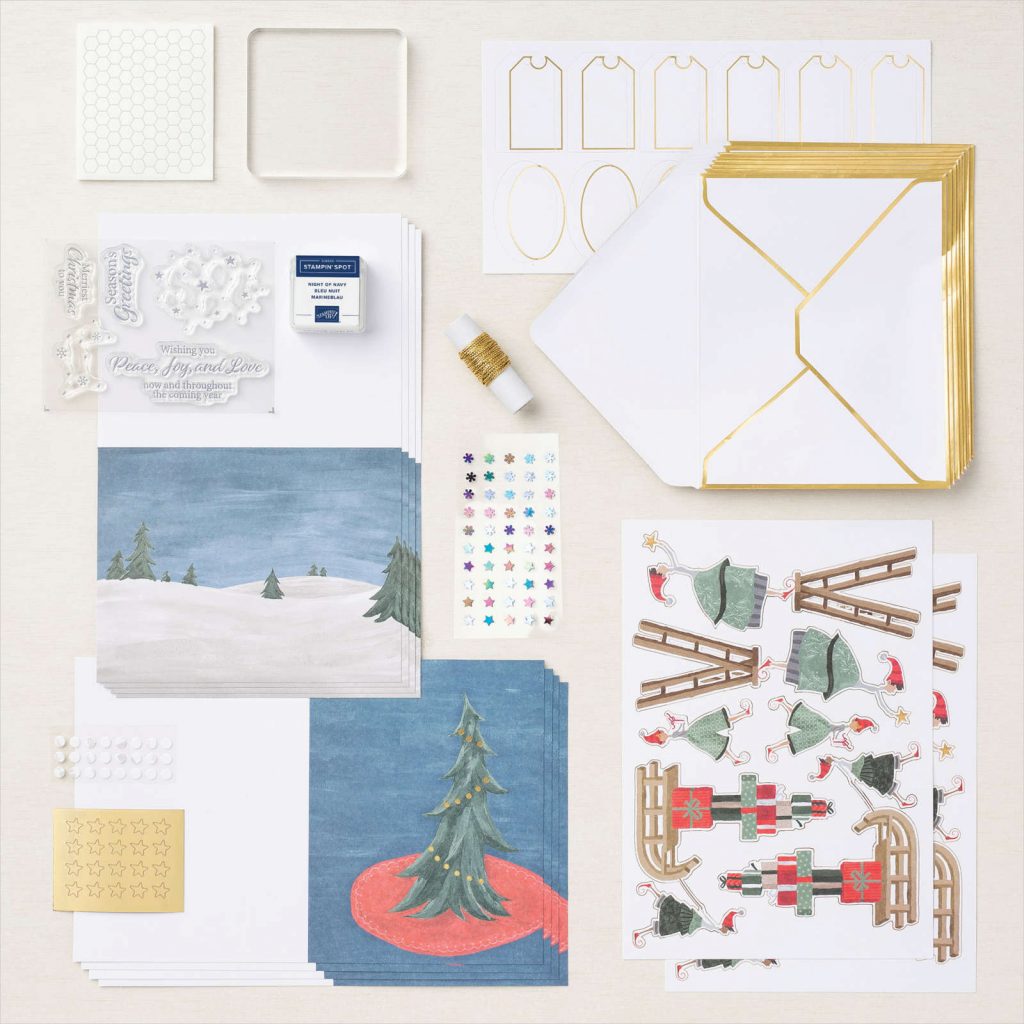
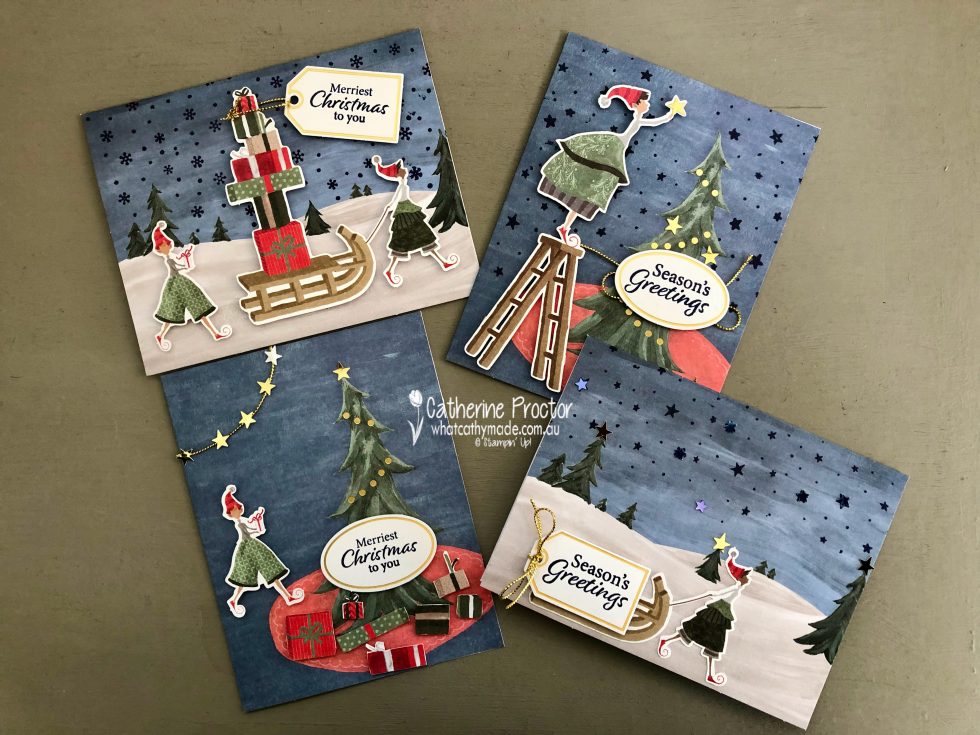
And here is the fabulous Christmas Whimsy card kit with its gold edged envelopes, stamp set and embellishments.
And here are my card variations – they only use the supplies included in the Christmas Whimsy card kit.
These are the other two Christmas kits, available online only. They both have stamp sets, acrylic blocks and ink spots included too.
It’s so fun and easy to get creative with the Stampin’ Up! Christmas kits – don’t forget to also use the stamps that come in the kits to create your own Christmas cards.
Now it’s time to hop on over to our next participant, the lovely Rachel Woollard. I can’t wait to see what Rachel has made this week.
If at any time you find a broken link, you can find the complete list of all participants on Sharon’s blog.
Welcome to week nineteen of the Heart Of Christmas Blog Hop!
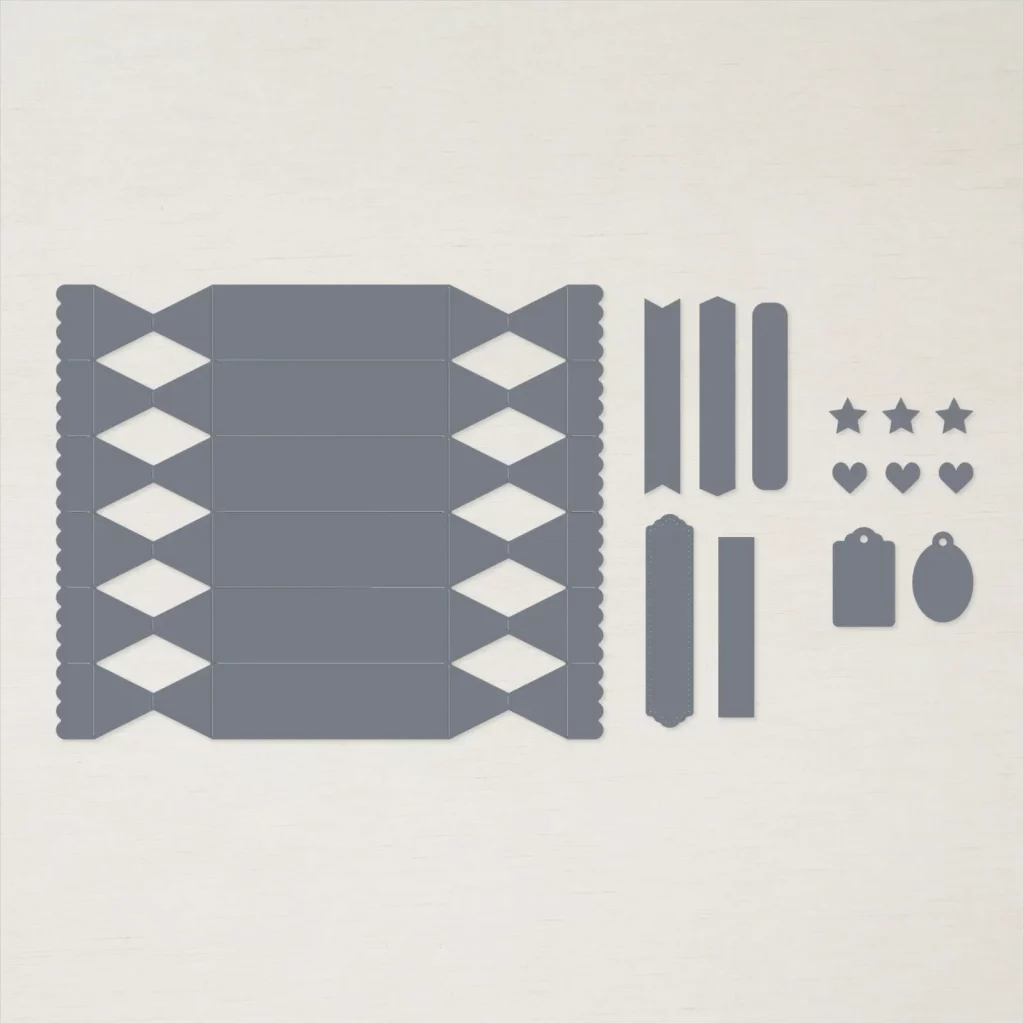
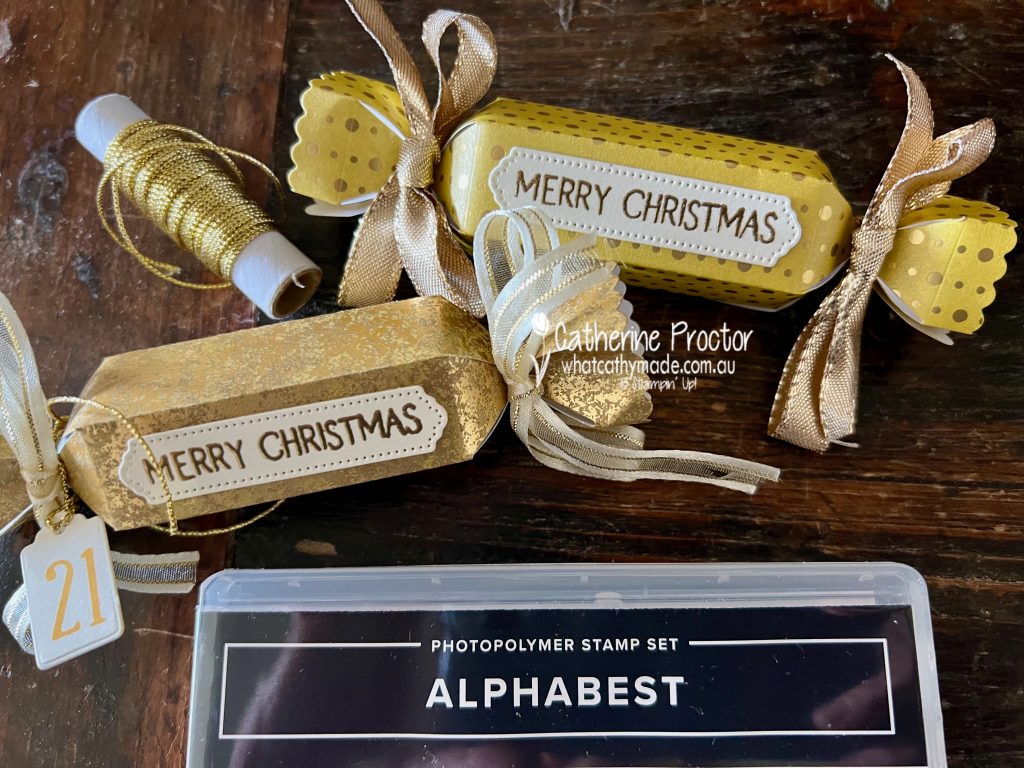
My project this week uses a set of dies from the Annual Catalogue that you may well have overlooked – the Cracker and Treat box dies.
This set of dies includes the cracker die, five labels, two tags, and dies for small hearts and stars you can use to embellish your crackers or as confetti or shakers inside a shaker card.
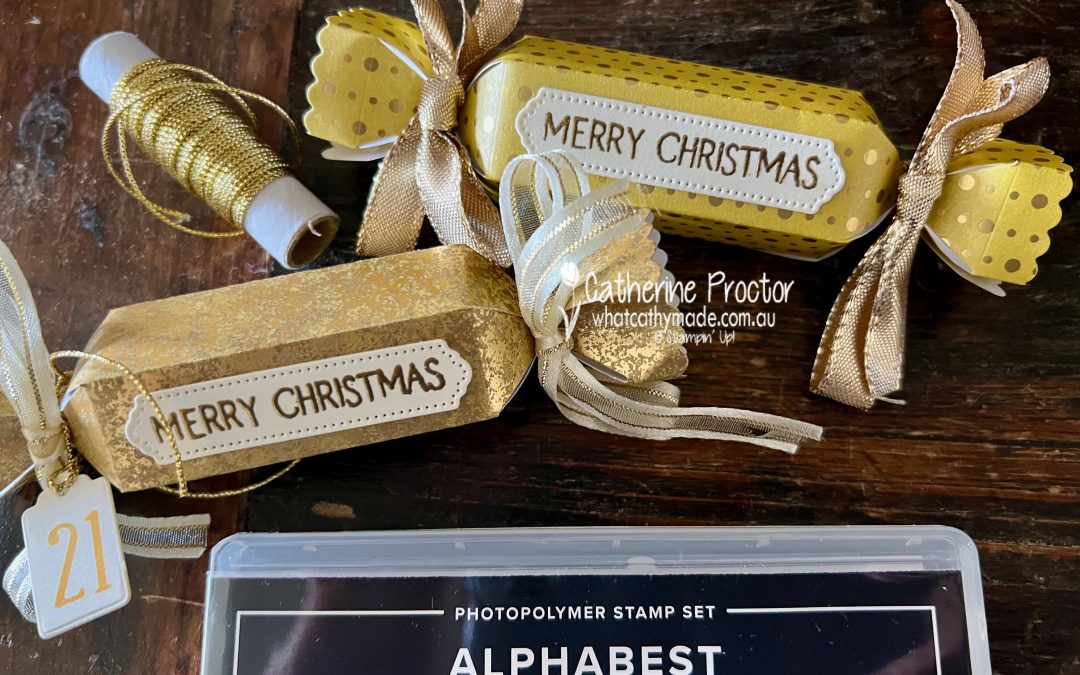
These cracker dies make mini crackers _ they are so adorable! Each cracker when made up and tied at either end with ribbon measures approximately 13 cm long and 3 cm across.
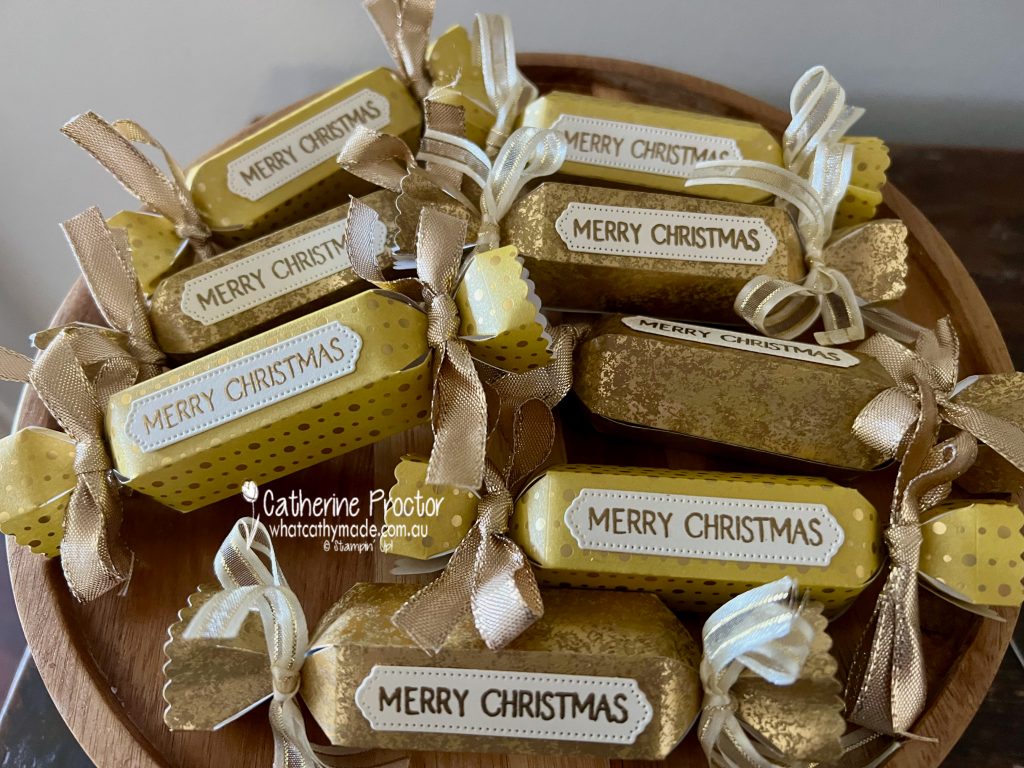
You will get one cracker per 6×6″ sheet of DSP or four crackers per 12×12″ sheet of DSP. I’ve made eight crackers today, using two papers that work well together – the Festive Foils DSP and the Distressed Gold paper.
The labels for my crackers are die cut using Very Vanilla cardstock, stamped with the “Merry Christmas” stamp from the Peaceful Deer stamp set, heat embossed in gold.
Even though cracker is a smaller size than a traditional cracker, it can be used in a multitude of ways!
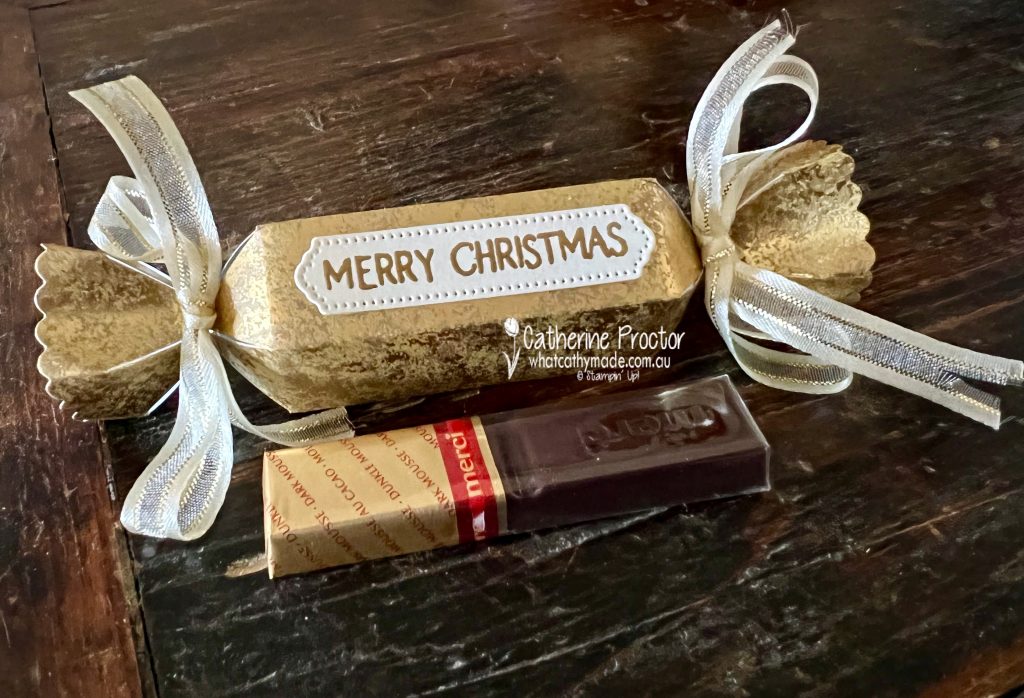
As is as a small Christmas cracker, filled with maybe a joke and a small chocolate or a sweet.
Adhere two cracker dies together to make a double Christmas cracker that you can fill with larger sweets and treats.
Die cut 24 crackers to make an Advent calendar, using one of the tag dies included in the Cracker & Treat dies to attach a number to each cracker.
As a name place holder for your Christmas day table. Handwrite in a gold pen each person’s name onto the sentiment label instead of stampin the “Merry Christmas” sentiment.
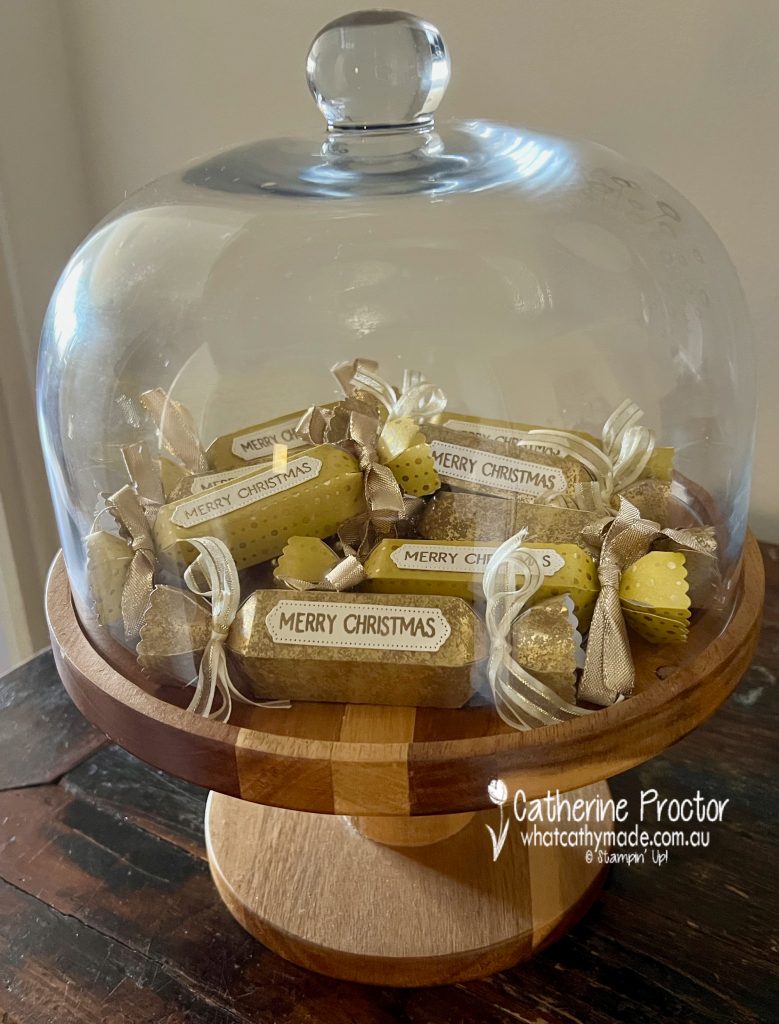
Use crackers as a Christmas decoration for your Christmas tree, mantlepiece or in the middle of your Christmas table.
Of course I had to check what type of chocolates fit into these smaller crackers! I’m pleased to report back that the delicious German Merci chocolates (sold at Aldi stores) fit perfectly, as do tiny candy canes or individually wrapped chocolates such as Fantales, Cadbury Favourites or Roses chocolates.
To fit a Lindt Ball or a Ferrero Rocher chocolate, you’ll need to make a wider cracker using two of the dies together.
To show you how to use these crackers as an advent calendar, I’ve used the Alphabest stamp set to stamp the number 21 on to this cracker on the left in the photo below.
Now it’s time to hop on over to our next participant, the lovely Sharon Davern, who is also the host of our hop!
If at any time you find a broken link, you can find the complete list of all participants on Sharon’s blog.
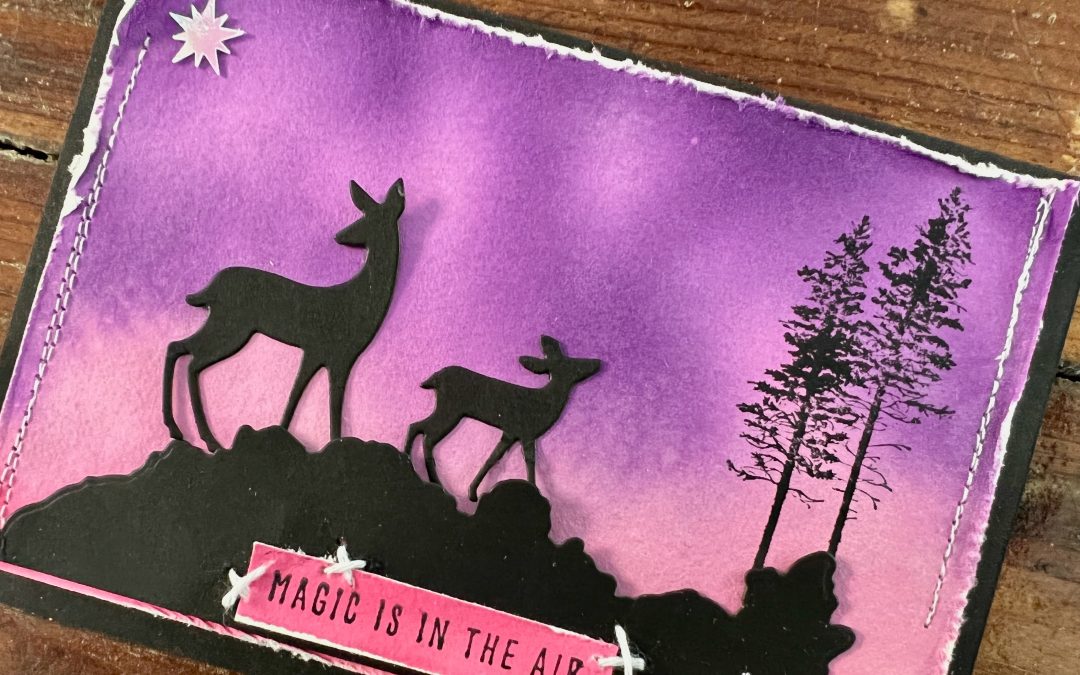
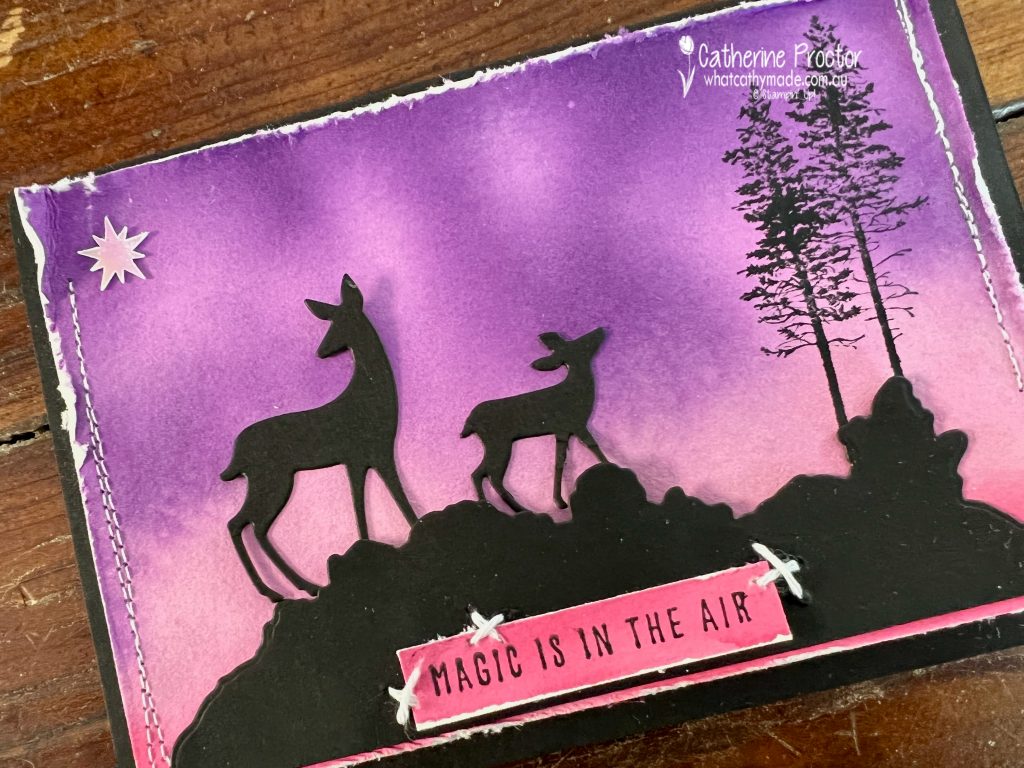
Day 7 of the #30DayChristmasCardMakingChallenge is a “Winter Sunset” card. This card certainly was a challenge for me!
I have to confess that living in Australia I have never seen a winter sunset in the Northern Hemisphere, so perhaps this scene looks more like the Northern Lights?
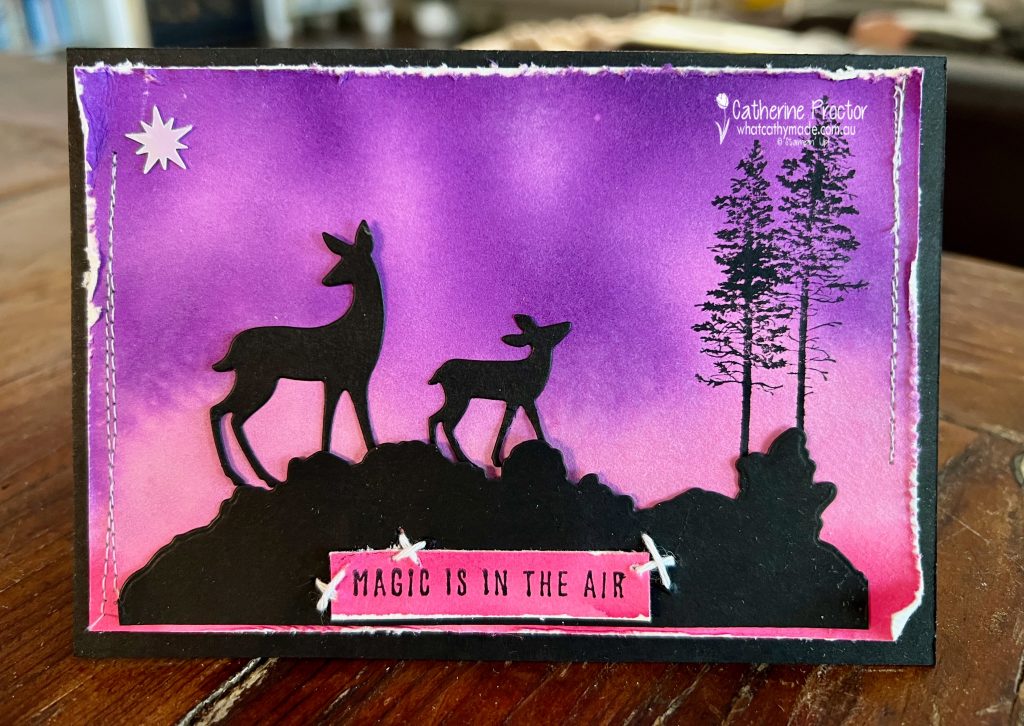
It was fun to get inky fingers for this challenge using the acrylic block technique with my Gorgeous Grape, Fresh Freesia and Polished Pink ink pads, stamping onto watercolour paper.
I use the largest acrylic block F, swiping it in order from top to bottom with Gorgeous Grape, Fresh Freesia and Polished Pink ink before squirting it with water using my Stampin’ Spritzer. I then gently placed a sheet of watercolour paper over the wet inky block and pressed down.
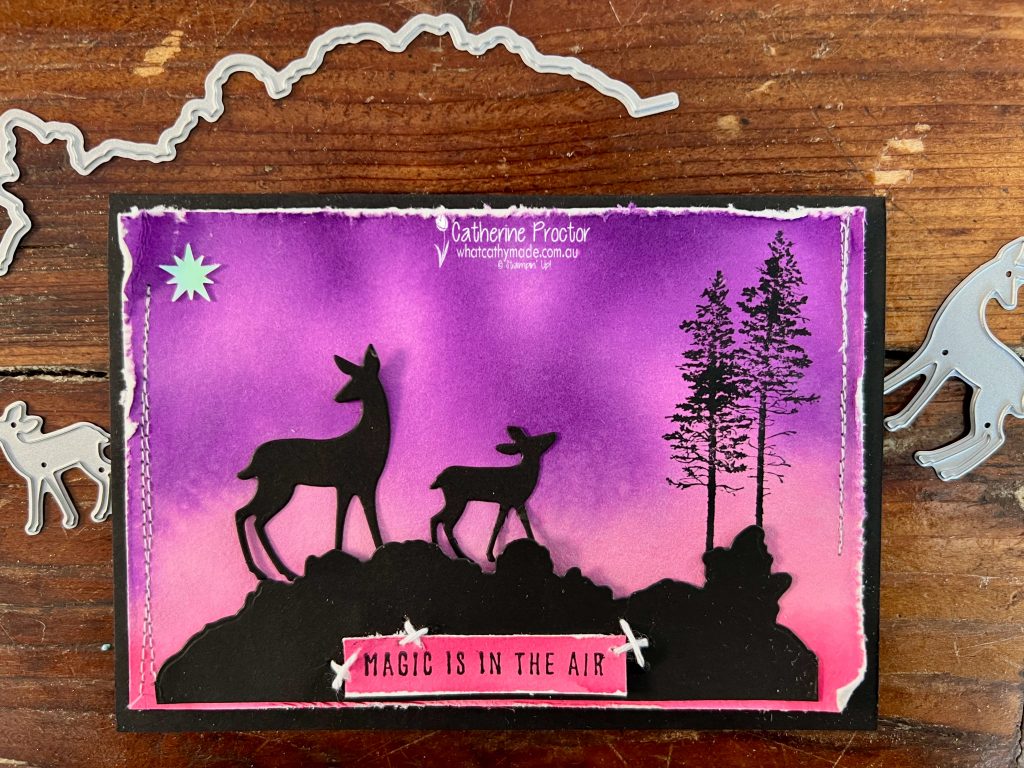
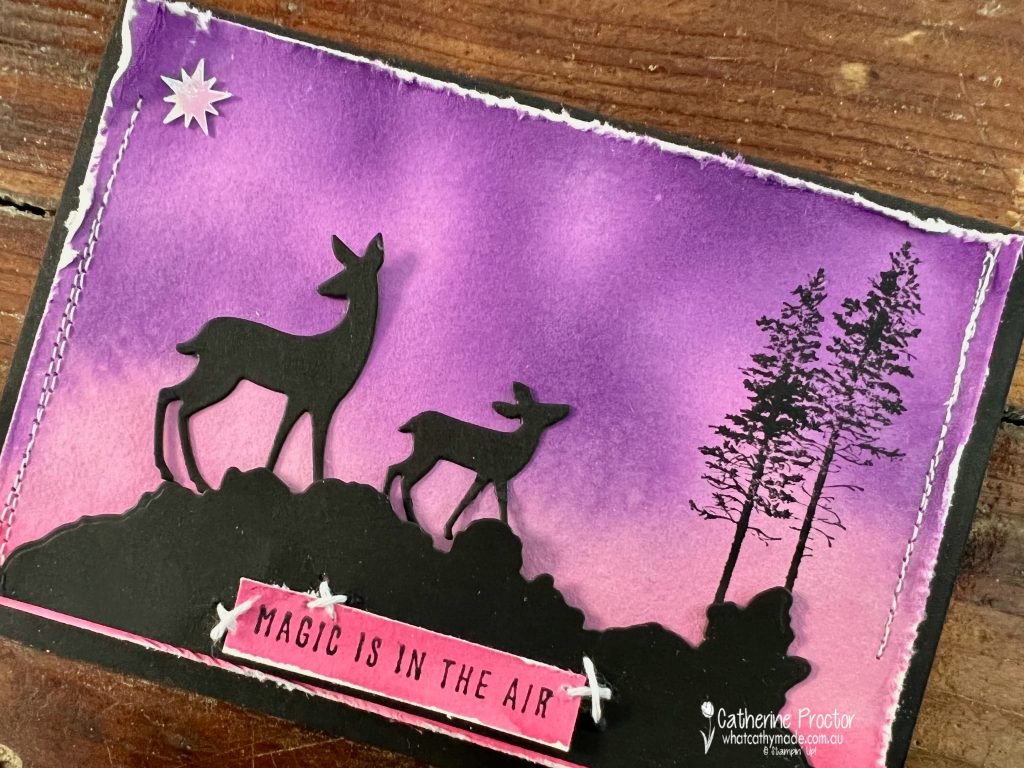
Once the background had dried, I stamped the trees from the Grassy Grove stamp set and then added my foreground elements, die cut from Basic Black Cardstock using the Grove dies.
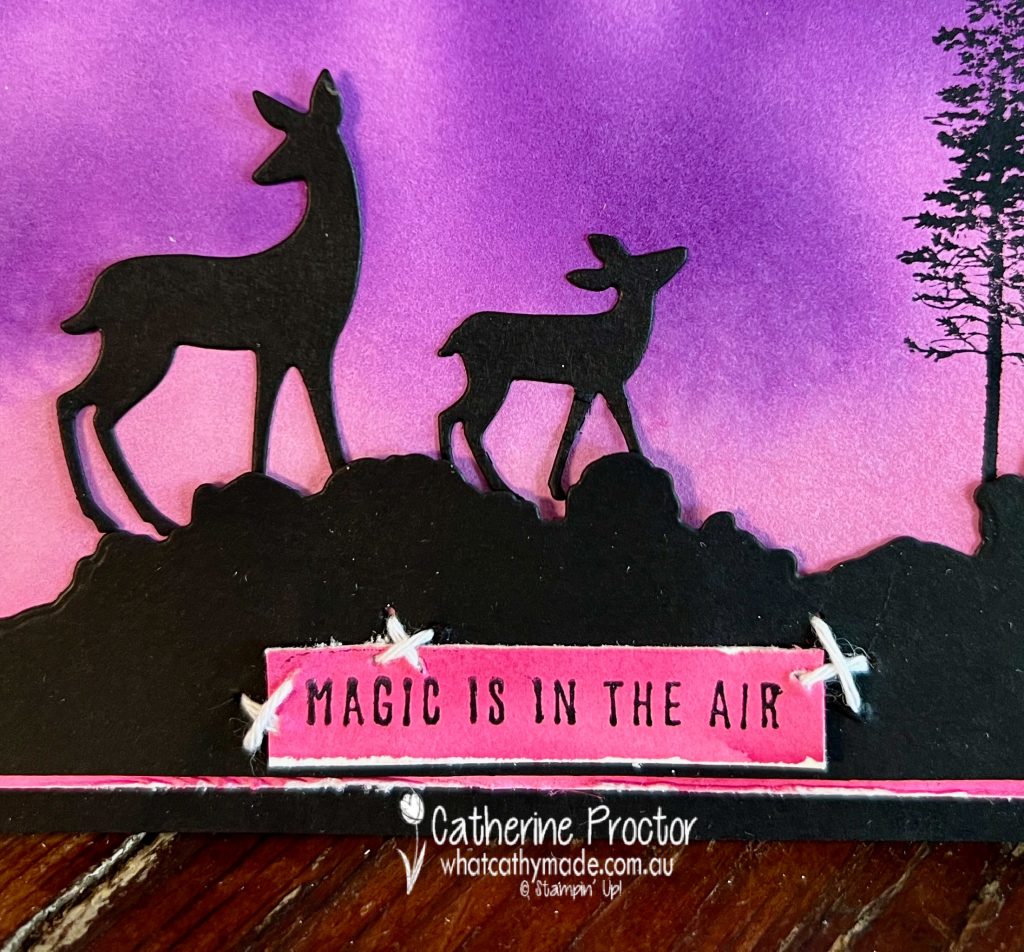
A solitary Adhesive Backed star adds a tiny touch of bling and because my sewing machine is out at the moment, I just couldn’t resist adding some machine stitching and hand stitching to my card as well!
The “Magic is in the air” sentiment from the Peaceful deer stamp set was stamped into an offcut of my water coloured background and hand stitched to my card.
I’ll be back tonight with some Heart of Christmas card inspiration, as well as some more cards I’ve created for the 30 Day Christmas Card Making Challenge.
Wherever you are in the world, stay safe, stay calm … and keep on crafting xxx
Welcome to week eighteen of the Heart Of Christmas Blog Hop!
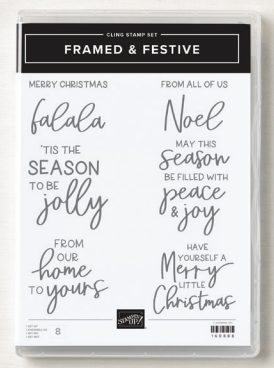
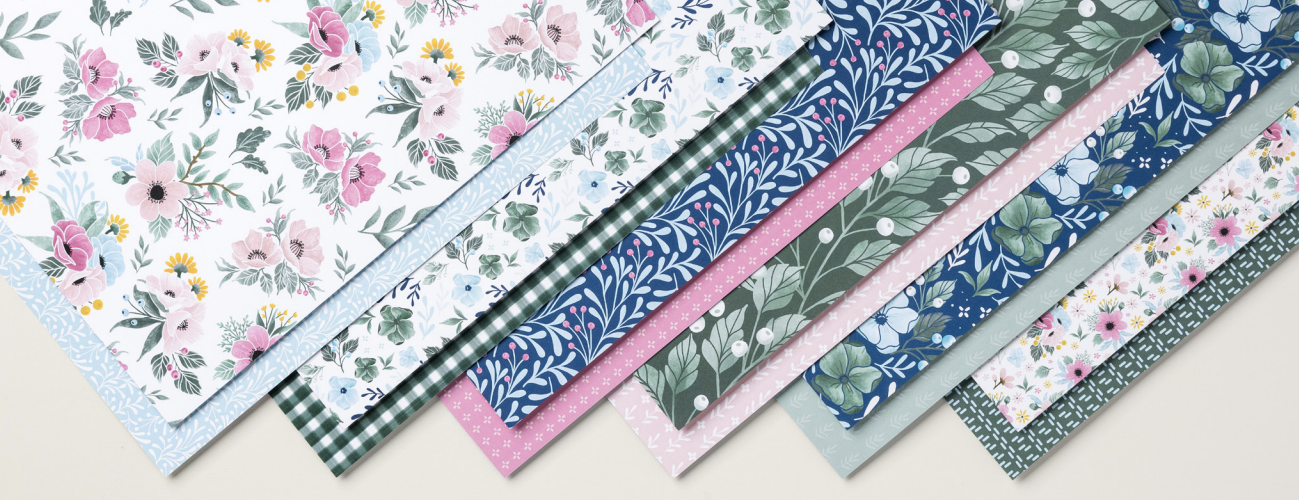
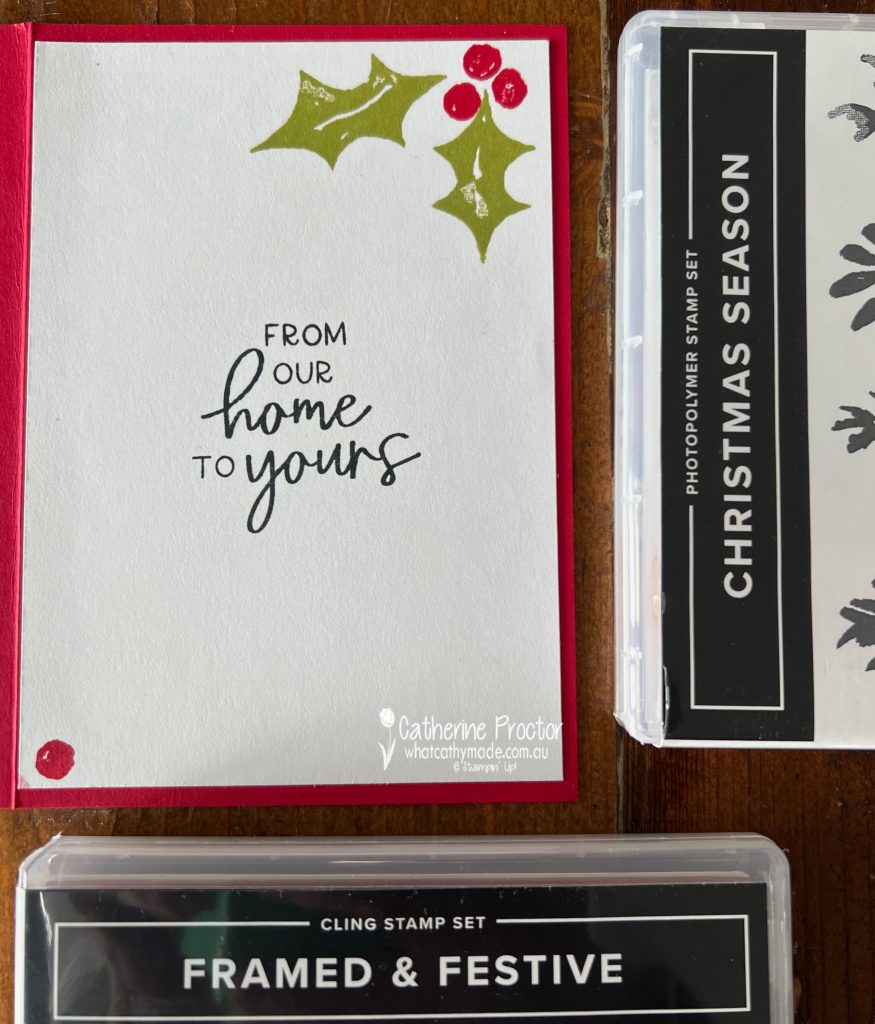
From tomorrow, November 1, the Fitting Florets Collection from the upcoming January – June Mini Catalogue will be available to order and it includes two products only available for limited time: the Framed & Festive Stamp Set and the Fitting Florets DSP.
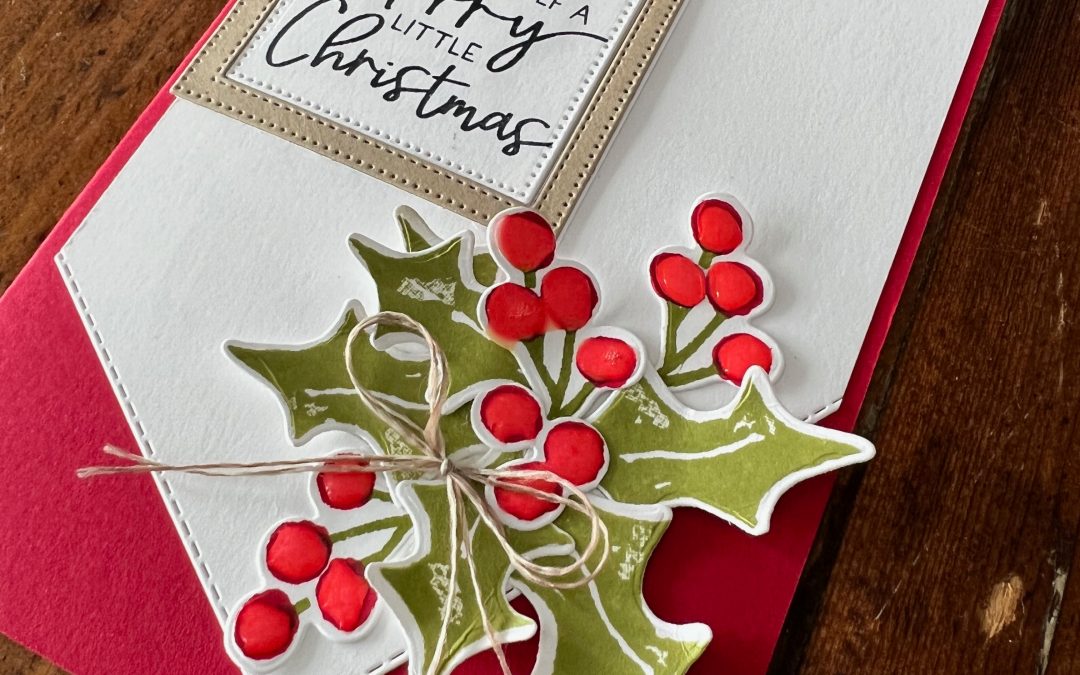
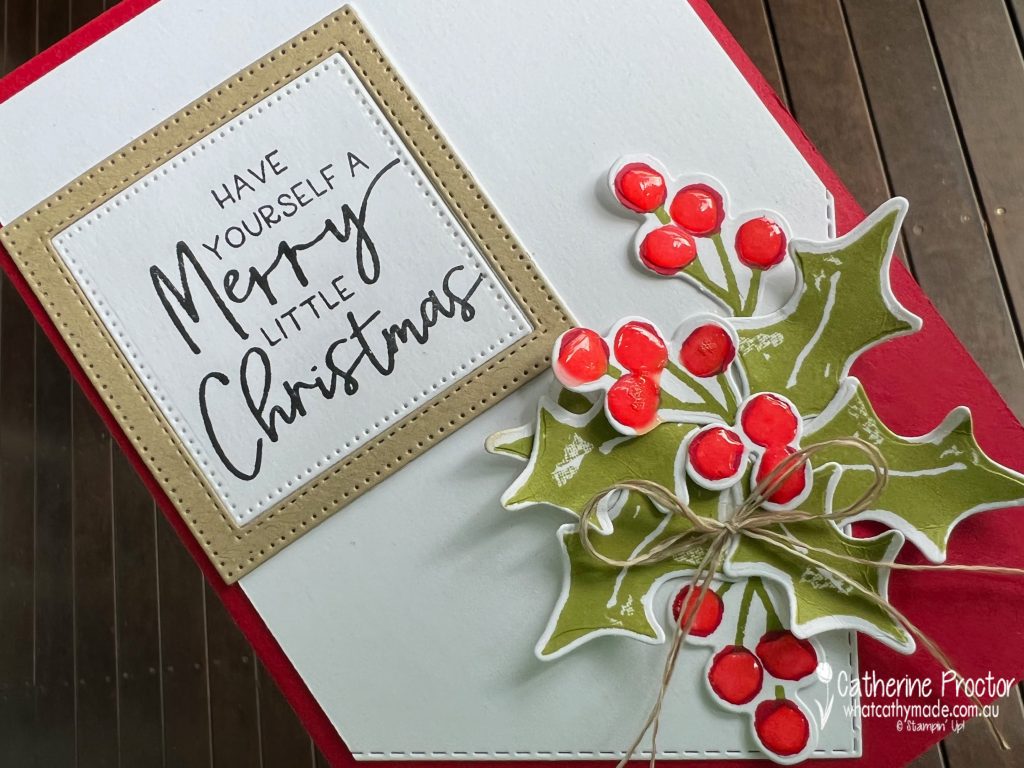
The Framed & Festive stamp set is a really versatile Christmas sentiment stamp set that works with any Christmas products. I’ve paired it with the Christmas Season stamp set and the coordinating Seasonal Labels dies for this week’s Heart of Christmas card.
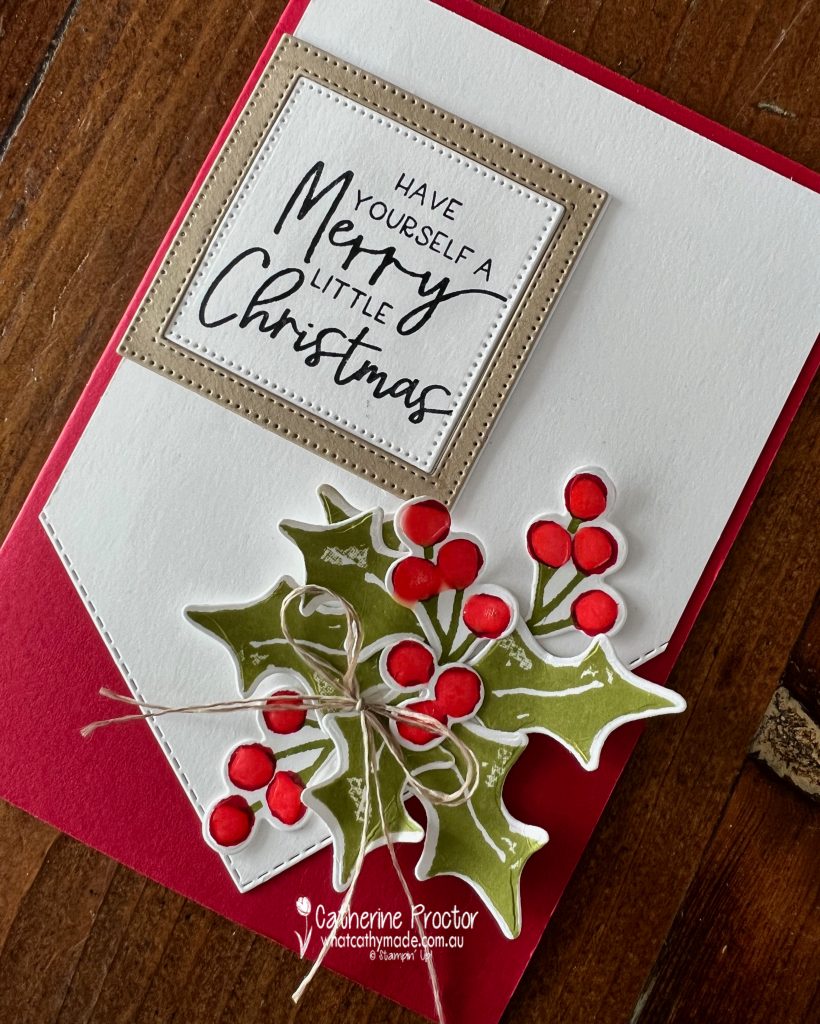
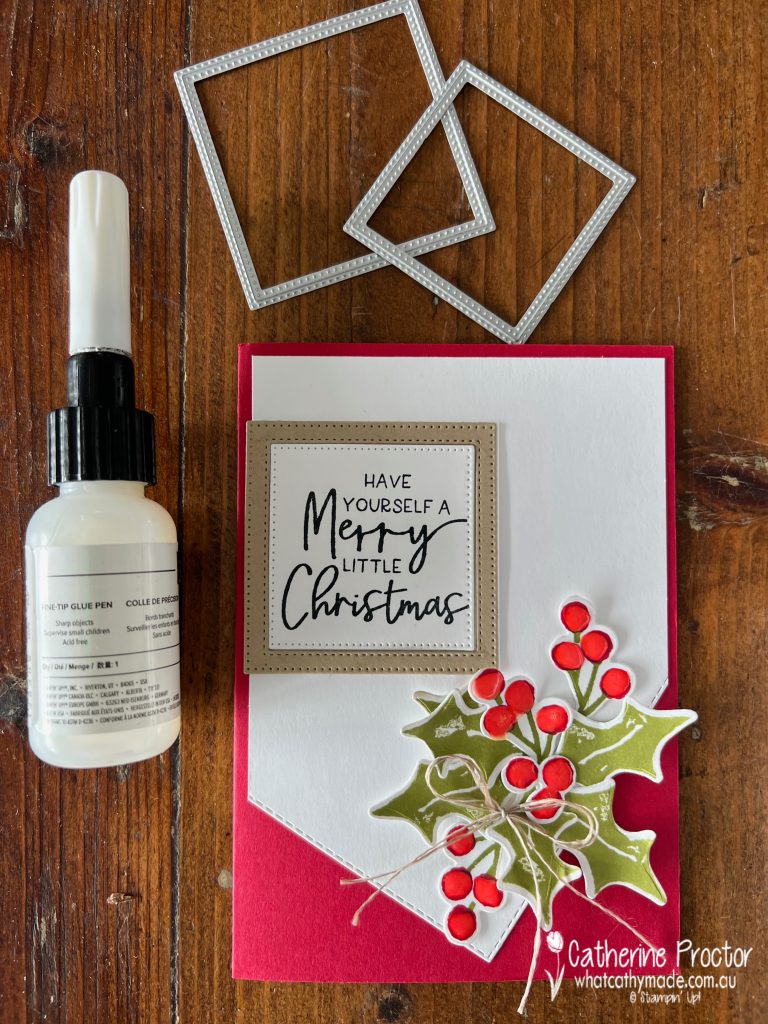
The Basic White layer has been die cut an angle using the largest of the stitched rectangle dies. This adds visual interest and draws your attention to the bunch of holly berries and leaves.
My traditional red and green colour combination uses Real Red, Pear Pizzazz, Crumb Cake and Basic White. Fine tipped glue has been added to the holly berries to make them shine.
The sentiment has been die cut and framed using the middle two square Stylish Shapes dies. I really like the mix of fonts in the Christmas sentiments in the Framed & Festive stamp set.
Another sentiment from the Framed & Festive stamp set has been used for the inside of the card – I think I will be using this sentiment a lot for my Christmas cards this year.
Now it’s time to hop on over to our next participant, the lovely Rachel Woollard – I can’t wait to see what Rachel has created today!
If at any time you find a broken link, you can find the complete list of all participants on Sharon‘s blog.