Welcome to week five of the 2019 Heart of Christmas blog hop!
This week I’ve decided to challenge myself to use three different embossing folders to create my Christmas cards. I often to forget to use my folders because I’m so focussed on DSP, stamps and dies, which is really silly because embossing folders are so quick and easy to use.
With so many beautiful designs to chose from, can you guess which three I chose?
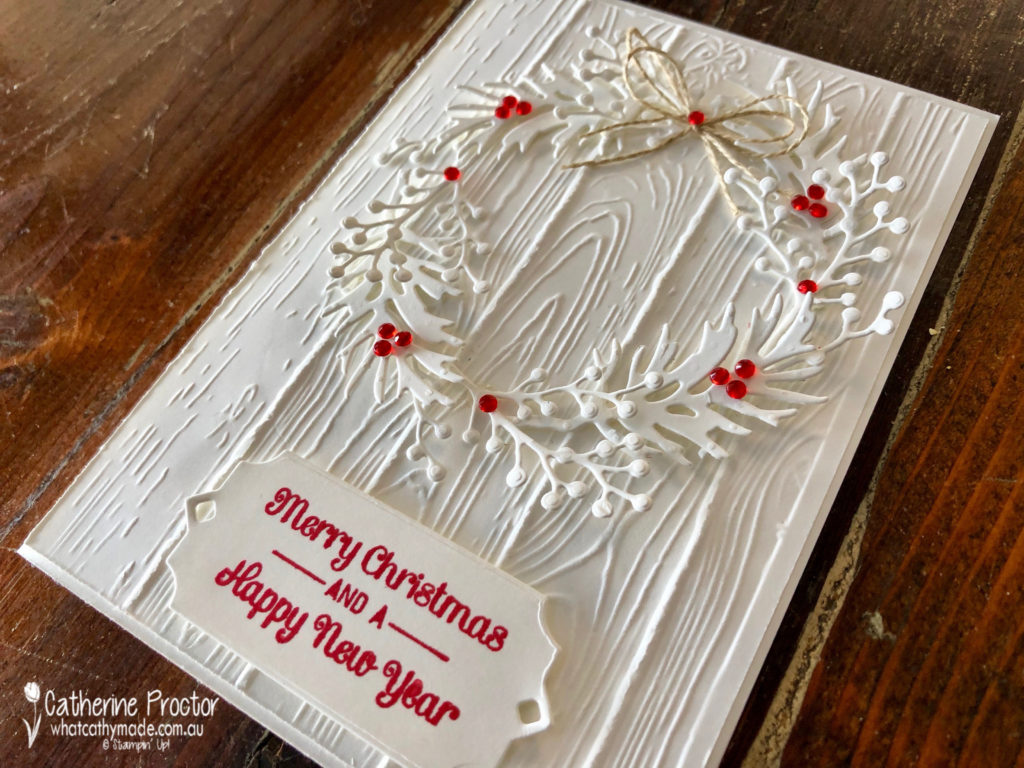
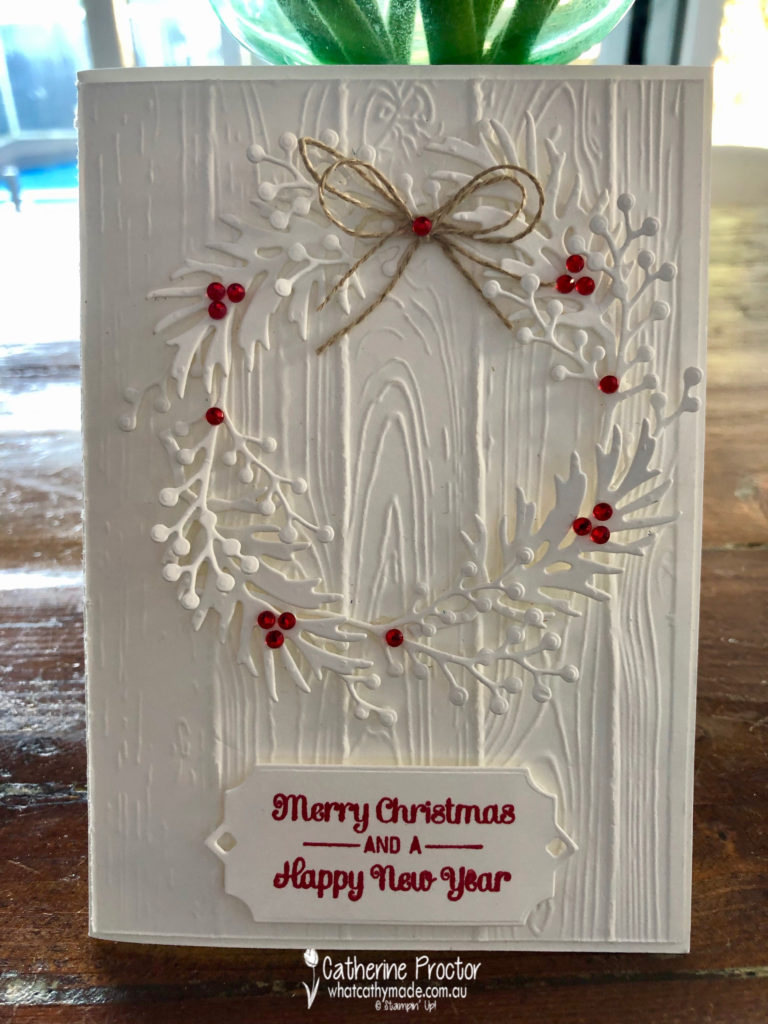
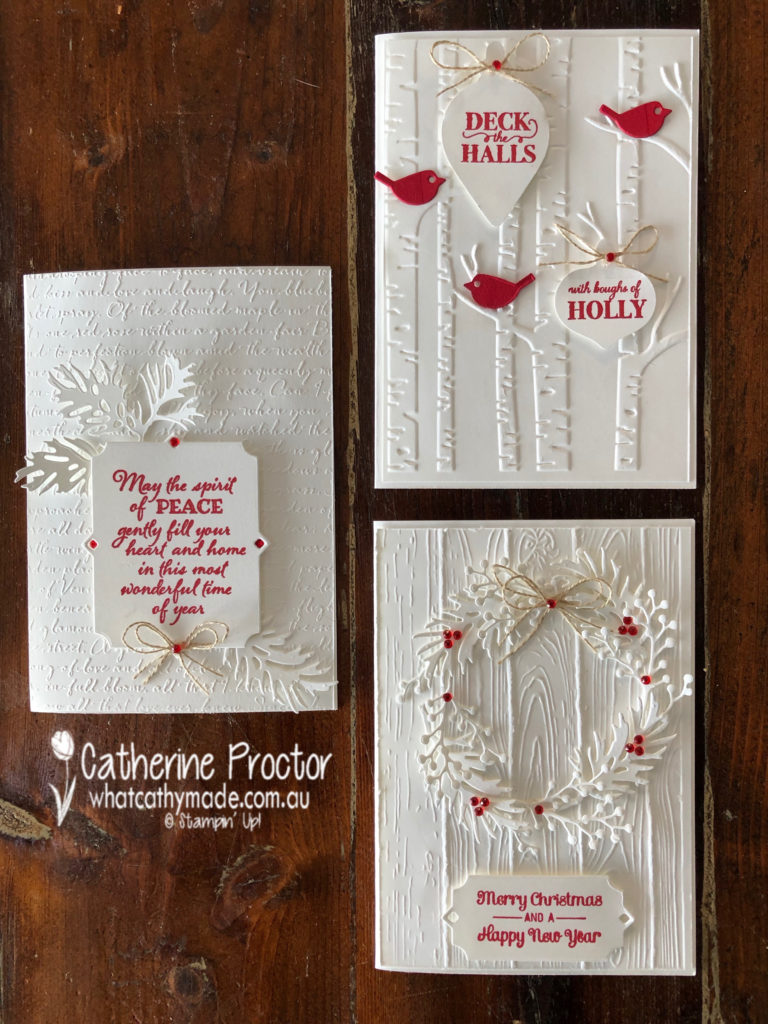
For my first card I used the Pinewood Planks embossing folder, which can be used either way up.
The wreath is made using a combination of dies from the Frosted Bouquet Dies and the Beautiful Boughs Dies.
How cute is that sentiment? It’s from the Itty Bitty Christmas Stamp set – I’m so glad I got this set. It has been die cut with the stunning frame from the Beautiful Boughs Dies.
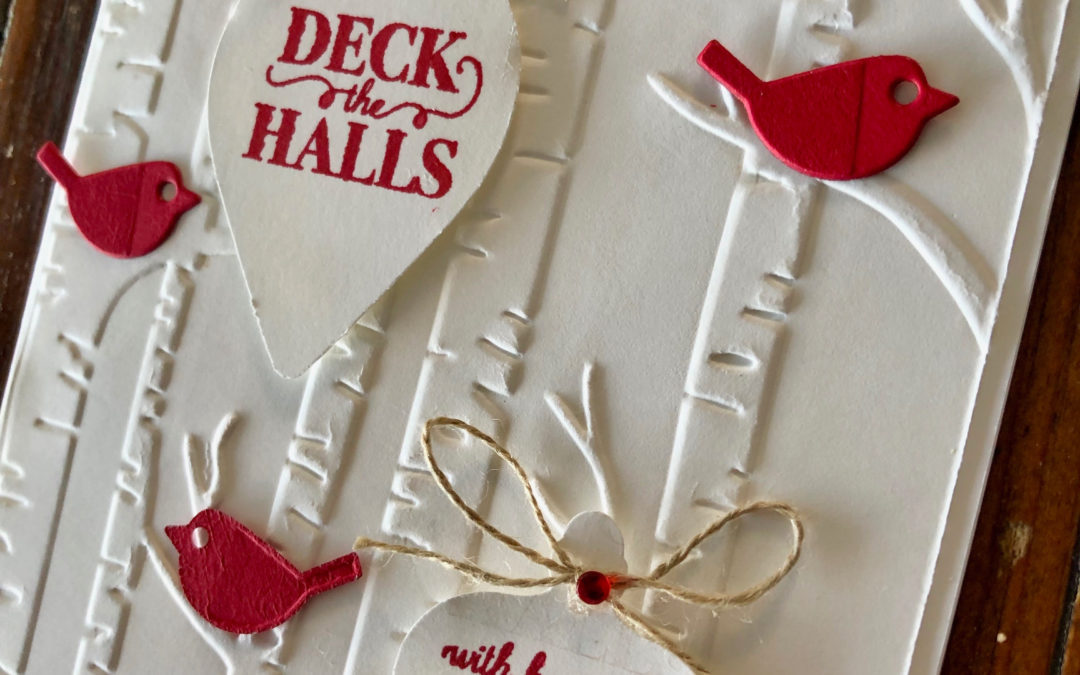
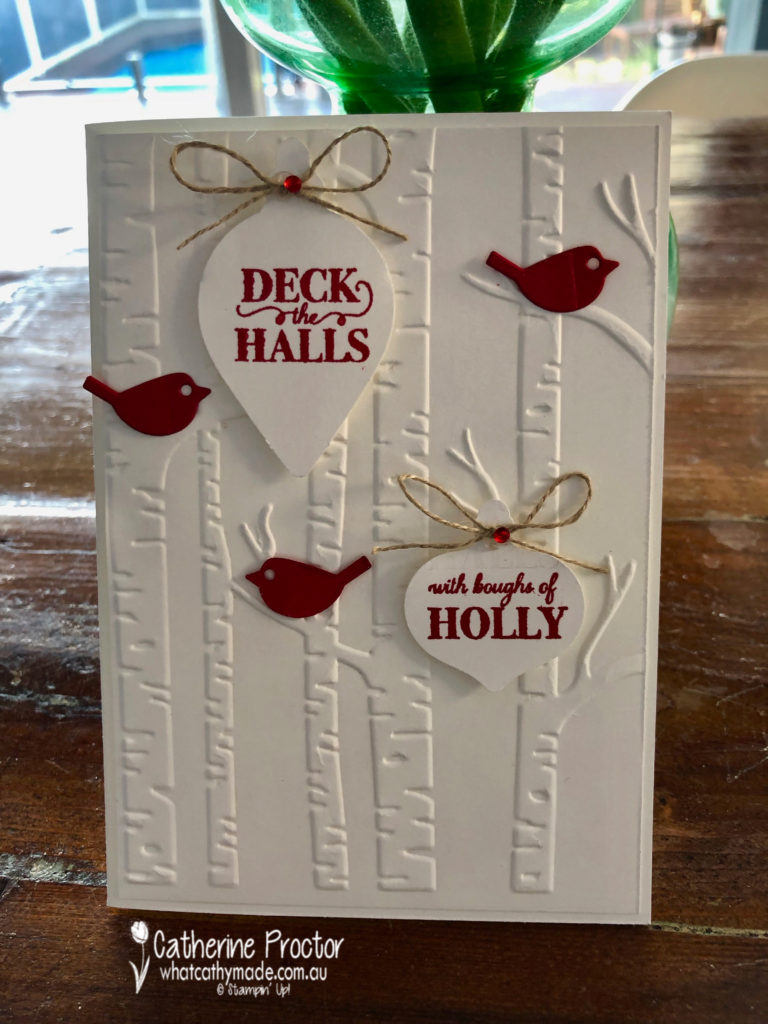
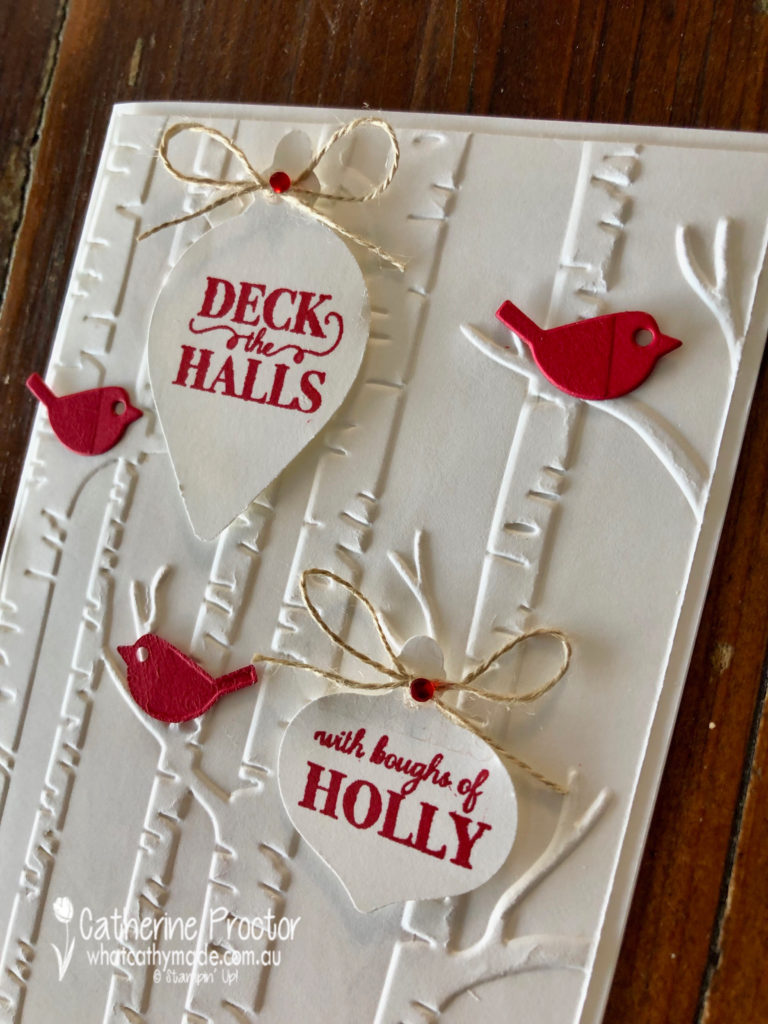
Card two continues the red and white theme, this time with the Woodland Embossing folder. Those branches were just crying out for some little birds – you might have overlooked these, they are in the Well Written die set.
The two baubles were punched out using the Gleaming Ornaments punches and then stamped with a stamp from the coordinatiing Christmas Gleaming stamp set.
To split the sentiment in half you can cut your stamp with scissors or do what I did and mask one side of your stamp with washi tape before inking up. Before you stamp, remove the washi tape and then stamp your image. Mask up the other side of your stamp with washi tape, ink your stamp, remove the washi and then stamp the other bauble.
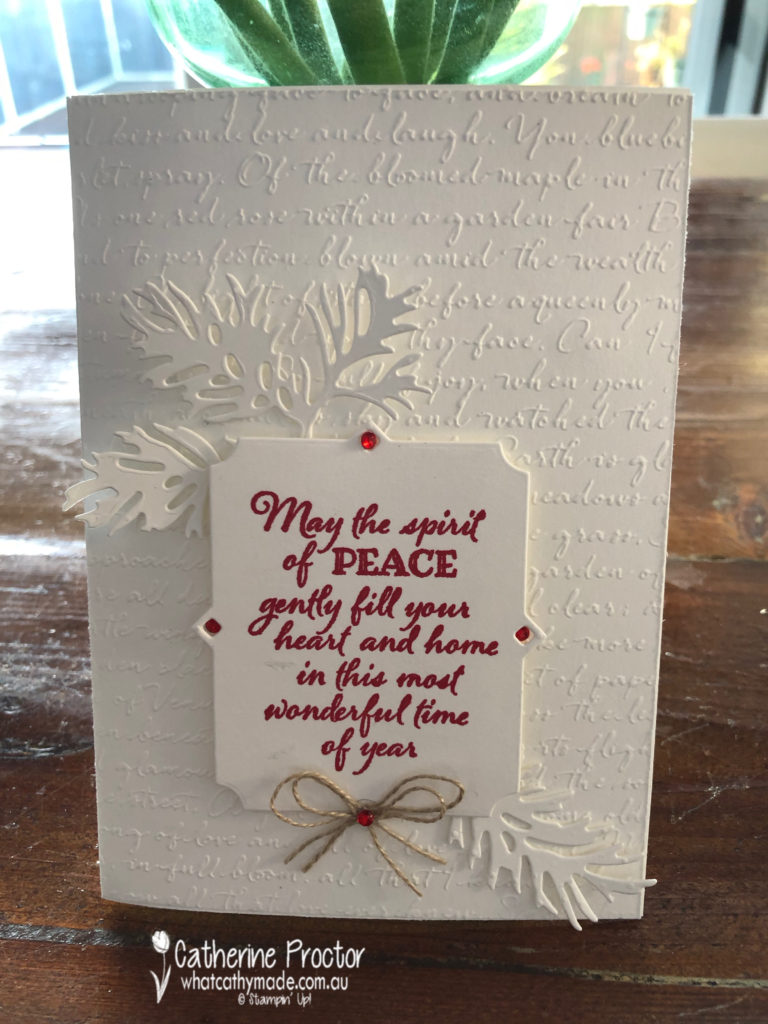
My final card uses the Scripty 3D embossing folder, topped with a sentiment from the Peaceful Boughs stamp set, die cut with the largest frame from the Beautiful Boughs Die set.
Here’s a close up of this gorgeous frame and the boughs I’ve die cut with the Peaceful Boughs Dies set. Can you see the lovely script effect this embossing folder gives?
All my cards this week are finished off with a bow (or two) of linen thread and some red rhinestones.
These cards were quick and easy to make and I really love how the embossing folders add so much dimension and texture while also allowing me to make very clean and simple cards.
I will definitely be reaching for my embossing folders more often!
The lovely Claire Daly is hosting our Heart of Christmas blog hop this week – to see what the rest of the team have made this week you can visit Claire’s page here.
To purchase any of the products I used in this project you can shop with me here.
If you’d like me to post you your very own copy of the brand new 2019 Stampin Up! Holiday Catalogue, the 2019-20 Stampin Up! annual catalogue or to simply find out about more about Stampin’ Up! contact me.
Welcome to week three of the 2019 Heart of Christmas blog hop! The brand new 2019 Stampin Up! Holiday Catalogue is live on the website as of today full of wonderful products to get your creative juices flowing.
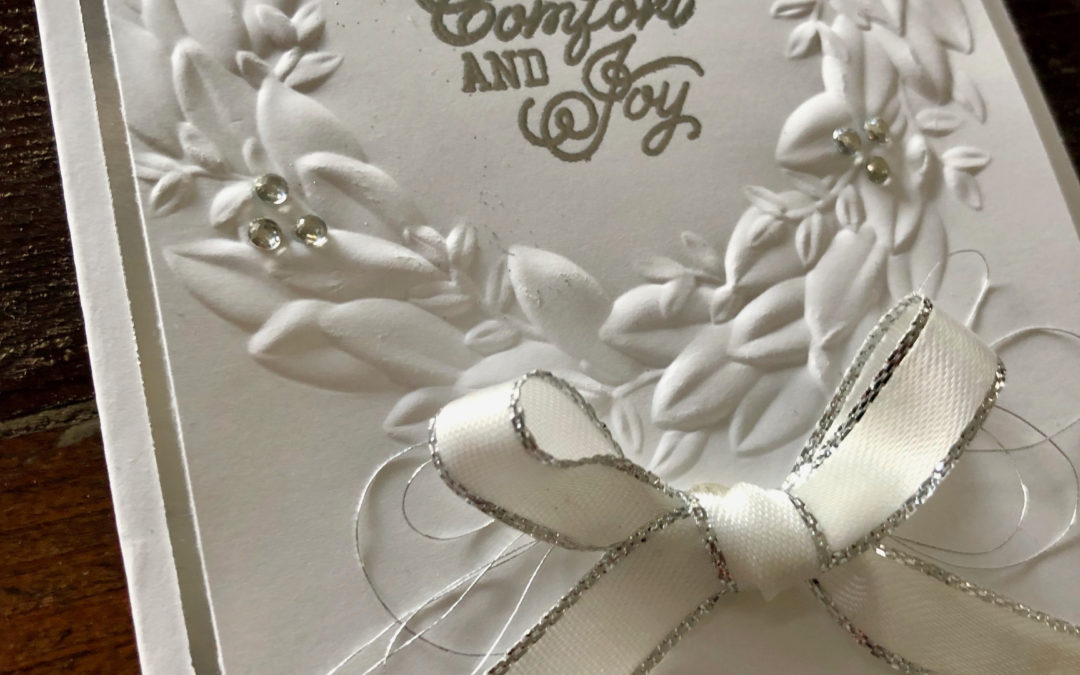
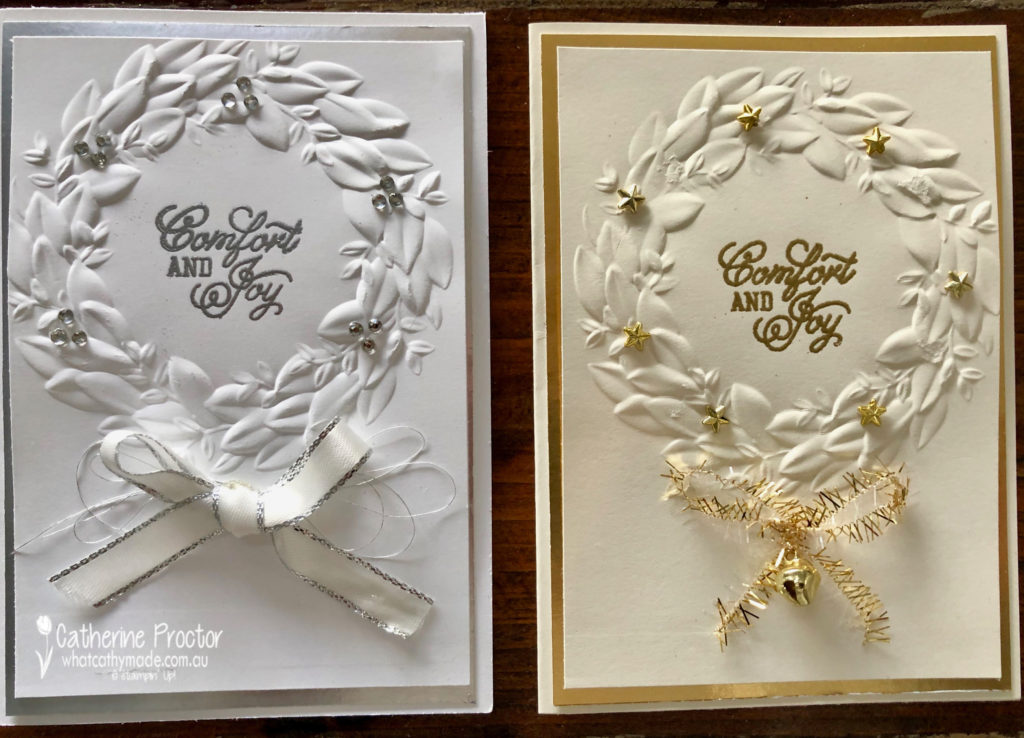
My cards tonight were inspired by a card created by a Canadian Stampin’ Up! demonstrator called Candace Chisholm, but I’ve tweaked the design to suit the materials I had on hand. Just like Candace’s cards, however, I have based my design on a simple and easy concept using the Seasonal Wreath embossing folder.
One card pairs Whisper White and Silver together, with the other card pairing Very Vanilla and gold. For both cards, the centre sentiment is stamped in Versamark and then heat embossed with either silver or gold embossing powder.
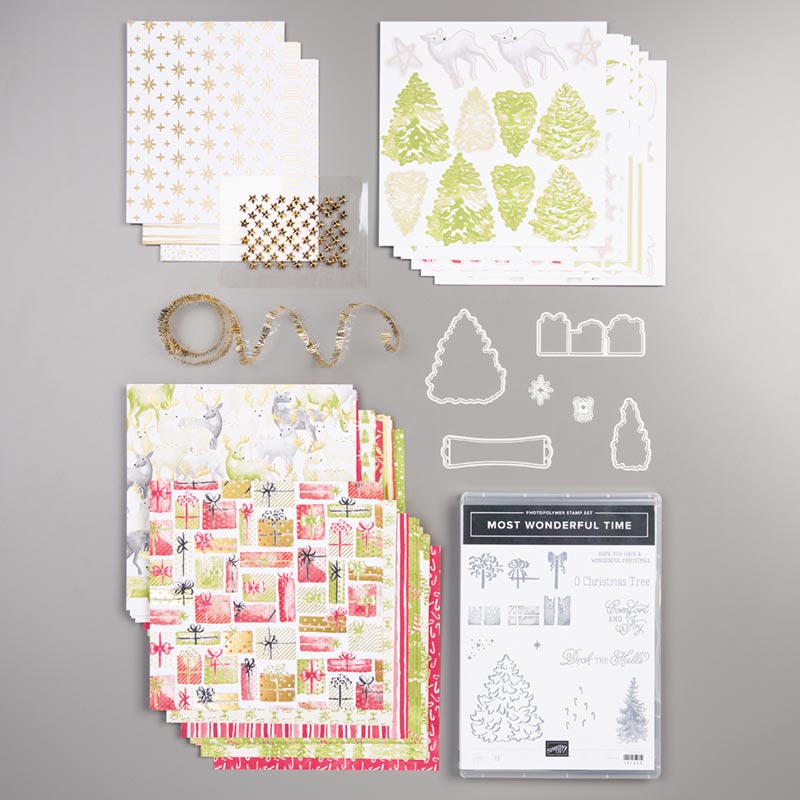
You might miss this stamp when you look through the Holiday Catalogue because it is part of a medley called Most Wonderful Time Medley. Here’s what you get in the Medley.
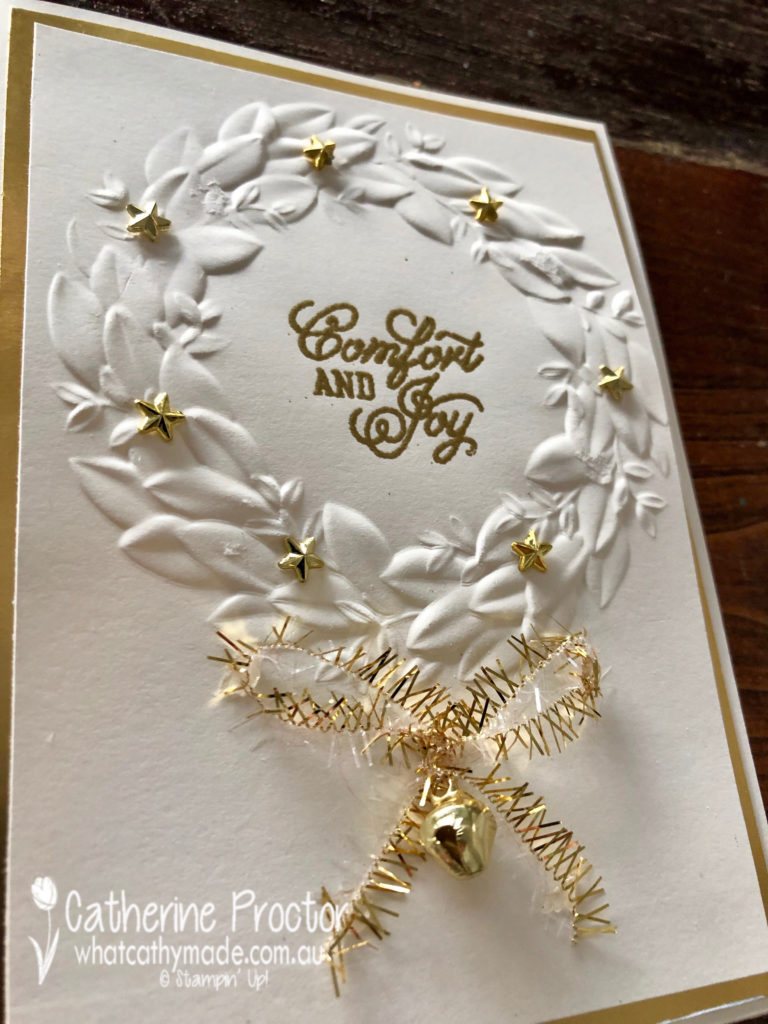
Did you notice the roll of gold tinsel and the little gold star elements? They decorate my Very Vanilla wreath card, along with a jingle bell embellishment (you get 24 jingle bells in Cherry Cobbler, gold, Shaded Spruce).
My silver card is embellished with Rhinestone Basic Jewels and a double bow in silver thread and Silver 3/8″ Metallic-Edge Ribbon.
The lovely Judy May is hosting our Heart of Christmas blog hop this week – to see what the rest of the team have made this week you can visit Judy’s page here.
I’ll be back tomorrow night with another Christmas blog hop. To purchase any of the products I used in this project you can shop with me here.
If you’d like me to post you your very own copy of the brand new 2019 Stampin Up! Holiday Catalogue, the 2019-20 Stampin Up! annual catalogue or to simply find out about more about Stampin’ Up! contact me.
Welcome to week two of the 2019 Heart of Christmas blog hop!
This time next week you will be able to view and order from the 2019 Holiday Catalogue but until then I can’t show the inside of the catalogue.
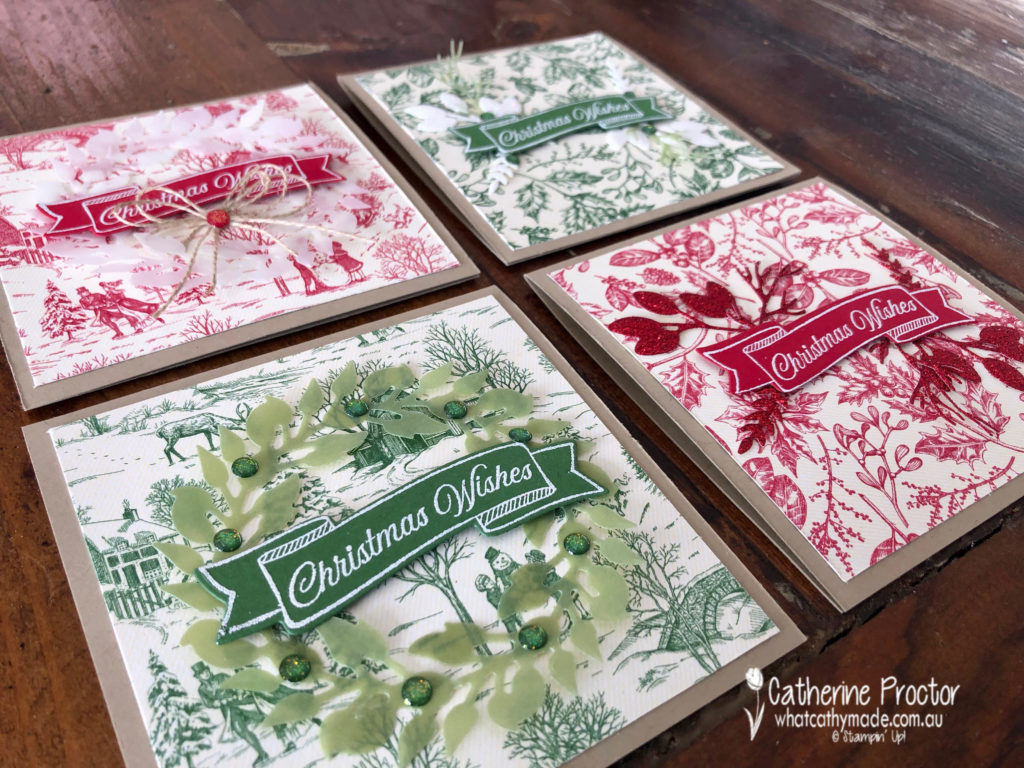
So to get you excited about what’s to come, tonight I’ve made four cards inspired by two samples in the brand new Holiday Catalogue.
The Toile Tidings Suite is what I’d call a mega suite because it has two stamp sets, two sets of coordinating dies, stunning DSP, matching wrapping paper, two different ribbons and the cutest ever glitter enamel dots.
The colours in this suite are Very Vanilla, Real Red and Garden Green. This suite is classic and monochromatic…I just had to buy the lot.
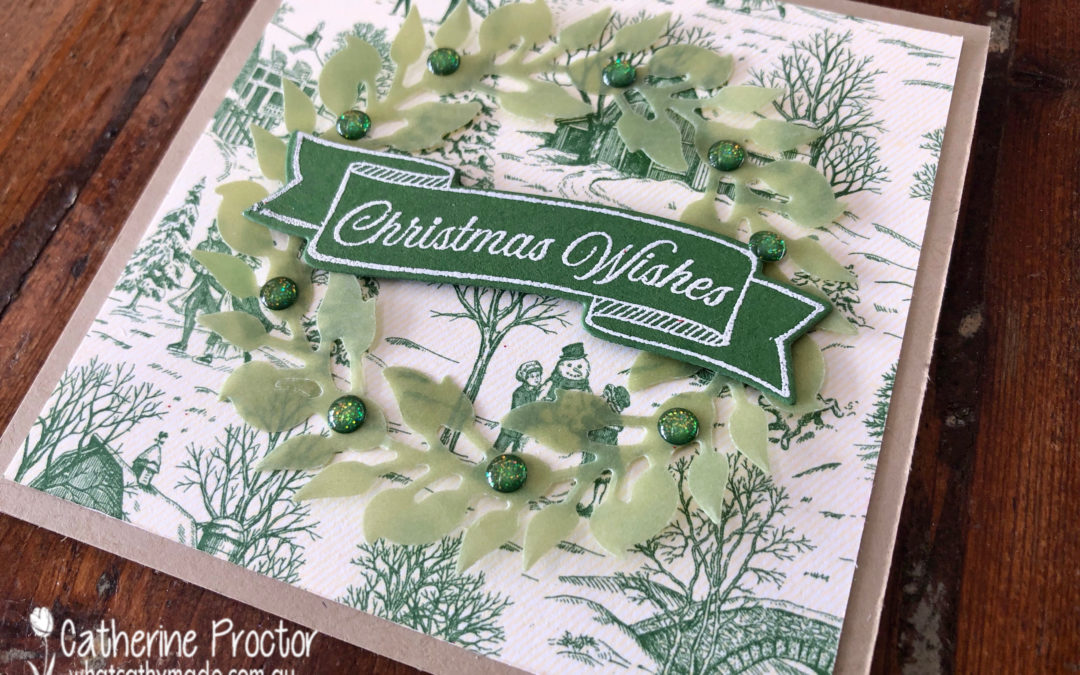
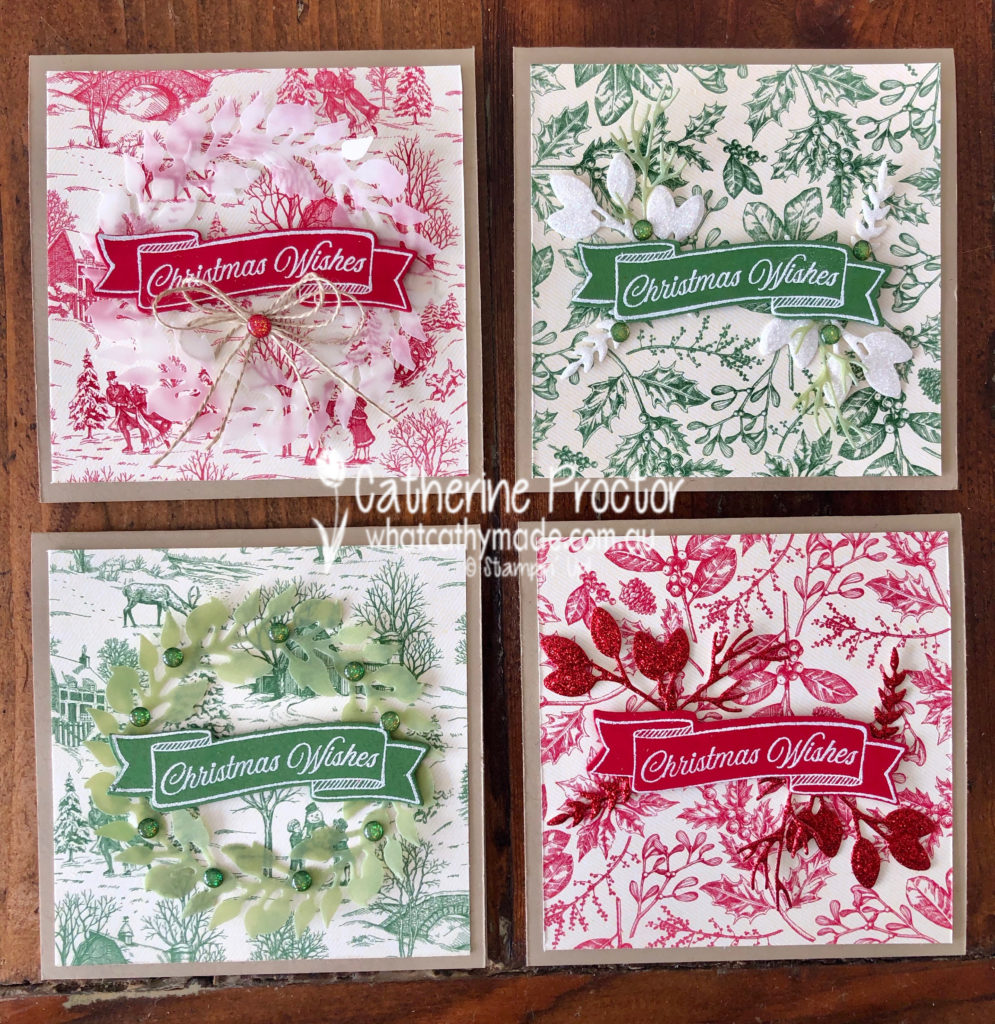
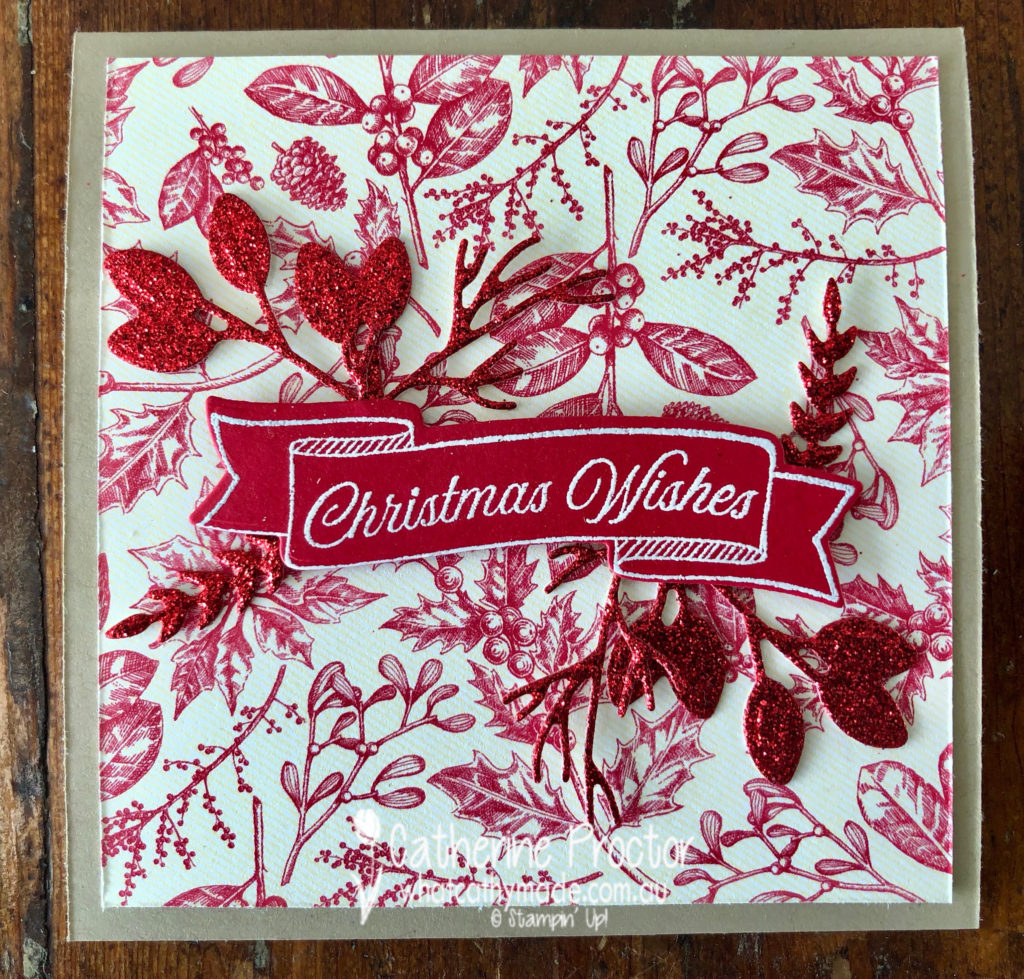
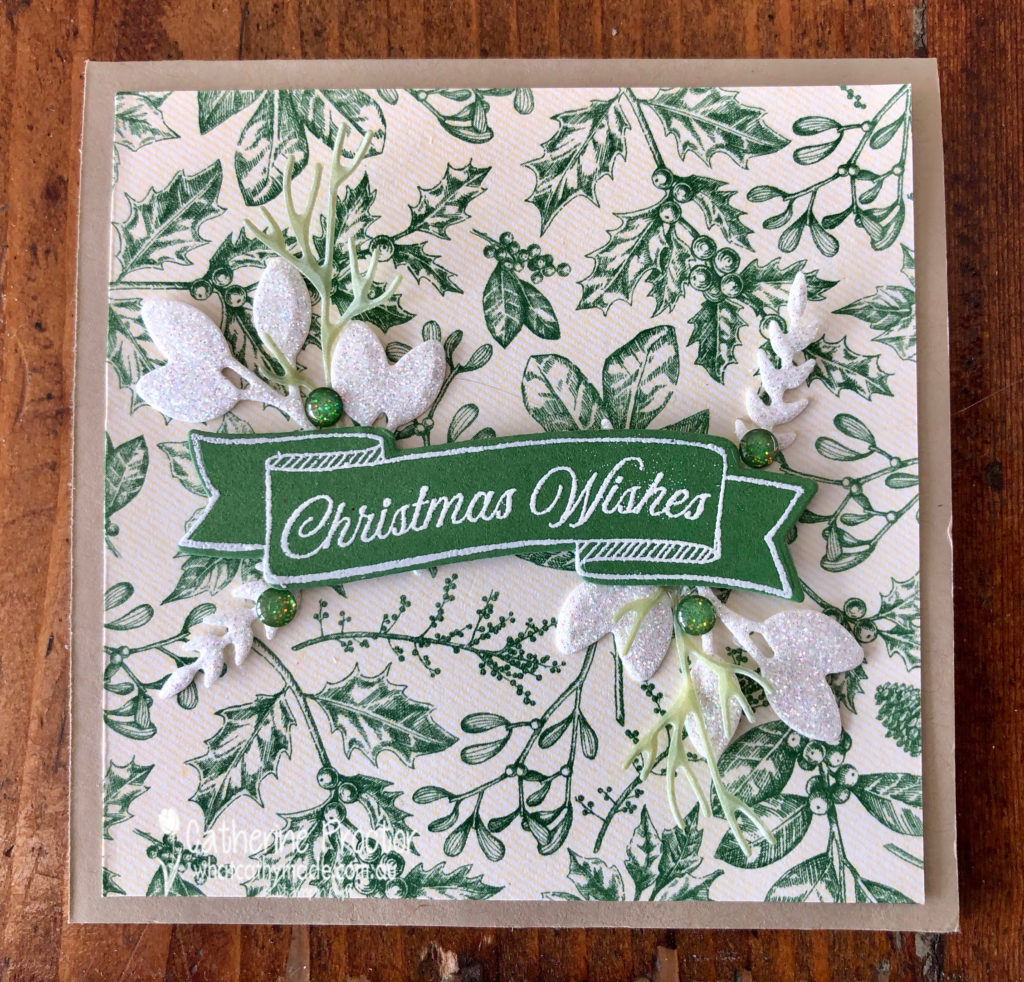
The card bases were super easy to make using a piece of Crumb Cake Card Stock (8×4 inches) folded in half. I stamped the Christmas Wishes sentiment from the Toile Christmas Stamp Set using Versamark ink onto Garden Green and Real Red card stock, heat embossed with white embossing powder and then die cut them out using the Christmas Cardinal dies.
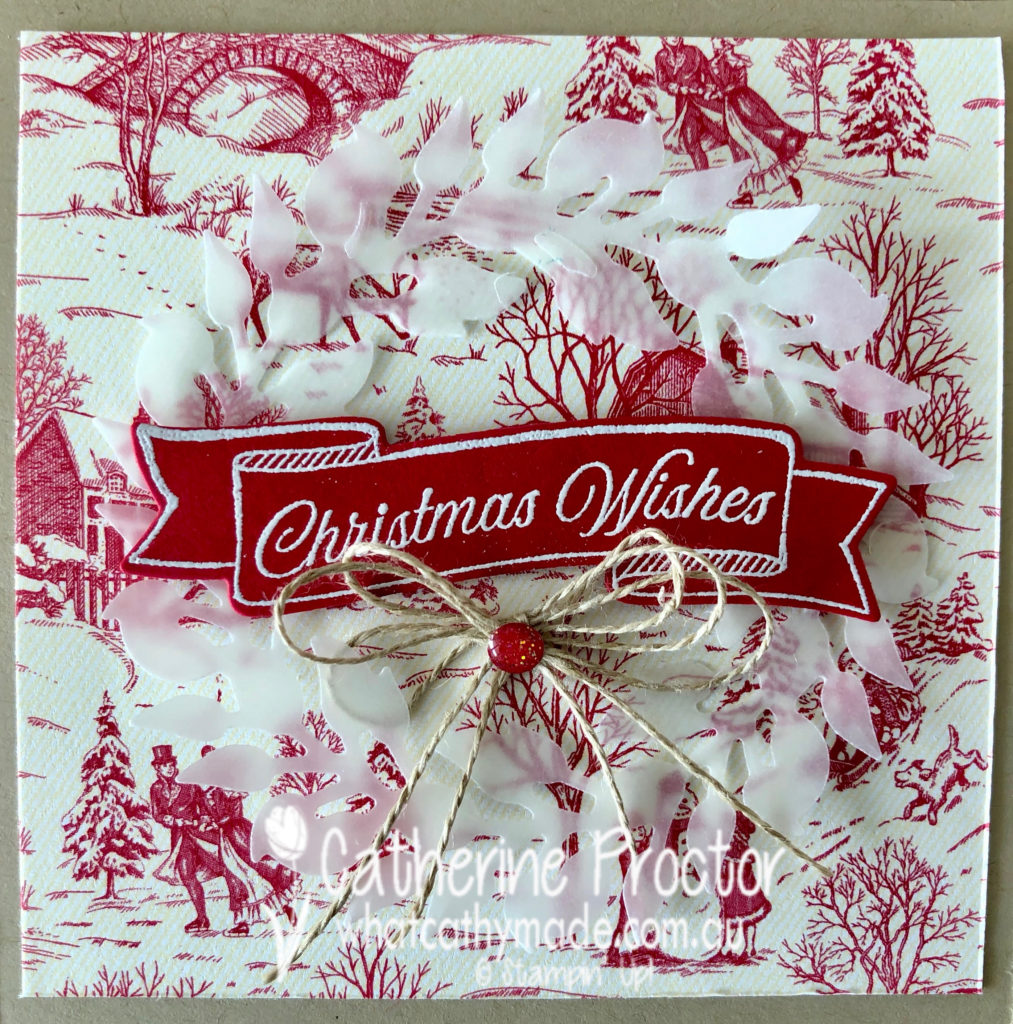
For my Red Christmas Wishes card I chose the DSP with the images of the skaters (so cute!) and used the All-around Wreath Dies to cut a clear vellum wreath to go behind the sentiment. The finishing touch is a triple bow of linen thread, topped with one of the Toile Tidings Glitter Enamel Dots.
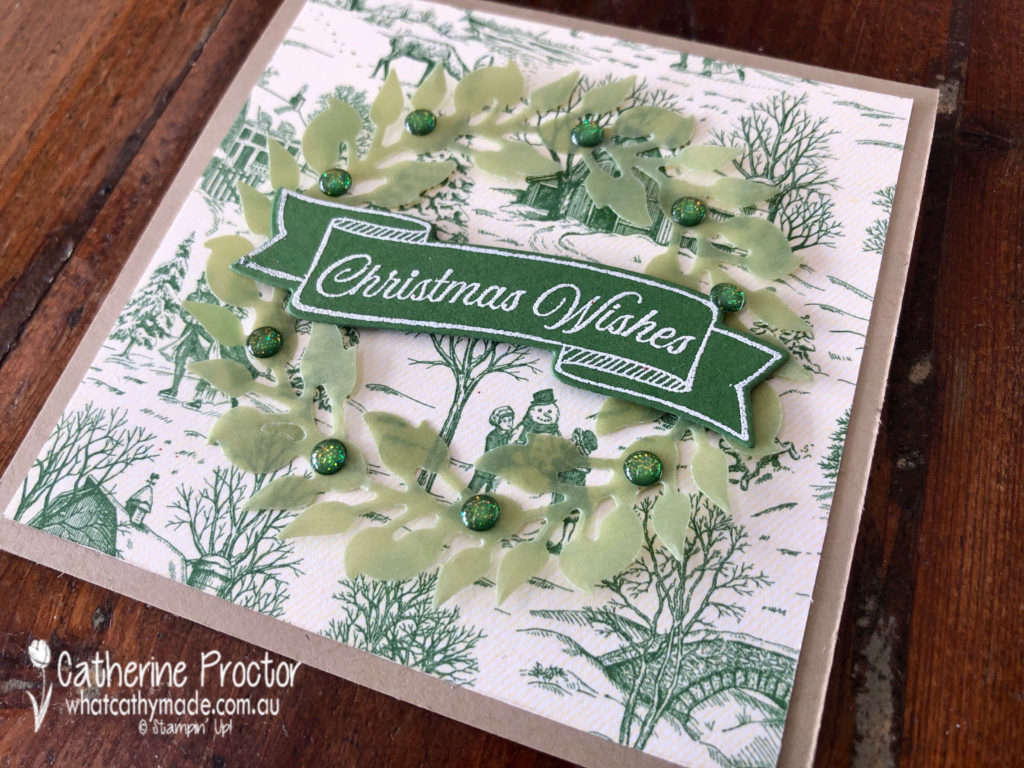
I used the same patterned DSP in Garden Green for my second card, this time die cutting my wreath from the Perennial Essence Old Olive vellum DSP in the Annual Catalogue. The Toile Tidings Glitter Enamel Dots in green are used to accent the wreath.
My third card uses the botanical pattern from the Toile Tidings DSP in Real Red. Leaves and branches were cut from Real Red Glimmer paper using the Christmas Cardinal Dies to pick up the botanical accents in the DSP.
The final card uses the same DSP pattern but in Garden Green this time. I cut the leaves and branches from Sparkle Glimmer paper and from the Perennial Essence Old Olive vellum DSP. The Toile Tidings Glitter Enamel dots in Garden Green add a touch of sparkle and dimension.
The lovely Claire Daly is hosting our weekly Heart of Christmas blog hop – to see what the rest of the team have made this week you can visit Claire’s page here.
I’ll be back tomorrow night with another Christmas blog hop. To purchase any of the products I used in this project you can shop with me here.
If you’d like me to post you your very own copy of the brand new 2019 Stampin Up! Holiday Catalogue, the 2019-20 Stampin Up! annual catalogue or to simply find out about more about Stampin’ Up! contact me.
Welcome to the first week of the 2019 Heart of Christmas blog hop!
Around this time every year the Art With Heart Stampin’ Up! team begin our annual weekly blog hop, featuring the Christmas products in both the Annual Catalogue and the brand new forthcoming Holiday Catalogue, my ABSOLUTE FAVOURITE!!!! catalogue of the year.
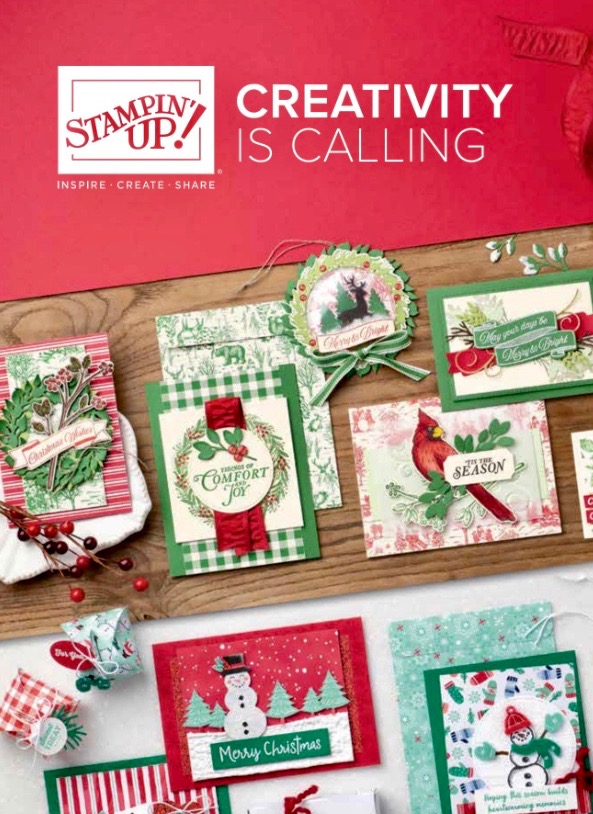
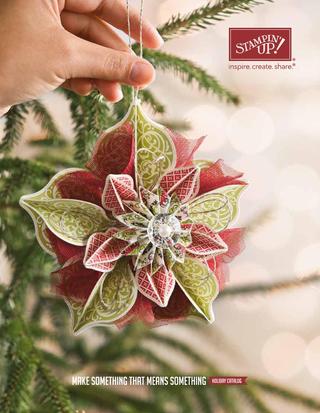
You will be able to view and order from the 2019 Holiday Catalogue from the 4th September, but in the meantime here’s a peek at the cover.
One of the first products to catch my eye in the brand new Stampin’ Up! 2019 Holiday Catalogue is a suite called the Brightly Gleaming Suite.
I love the beautiful blues and greens of the Brightly Gleaming DSP, the Star Designer Elements, the Hammered Metal 3D embossing folder but most of all I love that the Christmas Gleaming Stamp Set has not just one, but two coordinating punches!
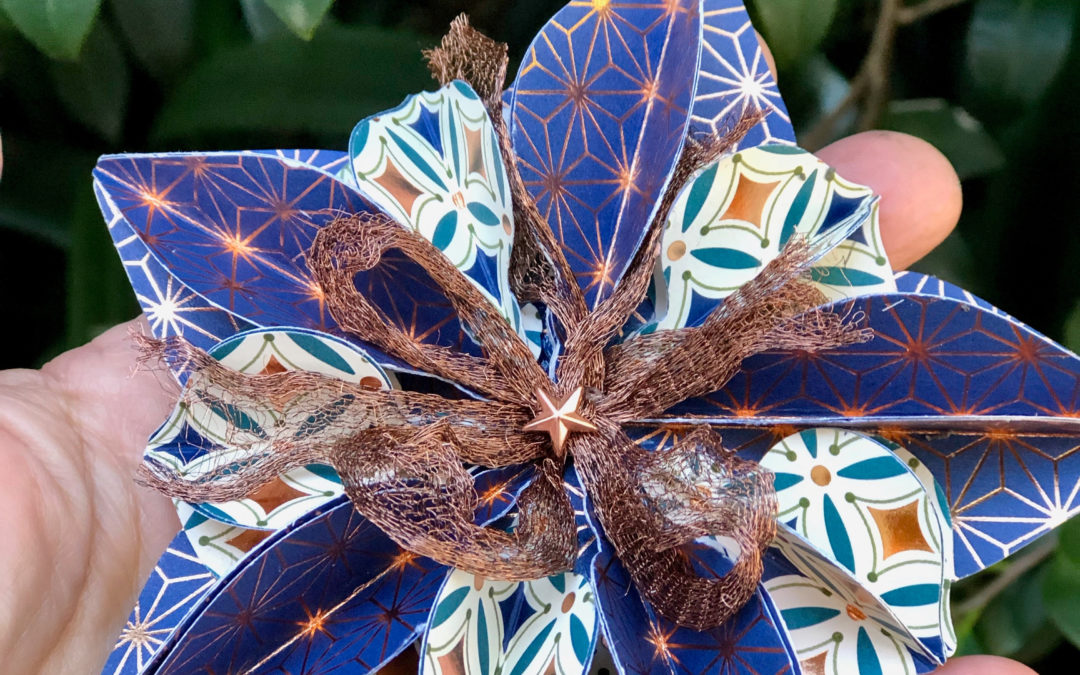
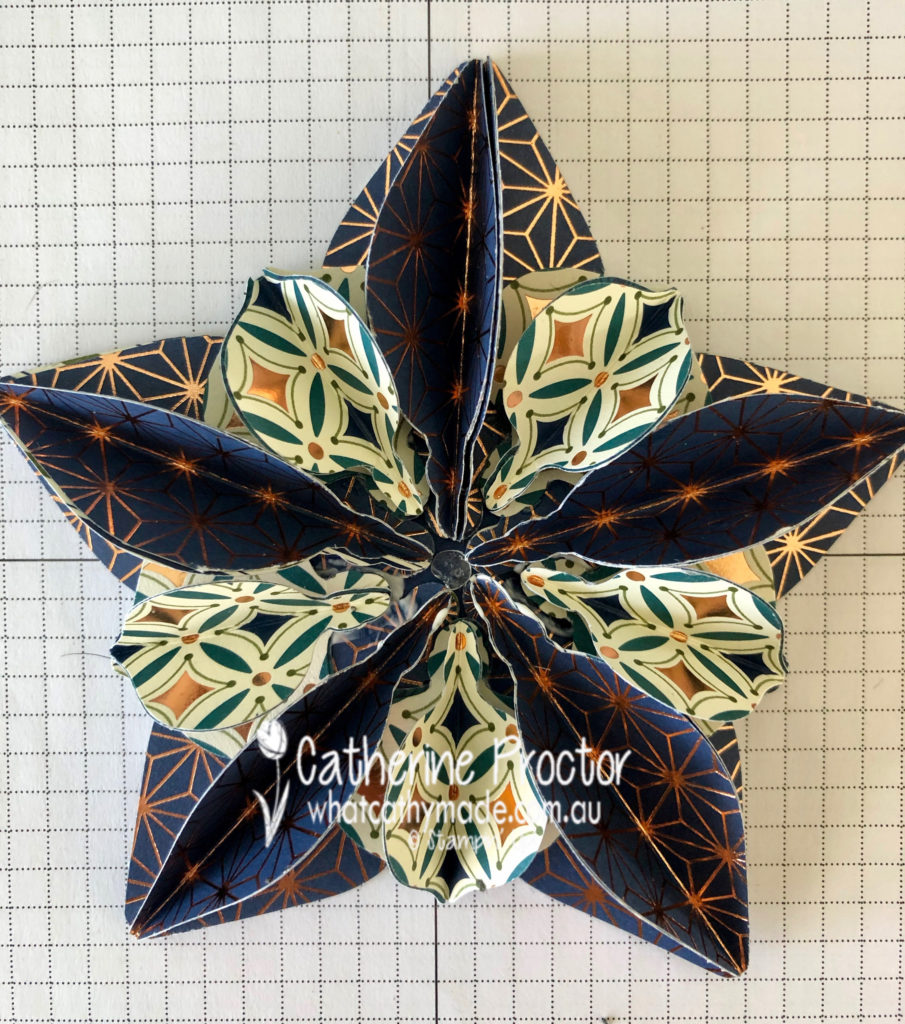
There are so many projects I’m planning to make with these punches but this week I decided to CASE a project I saw another demonstrator CASE from the cover of the 2012 Stampin’ Up! holiday catalogue. Isn’t this ornament simply gorgeous?
The other Stampin’Up! demonstrator used the Gleaming Ornaments punch to make this ornament by firstly stamping and then punching out the images, but I decided to make things even simpler by simply punching out my shapes from the Brightly Gleaming DSP.
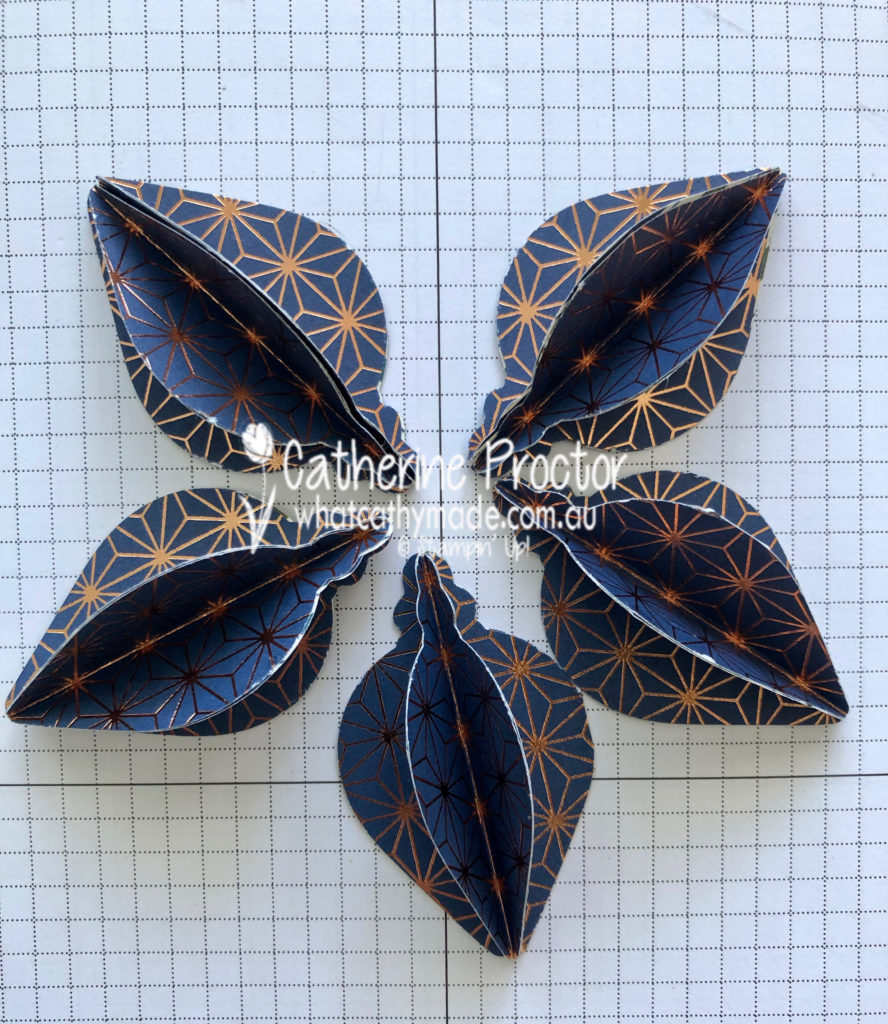
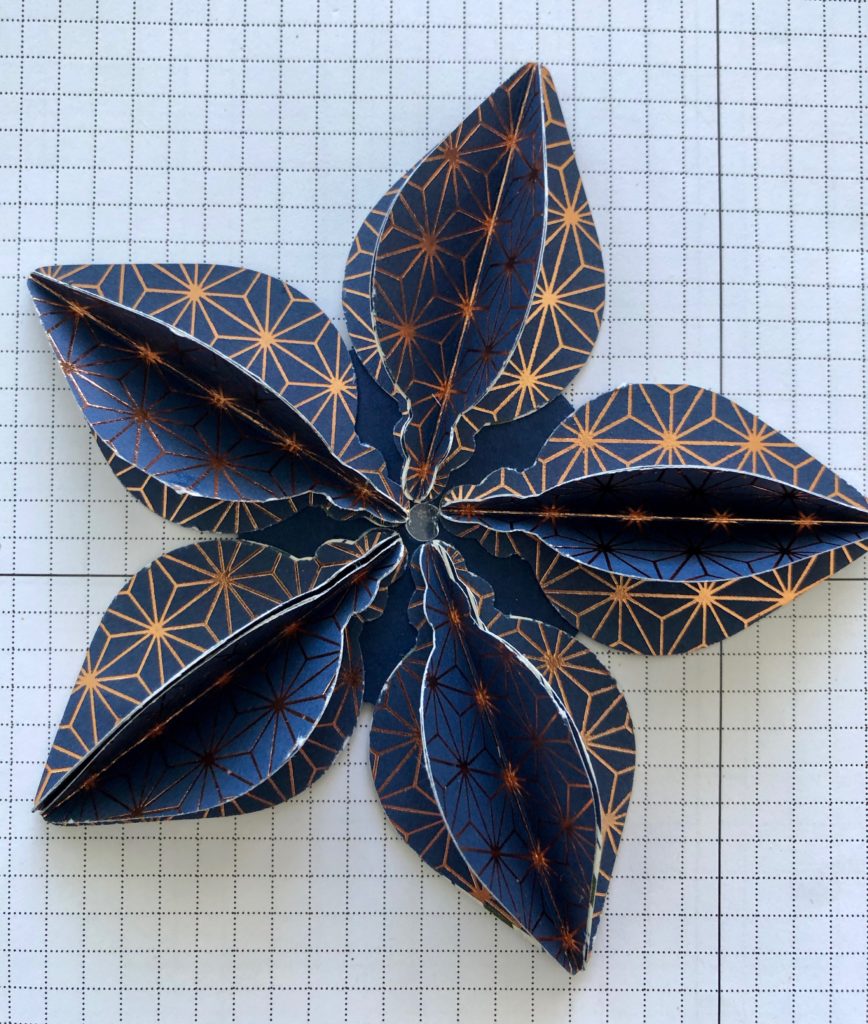
Firstly I punched out 20 of the larger punch ornaments using the Night of Navy and Copper paper from the Brightly Gleaming DSP. The geometric design of this DSP made it very easy to score down the centre of 15 of the ornaments before using multipurpose liquid glue to glue them together.
I simply glued 3 of the scored ornaments together before adhering these to one of the unscored ornaments. Repeat 4 times.
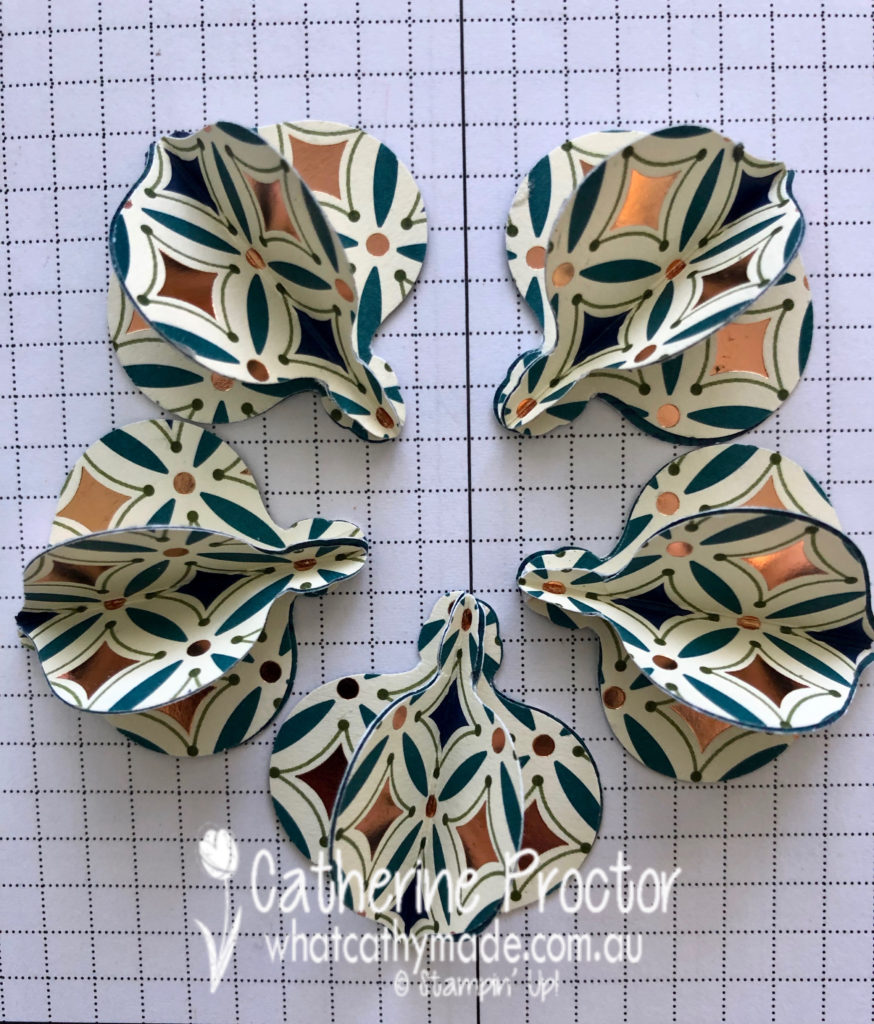
Follow the same steps, this time punching out 20 smaller ornaments from a different coloured DSP, and score and glue together.
Punch a 2 inch circle out of Night of Navy cardstock and place a glue dot in the middle. Use your glue dot to position the larger shapes evenly around the circle and adhere the shapes to the with multipurpose liquid glue
Then glue the smaller shapes between the larger ornament shapes.
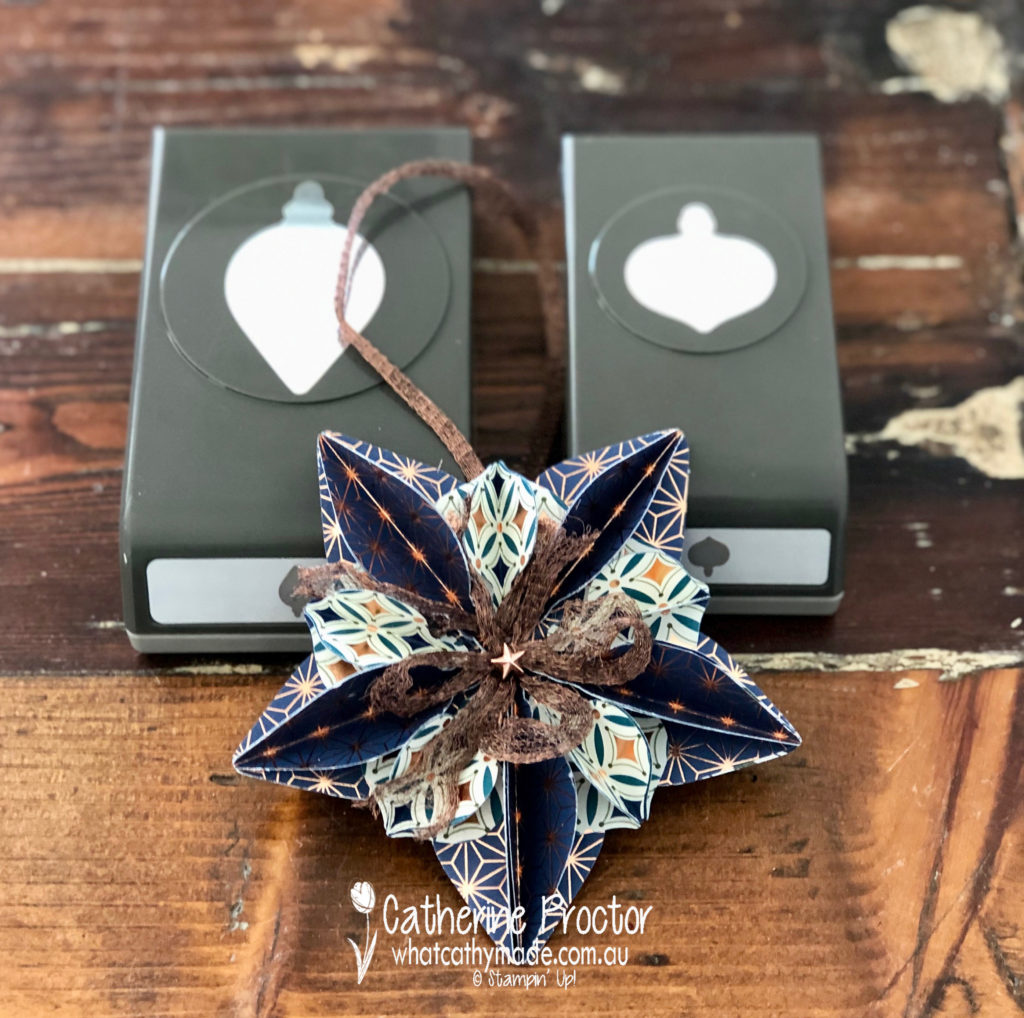
Tie two bows with the copper trim ribbon and then use your fingers to tease the ribbon out. Adhere these bows to the centre of your ornament using glue dots and then top with a copper star designer element.
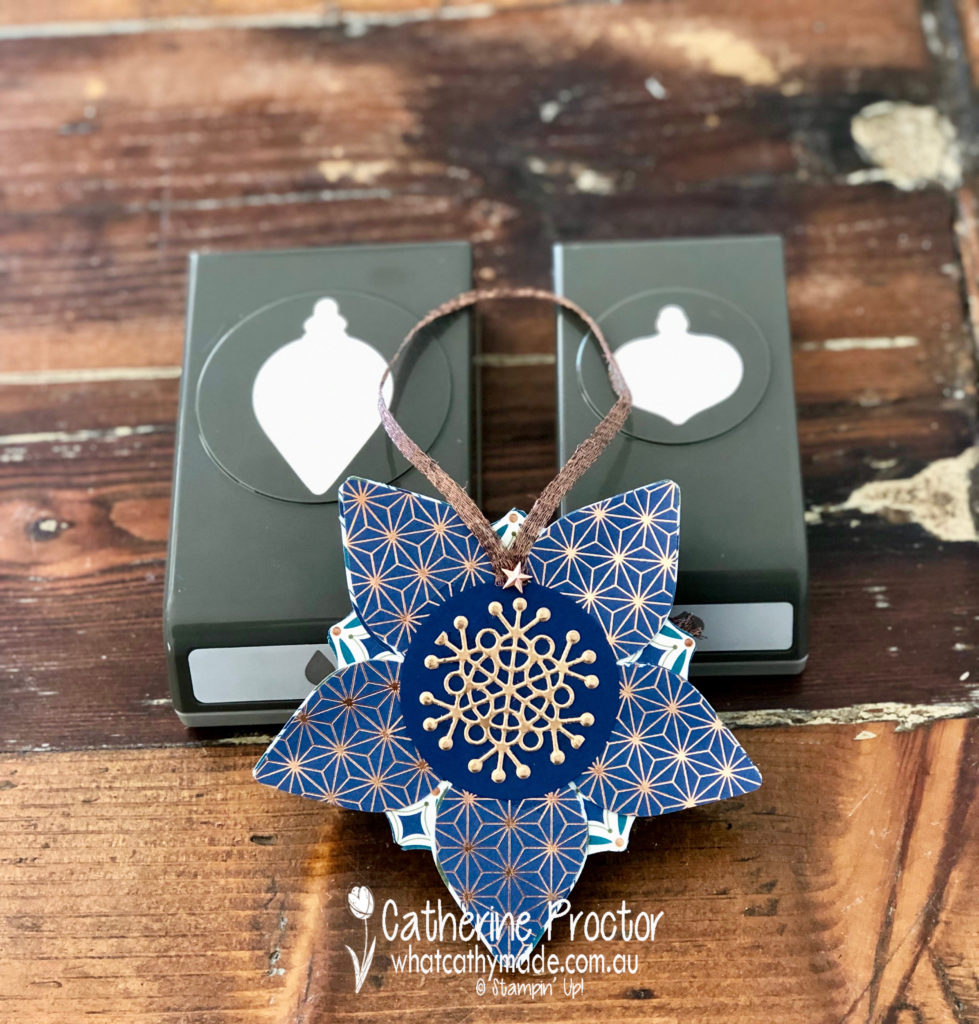
To finish off the reverse side die cut a snowflake from copper foil using the Seasonal Layers Thinlits dies and adhere to the middle of the Night of Navy circle with multipurpose liquid glue.
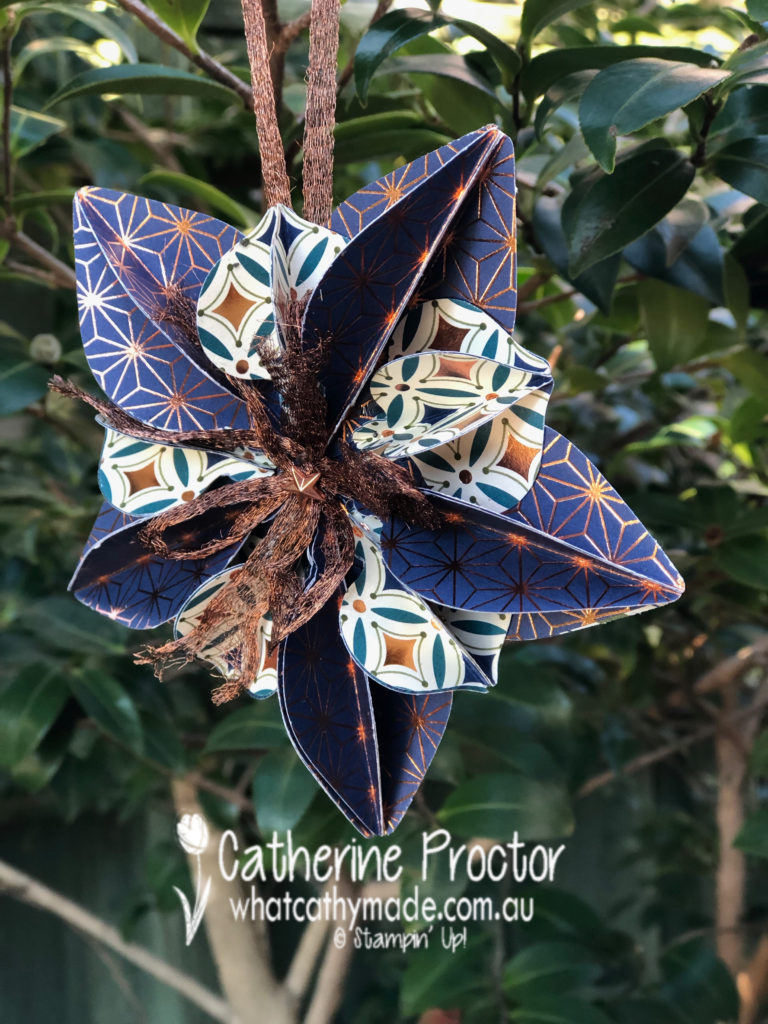
So you can hang your ornament, add a loop of copper trim ribbon to the back as well and adhere using glue dots. Use another copper star designer element to hide the ends of the copper trim ribbon and then hang from a tree!
The lovely Claire Daly is hosting our weekly Heart of Christmas blog hop – to see what the rest of the team have made this week you can visit Claire’s page here.
I’ll be back next week with two more Christmas blog hops. To purchase any of the products I used in this project you can shop with me here.
If you’d like me to post you your very own copy of the brand new 2019 Stampin Up! Holiday Catalogue, the 2019-20 Stampin Up! annual catalogue or to simply find out about more about Stampin’ Up! contact me.
Welcome to week 15 of our Art With Heart, Heart of Christmas blog hop…our final Heart of Christmas blog hop for 2018!
This week I’ve made a card using two limited edition stamp sets: Happiness Surrounds and Snow is Glistening. They come with a set of matching dies that coordinate with both of these sets and all three products are only available until the end of this month, sadly.
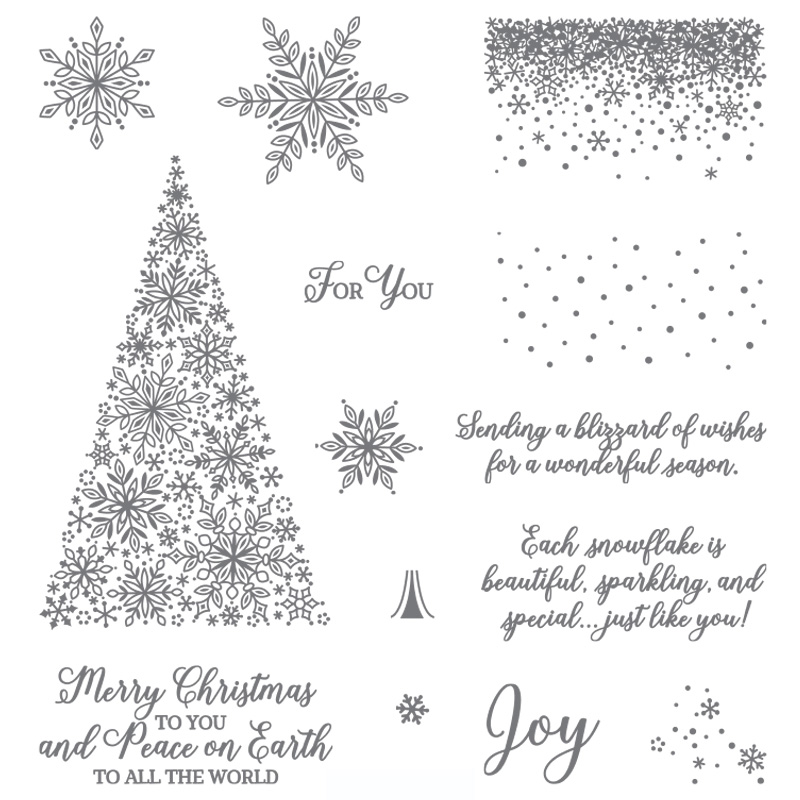
This is the Snow is Glistening stamp set.
This is Happiness Surrounds stamp set.
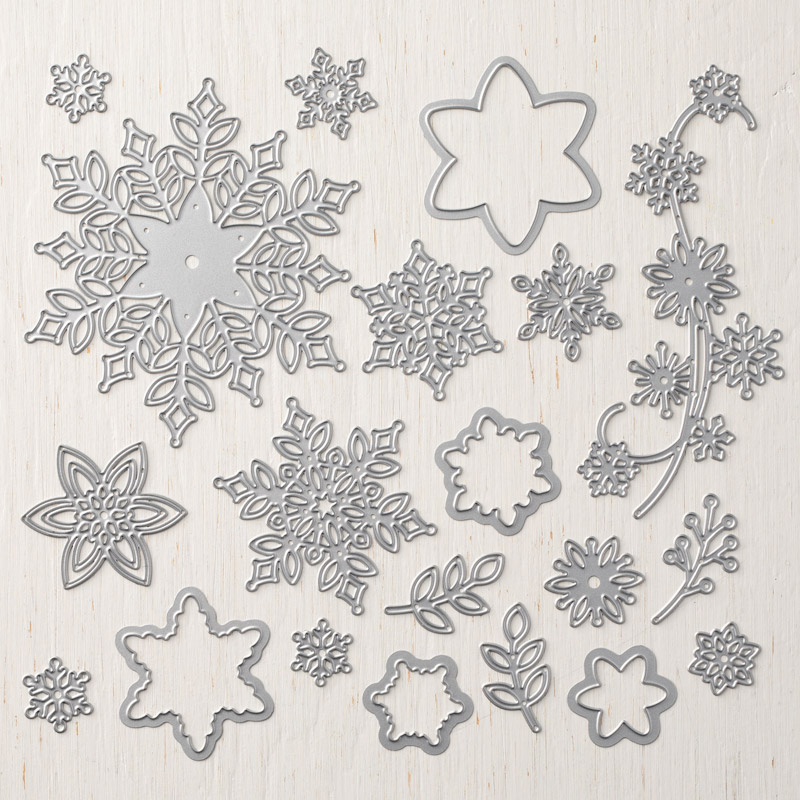
And these are the matching Snowfall Thinlits Dies.
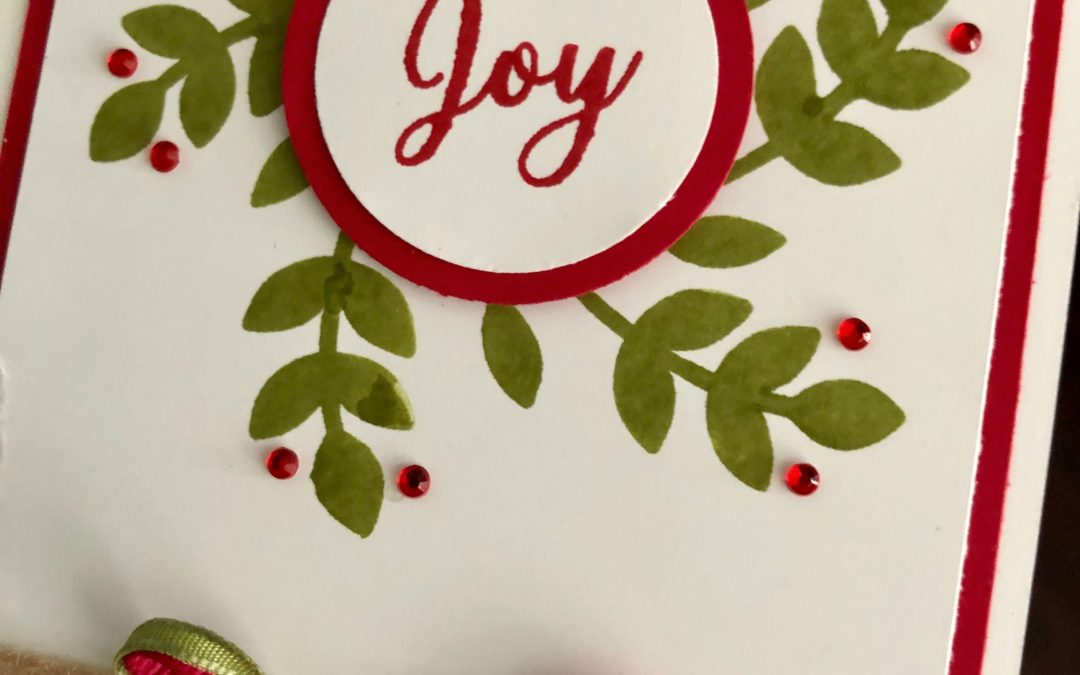
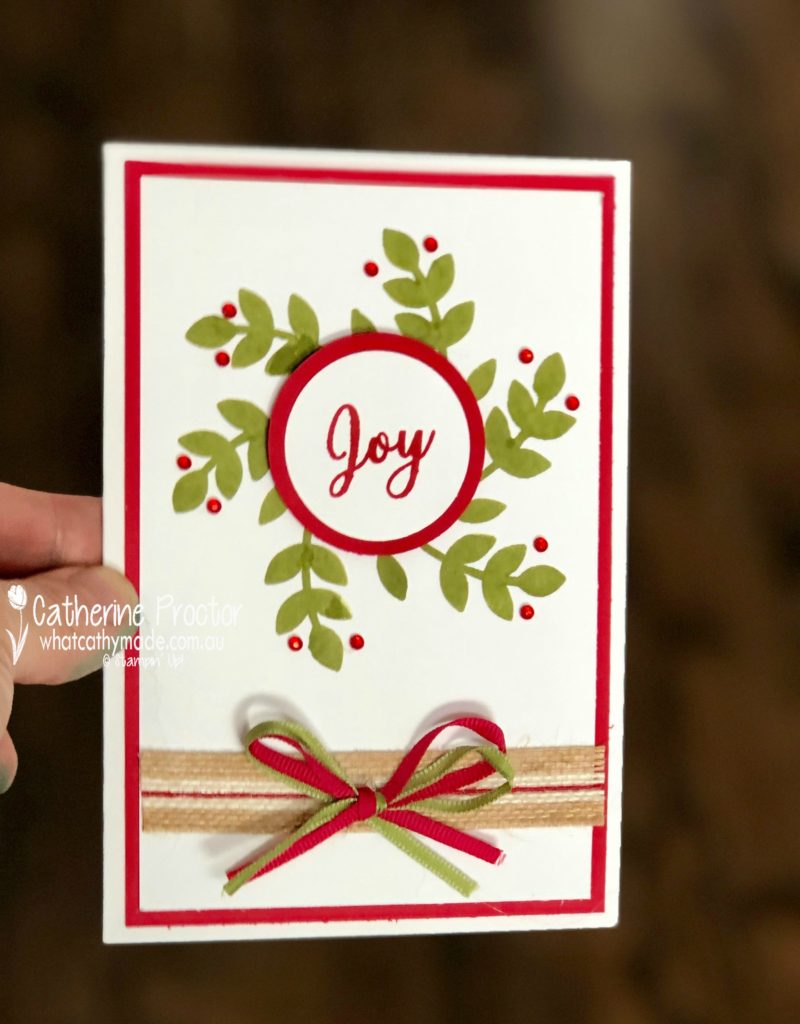
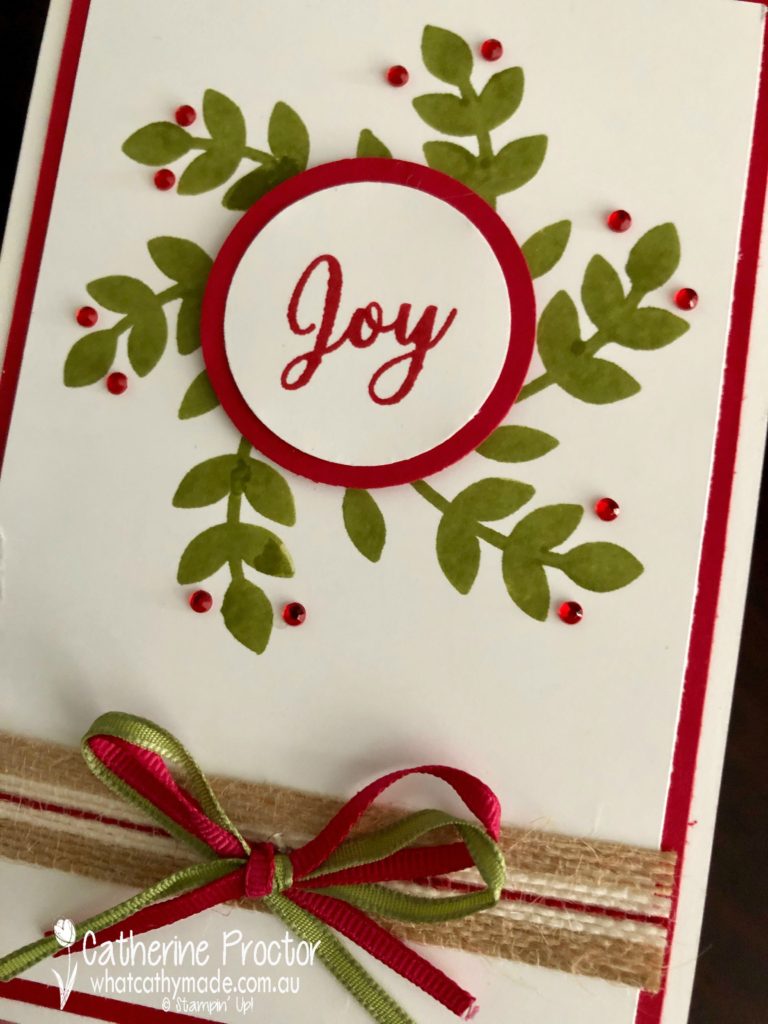
And this is the quick and simple card I’ve made using mainly the Happiness Surrounds stamp set.
I’ve used stamps from the Happiness Surrounds stamp set to make a simple wreath, stamped in Old Olive and then the sentiment is stamped in Real red using the Joy stamp from the Snow is Glistening stamp set.
I punched out both the circles using the 1 1/2 inch and the 1 3/4 inch circle pinches and finished the card off with striped burlap ribbon and 3/8 inch old olive and real red ribbon. The entire card came together in under 15 minutes with the minimum of fuss or equipment. Too easy!
To see what the rest of the team have made tonight head back to the lovely Claire Daly’s blog.
To purchase any of the products I used in this project you can shop with me here. Or if you’d like me to post you your very own copy of the 2018-2019 annual catalogue or find out about more about Stampin’ Up! contact me.
Welcome to week 13 of our Art With Heart, Heart of Christmas blog hop.
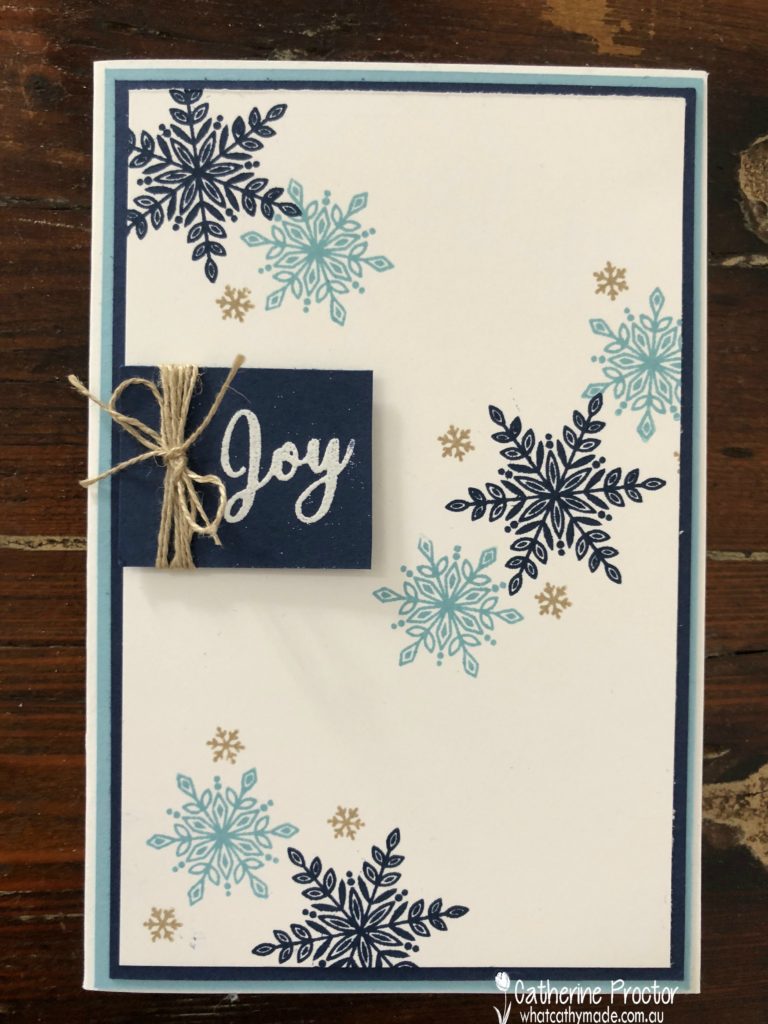
This week I’ve made a card using a limited edition stamp set, Snow is Glistening. I know we don’t have snowflakes here in Australia but I really have a thing for snowflakes and I couldn’t resist this stunning stamp set.
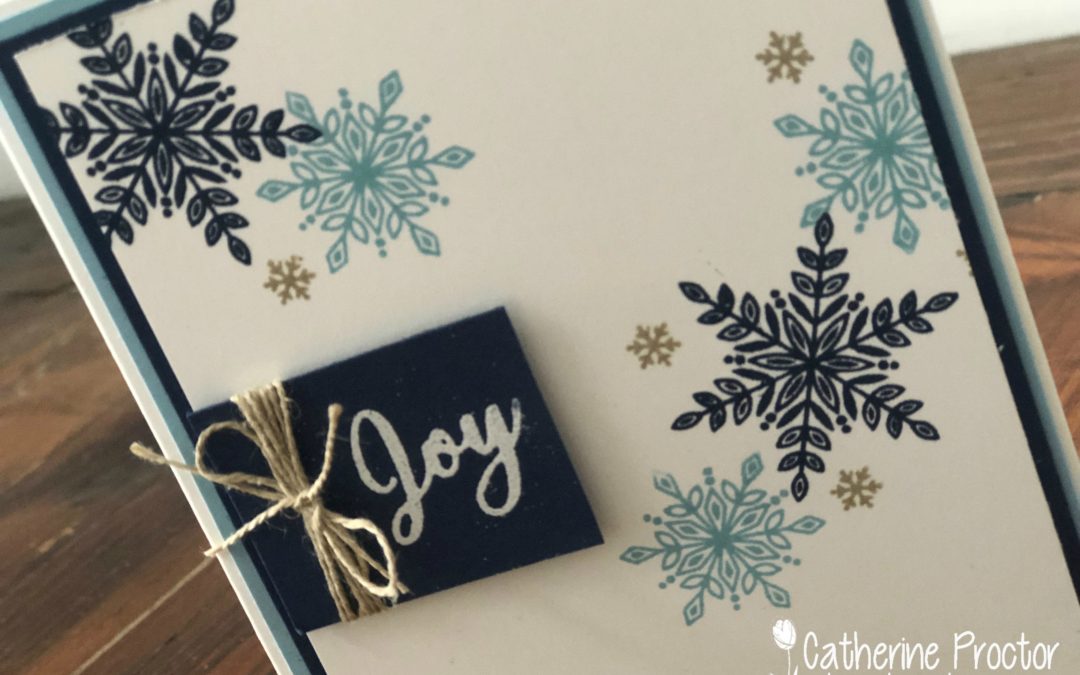
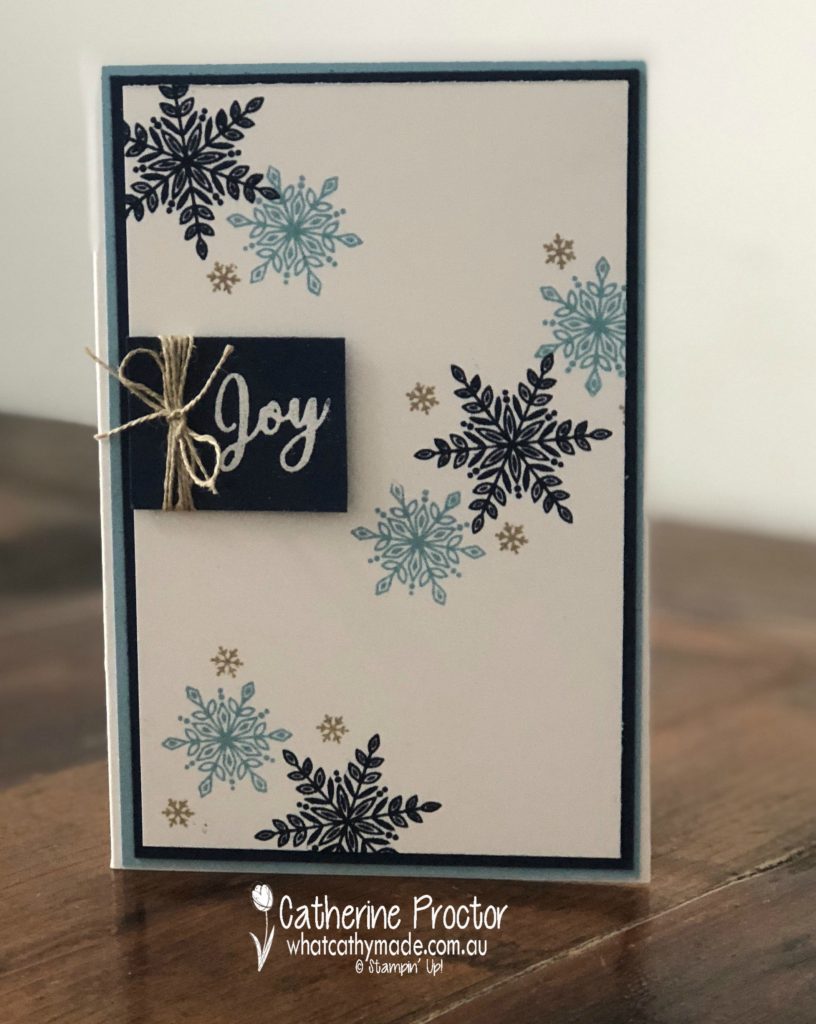
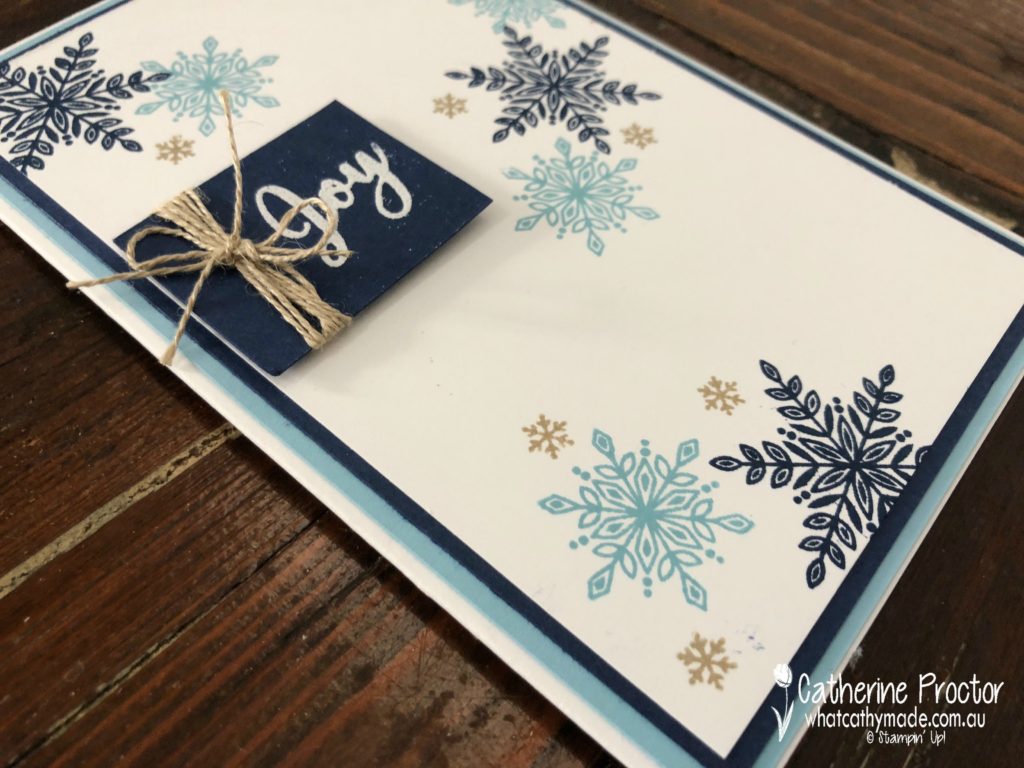
Although this comes with matching dies, I decided to make a very simple card that only involves stamping. The design was inspired by a card I found on Pinterest that was made by an American demo called Mary Haugen. I’ve CASED her placement of the snowflake stamps and the way she wrapped the twine around the sentiment, but changed the colours as well as several other elements on her card.
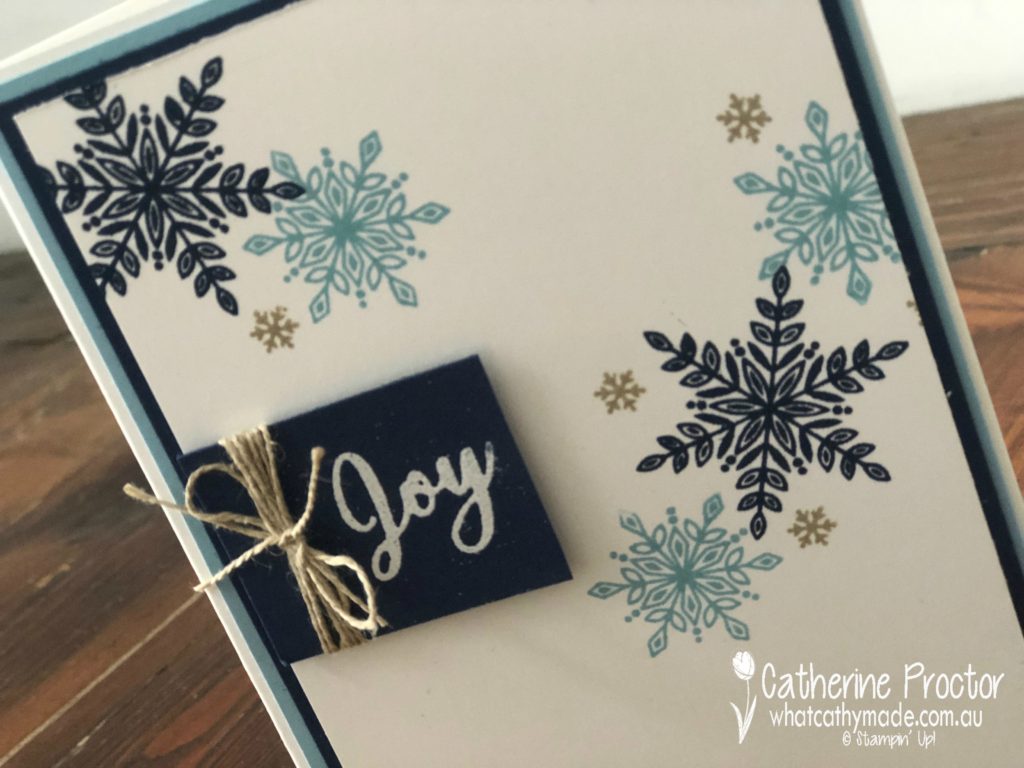
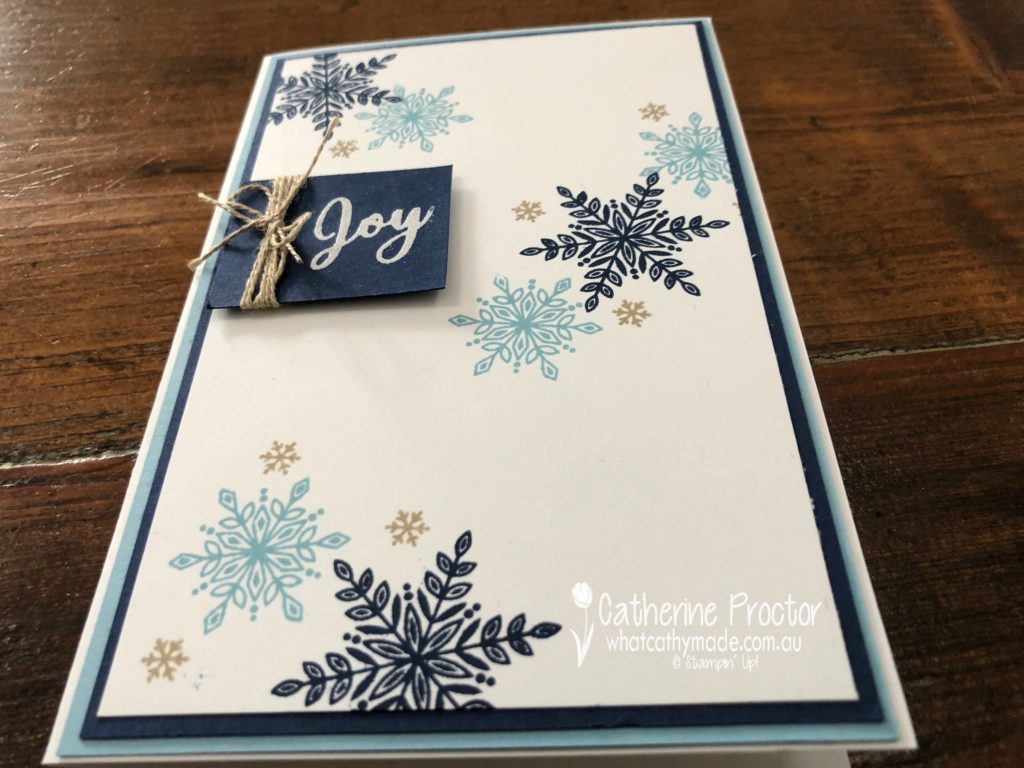
I used the three snowflake stamps in this set to stamp my card in Night of Navy, Balmy Blue and Sahara Sand. I LOVE these three colours together.
The stamped Whisper White panel was mounted onto Night of Navy cardstock, then Balmy Blue cardstock and adhered to a Memories and More Whisper White card base.
The final touch is the simple joy sentiment, stamped in Whisper White and then heat embossed in Whisper White, with linen thread wrapped around it.
To see what the rest of the team have made tonight head back to the lovely Claire Daly’s blog.
To purchase any of the products I used in this project you can shop with me here. Or if you’d like me to post you your very own copy of the 2018-2019 annual catalogue or find out about more about Stampin’ Up! contact me.
Welcome to week 11 of our Art With Heart, Heart of Christmas blog hop.
I have a confession to make.
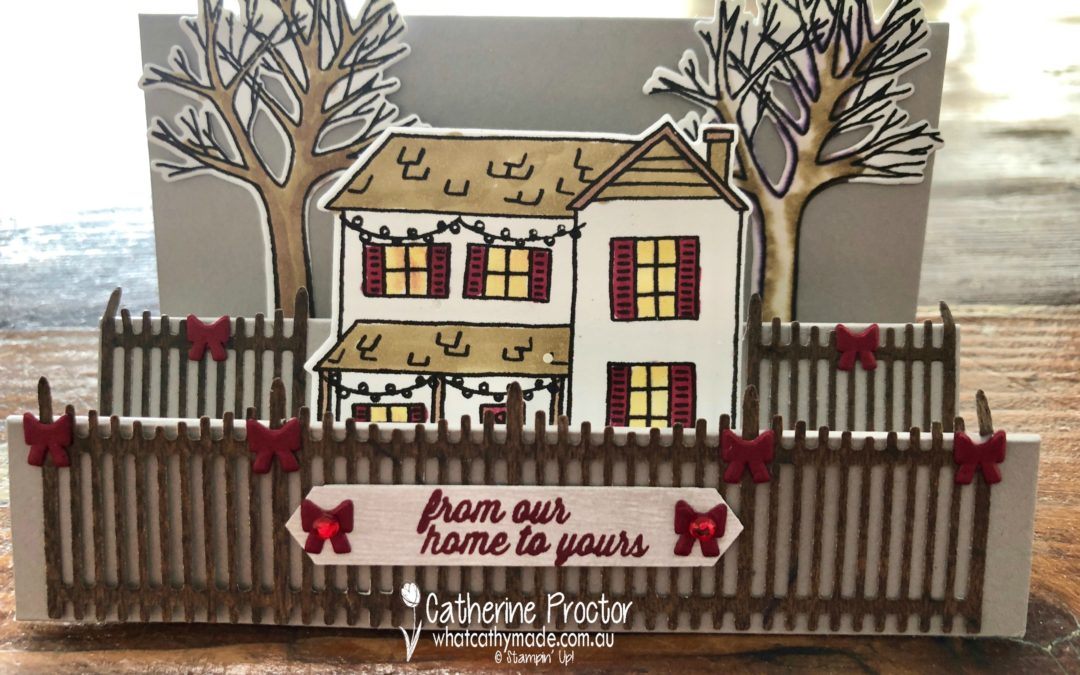
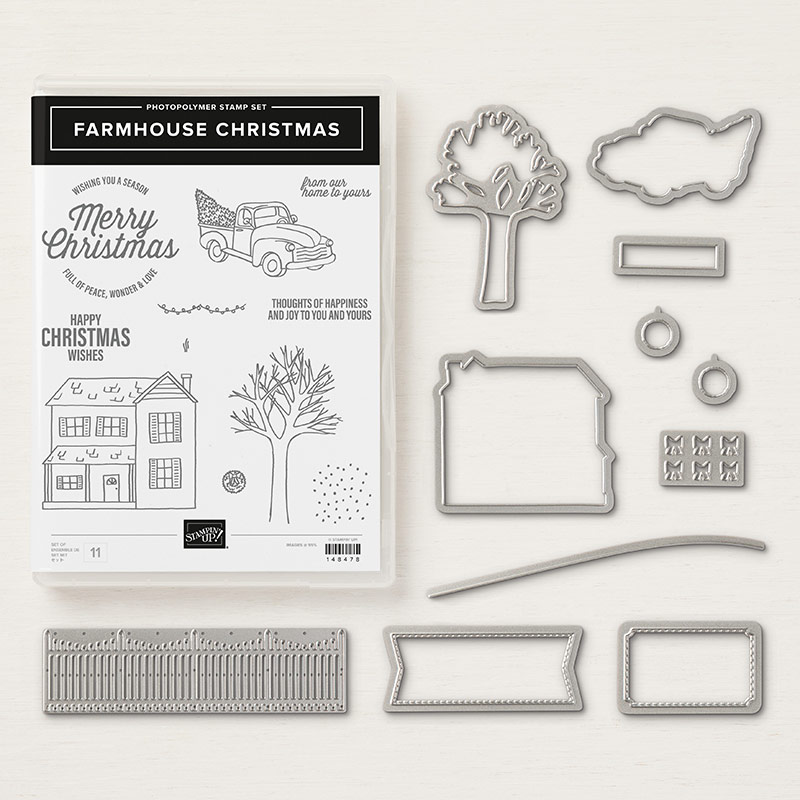
I bought the Farmhouse Christmas bundle simply to get the picket fence, the teeny tiny string of lights and the teeny tiny bow dies. But now that I’ve had a play with this set, I’ve fallen in love with every stamp and die in this bundle. It’s just so cute!
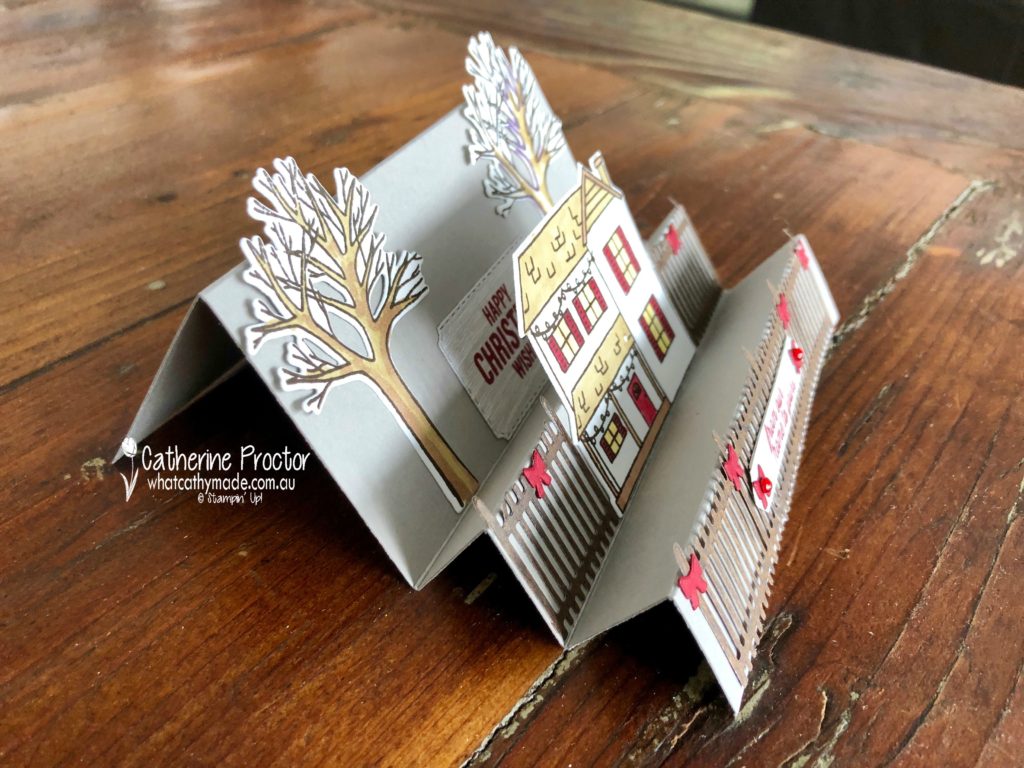
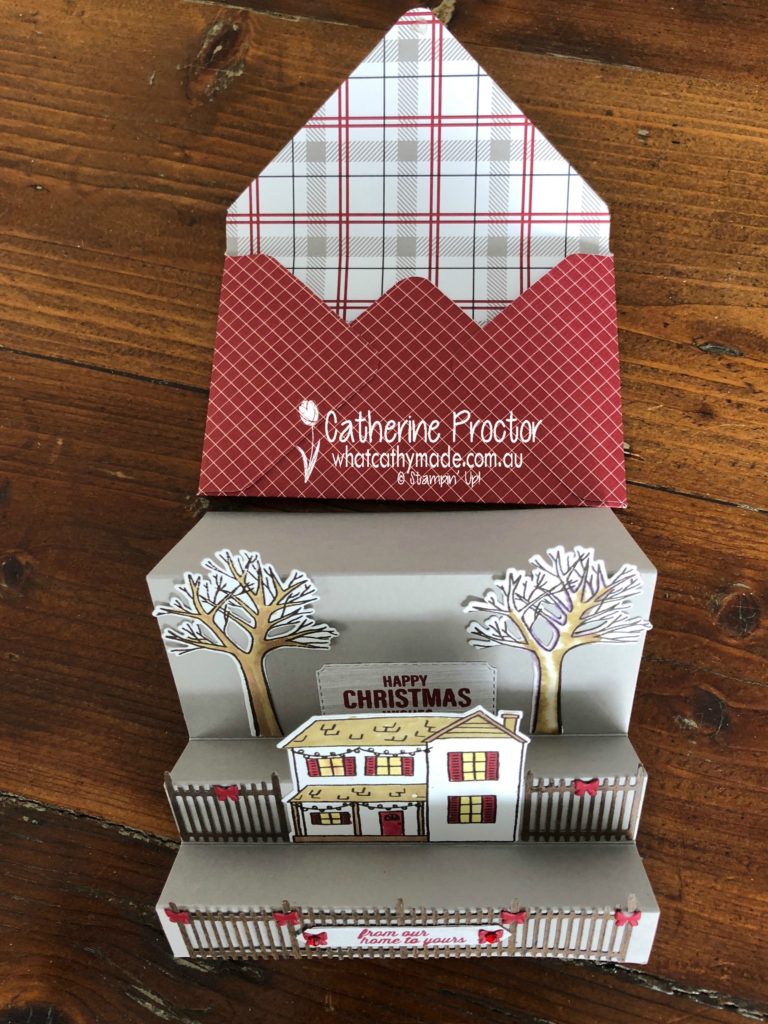
I’ve seen a few Z fold cards made with this set but I haven’t seen any step cards so I decided to make one for my project this week. If you haven’t seen a step card before, here’s a side on view to show you what I’m talking about.
Step cards come in so many different variations (just Google it and you’ll see what I mean) but the type I’ve made with the Farmhouse Christmas bundle is very simple and so easy to make. The measurements for my card are as follows. Begin with a piece of cardstock (I used Gray Granite) measuring 8 1/2 x 4 3/4 inches. Score and fold at 1″, 2″, 3″, 4″ and 6 3/8″.
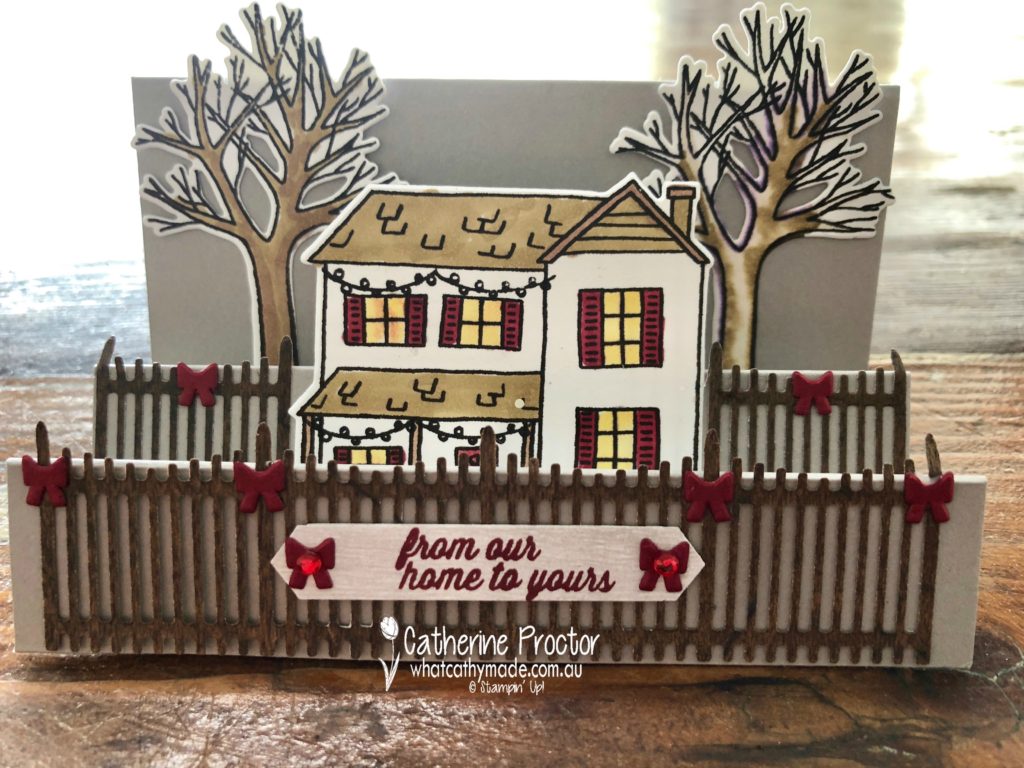
At this point, I need to insert a little disclaimer. I stamped my house and trees using Early Espresso ink and then used my Stampin’ Up! blends to colour them in, but on the tree where I used my colour lifter blender pen it comes up with a purple hue in my photos!
In real life, you don’t even notice this but if this worries you and you don’t want that purple hue on your card don’t use the colour lifter pen when colouring in.
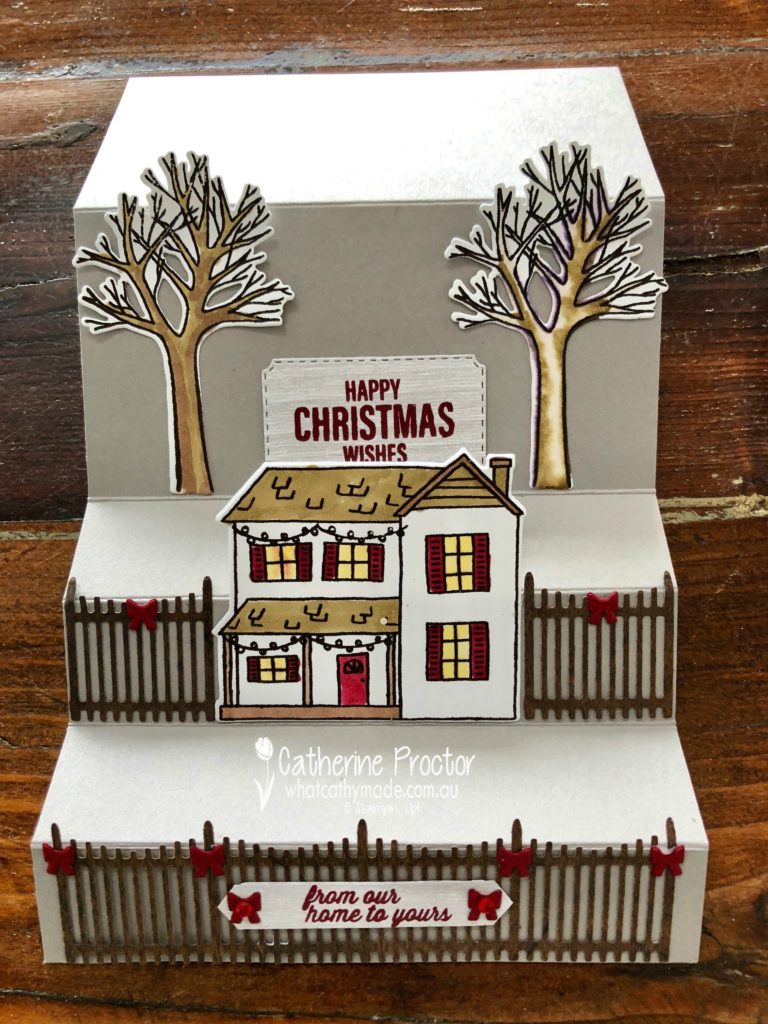
Here’s a photo of the card stretched out so you can see how I’ve laid out the stamps and the dies on my card.
Step cards are really suited to stamp sets that you can use to create a layered scene. And they are wonderful for the recipient because they stand up beautifully by themselves for display purposes.
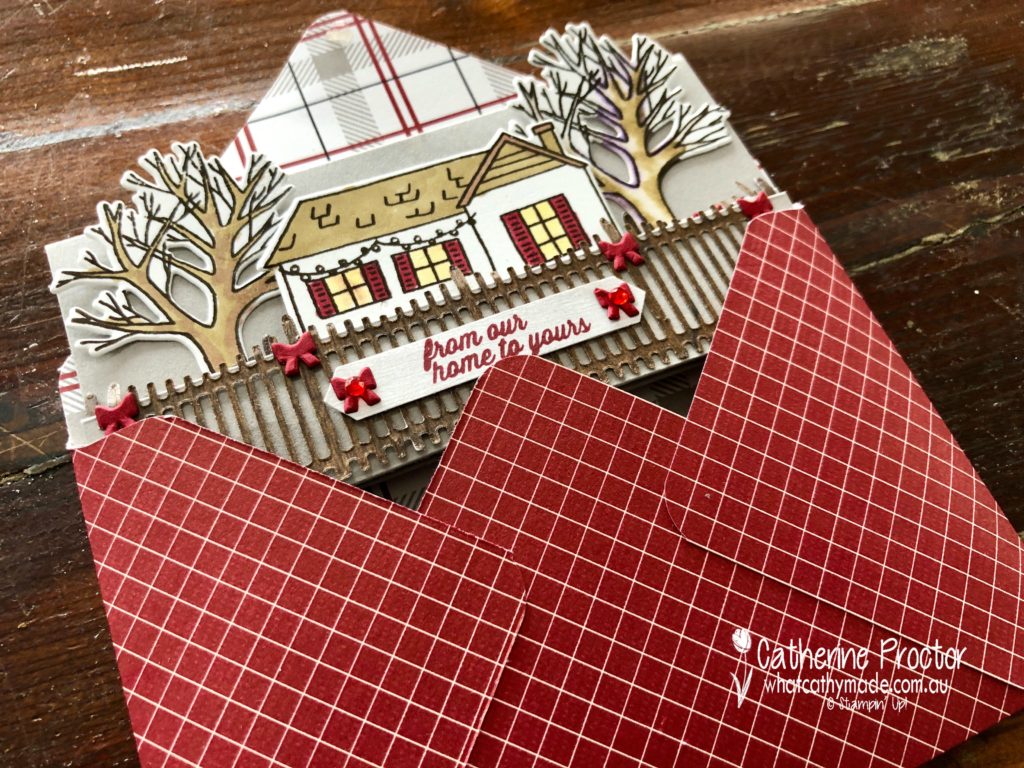
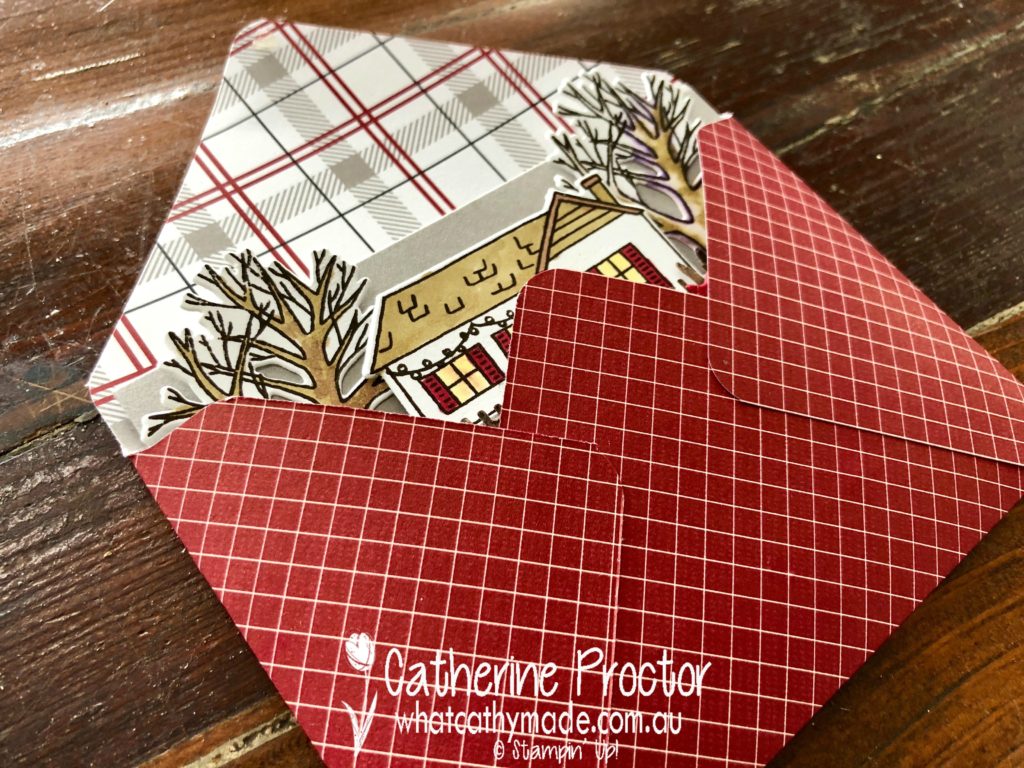
As you can see in the photo above I’ve made an envelope to match my card, using the envelope punch board and the matching Festive Farmhouse DSP. To keep my envelope closed when posting or gifting the card I use a glue dot underneath the back flap.
To see what the rest of the team have made this week hop over to the lovely Claire Daly’s blog.
To purchase any of the products I used in this project you can shop with me here. Or if you’d like me to post you your very own copy of the 2018-2019 annual catalogue or find out about more about Stampin’ Up! contact me.
Welcome to week 10 of our Art With Heart, Heart of Christmas blog hop.
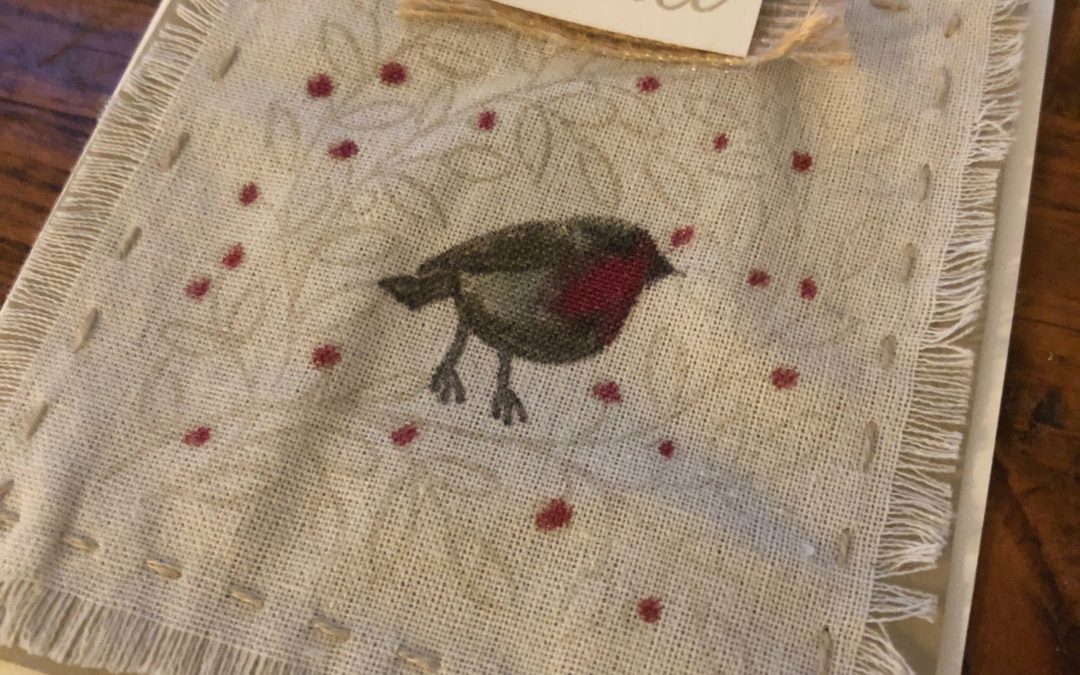
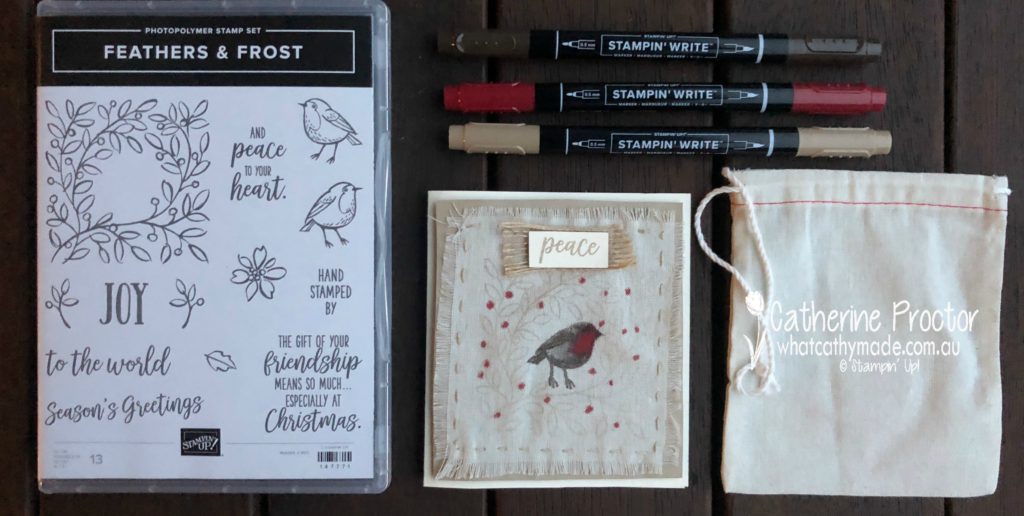
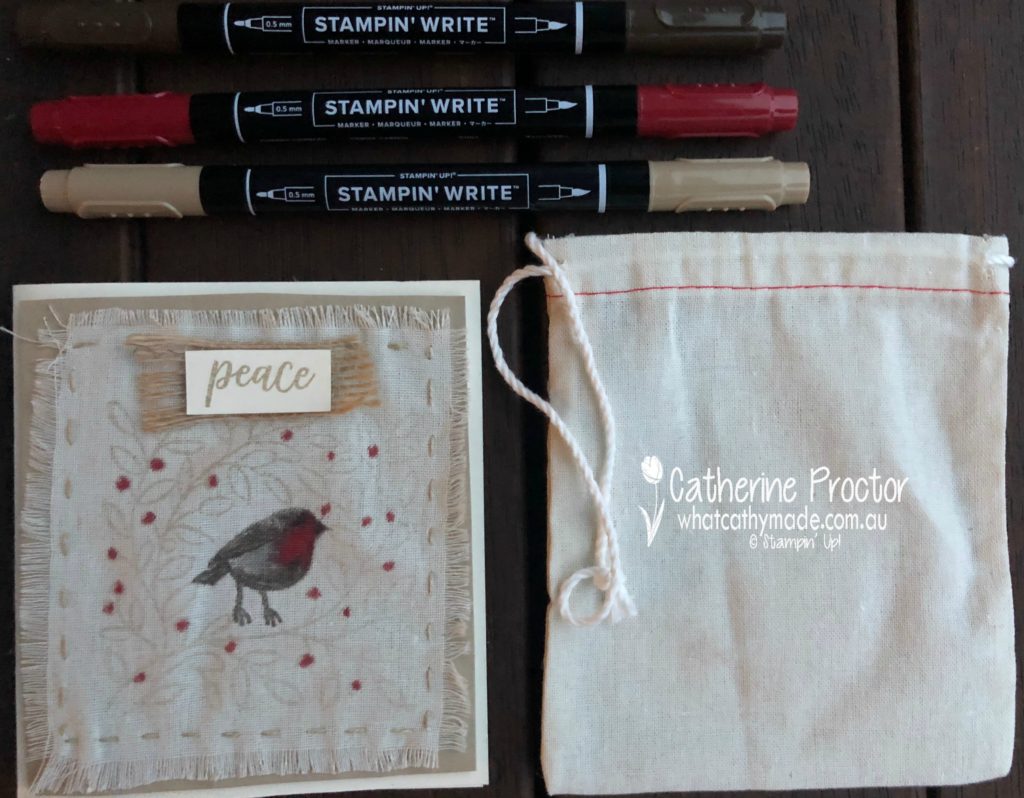
This week I made a very simple and rustic card using the Feathers & Frost stamps set, my Stampin’ Up! markers, the Santa Bags from the Holiday Catalogue and some linen thread.
This stamp set is just perfect for colouring in and, as it turns out, for stamping directly onto linen. I used my paper snips to cut one of the Santa Bags in half and then I stamped my stamps directly onto the linen using Crumb Cake ink.
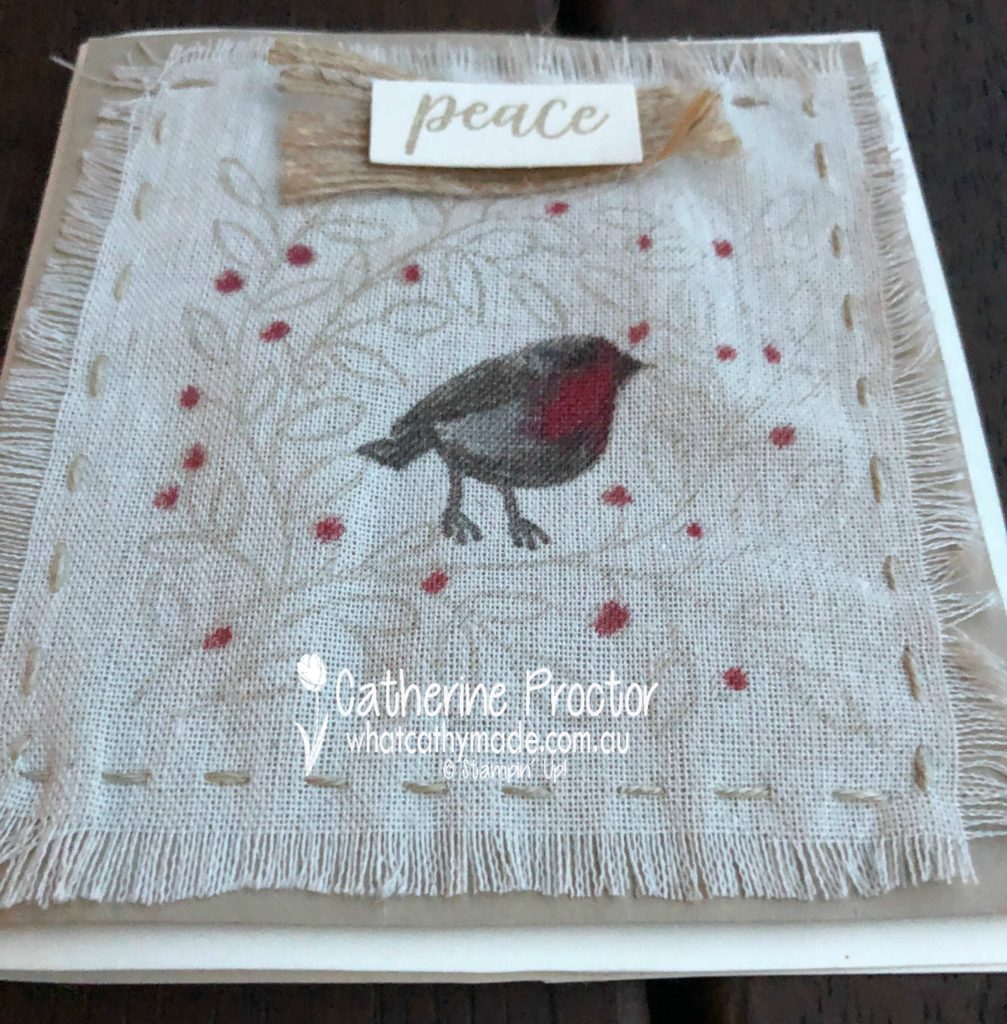
I coloured the little red robin in with my Early Espresso and Cherry Cobbler Stampin’ Up! markers before I used a needle with a large eye to sew the linen onto the cardstock using some linen thread.
Can you see the frayed edges of the linen? This is super easy to do, but I waited until after I’d coloured my image and sewed the linen to cardstock to fray the edges.
I stamped the inside of the card using a lovely sentiment from the Feathers & Frost stamp set.
I must apologise for the quality of the photos tonight- they were taken just before the blog went live on a dark and rainy night in old Sydney town. I also simply ran out of time re-redo my card…the linen is not sitting as flat as I would like so next time I would adhere it with tear and tape first BEFORE stitching to ensure it sits flat.
To see what the rest of the team have made this week hop over to the lovely Claire Daly’s blog.
To purchase any of the products I used in this project you can shop with me here. Or if you’d like me to post you your very own copy of the 2018-2019 annual catalogue or find out about more about Stampin’ Up! contact me.
Welcome to week 9 of our Art With Heart, Heart of Christmas blog hop.
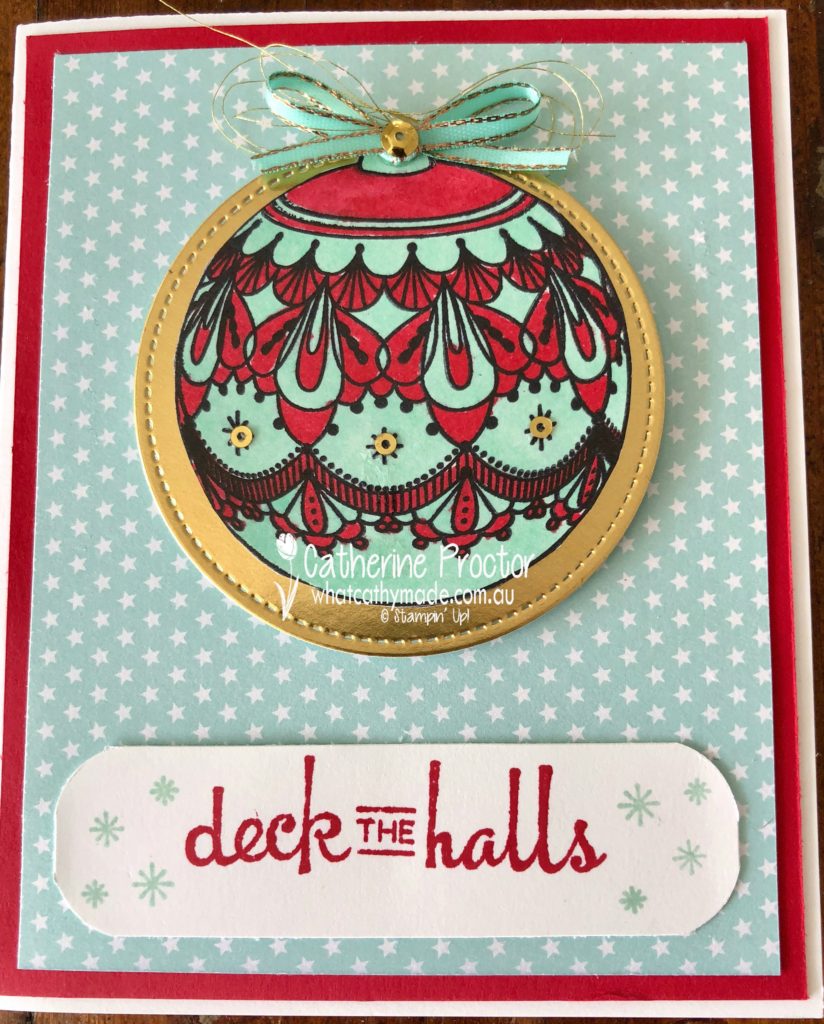
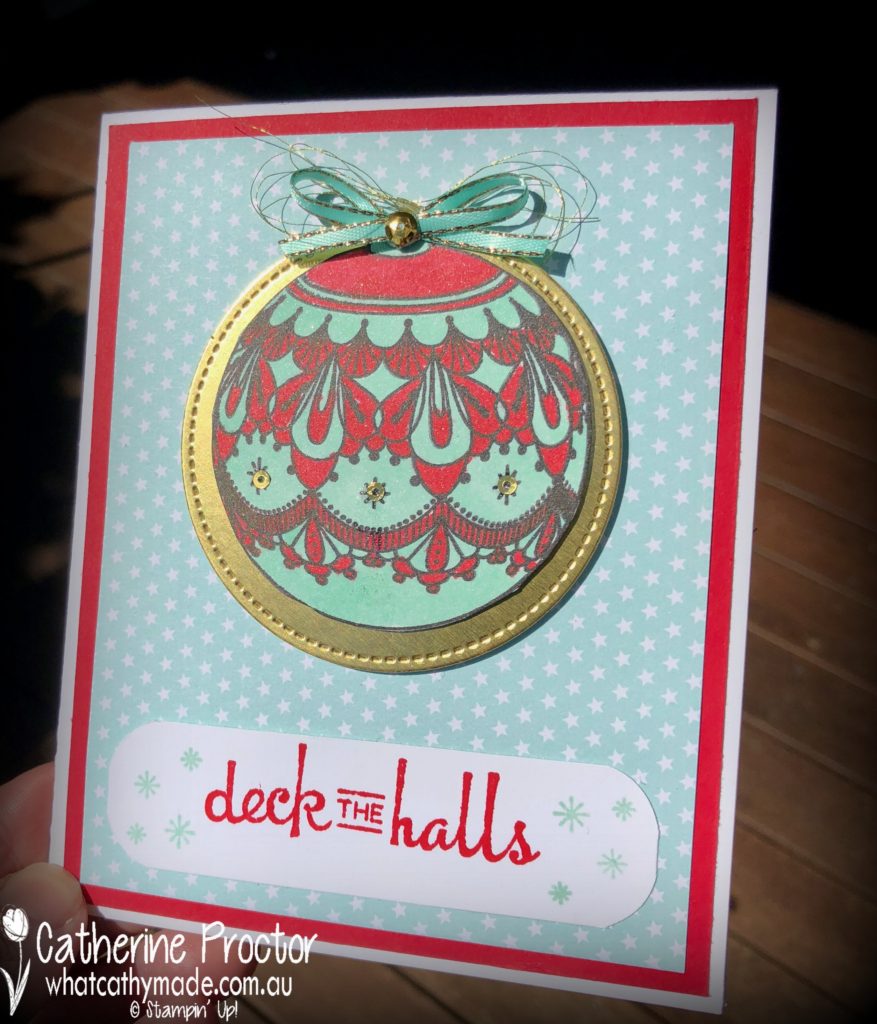
This week I had a play with the “Beautiful Bauble” stamp set.
This stamp set is just so easy to stamp, to colour in and even to fussy cut, just like I did for my card today. There are matching dies in this bundle but there isn’t a die for the big bauble I used on my card.
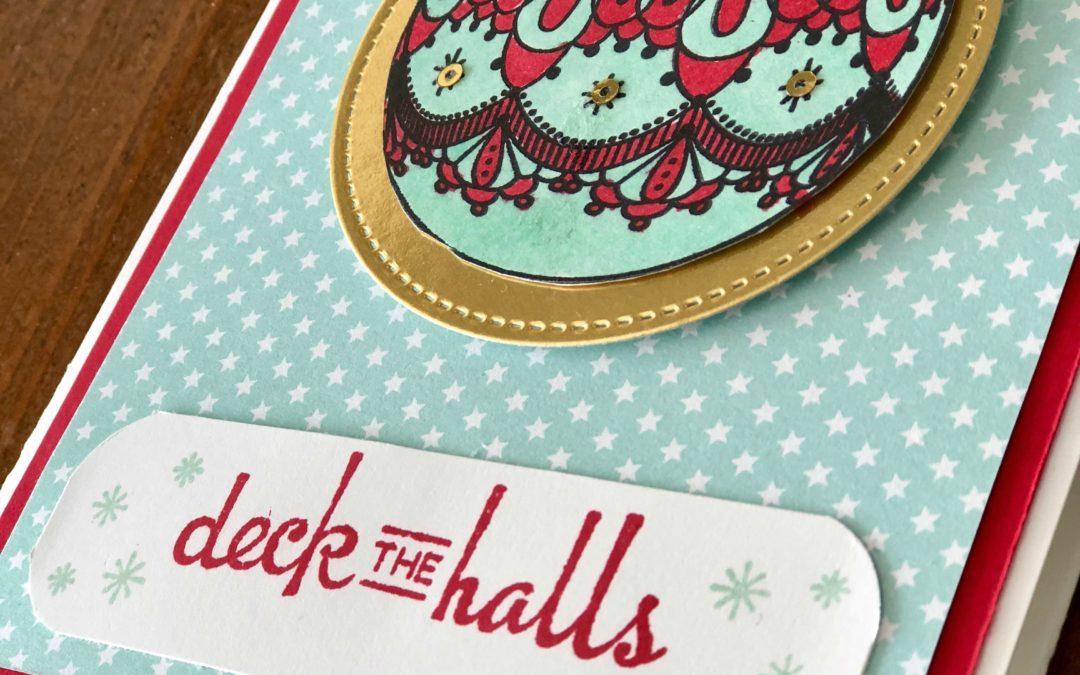
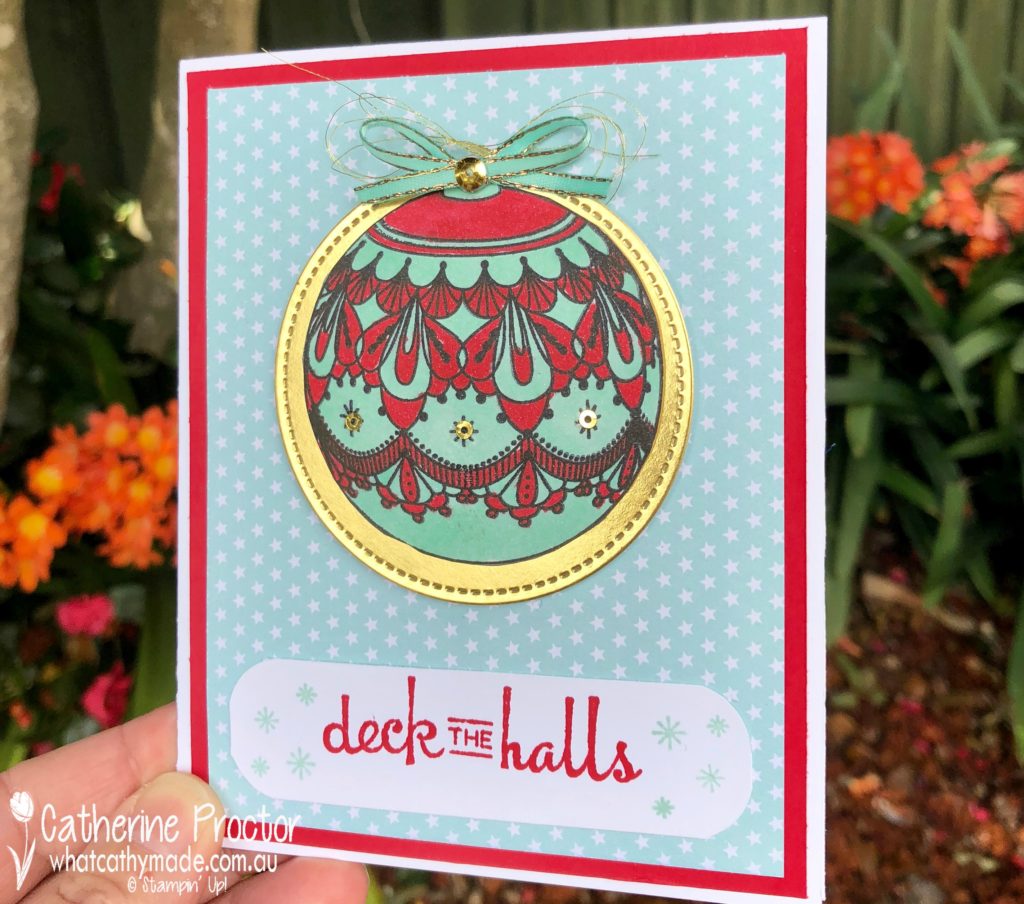
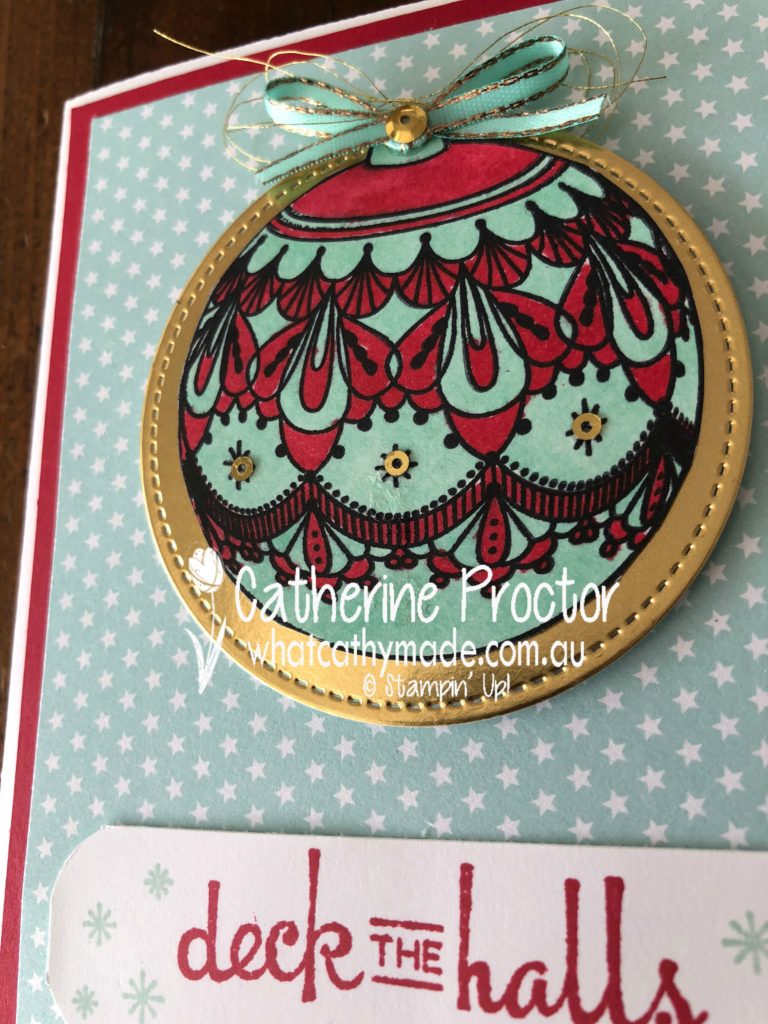
I used one of my favourite colour combinations: Real Red and Pool Party, but you can use any colour combination you want with the bauble stamp because baubles come in so many different colours. I stamped my bauble in black, coloured it in using my Stampin’ Blends and then I fussy cut it out.
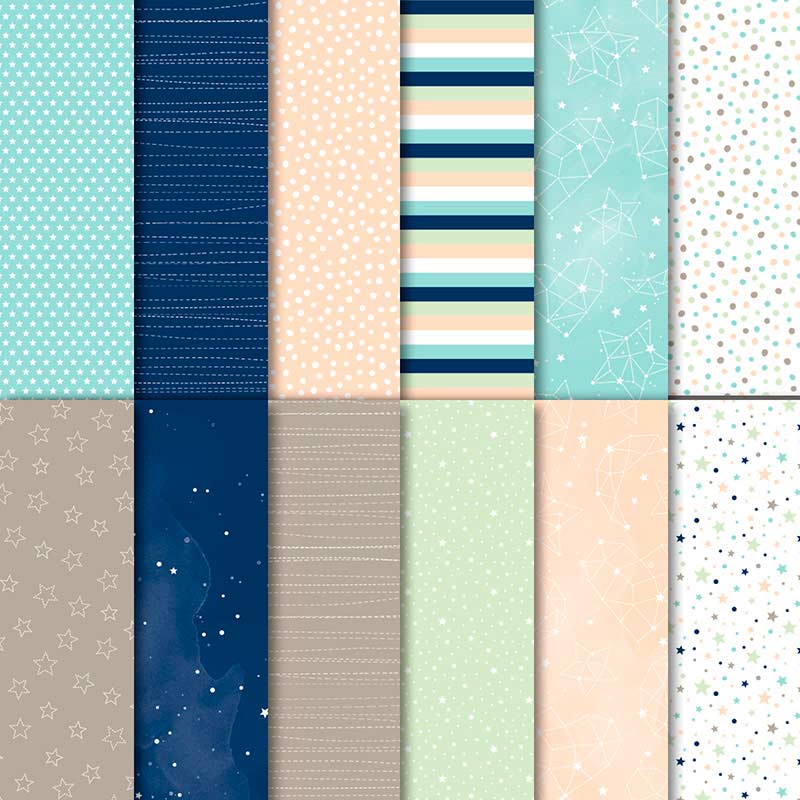
This stunning background Designer Series Paper with the teeny tiny stars is from a lovely DSP set in the annual catalogue called Twinkle Twinkle DSP.
Of course, I just had to add a little bling to this card so I used my Stitched Shapes framelits to cut out a circle of gold foil. My new “Take a Pick” tool was super helpful for removing individual sequins from the Gold Mini Sequin Trim and adhering them to my card.
I also used some gold metallic thread to decorate my bauble and the big gold sequin at the top of the bauble is from the Metallic Sequin Assortment.
To see what the rest of the team have made this week hop over to the lovely Claire Daly’s blog.
To purchase any of the products I used in this project you can shop with me here. Or if you’d like me to post you your very own copy of the 2018-2019 annual catalogue or find out about more about Stampin’ Up! contact me.
Welcome to week 7 of our Art With Heart, Heart of Christmas blog hop.
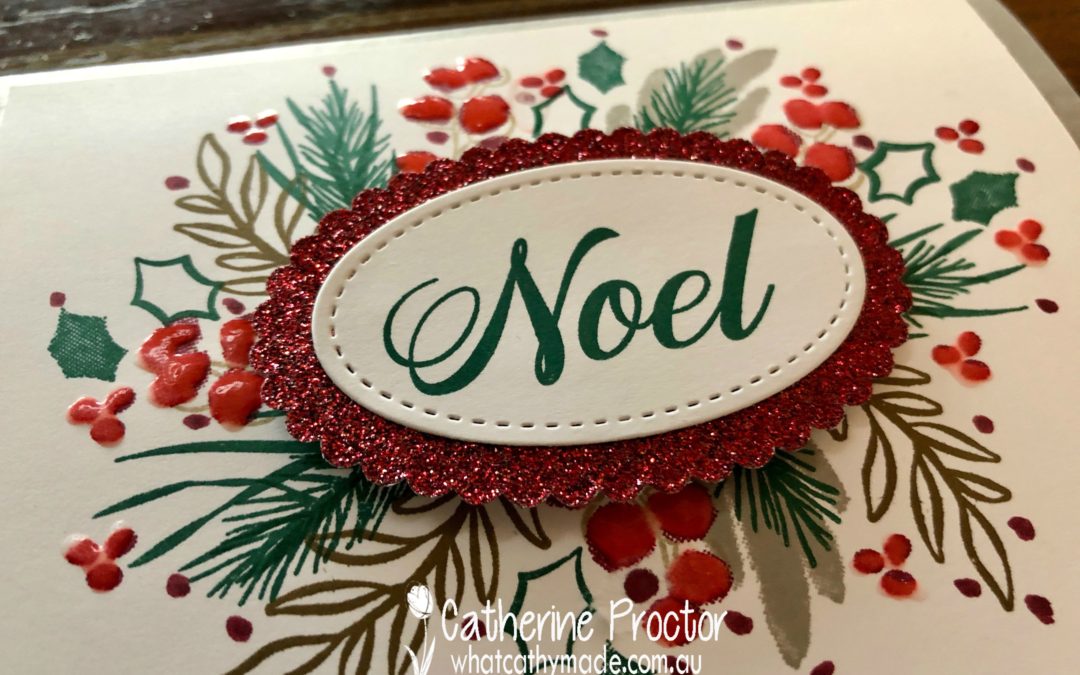
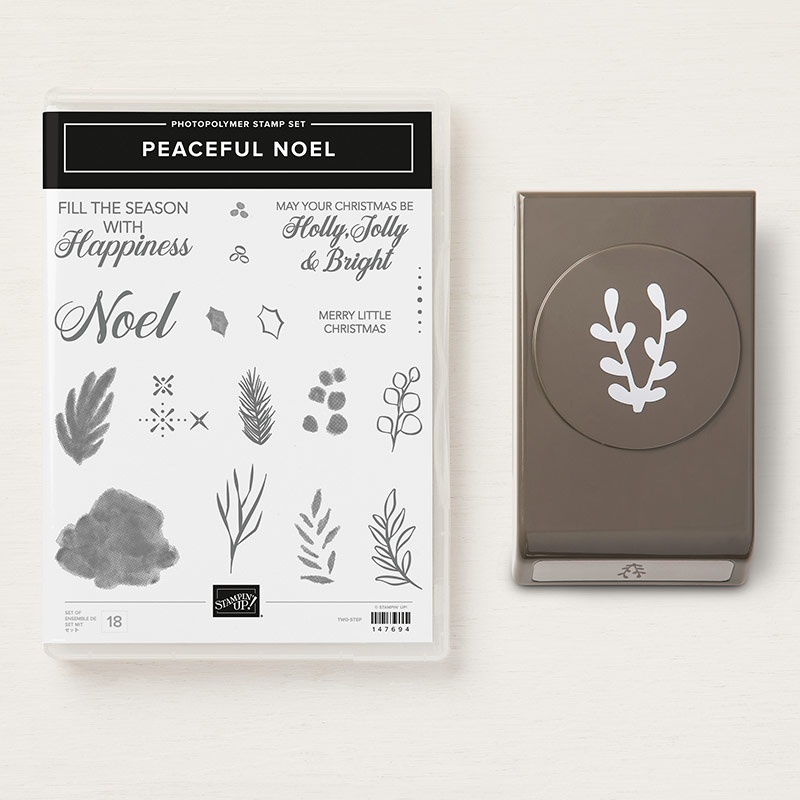
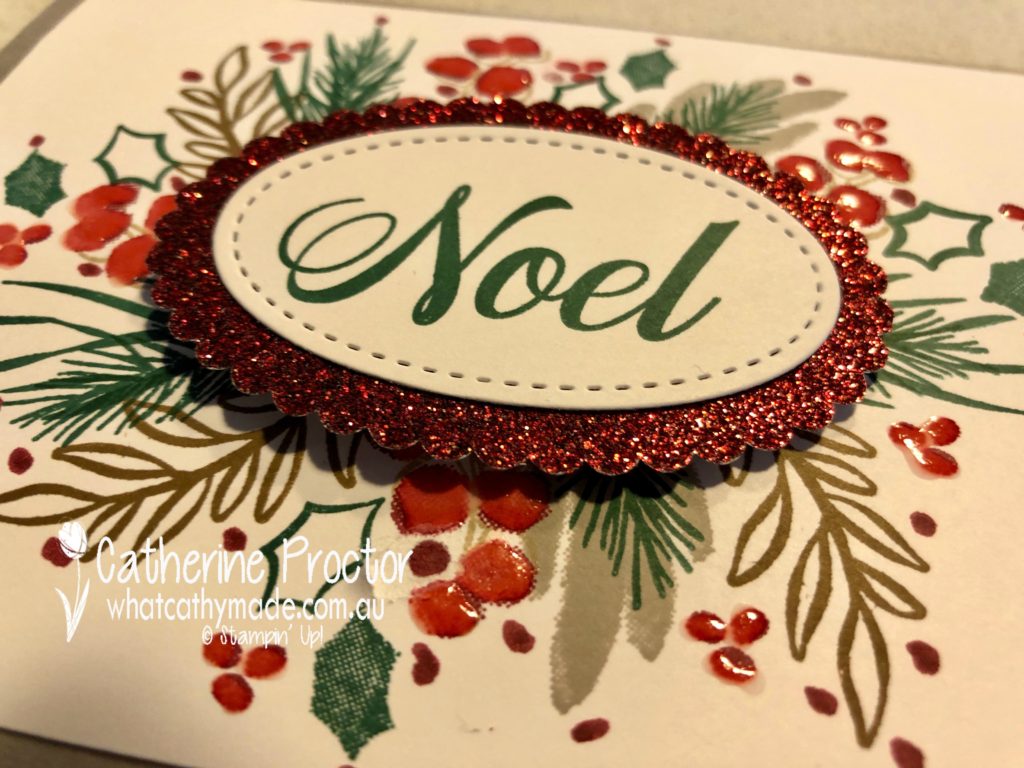
The stamp set I’ve used for this week’s Heart of Christmas project, Peaceful Noel, is such a beautiful stamp set and it comes with a matching punch called the sprig punch, that actually looks a lot like antlers!
I was going to use both the sprig punch and the Peaceful Noel stamp set for my card today but there was so much lovely detail in just the stamping on its own I decided to save the punch for another project.
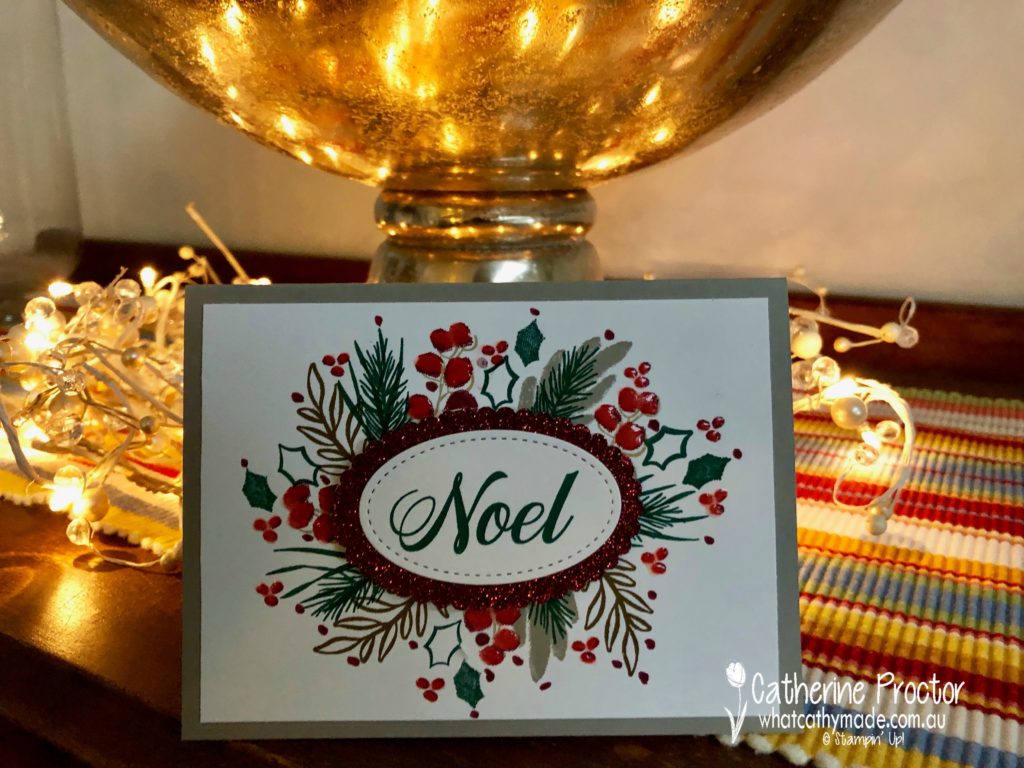
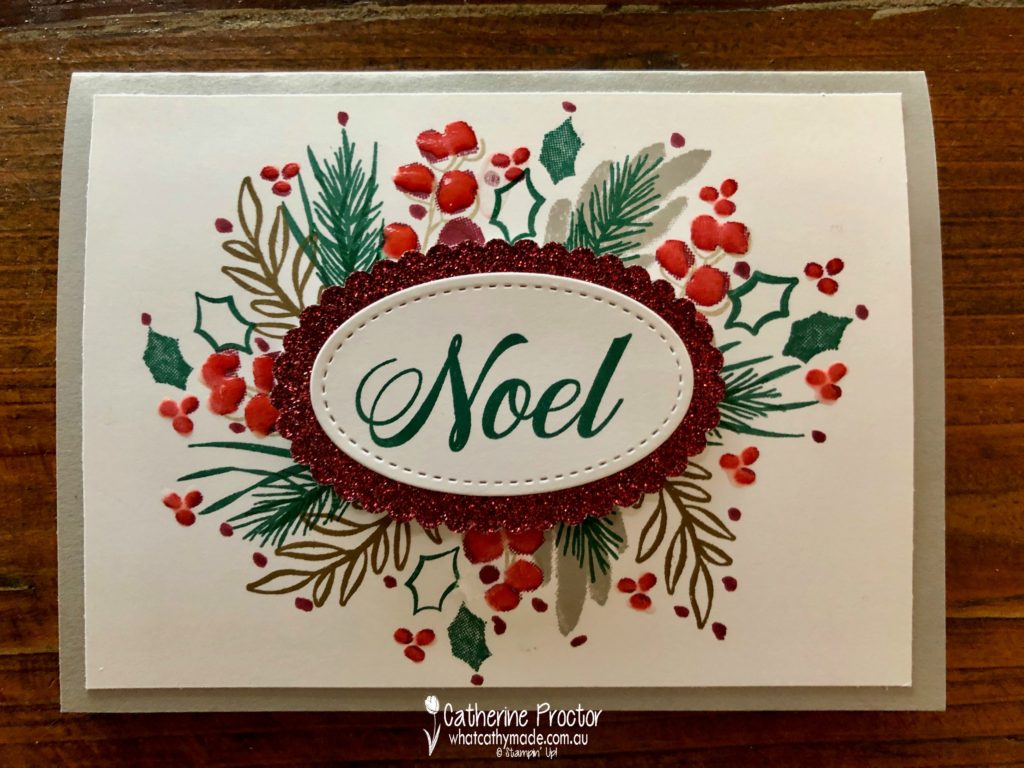
The ink colours I used for this card were the same stunning colours used in the Joyous Noel Suite: Gray Granite, Merry Merlot, Sahara Sand, Soft Suede, Tranquil Tide and Whisper White.
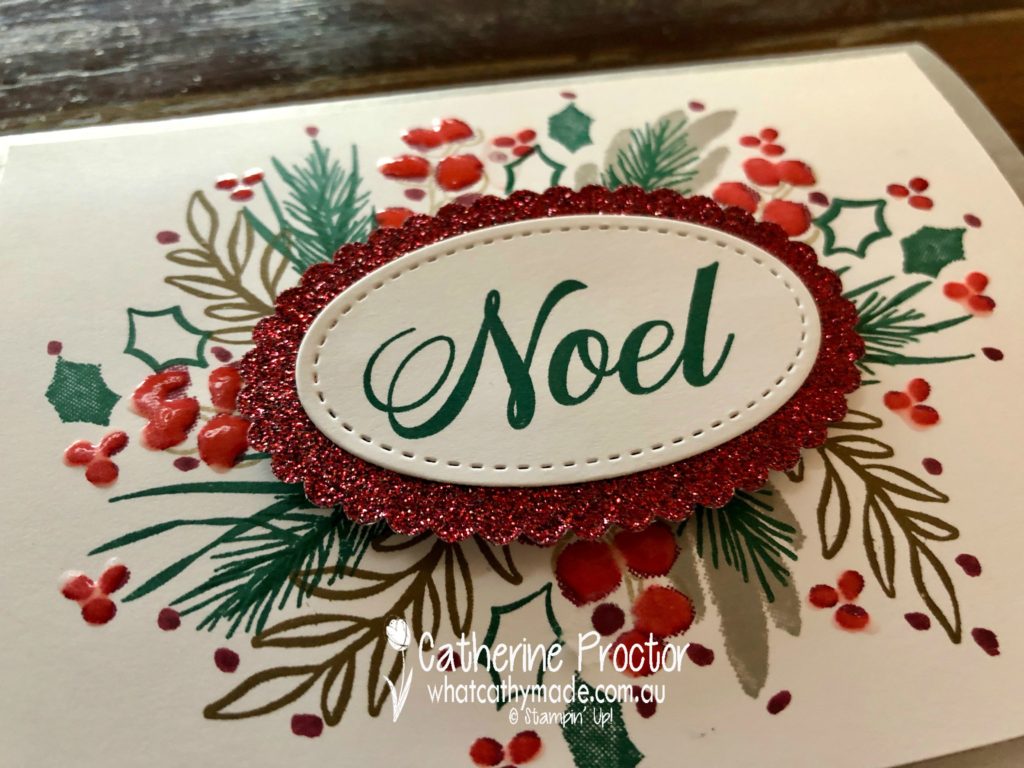
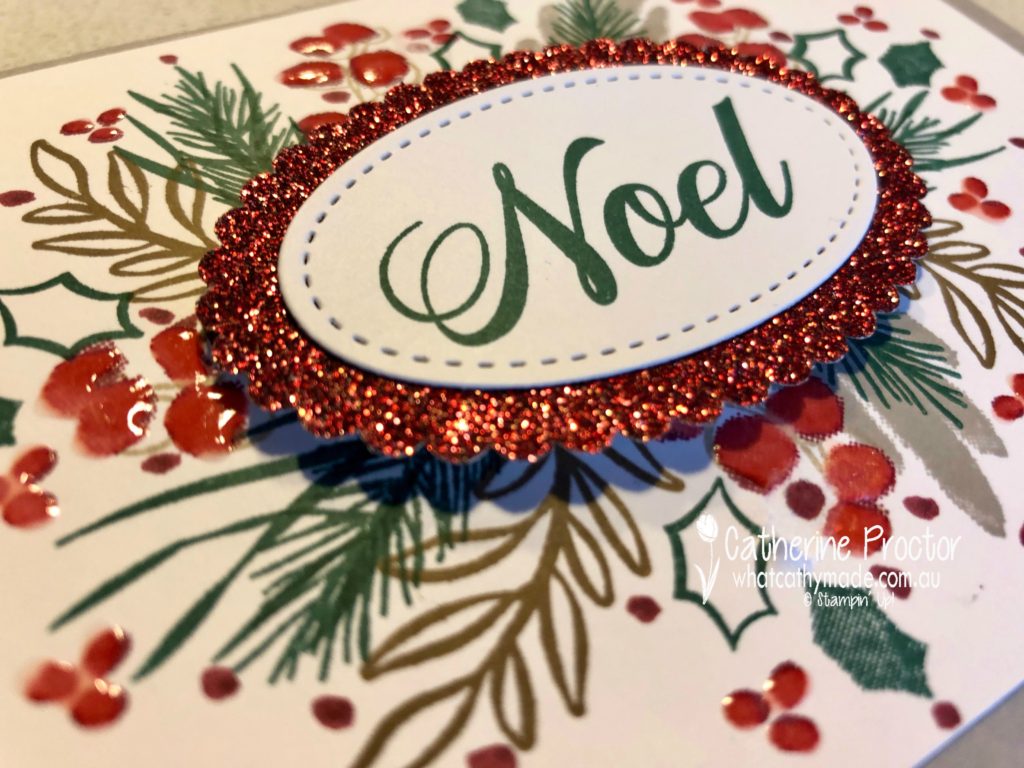
I used the outline of a small oval as my stamping guideline to stamp around and I just randomly started stamping, adding different colours and patterns as I went along. I then decided to add some more dimension to the Merry Merlot berries by covering them with a layer of fine-tipped glue. I love how this makes them shine!
Speaking of shine…how beautiful is this Merry Merlot glimmer paper! I die cut it out on the Big Shot with a layering oval die, then layered the Noel sentiment on top, after cutting it out with a Stitched Shapes oval die.
The base of the card is simply a piece of Gray Granite cardstock. Despite my love of Crumb Cake I must admit this colour comes a pretty close second as a neutral that works with so many different colours.
To see what the rest of the team have made this week hop over to the lovely Claire Daly’s blog.
To purchase any of the products I used in this project you can shop with me here. Or if you’d like me to post you your very own copy of the 2018-2019 annual catalogue or find out about more about Stampin’ Up! contact me.