Welcome to week thirty five of our Art With Heart 2022-23 Colour Creations blog hop. This is a weekly blog hop where we showcase the stunning range of Stampin’ Up! colours in alphabetical order over 12 months and this week we are featuring Pale Papaya from the 2021-23 In Colours.
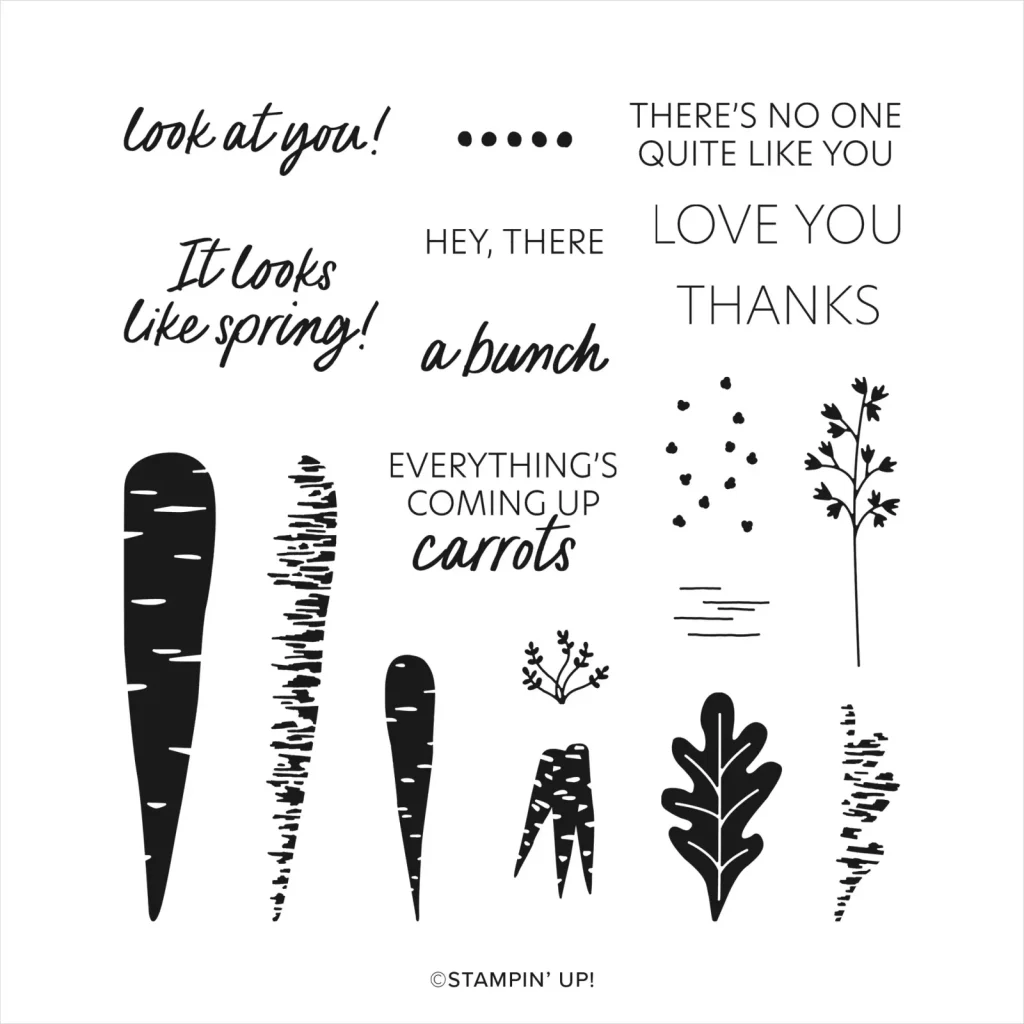
The new January-April Mini Catalogue and SALE-a-bration Catalogue launched last week and one of the free SALE-a-bration items you can redeem for a $90 spend is the Thanks A Bunch stamp set.
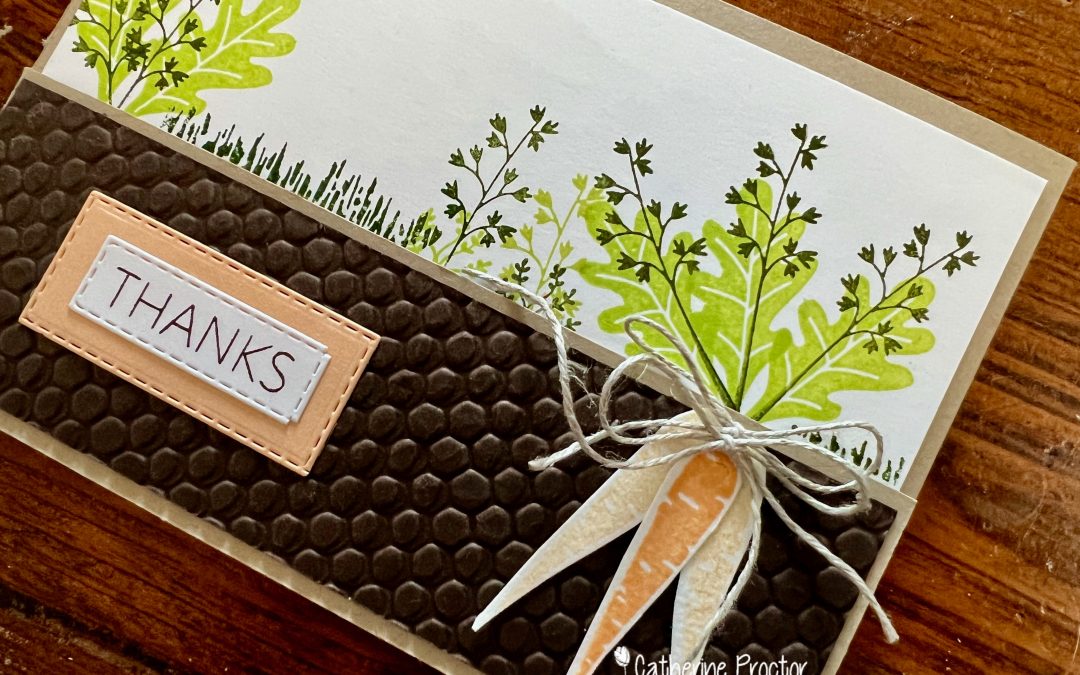
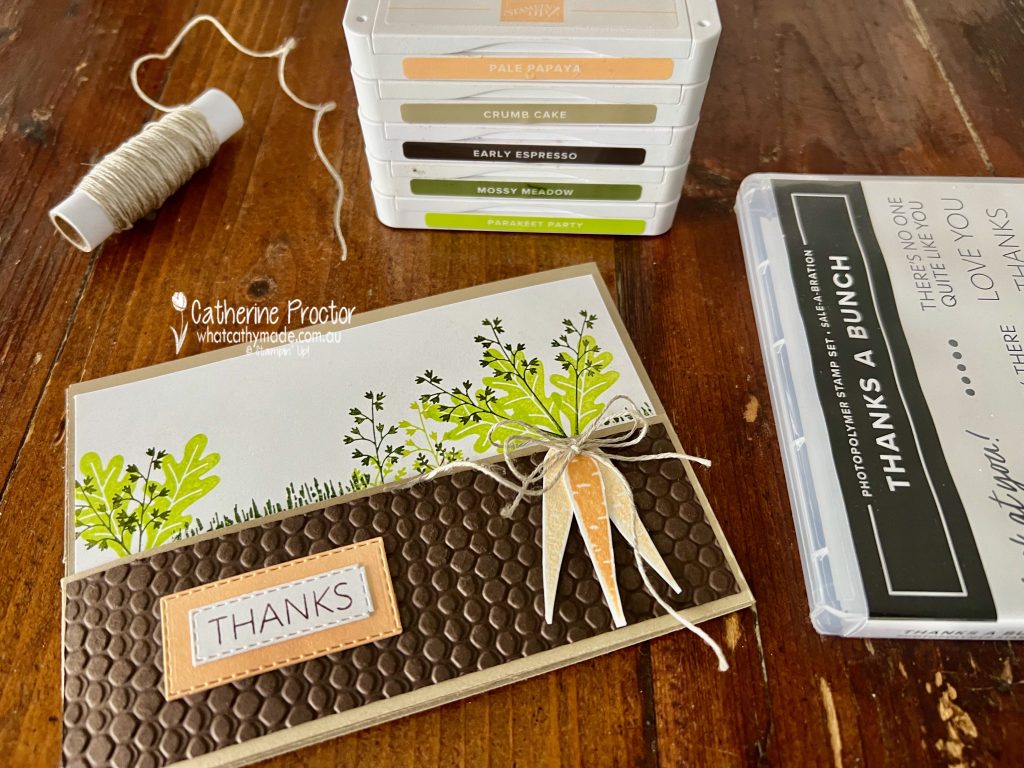
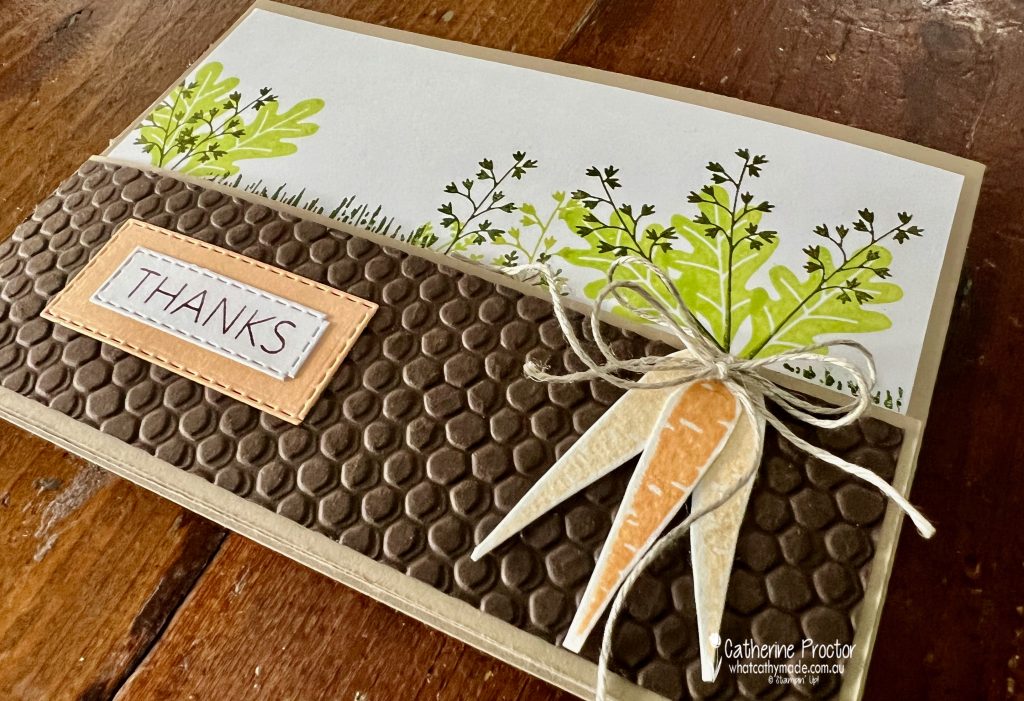
Pale Papaya is a great colour to use for carrots and I’ve used it both at full strength and stamped off once for the front of my split front, tri-fold fold card. Other colours used include Crumb Cake, Early Espresso, Mossy Meadow and Parakeet Party.
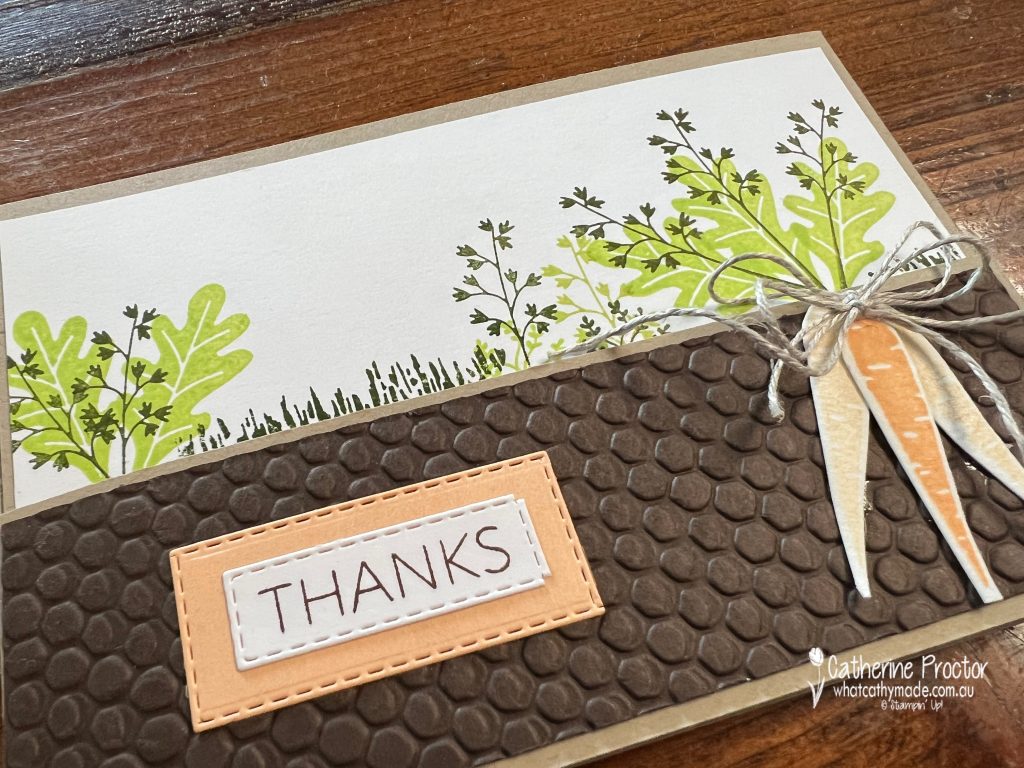
The Hive embossing folder was used to emboss Early Espresso cardstock to create soil for the front flap. As the split front, tri-fold fold card opens the layers of carrots are revealed.
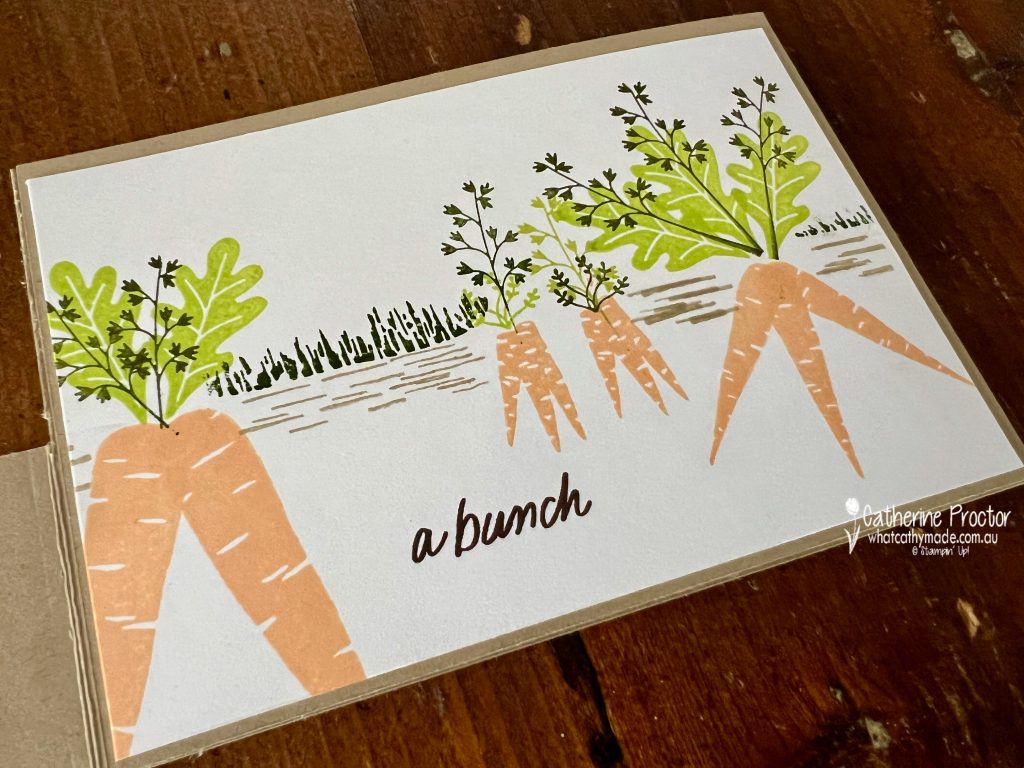
The middle flap shows carrots above and below the ground. One of the carrot shading stamps works really well to create grass once it is turned on its side.
Split front, tri-fold fold card instructions
Cut a sheet of A4 Crumb Cake cardstock at 10.5cm down the middle to divide into two long halves that each measure 21cm wide x 10.5 cm high.
Score both pieces at 14.8cm and fold in half along the score line to make two cards.
One of these cards will become the card base and the left split front panel, while the other card will be used for the right panel.
To create the left split front panel measure and cut off the top 5cm across the top of the left panel of one of the cards.
To create the right panel with the other card, measure 2 cm parallel to the middle score line and cut all the way down the card. You will now have a right panel with a 2cm wide flap which you use to adhere to the back of the right hand side of the card base.
Fold the right flap over the card base and then fold the left split front panel over the right panel – I’ve adhered the embossed Early Espresso cardstock, the “Thanks” greeting and the bunch of tied carrots to the left split front panel.
Stamp and decorate the cardstock layers for your right card flap and card base BEFORE adhering to your split front, tri-fold fold card base.
All of the sentiments in this card are from the Thanks a Bunch stamp set, stamped in Early Espresso.
Now it’s time to hop on over to our next participant, the lovely Tina Gillespie – I can’t wait to see what Tina has made this week!
If at any time you find a broken link, you can find the complete list of all participants below.
If you live in Australia, you can find and purchase these products in my Stampin’ Up! Online Store once they are available to purchase tomorrow morning.
We’ll be back next Wednesday January 18 with projects showcasing one of the Subtles, Pear Pizzazz.
Welcome to week thirty four of our Art With Heart 2022-23 Colour Creations blog hop, our first hop for 2023!
This is a weekly blog hop where we showcase the stunning range of Stampin’ Up! colours in alphabetical order over 12 months and this week we are featuring Pacific Point from the Brights family.
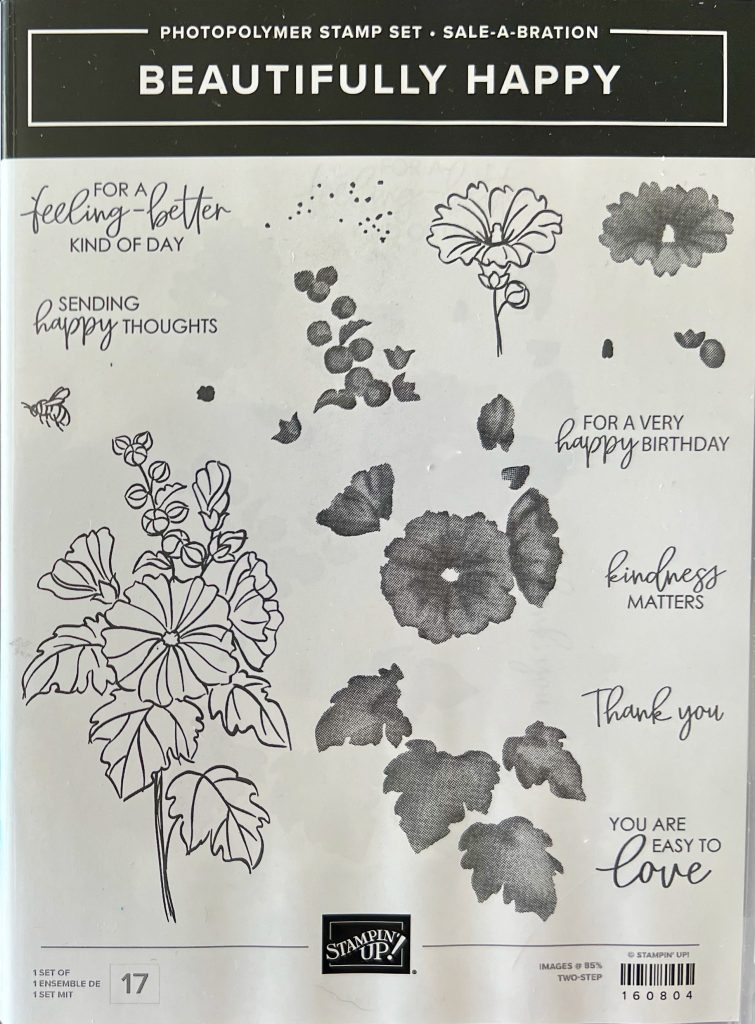
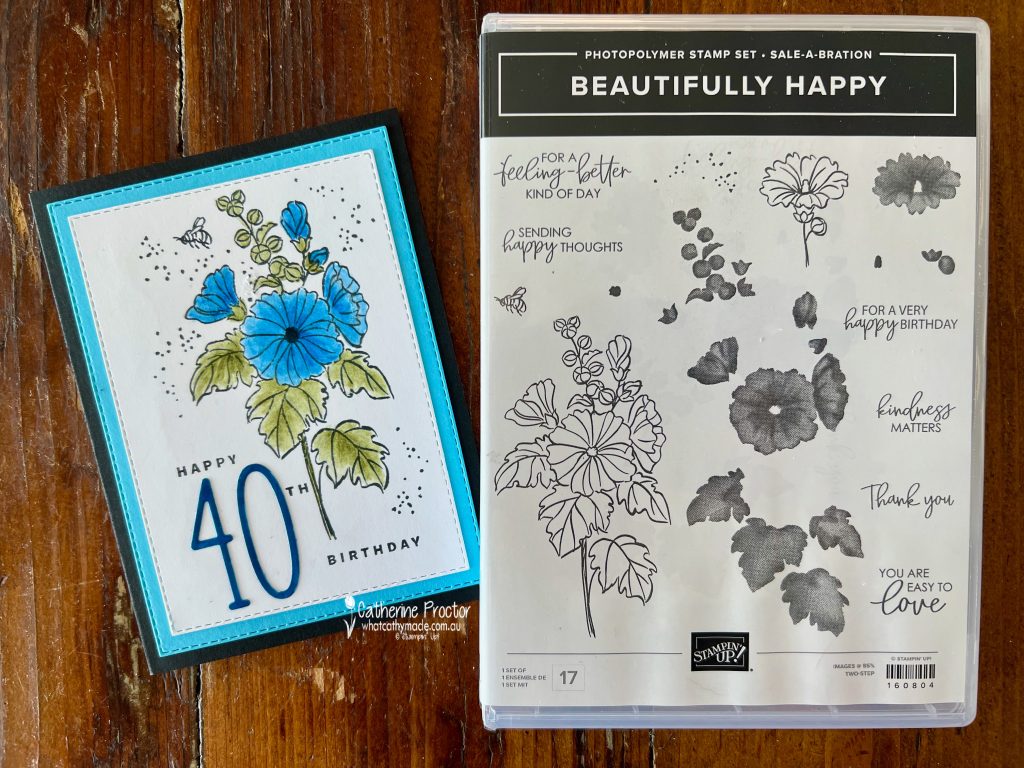
Tomorrow morning the new January-April Mini Catalogue and SALE-a-bration Catalogue are launched and one of the free SALE-a-bration items you can redeem for a $180 spend is the Beautifully Happy stamp set.
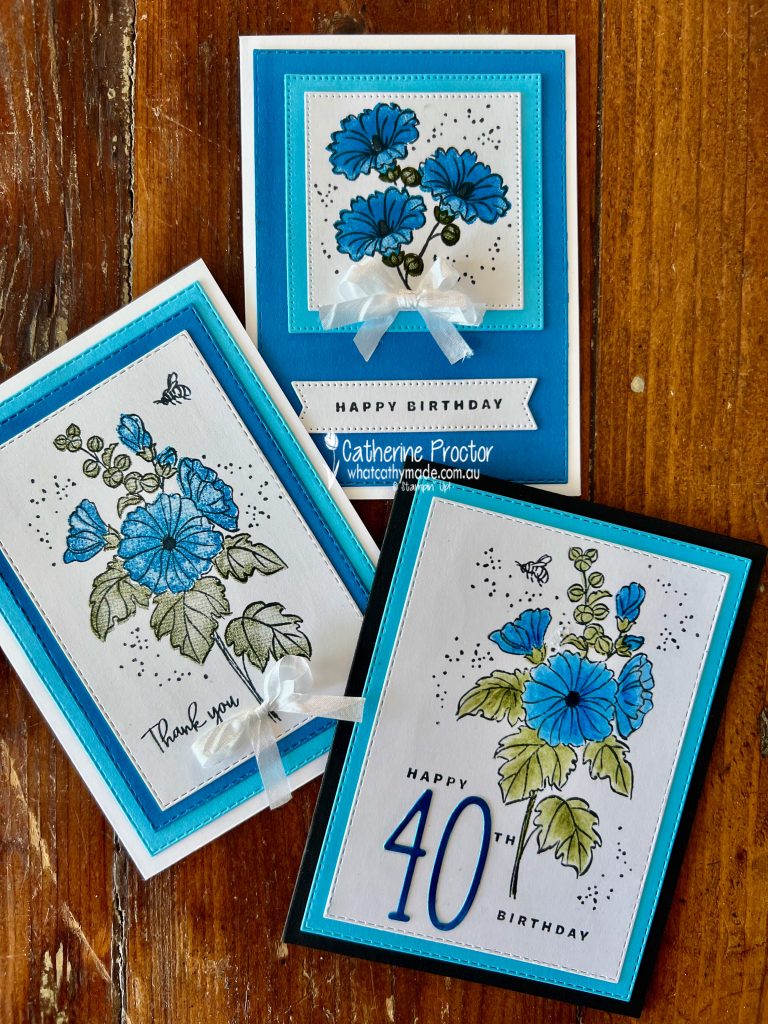
The Beautifully Happy stamp set is very versatile because it includes a good variety of sentiments, floral line drawings that can be coloured in, a “splatter” stamp, a tiny little bee stamp and “distinktive” stamps that allow you to stamp shaded colour inside the flowers and leaves instead of hand colouring.
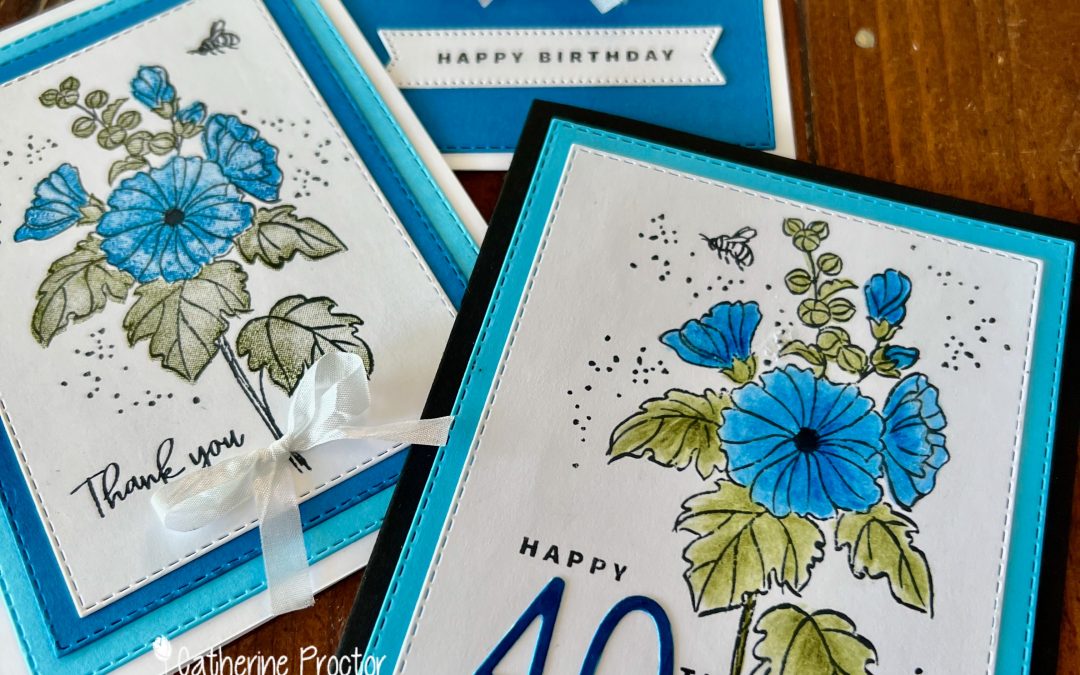
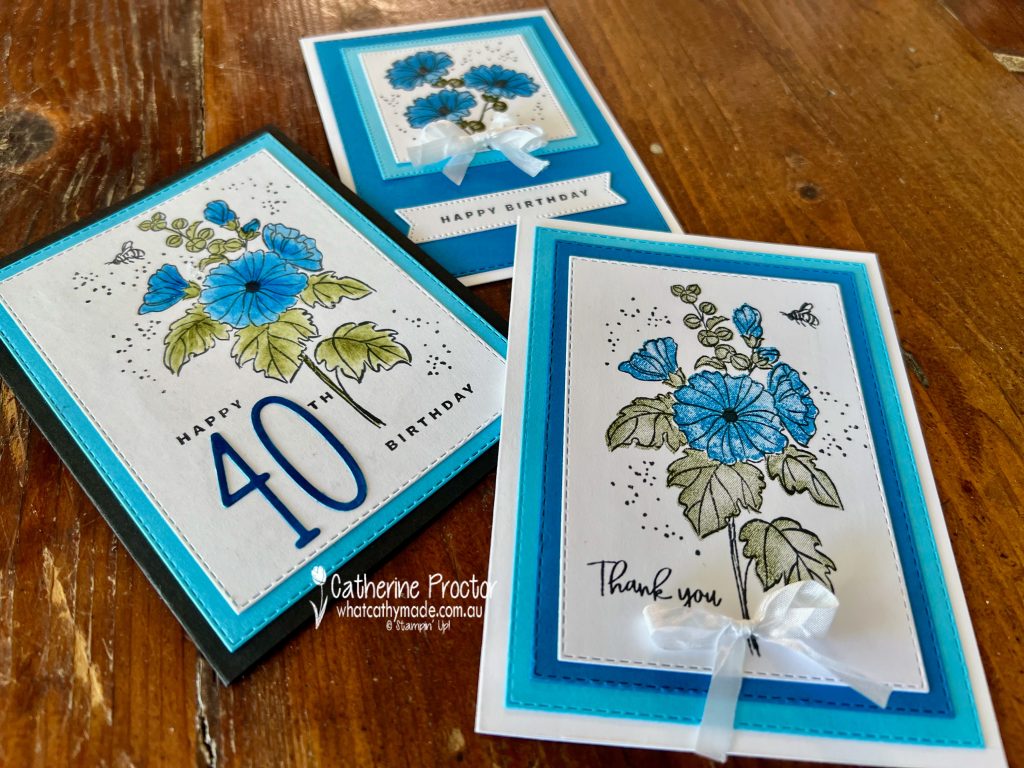
To show the versatility of this stamp set I have made three different cards using three different ways of colouring the stamped images. All three cards pair Pacific Point with Tahitian Tide – don’t these two blues look amazing together!
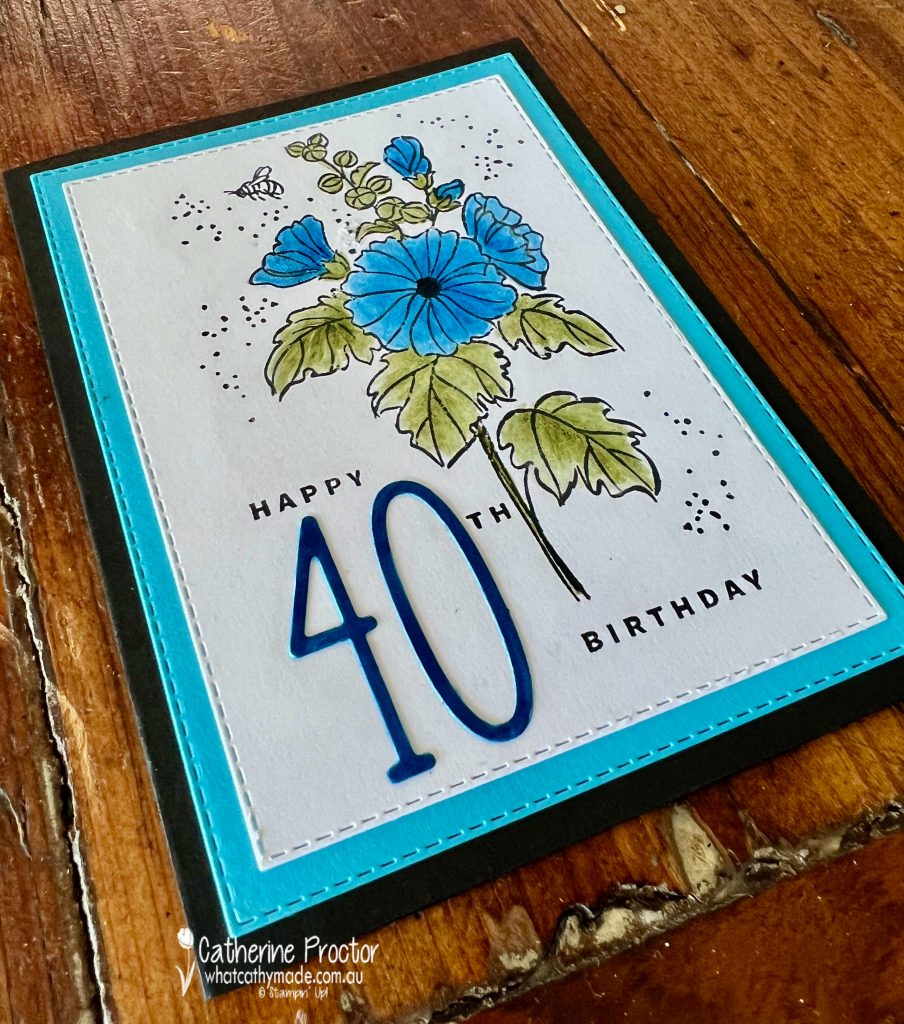
Card One is a birthday card for my sister-in-law who turns 40 next week. The 40 has been die cut with the new Alphabet A La Mode Dies and the “Happy Birthday” sentiment is from the Something Fancy stamp set, both available in the January-April mini catalogue.
I’ve coloured the flower and leaves using Pacific Point and Old Olive Watercolour Pencils, finally blending the watercolour pencil lines with a Blender Pen to smooth the colour out.
Stitched Rectangle dies create the card layers.
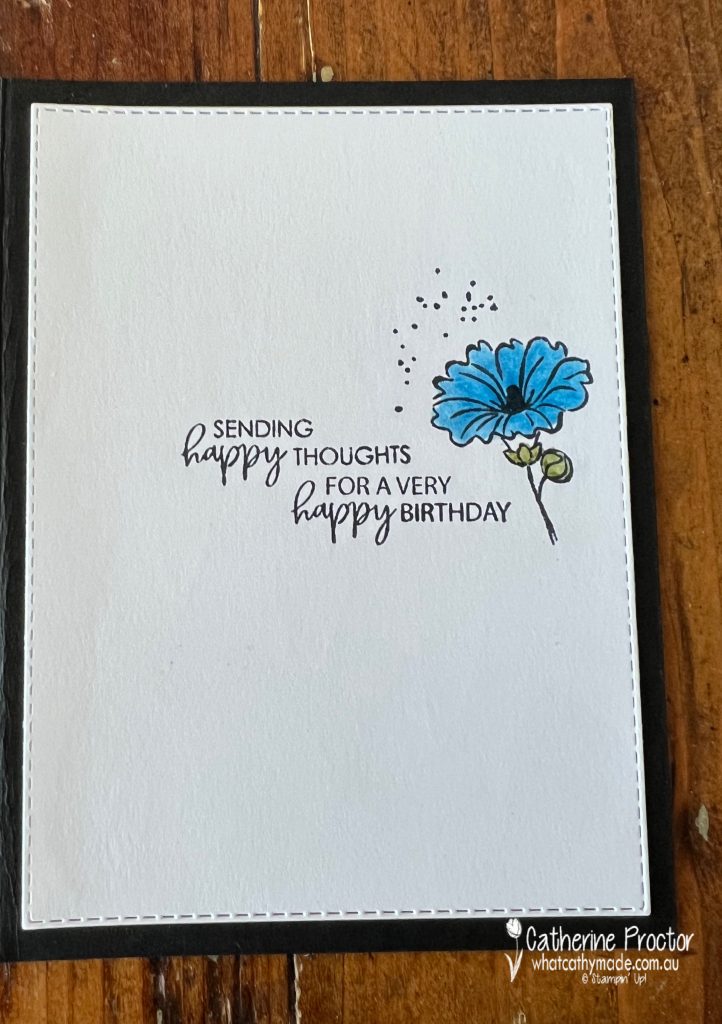
The inside of the card uses two of the sentiments from the Beautifully Happy stamp set. These sentiments are designed to be used on both the front and the inside of a card however I think they also work well when stamped together.
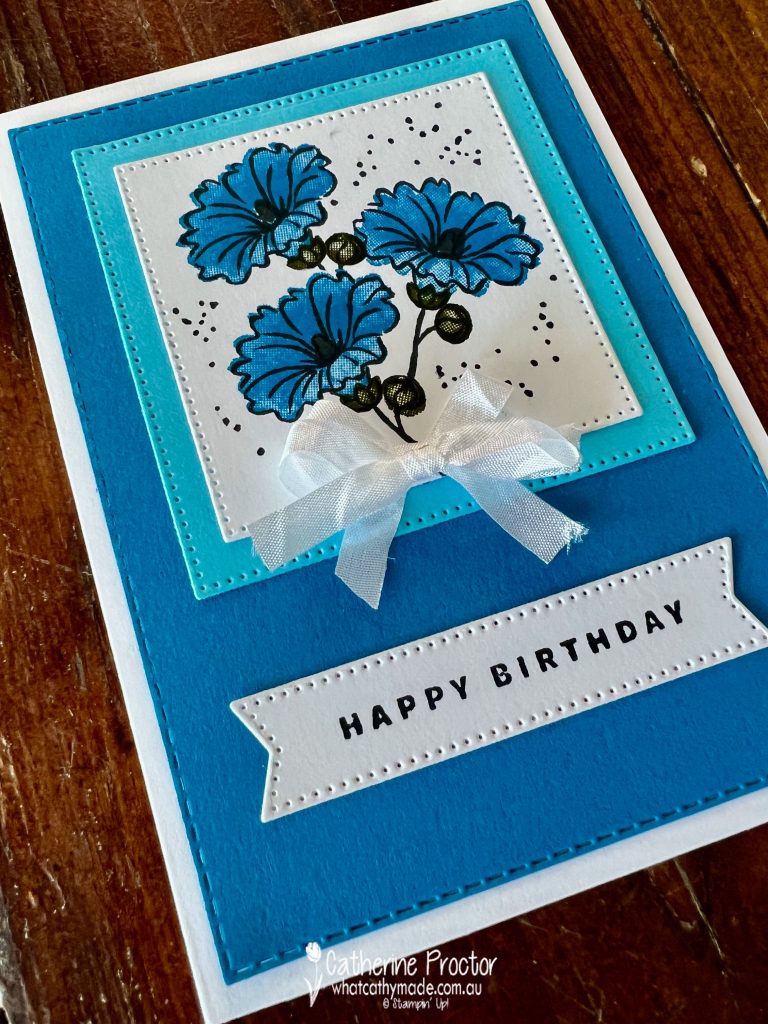
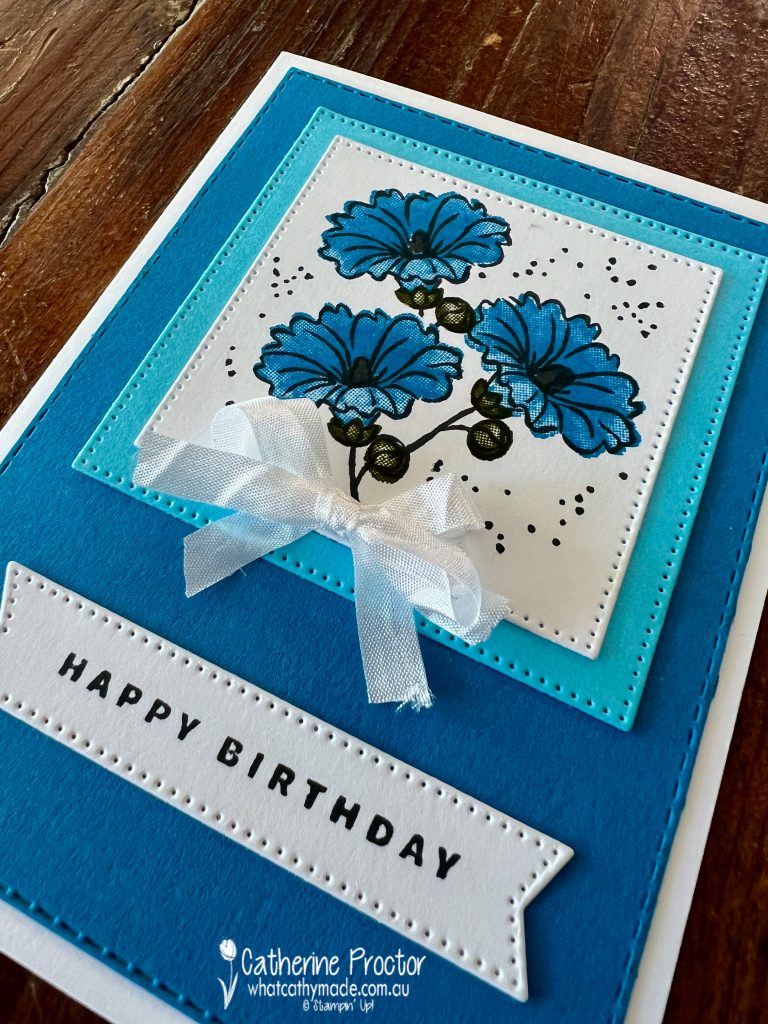
Card two is another birthday card that uses the smaller flower image, stamped three times. To colour these flowers I used the distinktive stamps from the Beautifully Happy stamp set, stamping both the Pacific Point and the Mossy Meadow ink at full strength.
The sentiment is the same “happy birthday” stamp from the Something Fancy stamp set that I used on the front of card one. Stylish Shapes dies cut the card front layers and the sentiment.
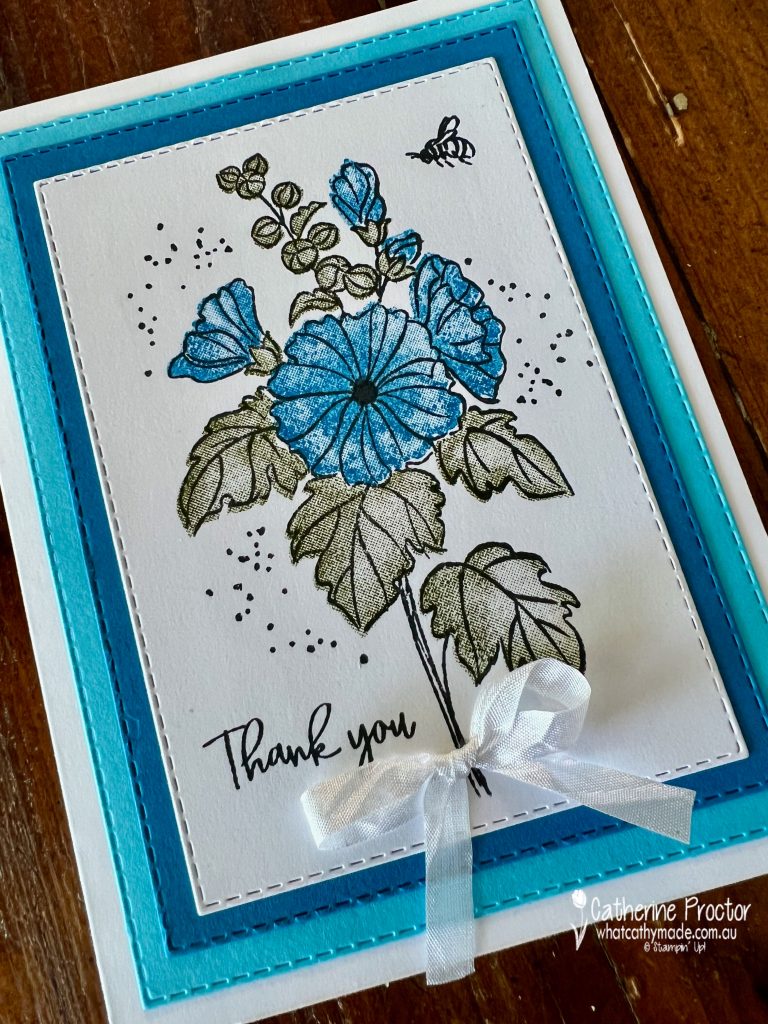
Card three is a thank you card that is coloured with the distinktive stamps, however this time the Pacific Point and the Mossy Meadow have been stamped off once onto scrap paper before stamping onto the card front.
Once again, the Stitched Rectangle dies create the front card layers.
I know I am going to get a lot of use from the Beautifully Happy stamp set as its variety of sentiments make it ideal for so many different occasions and it can be coloured in so many different ways.
Now it’s time to hop on over to our next participant, the lovely Tina Gillespie – I can’t wait to see what Tina has made this week!
If at any time you find a broken link, you can find the complete list of all participants below.
If you live in Australia, you can find and purchase these products in my Stampin’ Up! Online Store once they are available to purchase tomorrow morning.
We’ll be back next Wednesday January 11 with projects showcasing one of the 2021-23 In Colours, Pale Papaya.
Something very special happened last Sunday. My gorgeous mum turned 80 and we went out for a special lunch to celebrate her birthday. Happy birthday Mum!!!
Mum is an amazing crafter and we love to craft together when we can, which unfortunately is not often enough as life and work keeps getting in the way! I love making special cards for Mum because she really appreciates them, so I decided to make a fancy fold card I’ve never made before – a pop-up vase card!
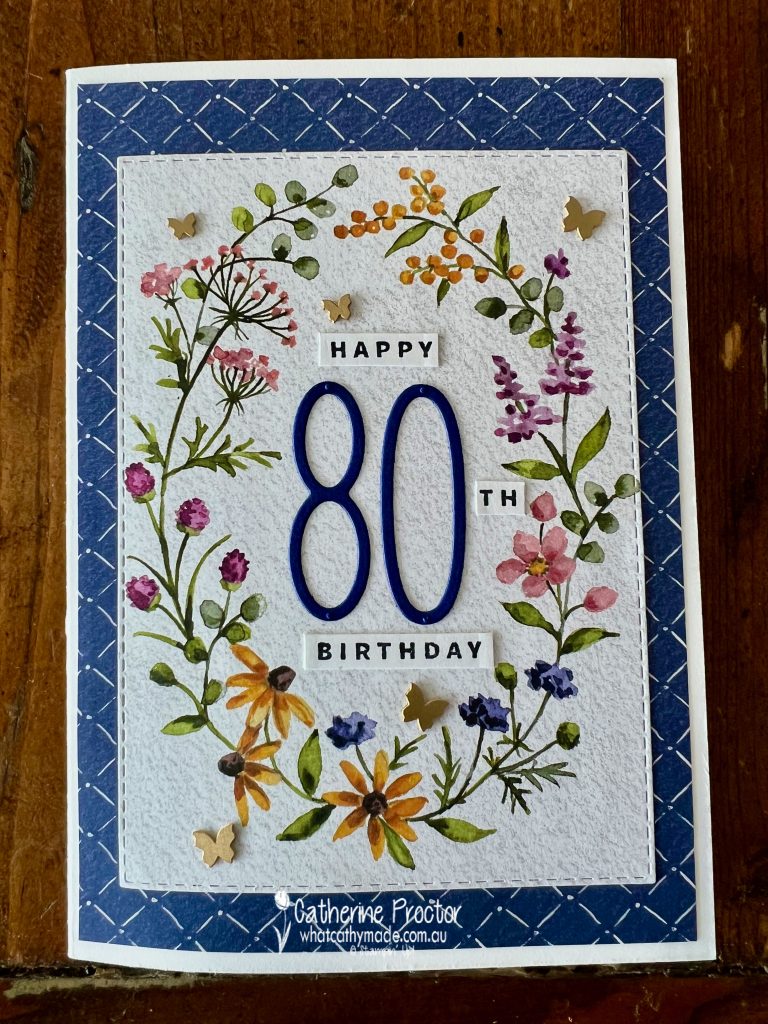
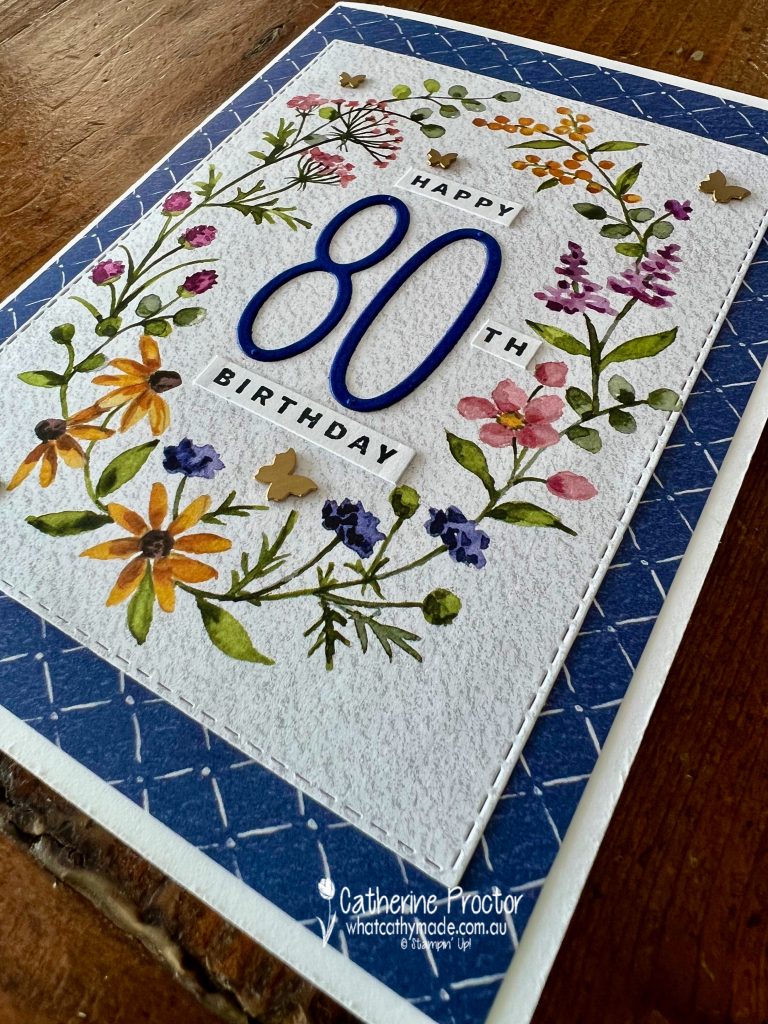
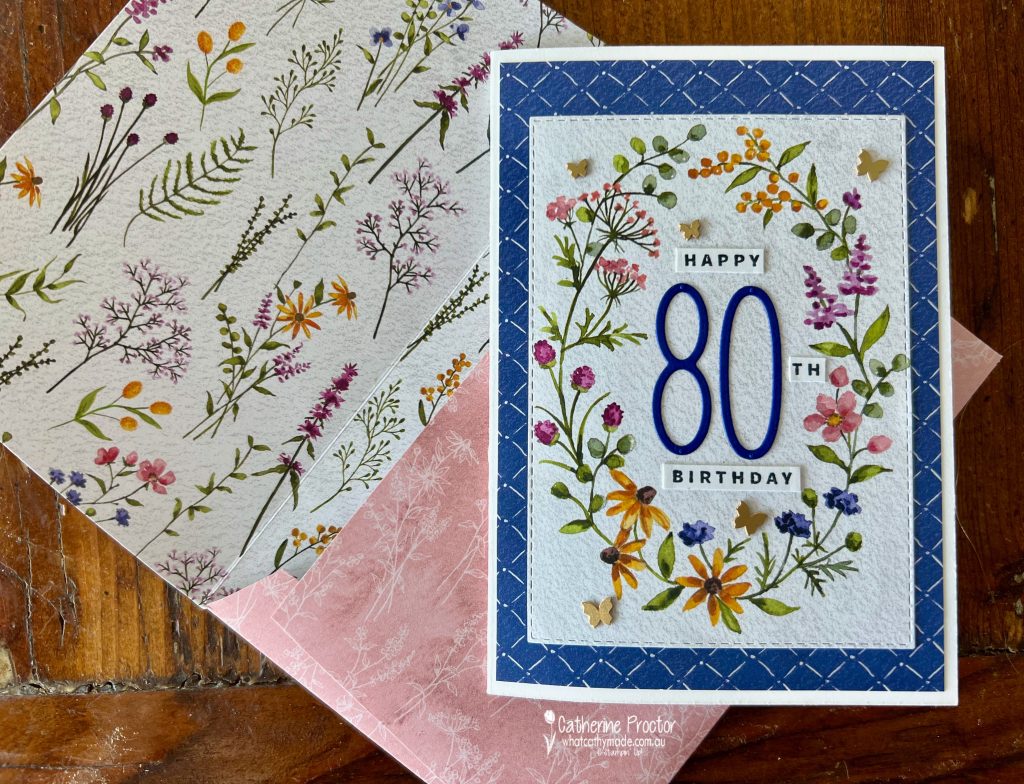
Here is the front of the card, featuring the stunning free SALE-a-bration Dainty Flowers DSP available from this Thursday.
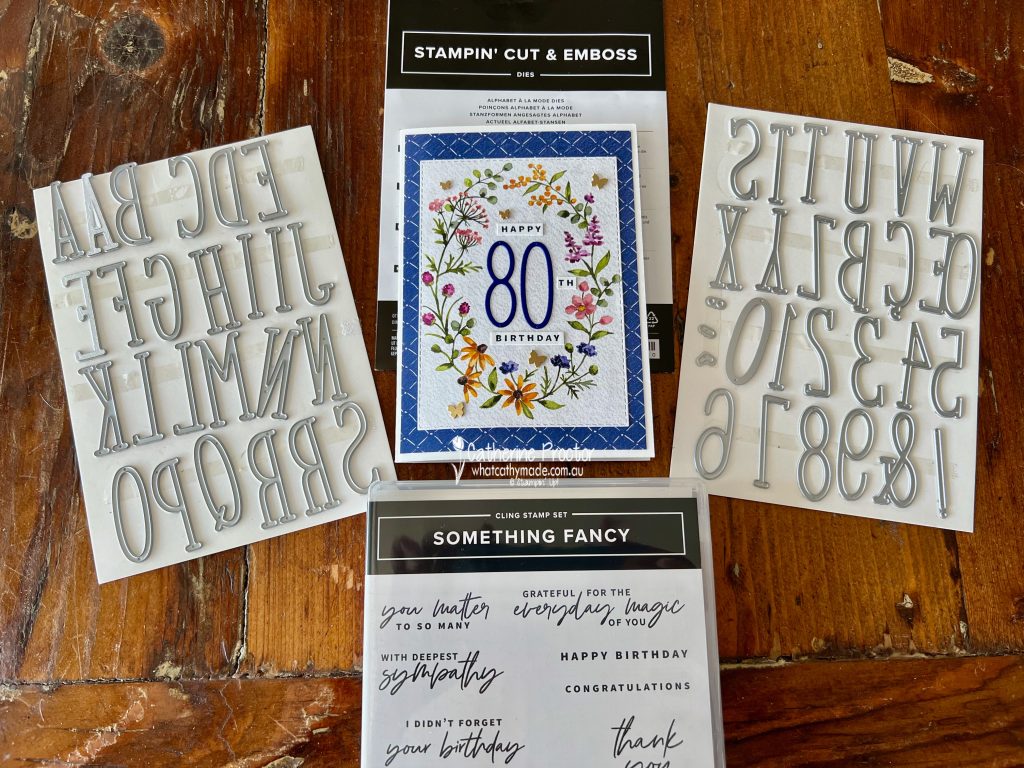
The 80 has been die cut using a new set of alphabet and number dies called Alphabet A La Mode Dies and the “Happy Birthday” sentiment is from the Something Fancy stamp set, both available from this Thursday in the January mini catalogue.
A little trick to create the “th” for 80th – stamp the “happy birthday” sentiment again and cut the “th” from the word “birthday”.
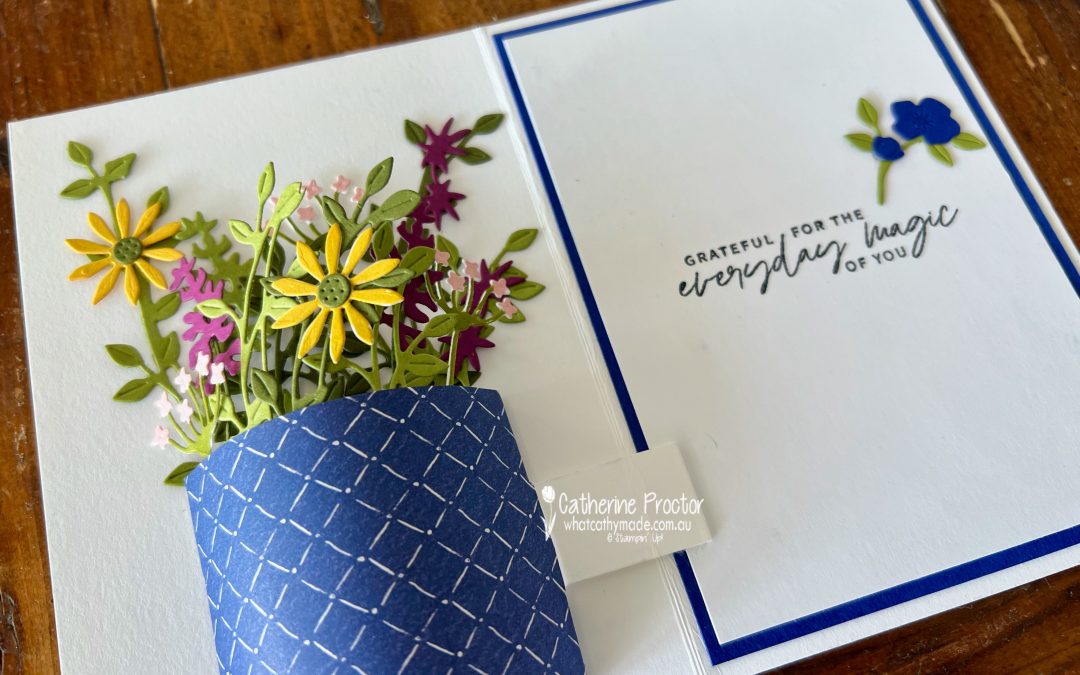
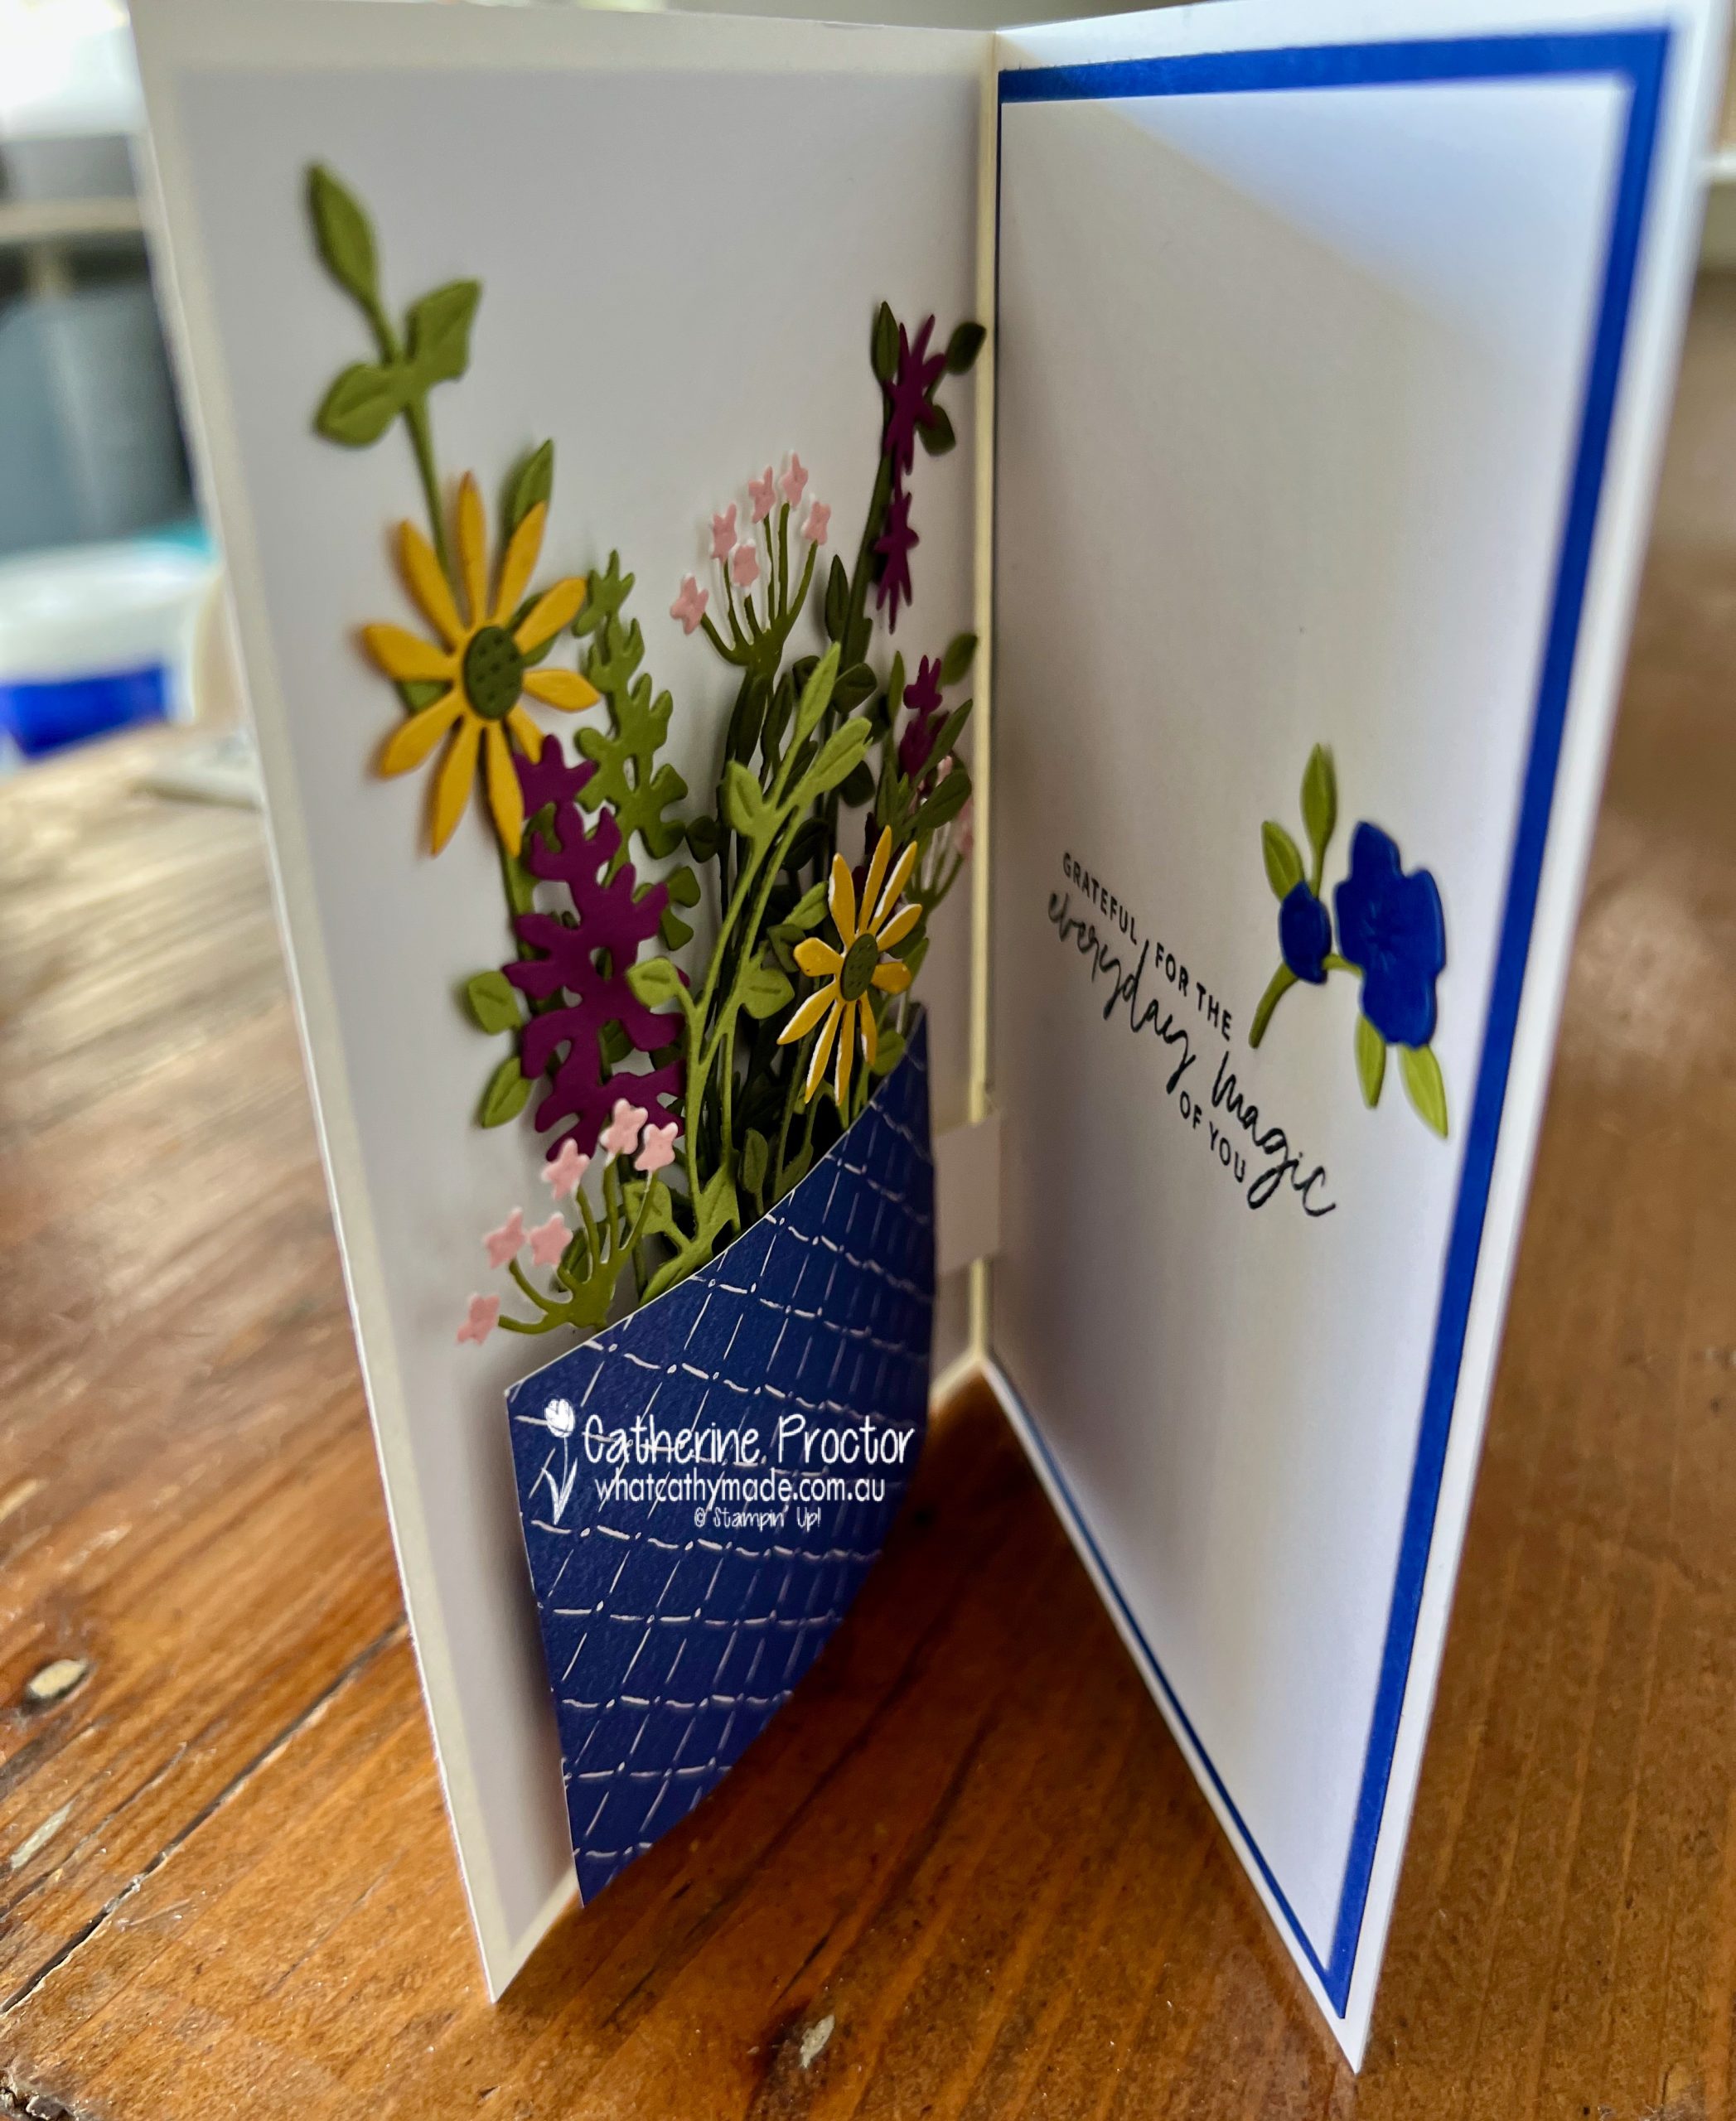
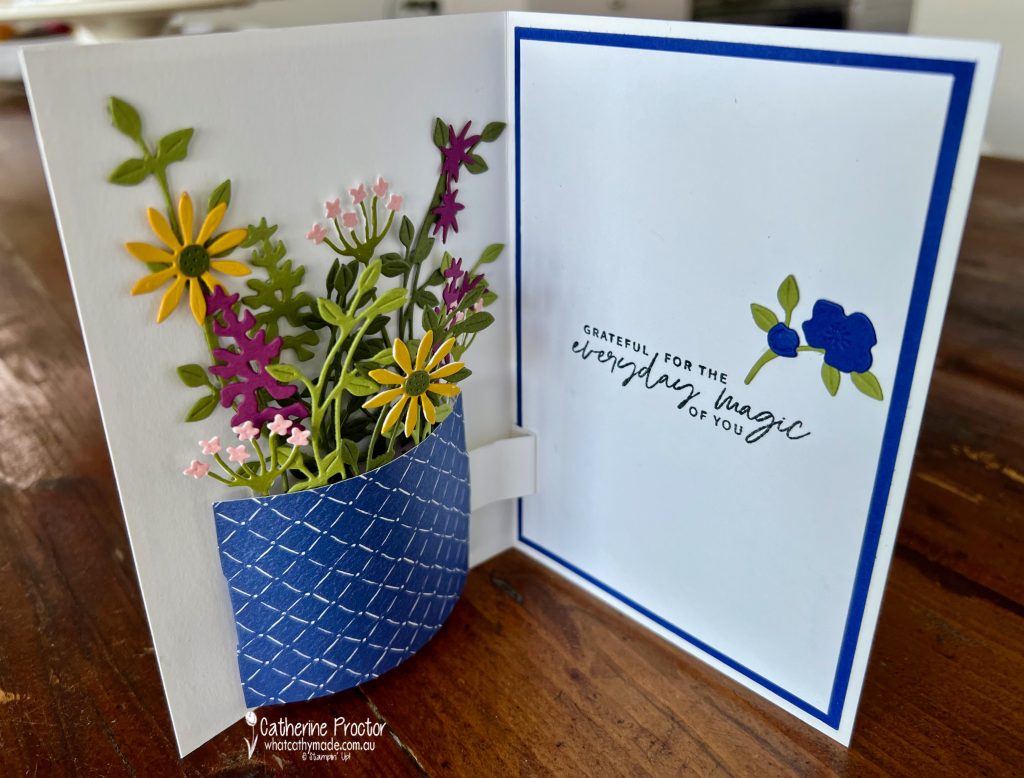
Inside the card is where the magic happens. In the video below you can see how as the card opens the vase of flowers pops up!
Here is the card folded flat, ready to open…
Halfway open …
Laid flat with the vase fully popped up…
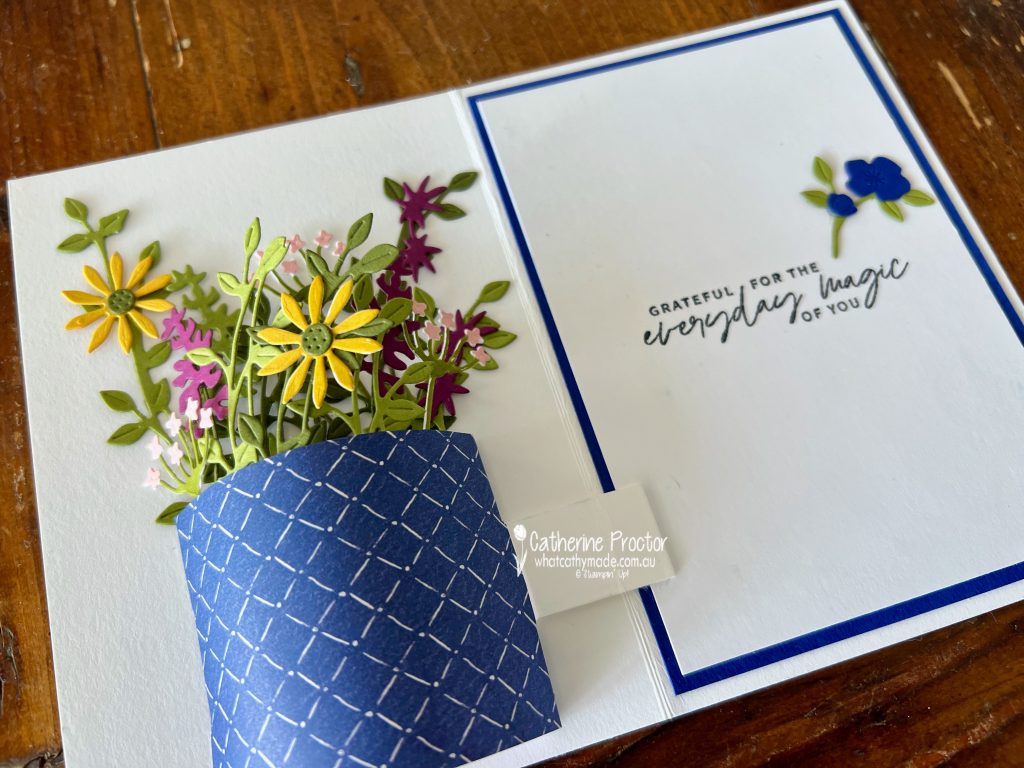
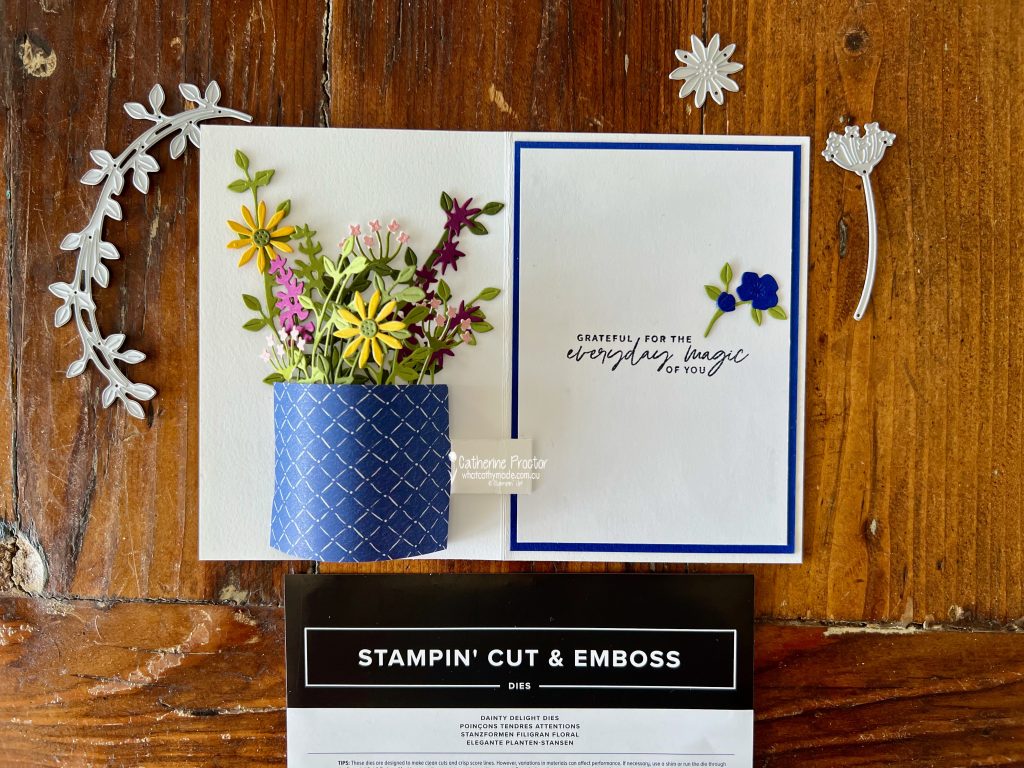
The flowers in the vase are all die cut using the Dainty Delight dies and the beautiful sentiment inside the card comes from the Something Fancy stamp set.
A special card needs a special envelope – this was made using another sheet of the SALE-a-bration Dainty Flowers DSP.
Did you notice the gorgeous Brushed Brass Butterflies that embellish the card front? They work perfectly with this DSP!
I’ll be back tomorrow, Wednesday January 4, with the AWH Colour Creations team to showcase Pacific Point and some more gorgeous SALE-a-bration products.
Welcome to week thirty three of our Art With Heart 2022-23 Colour Creations blog hop, our last hop for this year before we take a two week break over Christmas and New Year.
This is a weekly blog hop where we showcase the stunning range of Stampin’ Up! colours in alphabetical order over 12 months and this week we are featuring Old Olive from the Regals family.
Who’s ready for a sneak peek of some items from the new Mini Catalogue and SALE-a-bration Catalogue?
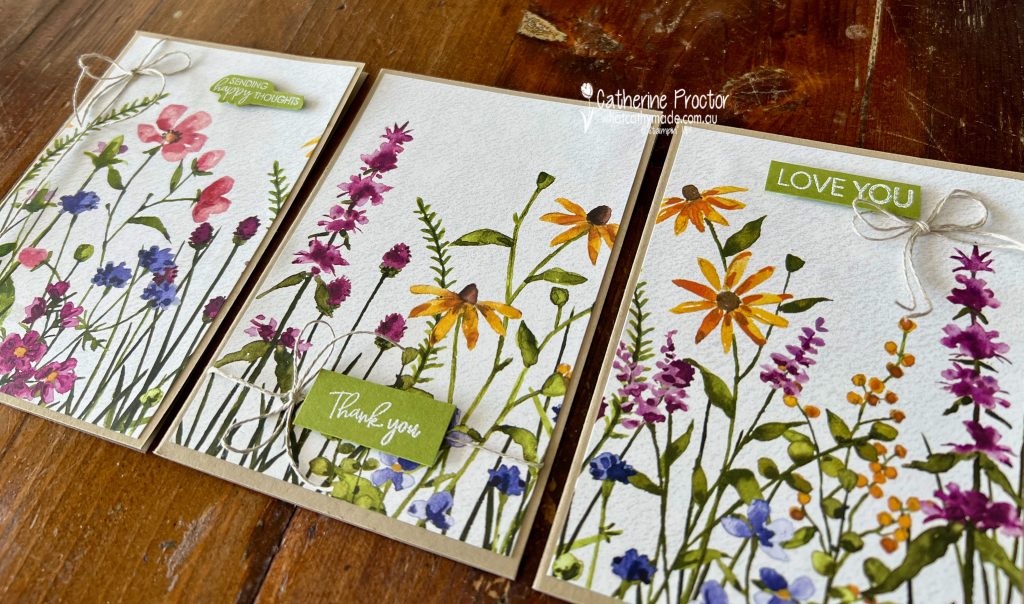
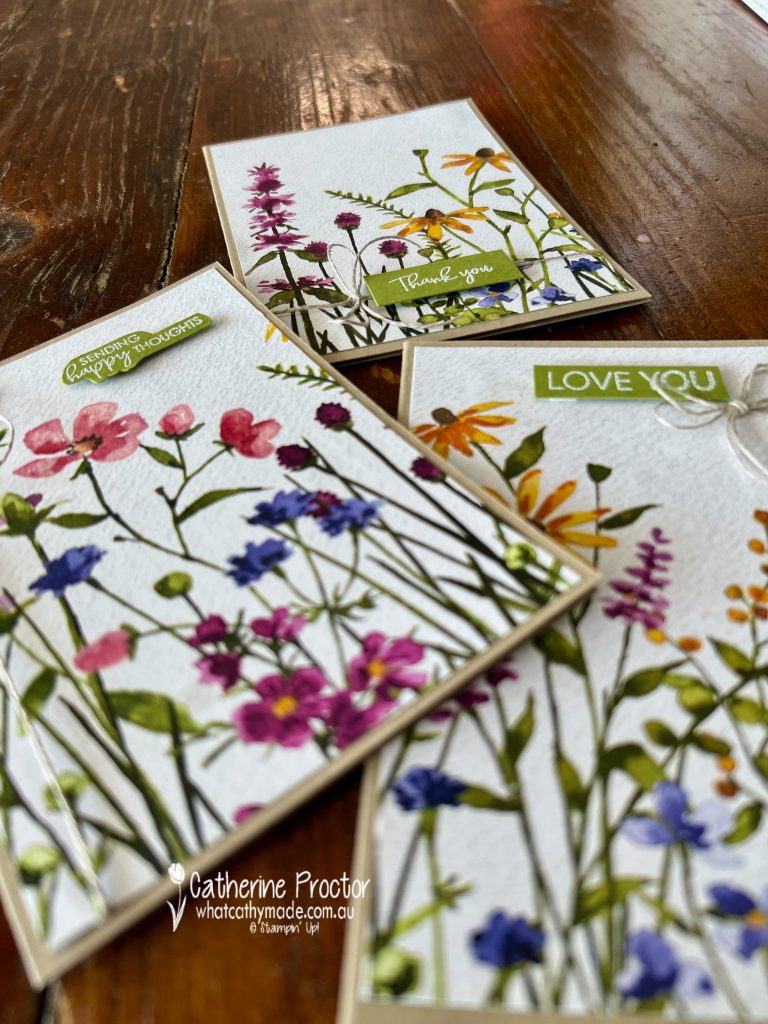
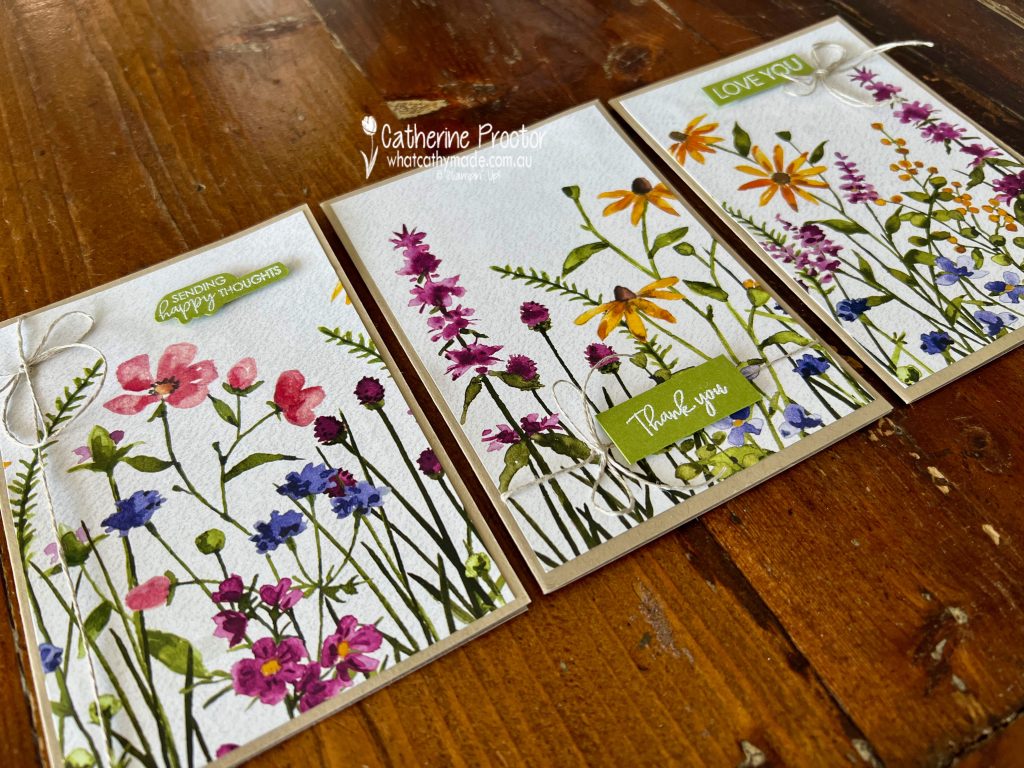
I’m excited to share with you three cards made using a stunning new SALE-a-bration DSP that will be available in just a few week’s time.
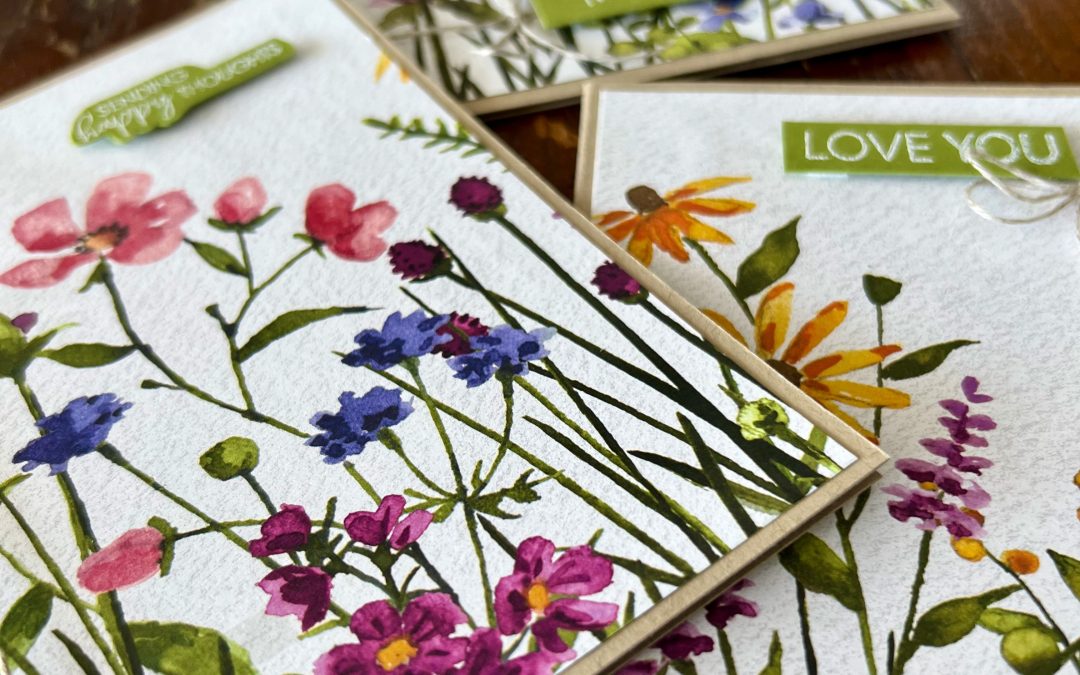
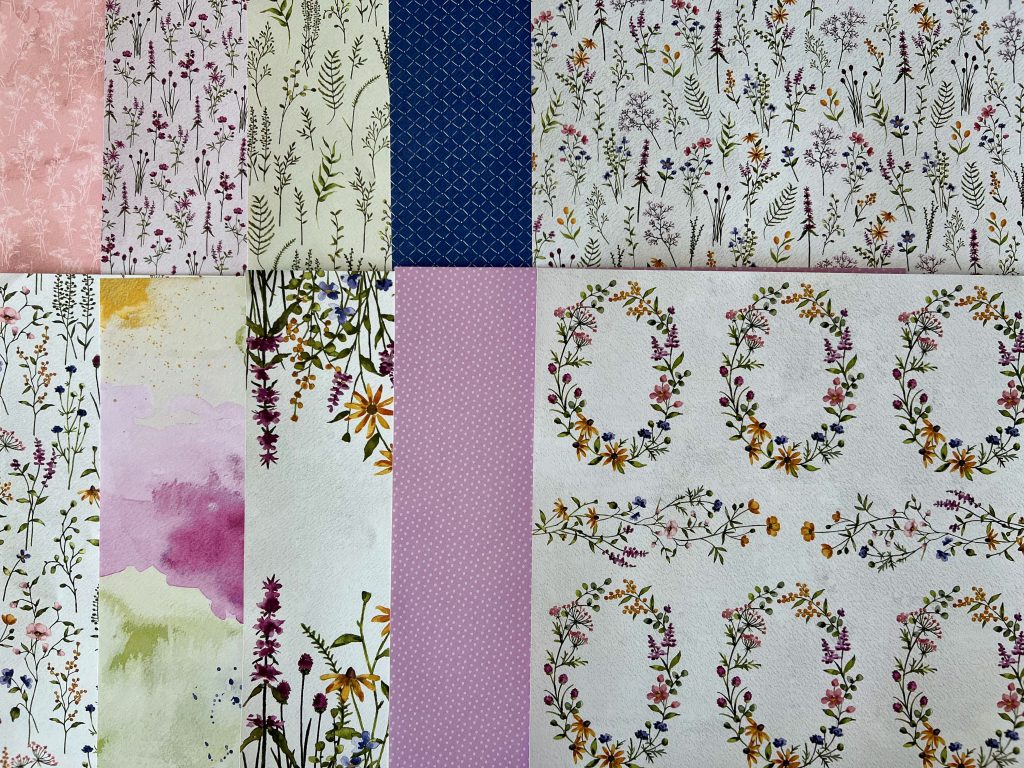
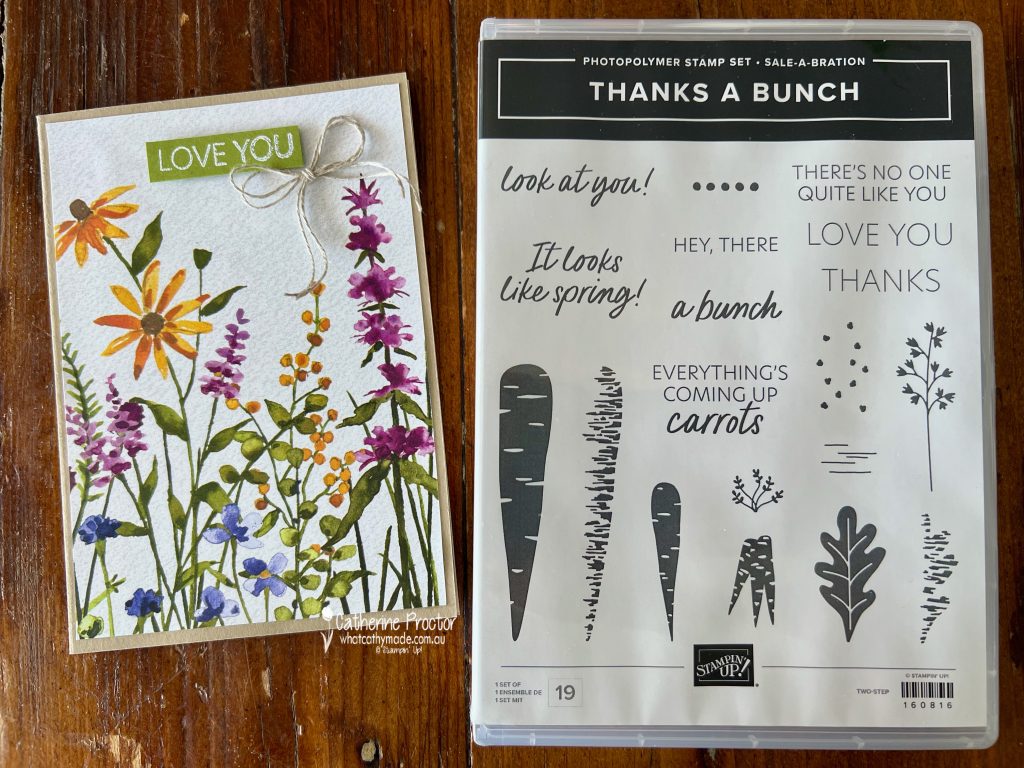
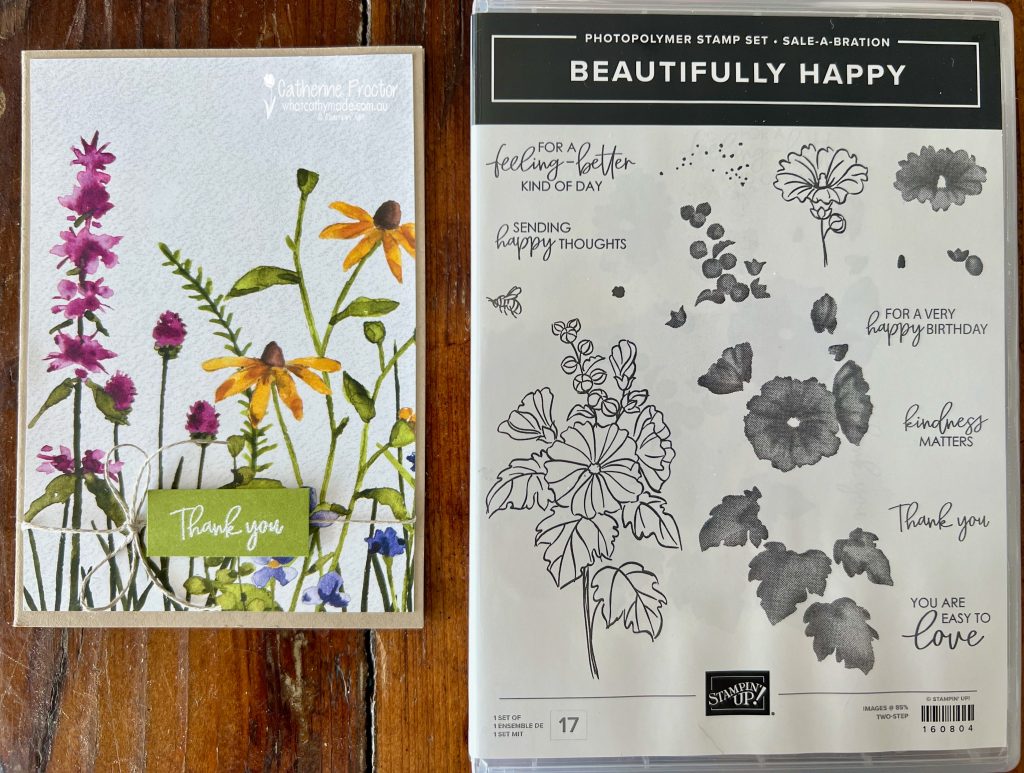
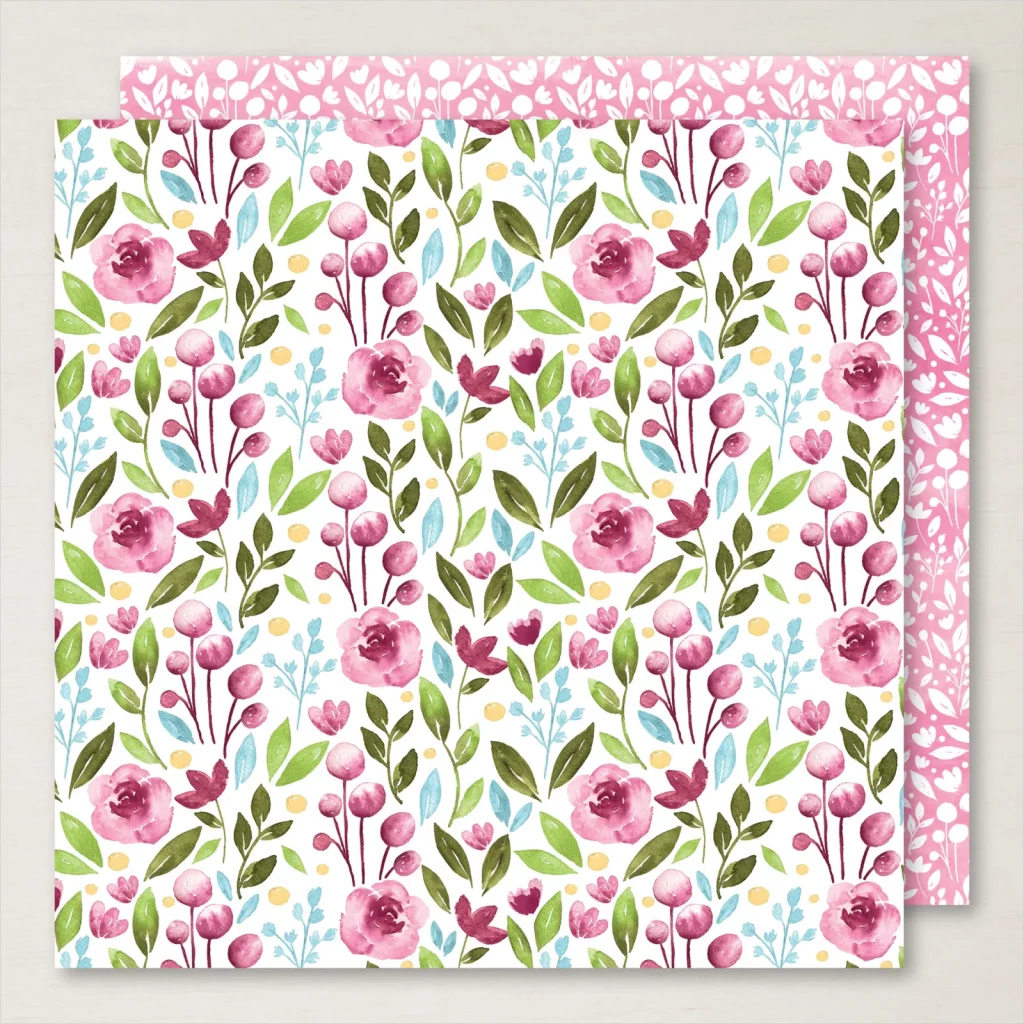
The Dainty Flowers DSP has been hand water coloured and it will be free to redeem with any order of $90 or over from January 5, 2023.
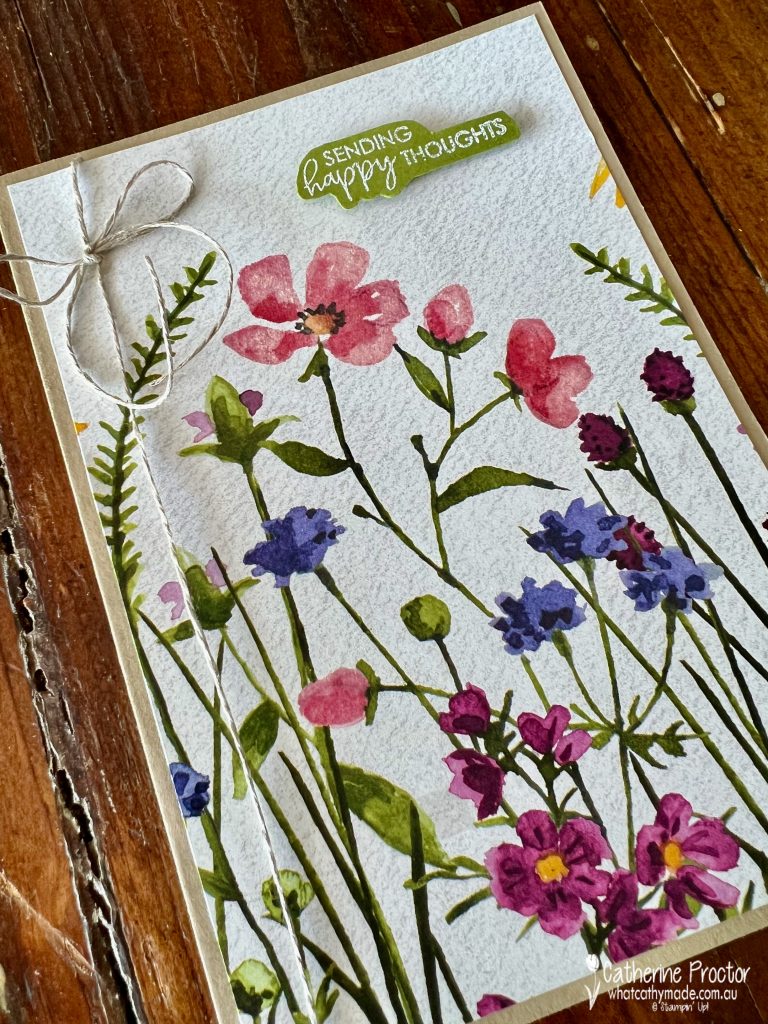
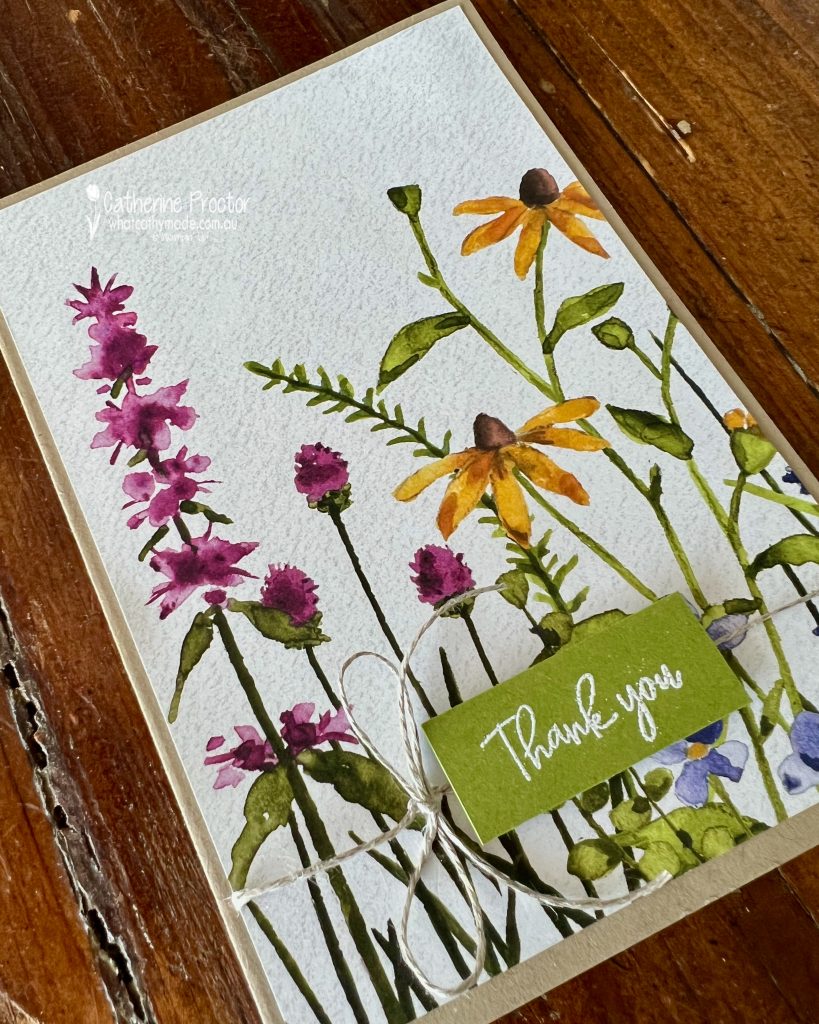
Photos don’t really do justice to just how beautiful this DSP is in real life. The water coloured floral pattern I’ve used for all three cards actually looks like it has been embossed!!
For the sentiments on all three cards, I stamped them in Versamark onto Old Olive cardstock and then heat embossed the sentiments with white emboss powder.
The “Love you” sentiment is from another forthcoming SALE-a-bration item, the Thanks A Bunch stamp set.
The “Thank You” and “Sending Happy Thoughts” sentiments are from yet another forthcoming SALE-a-bration stamp set, Beautifully Happy.
All three cards have a Crumb Cake cardstock base and the only embellishment is some linen thread.
After all, with Designer Series Paper this beautiful, you really don’t need to do much at all!
Now it’s time to hop on over to our next participant, the lovely Kate Morgan – I can’t wait to see what Kate has made this week!
If at any time you find a broken link, you can find the complete list of all participants below.
Welcome to week thirty two of our Art With Heart 2022-23 Colour Creations blog hop!
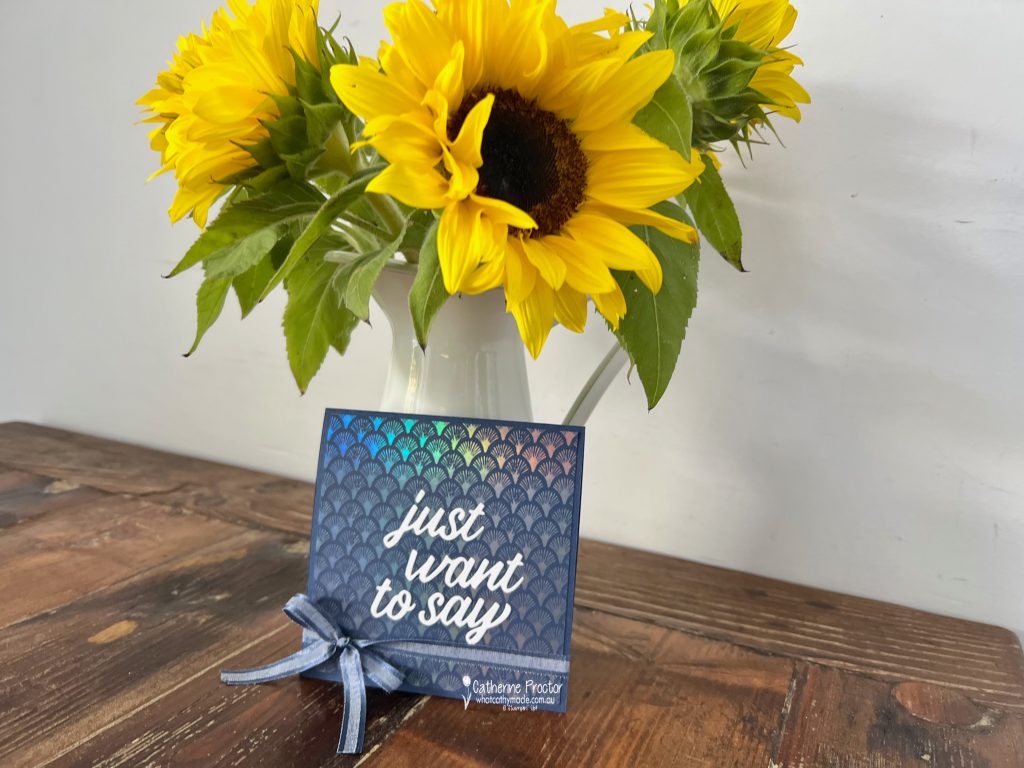
This is a weekly blog hop where we showcase the stunning range of Stampin’ Up! colours in alphabetical order over 12 months and this week we are featuring Night of Navy from the neutrals family.
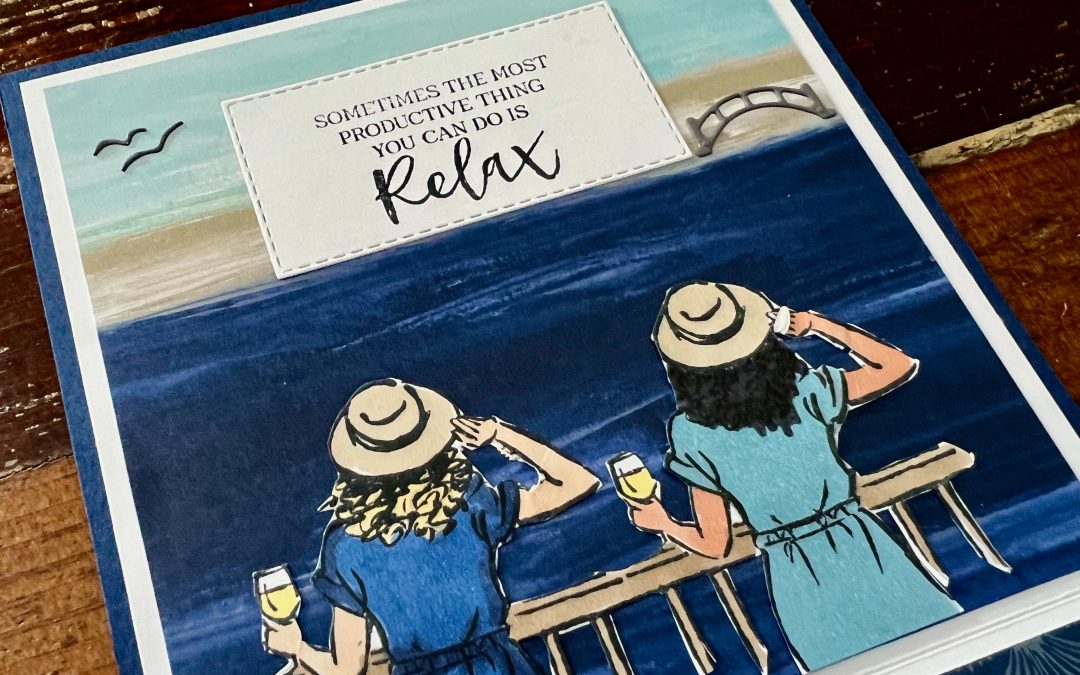
This is a special card I made for my sister-in-law’s birthday last week. My present to her is a girl’s night out together at the Open Air cinema, a new tradition we started last year.
I highly recommend this experience to anyone who is visiting Sydney, as you get to enjoy a drink and a meal, before watching a movie on a giant outdoor screen that rises up from our iconic Sydney Harbour!
photography – andrewmaccoll.com
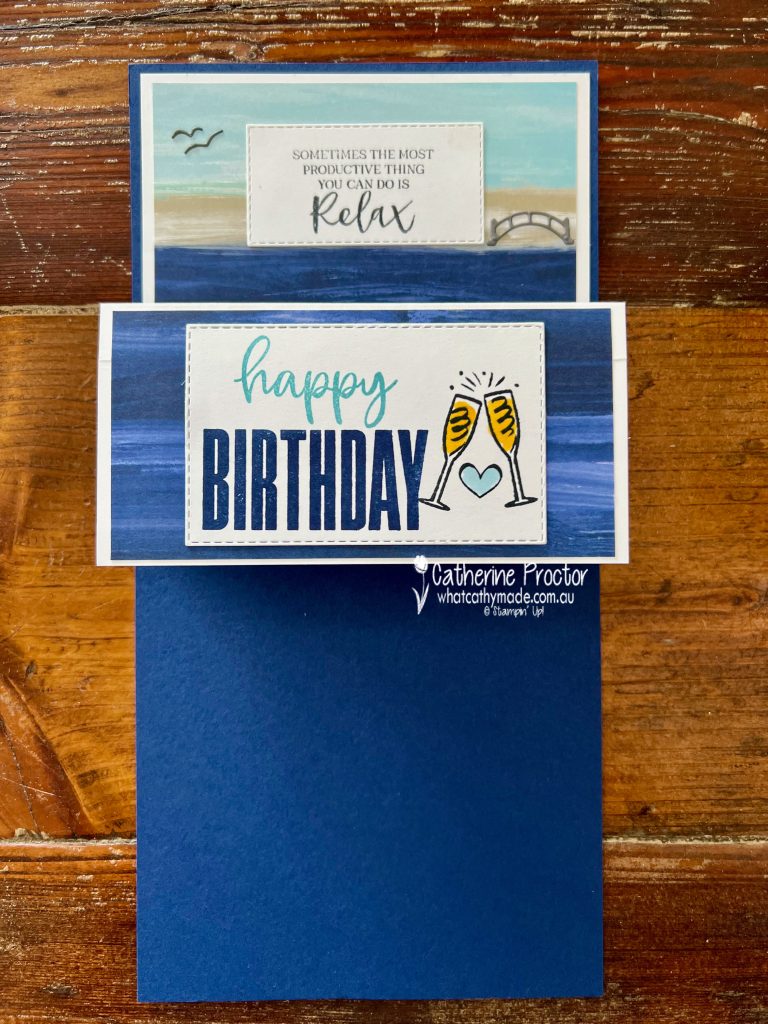
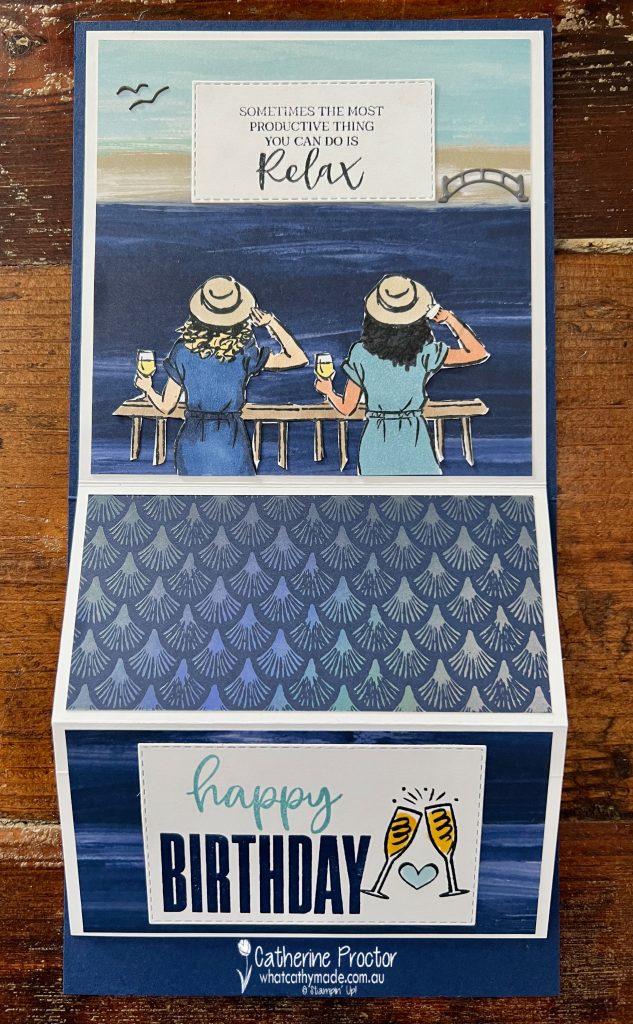
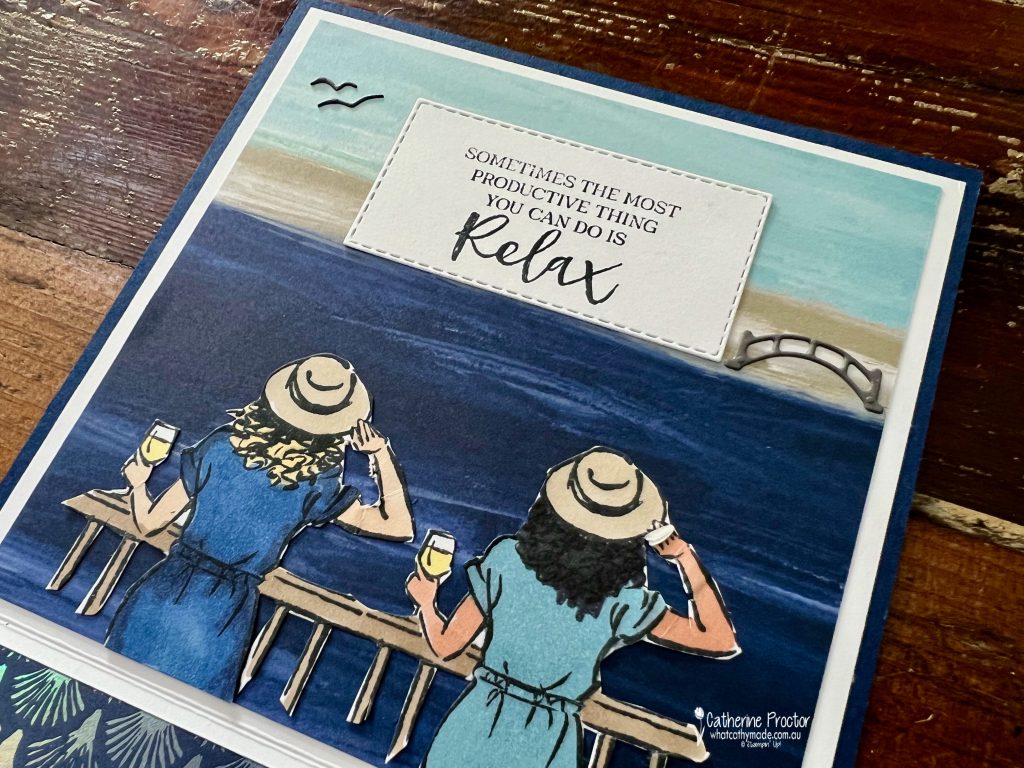
To recreate the Open Air Cinema experience I decided to make a double easel card, using the Stitched Rectangle Dies to create the actual cinema screen in the harbour.
Here’s what the card looks like when it’s closed.
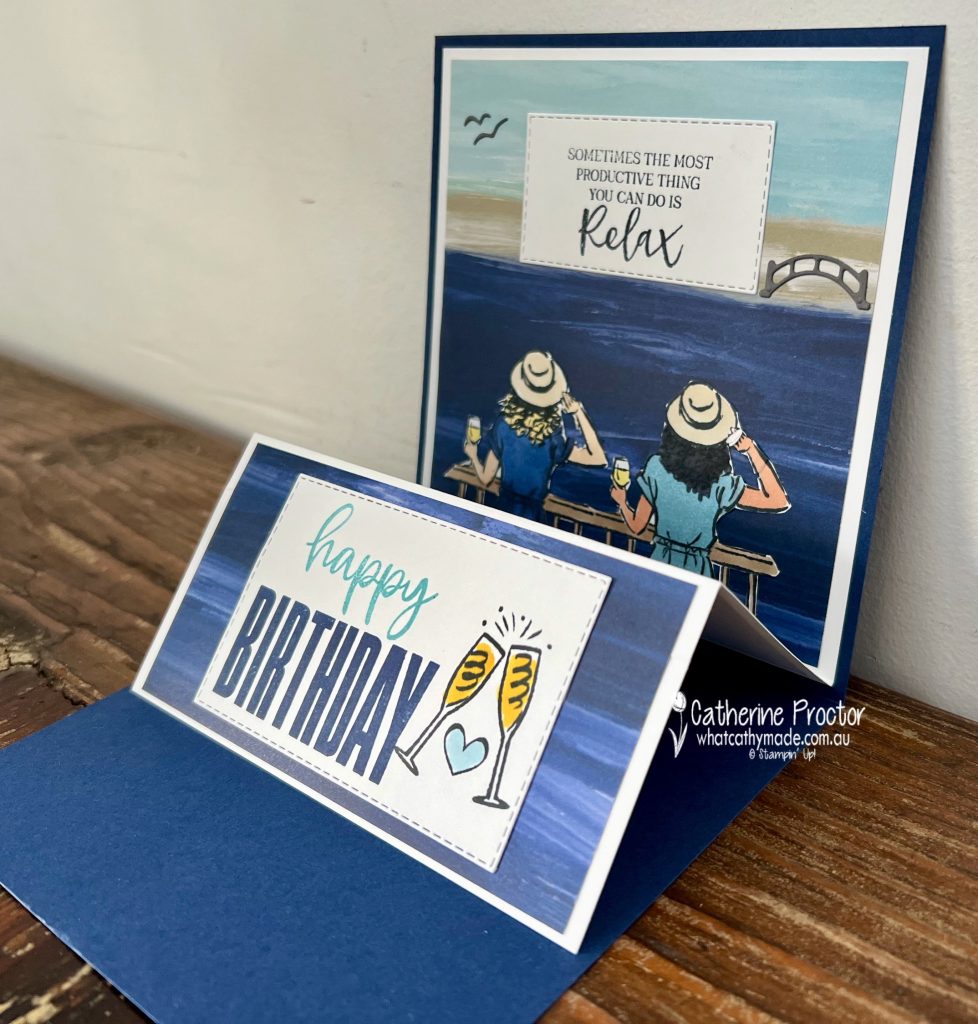
Opened up…
Laid out flat…
Folded into an easel…
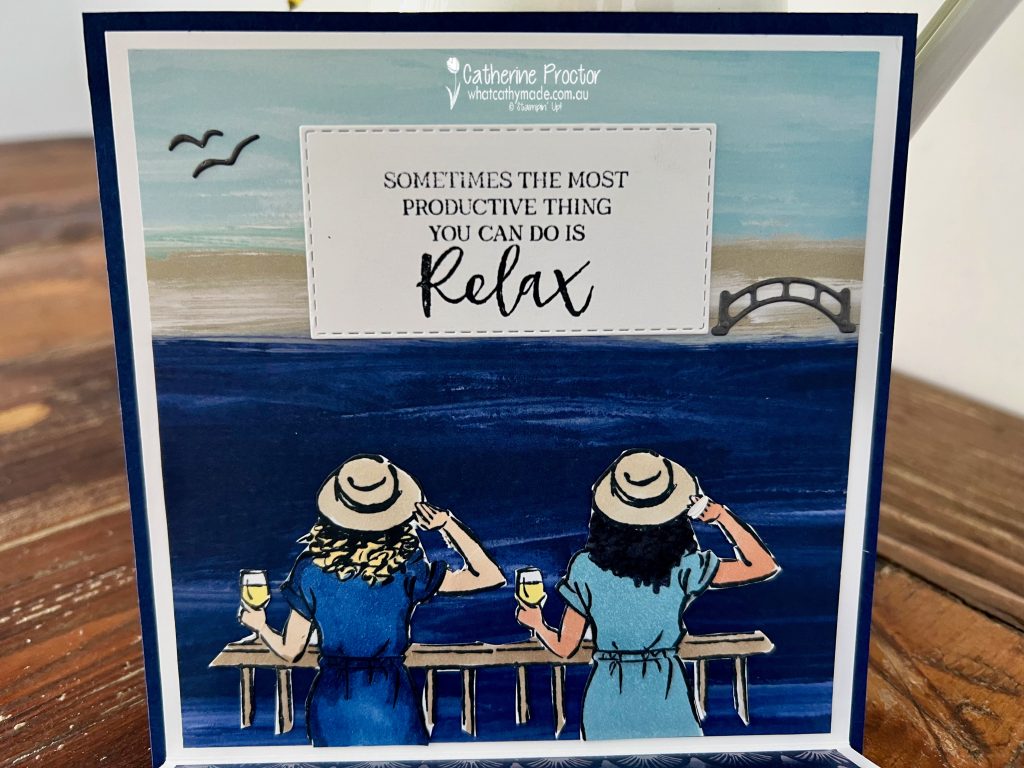
We always drink champagne together to start the night so I stamped one of the images from the “In The Moment” stamp set twice and fussy cut it out to show us both enjoying a drink and looking at the view before the movie starts.
Hang on a sec! What is the Designer Series Paper you’ve used for the front of the card and the inside harbour scene, I hear you ask?
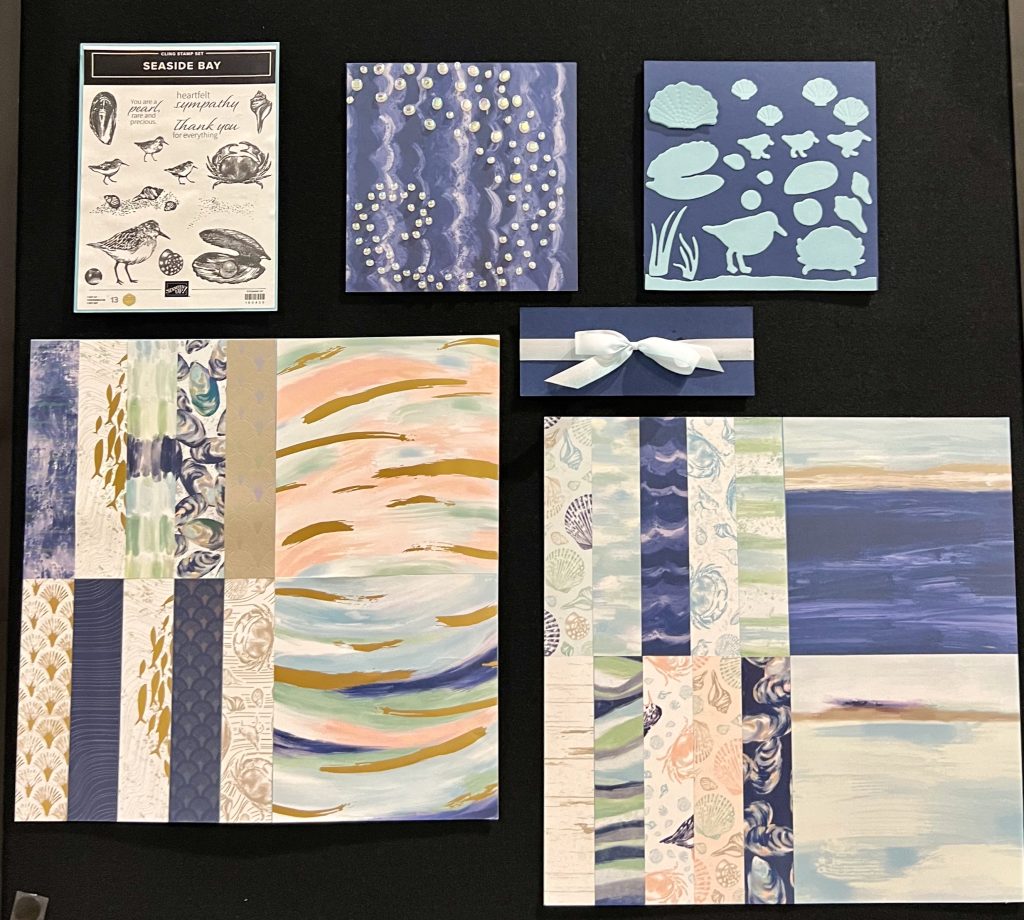
By The Bay is a gorgeous 6×6 DSP from the January–April 2023 Mini Catalogue, which will be available from January 5. It’s part of the By The Bay suite and one side of all of the DSP designs is pearlised – so stunning!
I’ve used one of the pearlised patterns for the front of my double easel card. To tie it flat I’ve used another new product from the catalogue: Night of Navy Bordered Ribbon.
The Sydney Harbour Bridge and birds in the sky are created using the Waterfall dies, currently on sale in the clearance rack and reduced to $26.
Other products used in the card include the Biggest Wish stamp set for the birthday sentiment, the Breaking News Stamp set for the clinking champagne glasses and heart, and the Floral Gallery Dies for the sentiment on the front of the card.
Now it’s time to hop on over to our next participant, the lovely Fiona Ryan – I can’t wait to see what Fiona has made this week!
If at any time you find a broken link, you can find the complete list of all participants below.
Welcome to week thirty one of our Art With Heart 2022-23 Colour Creations blog hop!
This is a weekly blog hop where we showcase the stunning range of Stampin’ Up! colours in alphabetical order over 12 months and this week we are featuring Mossy Meadow from the subtles family.
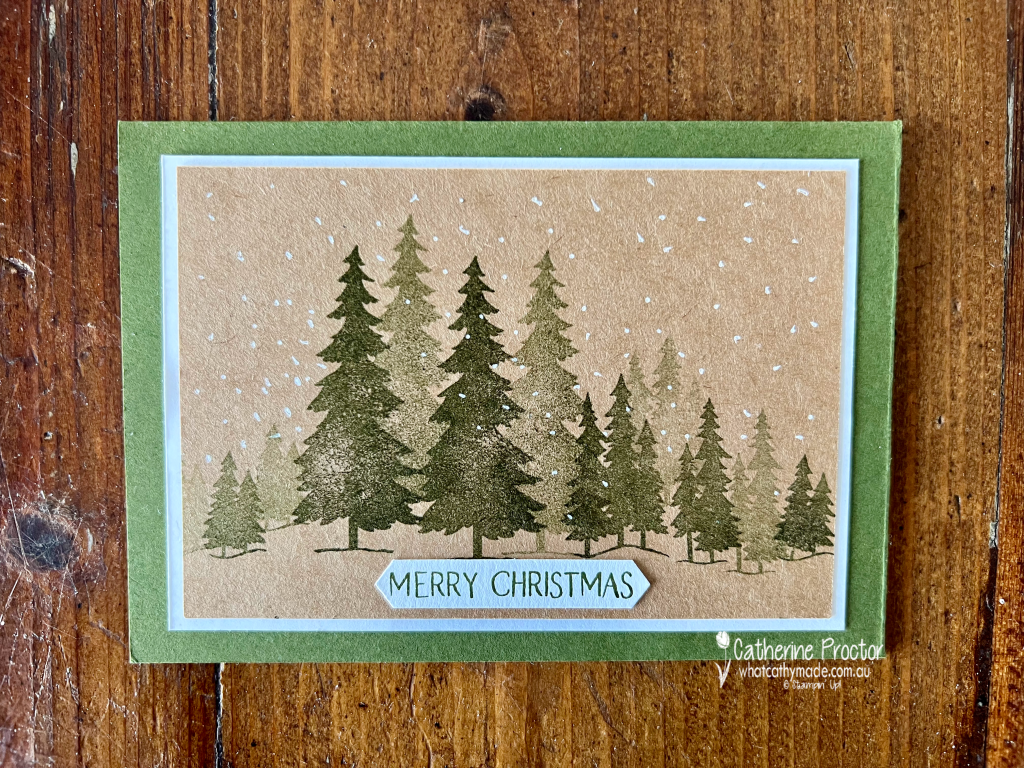
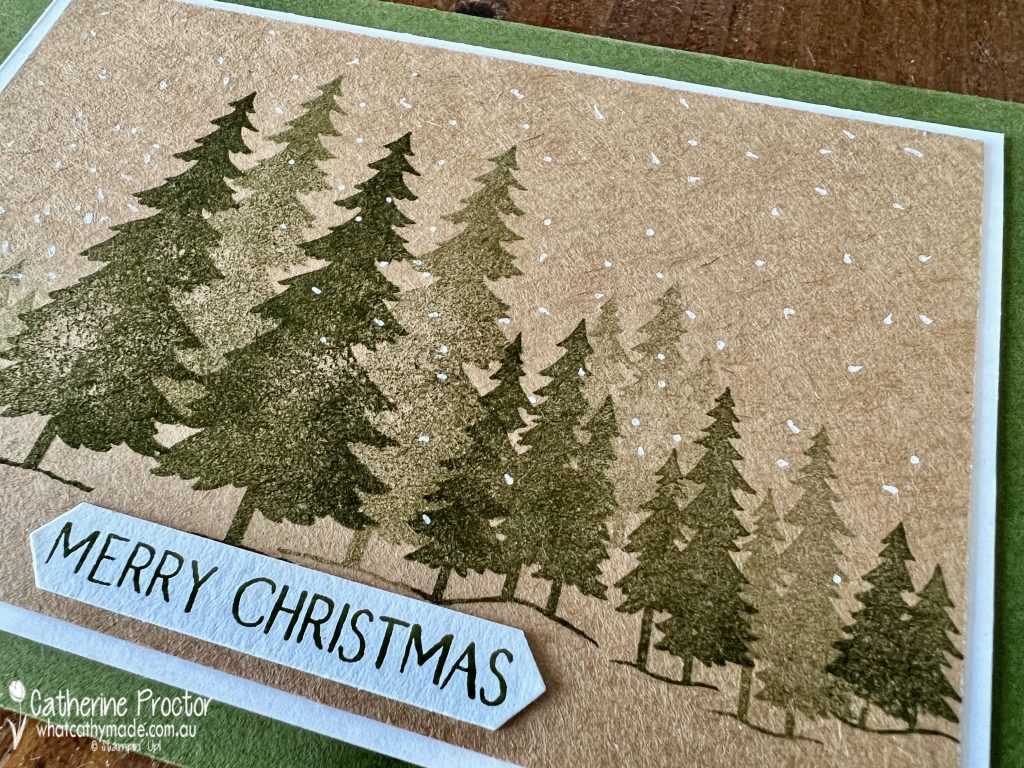
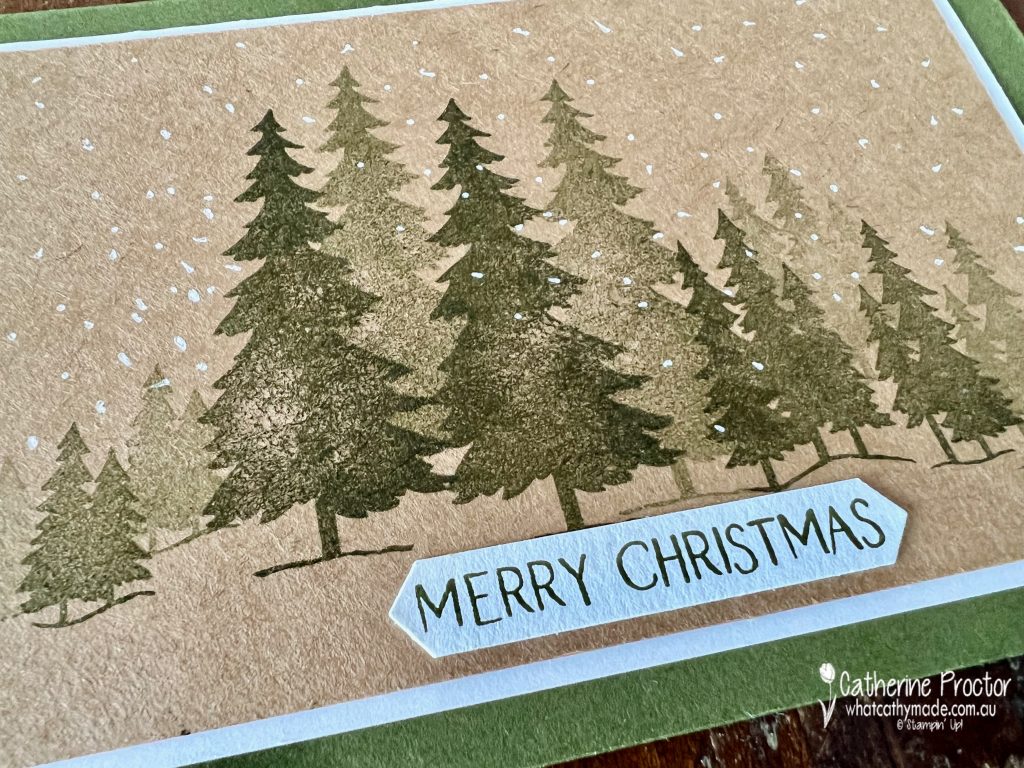
I love Mossy Meadow when it’s paired with other neutrals or with Kraft cardstock, which is what I’ve used today for my simple stamping card.
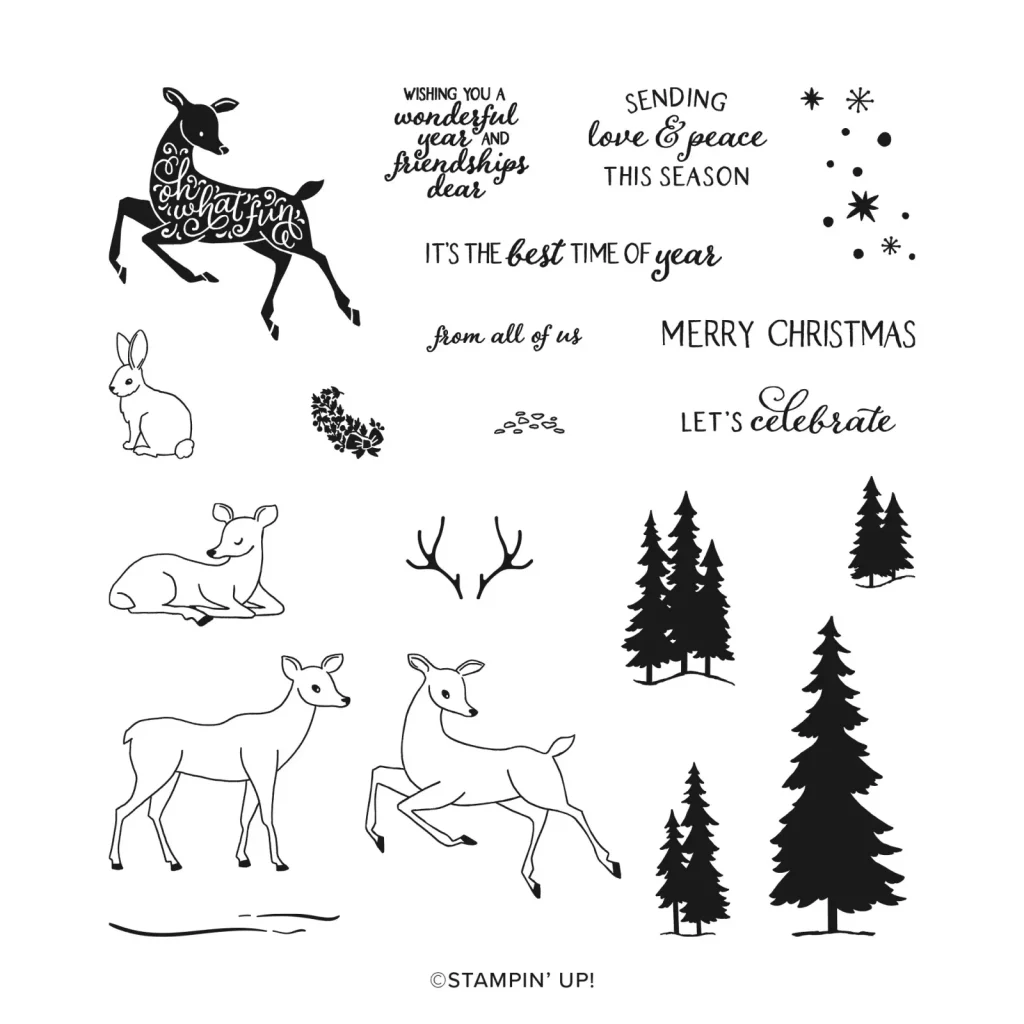
The Peaceful Deer stamp is perfect for this card design because it has four different tree stamps in different sizes, making it quick and easy to create a forest scene.
Although it looks like I’ve used two greens, my trees are all stamped in Mossy Meadow. I’ve stamped at full strength and then once again without reinking the stamp – this is called “stamping off” and it gives you two shades of the one colour, adding dimension to the card.
The snow was created with a white gel pen and the “Merry Christmas” sentiment can be simply cut out with a paper trimmer or even by hand using paper snips.
This is such a quick and easy simple stamping card – ideal if you haven’t started making your Christmas cards yet and you need to quickly build your stash.
Now it’s time to hop on over to our next participant, the lovely Rachel Palmieri – I can’t wait to see what Rachel has made this week!
If at any time you find a broken link, you can find the complete list of all participants below.
Welcome to week twenty-two of the Heart Of Christmas Blog Hop, our last one for this year!
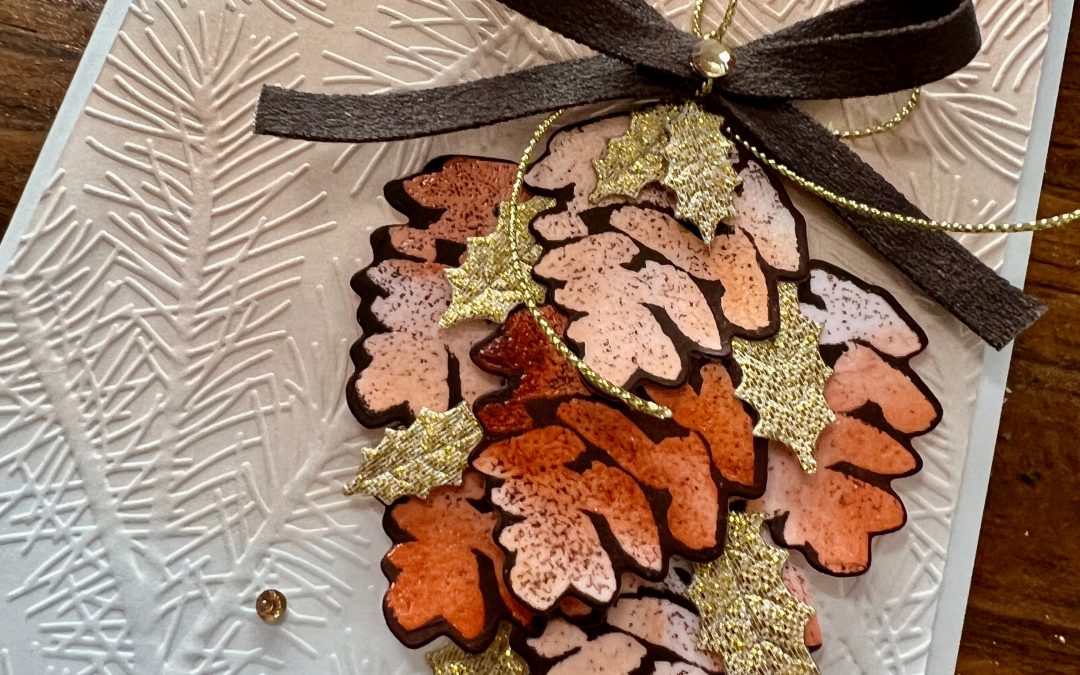
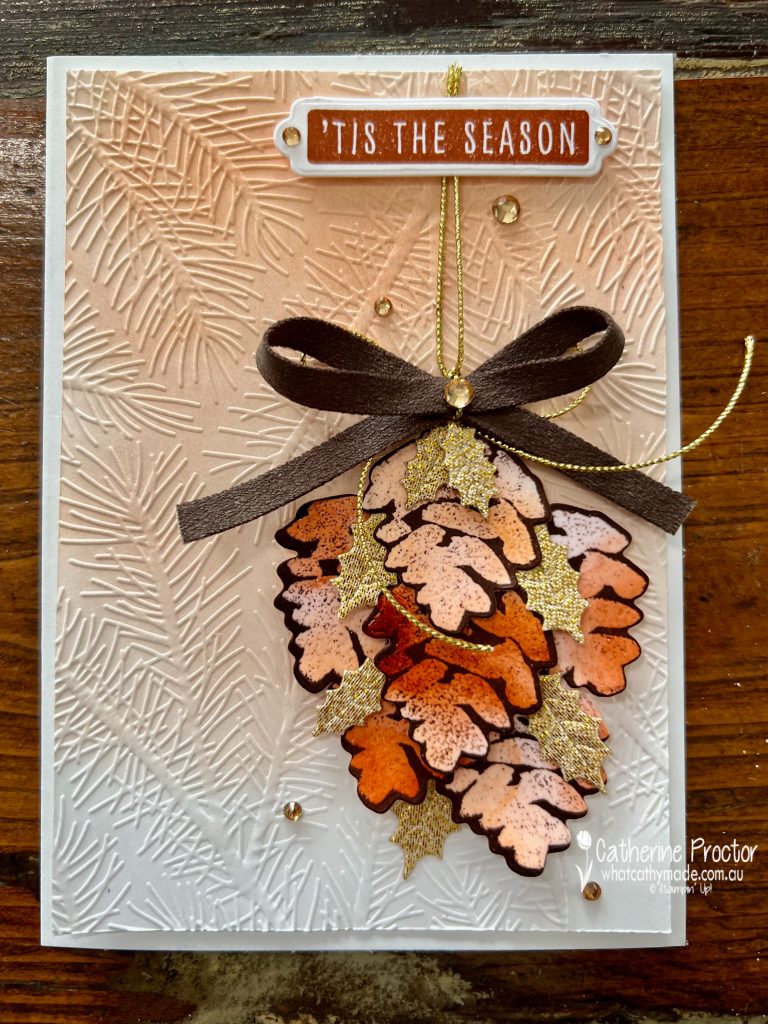
This week’s Christmas card was created primarily for this hop, but also for a colour challenge that used colours I would not naturally chose to use for Christmas – Cajun Craze, Petal Pink and Early Espresso.
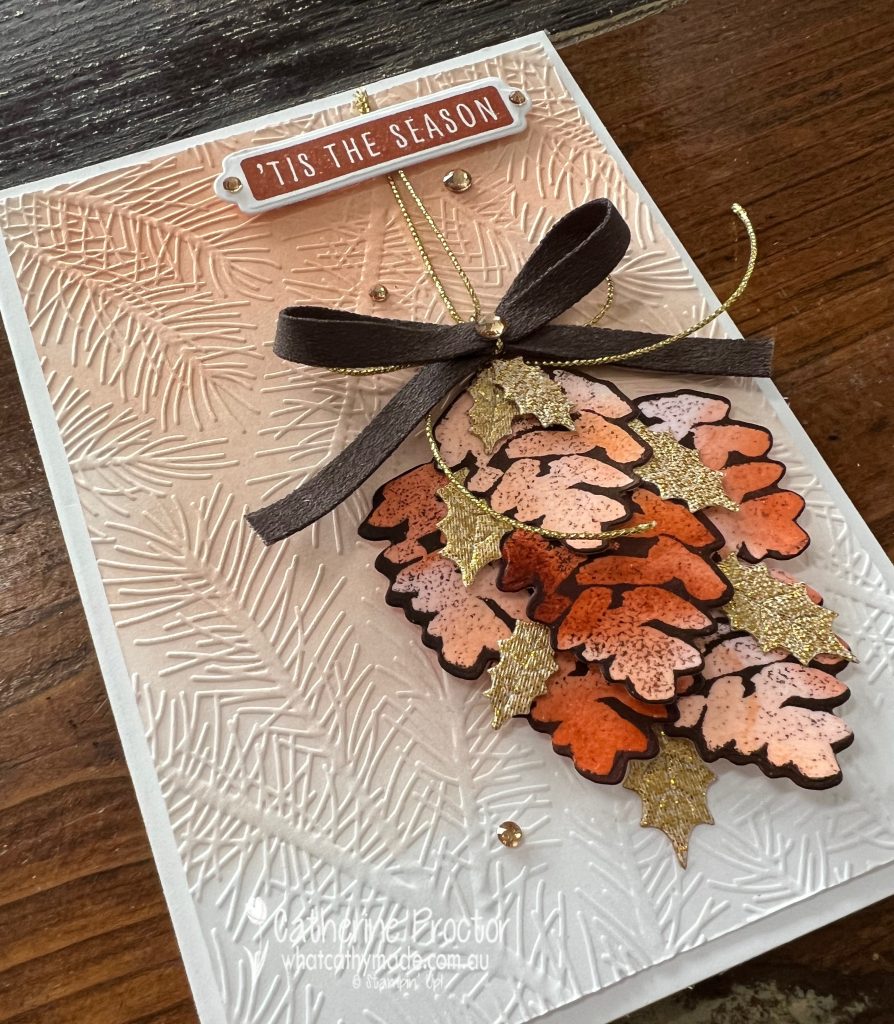
I decided that the pinecones from the Christmas Season stamp set would work well for this very unusual Christmas colour scheme.
I was originally using the Joseph’s coat technique, however, once I added the top layer of Early Espresso ink I realised I’d spaced my pinecones from Christmas Season too far apart to use the cardstock layer I’d created with this technique, so I decided to use the Seasonal Label dies to die cut out the pinecones and turn them into a Christmas ornament instead.
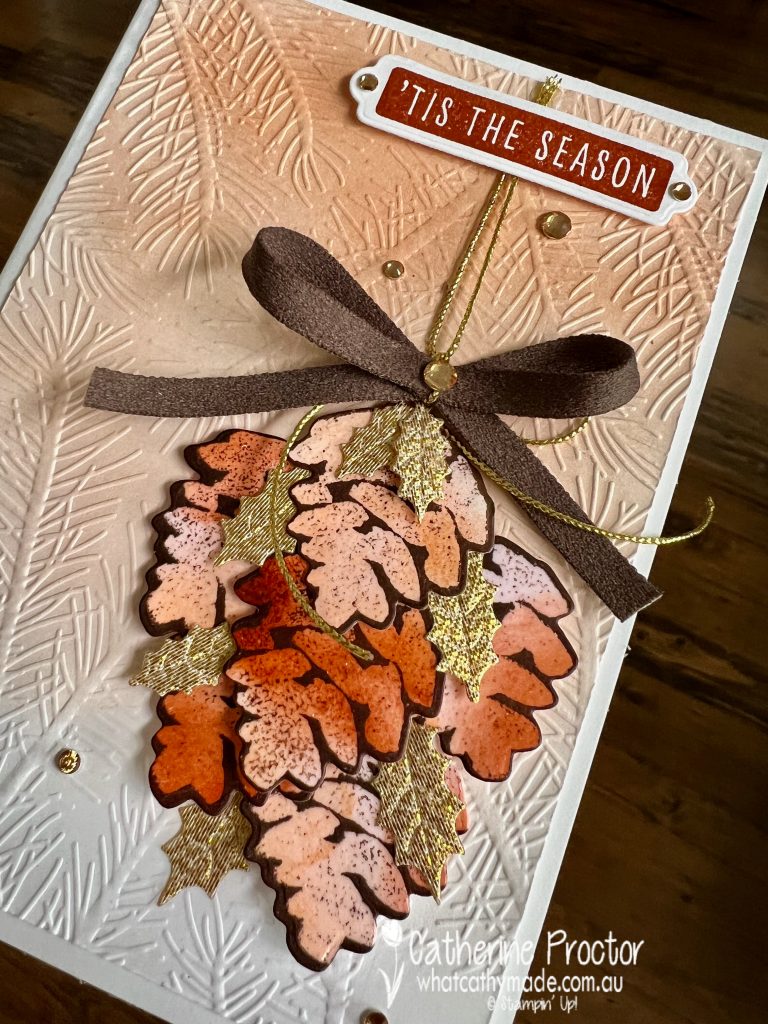
The ombre effect on the background layer was created using a blending brush to add Petal Pink ink, then it was embossed with one of the Wintery embossing folders.
Gold holly leaves, Simply Elegant Gold twine and Champagne Rhinestone Jewels all add a touch of sparkle and elegance – I think they work well with this colour scheme.
The double bow uses both Early Espresso Faux Suede Trim and Simply Elegant Gold twine.
The sentiment is one I use a lot and it’s from the Christmas to Remember stamp set, stamped in Cajun Craze and die cut with the matching die from Seasonal Labels.
Now it’s time to hop on over to our next participant, the lovely Sharon Davern who has hosted our Heart of Christmas blog hops this year. Thank you so much Sharon!!!!
If at any time you find a broken link, you can find the complete list of all participants on Sharon’s blog.
Welcome to week thirty of our Art With Heart 2022-23 Colour Creations blog hop!
This is a weekly blog hop where we showcase the stunning range of Stampin’ Up! colours in alphabetical order over 12 months and this week we are featuring Mint Macaron from the subtles family.
Hands up if you’re excited about the drill die in Stampin’ Up!’s Rugged Icons dies!
That’s my hand you can see frantically waving in the background, as my youngest son, after trying university for a year, decided to become an electrician instead and he has never been happier.
I think he has finally found his tribe 🙏😍 … and I’ve found the perfect die for my tradie son!
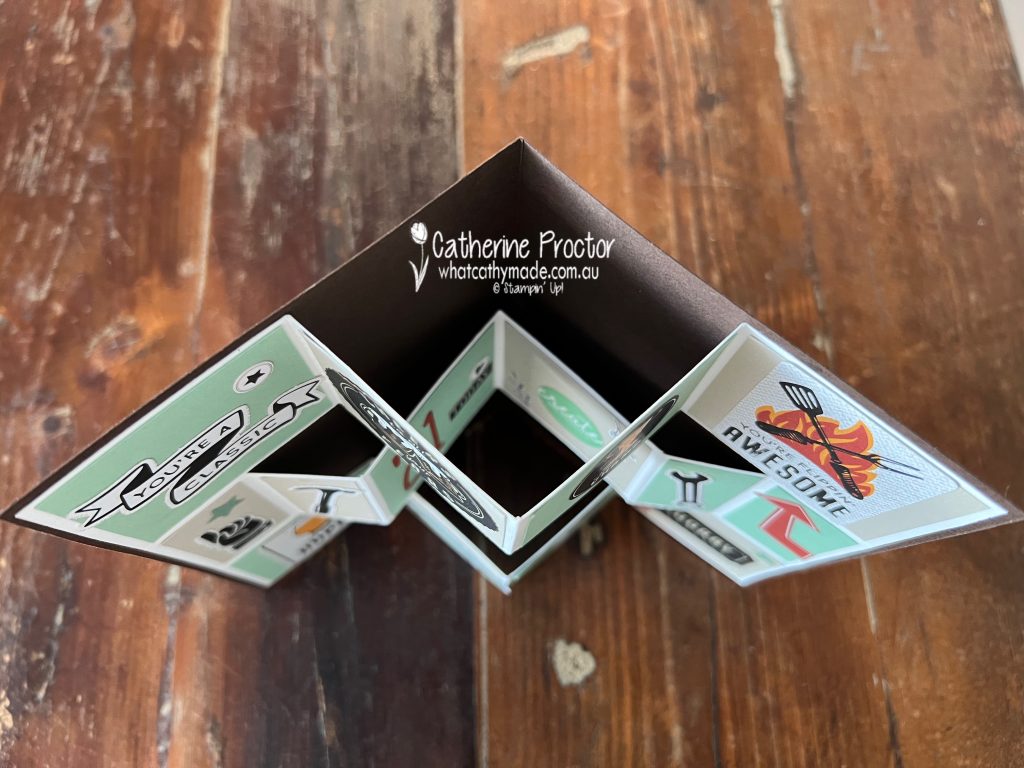
When Ben turned 21 last weekend I knew I wanted to use the drill die from the Rugged Icons die and the die-cut pieces from the He’s The Man DSP, but I wasn’t sure what type of card I would make.
When I saw this fabulous Masculine Fun Fold 3D Shutter Card made by my fellow AWH teammate and friend, Kate Morgan, for our Colour Creations Merry Merlow blog hop last week I knew I’d found the perfect design.
Unfortunately, Kate’s template was too small for these die cuts, so I’ve created a new template for my card.
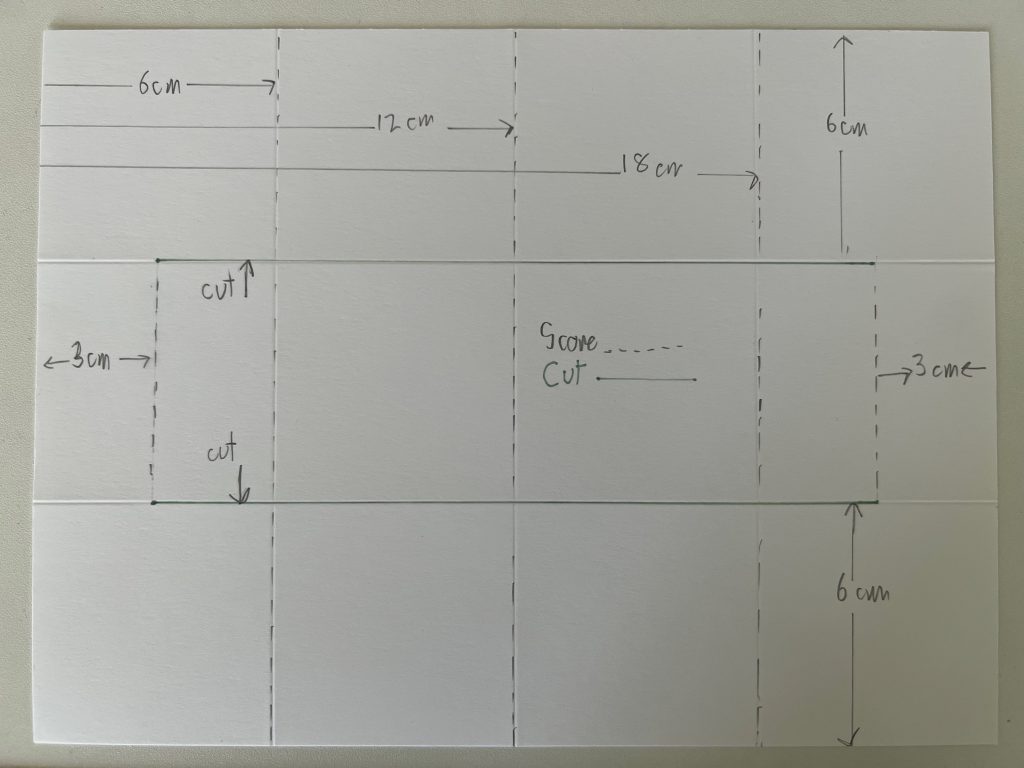
Trifold Shutter Card Template
Start with a piece of cardstock (this is for the inside fancy fold) measuring 24 cm wide x 18 cm high.
Cut, score and fold the cardstock as shown on the template to make the fancy fold.
Make an inner card base measuring 24.5 cm wide x 17.5cm high, scored at 12.25 cm and then folded in half.
After decorating the inside of your trifold shutter card, glue the outside panels to the inside of your card base as shown below.
I have to confess that it was not until I’d finished making the card that I realised the light green in the He’s The Man DSP was Soft Succulent, not Mint Macaron! So I’ve used Mint Macaron cardstock throughout but I think it still works okay?
All of the images inside the card are from the He’s the Man DSP apart from the centre 2 panels that have “21 today” and “create memories”. Can you guess where these are from?
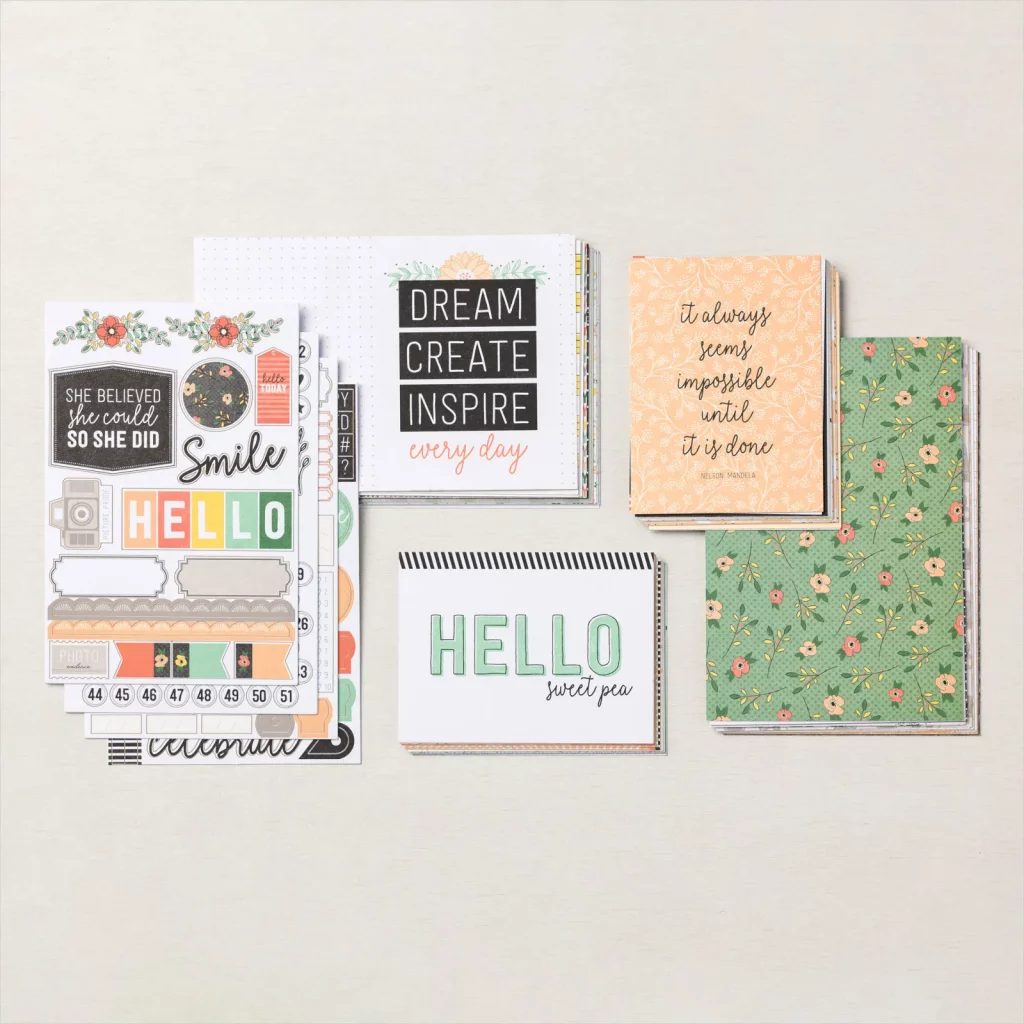
The word “today”, the tiny heart above it, the “create memories” and the two sprigs are all stickers from the “Today Is the Day Memories & More Card Pack”.
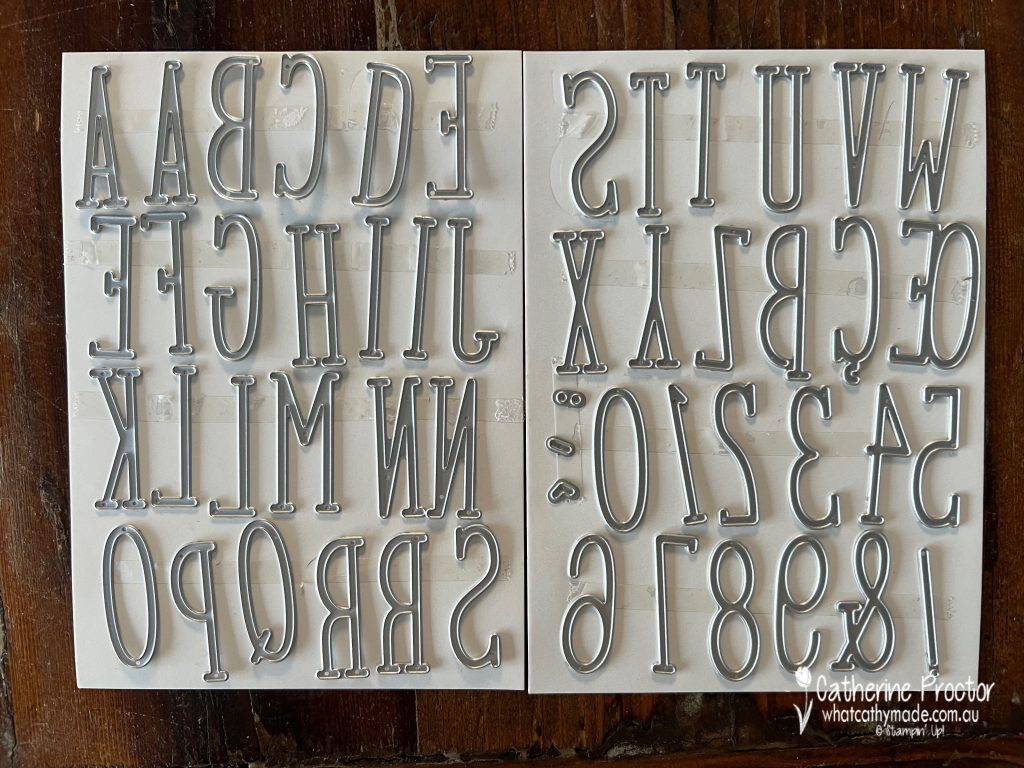
The “21” on the inside of the card and the “Happy Birthday” on the front of the card are a brand new product from the forthcoming January – April mini catalogue: Alphabet À La Mode dies. These dies are 1 ½ inches (3.8cm) high and there are 52 dies in the set!
If didn’t already have your hand in the air for the Rugged Icons dies, I bet you do for these brand new Alphabet À La Mode dies!
I’ve also used these Alphabet À La Mode dies (always attach an adhesive sheet on the back of the card stock before die cutting) to make the Happy Birthday for the front of my card.
A card this size needs a homemade envelope, which leads me to a confession. It was when I used this sheet of He’s The Man DSP to make the envelope that I realised I’d mixed up my greens!!!!!
This photo also shows the back panel of the card for writing on. A couple of glue dots under the “Cheers to all your years” die cut make a resealable envelope for the card.
Now it’s time to hop on over to our next participant, the lovely Di Furniss – I can’t wait to see what Di has made this week!
If at any time you find a broken link, you can find the complete list of all participants below.
Welcome to week twenty-one of the Heart Of Christmas Blog Hop!
Oh my goodness, I love it when different products are designed to coordinate together!
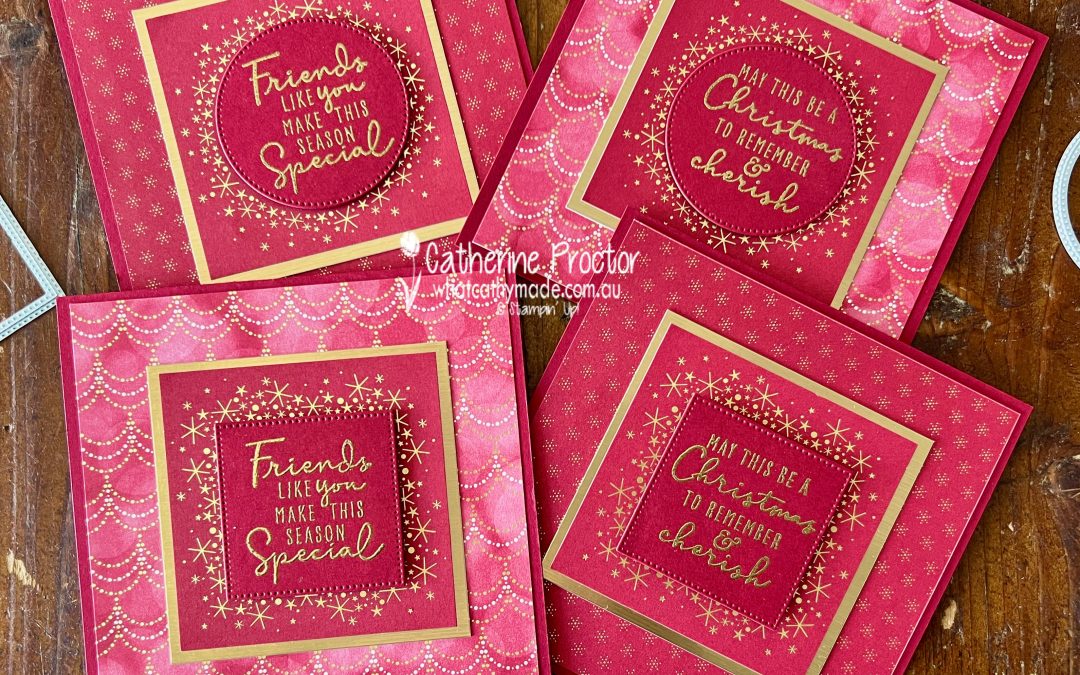
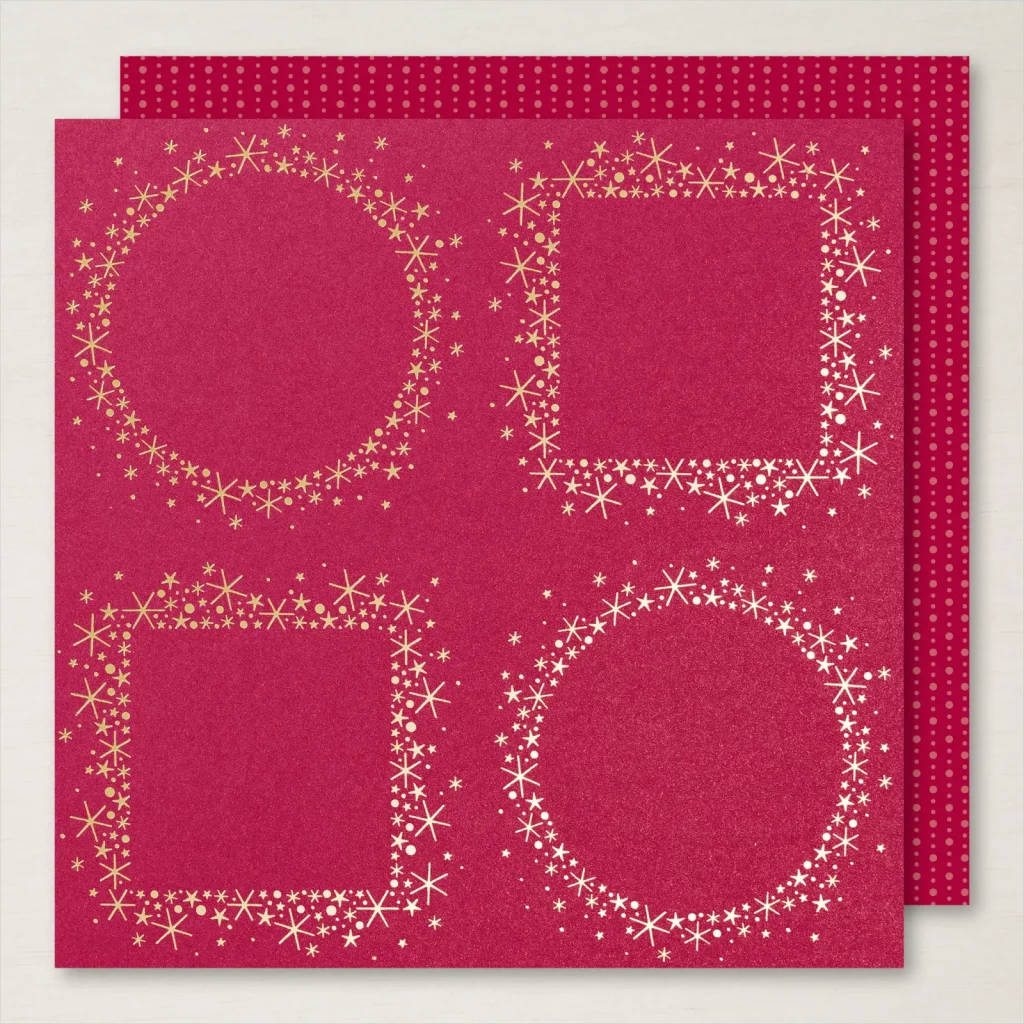
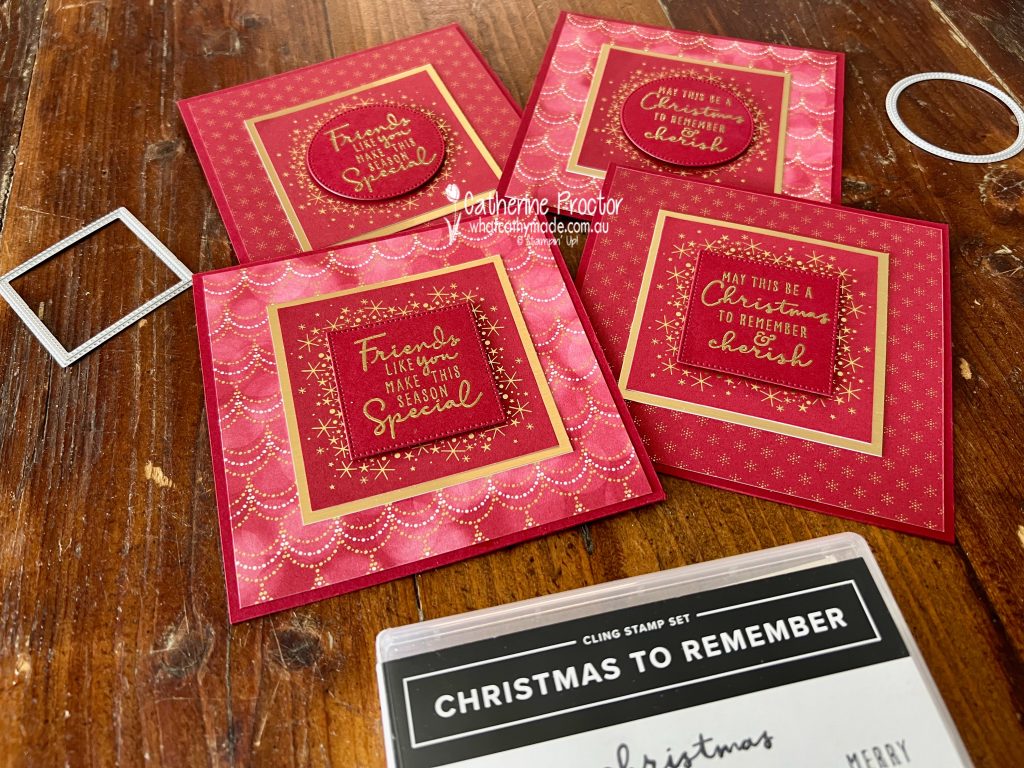
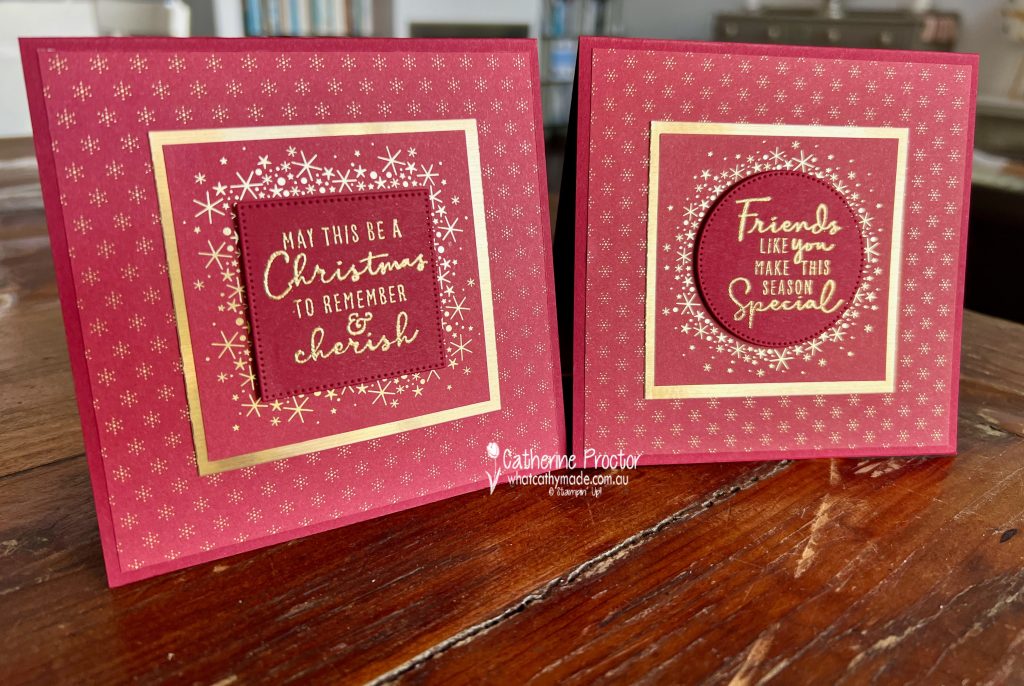
Did you know that two of the stamps in the Christmas To Remember Stamp Set fit perfectly into the Stylish Shapes Dies, which in turn, fit into the centre of the circles and squares on this design in the Lights Aglow DSP?
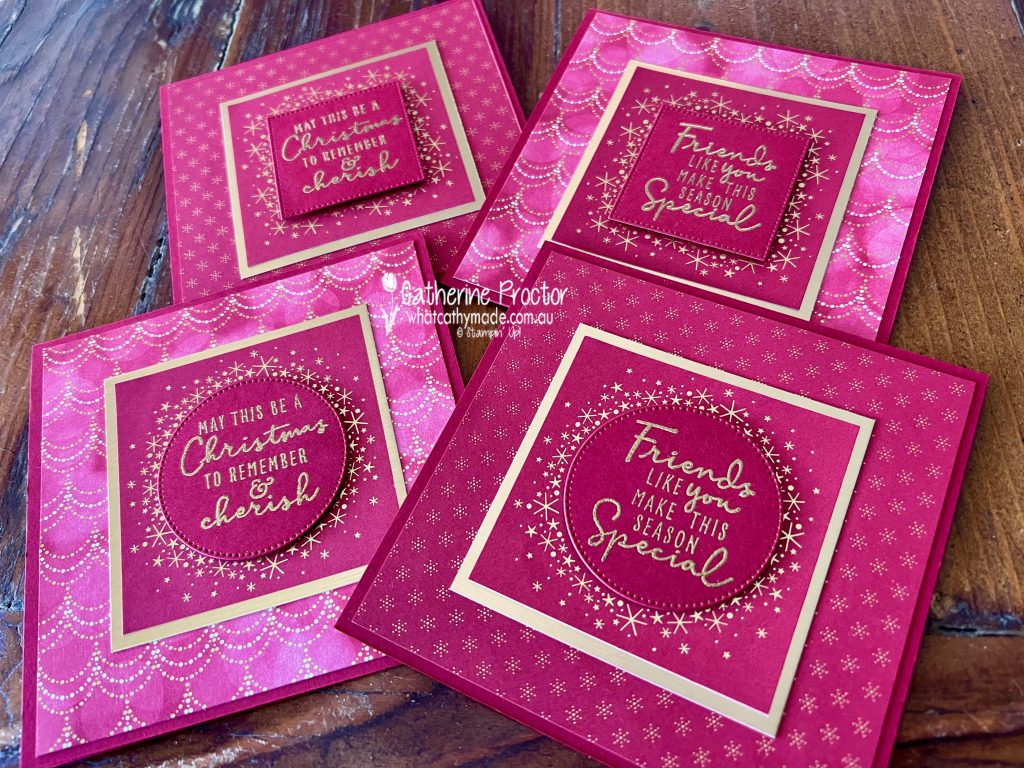
I made four cards from this one sheet of DSP, deliberately keeping my colour scheme very monochromatic by only using Cherry Cobbler and gold.
In the photo above, Cherry Cobbler looks very pink, but in the photo below, it looks more like a rich red. Either way, this is a stunning colour.
Can you see the gorgeous shimmer of the Lights Aglow DSP? These two cards use another pattern from the Lights Aglow DSP – the small gold foiled star pattern for the background layer.
These next two cards use the foiled festive garland design from the Lights Aglow DSP as their background. I love the classic colours and elegance of this DSP!
Now it’s time to hop on over to our next participant, the lovely Sharon Davern. I can’t wait to see what Sharon has made this week.
If at any time you find a broken link, you can find the complete list of all participants on Sharon‘s blog.
Welcome to week twenty nine of our Art With Heart 2022-23 Colour Creations blog hop!
This is a weekly blog hop where we showcase the stunning range of Stampin’ Up! colours in alphabetical order over 12 months and this week we are featuring Merry Merlot from the neutrals family.
My Merry Merlot card uses some gorgeous products that are currently on sale during the four day Stampin’ Up! Seasonal Sale.
Until 18 November, these products from the 2022–2023 Annual Catalogue are on sale with the following discounts:
10% off all punches
15% of all stamps (Host stamp sets are not included in this sale)
20% off all dies
20% off all embossing folders
20% off all non-specialty and non-assortment Designer Series Paper
Here are the three products I’ve used in this card that are on sale right now.
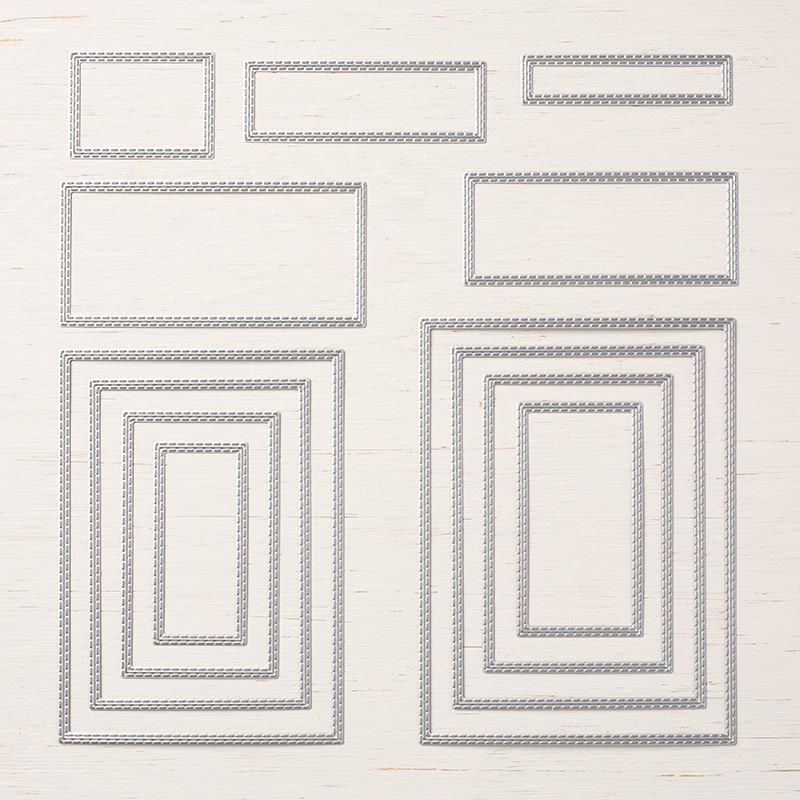
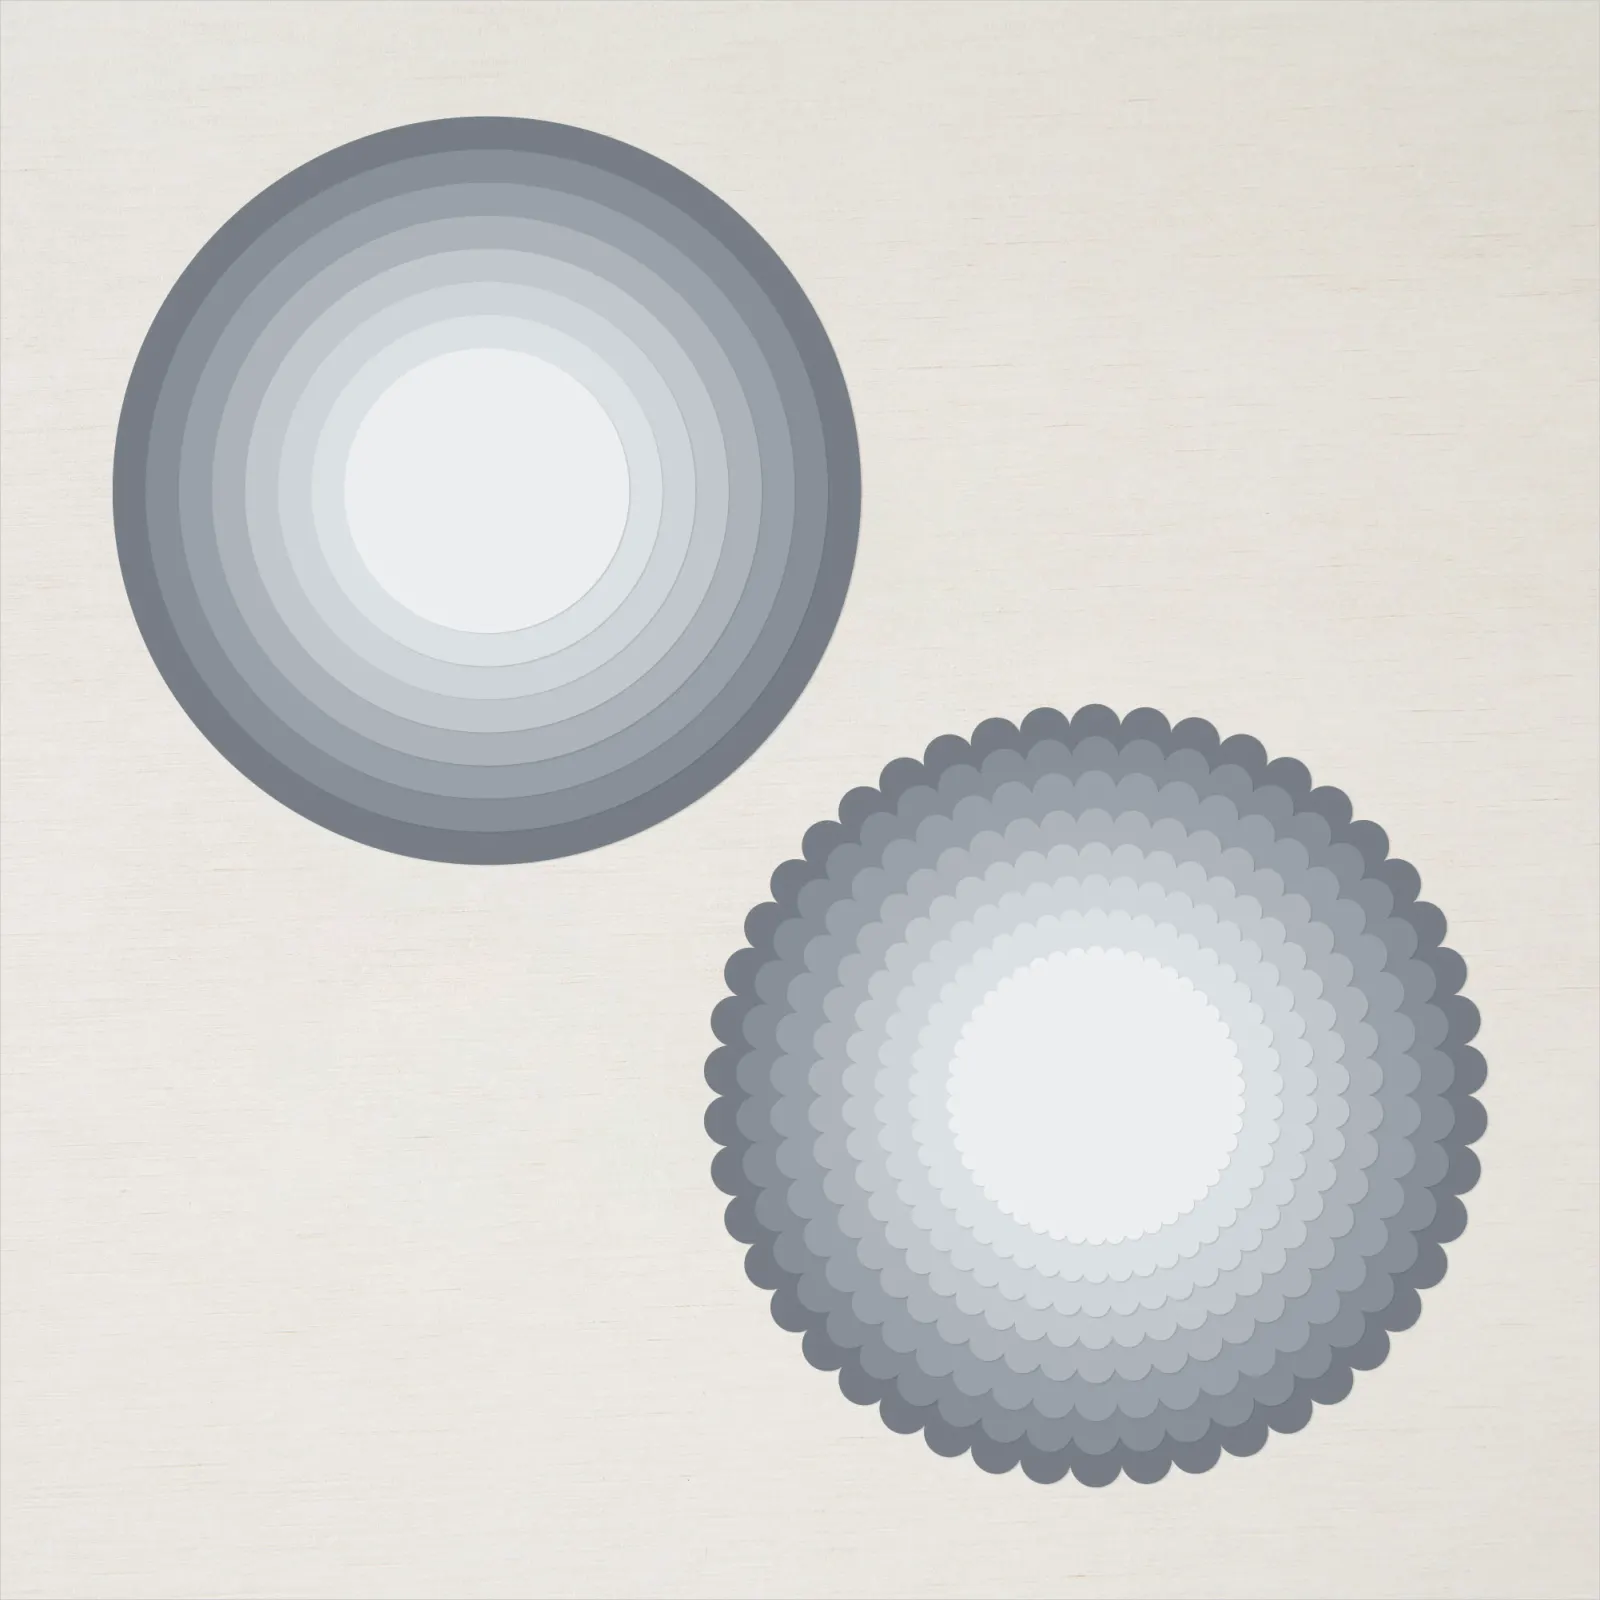
Awash in Beauty DSPStitched Rectangle diesLayering Circles Dies
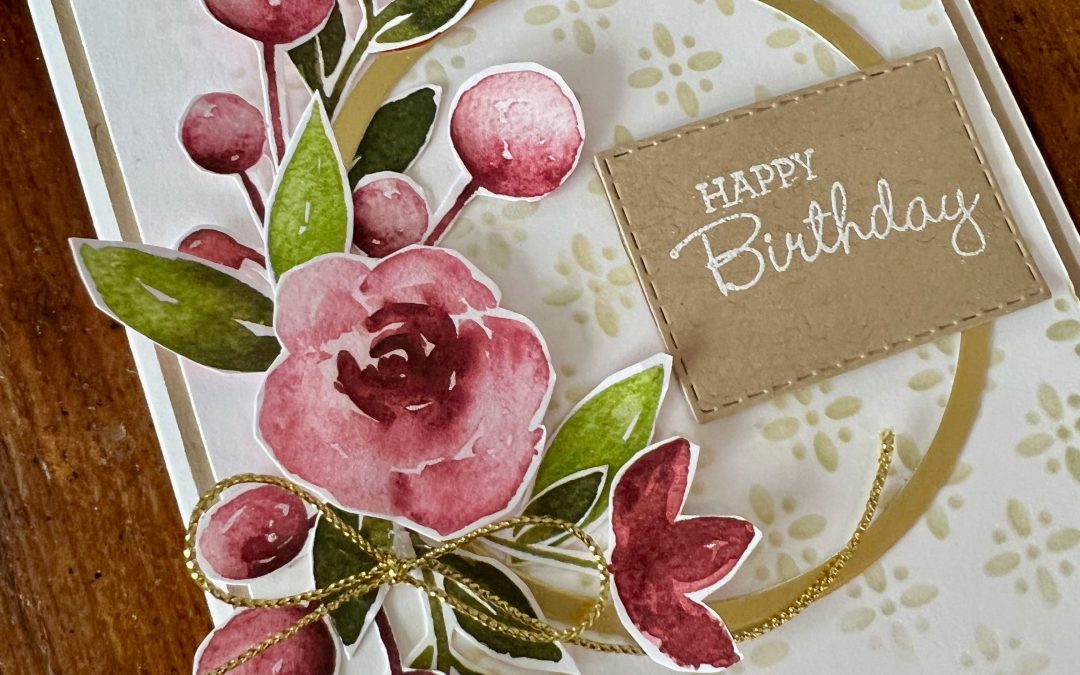
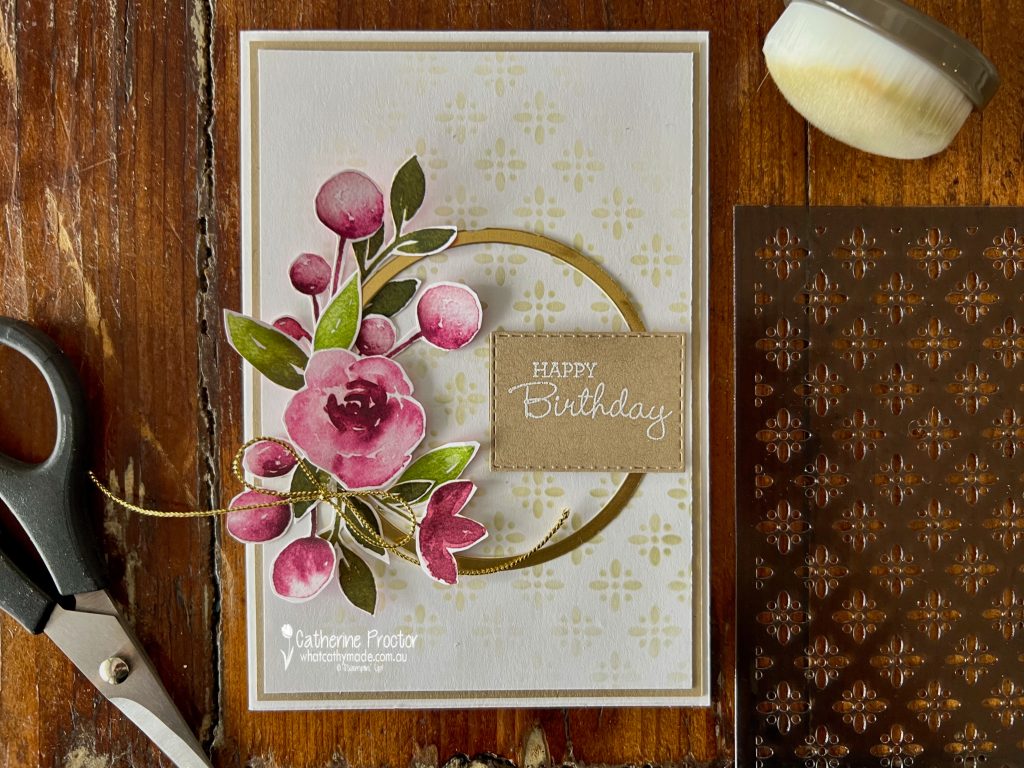
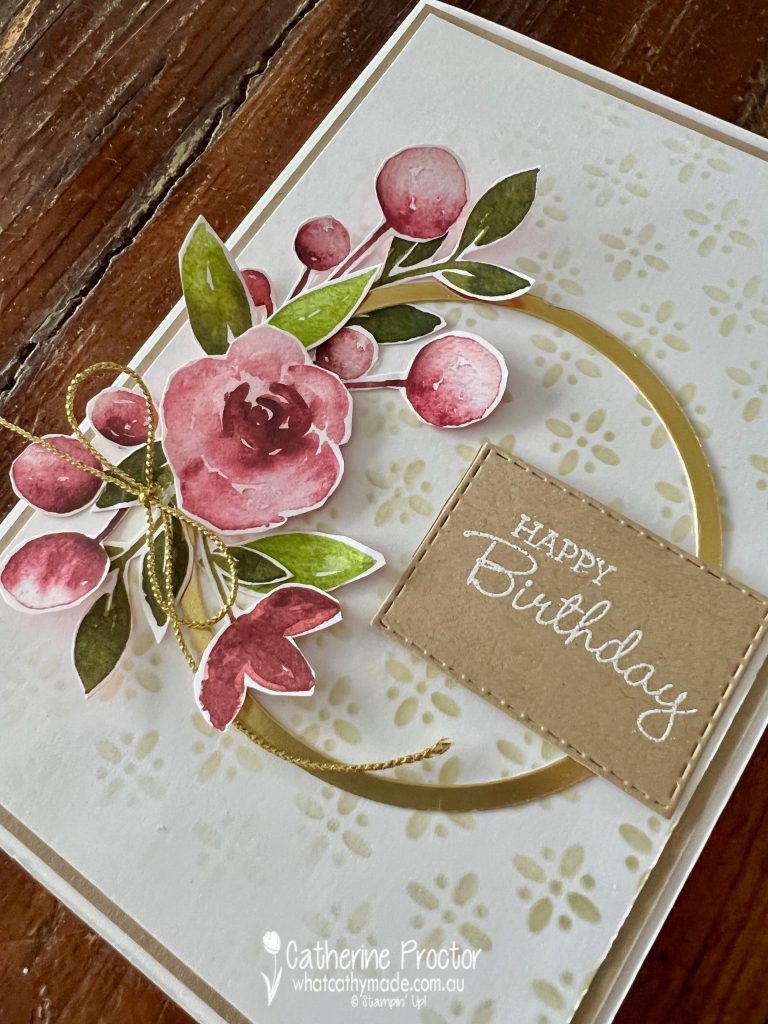
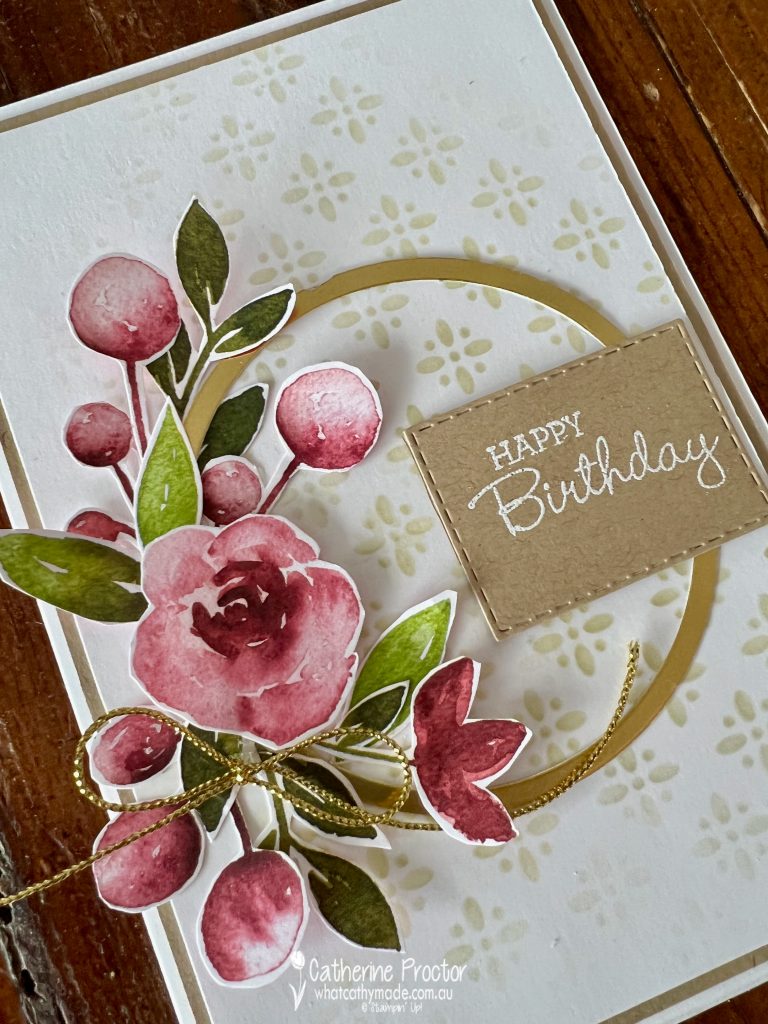
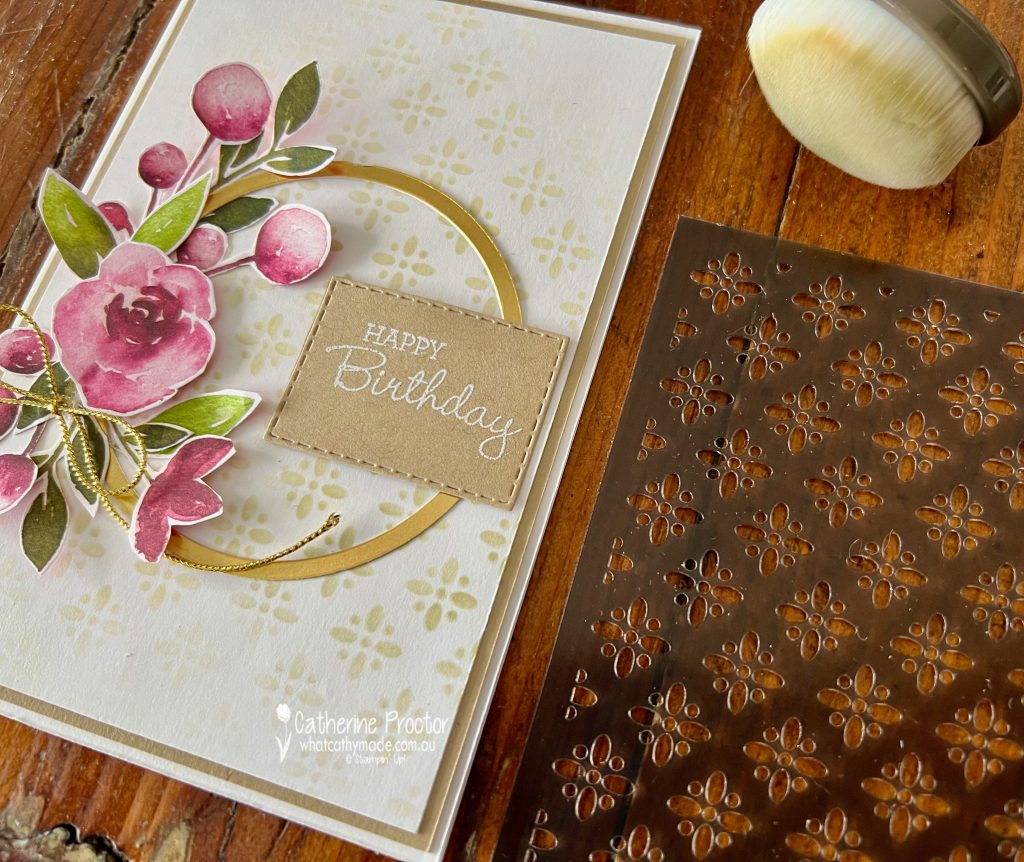
The background pattern on the card front is created using an Artistic Mix Decorative Mask with some Crumb Cake gently sponged over the top. This is such a quick and easy way to customise a background.
All of the flowers and leaves were fussy cut from this sheet of Awash in Beauty DSP – it was easy to fussy cut this DSP design.
I love Merry Merlot at different strengths – it’s a gorgeous shade of pink.
The gold hoop is made using the largest and second largest of the Layering Circle dies. Die cut the largest circle first and then it’s easy to line up the second largest circle die.
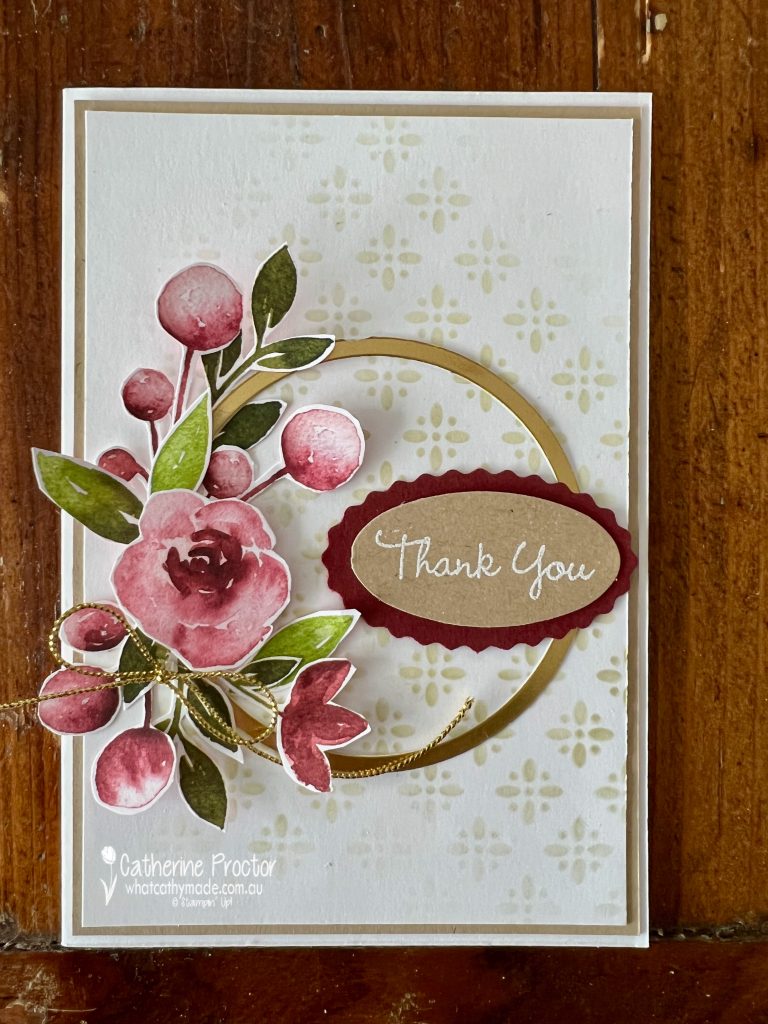
I’ve decided to try a new thing with my cards going forward. Wherever possible, I’m going to make a couple of different sentiments for each card and I’m not going to adhere the sentiment until I know what I am using the card for.
Here’s my alternate sentiment for this card.
This sentiment is stamped in Versamark Ink on Crumb Cake card stock, then heat embossed with white Emboss powder before it was die cut with a Stitched Rectangle die.
Now it’s time to hop on over to our next participant, the lovely Di Furniss – I can’t wait to see what Di has made this week!
If at any time you find a broken link, you can find the complete list of all participants below.