Welcome to week seven of the 2019 Heart of Christmas blog hop!
This week has been hectic at our place with my latest book going to print (code for lots of last minute corrections and working all weekend!), training a new writer at my work and then my youngest son graduating school…did I really just type that sentence????
So what does all of this have to do with my card tonight? Well, it means I only had a very brief window to design, make, photograph and watermark my card before blogging about it. So this week I reached for the tools that make card making super easy and super fast: punches and embossing folders!
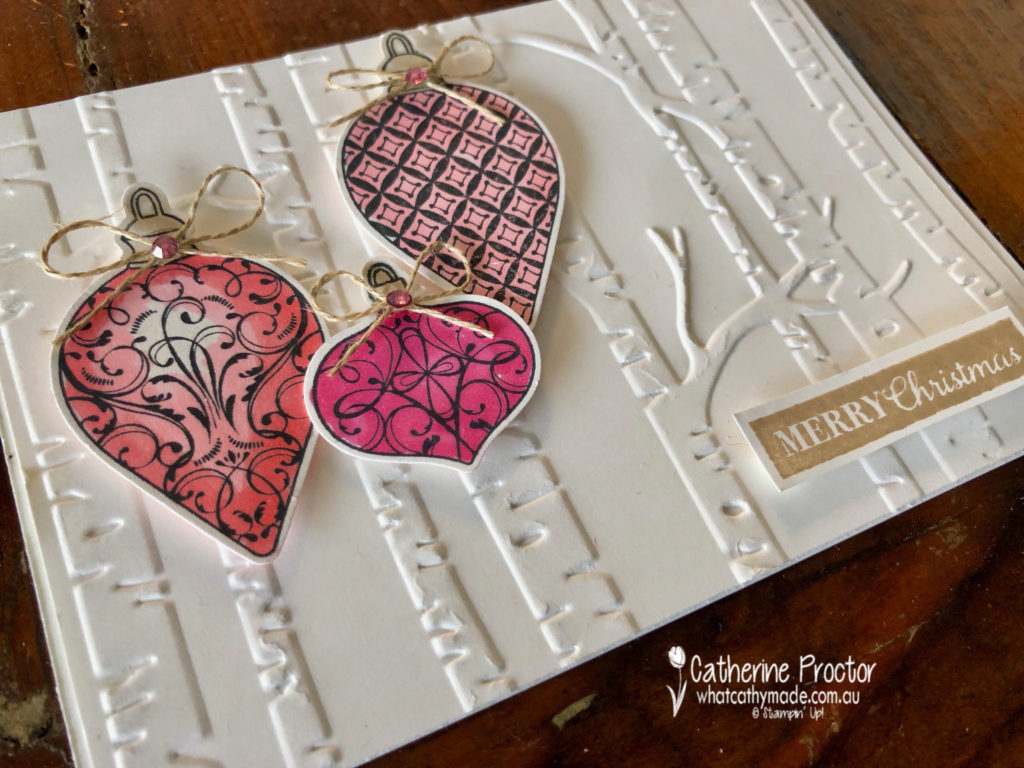
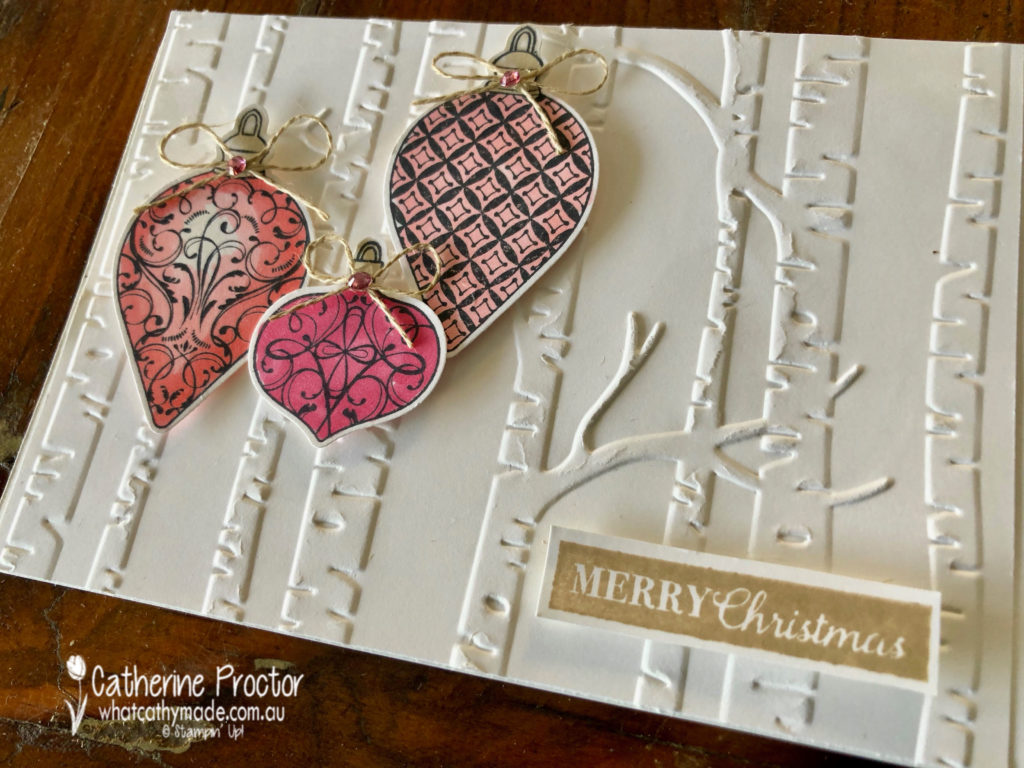
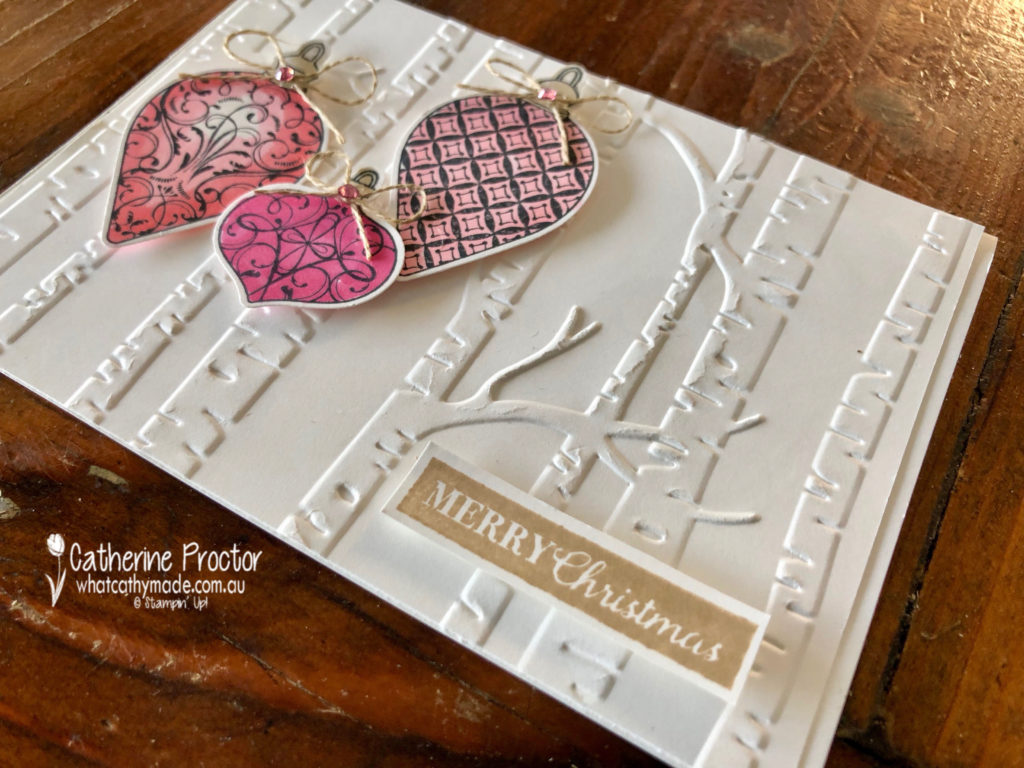
The three baubles were punched out using the Gleaming Ornaments punches after I stamped them in Momento Ink using stamps from the co-ordinating Christmas Gleaming stamp set.
Can you guess what coloured Stampin’ Up! blends I used to colour my ornaments? I stepped right outside of my comfort zone and went with an assortment of pinks: Flirty flamingo (dark and light) and the light Lovely Lipstick blender pen.
The “Merry Christmas” sentiment was stamped in Crumb Cake using a stamp from the same stamp set: Christmas Gleaming.
My card this week is finished off with a bows of linen thread and some Melon Mambo rhinestones from the Noble Peacock Rhinestones.
This card was so quick and easy to make and I really love how the woodland embossing folder on the base layer adds so much dimension and texture while also allowing me to make a very clean and simple card.
The lovely Claire Daly is hosting our Heart of Christmas blog hop this week – to see what the rest of the team have made this week you can visit Claire’s page here.
To purchase any of the products I used in this project you can shop with me here.
If you’d like me to post you your very own copy of the brand new 2019 Stampin Up! Holiday Catalogue, the 2019-20 Stampin Up! annual catalogue or to simply find out about more about Stampin’ Up! contact me.
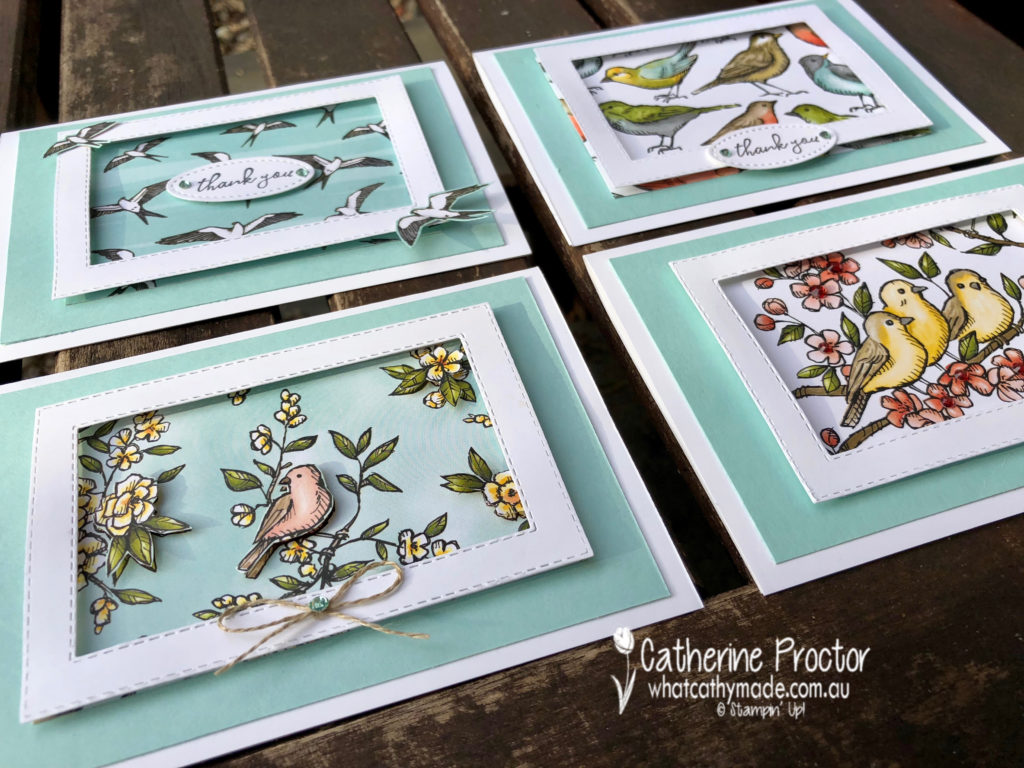
Tonight the Art with Heart team are sharing amazing projects featuring Stampin’ Up! Designer Series Paper, most of which is in the current promotions where you can buy 3 packs of Designer Series Paper and receive a pack for free! Only available until the 30th of September.
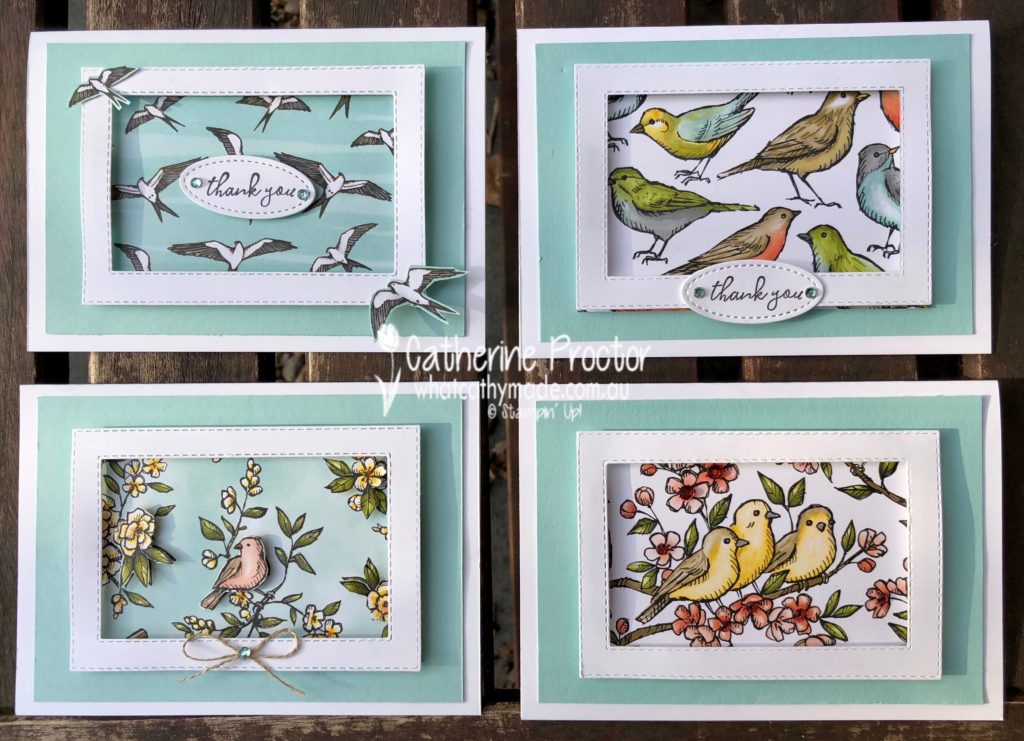
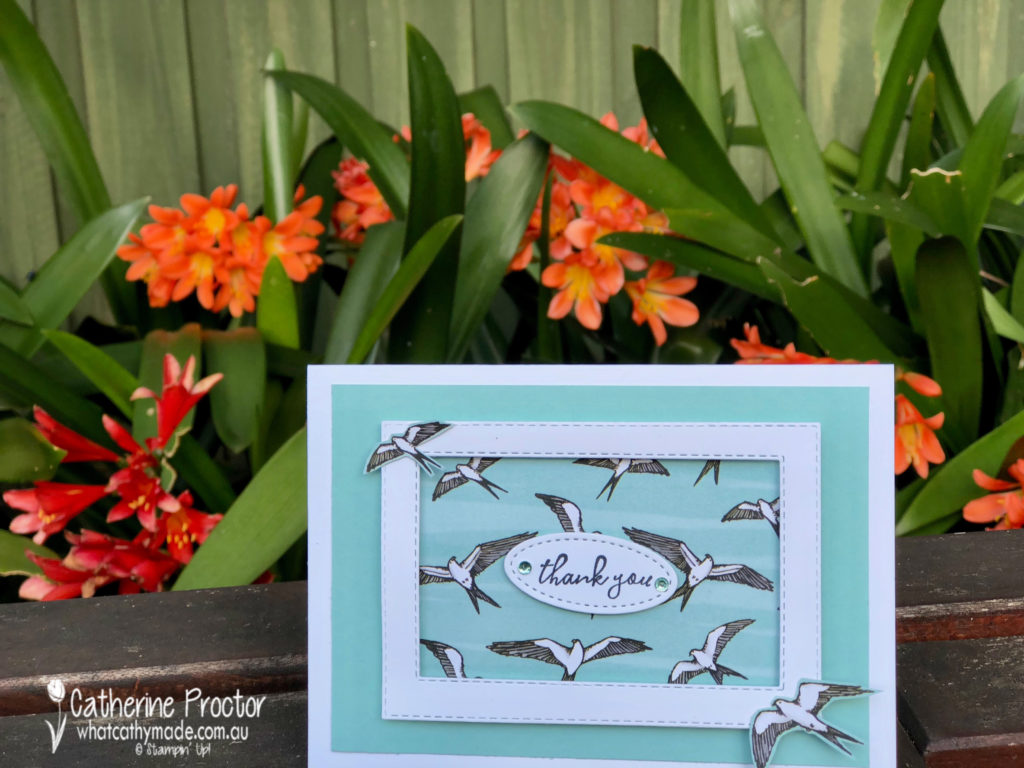
Sometimes I’m reluctant to use Design Series Paper in my card making because it’s just so beautiful I don’t want to cover it. So my solution for my cards tonight is to frame the paper instead!
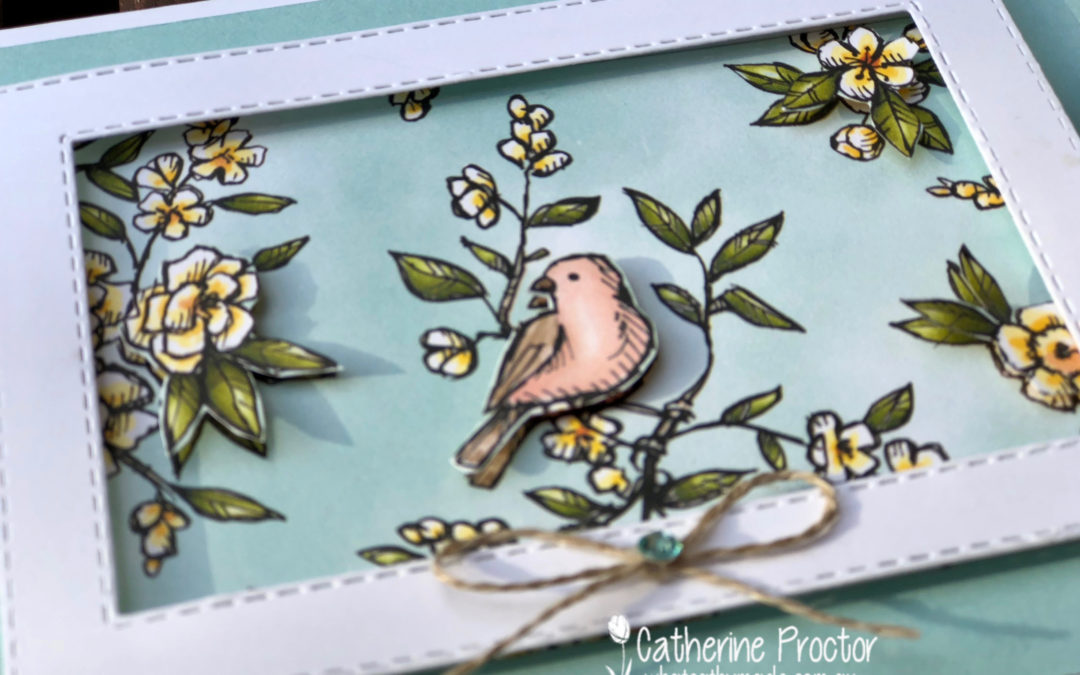
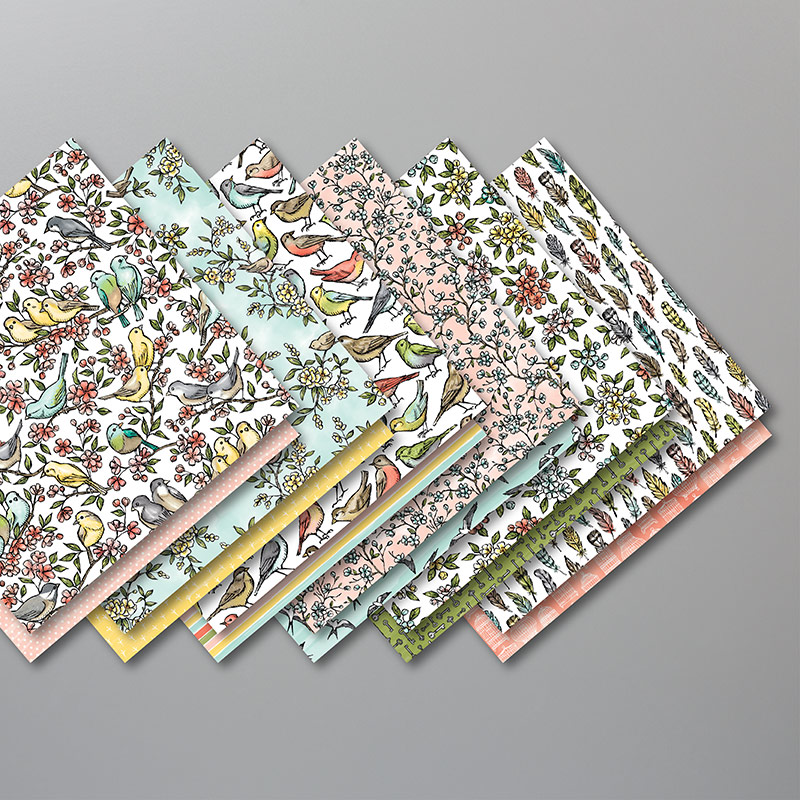
I’ve used my favourite Designer Series Paper from the Annual Catalogue: Bird Ballad DSP.
You can take a closer look at this stunning paper in this short video below.
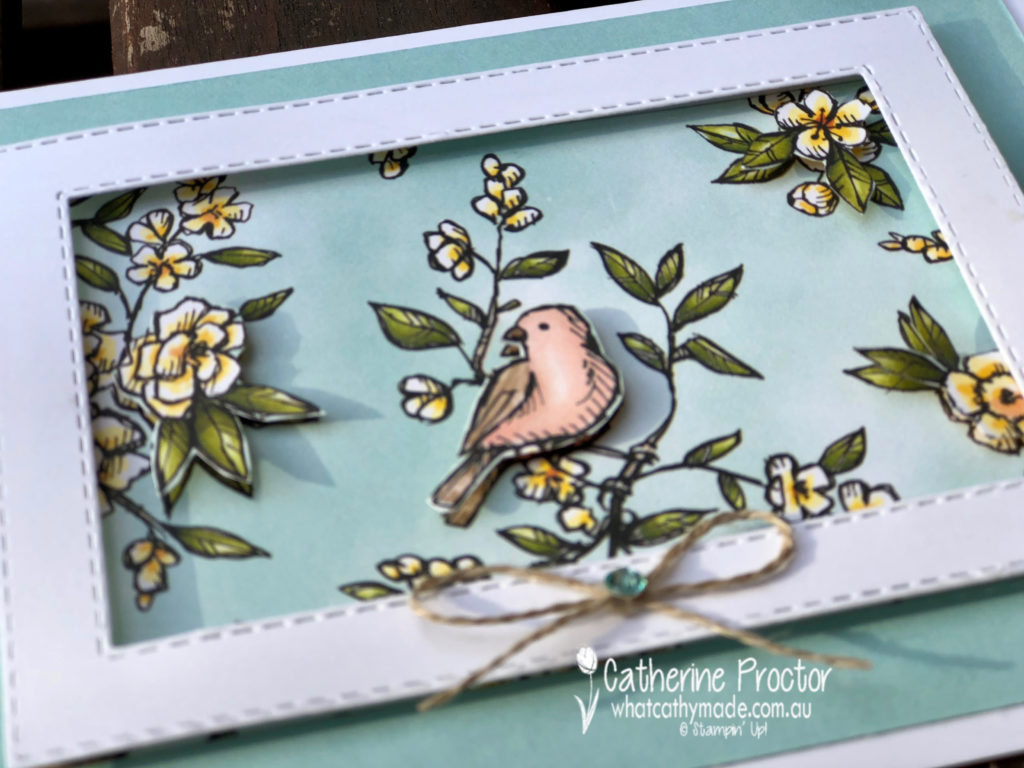
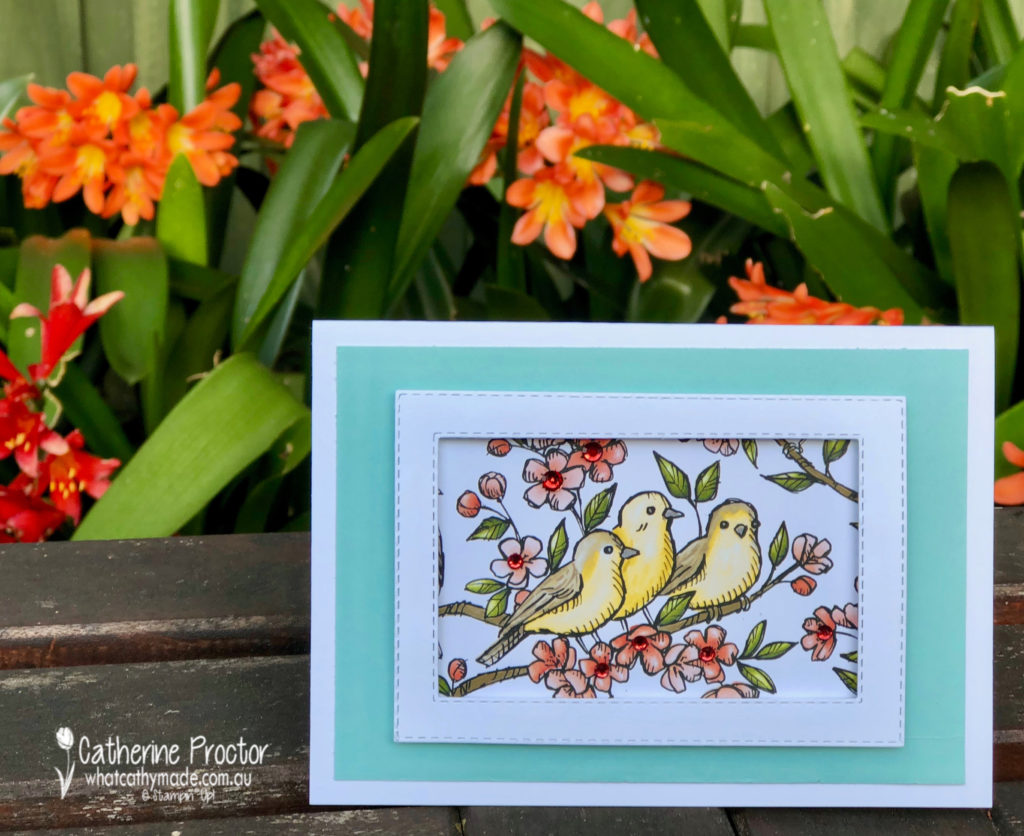
I made the same sized frame for all four cards, using two of the rectangle stitched dies. Each card features a different piece of DSP from this set, mounted onto a rectangle of Pool Party card stock. Foam adhesive strips made it easy to lift the frames above the image, giving the effect of a picture frame.
In card one I used mini dimensionals to pop up some fussy cut images from the DSP and finished the card off with a bow of linen thread and a pool party rhinestone from the the Holiday Rhinestones Basic Jewels.
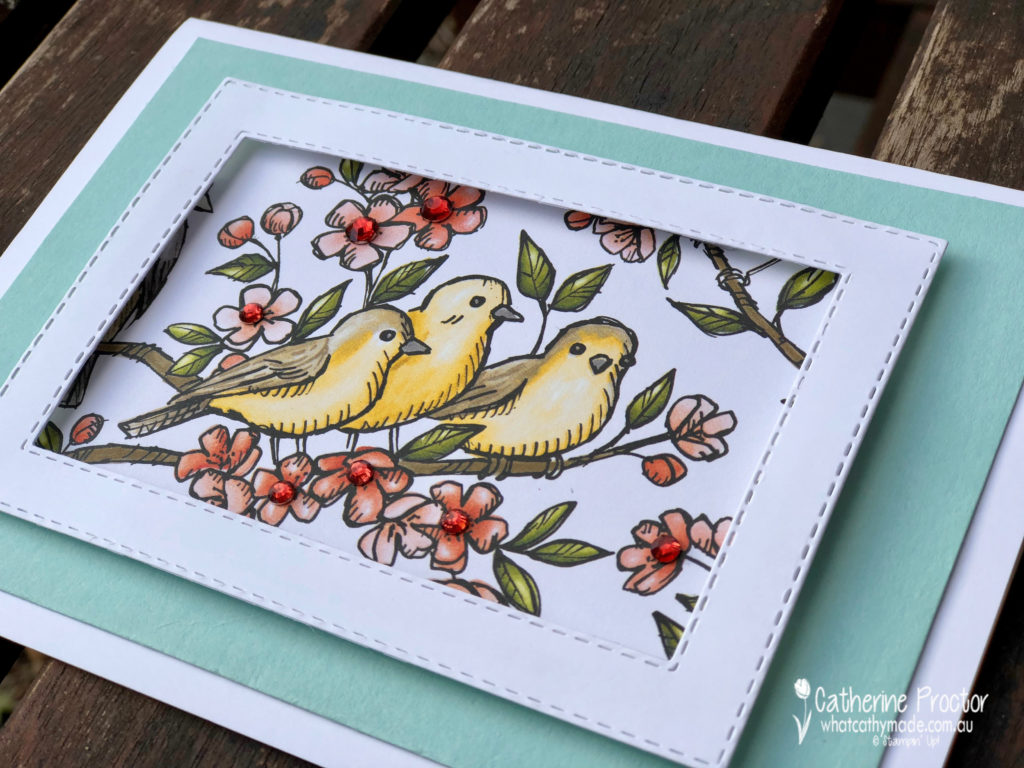
In card two I simply used more of the dimensionals from the Holiday Rhinestones Basic Jewels – this time in cherry cobbler – to add a bit of bling to the flowers.
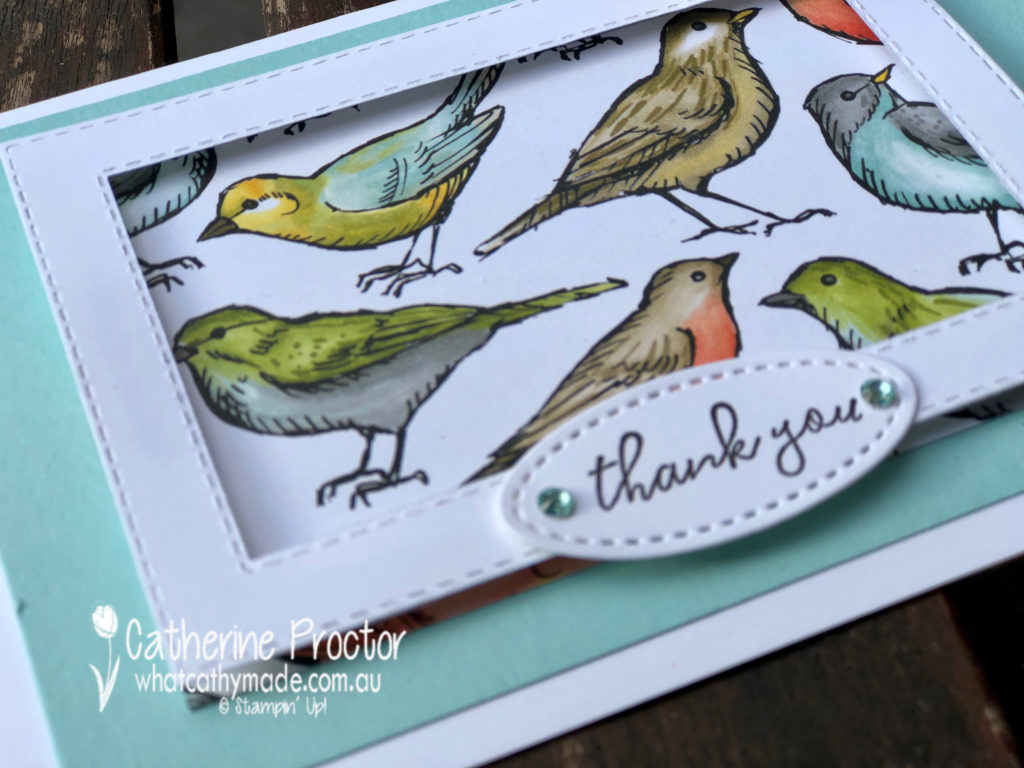
Cards three and four have the stamped “thank you” from the co-ordinating Free as a Bird stamp set, die cut out with the smallest oval in the stitched shapes framelits.
All these photos were taken outside in my garden today – it is spring here and my garden is full of birds and blooming with colour. Because the DSP for card four was more of a background pattern I fussy cut a couple of the birds and adhered them to the edges of the frame for some visual interest and dimension.
Here’s another shot of my stunning clivia!
Now it’s time to hop on over to our next participant, the very talented, Caroline Manwaring.
If you find a broken link or have come to this blog hop from a different entry point, you can view the participants below:
Welcome to week five of the 2019 Heart of Christmas blog hop!
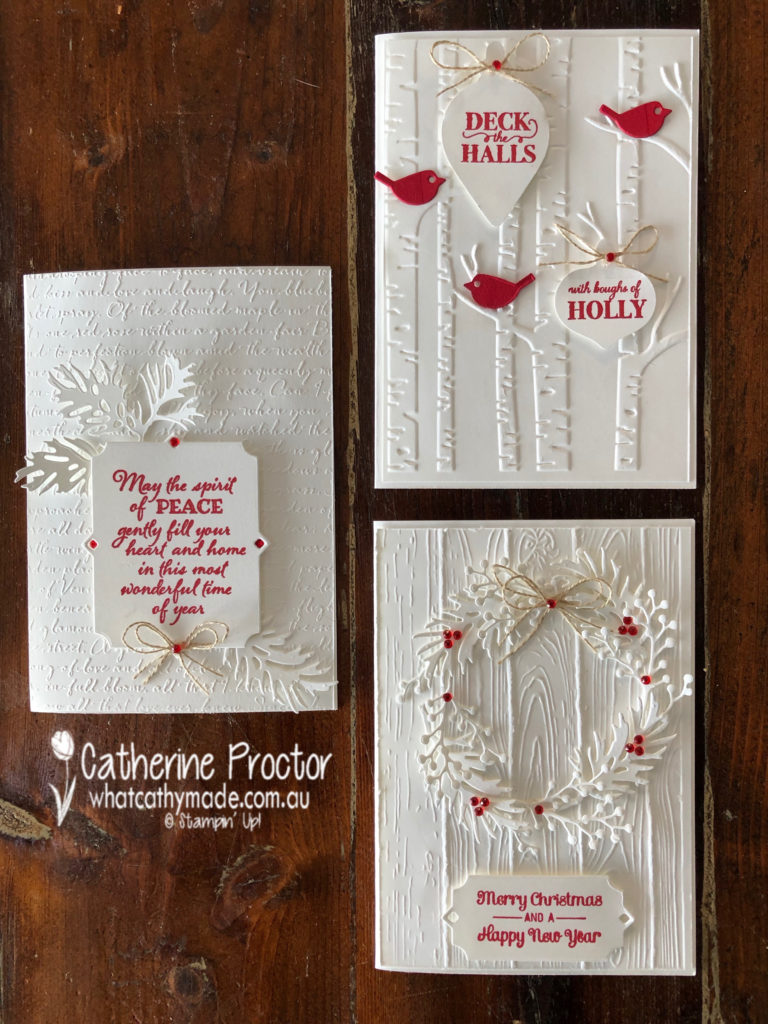
This week I’ve decided to challenge myself to use three different embossing folders to create my Christmas cards. I often to forget to use my folders because I’m so focussed on DSP, stamps and dies, which is really silly because embossing folders are so quick and easy to use.
With so many beautiful designs to chose from, can you guess which three I chose?
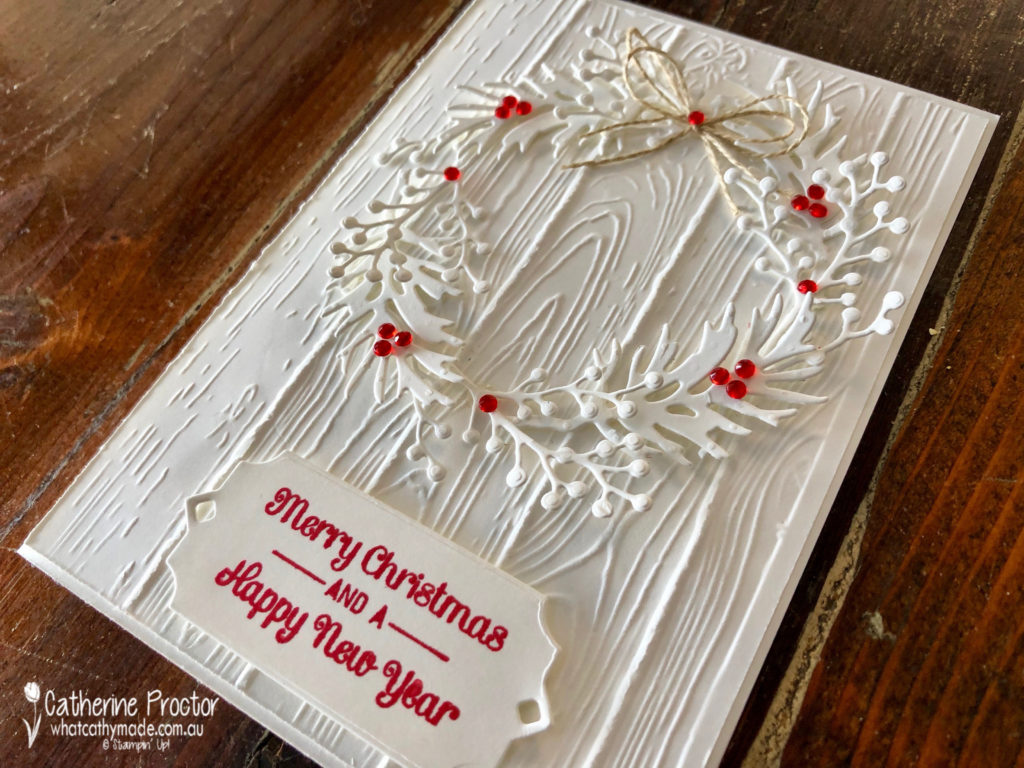
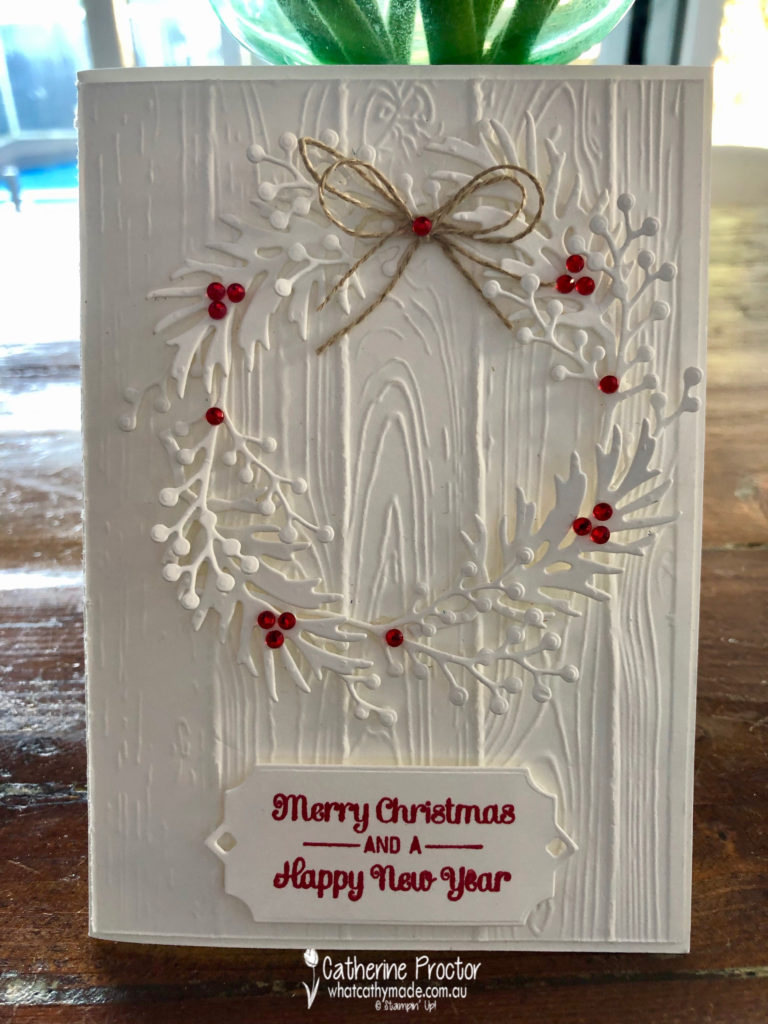
For my first card I used the Pinewood Planks embossing folder, which can be used either way up.
The wreath is made using a combination of dies from the Frosted Bouquet Dies and the Beautiful Boughs Dies.
How cute is that sentiment? It’s from the Itty Bitty Christmas Stamp set – I’m so glad I got this set. It has been die cut with the stunning frame from the Beautiful Boughs Dies.
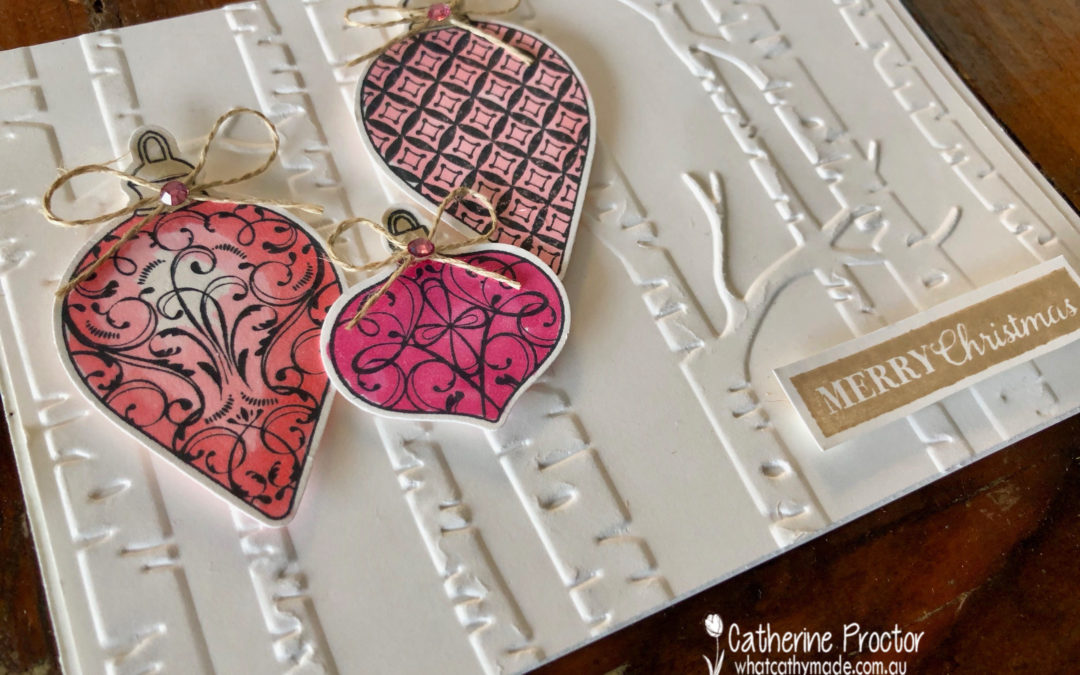
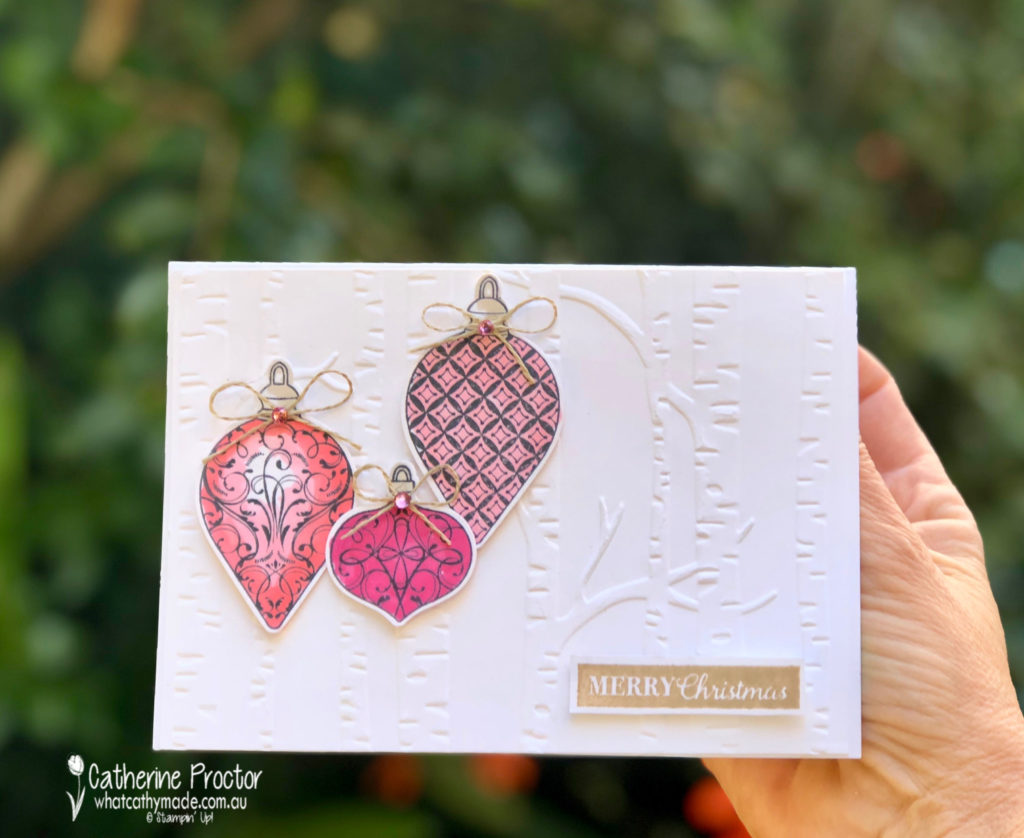
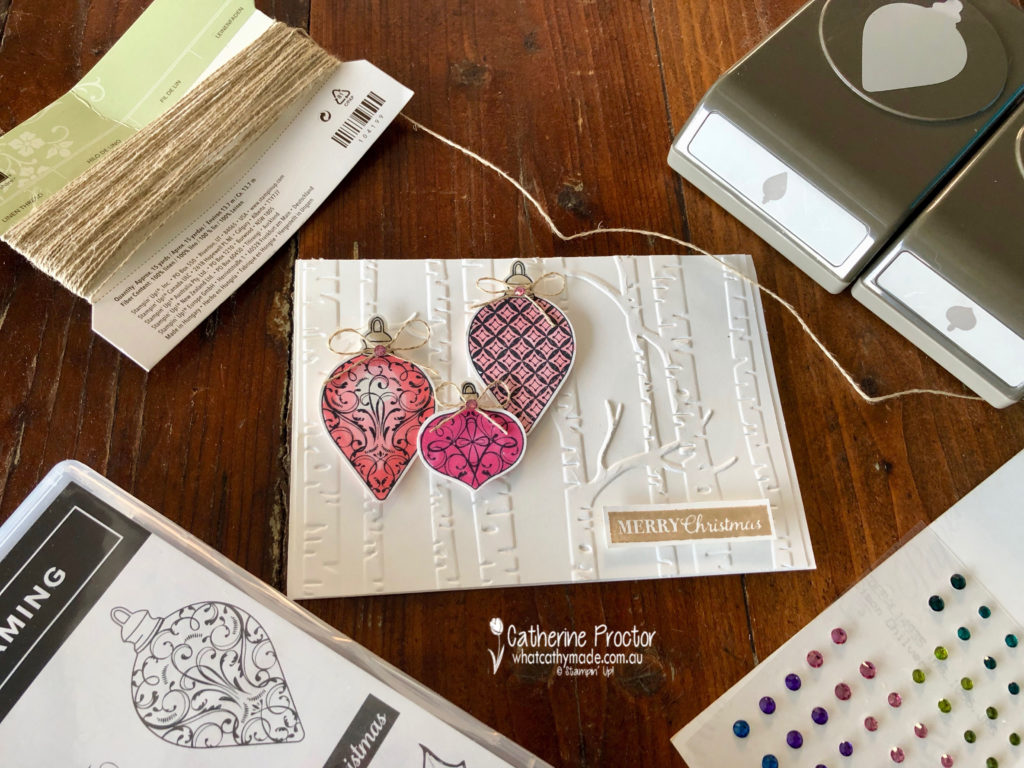
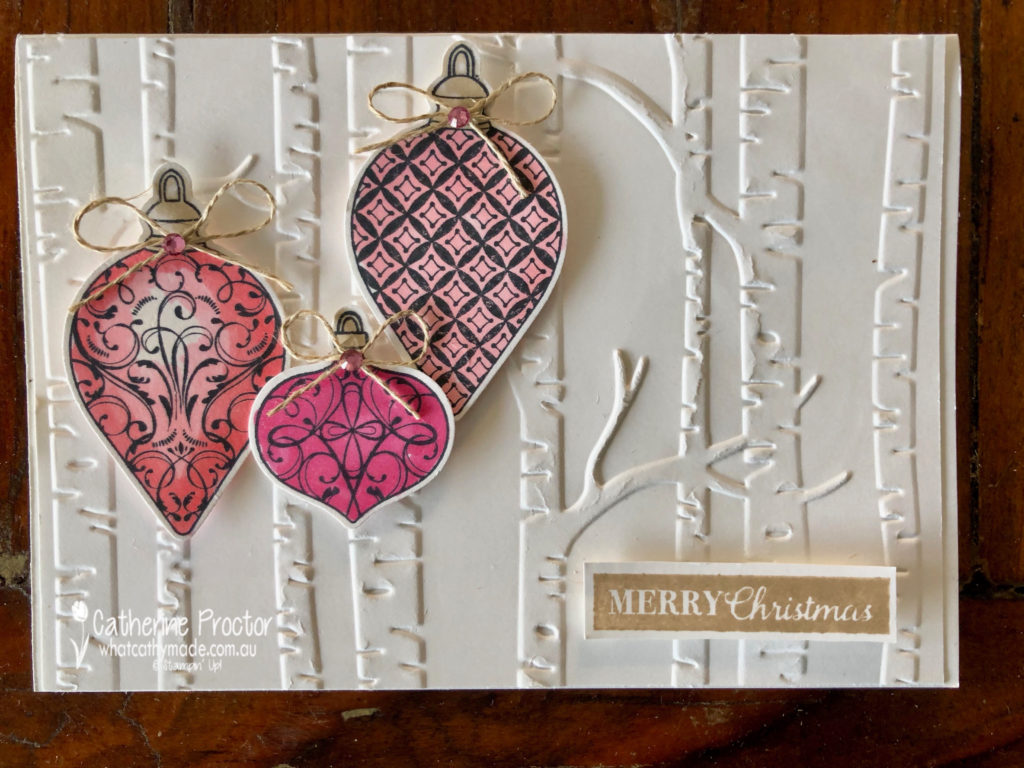
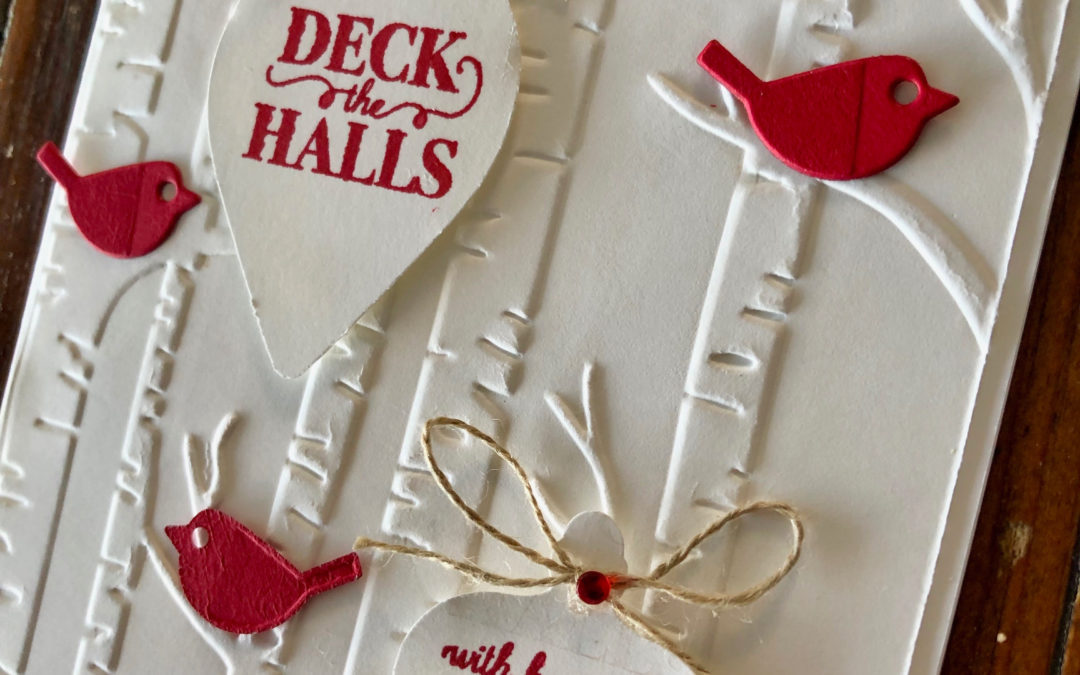
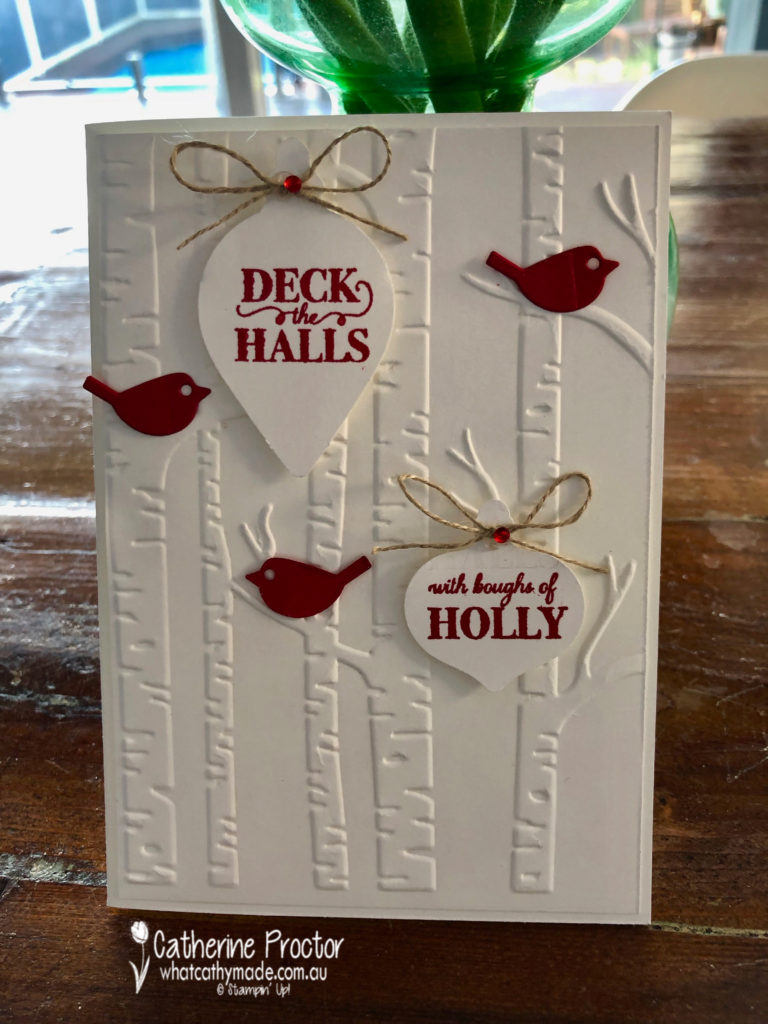
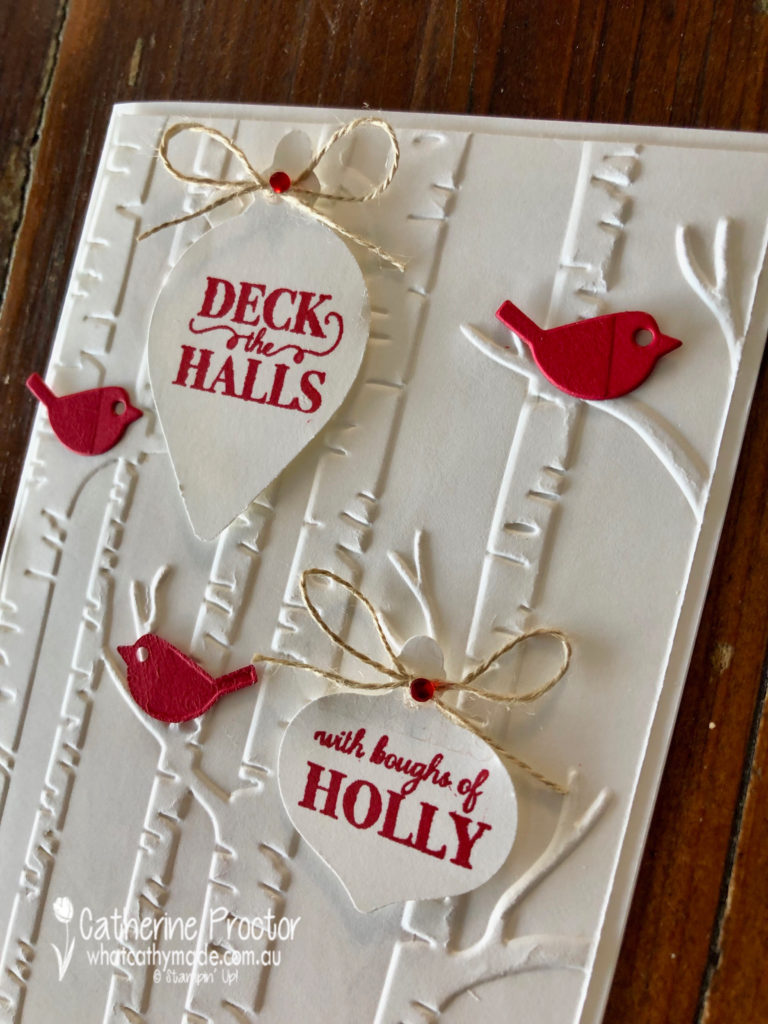
Card two continues the red and white theme, this time with the Woodland Embossing folder. Those branches were just crying out for some little birds – you might have overlooked these, they are in the Well Written die set.
The two baubles were punched out using the Gleaming Ornaments punches and then stamped with a stamp from the coordinatiing Christmas Gleaming stamp set.
To split the sentiment in half you can cut your stamp with scissors or do what I did and mask one side of your stamp with washi tape before inking up. Before you stamp, remove the washi tape and then stamp your image. Mask up the other side of your stamp with washi tape, ink your stamp, remove the washi and then stamp the other bauble.
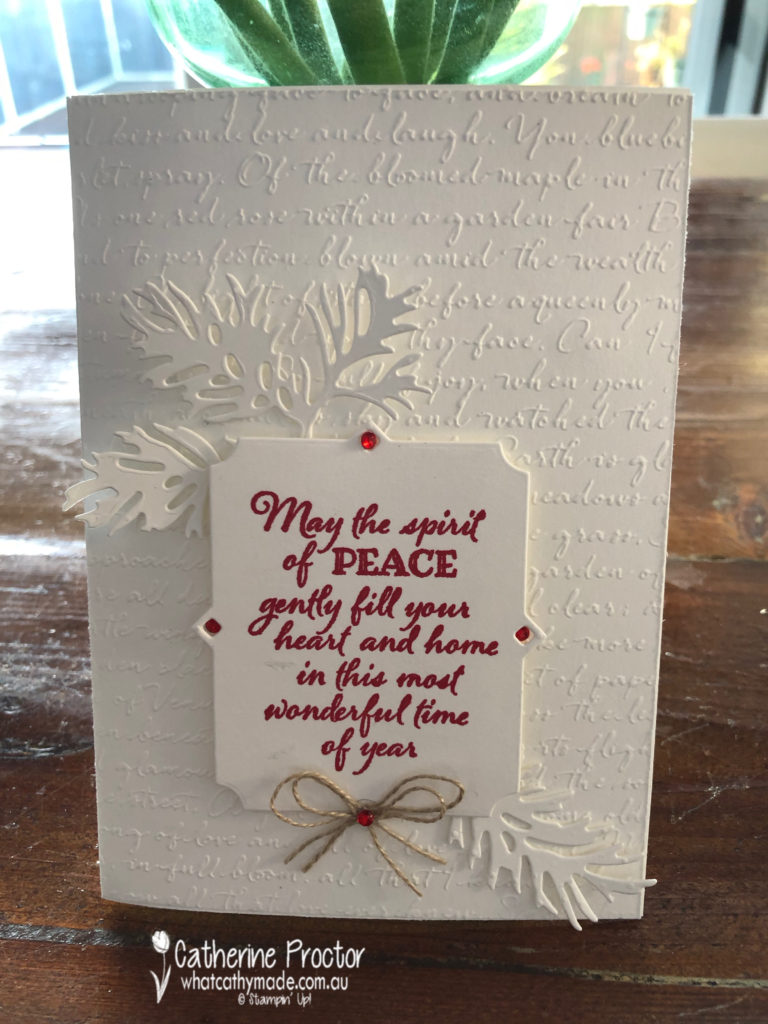
My final card uses the Scripty 3D embossing folder, topped with a sentiment from the Peaceful Boughs stamp set, die cut with the largest frame from the Beautiful Boughs Die set.
Here’s a close up of this gorgeous frame and the boughs I’ve die cut with the Peaceful Boughs Dies set. Can you see the lovely script effect this embossing folder gives?
All my cards this week are finished off with a bow (or two) of linen thread and some red rhinestones.
These cards were quick and easy to make and I really love how the embossing folders add so much dimension and texture while also allowing me to make very clean and simple cards.
I will definitely be reaching for my embossing folders more often!
The lovely Claire Daly is hosting our Heart of Christmas blog hop this week – to see what the rest of the team have made this week you can visit Claire’s page here.
To purchase any of the products I used in this project you can shop with me here.
If you’d like me to post you your very own copy of the brand new 2019 Stampin Up! Holiday Catalogue, the 2019-20 Stampin Up! annual catalogue or to simply find out about more about Stampin’ Up! contact me.
Welcome to week three of the 2019 Heart of Christmas blog hop! The brand new 2019 Stampin Up! Holiday Catalogue is live on the website as of today full of wonderful products to get your creative juices flowing.
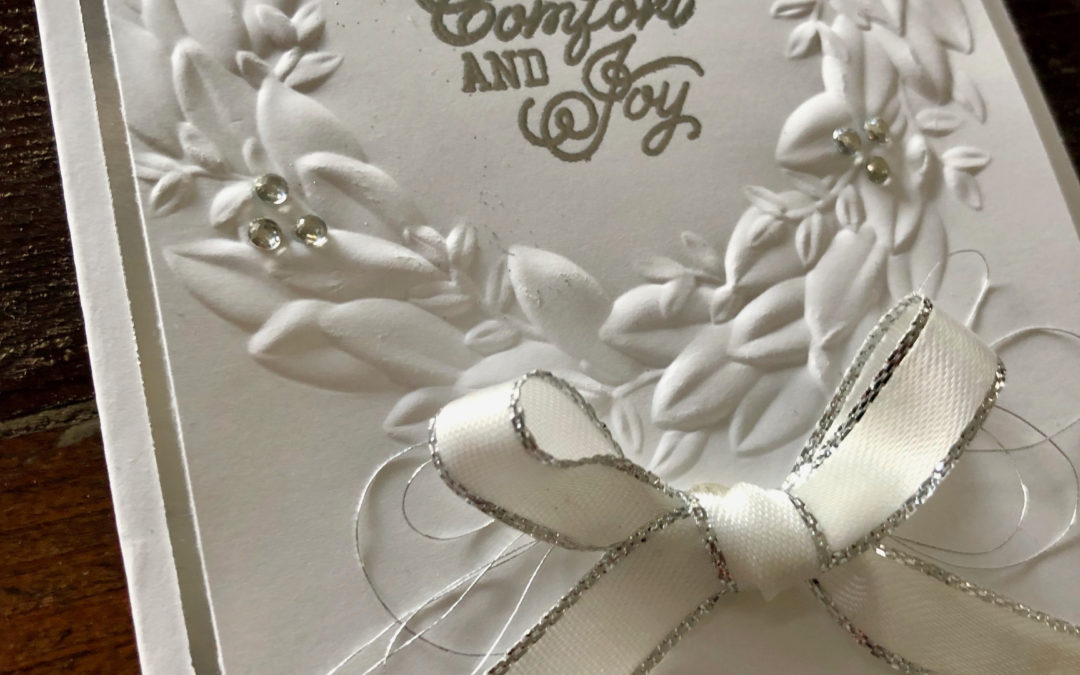
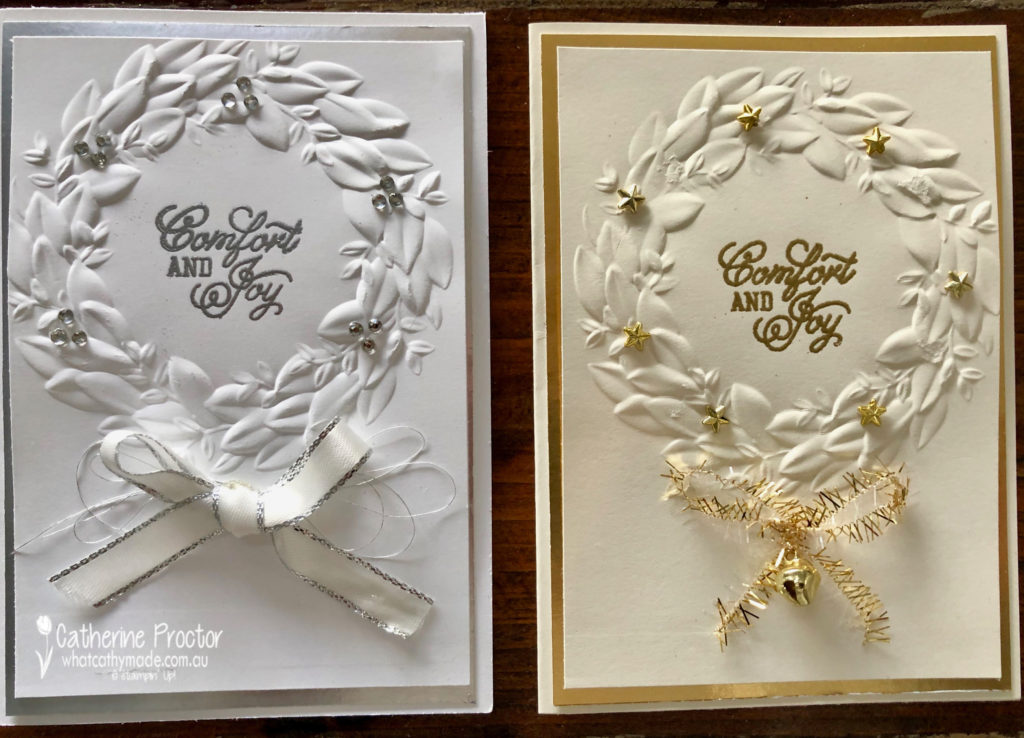
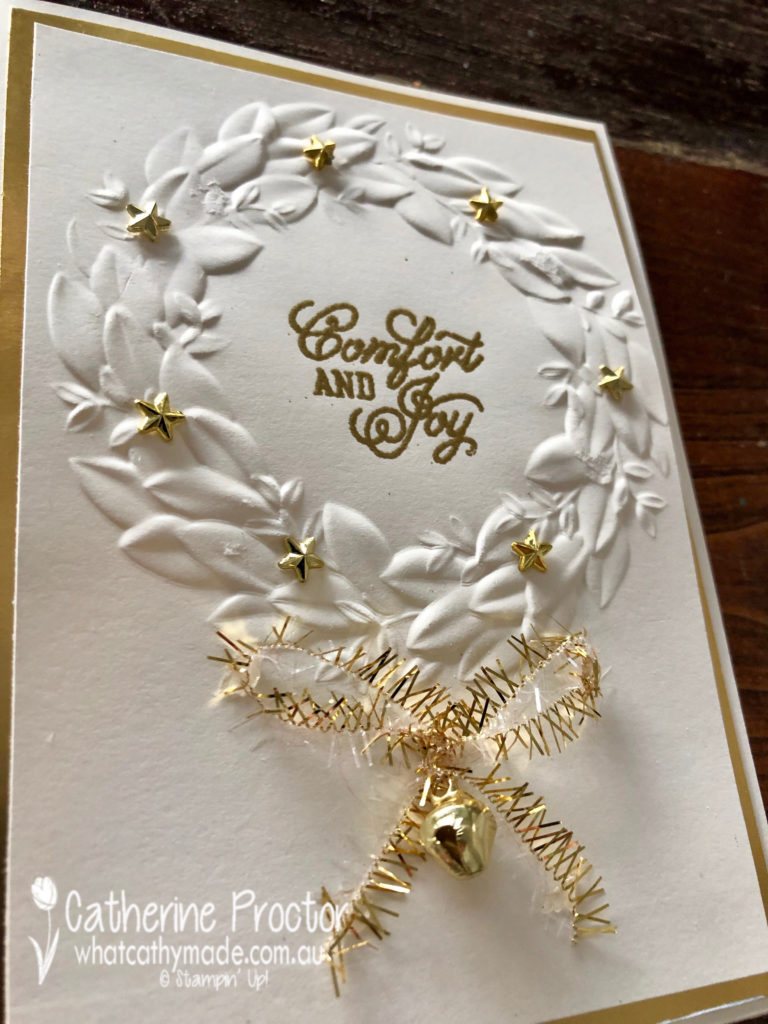
My cards tonight were inspired by a card created by a Canadian Stampin’ Up! demonstrator called Candace Chisholm, but I’ve tweaked the design to suit the materials I had on hand. Just like Candace’s cards, however, I have based my design on a simple and easy concept using the Seasonal Wreath embossing folder.
One card pairs Whisper White and Silver together, with the other card pairing Very Vanilla and gold. For both cards, the centre sentiment is stamped in Versamark and then heat embossed with either silver or gold embossing powder.
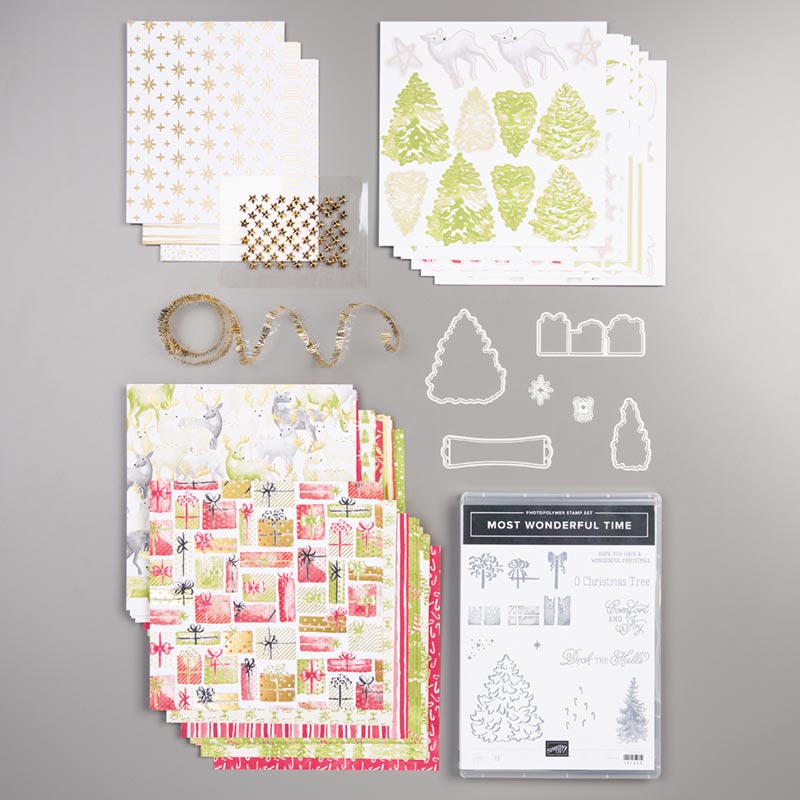
You might miss this stamp when you look through the Holiday Catalogue because it is part of a medley called Most Wonderful Time Medley. Here’s what you get in the Medley.
Did you notice the roll of gold tinsel and the little gold star elements? They decorate my Very Vanilla wreath card, along with a jingle bell embellishment (you get 24 jingle bells in Cherry Cobbler, gold, Shaded Spruce).
My silver card is embellished with Rhinestone Basic Jewels and a double bow in silver thread and Silver 3/8″ Metallic-Edge Ribbon.
The lovely Judy May is hosting our Heart of Christmas blog hop this week – to see what the rest of the team have made this week you can visit Judy’s page here.
I’ll be back tomorrow night with another Christmas blog hop. To purchase any of the products I used in this project you can shop with me here.
If you’d like me to post you your very own copy of the brand new 2019 Stampin Up! Holiday Catalogue, the 2019-20 Stampin Up! annual catalogue or to simply find out about more about Stampin’ Up! contact me.
Tonight the Art with Heart team are sharing creative Christmas projects, many featuring products from the upcoming Holiday Catalogue which starts on the 4th of September.
If you would like a copy of the 2019 – 2020 Annual catalogue or the new Holiday catalogue, contact any of the girls on the blog hop and we will get in touch with you.
I have to admit I have a thing about stamp sets that feature buildings. Ever since I was a little girl I’ve loved floorpans, dolls houses, miniature models…I probably should have studied architecture. So as soon as I saw the “From Our Home to Yours” stamp set I just knew I had to have it!
This set has 33 photopolymer stamps and it stamps the images very crisply and clearly. It can be used for many other occasions apart from Christmas and it works with so many different colours.
It’s good value for money, versatile, easy to use…oh, and did I mention just how adorable the little houses are?
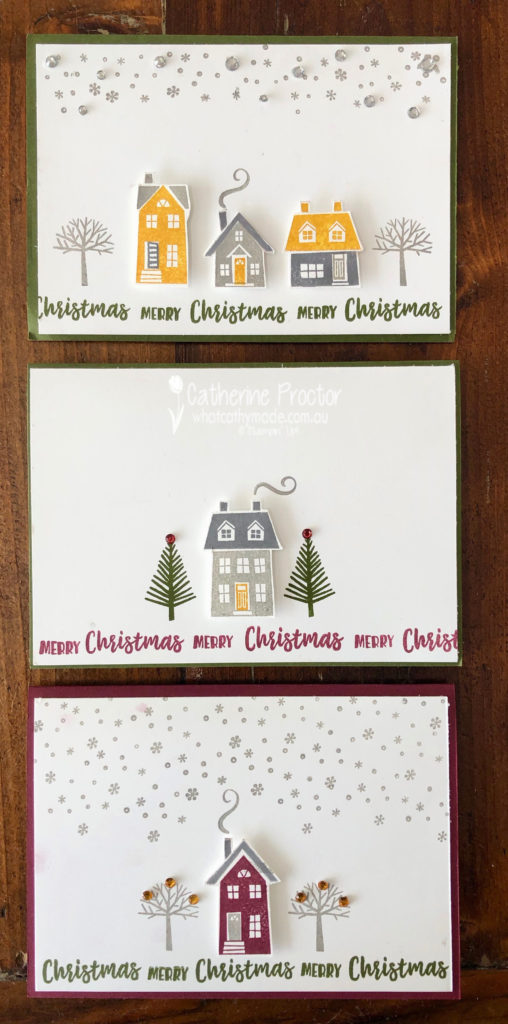
My colour scheme for my cards tonight kind of evolved as my cards did. I was only going to make one card but ended up making three!
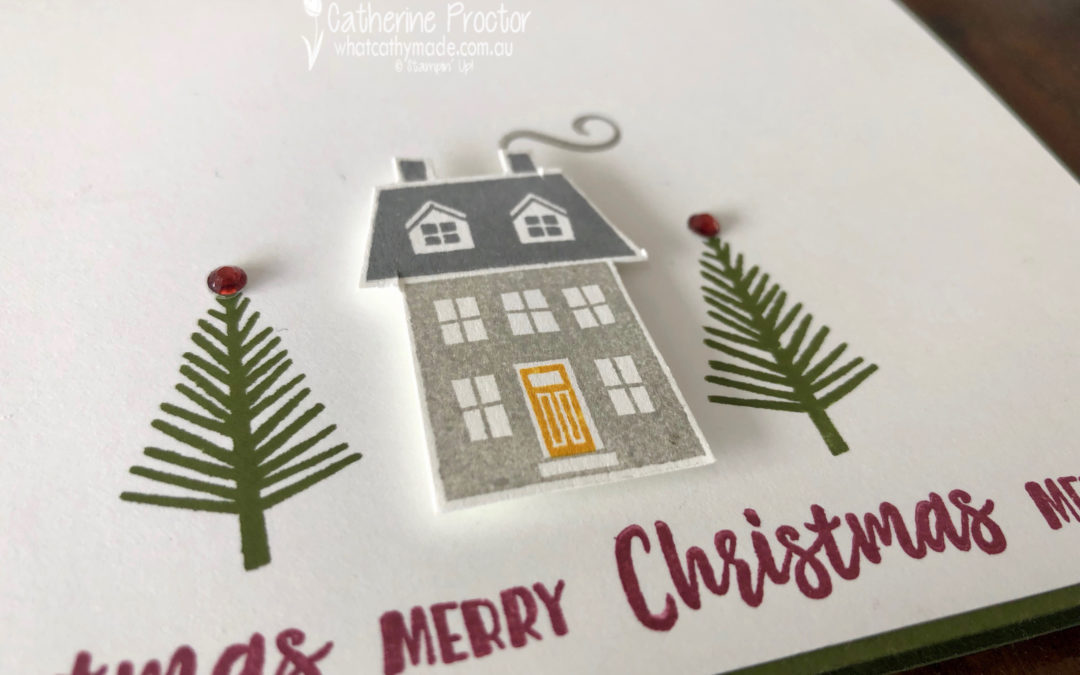
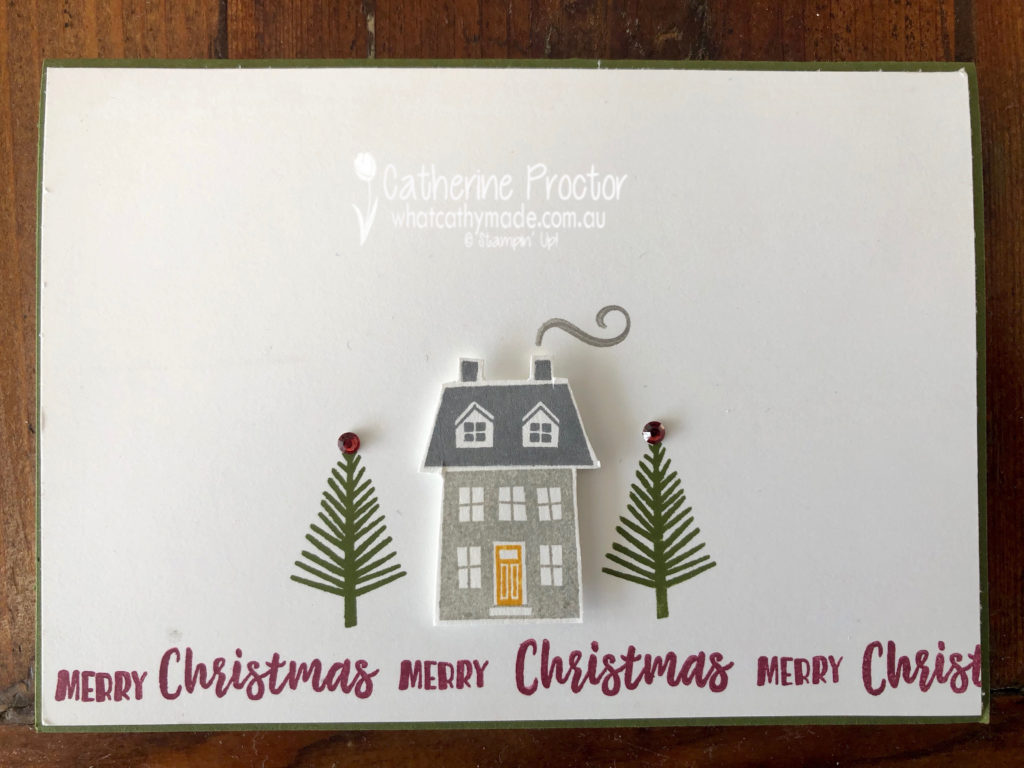
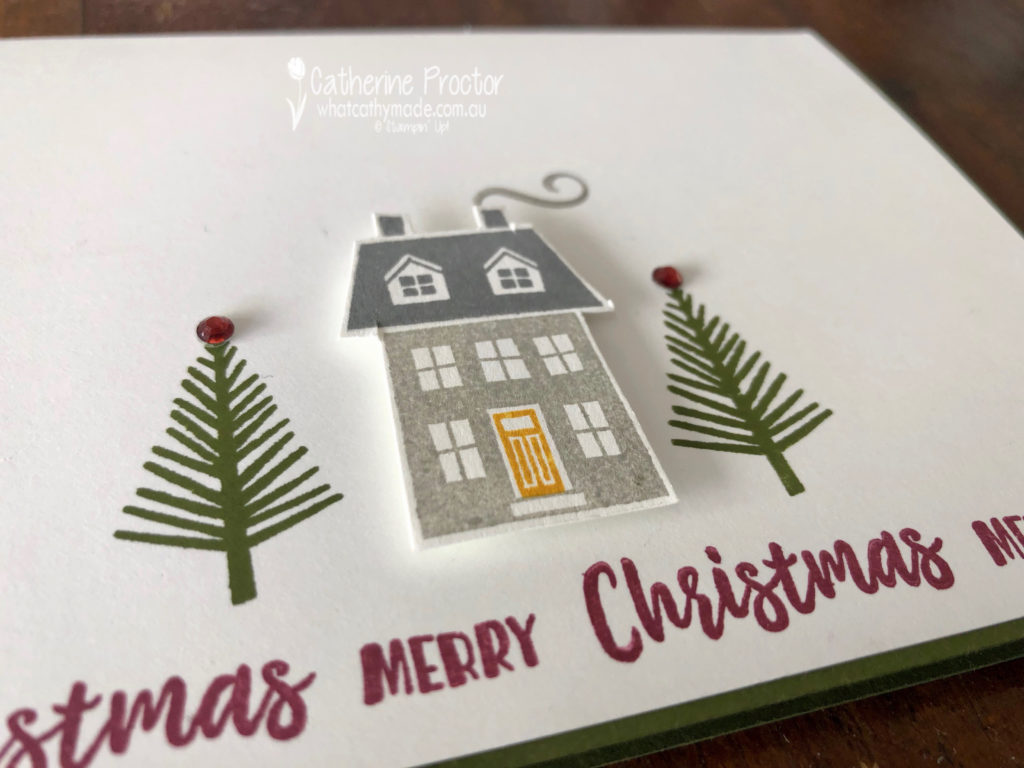
I began stamping on my first card with the colours of my own home: a soft light grey on the walls (Smoky Slate), with a dark grey/black roof (Basic Gray), white windows and a bright yellow (Crushed Curry) front door to greet my friends and family.
I fussy cut my little house out and attached it with dimensionals to my card before stamping the smoke coming out of the chimney and the little pine trees in Mossy Meadow.
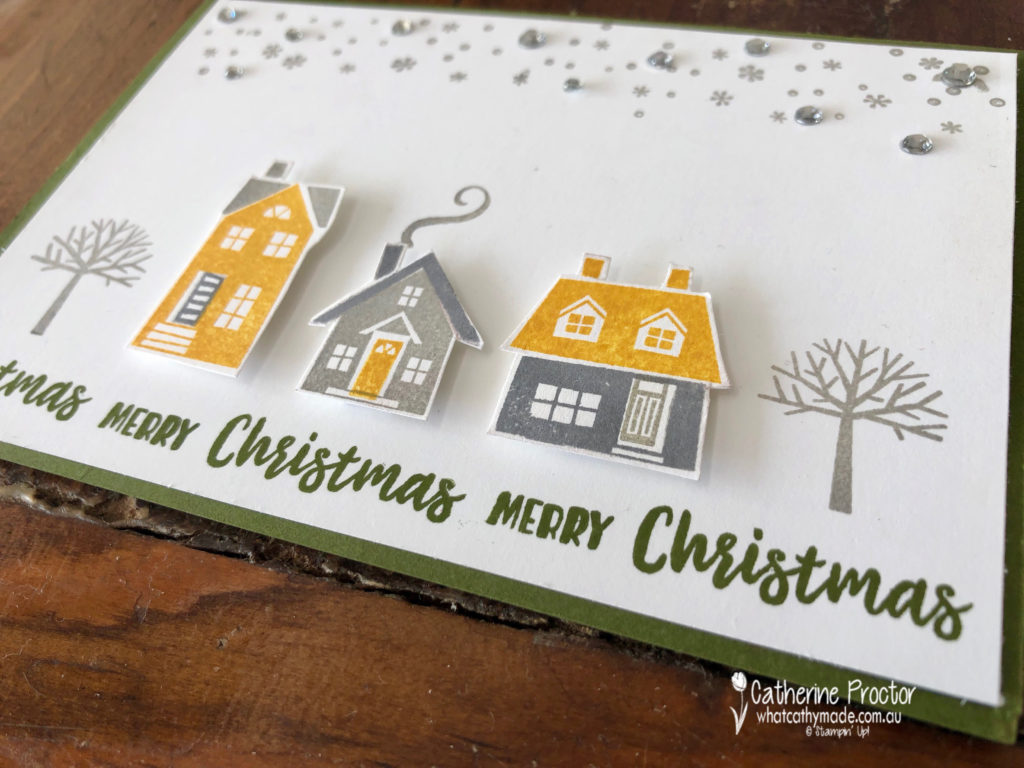
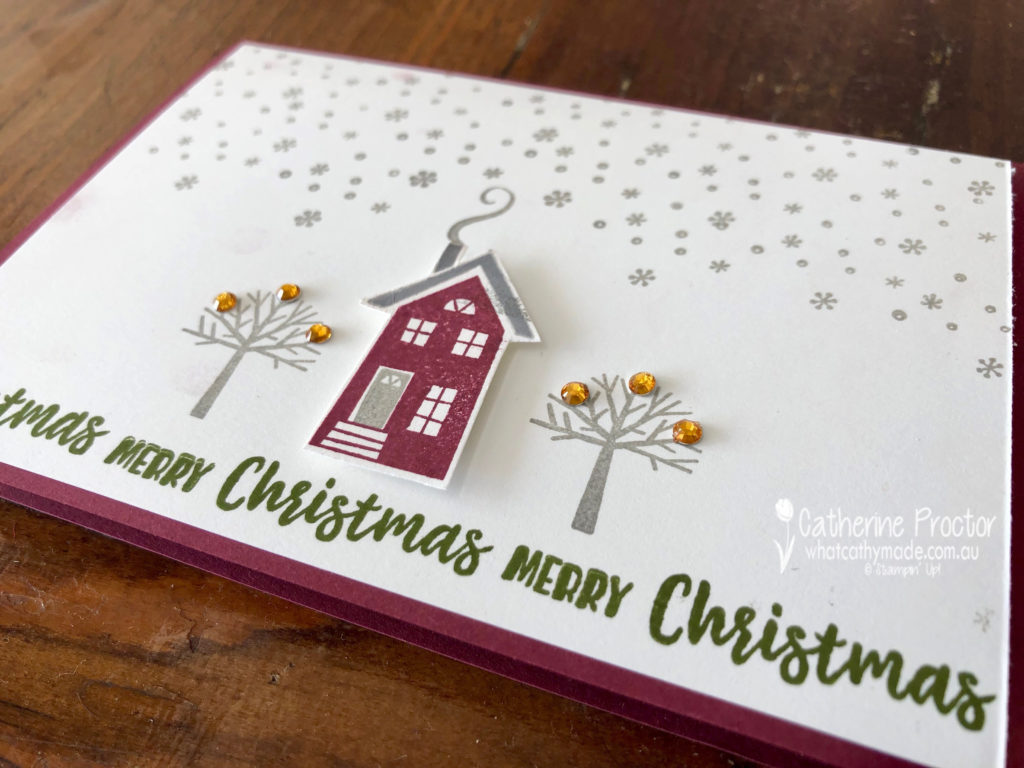
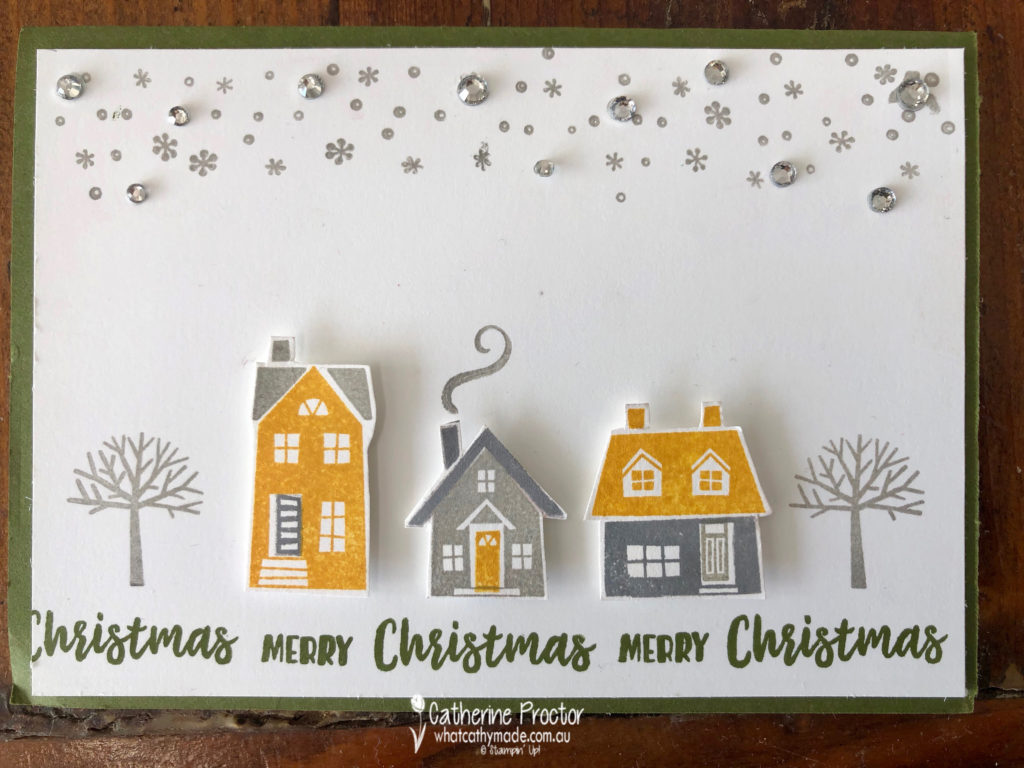
Cards two and three are variations on the same theme using different colours for the houses and different house stamps from the stamp set.
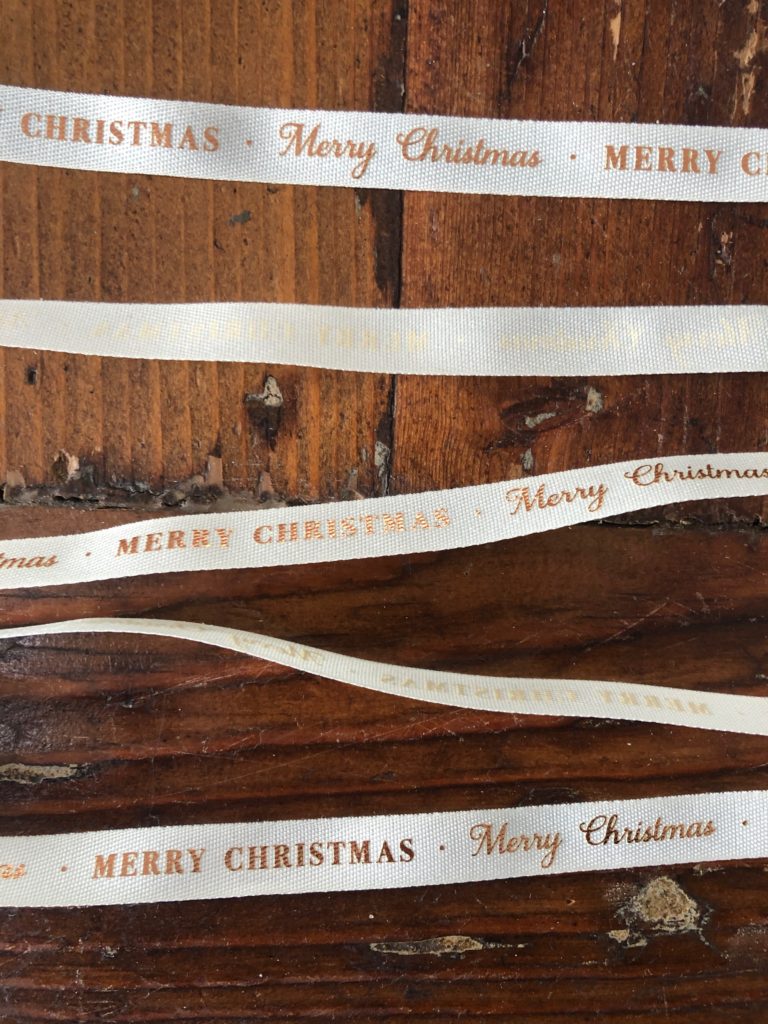
For all three cards I stamped two of the sentiments (Merry and Christmas) across the bottom of the card in either Merry Merlot or Mossy Meadow. I was inspired to do this after seeing the gorgeous new Classic Weave ribbon from the Holiday Catalogue. Here’s a sneak peek of it…
Holiday Rhinestones Basic Jewels in Cherry Cobbler top my pine trees in card one.
Rhinestone Basic Jewels (from the annual catalogue) add some sparkle to my snow in card two…and cover a mistake!!
Holiday Rhinestones Basic Jewels in Pumpkin Pie add the final touch of bling to my Smoky Slate trees in card three.
I nearly missed these rhinestones in the catalogue as they are hidden right at the back at the bottom of a page, but I’m so glad I saw them because they come in such beautiful colours.
Now it’s time to hop on over to our next participant, the very talented, Vicki Boucher. I can’t wait to see what Vicki’s created for us tonight.
If you find a broken link or have come to this blog hop from a different entry point, you can view the participants below:
Welcome to week two of the 2019 Heart of Christmas blog hop!
This time next week you will be able to view and order from the 2019 Holiday Catalogue but until then I can’t show the inside of the catalogue.
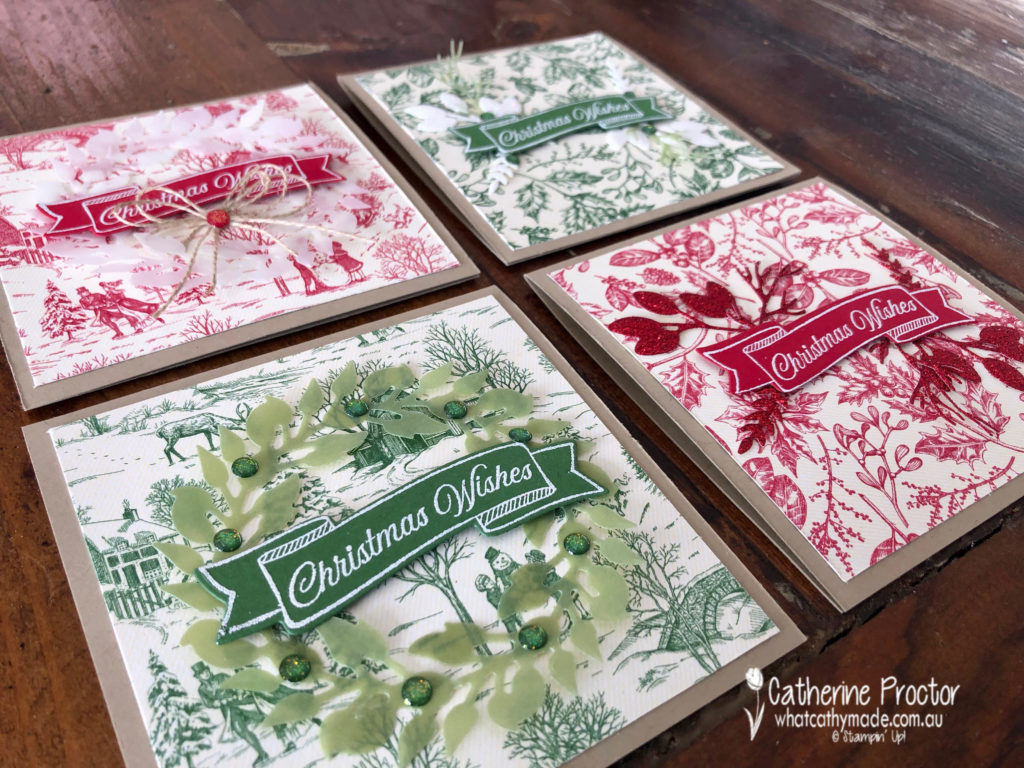
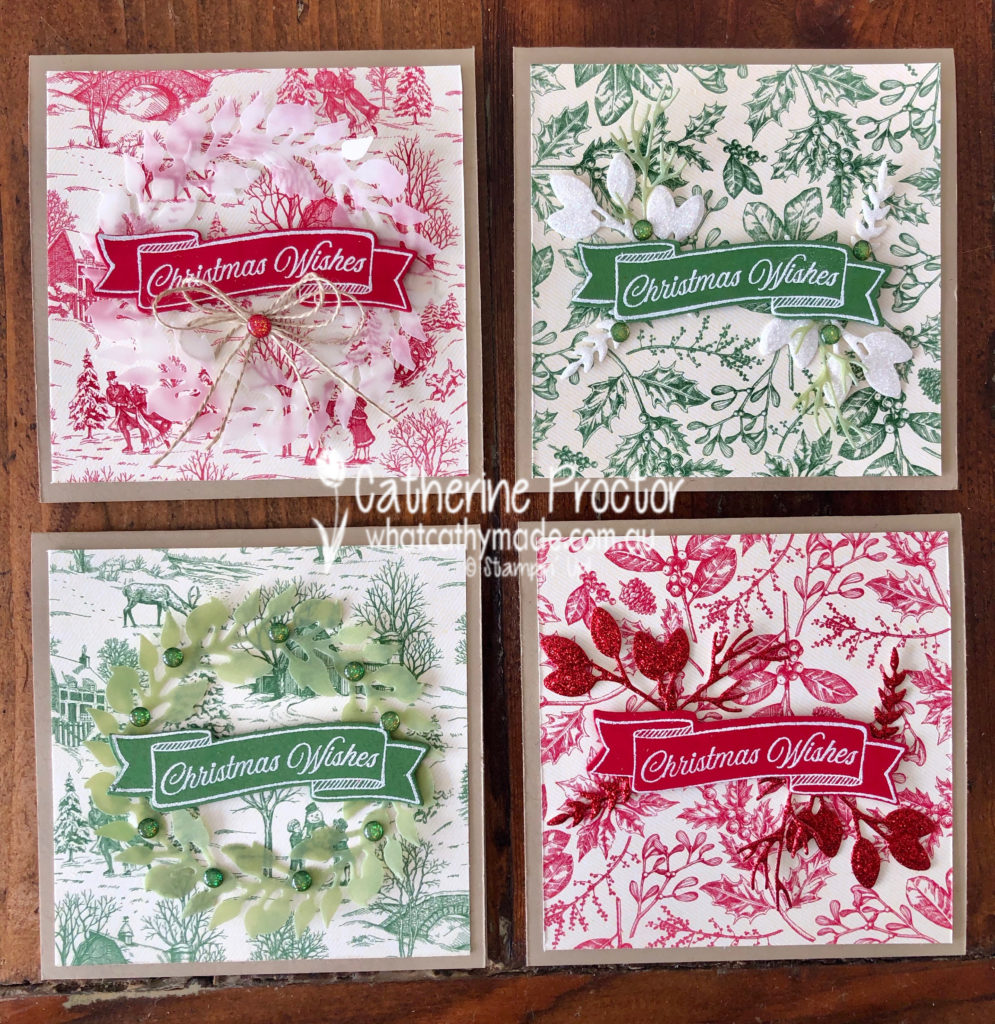
So to get you excited about what’s to come, tonight I’ve made four cards inspired by two samples in the brand new Holiday Catalogue.
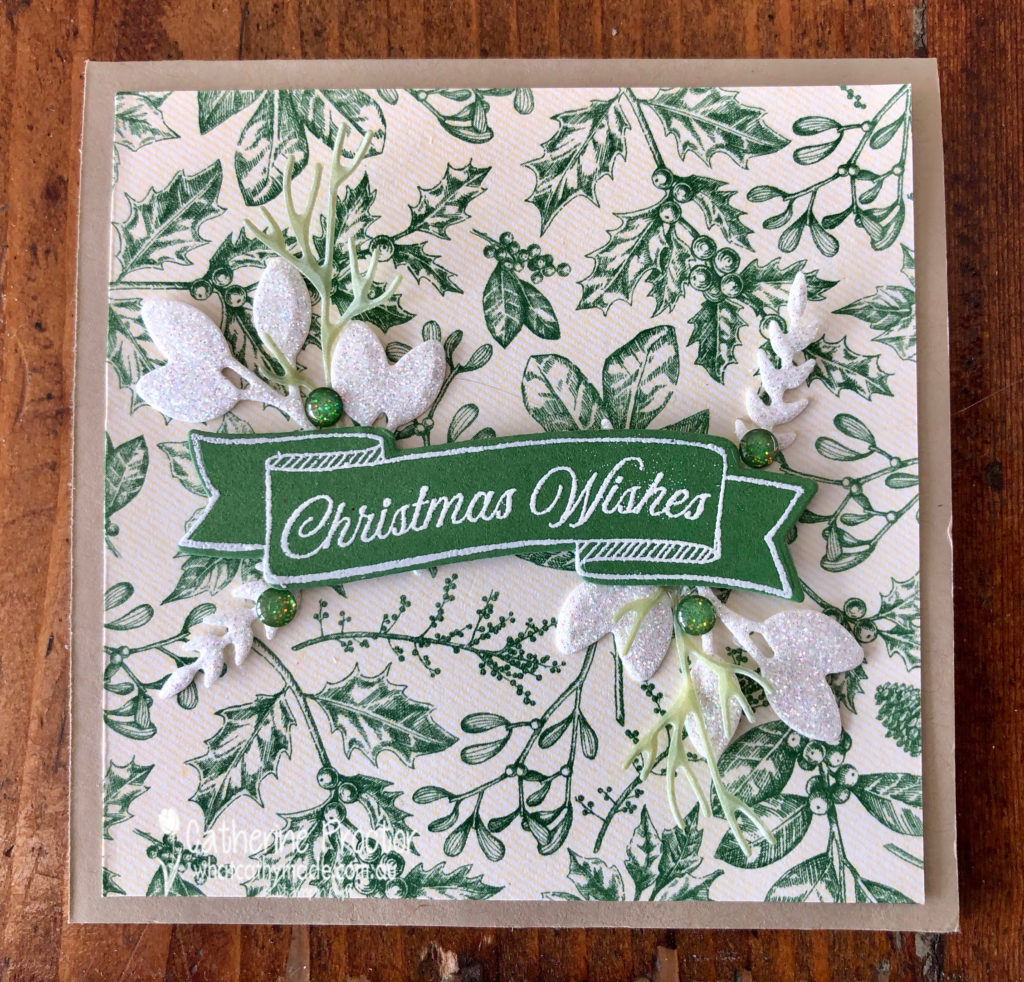
The Toile Tidings Suite is what I’d call a mega suite because it has two stamp sets, two sets of coordinating dies, stunning DSP, matching wrapping paper, two different ribbons and the cutest ever glitter enamel dots.
The colours in this suite are Very Vanilla, Real Red and Garden Green. This suite is classic and monochromatic…I just had to buy the lot.
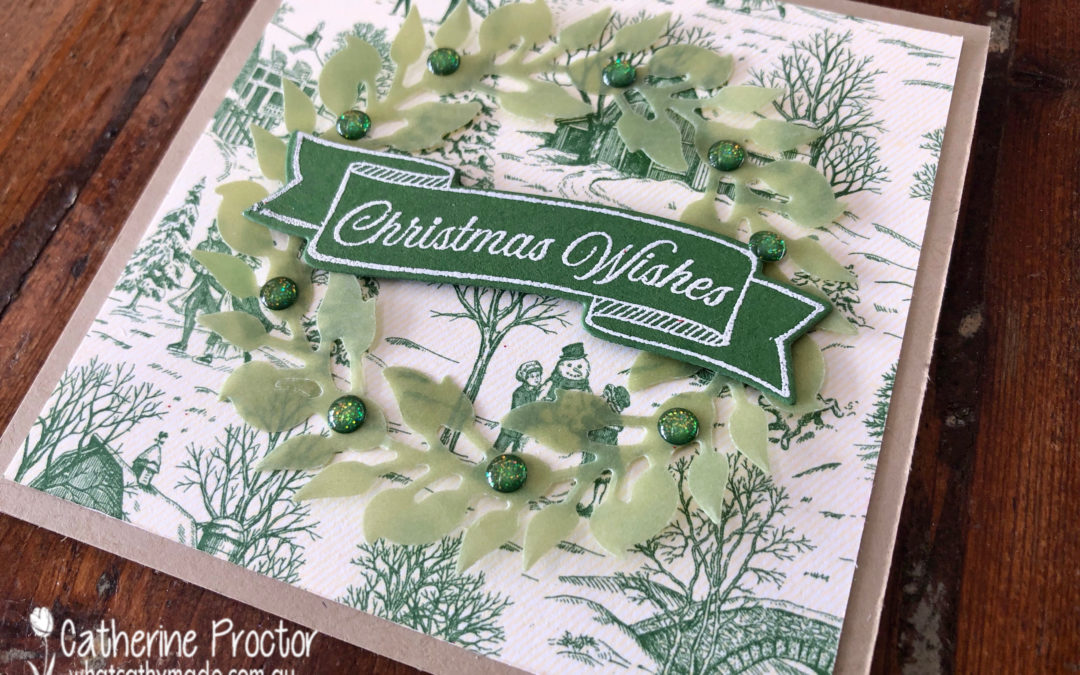
The card bases were super easy to make using a piece of Crumb Cake Card Stock (8×4 inches) folded in half. I stamped the Christmas Wishes sentiment from the Toile Christmas Stamp Set using Versamark ink onto Garden Green and Real Red card stock, heat embossed with white embossing powder and then die cut them out using the Christmas Cardinal dies.
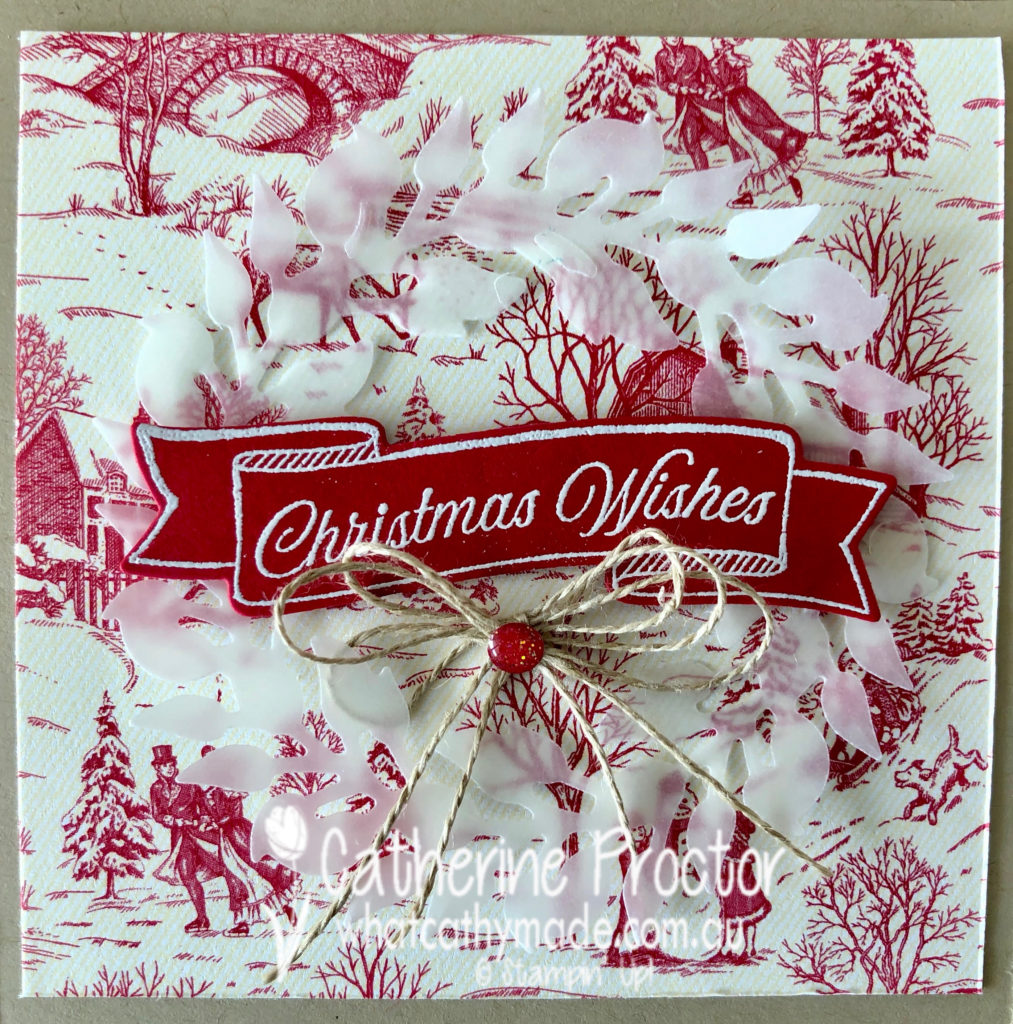
For my Red Christmas Wishes card I chose the DSP with the images of the skaters (so cute!) and used the All-around Wreath Dies to cut a clear vellum wreath to go behind the sentiment. The finishing touch is a triple bow of linen thread, topped with one of the Toile Tidings Glitter Enamel Dots.
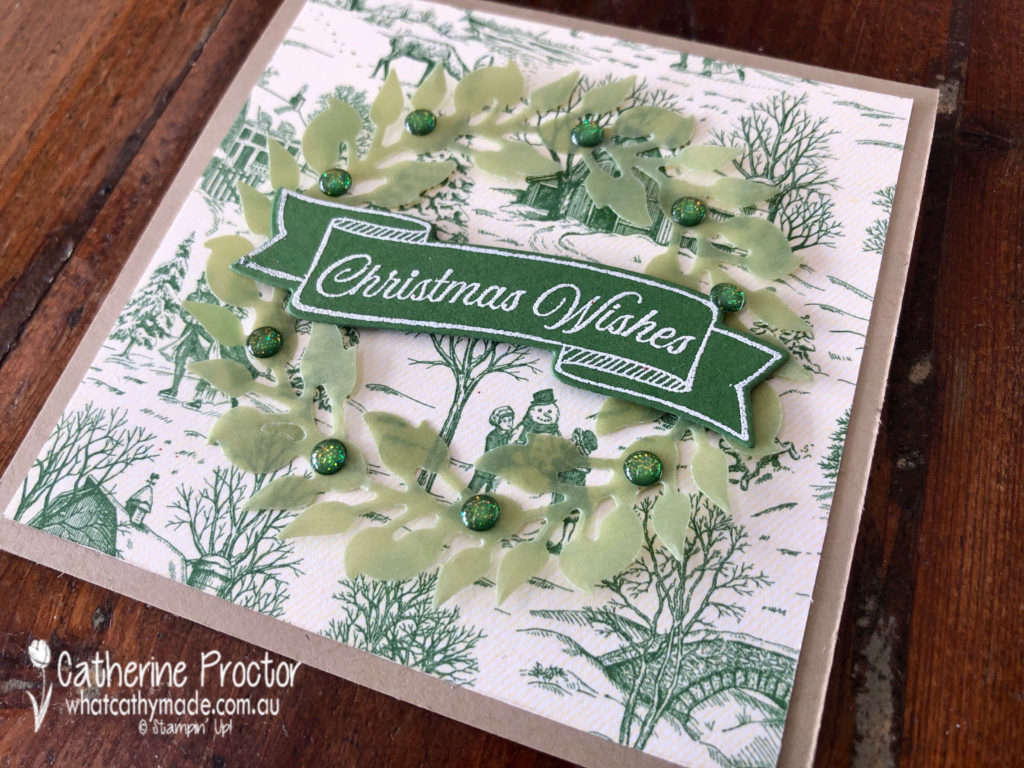
I used the same patterned DSP in Garden Green for my second card, this time die cutting my wreath from the Perennial Essence Old Olive vellum DSP in the Annual Catalogue. The Toile Tidings Glitter Enamel Dots in green are used to accent the wreath.
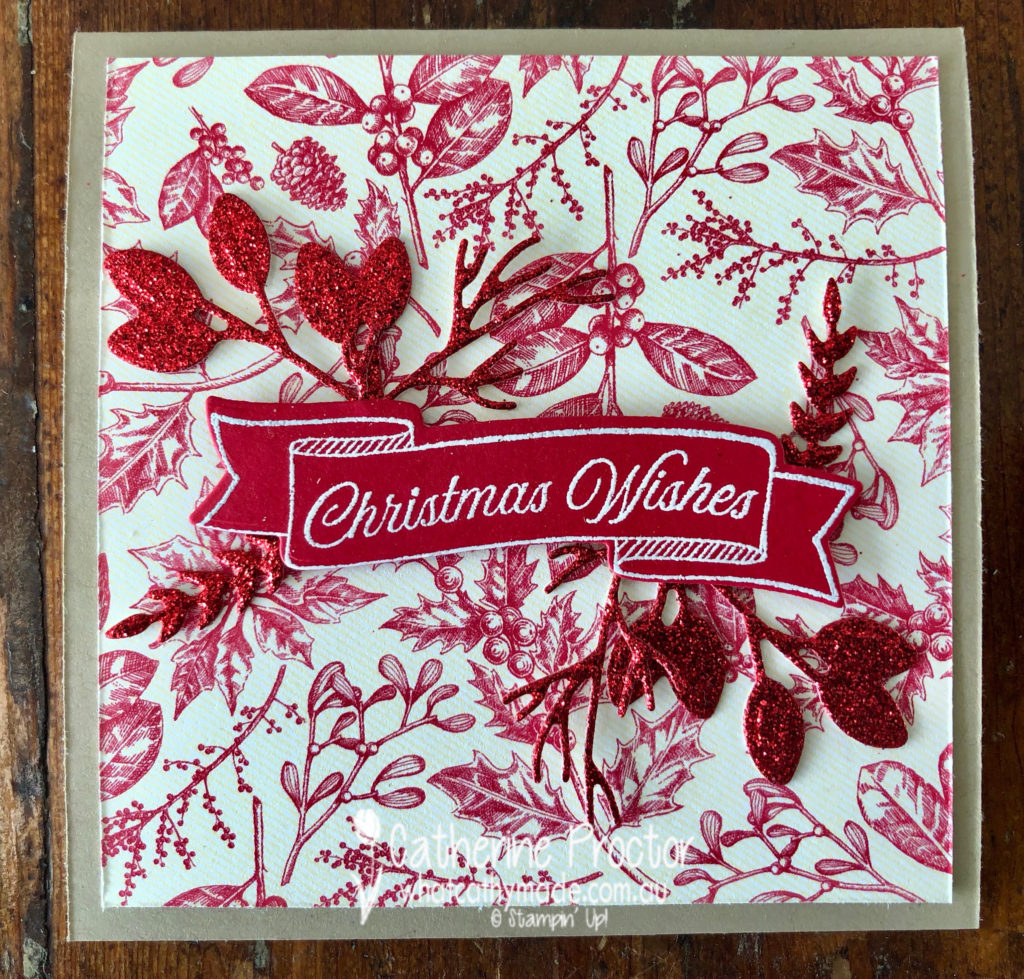
My third card uses the botanical pattern from the Toile Tidings DSP in Real Red. Leaves and branches were cut from Real Red Glimmer paper using the Christmas Cardinal Dies to pick up the botanical accents in the DSP.
The final card uses the same DSP pattern but in Garden Green this time. I cut the leaves and branches from Sparkle Glimmer paper and from the Perennial Essence Old Olive vellum DSP. The Toile Tidings Glitter Enamel dots in Garden Green add a touch of sparkle and dimension.
The lovely Claire Daly is hosting our weekly Heart of Christmas blog hop – to see what the rest of the team have made this week you can visit Claire’s page here.
I’ll be back tomorrow night with another Christmas blog hop. To purchase any of the products I used in this project you can shop with me here.
If you’d like me to post you your very own copy of the brand new 2019 Stampin Up! Holiday Catalogue, the 2019-20 Stampin Up! annual catalogue or to simply find out about more about Stampin’ Up! contact me.
Welcome to the first week of the 2019 Heart of Christmas blog hop!
Around this time every year the Art With Heart Stampin’ Up! team begin our annual weekly blog hop, featuring the Christmas products in both the Annual Catalogue and the brand new forthcoming Holiday Catalogue, my ABSOLUTE FAVOURITE!!!! catalogue of the year.
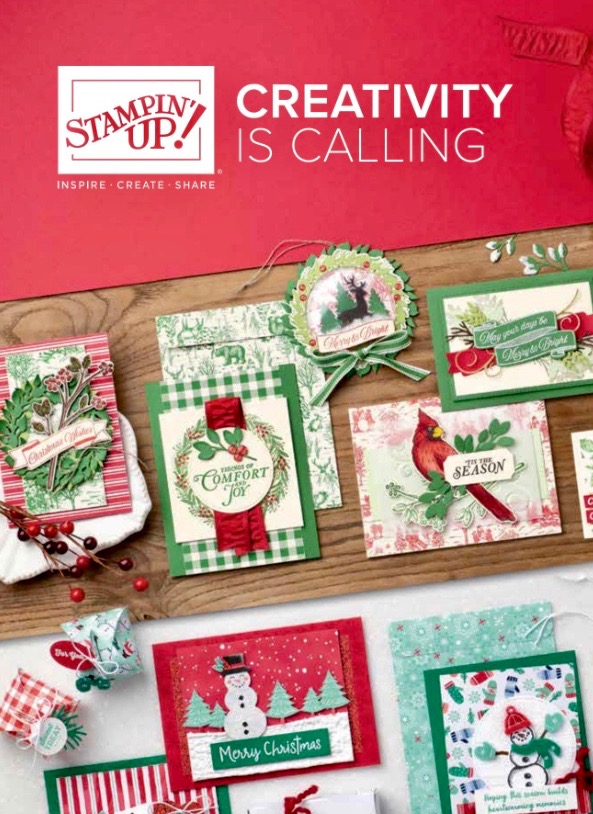
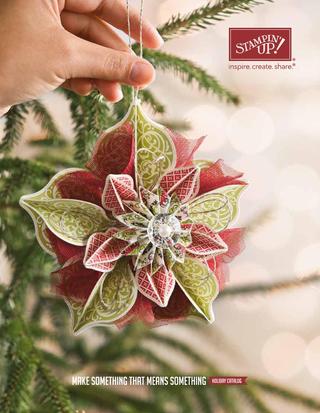
You will be able to view and order from the 2019 Holiday Catalogue from the 4th September, but in the meantime here’s a peek at the cover.
One of the first products to catch my eye in the brand new Stampin’ Up! 2019 Holiday Catalogue is a suite called the Brightly Gleaming Suite.
I love the beautiful blues and greens of the Brightly Gleaming DSP, the Star Designer Elements, the Hammered Metal 3D embossing folder but most of all I love that the Christmas Gleaming Stamp Set has not just one, but two coordinating punches!
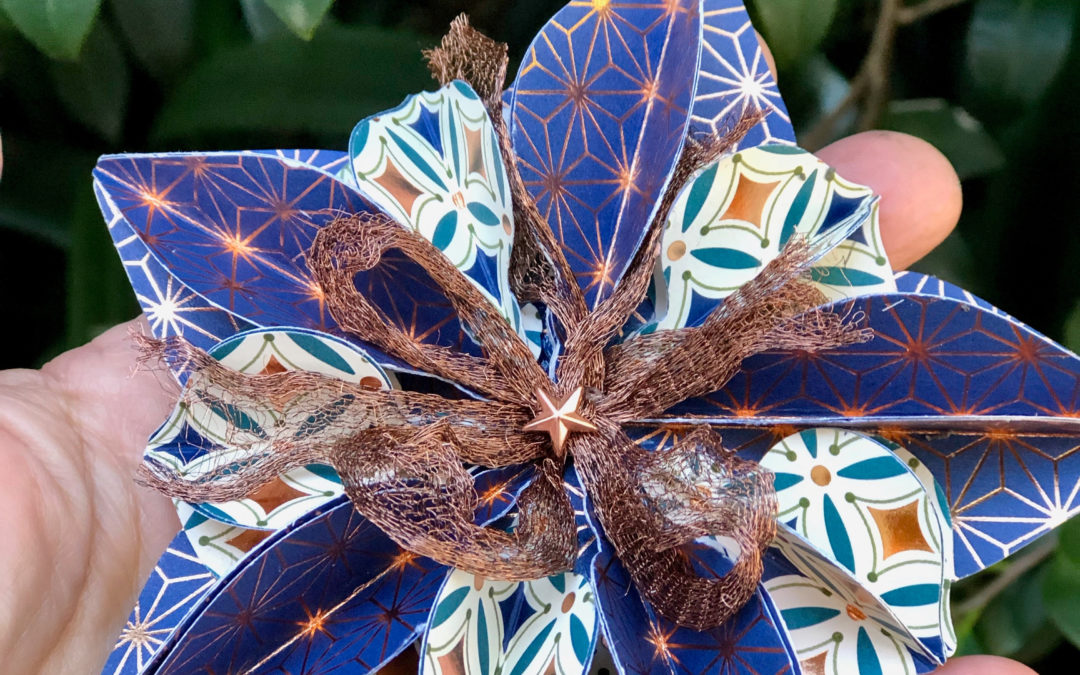
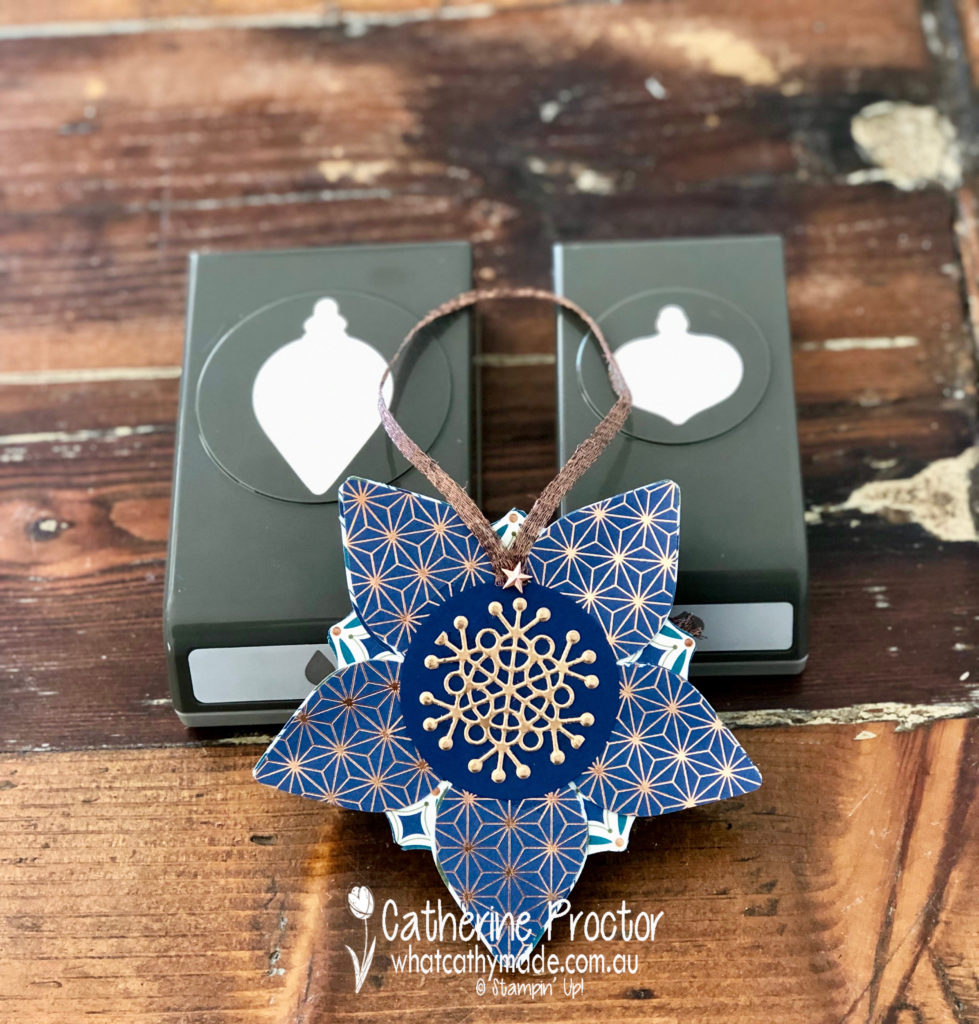
There are so many projects I’m planning to make with these punches but this week I decided to CASE a project I saw another demonstrator CASE from the cover of the 2012 Stampin’ Up! holiday catalogue. Isn’t this ornament simply gorgeous?
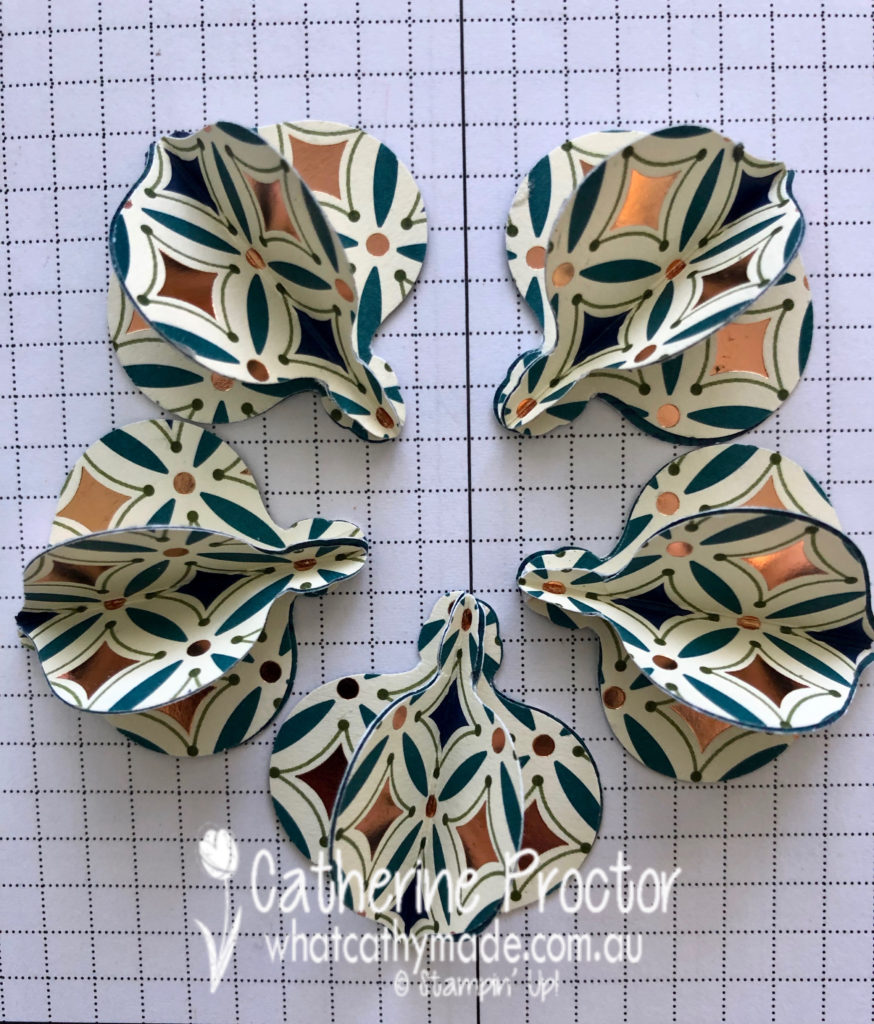
The other Stampin’Up! demonstrator used the Gleaming Ornaments punch to make this ornament by firstly stamping and then punching out the images, but I decided to make things even simpler by simply punching out my shapes from the Brightly Gleaming DSP.
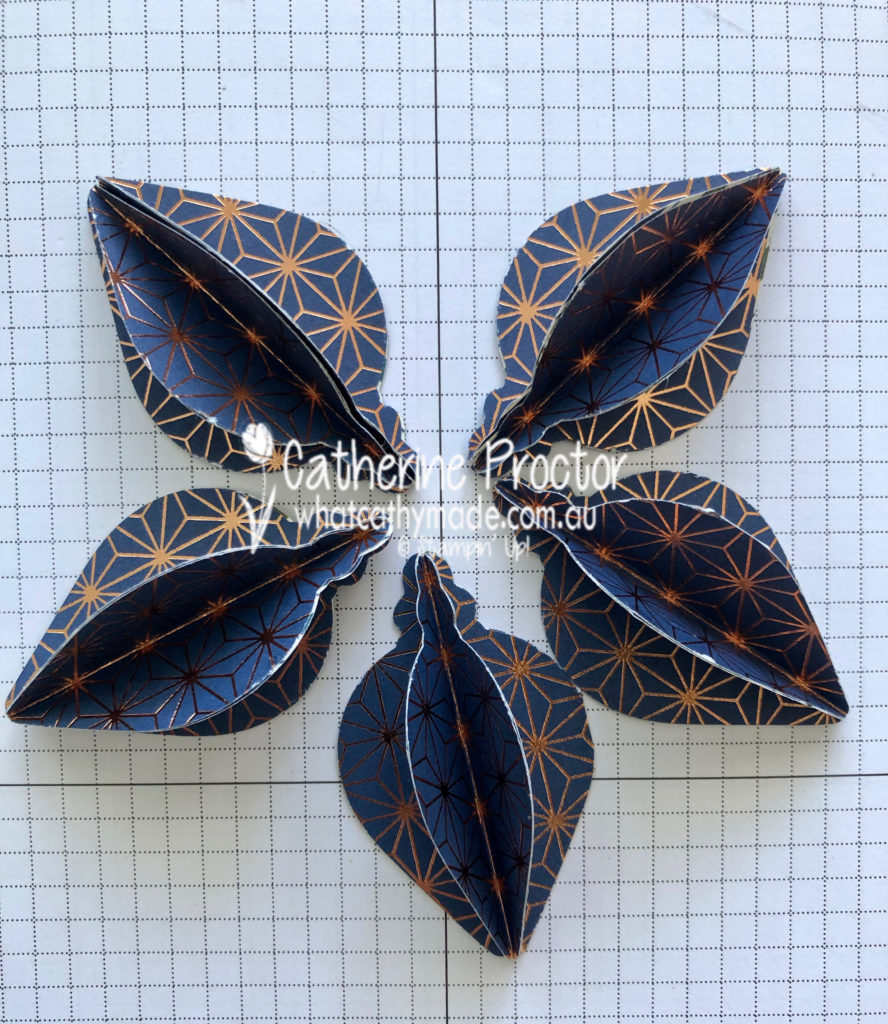
Firstly I punched out 20 of the larger punch ornaments using the Night of Navy and Copper paper from the Brightly Gleaming DSP. The geometric design of this DSP made it very easy to score down the centre of 15 of the ornaments before using multipurpose liquid glue to glue them together.
I simply glued 3 of the scored ornaments together before adhering these to one of the unscored ornaments. Repeat 4 times.
Follow the same steps, this time punching out 20 smaller ornaments from a different coloured DSP, and score and glue together.
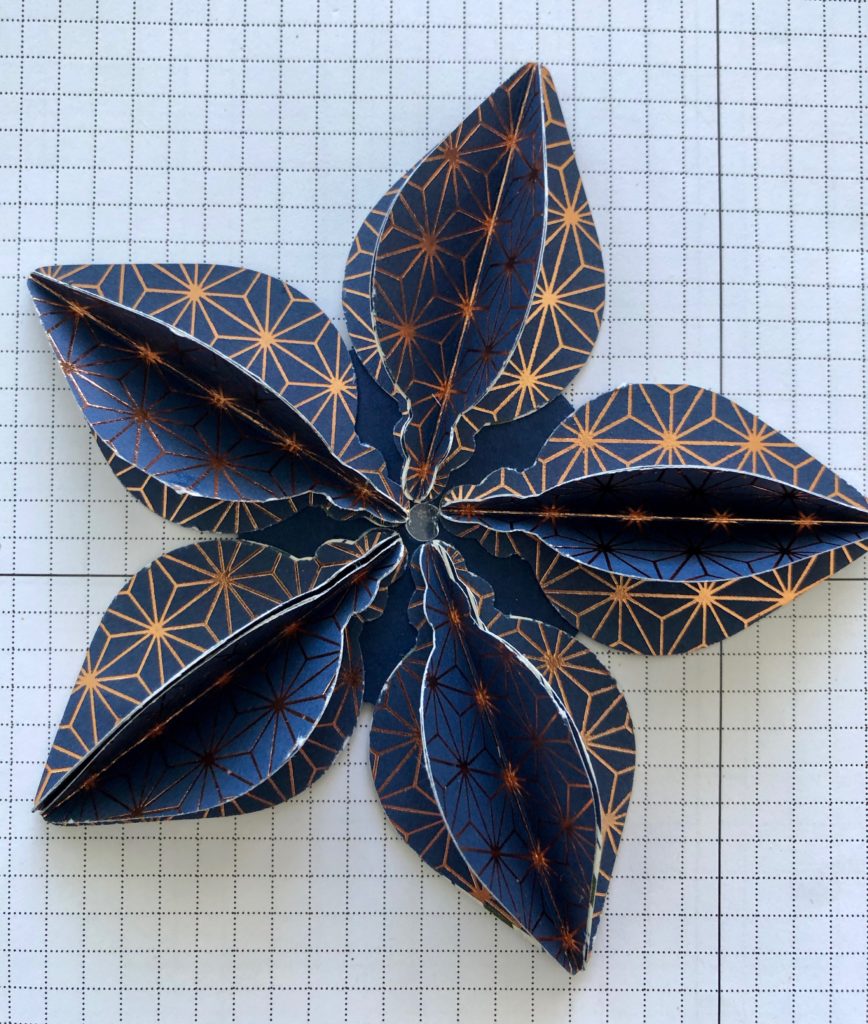
Punch a 2 inch circle out of Night of Navy cardstock and place a glue dot in the middle. Use your glue dot to position the larger shapes evenly around the circle and adhere the shapes to the with multipurpose liquid glue
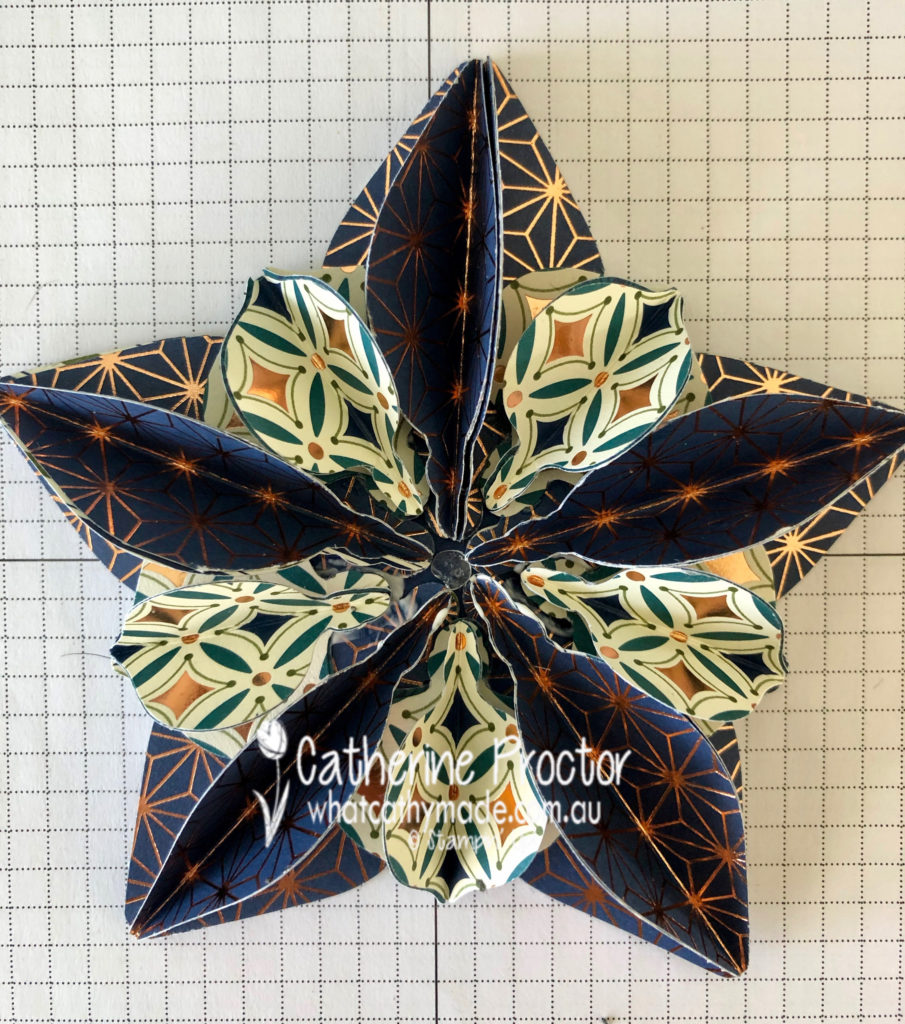
Then glue the smaller shapes between the larger ornament shapes.
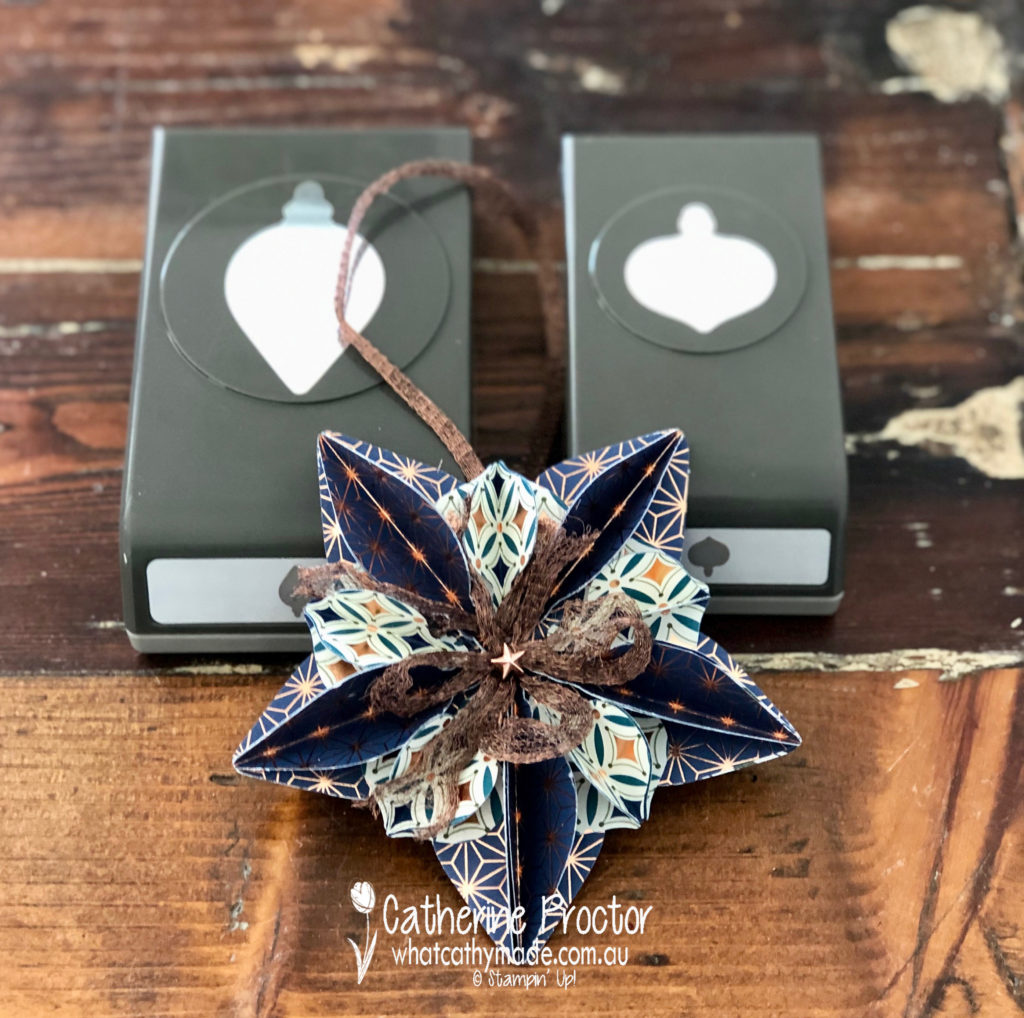
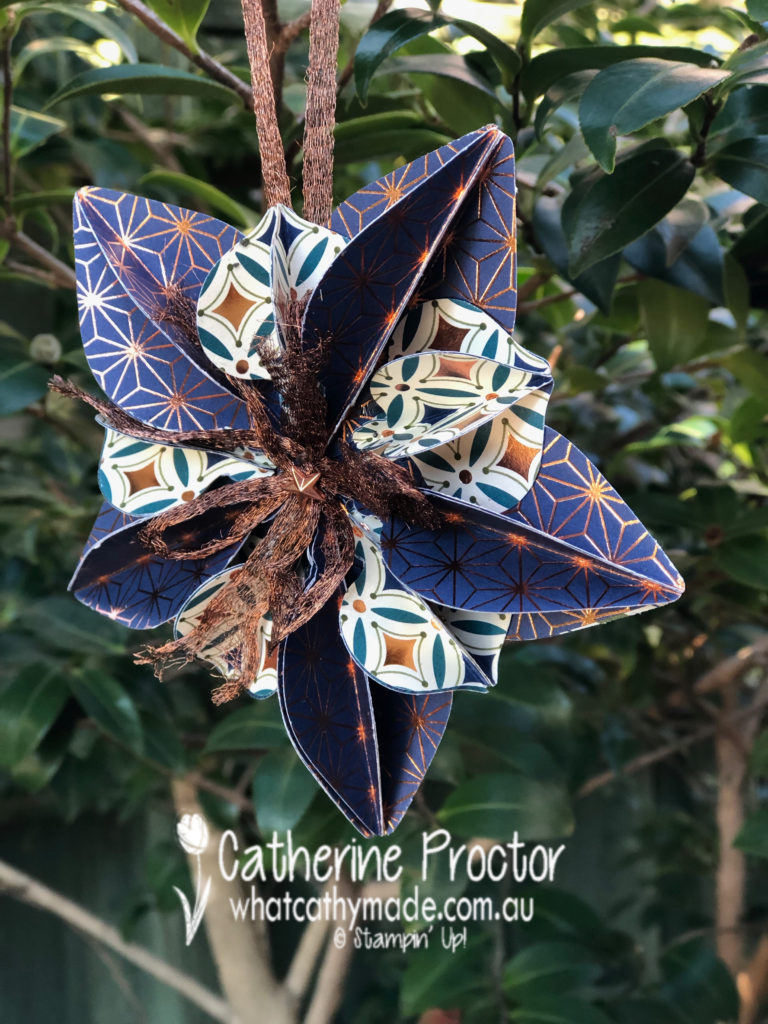
Tie two bows with the copper trim ribbon and then use your fingers to tease the ribbon out. Adhere these bows to the centre of your ornament using glue dots and then top with a copper star designer element.
To finish off the reverse side die cut a snowflake from copper foil using the Seasonal Layers Thinlits dies and adhere to the middle of the Night of Navy circle with multipurpose liquid glue.
So you can hang your ornament, add a loop of copper trim ribbon to the back as well and adhere using glue dots. Use another copper star designer element to hide the ends of the copper trim ribbon and then hang from a tree!
The lovely Claire Daly is hosting our weekly Heart of Christmas blog hop – to see what the rest of the team have made this week you can visit Claire’s page here.
I’ll be back next week with two more Christmas blog hops. To purchase any of the products I used in this project you can shop with me here.
If you’d like me to post you your very own copy of the brand new 2019 Stampin Up! Holiday Catalogue, the 2019-20 Stampin Up! annual catalogue or to simply find out about more about Stampin’ Up! contact me.
Tonight the Art with Heart team are sharing creative projects featuring Simple Stamping, which means our projects feature only paper, stamps and ink.
It’s a great way to create a quick and easy card for new stampers or for when you need a card at short notice. These projects highlight how Stampin’ Up! ink, paper and card stock coordinates perfectly.
If you would like a copy of the 2019 – 2020 annual catalogue, contact any of the girls on the blog hop and we will get in touch with you.
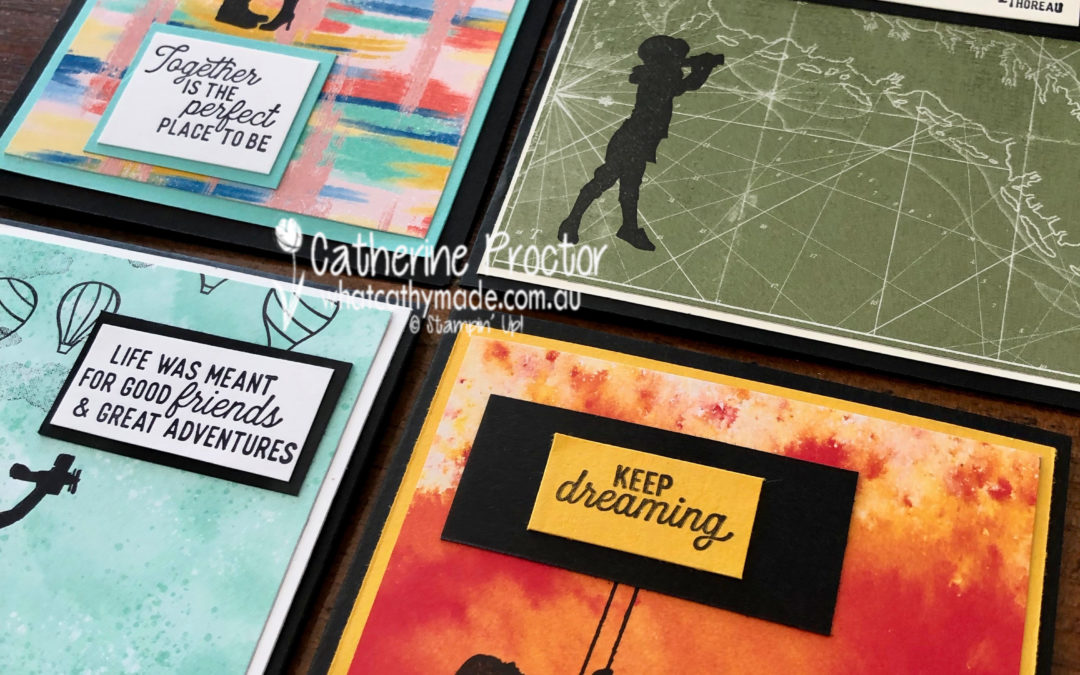
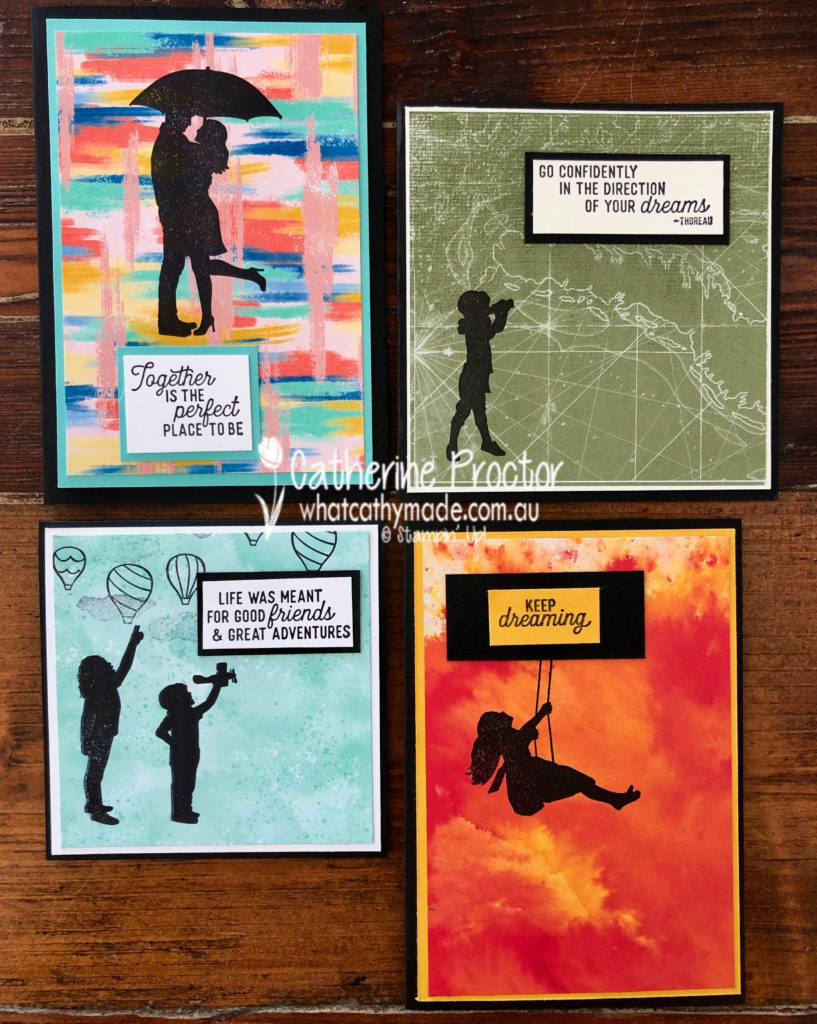
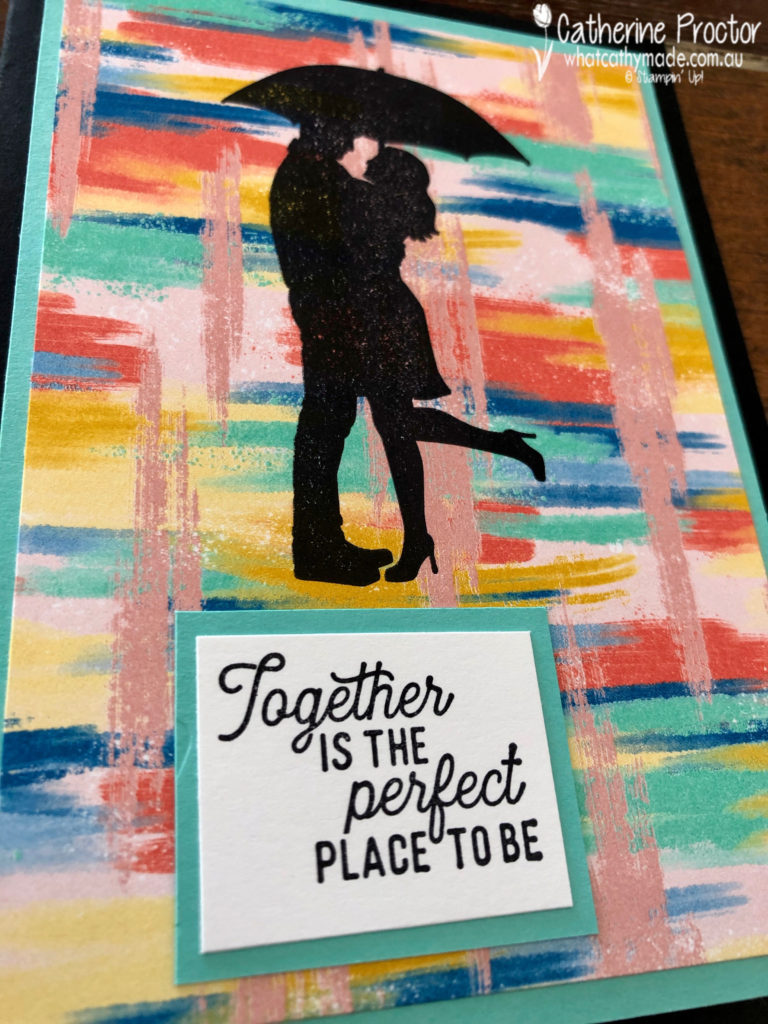
My cards all feature the stunning Silhouette Scenes stamp stamped on a range of Designer Series Papers. I love how the DSP does all the heavy lifting for me, creating instant backgrounds to match the stamp and the sentiment.
The “together is the perfect place to be” card was inspired by this style of gorgeous photo. The long exposure of the photo and the rain makes the city lights look like blurs of paint.
Don’t you think this design from the Follow Your Art DSP has a similar feel?
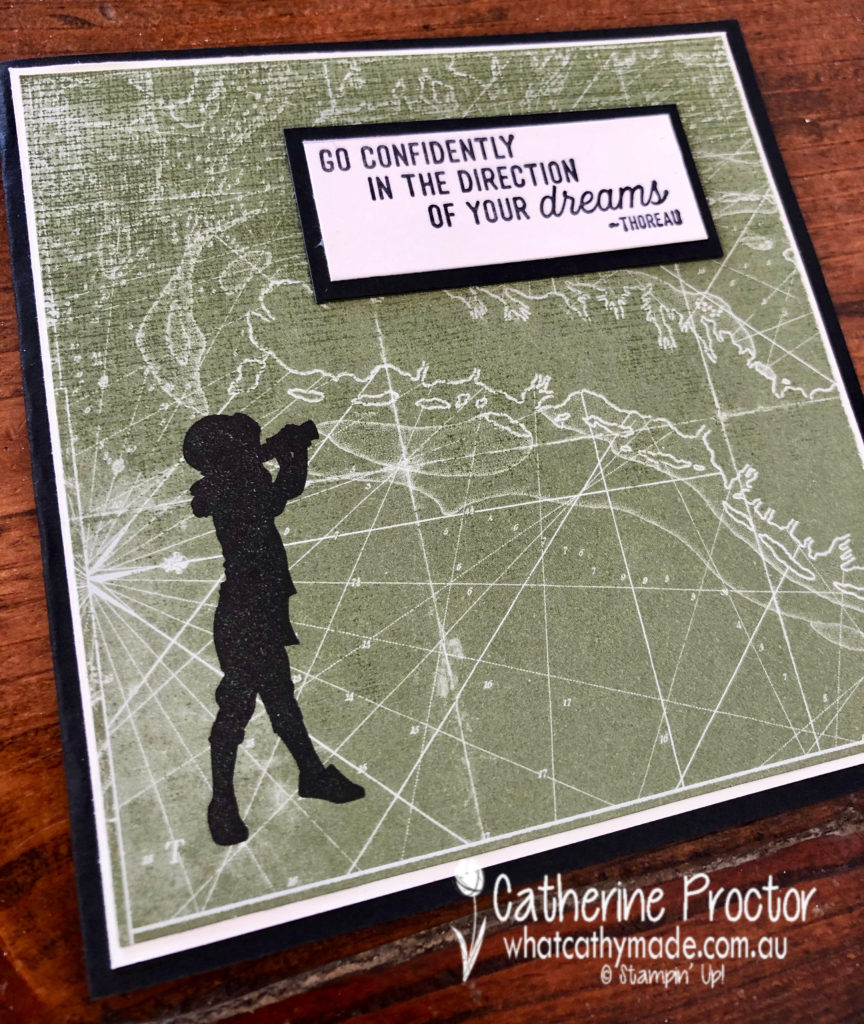
I next went in search of some paper to match the child with the binoculars who is looking towards the future and hopefully a life full of possibilities and adventure.
This paper from the Come Sail Away DSP was the perfect match, with its finely detailed map image.
I was now on a roll as the one card quickly morphed into four cards, but when card making is this quick and easy thanks to simple stamping and DSP I just had to go with the flow.
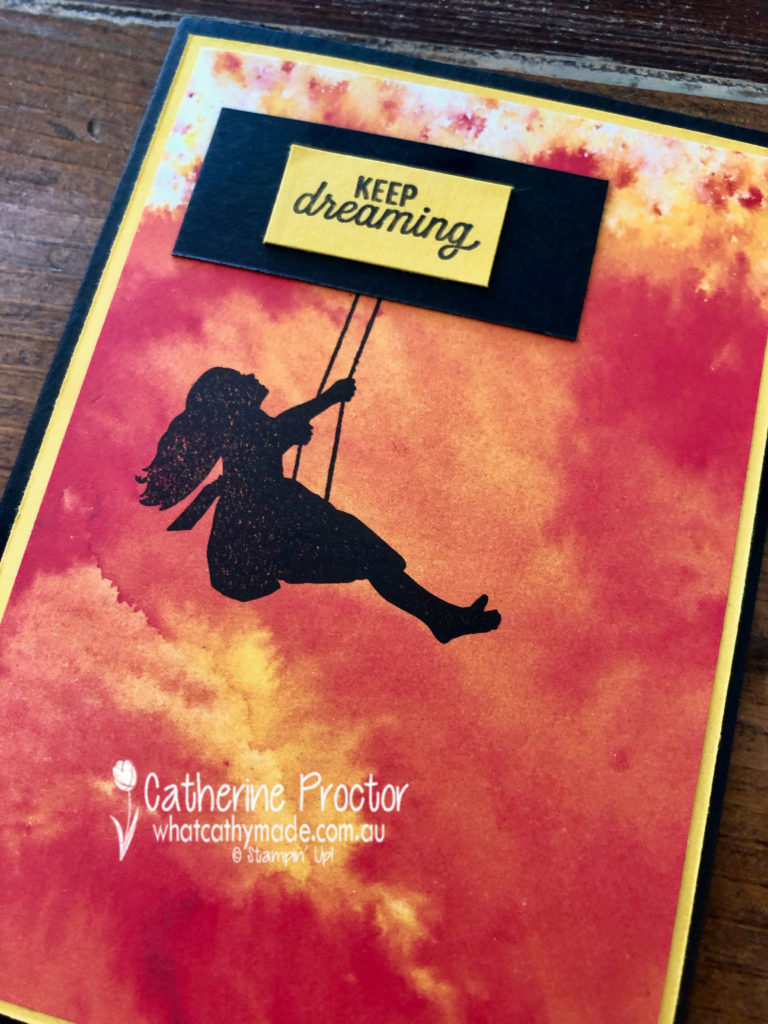
The little girl on the swing card was CASED from the card on page 133 of the Annual Catalogue. I couldn’t use the tree branch die for a simple stamping card but I think the placement of the sentiment is just as effective. The DSP is from the See a Silhouette DSP pack.
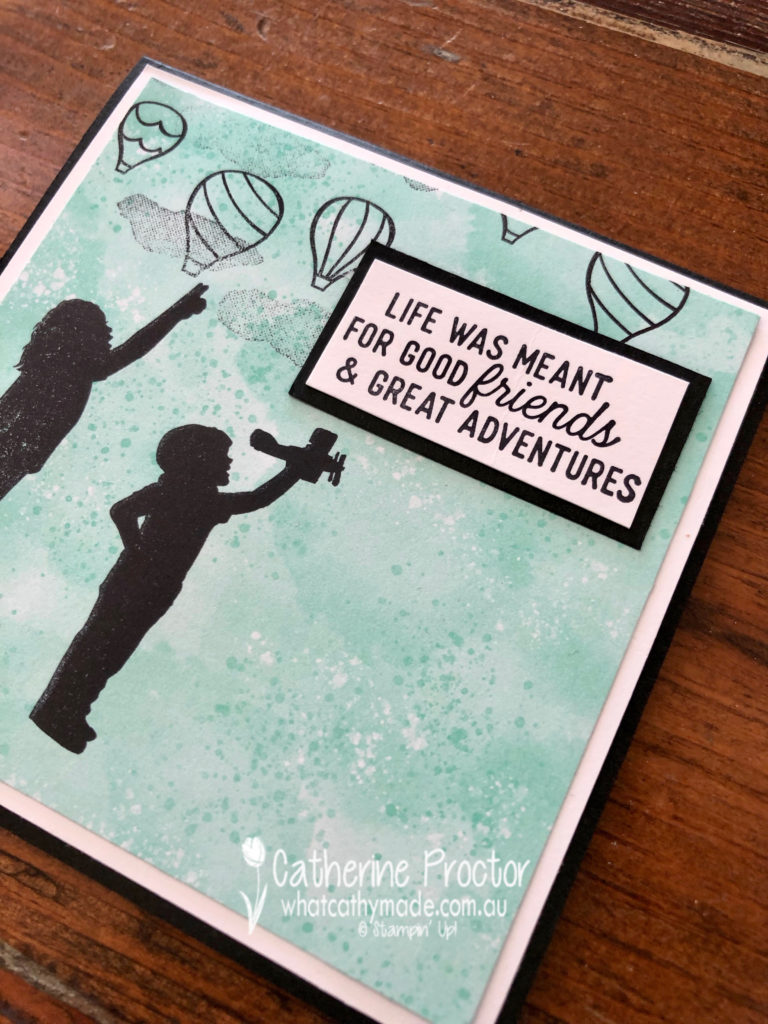
My final card uses another piece of DSP from the Follow Your Art DSP – this one looks like a cloudy sky. I also stamped a few clouds and hot air balloons from the Above the Clouds stamp set.
This really is simple stamping at its best, using just one ink pad and one stamp set (for 3 out of the 4 cards) to achieve such a variety of cards.
Now it’s time to hop on over to our next participant, the very talented, Tina Gillespie.
If you find a broken link or have come to this blog hop from a different entry point, you can view the participants below:
In my family a lot of our birthdays fall in both July and December. One of the July birthdays we have just celebrated is for my niece Mimi, who has just turned three.
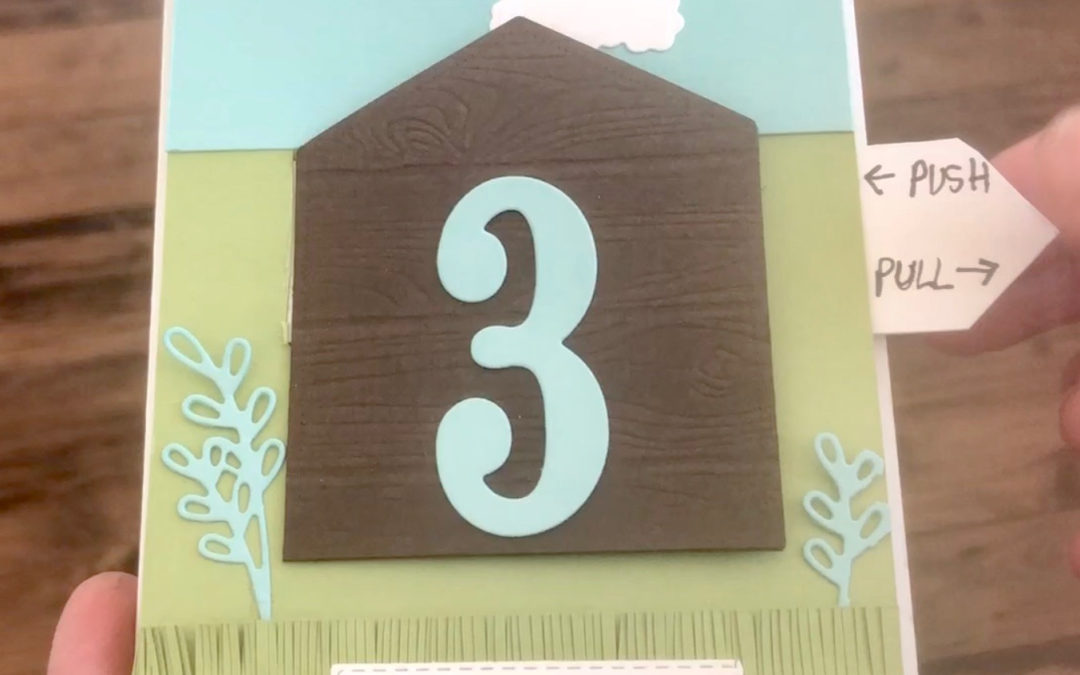
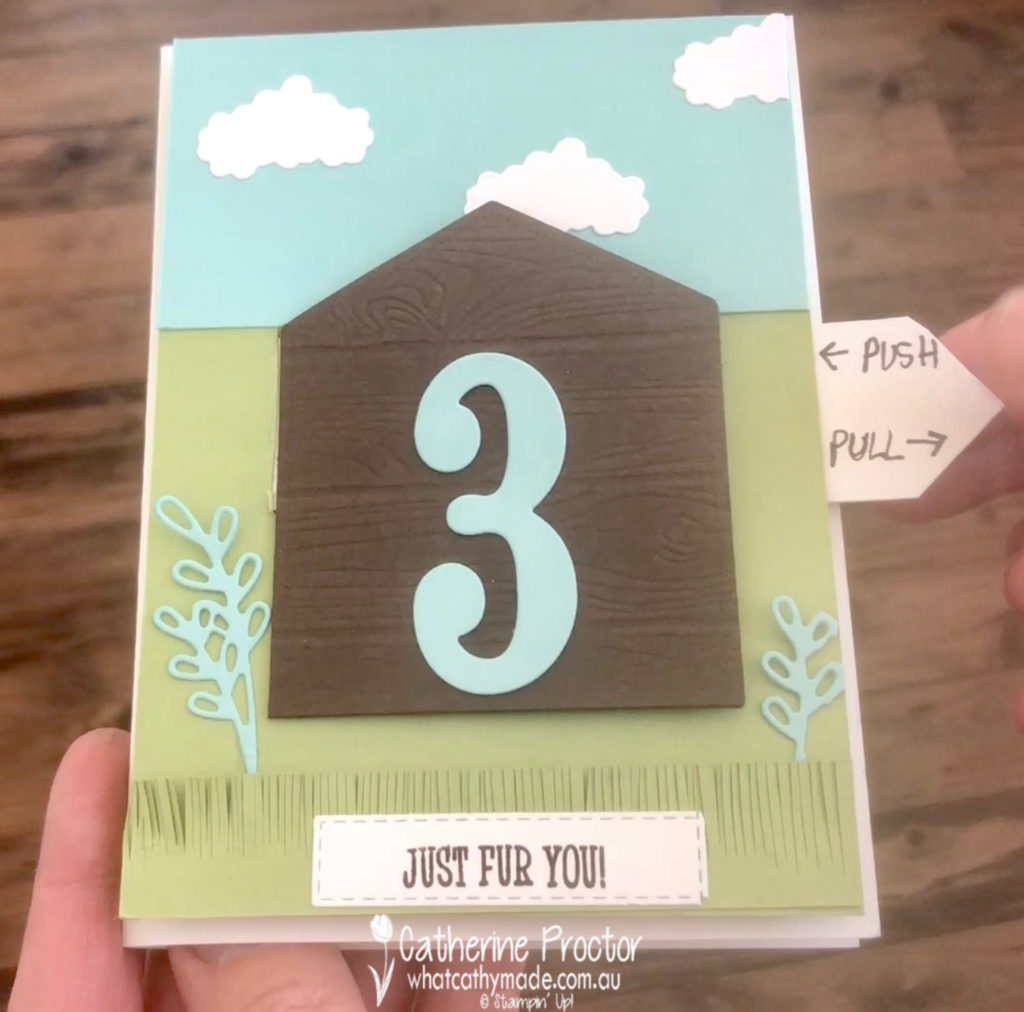
Because Mimi is obsessed with my dog, Superman, I decided to use the Happy Tails stamp set to create a special type of pop-up card for her birthday.
I used Kylie Bertucci’s video tutorial HERE to learn how to create the pop up tab mechanism, but altered the design of the card to suit the products I had available.
Here’s a short video of my card. I love cards that move!
The dog house is created by embossing Early Espresso card stock with the Pinewood Planks embossing folder and the grass is simply hand snipped from Pear Pizzaz card stock using my paper snips. The clouds are die cut using a die from the new Detailed Peacock dies.
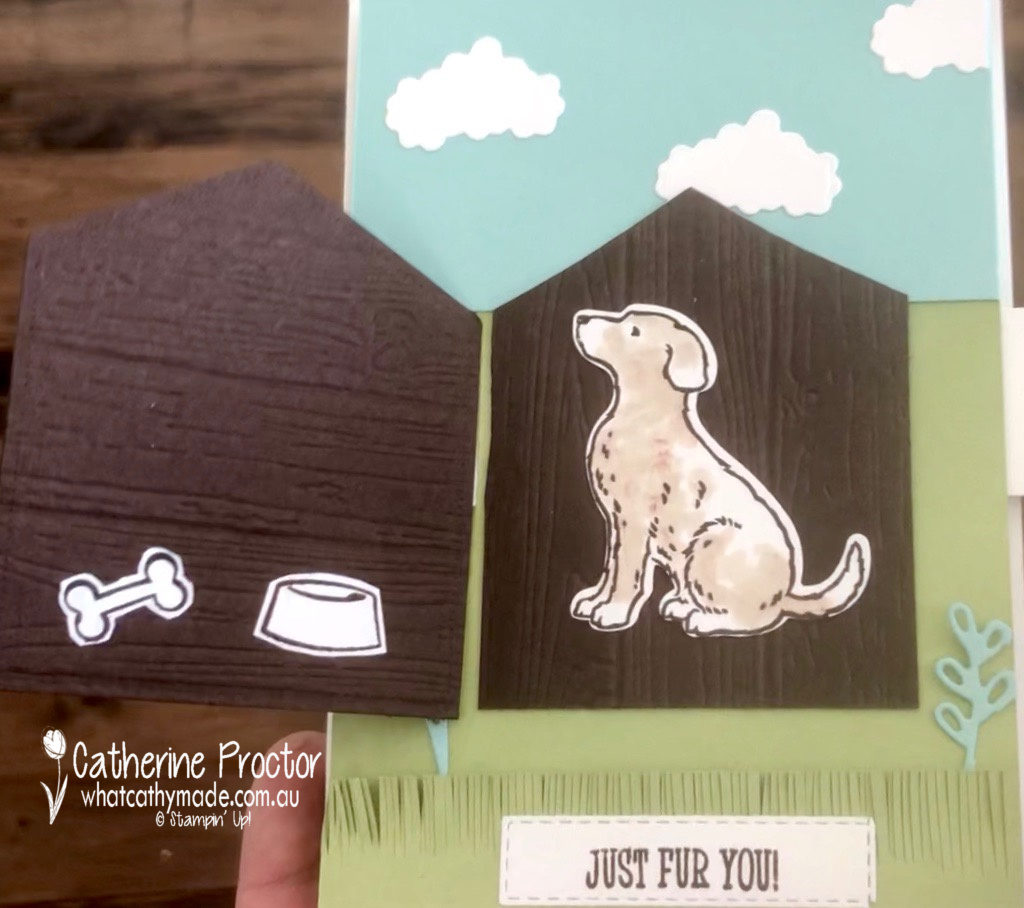
Inside my card I’ve used the Happy Tails stamp set and matching Dog Builder punch to create a surprise Superman for my niece.
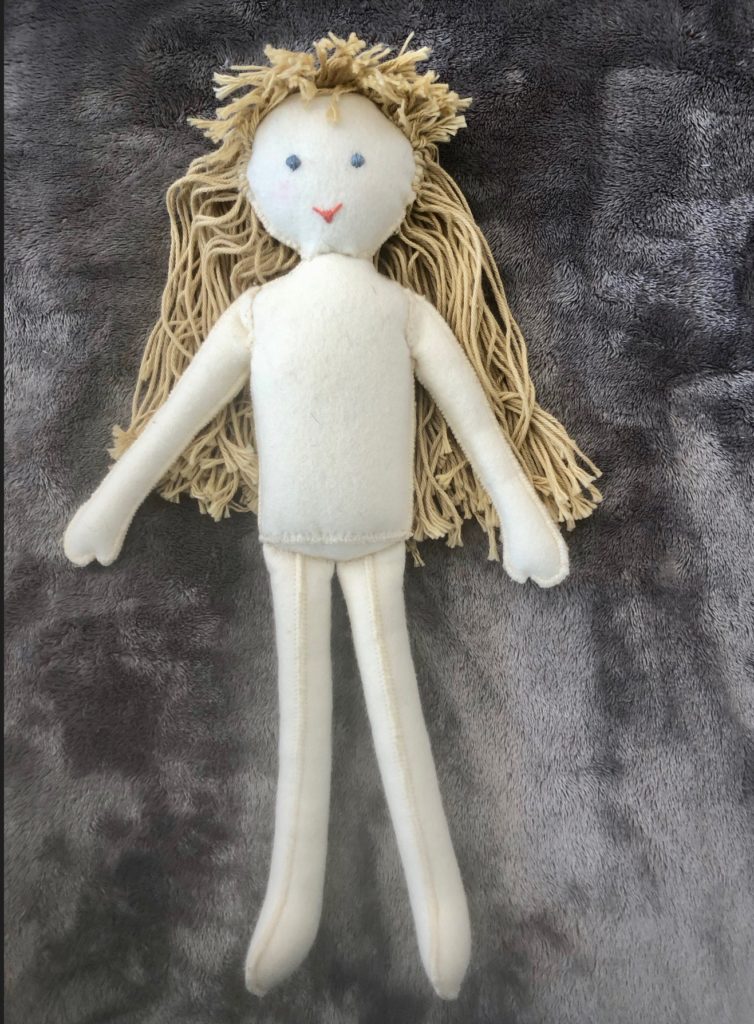
I also had a lot of fun making Mimi’s birthday present: a handmade felt doll.
I also made her a hand knitted and hand sewn wardrobe, including flannelette pjs and her very own felt Miffy Doll (Mimi’s favourite toy!).
And yes, you guessed it, her favourite colour is purple!
To purchase any of the products I used in this project you can shop with me here.
Or if you’d like me to post you your very own copy of any of the brand new 2019-20 Stampin Up! catalogue or find out about more about Stampin’ Up! contact me.
Welcome to the final week of the Art With Heart Colour Creations Blog Hop.
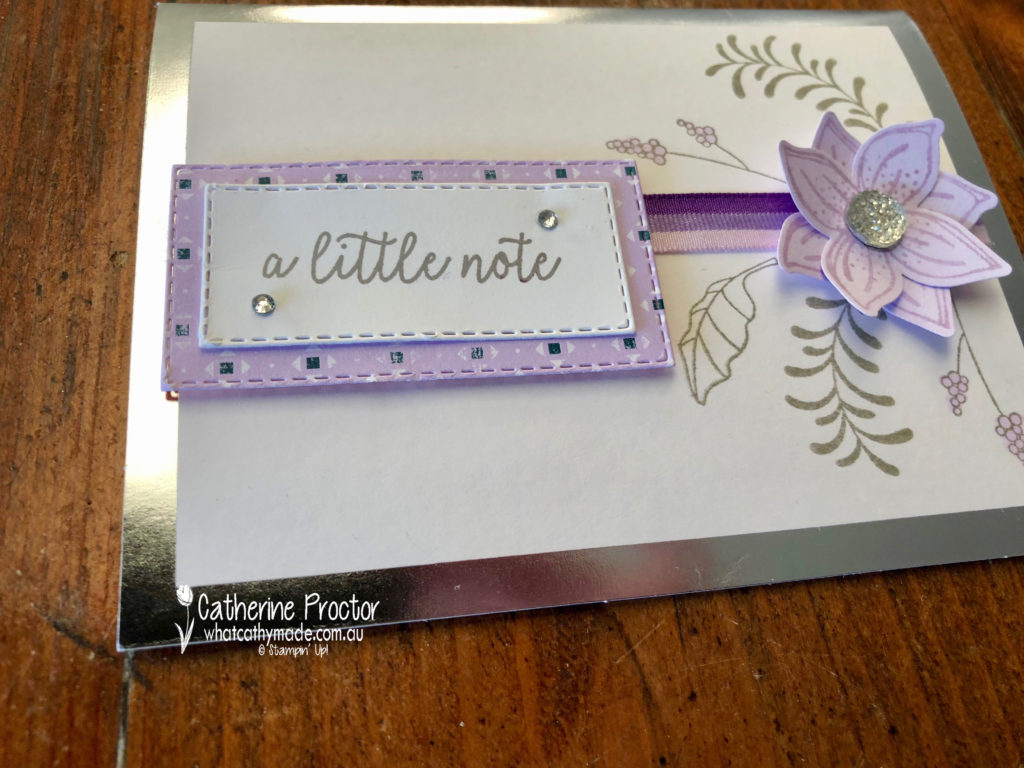
We have blogged every Stampin Up colour over 55 weeks in our Colour Creations Blog Hop and our final colour is another 2019-21 Stampin’ Up! in colour: Purple Posy
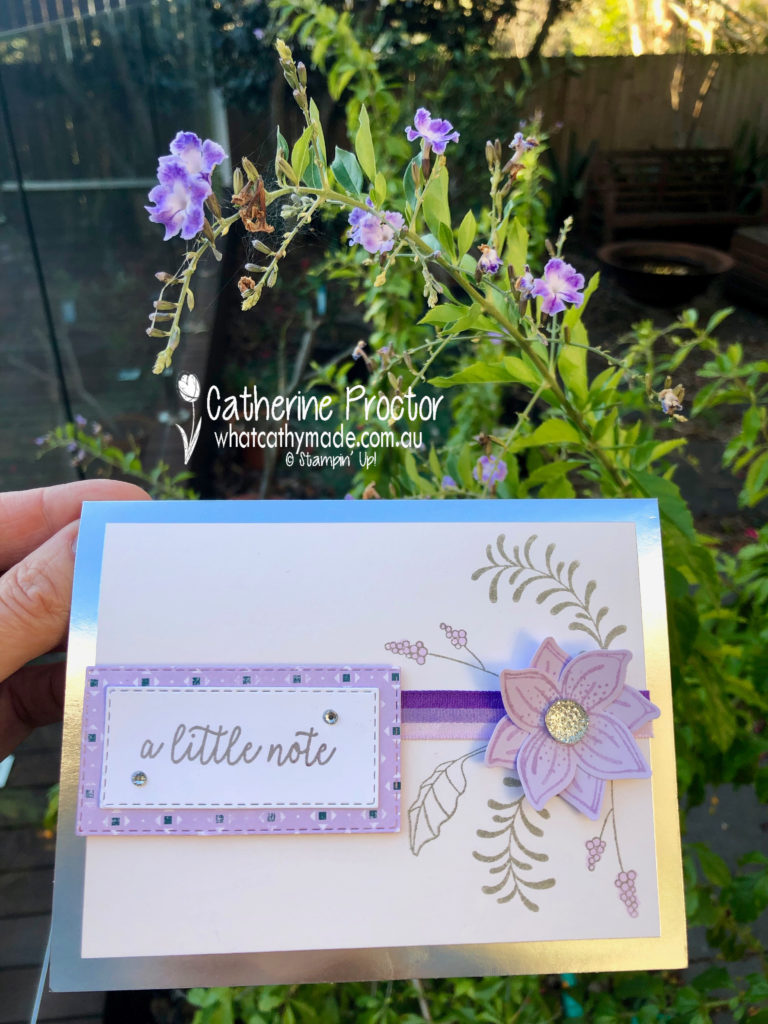
My inspiration for my card today came from my garden and one of my favourite plants, called Geisha girl. It has beautiful foliage all year round, orange berries and purple flowers.
Here’s a photo of my card in front of the plant.
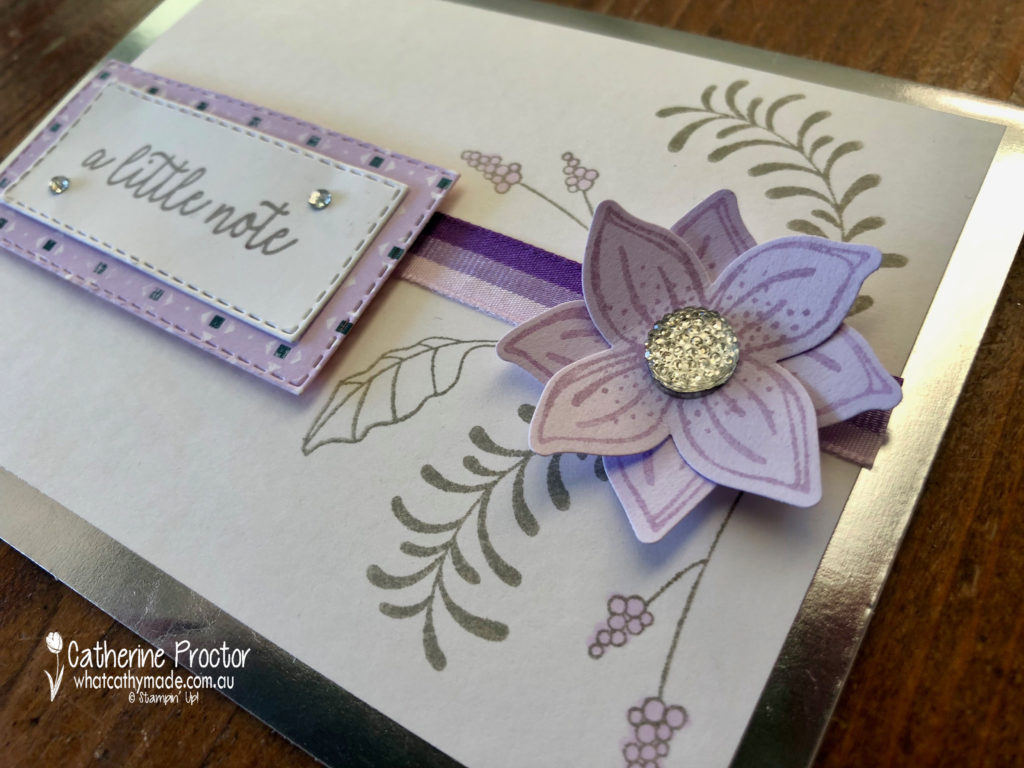
The colour of these flowers gradiates from a deep purple on the outside, through to a pale purple on the inside, just like the stunning new 3/8″ (1 cm) Tricolor Ribbon on my card. The stripes are Gorgeous Grape, Highland Heather and Purple Posy, all on one craft ribbon.
To create my Geisha Girl flower on my card I stamped Purple Posy ink onto Purple Posy card stock using the Pop of Petals stamp set and then punched out the stamped images with my four-petal flower punch.
The flower is made by layering two flowers together and adhering with a glue dot.
Silver and purple are such a classic colour combination so I stamped my silver foil card base with Smokey Slate ink, using other stamps from the Pop of Petals stamp set.
There are no sentiments in the Pop of Petal stamp set so I stamped the “A Little Note” stamp from the Butterfly Gala Stamp set before die cutting it withe the stitched rectangle die.
The gorgeous DSP behind the sentiment is from the Woven Threads Designer Series Paper.
Thank you so much for joining us for the past 55 weeks on the Art With Heart Colour Creations blog hop.
To see what the rest of the team have created, click on the links below.
To purchase any of the products I used in this project you can shop with me here.
Or if you’d like me to post you your very own copy of any of the brand new 2019-20 Stampin Up! catalogue or find out about more about Stampin’ Up! contact me.