Okay, so I’m technically a few days early (we celebrate Father’s Day on the the first Sunday in September here in Australia) but I wanted to share an idea for a quick and easy Father’s Day card in case you’re also struggling with ideas for a card for your dad.
When I go to design a card I often begin by thinking of a stamped image that I’d like to use and if you’re anything like me you probably find male cards harder to make than female cards. Unfortunately, most of my stamp sets tend to be feminine in nature and male stamp sets are often sport focused, but my dad is just not a sporty dad…apart from cricket and the Tour de France, which he stays up all night to watch!
So instead of designing my card by beginning with a stamp image in mind, I found it really helped to stop and think about:
what are my dad’s hobbies/interest/passions?
what colours does he like?
what did I really want to say to him?
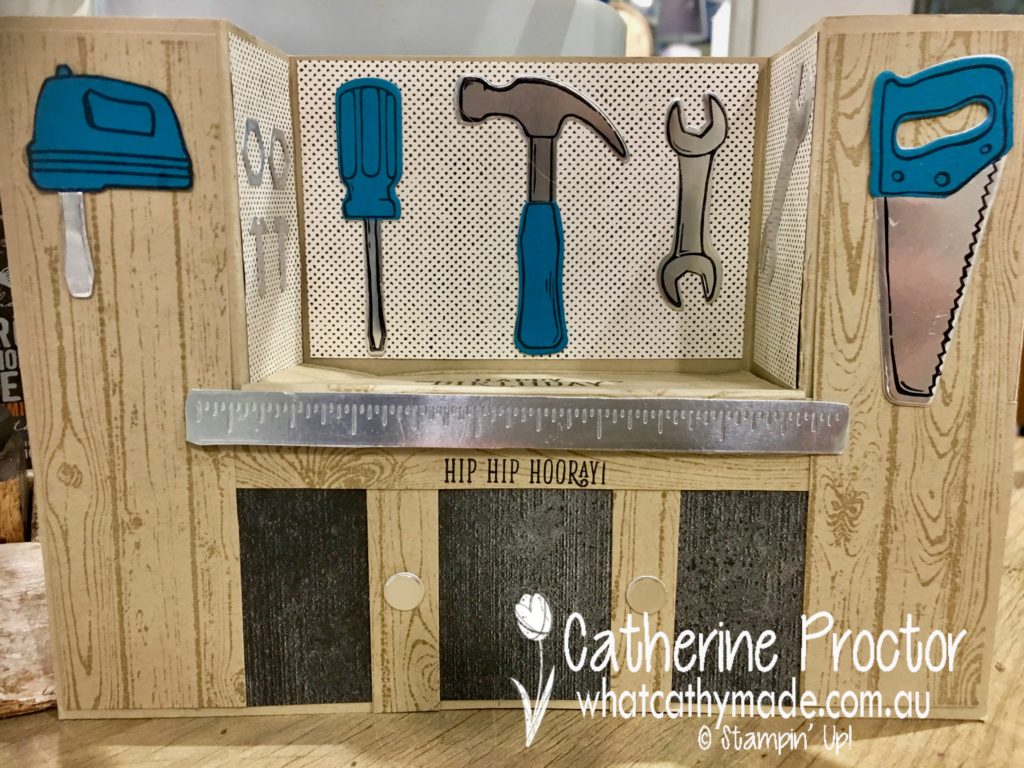
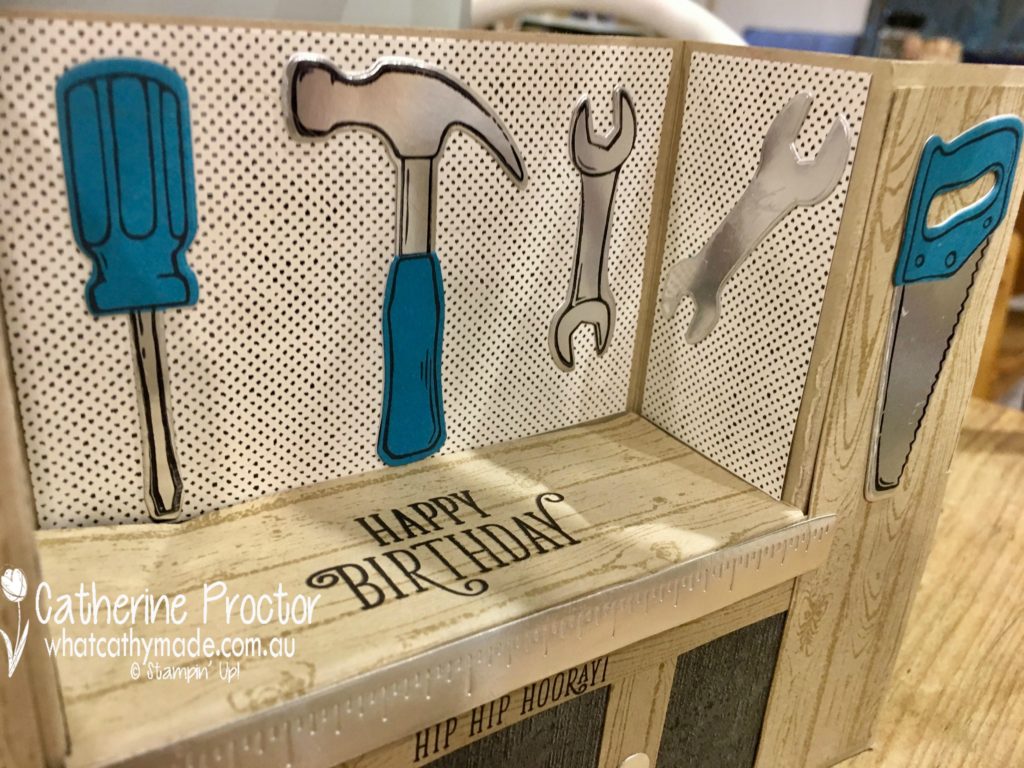
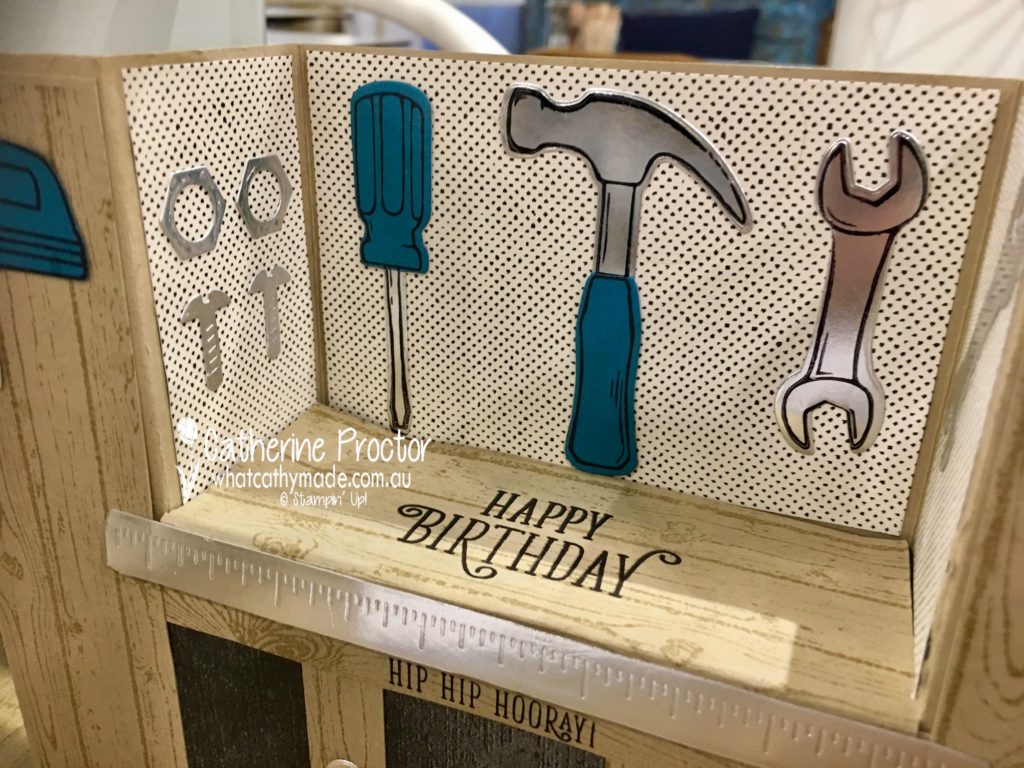
My dad’s hobbies include gardening, woodworking, astronomy, music and reading so I wanted to design a card that reflected one of these hobbies. I’d already used the awesome Nailed It bundle to make him a birthday card and he really loved this card. I followed a tutorial I purchased from a UK demo, Amanda Bates at The Craft Spa …and here’s the card that I adapted for Dad’s birthday from her tutorial.
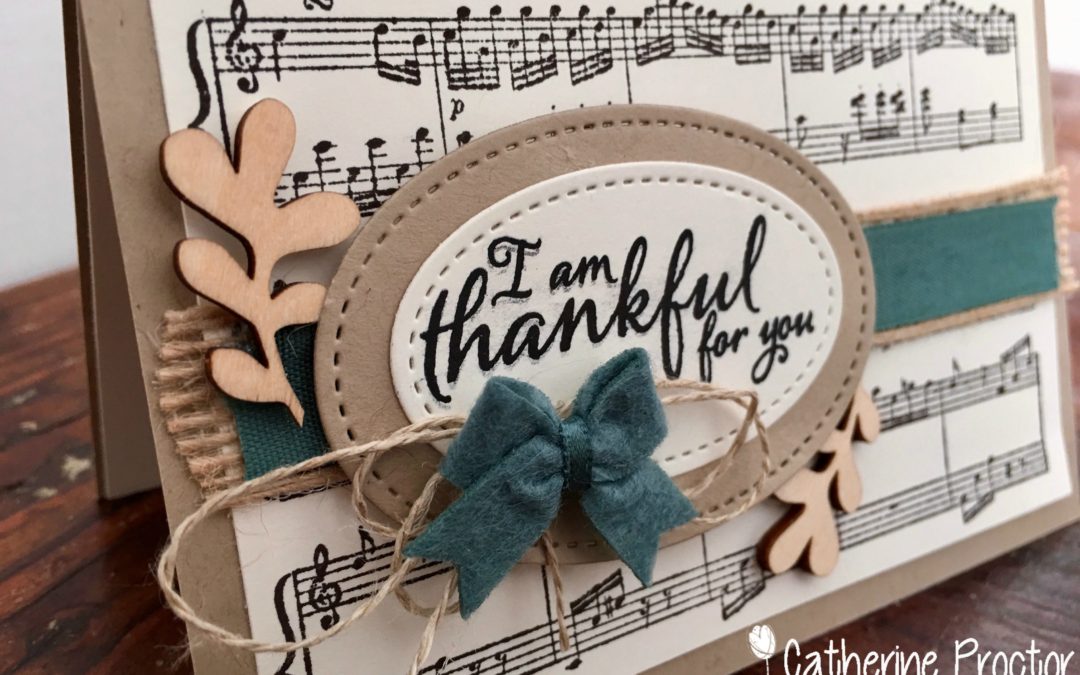
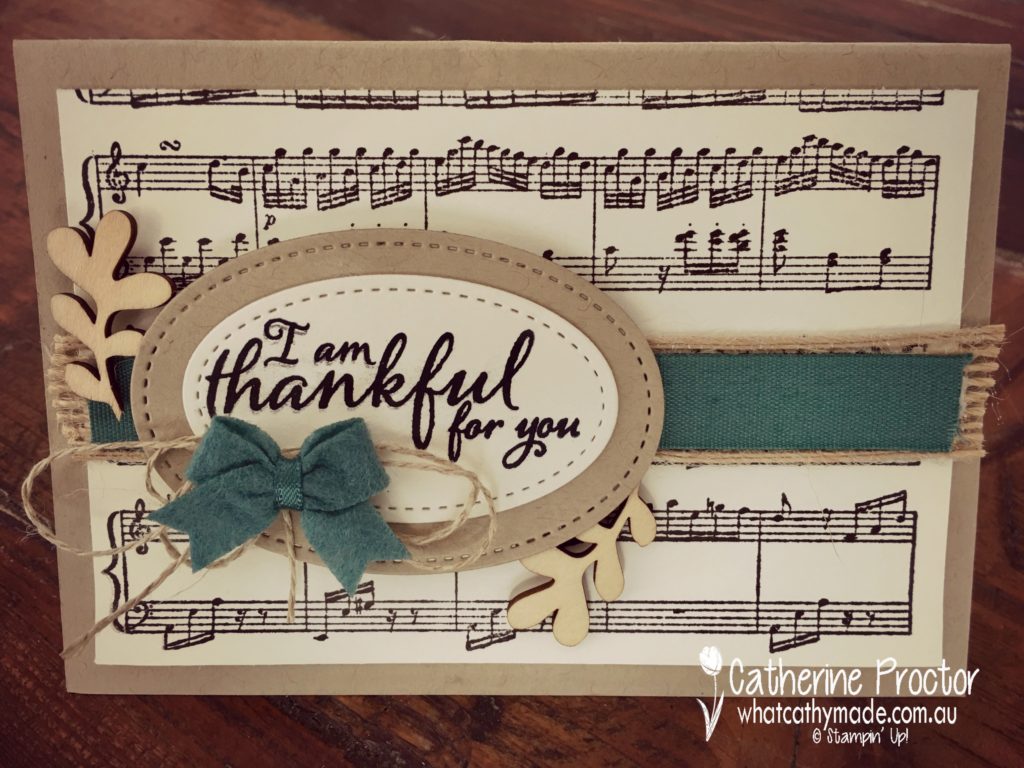
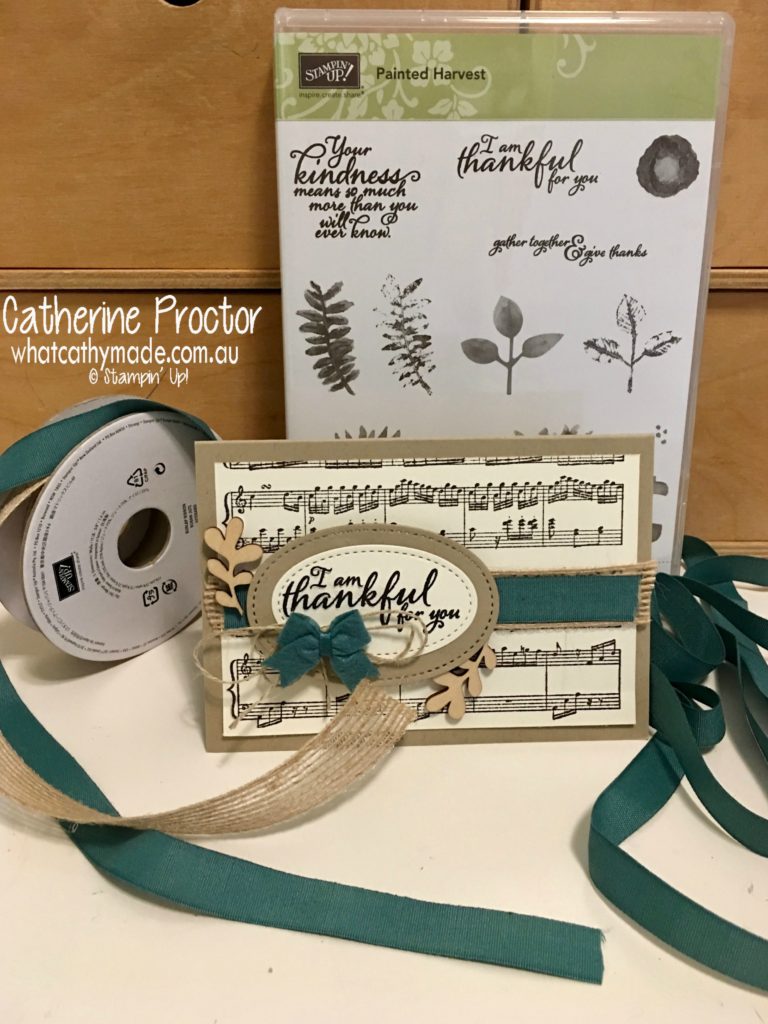
For Father’s Day I decided to instead focus on my dad’s love of music, so I stamped some very vanilla card stock using the sheet music background stamp. Because this is quite a busy background (and I wanted music to remain the focus) I knew all I needed was some ribbon and a sentiment to finish this card off.
I wanted to add a little bit of colour so I added some burlap ribbon, tranquil tide ribbon and a matching bow because I know that these earth tones are some of his favourite colours. The touches of nature elements are a nod to his love of gardening and nature.
Finally, I thought about what I really wanted to say to my dad and this is where the sentiment from the new Painted Harvest stamp set was just perfect: “I am thankful for you”. I’m so incredibly thankful to have my loving, generous, kind-hearted and super supportive dad in my life.
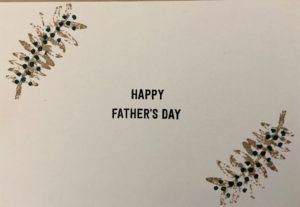
I finished the card off with a Happy Father’s Day sentiment inside from the Thoughtful Banners stamp set, because after all, it is a Father’s Day card…I just decided to have the more personal sentiment on the front of the card, but I could also have designed the card with the Father’s Day sentiment on the front and the other sentiment inside. I also used some of the stamps from the painted harvest set to decorate the inside of the card.
Now that I’ve sorted the card…the next tricky question is what do you give your dad for Father’s Day?
This year I’ve decided to give him something I know he really wants and something he’s actually asked for but we’ve never done before. I’m organising a photographer to take a family portrait for us, as all his grandchildren just keep growing and changing. And the rest of us are certainly not getting any younger!
If you’re stuck for an idea for your dad this year I reckon most dads would love the idea of a family portrait, because at the end of the day, that’s what Father’s Day is really about…our dads being with the ones they love the most, their family.
Live in Australia? You can purchase all the supplies I used for this card by clicking on the links below.
Tonight some of the Art with Heart Stampin’ Up! team girls are sharing some fun and fabulous ideas to inspire you from our brand new Holiday Catalogue available on 1st September until 2nd January 2018. Be sure to request your copy of the catalogue today!
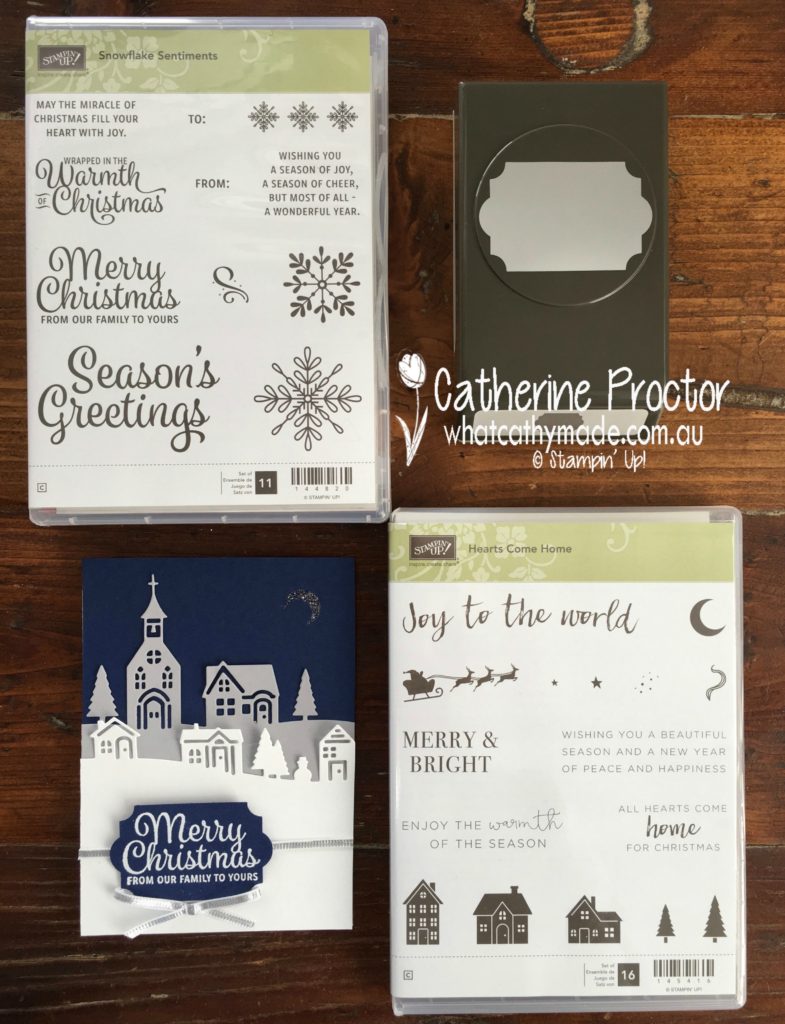
There are so many fantastic products in the new holiday catalogue it made it very had to choose which one to use, so I decided to use products from 3 different sets on my card this week.
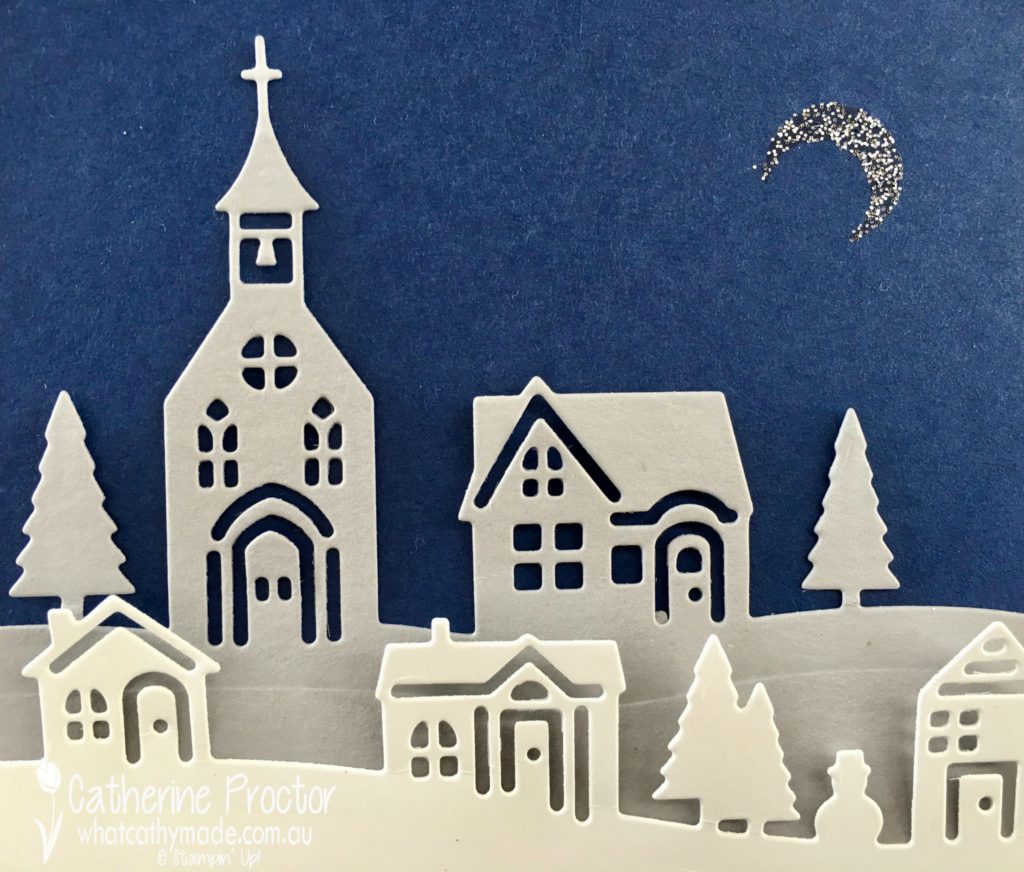
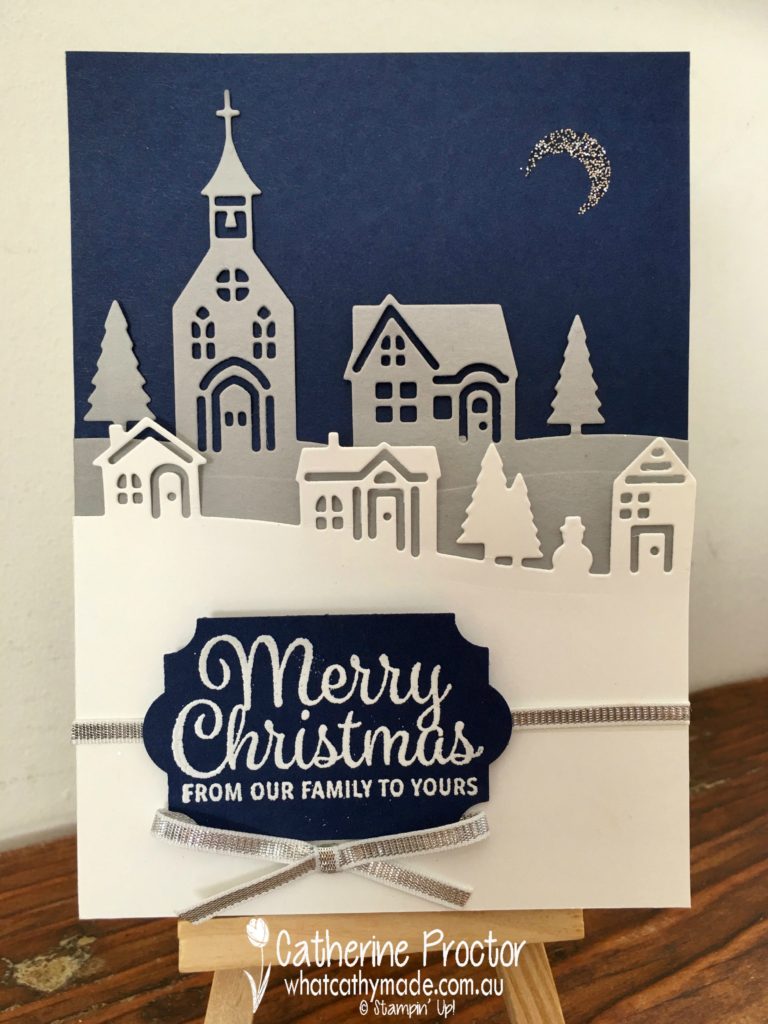
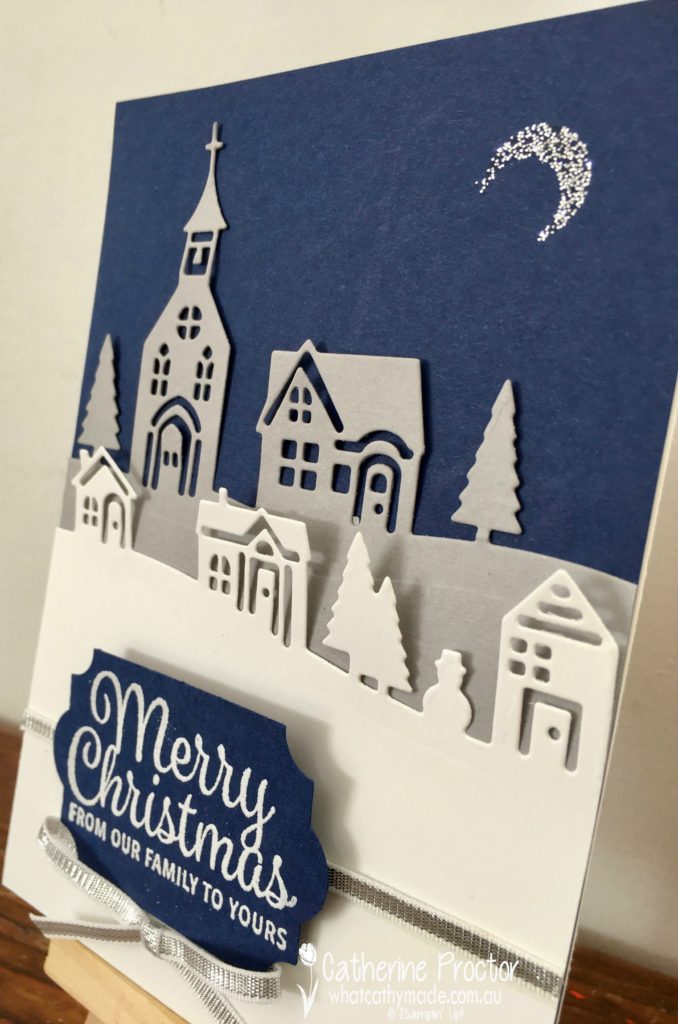
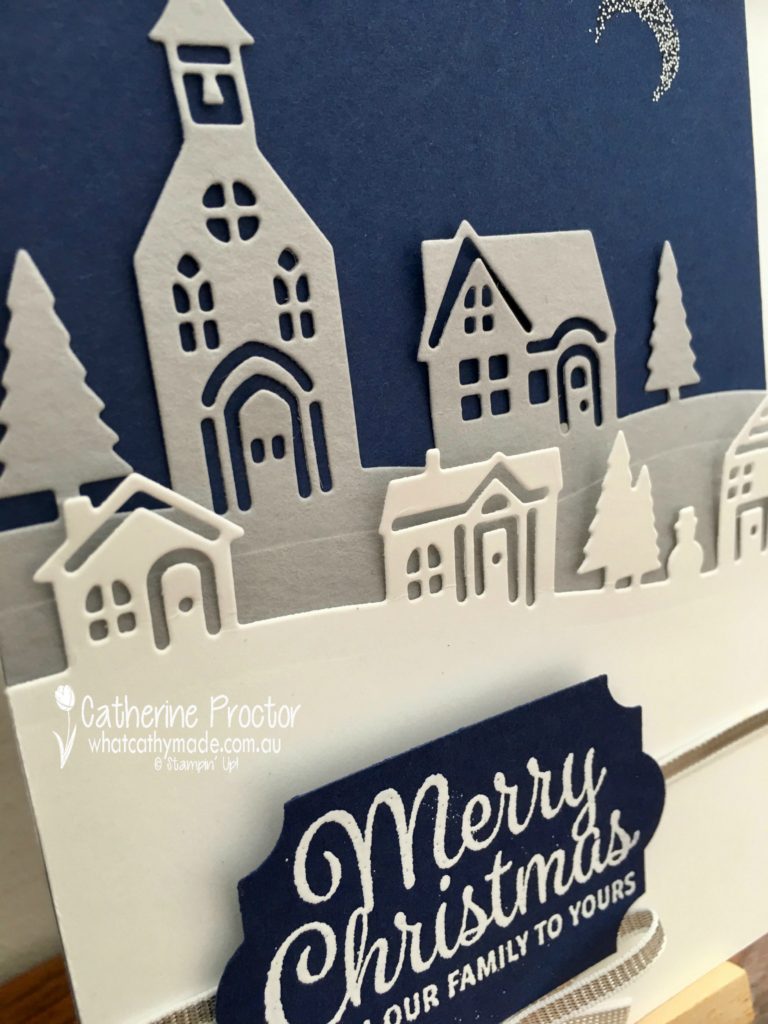
The most obvious product on this card is the stunning Hometown Greeting Edgelits Dies. I’ve used my big shot to cut them out from whisper white, smoky grey and night of navy card stock. Every time I use this set of framelits I notice another tiny little detail, such as the bell in the church tower, the handle on the doors and the teeny tiny top hat on the little snowman…it’s just all too cute for words!
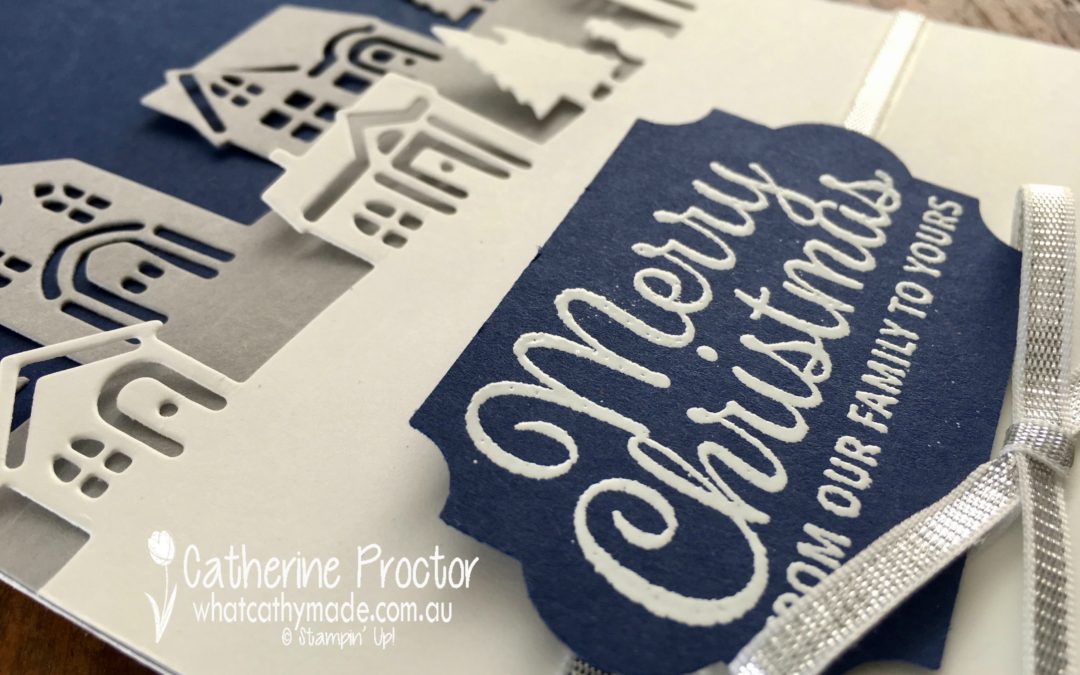
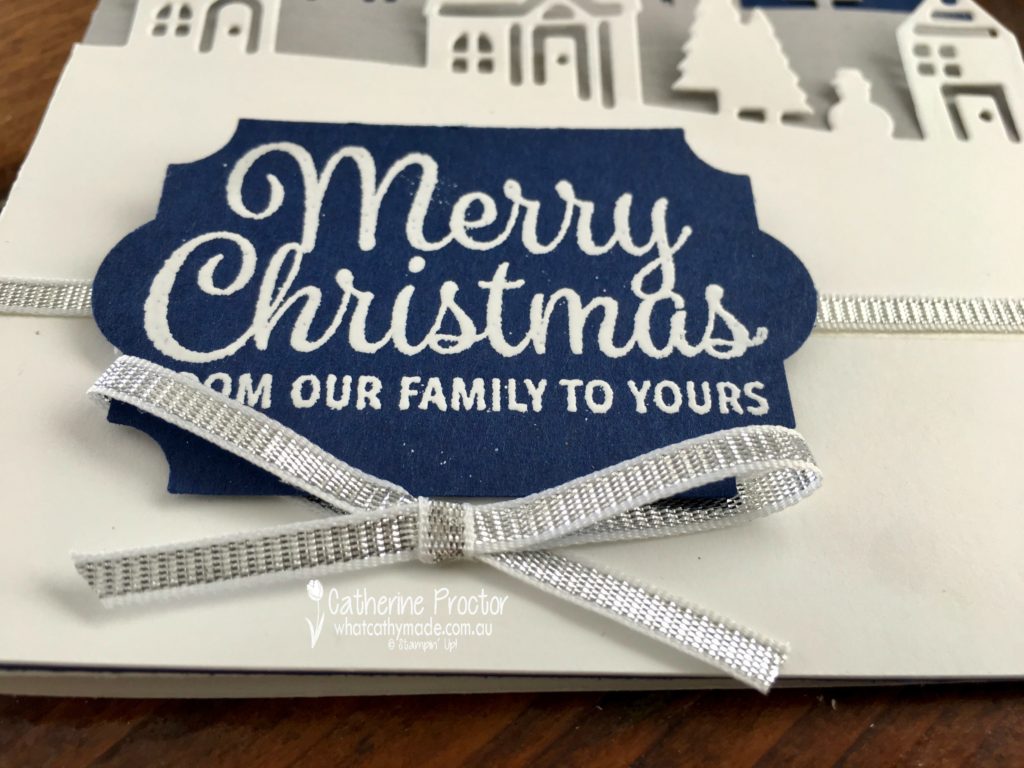
I knew I wanted a sentiment to add dimension to my card so I decided to use the new everyday label punch to cut out some night of navy card stock. But the most exciting part of making this card came about when I was deciding which sentiment to use with the everyday label punch.
Quite by accident I discovered that my absolute favourite sentiment from the entire catalogue (the Merry Christmas stamp in the Snowflake Sentiments stamp set) fits perfectly into the Everyday Label Punch. In fact it fits so perfectly it looks as if they are from the same bundle and designed to be used together.
Once I recovered from my excitement I just had enough time to cover the whisper white ink while it was still wet with white embossing powder and heat emboss it with my heat tool to further emphasise the beautiful font of this stamp.
The final touch for this card was little bit of bling. I used a strip of 1/8 inch silver ribbon at the bottom of the card and added a bow under the label punch. And then I stamped the moon from the Hearts Come Home stamp set (part of the Hearts Come Home bundle with the Hometown Greetings Edgelits) and sprinkled it with some silver Stampin glitter.
I hope you’ve enjoyed my holiday catalogue inspiration today. Make sure you also check our what the other ladies in our Art with Heart blog hop have made from the holiday catalogue.
If you find a broken link or have come to this blog hop from a different entry point, you can view the participants below:
Welcome back to Week 13 of our weekly Heart of Christmas blog.
Although I missed week 1, I’m determined to try to post a Christmas card or project every week until Christmas. I really love making Christmas cards and being part of this weekly blog with the Art with Heart Team is a great excuse to make Christmas cards year round. It also means I end up being super organised with my cards by the time December comes around… a win/win!
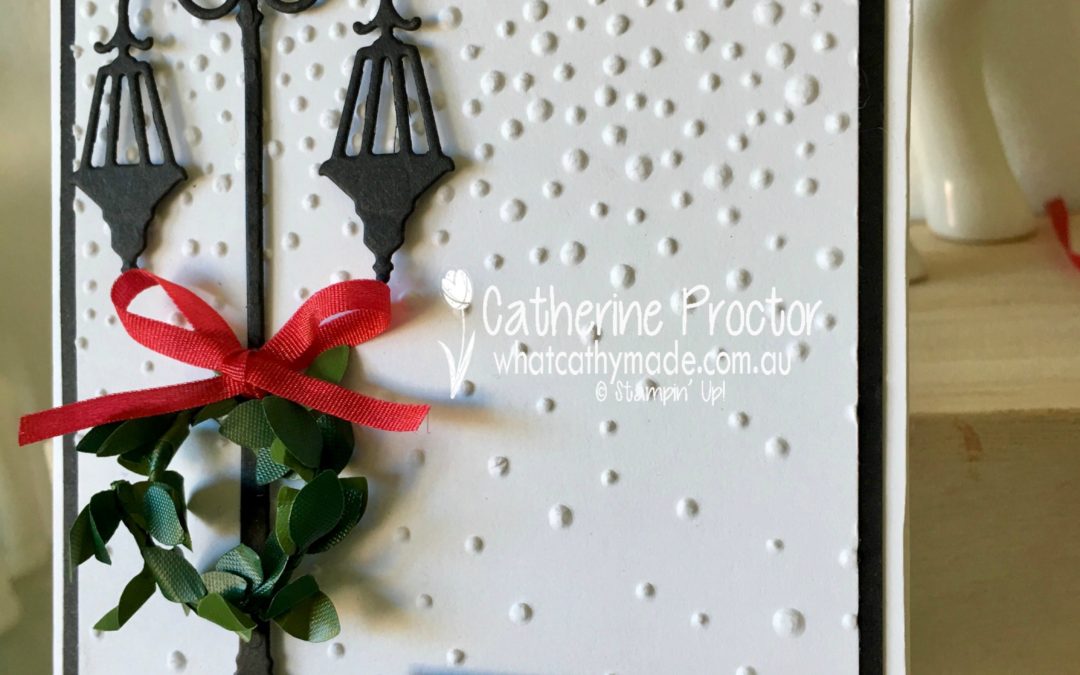
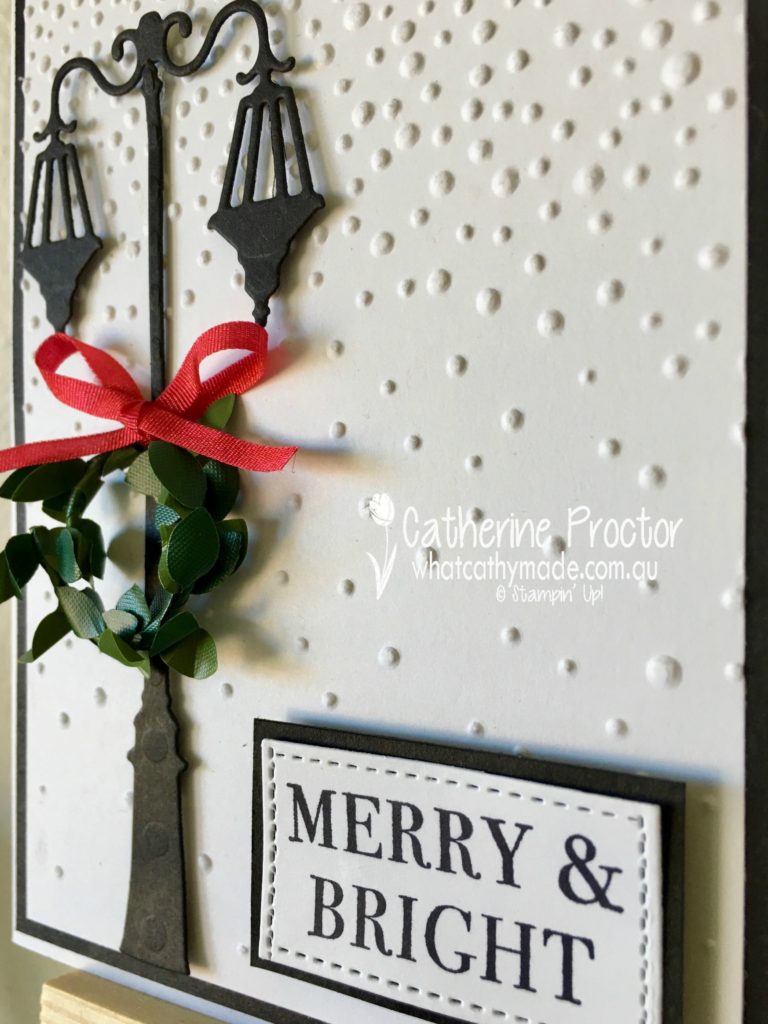
This week I wanted to make a simple card that would “hero” the gorgeous new lamppost die. This die reminds me of my one and only white Christmas in 1989, which I spend in Edinburgh (where my father’s family comes from) after a month’s holiday in the UK. It was such a special time and I loved having a white Christmas in that magical city.
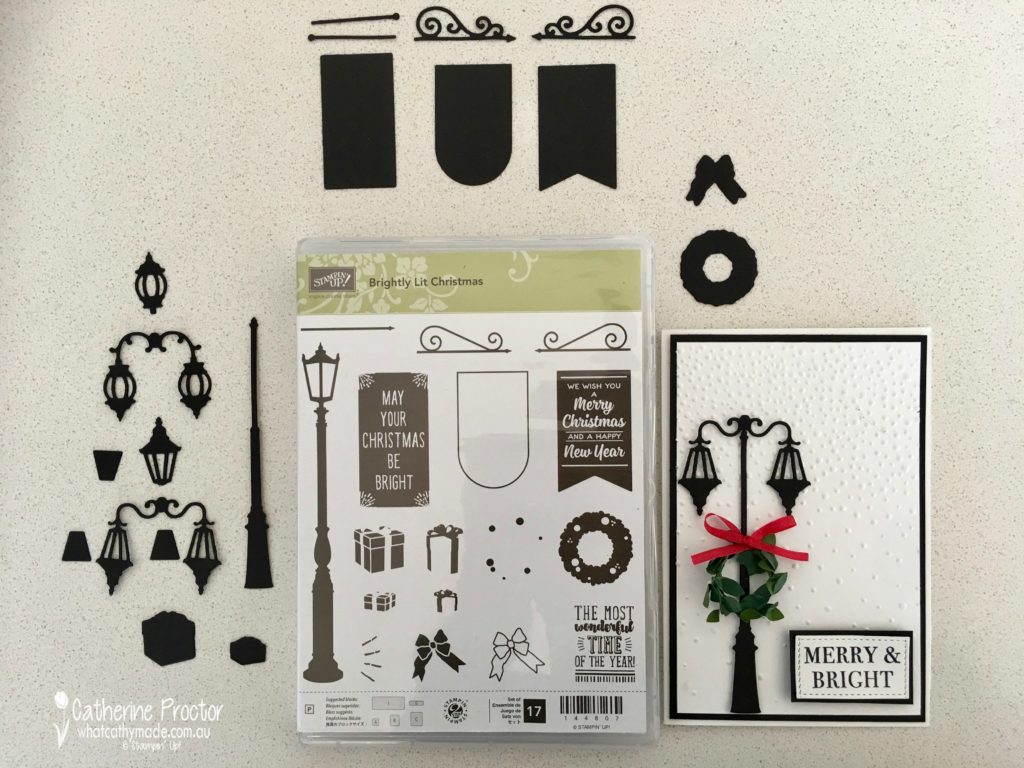
The Brightly Lit Christmas bundle comes with a variety of lamps and they look great angled up or down, used singularly, or with 2 or 3 lampshades. There’s also the option of a hanging banner or sign that hangs off an arm off the lamppost (the matching stamp set has signs that fit perfectly into these banners). I’ve cut out all the dies below and photographed them beside the Brightly Lit Christmas stamp set so you can see just how many pieces you get in this bundle, how they co-ordinate together, and how versatile it is!
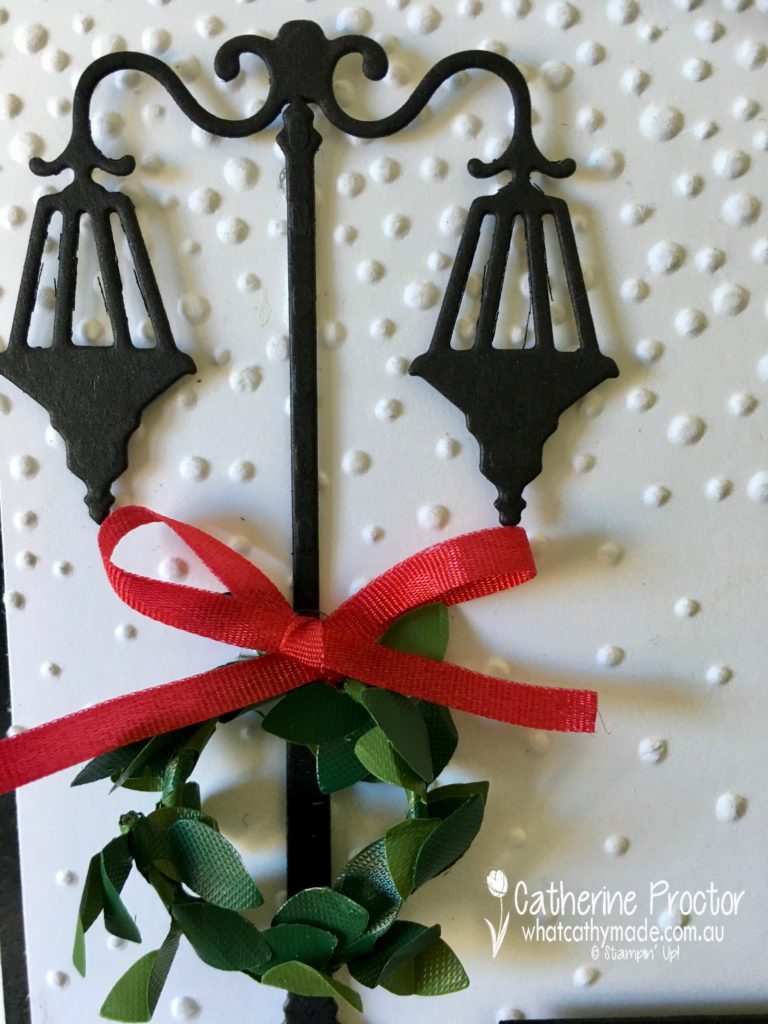
The perfect background for this lamppost is the softly falling embossing folder. I must admit I often forget to use my embossing folders but when I do remember to use them I just love the texture and dimension they add to my cards.
I’ve used some of the new beautiful 1/8 inch real red ribbon to attach one of the darling little boxwood wreaths to the lamppost. I actually cut the wreath in half with my scissors to make it the right dimension for this card.
Finally, to finish the card off I thought the “Merry & Bright” sentiment from the new Hearts Come Home stamp set was just the perfect match for a lamppost. If you love the Hearts Come Home bundle as much as I do take a look at my blog tomorrow as I’ll be sharing another card that features this beautiful bundle.
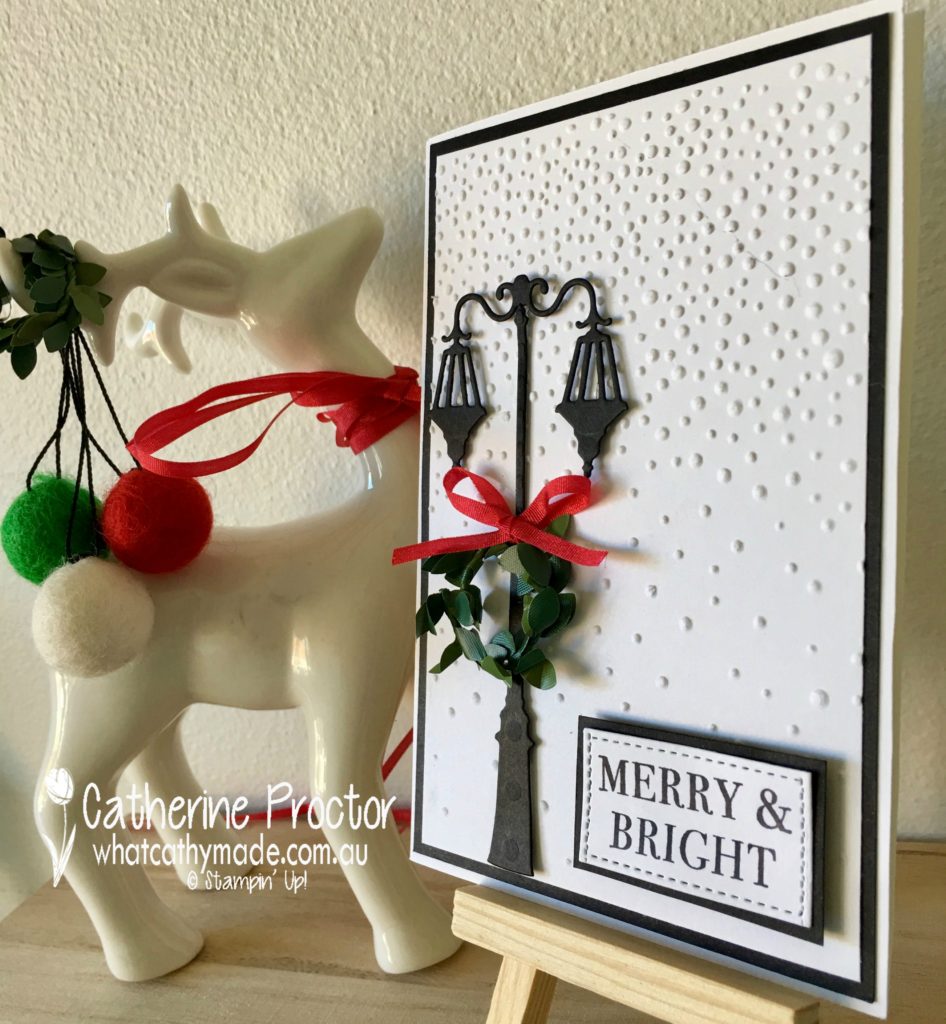
I love this classic and neutral colour combination of black and white because I think it really makes the green wreath and red ribbon pop. And my little reindeer just loves his fancy pom pom decorations for this week’s blog!
To see what the rest of the team have made, visit Claire’s blog here. I’ll be back with more Christmas card inspiration next week.
Product List (I can’t include a link here to the Brightly Lit bundle, the real red ribbon or the Hearts Come Home stamp set because these are not available for purchase until September 1)
Welcome back to another week of “Heart of Christmas” inspiration from the Art With Heart team. I hope you’re enjoying reading our blog as much as we’re enjoying making these cards!
I’m just loving all the products from the new holiday catalogue (contact me if you’d like a copy and I’ll post one out to you) and this week I decided to mix up some old and new products to make a box of iced gingerbread Christmas ornaments.
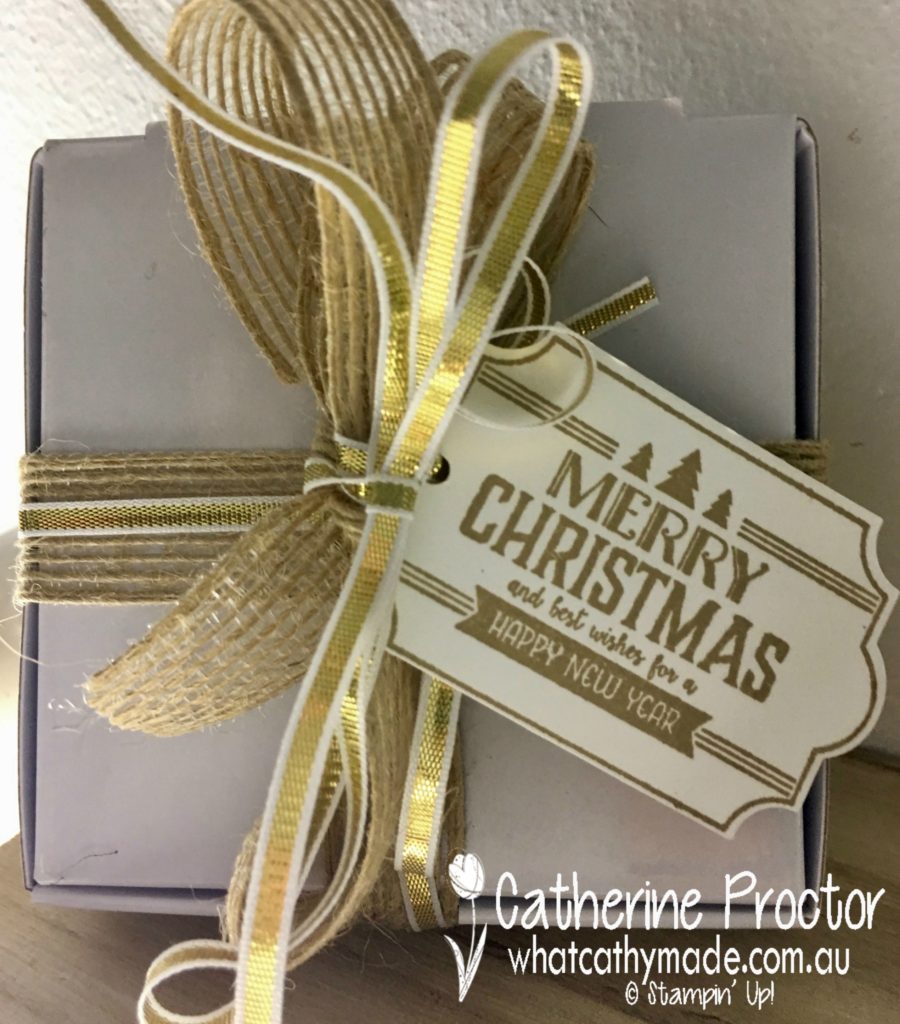
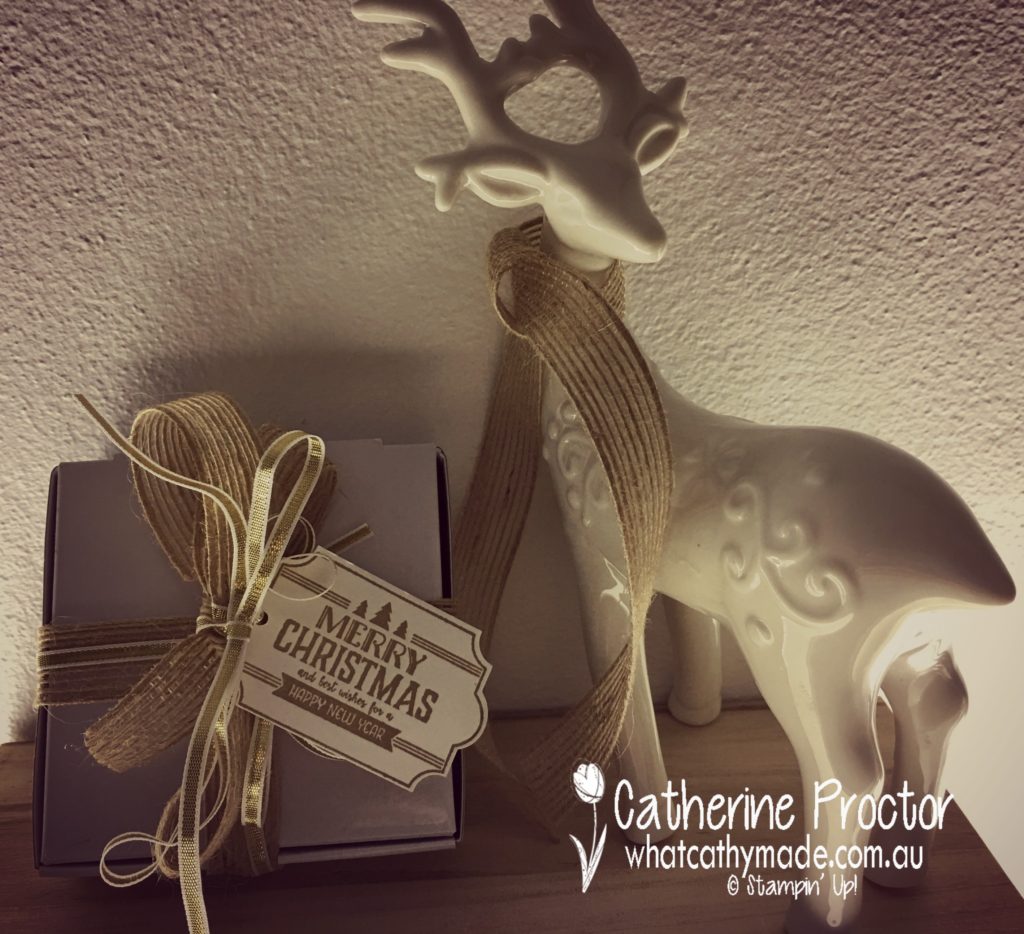
This packaging was so quick to make. I stamped the tag using crumb cake ink and the Merry Little Labels stamp set which I then punched out with its matching label punch. This new everyday label punch is so versatile and it has 2 new stamp sets that match it!
My ornaments are presented in a mini pizza box…so cute! They come in a pack of 8 and are food safe if you want to use them to package up edible gifts. You simply fold the precut and scored pizza box into shape and glue 2 of the bottom flaps. Then it’s all ready for you to pop your gifts inside. I wrapped mine up with burlap ribbon and 1/8 inch gold ribbon, then used some more of the ribbon to attach the gift tag.
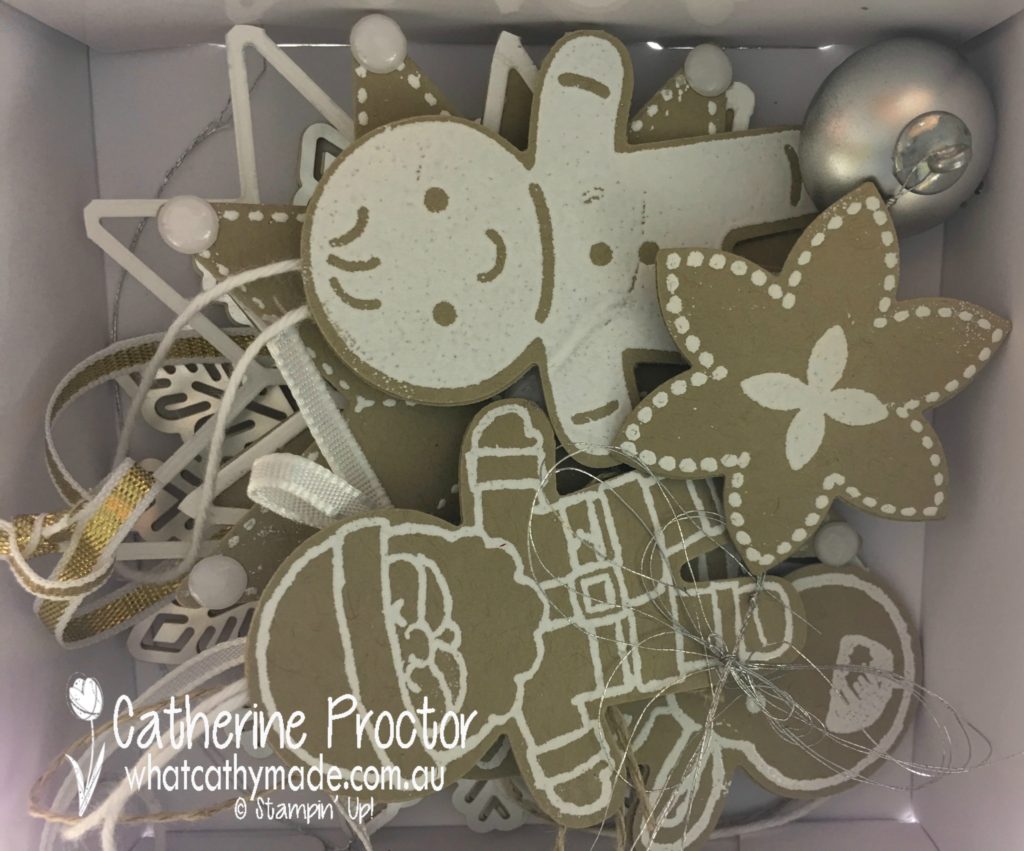
Want to take a peek inside the box?
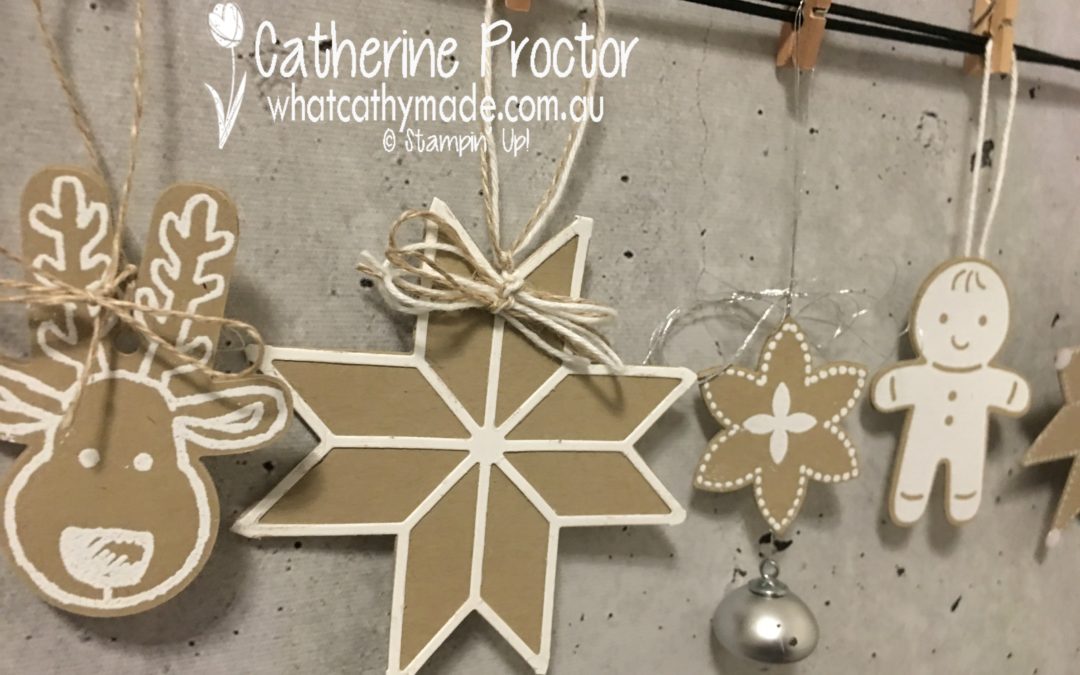
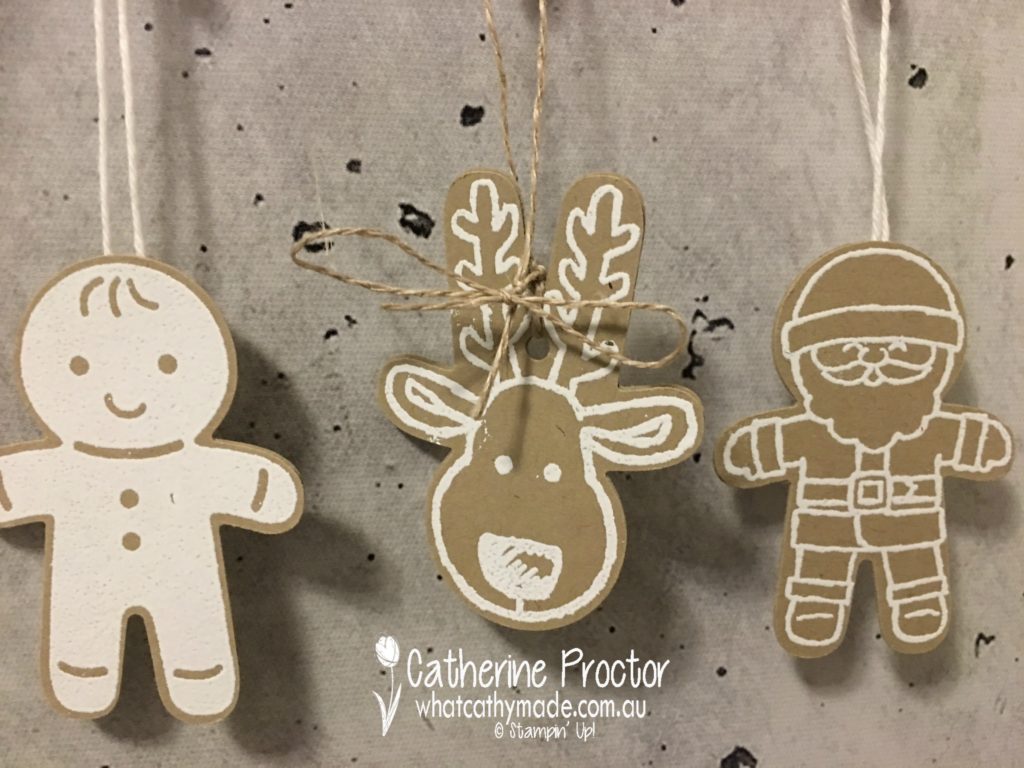
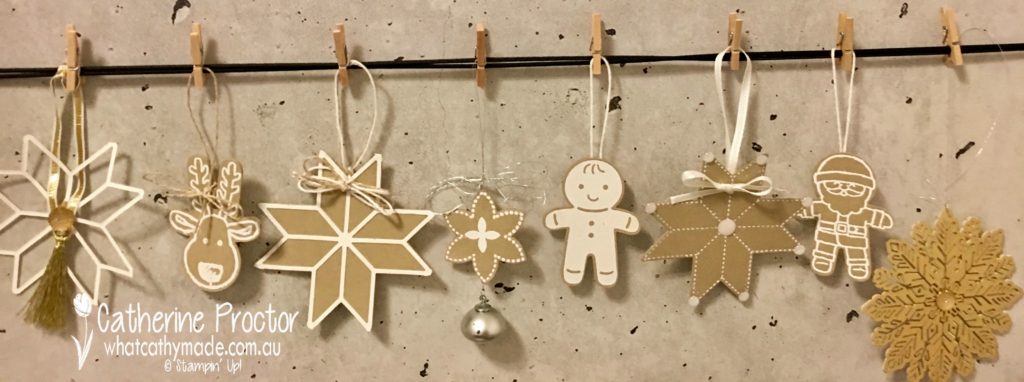
Using crumb cake paper, whisper white paper and ink, white embossing powder, my heat tool and various embellishments and ribbons I’ve made a set of Christmas tree ornaments that (hopefully) look like iced gingerbread ornaments for the tree.
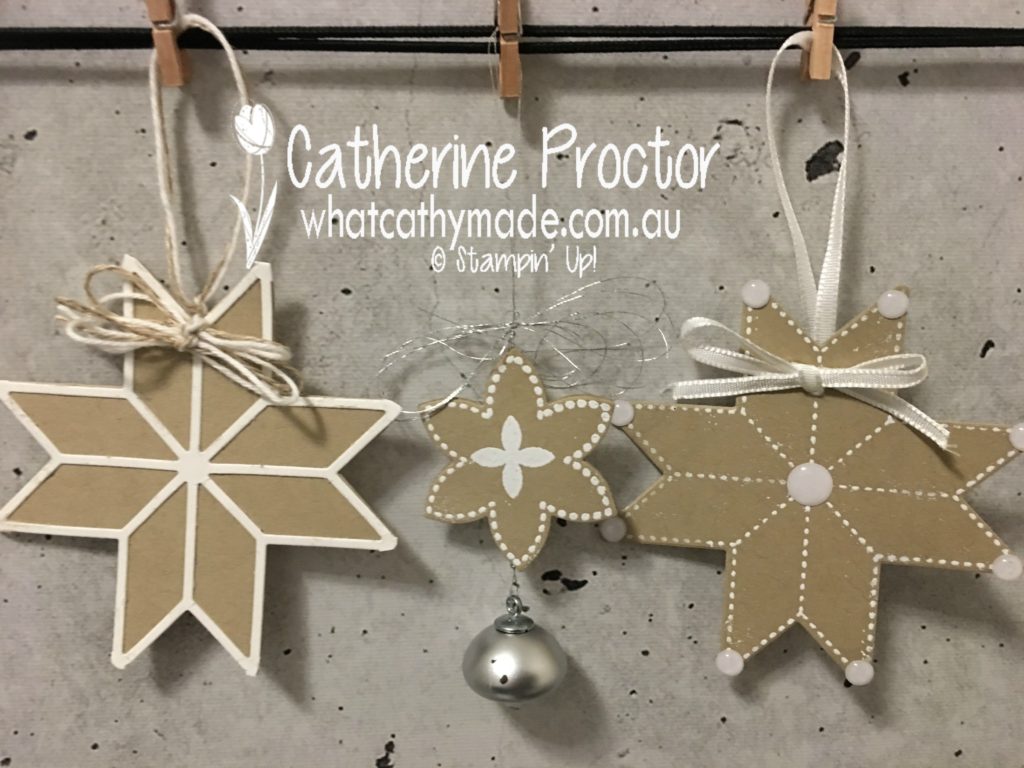
I started by using the new quilt builder framelits and merry little quilt stamps to make the first 3 ornaments. Did you notice the silver ornament hanging from the middle one? Thats a new embellishment called mini ornaments and they also come in a pack of 8.
And I just love how the white embellishments on the star on the far right look like little blobs of royal icing on the gingerbread biscuit!
I then decided to use the cookie cutter punch and its matching stamp set to make another 3 iced gingerbread ornaments, this time using white bakers twine and linen thread to hang them from the tree.
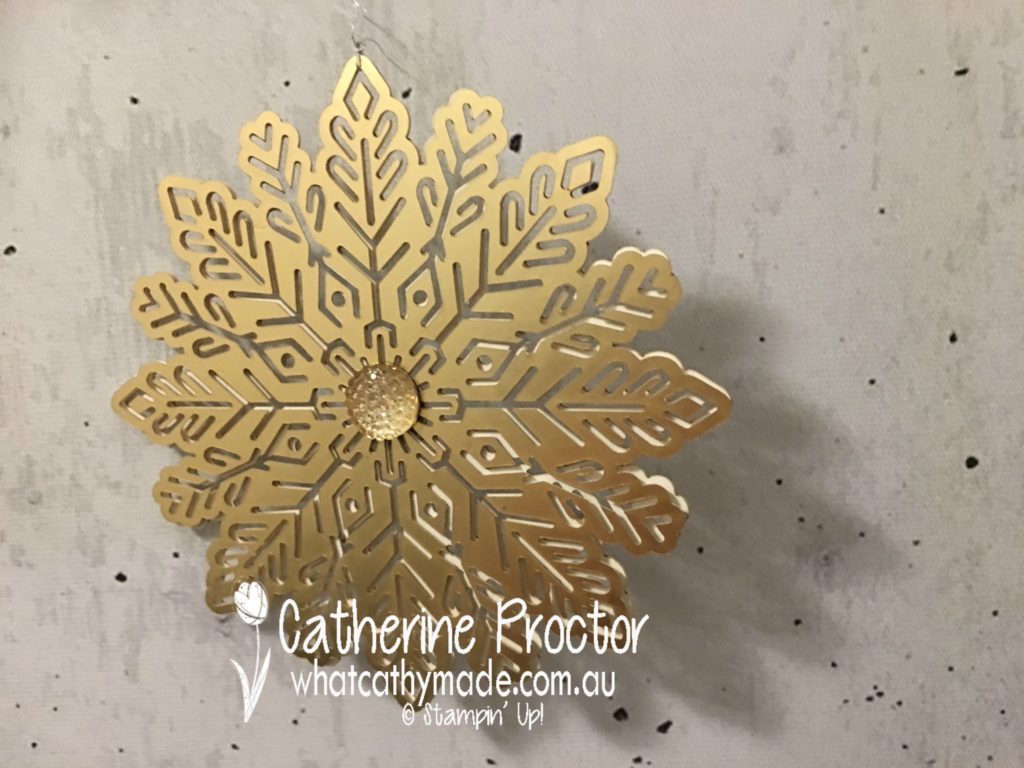
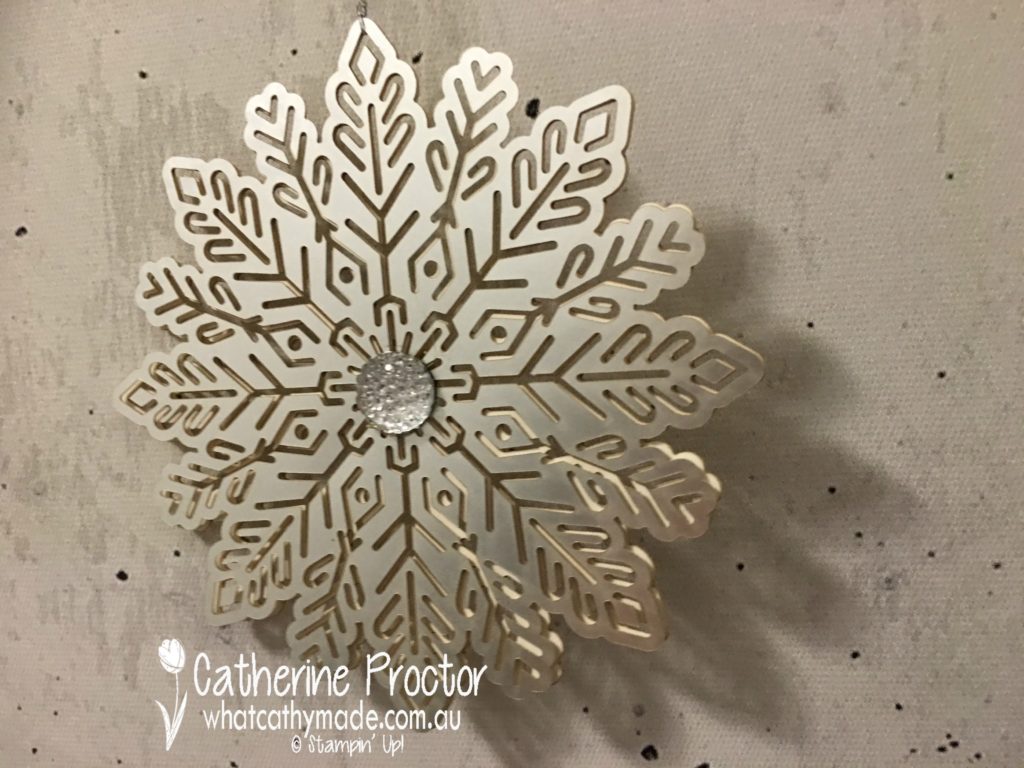
I was having so much fun I also made a very quick and easy snowflake ornament by simply adhering and gold and a silver snowflake together and placing a gold and a clear facetted gem in the middle of each side. This time I used silver thread as the hanger.
If you wanted a last minute present you could make up a set of these snowflake ornaments and present them in one of the little pizza boxes…no stamping or die cutting required, just glue dots and a quick tie of the silver or gold thread and you’re done! I think I might make a set of these for my tree this year…they are so sparkly and beautiful!
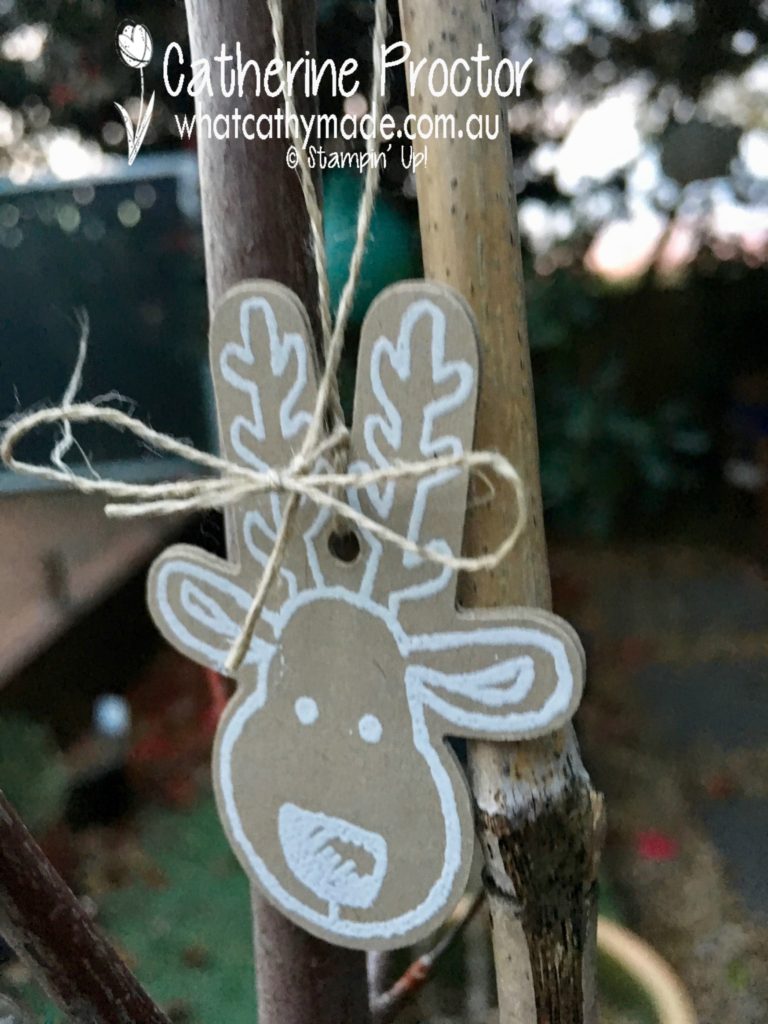
Okay, I really, really tried to say no…but one of the naughty reindeers carried on a treat until I relented and said yes, you can be in the blog. I mean he already had the burlap ribbon tied around his neck, so what could I do?
And finally, here are all my little iced gingerbread ornaments lined up in a row!
I did attempt to take a picture of them all hanging on a tree outside but it was already way too dark, so here’s a closeup of just one of them on my very bare maple tree (it’s winter here in Australia).
To see what the rest of the team have made this week, visit Claire’s blog here.
I’ll be back with more Christmas card inspiration next week.
Product List (unfortunately I can’t include the new products from the holiday catalogue in this list yet)
Welcome back to another week of “Heart of Christmas” inspiration from the Art With Heart team. I hope you’re enjoying reading our blog as much as we’re enjoying making these cards!
Well I received my “little” order from the holiday catalogue this week but as luck would have it have had very little time to play with my new goodies.
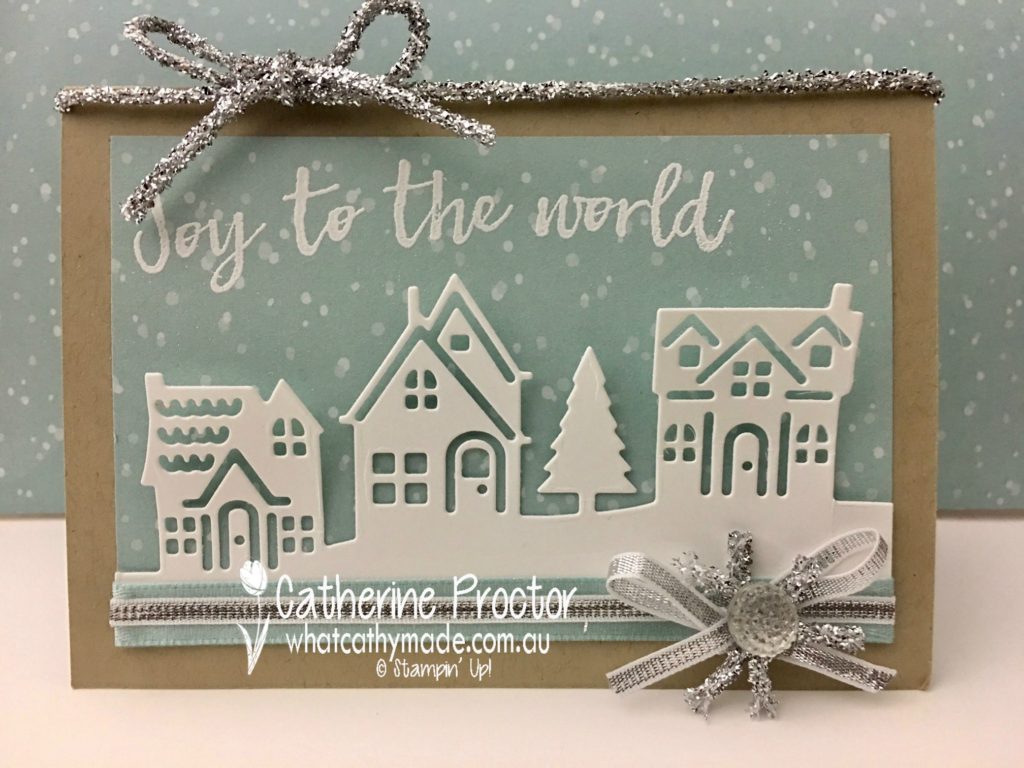
However I was determined to bring you a card made with one of the stunning products and so I decided to make a quick and easy card with the bundle that was at the absolute top of my wish list…”Hearts Come home”.
I love absolutely every stamp, every sentiment and every die in this bundle, and this card only uses a fraction of them all.
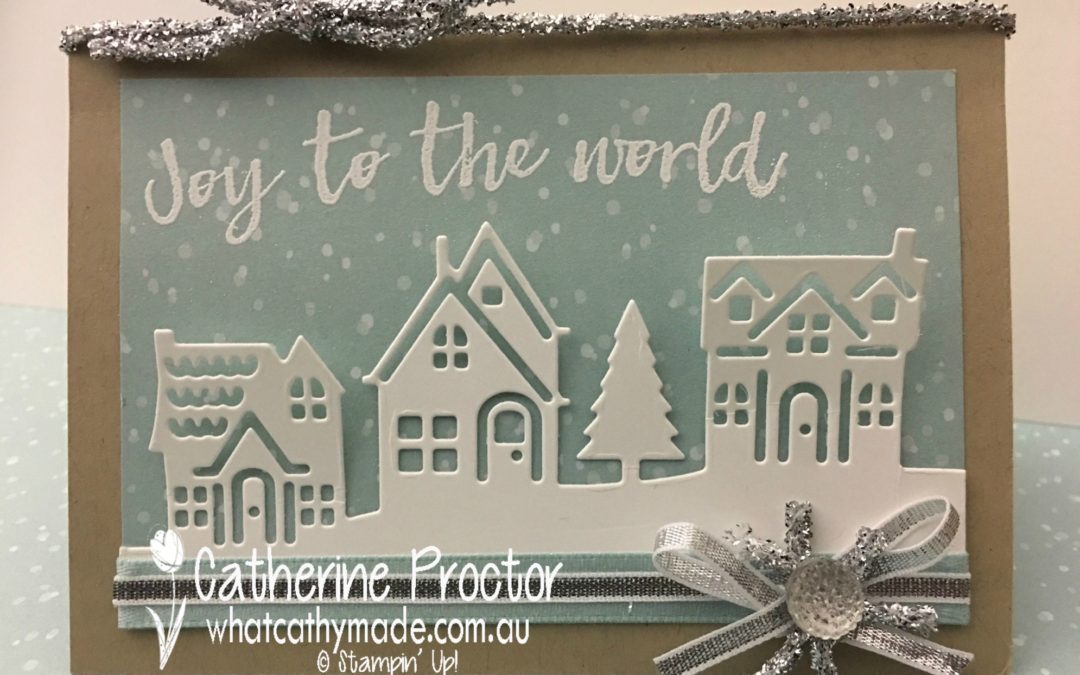
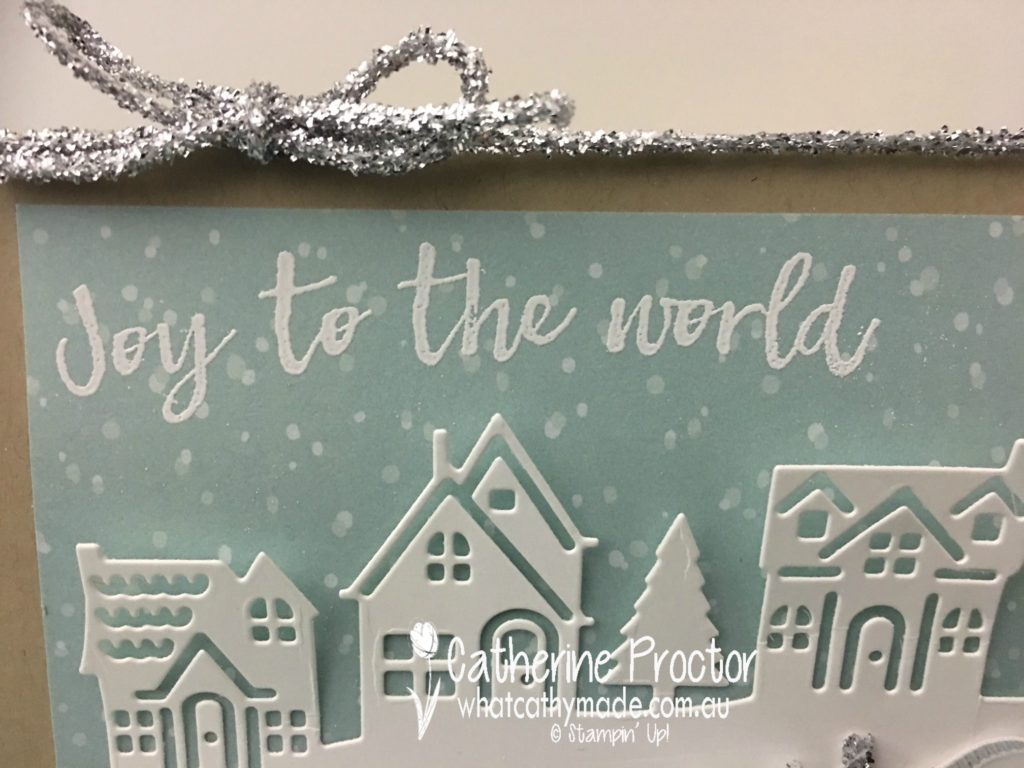
The stunning background paper comes from a sensational DSP pack called “Christmas Around the World”. This paper belongs to a different suite but the beauty of Stampin’ Up! is that all the products co-ordinate across the suites and I just love mixing and matching them all.
Here’s a close-up to show you how the paper looks like softly falling snow and the intricate detail of these gorgeous little framelits.
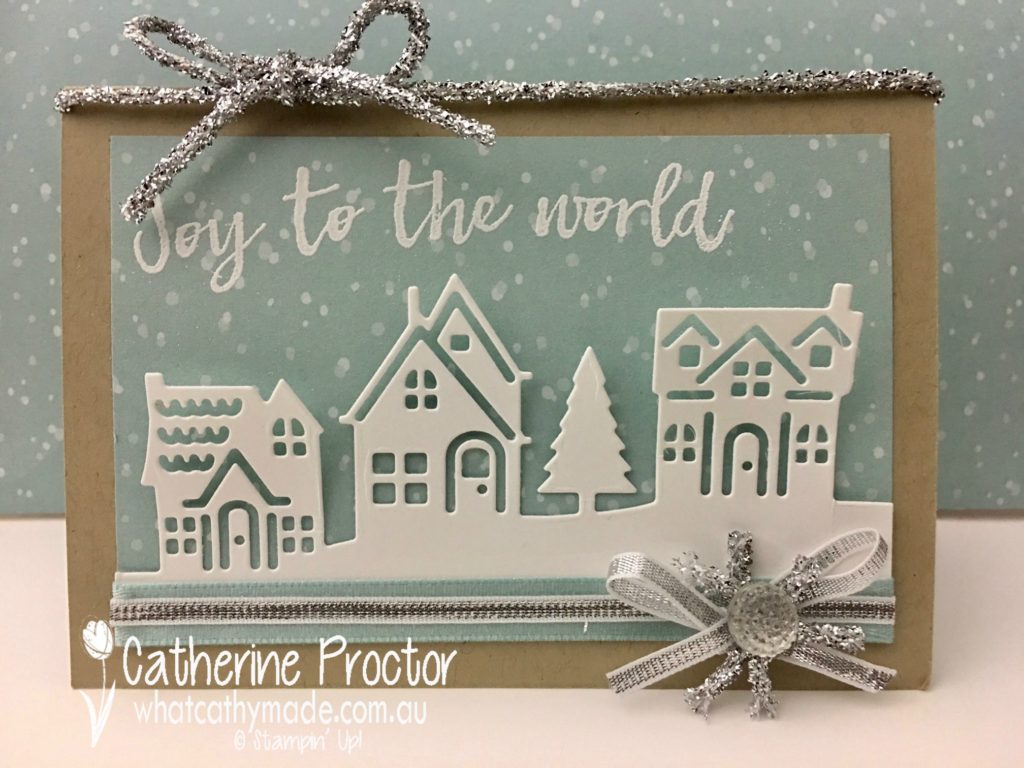
I stamped the “Joy to the World” in whisper white and then embossed it with my heat embossing tool using white embossing power.
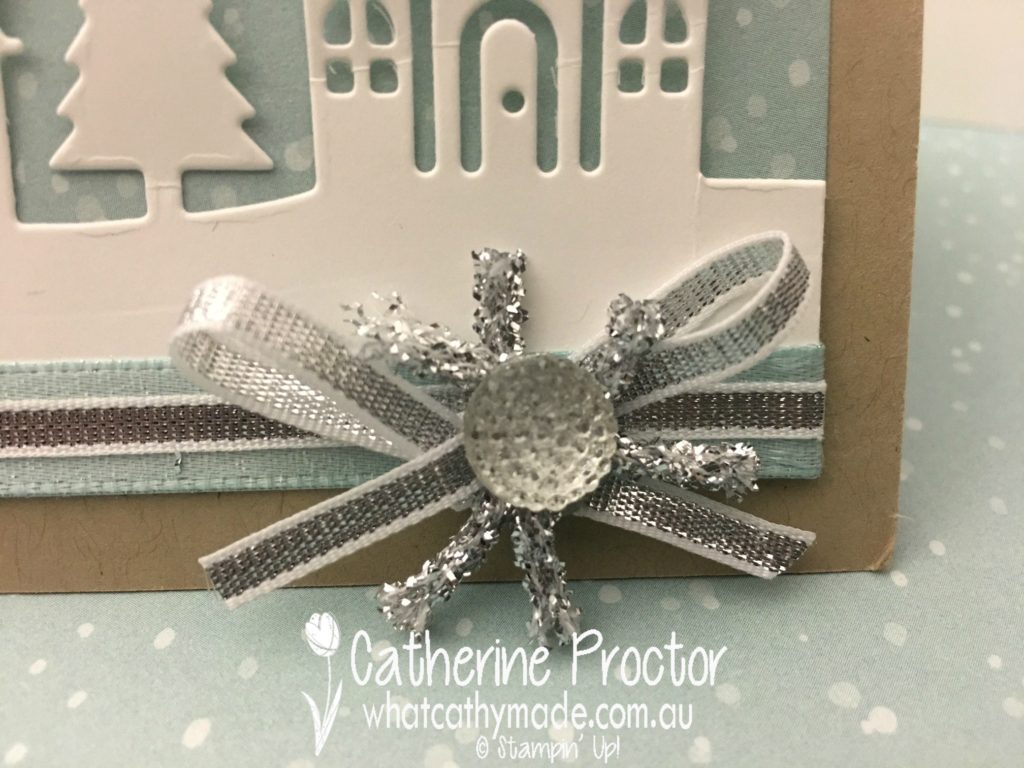
Did you notice the tinsel on the top of the card? This is a great way to add a little bling to your cards. It’s called Mini Tinsel Trim and it comes in a pack with a roll of silver and a roll of red. So cute!
I used the off-cuts of my tinsel to make an embellishment that sits on top of the 1/8 inch silver ribbon and bow, and the beautiful pool party shimmer ribbon. Just between you and me I think it might be little too much for this card, but with the clear facetted jewel in the middle, it certainly adds a wow factor to the card!
I love this colour combination of crumb cake (card base), pool party (DSP and ribbon), whisper white (framelits and sentiment) and silver (tinsel, ribbon and facetted jewel).
To see what the rest of the team have made, visit Claire’s blog here. I’ll be back with more Christmas card inspiration next week
 Now that I’ve sorted the card…the next tricky question is what do you give your dad for Father’s Day?


 Burlap Ribbon")