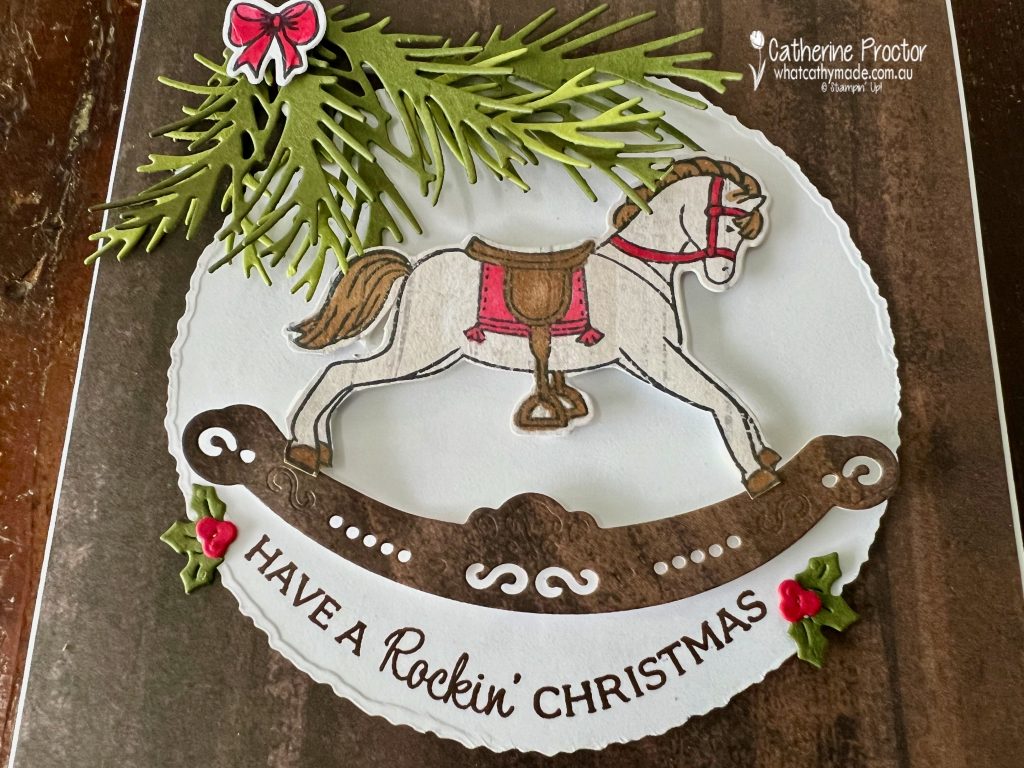
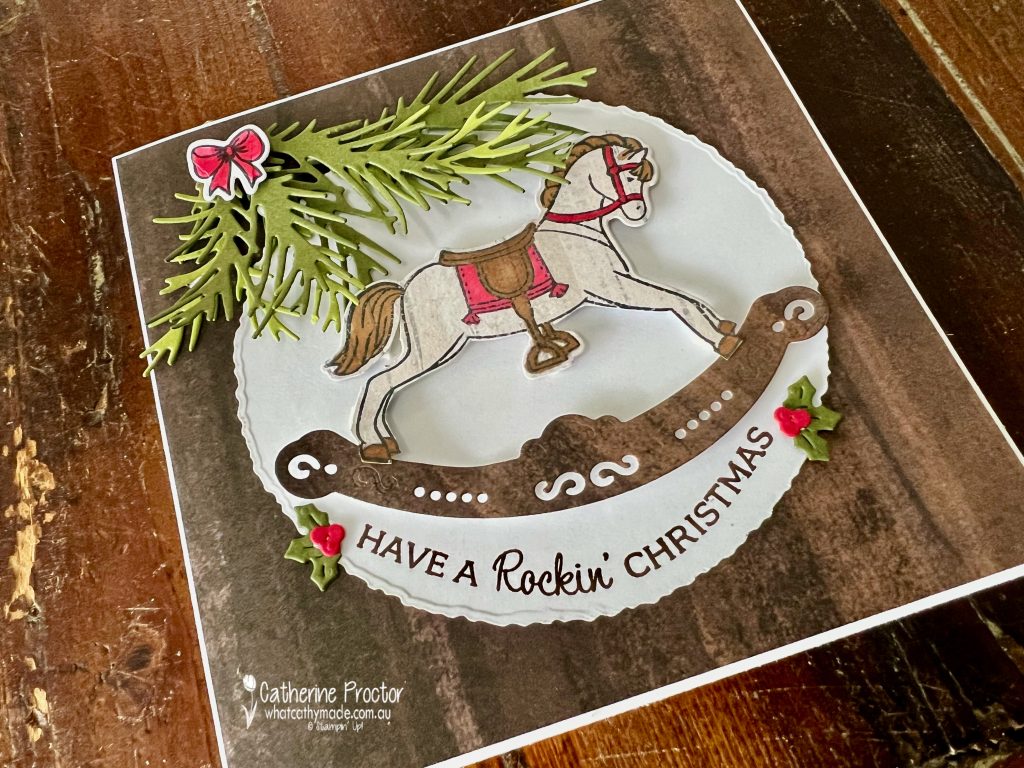
The challenge for Day 3 of the #30DayChristmasCardMakingChallenge is ‘Rockin’ Around’.
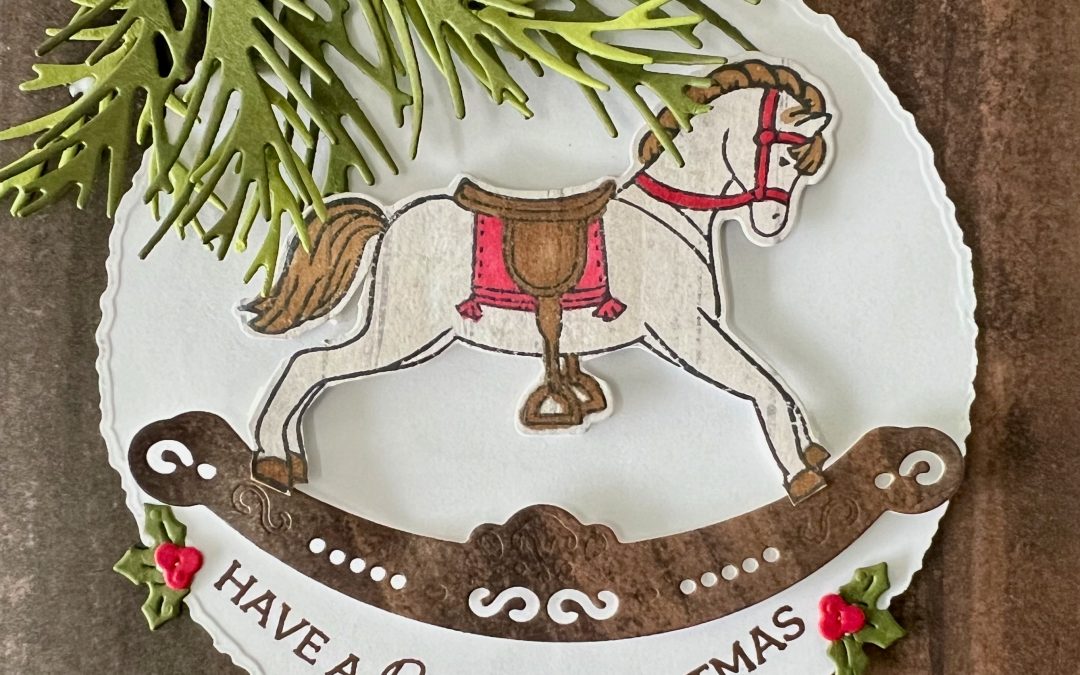
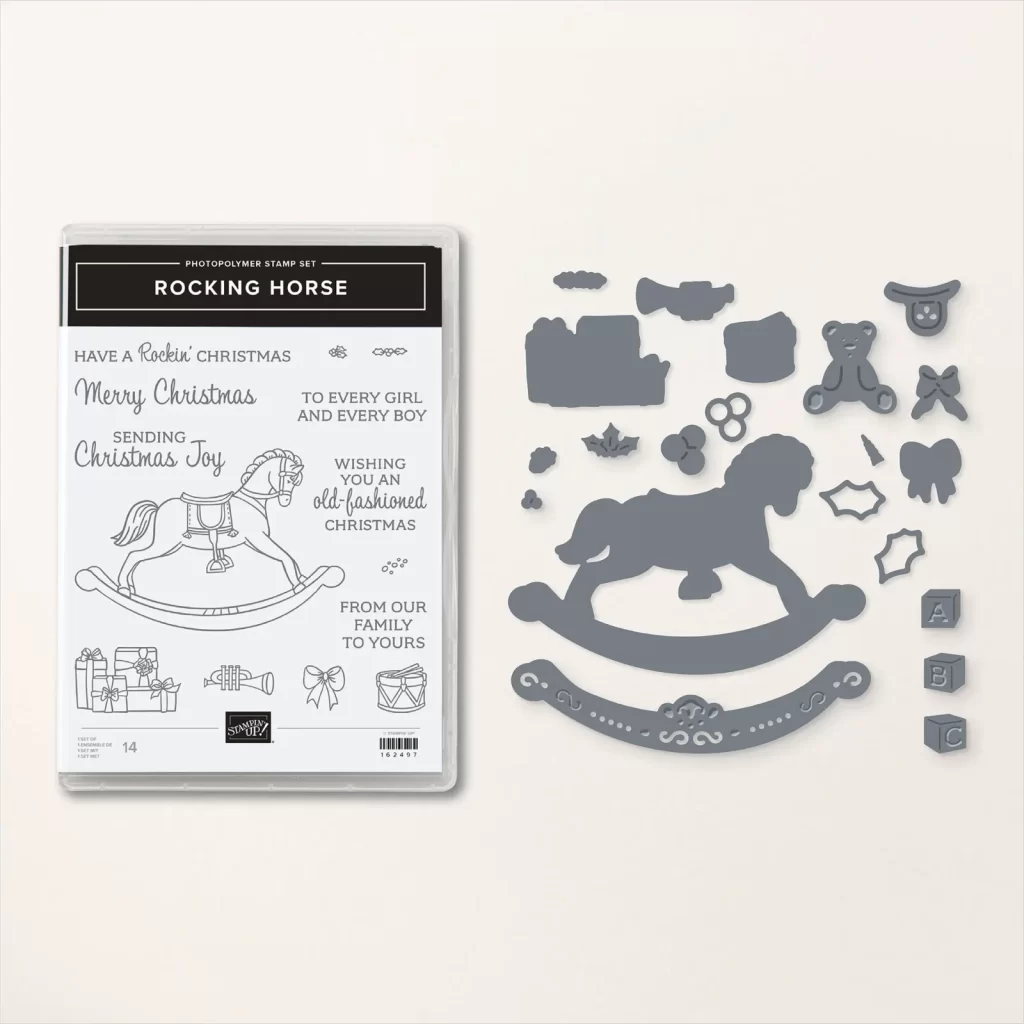
The Rocking Horse Bundle is such an obvious choice for the theme, ‘Rockin’ Around’. I actually bought this bundle to use for new baby cards, however it is a Christmas bundle.
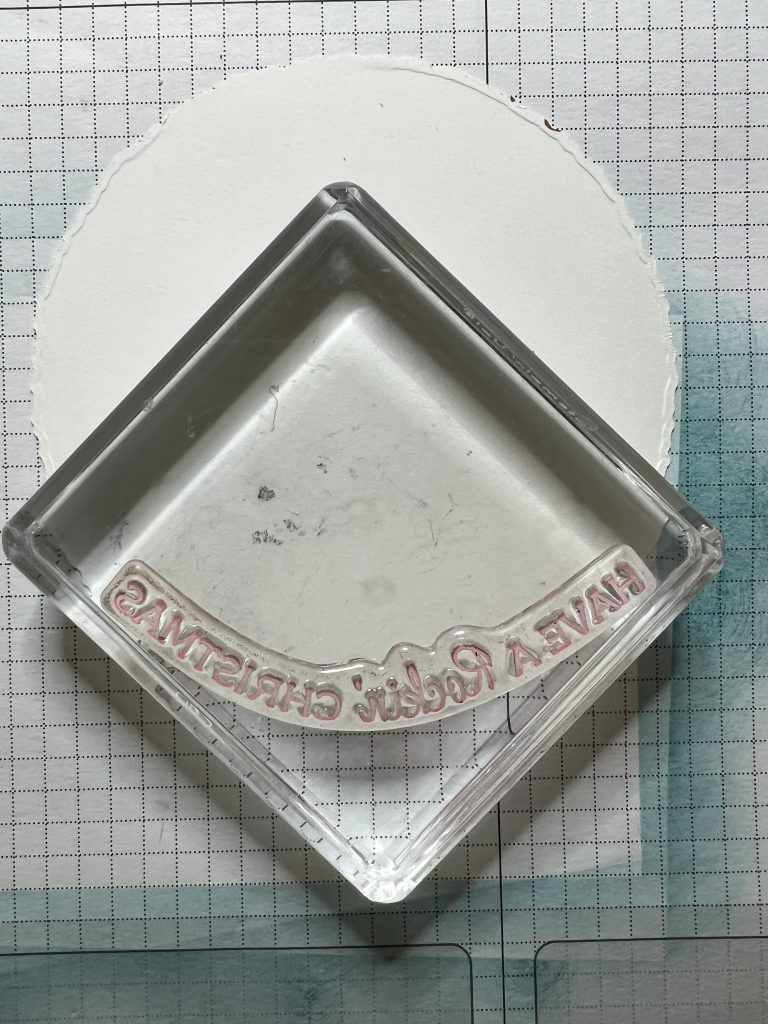
As this stamp set is photopolymer, it’s easy to curve the sentiment. First I die cut a circle of Basic White card stock and then placed my acrylic block over the area where I wanted to stamp. Then I adhered the stamp on top of the block, lining up the curve of the sentiment with the curve of the circle.
I inked up the sentiment with Early Espresso Ink and stamped it onto the deckled circle.
The rocking horse was stamped onto a sheet of the One Horse Open Sleigh Designer Series Paper, coloured with Read Red and Pecan Pie Stampin’ Blends and die cut, before I fussy cut the rocker off the bottom.
I replace the rocker using the ‘rocker base’ die from the Rocking Horse dies which was die cut from another sheet of One Horse Open Sleigh Designer Series Paper.
The Christmas tree fronds are made using the Joy of Noel dies and the Christmas Pinecone dies, die cut from Old Olive and Mossy Meadow card stock.
The tiny Christmas holly dies are from the Rocking horse dies, die cut in Real Red and Mossy Meadow.
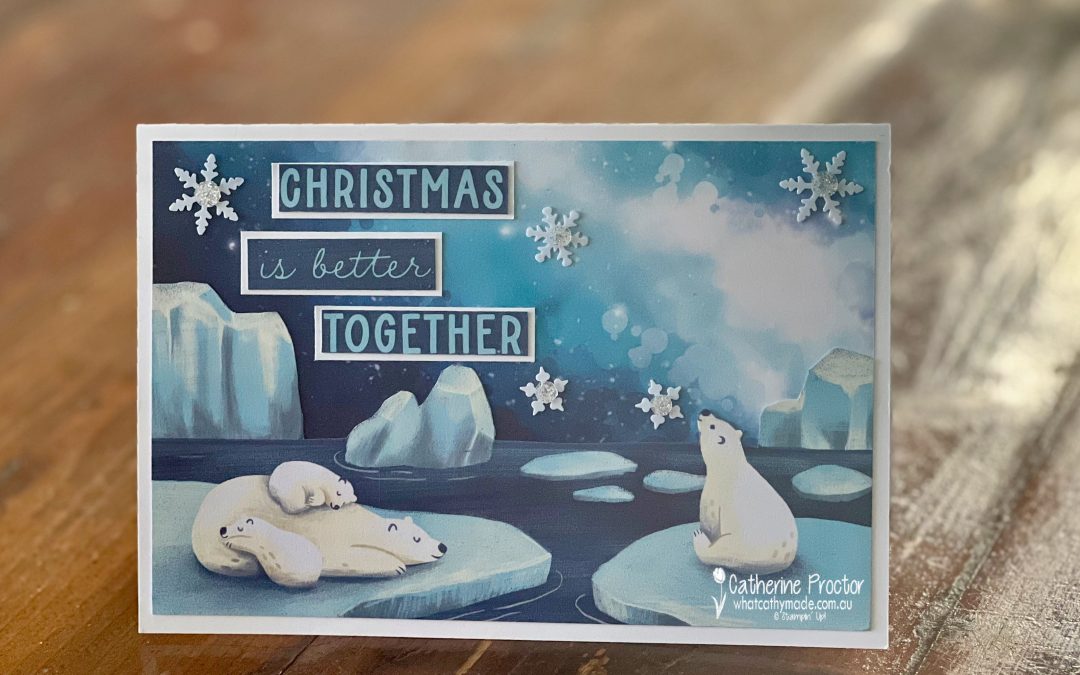
The challenge for Day 2 of the #30DayChristmasCardMakingChallenge is ‘Frosty Air’.
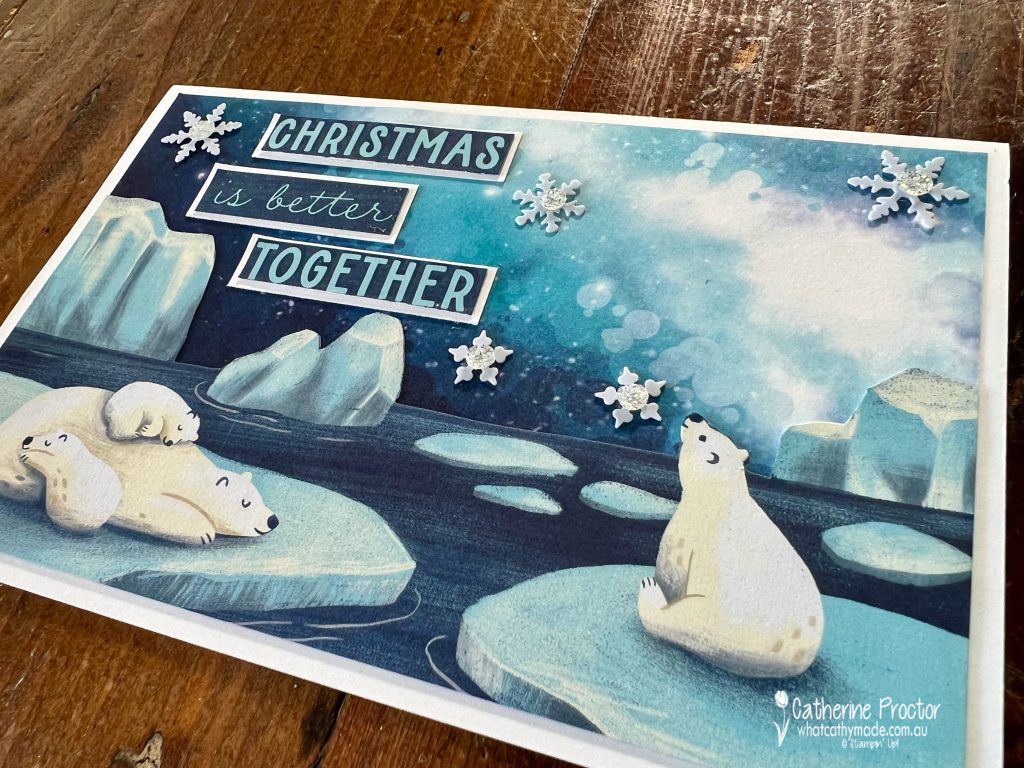
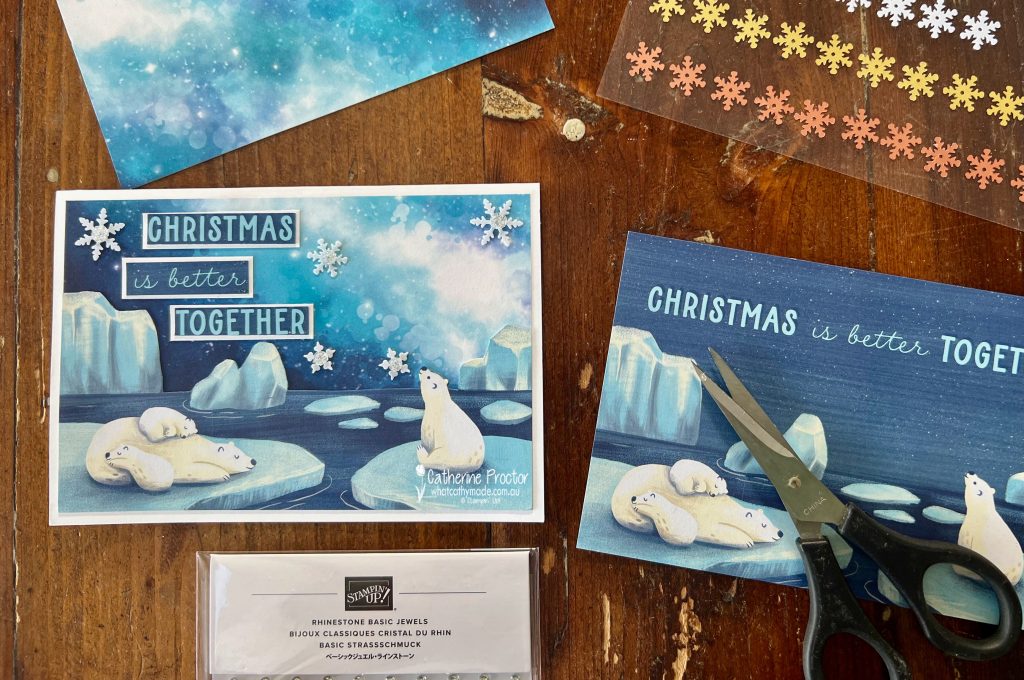
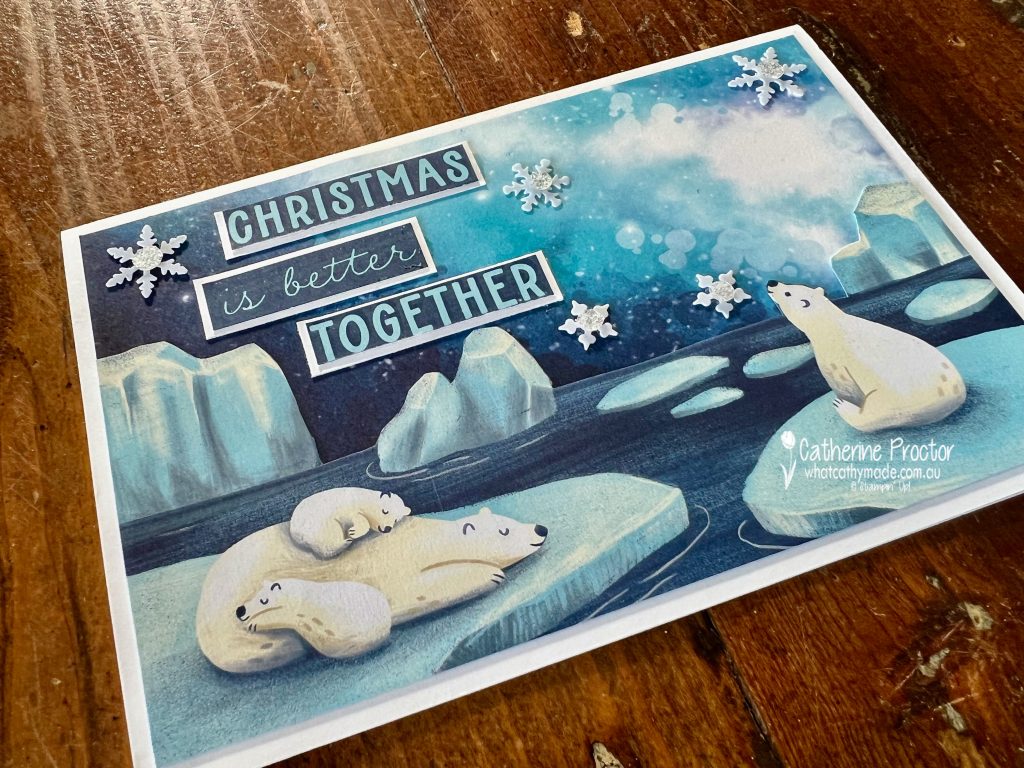
Can you get any more frosty than a family of polar bears relaxing on an ice shelf with snowflakes falling?
This simple, no stamping card uses the Stargazing Designer Series Paper for the frosty sky and a card from the Beary Christmas Memories & More Card Pack, fussy cut with paper snips.
The ‘Christmas is better together’ sentiment has been cut with the paper trimmer from the M&M card and mounted onto some Basic White cardstock scraps.
Adhesive snowflakes and rhinestone gems add an extra touch of frostiness to this winter scene.
Welcome to week twenty seven of our Art With Heart 2023-24 Colour Creations blog hop!
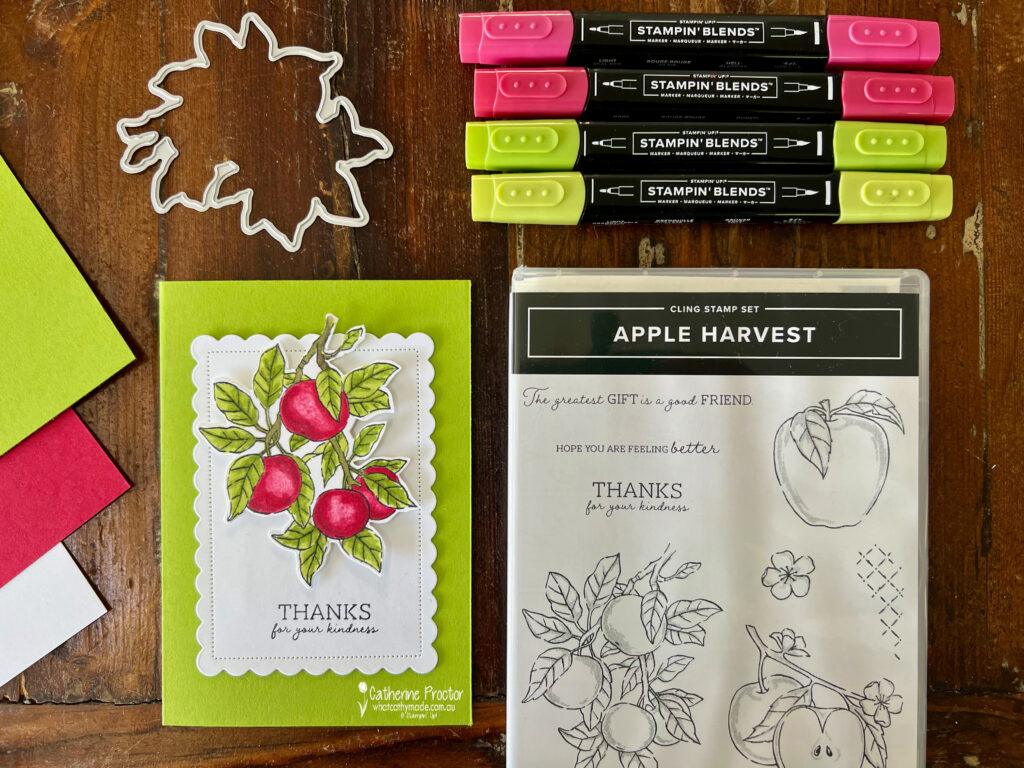
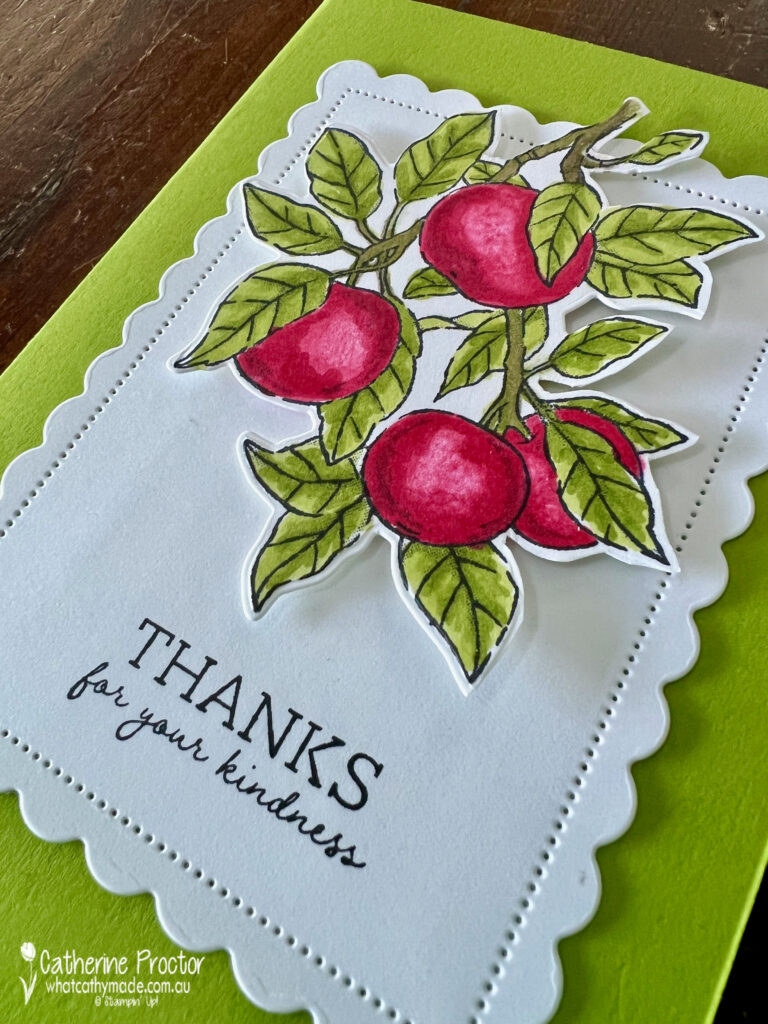
This week we are showcasing Granny Apple Green, a vibrant clear green colour that sits somewhere between Old Olive and Parakeet Party in depth of colour saturation.
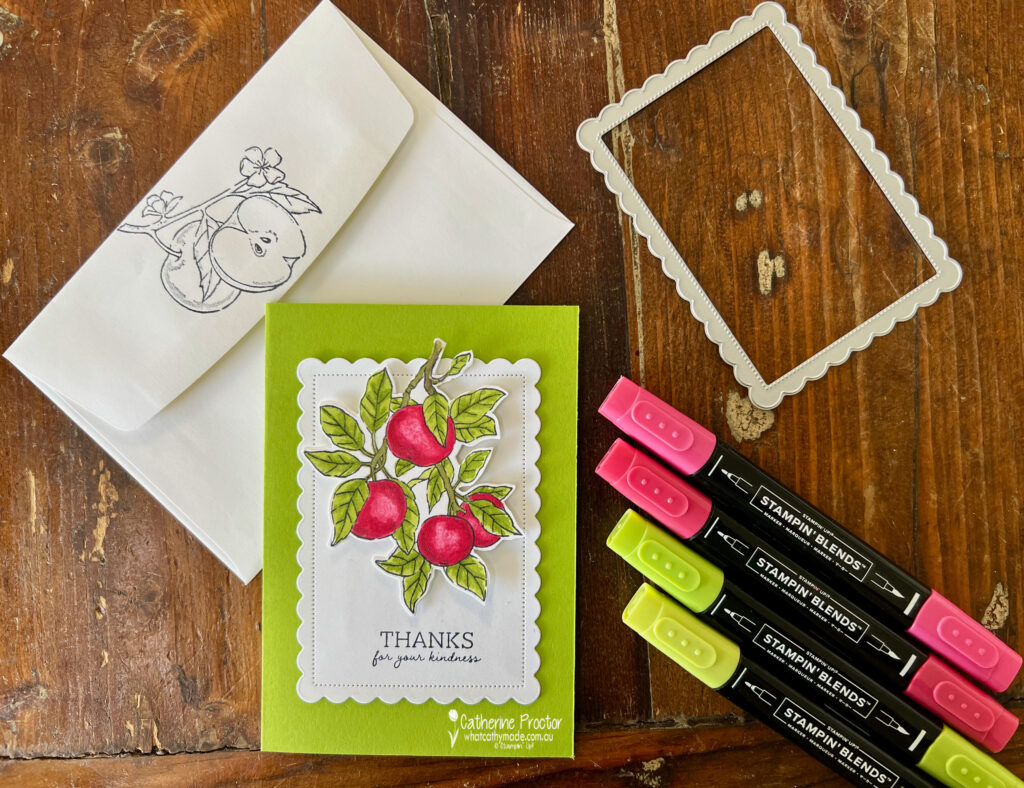
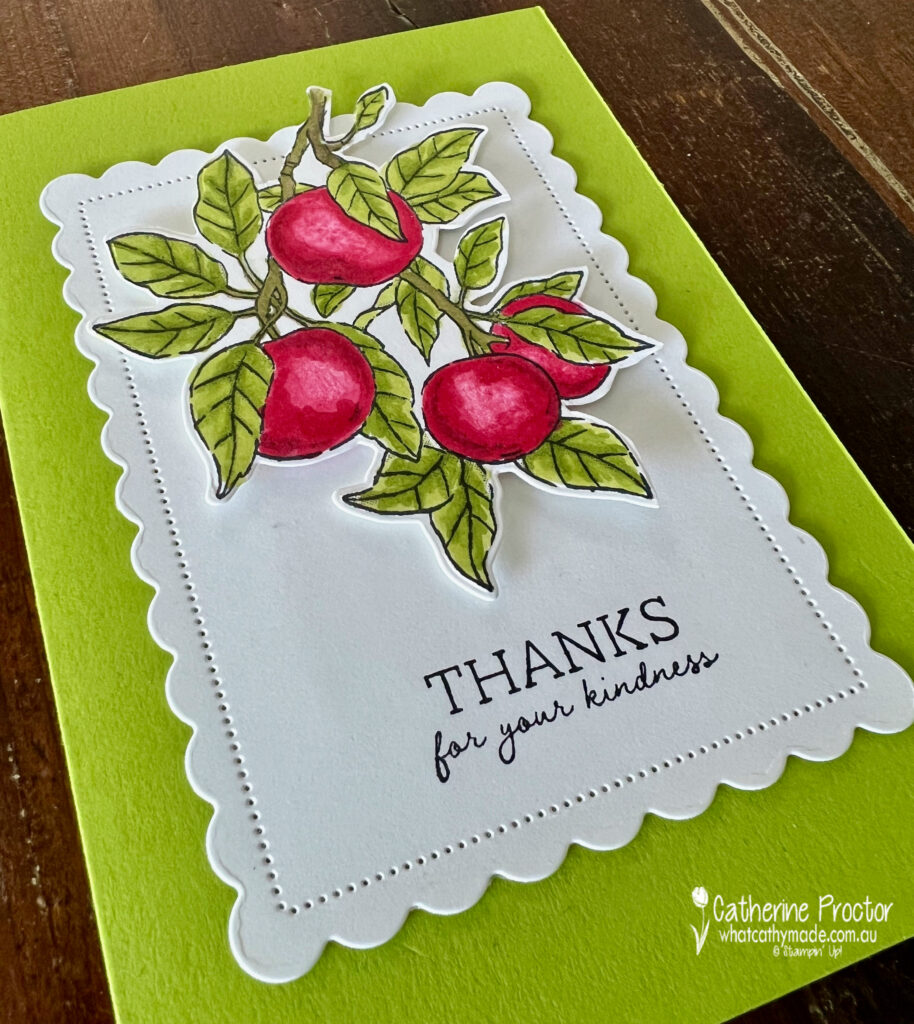
I’ve used the Apple Harvest stamp set with its coordinating dies, the Apple Blossom dies. These dies have retired but are on sale in the Clearance rack at an absolute bargain price of $24.40, reduced from $61.
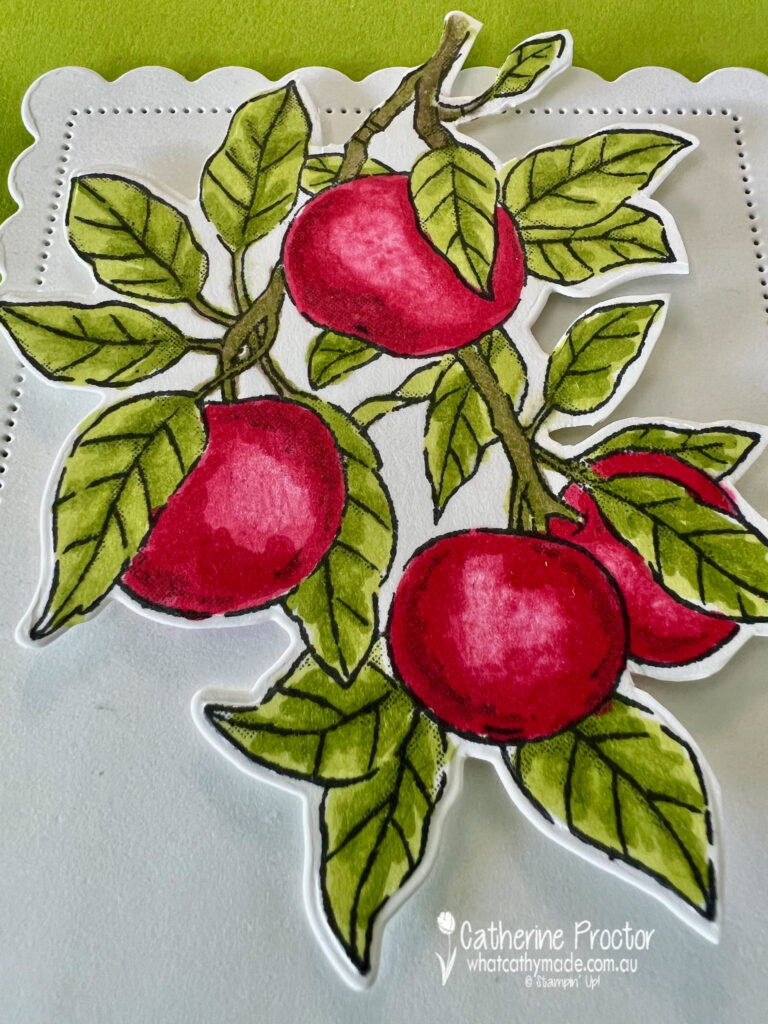
My apples are stamped in Tuxedo Memento ink and then coloured in using Stampin’ Up! Blends in Granny Apple Green and Real Red.
The Basic White card stock layer has been die cut using one of the Scalloped Contour dies and the back of the envelope stamped with another image from the Apple Harvest stampset.
I like the crisp contrast of the white against the vibrant red and the green.
I briefly considered adding some bling or a bow of ribbon, however I decided I really liked the bold simplicity of the card as it was.
Now it’s time to hop on over to our next participant, the lovely Kate Morgan – I can’t wait to see what Kate has made this week!
If at any time you find a broken link, you can find the complete list of all participants below.
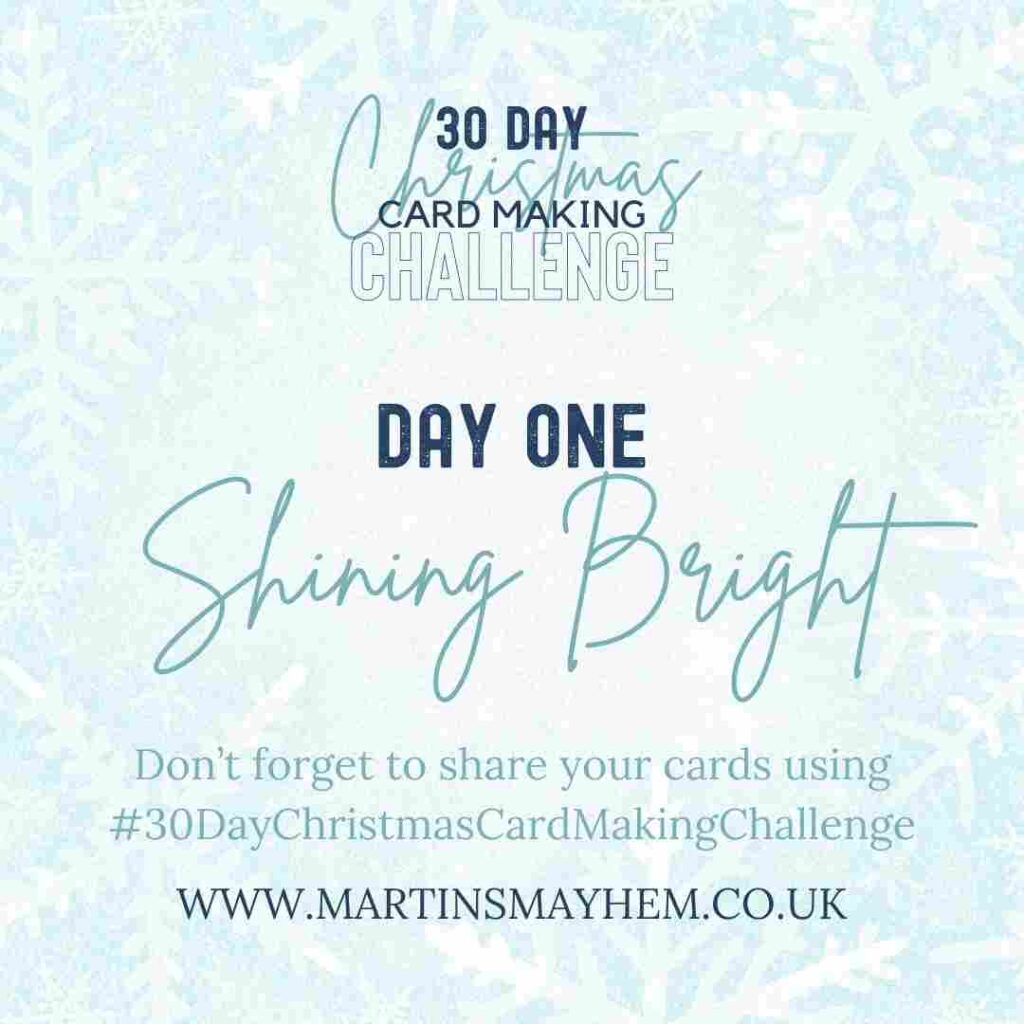
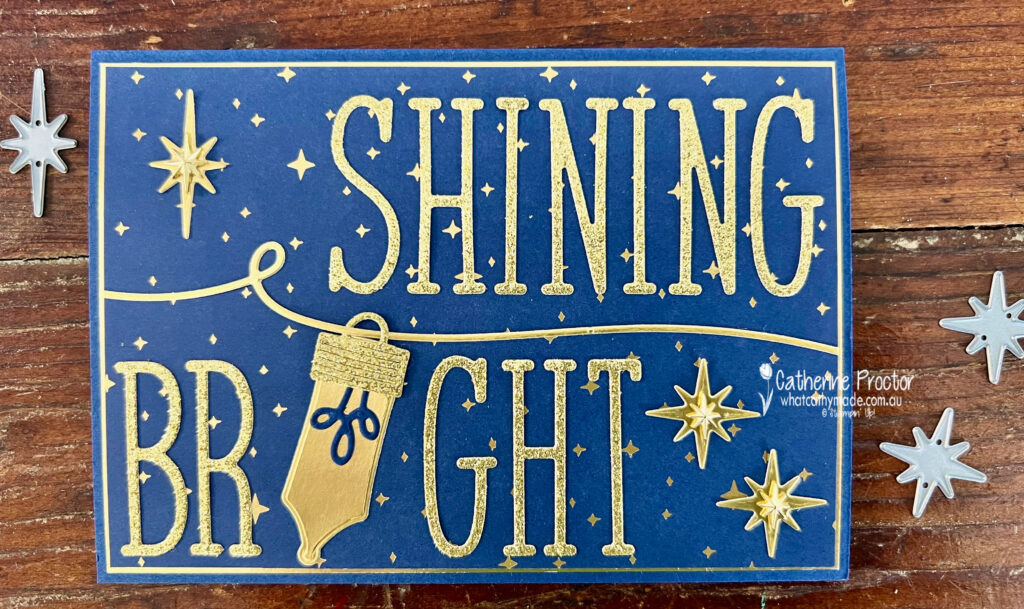
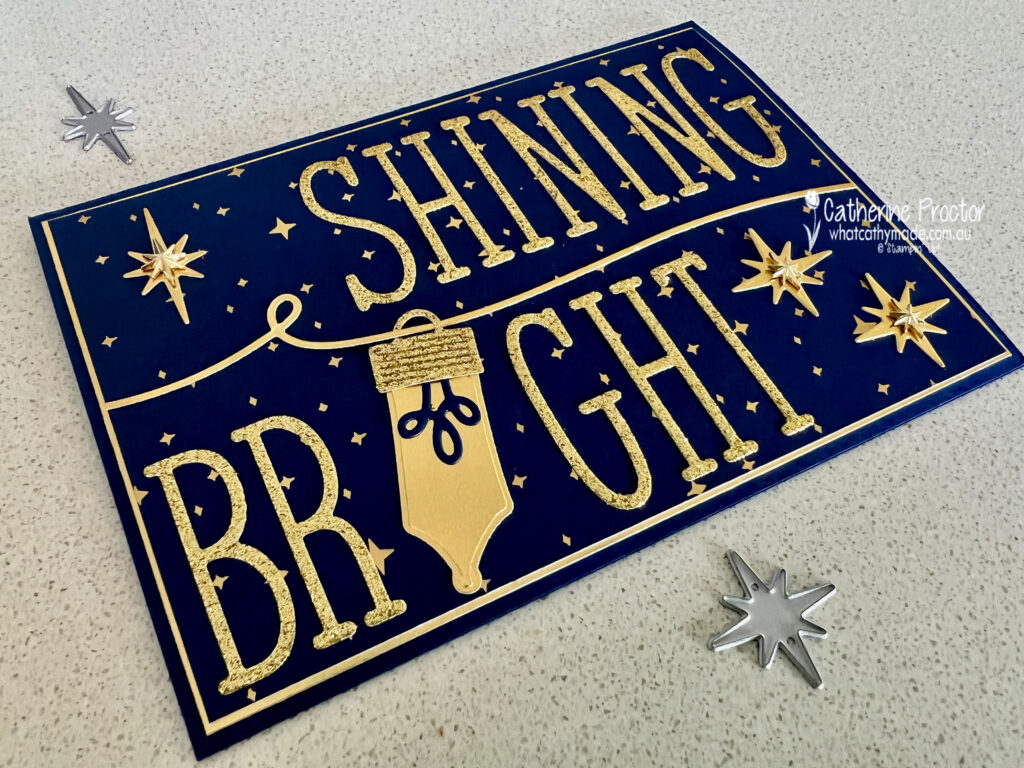
The #30DayChristmasCardMakingChallenge is a global challenge hosted by UK Artisan Stampin’ Up! demonstrator, Martin Stone, and the challenge for Day 1 is “Shining Bright”.
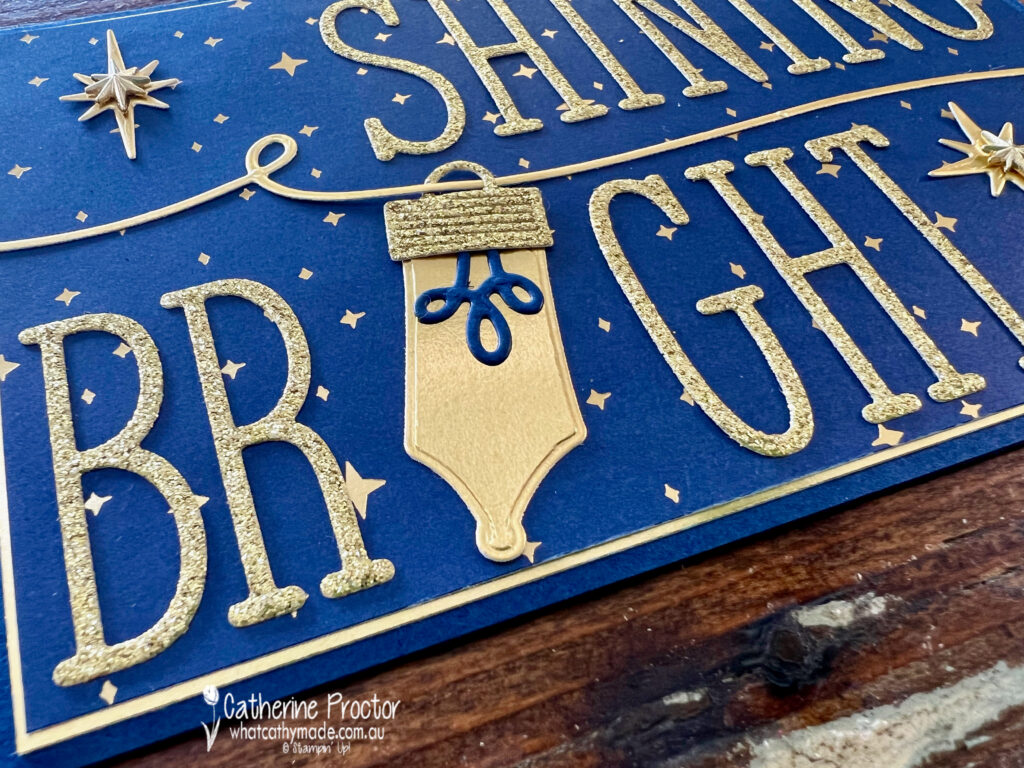
I’ve taken today’s challenge very literally, creating a Night of Navy and Gold card that uses the Shining Brightly Specialty Designer Series Paper, Adhesive Backed star trinkets, Alphabet a la Mode dies and the Merry & Bright dies.
The ‘Shining Bright’ sentiment was die cut using an exciting new online only product, Silver & Gold 12″ x 12″ (30.5 x 30.5 cm) Adhesive-backed Glimmer Paper. As soon as I die cut the letters out they became repositionable stickers – what a game changer!
The stars were die cut from gold foil that had first been attached to an adhesive sheet. No mess and no fuss!
Instead of the letter ‘I’ in ‘Bright’ I die cut one of the Christmas light bulbs from gold foil, adding a Night of Navy filament.
Adhesive Backed star trinkets add dimension to all three gold stars.
I’ll be back tonight with a Granny apple Green card for our Art With Heart Colour Creations blog, then I have another card to share with you for Day 2 of the 30 Day Christmas Card Making Challenge.
Wherever you are in the world, keep on crafting xxx
Welcome to week twenty six of our Art With Heart 2023-24 Colour Creations blog hop!
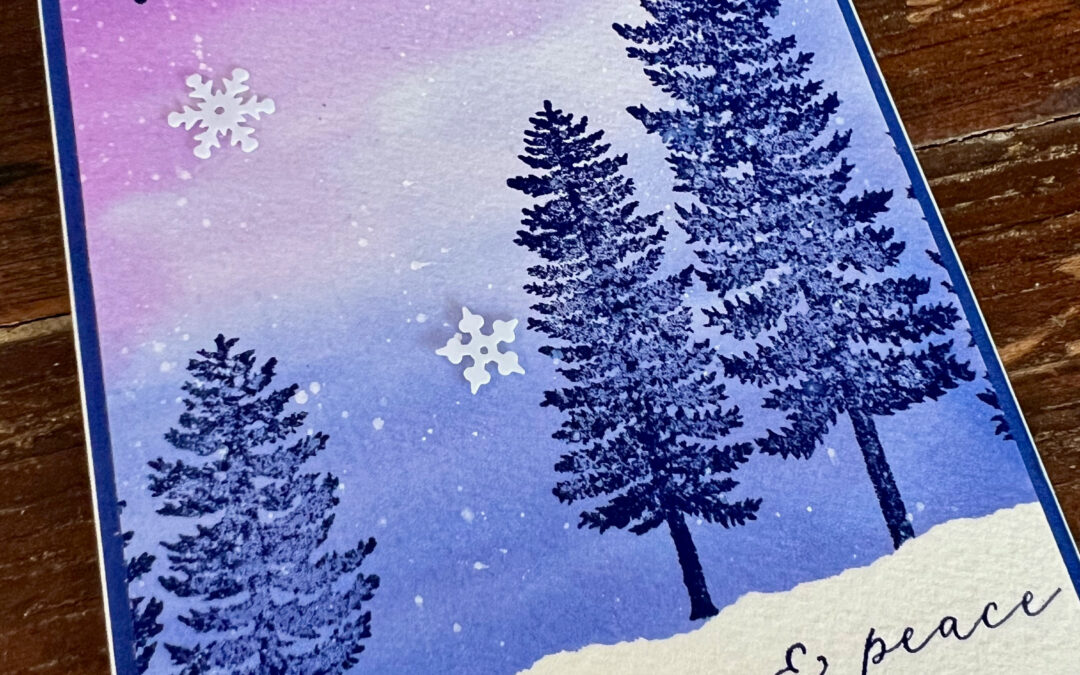
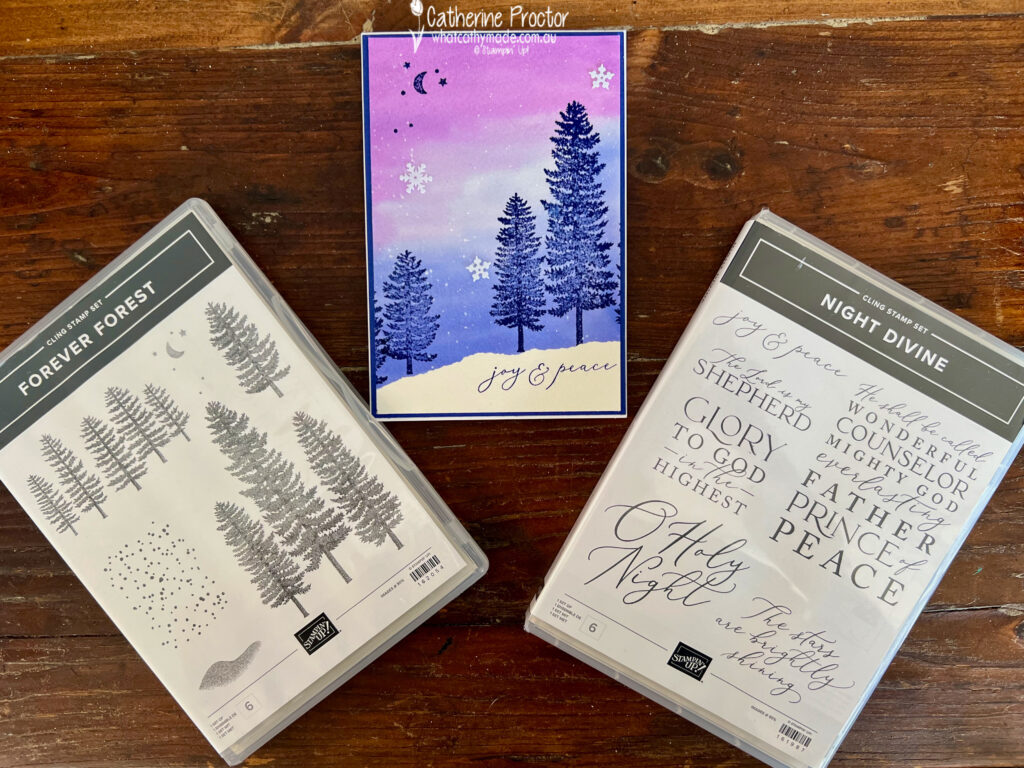
This week we are showcasing Gorgeous Grape, a vibrant purple colour that is now in the regals family, however I still consider it to be a bright! I’ve made a watercolour Christmas card that pairs Gorgeous Grape with Orchid Oasis and Starry Sky.
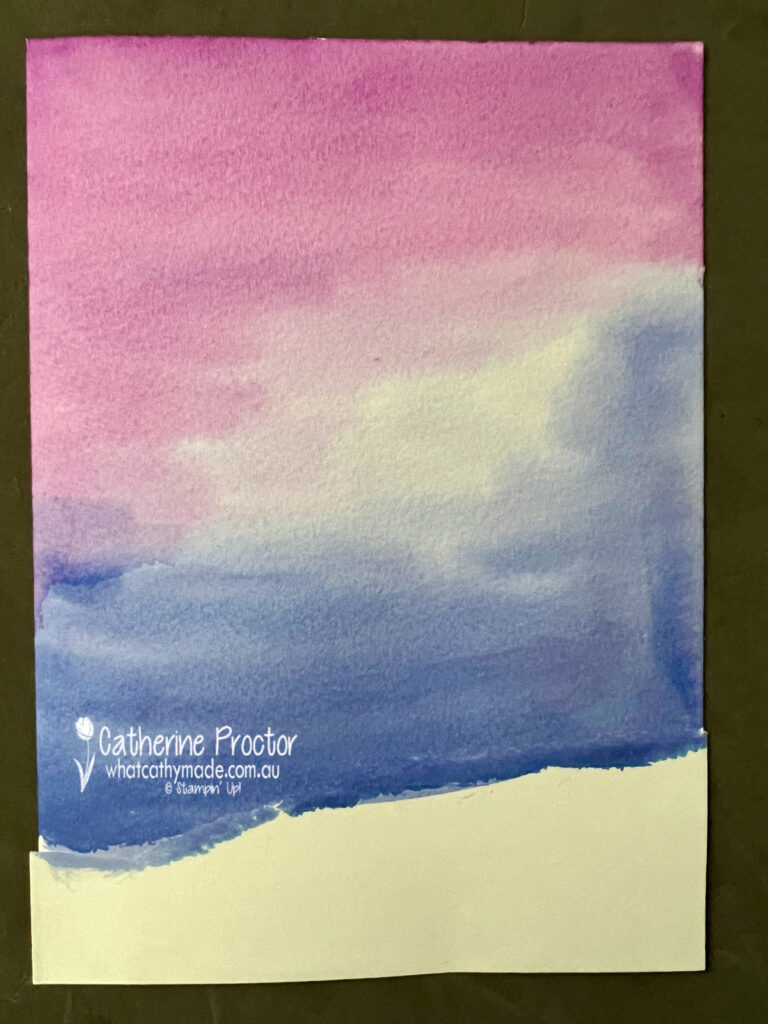
Watercolor backgrounds are so easy to make and even though they come out differently every time you really can’t make a mistake with watercolour. Well, that’s what I like to tell myself, anyway.
Adhere a torn strip of Stampin’ Up masking paper to the bottom section of a sheet of Fluid 100 watercolour paper and then use the widest water painter brush to cover the watercolour paper with water.
Once the paper is all wet, colour it in with Gorgeous Grape, Orchid Oasis and Starry Sky from top to bottom. Use a heat tool to dry the water coloured background.
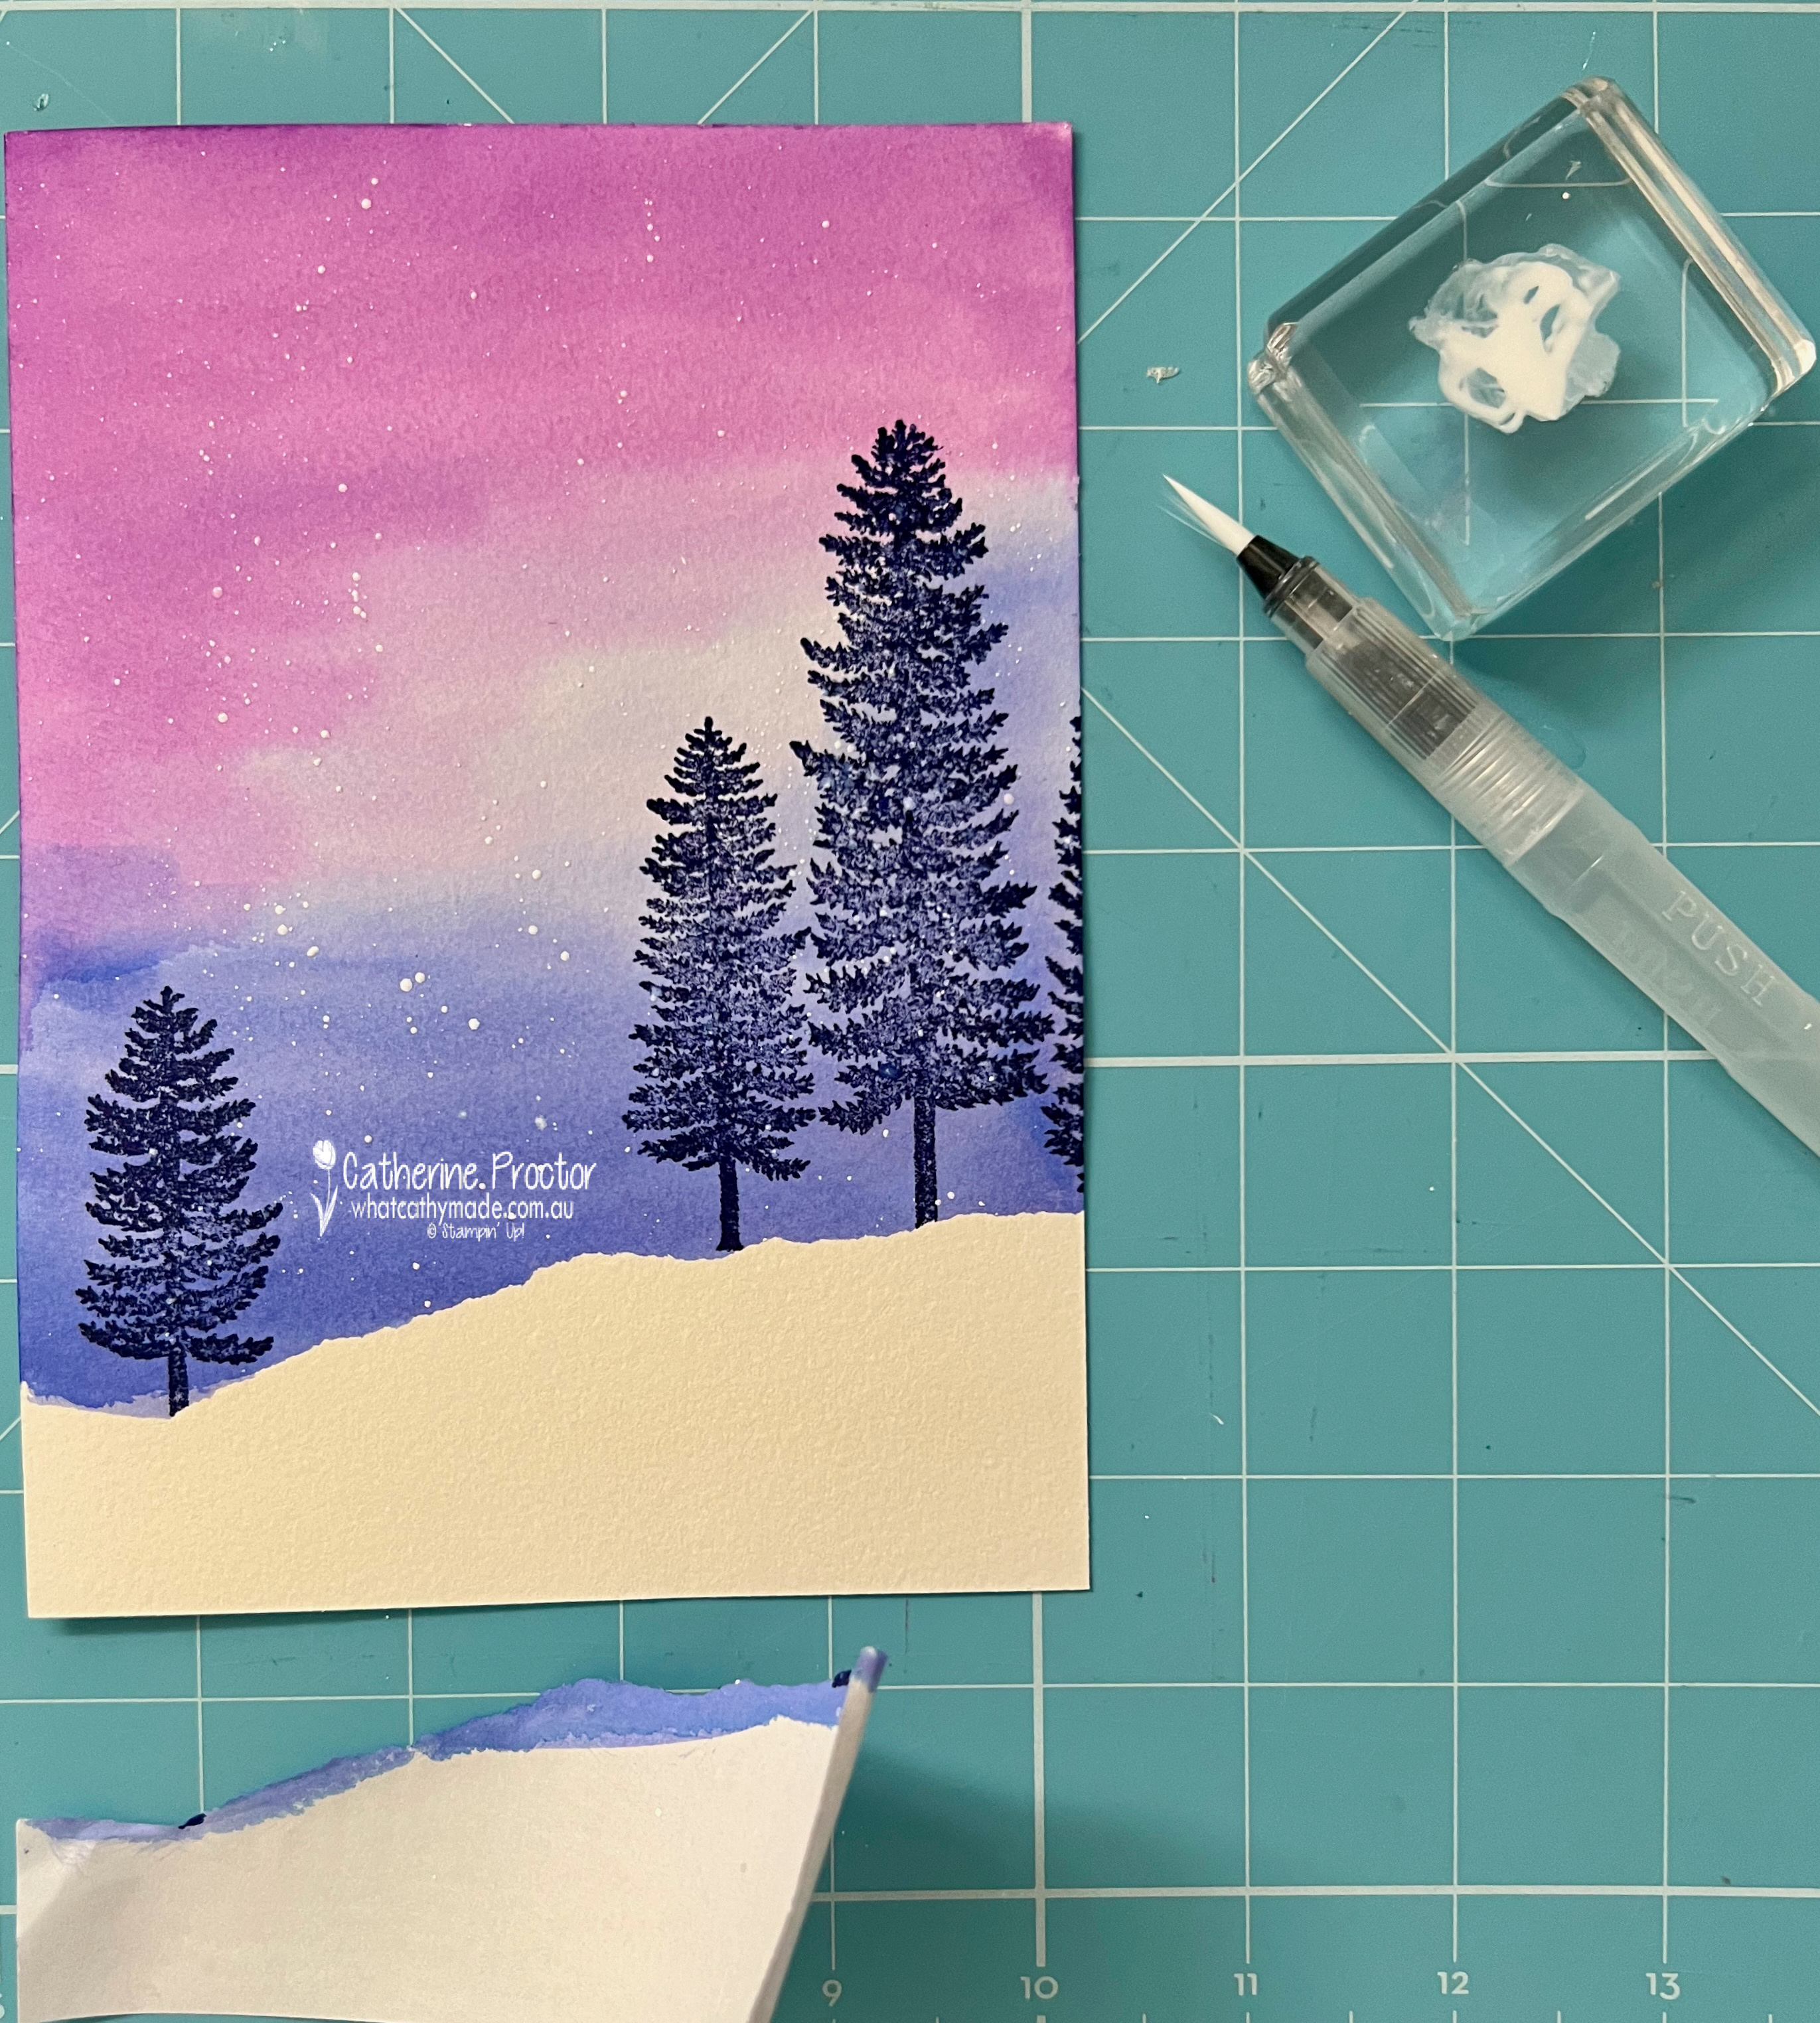
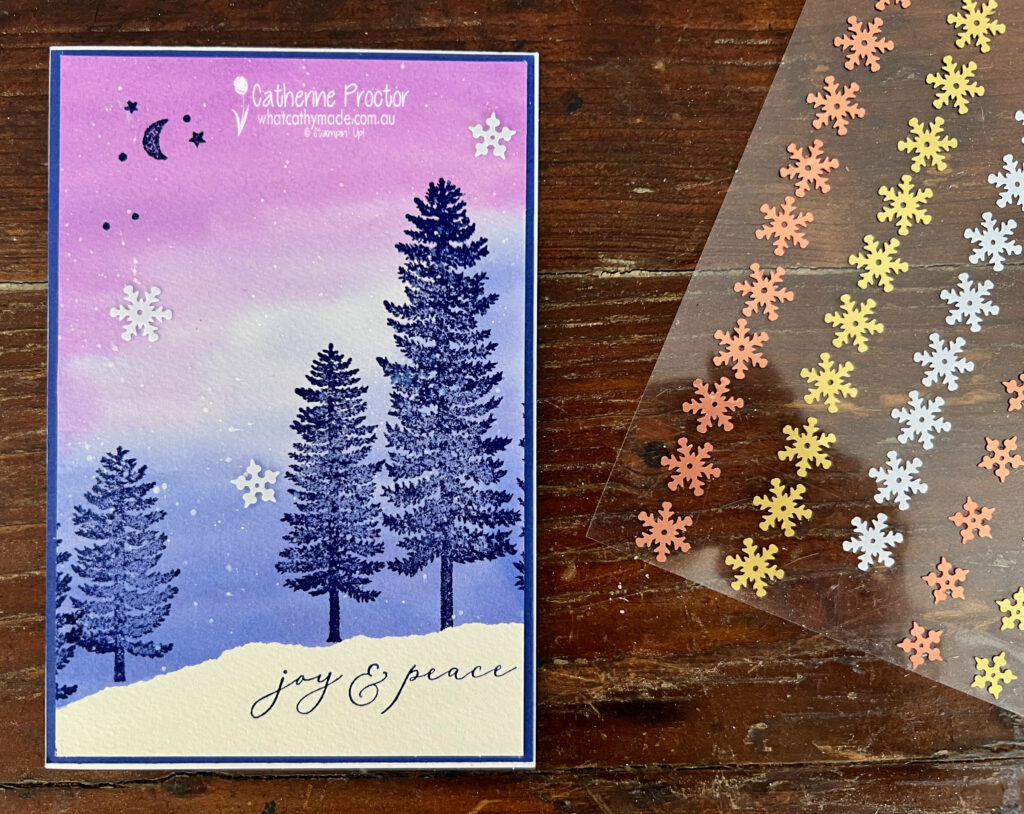
Stamp trees from the Forever Forest stamp set in Starry Sky and splatter some Whisper White Craft Stampin’ Ink Refill (diluted with water) before carefully removing the masking paper to reveal the snowy landscape.
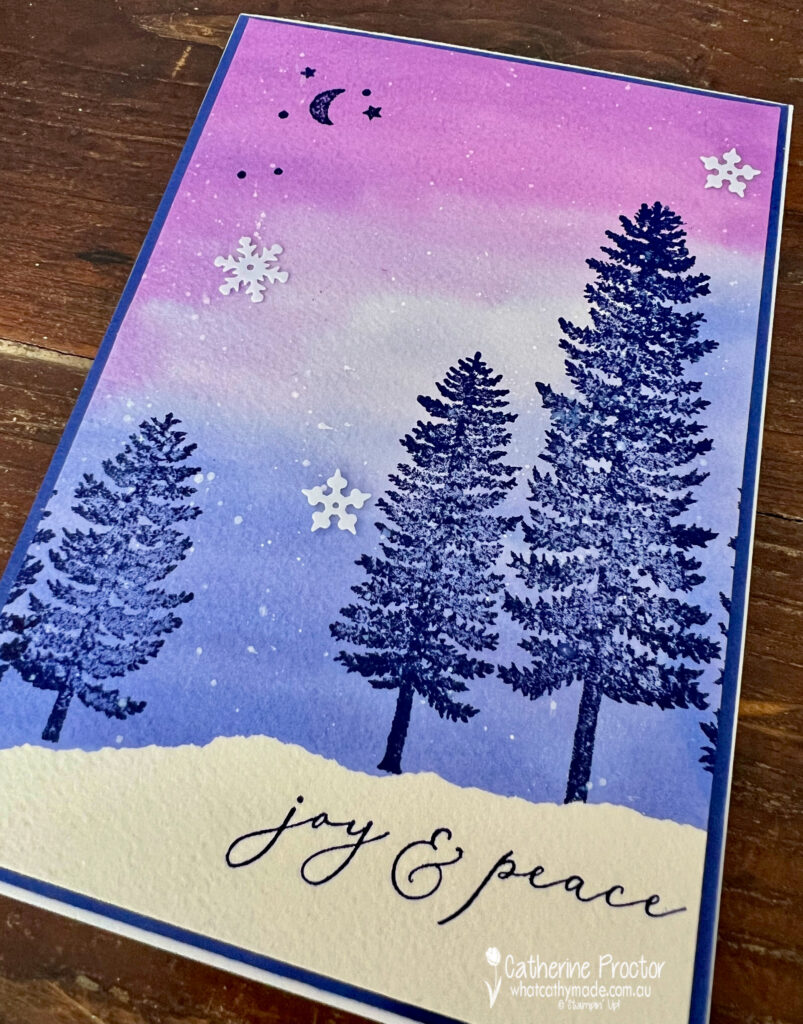
The ‘joy & peace’ sentiment is from the Night Divine stamp set and the moon and star images are from The Forever Forest stamp set, both stamped in Starry Sky.
Tiny white snowflakes from the Adhesive-Backed Snowflake Assortment complete the front of the card.
I stamped another tree on the left in Starry Sky once I trimmed the card front to fit on the card base – I forgot the watercolour paper is a lot wider than our metric card bases.
The Starry Sky cardstock layer behind the water coloured card front really makes the Gorgeous Grape water coloured section of the sky stand out.
Now it’s time to hop on over to our next participant, the lovely Rachel Palmieri – I can’t wait to see what Rachel has made this week!
If at any time you find a broken link, you can find the complete list of all participants below.