Welcome to week five of the Heart Of Christmas Blog Hop!
My card this week is brought to you by the stamped and die cut pieces I rejected from my Cherry Cobbler card last week, repurposed this week to make a slimline Christmas card!
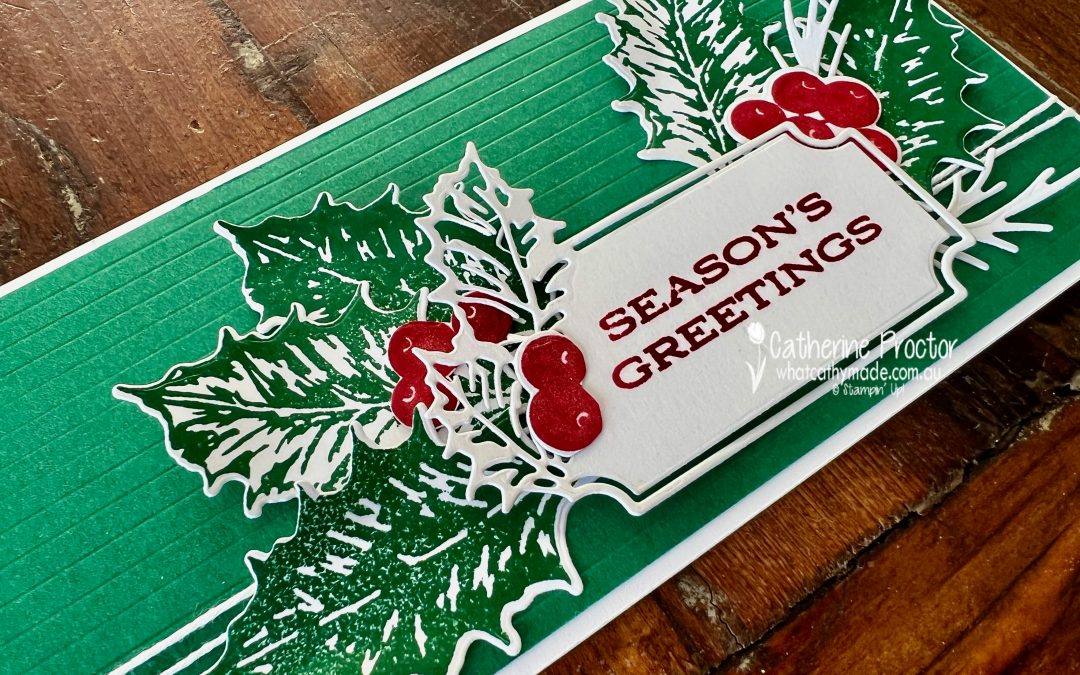
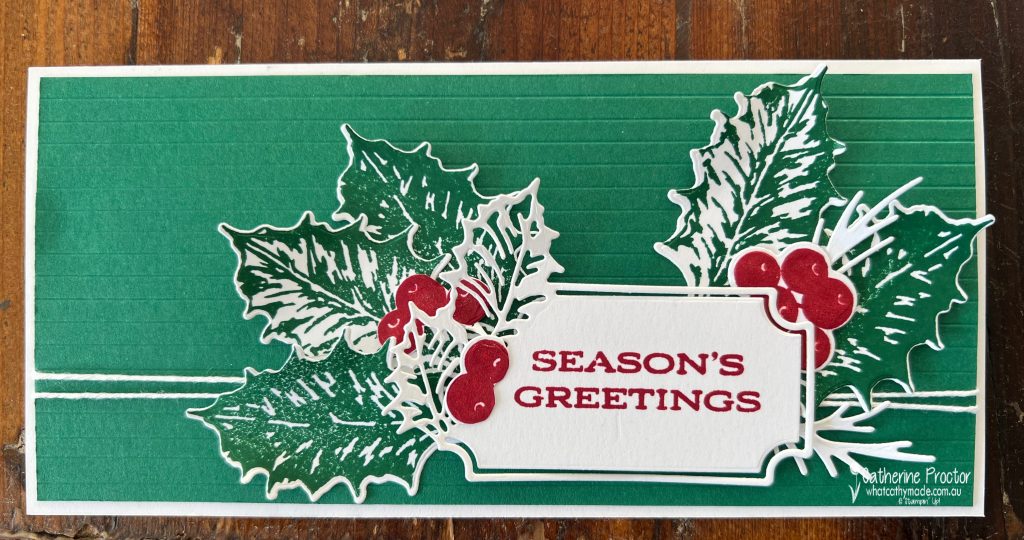
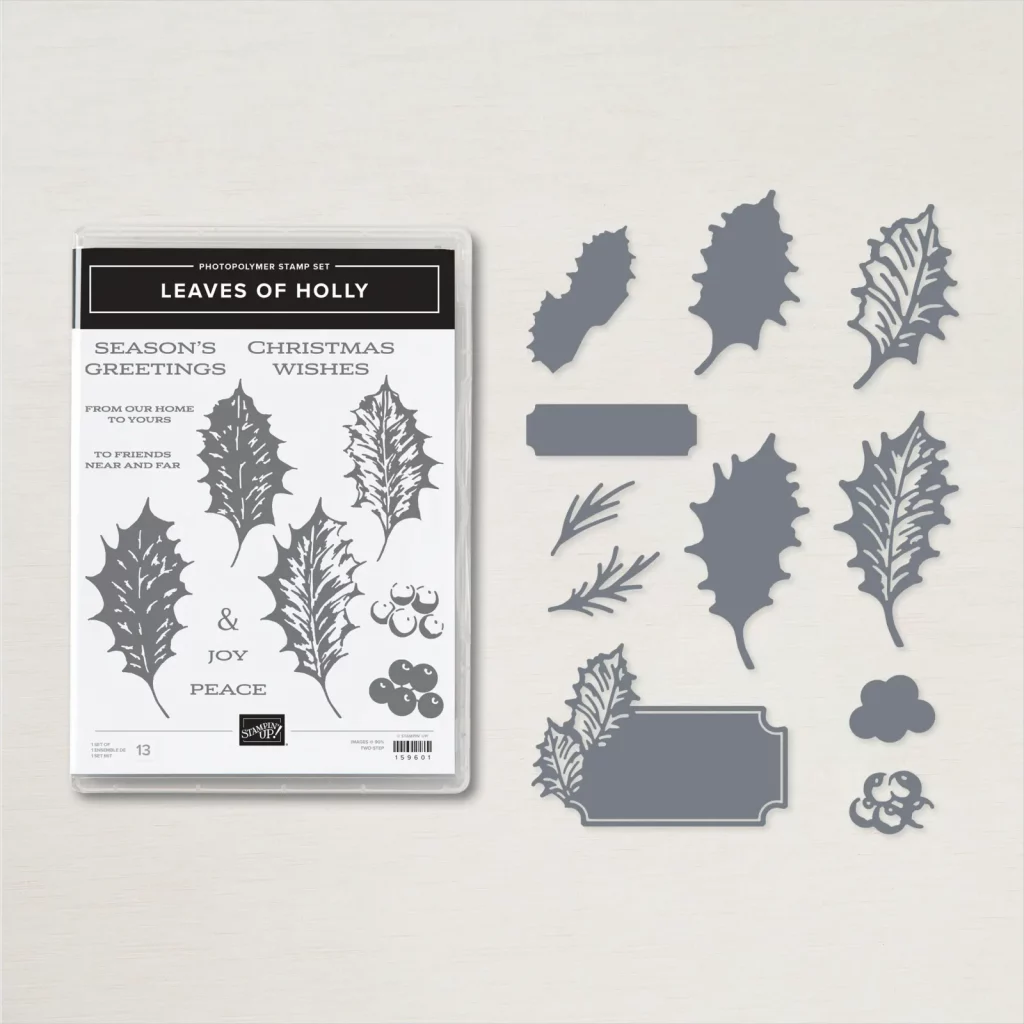
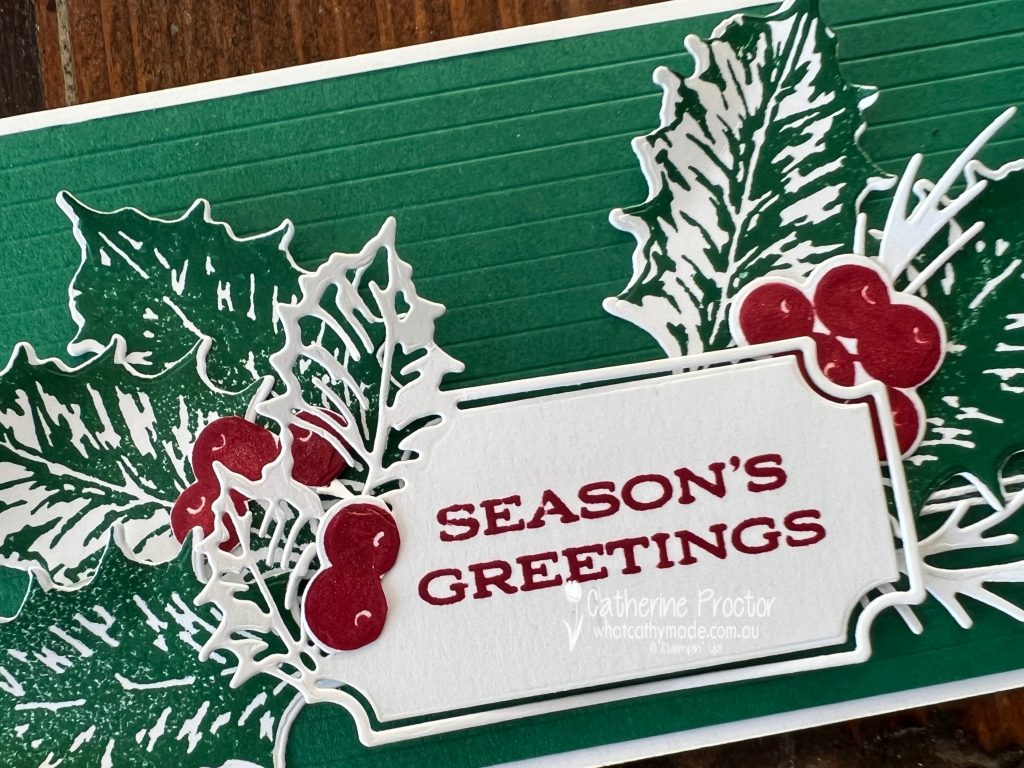
I have to confess I bought the Leaves of Holly Bundle (the Leaves of Holly Stamp Set and the Holly Berry Dies) mainly because I love this sentiment die with its holly frame!
I was worried about how to use the holly leaves and berries on a card as they are quite large, so I decided to leave the background layer quite plain, using cardstock instead of DSP and extending the length of the card to a slimline card.
I used the scoring blade on my paper trimmer to score the Shaded Spruce cardstock at 5 mm intervals, creating a clean and modern embossed layer that lets the oversized holly berries and leaves take centre stage.
A length of white bakers twine was wrapped twice around the Shaded Spruce layer before the stamped “Seasons Greetings” sentiment and holly leaves and berries were adhered to the front of the card.
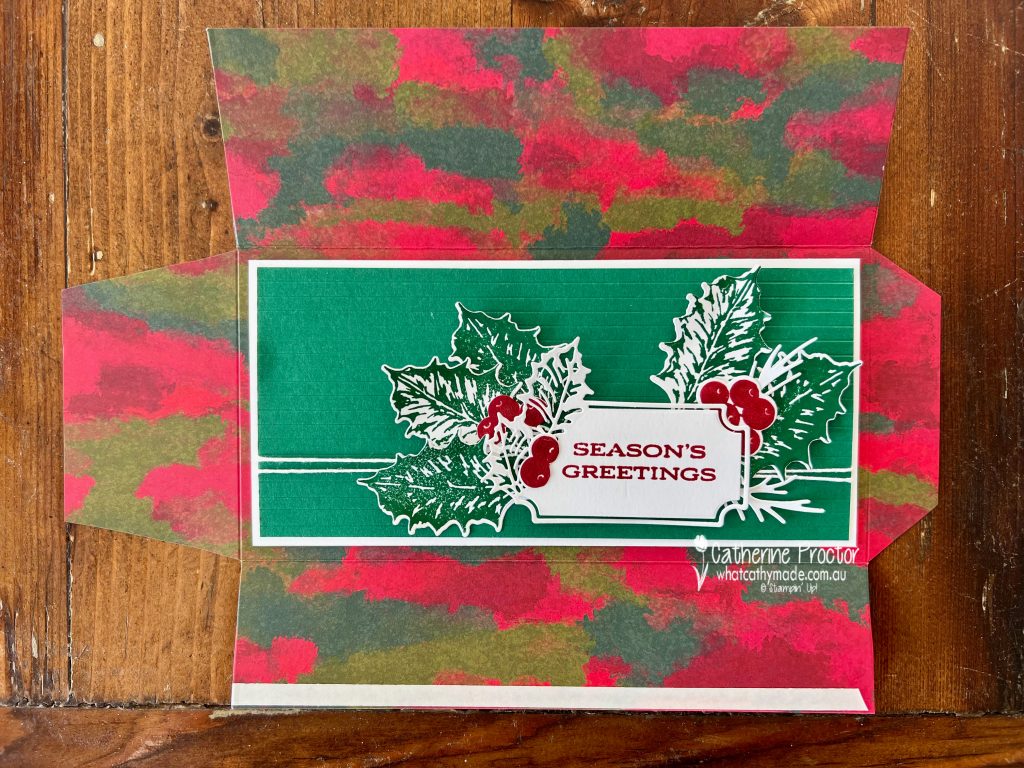
To make an envelope for my 20 x 10 cm slimline card I used the coordinating Boughs of Holly 12″ x 12″ (30.5 x 30.5 cm) Designer Series Paper.
It’s very simple to make a matching envelope for any sized card. All you need is a paper trimmer, tear’n’tape adhesive and some brads and bakers twine for the closing mechanism.
To work out the size of the envelope add 1 cm to the length and the height of the card so it has enough room to easily slide in and out. Then work out how much overlap is needed in the middle of the card to adhere the sides of the envelope together.
Slimline Envelope instructions for a 20×10 slimline card
Using 12×12 DSP, score at 7 cm and 18 cm and then cut at 23 cm
Rotate the DSP once and score at 2.5 cm and 24.5cm
Cut away the 4 corner pieces away
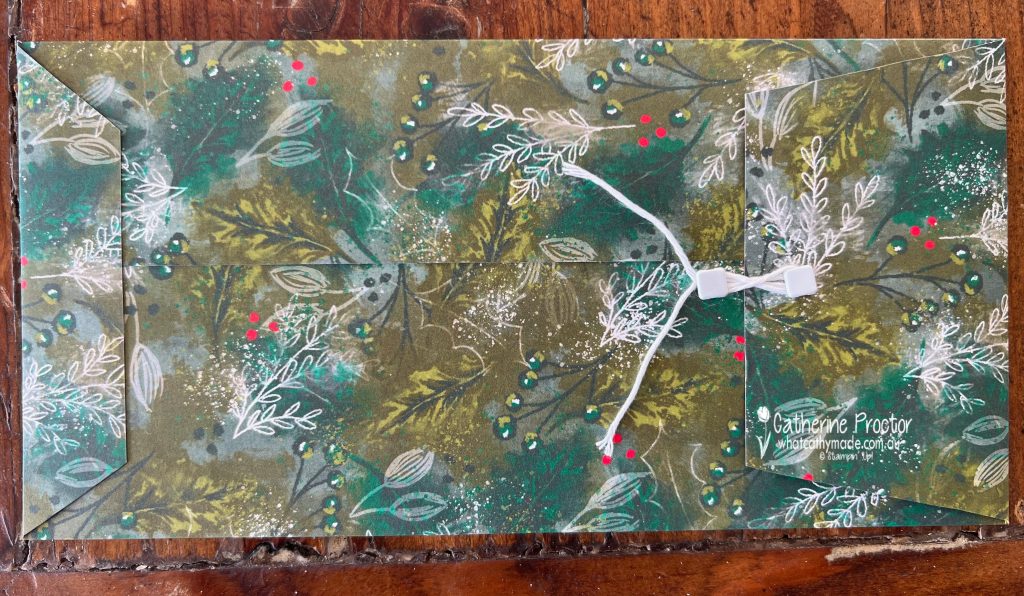
Add a strip of tear’n’tape to the length of the 5 cm side flap
Cut an angle in to both sides the top and the bottom flaps – I eyeball it, but it’s around 1cm at its widest point
Fold the sides in, adhering the 5cm flap over the top of the 7 cm flap.
Add tear’n’tape to the bottom 2.5cm flap and adhere it to form the base of the envelope
Form the closure using two brads and another length of white bakers twine.
For the front of the envelope that gorgeous sentiment die is used as an address label, decorated with holly berries.
Now it’s time to hop on over to our next participant, the lovely Sharon Davern – I can’t wait to see what Sharon has made this week!
If at any time you find a broken link, you can find the complete list of all participants on Sharon‘s blog. Sharon Davern is the host of our Heart of Christmas blog hop this year – thank you so much Sharon!!!
Welcome to week twelve of our Art With Heart 2022-23 Colour Creations blog hop! This is a weekly blog hop where we showcase the stunning range of Stampin’ Up! colours in alphabetical order over 12 months and this week we are featuring Cherry Cobbler.
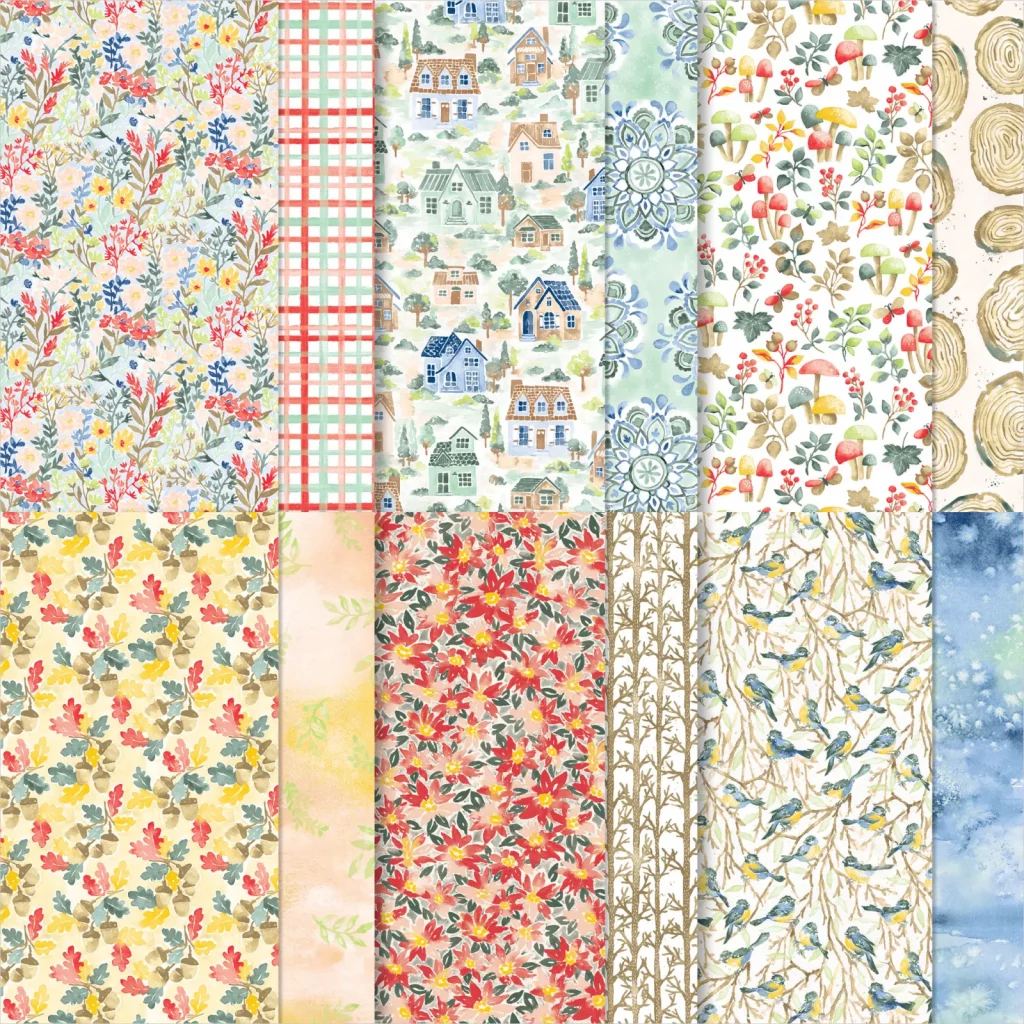
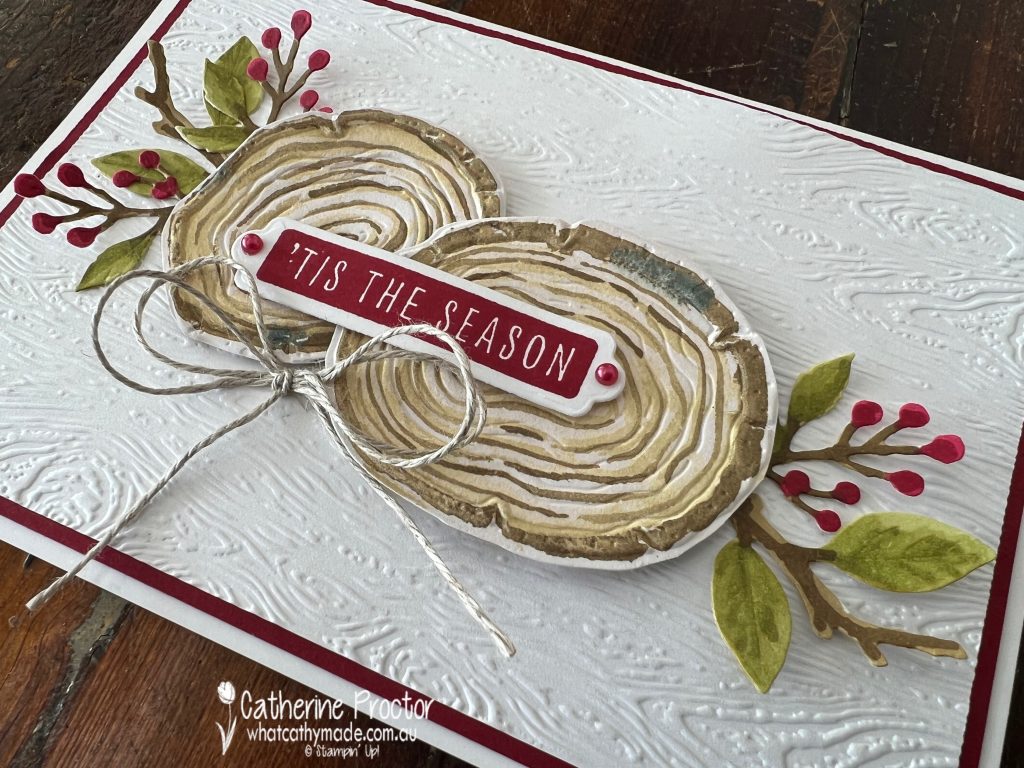
I love Cherry Cobbler on Christmas cards so I’ve paired it with the FREE (with $90 order) Rings of Love DSP to make a Christmas card for this week.
The gorgeous Rings of Love DSP and other Sale-a-bration products are only available until August 31, or when sold out – the Pool Party & Soft Sea Foam Cards & Envelopes have already sold out.
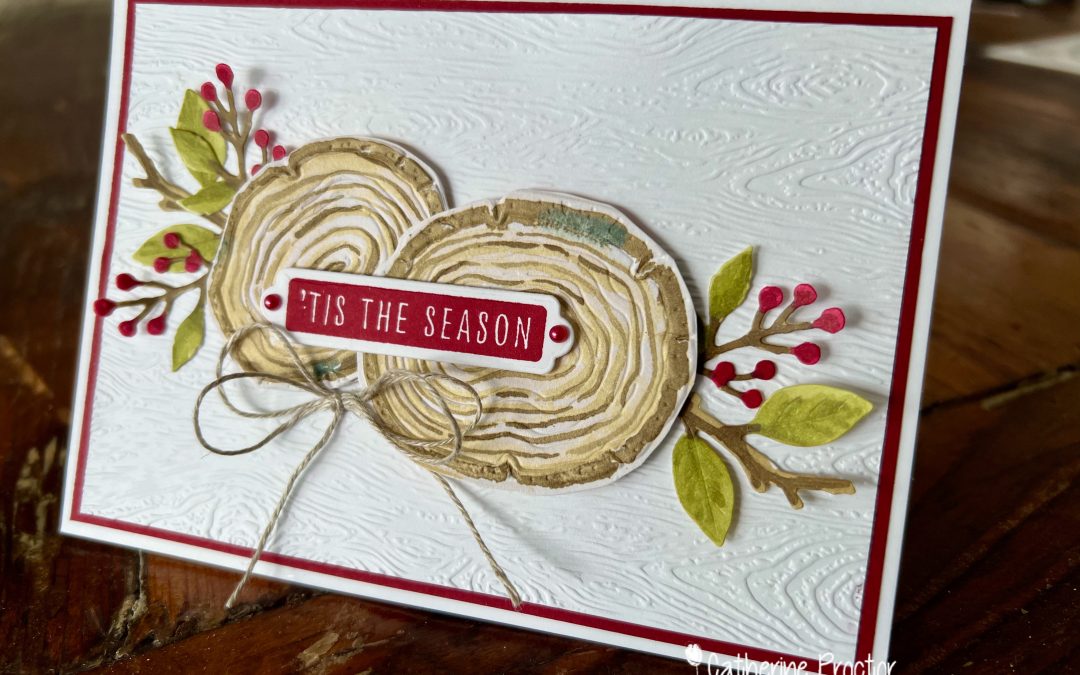
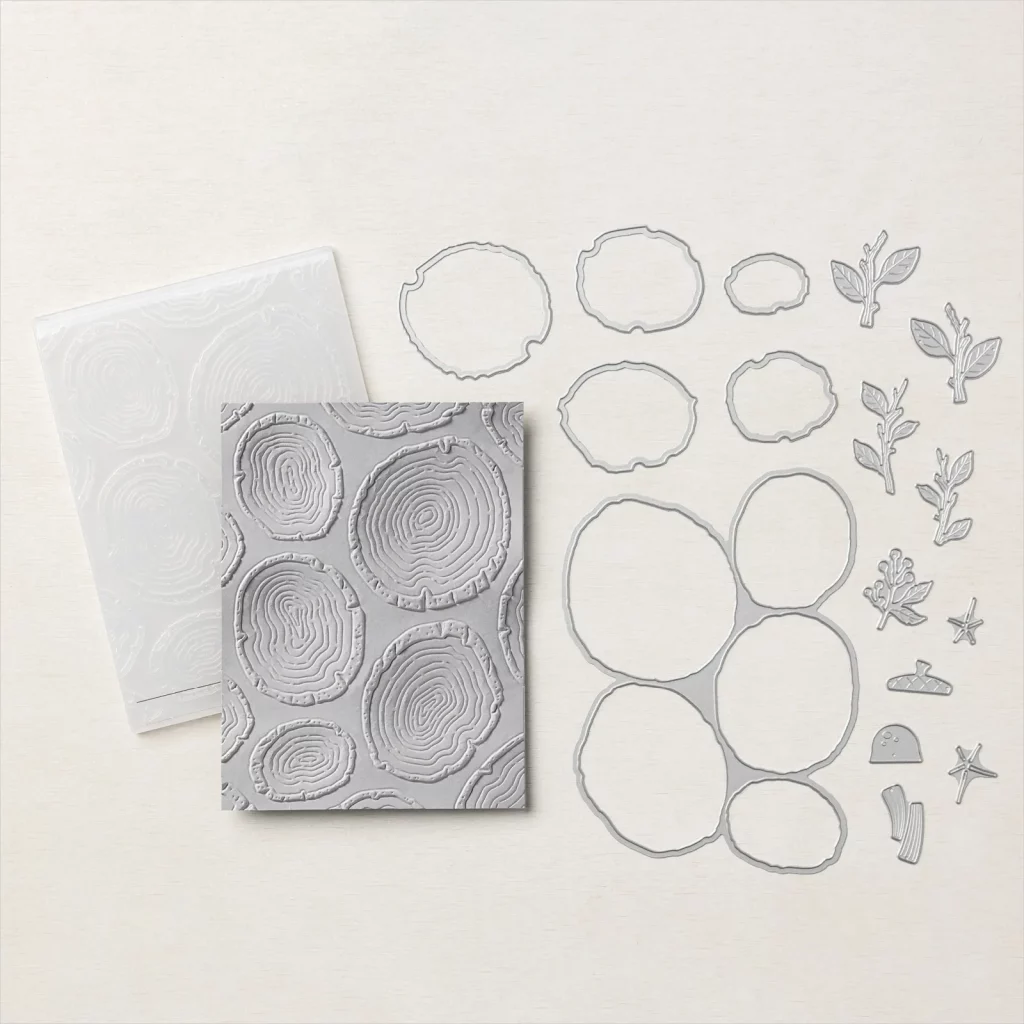
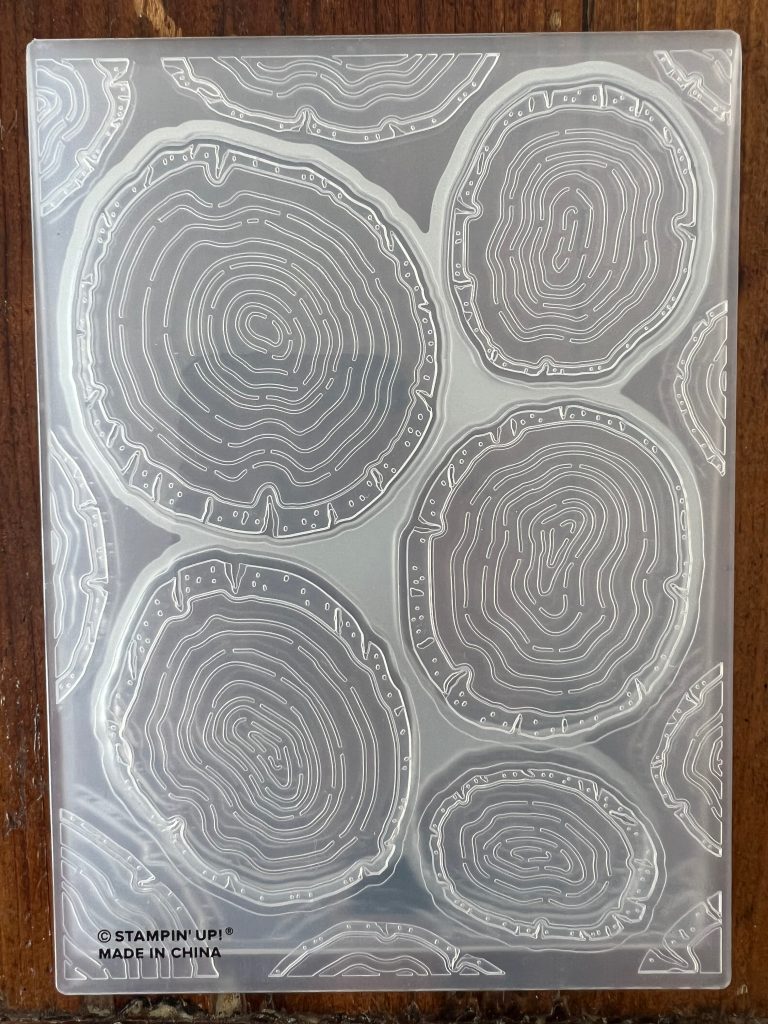
I’ve used the tree ring pattern from the Rings of Love DSP for my card because the tree rings on this patterned paper can be die cut and embossed using the all-in-one Tree Rings Hybrid Embossing Folder.
I love the realistic texture this Hybrid Embossing Folder gives to the tree rings and I don’t have to stamp a thing!
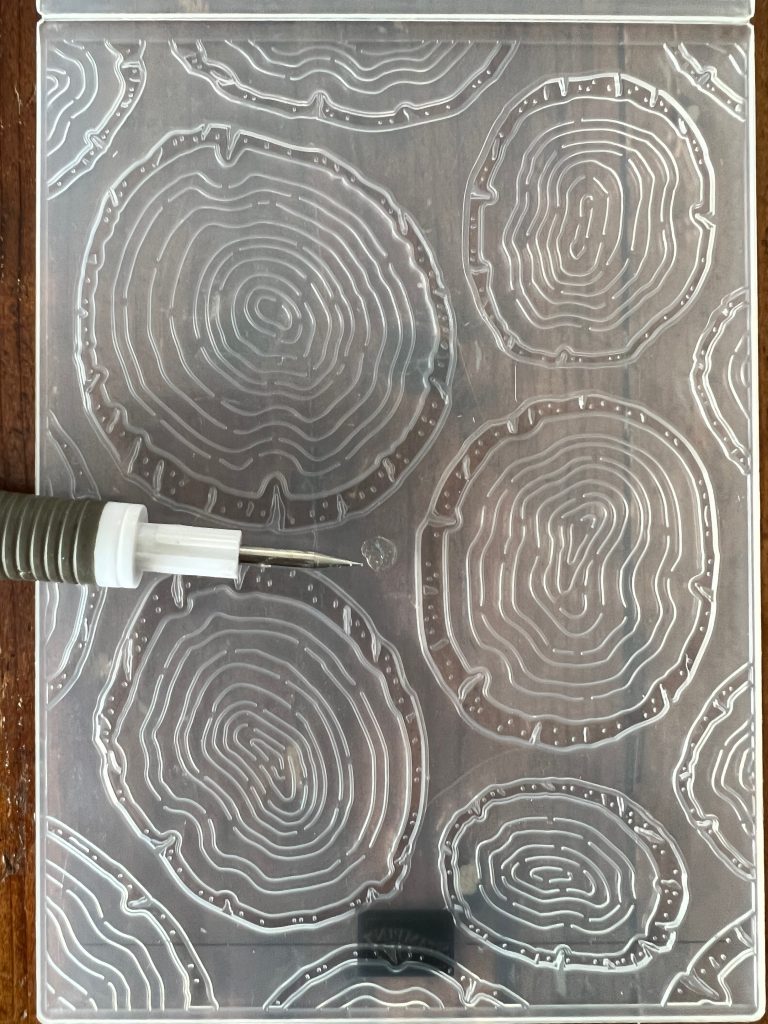
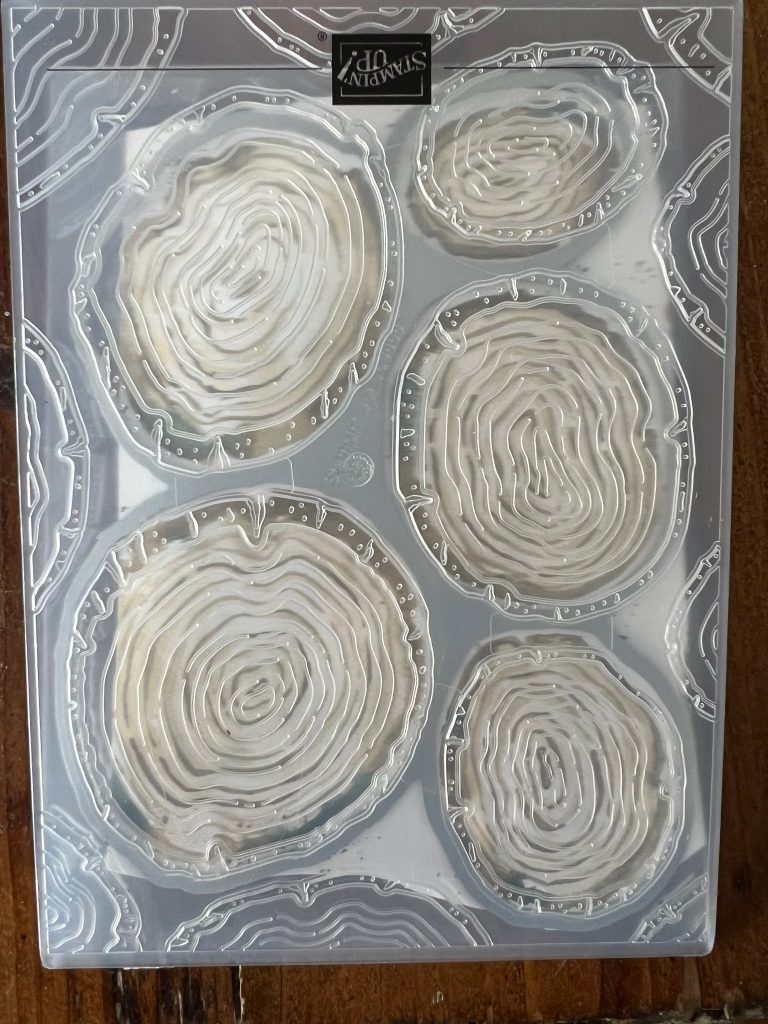
This is how I lined up the tree ring images on the DSP with the all-in-one Tree Rings Hybrid Embossing Folder. Using a glue dot really helps.
Place glue dot in centre of embossing folder on the side that has the Stampin’ Up! logo.
Place the die cutting side up into embossing folder, pressing the die onto glue dot to adhere.
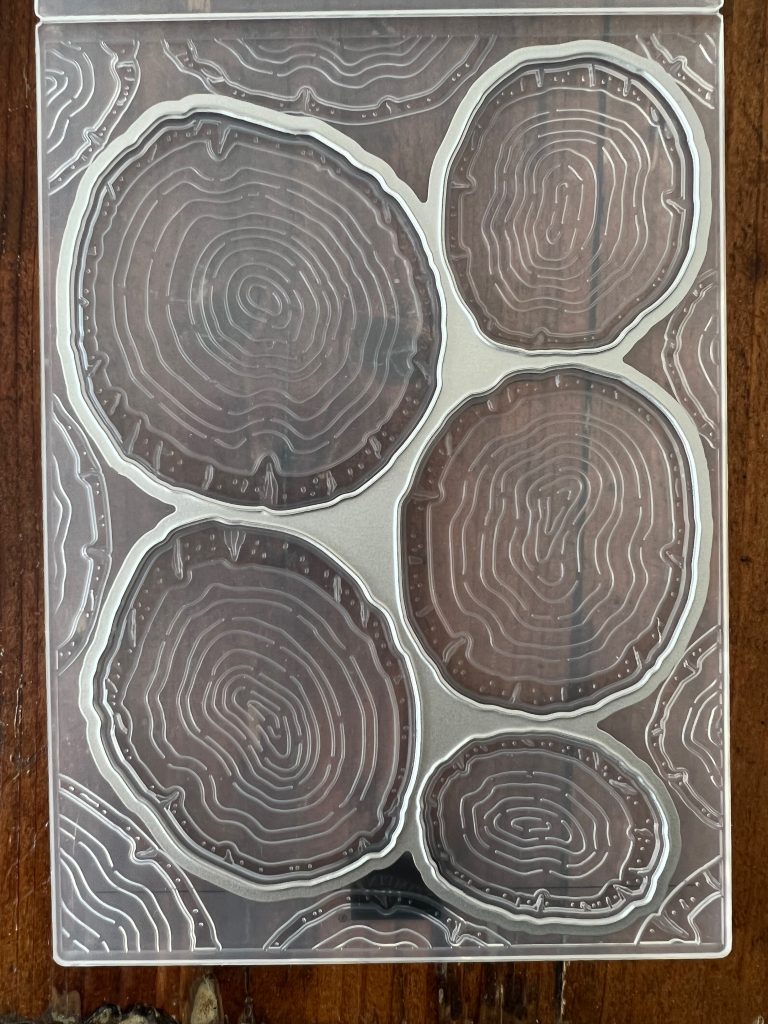
Turn the embossing folder over so that the cutting side of the die is now facing downwards.
Open the embossing folder slightly to slide the DSP under the die, lining up the tree ring images with the die. Run the embossing folder sandwich through the Stampin’ Up! Stampin’ Cut & Emboss Machine to die cut and emboss your tree rings.
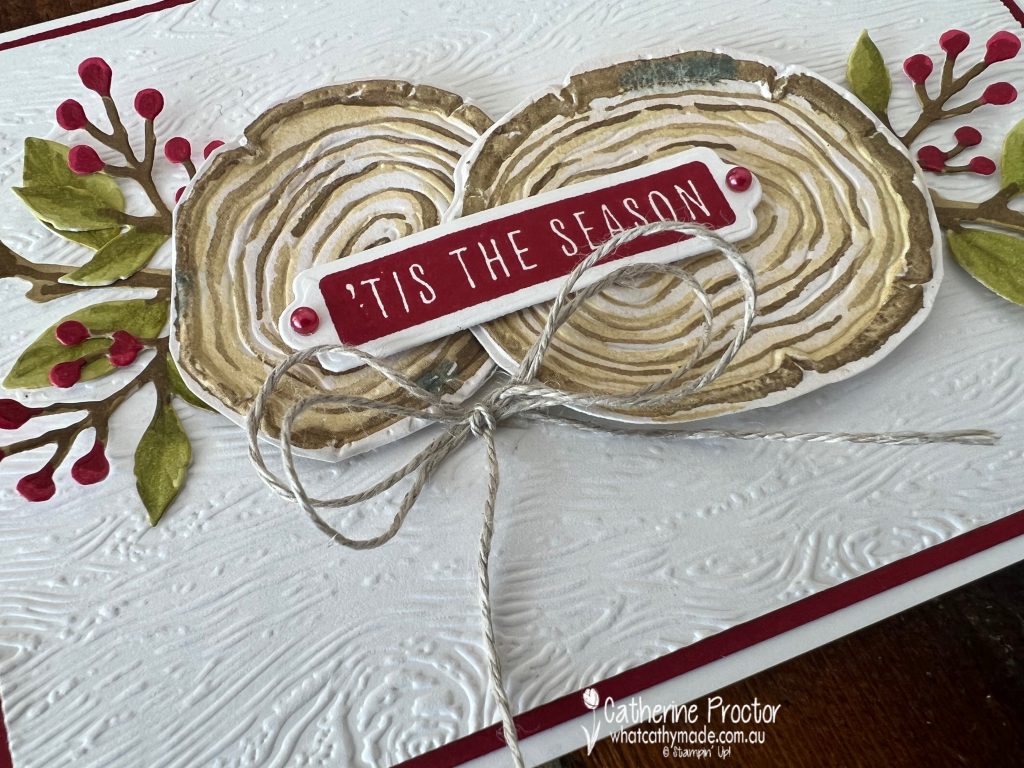
The Timber embossing folder on the Basic white card stock layer was the perfect match for the embossed tree rings.
I used my light and dark Cherry Cobbler, Old Olive and Soft Suede Stampin’ Blends to colour in the twigs, branches and berries, all die cut using the smaller dies from the Tree Rings dies.
The sentiment is from the Christmas to Remember Stamp Set, stamped in Cherry Cobbler and die cut using the Seasonal Labels die.
The Cherry Cobbler pearls come from the Festive Pearls and a linen thread bow completes the card.
Now it’s time to hop on over to our next participant, the lovely Tina Gillespie – I can’t wait to see what Tina has made this week!
If at any time you find a broken link, you can find the complete list of all participants below.
Welcome to week four of the Heart Of Christmas Blog Hop!
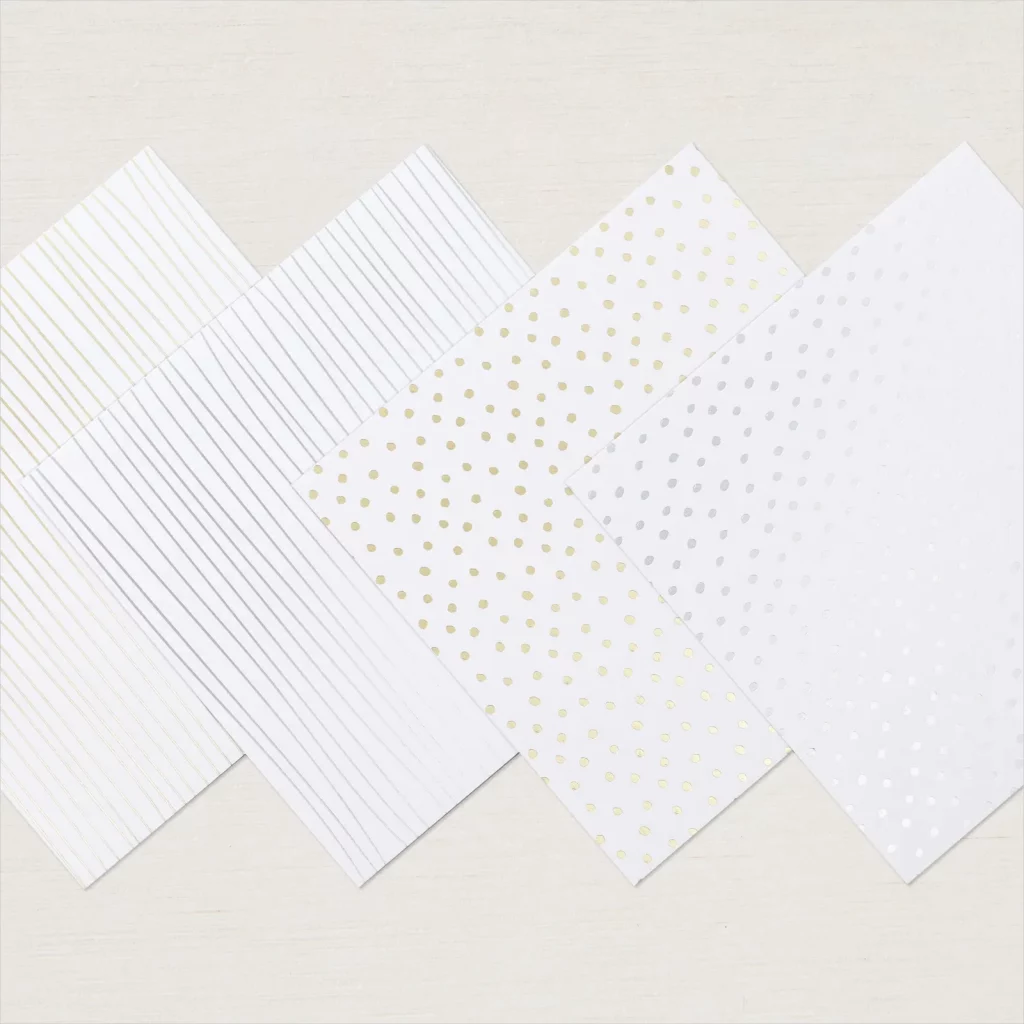
One of the FREE Sale-a-bration items you can earn with a $90 spend is this gorgeous Silver & Gold 6″ x 6″ Designer Series Paper. You receive 24 sheets in the pack, 12 each in 2 patterns (spots and stripes) and 2 colours (silver and gold).
In week 2 of our Heart of Christmas blog hop, the lovely Rosa Leyden made some gorgeous cards using the gold patterns from this DSP and the layering circle dies.
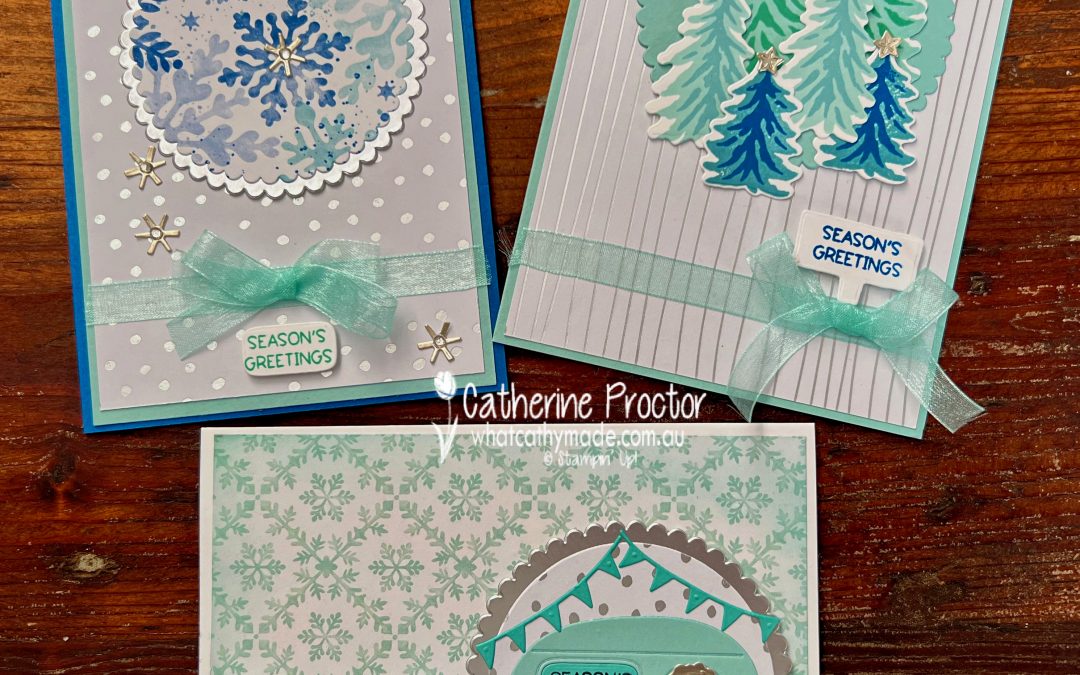
I loved her layout so much that I decided to use the silver patterns from this DSP to create 3 quite different cards that are all inspired by Rosa’s layout. Using a layout that you like as a sketch is a fabulous way to create cards. Thank you so much for the inspiration, Rosa!
The color combination for my cards comes from some of the colours in the Storybook Gnomes DSP – Pool Party, Coastal Cabana and Pacific Point, along with the silver and white of the Silver & Gold DSP.
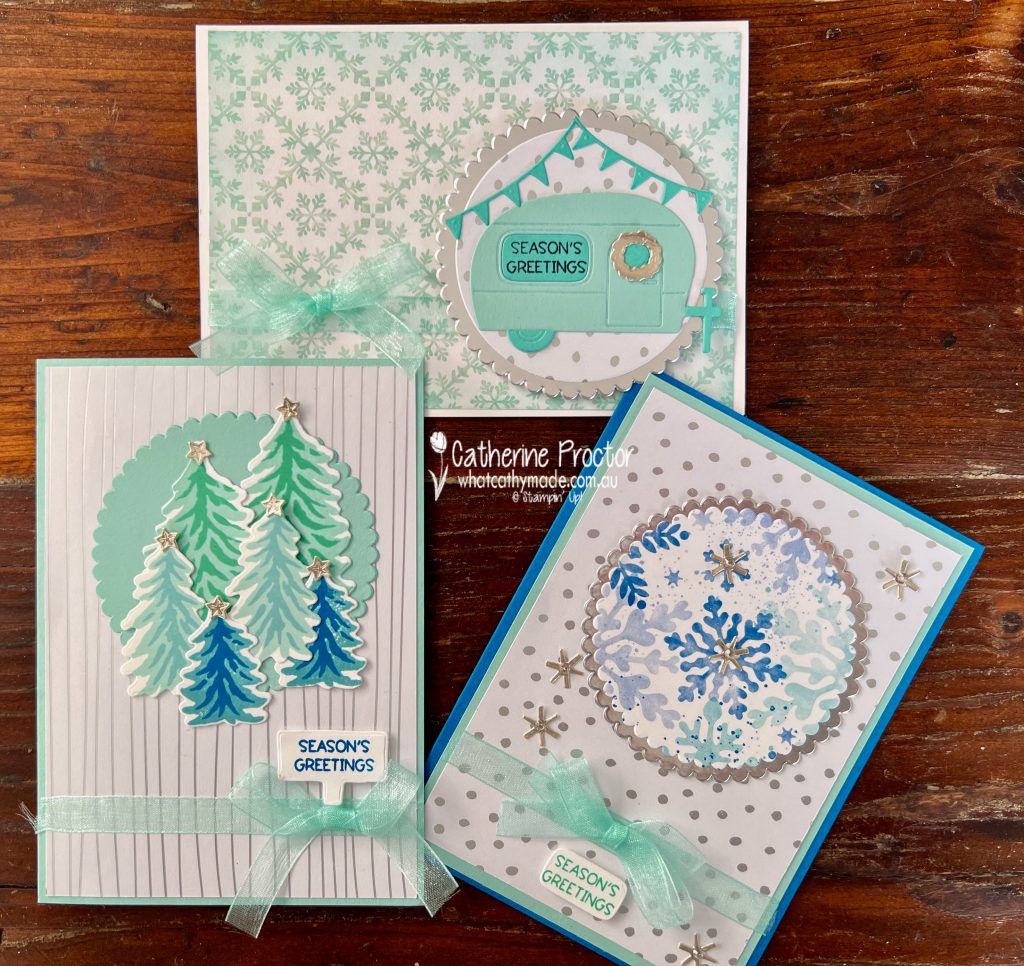
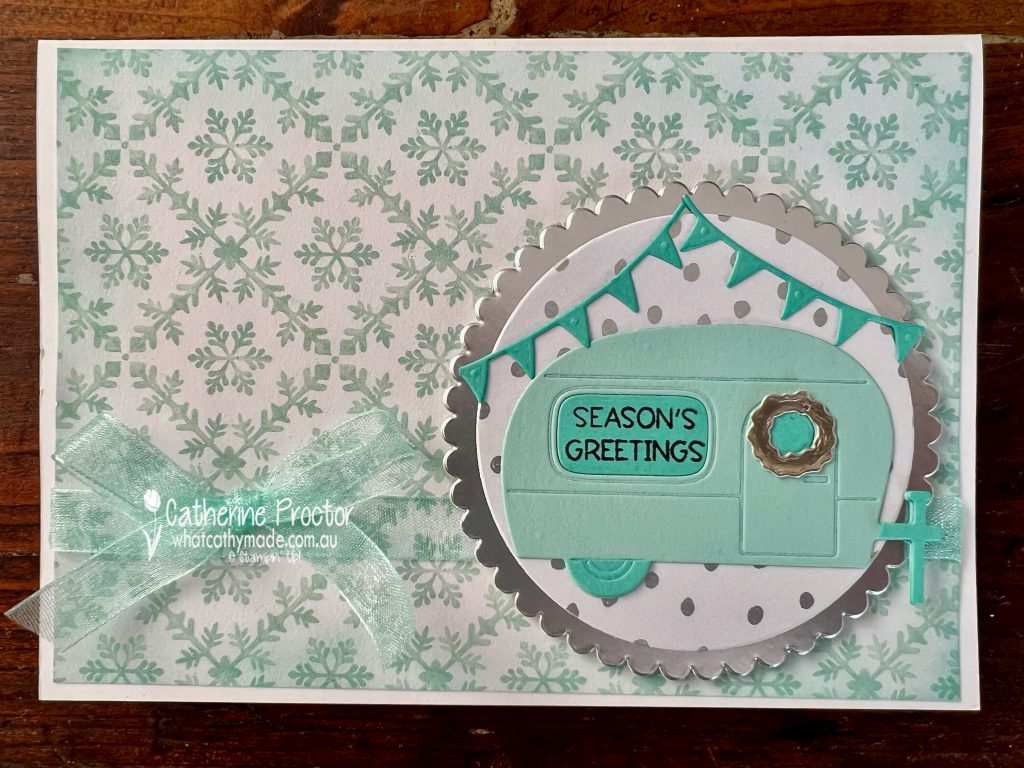
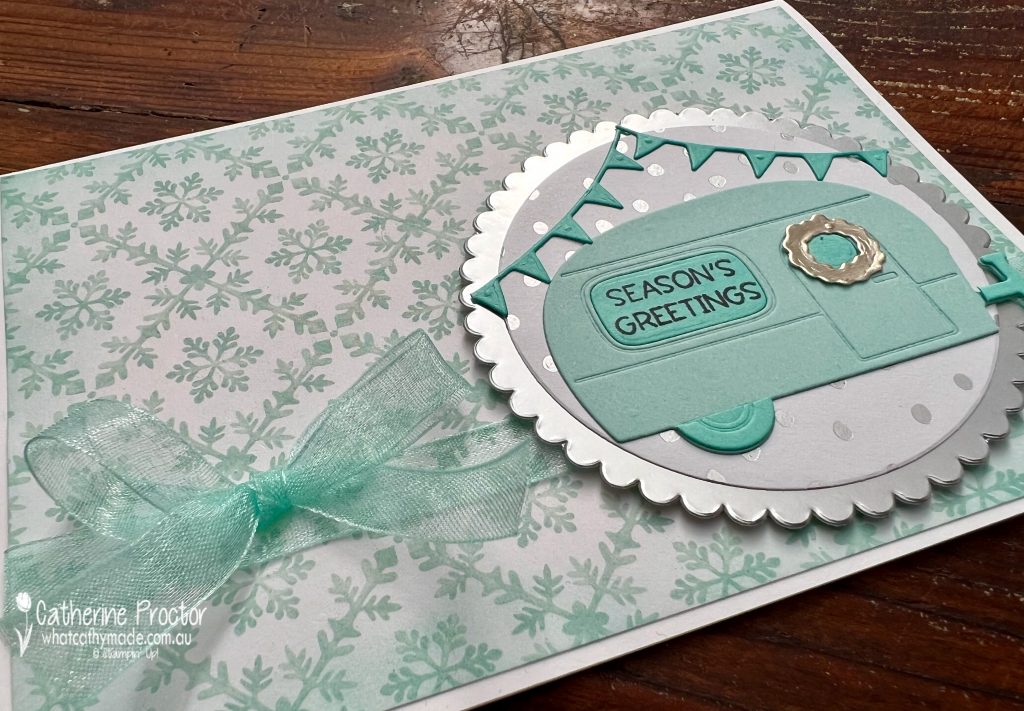
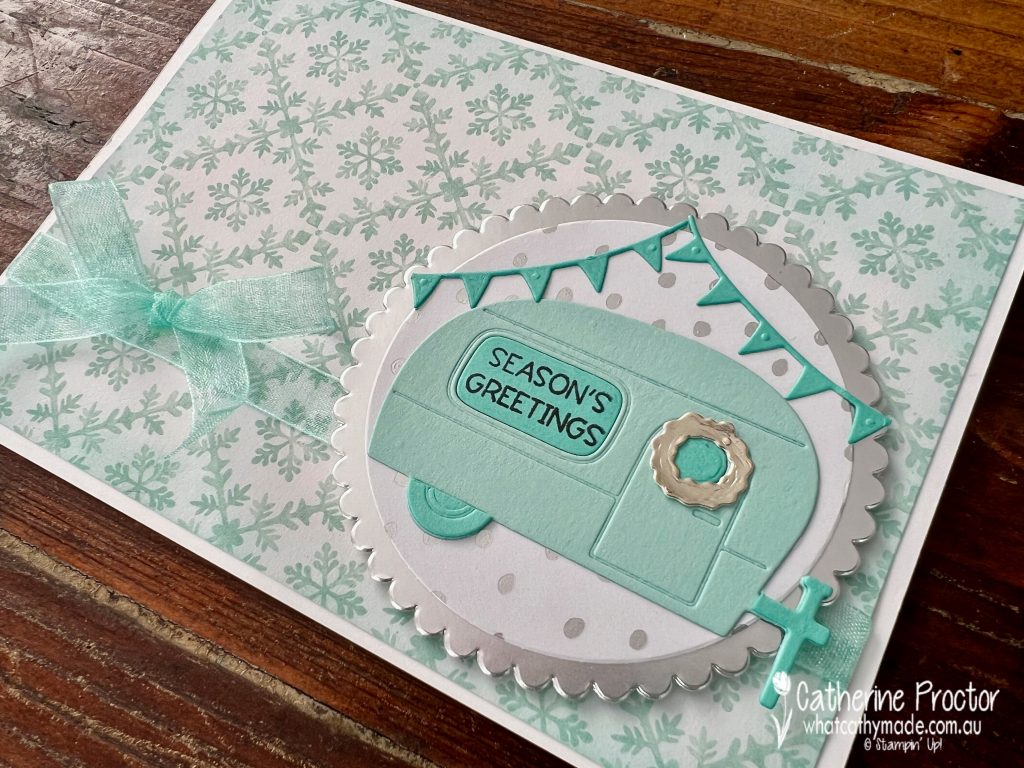
Card one features the adorable caravan from another Sale-a-bration item, the Tree Lot Dies. The die cut circle of Silver & Gold DSP gives the effect of snow falling behind the caravan.
The reverse side of the Storybook Gnomes DSP has some lovely patterns in greens, aquas and blues – this pattern is my favourite. I’ve used a blending brush to add a touch of Pool Party to soften the edge of this DSP.
Did you realise that the “Season’s Greetings” sentiment from the Penguin Place Stamp Set fits perfectly in the caravan window! How cute is that!
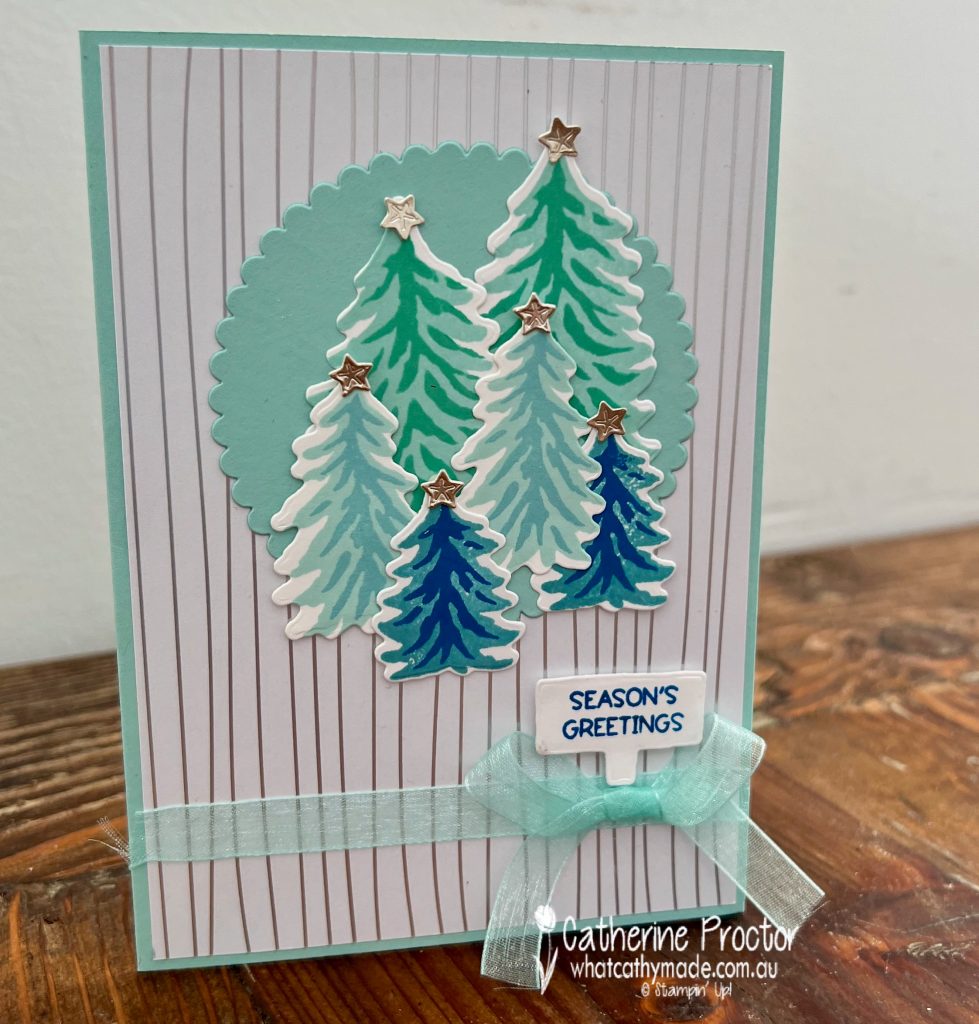
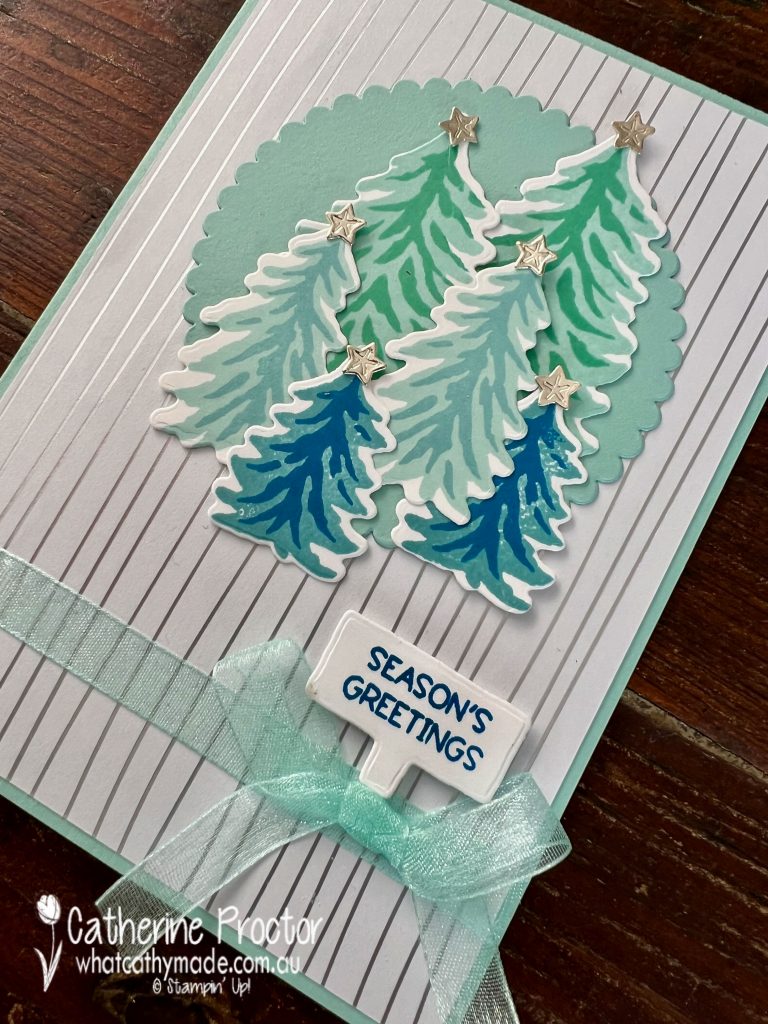
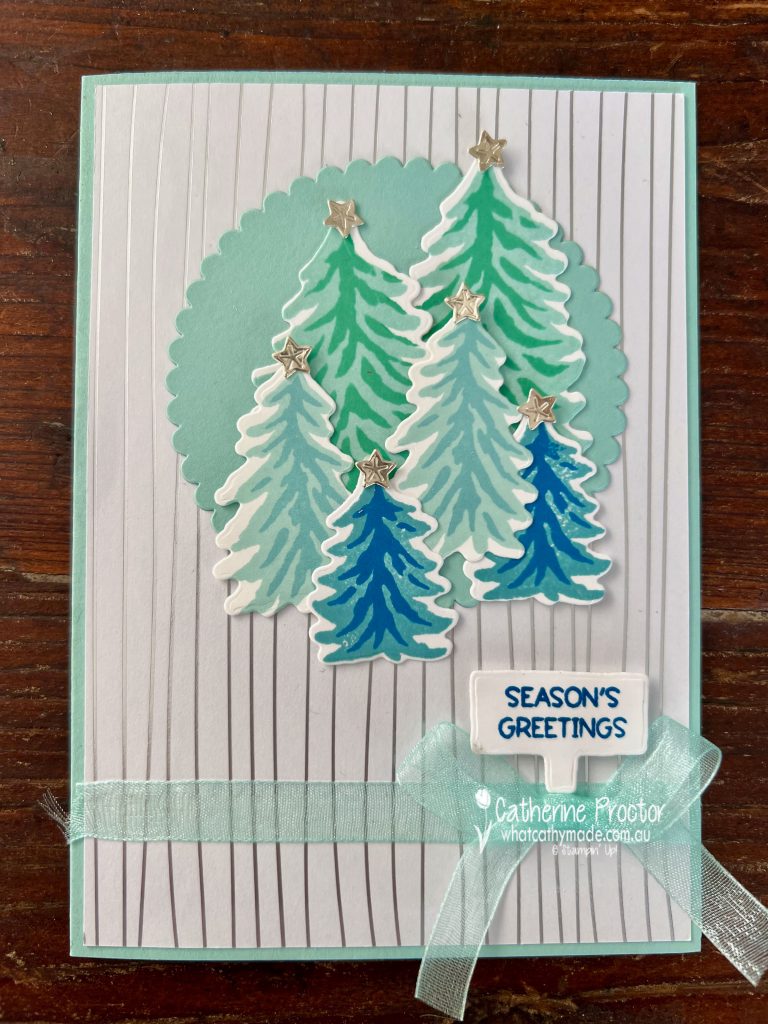
The striped pattern from the Silver & Gold DSP works well with the trees from the Trees For Sale stamp set, making the trees look taller. I die cut these trees and the sentiment using the coordinating Sale-a-bration Tree Lot Dies.
The little silver stars are also from the Tree Lot Dies. I can’t stop using this die set, I love it so much!
The “Season’s Greetings” sentiment from the Penguin Place Stamp Set also fits perfectly in this sign die from the Tree Lot Dies.
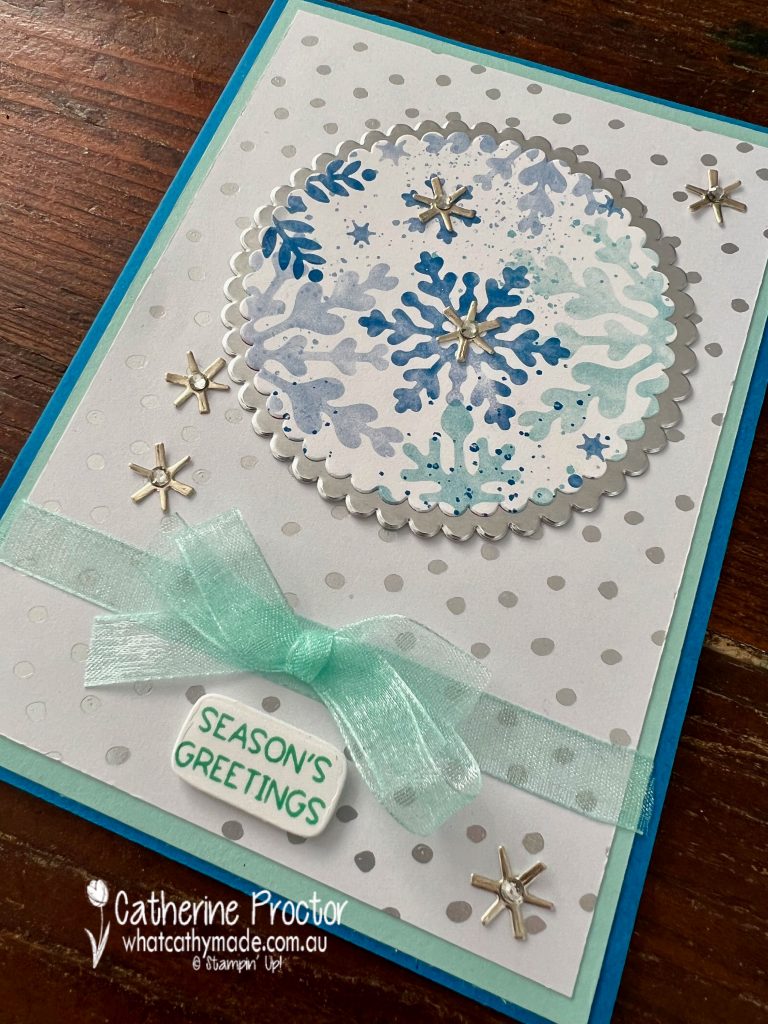
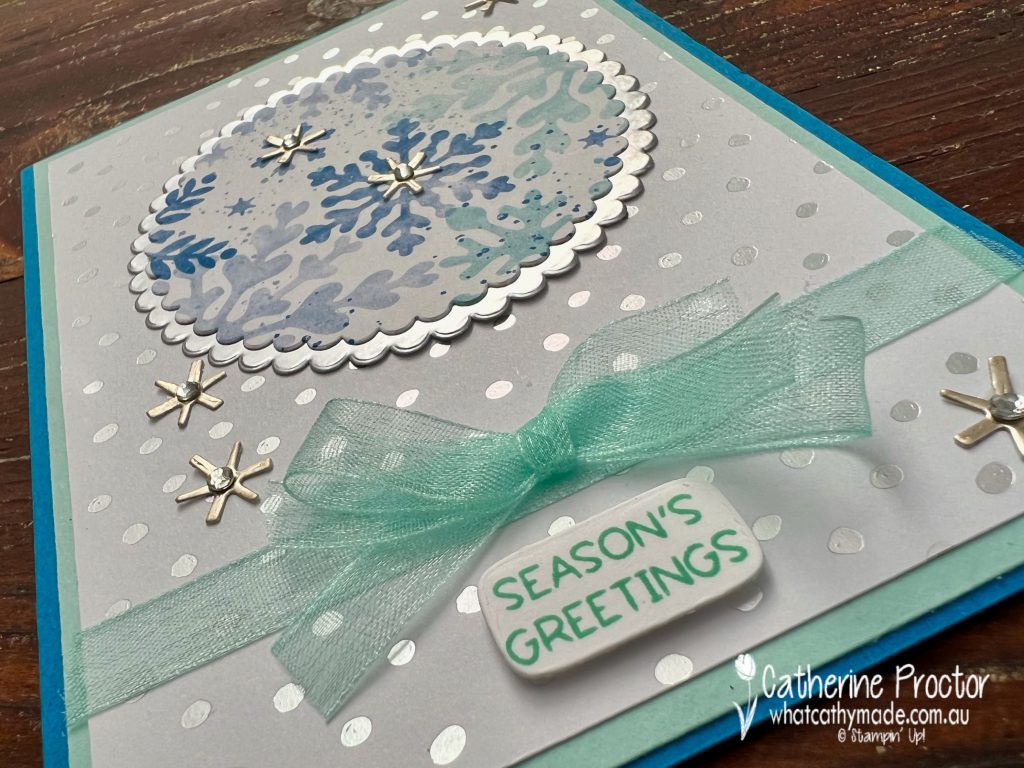
Like the first two cards, card three also uses the Silver & Gold DSP and the Pool Party sheer ribbon. I’ve also used the soft snowflake pattern from the Storybook Gnomes DSP.
I’ve used the window “offcut” from a caravan that I die cut for another card for the sentiment on this card and the stars/snowflakes (I’m not sure exactly what they are!) are die cut using the Decorated Pine Dies.
Each star/snowflake has a small Rhinestone Basic Jewel in its centre.
Now it’s time to hop on over to our next participant, the lovely Kate Morgan – I can’t wait to see what Kate has made this week!
If at any time you find a broken link, you can find the complete list of all participants on Sharon’s blog. Sharon Davern is the host of our Heart of Christmas blog hop this year – thank you so much Sharon!!!
Welcome to week twelve of our Art With Heart 2022-23 Colour Creations blog hop! This is a weekly blog hop where we showcase the stunning range of Stampin’ Up! colours in alphabetical order over 12 months and this week we are featuring Calypso Coral.
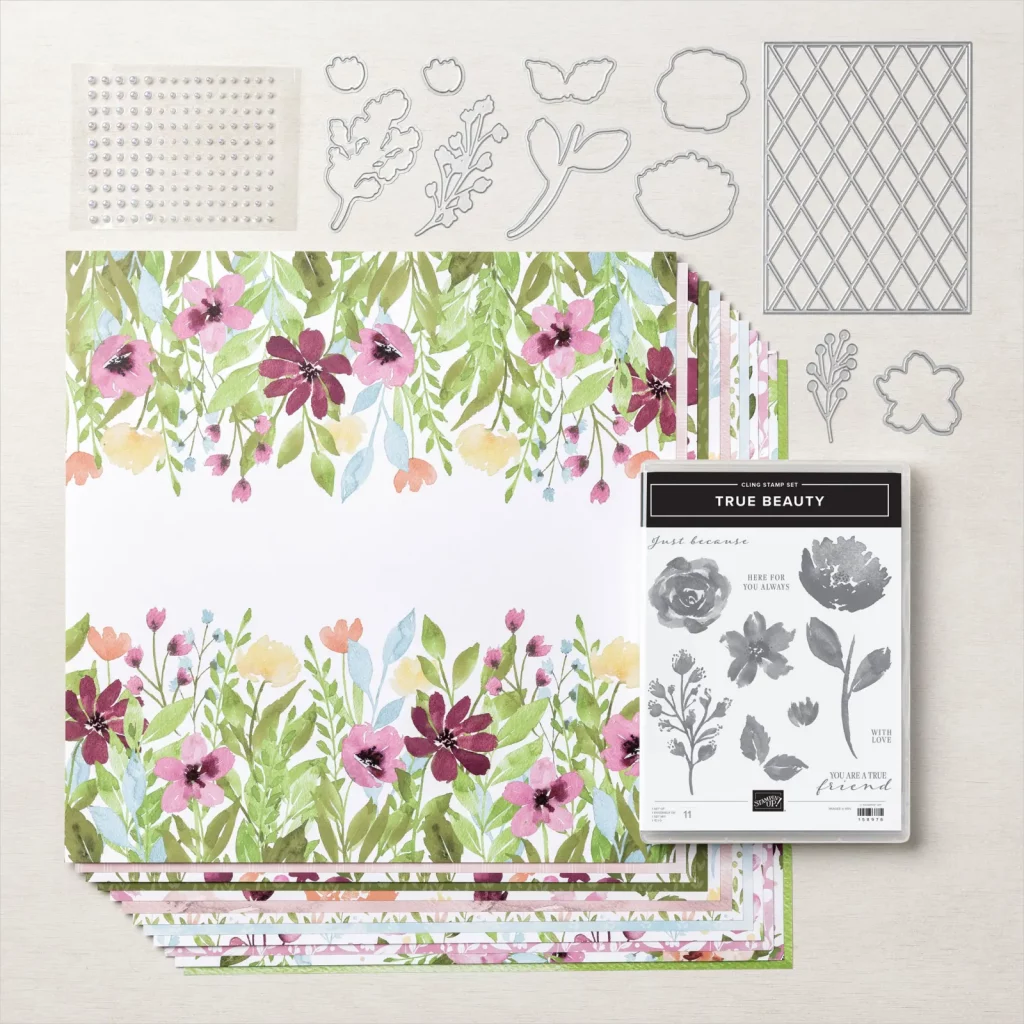
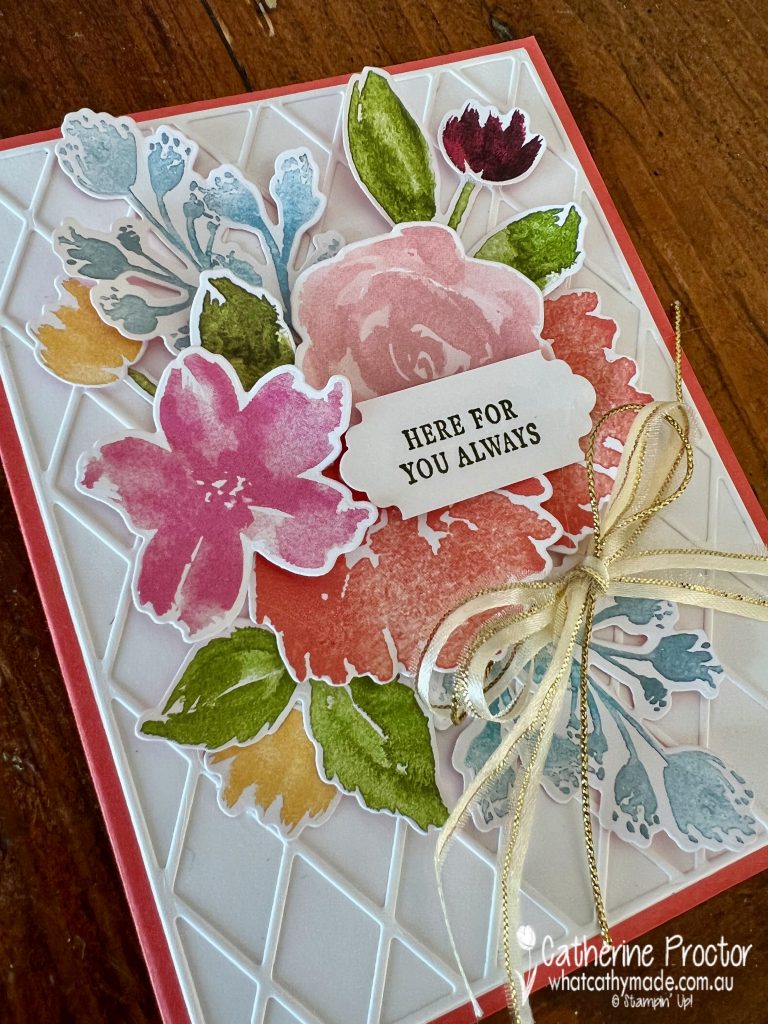
Unfortunately, I had to make some sympathy cards this week so I reached for the Awash in Beauty suite. I love the soft watercolour flowers in this suite and the sentiments in the True Beauty Stamp Set include “Here for you always” and “with love” – just perfect for a sympathy card.
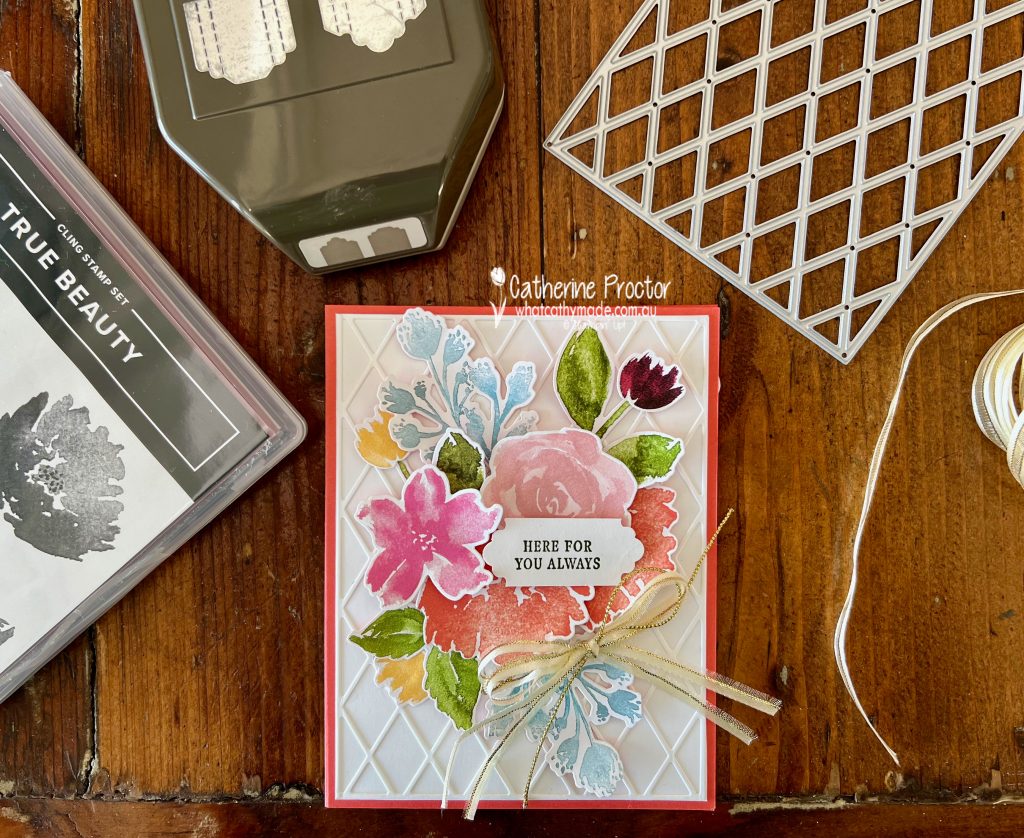
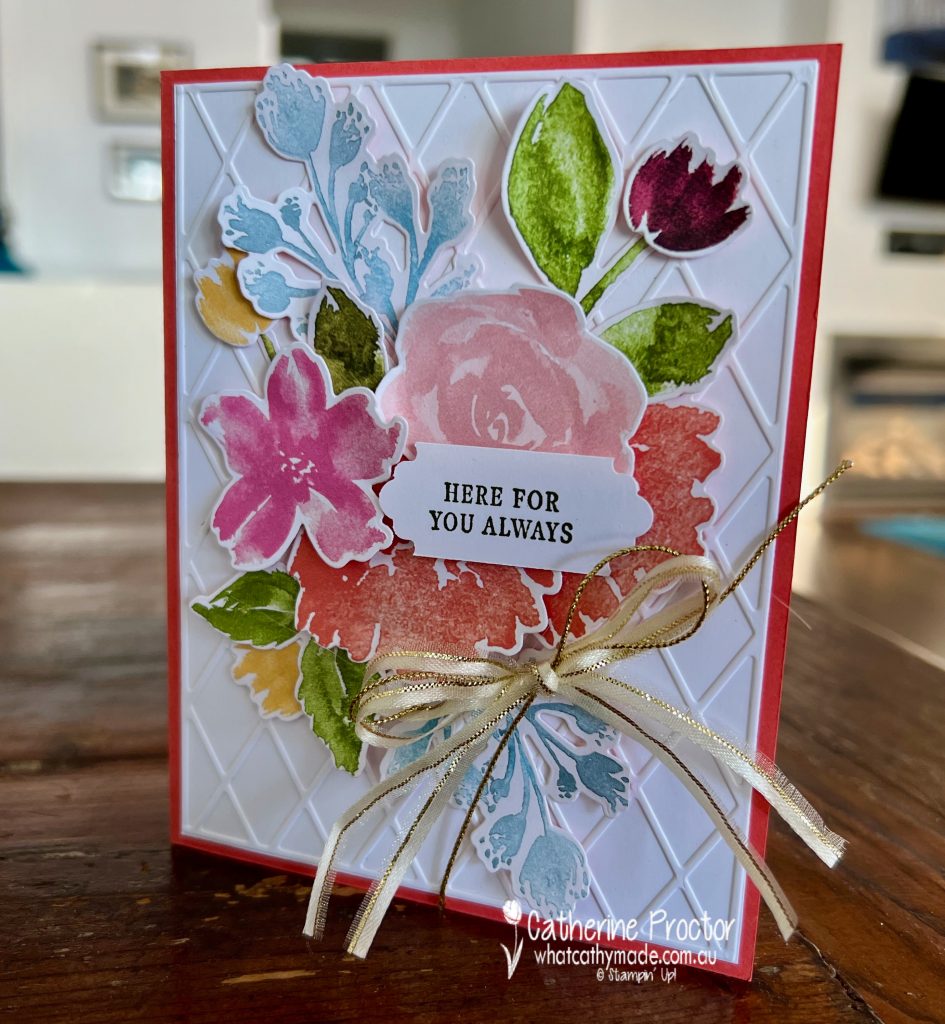
This large lattice die can be used for masking or as a background die to give an embossed effect as I’ve done on this card.
Just remember to attach an adhesive sheet to the card stock before die cutting – it makes it very easy to position and adhere to the card base.
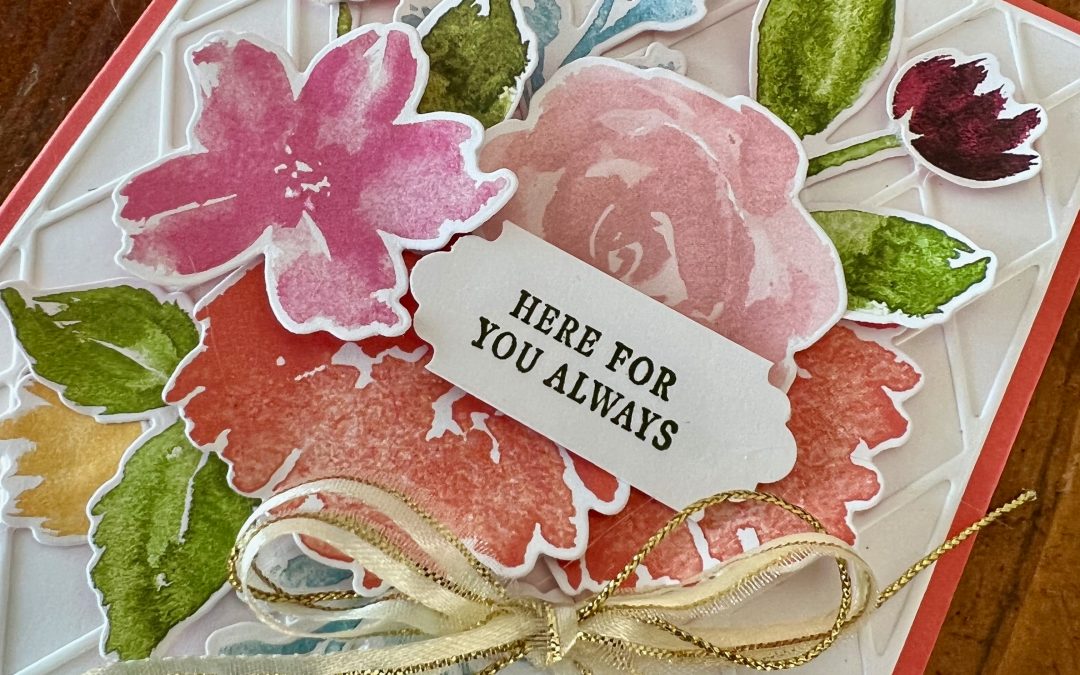
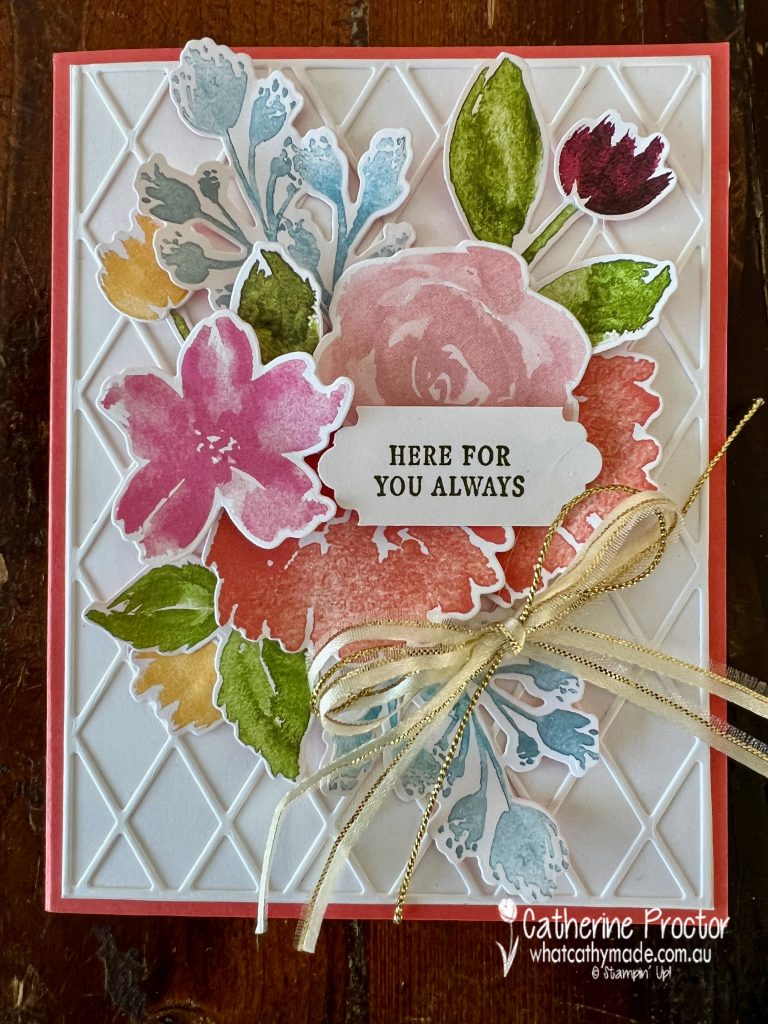
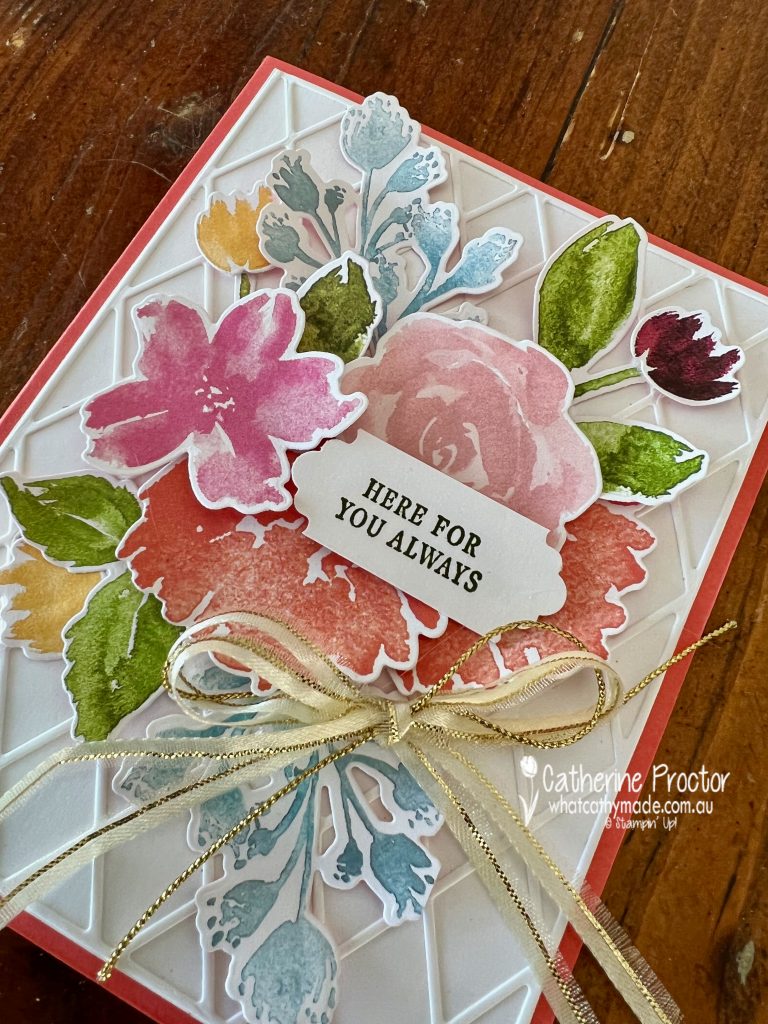
Would you believe that apart from the sentiment, there is no stamping at all on this card? These gorgeous flowers and leaves are all images from the Awash in Beauty Designer Series Paper, die cut with the coordinating Organic Beauty dies.
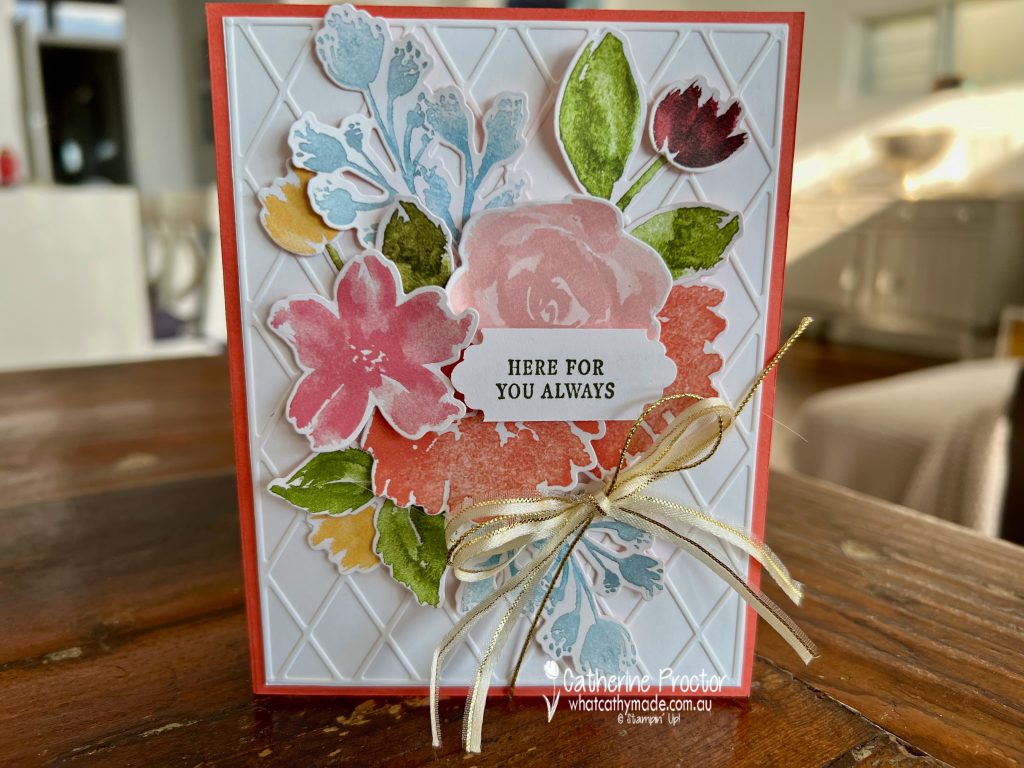
I love how Calypso Coral looks when it’s paired with these other colours in a bunch of flowers.
The “Here For You Always” sentiment was stamped in Mossy Meadow onto a 3/4 inch strip of DSP and then cut to the desired length using the Lovely Labels Pick a Punch.
My favourite ribbon from the July-December Mini catalogue is the Gold & Vanilla 3/8″ (1 cm) Satin Edged Ribbon. I’ve cut a length of it in half to create a double bow with the metallic Simply Elegant Trim.
Because this card wasn’t going in the post – it was hand delivered with a bunch of flowers – I used my bone folder and fingers to curl up the edges of all of the flowers, adding a lot of dimension to the card.
Now it’s time to hop on over to our next participant, the lovely Ros Davidson – I can’t wait to see what Ros has made this week!
If at any time you find a broken link, you can find the complete list of all participants below.
Welcome to week three of the Heart Of Christmas Blog Hop!
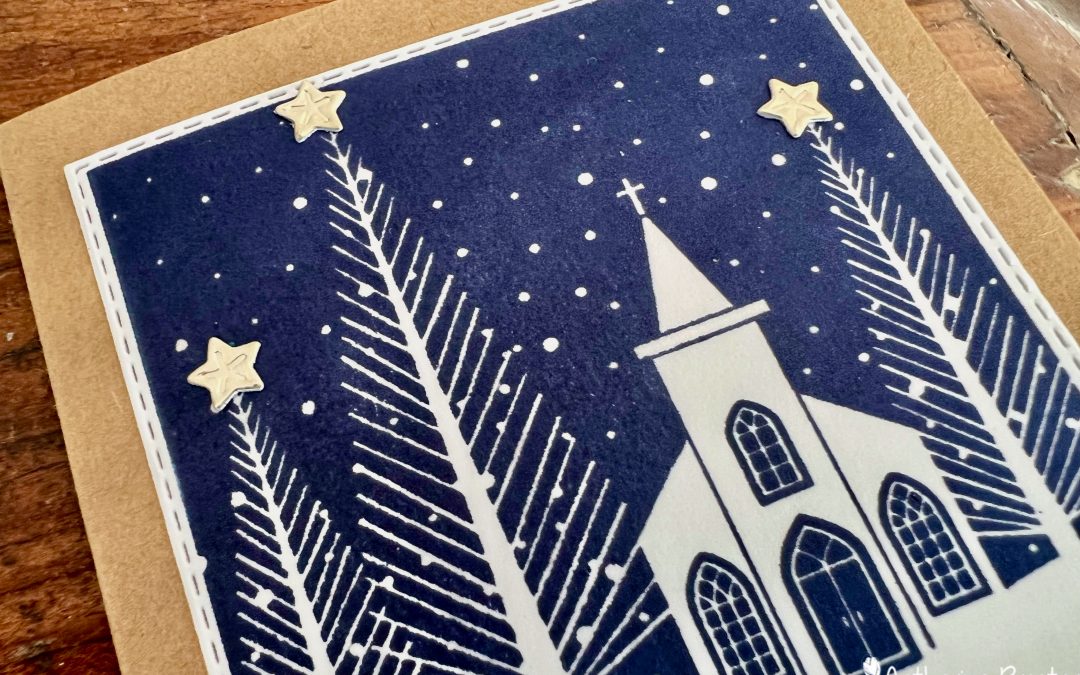
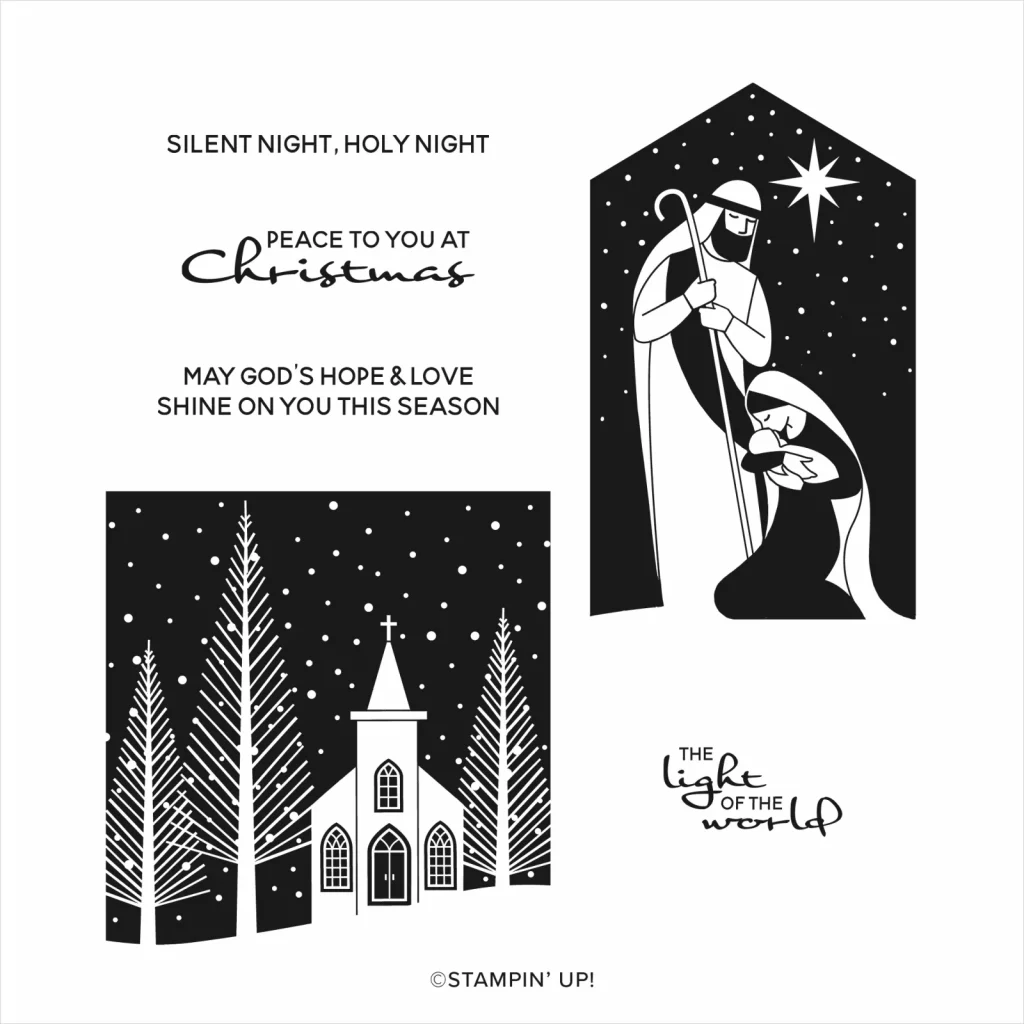
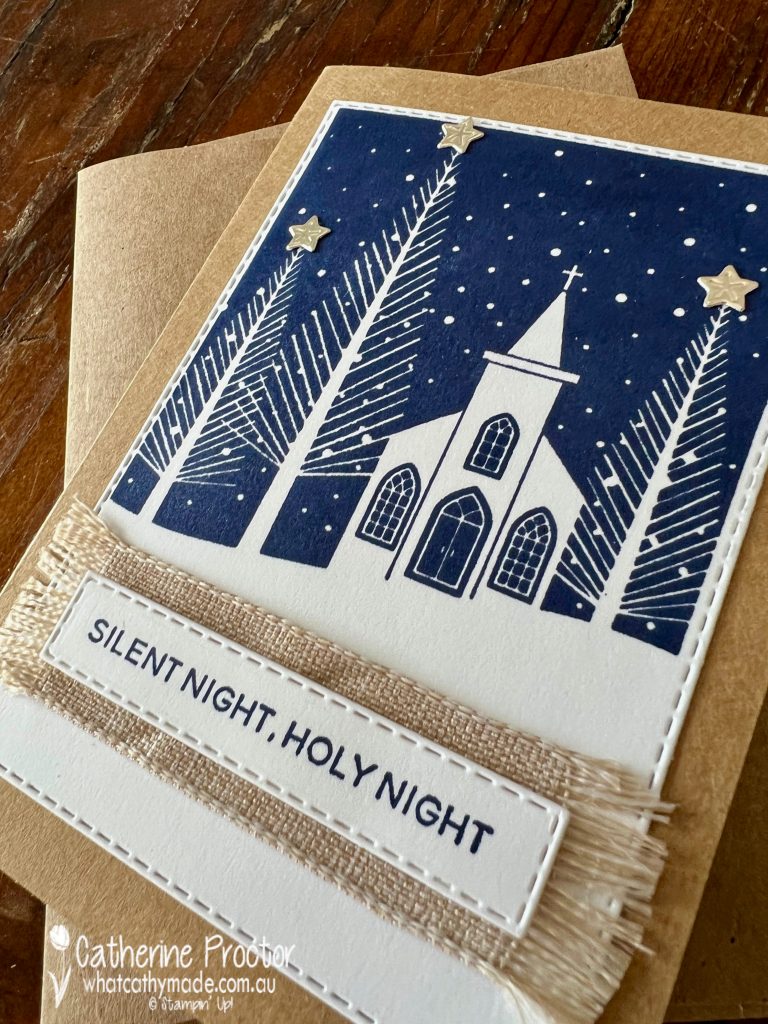
Tonight I’m using a beautiful stamp set that really does all the work for you when making Christmas cards – the “Peace to You” stamp set.
I love this style of stamp as all you have to do is ink up your stamp, add a sentiment and you’ve made a gorgeous card.
It’s the perfect stamp for mass production, however I would recommend using a Stamparatus to ensure that lovely inky dark sky is evenly stamped up.
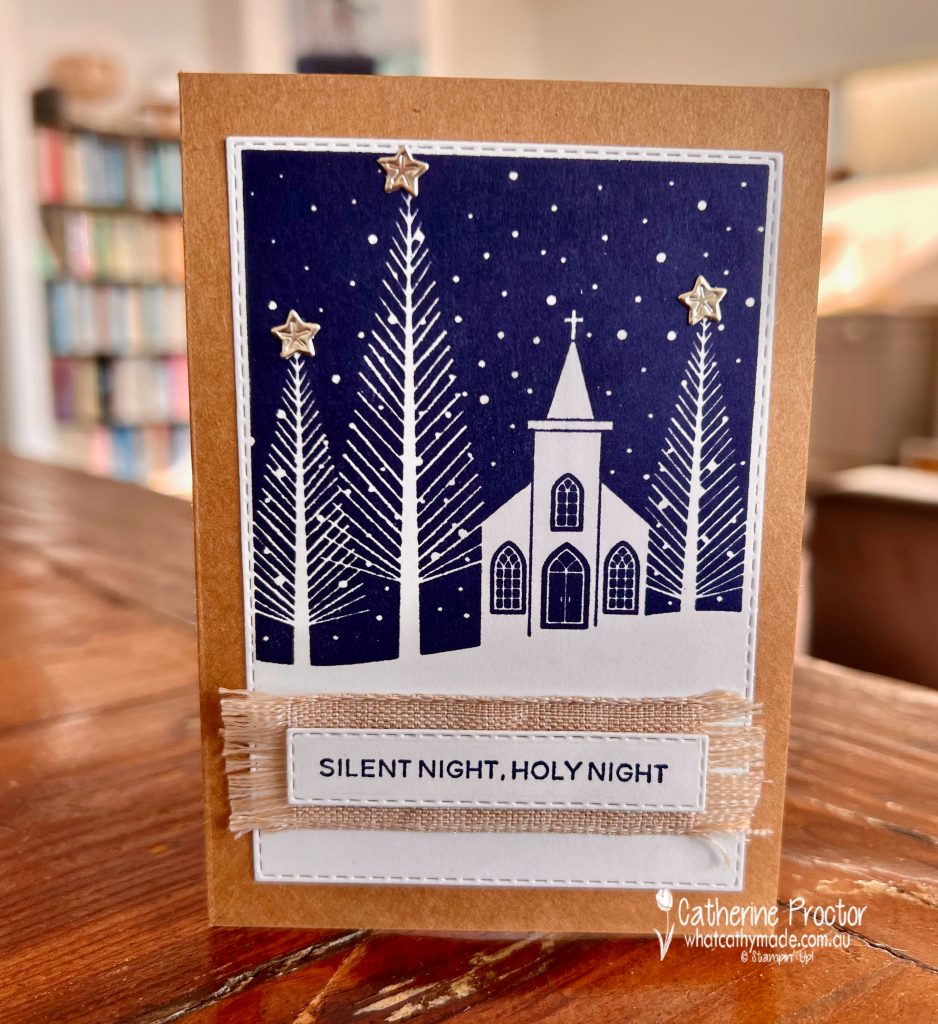
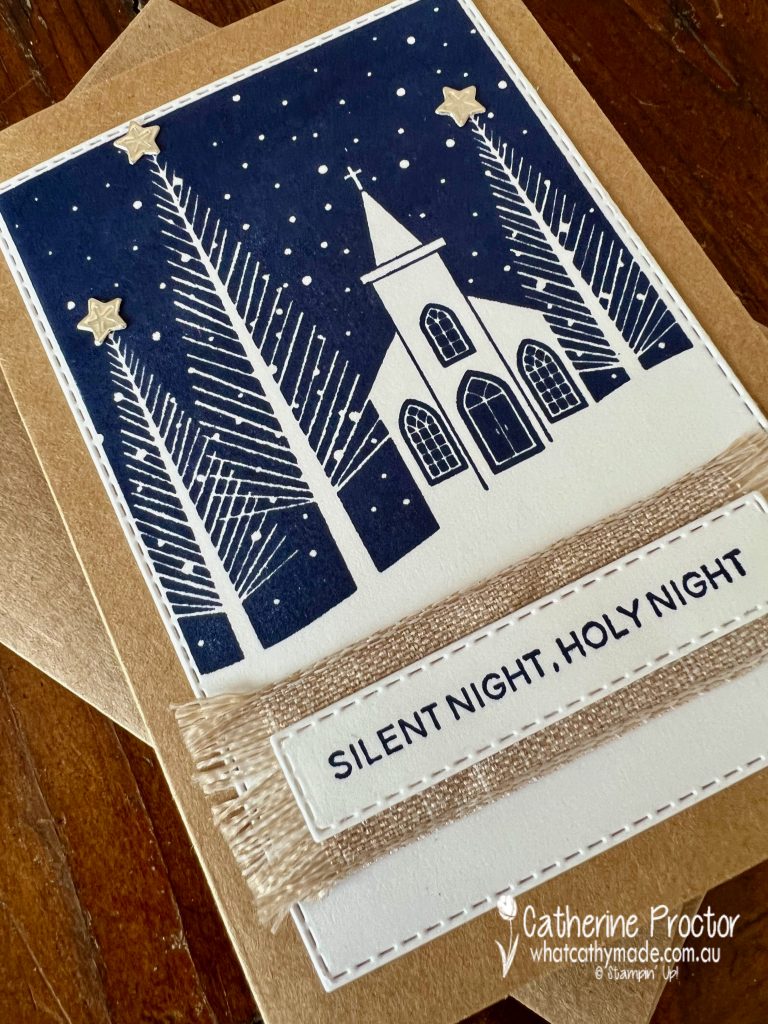
I die cut the stamped image out using the 3rd largest stitched rectangle die which adds a slim white border to the stamped layer.
The card base and matching envelope is one of the new Kraft Note Cards and envelopes (page 137 of the Annual Catalogue). These are a great versatile and neutral background layer for any colour!
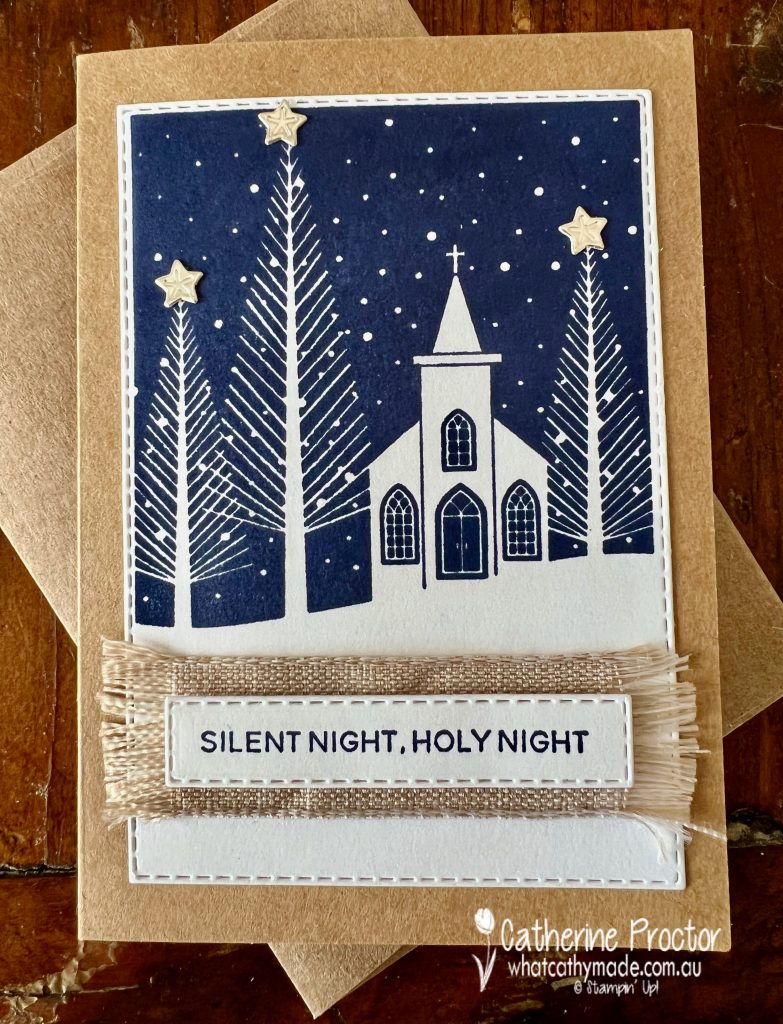
The “Silent Night, Holy Night” sentiment is die cut with another stitched rectangle die and layered onto a piece of Natural Finish ribbon which I frayed at the ends.
The FREE SALE-a-bration Tree Lot Dies have a die that cuts 3 tiny stars – I’ve used this die to die cut silver foil stars for the tops of the trees. Isn’t the detail in these tiny stars just gorgeous!
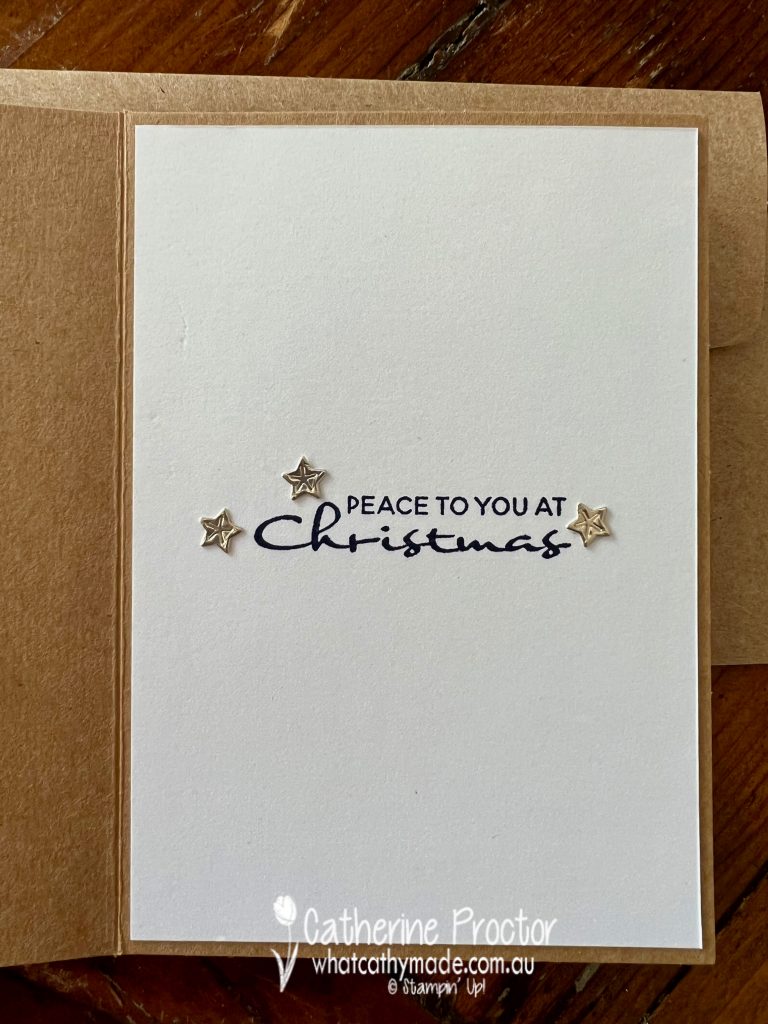
I’ve also added a few silver stars to the inside of the card too. The “Peace to you at Christmas” is another sentiment from the “Peace For you” stamp set and it’s a sentiment that is particularly pertinent for the world right now.
Now it’s time to hop on over to our next participant, the lovely Christine Blain – I can’t wait to see what Christine has made this week!
If at any time you find a broken link, you can find the complete list of all participants on Sharon’s blog. Sharon Davern is the host of our Heart of Christmas blog hop this year – thank you so much Sharon!!!
If you live in Australia, you can find and purchase these products in my Stampin’ Up! Online Store or by clicking on the images below.


 Designer Series Paper")
")


")


 Ribbon")

 Specialty Pack")


