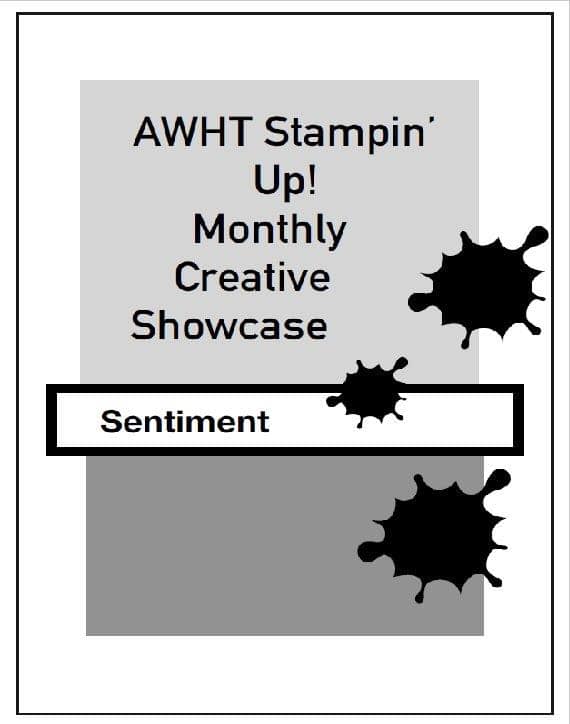
Welcome to the Monthly Art With Heart Creative Showcase.
Tonight we’re sharing some ideas for projects inspired by a card sketch. I’ve never actually participated in a card sketch challenge before but wow, I had so much fun making my card. I love how easy it is to create when someone else has done all the hard work for you in terms of thinking about the design and layout of your card! Thanks Rachel!
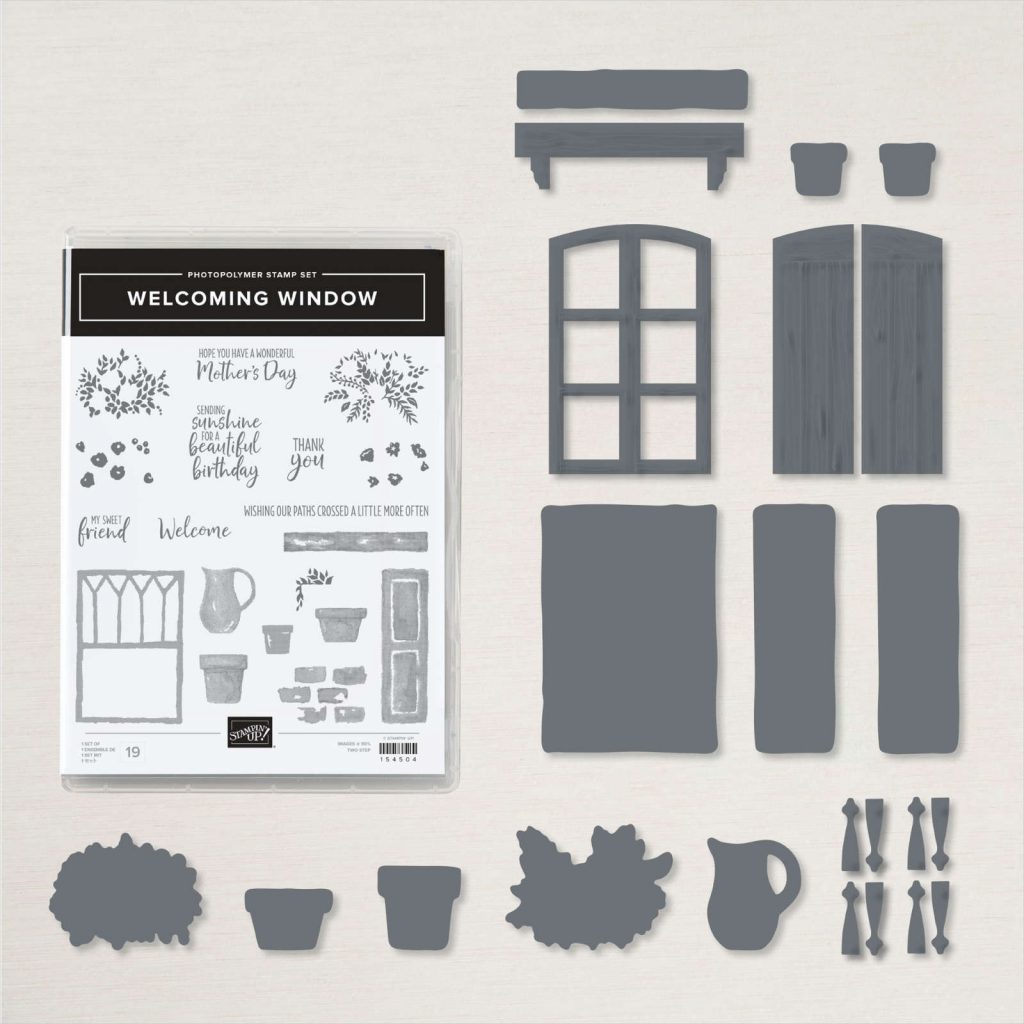
The Welcoming Window bundle was a bundle that had been on my wish list since I first saw the January – June mini catalogue and after months of deliberation it sort of “accidentally” fell into my shopping cart when I was placing an order last month. Whoops! Anyway, I must have known it would be just what I needed for this sketch challenge.
I’m always drawn to stamp sets and dies with architectural features – I think it’s because of the incredible dolls house my dad made for me when I was a child. It was my favourite toy ever!
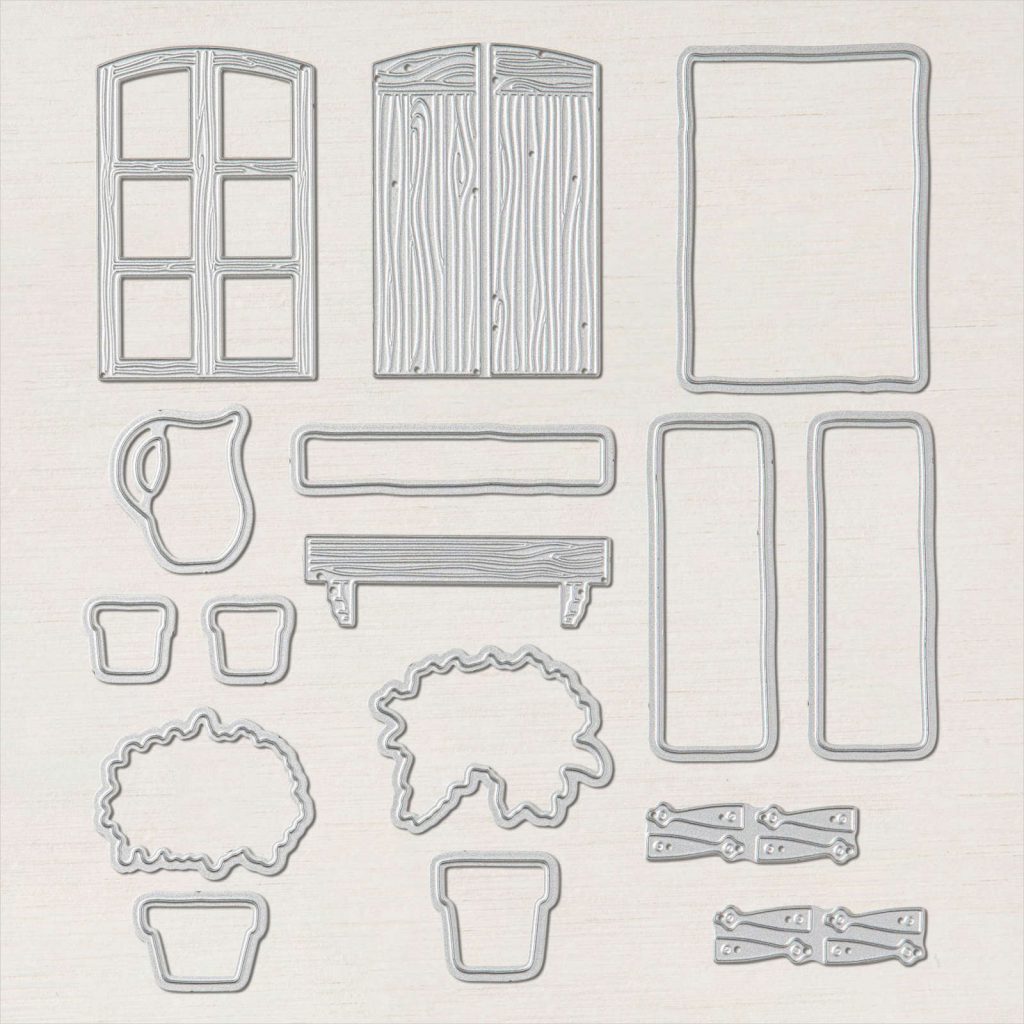
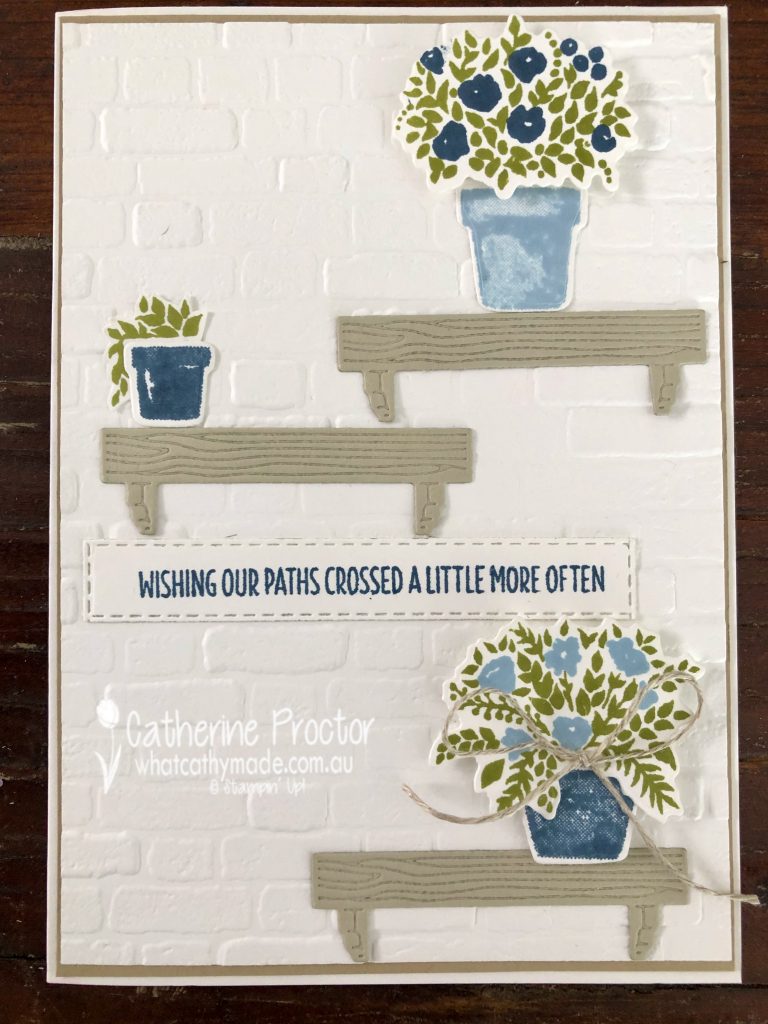
These Window Flower Box Dies are so cute – I’ve only used the embossed window sills and the dies that cut out the flowers and the pots on this card but there are also windows, shutters and hinges.
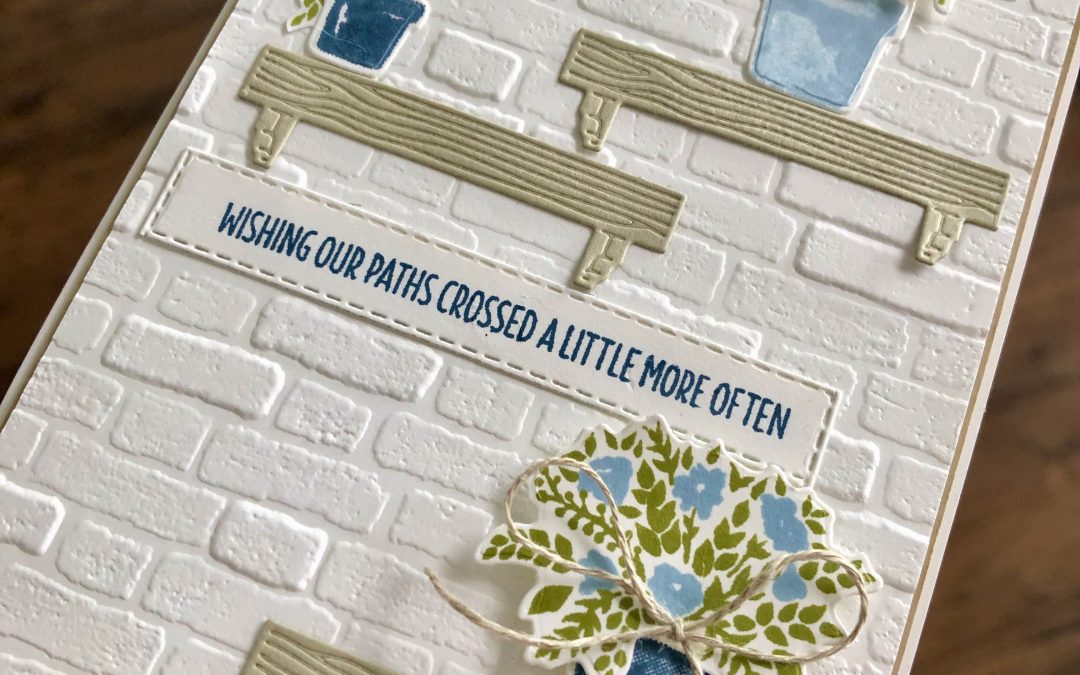
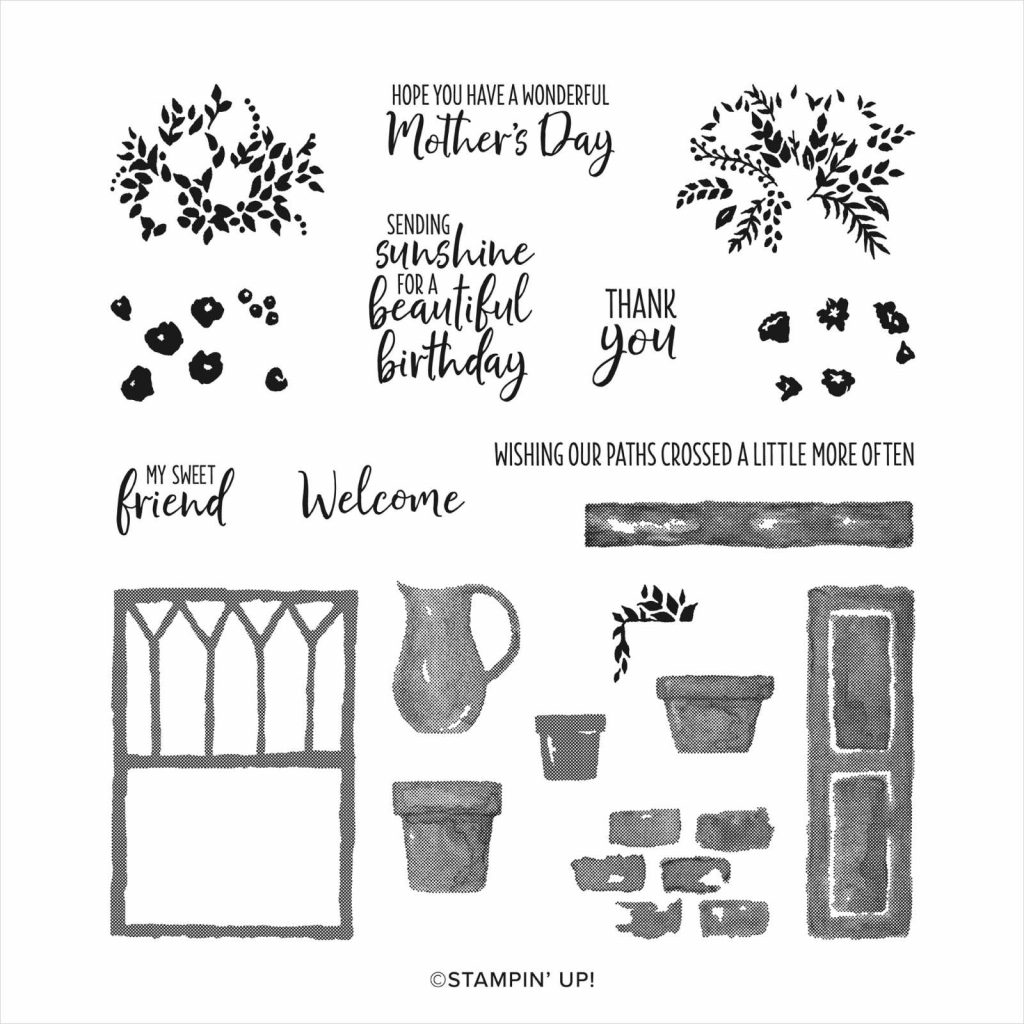
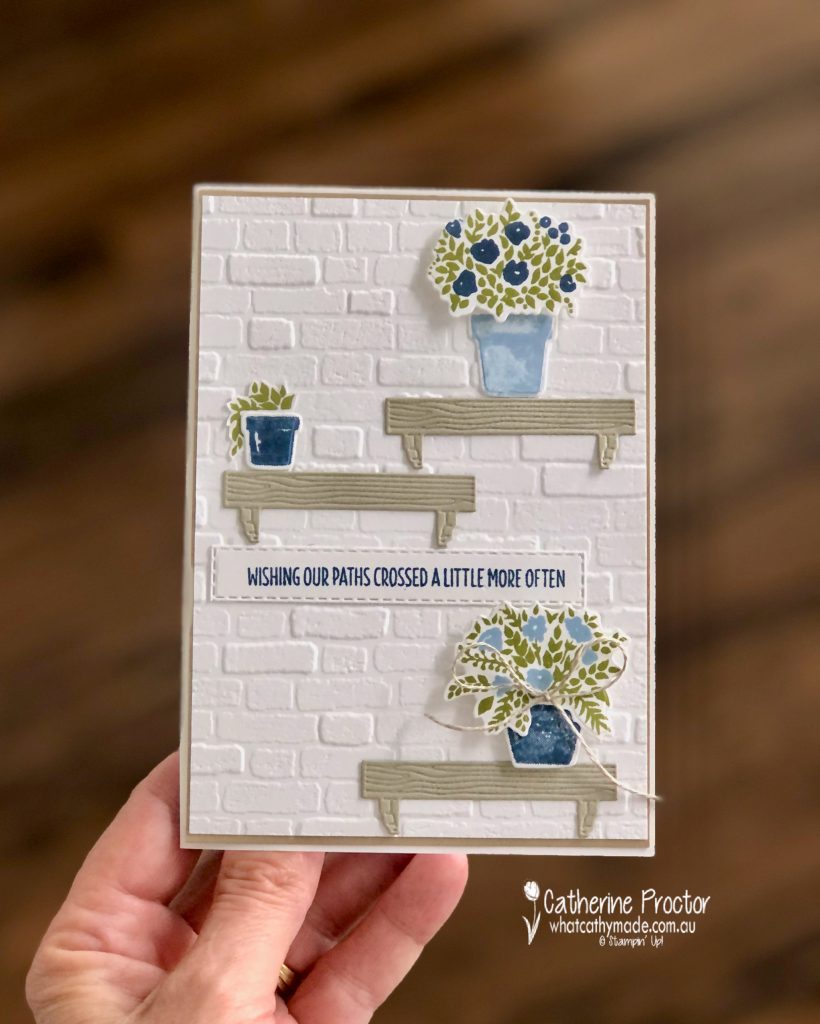
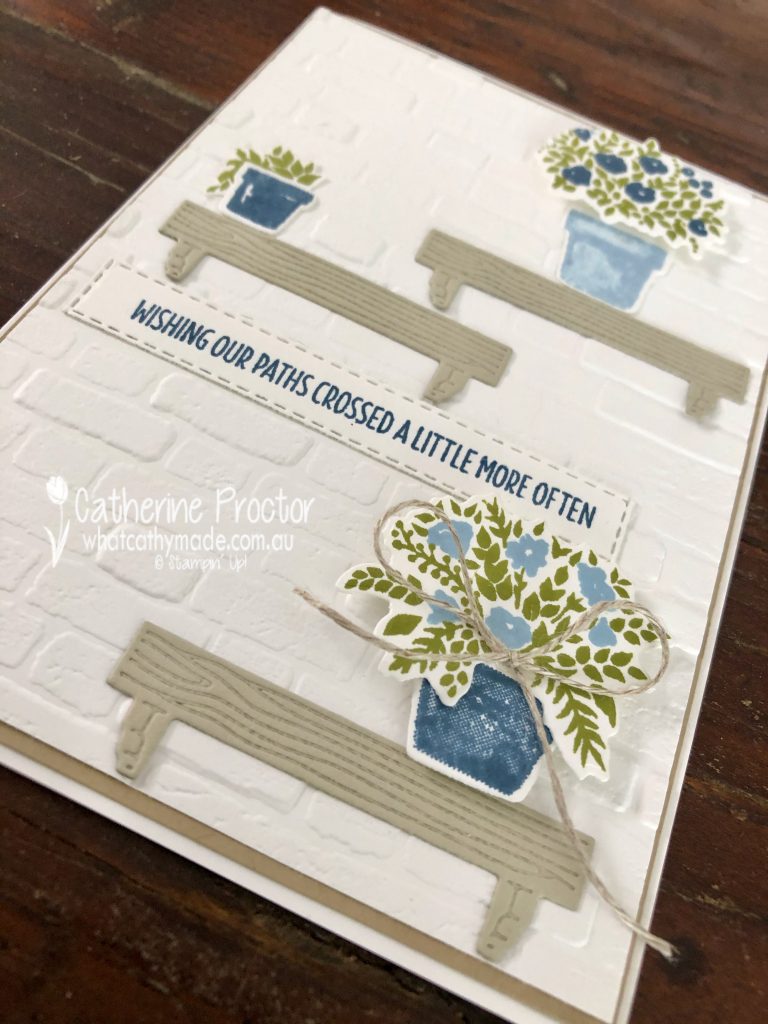
Apart from the architectural details of this bundle, I just had to have this bundle for this sentiment: “Wishing our paths crossed a little more often” – isn’t that just wonderful? It’s how I feel about a lot of my friends.
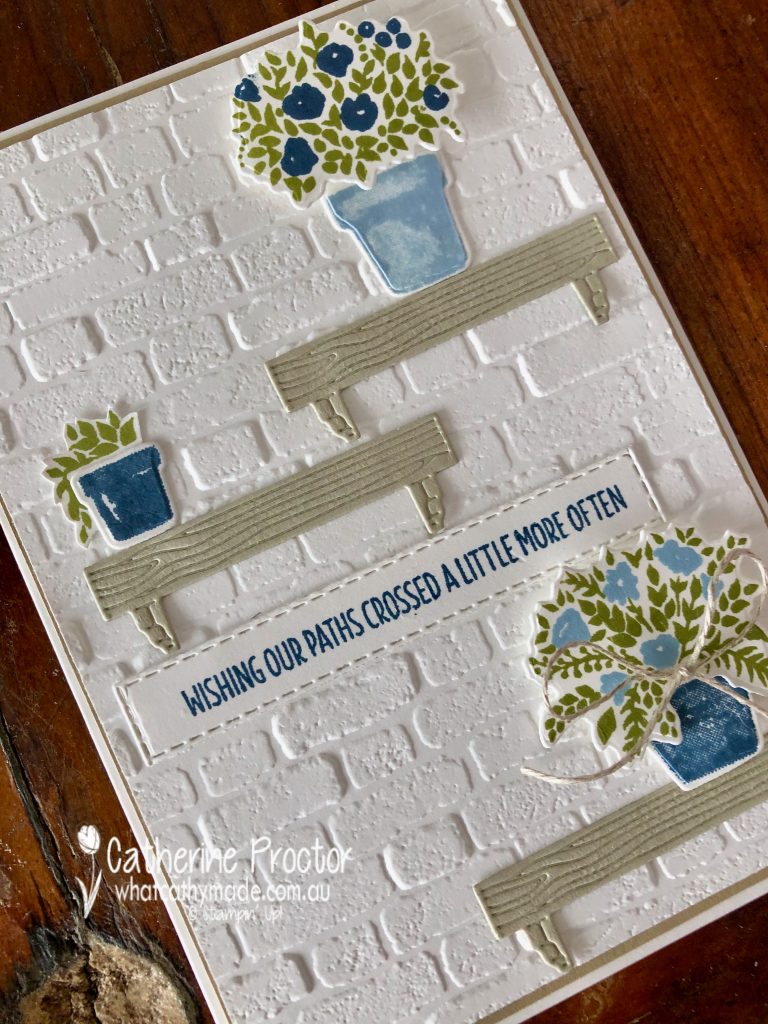
The Bricks & Mortar embossing folder was the perfect background to place my window sills on. It gives a wonderful realistic texture. If you don’t have this embossing folder you can use the brick stamp set from this bundle to stamp the background.
Can you also see how the window sill dies emboss as well as cut – all at the same time!
I could have used any colour for the flowers and the sweet little flower pots but I went with two of my favourite In Colours: Seaside Spray and Misty Moonlight. Olive Green is my go to green for foliage and leaves – I really use this colour like a neutral.
The sentiment is die cut with a stitched rectangle die – to get one long enough I had to use a die that was too wide so I die cut it again, using the long edge of the die to make it the right size for the sentiment.
To finish my card off I simply added a bow of linen thread under some of the flowers.
To see more sketch inspiration from the AWH Team head back to Rachel’s page as she is hosting our monthly blog hops.
To purchase any of the products used in my card tonight, click on the links below.
If you’d like me to post you your very own copy of the January – June 2020 mini catalogue, the 2020-21 Stampin Up! Annual Catalogue, the 2020-21 Beginners Brochure, or to simply find out about more about Stampin’ Up! contact me.
In the meantime, wherever you are in the world, stay safe, stay calm…and keep on crafting xxx
Welcome back to our Colour Creations Showcase as we continue our showcase of over 50 beautiful Stampin’ Up! colours in alpha order.
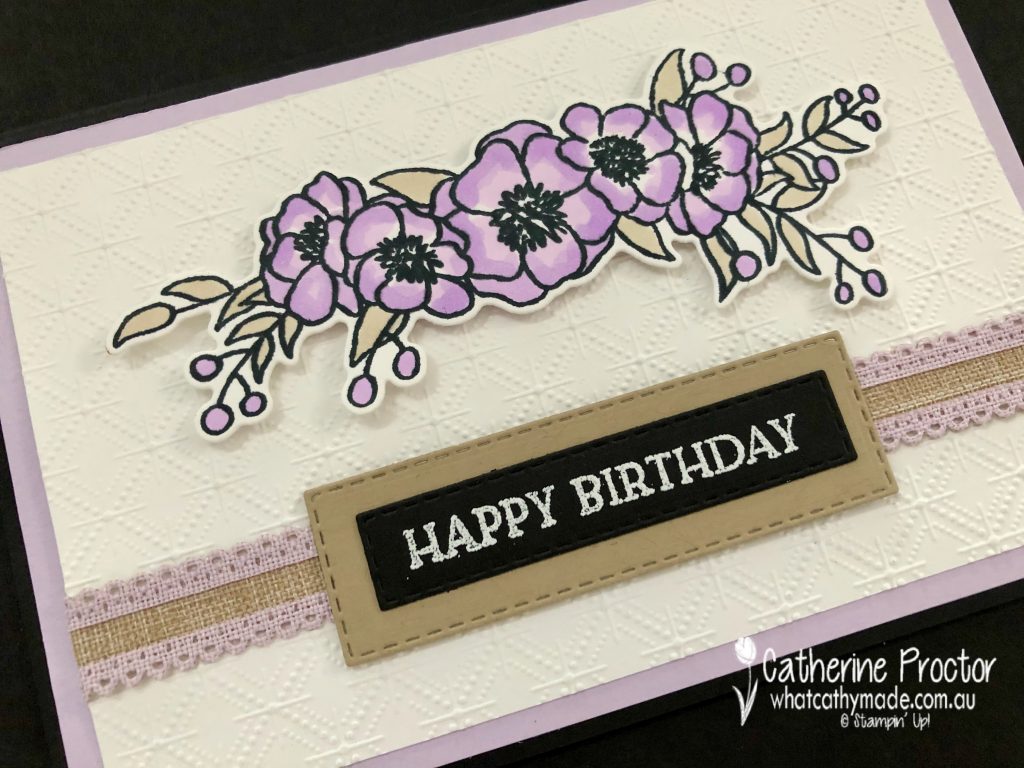
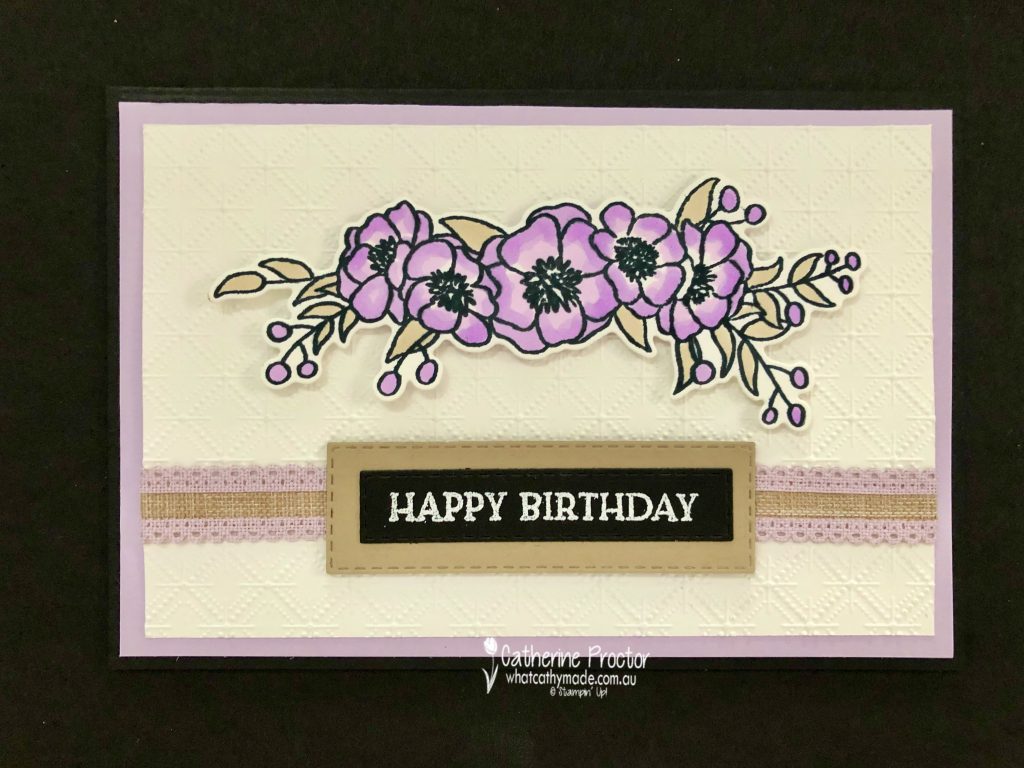
This week we are showcasing Purple Posy, a soon to be retired pale purple from Stampin’ Up’s 2019-21 InColour collection.
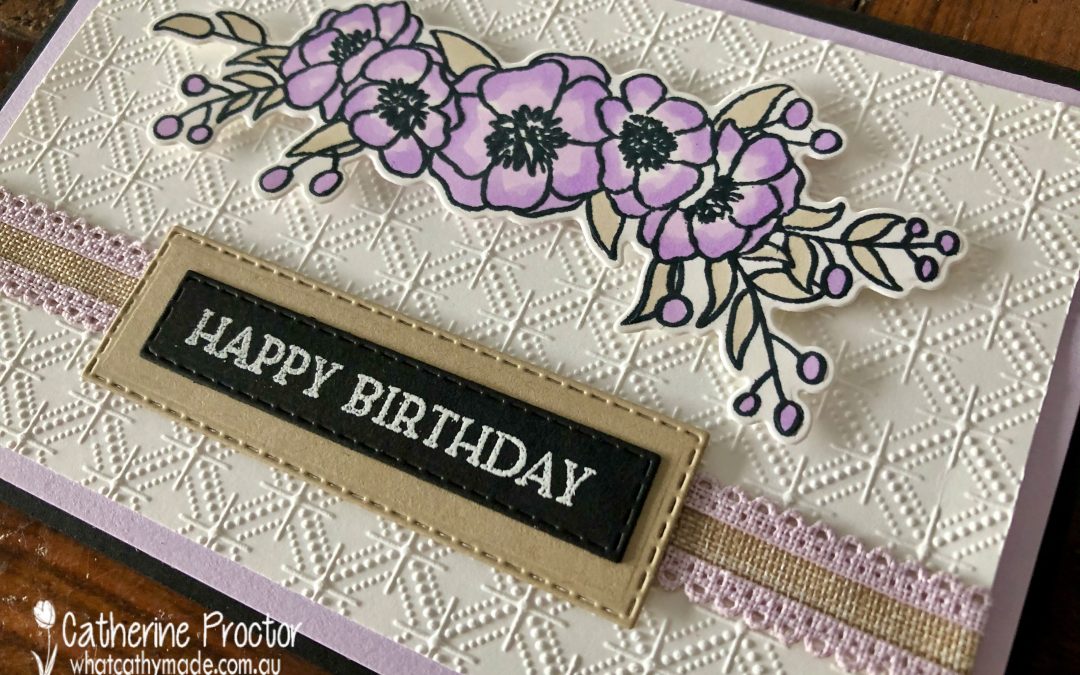
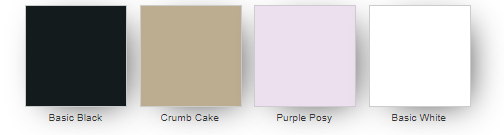
Purple Posy is a feminine and slightly old fashioned (in a good way!) colour that reminds me of my Nana and so I decided to make a card that I think she would have liked to receive. I paired Purple Posy with all neutrals: Crumb Cake, Basic Black and Basic White.
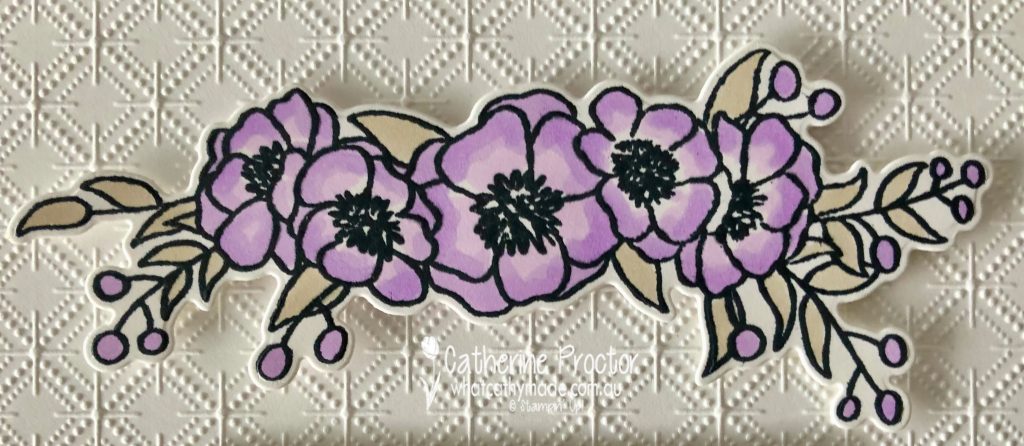
Because there is no Purple Posy stamp pad, I used a floral stamp set that could be coloured using Purple Posy Stampin Blends – Bloom & Grow with its matching Budding Blooms dies.
I could have used virtually any embossing folder on the Basic White card stock layer but decided on the Dainty Diamonds, again with my Nana in mind.
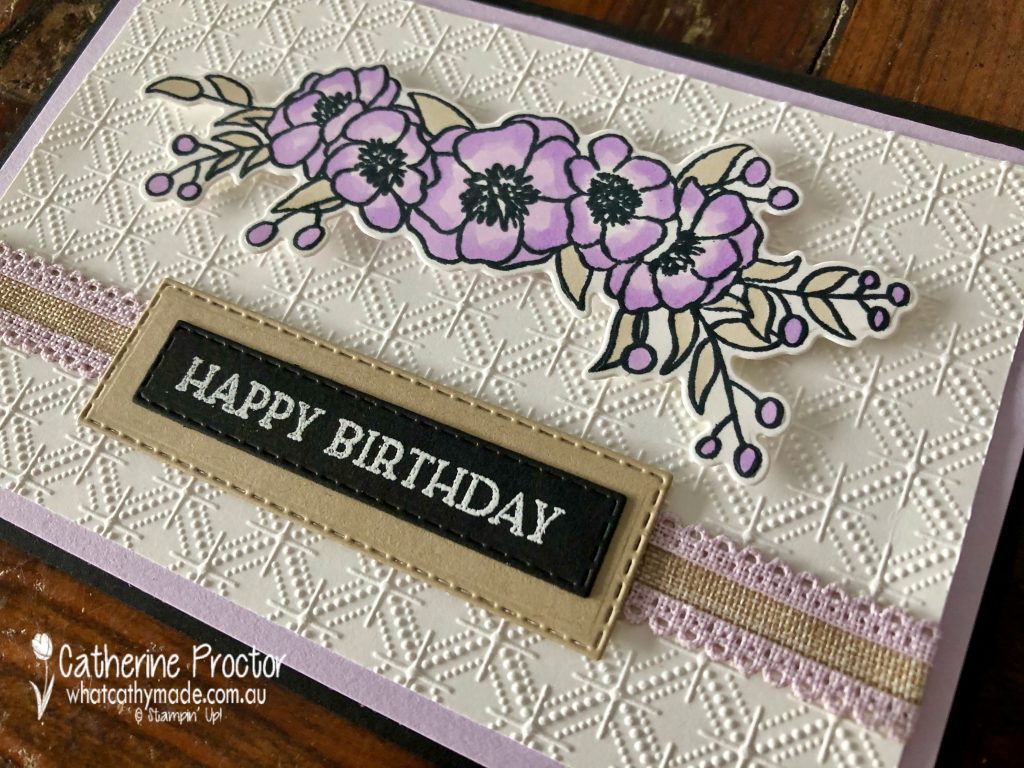
I love this scalloped linen ribbon – it was the Crumb Cake in the centre of this ribbon that inspired me to add Crumb Cake to my colour combination, both in the layer behind the sentiment and the colouring of the leaves.
Because there isn’t a “Happy Birthday” sentiment in the Bloom & Grow stamp set I used the “Happy Birthday” sentiment from Blossoms in Bloom instead.
My friend Tina Gillespie ALWAYS stamps the insides of her cards and she has inspired me to try to remember to do the same too …
I can’t wait to see what everyone else has created with Purple Posy today!
If you’d like me to post you your very own copy of the January – June 2020 mini catalogue, the 2020-21 Stampin Up! Annual Catalogue, the 2020-21 Beginners Brochure, or to simply find out about more about Stampin’ Up! contact me.
In the meantime, wherever you are in the world, stay safe, stay calm…and keep on crafting xxx
Welcome back to our Colour Creations Showcase as we continue our showcase of over 50 beautiful Stampin’ Up! colours in alpha order.
This week we are showcasing Pumpkin Pie, a rich orange from our regals family.
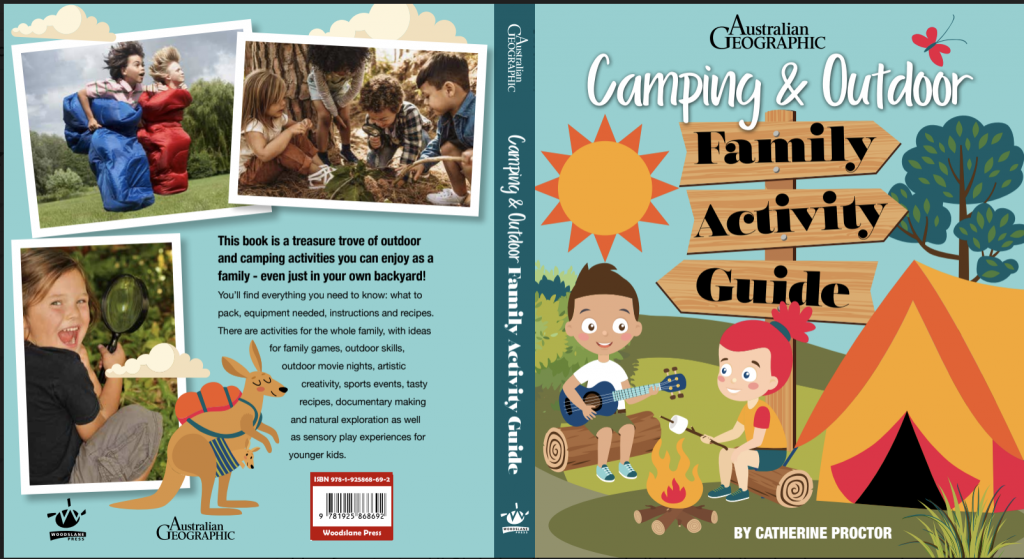
I wanted to make a thank you card for my amazing designer Christine who has just designed and typeset my latest book. We’ve worked together on many books together over the years but I really think this is her best design ever.
The book is being printed overseas now but I’m so excited about Christine’s design I wanted to share a sneak peek at the cover…
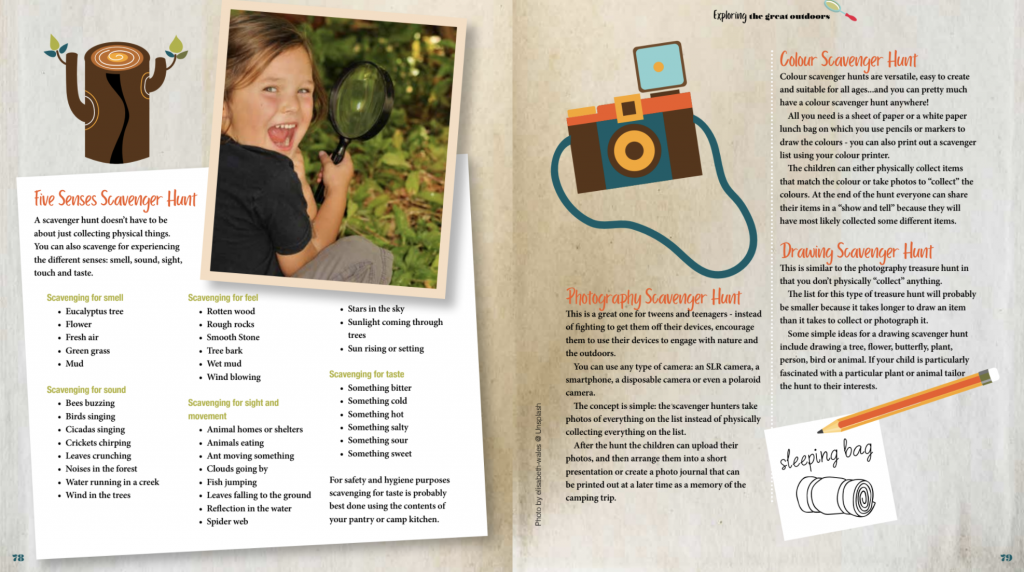
And a sample of the internal pages..
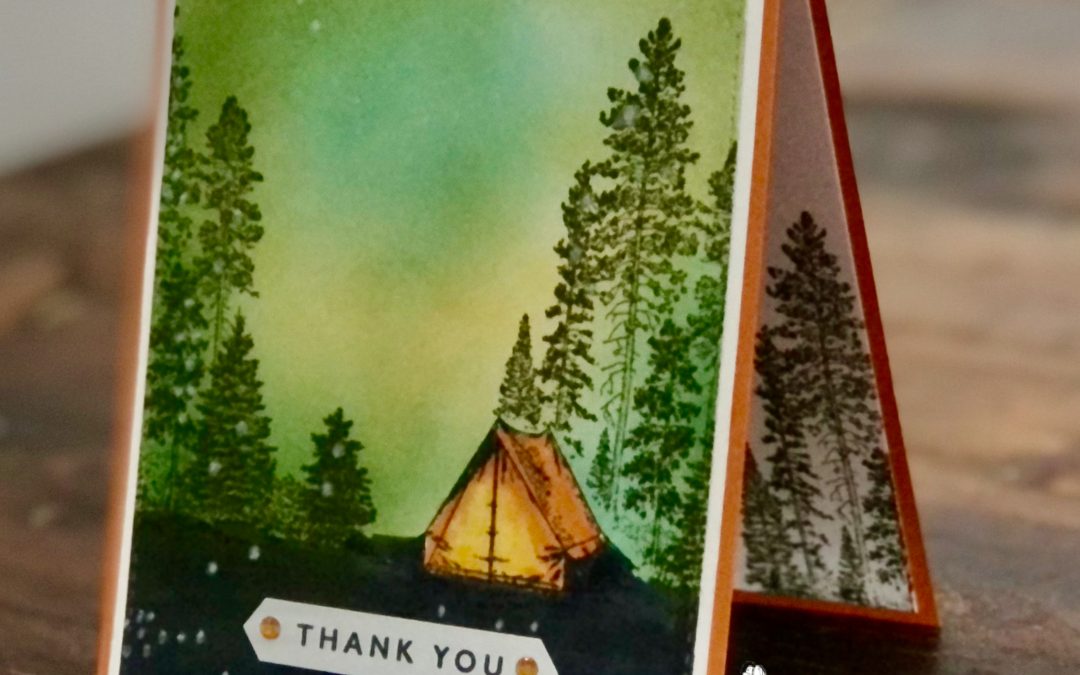
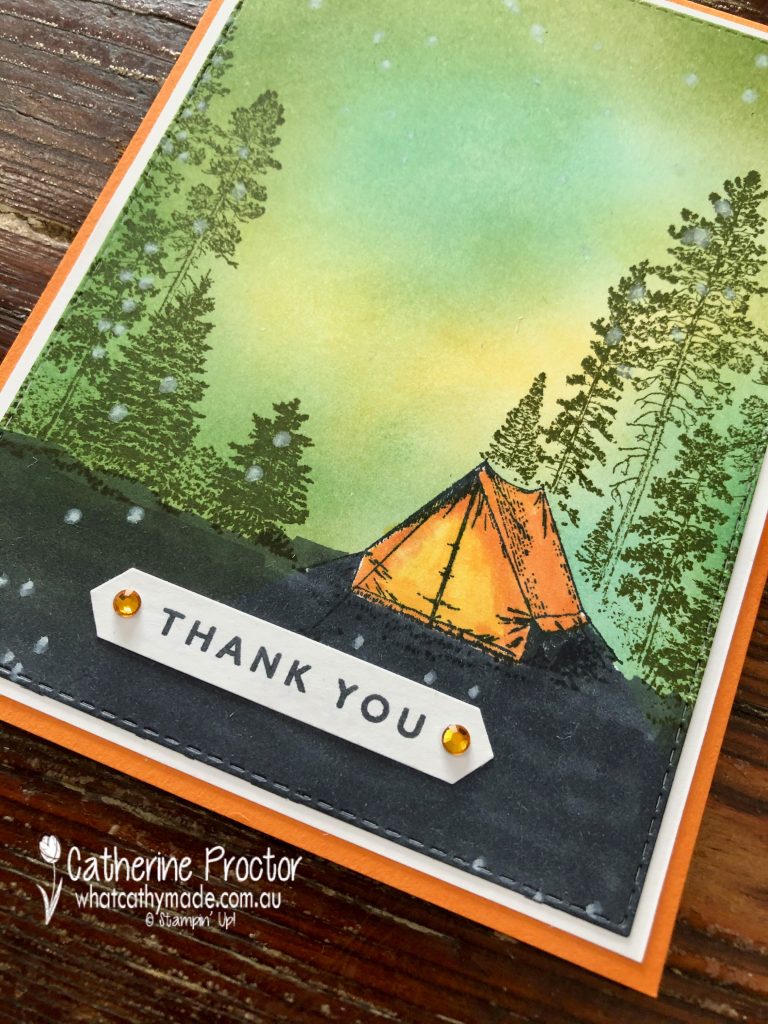
Campology is the stamp set I just had to use for this card but I’ve never feel very confident making “scene” cards. I searched Pinterest for inspiration on how to use the “Campology” stamp set and I found a wonderful card by one of the top American Stampin’ Up! demonstrators called Michelle Zindorf – she is amazing at creating blended backgrounds. I have CASED elements of Michelle’s card, including the Pumpkin Pie tent, but changed the rest of the card design and layout to include more Pumpkin Pie.
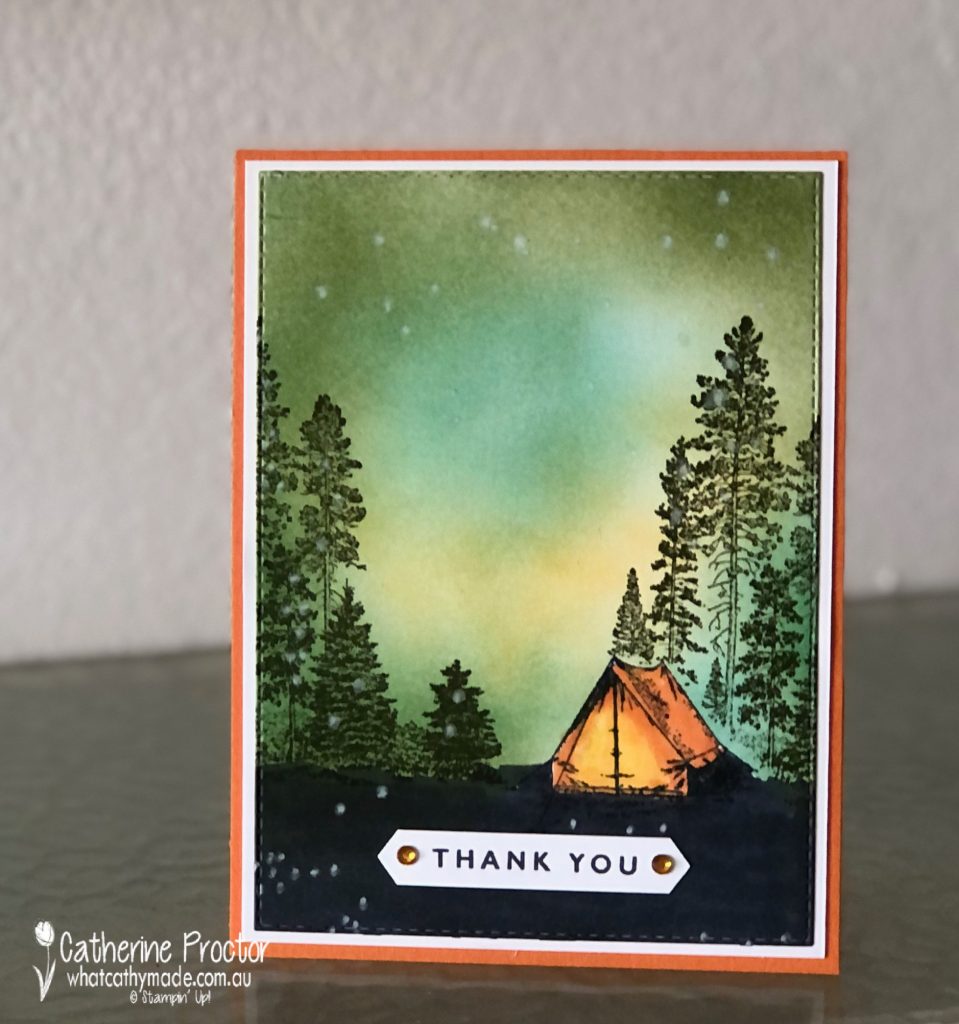
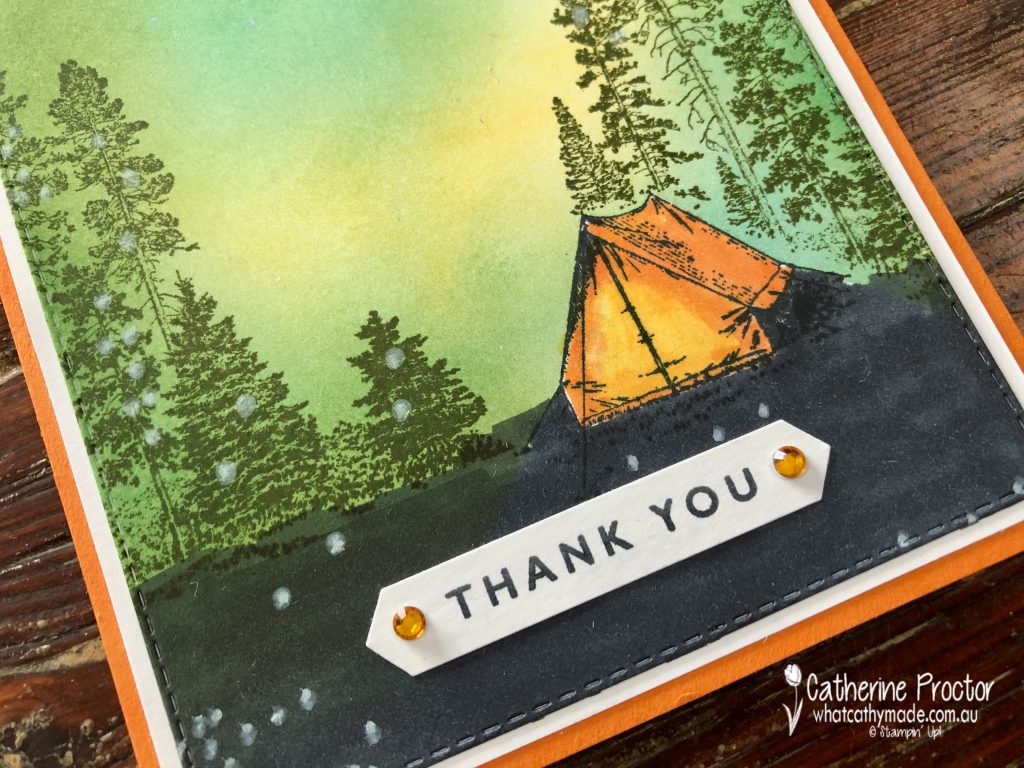
Thanks to the new Stampin’ Up! blending brushes I’m no longer scared of making “scene cards”! I used blending brushes to make a night sky background with my So Saffron, Just Jade and Mossy Meadow ink pads. The secret to getting a smooth coverage is to start blending off the page and keep moving the brushes in a circular motion.
I then stamped the tent in Memento Ink onto the front layer of the card and also onto a Post-It note to mask the tent – you fussy cut around the top of the tent to create a mask that protects the tent while you stamp the trees in Mossy Meadow over the tent and on either side of the card. Once you’ve stamped the trees remove the Post It note and your tent pops into into the foreground of the scene, with the trees in the background.
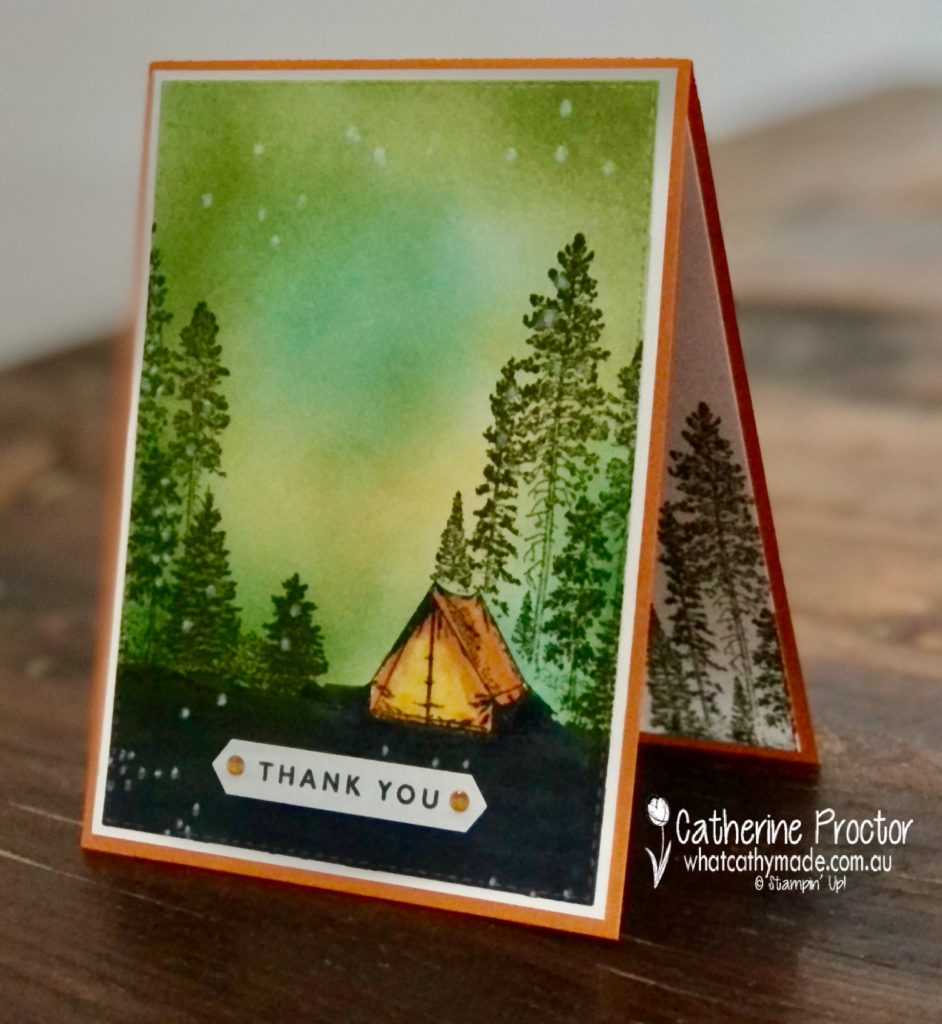
The tent is coloured in with Pumpkin Pie and Mango Melody blends – I love how these colours make it look like there is a light on in the tent!
The base of the top layer was coloured in with the Basic Black Stampin’ Blends and the “Thank you” sentiment is from “Blossoms in Bloom” with the ink applied with a sponge dauber for a crisp finish – my go-to tip when inking up sentiments. My trusty Holiday Rhinestone Basic Jewels just add a tiny bit of bling and dimension.
The card opens at the top and the inside has been stamped in Mossy Meadow using the tall tree stamp from “Campology”. I hope this card brings a smile to Christine’s face and expresses how grateful I am to her incredible design skills that bring my writing to life!
I can’t wait to see what everyone else has created with Pumpkin Pie today!
We will return next week on Wednesday March 10th when we’ll be showcasing one of the soon to be retired 2019-21 In Colours: Purple Posy. We hope you can join us all then.
To purchase any of the products used in my card tonight, click on the links below.
If you’d like me to post you your very own copy of the January – June 2020 mini catalogue, the 2020-21 Stampin Up! Annual Catalogue, the 2020-21 Beginners Brochure, or to simply find out about more about Stampin’ Up! contact me.
In the meantime, wherever you are in the world, stay safe, stay calm…and keep on crafting xxx
Welcome back to our Colour Creations Showcase as we continue our showcase of over 50 beautiful Stampin’ Up! colours in alpha order.
This week we are showcasing Pretty Peacock, a deep teal/turquoise blue/green which is one of the soon to be retired 2019-21 InColours.
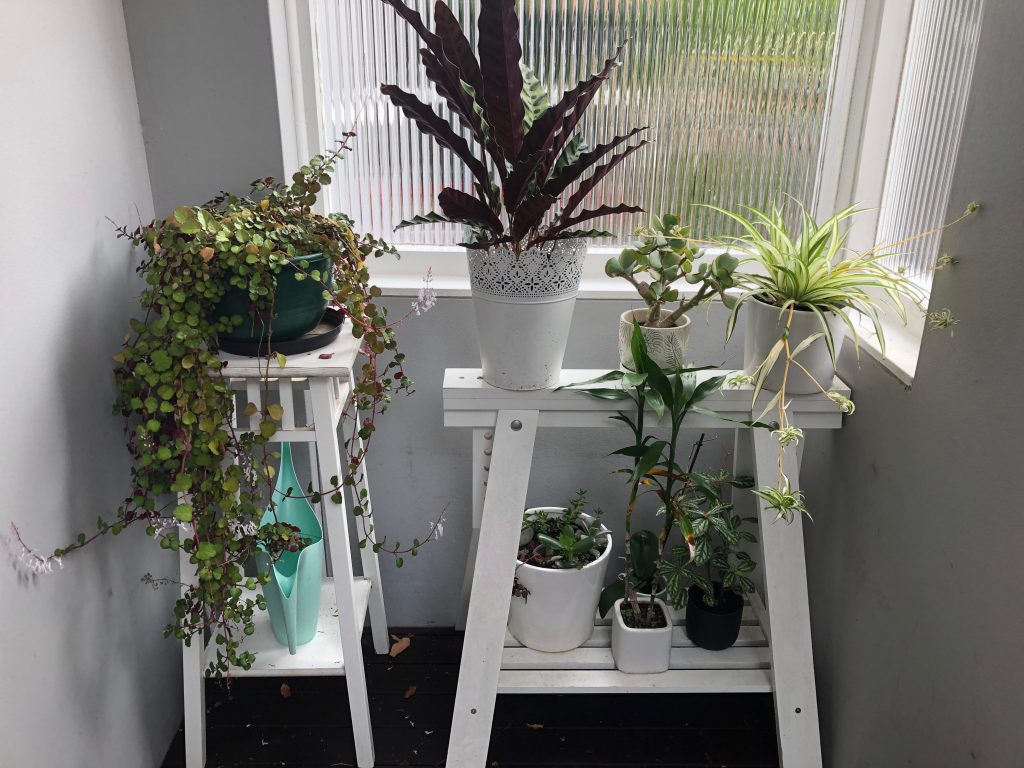
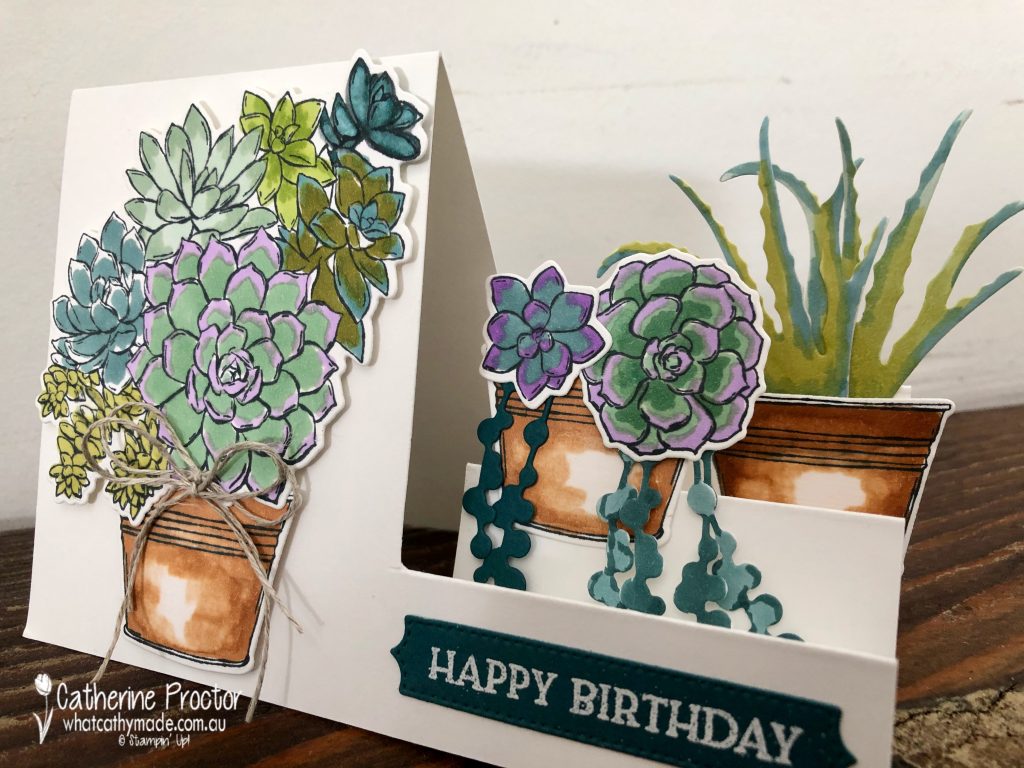
I don’t know about you, but I love succulents because they are so sculptural, come in amazing colours and shapes, are hard to kill, easy to propagate…and they survive and flourish where other plants don’t.
Plants can be tricky to grow at my home because it sits high on a hill near the sea, with the front of the house facing south and our back garden facing north. Our backyard is flooded with sun year round and at the front of the house southerly winds whip up the hill in the afternoons.
These plants at my front entrance have to survive both the strong salty southerlies AND the hot northern sun streaming through the glass.
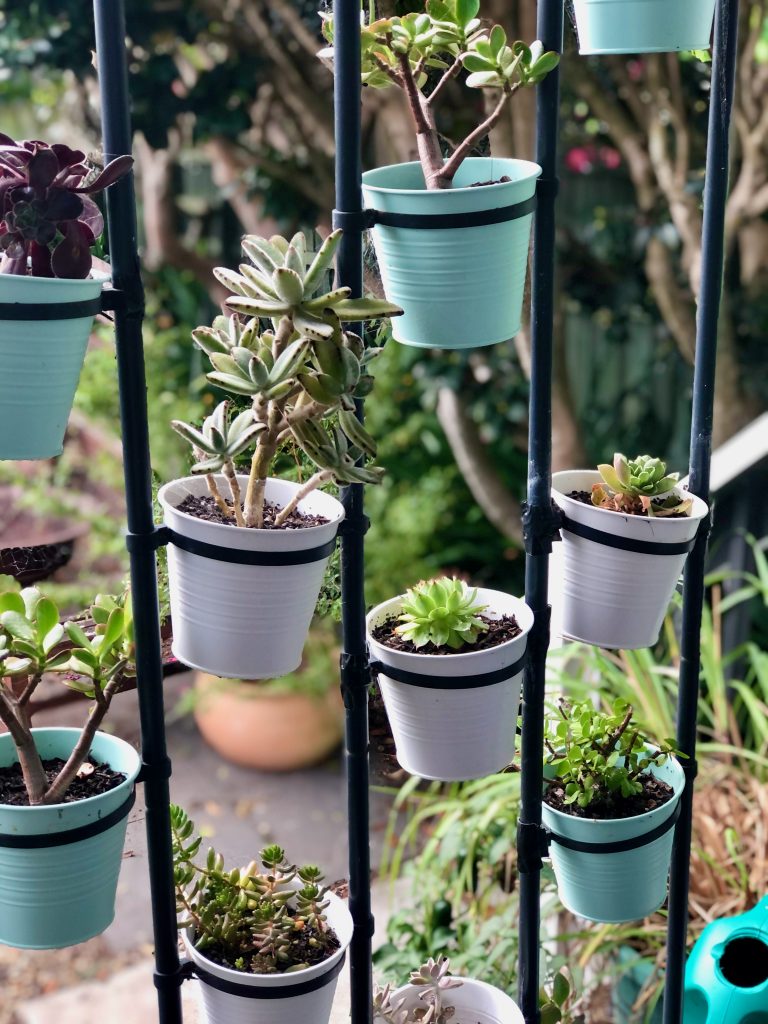
On my back deck the only plants that survive the year-round northern sun are my succulents – please excuse the spider webs, it is constant battle!
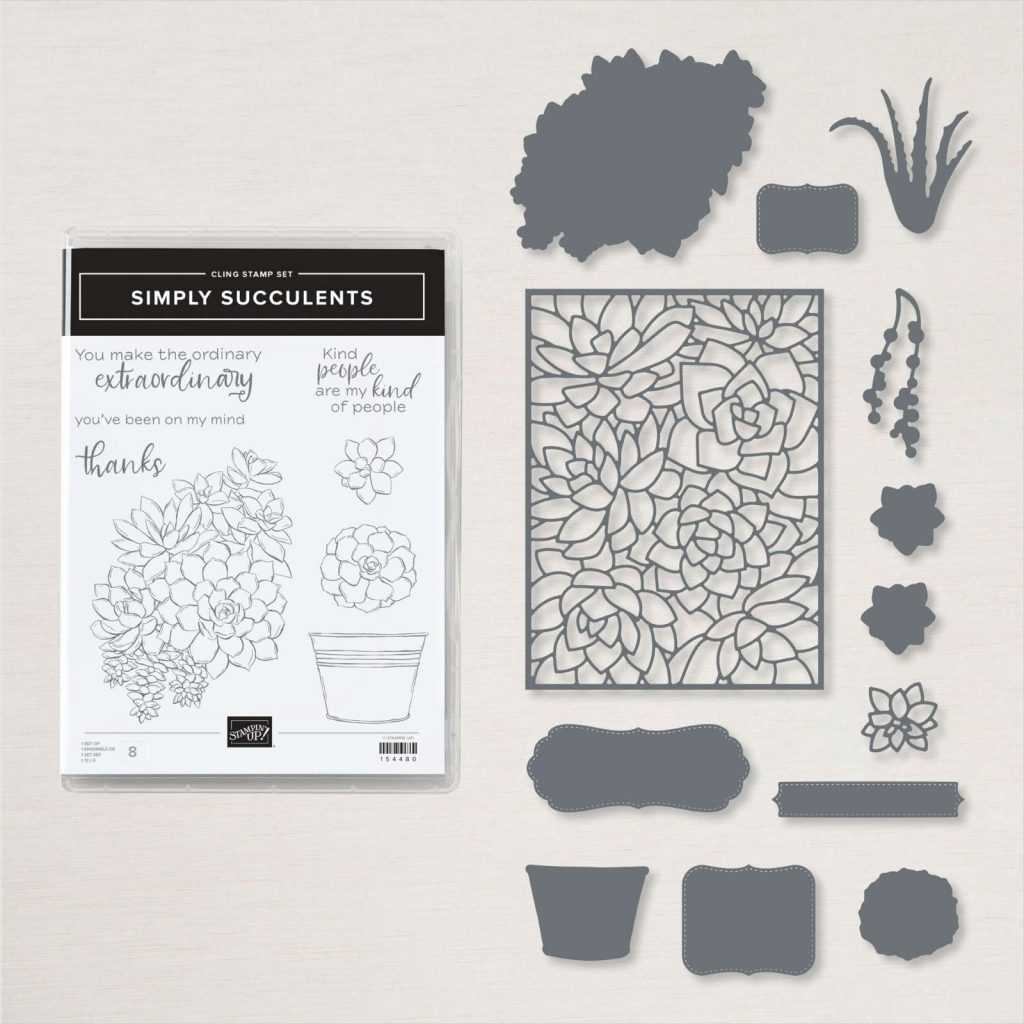
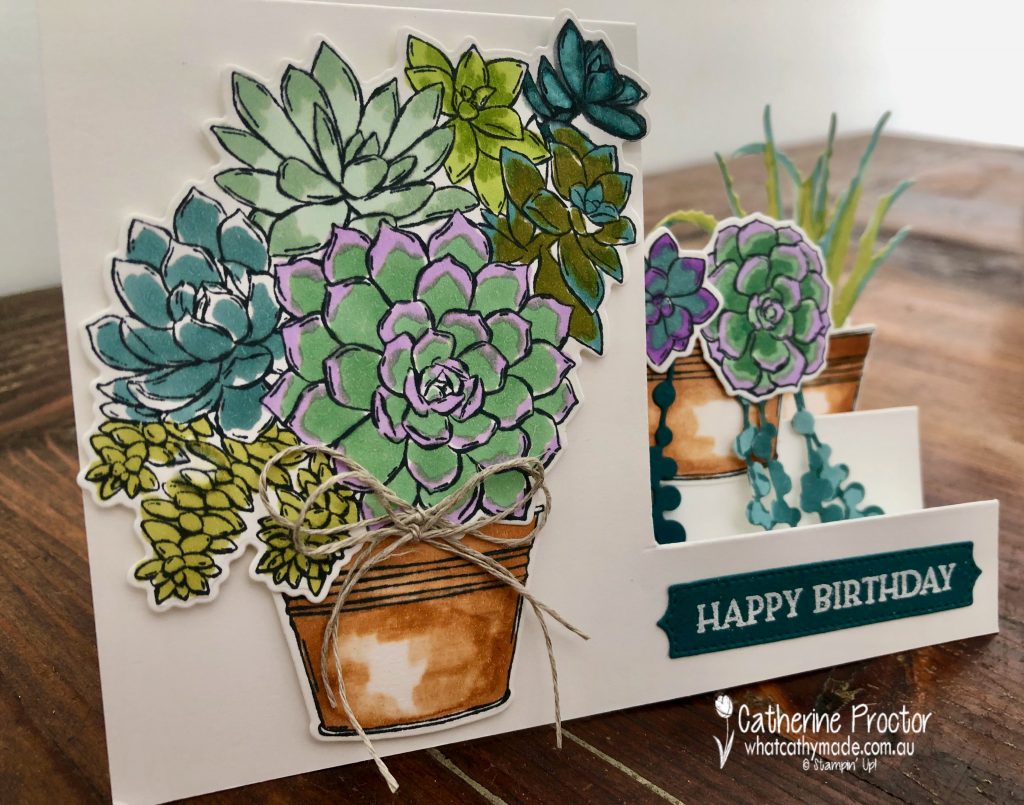
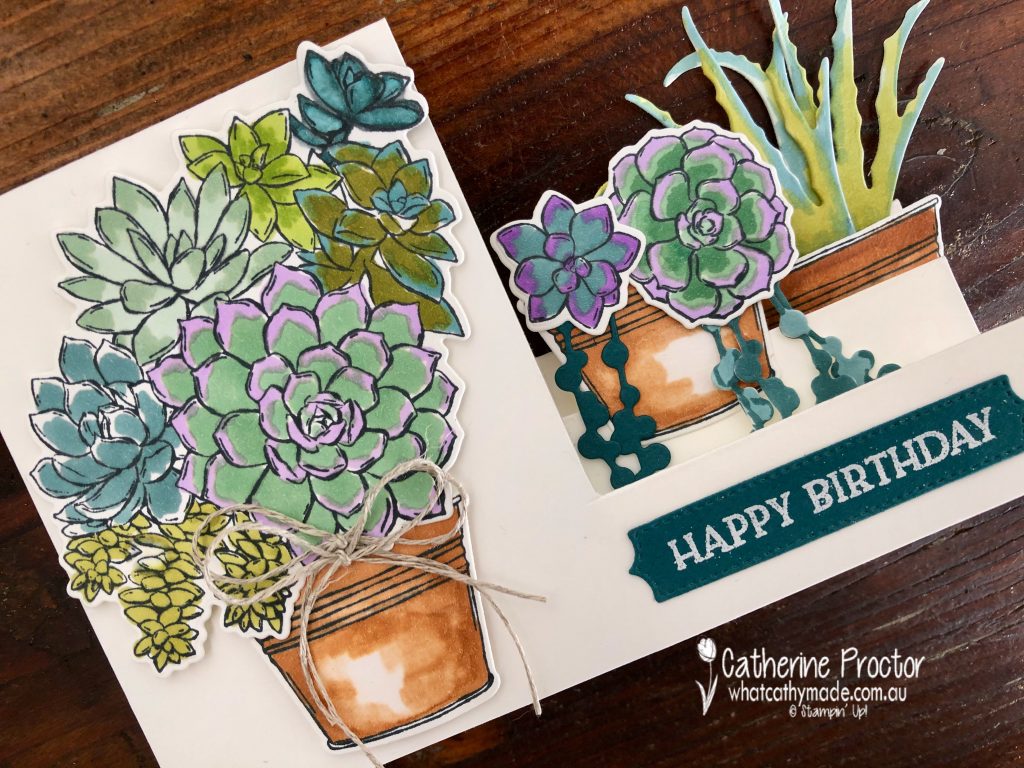
If you love succulents like I do, the simply succulents bundle from the January-June 2021 mini catalogue is a must have! Take a closer look at the dies – not only are there co-ordinating dies to cut out the pot and the three succulent stamps, but there are also dies for two other succulents (LOVE the hanging succulent), four stitched label dies and an enormous background succulent die!
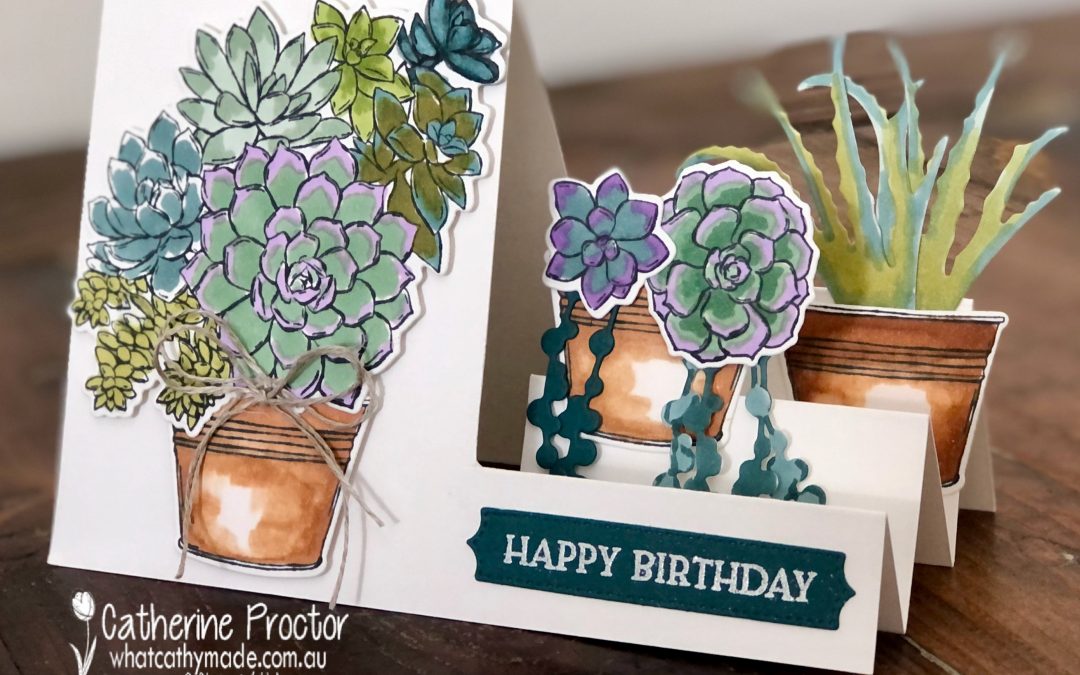
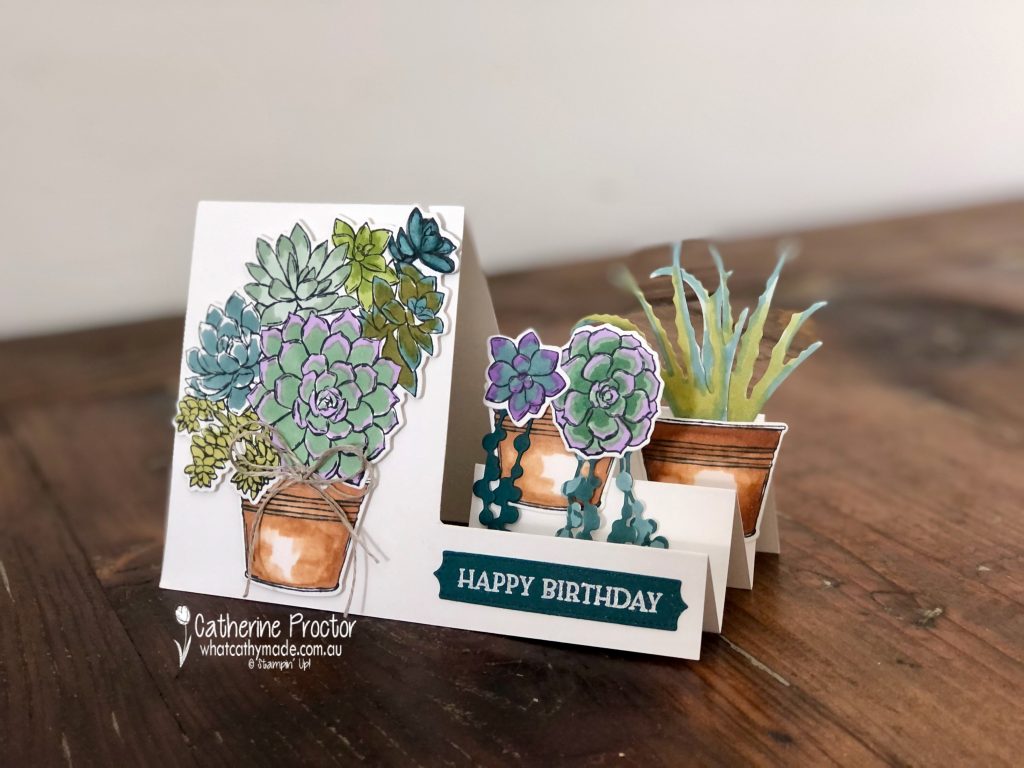
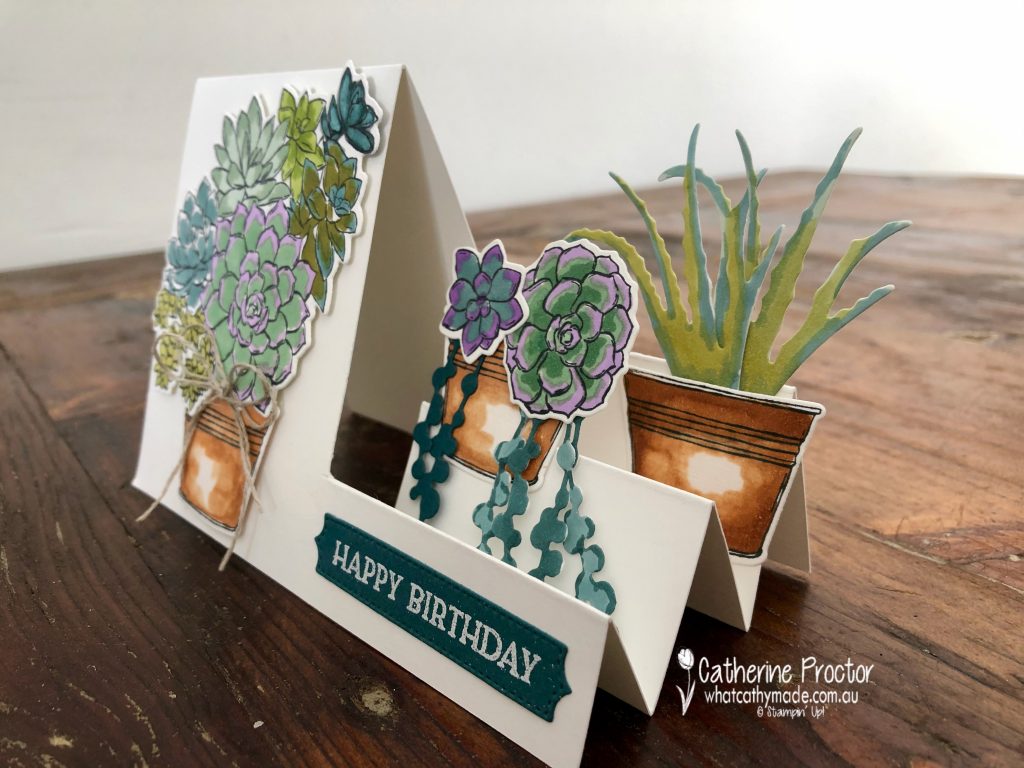
I was trying to work out how to make a card that reflected the different heights my succulents sit at both on my back deck and my front door, and I realised a side step card was the answer.
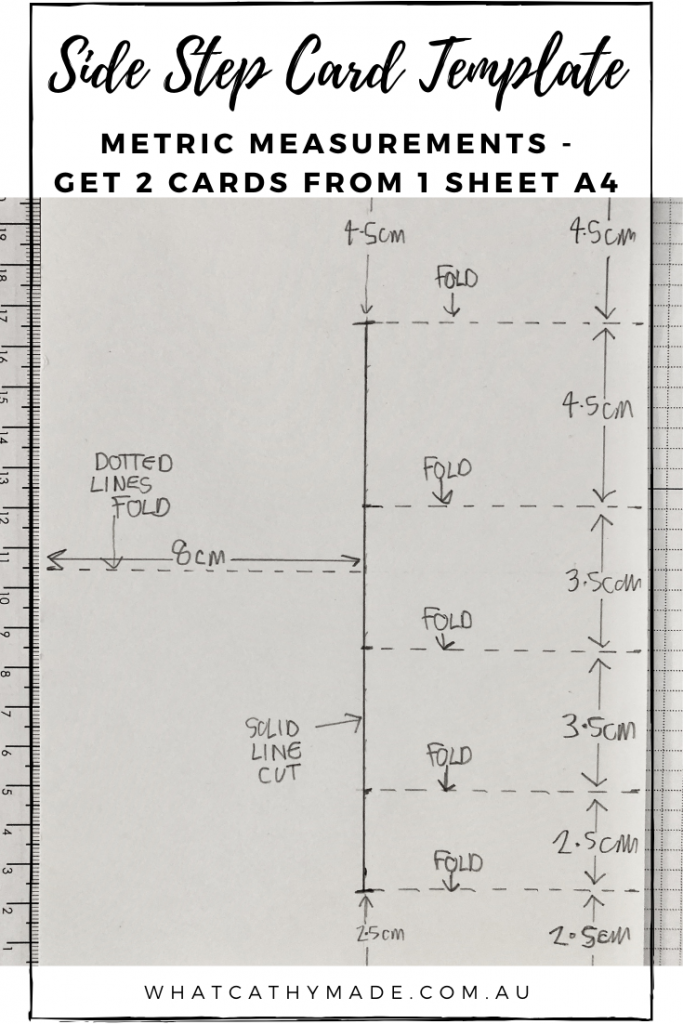
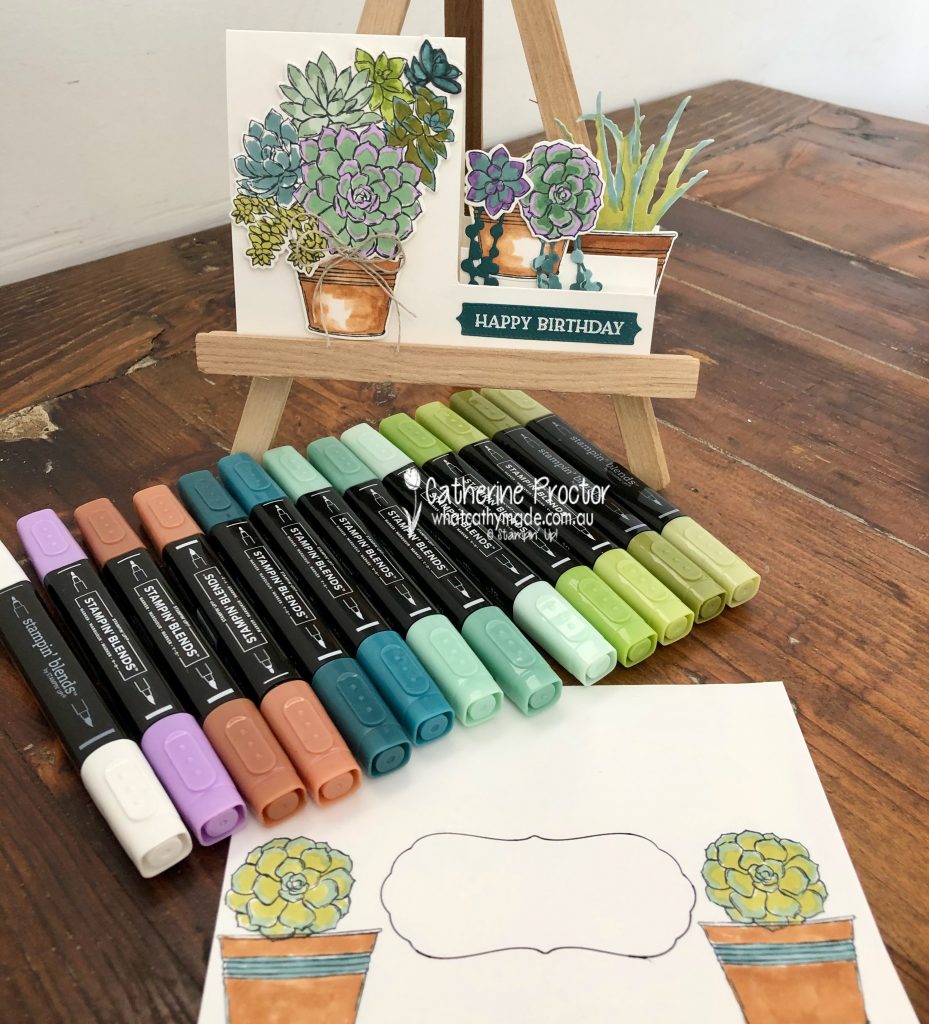
I couldn’t find a template for a side step card that worked with our paper sizes here in Australia, so I created one that gives you 2 cards bases from one sheet of A4 card stock.
Making a side step card is quite simple – there is only one single cut and a few folds. One sheet of A4 paper is enough for 2 card bases, each measuring 14.8cm x 21cm each. Use your paper trimmer to cut your A4 card stock in half and then cut and score as per the template below.
Measure in 8cm from the left on the 14.8cm side of your card base and draw a pencil line from top to bottom.
Along this line measure down 4.5cm from the top of the card stock and measure up 2.5cm from the base of the card stock. The solid line in between these 2 measurements is your only cutting line for this card- I’ve marked this as a solid black line in my template.
Cut along this solid line, being very carful not to cut above or below this line.
All the other dotted lines are fold lines – measure and score these with your paper trimmer.
Once you’ve scored these lines, rub out the pencil mark along your cut line and fold the score lines so the folds of your card look like this.
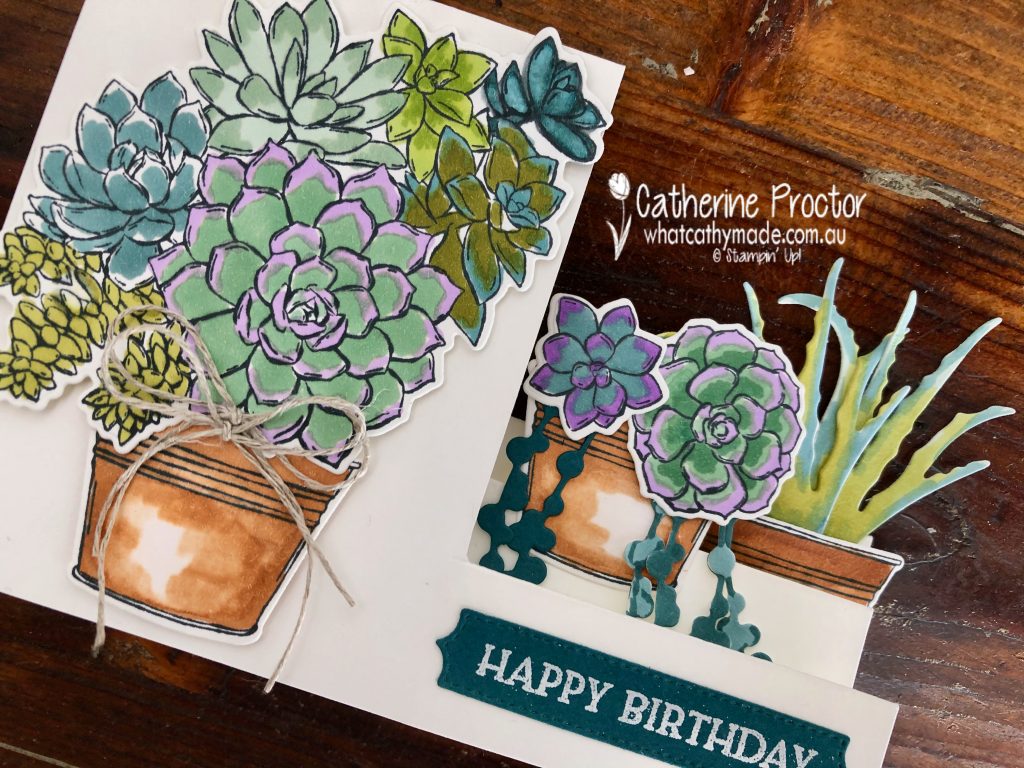
I’ve used a lot of different coloured Stampin’ Blends for my succulents, including light and dark Pretty Peacock, Just Jade, Mint Macaron, Old Olive, Granny Apple Green and Highland Heather. The terracotta pots are coloured with Cinnamon Cider Stampin’ Blends.
For the trailing succulents in the middle pot I die cut one from Pretty Peacock card stock and two in Basic White card stock. I used my dark and light Pretty Peacock Stampin’ Blends to colour the Basic White card stock. You can see in the picture below how this gives three different shades of Pretty Peacock.
The succulent on the back right hand side of the card was coloured by blending together Old Olive and light Pretty Peacock. I love this spiky succulent!
The “happy birthday” sentiment is from the Blossoms in Bloom stamp set, stamped in Versamark ink and then white heat embossed onto Pretty Peacock card stock. This sentiment perfectly fits into one of the stitched label dies from the Simply Succulent Bundle.
The final touches are a double bow of linen thread and a few stamped and coloured succulents to decorate a Basic White C6 envelope. I traced around another die from this bundle to create an address border on the front of the envelope.
I didn’t forget the back of the envelope either!
I can’t wait to see what the rest of the Art With Heart team have created with Pretty Peacock today. Click on the links below to see what they’ve made.
If you’d like me to post you your very own copy of the January – June 2020 mini catalogue, the 2020 Sale-a-bration catalogue, the 2020-21 Stampin Up! Annual Catalogue, the 2020-21 Beginners Brochure, or to simply find out about more about Stampin’ Up! contact me.
When you shop online in my Stampin’ Up! Online Store don’t forget to use my monthly Host Code (if your order is between $50 – $250) and I will send you a thank you gift the following month. If your order is over $250 don’t use the host code because you will qualify for your own stamping rewards.
My February 2021 Host code is ZYAR6HTF and it is valid until midnight February 28.
Would you like to get a 20% discount on everything you order? Click here to join my team:
In the meantime, wherever you are in the world, stay safe, stay calm…and keep on crafting xxx
Welcome back to our Colour Creations Showcase as we continue our showcase of over 50 beautiful Stampin’ Up! colours in alpha order.
This week we are showcasing Poppy Parade, a very bright and happy red!
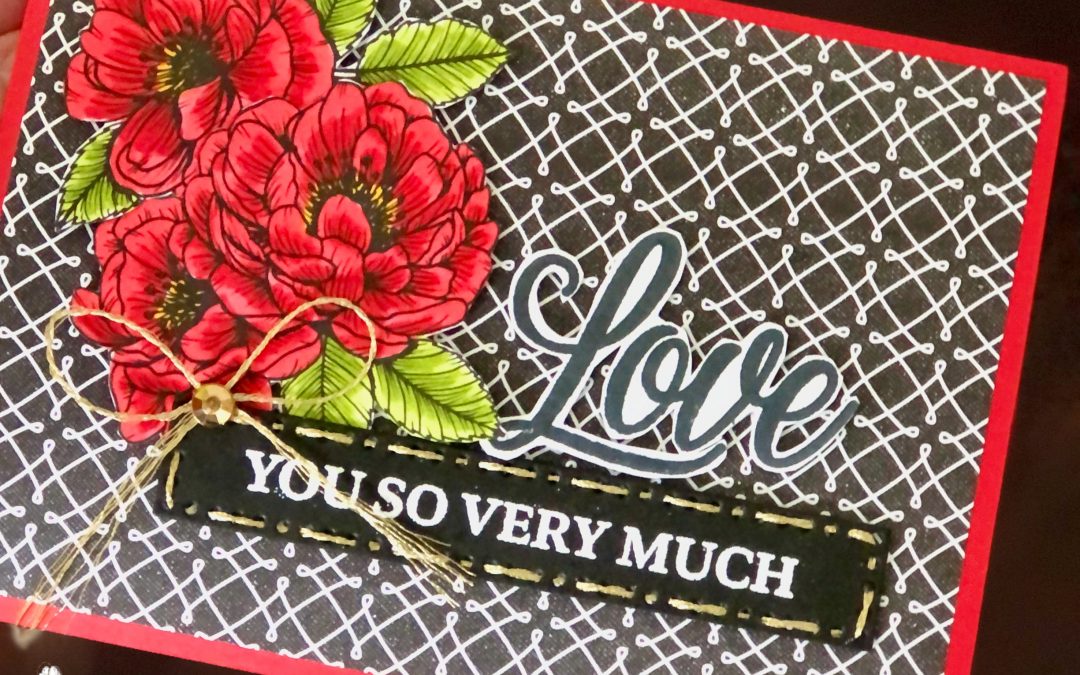
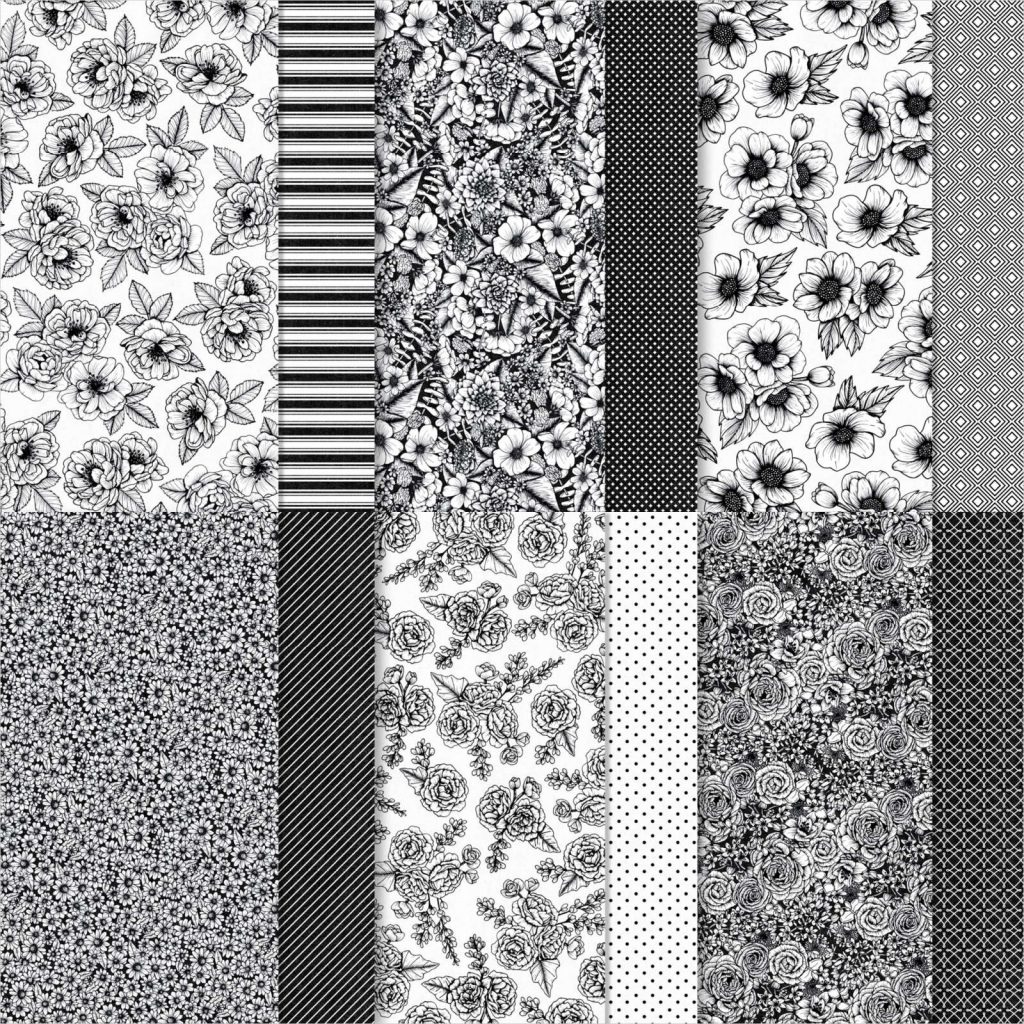
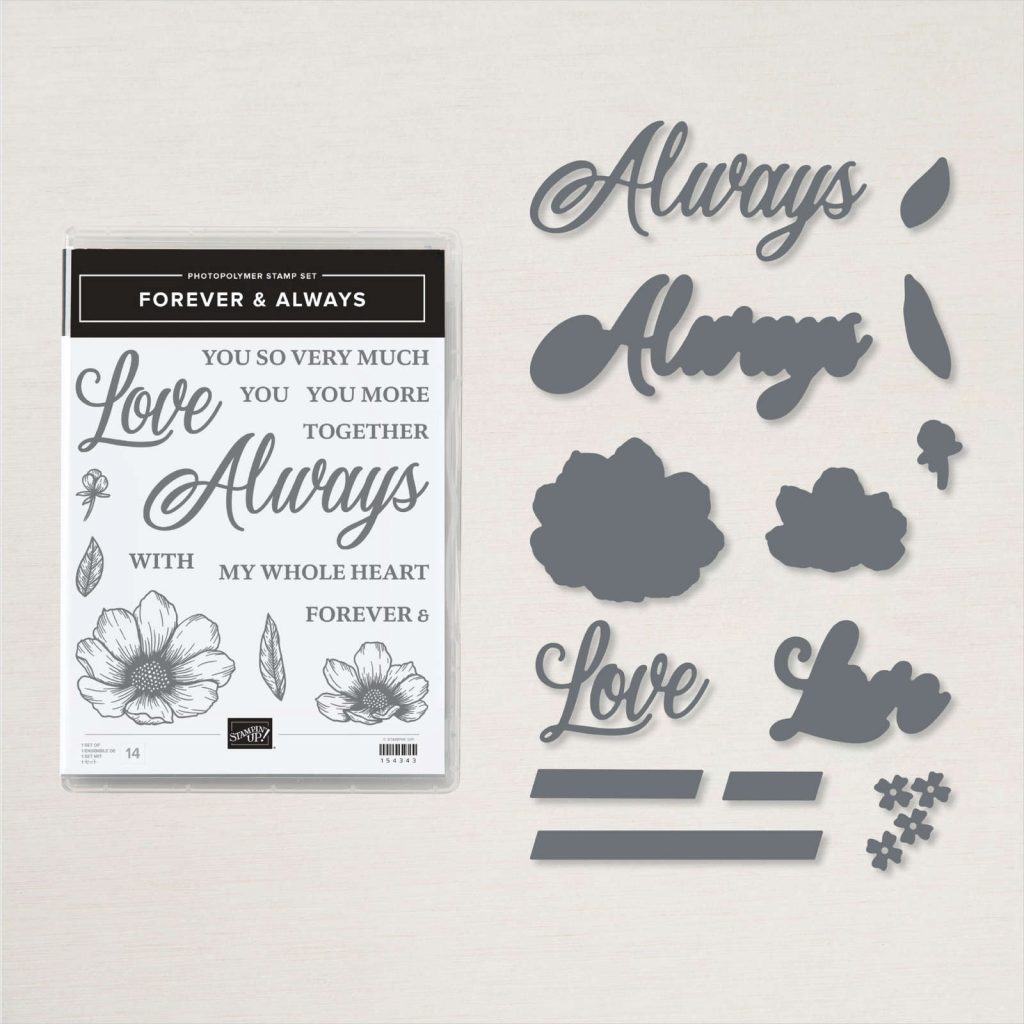
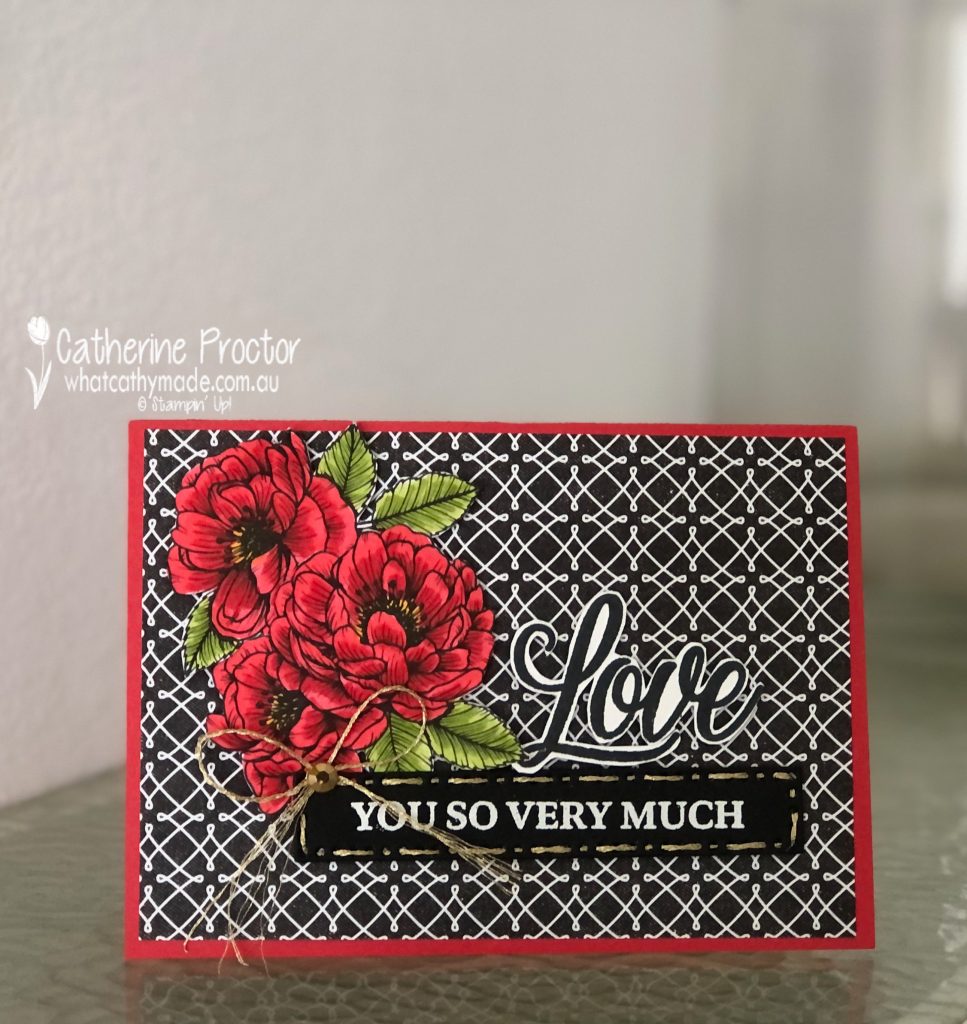
If you’ve got a “thing” for black and white paper like I do, you’re going to love, love, love this True Love DSP. It’s so very versatile because you can use it for backgrounds, colour it in different ways or fussy cut the flowers to use on your cards or scrapbook layouts.
And the back and white patterns just makes any colour pop!
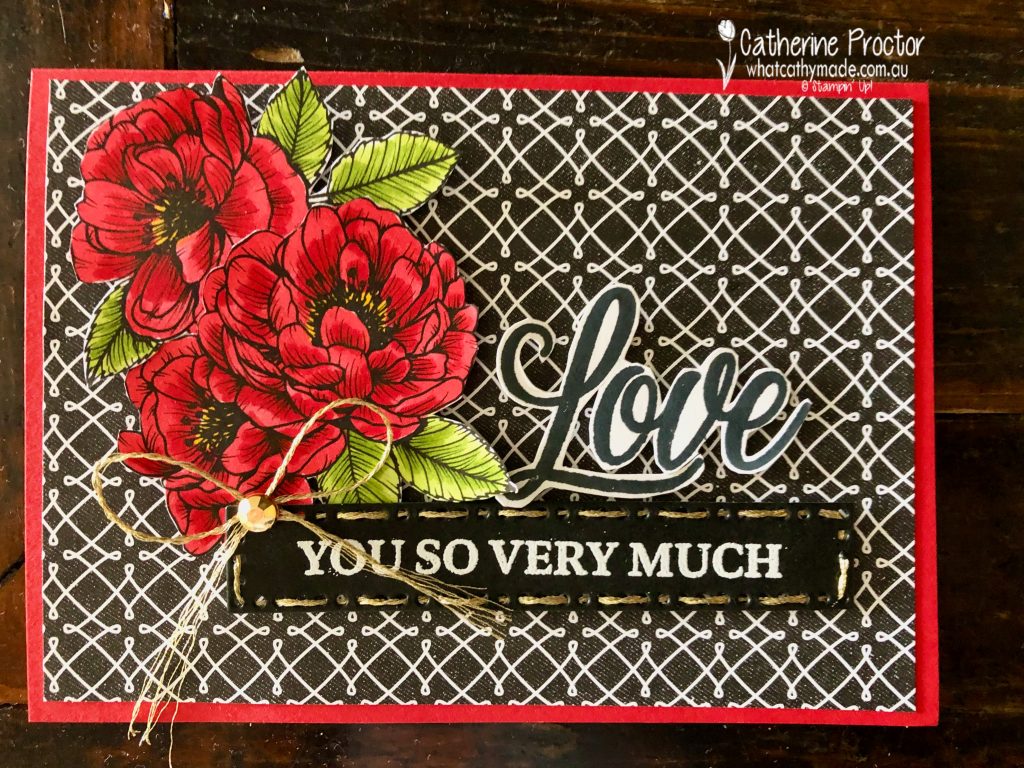
The colour scheme I’ve used today is such a classic: Poppy Parade, black and white…with just a touch of another bright: Granny Apple Green.
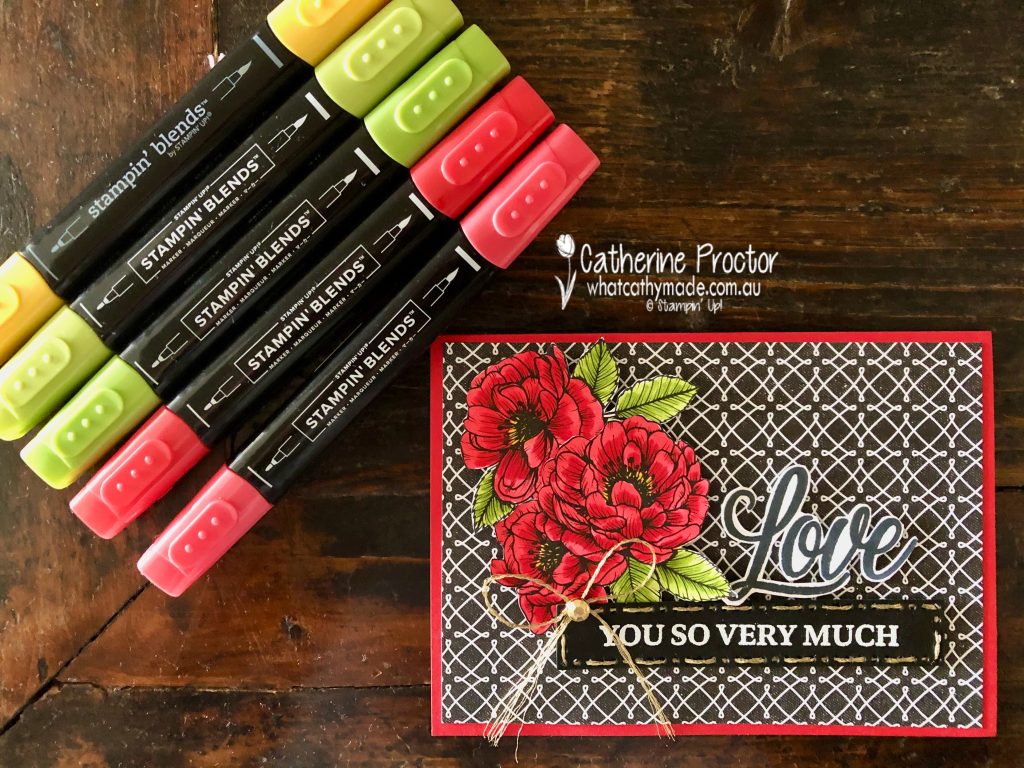
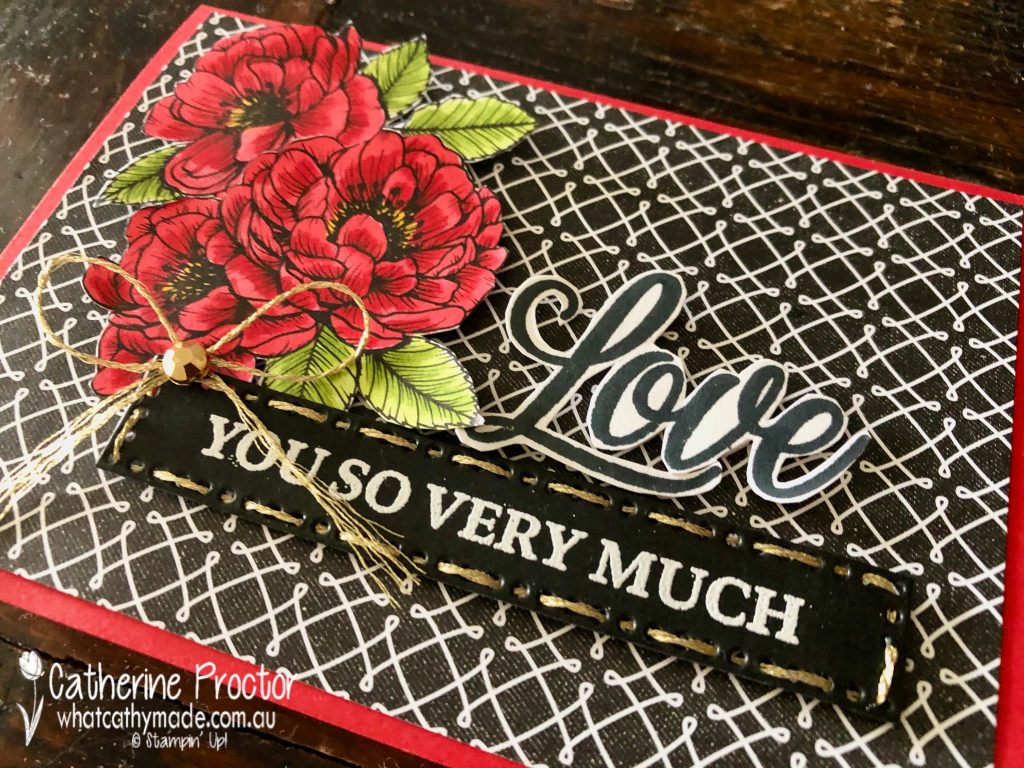
The beautiful red flowers were coloured in with Stampin’ Blends: Poppy Parade for the petals, Granny Apple Green for the leaves, oh, and I nearly forgot the centre of the flowers…Daffodil Delight.
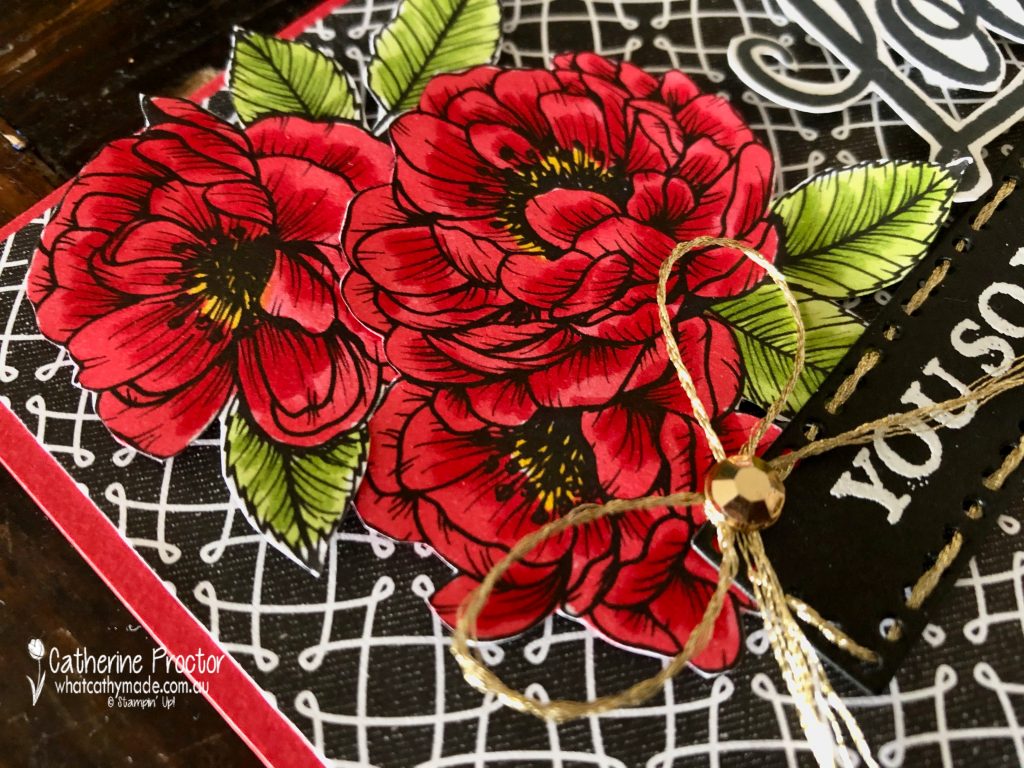
The detail on these flowers in the True Love Designer Series Paper make them so easy to colour and shade – just follow the lines!
The sentiment is from the matching stamp set: “Forever & Always”. After stamping the “Love” stamp I fussy cut it out only to remember I actually own the co-ordinating “Always” dies!!! Duh!!!!
Instead of adding a swirl of the Forever Greenery gold trim behind the “you so very much sentiment” I die cut it using the long rectangle die from the Field Tiles Dies. I then used a needle to thread the gold trim through the holes and then tie a bow, which is secured with a gilded gem.
I really like this effect and must remember to use it again.
I can’t wait to see what the rest of the Art With Heart team have created with Poppy Parade today. Click on the links below to see what they’ve made.
We will return next week on Wednesday February 24th when we’ll be showcasing one of the 2020-22 InColours: Pretty Peacock. We hope you can join us all then.
To purchase any of the products used in my project tonight, click on the links below.
If you’d like me to post you your very own copy of the January – June 2020 mini catalogue, the 2020 Sale-a-bration catalogue, the 2020-21 Stampin Up! Annual Catalogue, the 2020-21 Beginners Brochure, or to simply find out about more about Stampin’ Up! contact me.
When you shop online in my Stampin’ Up! Online Store don’t forget to use my monthly Host Code (if your order is between $50 – $250) and I will send you a thank you gift the following month. If your order is over $250 don’t use the host code because you will qualify for your own stamping rewards.
My February 2021 Host code is ZYAR6HTF and it is valid until midnight February 28.
Would you like to get a 20% discount on everything you order? Click here to join my team:
In the meantime, wherever you are in the world, stay safe, stay calm…and keep on crafting xxx


")

 Scalloped Linen Ribbon")