I hope you had a relaxing break over Christmas and the new year? I have had a very busy time with so many family birthdays on top of Christmas and ever changing lockdown rules but was so very grateful to be able to see some of my family over Christmas.
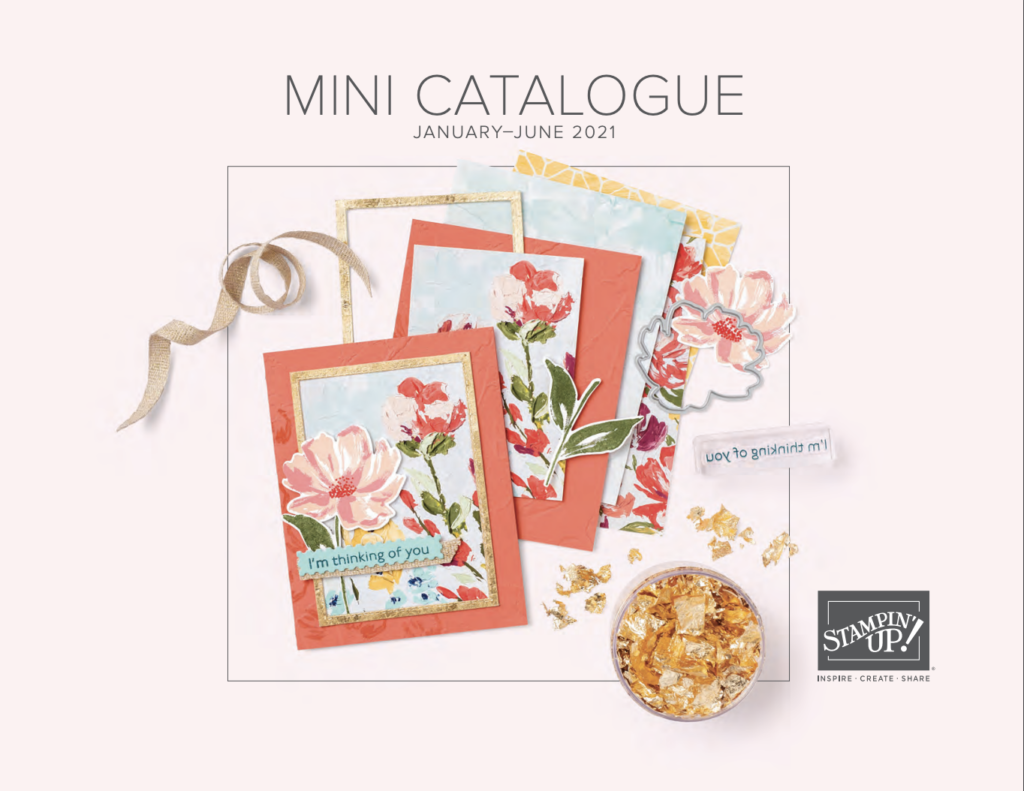
Today is an exciting day because it is the launch of two new catalogues: the 2021 January to June Mini Catalogue and the SALE-a-bration catalogue.
You can take a look and download the PDF for both of these catalogues by clicking on the images below. If you haven’t already received a free paper catalogues and you would like a copy please contact me and I’ll pop one in the post for you.
Earn Free Products During SALE-a-bration!
SALE-a-bration begins today and ends on 28th February. During this period there are several ways you can earn free product.
Place an order, combine an order with friends or host a party
Any order of $90 or more in one transaction earns you free product. And the more you order, the more you earn. There are two levels of SALE-a-bration products for you to chose from: level 1 is for orders over $90 and level 2 with orders over $180.
You can see the SALE-a-bration items HERE in my online store that you can earn for the $90+ or $180+ levels.
SALE-a-brations Items which can be earned with a $90 order (for every $90 you spend you earn a free item):
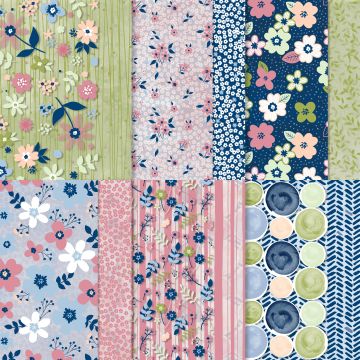
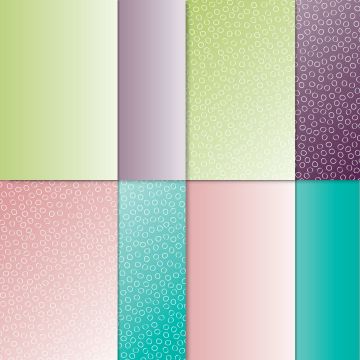
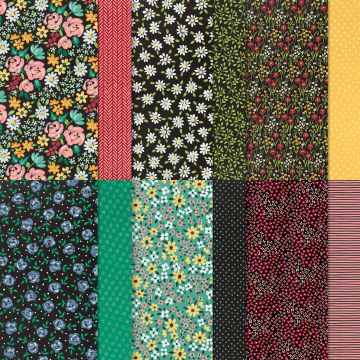
There are three stunning paper packs to chose from.
PAPER BLOOMS 12″ X 12″ (30.5 X 30.5 CM) DESIGNER SERIES PAPER
OH SO OMBRE 6″ X 6″ (15.2 X 15.2 CM) DESIGNER SERIES PAPER
FLOWER & FIELD 12″ X 12″ (30.5 X 30.5 CM) DESIGNER SERIES PAPER
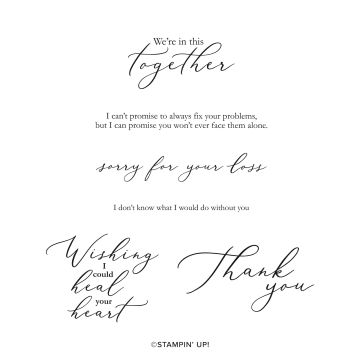
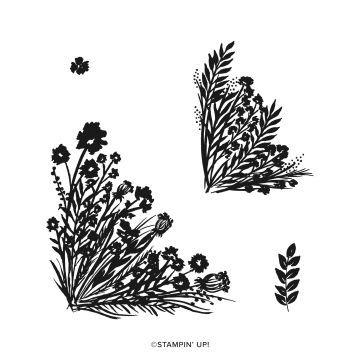
Or you can chose from these four stamp sets.
DARLING DONKEYS CLING STAMP SET
APPROACHING PERFECTION CLING STAMP SET
HEAL YOUR HEART CLING STAMP SET
CORNER BOUQUET CLING STAMP SET
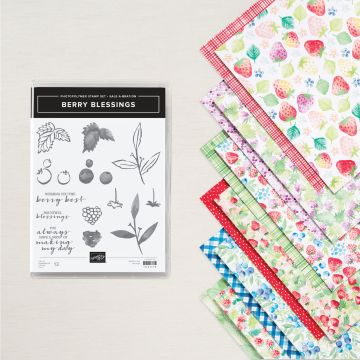
SALE-a-bration Items which can be earned with a $180 order: for every $180 you spend you earn a free item):
BERRY BLESSINGS BUNDLE
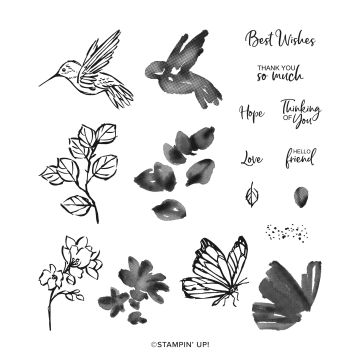
A TOUCH OF INK PHOTOPOLYMER STAMP SET
SALE-a-bration stamp set earned with a $500 order:
Whether you have a large order to place yourself, decide to host a party or combine an order with friends, you can earn this exclusive stamp set (in addition to your normal SALE-a-bration choices) when an individual order, combined order or party order exceeds $500. See it HERE in my online store.
PUNCH PARTY PHOTOPOLYMER STAMP SET
Join as a demonstrator
If you have a large wish list why not consider joining Stampin’ Up! for the discount? Hobby demonstrators are welcome to join for the discount and community – there is absolutely no pressure to sell or demonstrate to others and no ongoing commitment if you decide it’s not for you.
Starter kits cost just $169 and you get to choose up to $235 product of your choice for $169, a box of 8 catalogues and free postage AND during SALE-a-bration you get even more.
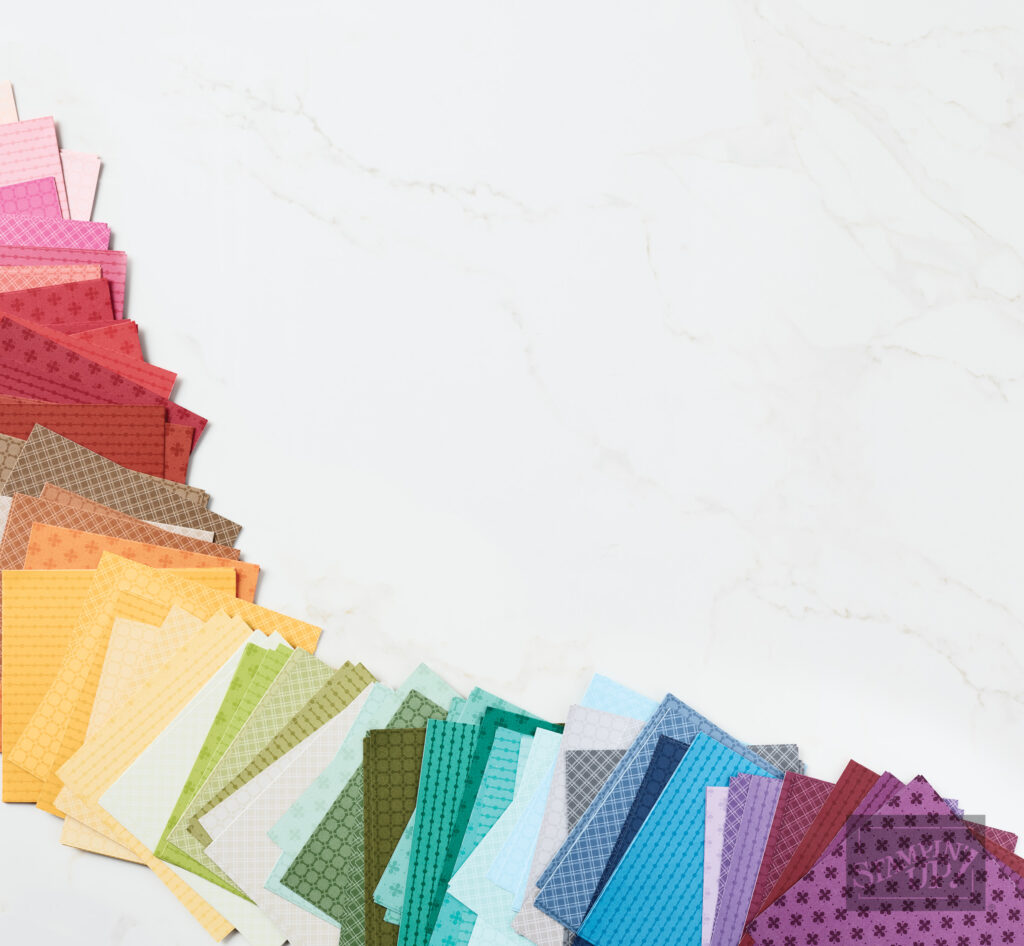
You will also get a bonus of 5 paper packs of 40 double sided colour group 6×6″ papers in all new patterns – that’s a total of $335 product for $169, saving you nearly 50%!
If you’d like to find out more about the new catalogues or joining Stampin’ Up! please don’t hesitate to contact me.
I’ll be back this Wednesday January 6th with the AWH Colour Creations Showcase when we’ll be showcasing one of the Neutrals: Night of Navy. We hope you can join us all then.
In the meantime, wherever you are in the world, stay safe, stay calm…and keep on crafting xxx
Welcome to our last Colour Creations Showcase for 2020-2021! Thank you for joining us each week and thank you to my fellow AWH team members who have inspired us all with their amazing colour creations.
We’re taking a break over Christmas and New Year but we will be back on January 6 to continue our showcase of over 50 beautiful Stampin’ Up! colours in alphabetical order.
Week 29 – Mossy Meadow
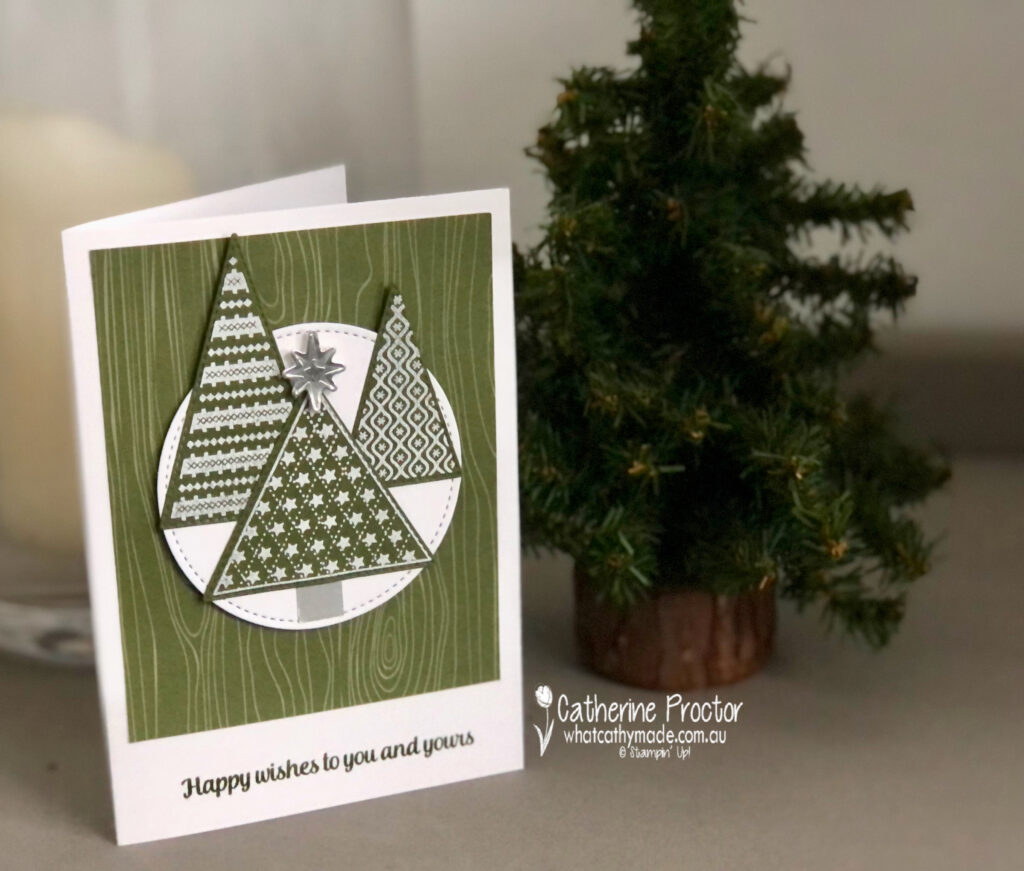
Mossy Meadow is one of Stampin’ Up!’s neutrals, a dark green that looks like pear pizzaz when it is stamped off. As I needed to make some more Christmas cards (yes I know it’s only a week until Christmas!!) I decided to use a lovely graphic stamp set called Tree Angle that is retiring soon. (NOTE this stamp set has already sold out so you could also use the three different sized pine trees from the In the Pines stamp set if you would like to make these cards but missed out on this stamp set).
The Tree Angle stamp set co-ordinates with the stitched triangle dies but you could easily trim these trees with your paper trimmer if you don’t own the dies.
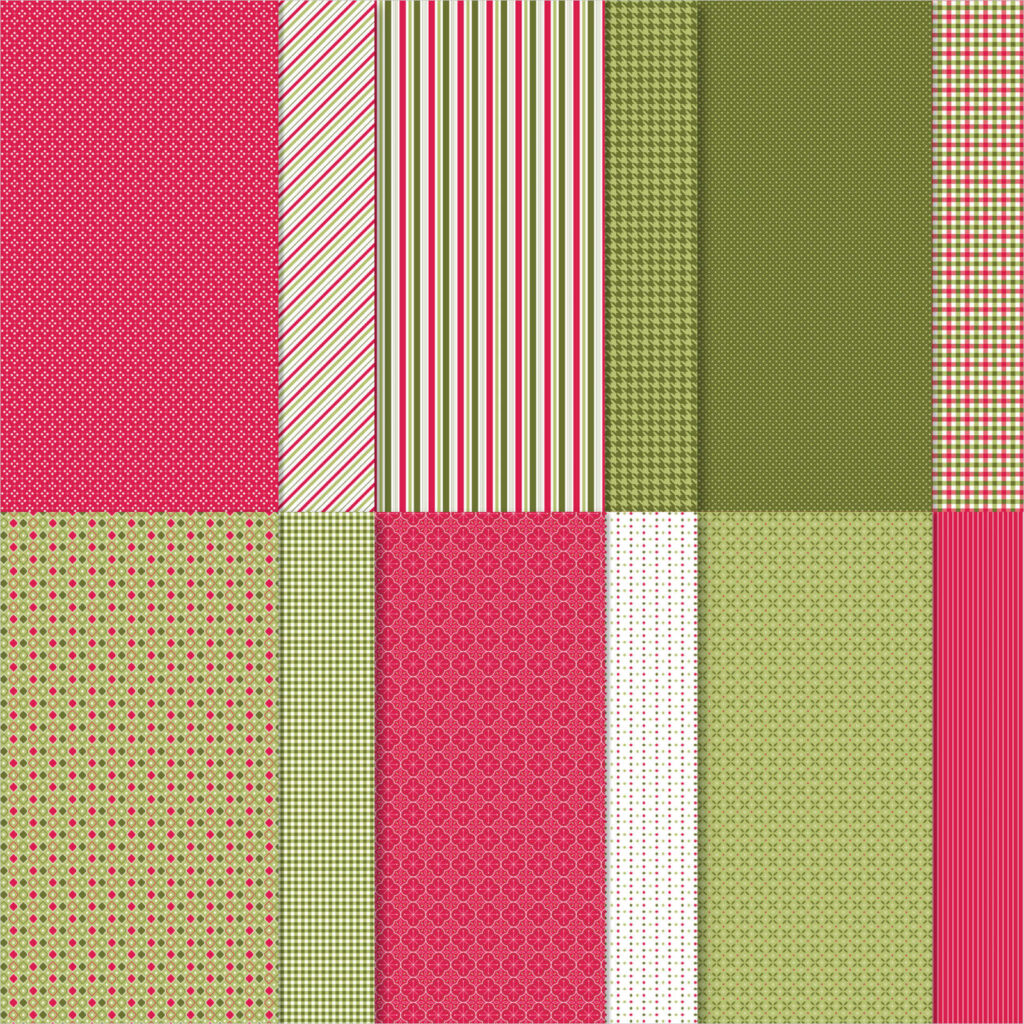
Mossy Meadow is a neutral that works really well with most colours – my classic Christmas colour scheme today was inspired by colours in the Heartwarming Hugs DSP that I’ve used in one of my cards.
As well as Mossy Meadow, Pear Pizzazz, Real Red and Whisper White I added in Crumb Cake and some metallic highlights.
This card pairs Mossy Meadow with some hints of soft metallics in the brushed metallic card stock layer and the copper stars that sit on top of the trees.
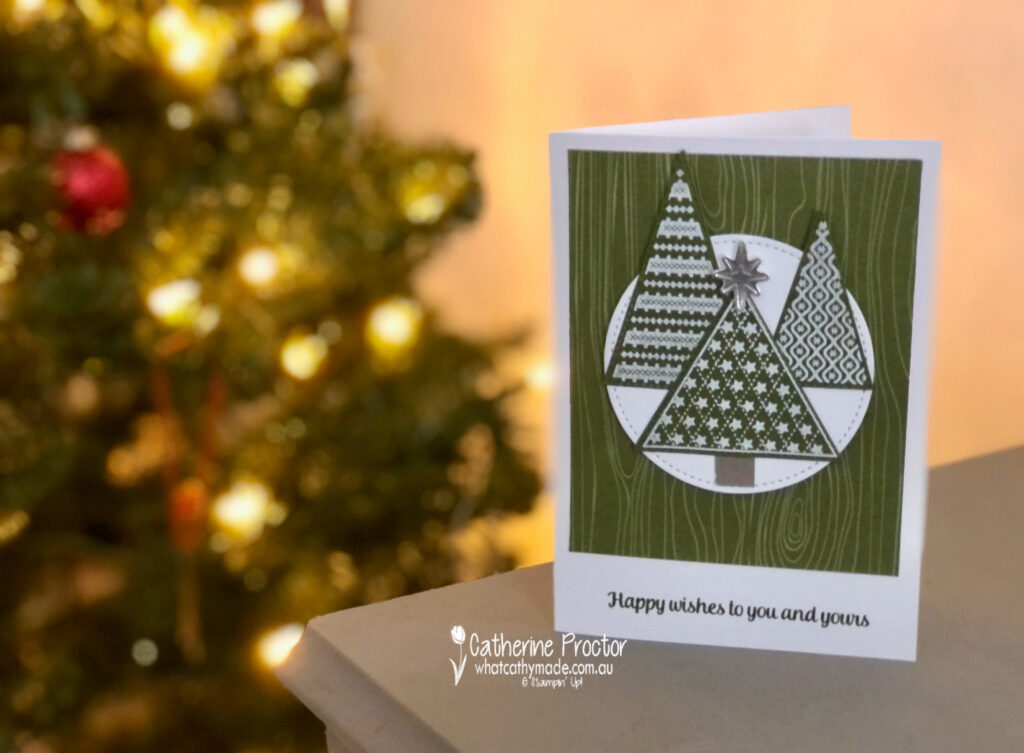
Mossy Meadow also looks great with silver in this monochromatic card. The background DSP layer is from the Neutrals 6×6 stack – I like how the pattern reflects the wooden tree trunks stamp in this stamp set.
Did you notice the little silver star on top of the tree! I love this die – it is from The Most Wonderful Time Medley, also retiring soon. Instead of using the tree trunk stamp again in this card I cut little silver trunk to co-ordinate with the silver star.
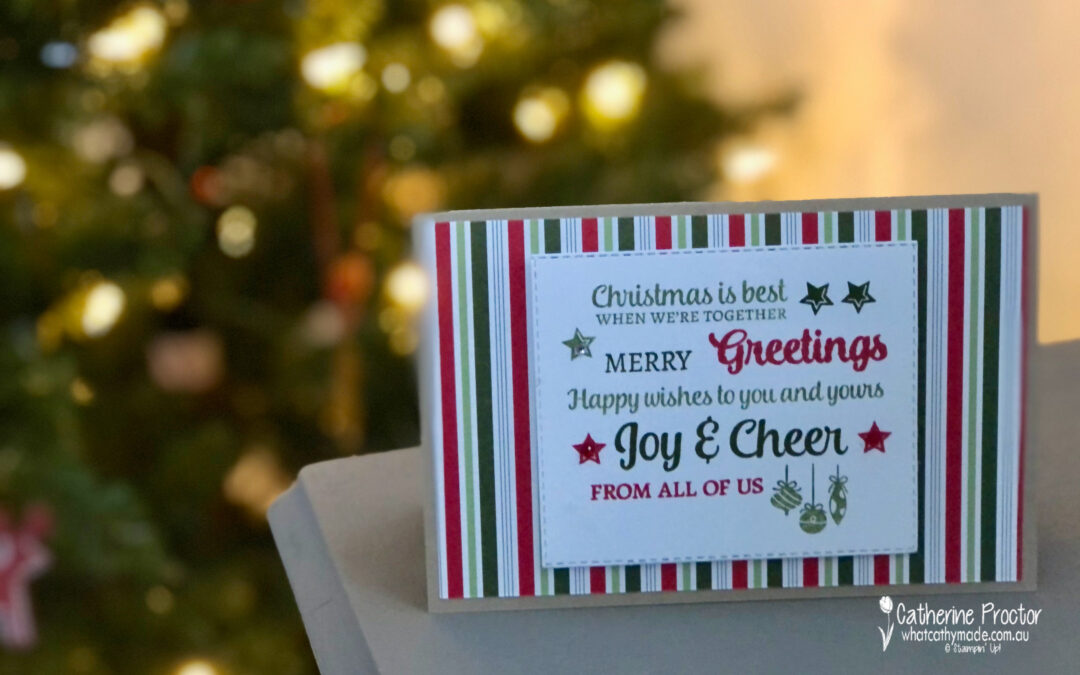
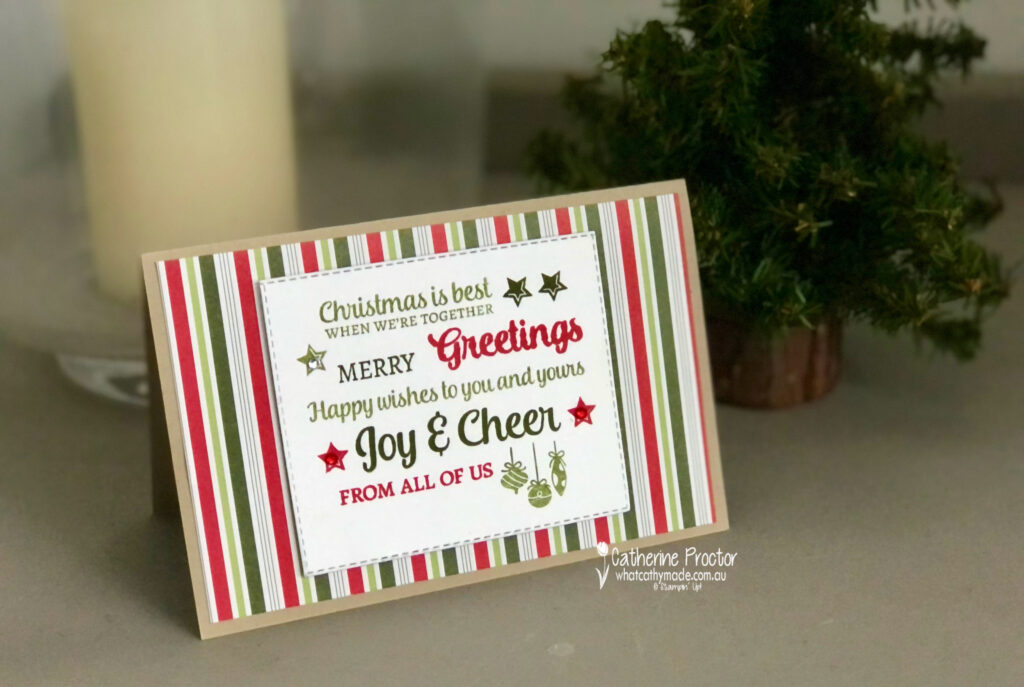
There are so many lovely greetings in this stamp set I decided to create a large sentiment panel using all of them together. I love the way it came together with no layout plan – I just started stamping in different colours!
The different colours on the greeting pick up the colours on the striped DSP. You could also create this card using any of your Christmas greetings from different stamp sets – the key to achieving a clean look is stamping the sentiments in the same colours as the stripes on the DSP.
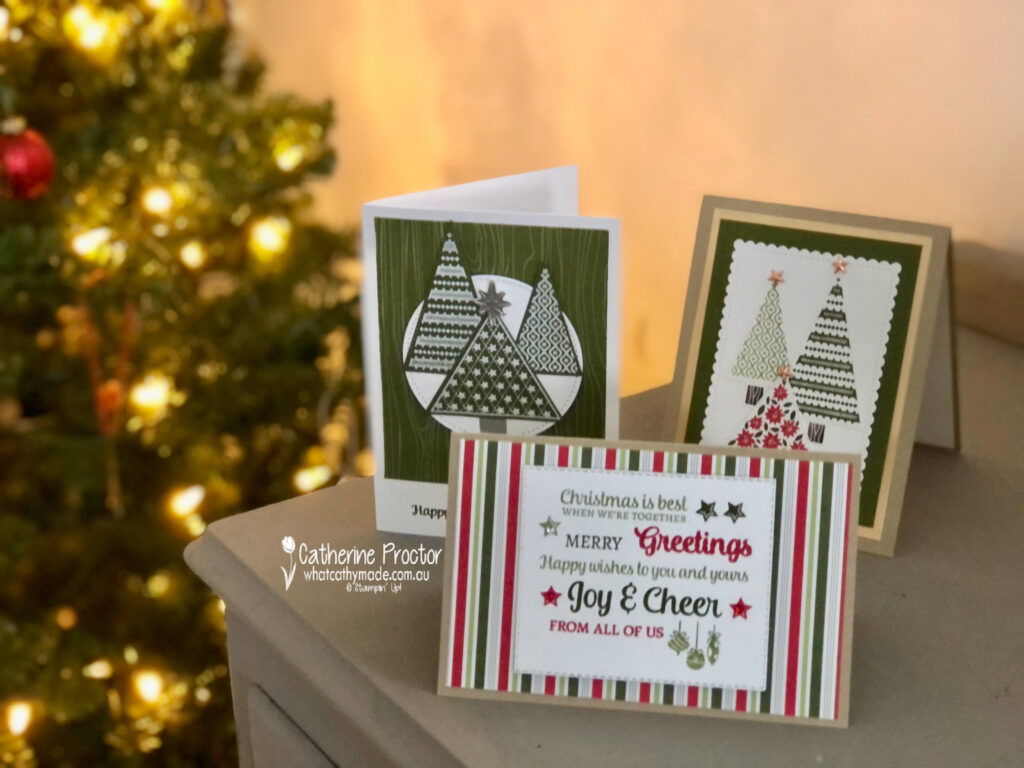
These cards were so quick and easy to make – just as well because I still have so much to do before Christmas Day! Here’s a pic of all three in front of my beautiful Christmas tree.
I can’t wait to see what the rest of the Art With Heart team have created with Mossy Meadow today. Click on the links below to see what they’ve made.
We will return next year on Wednesday January 6th when we’ll be showcasing another one of the Neutrals: Night of Navy. We hope you can join us all then.
If you’d like me to post you your very own copy of the January – June 2020 mini catalogue, the 2020 Sale-a-bration catalogue, the 2020-21 Stampin Up! Annual Catalogue, the 2020-21 Beginners Brochure, or to simply find out about more about Stampin’ Up! contact me.
In the meantime, wherever you are in the world, stay safe, stay calm…and keep on crafting xxx
Welcome to the Monthly Art With Heart Creative Showcase. Tonight we’re sharing some ideas for summer cards.
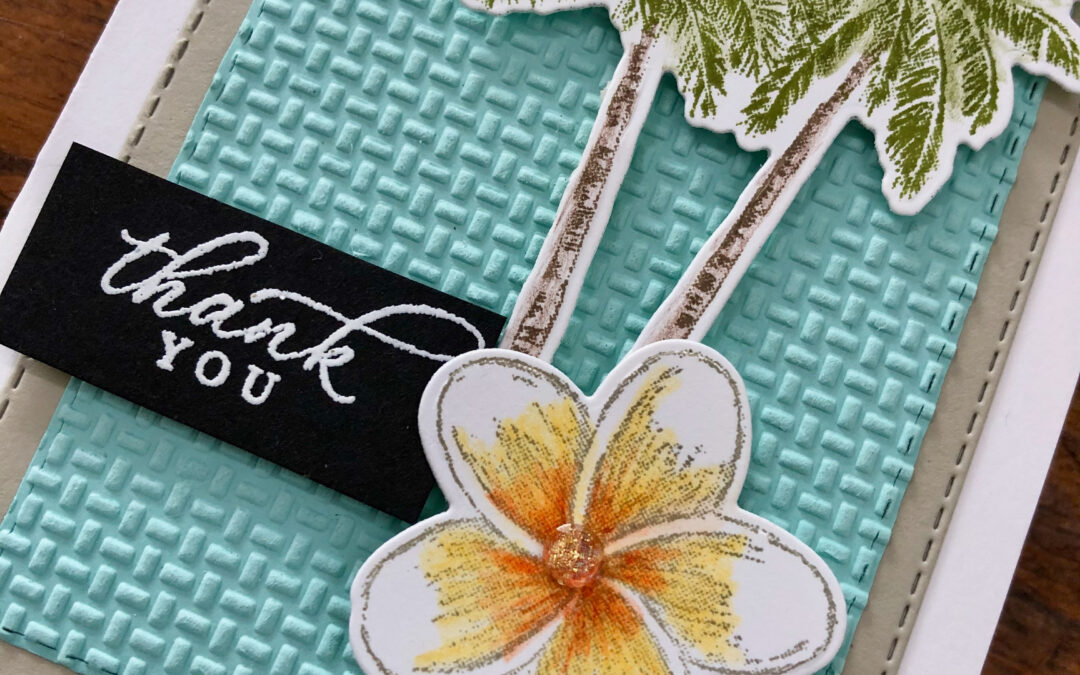
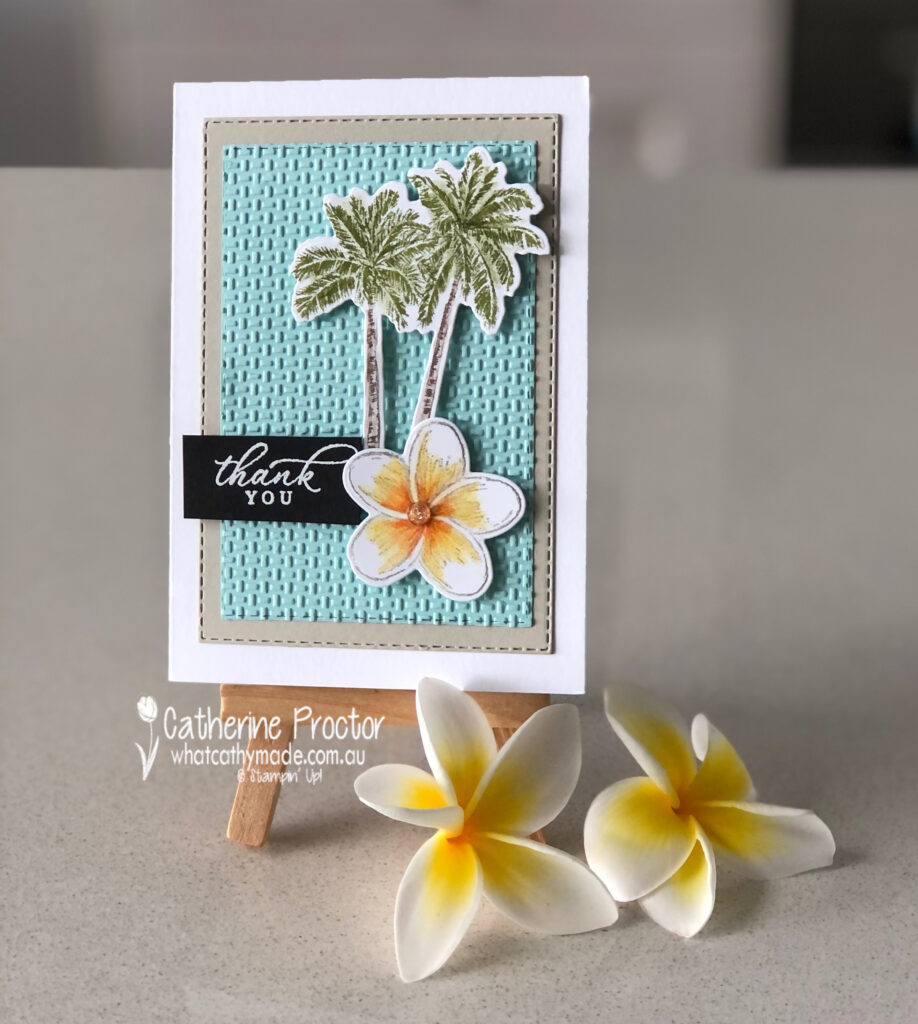
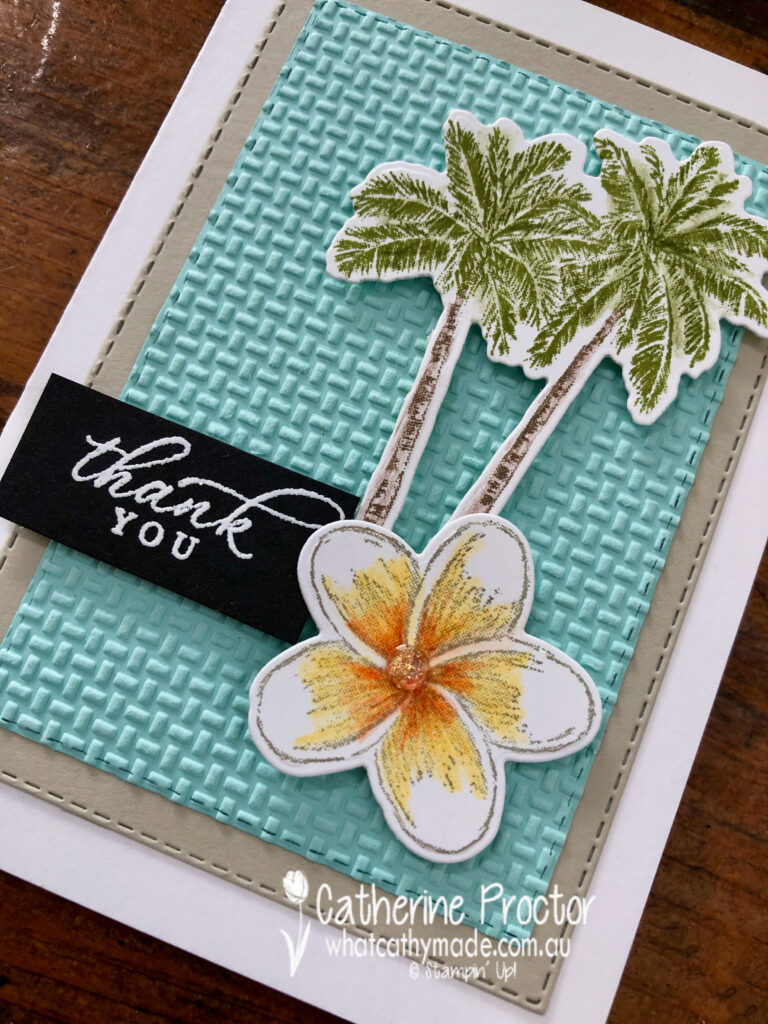
Summer for me means frangipanis, my favourite flower. I have many frangipani trees in my garden in various shades of yellow and pink and most of them have been grown from cuttings. My frangipanis are just coming into flower now and every year the yellow ones always flower before the pink ones do.
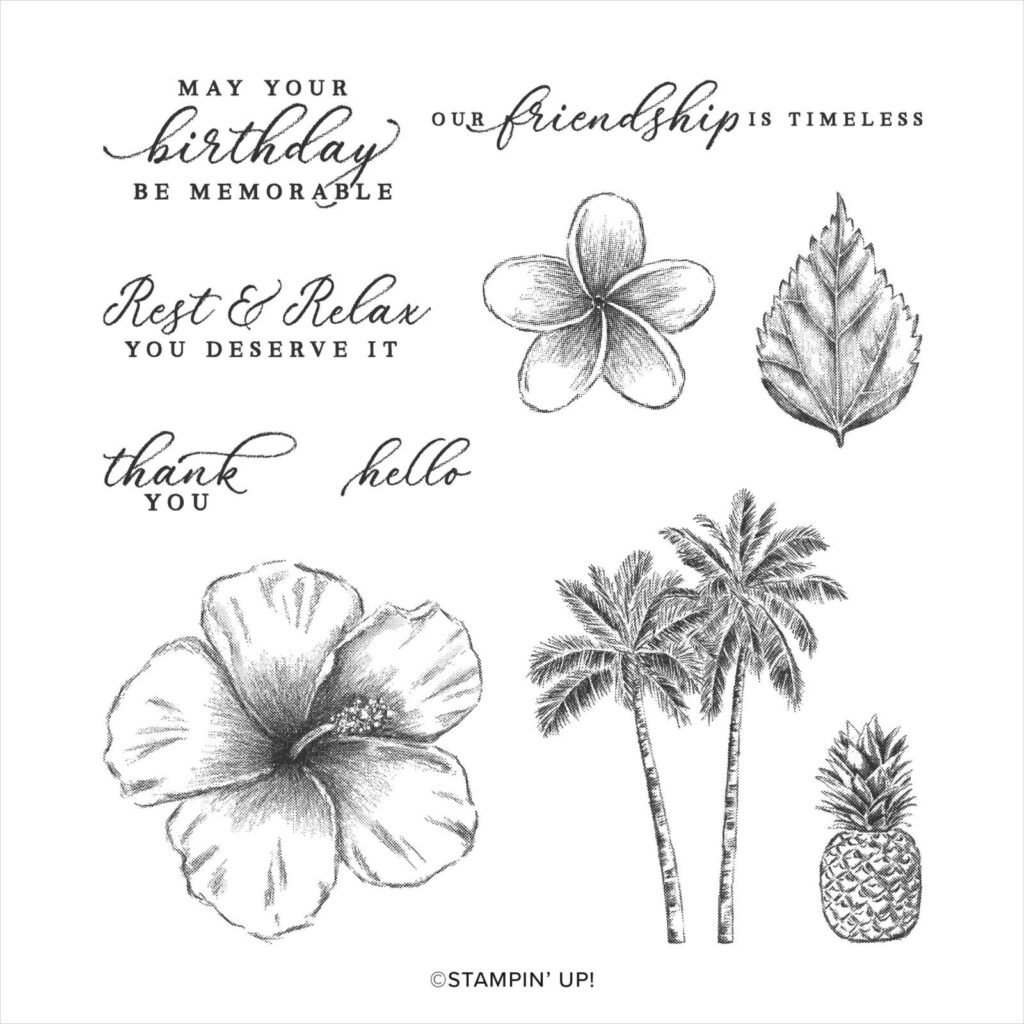
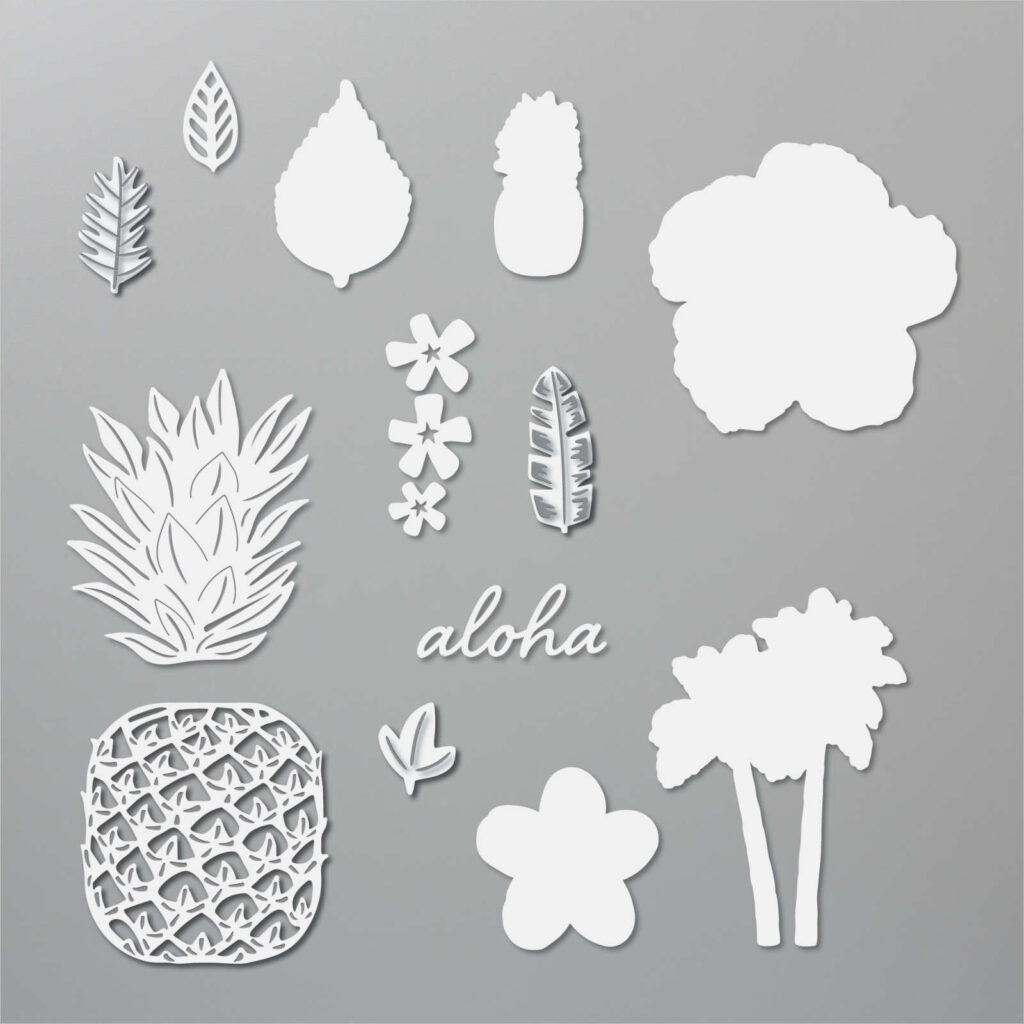
I’m sure it will come as no surprise when I tell you that I’ve used the Timeless Tropical stamp set and its co-ordinating In the Tropics dies for my card today. I have to admit I bought this entire bundle just for the frangipani flower and die, but I love this entire stamp and die set!
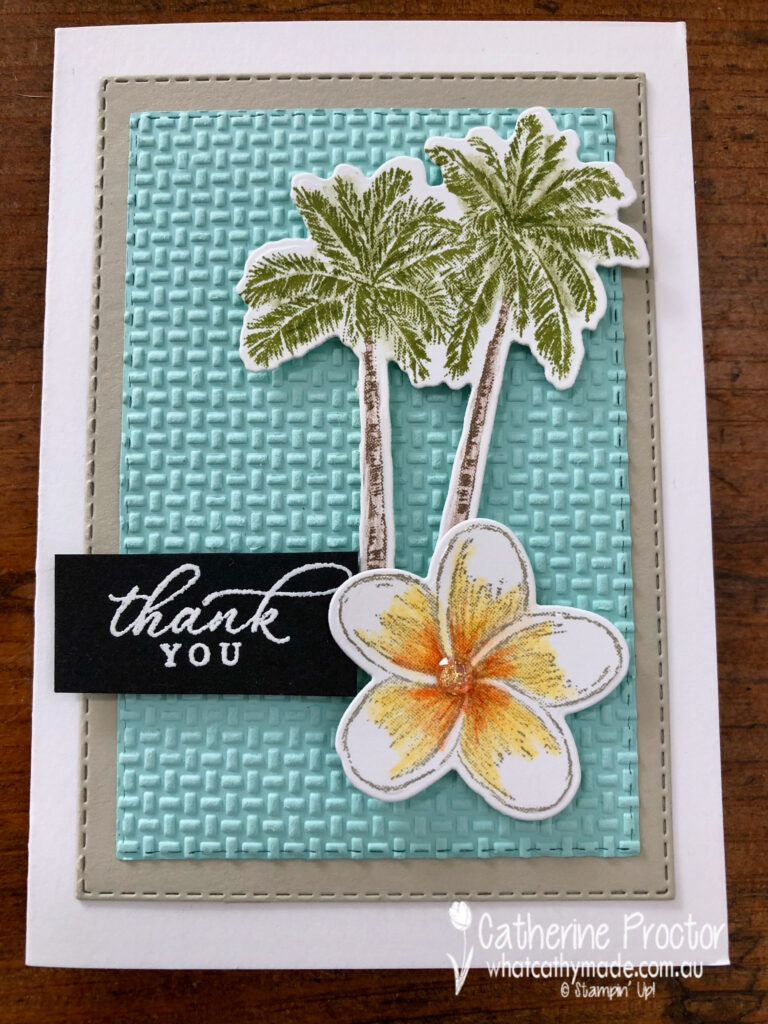
The palm tree is coloured using the marker technique – I used soft suede for the tree trunk and old olive for the palm branches. Once I coloured the stamp with my markers I “huffed” on it before stamping. To add colour and depth I used Watercolour pencils to lightly add some more old olive to the branches and some early espresso to the trunk.
The frangipani flower was stamped in smoky slate (stamped off once) and then coloured in using my daffodil delight and pumpkin pie watercolour pencils.
The pool party layer is die cut with a stitched rectangle die and embossed with the wrapped in texture embossing folder – on sale now at 50% off as it is retiring at the end of December or when sold out.
This pool party embossed layer is then layered onto Sahara Sand (also die cut with a stitched rectangle die) and adhered to a whisper white notecard.
The sentiment is also from the Timeless Tropical stamp set, stamped in versamark ink and heat embossed with White Emboss powder.
Did you notice the embellishment in the centre of the flower? It’s a clear wonderful gem from the August – December 2020 Mini Catalogue and it adds a lovely sparkle to my frangipani flower.
To see more summer card inspiration from the AWH Team head back to Rachel‘s page as she is hosting our monthly blog hops.
If you’d like me to post you your very own copy of the forthcoming January-June 2021 Mini Catalogue, the August – December 2020 Mini Catalogue, the 2020-21 Stampin Up! Annual Catalogue, the 2020-21 Beginners Brochure, or to simply find out about more about Stampin’ Up! contact me.
Welcome to week twenty-six of our 2020-2021 Art With Heart Colour Creations Showcase.
Each week various members of our Art With Heart Colour Creations team will be bringing you weekly colour inspiration as we showcase our range of over 50 beautiful Stampin’ Up! colours in alphabetical order.
Week 28 – Misty Moonlight
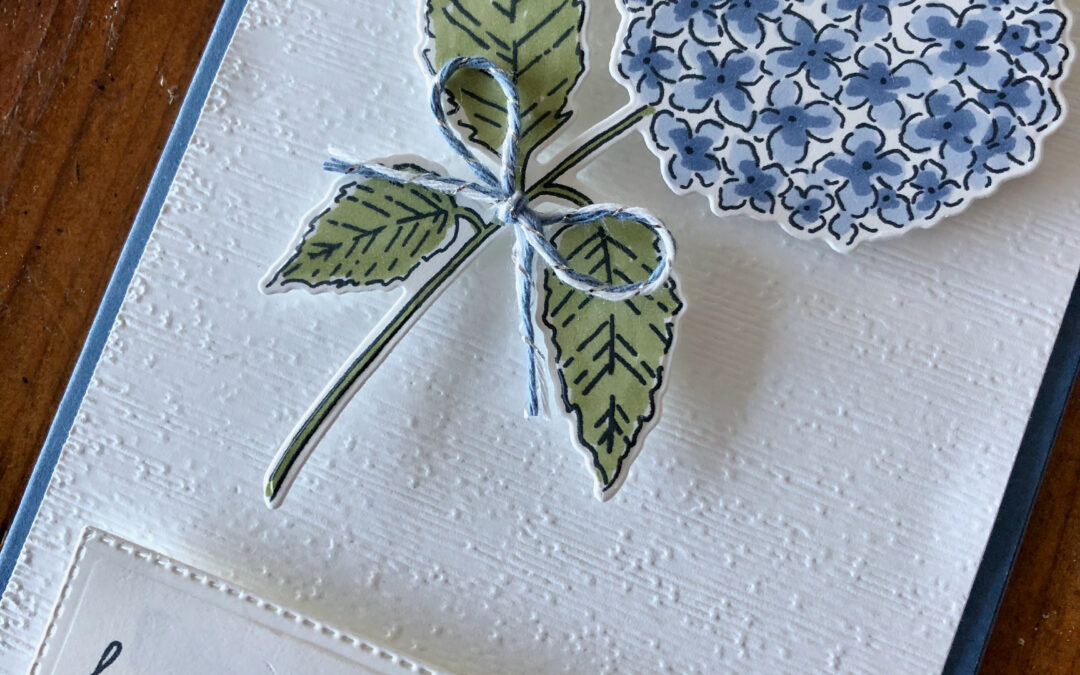
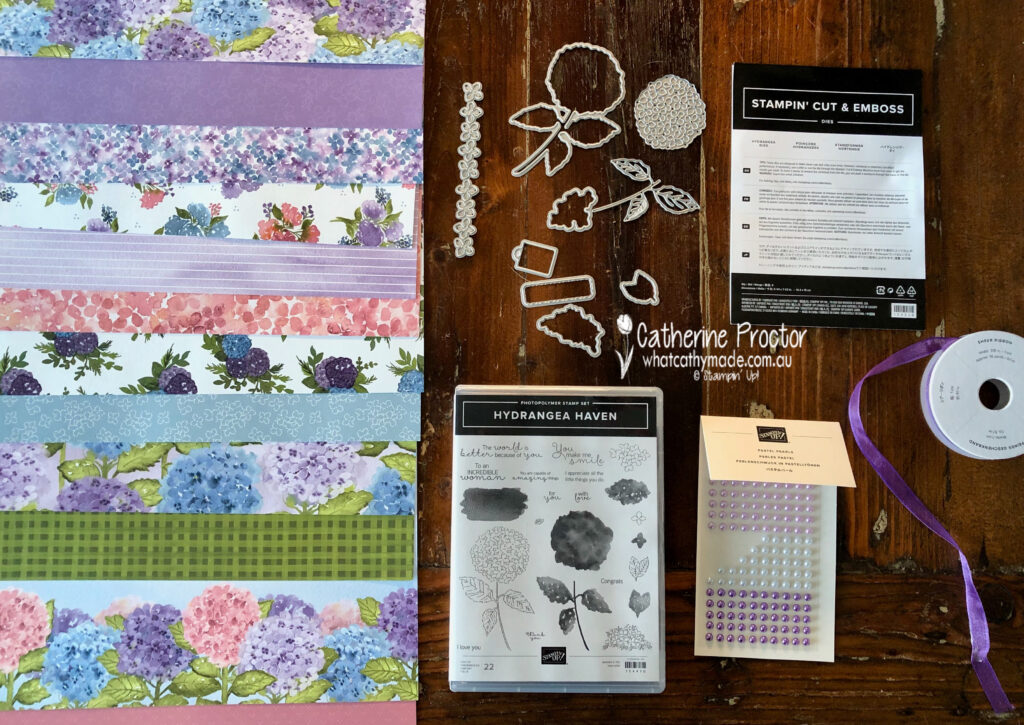
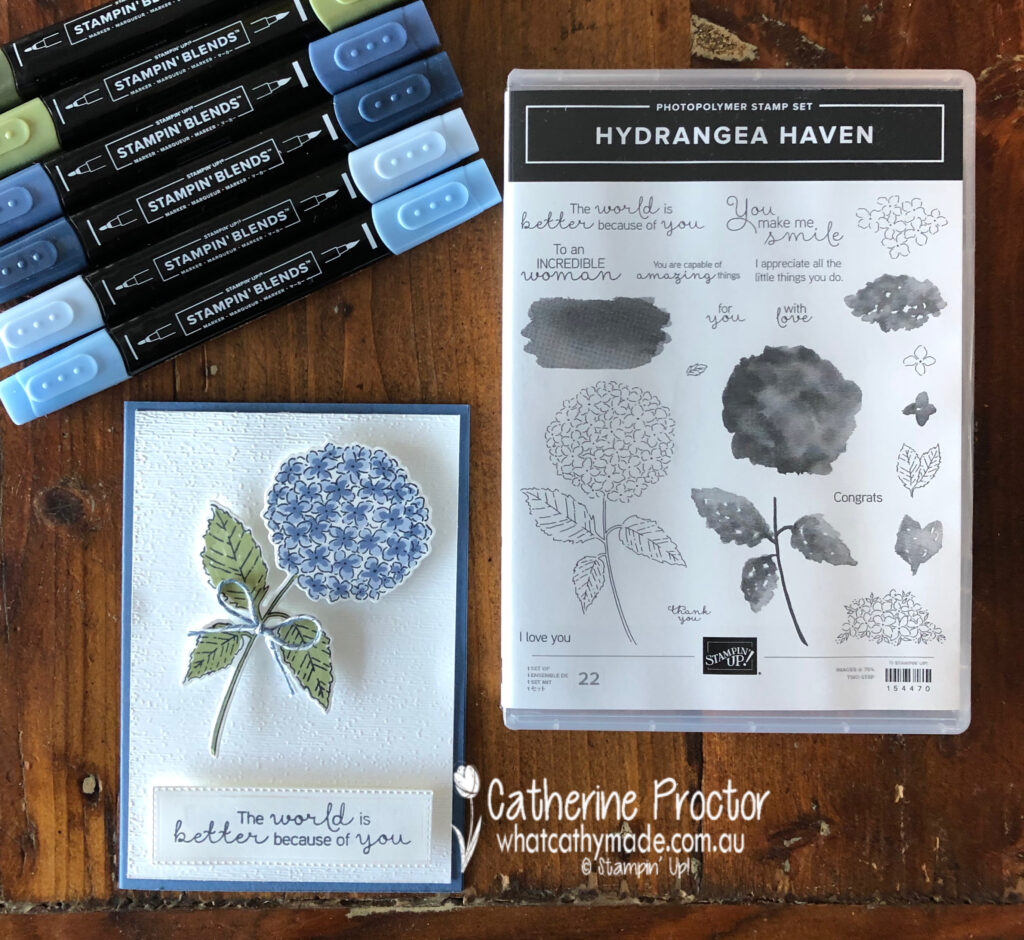
I’m so excited to bring you a sneak peek this week of my favourite suite from the forthcoming 2021 January -June mini catalogue: the Hydrangea Hill Suite.
This suite has the most beautiful DSP but tonight I’m focusing on Misty Moonlight so I decided to use the Hydrangea Haven Bundle to showcase Misty Moonlight. I promise I’ll share some cards soon using this stunning DSP.
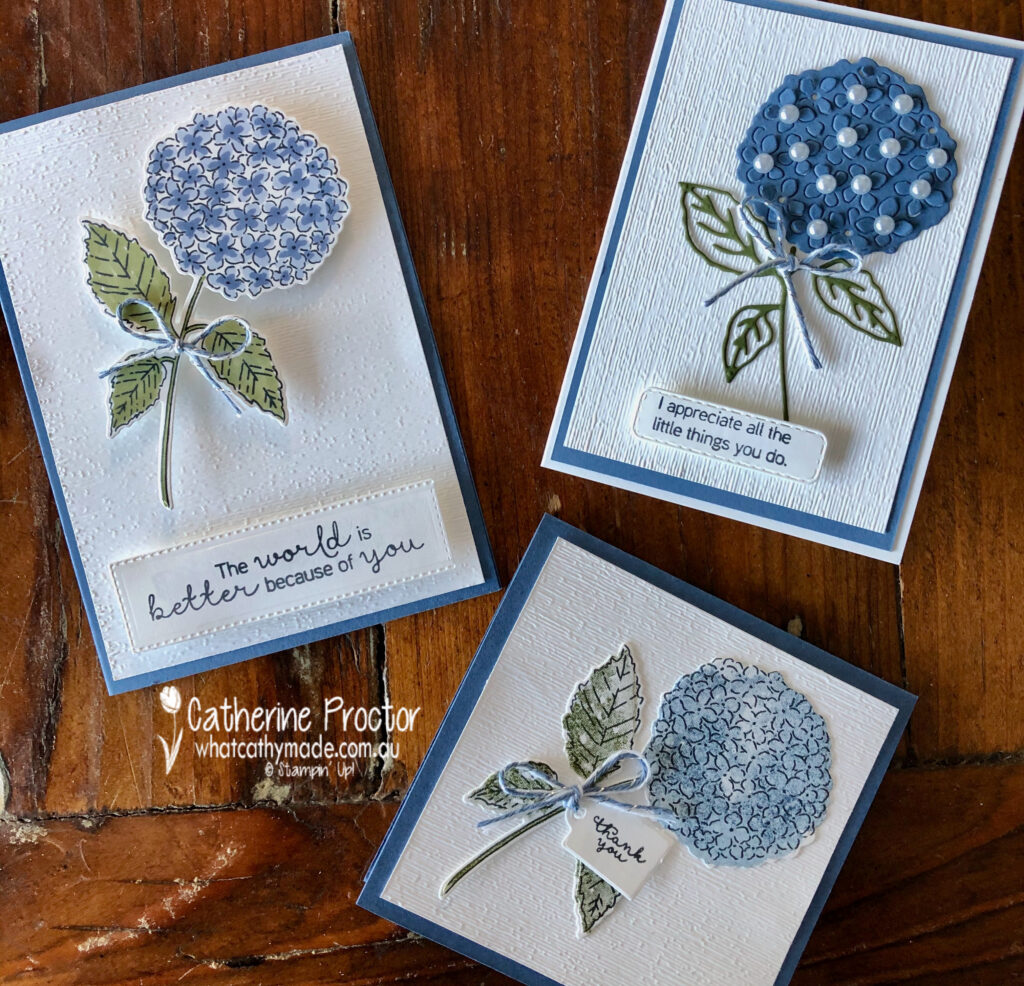
One of the things I love about this stamp and die bundle is the different ways you can use it. I’ve made three very simple cards today using basically the same colours and same layout, yet they look very different.
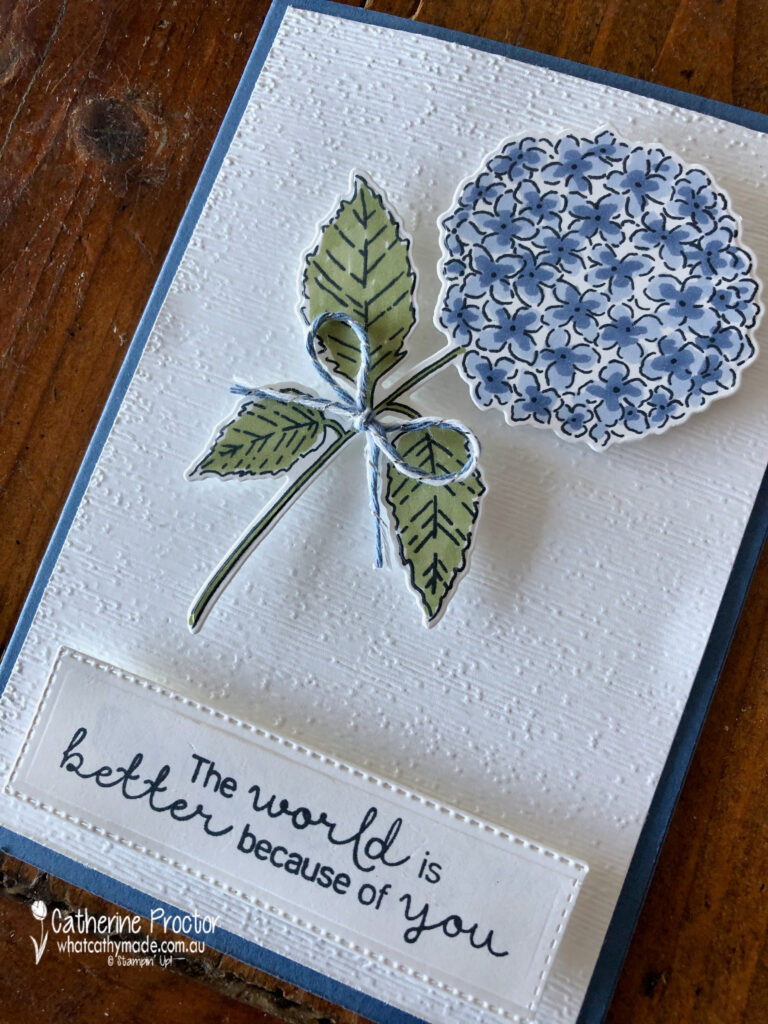
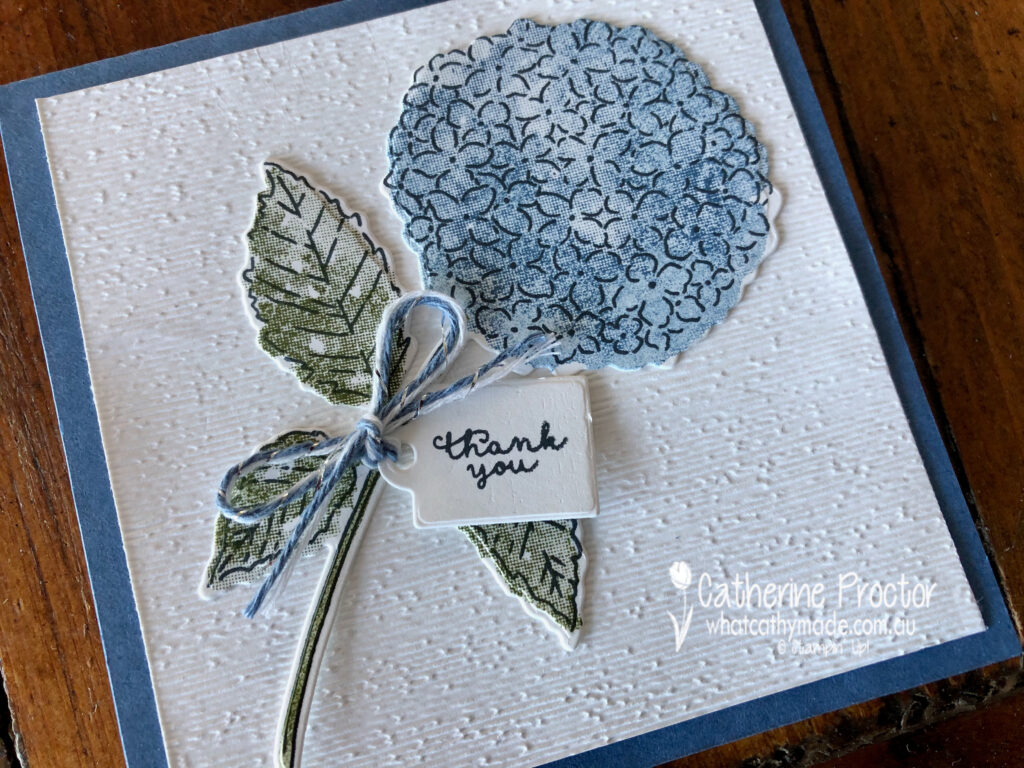
For my first card I’ve stamped the largest hydrangea stamp in Memento ink before colouring it in with my Misty Moonlight, Seaside Spray and Mossy Meadow Stampin’ Blends.
All three cards feature sentiments from the Hydrangea Haven stamp set, the Hydrangea dies, are layered on a piece of whisper white that has been embossed with the subtle embossing folder and finished of with a bow of Misty Moonlight, Whisper White and silver bakers twine from the Flowers For Every Season Ribbon Combo Pack.
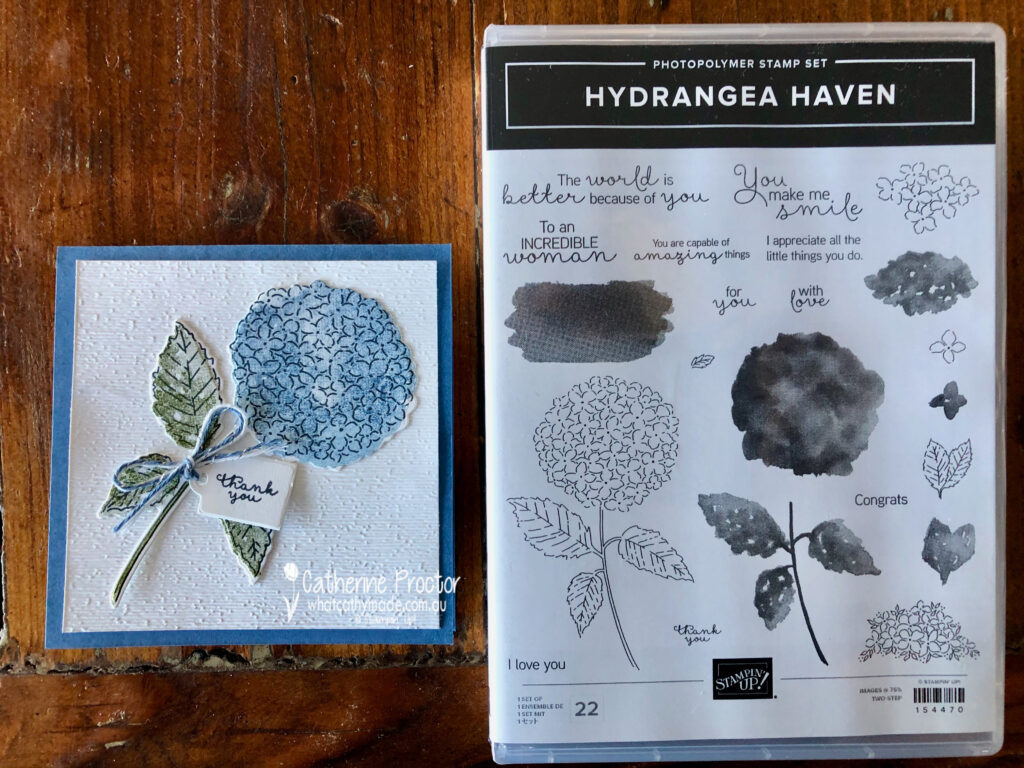
Card Two uses the same main stamp, this time coloured by using the background stamps that match (they are the dark solid stamps in this set). The Misty Moonlight stamp for the flowers has been stamped off three times and the Mossy Meadow for the stem and leaves just two times.
How adorable is this little tag die – there are five stamps that fit into this tag. Love, love, love this!
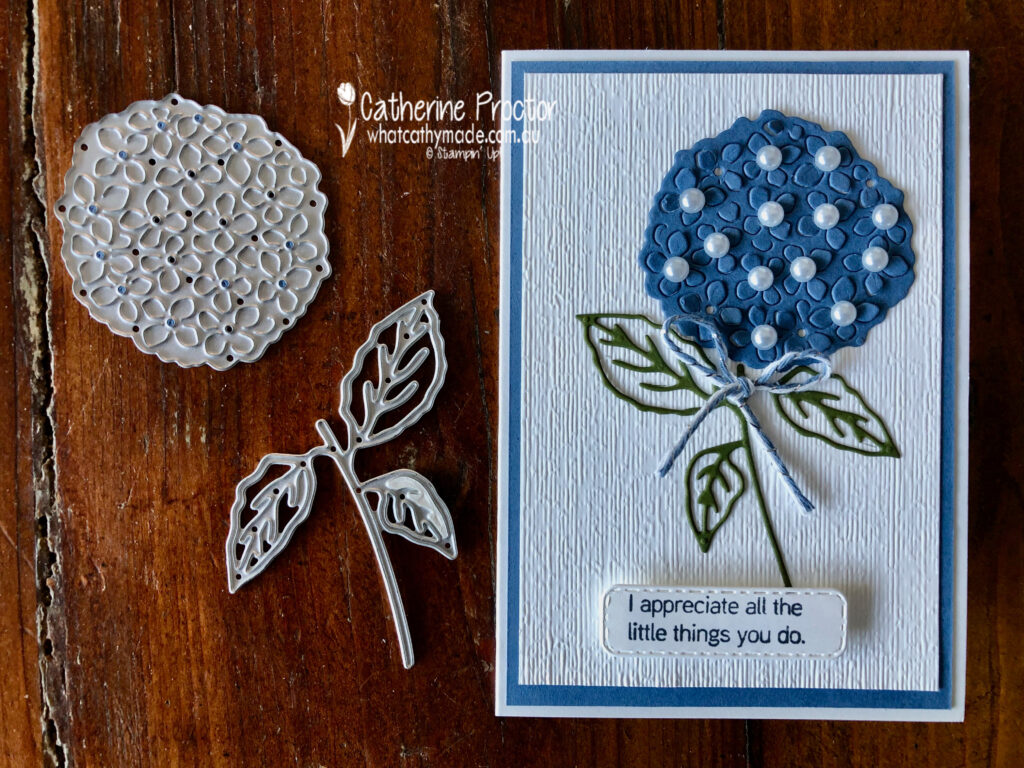
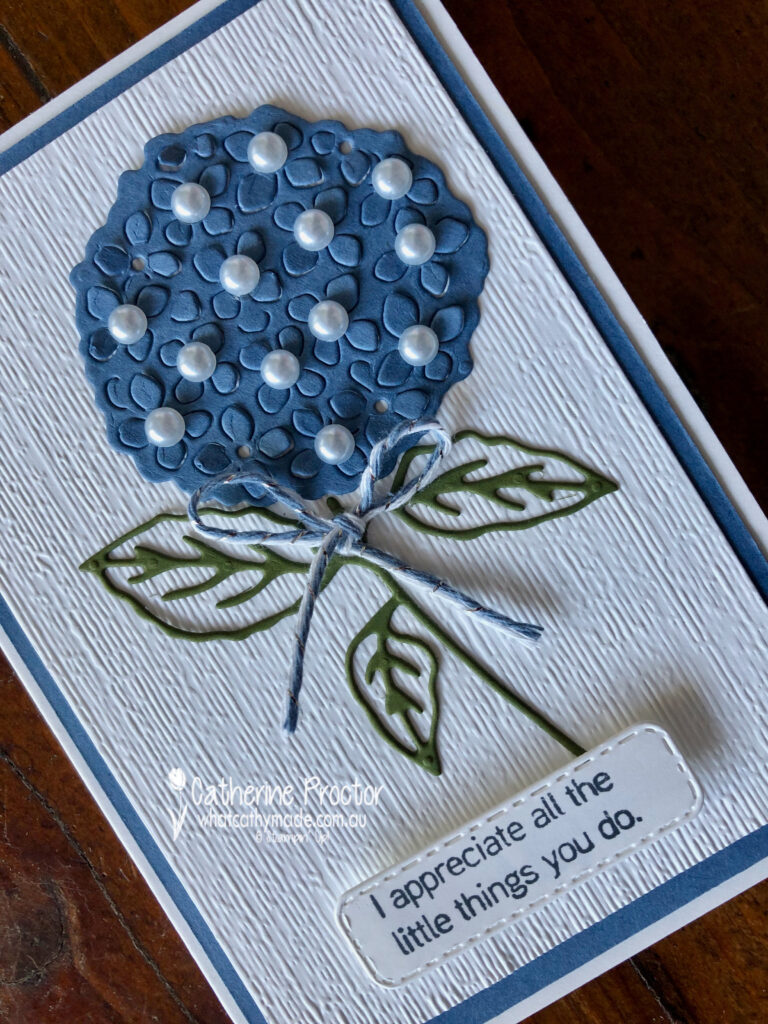
My final card uses just dies from the Hydrangea dies.
Can you see how the dies on the flower lift up? I’ve added some of the Seaside Spray Pastel Pearls to finish this square card off.
I can’t wait to see what the rest of the Art With Heart team have created with Misty Moonlight today. Click on the links below to see what they’ve made.
Next Tuesday we’ll be showcasing one of the Neutrals: Mossy Meadow. We hope you can join us all then.
If you’d like me to post you your very own copy of the 2021 January -June mini catalogue, Sale-a-bration catalogue, August–December 2020 Mini Catalogue, 2020-21 Stampin Up! Annual Catalogue, the 2020-21 Beginners Brochure, or to simply find out about more about Stampin’ Up! contact me.
In the meantime, wherever you are in the world, stay safe, stay calm…and keep on crafting xxx
Welcome to week twenty-seven of our 2020-2021 Art With Heart Colour Creations Showcase.
Each week various members of our Art With Heart Colour Creations team will be bringing you weekly colour inspiration as we showcase our range of over 50 beautiful Stampin’ Up! colours in alphabetical order.
Week 27 – Mint Macaron
Hello crafters!
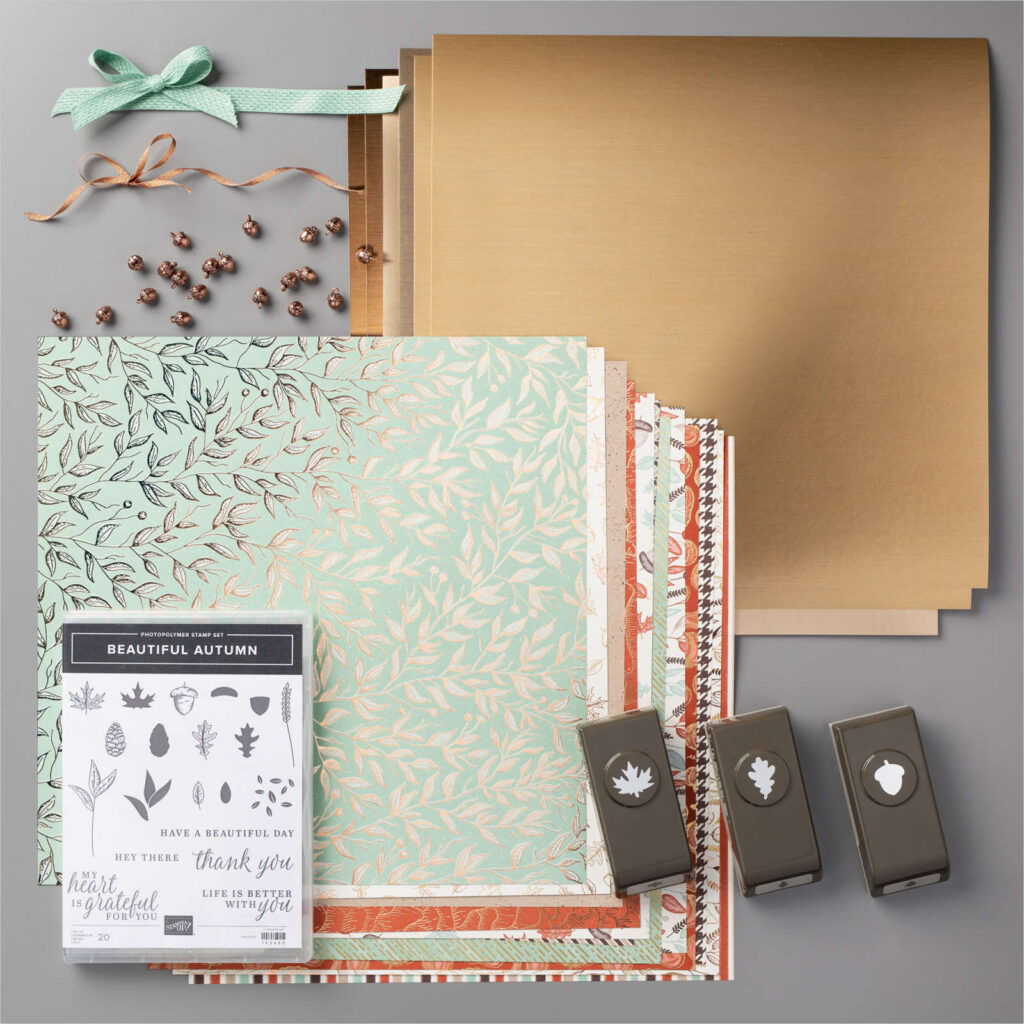
Our colour this week is Mint Macaron, a lovely soft green. There were so many possible projects I had in my mind for Mint Macaron but in the end I was inspired by the colour combination and several products from the Gilded Autumn Suite on page 45 of the July – December Mini Catalogue.
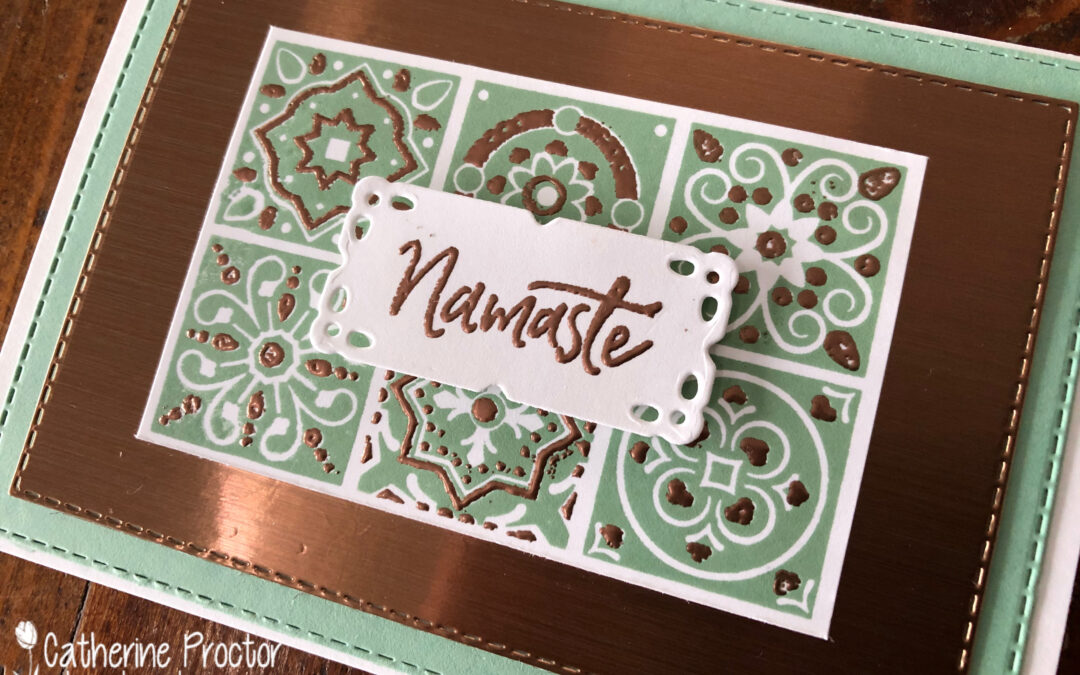
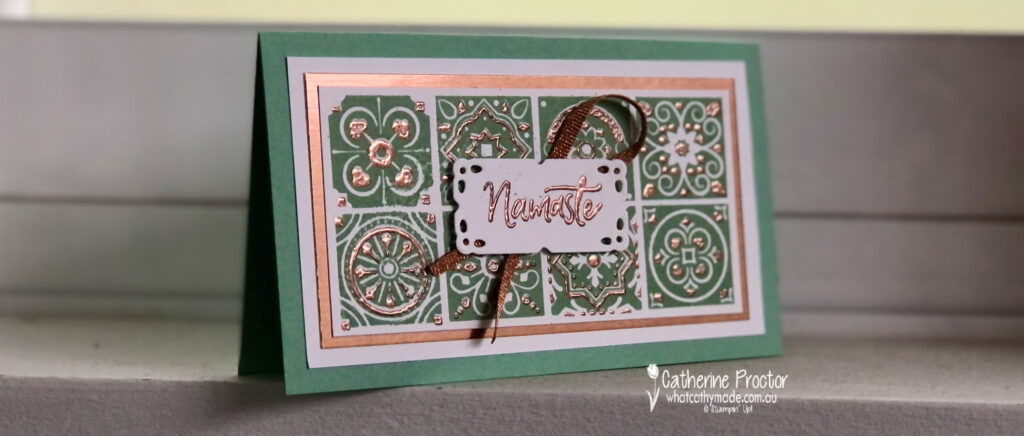
I just love Mint Macaron and Copper foil together on these beautiful foiled papers and the Brushed Metallic Card stock, however instead of using this DSP I decided to see what the Today’s Tiles would look like inked up in Mint Macaron, with the second layer heat embossed in copper.
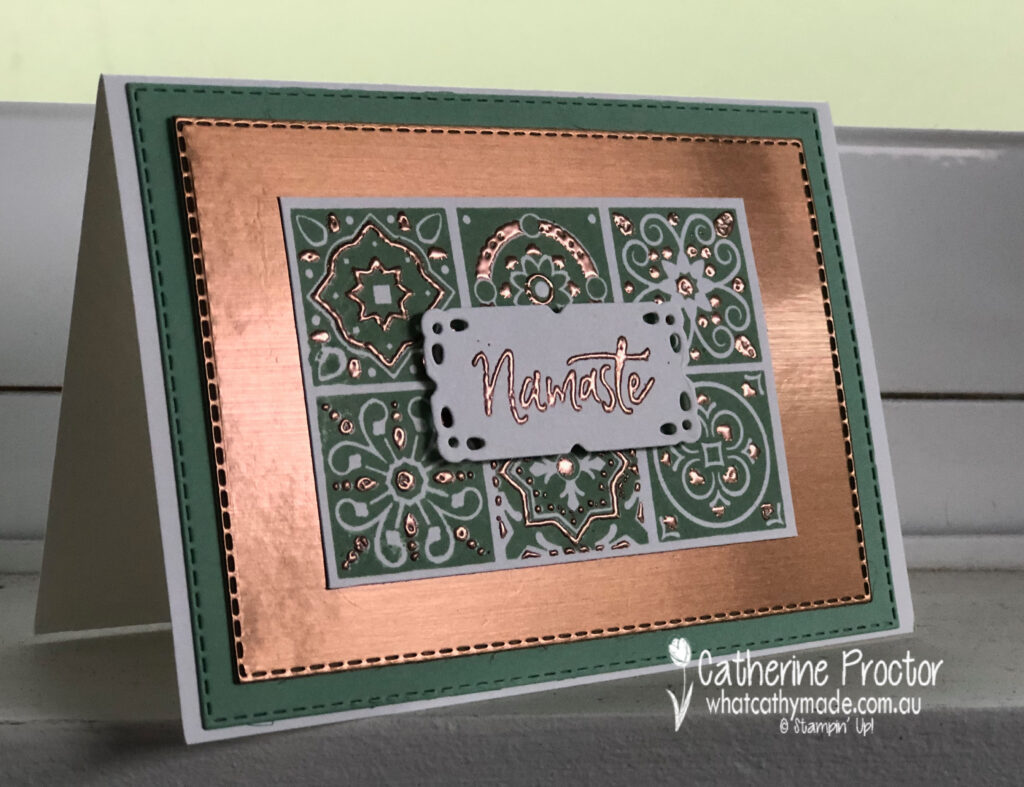
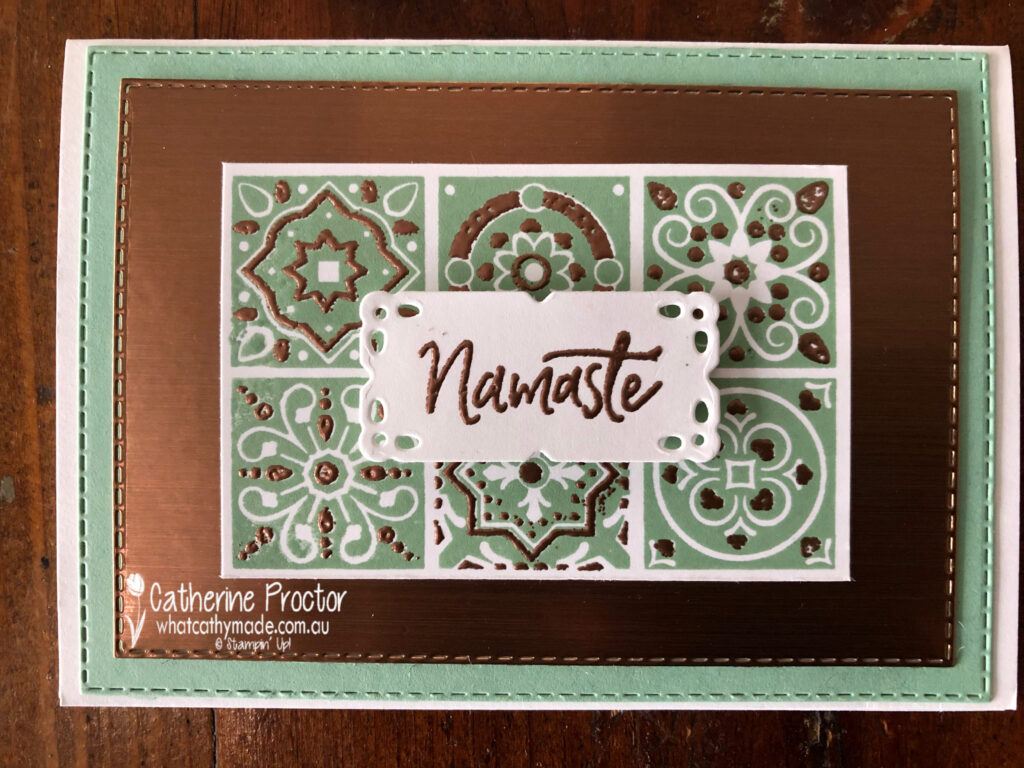
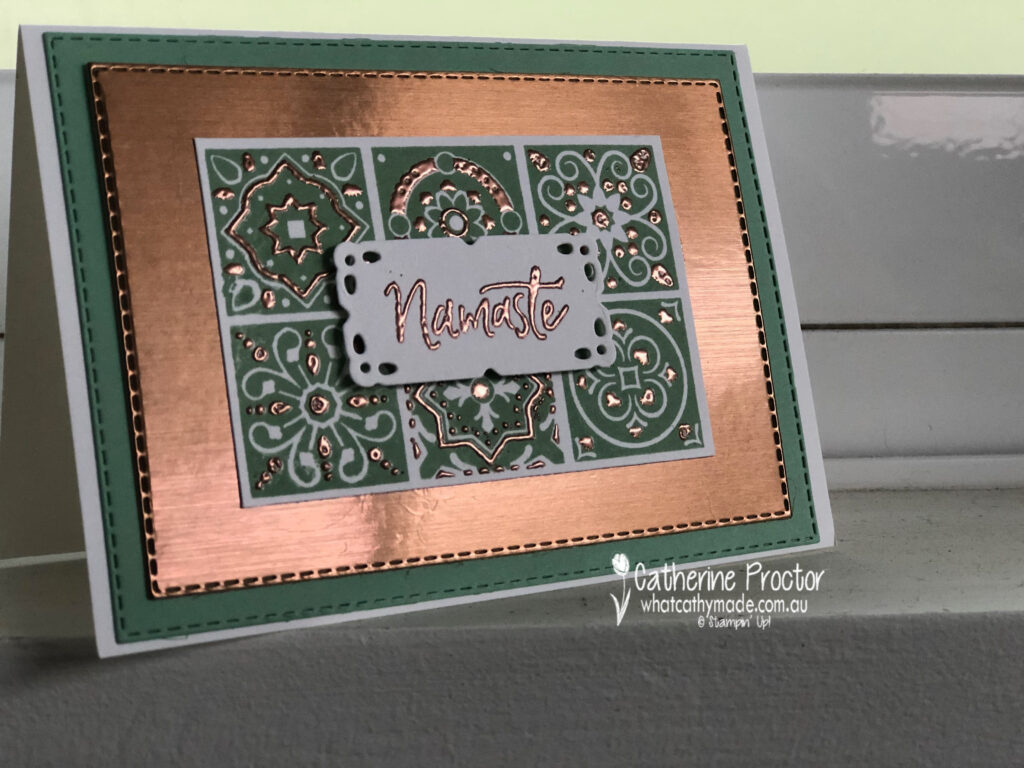
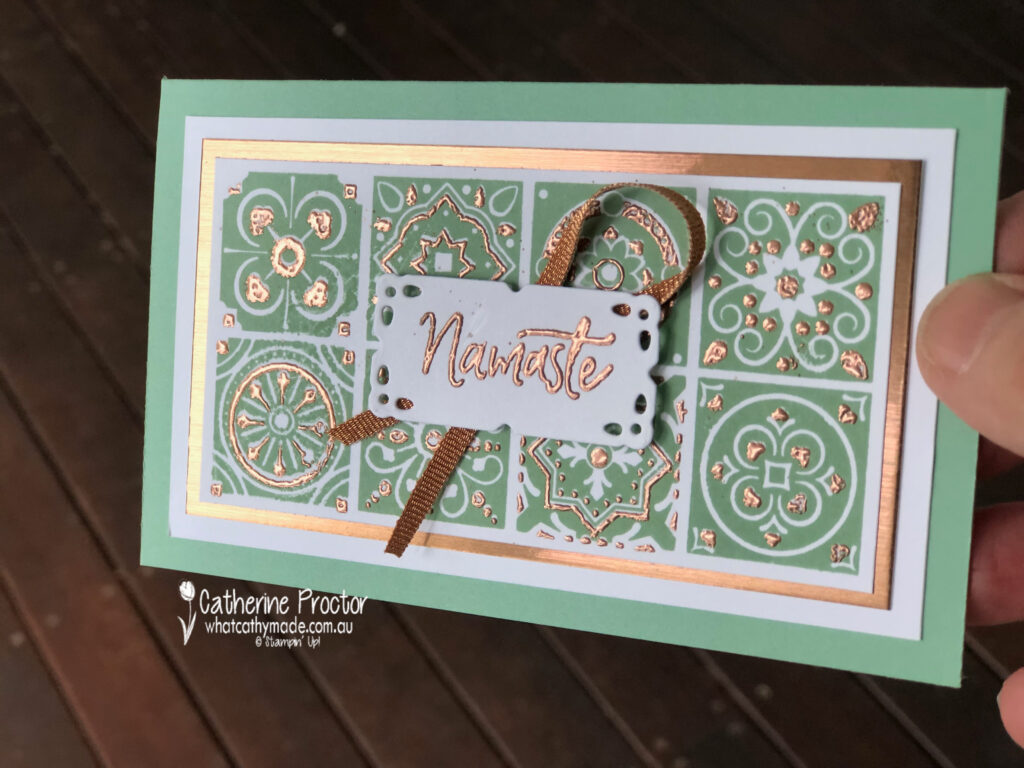
This card is super hard to photograph – either you capture the shine of the beautiful brushed metallic copper card stock and the Mint Macaron looks very dark (photo above) or you capture the true colour of Mint Macaroon but not the shine of the brushed metallic copper card stock (photo below).
The key to lining up the layers of the tile stamp is your trusty Stamparatus. To achieve the copper foiled look I stamped in Versamark ink before applying copper emboss powder. (NOTE I’ve just realised this product is now retired but you could use the gold emboss instead and the gold brushed metallic card stock instead of the copper brushed metallic card stock).
I’ve used the Totally Tile stamp set on purpose because I’ve made these two cards as a thank you to two of my amazing yoga teachers. I was so excited when I saw that Stampin’ Up! had a stamp set with “Namaste”. If you don’t practice yoga you might not be familiar with this word. We say it with our teachers at the end of a class and it can mean “I bow to you” but apparently it is also colloquially used among Hindi speakers as a way of saying hello, especially when greeting someone older.
My second card also uses the “Namaste” sentiment and the same colour combination but I’ve mixed the design up a bit and added some of the Metallic Copper Grosgrain Ribbon from the Gilded Autumn Suite.
Doesn’t that metallic Copper Grosgrain ribbon look beautiful behind the sentiment? I really hope my yoga teachers enjoy receiving their personalised “Namaste” thank you card!
I can’t wait to see what the rest of the Art With Heart team have created with Mint Macaron today. Click on the links below to see what they’ve made.
If you’d like me to post you your very own copy of the upcoming January-June 2021 Mini Catalogue, the August–December 2020 Mini Catalogue, 2020-21 Stampin Up! Annual Catalogue, the 2020-21 Beginners Brochure, or to simply find out about more about Stampin’ Up! contact me.
In the meantime, wherever you are in the world, stay safe, stay calm…and keep on crafting xxx
Welcome to week twenty-six of our 2020-2021 Art With Heart Colour Creations Showcase.
Each week various members of our Art With Heart Colour Creations team will be bringing you weekly colour inspiration as we showcase our range of over 50 beautiful Stampin’ Up! colours in alphabetical order.
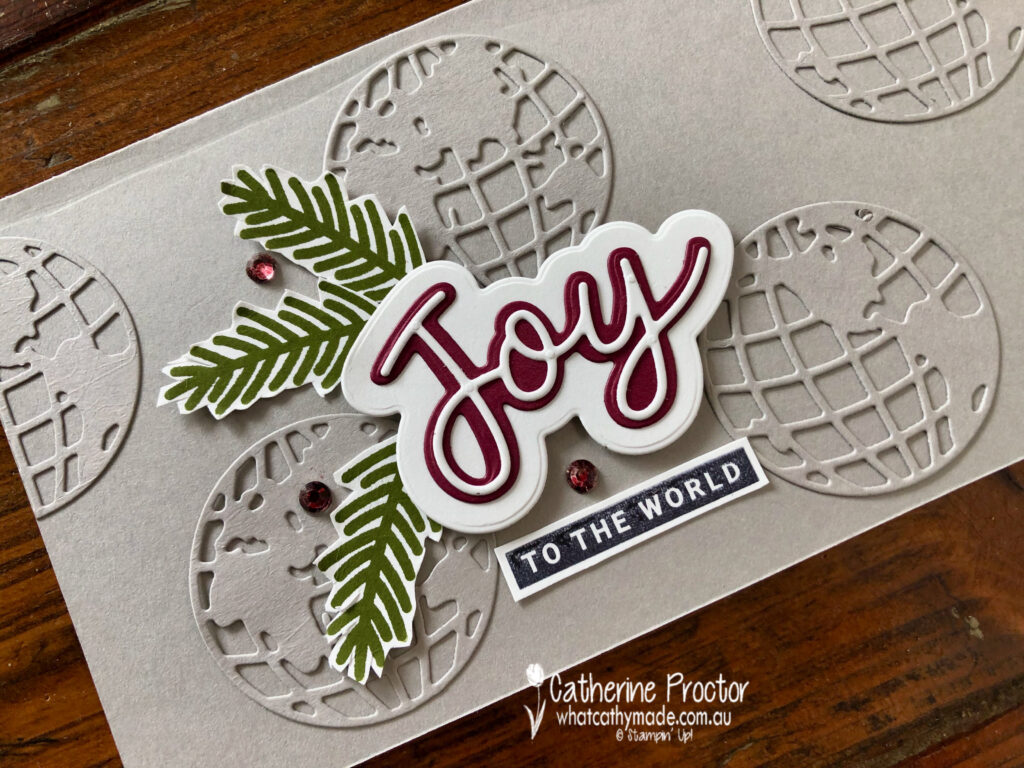
Week 26 – Merry Merlot
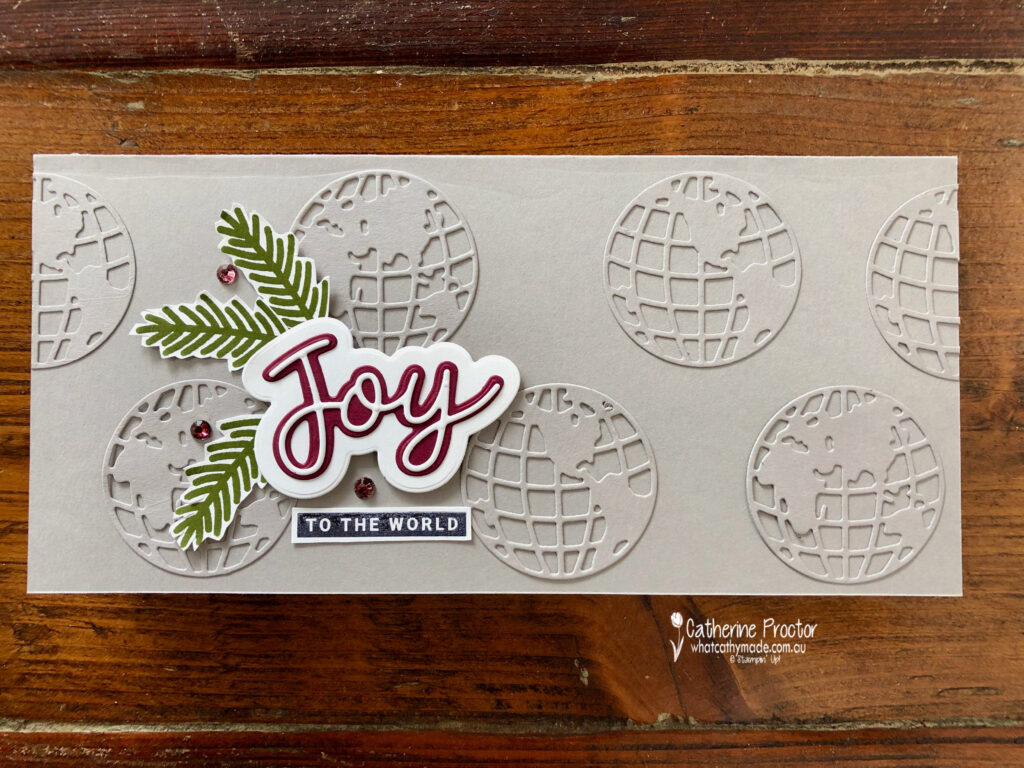
Hello crafters. This week I’m sharing a Christmas card I’ve made using an entirely neutral colour palette – I really love any combination of neutrals together on a card.
Merry Merlot is our colour for this week and I’ve only used a tiny bit of it on my card because it is a very rich colour. Hopefully I’ve used enough to show you how nicely it pairs with these other neutrals.
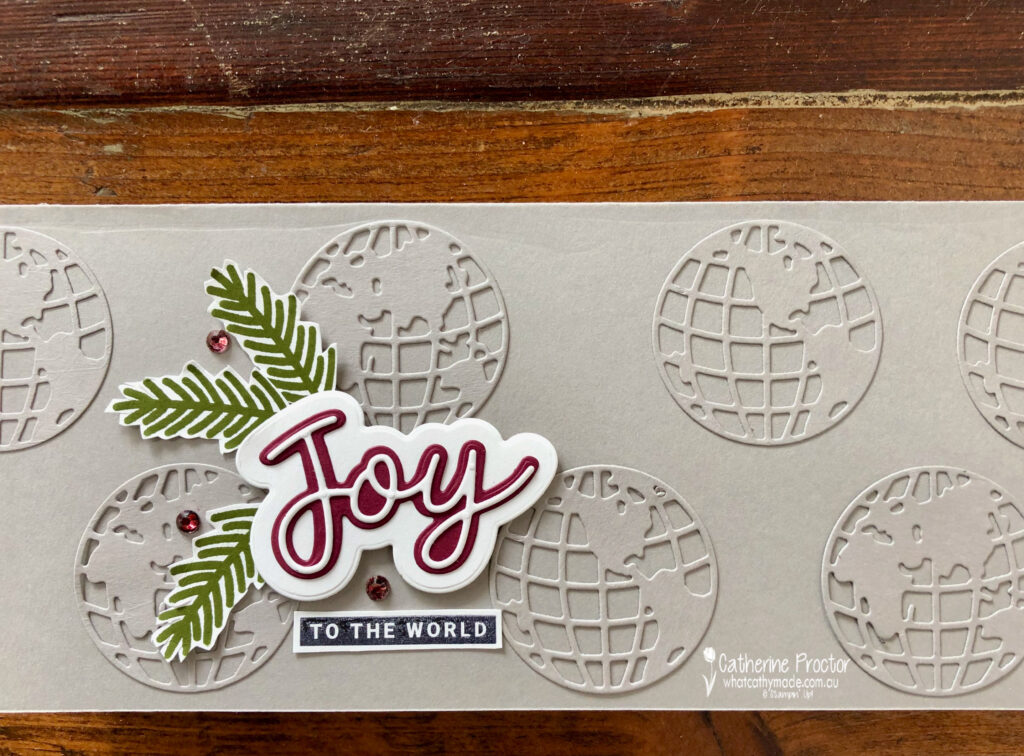
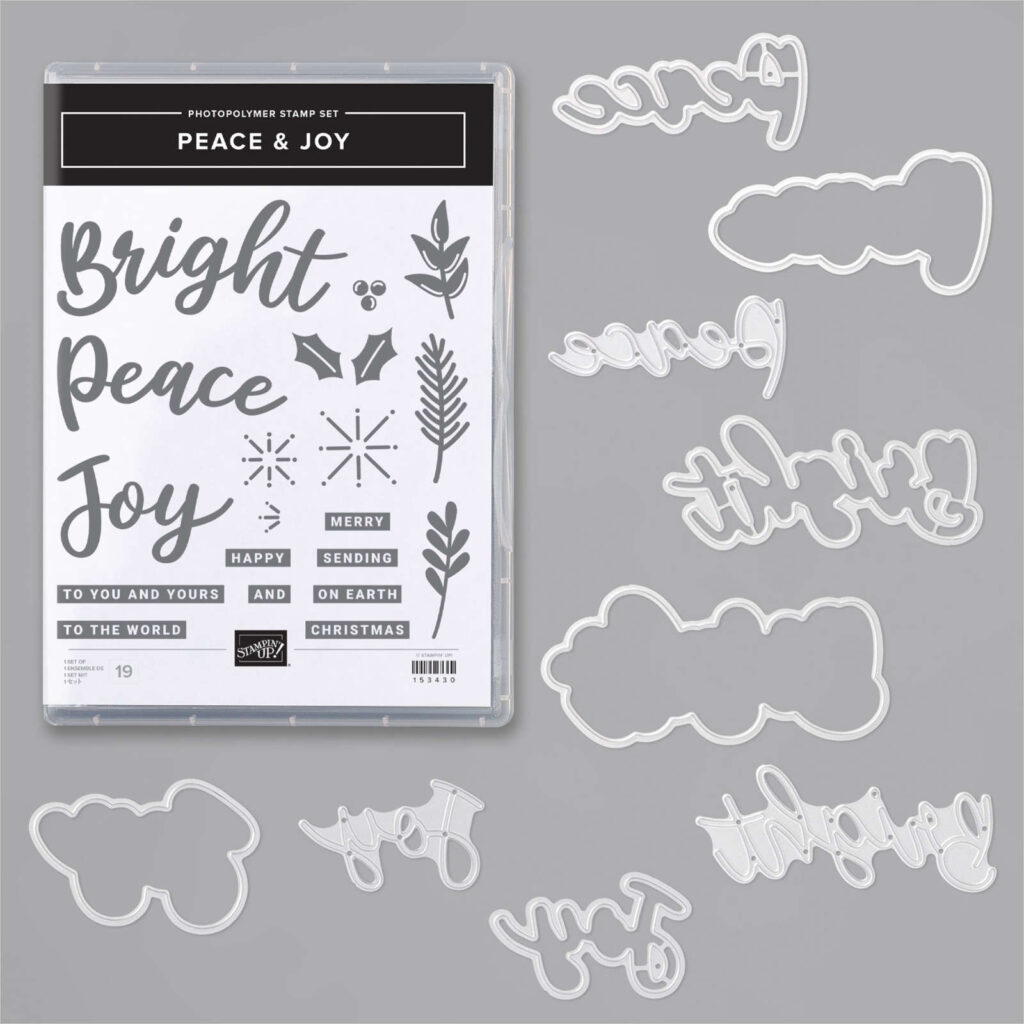
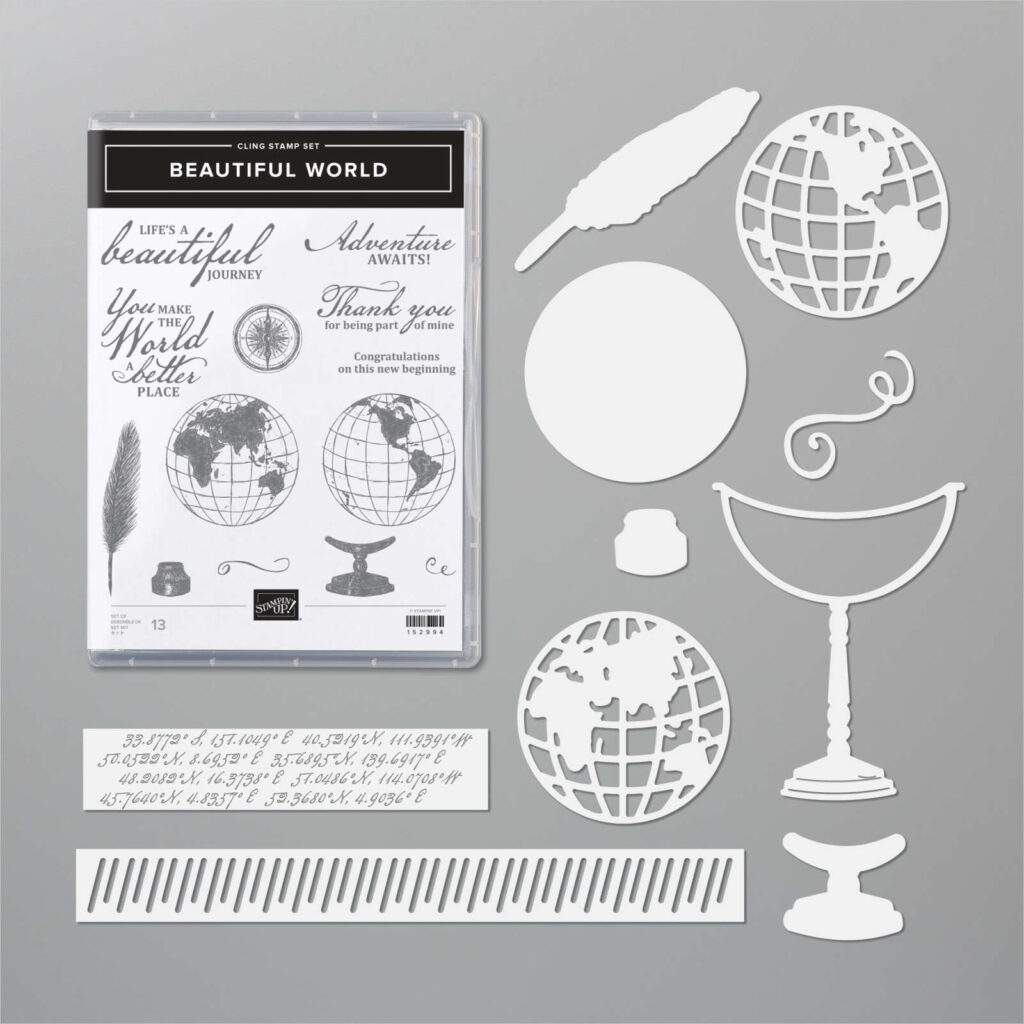
If there ever were two bundles just crying out to be used together it’s the Beautiful World bundle on p26 of the annual catalogue and the Peace & Joy bundle on page 18 of the August to December Mini catalogue. I love how Stampin’ Up! co-ordinate their products right through their range.
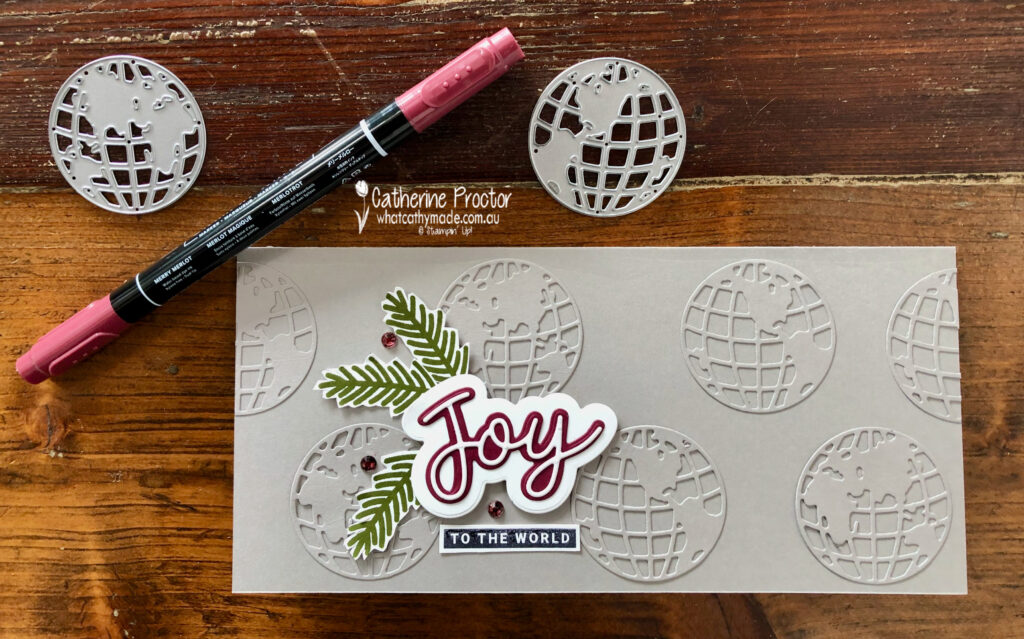
The “faux embossed” background of my Gray Granite slimline card was easy to make using the globe dies and adhesive sheets. Just remember to attach a sheet to the back of your card stock before you die cut. Next time I make this card I think I’ll add more globes and space them more closely together for even greater impact.
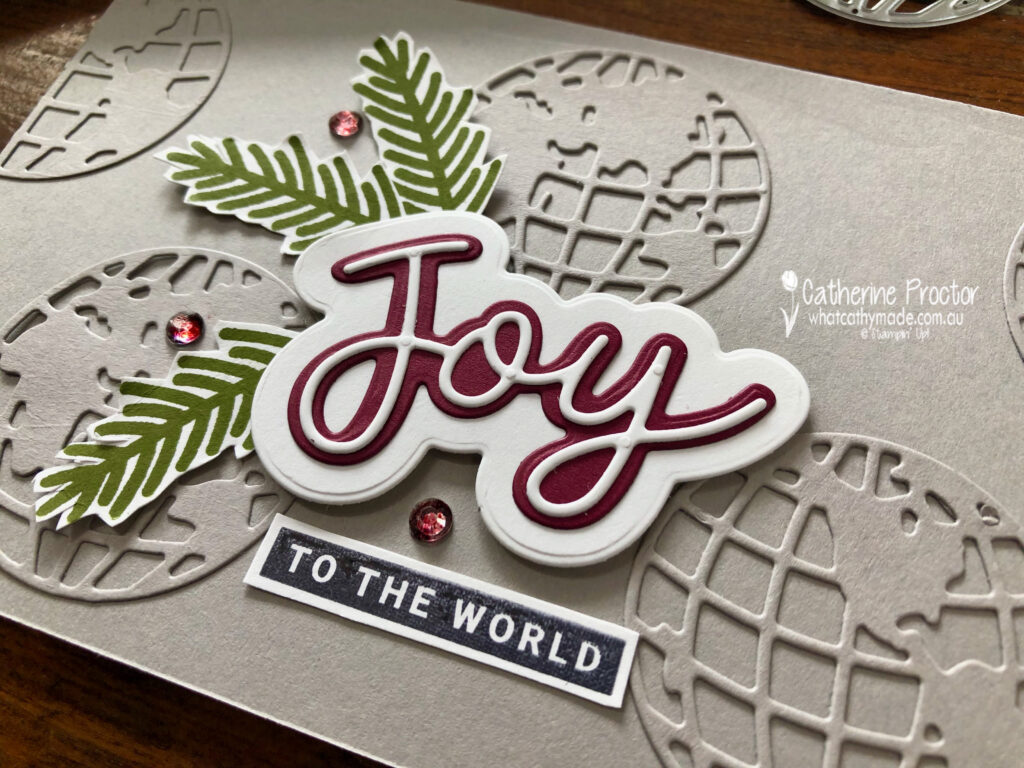
The joy sentiment uses all three joy die cuts from the Peace & Joy bundle. Adding adhesive sheet to the card stock for the thinest joy on the top layer makes it easy to adhere.
Apart from the middle layer of the joy sentiment the other touch of Merry Merlot on the card is the Rhinestone Basic Jewels which I have coloured using my Merry Merlot Stampin’ Write Marker.
The pine fronds were stamped in Mossy Meadow and fussy cut out using my paper snips.
I can’t wait to see what the rest of the Art With Heart team have created with Merry Merlot today. Click on the links below to see what they’ve made.
If you’d like me to post you your very own copy of the August–December 2020 Mini Catalogue, 2020-21 Stampin Up! Annual Catalogue, the 2020-21 Beginners Brochure, or to simply find out about more about Stampin’ Up! contact me.
In the meantime, wherever you are in the world, stay safe, stay calm…and keep on crafting xxx
Welcome to week twenty-five of our 2020-2021 Art With Heart Colour Creations Showcase. I can’t believe we are halfway through our 2020-2021 colour creations showcase!
Each week various members of our Art With Heart Colour Creations team will be bringing you weekly colour inspiration as we showcase our range of over 50 beautiful Stampin’ Up! colours in alphabetical order.
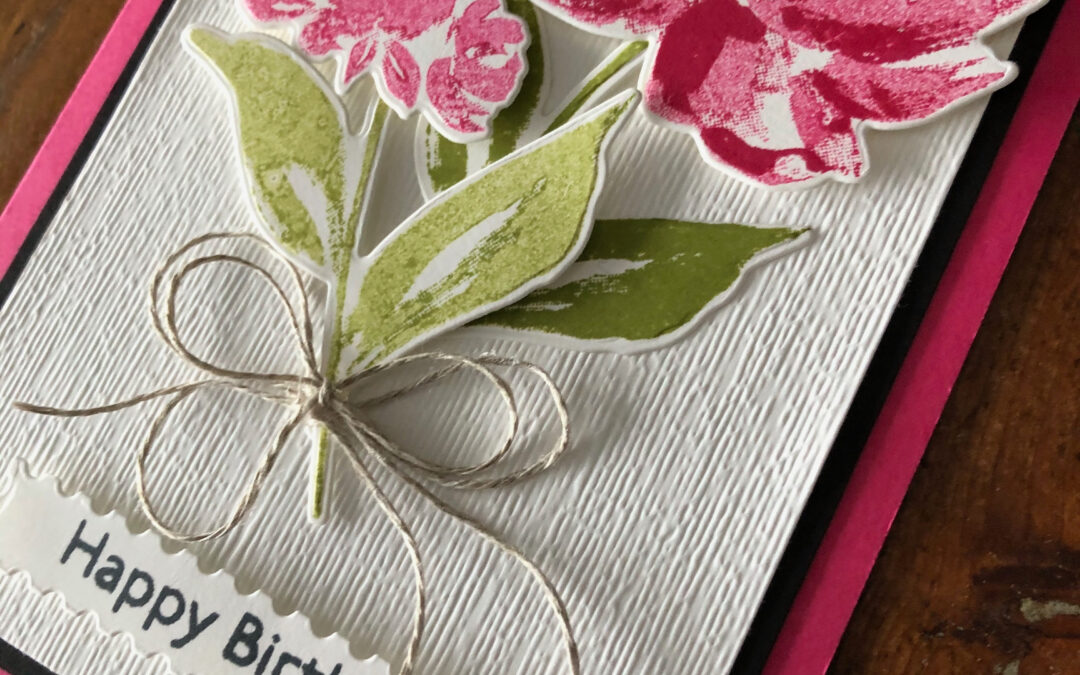
Week 25 – Melon Mambo
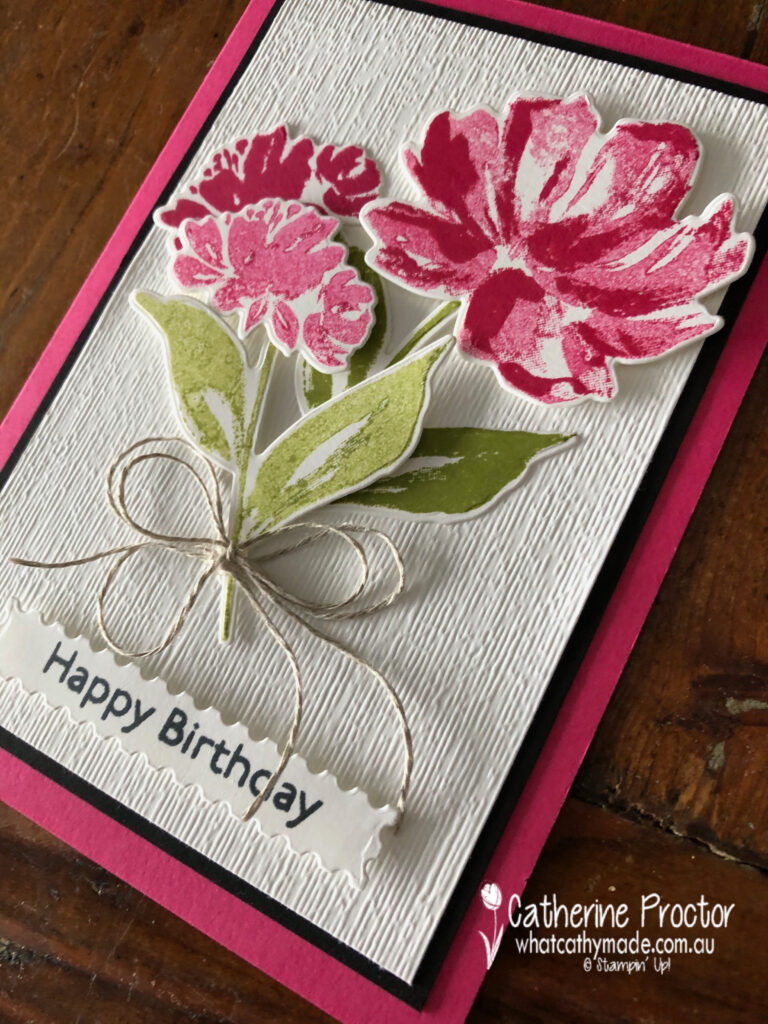
Melon Mambo is a colour I love to use for two step stamping and especially for stamping off because it is such a gorgeous pink when stamped off, without any of the orange tones of the other pinks in the Stampin’ Up! colour range.
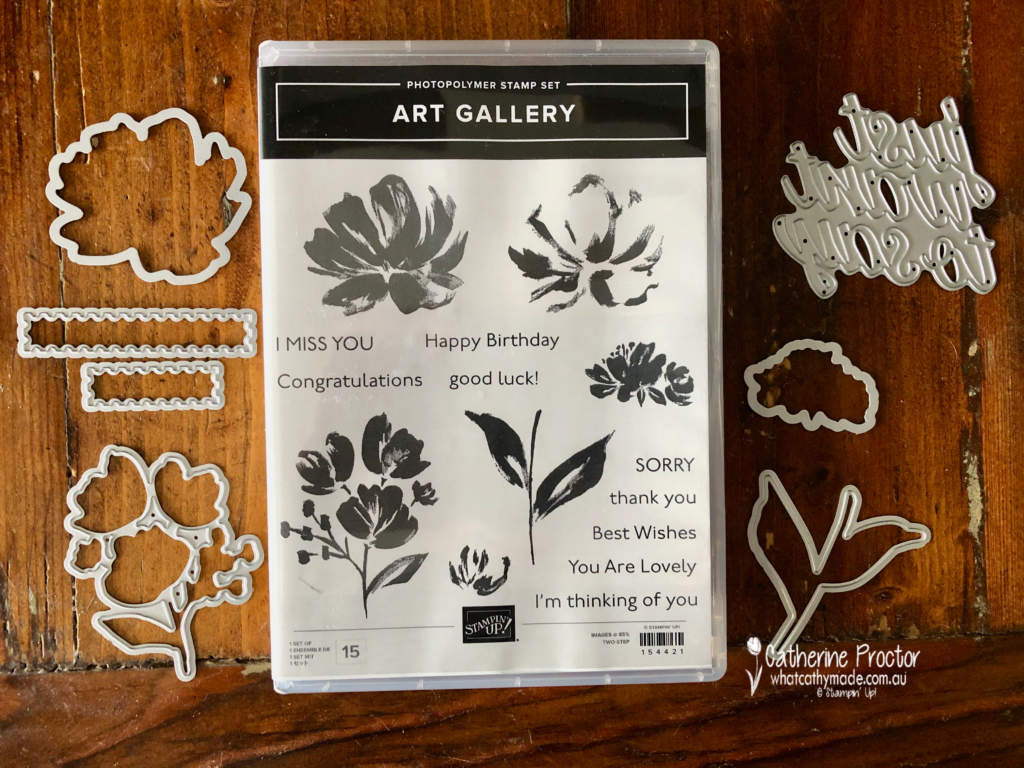
To show you just how beautiful Melon Mambo looks when stamped off I’m using a brand new stamp set with matching dies from the upcoming January – June 2020 Mini Catalogue: the Art Gallery Bundle, which consists of the Art Gallery stamp set and co-ordinating Floral Gallery Dies.
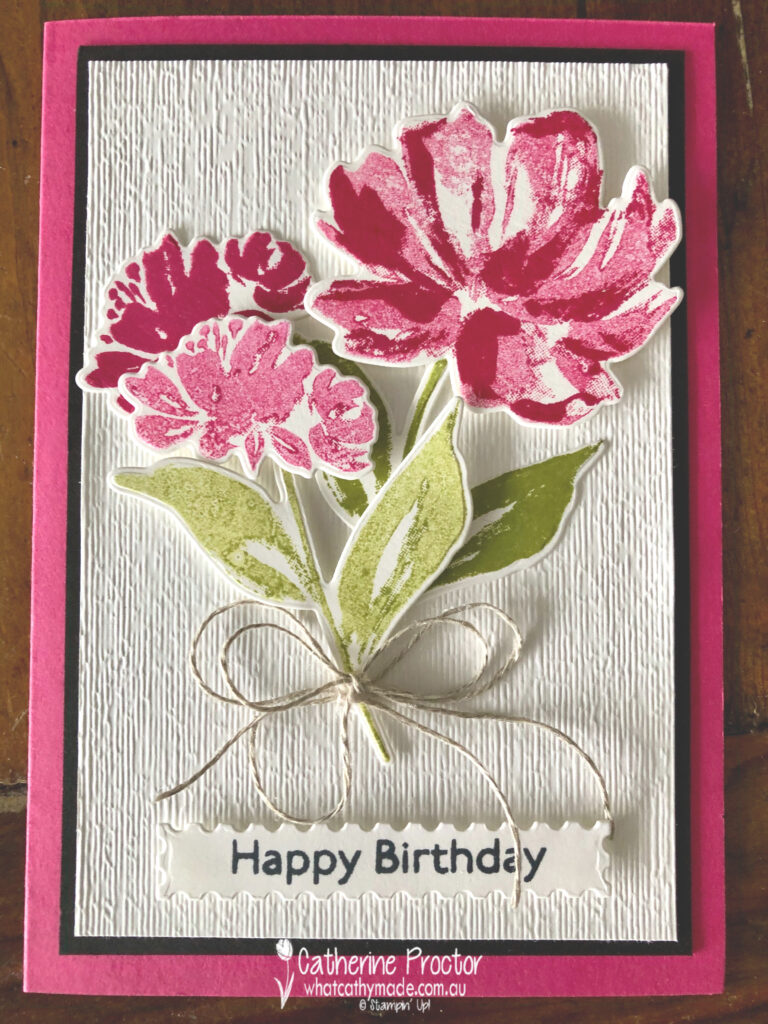
My favourite green to use with Melon Mambo is Pear Pizzaz so here’s the colour combination I’ve used for my card today.
It looks like I’ve used two different pinks on this card but I’ve actually only used Melon Mambo at full strength and stamped off once. The largest flower is two-step stamping and then I’m stamped the smaller flower twice, once at full strength and once stamped off. There is a another stamp (that I’ve used on the inside of the card) for two step stamping on this flower image as well but I wanted to show the colour of Melon Mambo stamped off very clearly.
The two stems are stamped in Pear Pizzaz, one at full strength and the other one stamped off once.
One of the things I really love about this bundle is the font and the size of the sentiments, the number of different sentiments (there are nine in total) and the two rectangular dies designed to fit all these sentiments. I’ve used “Happy Birthday” and the longer rectangle for my card today.
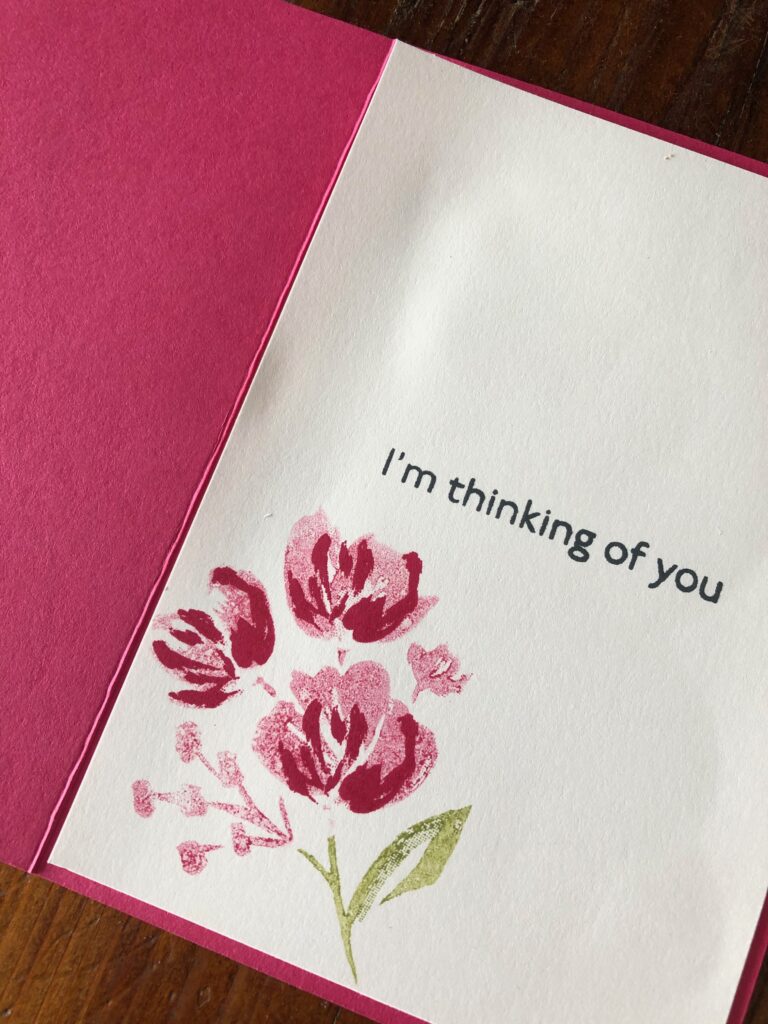
Inside my card I used another sentiment and roughly inked up another stamp from this set in both Pear Pizazz and Melon Mambo, stamping it off once before stamping inside my card. The final touch is the addition of Melon Mambo at full strength for the second part of the floral stamp, using the stamp that also works for the second step of the smaller flower on the front of the card.
I can’t wait to see what the rest of the Art With Heart team have created with Melon Mambo today. Click on the links below to see what they’ve made.
Next Tuesday we’ll be showcasing one of the Neutrals: Merry Merlot. We hope you can join us all then.
If you’d like me to post you your very own copy of the forthcoming January-June 2021 Mini Catalogue, the August – December 2020 Mini Catalogue, the 2020-21 Stampin Up! Annual Catalogue, the 2020-21 Beginners Brochure, or to simply find out about more about Stampin’ Up! contact me.
In the meantime, wherever you are in the world, stay safe, stay calm…and keep on crafting xxx
Welcome to the Heart of Christmas 2020 where the Art with Heart team share their Christmas inspiration with you on the third Monday of each month.
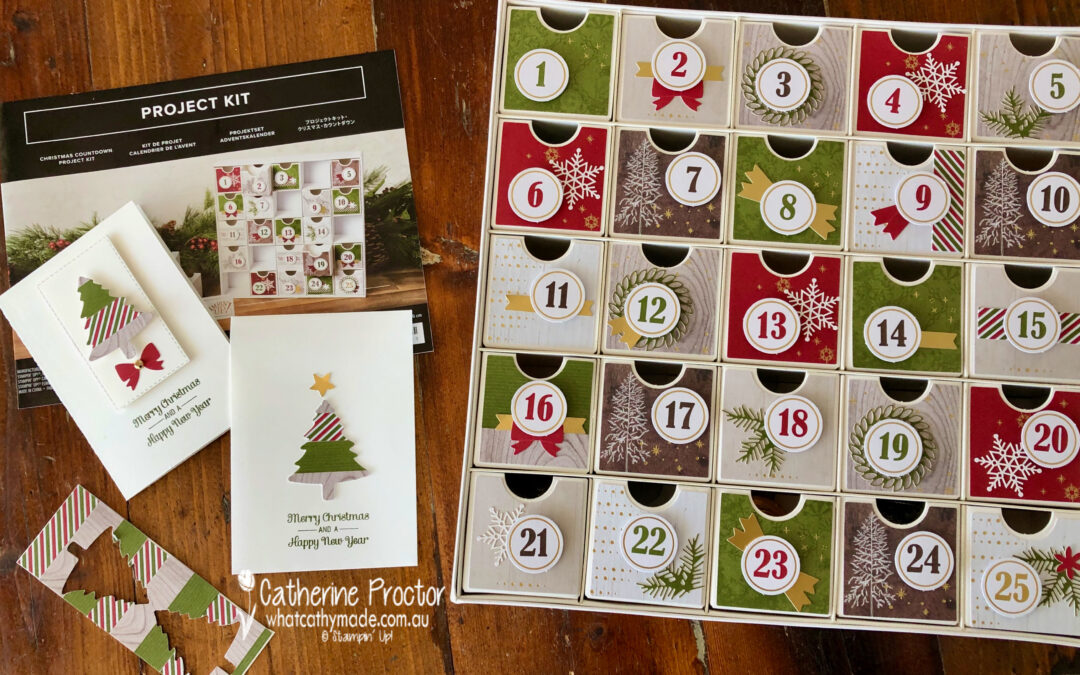
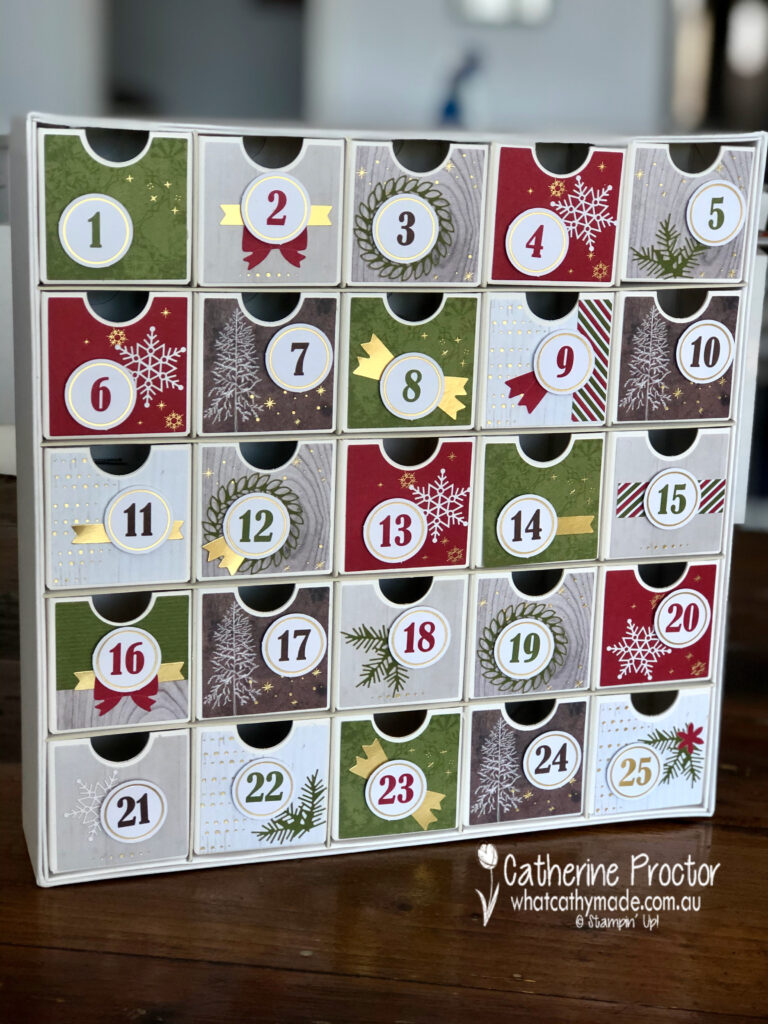
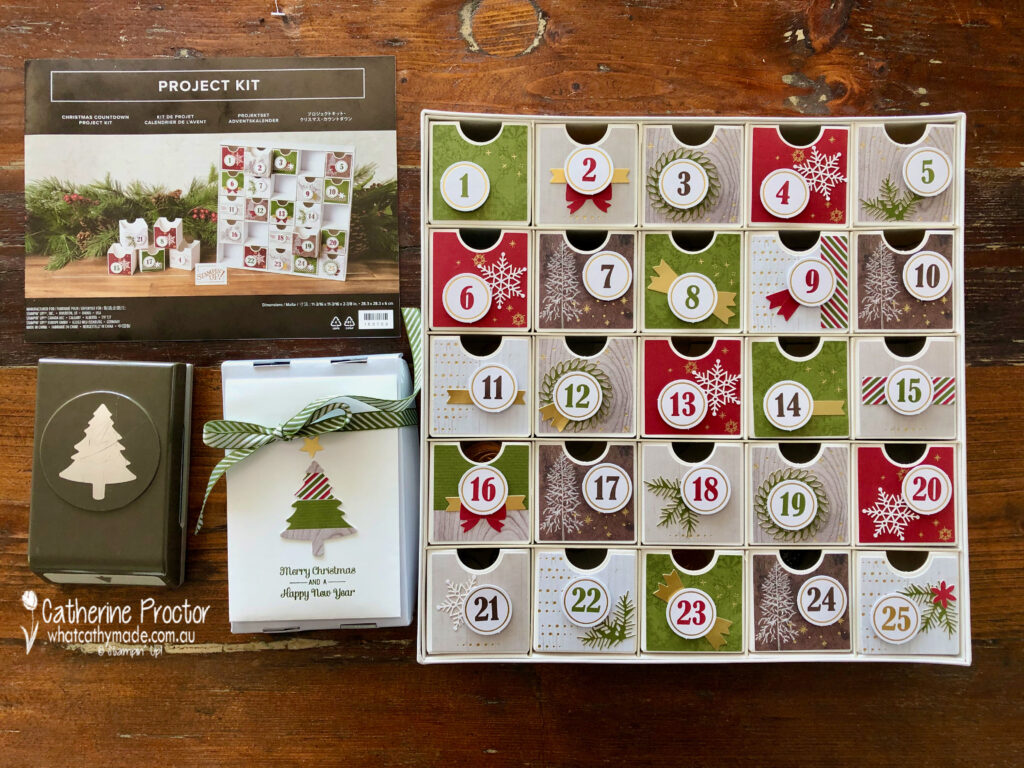
Today I’m sharing with you an advent calendar that I made for my 4 year old niece – it is the Christmas Countdown kit. Advent calendars are a tradition in our family, in fact last year my boys turned 18 and 21 and it was the first Christmas they didn’t have an advent calendar!
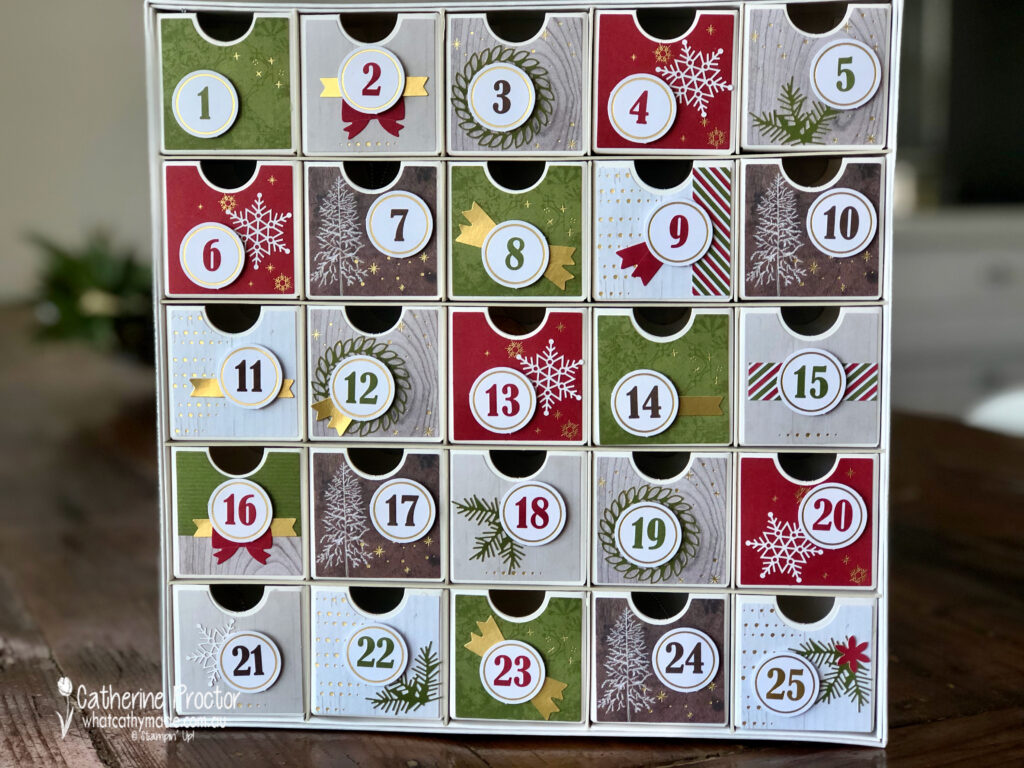
This advent calendar was so easy to make using the Christmas Countdown kit. All I needed was some adhesive because the kit includes the paper for the front of the drawers, the numbers and stickers to personalise each drawer.
The big decision with a refillable advent calendar is what to put inside the drawers. My boys would receive a gold coin and a chocolate coin each day. On Christmas Eve we would go shopping and they would use half their coins to buy a gift for their brother and then we would visit a local street renowned for their Christmas lights where my boys would donate the rest of their coins to a charity.
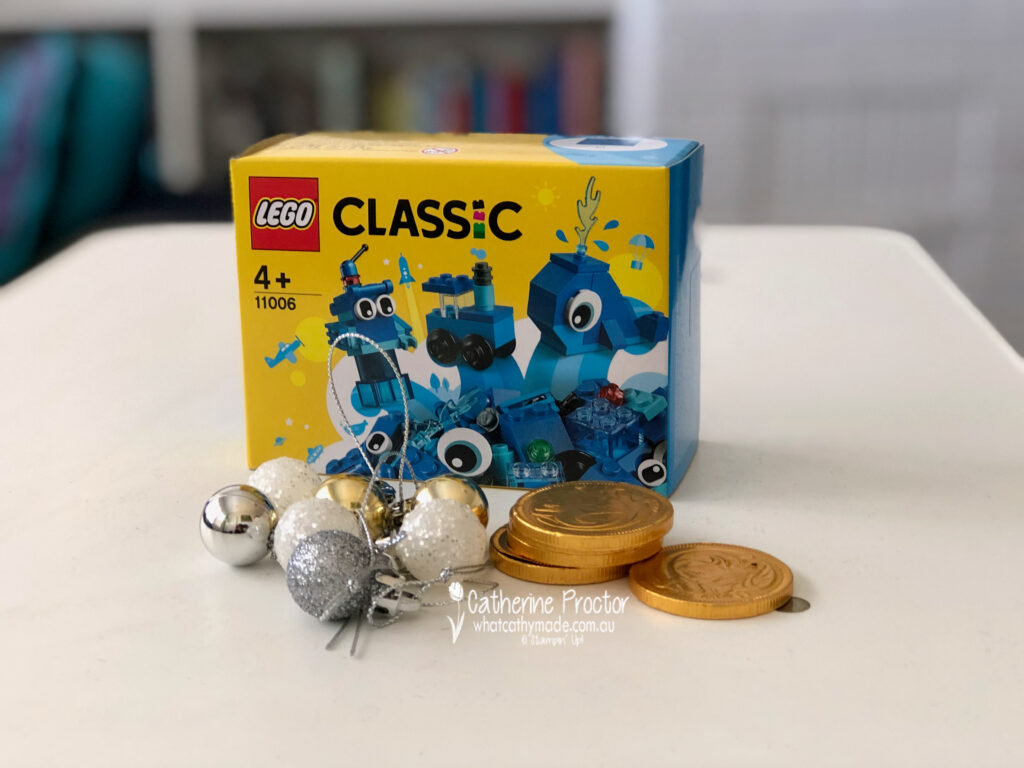
For my niece I’ve mixed things up a bit. She is just getting into LEGO so I bought a little LEGO set for her and split the pieces between 1/3 of the drawers, filling the other drawers with baubles to hang on her Christmas tree and of course some chocolate coins!
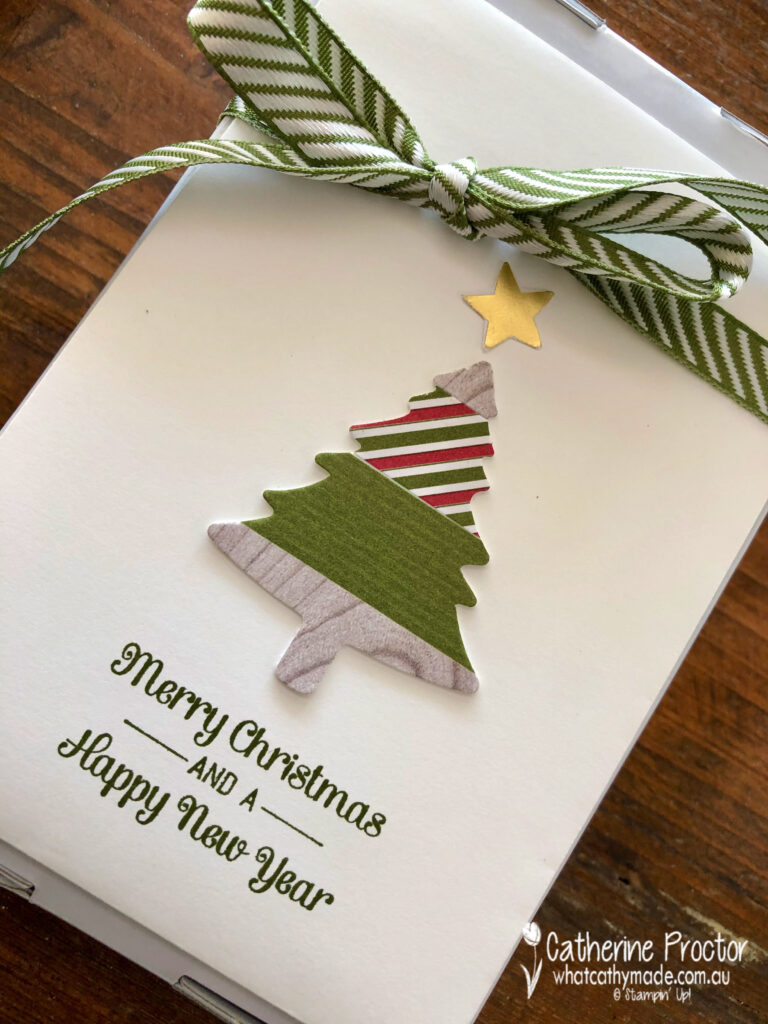
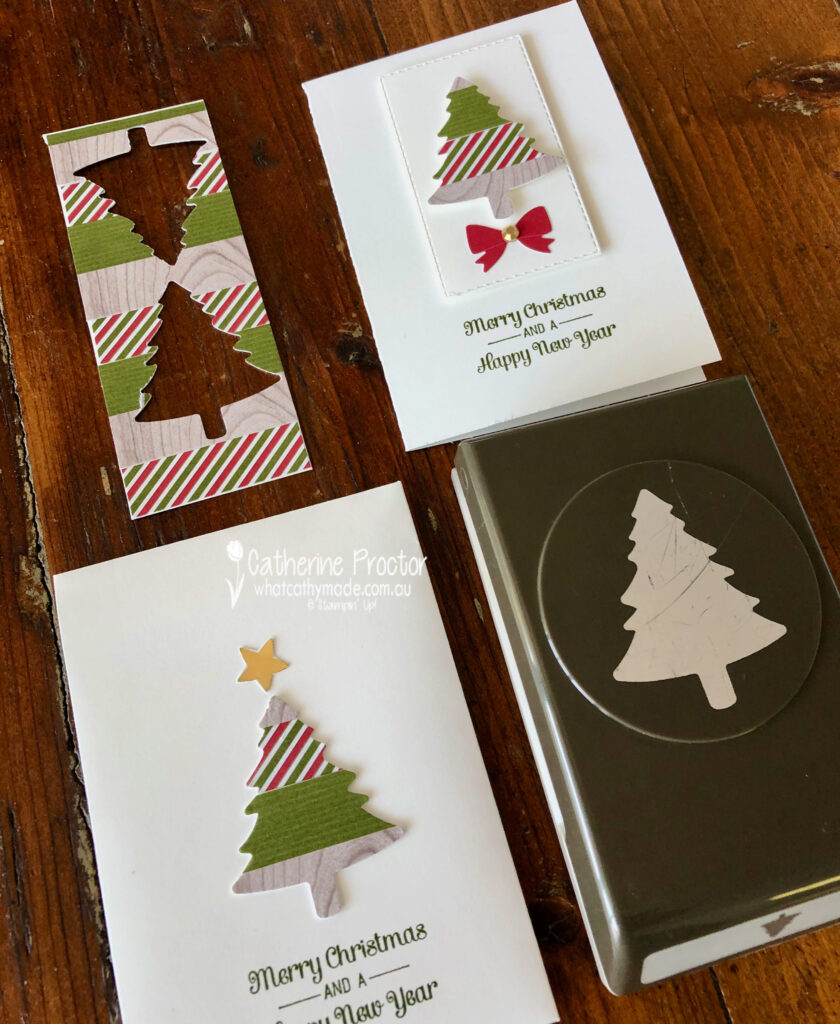
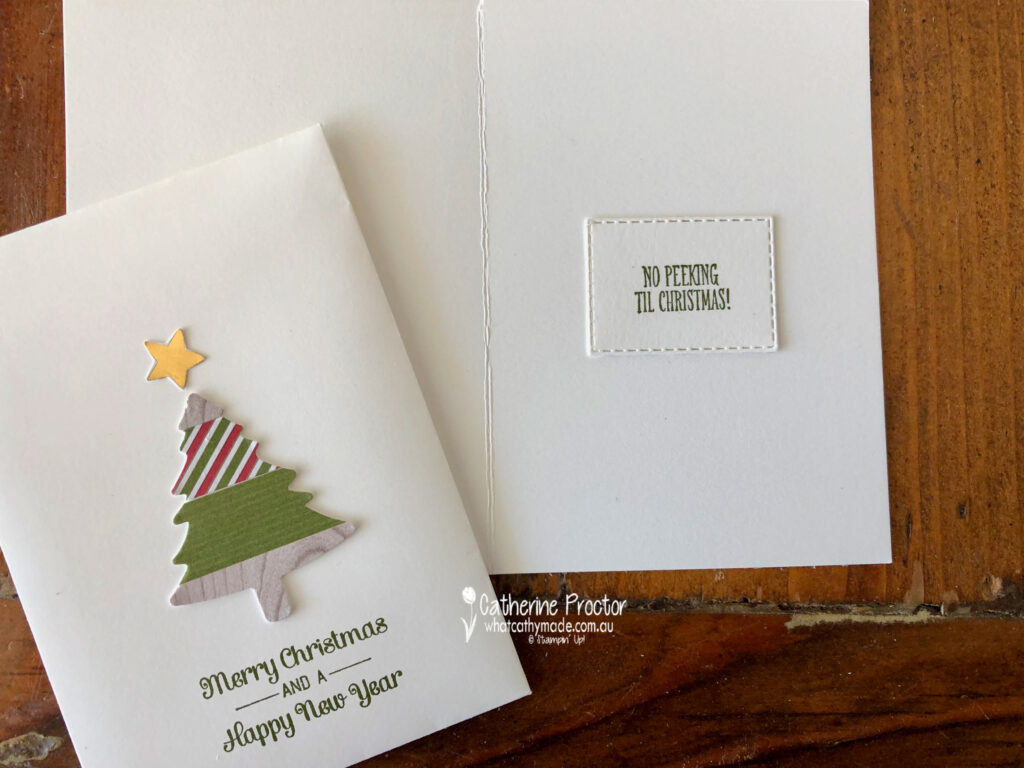
As this will be my niece’s first ever advent calendar and I won’t be there to explain the concept to her I made a matching card and envelope to go with the calendar. I used the left over stickers and paper drawer fronts to decorate my card and envelope.
The tree for the envelope and the card is made by adhering the stickers and paper to some card stock and then punching it out with the tree punch. I’ve also punched out the star from the die cuts included in the kit and used a red bow sticker, also included in the kit.
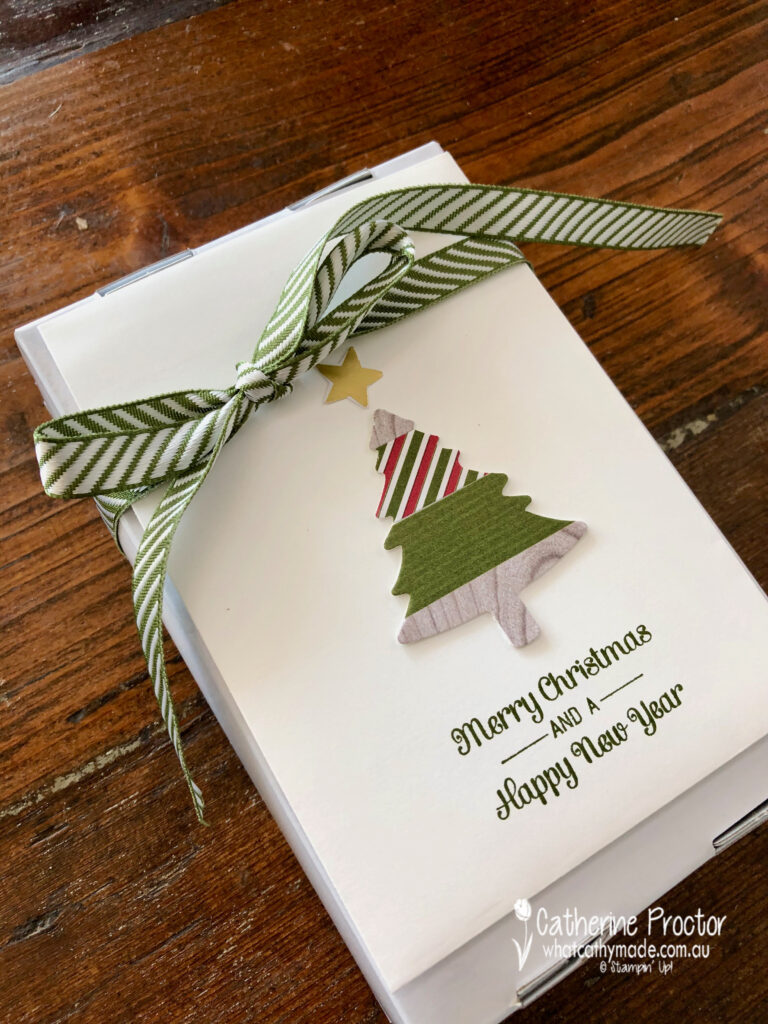
I don’t want my niece to lose her tiny LEGO pieces so I cut out the front of the LEGO box and stuck it to a mini Paper Pumpkin box. Inside the box I put the LEGO instructions and a ziplock bag to keep everything safe.
Here’s the inside of the card – the “no peeking” sentiment comes from the Itty bitty Christmas stamp set, as does the sentiment on the front of the card.
Once I’d written inside the card and explained the concept of an advent calendar to my niece, I placed the card on top of the mini Paper Pumpkin box and tied them together with the Mossy Meadow diagonal striped ribbon.
I’m so excited to be carrying on this Christmas tradition in our family with this beautiful Christmas advent calendar.
The lovely Judy May is hosting our Heart of Christmas showcase this year. To see the other Christmas creations go back to Judy’s post.
If you’d like me to post you your very own copy of the August – December Mini catalogue (AKA the Holiday Catalogue), the 2020-21 Stampin Up! Annual Catalogue, the 2020-21 Beginners Brochure, or to simply find out about more about Stampin’ Up! contact me.
In the meantime, wherever you are in the world, stay safe, stay calm…and keep on crafting xxx
Click on the photos below to purchase the items to make this Advent Calendar and matching card.
Welcome to the Monthly Art With Heart Creative Showcase. Tonight we’re sharing some ideas for cards that only use five supplies or less – a challenge for many avid crafters.
Luckily we all agreed that paper trimmers, paper snips, acrylic blocks and adhesives were core supplies assumed to be already on hand, which meant we could chose five more supplies in addition to these basics.
Although technically you could argue that an all inclusive card kit could be counted as one supply I did feel that would be cheating for the purposes of this challenge, so after much deliberation I settled on the following five supplies:
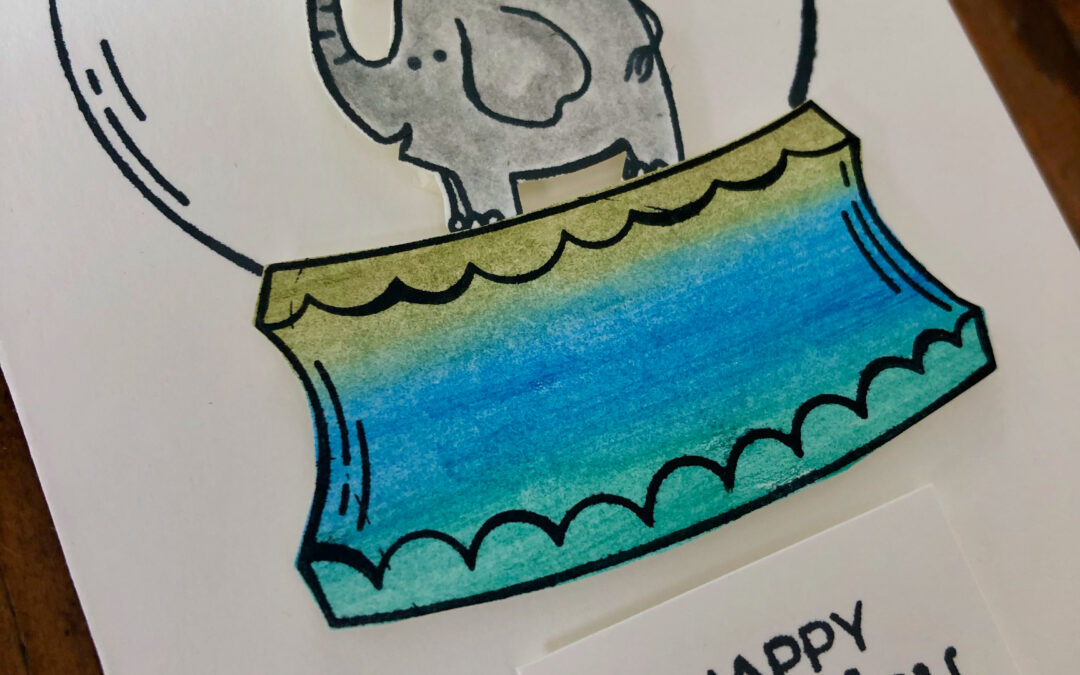
Zoo Globe Stamp Set – this set is perfect for colouring and has both sentiments and images
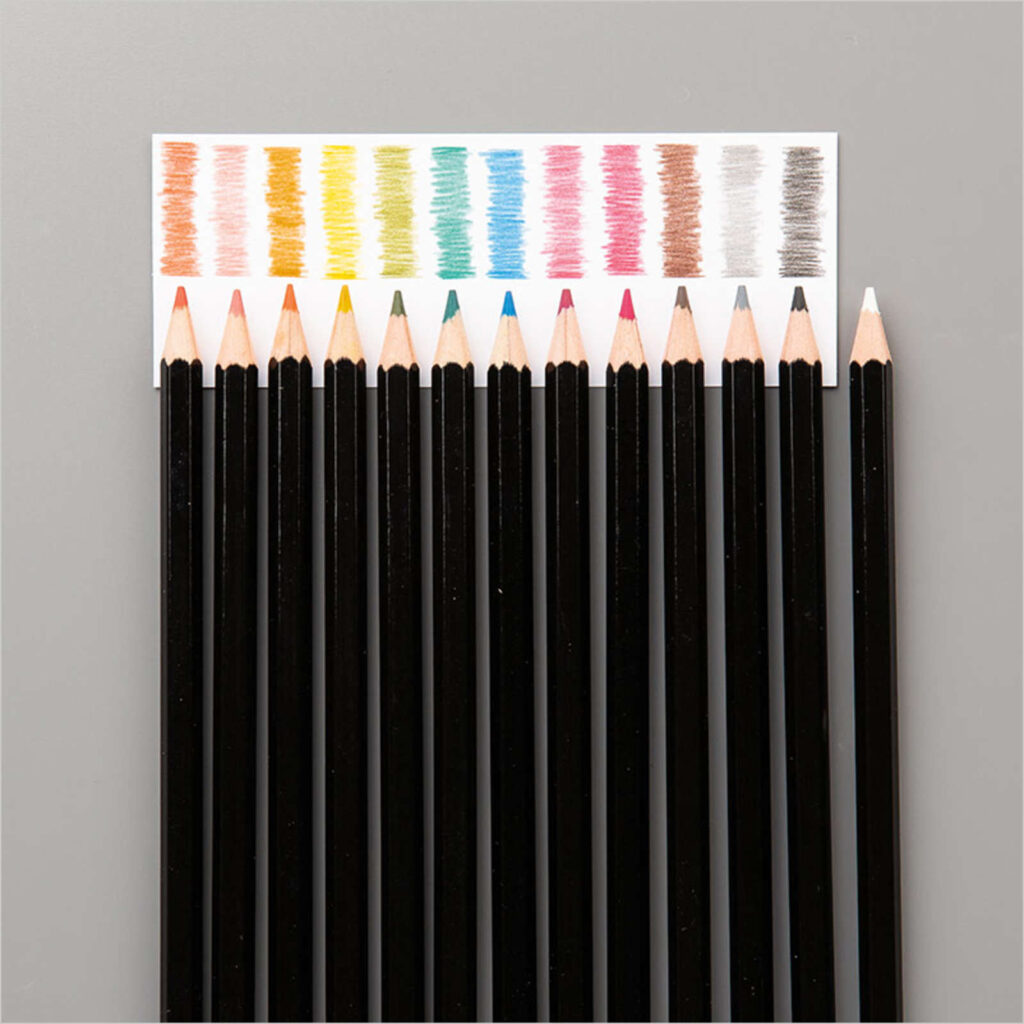
Watercolour Pencils – an affordable and easy way to get a wide range of Stampin’ up! colours
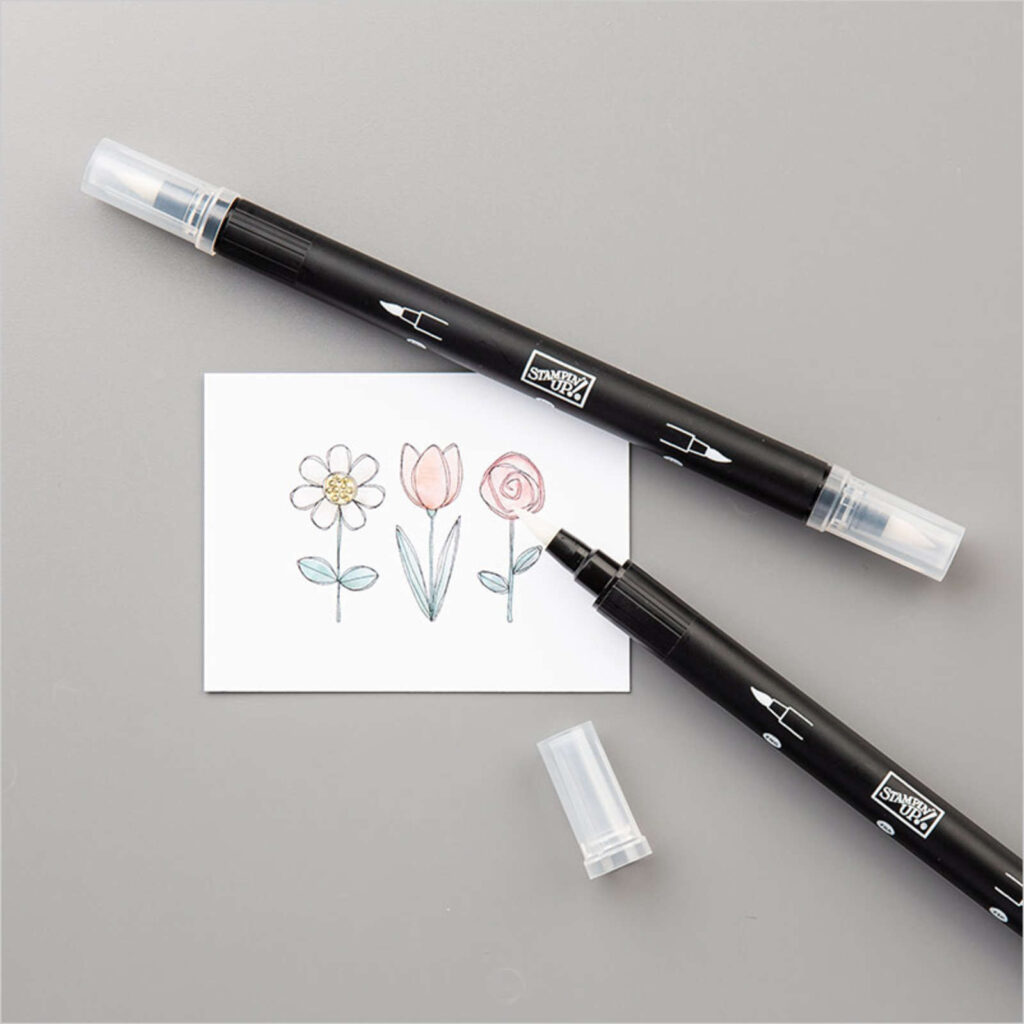
Blender Pen – brings watercolours to life and not as wet or messy on the card stock as water painters
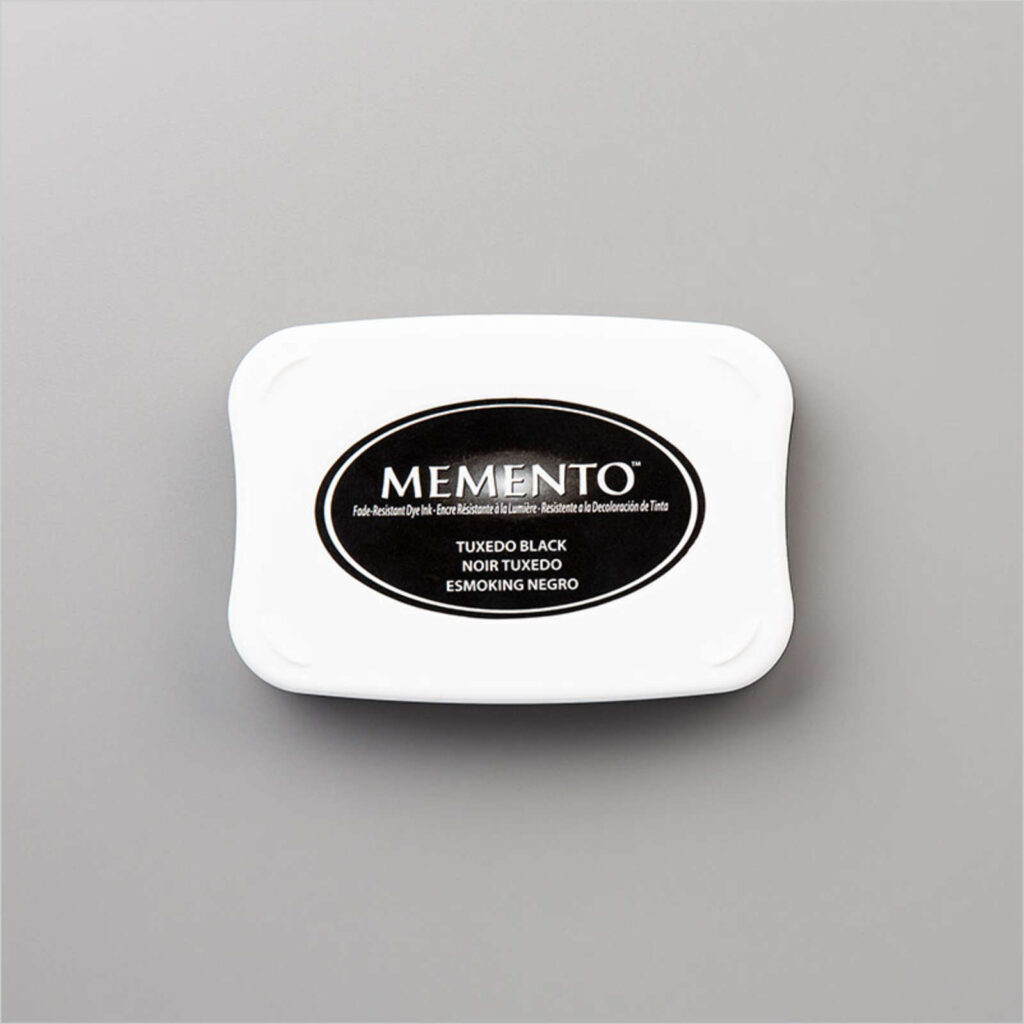
Memento Stamp Pad – versatile black stamp pad for images and sentiments
Whisper White card Stock – an essential and versatile basic for both making the card base and stamping the card layer
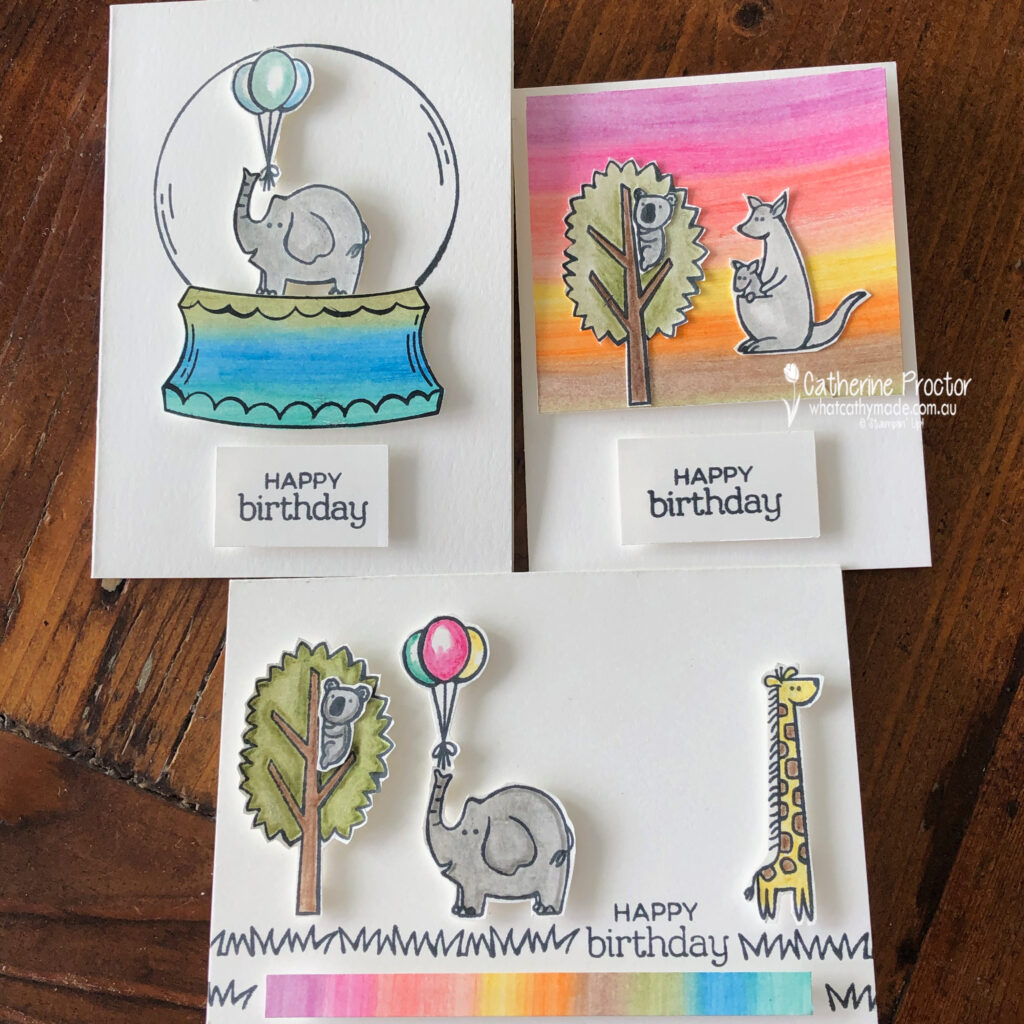
I had so much fun playing with the zoo globe stamp set I ended up making three cards to share with you several different techniques you can try even if you only have limited supplies.
TECHNIQUES 1 AND 2: CREATING YOUR OWN DSP AND BLENDING WATERCOLOUR PENCILS WITH BLENDER PENS
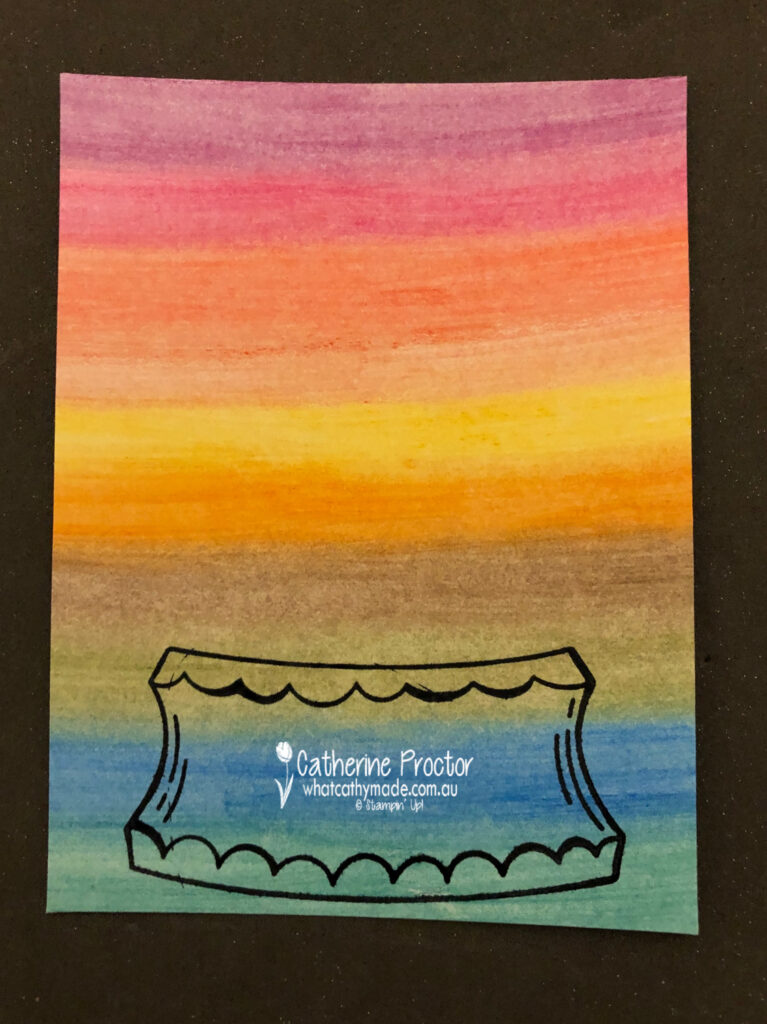
All three of my cards today begin with a piece of home made rainbow DSP. I created my rainbow DSP by simply using my watercolour pencils to scribble on my card stock in rainbow order. I could have also created a homemade patterned DSP by stamped images onto the card stock and either coloured them in or left it as black and white but this was much faster.
To blend the colours together I simply coloured over the top of my pencil marks with my blender pen – it’s amazing to watch the pencil lines smooth out with the blender pen. Once I’d finished I rubbed the nip of my blender pen onto some scrap paper until it ran clear. It doesn’t matter if your nib is stained – it’s now ready to use again with any colour.
The photo below shows my homemade DSP with the globe base stamp already stamped onto it, which leads to my next techniques….
TECHNIQUES 3 AND 4 : PAPER PIECING AND FUSSY CUTTING
Once you’ve created your own DSP you can use it in a variety of ways. For card one I’ve stamped the base of the globe onto it before fussy cutting this piece out with my paper snips.
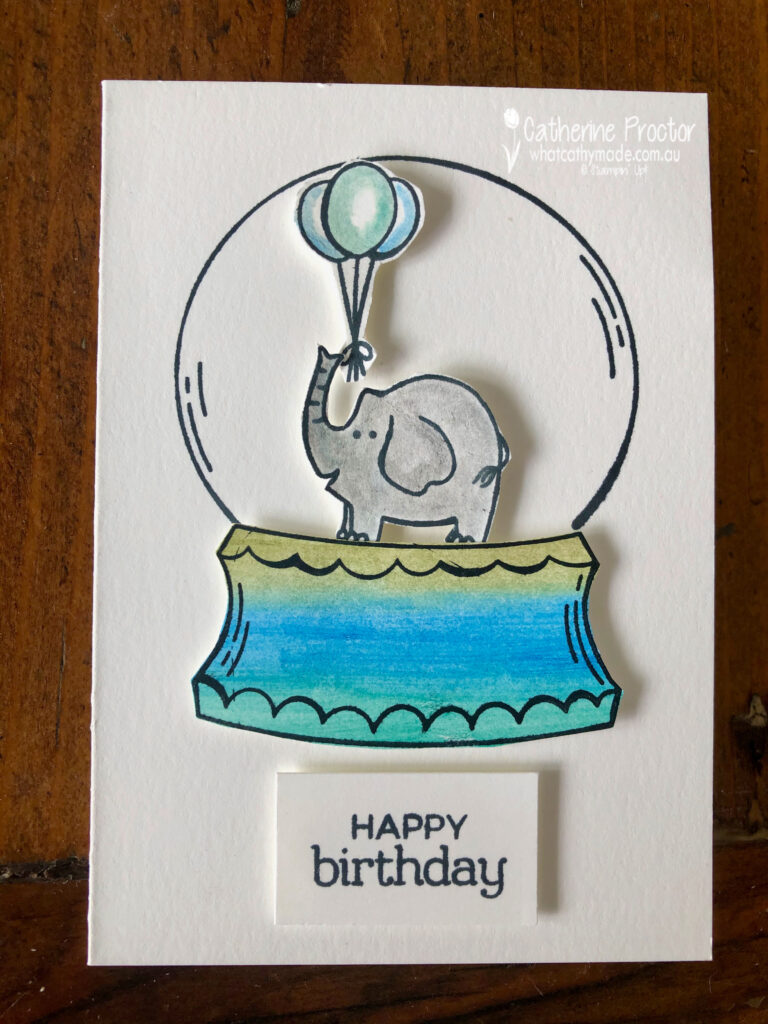
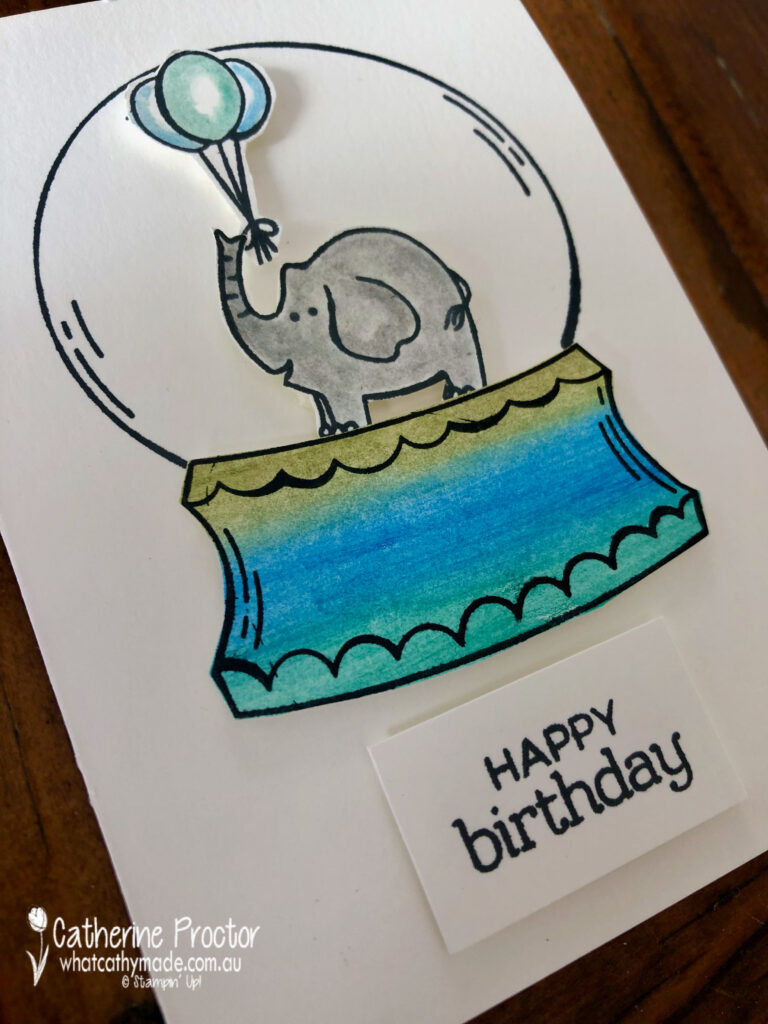
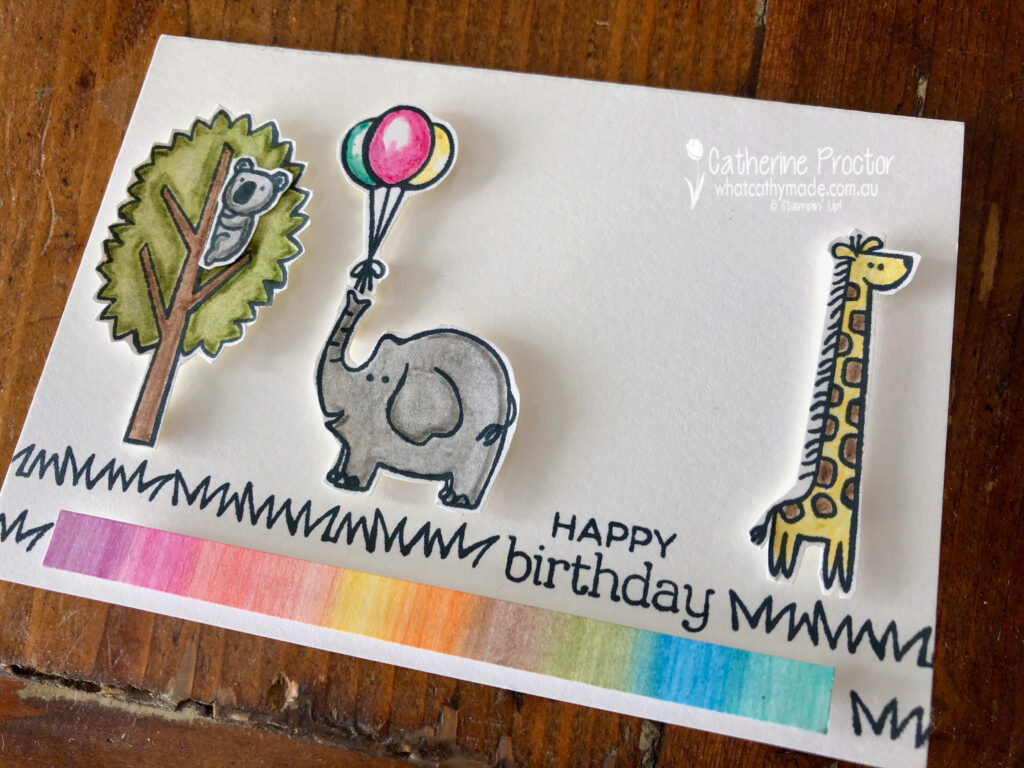
The dome of the globe was stamped directly onto my card base but the balloons, elephant and base of the globe were all coloured in with watercolour pencils and then blended with the blender pen before being fussy cut out and adhered to the card using Stampin’ Dimensionals.
Leaving a white space in the middle of the balloons gives them a real dimension.
The “happy birthday” sentiment was stamped onto scrap piece of Whisper White card stock before being trimmed to size with the paper trimmer and adhered using Stampin’ Dimensionals.
TECHNIQUES 5 AND 6: CREATING A BORDER WITH STAMPS AND THE BLENDER PEN DIRECT TO PENCIL COLOURING TECHNIQUE
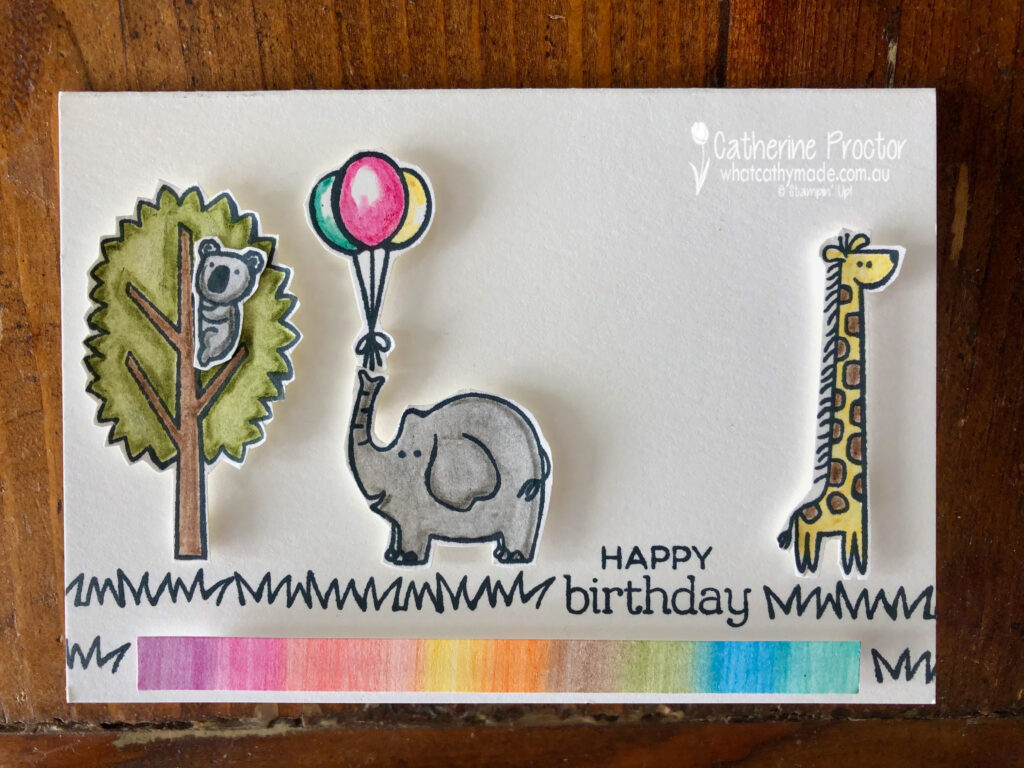
For my second card I used a rainbow strip of my homemade DSP and the grass stamp to create a double border for the base of my card.
This time, when colouring my animals I first applied the nib of my marker to the tip of the pencil, lifting the colour off the pencil with my blender pen and then colouring the images with my blender pen.
You can also use your blender pen in this way to lift ink from the lid of your ink pad or ink from an acrylic block – it means your clear blender pen can be used to colour in any coloured pencil or ink that you have.
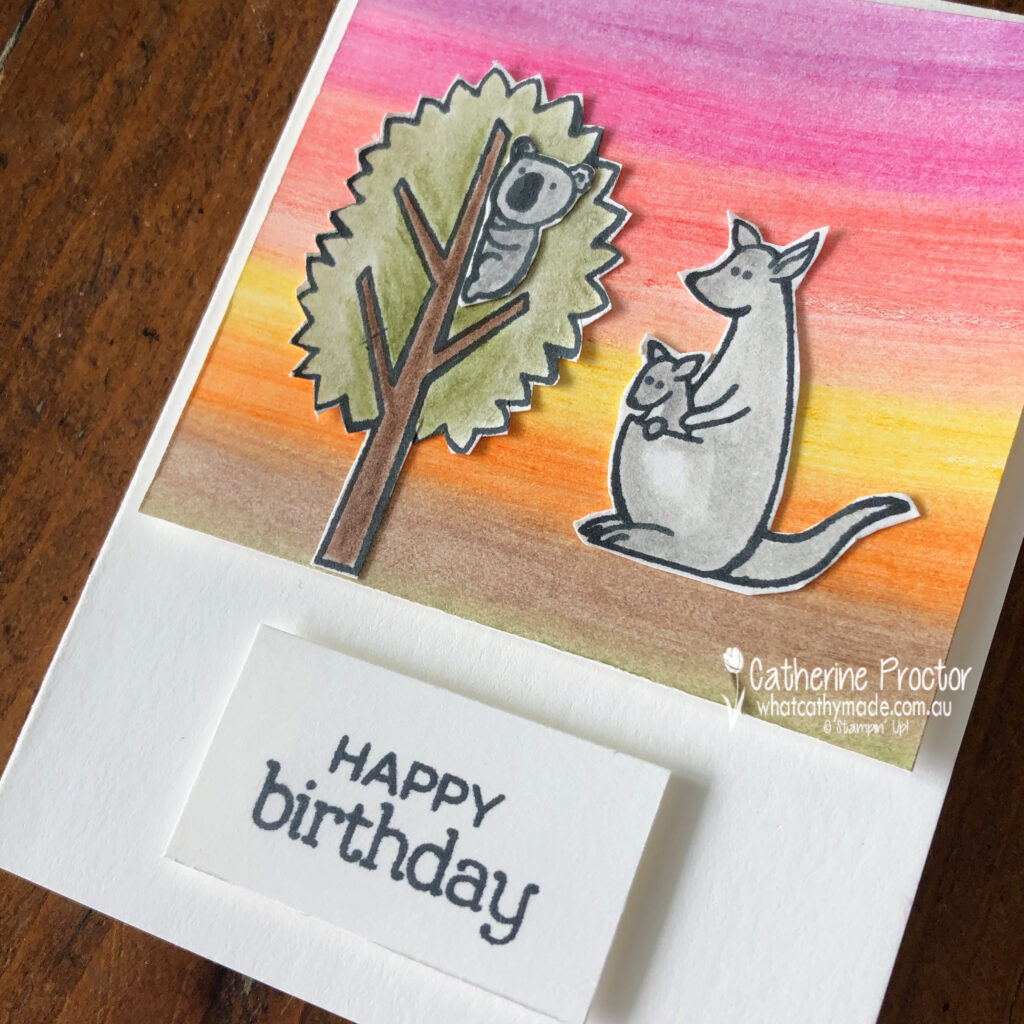
TECHNIQUE 7: USING HOMEMADE DSP AS BACKGROUND LAYER
I hadn’t originally intended to make a third card but the colours on my remaining section of homemade DSP reminded me of the Australian outback…and I hadn’t used the adorable kangaroo and joey stamp yet!
This time I glued both of the stamped, water coloured and fussy cut images directly onto my home made DSP and added dimension behind the DSP by using Stampin’ Dimensionals to adhere it to the card base.
So what do you think of my 5 ingredient cards?
Simple cards made with few supplies can be really effective…especially if you have a few techniques and tricks up your sleeve that enable you to maximise whatever supplies you have on hand.
To see more Designer Series Paper inspiration from the AWH Team head back to Rachel‘s page as she is hosting our monthly blog hops.
To purchase any of the products I’ve used in my cards tonight simply click on the phots of the products below.
If you’d like me to post you your very own copy of the forthcoming January-June 2021 Mini Catalogue, the August – December 2020 Mini Catalogue, the 2020-21 Stampin Up! Annual Catalogue, the 2020-21 Beginners Brochure, or to simply find out about more about Stampin’ Up! contact me.
Welcome to week twenty-four of our 2020-2021 Art With Heart Colour Creations Showcase.
Each week various members of our Art With Heart Colour Creations team will be bringing you weekly colour inspiration as we showcase our range of over 50 beautiful Stampin’ Up! colours in alphabetical order.
Week 24 – Mango Melody
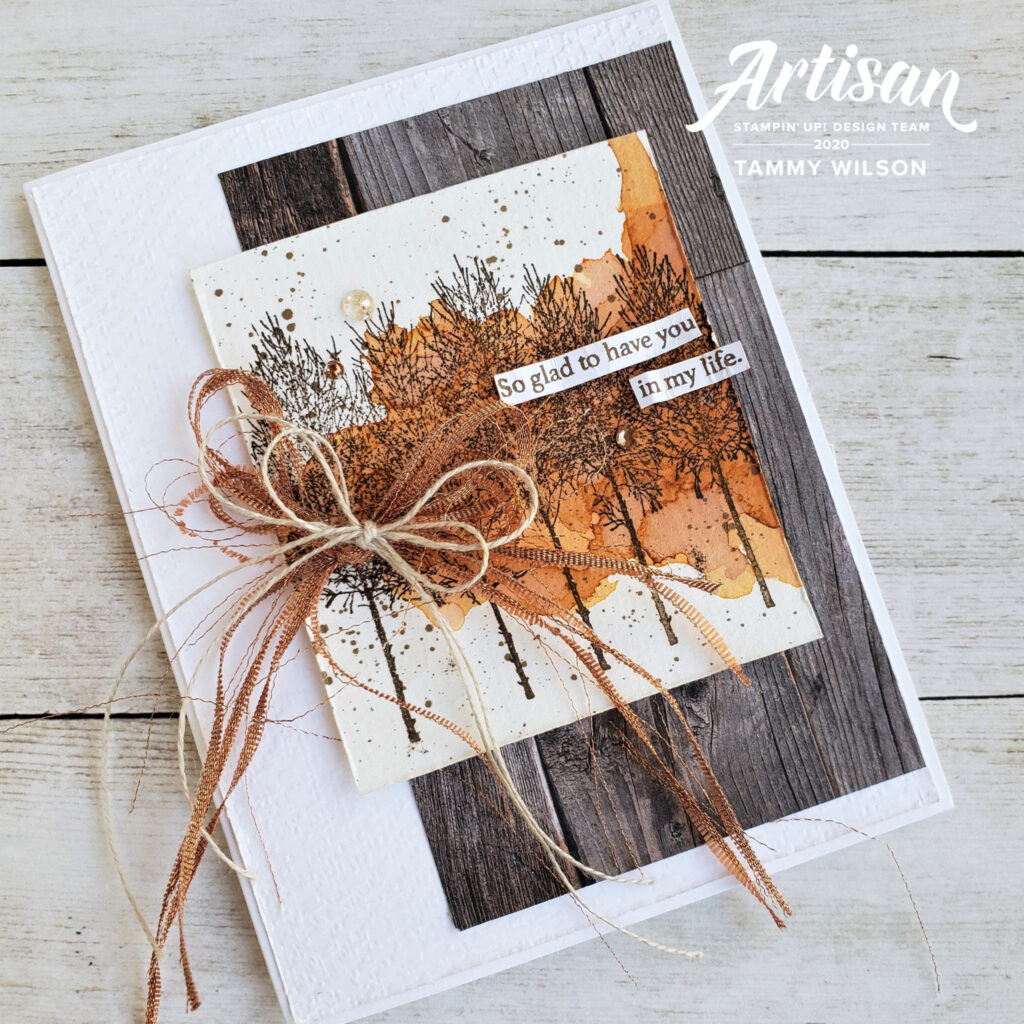
When I saw this beautiful card on Pinterest – created by Tammy Wilson, a USA Stampin’ Up! demonstrator and member of the Artisan Design Team – it instantly evoked a very special memory for me.
In 2018 I visited New York, Indianapolis and Hawaii with my husband and two sons – it was our first big holiday as a family and the first time all four of us went overseas together. We went to celebrate my 50th birthday and more importantly to finally meet and thank my amazing bone marrow donor Ben and his wife Christy.
This incredible trip was one of the happiest times of my life and now with COVID I’m forever grateful we were able to enjoy this special trip together.
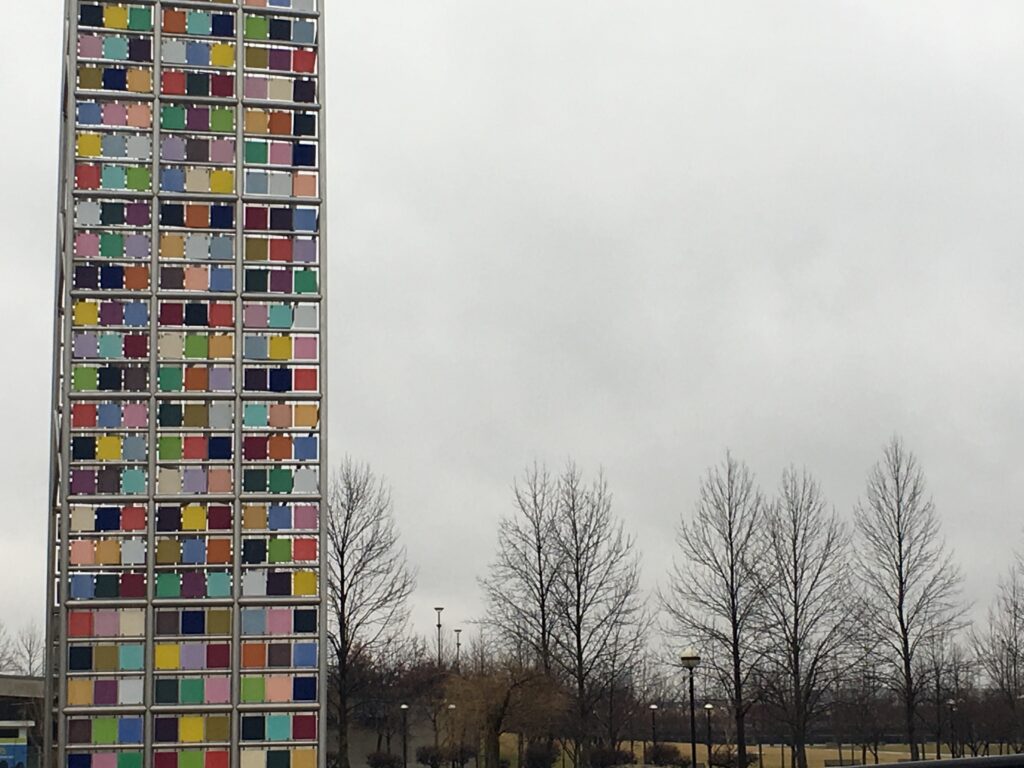
Tammy’s card immediately reminded me of the stunning trees in Central Park, New York and Indianapolis – the soft colour of the sky and the shape of the tree branches is totally different to we have here in Australia. Here’s a few photos I took of this soft winter sky with the silhouettes of the winter trees.
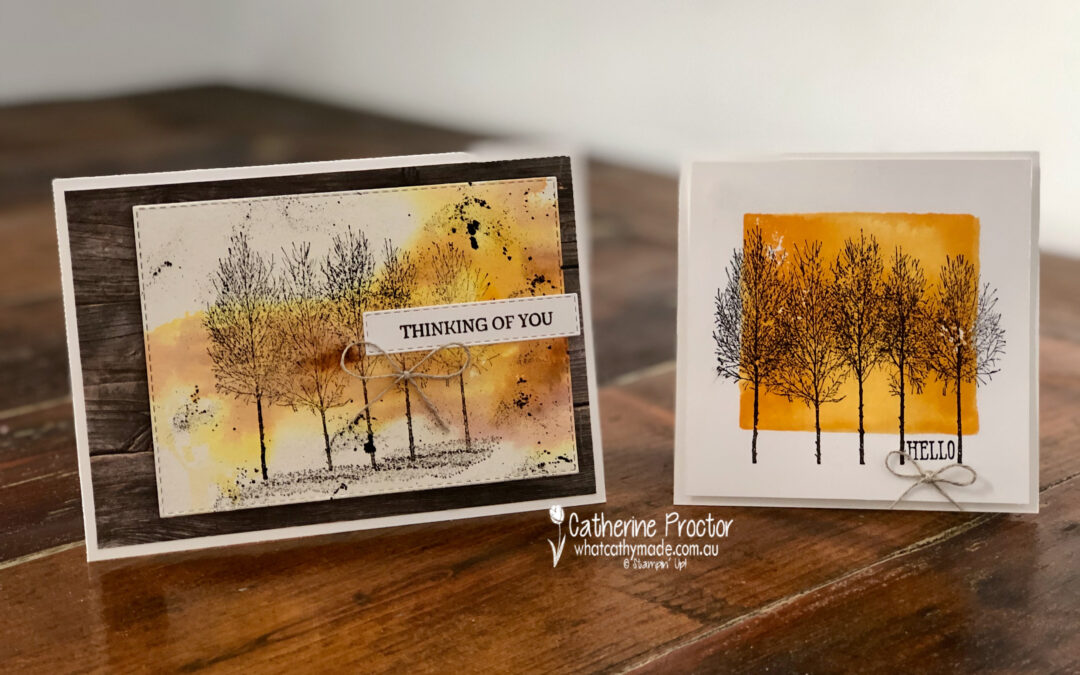
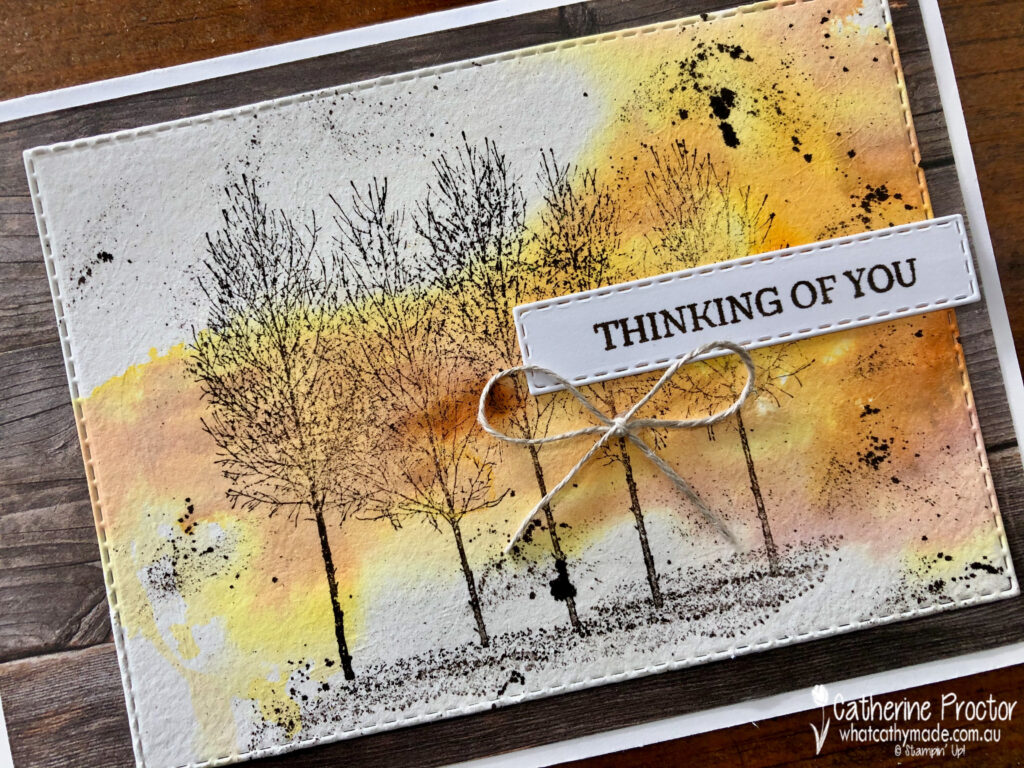
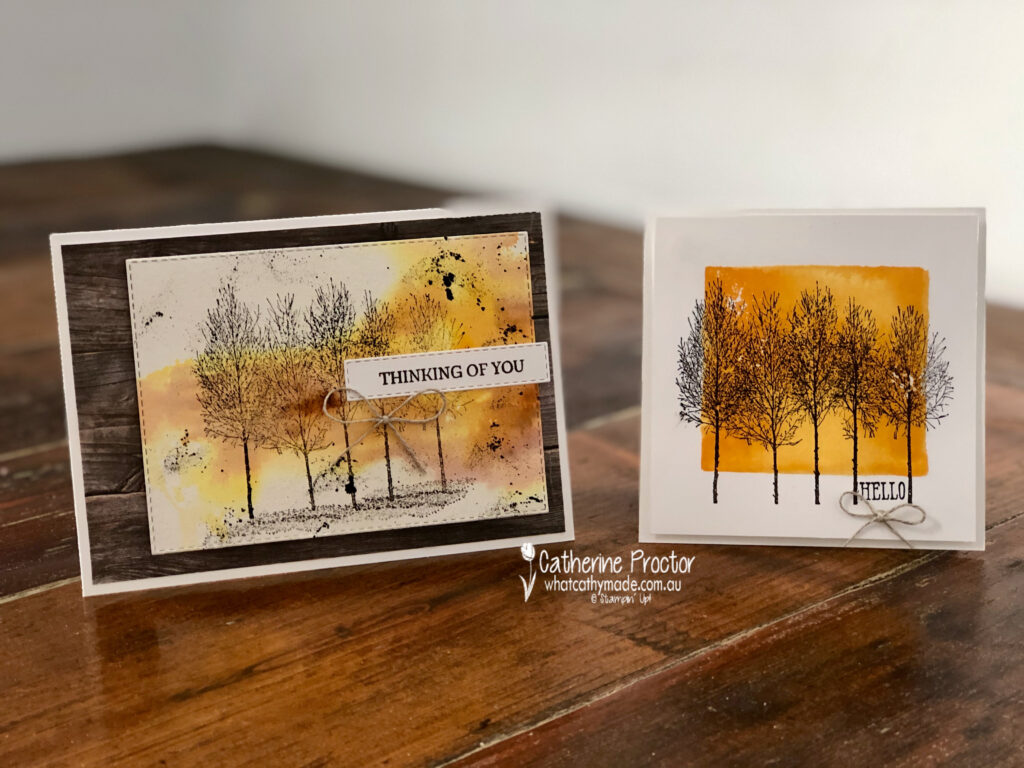
My first card today is a much simpler version of Tammy’s card and it uses slightly different colours. I love these shades of orange and brown together: Mango Melody, Cinnamon Cider, Early Espresso and Whisper White.
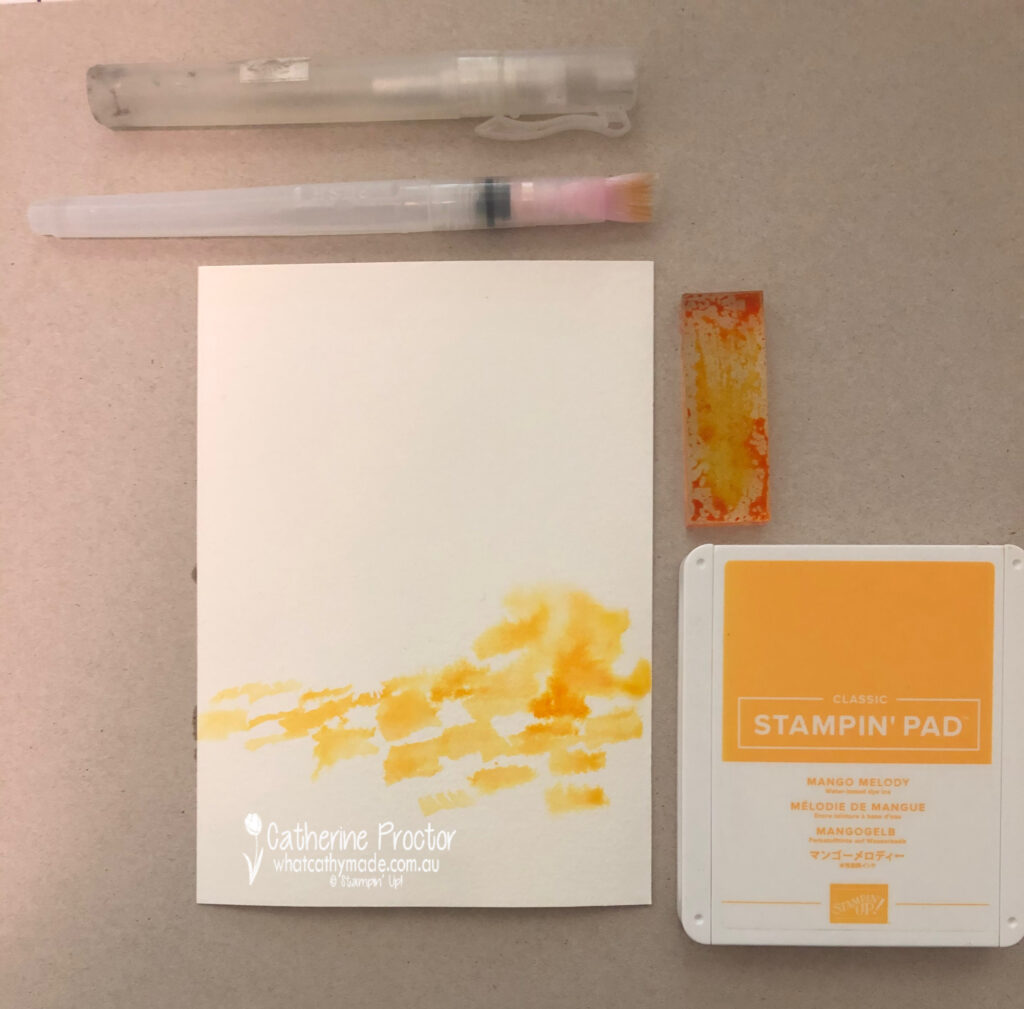
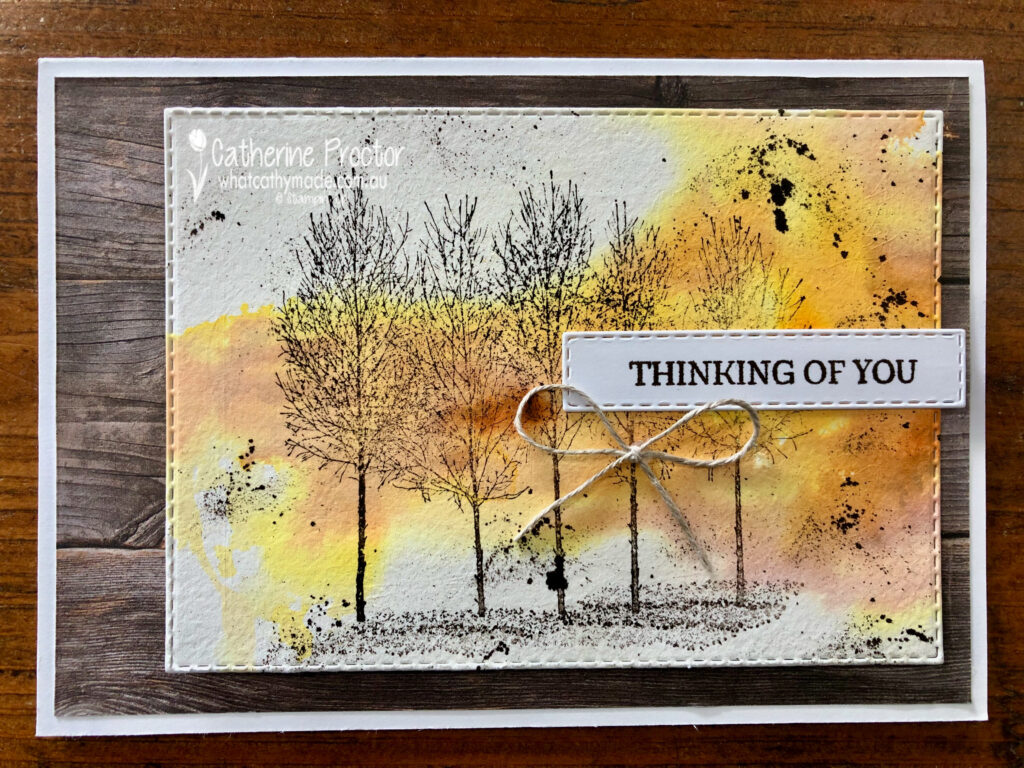
To create my background I’ve used a really fun watercolour technique that creates a different look every time.
Spritz a sheet of Fluid 100 Watercolour paper several times with your Stampin’ Spritzer
Tap an acrylic block onto Mango Melody ink pad to cover the surface of the block with the ink
Use your widest water painter to lift Mango Melody ink off your acrylic block and paint it onto the Fluid 100 Watercolour paper
Tap another acrylic block, this time onto your Cinnamon Cider ink pad and then use your widest water painter to paint some Cinnamon Cider ink onto your Fluid 100 Watercolour paper
Spritz the paper again with your Stampin’ Spritzer (watch the inks merge together at the edges) and then dry the ink using your heat tool
Stamp the largest tree stamp in Early Espresso ink, and then stamp the “shadows” stamp in Early Espresso ink underneath the group of trees
Flick the thick end of your Early Espresso Stampin’ Write marker with your finger to create splatters all over the card
My sentiment is also from the Winter Woods stamp set – I used my Early Espresso marker to colour just the “thinking of you” section of the sentiment before stamping and then die cutting the sentiment out with stitched rectangle die to match the larger stitched rectangle die I used to cut the water coloured layer.
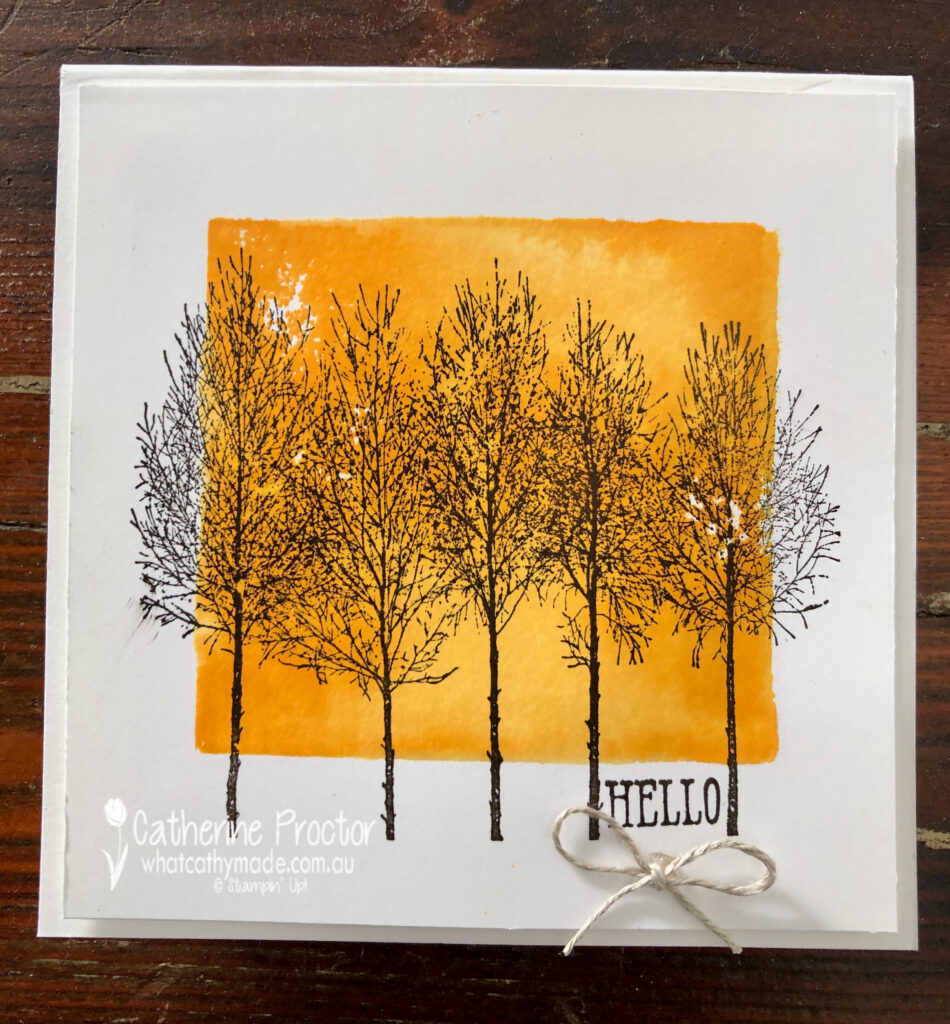
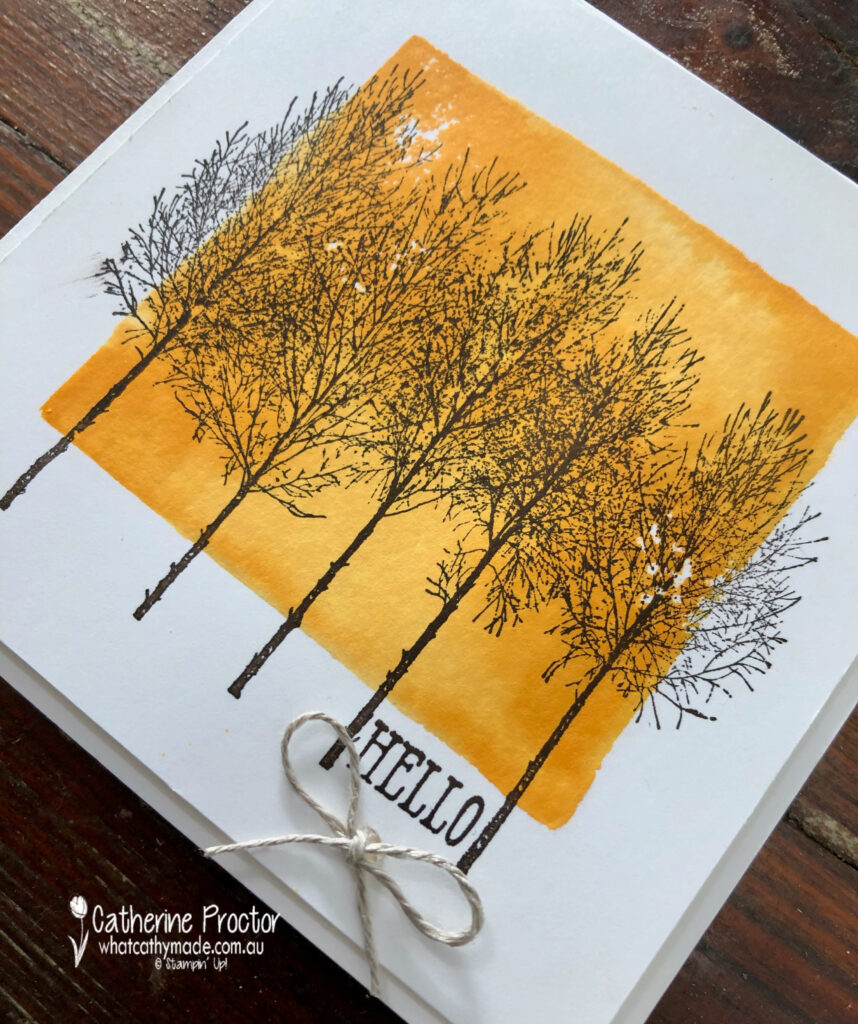
I couldn’t resist making one more card with this stamp set because it also is the perfect stamp set for the acrylic block stamping technique. If you’ve never tried this technique please give it a go – it is so easy and so effective.
You simply ink up an acrylic block (I used size C) by tapping it onto your stamp pad, then spritz it with your Stampin’ Spritzer and stamp the acrylic block directly to your paper. This time I used Whisper White but this technique looks great on watercolour paper too.
Once you’ve dried your ink background, stamp the tree stamp over the top in Early Espresso ink. I wanted a small sentiment to fit in the gap between the two tree branches on the far right and the “Hello” sentiment from the Well Said stamp set was the perfect fit.
Both my cards were finished off with a simple bow of linen thread.
I can’t wait to see what the rest of the Art With Heart team have created with Mango Melody today. Click on the links below to see what they’ve made.
If you’d like me to post you your very own copy of the August–December 2020 Mini Catalogue, 2020-21 Stampin Up! Annual Catalogue, the 2020-21 Beginners Brochure, or to simply find out about more about Stampin’ Up! contact me.
In the meantime, wherever you are in the world, stay safe, stay calm…and keep on crafting xxx


")


")