Sale-a-bration Second Release: Eclectic Expressions
Tonight the Art with Heart team are sharing creative projects using products from the sale-a-bration brochure. All sale-a-bration products are earned for FREE with sales of $90+ (AUD).
•If you spend $90, you get one free level 1 product.
•If you spend $180, you get one free level 2 product, OR, they can choose two level 1 items.
•If you spend $270, you have the option to choose three level 1 items or one level 1 item and one level 2 item.
The sale-a-bration promotion is current now until March 31st. Be sure to request your copy of the brochure today.
Sale-a-bration is also a great time to join our fabulous team. Ask any of the girls on the hop!
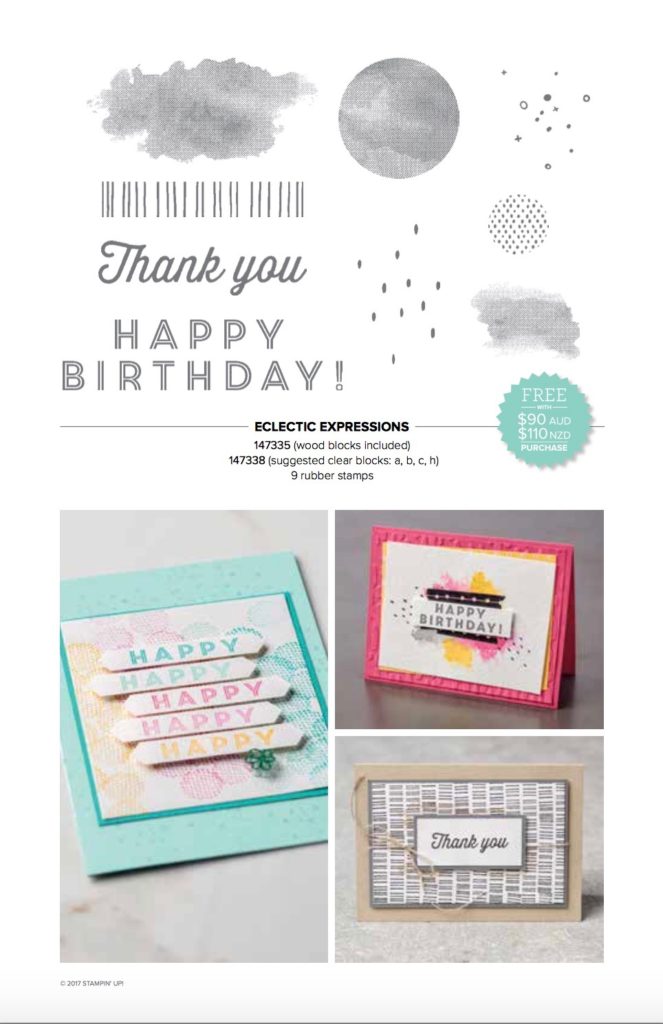
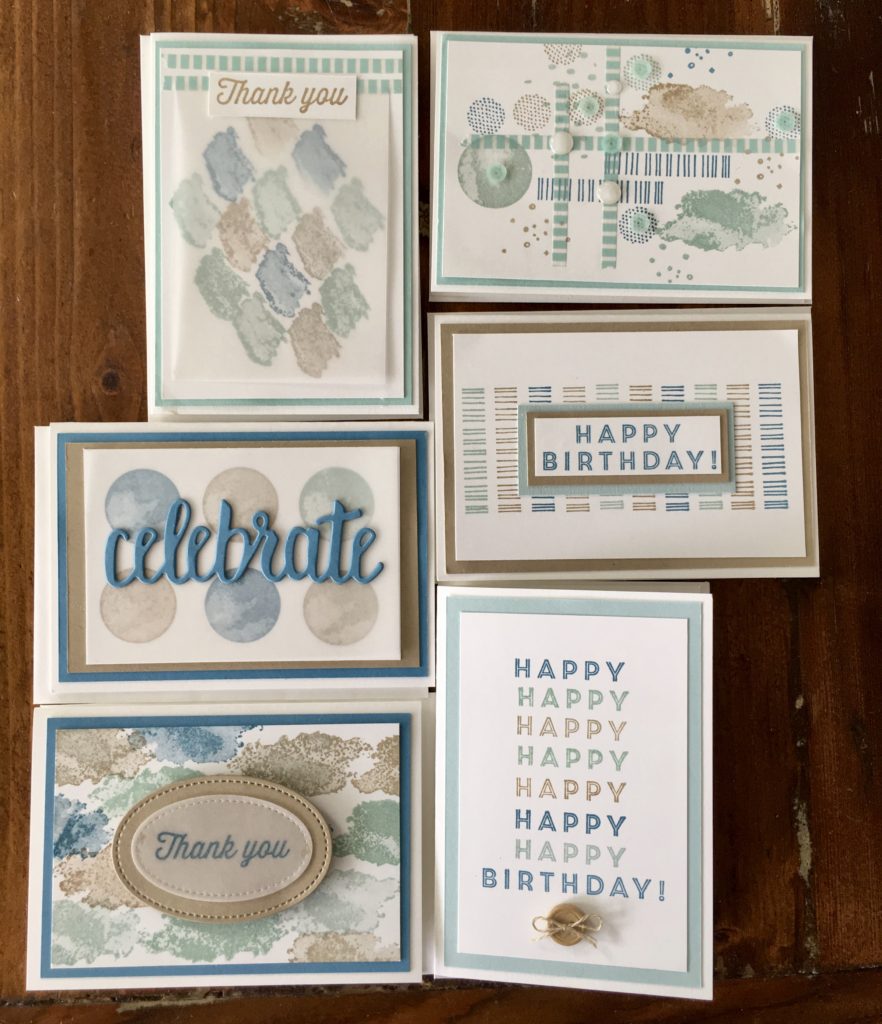
As soon as I saw the 3 new free Sale-a-bration products, I knew I had to order the Eclectic Expressions stamps set because it’s such a versatile set, just perfect for masculine cards.
There are 9 stamps in this set and it reminds me a lot of the very popular ‘gorgeous grunge’ set. Here’s a close-up of the stamp set so you can see exactly what you get…all for free!!!!!
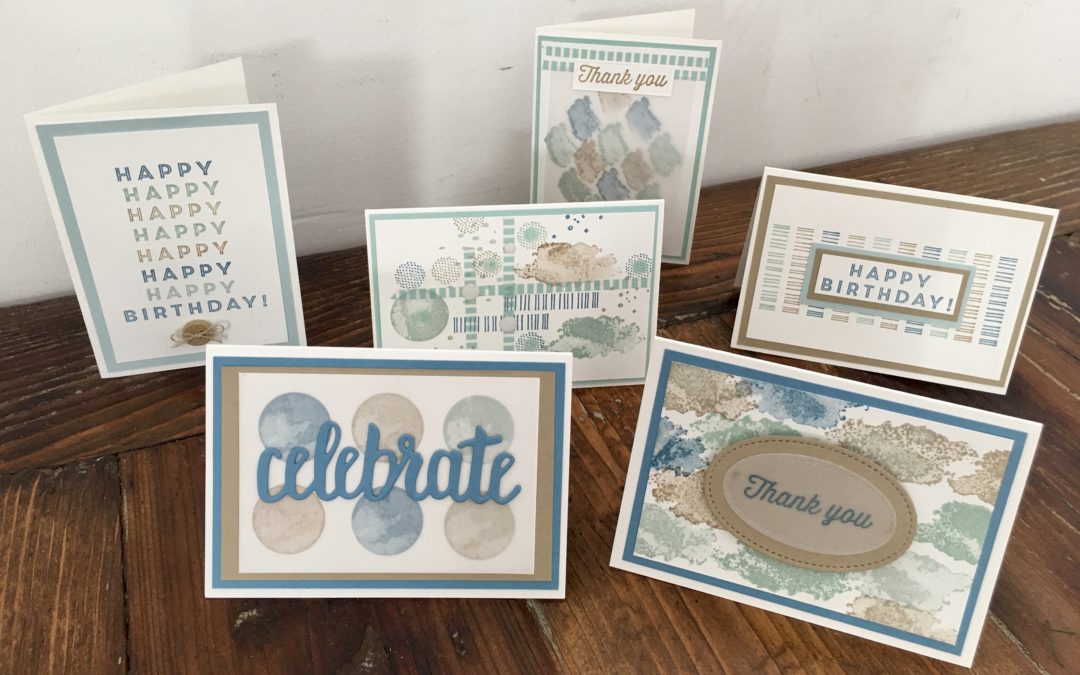
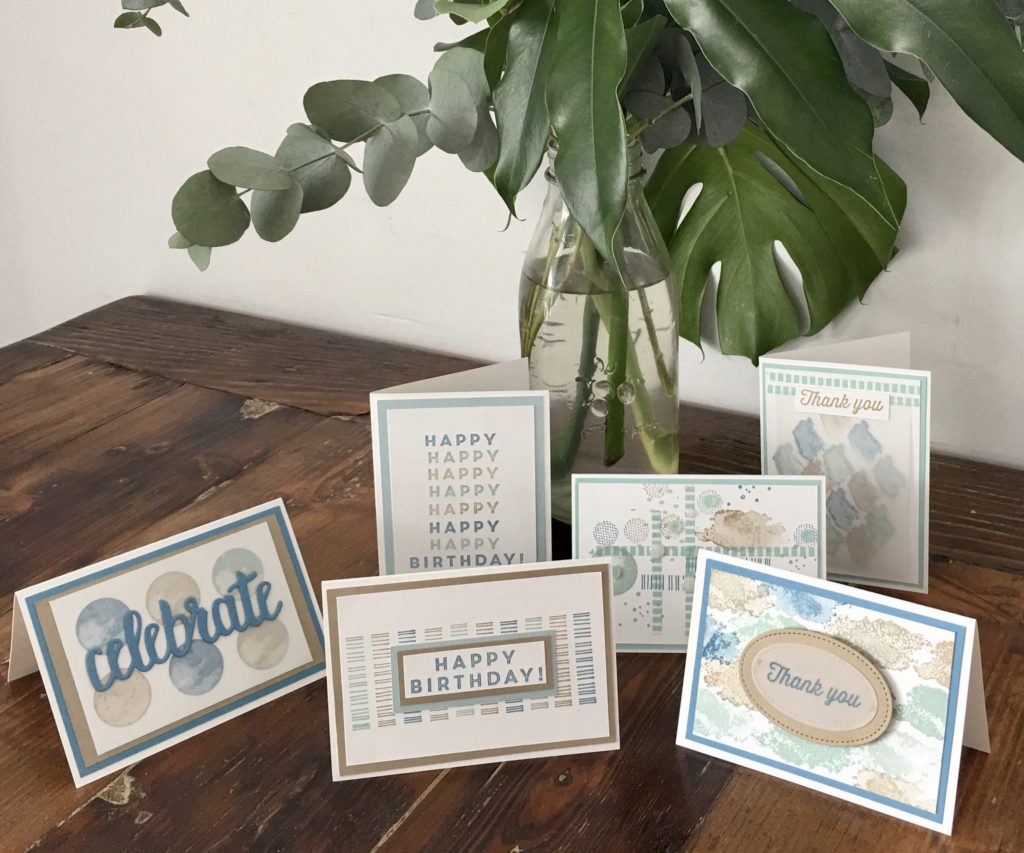
I was so inspired by the cards in the Sale-a-bration brochure I decided to create a set of 6 cards in soft masculine colours…cards that could be suitable for both men and women.
I used Pool Party, Soft Sky, Crumb Cake, Sahara Sand and Marina Mist, all stamped onto Whisper White card stock and mounted onto Whisper White cards and envelopes, which makes creating sets of cards super quick and easy.
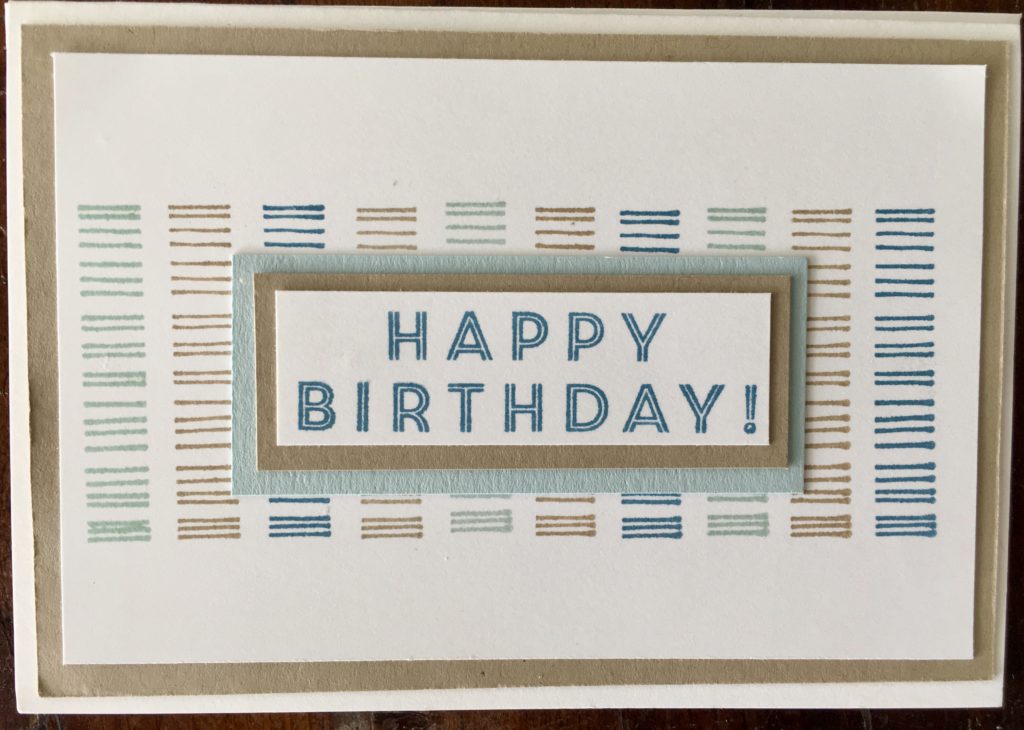
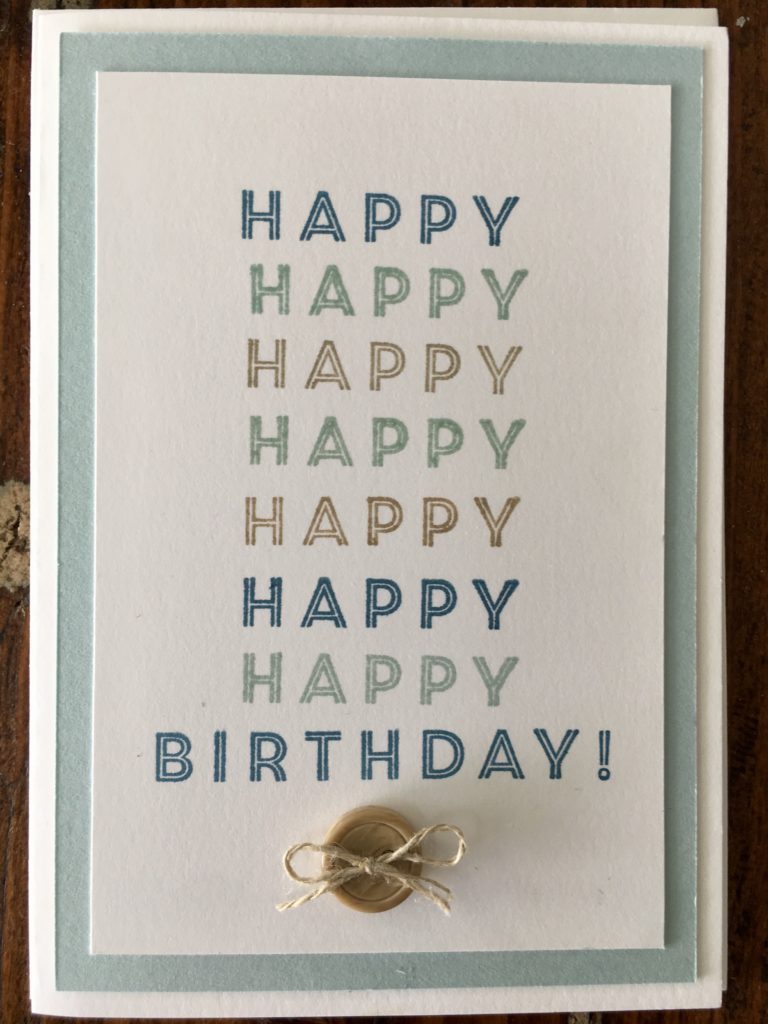
Card 1 (below) features the ‘barcode stamp’ and the happy birthday stamp, which I cut in half.
Don’t be scared to cut your stamps in half…it makes sentiments so much more versatile and it’s still really easy to put the sentiment back together. I actually stamped the happy birthday sentiment on this card after I had cut the happy and the birthday apart, and the 2 pieces of the stamp still stamped perfectly together.
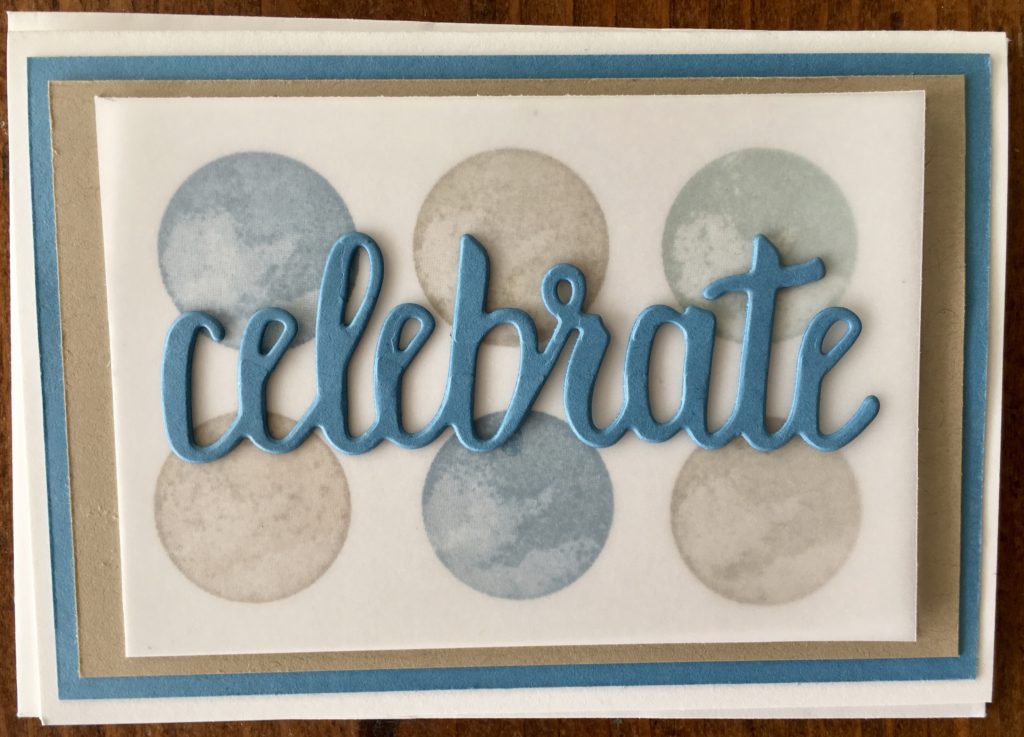
Card 2 uses the large circle stamp, overlaid with vellum.
The word ‘celebrate’ was die cut using the free Sale-a-bration Celebrate You Dies, which will be carried over to the new annual 2018-2019 catalogue.
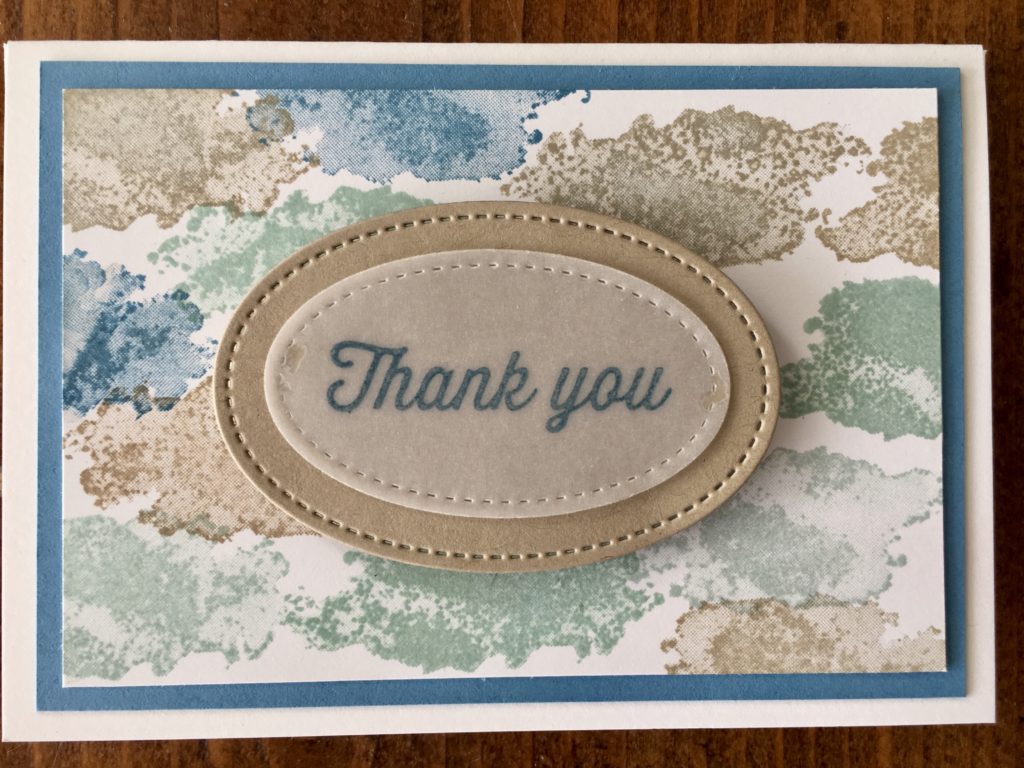
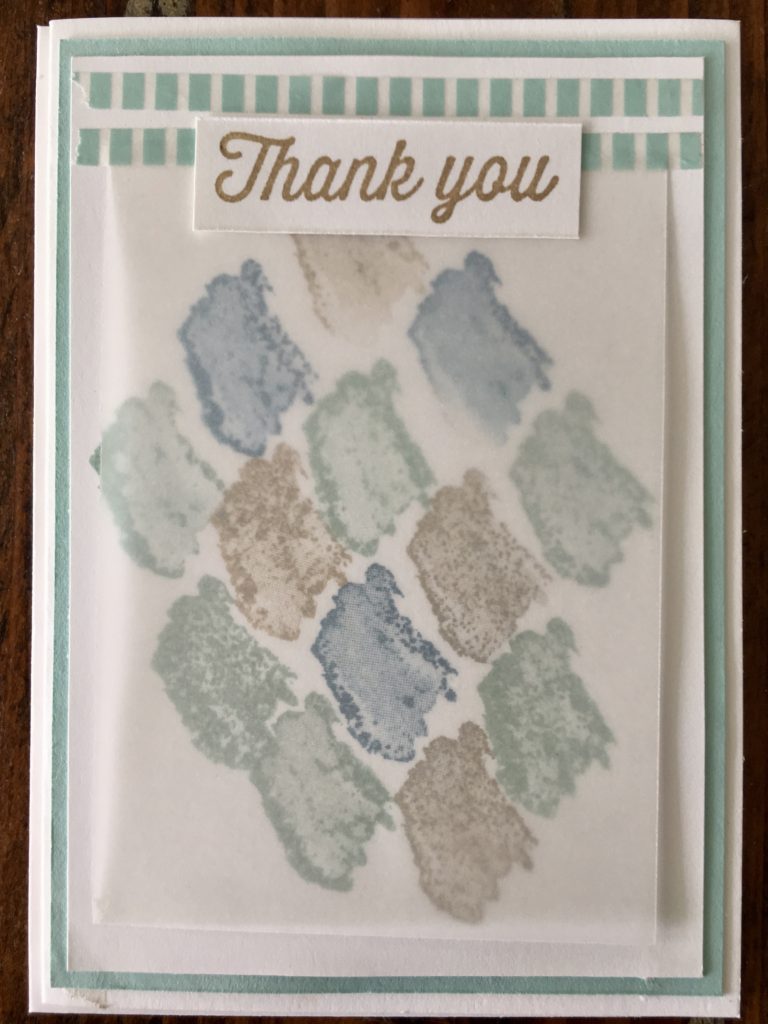
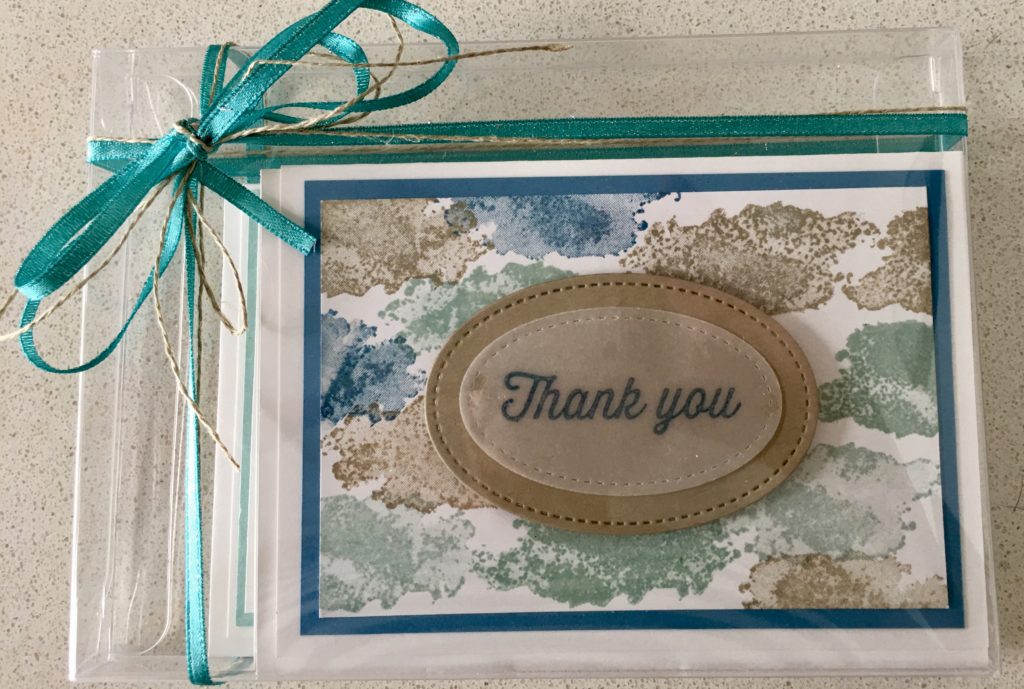
Card 3 uses the larger ‘cloud’ stamp and the ‘Thank You’ stamp, which I stamped onto vellum and then die cut with the stitched shape framelits, mounted onto Crumb Cake card stock.
Card 4 is another thank you card, this time using the smaller ‘cloud’ stamp, the ‘thank you’ stamp, a vellum overlay and some of the gorgeous Pool Party washi tape from the Basics Pack 3.
Card 5 is the reason why I cut the ‘happy birthday’ stamp in half, and I think the button from the new True Gentleman Buttons (tied with tiny bit of linen thread) really finished of this card nicely, while still keeping it masculine enough to send to a man.
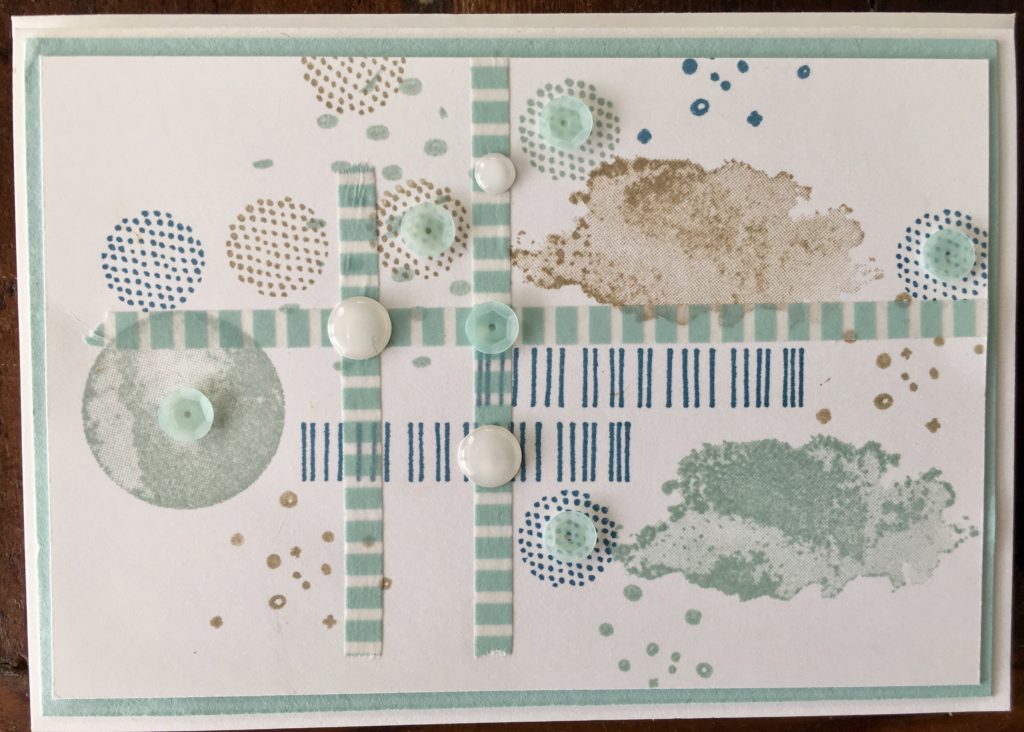
Card 6 uses the rest of the stamps in the Eclectic Expressions set (and yes, I did ink up every single stamp!) as well as that lovely Pool Party Washi tape.
Embellishments include the Pool Party sequins from the new ‘Tutti-frutti Adhesive-backed Sequins’ and White Perfect Accents.
Finally, to make this set of cards a lovely gift, I popped then into a C6 Acetate Box, and wrapped the box up with the Bermuda Bay ribbon (another free Sale-a-bration product, part of the ‘Shimmer Ribbon Pack’) tied together with some linen thread.
Now it’s time to hop on over to our next participant, the very talented, Caroline Manwarring.
If you find a broken link or have come to this blog hop from a different entry point, you can view the participants below:
I think my favourite craft project, both to create and to enjoy, is the personalised calendar I make for my mum every year.
Because my mum’s birthday is January 1, a calendar is a timely gift, and making a personalised calendar ensures I reflect on the year that has passed and ensure our family’s special memories can be enjoyed by my mum for the year to come.
You don’t need a fancy camera…in fact, most of these photos were taken on my iphone. I selected my 12 favourite images and scrapbooked them onto a blank 2018 calendar using matching DSP that picks up the main colour in the photos and sentiment stamps that have a real meaning for the image they’re paired with.
Add a few embellishments or washi tape (not too many as it makes the calendar bulky) and before you know it you have a very special family keepsake.
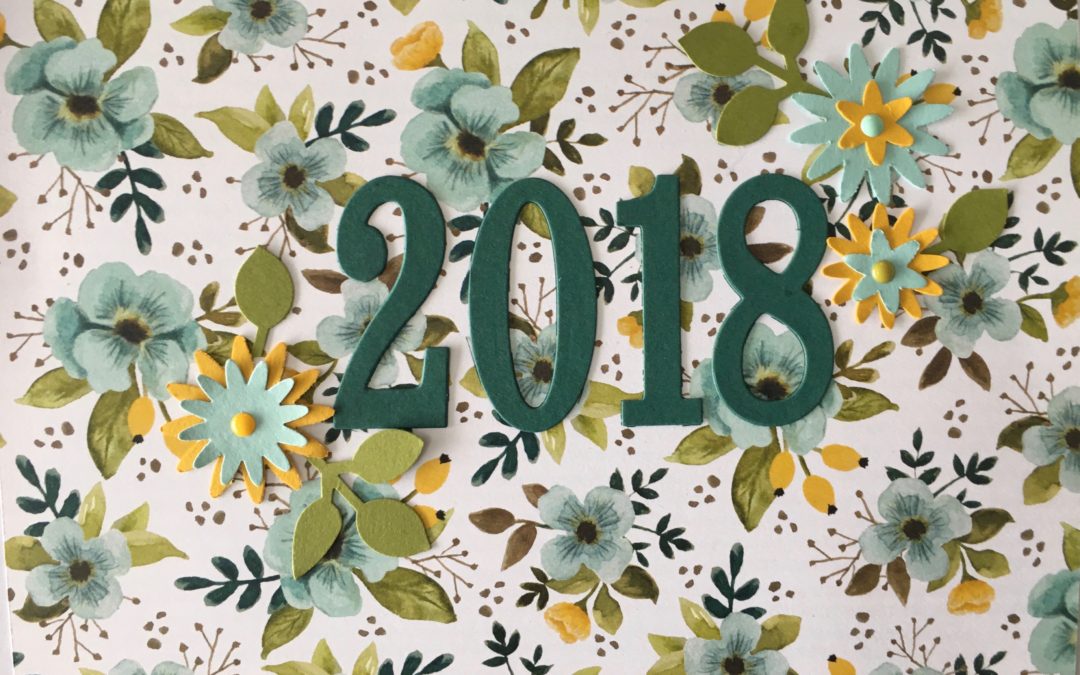
Here’s what 2018 looked like for our family.
January
This would have to be my favourite photo in the entire calendar, and the sentiment from Beautiful You stamp set sums up the moment perfectly!
February
Miss February shows that many Christmas papers (in this case the Merry Little Christmas DSP) can also be used for other occasions.
March
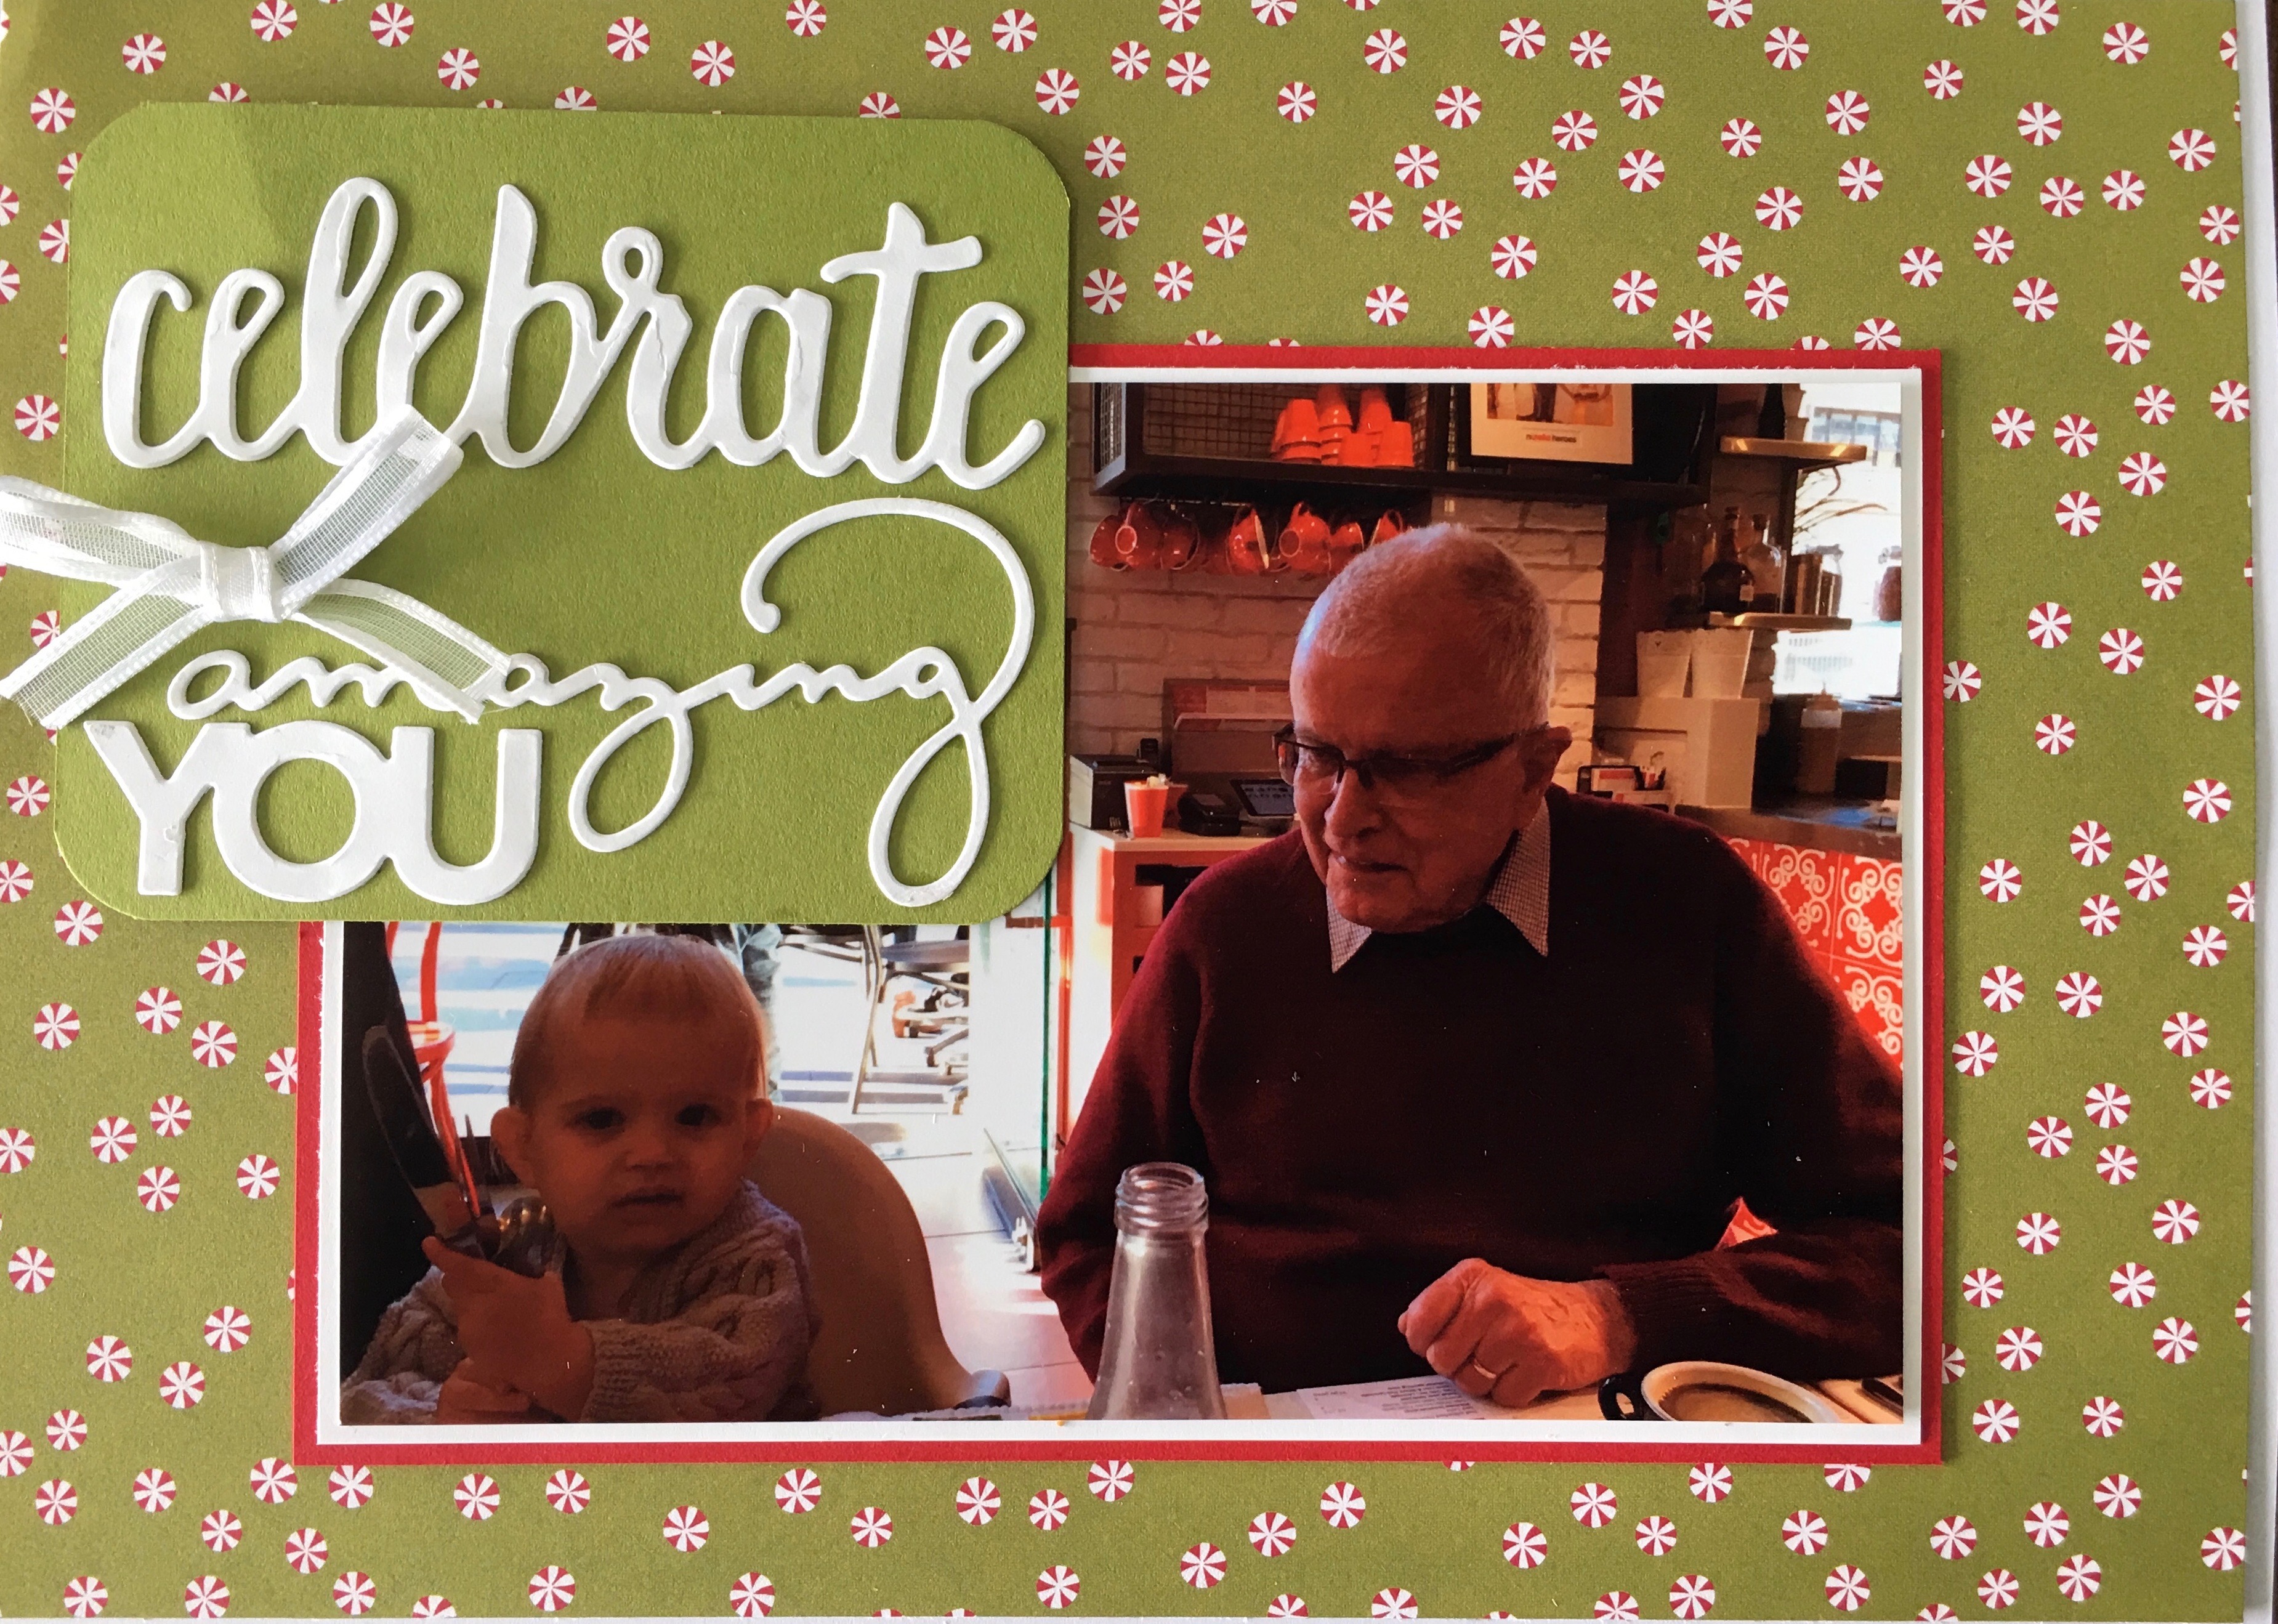
In terms of quality, this is the worse picture in the calendar but the only one I had of my dad and his beloved granddaughter. To hide the random photo bombers in the background I used the gorgeous new (and free!) Celebrate You thinlits dies from the new Sale-a-bration catalogue.
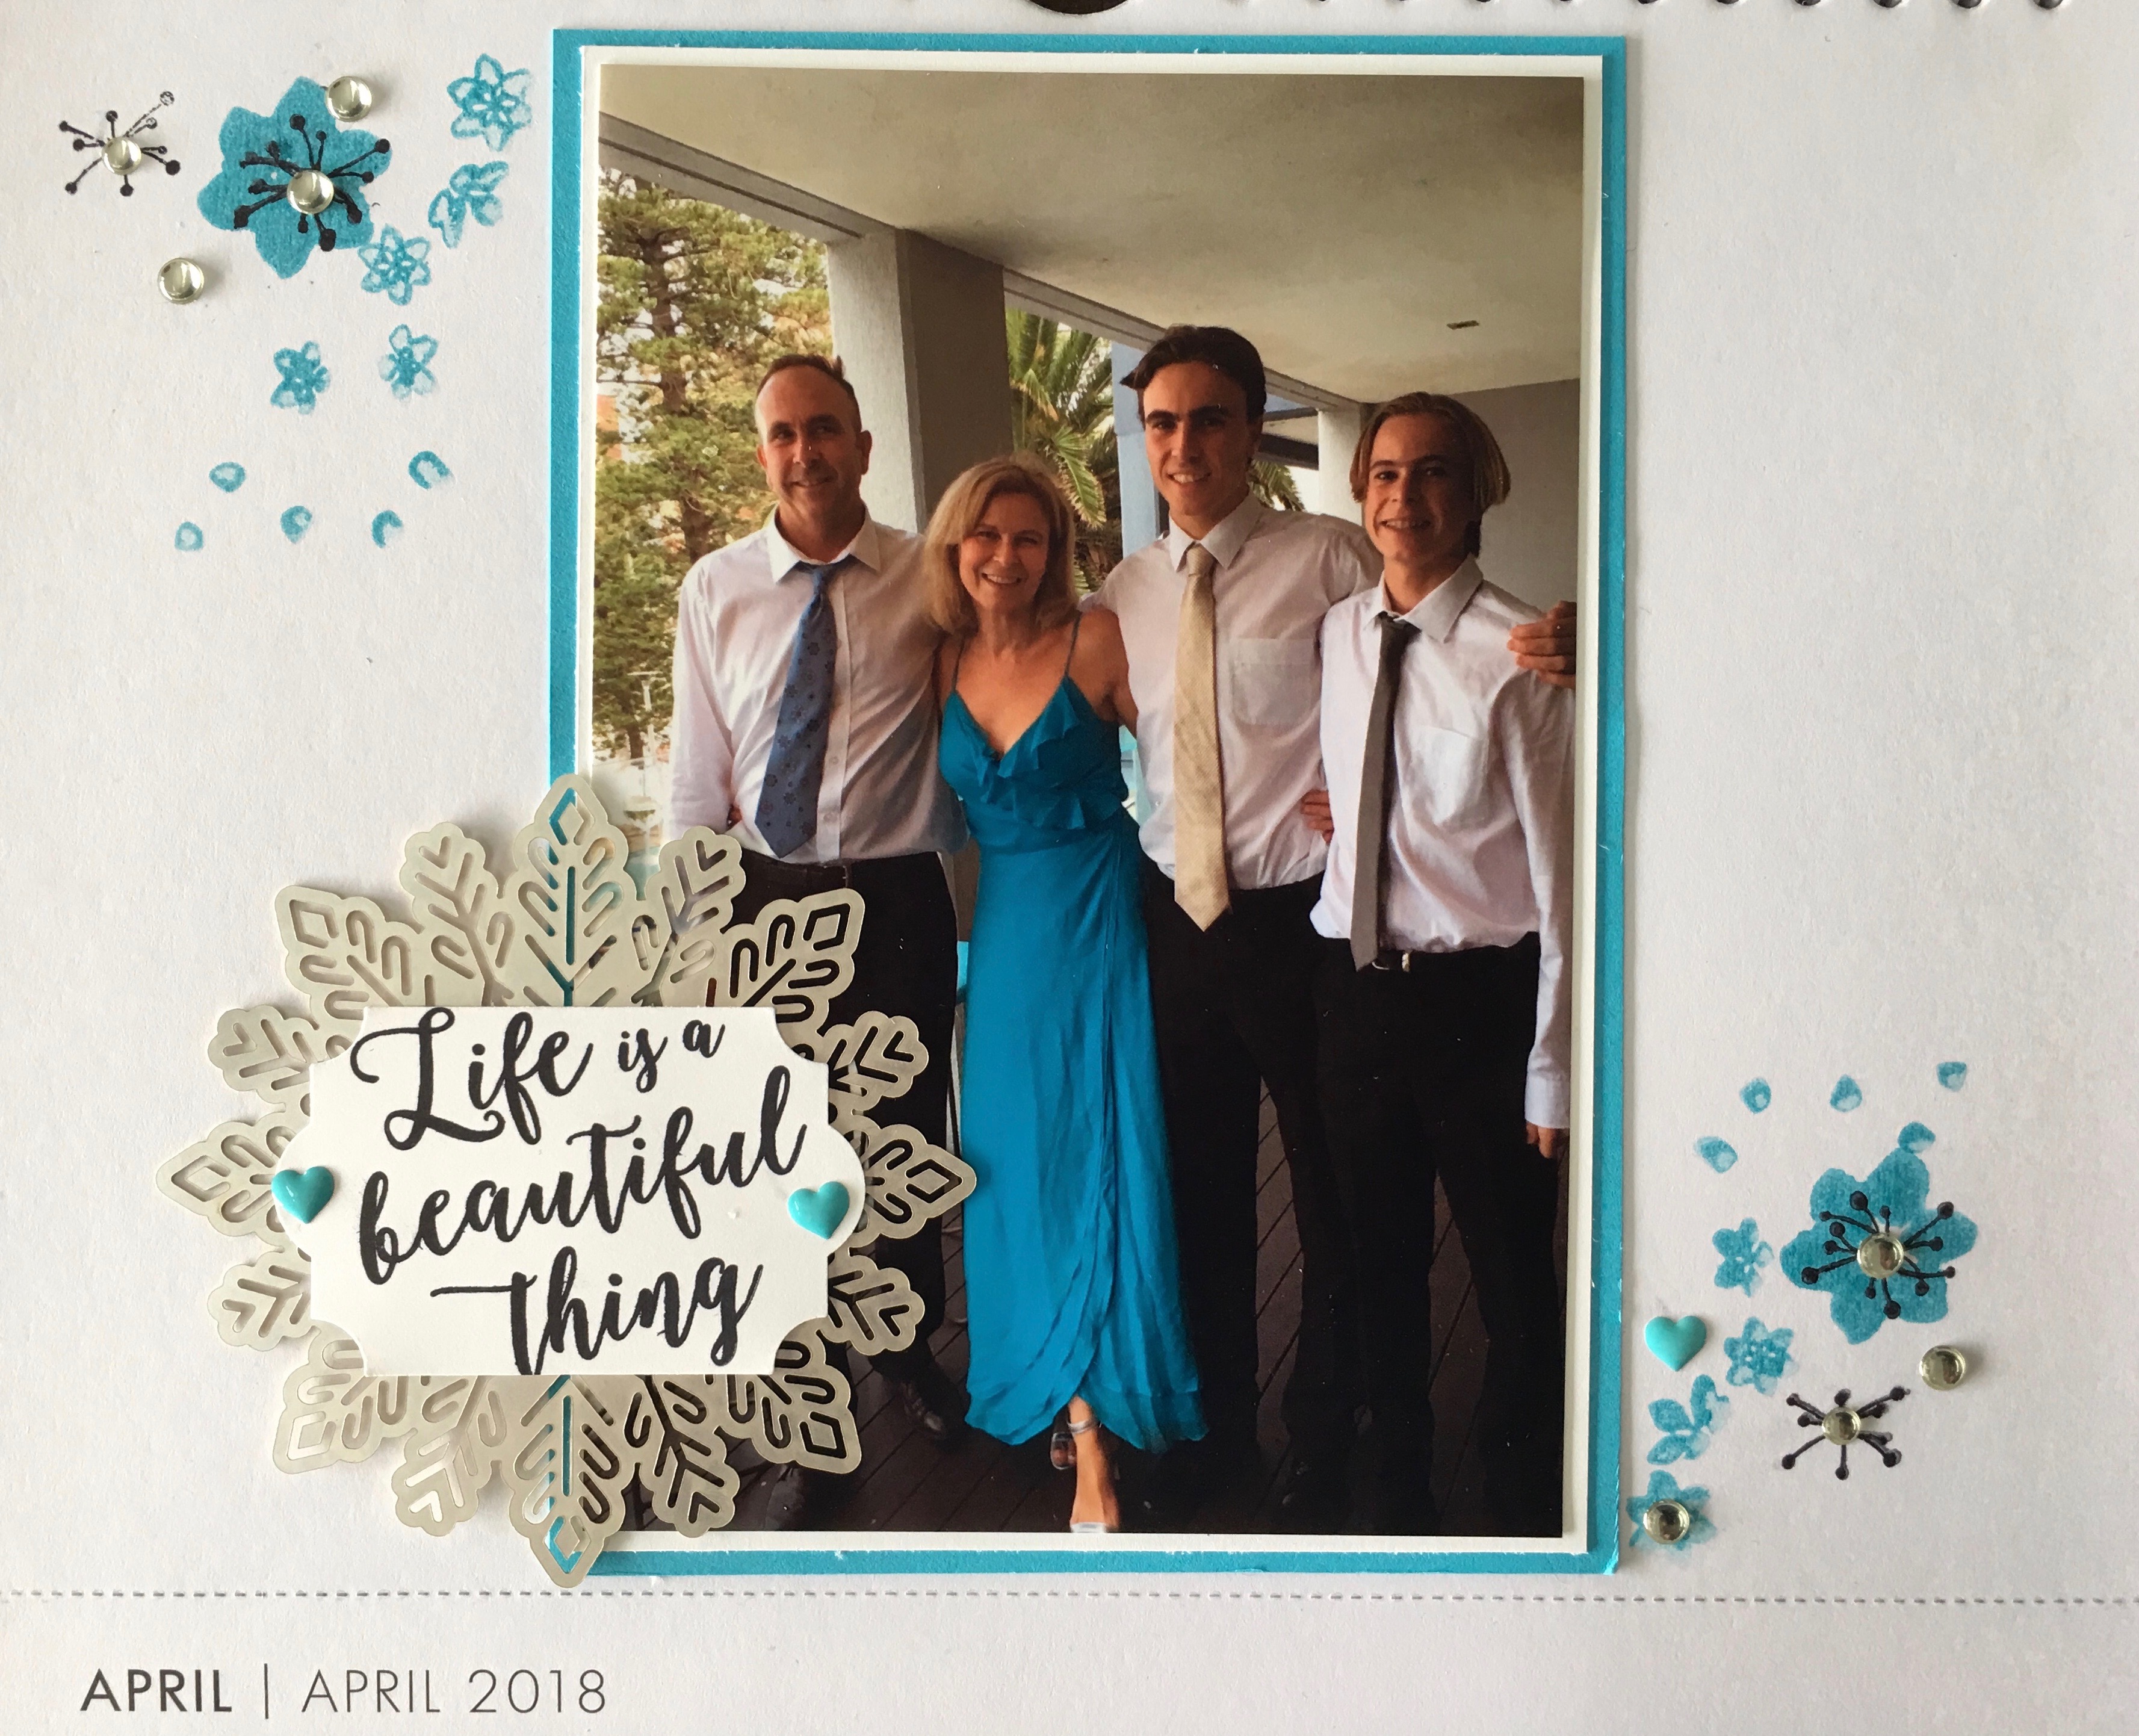
April
When I’m with my 3 beautiful boys (or should I say men?) …life is indeed a beautiful thing (sentiment and flowers stamped from Colourful Seasons stamp set).
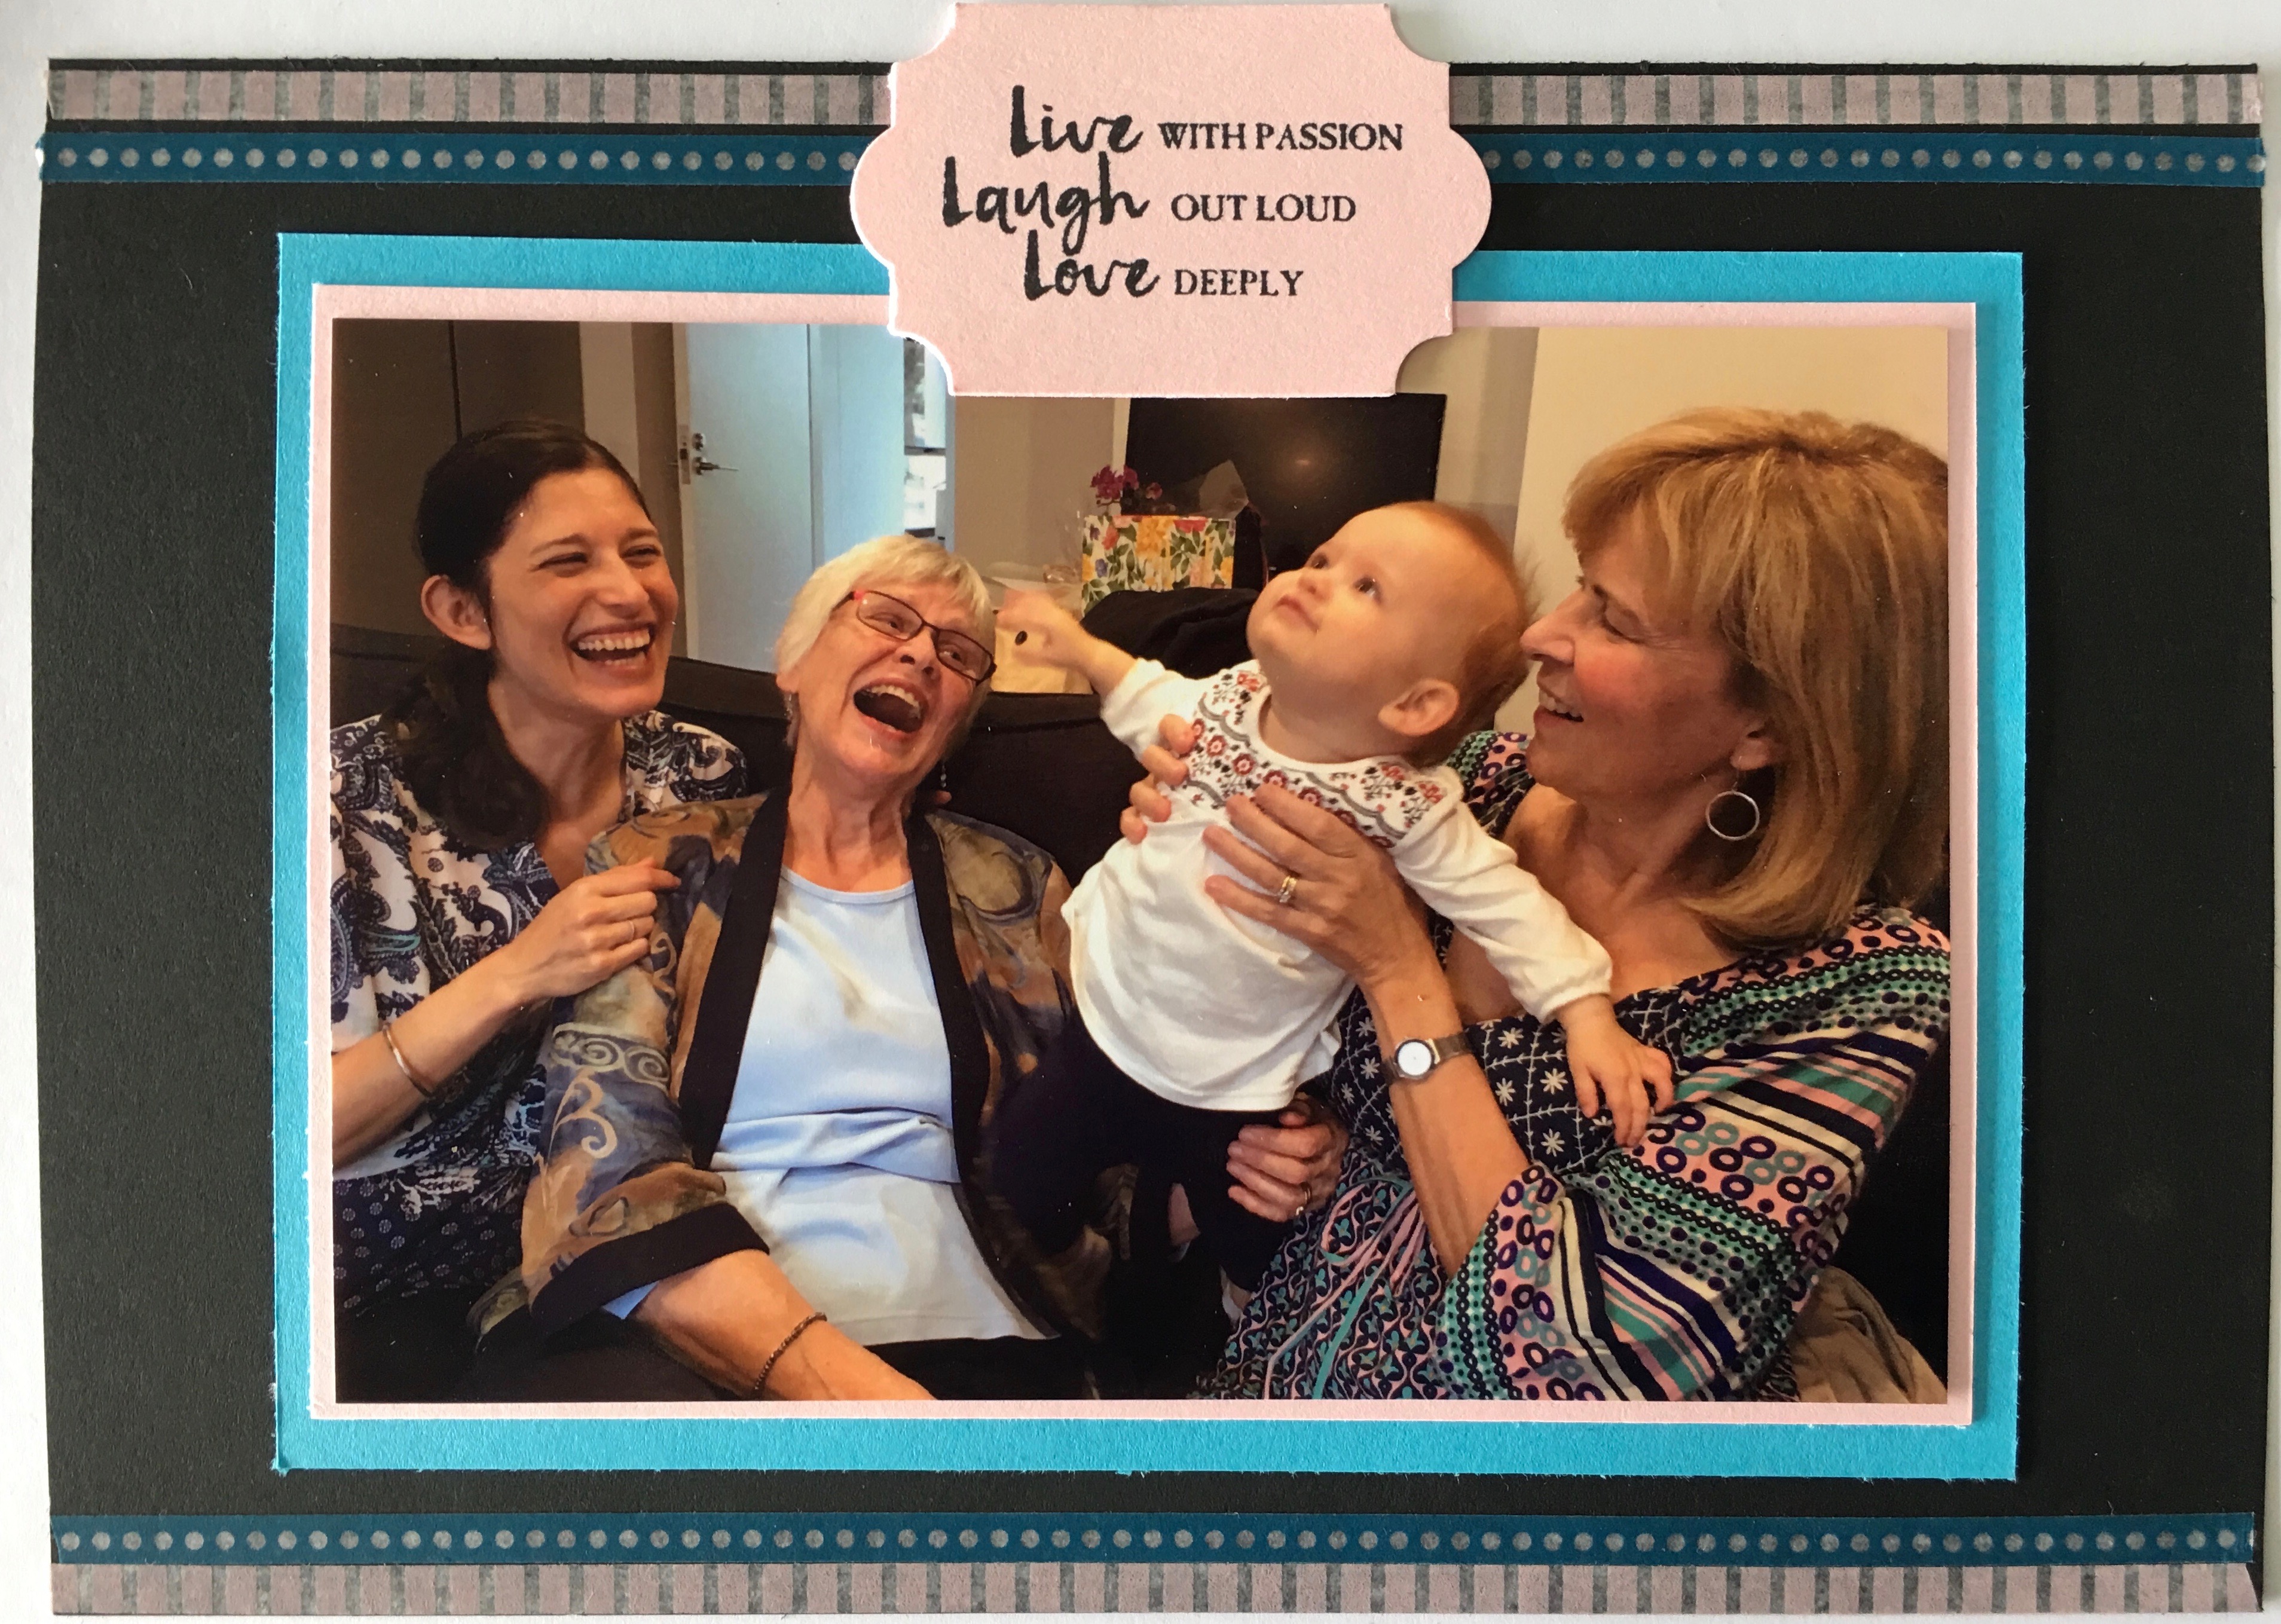
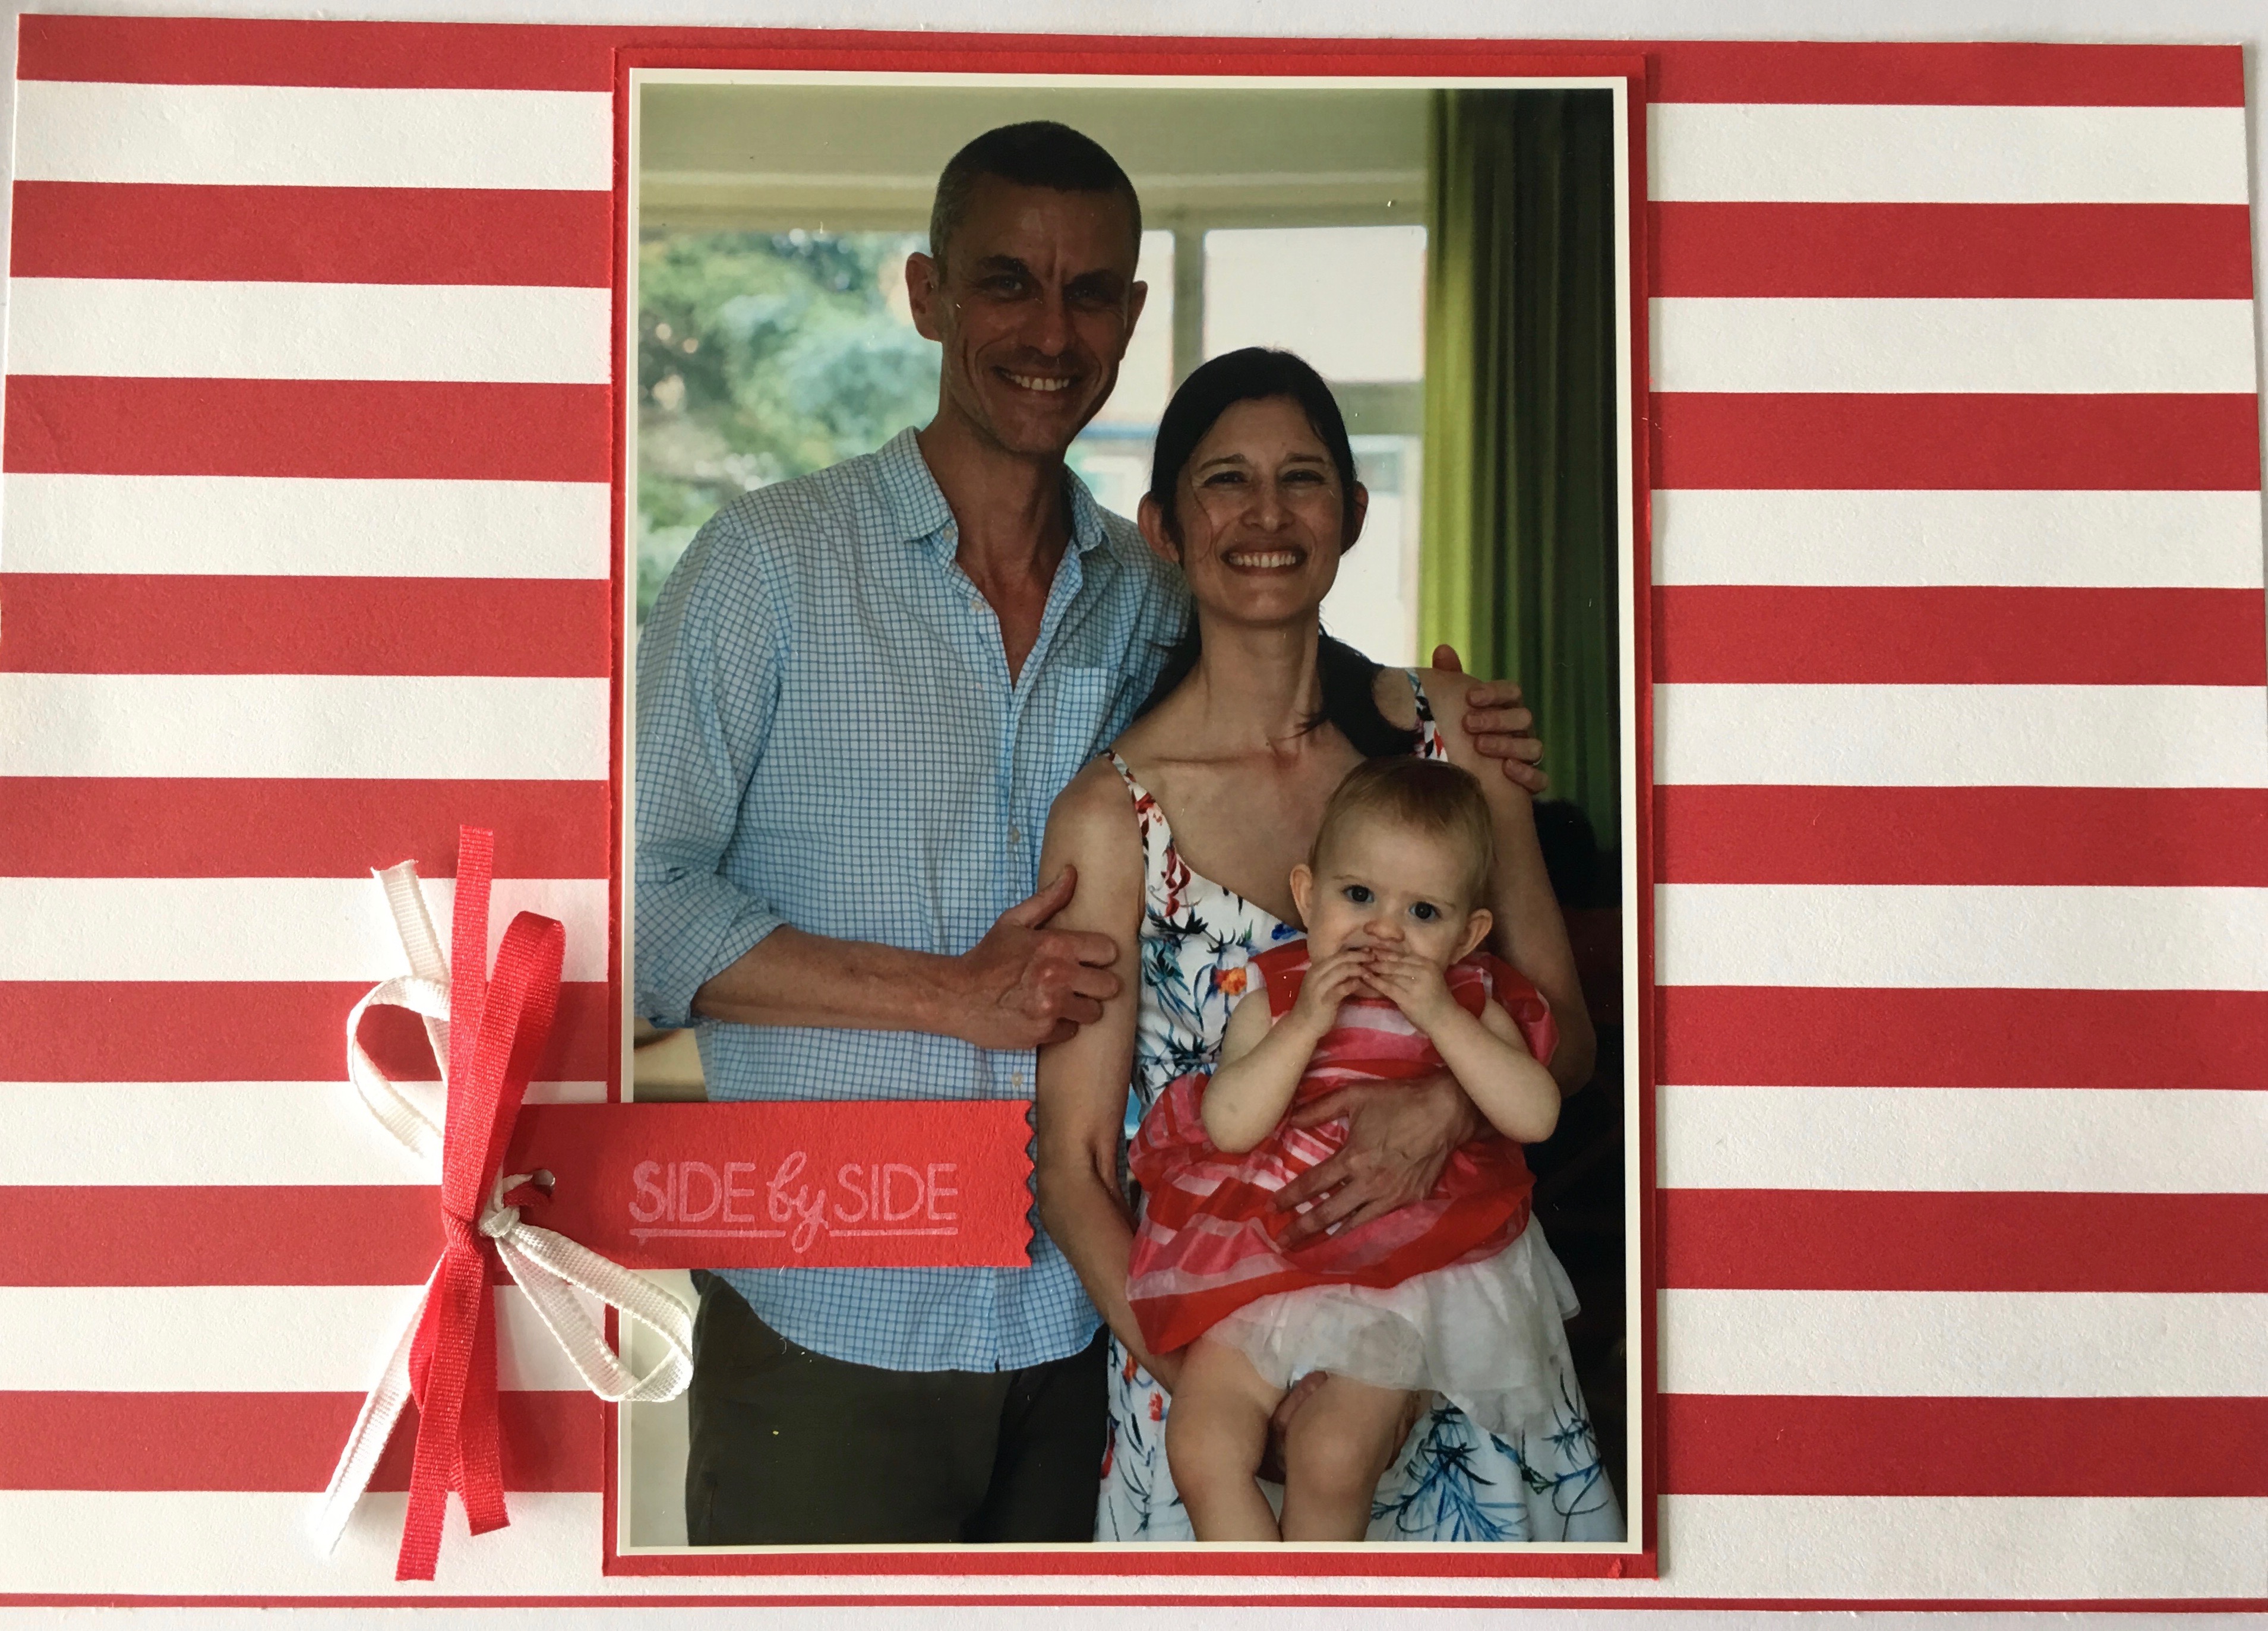
May
This sentiment from the Beautiful Bouquet stamp set sums up the beautiful parenting partnership these two have.
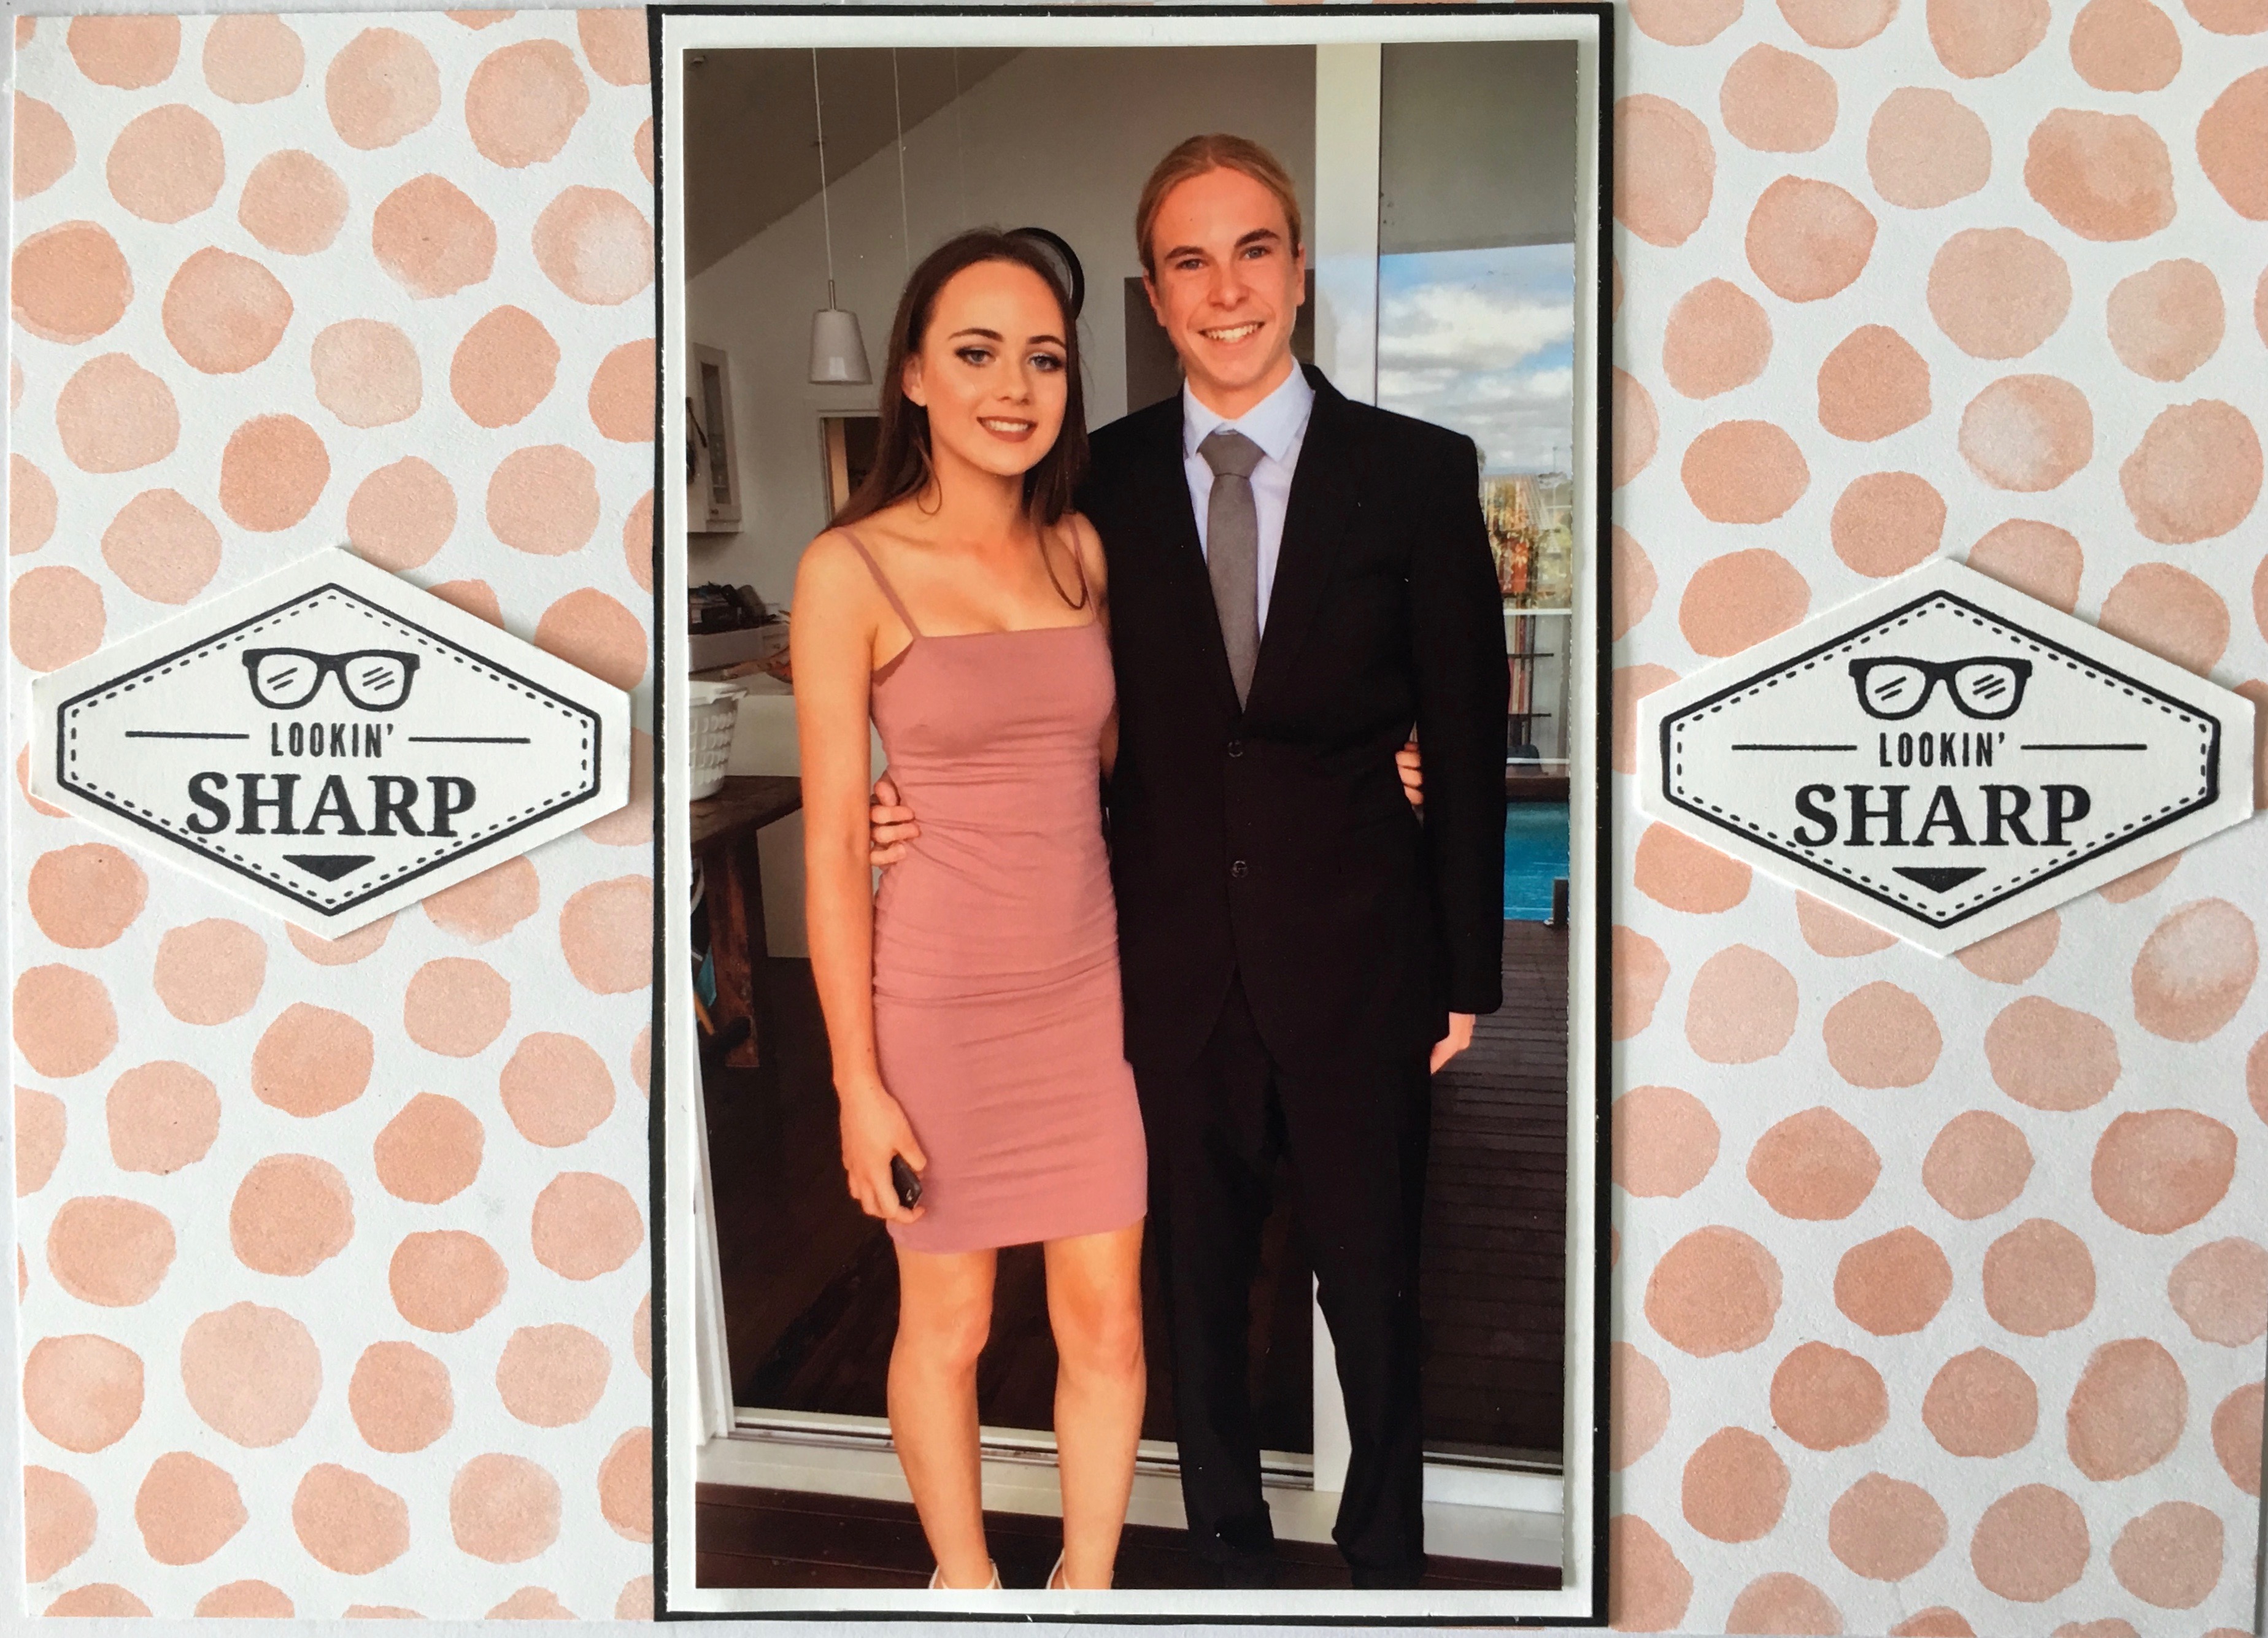
June
My baby boy was indeed looking sharp at his year 10 formal! Stamp and punch from the new truely tailored bundle in the Occasions catalogue.
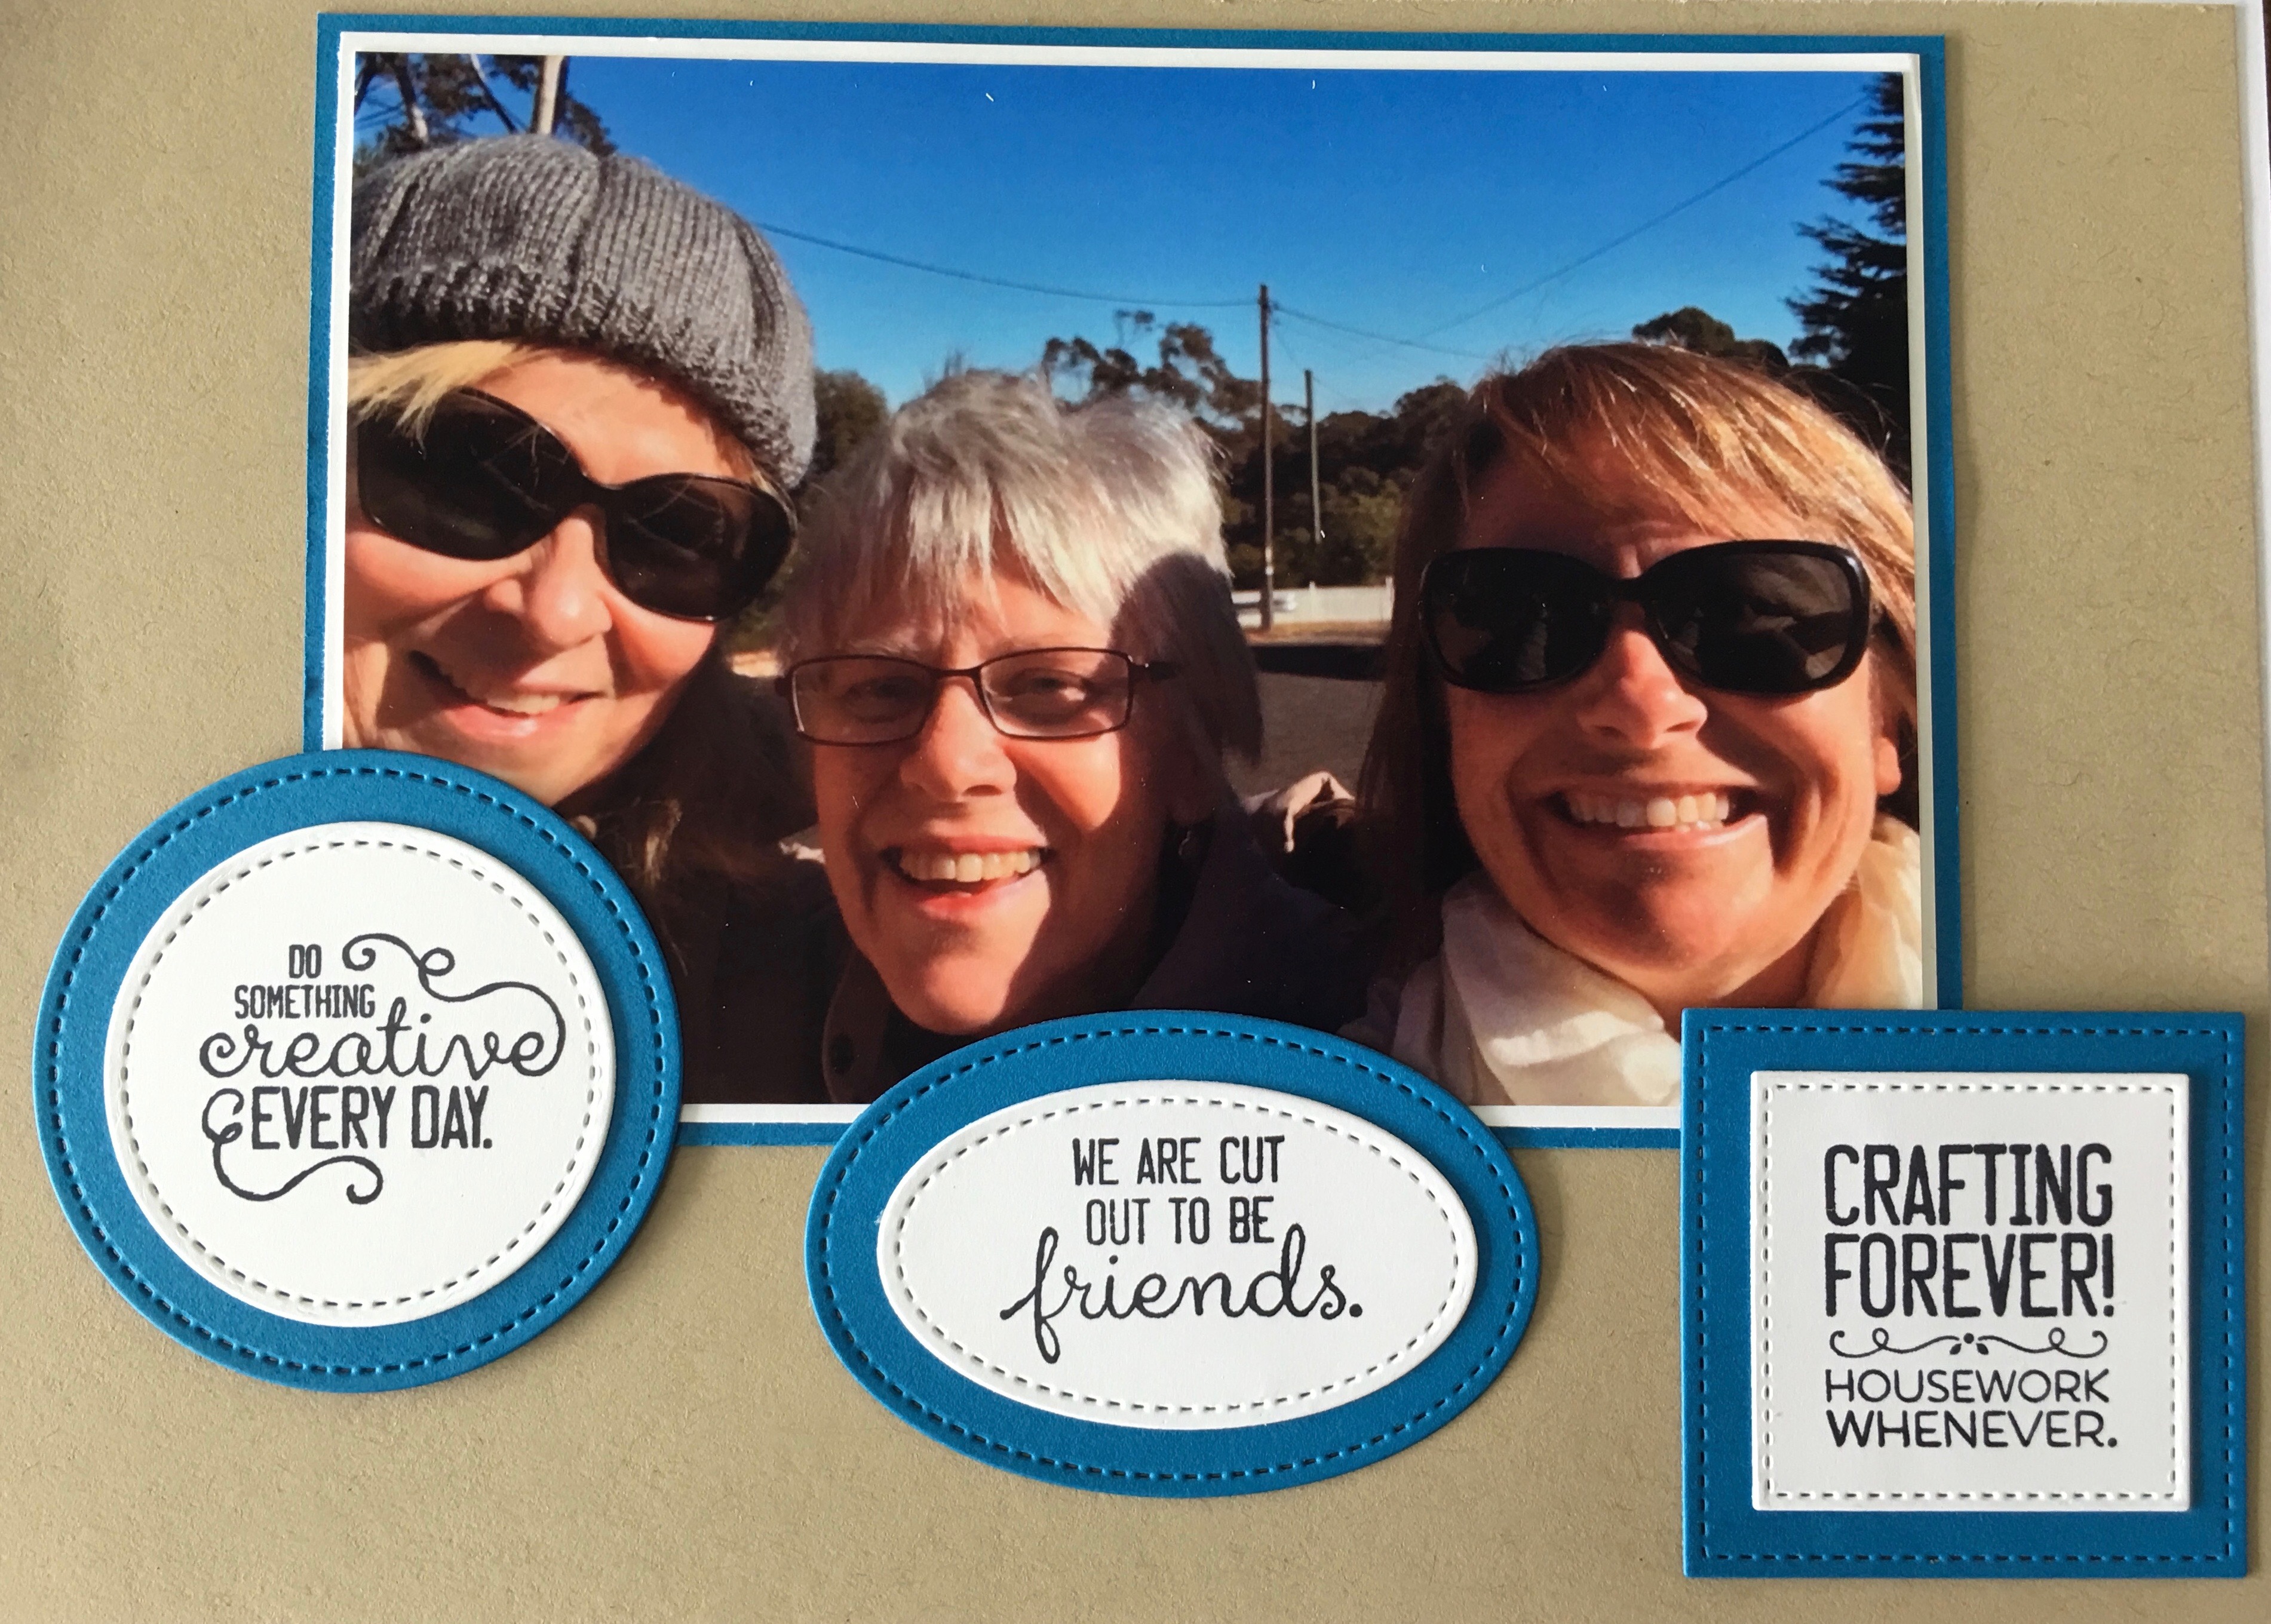
July
Of course there was only one stamp set I could use for a selfie taken at our annual crafting weekend away…Crafting Forever!
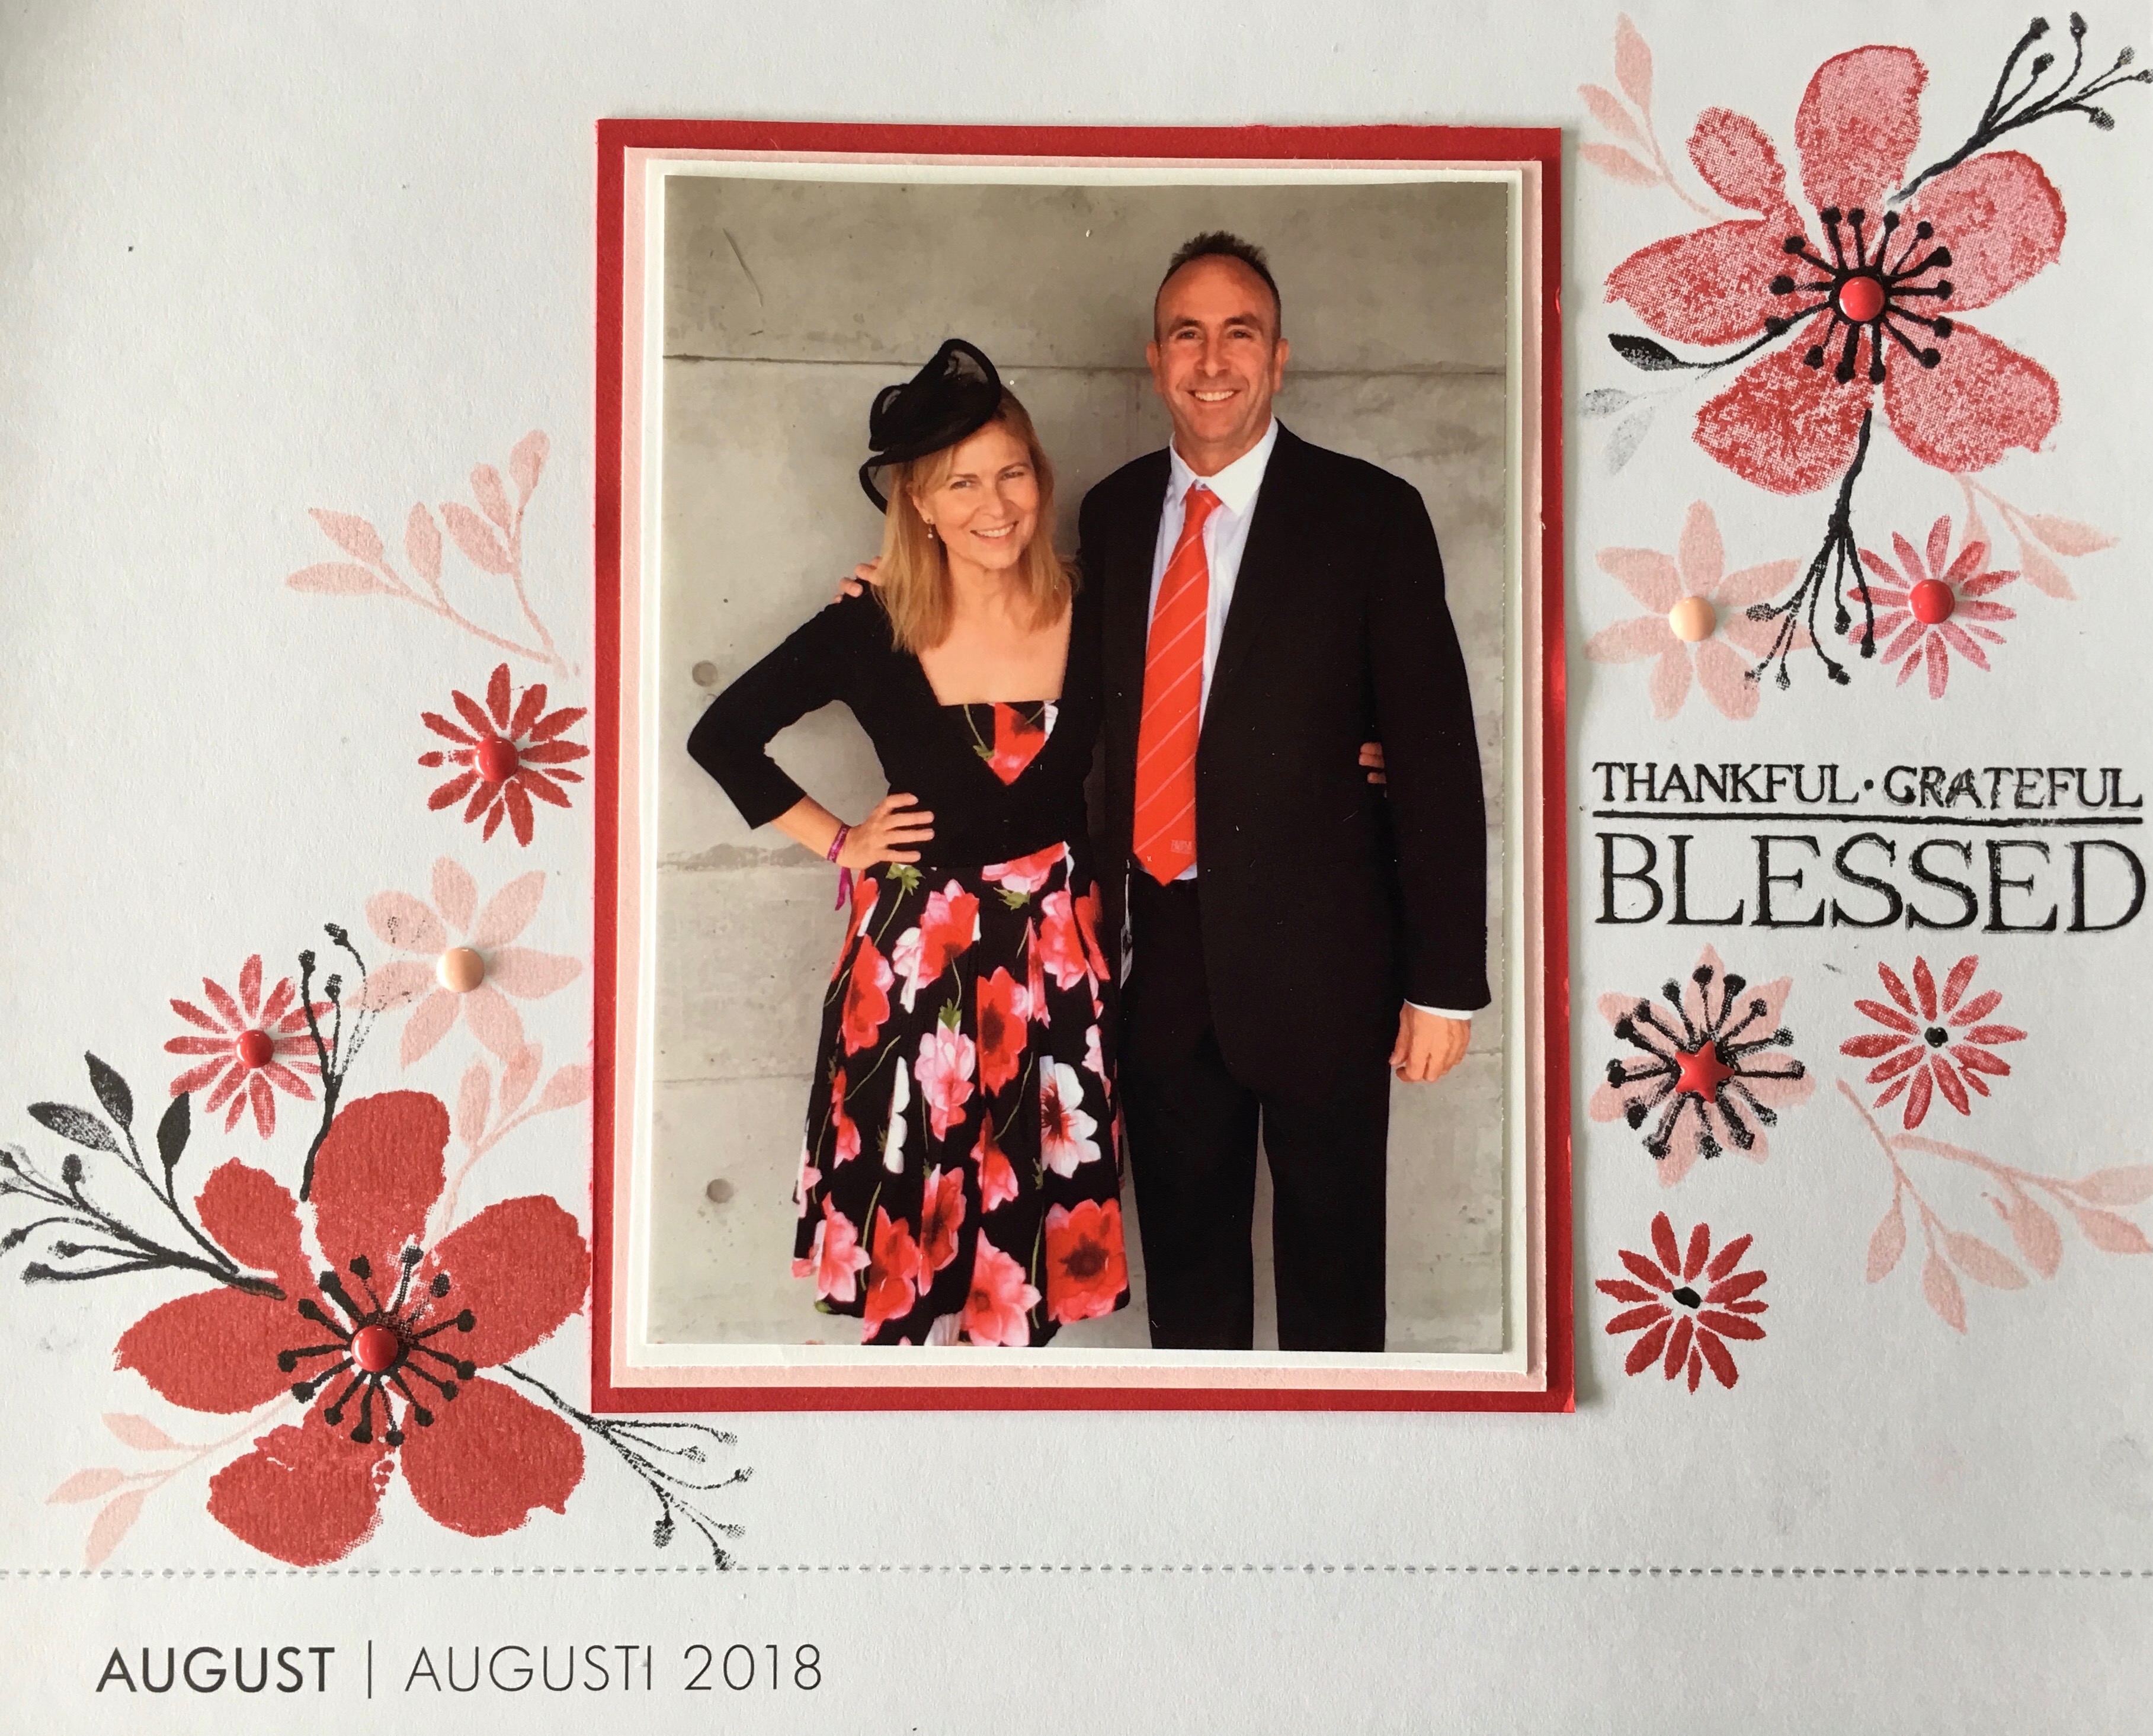
August
What to do when there’s no paper to match your dress? Stamp your background to match using Blooms and Wishes and the beautiful sentiment from Paisleys & Posies.
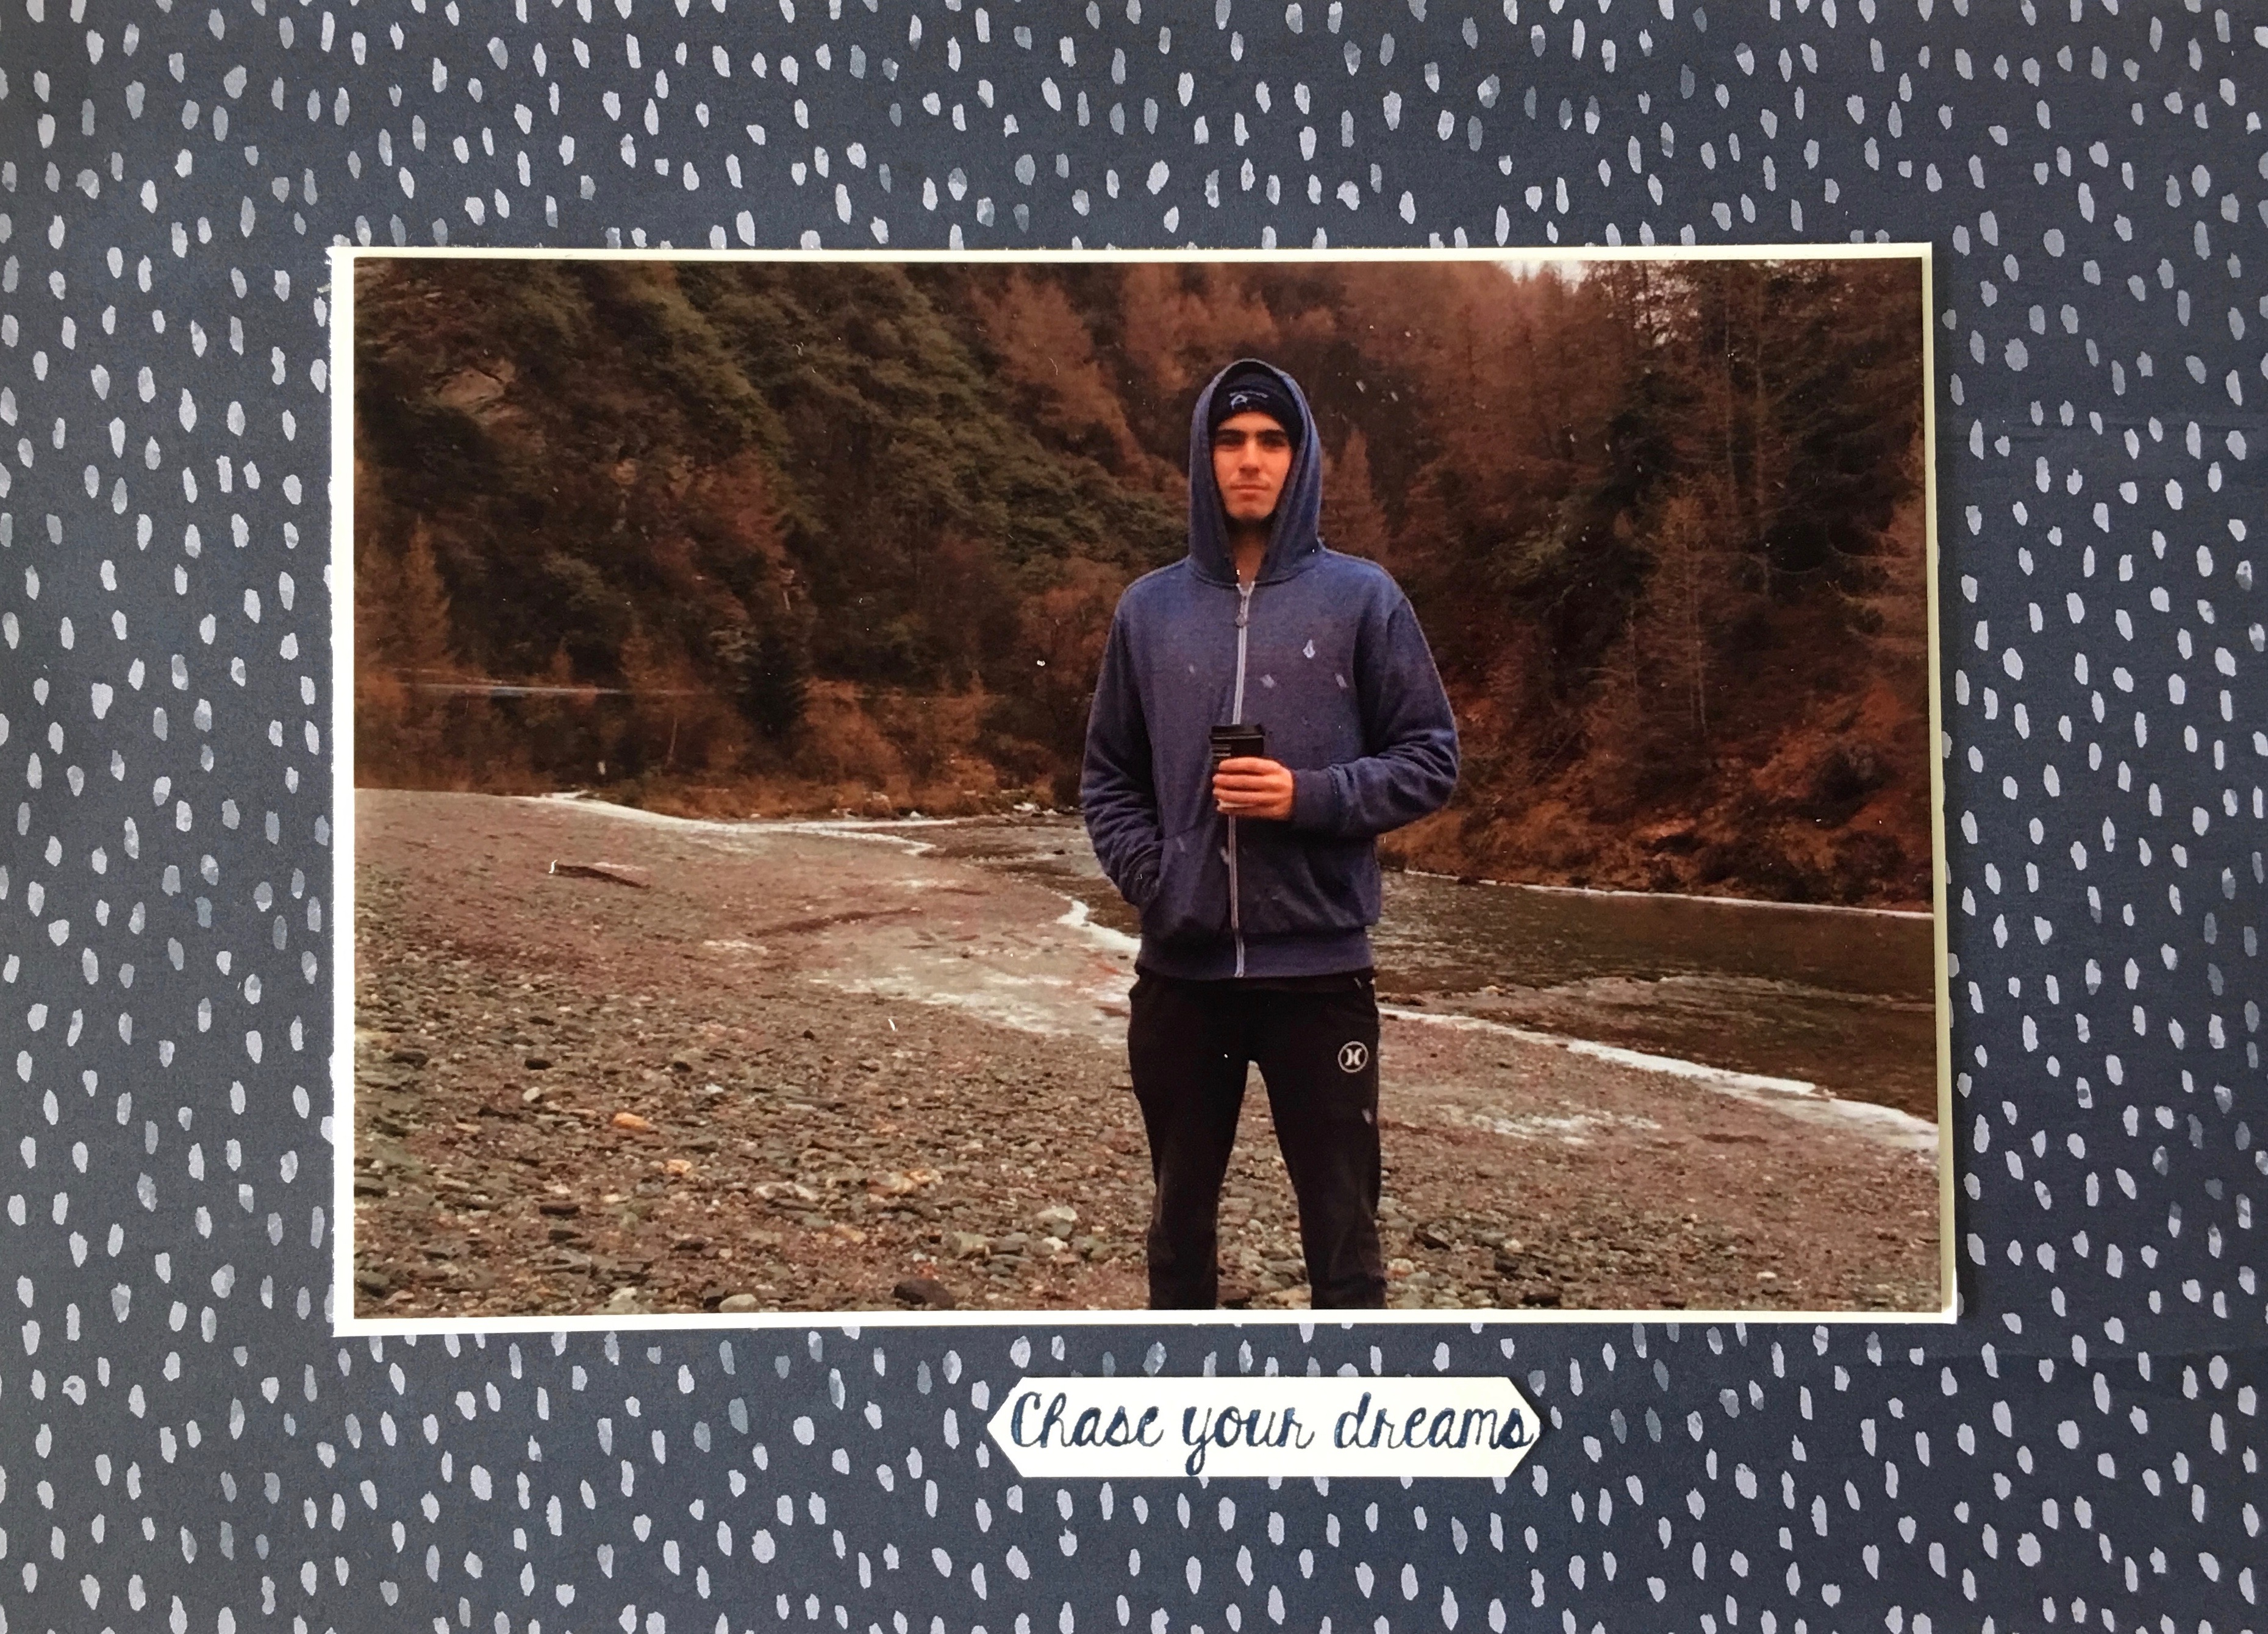
September
My firstborn has indeed been chasing his dreams, having taken a gap year and travelled the world in 2017! Here he is in New Zealand.
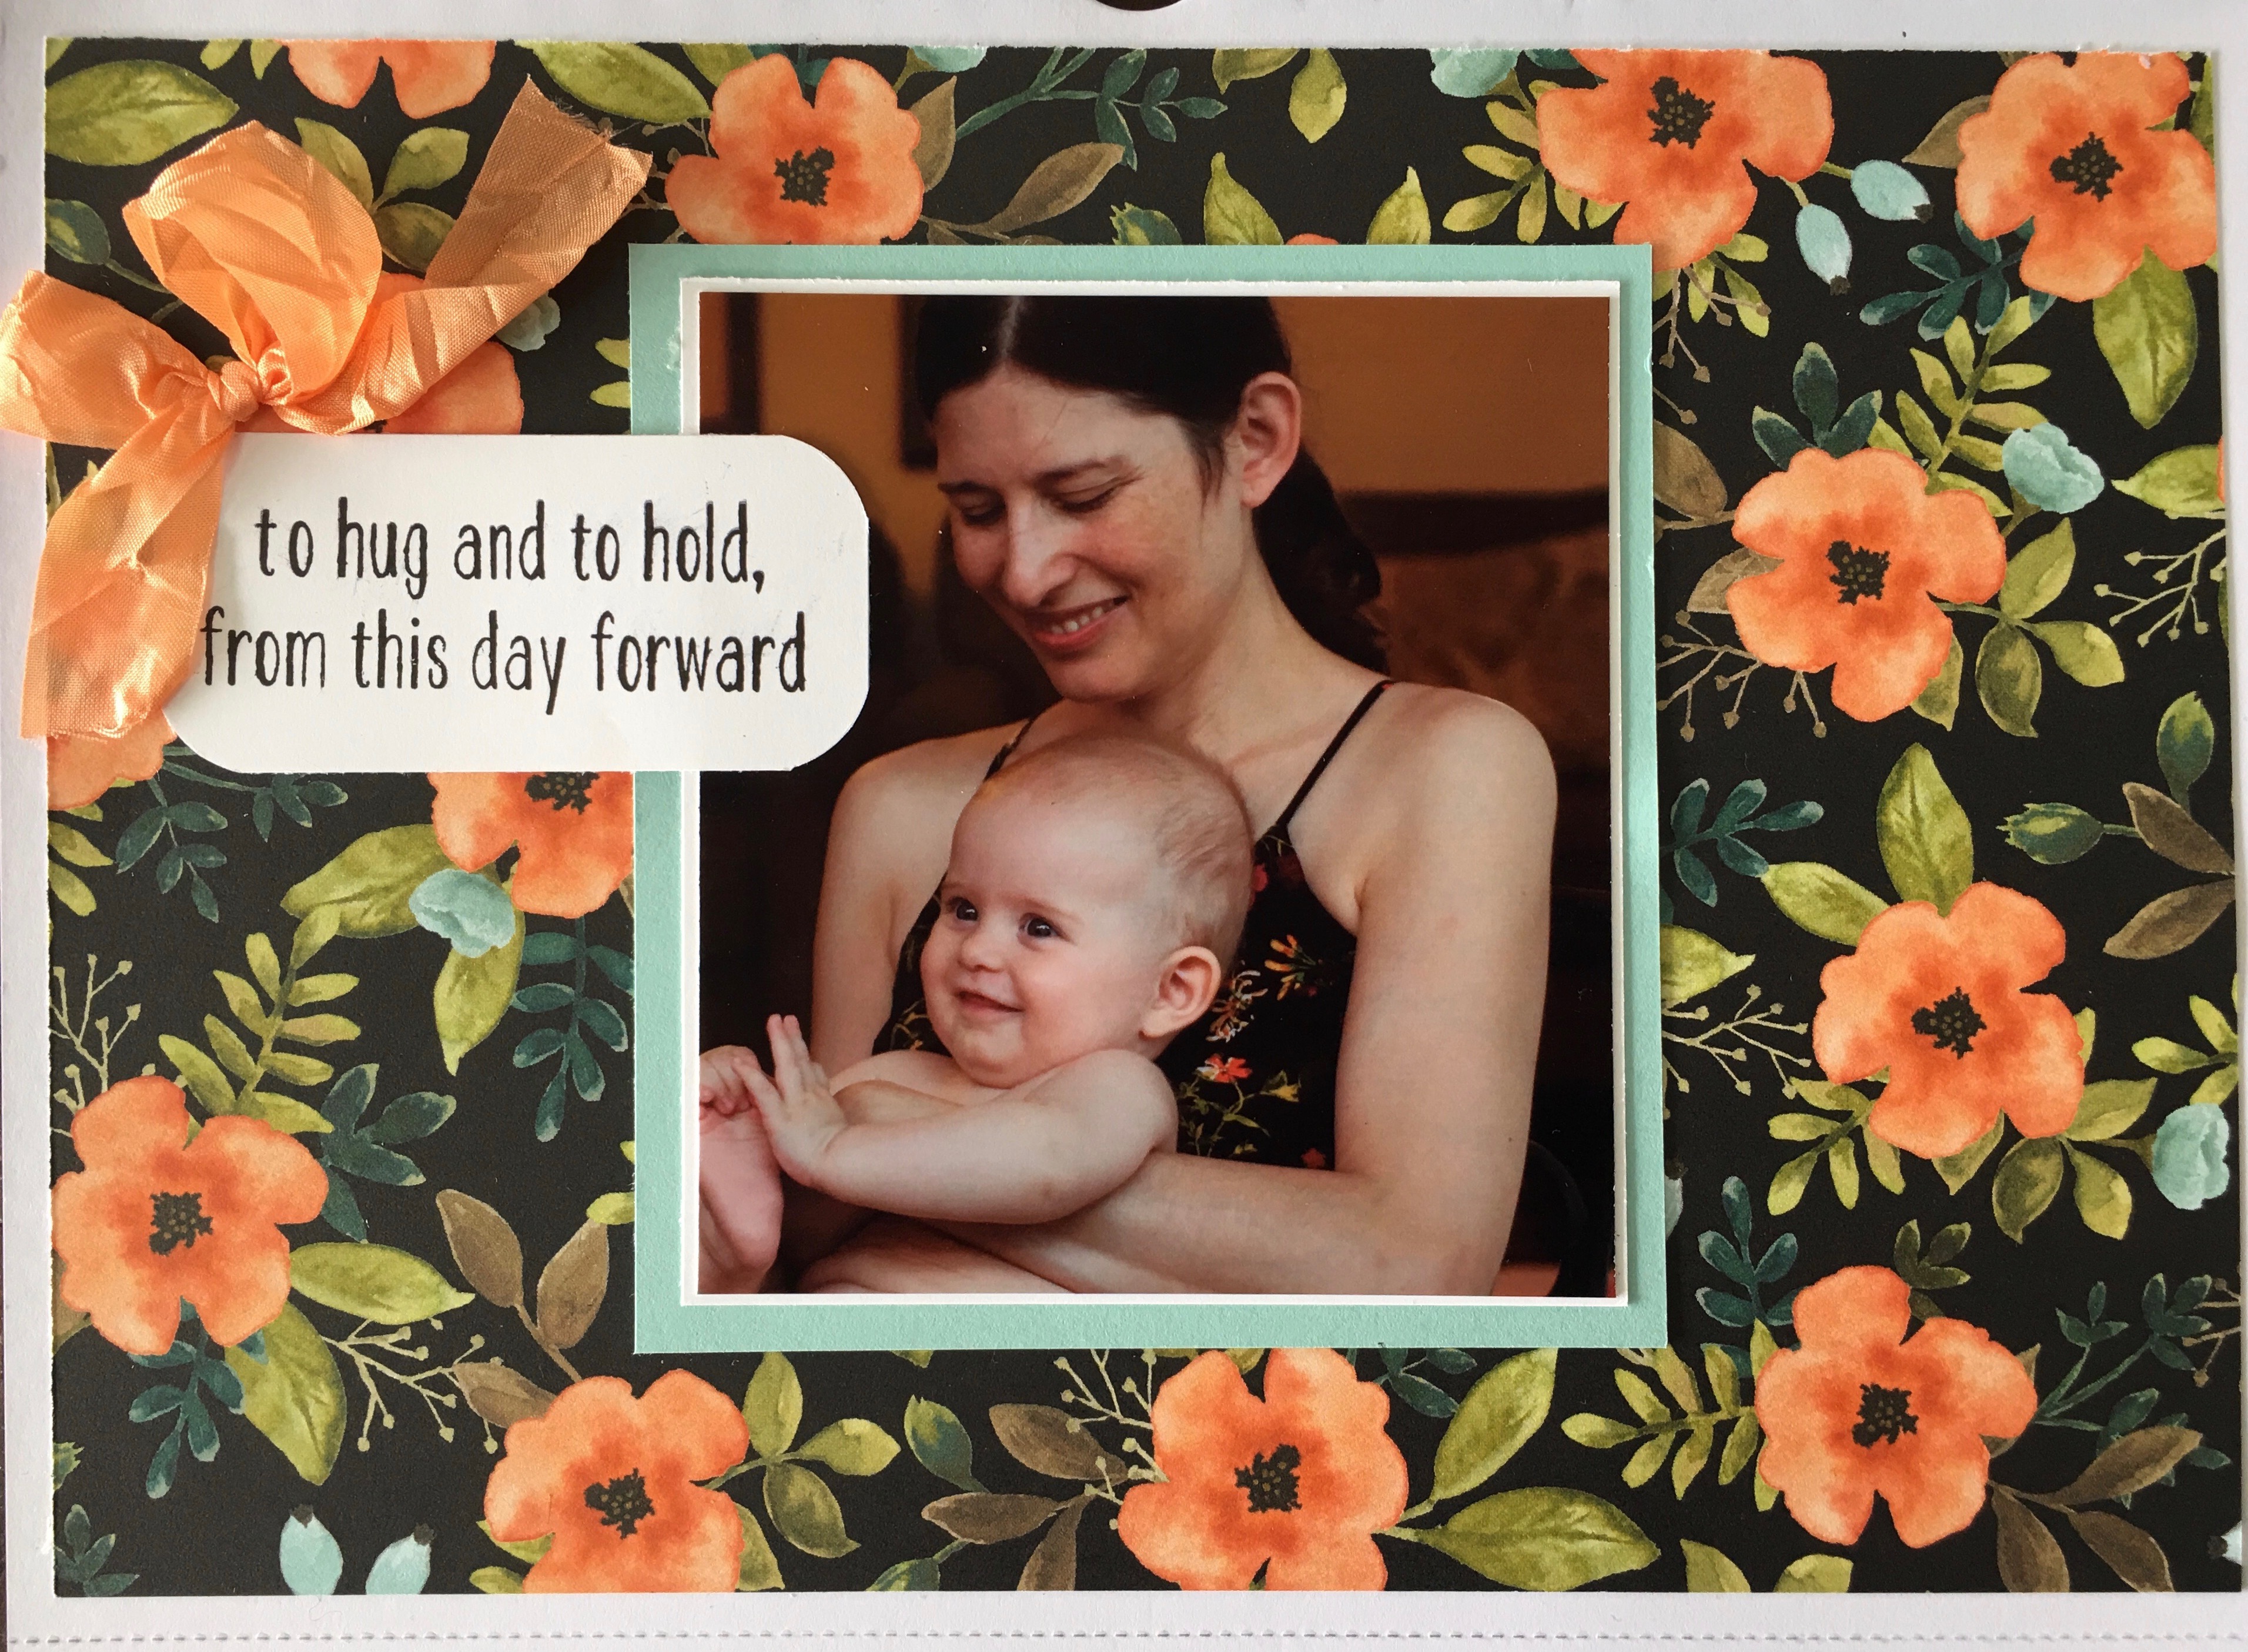
October
Love, love, love this design from the Whole Lot of Lovely DSP and the sentiment from the Baby Bear stamp set.
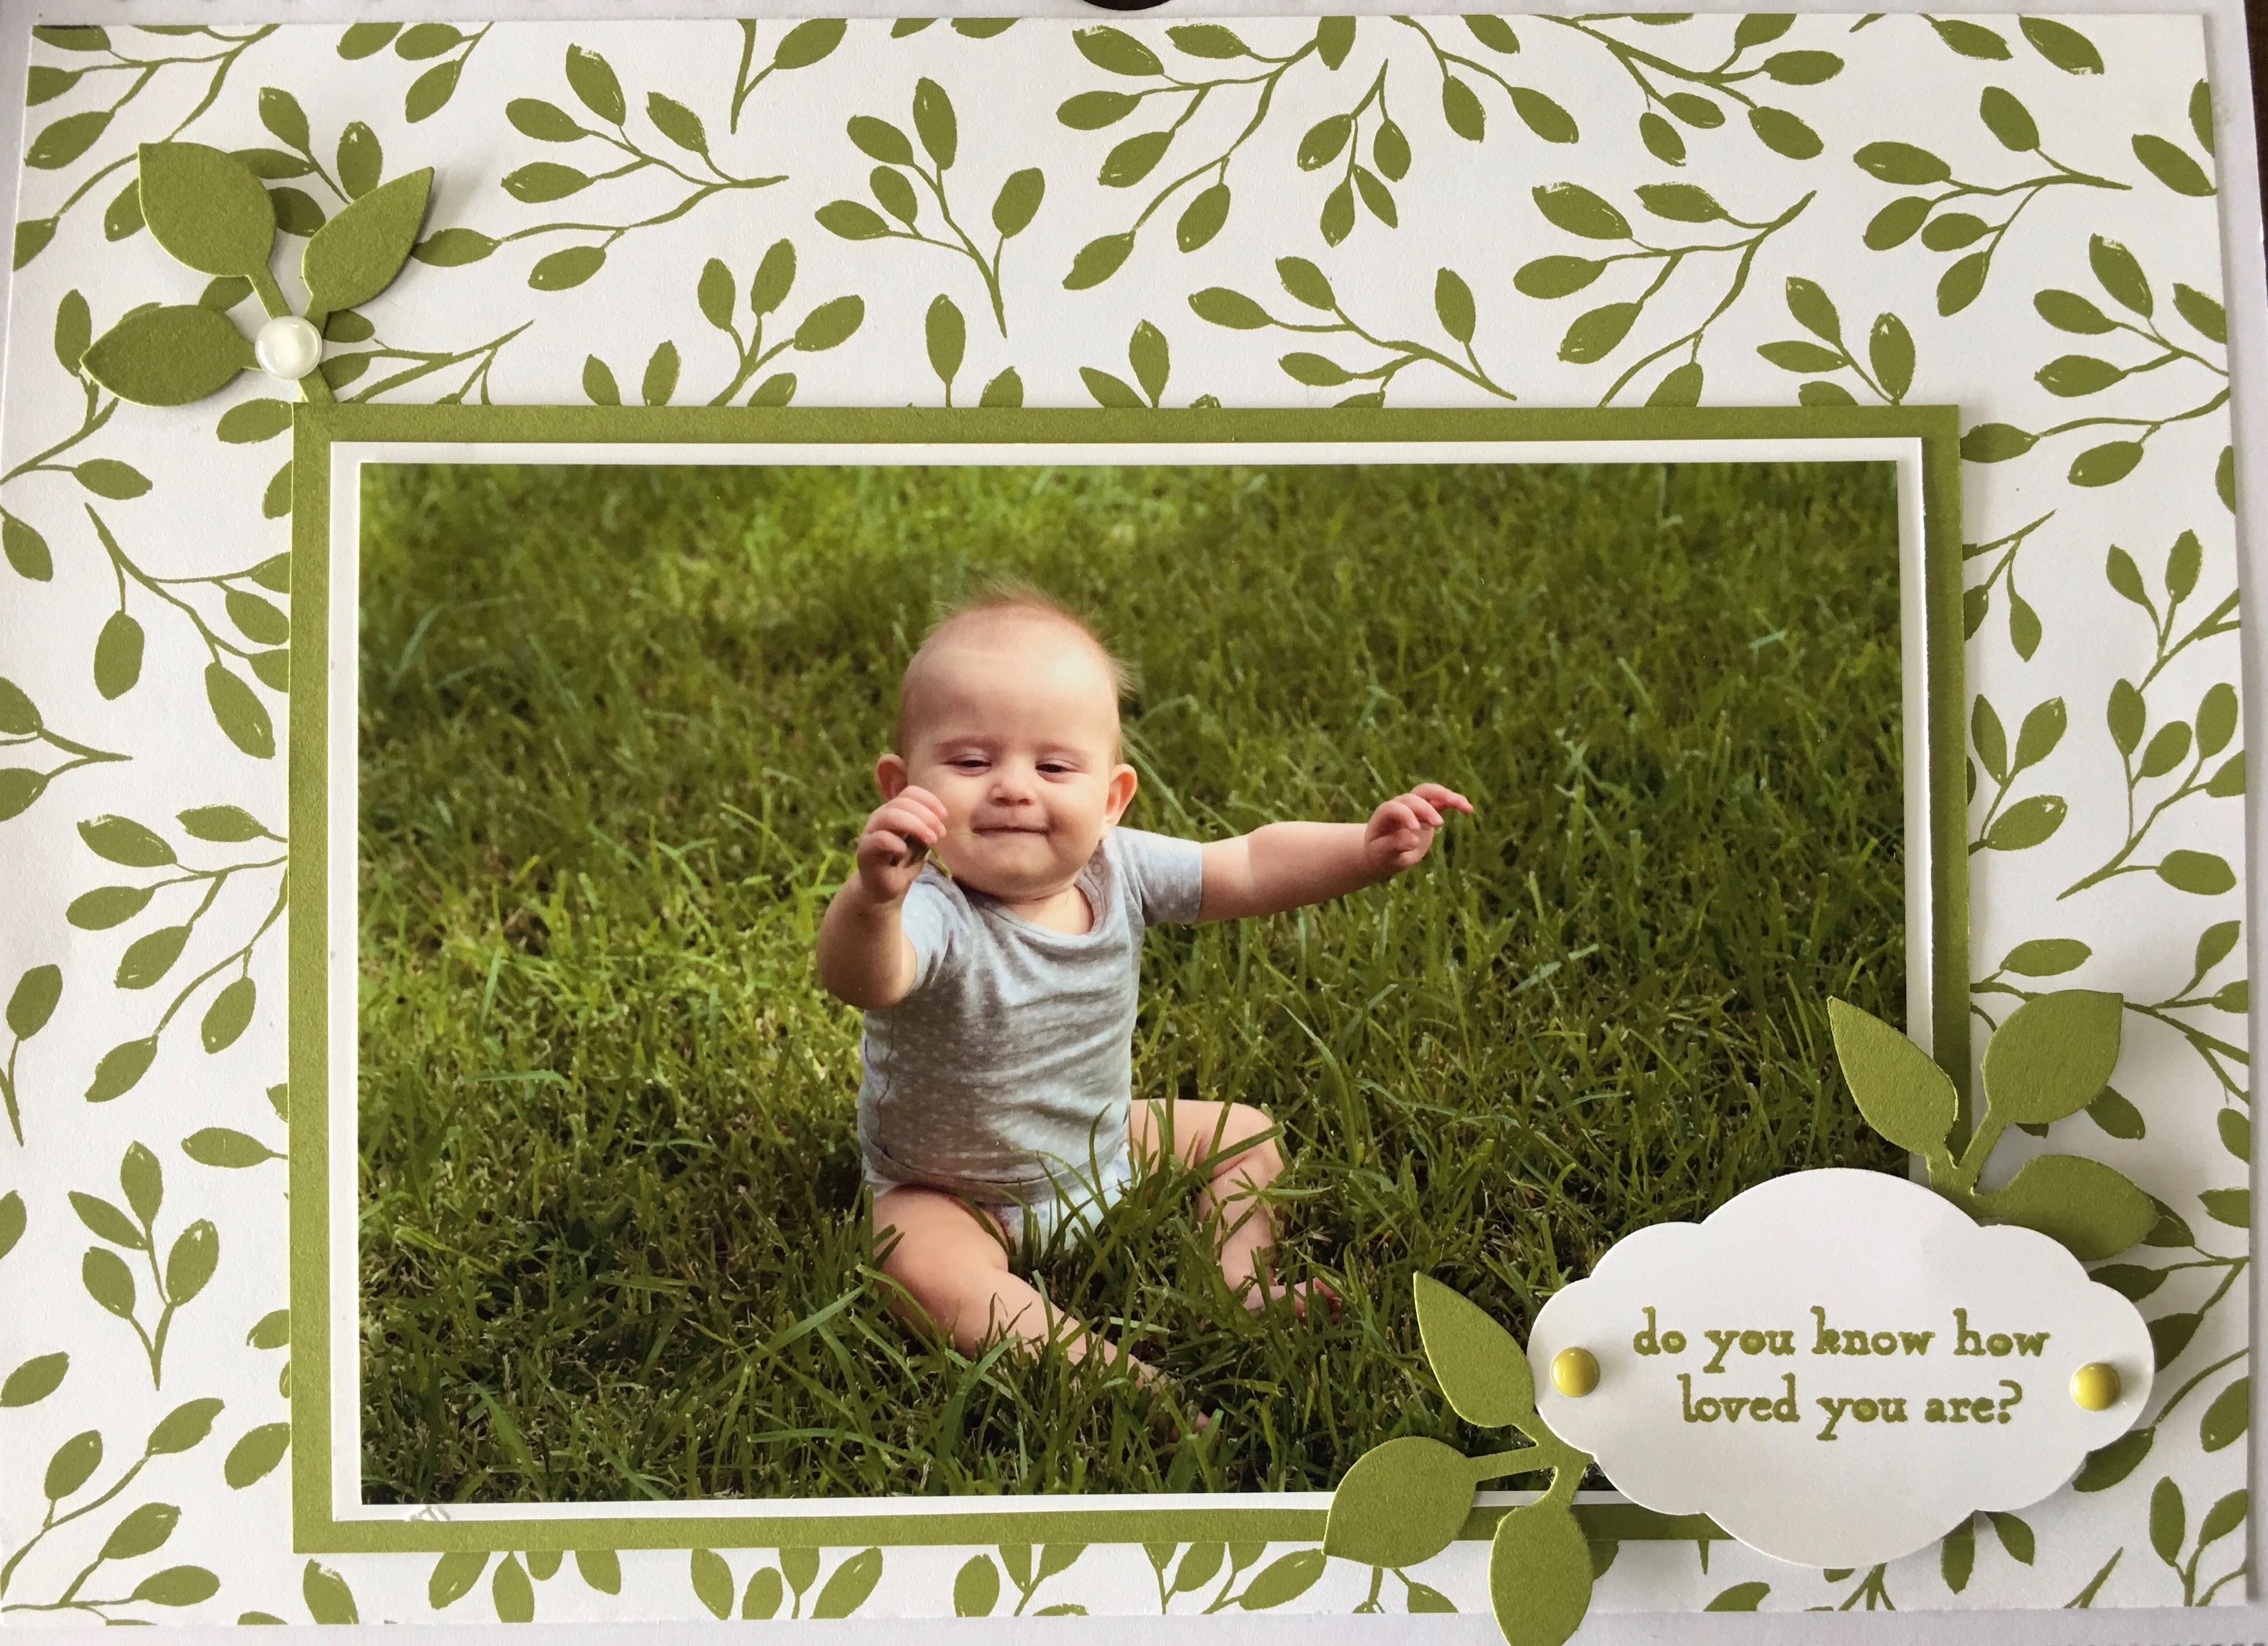
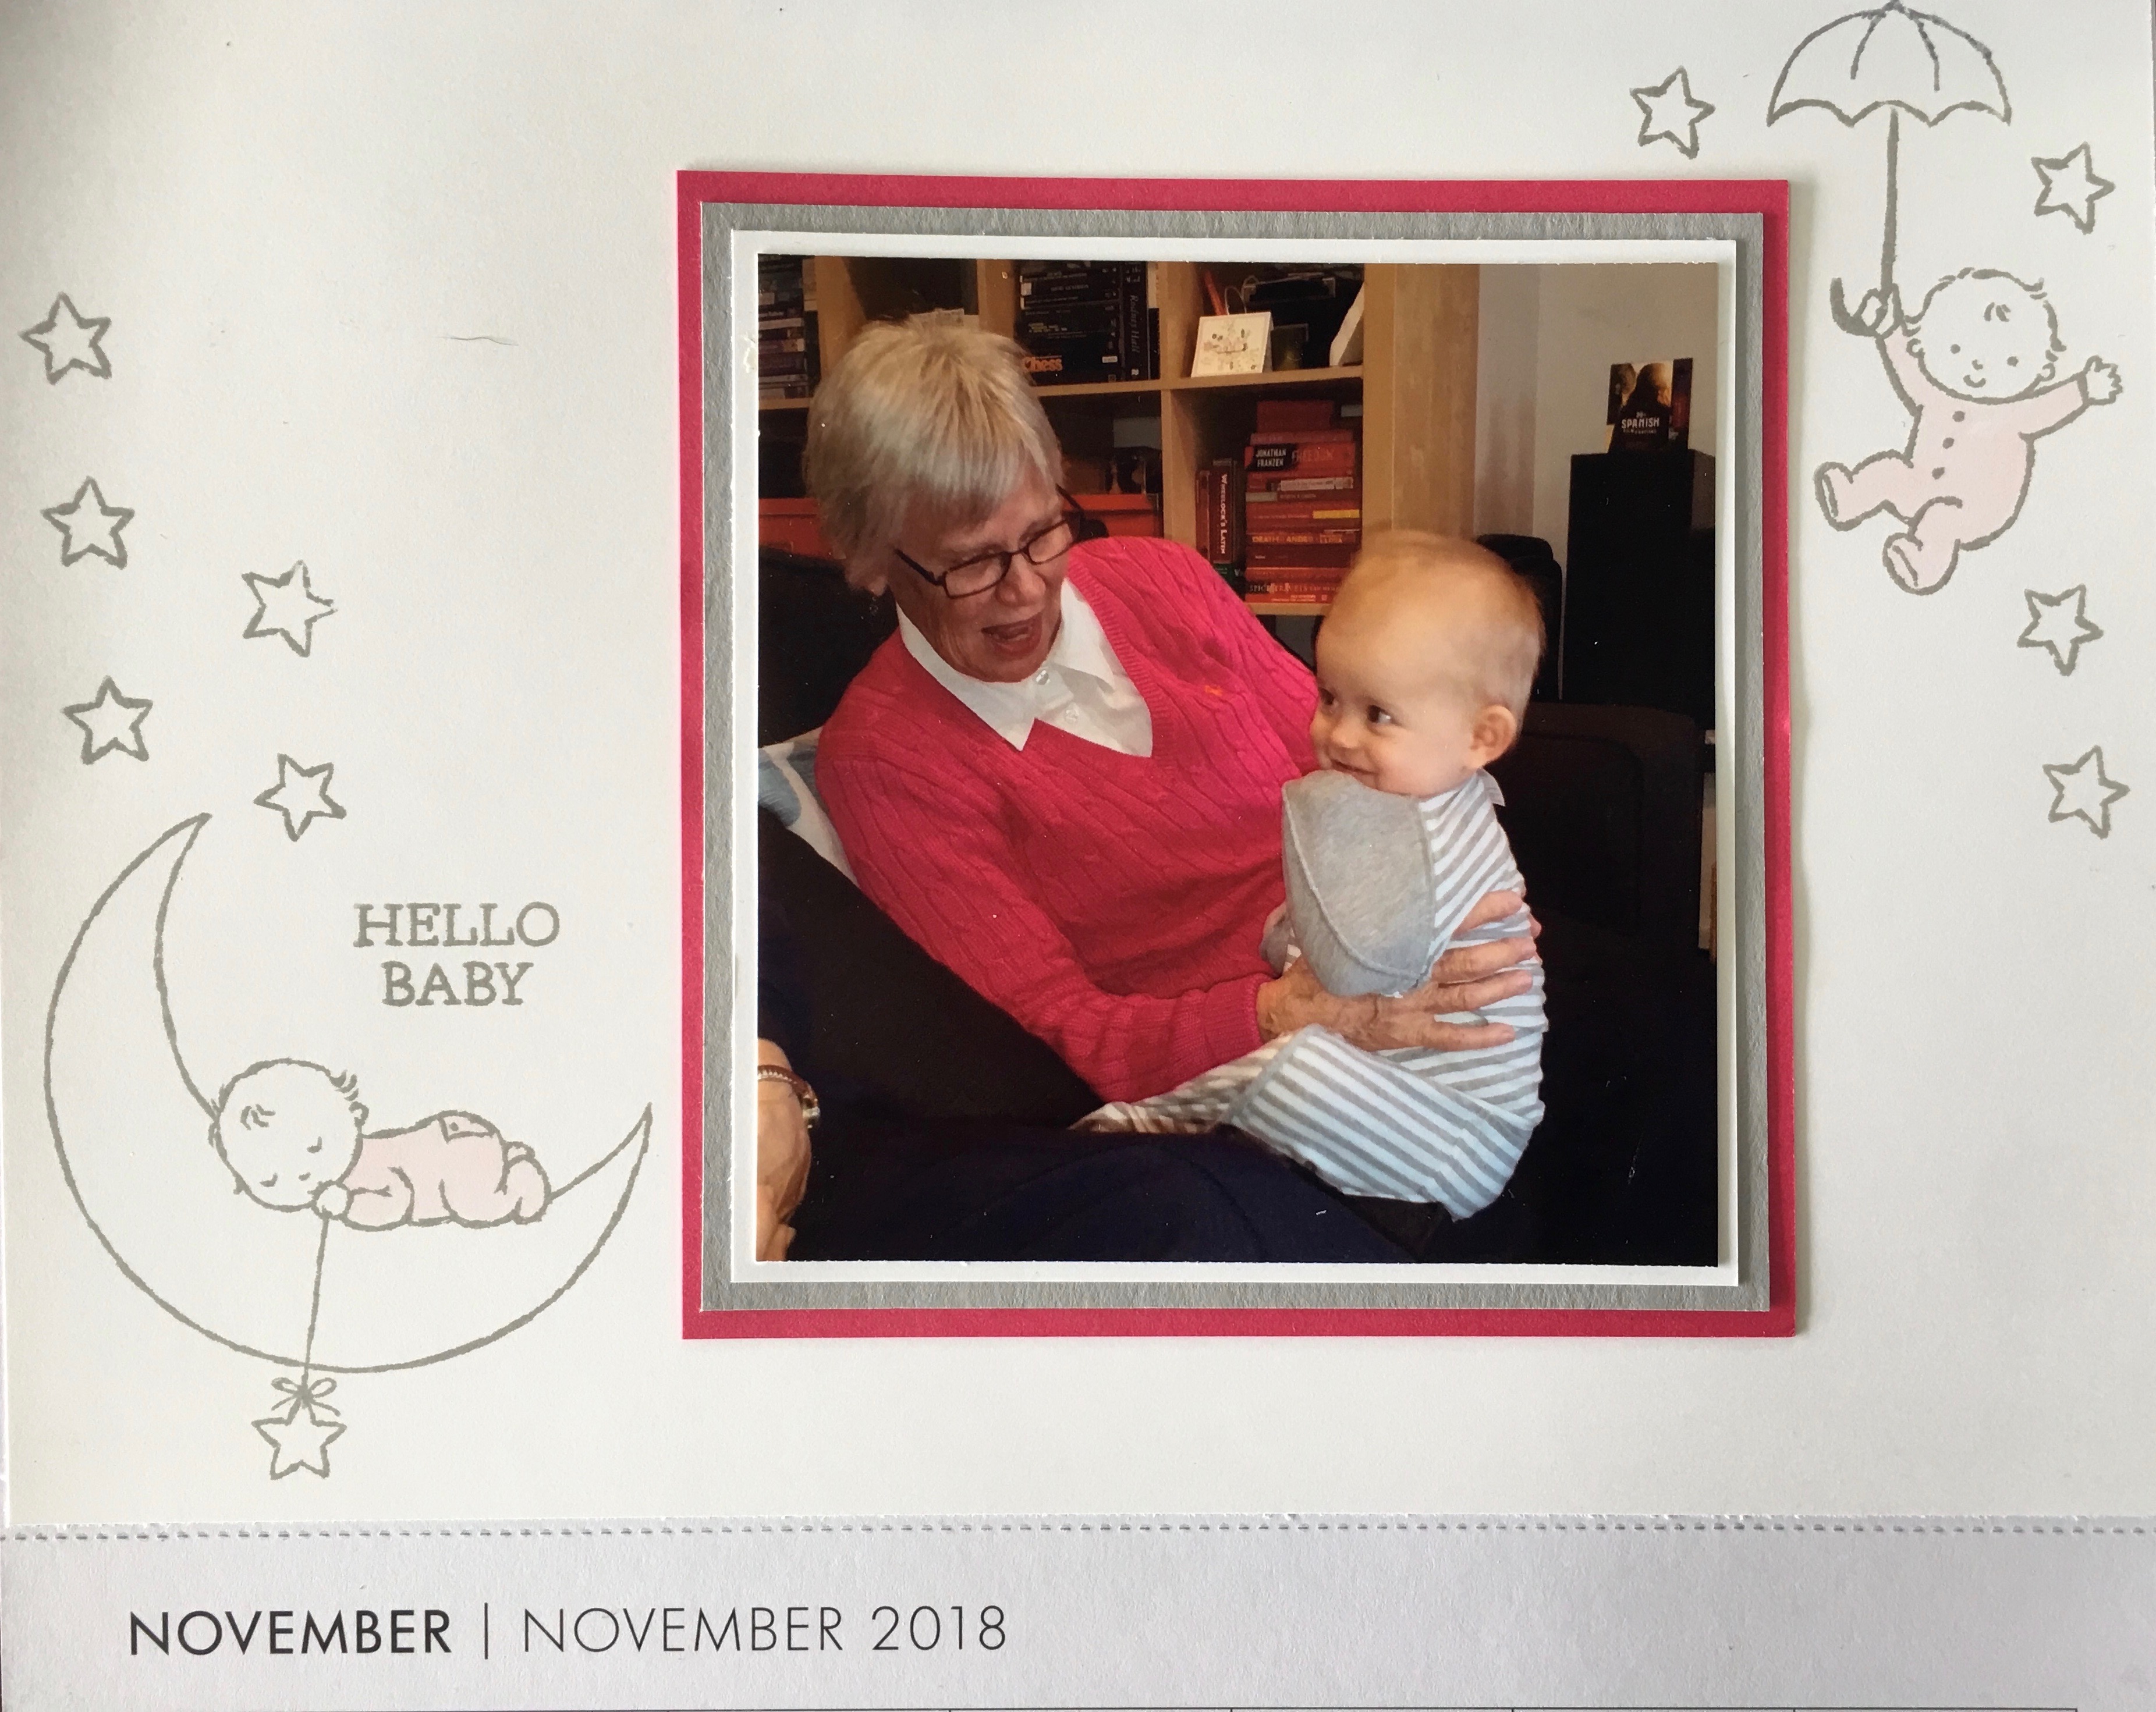
November
Moon Baby is just perfect for this photo of my mum and her granddaughter.
December
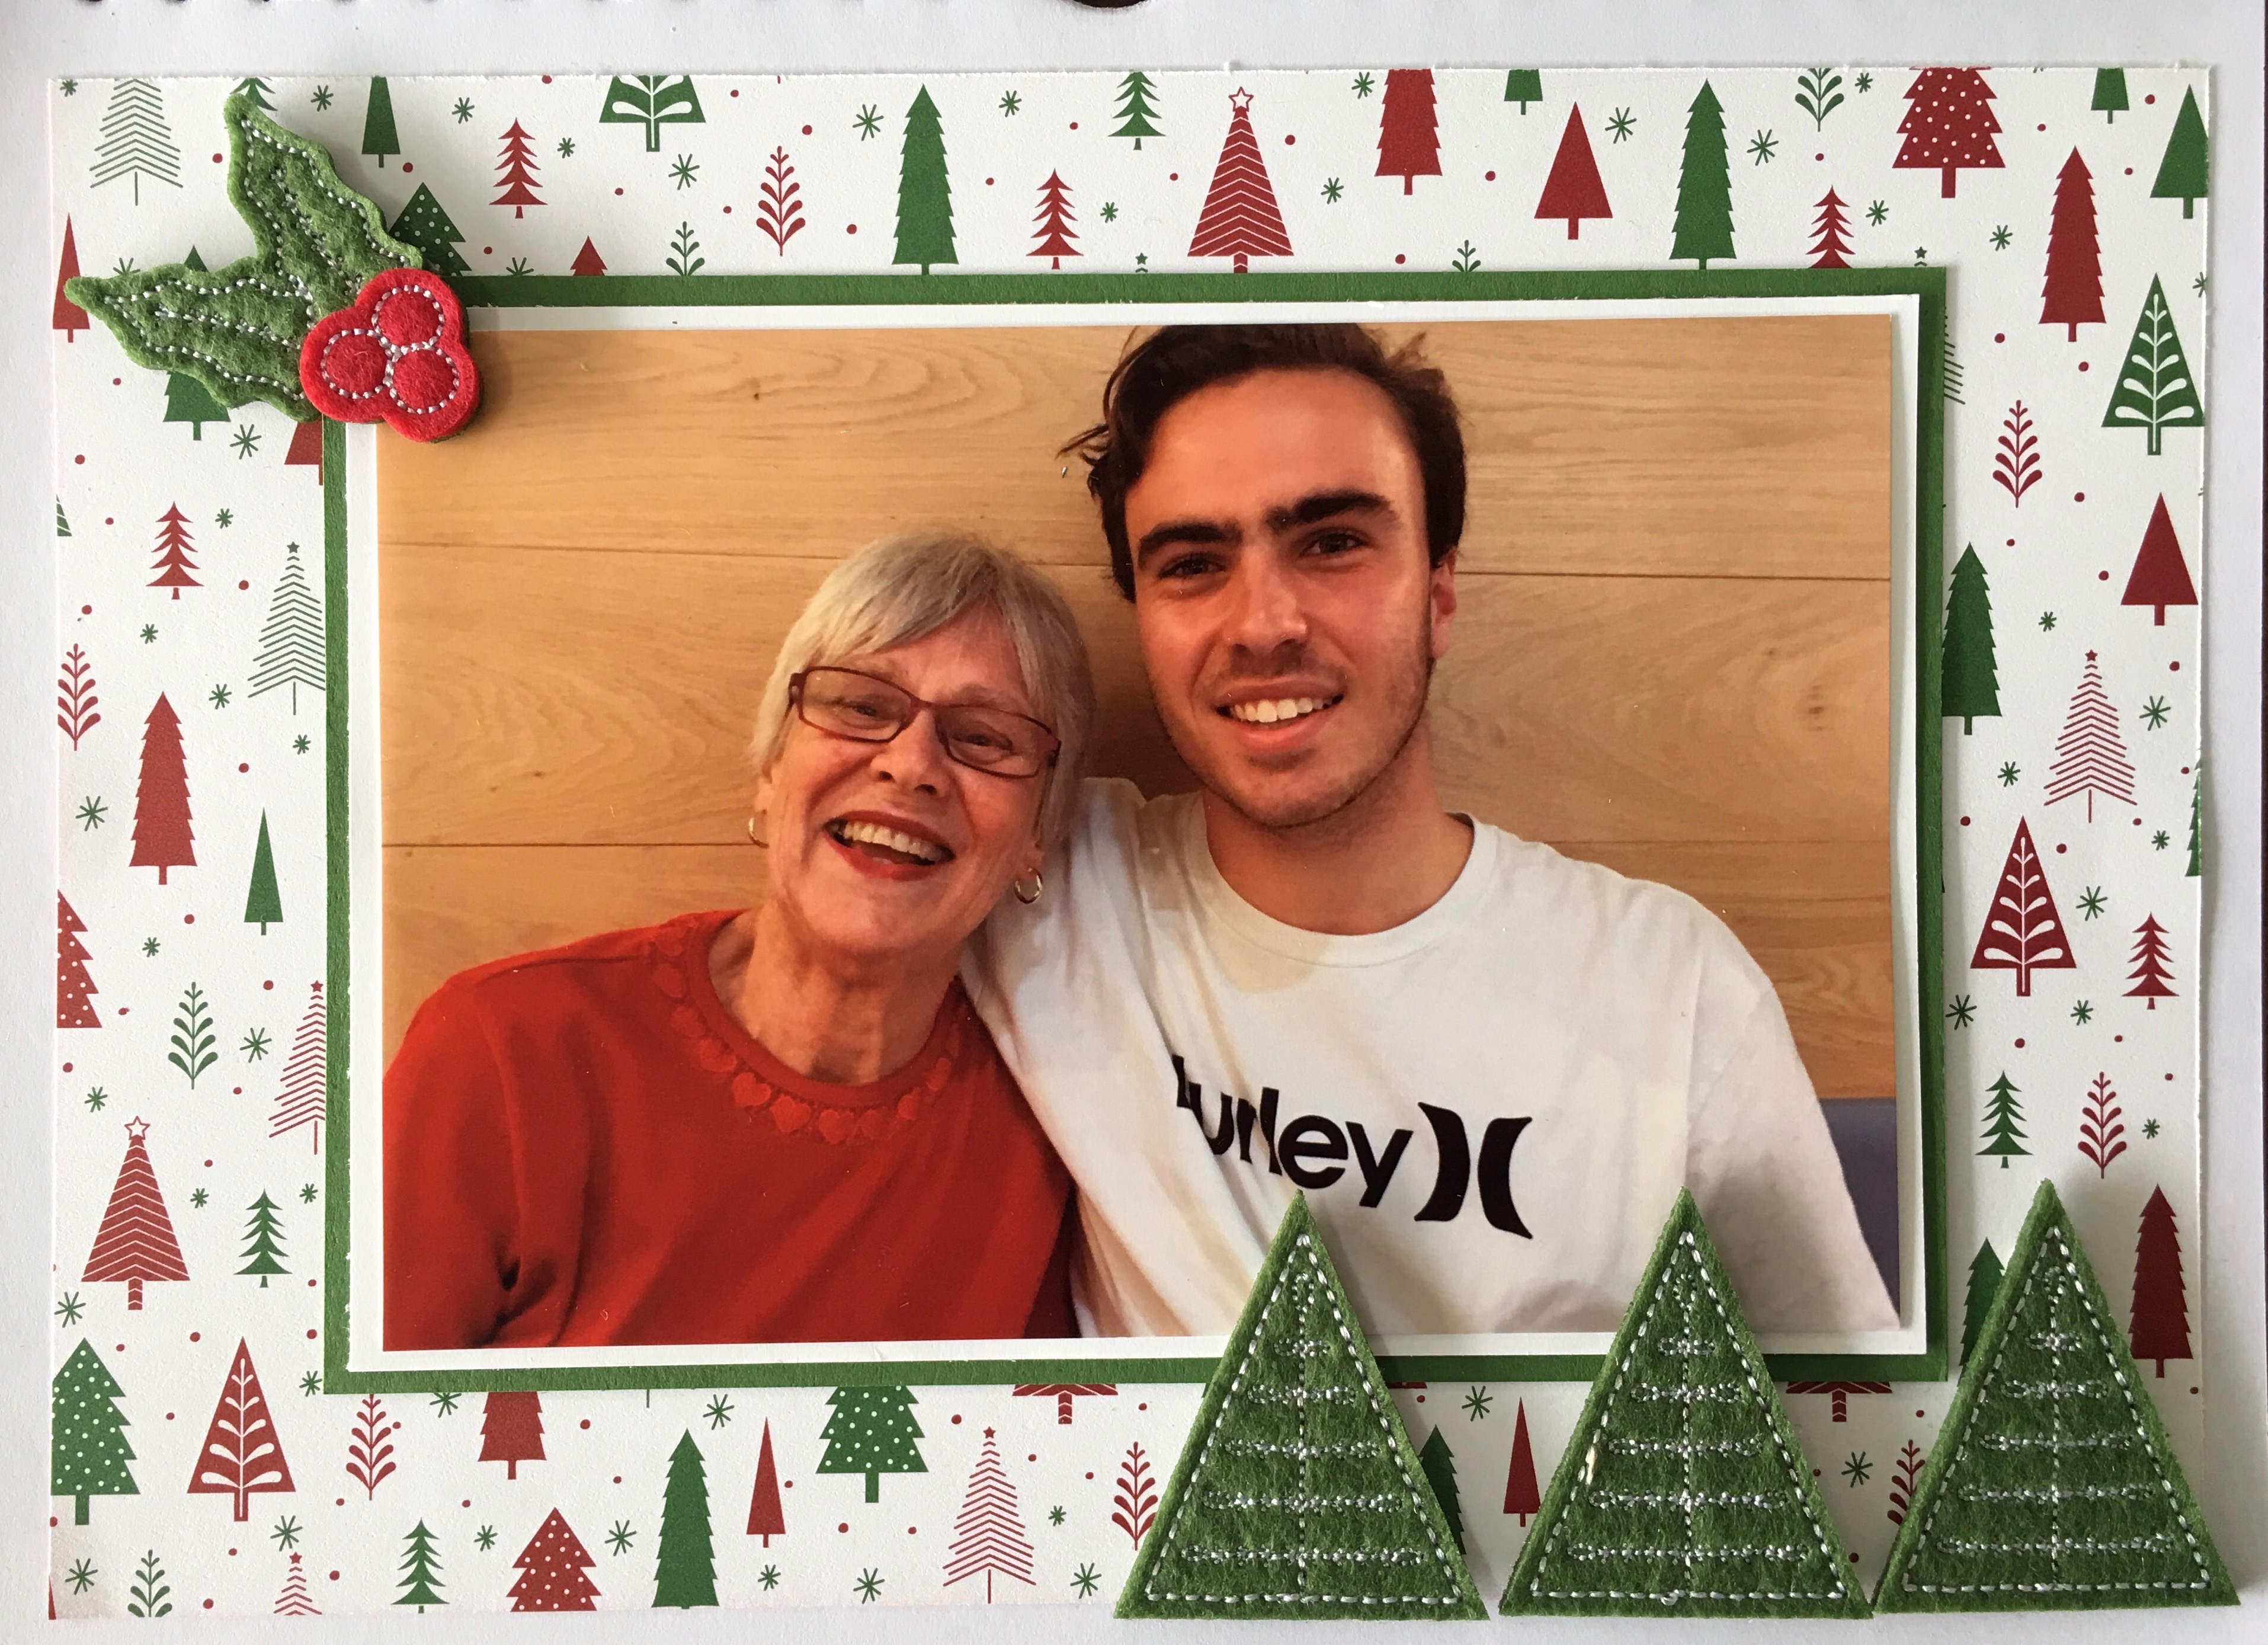
It seems appropriate to end the year with a photo of my birthday boy (who was due Christmas day but luckily came a few days earlier) having a coffee with my mum on his birthday!
I’m so glad I make this calendar each year and my only regret is that I didn’t start when my boys were younger. Making this calendar also reminds me how much I enjoy scrapbooking, so watch out for more posts on scrapbooking and memory keeping in 2018!
Is there any better way to start the new year than with free craft stuff?
Well, more time to craft is a personal new year’s resolution for me, but while I’m working on finding that extra time in my week, I’ll happily settle for free craft stuff!
Want even more free stuff? Don’t forget to watch for another release of new Sale-a-bration items coming 16 February.
Over the next few weeks I’ll share with you some of the things I’ve made with exciting new products from both of these catalogues, but until then, happy crafting!
Tonight the Art with Heart team girls are sharing some creative projects by adding texture with embossing. Embossing can add a lovely dimension, and with our wonderful Stampin’ Up! products, we can create many different looks. These include heat embossing using embossing powder, dry embossing using our textured folders or by adding embossing paste!
When it comes to embossing I have a confession to make…I regularly heat emboss my cards but I almost never use my embossing folders! Don’t get me wrong, I really adore embossed paper, I guess it’s more because of the way I design my cards. I usually begin with a stamp set, coloured card stock or Designer Series Paper as my starting point and I simply forget about embossing my cards.
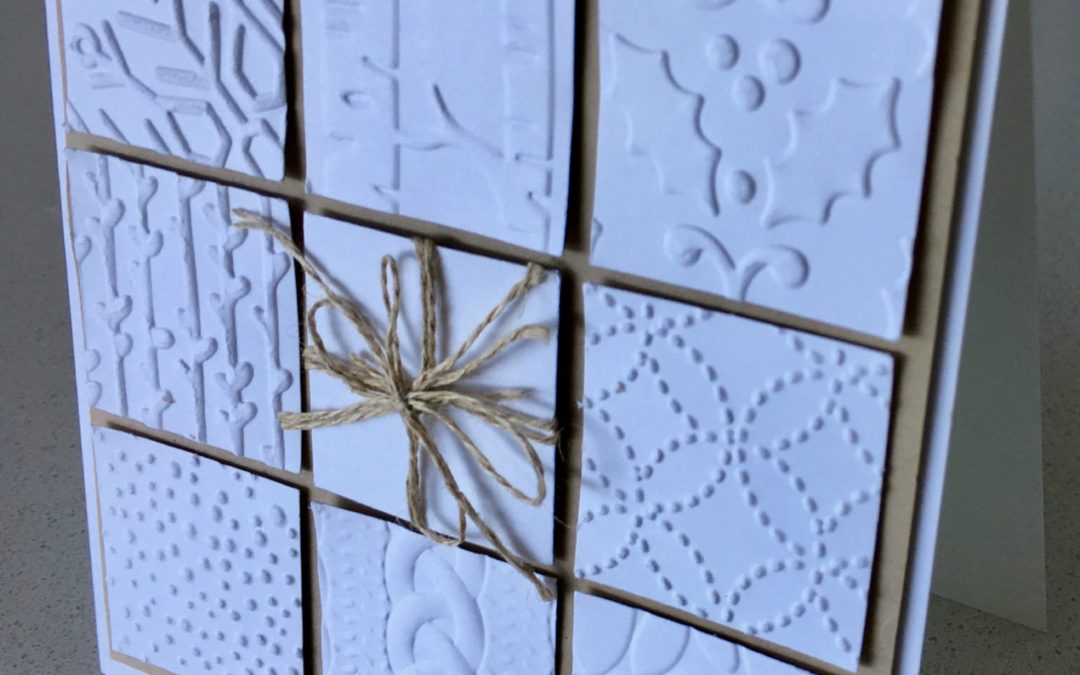
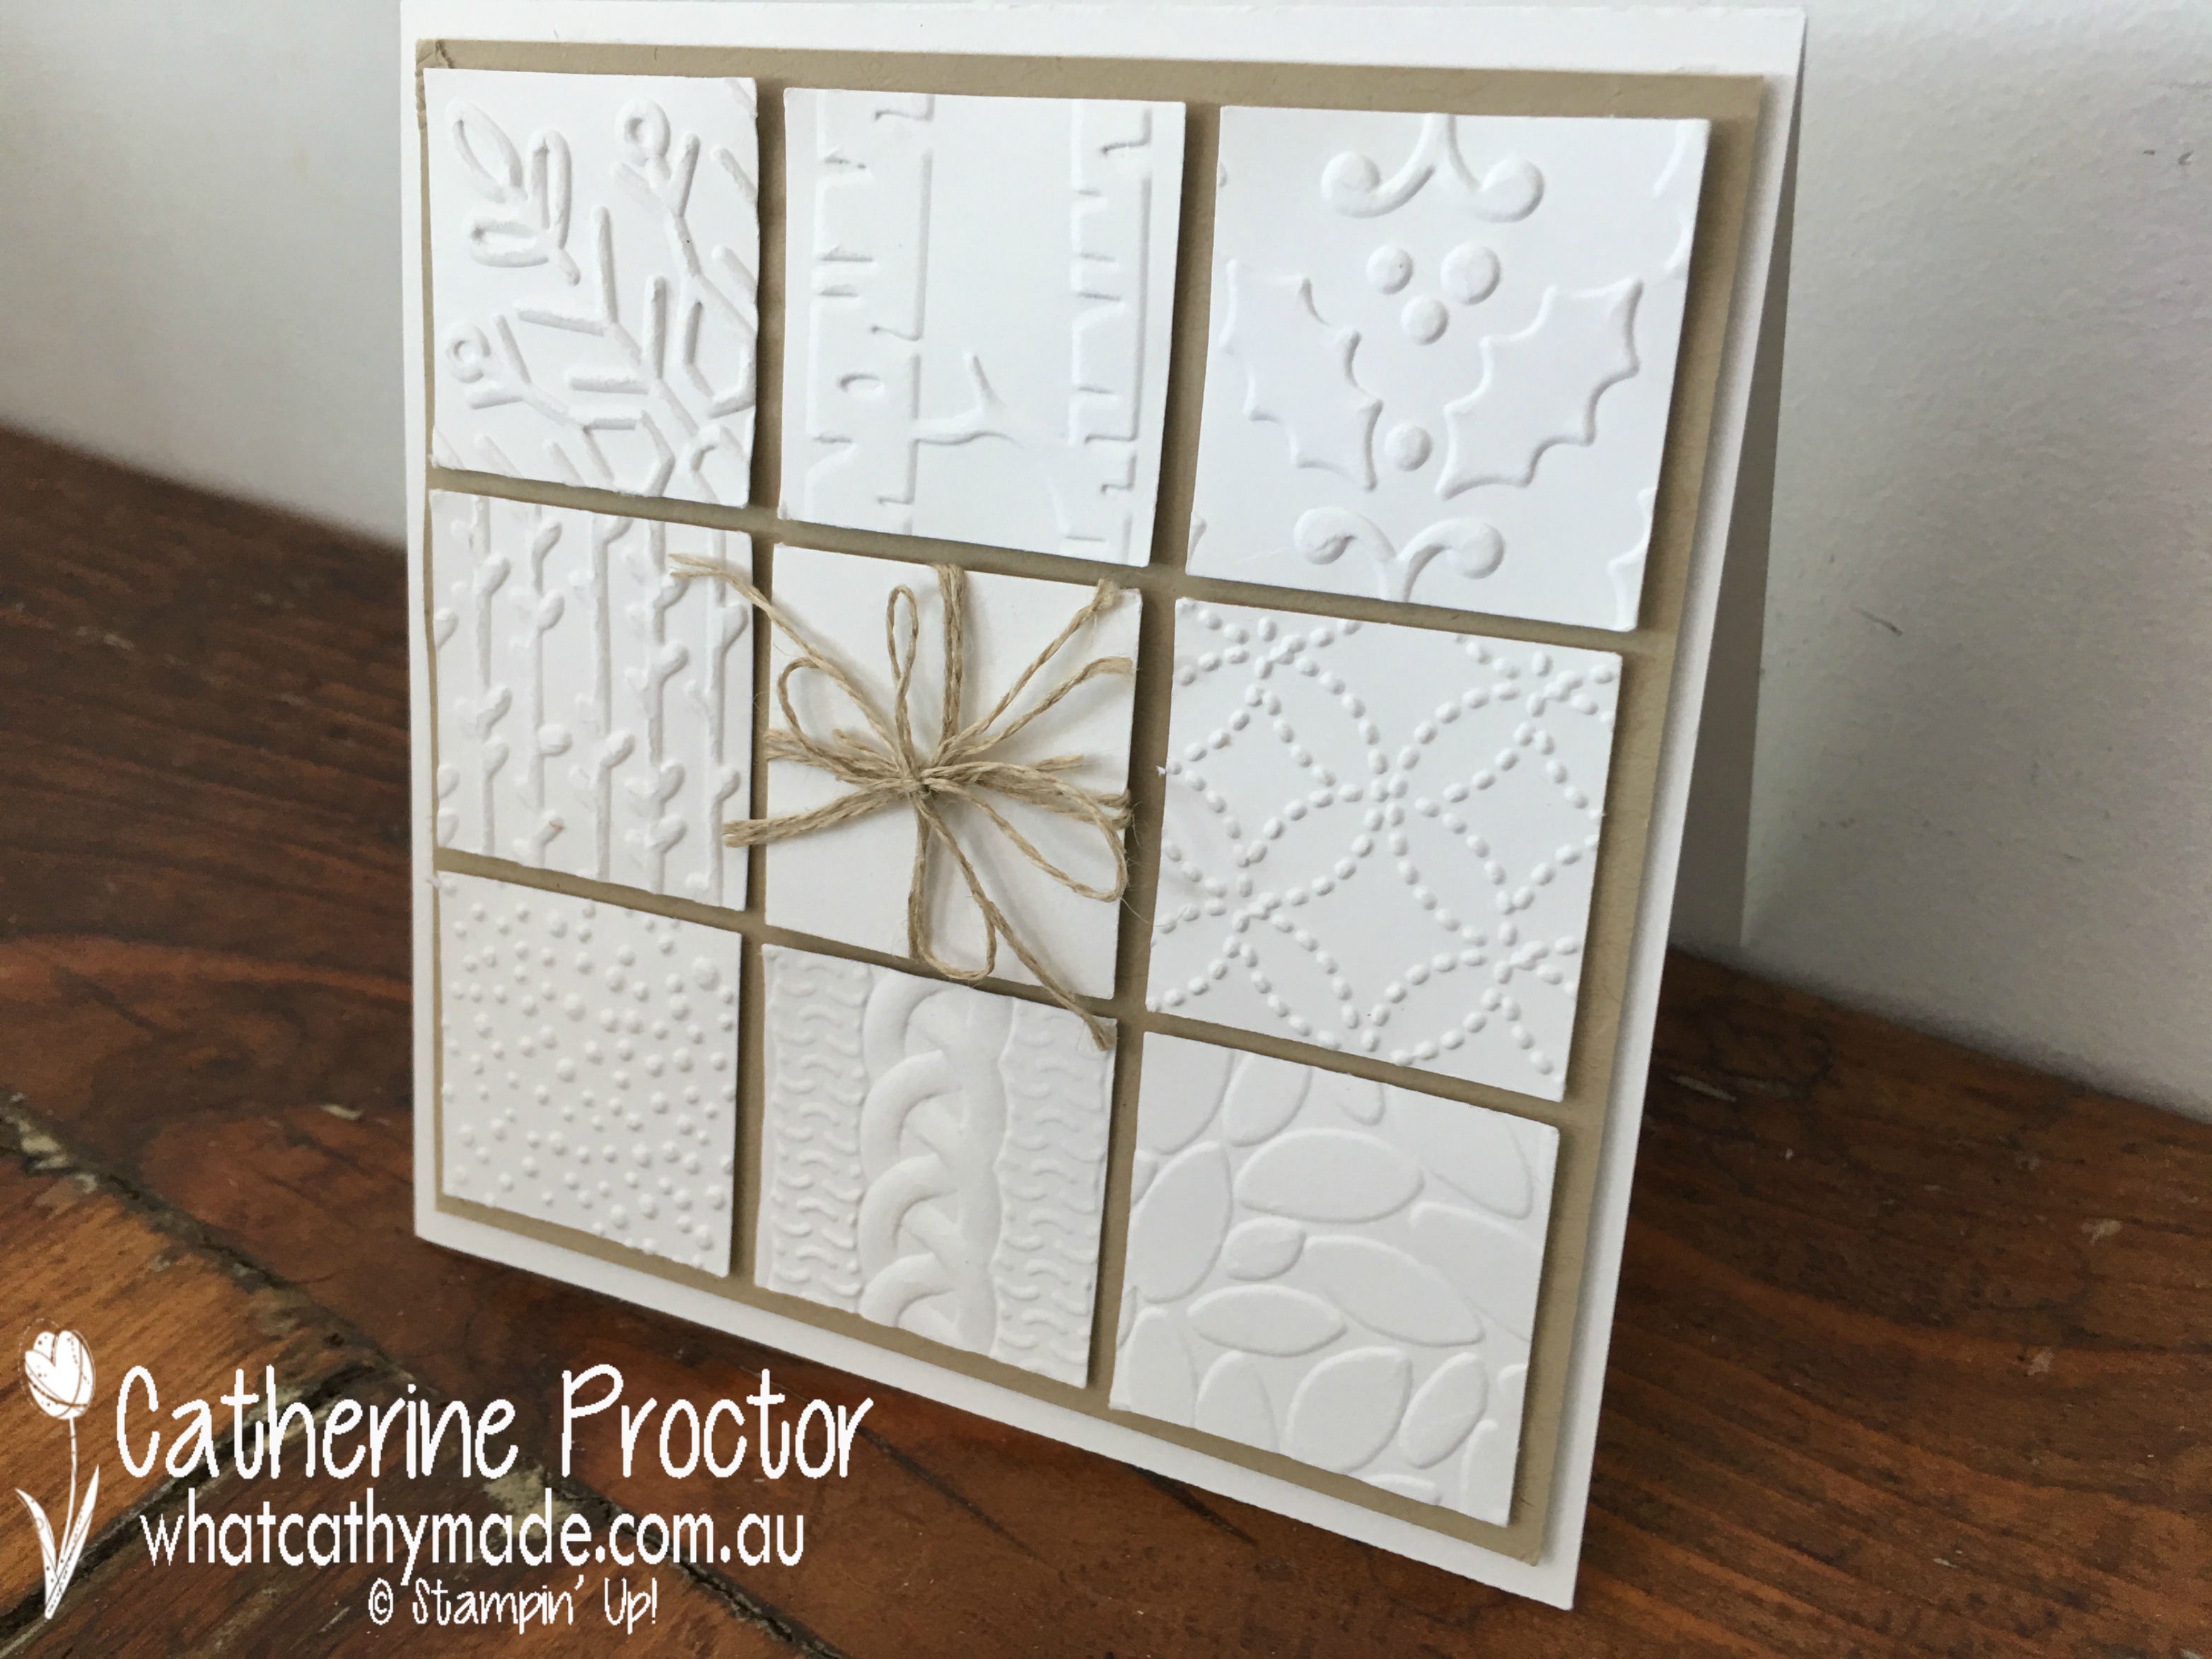
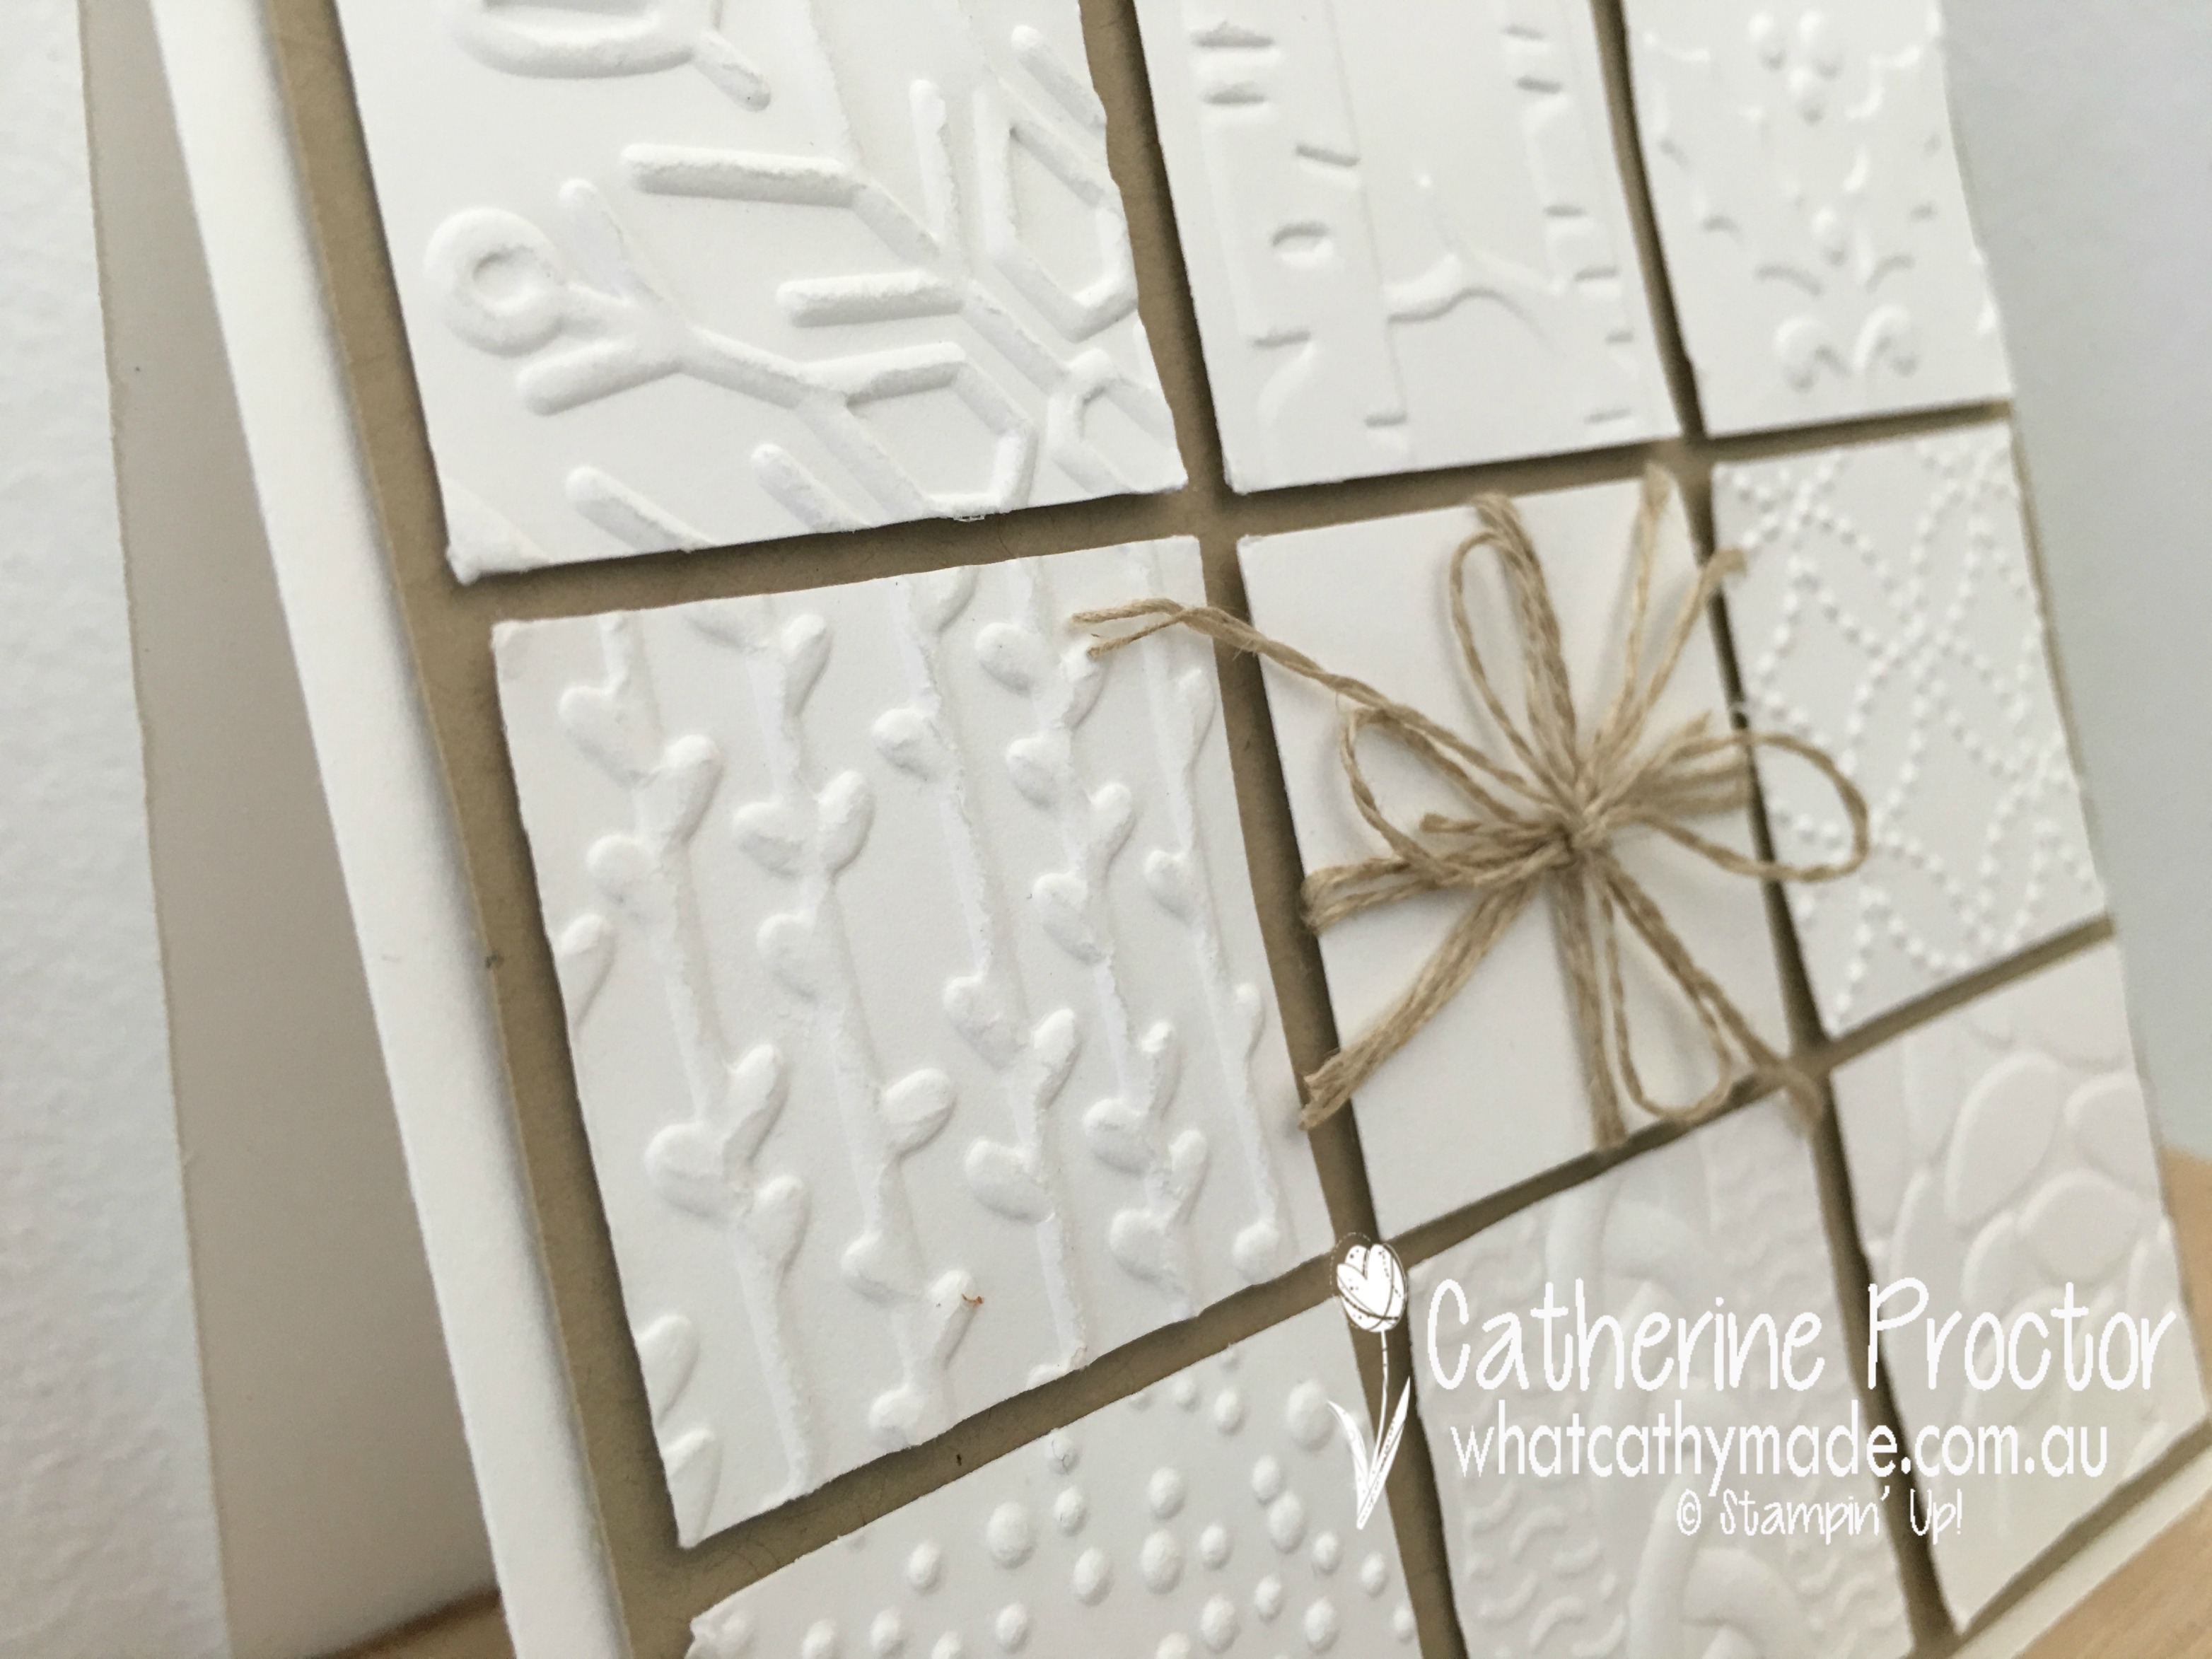
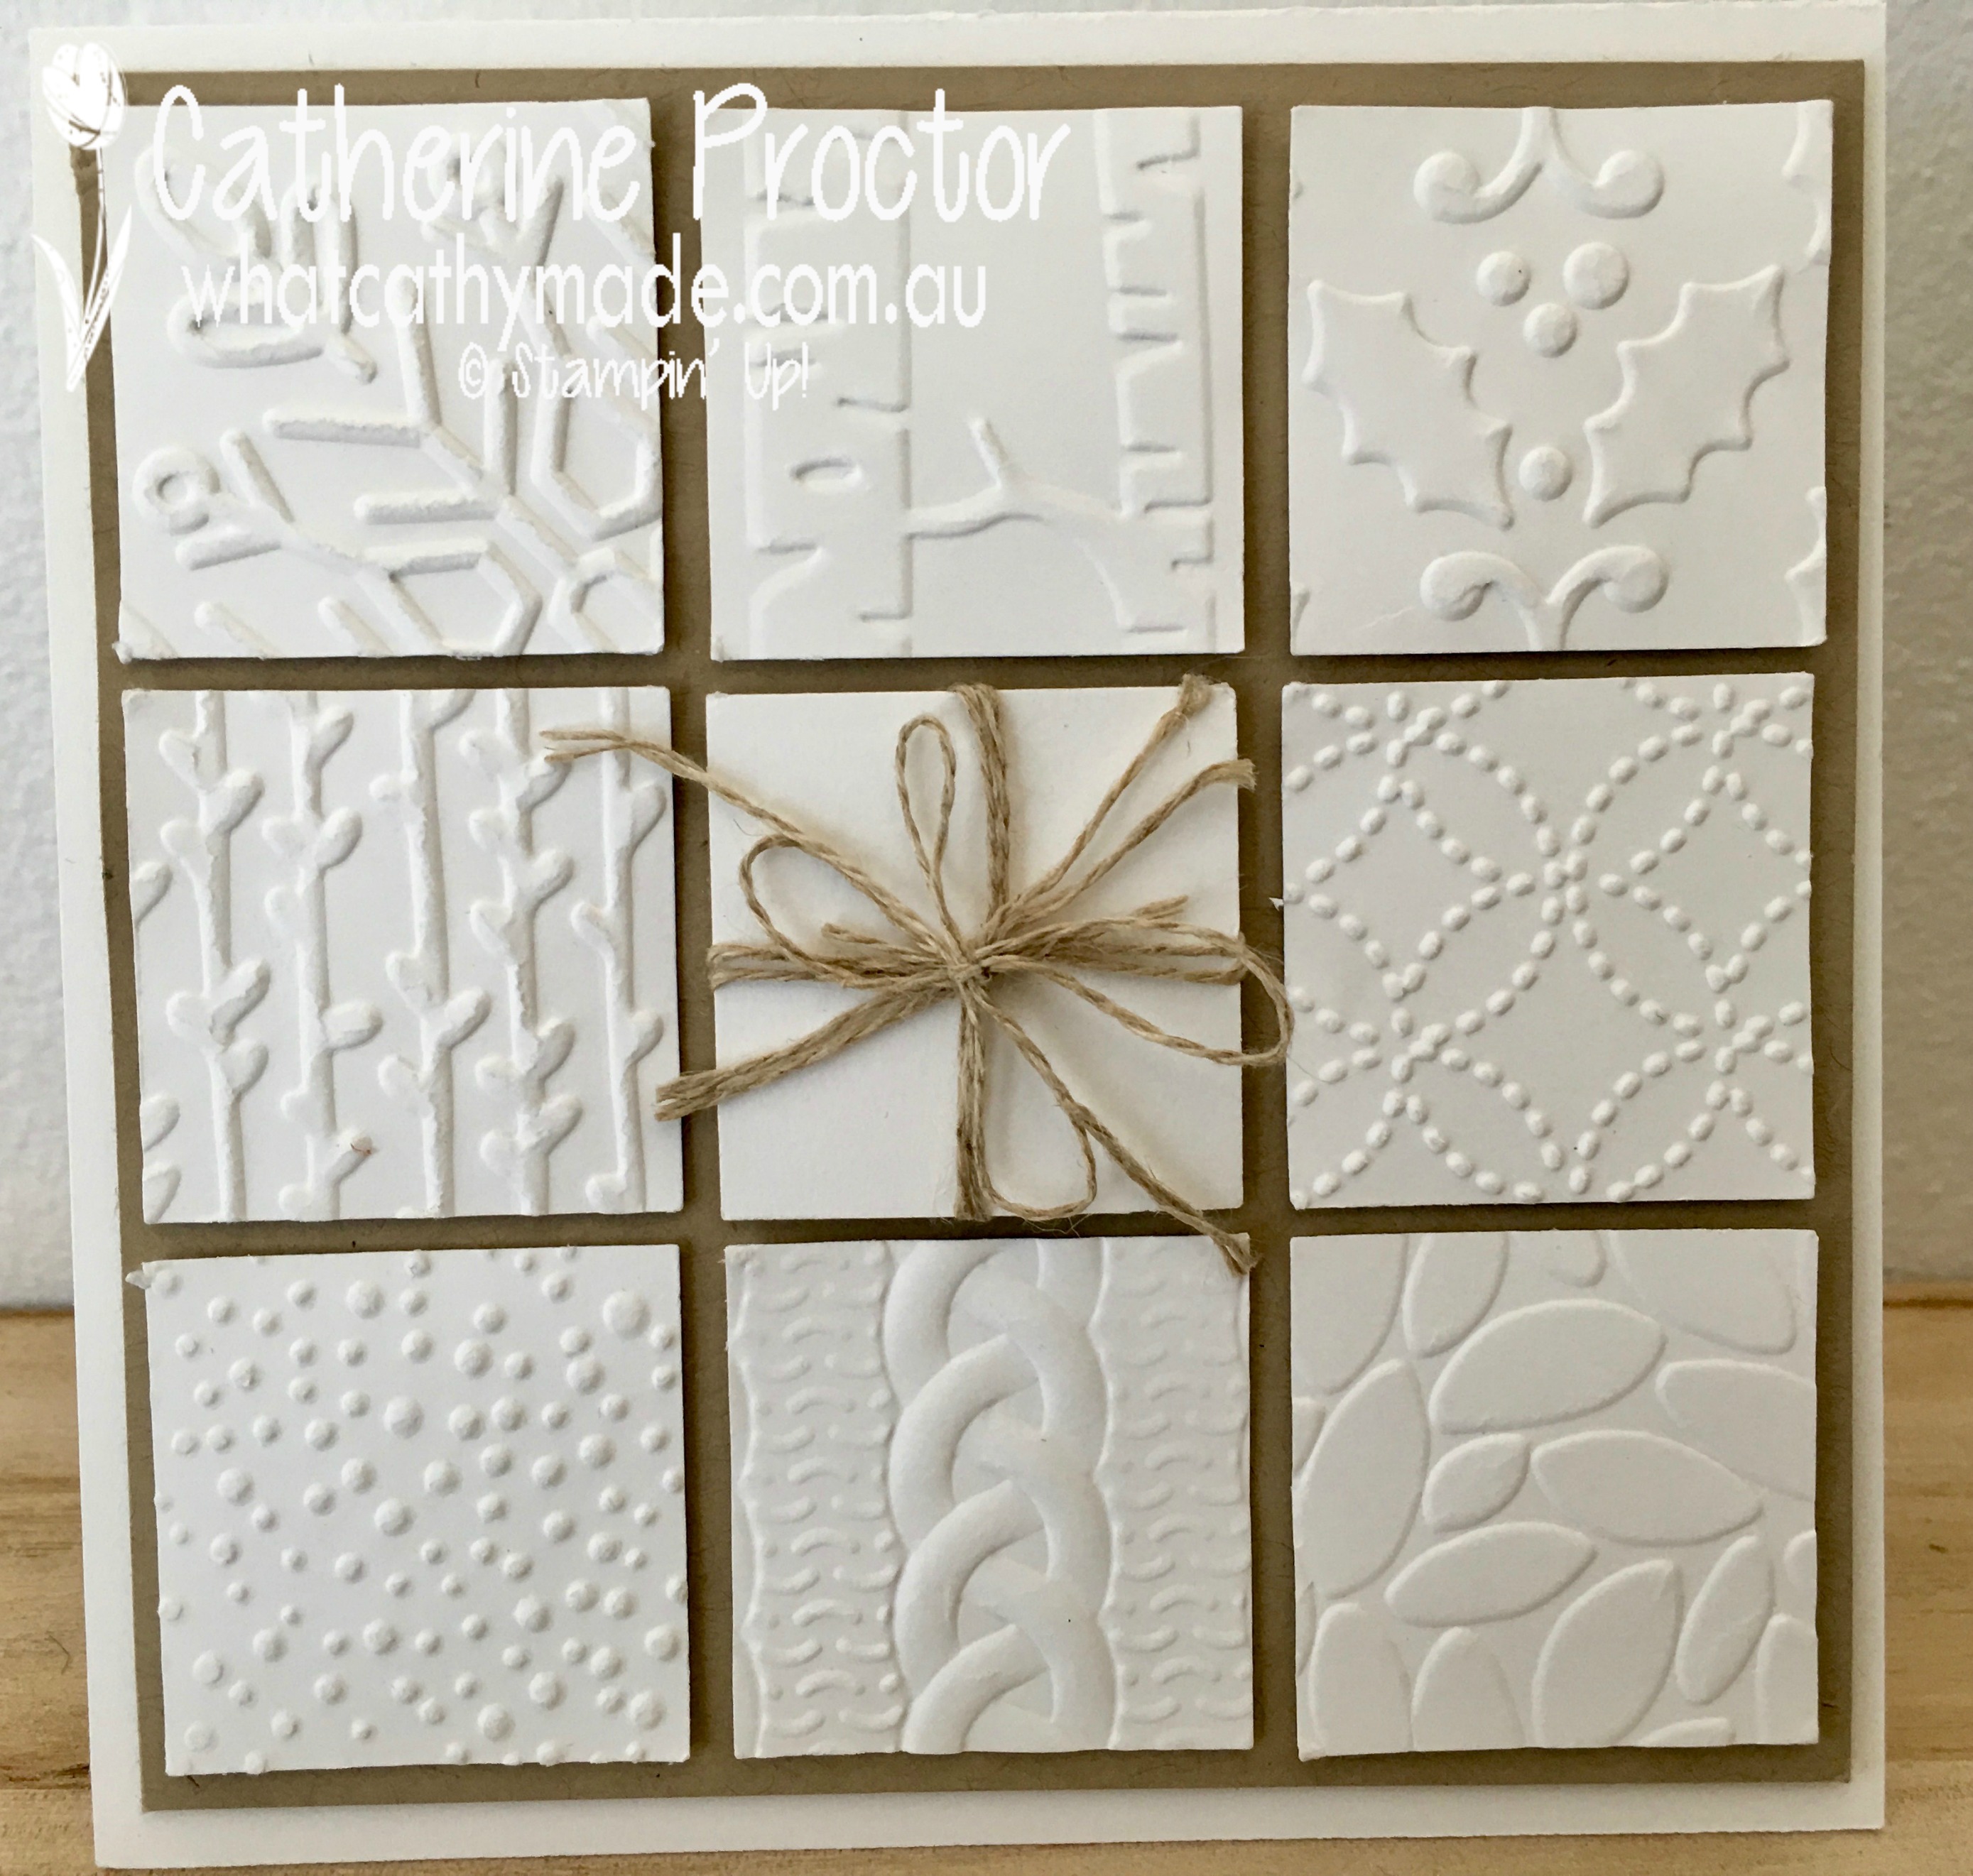
So for this blog hop I decided it was time to really challenge my self and make a card that had no heat embossing, stamping or designer series paper…a card that really showcased the beautiful texture of the Stampin’ Up! embossing folders. And what better way to show case as many embossing folders as possible than a sampler card!
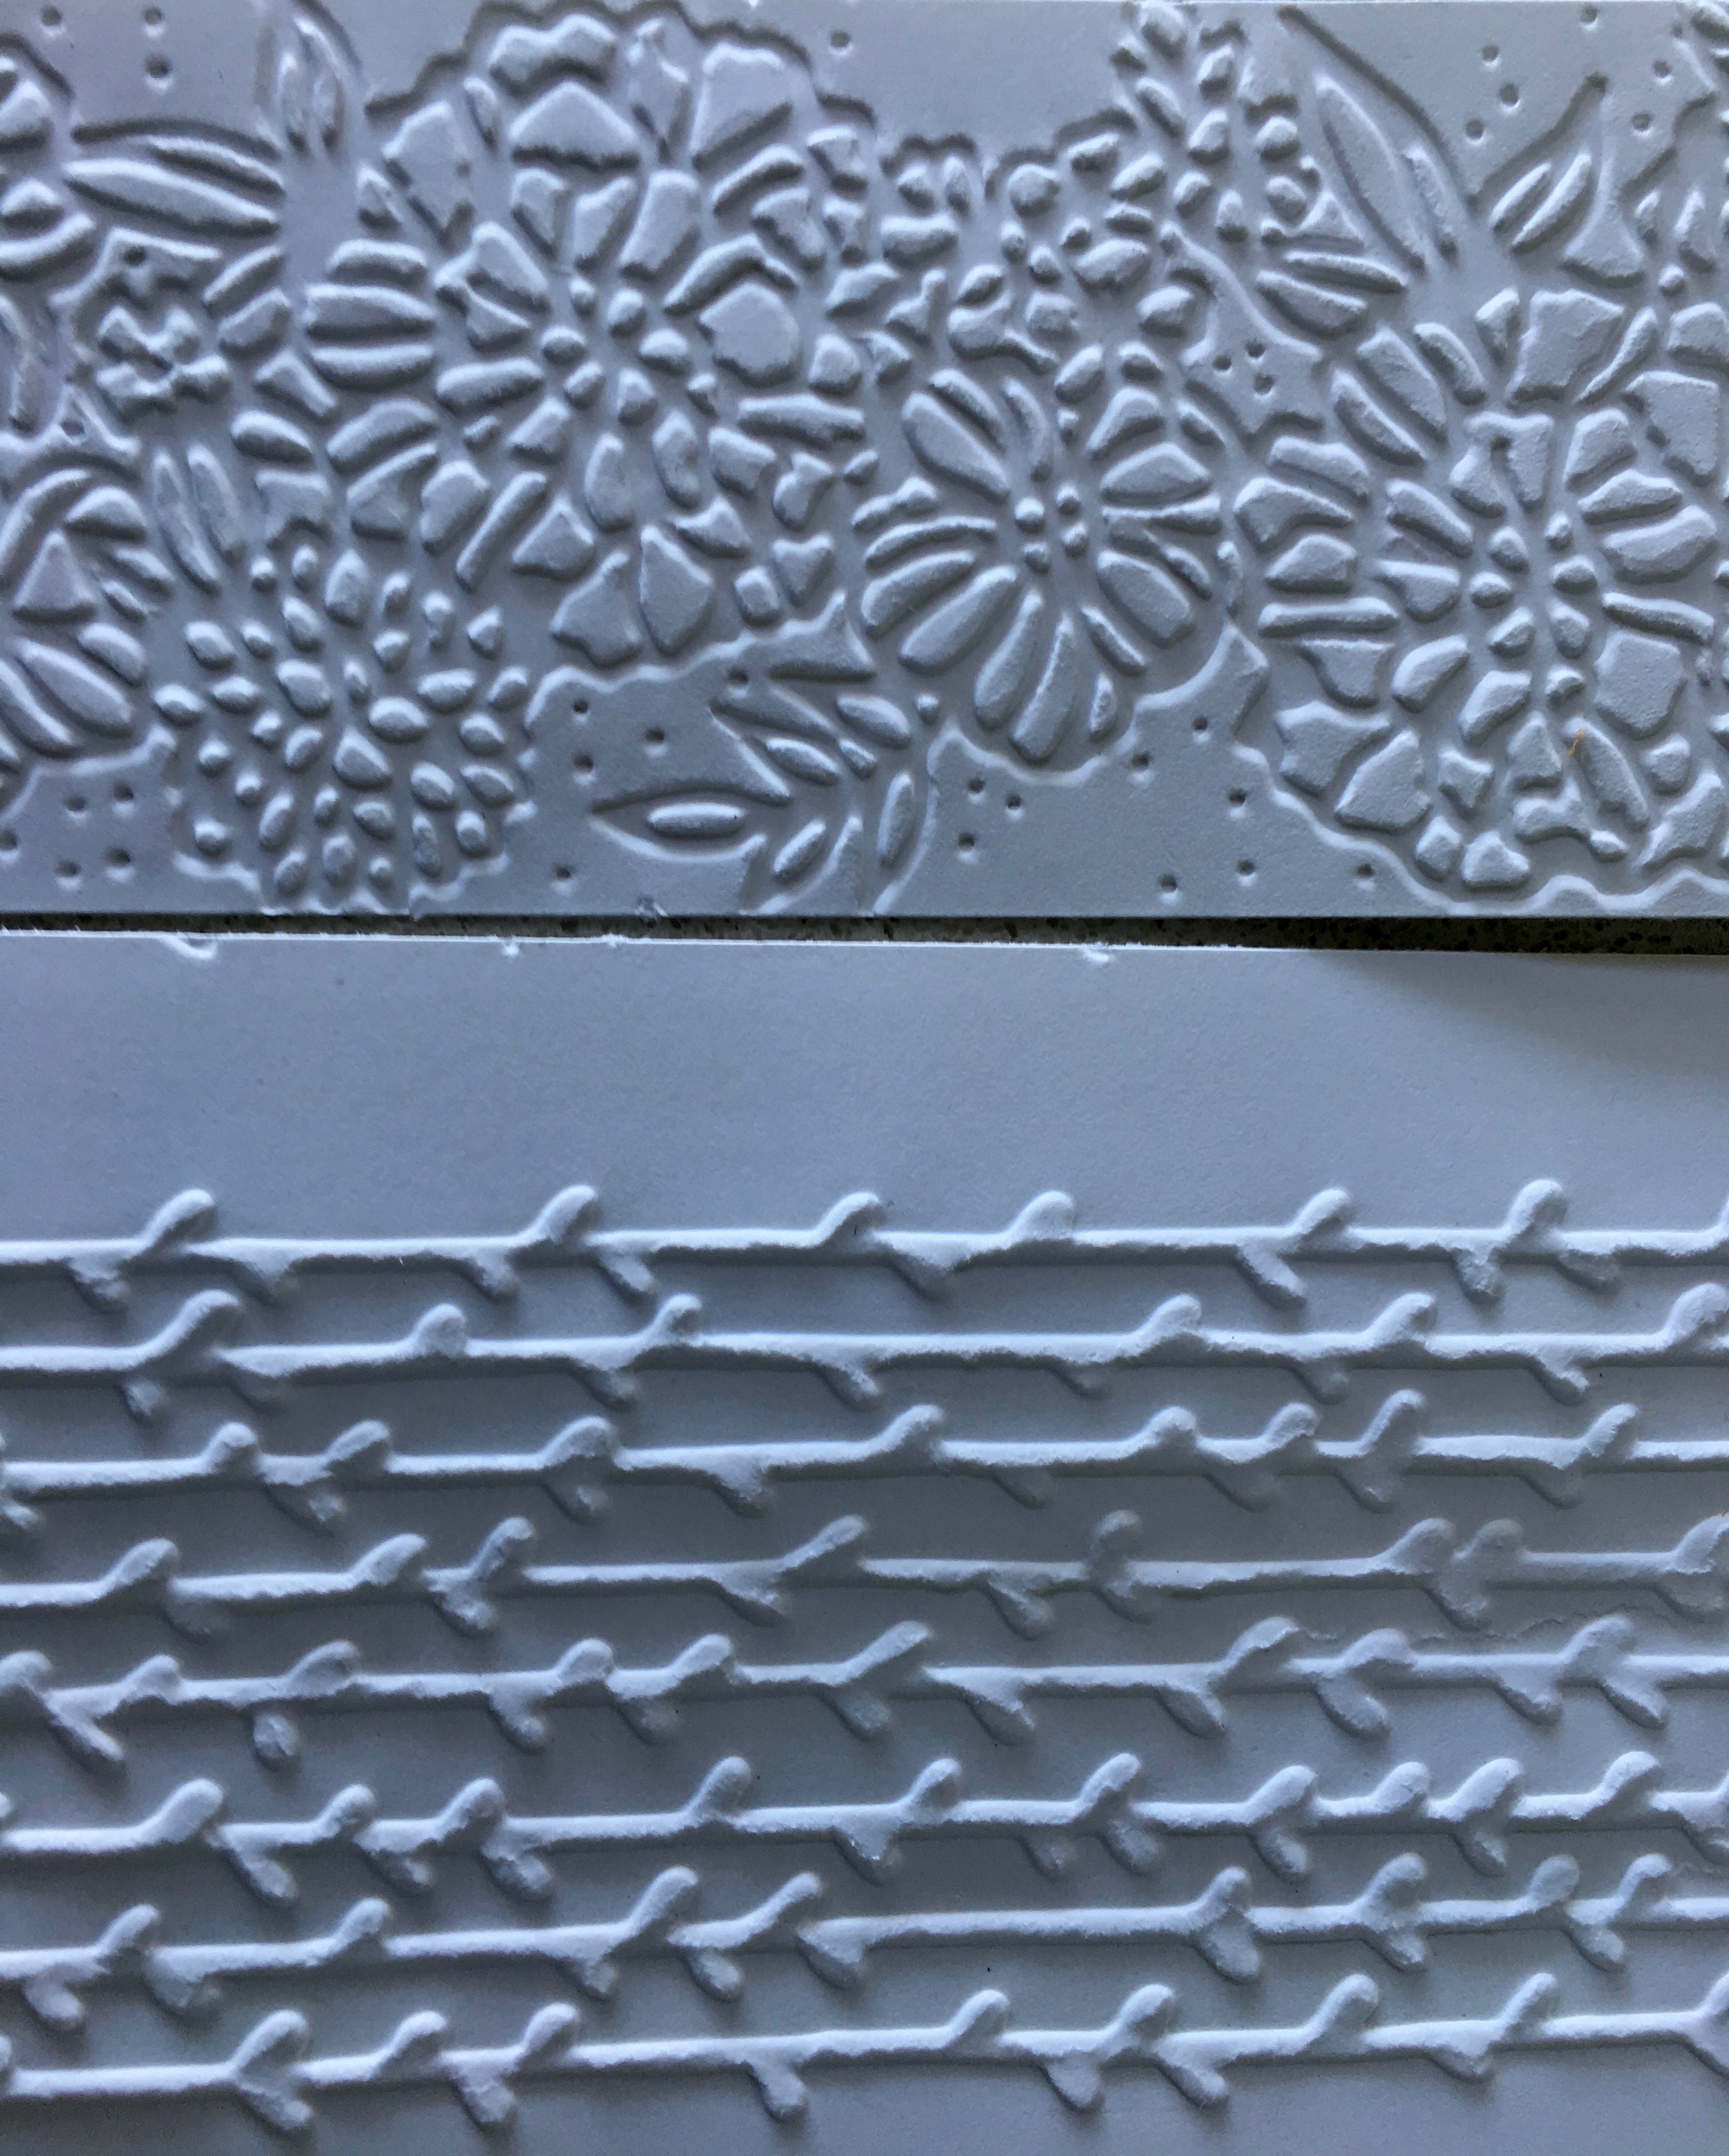
This sample card features 8 embossing folders…one of which is a sneak preview from the forthcoming Occasions catalogue. Can you guess which one it is? If you look to the middle lefthand side of the card you’ll see it. It’s such a gorgeous pattern and it comes in a twin pack, called Petal Pair Textured embossing folder. Here’s a larger sneak peek of this stunning pair!
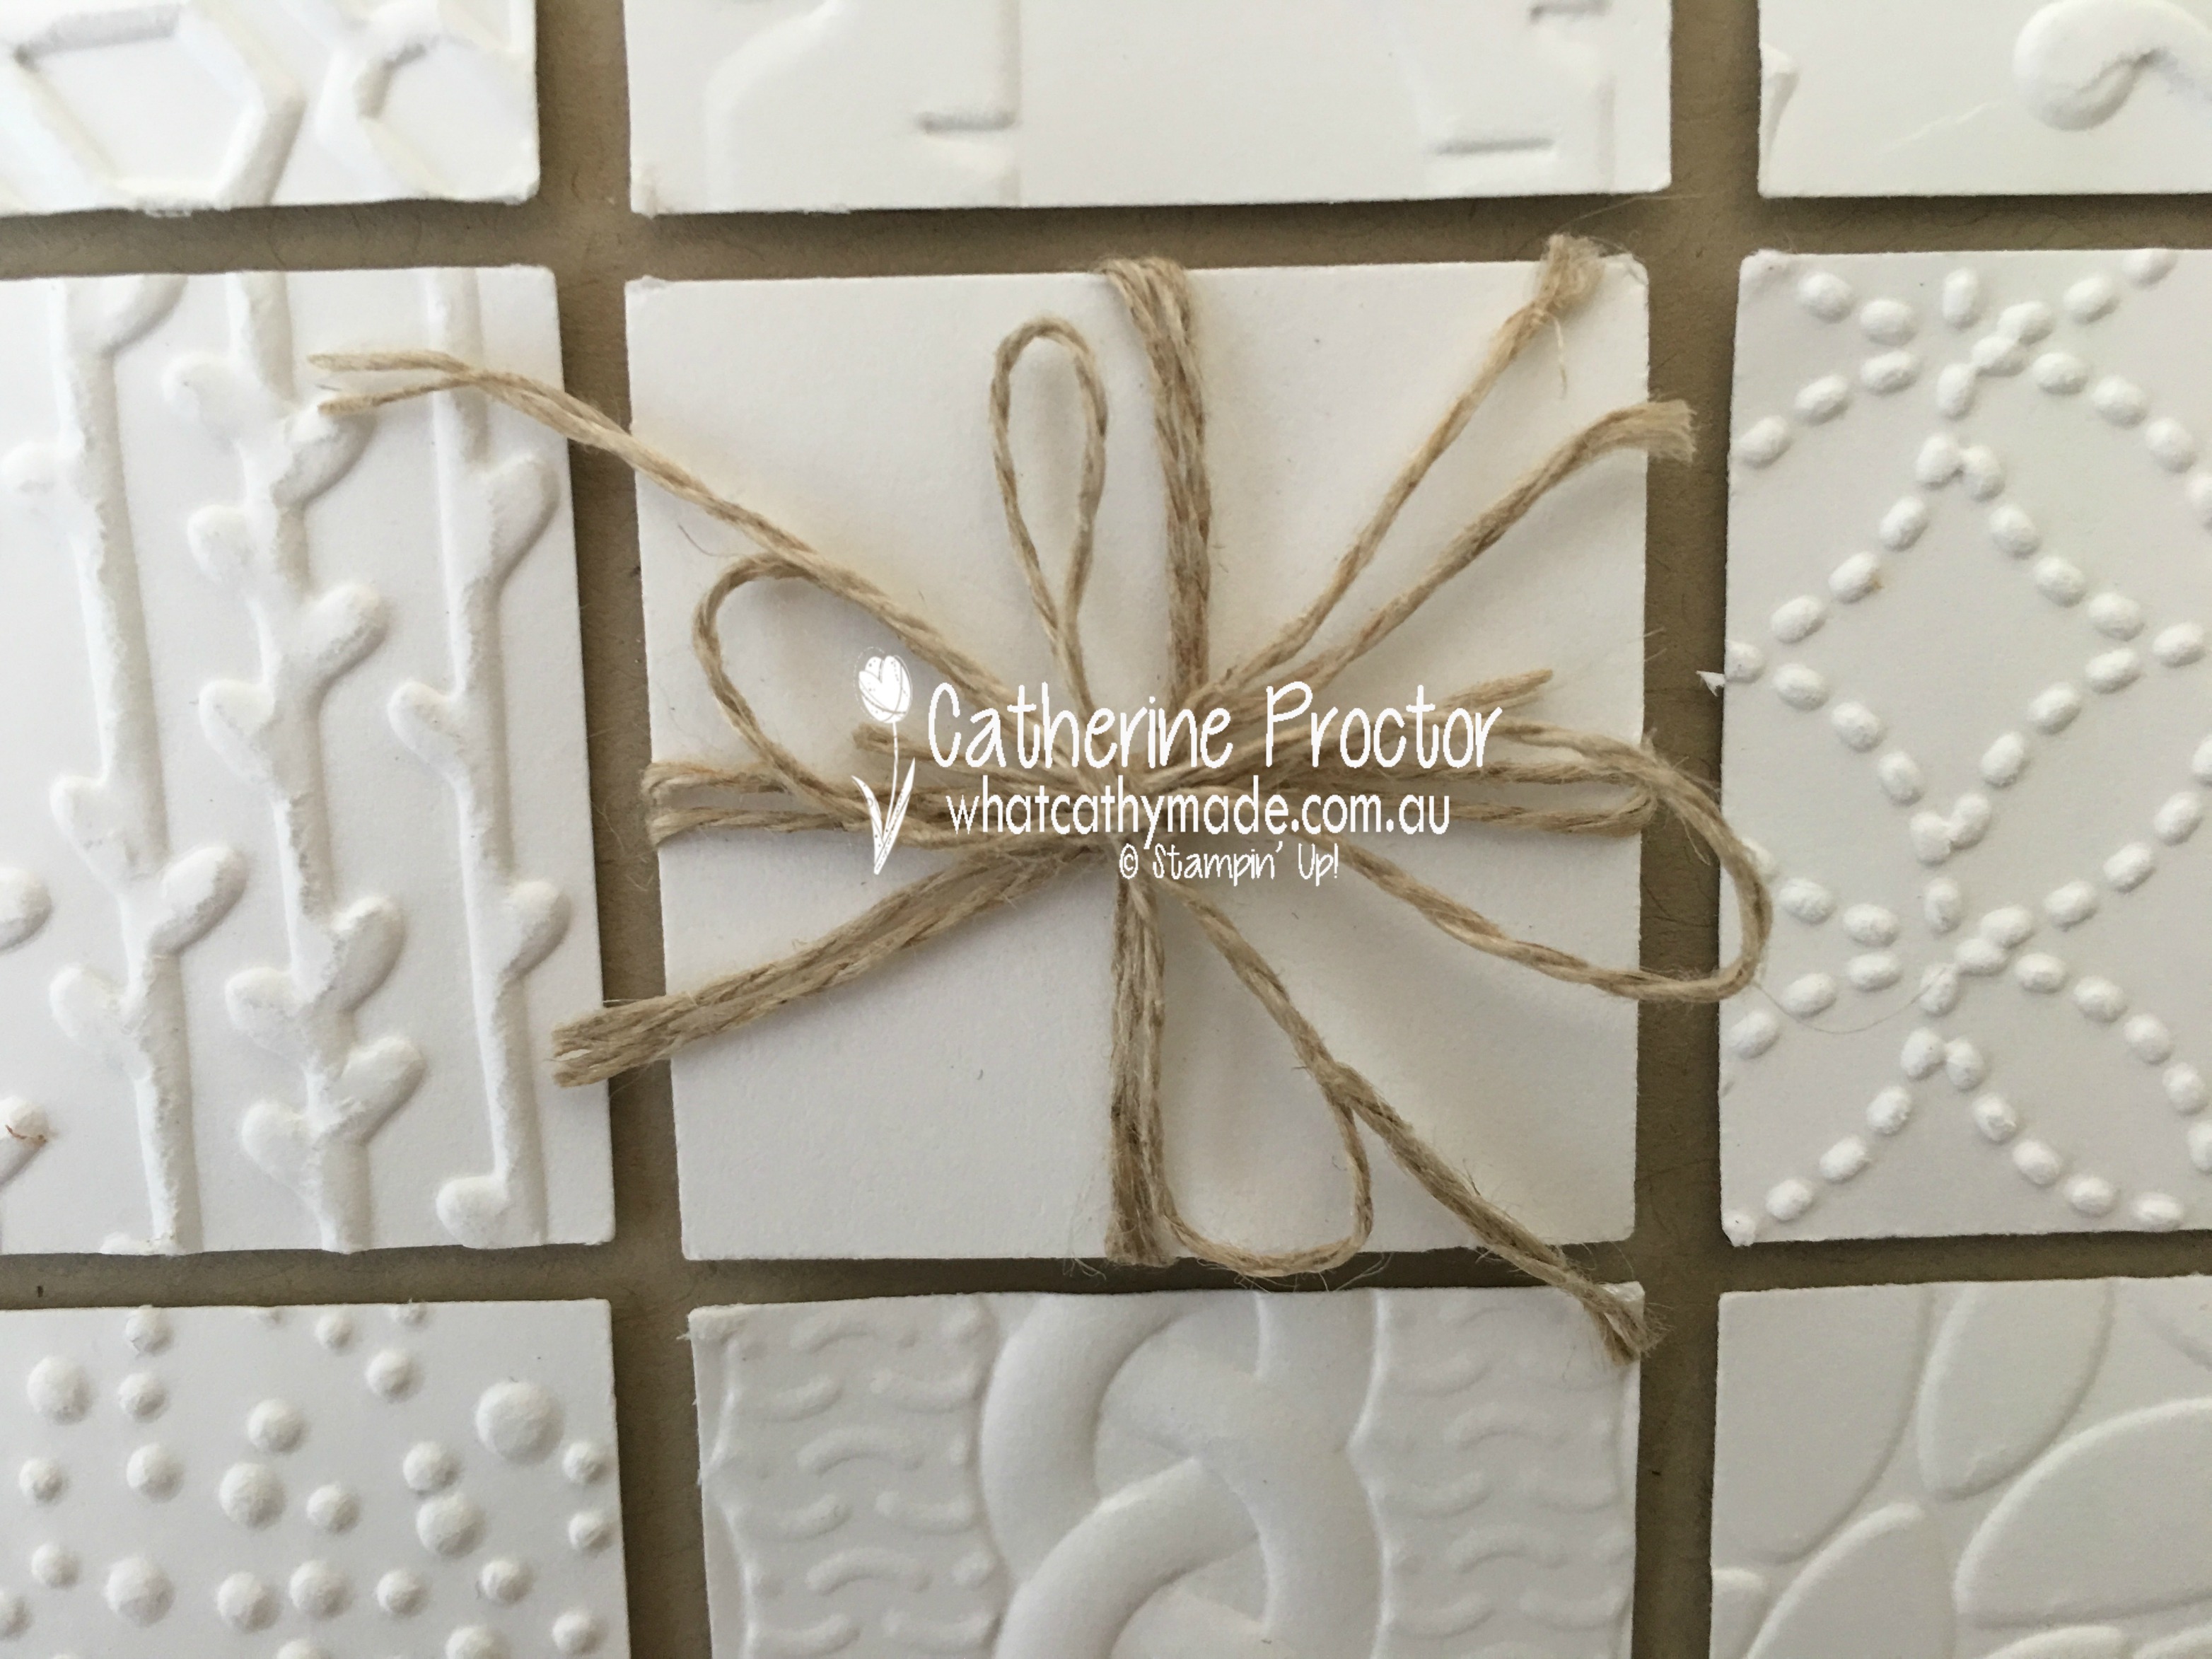
The complete list of embossing folders are as follows, clockwise from the top left of the card: Winter Wonder; Woodland; Holly; Quilt Top; Petal Burst; Cable Knit; Softly Falling; and the new Petal Pair.
This is such a quick and versatile card design because it works with any coloured card stock; it’s fast to mass produce; and you can quickly and easily cut out the squares of embossed card stock with your trimmer, square framelits, or even a square punch, And this design can be used for any occasion, and for either male or female cards.
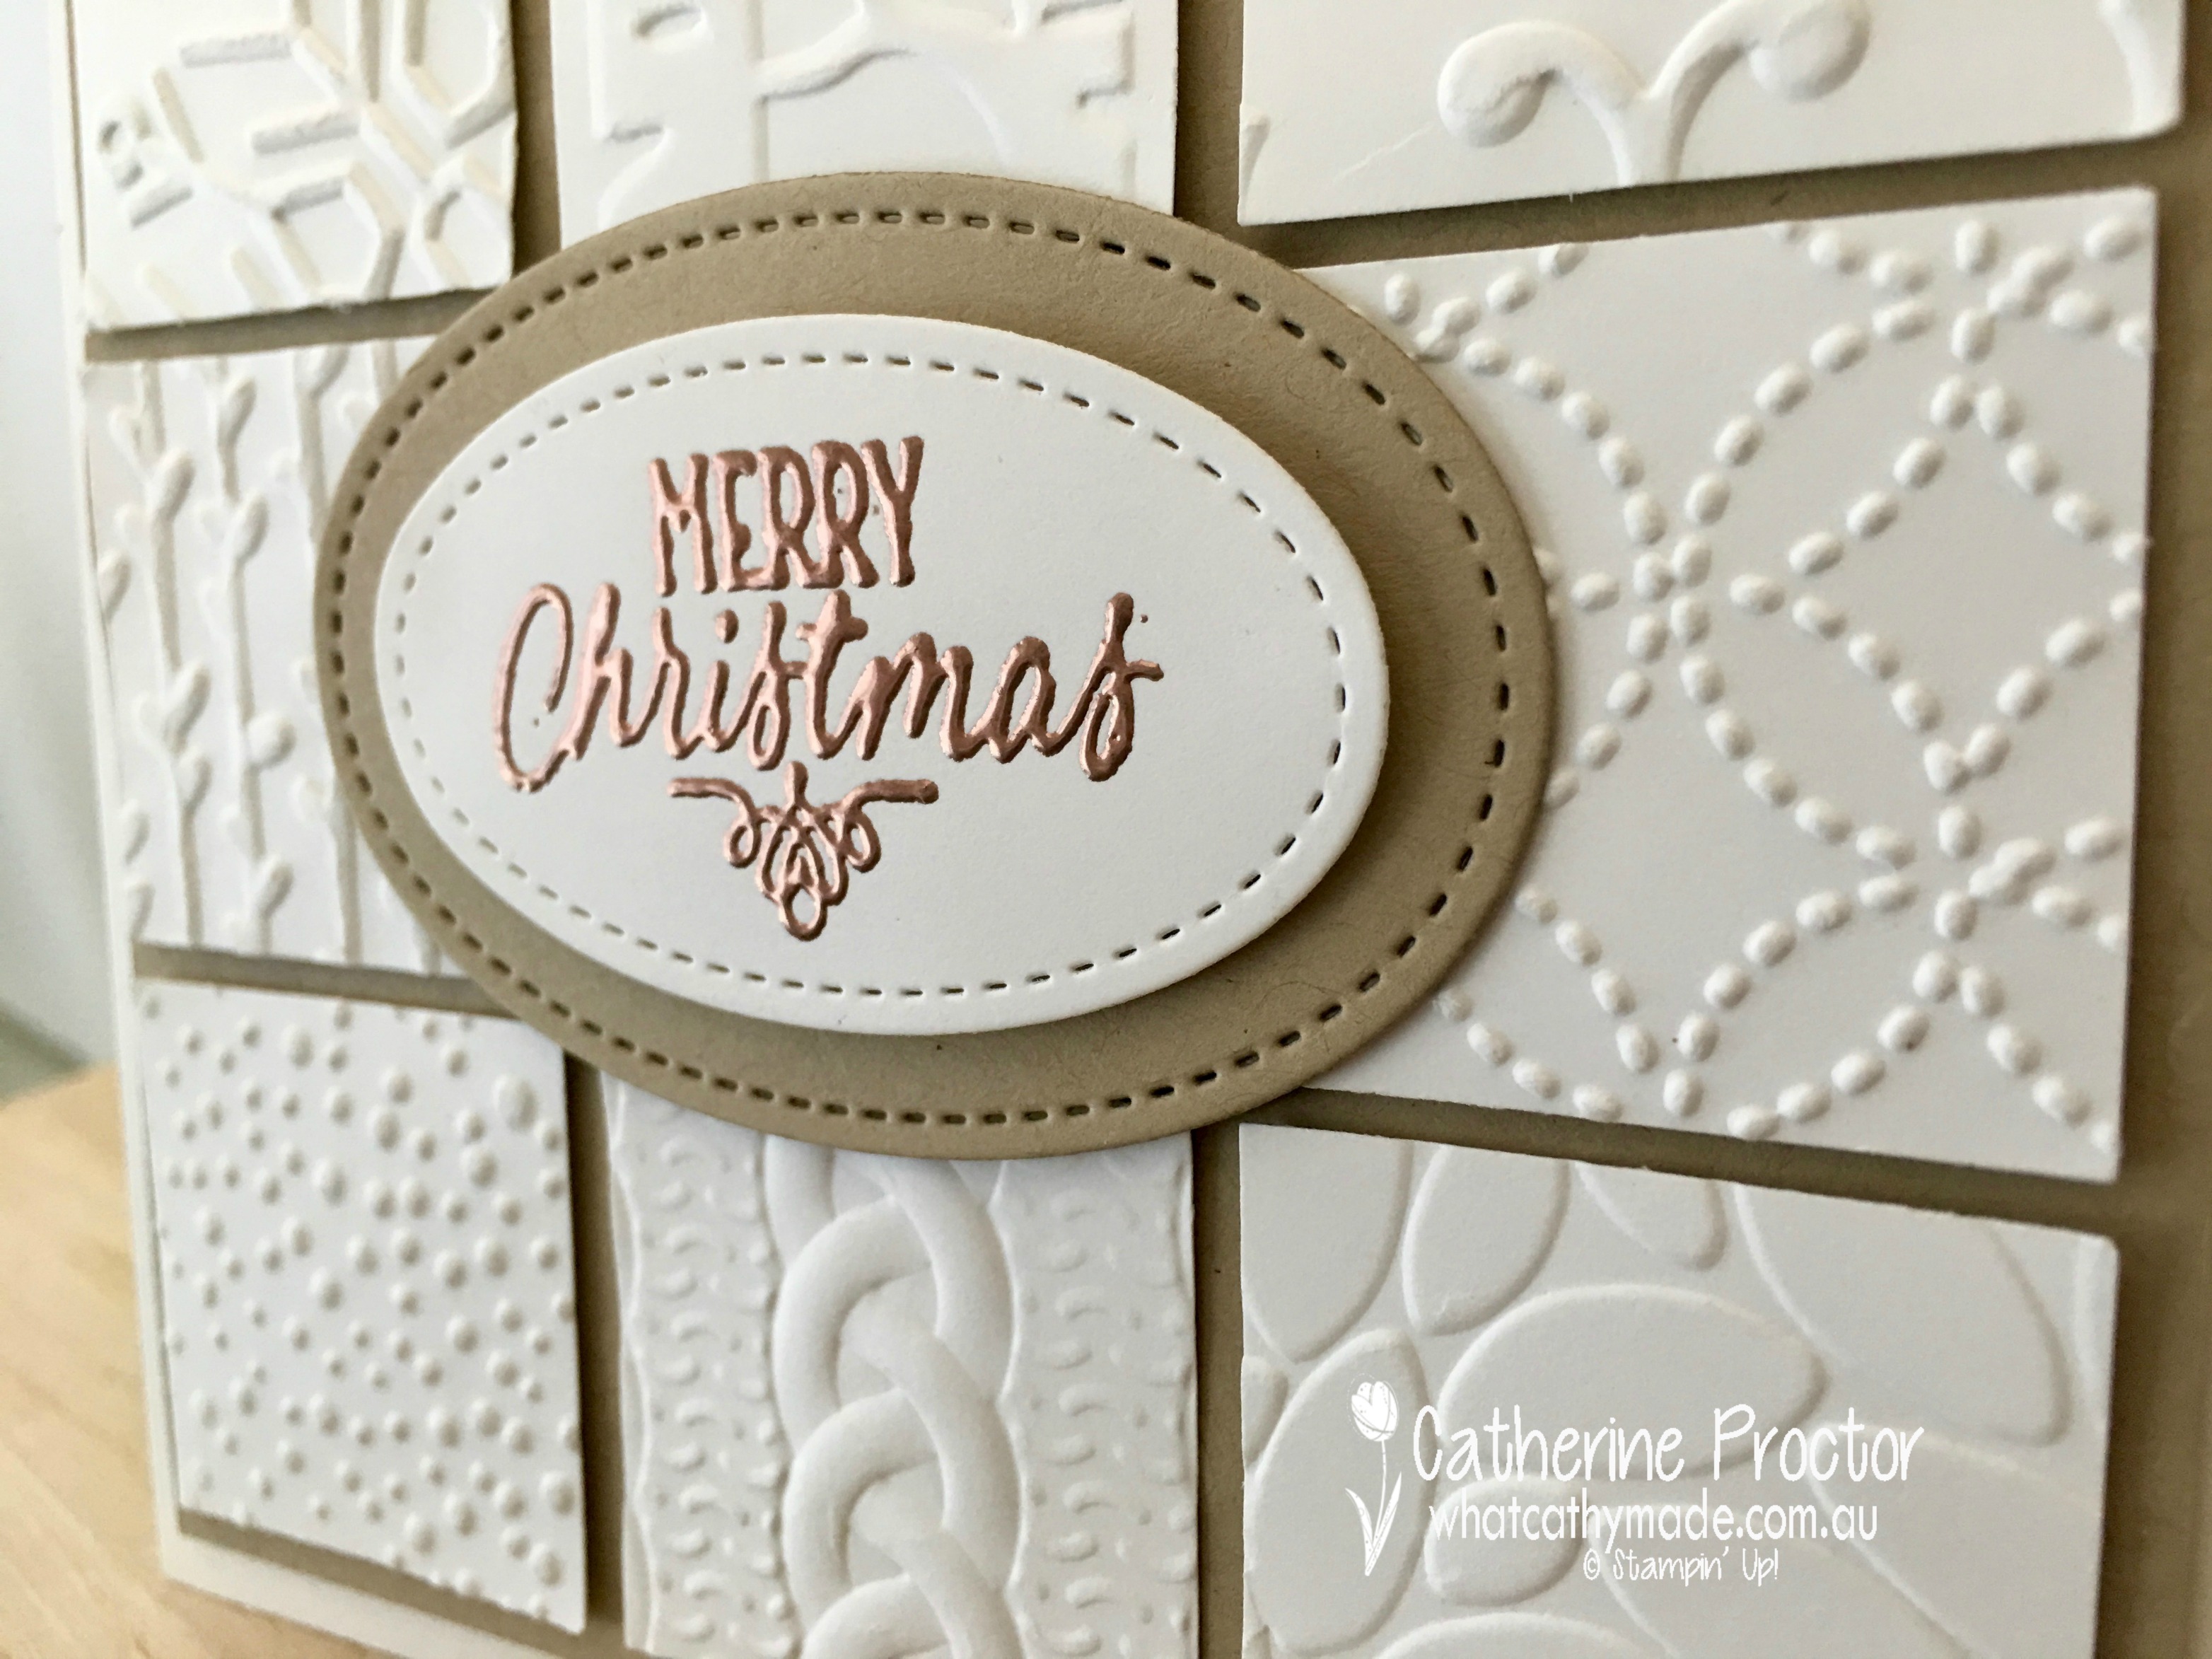
If you would like to add a sentiment to the front of the card simply replace the middle square with your sentiment of choice stamped onto any shape card stock. Here I’ve used 2 of the stitched frame lit ovals and heat embossed the sentiment with the gorgeous copper embossing powder.
Which version of my embossed sampler card do you like best? I actually can’t chose and I’m planning on a mass production this weekend to stock up my card supplies as I have a lot of birthday and Christmas cards to send out in November and December!
Now it’s time to hop on over to our next participant, the very talented,Caroline Manwaring.
If you find a broken link or have come to this blog hop from a different entry point, you can view the participants below:
Welcome back to another week of Christmas Inspiration with the Art With Heart team.
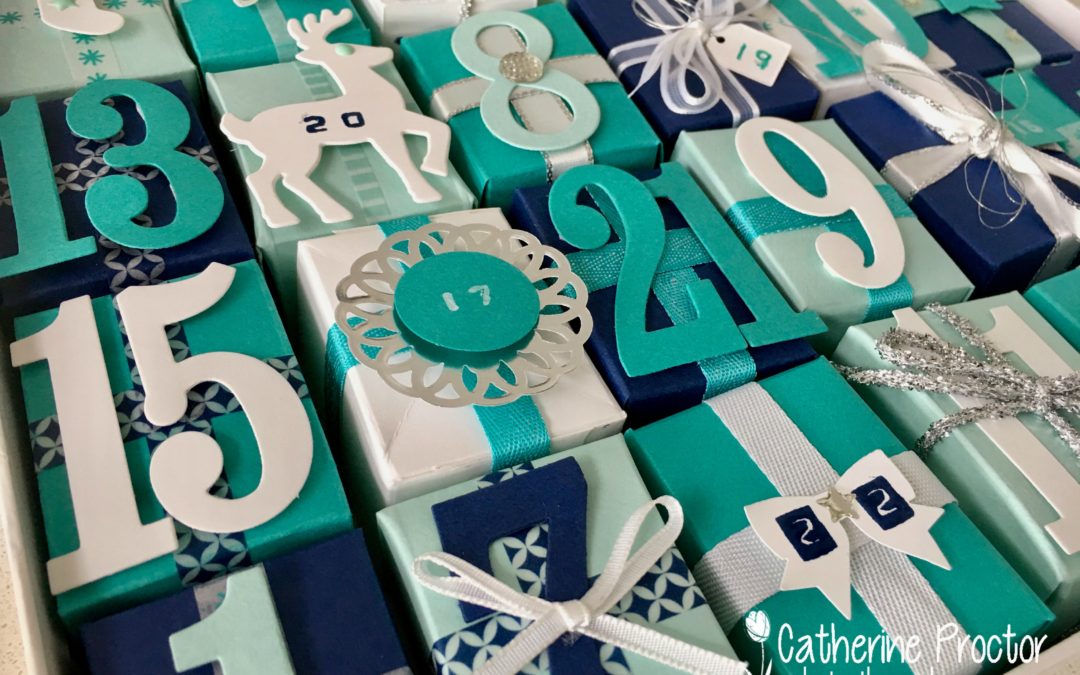
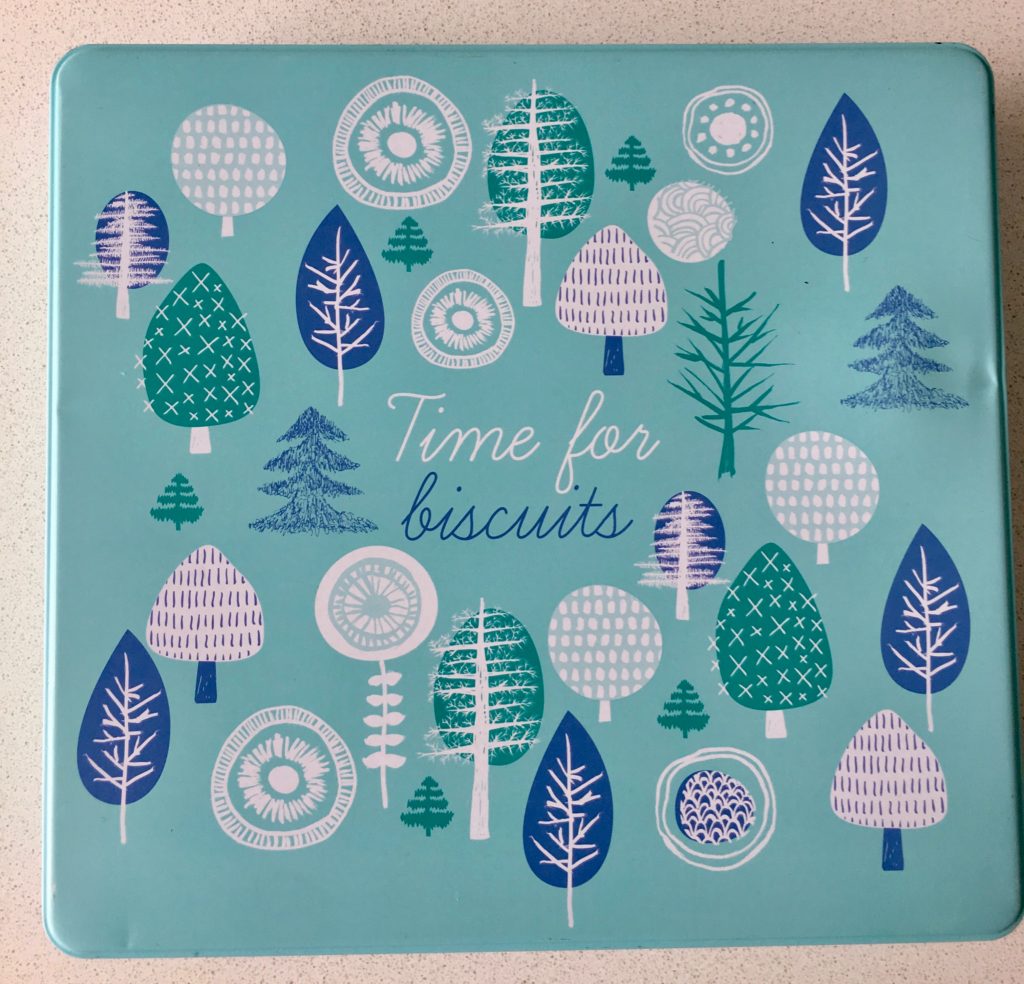
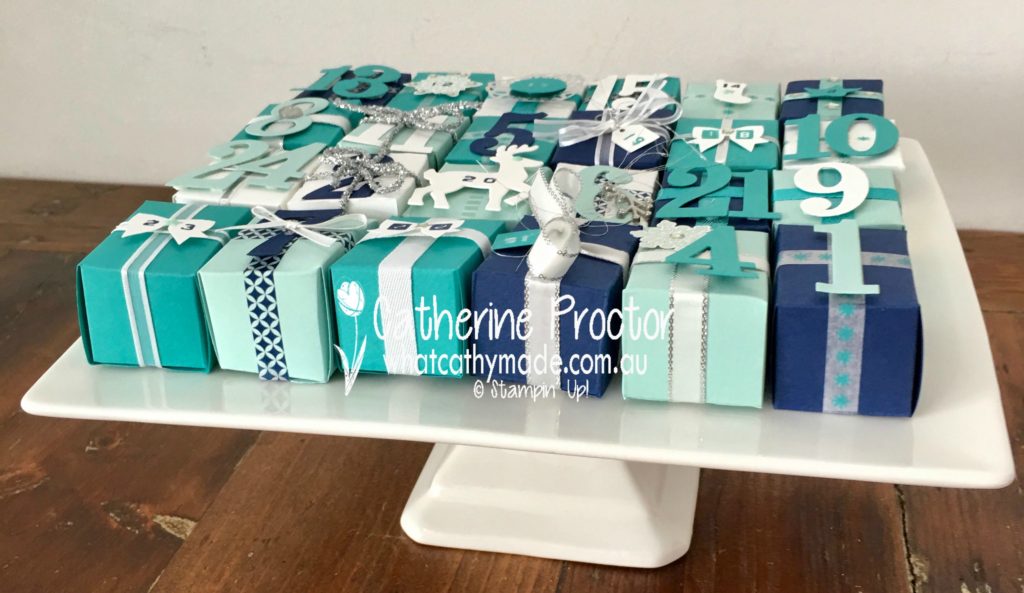
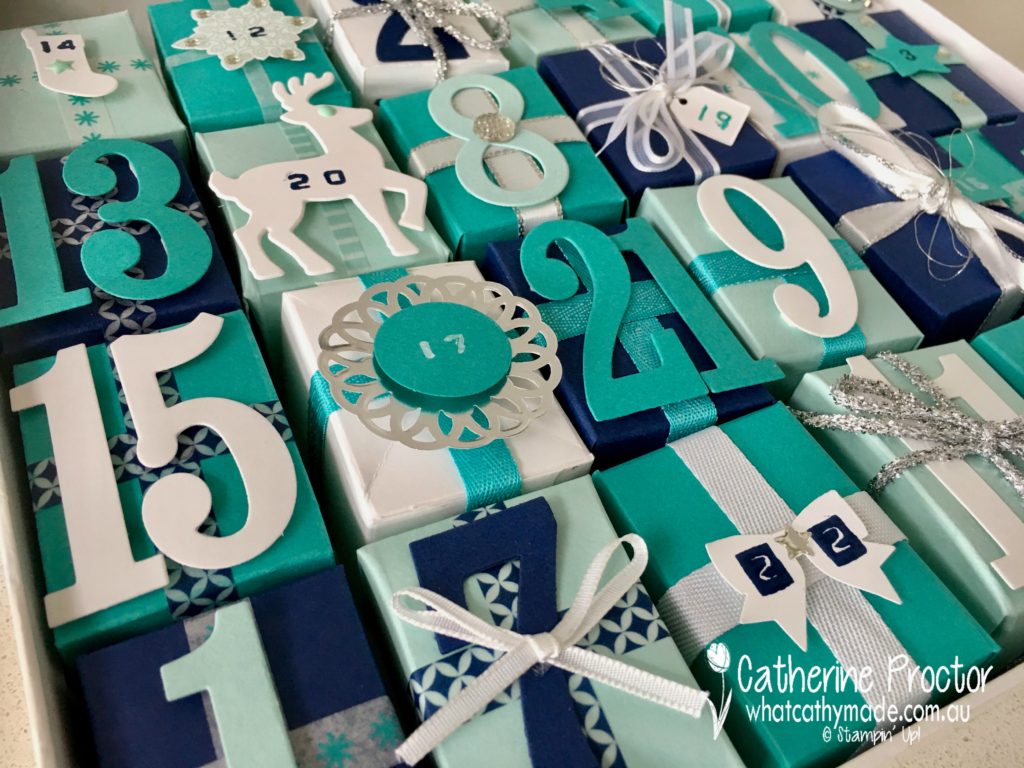
I began this project this time last year, when I was inspired by a biscuit tin that perfectly matched a stamp set from last year’s holiday catalogue…totally trees. The colour scheme also matched our Stampin’ Up! colours (night of navy, pool party, Bermuda bay and whisper white) and I planned to make a card topper to attach to the middle of the lid, covering the words ‘Time for biscuits’.
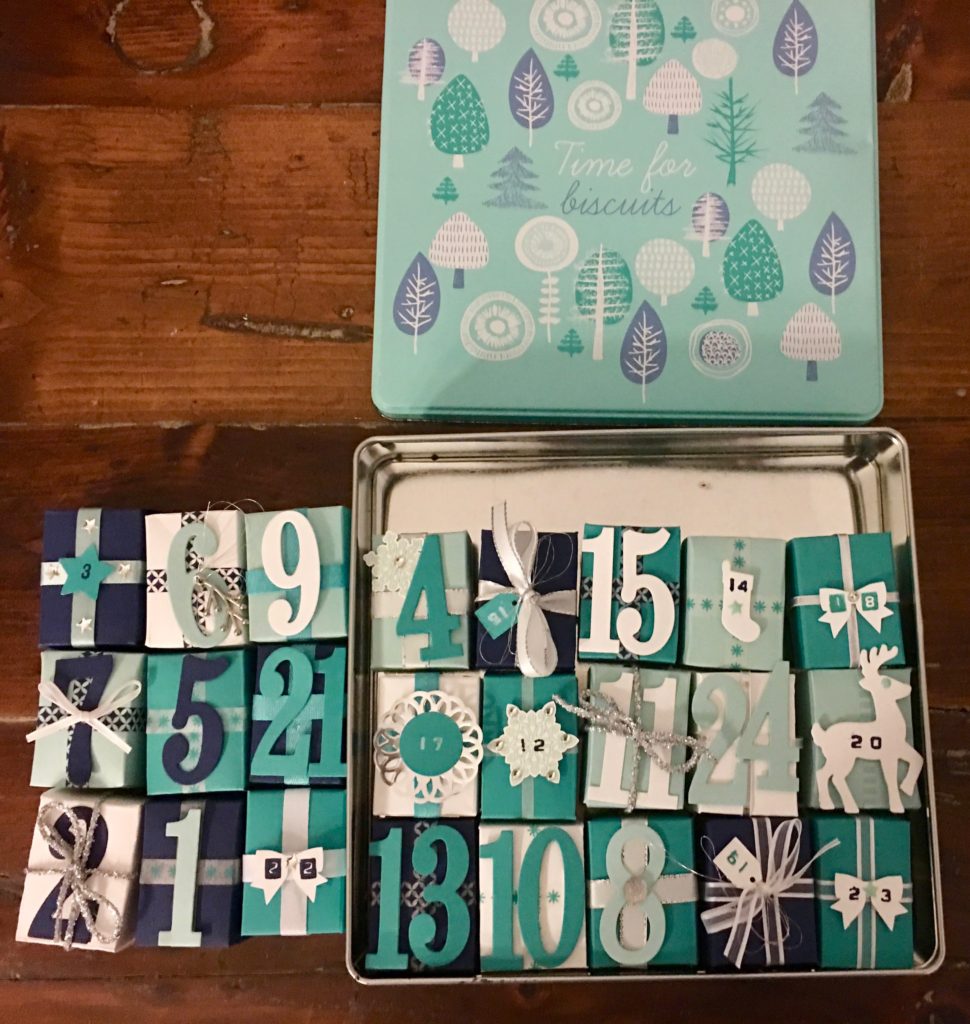
I ate all the biscuits from the tin (the things we do for crafting!), washed it out, worked out all the measurements, and cut and punched 24 squares of card stock to make the 24 boxes.
Can you guess what happened next? Well, let’s just put it this way, maths never was my best subject! I realised I’d calculated incorrectly…only 15 of my 24 advent boxes fitted into the tin and the whole ‘advent calendar in a tin’ idea was a total flop!
For the past year my mistake has haunted me every time I opened my craft cupboard. I wanted to throw it into the bin but didn’t want to waste all that cardstock. So yesterday I decided it was time to work out how I could save this project.
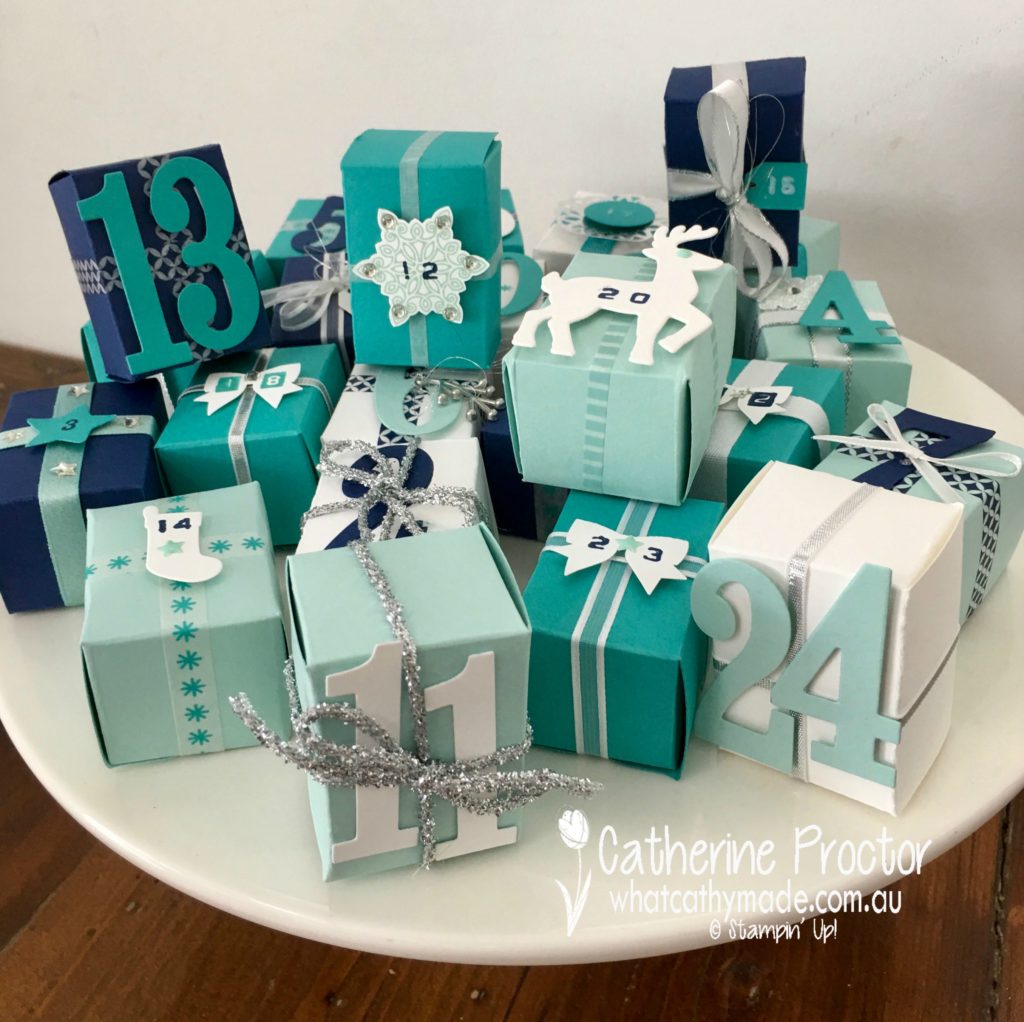
Just because my boxes don’t fit into the biscuit tin they were designed to fit into doesn’t mean I couldn’t still use them as an advent calendar. I just had to think outside the square. For starters, I could display them on my cake stands.
These little boxes can be displayed either horizontally or vertically.
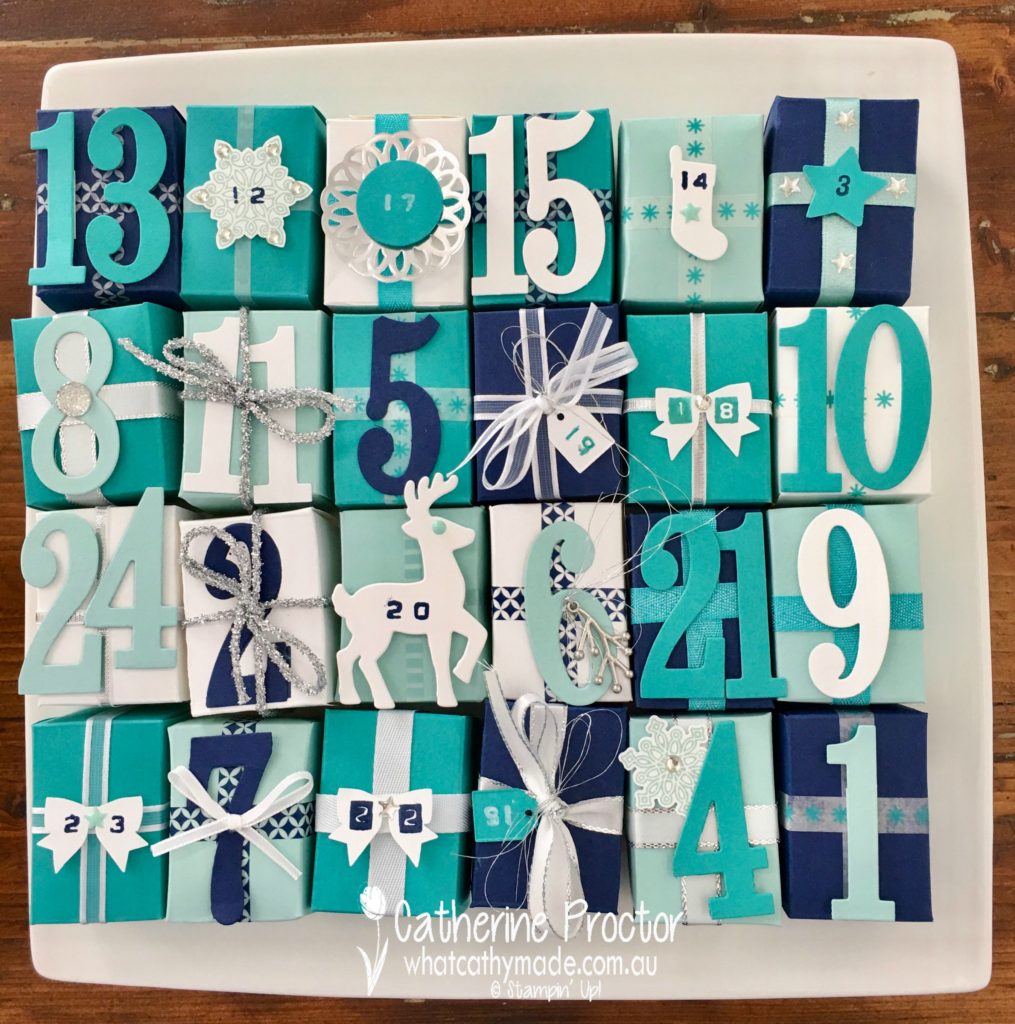
And they also look great all lined up on my square cake stand.
Heres’ the view from the side…it highlights the cute washi tape and the ribbon
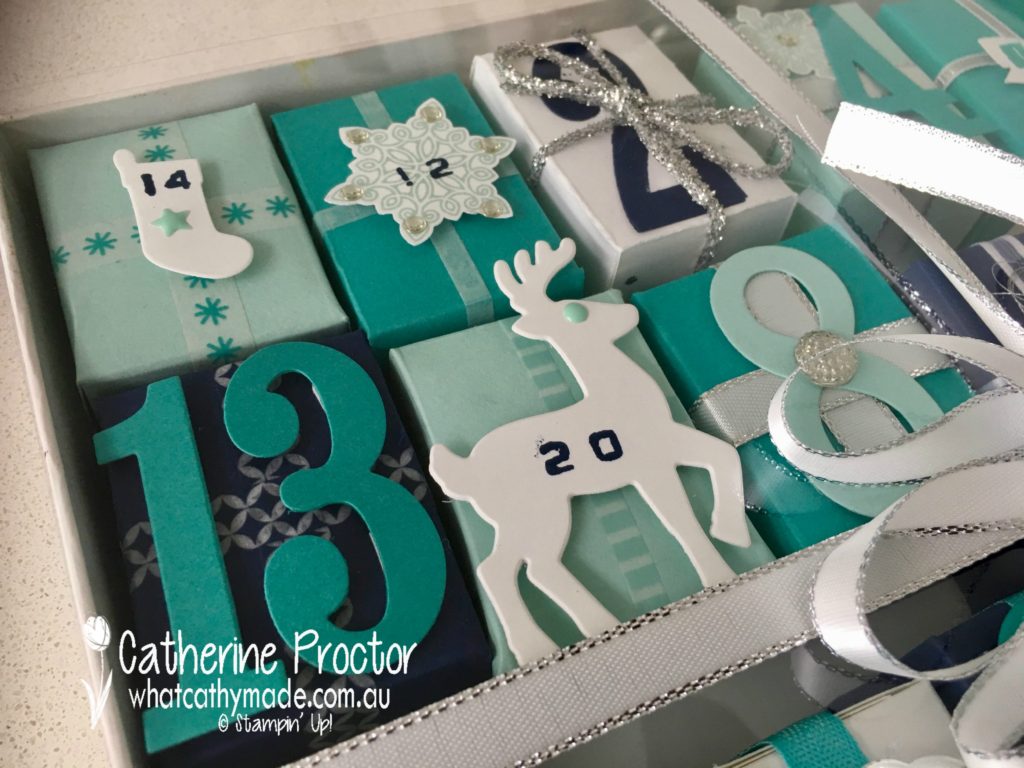
I also popped them into a the lid of a white box I had and layered a sheet of window sheeting over the top, then tied it all up with a bow.
This project is a great way to use a variety of washi tapes, ribbons, silver thread, die cuts and embellishments. I think the more you mix it up, the better it looks.
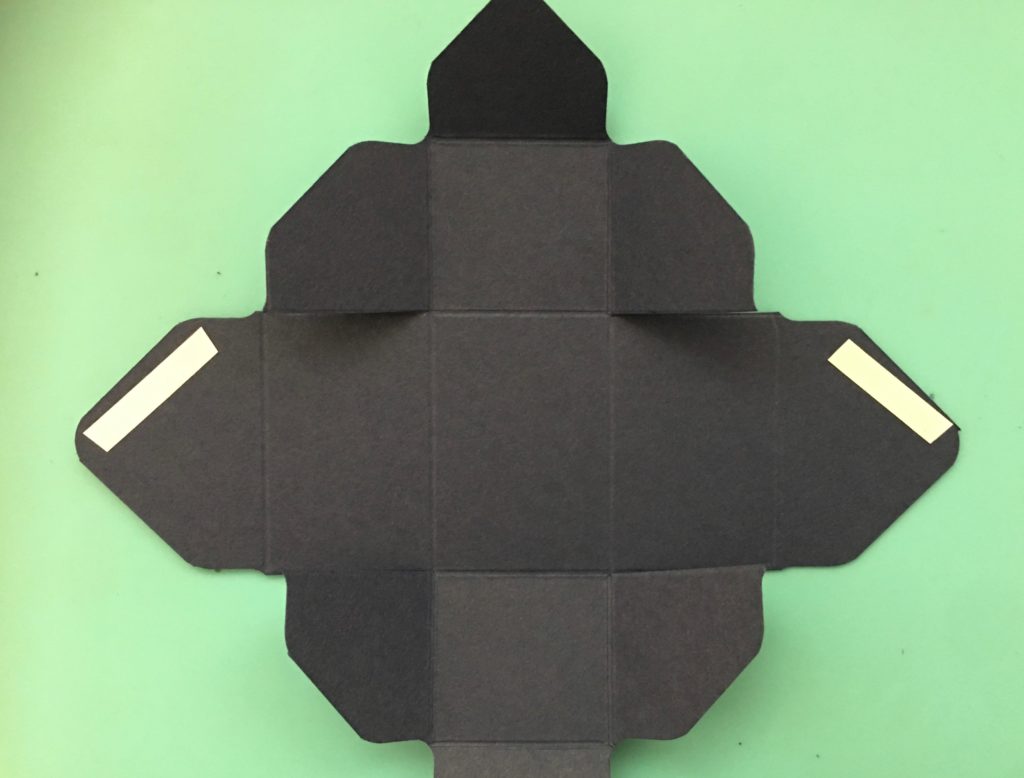
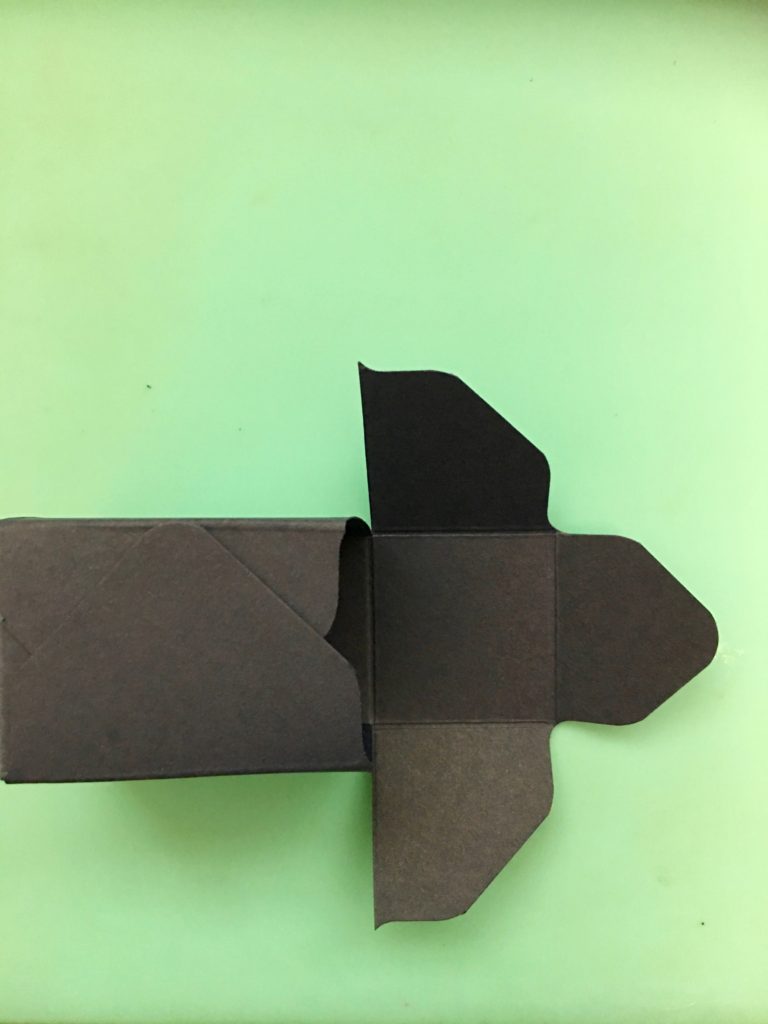
So how do you make the little boxes? Trust me, you don’t want to follow my measurements, but there’s a great online tool called the ‘box buster’ that lets you type in the finished measurements you want for your box. It then gives you the measurements you need to make that size box. These photos below will give you an idea of how I constructed my boxes using my envelope punch board, paper snips and tear and tape.
Once you’ve constructed your boxes it’s simply a matter of folding and assembling them, filling them with sweets, toys or a little note, wrapping each box with washi tape or ribbon, decorating with all your coordinating embellishments, and numbering 1-24.
Some of the numbers I created using the large numbers die cuts and some were stamped using the labeller stamp set.
Well that’s another project I’m glad I didn’t throw into the bin when it didn’t work out the way I originally intended it to!
To see what the rest of our lovely Art With Heart Team have made hop on over to Claire’s blog.
I’ll be back with some embossing inspiration tomorrow night and them the following week is our last Heart of Christmas blog hop for the year!