Today I am participating in a blog hop along with the super talented ladies in the Art With Heart Team. We thought it would be fun to share some projects using our favourite retiring products from both the 2016-2017 annual and 2017 occasions catalogues!
Select retiring products have discounts of up to 50% off but are only available until sold out. Be sure to place orders before the sun sets on these items on 31 May. You don’t want to miss out – ask me how!
Such an incredibly versatile product
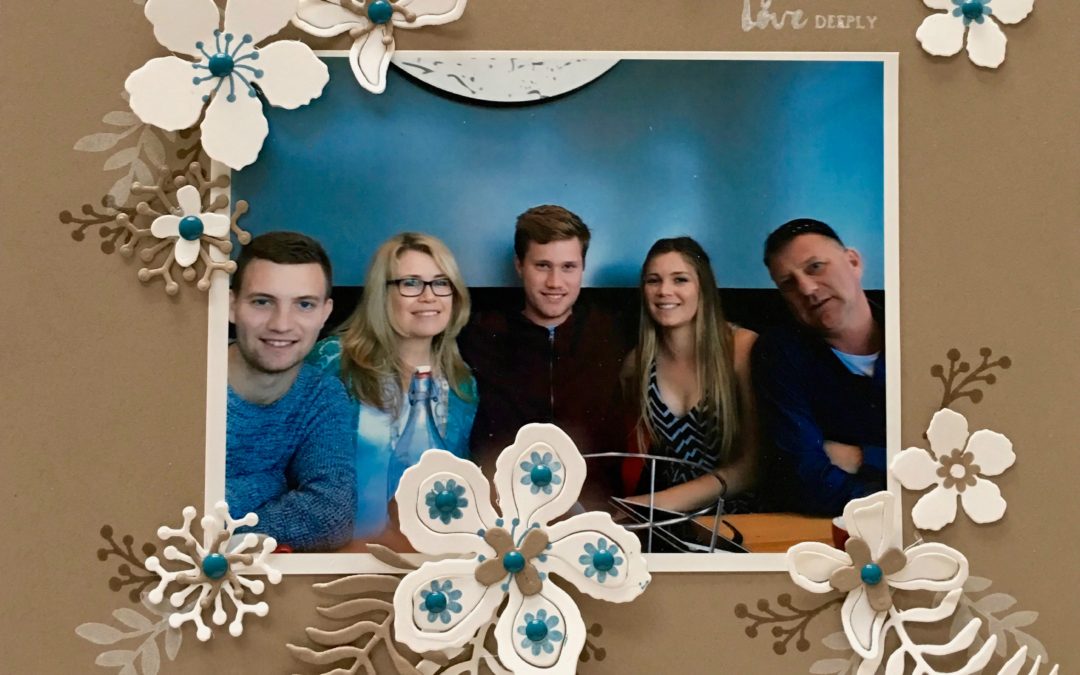
My beautiful sister-in-law recently turned 50 and instead of a party she decided to take a well-deserved holiday to Thailand. So when we finally caught up over the Easter break it was the first time I’d seen her since her birthday and I wanted to make her something personal to mark the occasion.
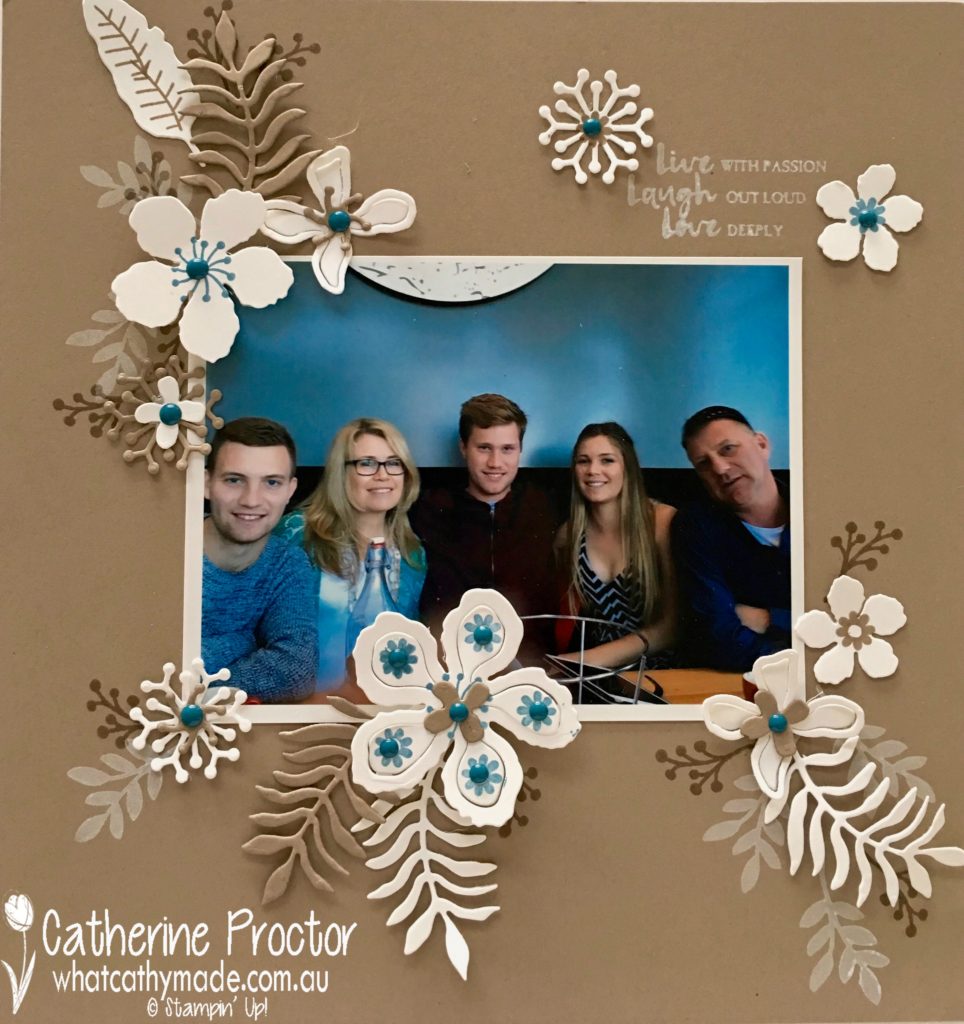
For this scrapbooked wall art I used several of my all-time favourite retiring products. Botanical Builder Framelits are the most versatile Stampin’ Up! product I have ever used. It is actually impossible to make a bad card with this set! If you don’t already own them, now’s your last chance to buy them…and they’re on special! They work with any colour card stock and are just so incredibly beautiful, easy to use and versatile.
I’ve used the matching Botanical Blooms polymer stamp set (also so versatile and on sale) and my favourite retiring in-colour: Tip Top Taupe.
This is such a great neutral…don’t you love it here with the whisper white and tip top taupe ink stamped on it?
The lovely blue ink is Marina Mist – I’ve only recently purchased this colour and it’s truely love at first sight.
Other gorgeous retiring products I’ve used here are the Love & Affection stamp set (stamped in Tip Top Taupe) and the 2016-2018 In Colour Enamel Shapes (in Dapper Denim).
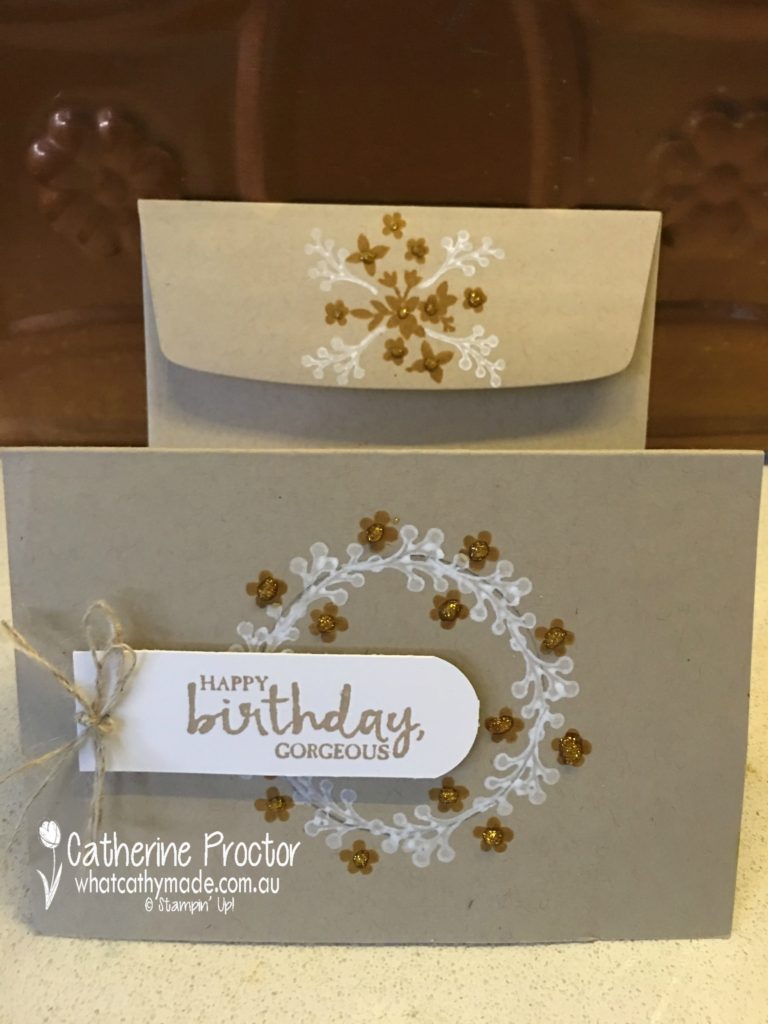
For the matching card and envelope I used the retiring Crumb Cake Note Cards & Envelopes stamped with stamps from the retiring Love & Affection stamp set (another favourite!) in retiring Tip Top Taupe and the ever lovely Whisper White. I embellished the little flower stamp with the retiring Gold Glitz Dazzling Details.
Luckily the linen thread and the sentiment (on the wall art and on the card) from Beautiful You are not retiring. Boy am I going to miss all these retiring products!
Now it’s time to see what the talented Ros Davidson has made.
If you find a broken link or have come to this blog hop from a different entry point, you can view the participants below:
Today I am participating in a blog hop along with the super talented ladies in the Art With Heart Team.
We thought it would be fun to share some Easter projects, seeing as Easter is only about 3 weeks away!
Saleabration is a great time to join or place a $90 order to get extra free items – ask me how!
Blog Hops are full circles, so you can start hopping here and then at the end of each post is a link to the next one. There is also a list of participants at the end in case of any broken links. Now let’s get started!
‘Punch and Framelit Art’ Easter Bunny
The Stitched Shape Framelits are one of the most versatile products I have ever bought from Stampin’ Up!
I love how the set includes 4 different sizes of 3 different shapes and they work with so many sentiments, stamp sets…and even on their own.
But (until now) I’d never thought of using them in punch art.
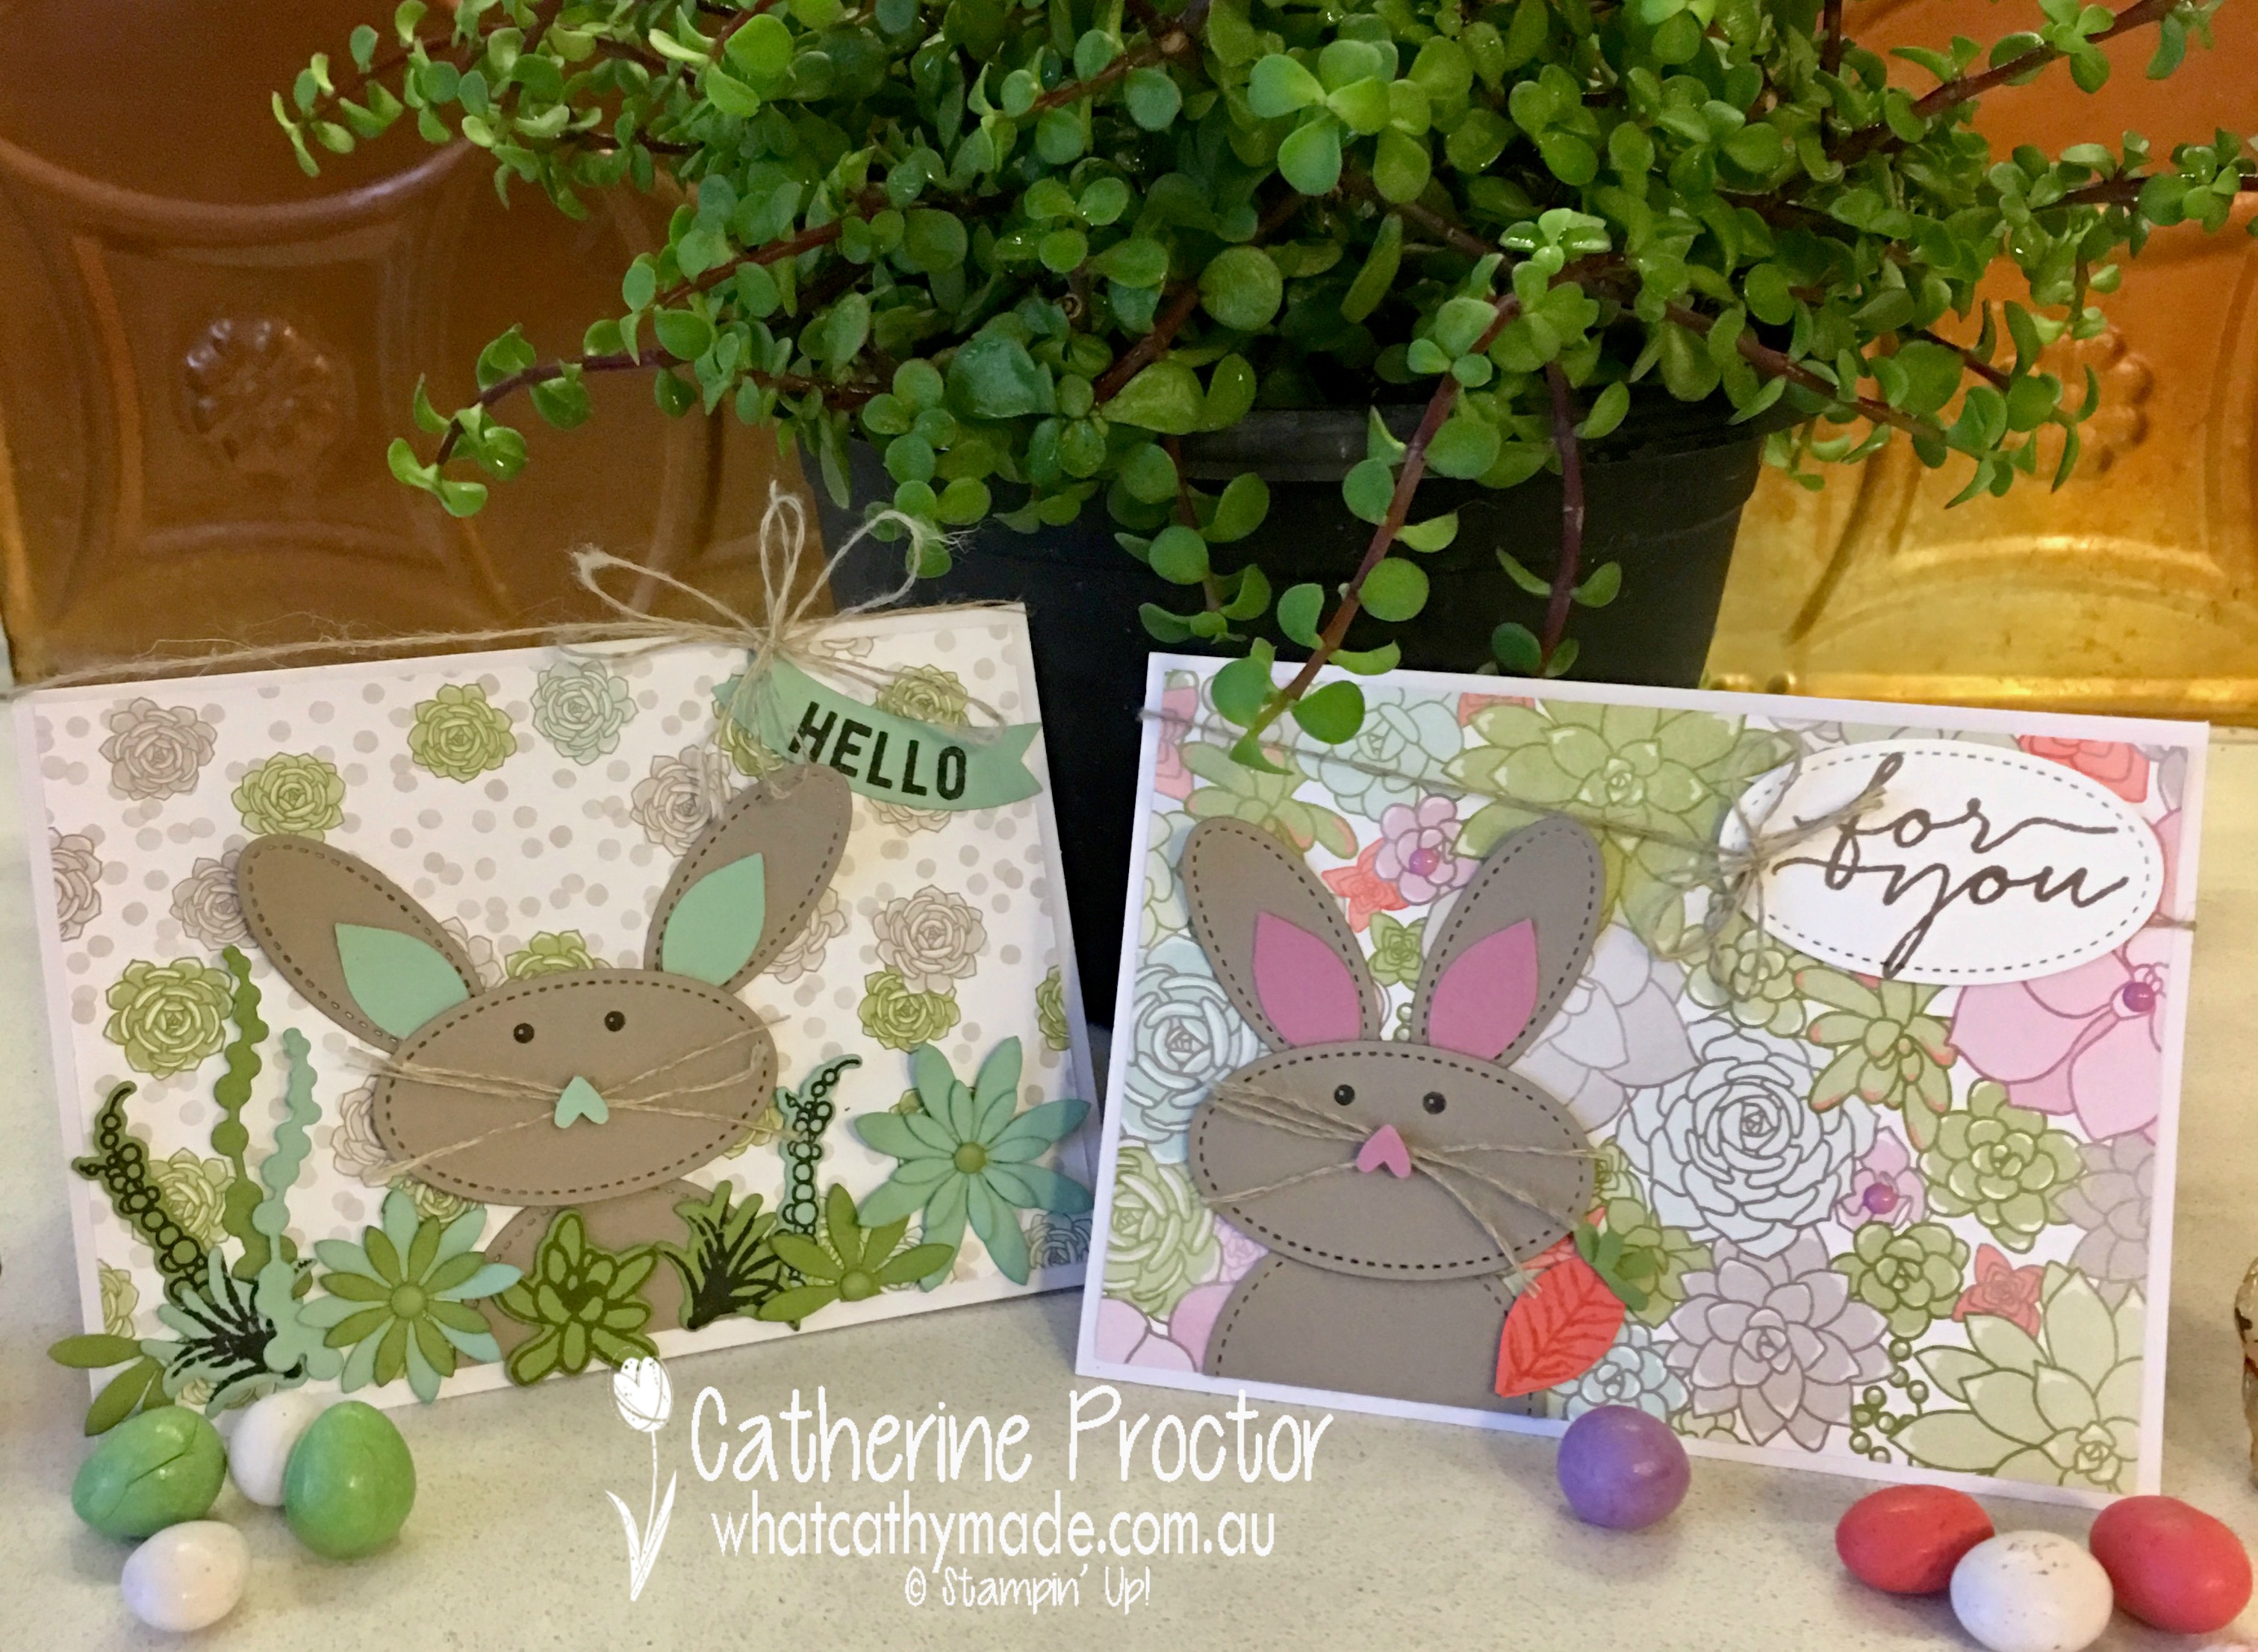
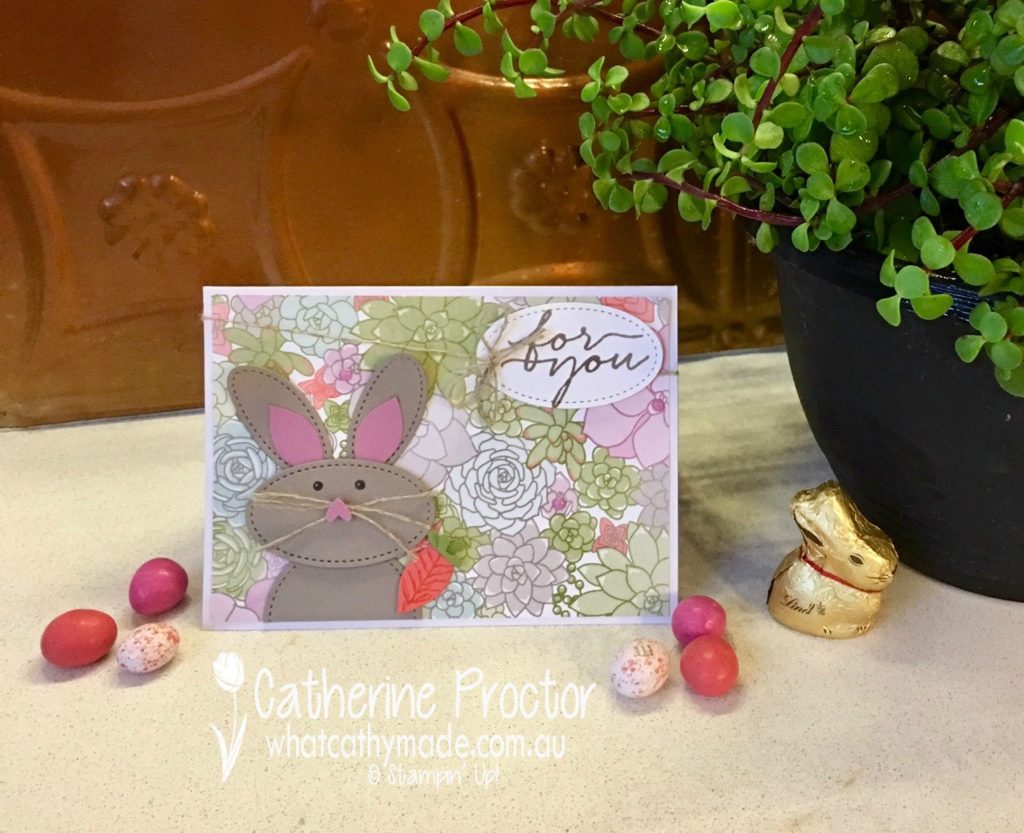
Sweet Sugarplum Stitched Rabbit
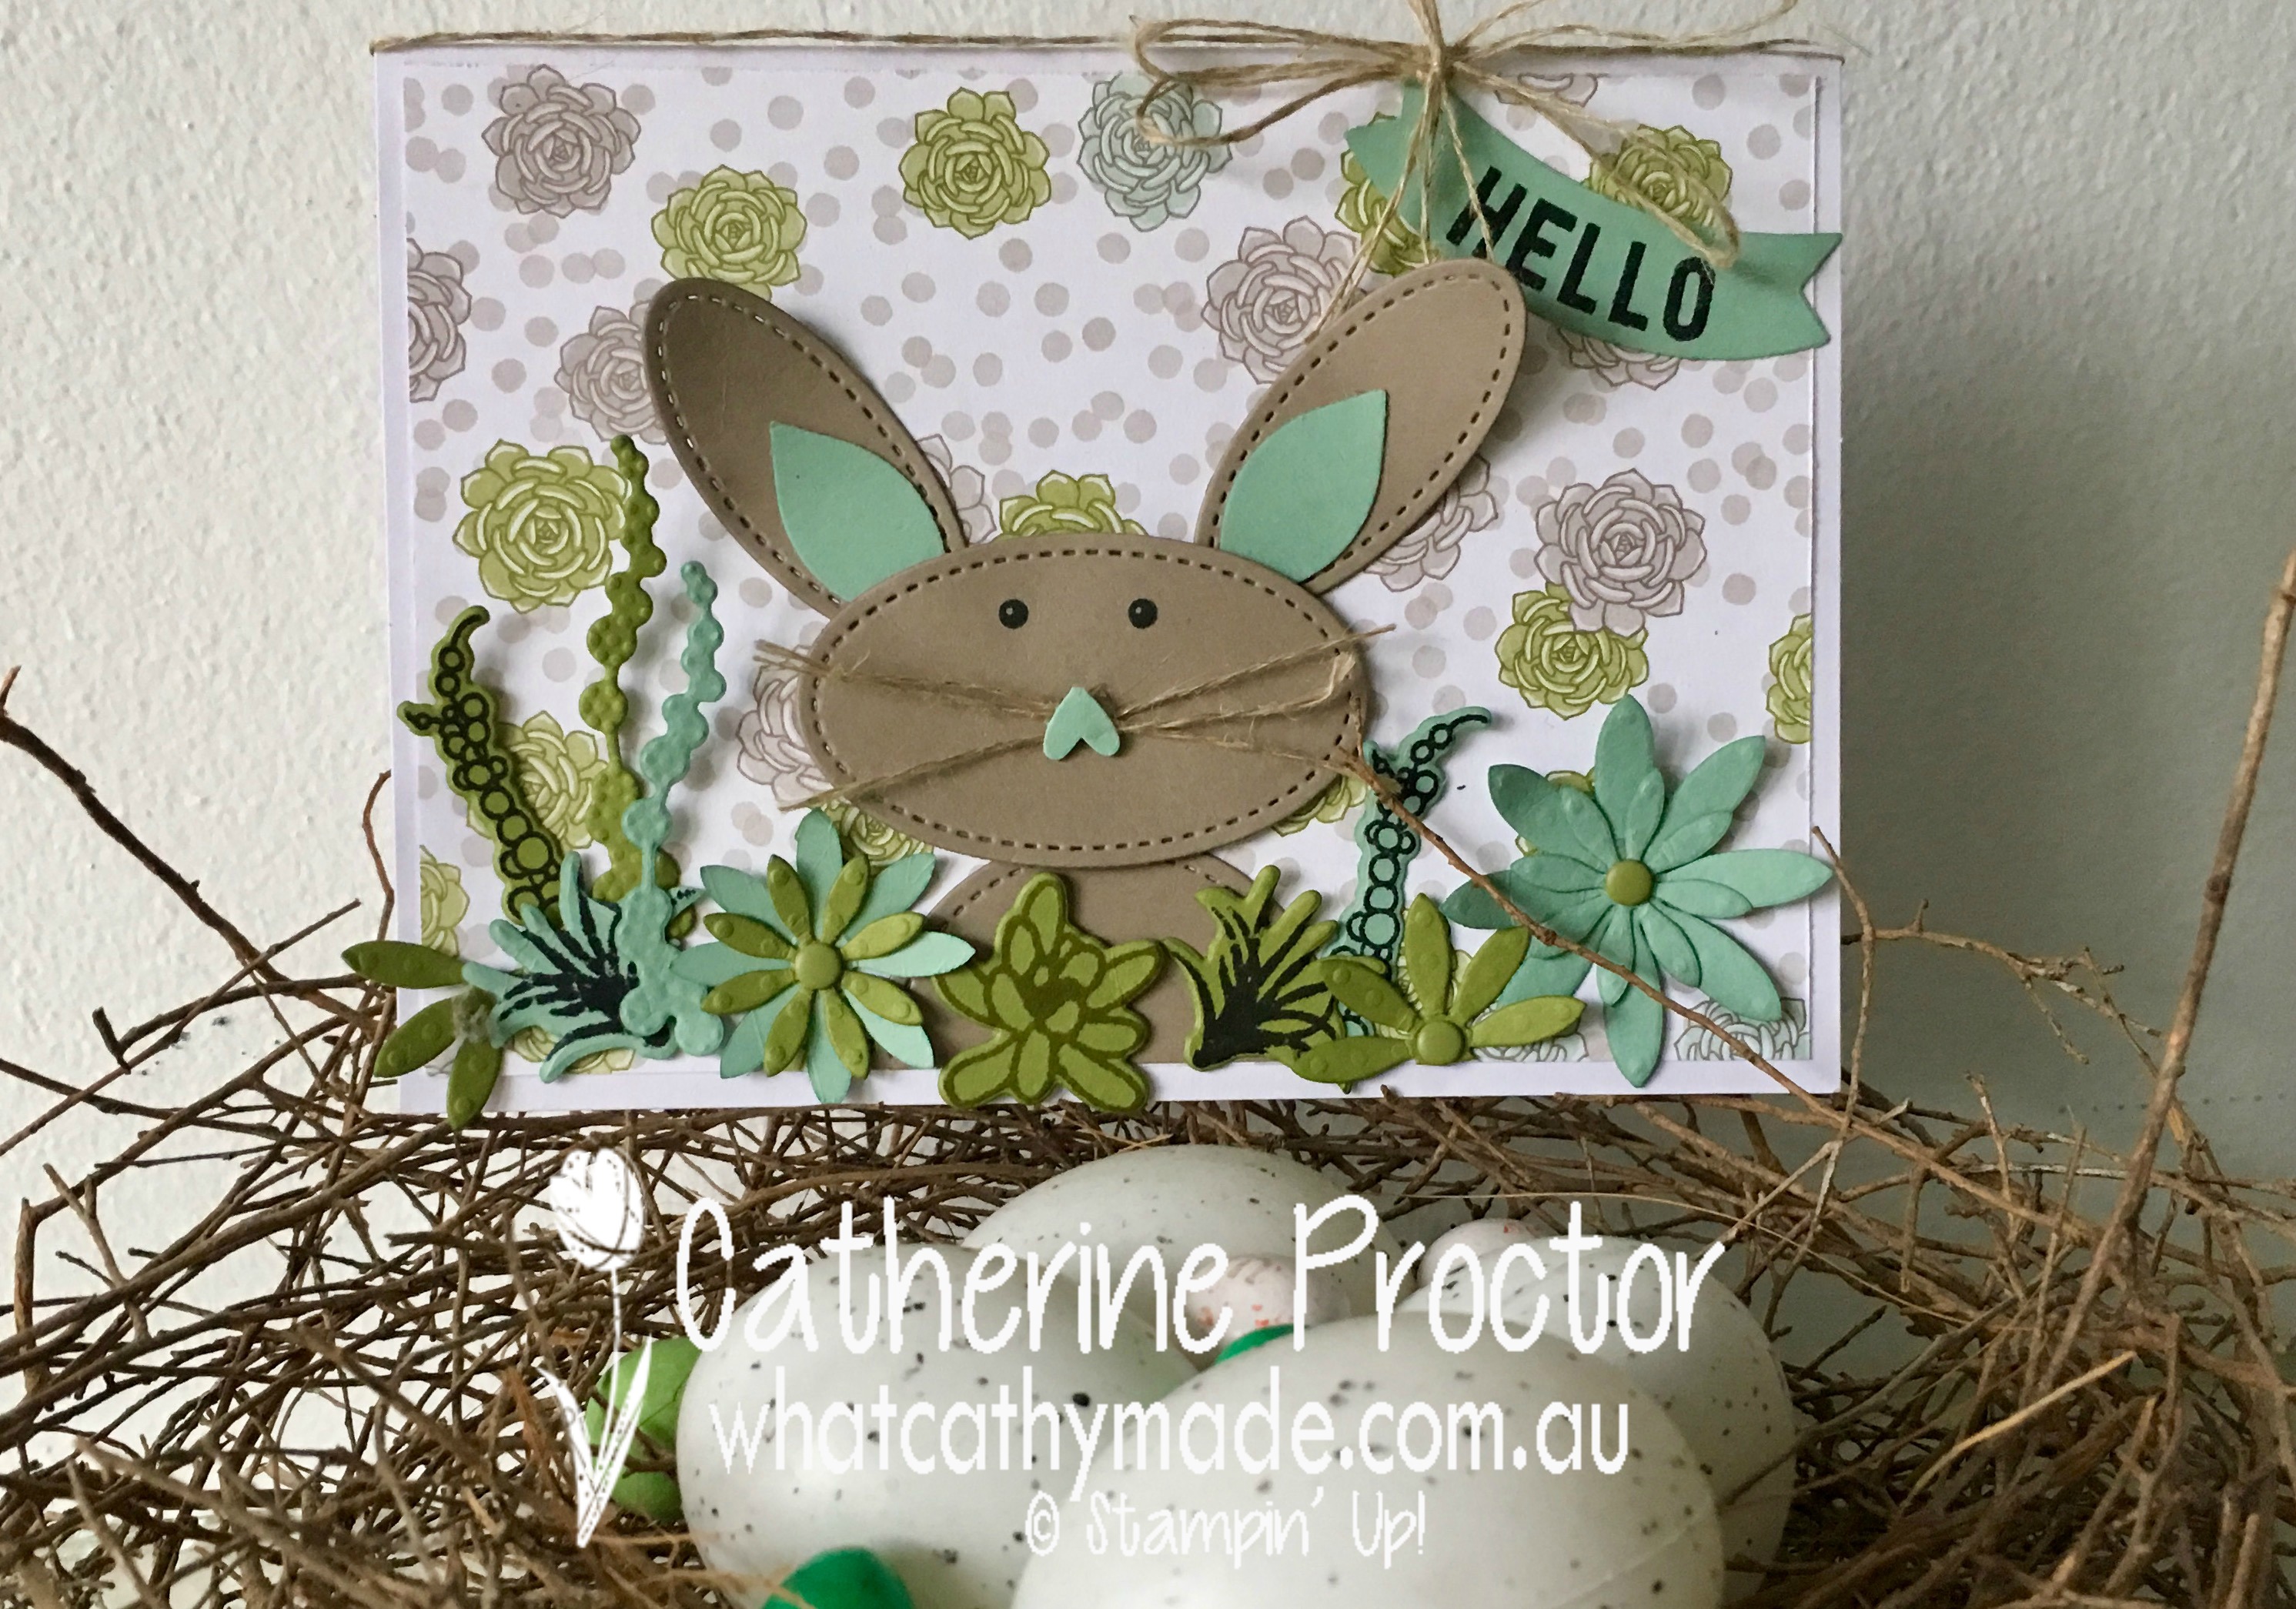
For my first Easter card I decided to give my rabbit Sweet Sugarplum ears to match the beautiful background paper from the Succulent Garden Designer Series Paper.
Can you guess which punch I used for her ears?
I’ll give you a hint…I also used the same punch to make her crunchy carrot.
Believe it or not, it’s the Festive Flower Builder punch!
Both the inside of her ears and the carrot were made out of the long, moustache shaped piece of the punch. For the ears, I cut that piece in half, and for the carrot I punched it in Calypso Coral cardstock and then simply folded it over.
The little green carrot top is made from the cross piece of that punch as well–I punched it out in Old Olive card stock and simply folded it in half on an angle.
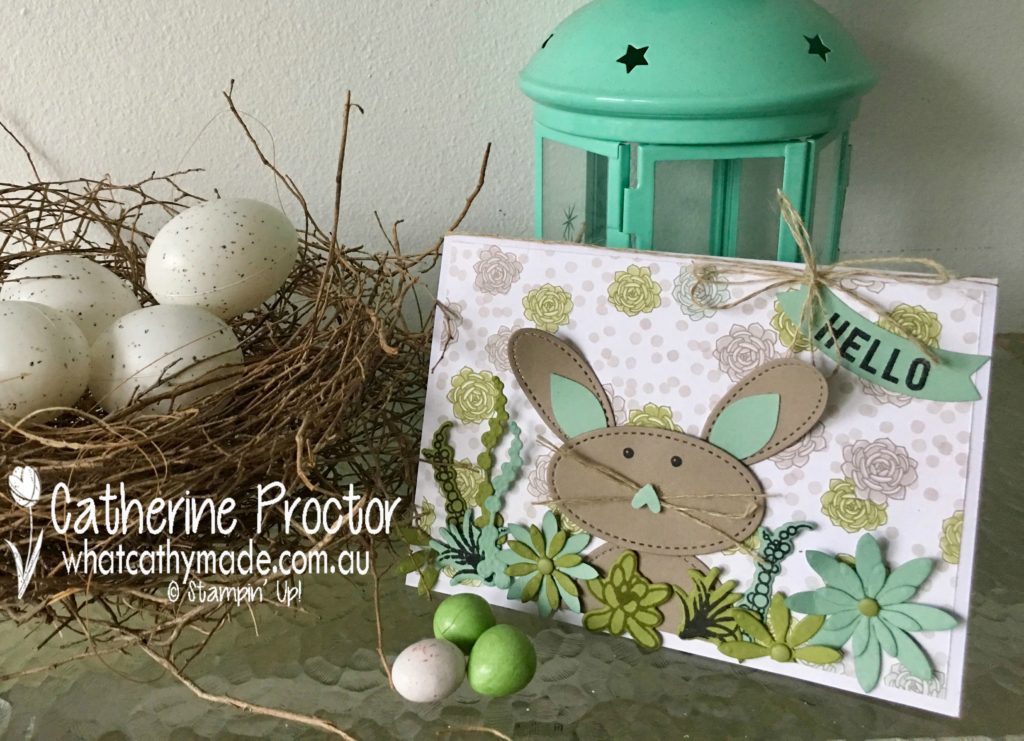
Here’s a close-up to show you how I also curved her ears forward to add even more dimmension
Her body and ears are made from Tip Top Taupe card stock and her nose is cut from the Owl builder punch.
The eyes are stamped with another incredibly versatile set, Cookie-Cutter Christmas. When stamping the eyes I just made sure I only inked up the the eyes and not the nose, because I wanted to use the cute little heart piece from the Owl Builder punch for her nose.
And don’t you just love her whiskers, made with the Stamping’ Up! Linen Thread?
Mint Macaron Stitched Rabbit
Well, I had so much fun making my sweet sugarplum rabbit I decided to make her a friend.
This time I used a different sheet of paper from the Succulent Garden Designer as the background paper and then dies and stamps from The Oh So Succulent Bundle to give him the appearance of hiding in the shrubbery.
He looks a little bit shy and a little bit cheeky, doesn’t he?
Mint Macaroon, Old Olive and Tip Top Taupe is one of my all-time favourite colour combinations.
For the sentiment on this card I used one of the free Salebration stamp sets, Any Occasion. It actually fits perfectly into the Duet Banner Punch, making for a quick and easy sentiment to finish the card off.
Get More Out of Your Craft Supplies
Have you ever tried to use your framelits as punch art?
This was my first attempt and I’m thrilled with the result. I really enjoy discovering another use for what was already an incredibly useful and versatile set.
And as a sewer and quilter I just love how quickly and easily the Stitched Shapes Framelits add texture and give my cards that hand-stitched look.
Next up on our blog hop is the incredibly talented Ros Davidson. I can’t wait to see what she’s created!
If you find a broken link or have come to this blog hop from a different entry point, you can view the participants below:
Today I’m excited to bring you a blog hop with some of the awesome ladies in the Art With Heart Stampin’ Up! Team.
Today we focus on the kids in our lives, from birthday cards to party ideas.
Sale-a-bration continues and this week we have three new additional items you can earn for free with a $90 order – ask me how!
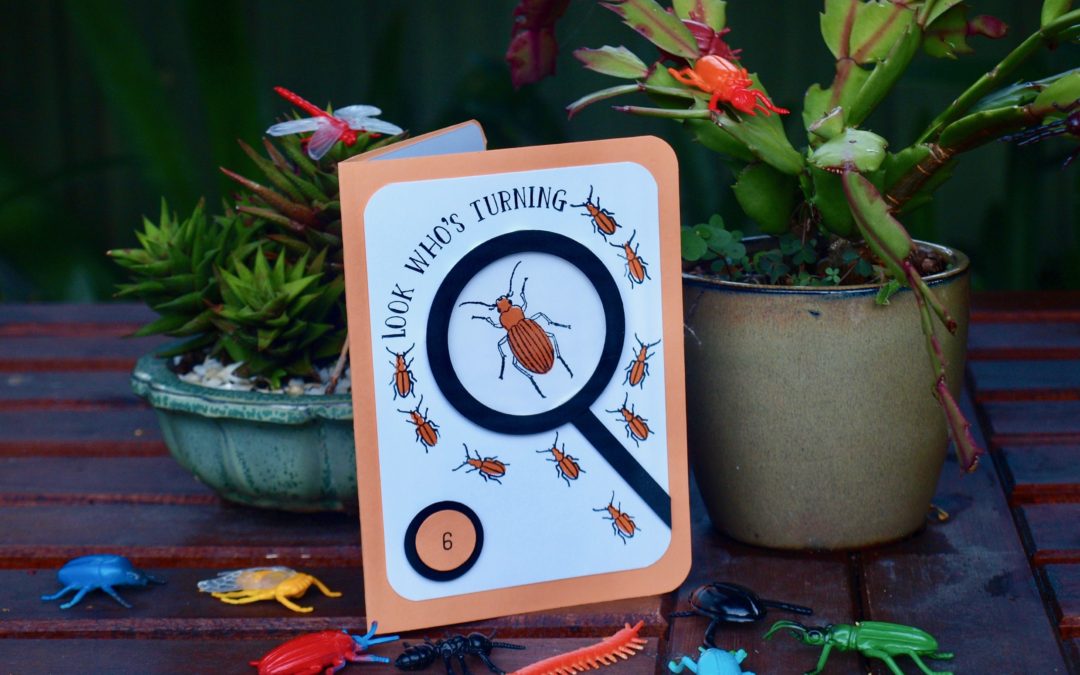
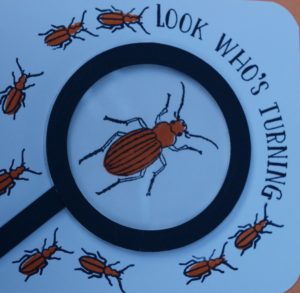
As soon as I received my Occasions catalogue I knew I was just going to have to have the Beetles and Bugs stamp set. It instantly evoked memories of coming to the big smoke (i.e. Sydney) as a child and going to the Australian Museum with my parents when we put on our Sunday best and caught the train into the city.
As a child from the country, Sydney was total sensory overload!
We’d have lunch in a smart coffee shop in the city, visit the David Jones Food Hall and we were allowed to chose just one thing from the Nut Shop in the Strand Arcade.
There was always something new and exciting to see in the Australian Museum, but my favourite part was the insect collection. I think I loved the wide wooden drawers the insects were stored in as much as the insects themselves!
My love affair with beetles and bugs has continued to this day…as long they’re not in my house!
Stamp Sets for Boys Can Be So Hard to Find!
…which is why I love this set so much!
As a mother to two boys I instantly knew this stamp set would be incredibly useful. It’s also very versatile because beetles and bugs come in so many different colours, which means you can use any Stampin’ Up! ink you like with this set.
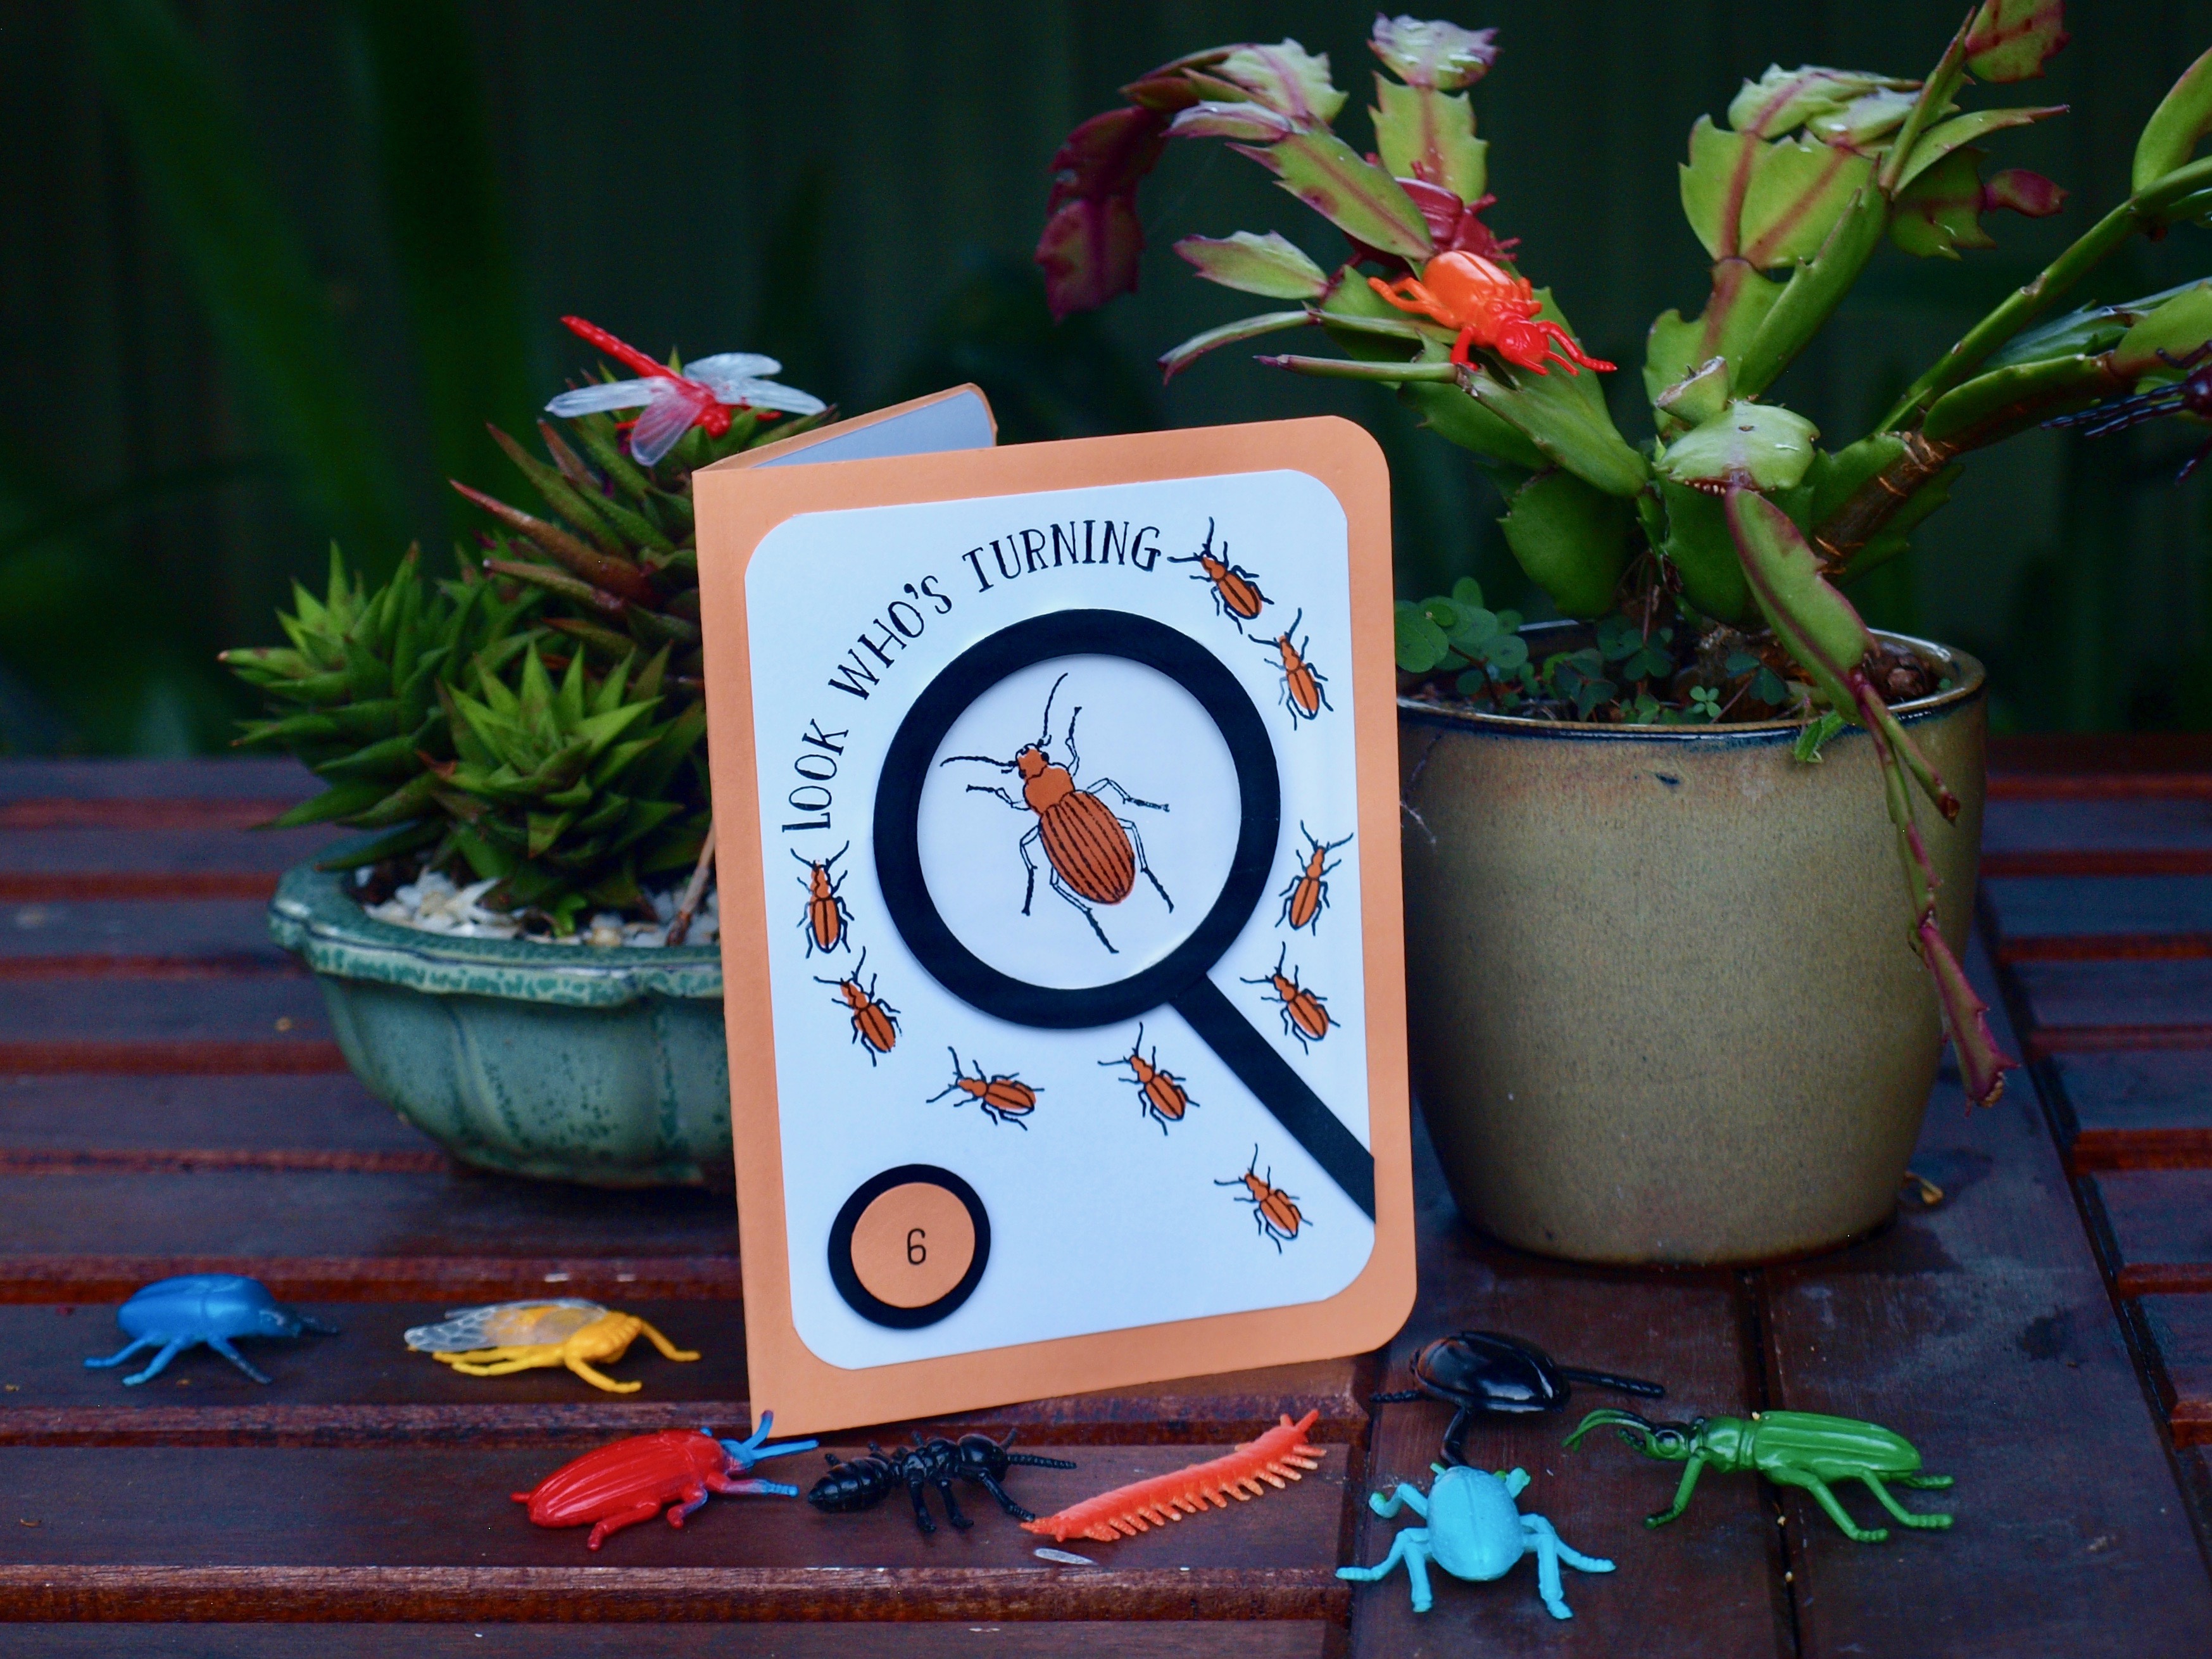
When making this card I decided to try a colour I hadn’t used before – Peekaboo Peach – and I just love how well it co-ordinates with Pumpkin Pie, Whisper White and Basic Black. I’ll definitely be using Peekaboo Peach again.
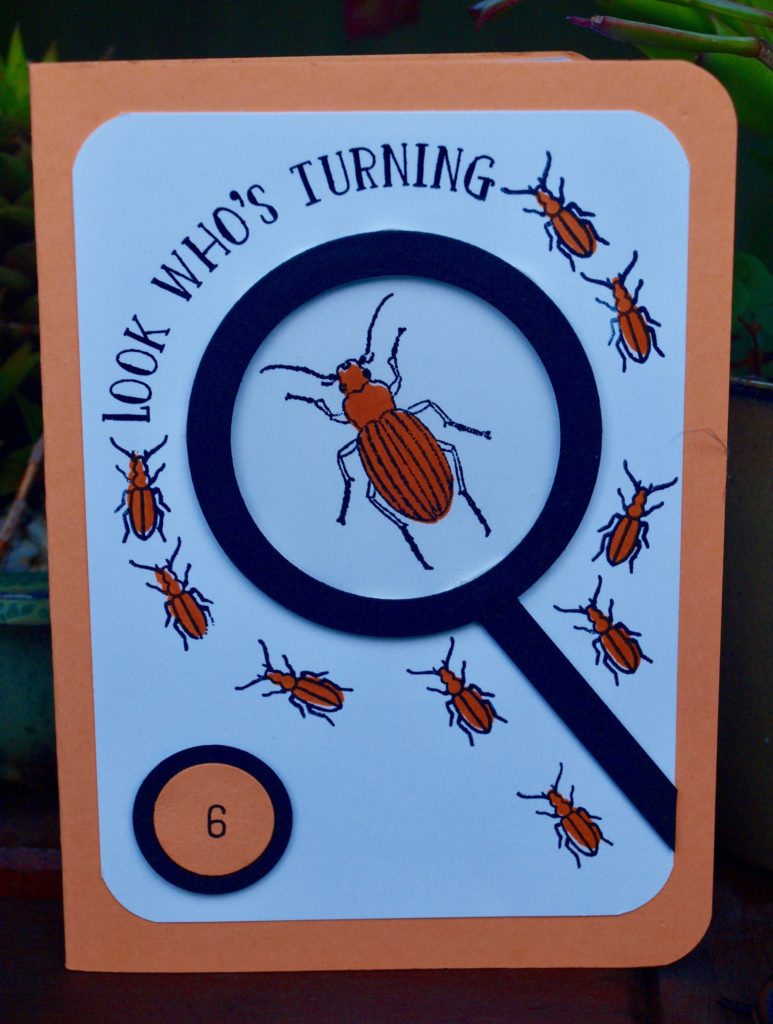
I used the layering circle framelits with basic black card stock and window sheets to make my magnifying glass and I’m really pleased with how realistic it looks, however it’s hard to photograph the ‘glass’ in the centre of my magnifying glass. Here’s a close-up to give you a bit of a better look.
The sentiment is from the Number of Years stamp set and because it is a photopolymer stamp I was able to bend it to exactly fit around the curve of the magnifying glass. The tiny number 6 is from the incredibly useful and versatile Labeler Alphabet stamp set.
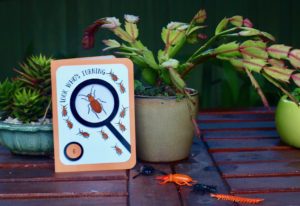
Little Boys Always Love a Surprise!
The Party Pop-up Thinlits die would have to be one of my all time favourite dies to add that ‘wow’ factor to all of my birthday cards.
Both my boys would have loved to receive this card when they were younger…in fact I’m sure that even as teenagers they would still secretly love it today!
I hope you enjoy the versatility and ‘boy friendliness’ of the Beetles and Bugs set as much as I do.
Thanks for stopping by!
Now it’s time to see what the incredibly talented Alisha Watson has created by clicking on the next blog hyperlink below.
If you find a broken link or have come to this blog hop from a different entry point, you can view the participants below:
Today some of the Art with Heart Stampin’ Up! team girls have created some amazing Christmas projects to inspire you with the theme, It’s beginning to look a lot like Christmas! We have tags, gift bags, teacher gift ideas, decorations and many more fun projects to create this holiday season.
You’ve arrived at my blog from Kathryn Mangelsdorf (there’s a list of all the participants at the end of this post in case you missed any).
Blogs are full circles, so you can start hopping here and then follow the link at the end of each post to go to the next one.
‘Easy Peasy’ Washi Tape Advent Calendar
I don’t know about you, but I’ve always loved advent calendars.
There’s something quite magical and childlike about counting down the days to Christmas, and let’s be honest…is there any child who doesn’t love starting each day in December with a little sweet, a tiny toy or a coin?
Personally, I’ve never liked commercial advent calendars that feature a cartoon superhero character and contain cheap, nasty chocolate. I mean if you’re going to indulge, you may as well eat the good stuff!
It’s so much nicer to make your own advent calendar because you can co-ordinate the colours you use to your Christmas theme or house décor…and you have the freedom to fill your calendar with whatever you want. And it’s also a lovely way to create your own family Christmas tradition.
When my children were little they’d get a 50 cent coin in their calendar every day, along with a small sweet or candy cane. Then on Christmas Eve they would use half their coins to buy a present for their brother and the other half would be donated to the charity buckets when we went to look at Christmas lights.
This lovely family Christmas tradition came about from my homemade advent calendar.
Make this calendar as a surprise for your kids or make it together
…it’s super easy to make and you can adapt the design to use the craft materials you have
…it’s reusable, year after year, because washi tape can repositioned multiple times, so once you’ve opened the boxes you can refill and reseal them again the following year
…it’s an upcycling project that re-purposes an item item every home has…old toilet paper rolls
…its design is flexible, you can display your calendar so many different ways
…it’s super cute and really fun to make!
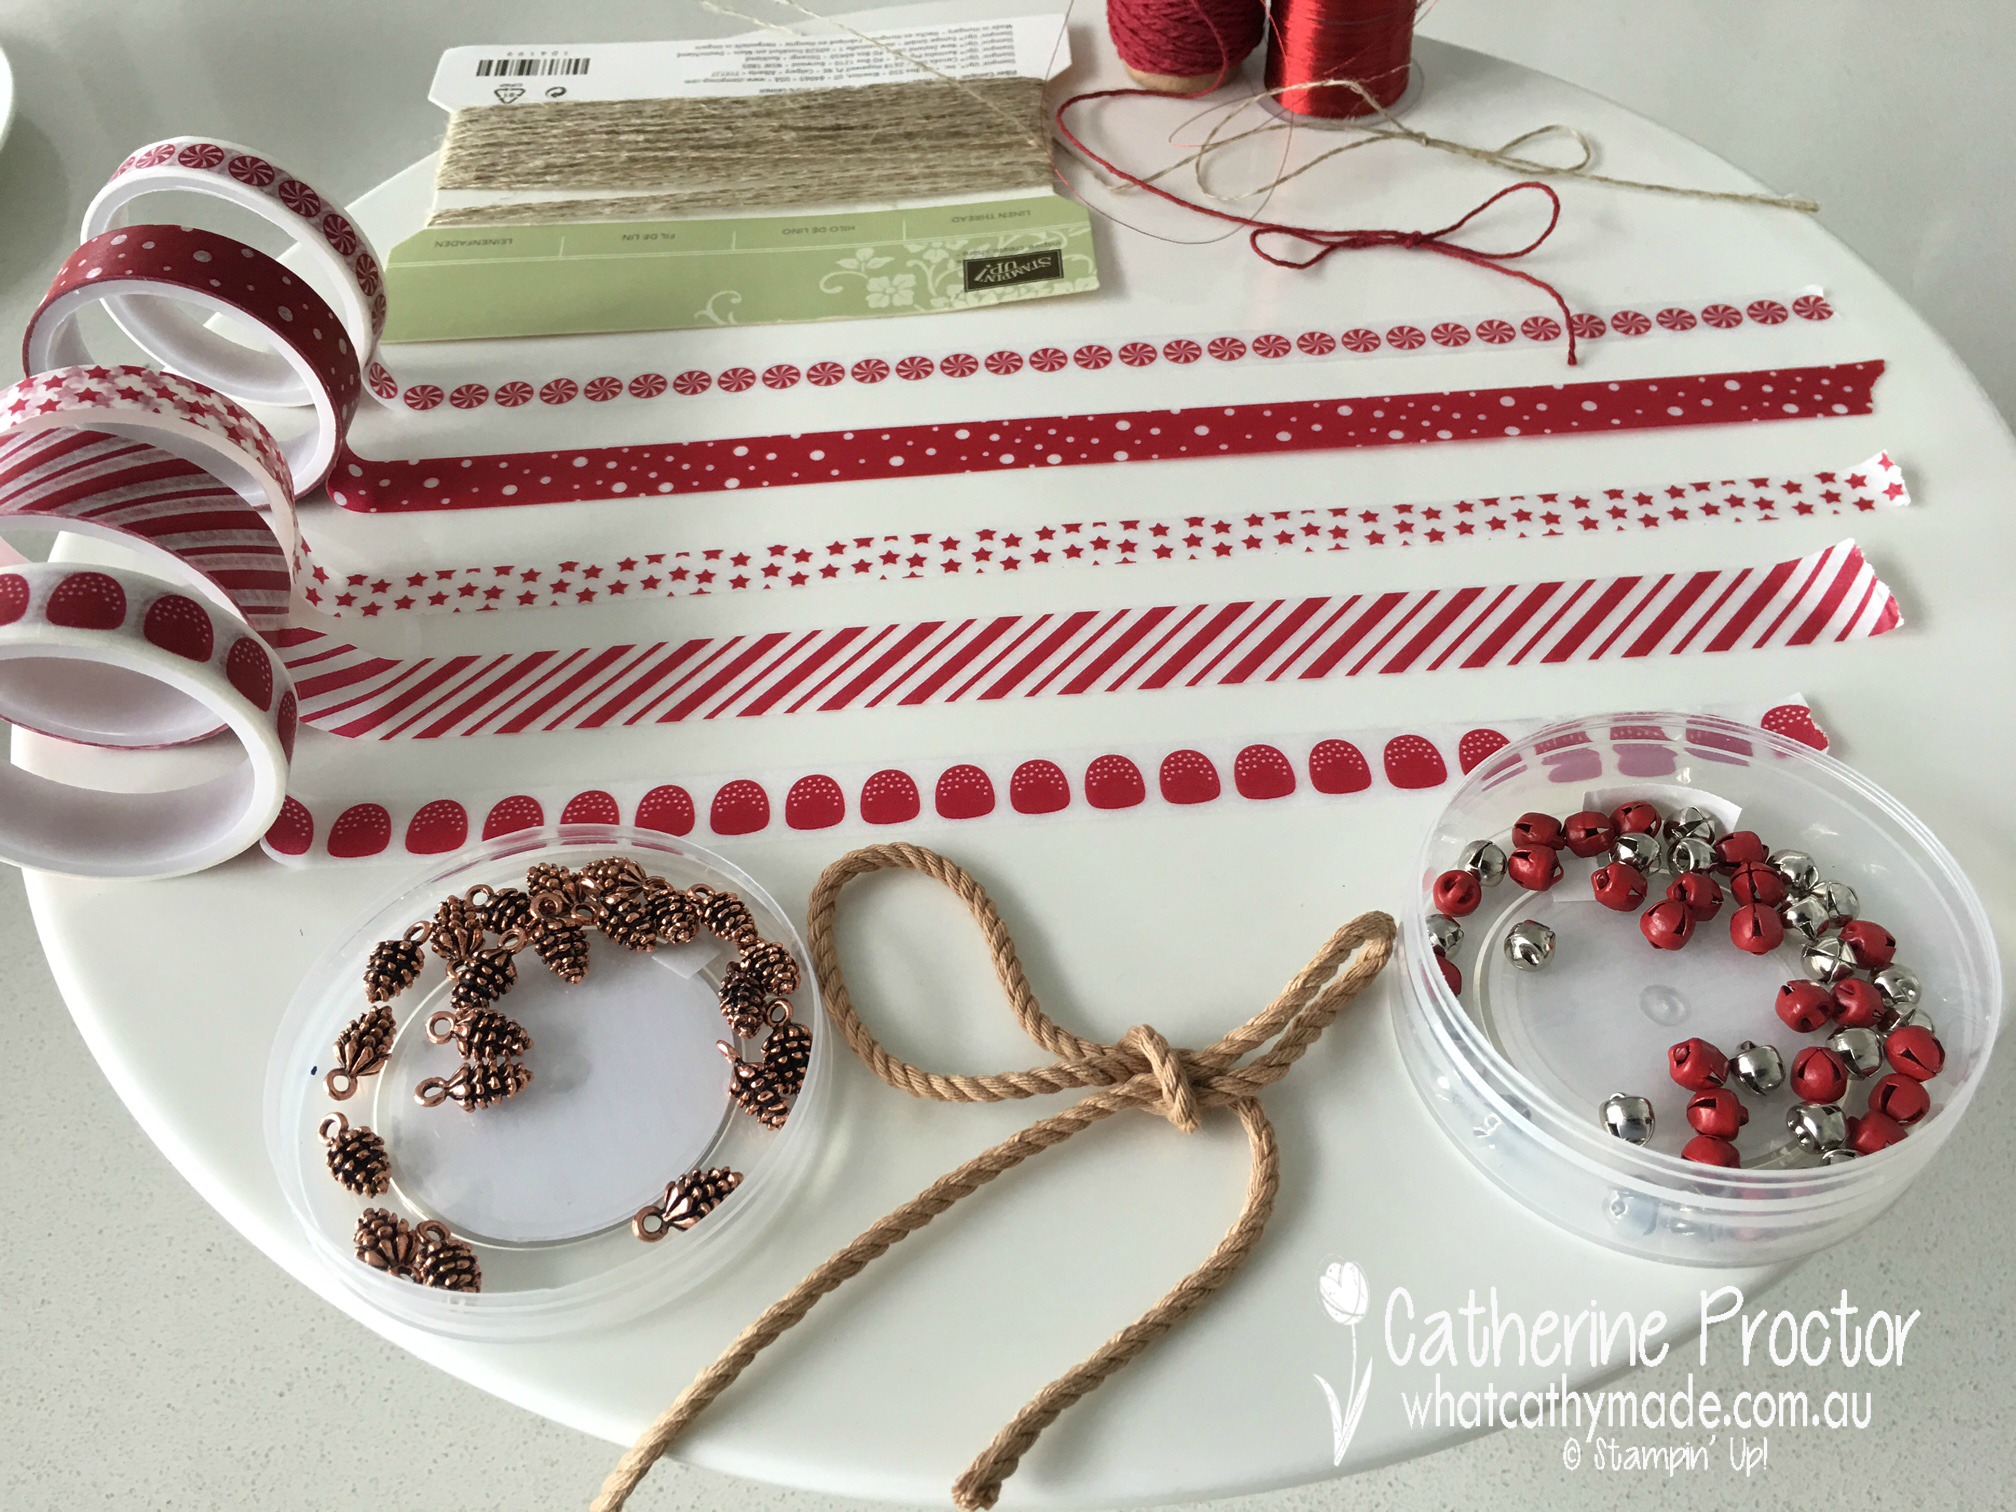
Here’s what you’ll need
24 old toilet paper rolls (if you want to display your calendar as 5 rows of 5 boxes you will need to make an extra box and number it 25 to be opened on Christmas morning)
Washi tape of your choice
Matching cardstock
Number stamps
Punches or die cutting machine and dies
Scissors
Glue
Embellishments, such as twine, ribbon, etc
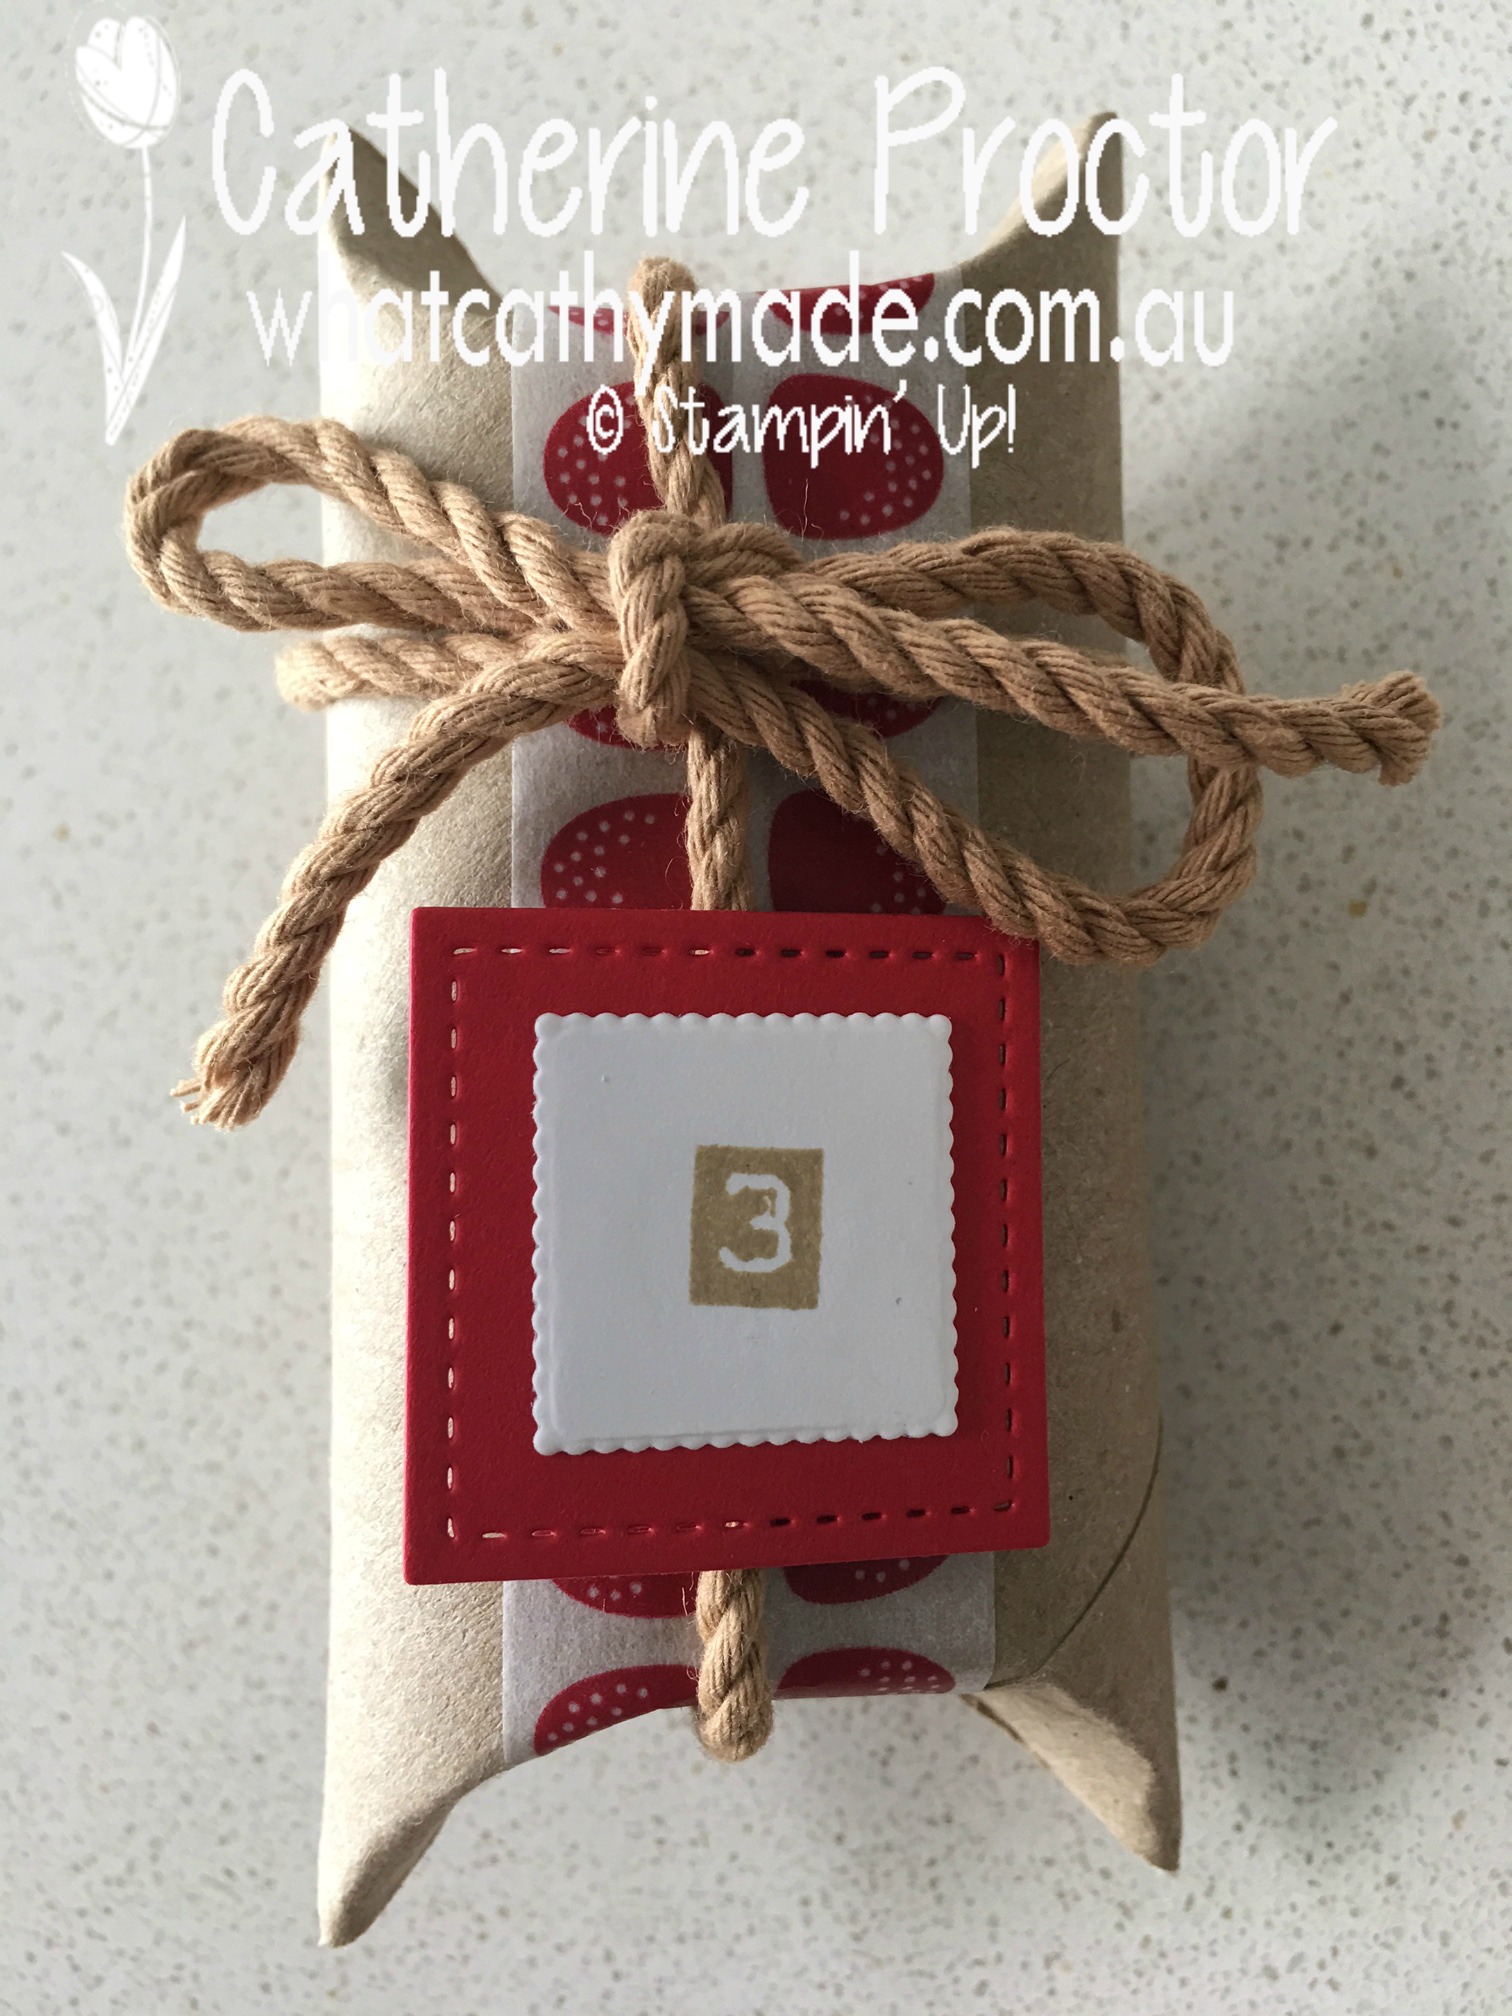
Begin by turning your toilet paper rolls into curvy boxes to hold your advent surprises. Press one end down with your thumb to the halfway point and do it with the facing side. Repeat with the other end and do this for all 24 (or 25) rolls.
At this stage you can fill your calendar with whatever you want: coins, lollies, tiny toys, craft projects, candy canes or even Christmas tree decorations.
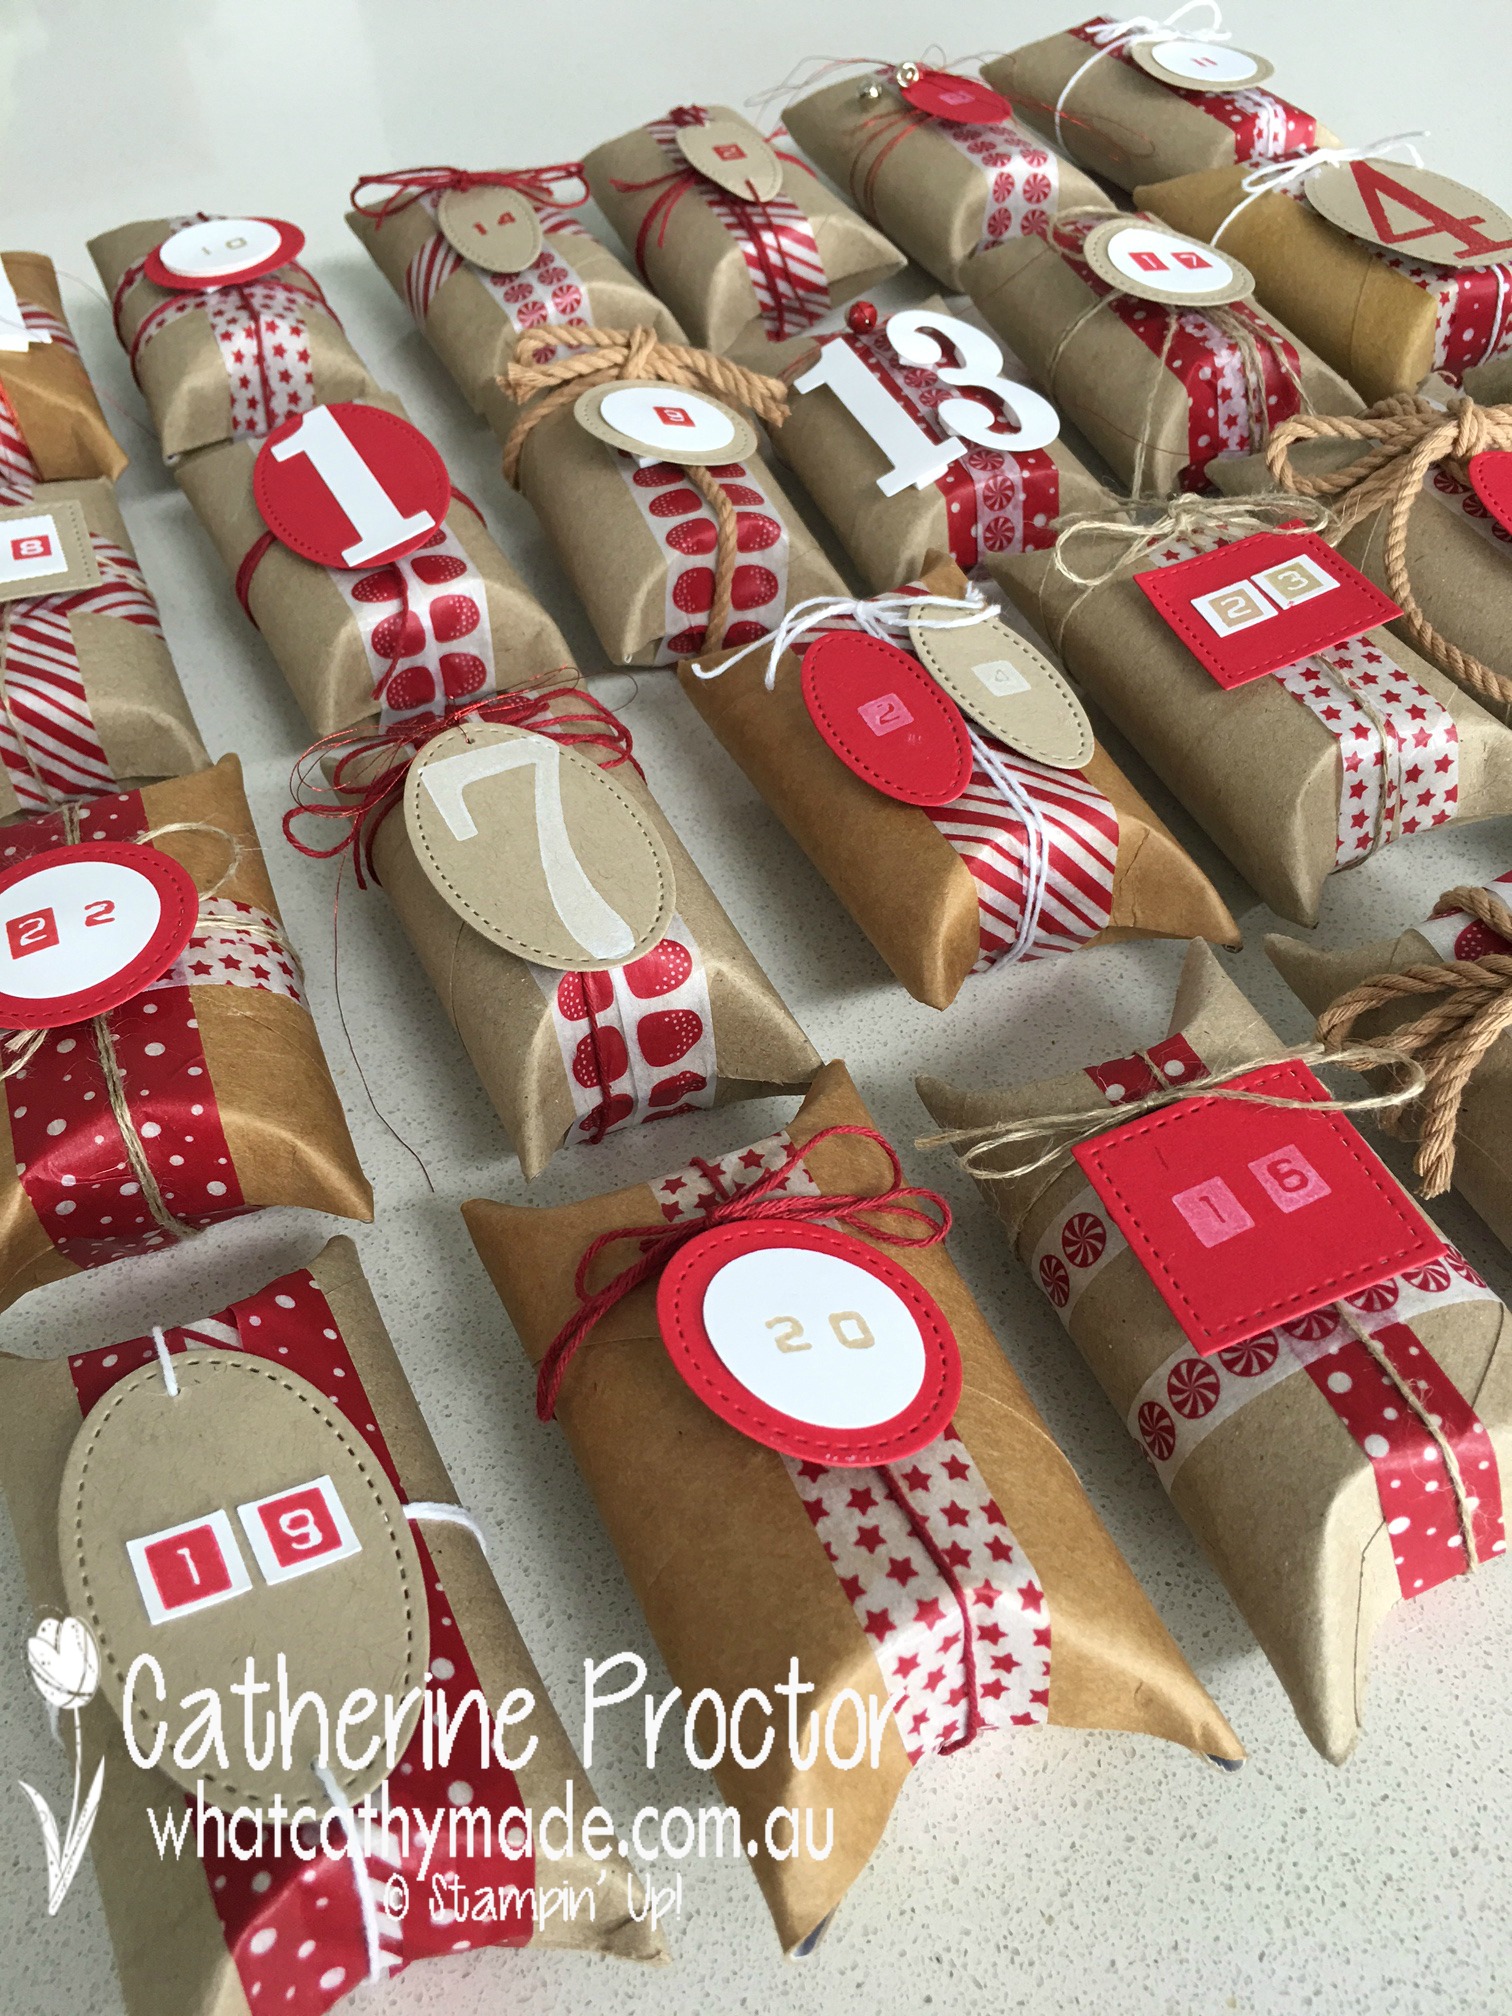
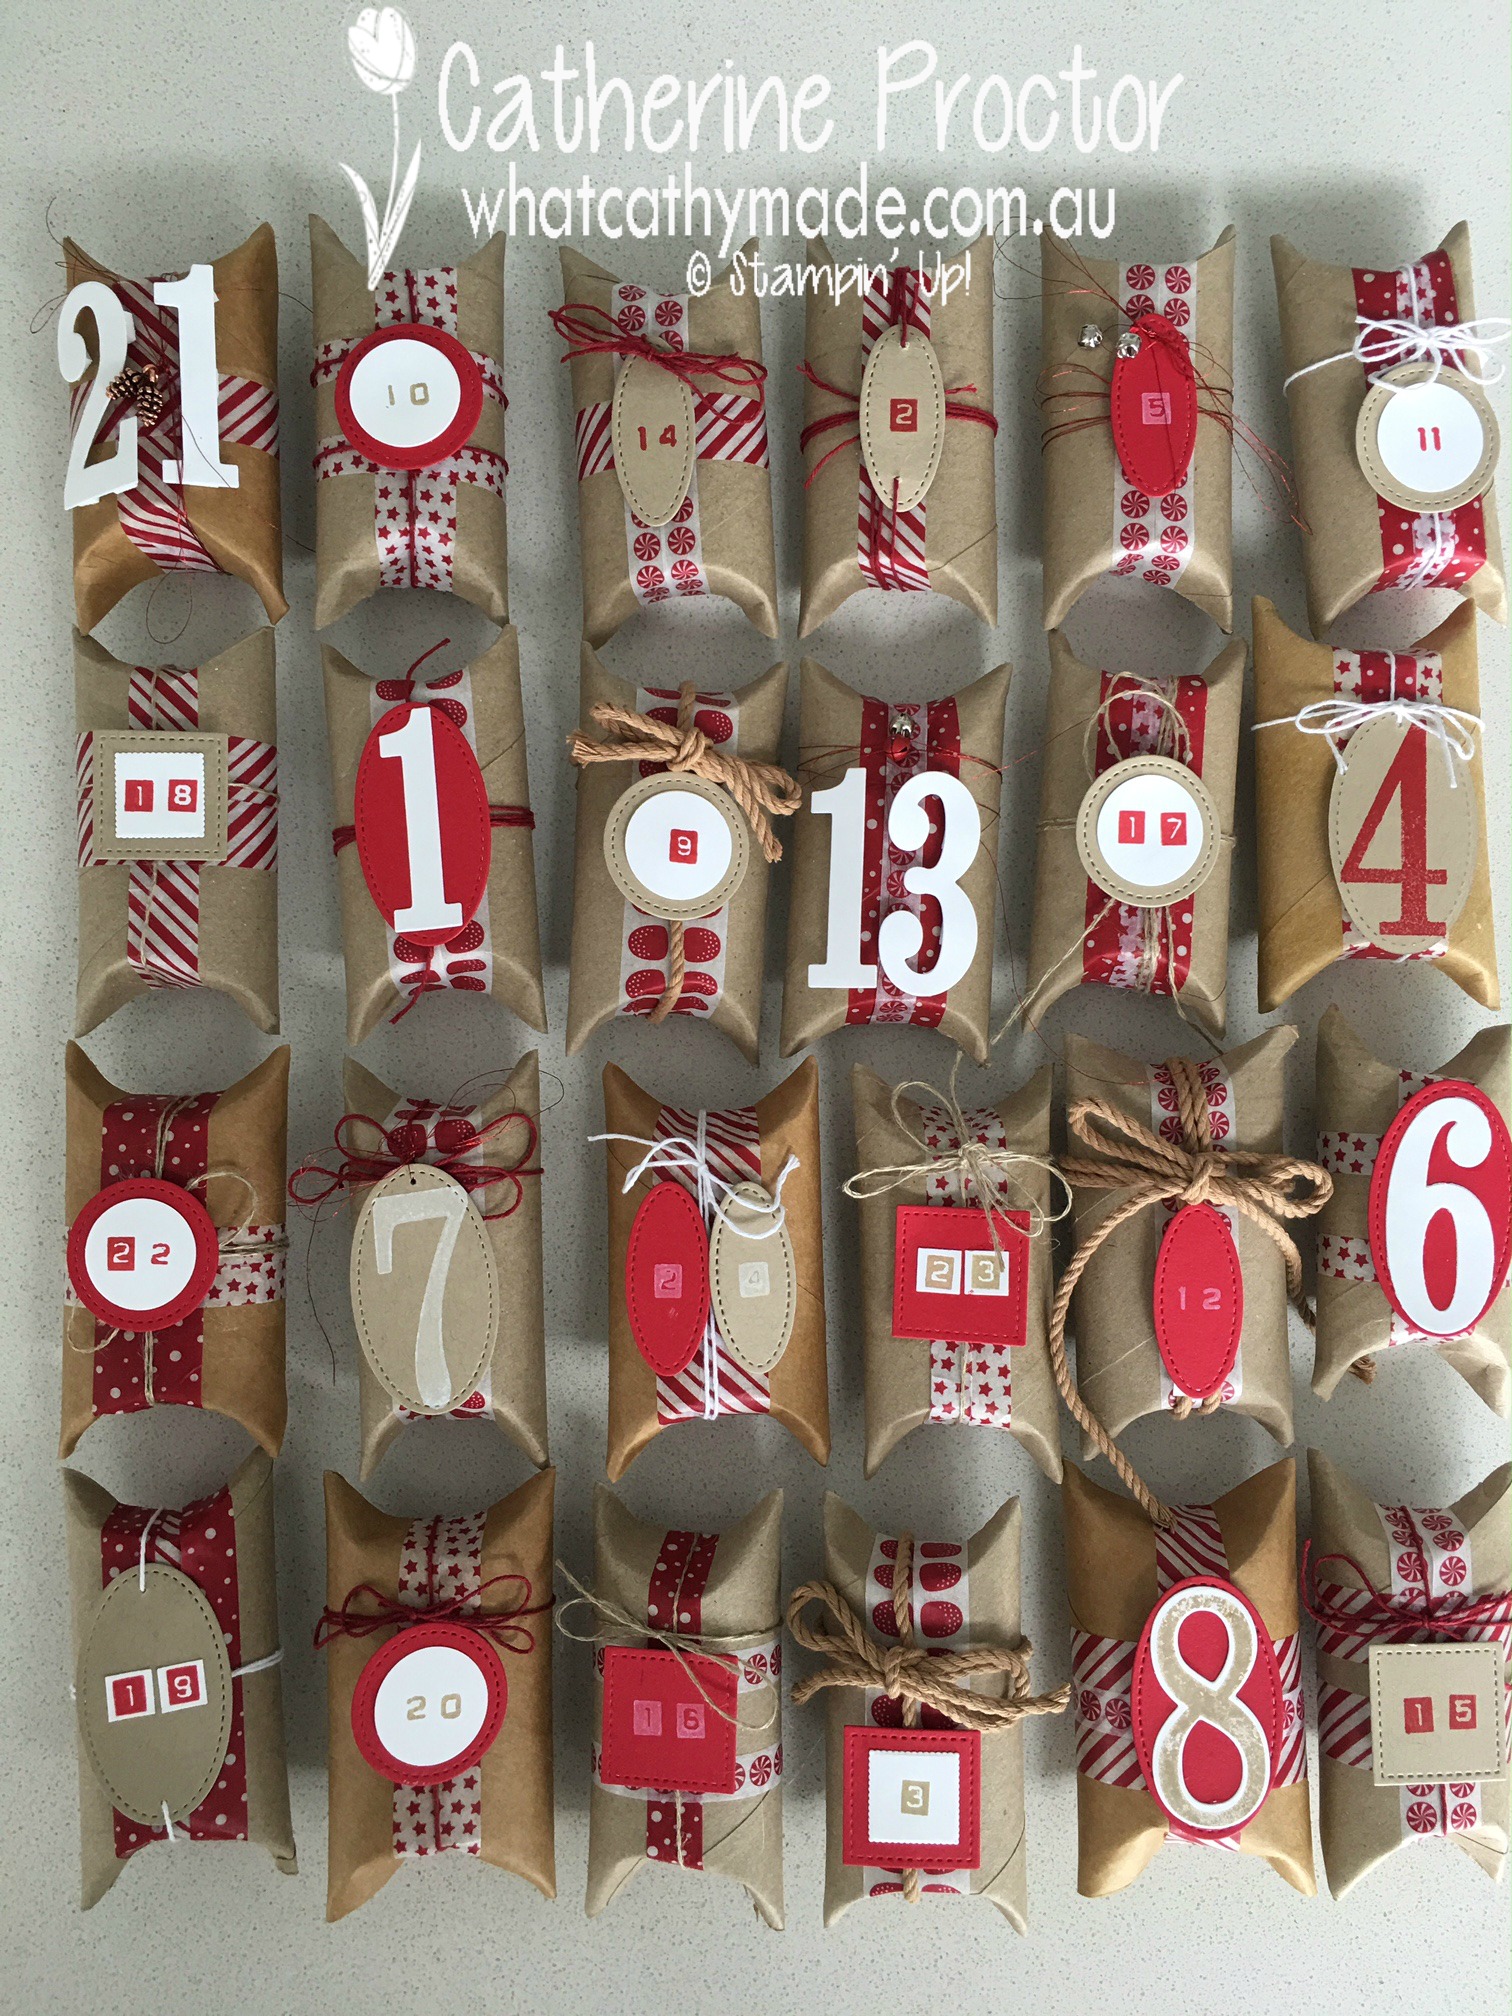
Once your boxes are filled the fun really begins. I’ve wrapped mine with five gorgeous rolls of Candy Cane Lane Washi Tape, which all co-ordinate together.
Wrapping the boxes with washi tape is super easy to do.
No glue needed as the washi tape is self-adhesive.
No scissors required, you simply tear the washi tape
No problem if you make a mistake—just peel it back and reposition it!
The final countdown!
Once I’d wrapped all my boxes in Candy Cane Lane washi tape I then made a variety of numbers from 1-24, using the Large Letter Framelits Dies (these are on sale @ 20% off, $43.20, from 21-28 November!), the matching Number of Years Stamp Set and the Labeler Alphabet stamp set, which has 2 styles of letters and numbers.
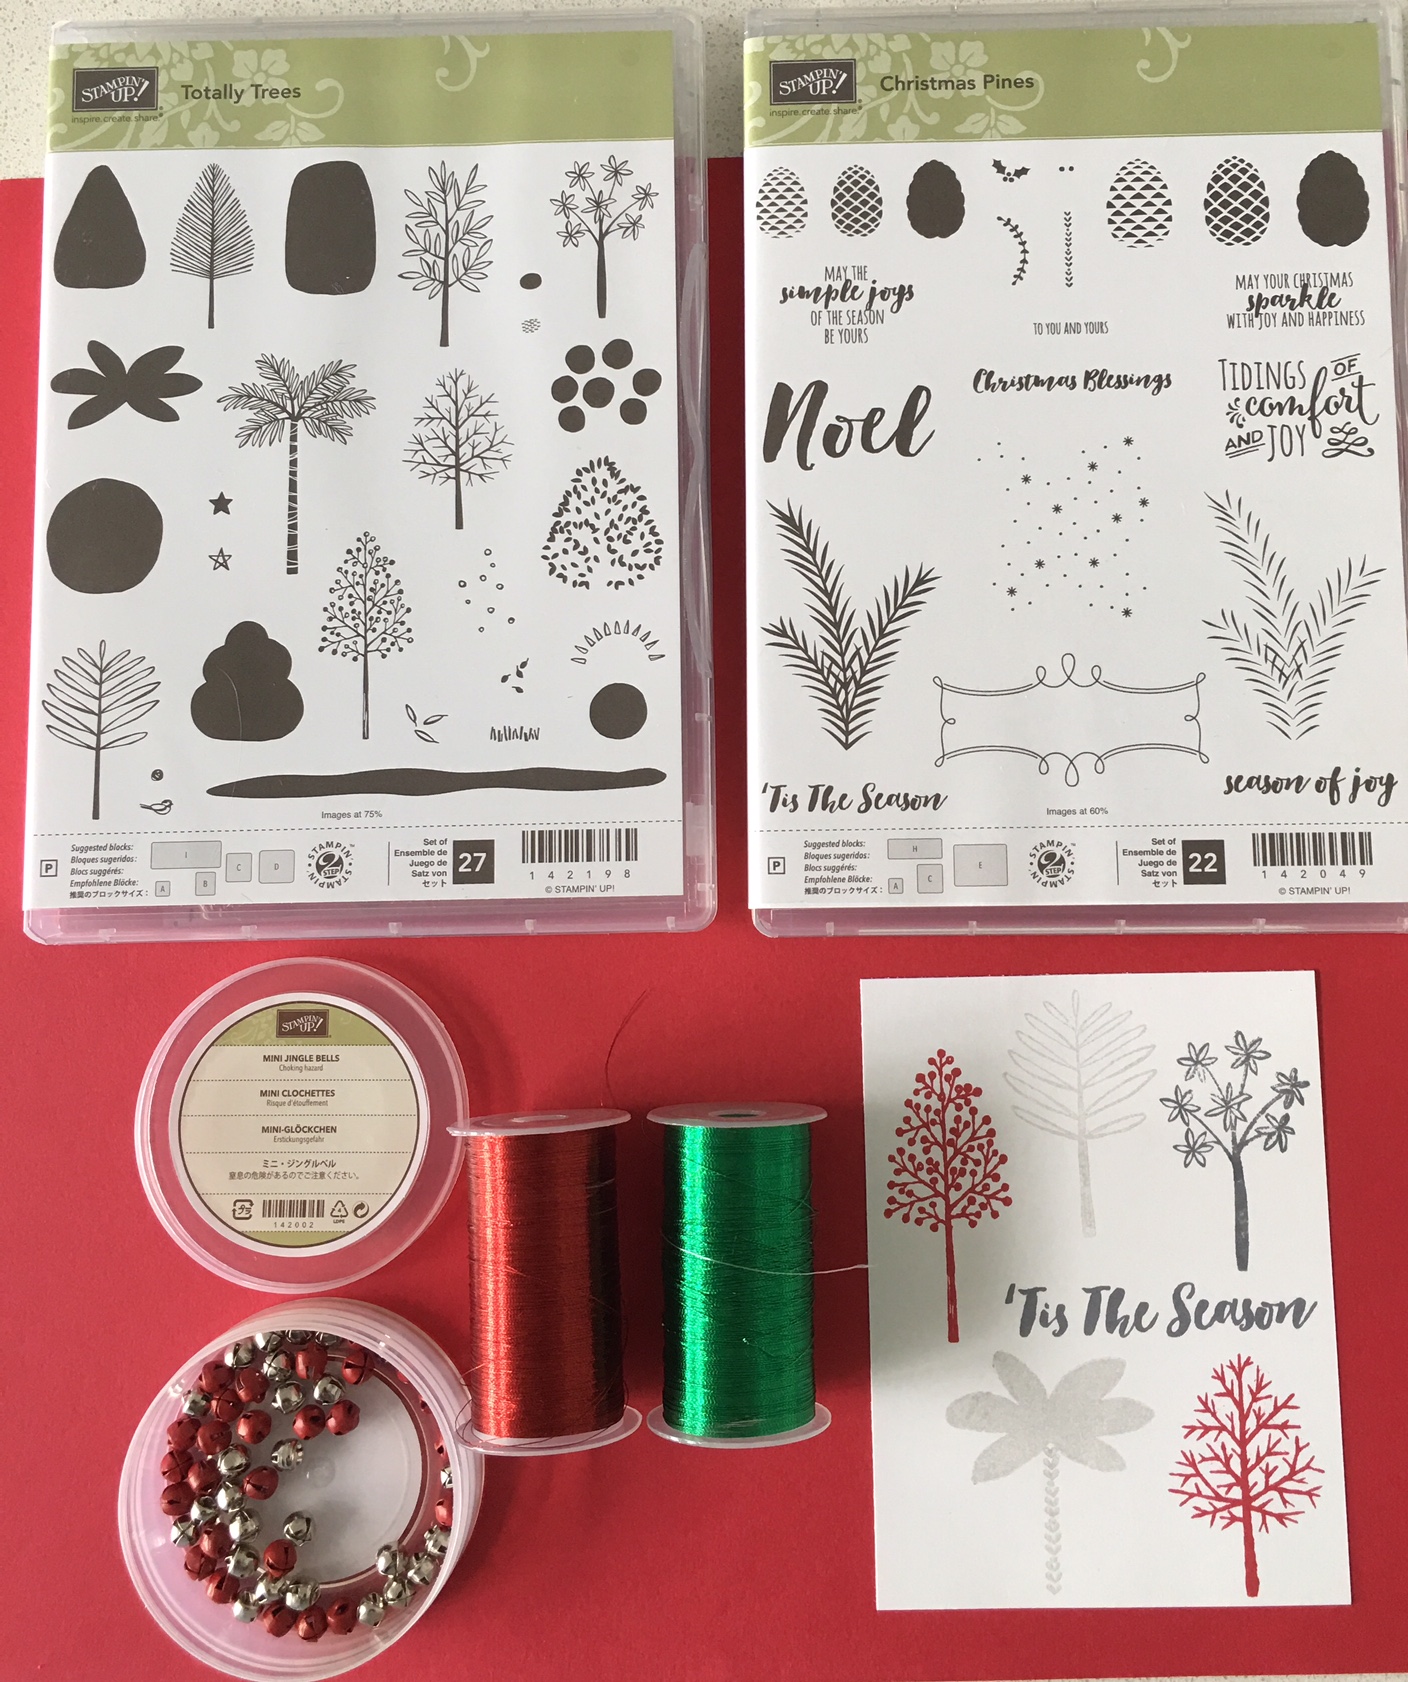
I also used the co-coordinating stamp pads in Real Red, Whisper White and Crumb Cake and embellished the boxes with Linen Thread, Cherry Cobbers Baker’s Twine, Cherry Cobber metal thread, Kraft Rope Trim, Mini Pinecones Embellishments and Mini Jingle Bells.
I just love how all the Stampin’ Up! Products co-ordinate and especially how the new Stitched Shape Framelit dies can be layered with the circle punch or the layering squares framelits, or simply have the numbers stamped or glued onto them.
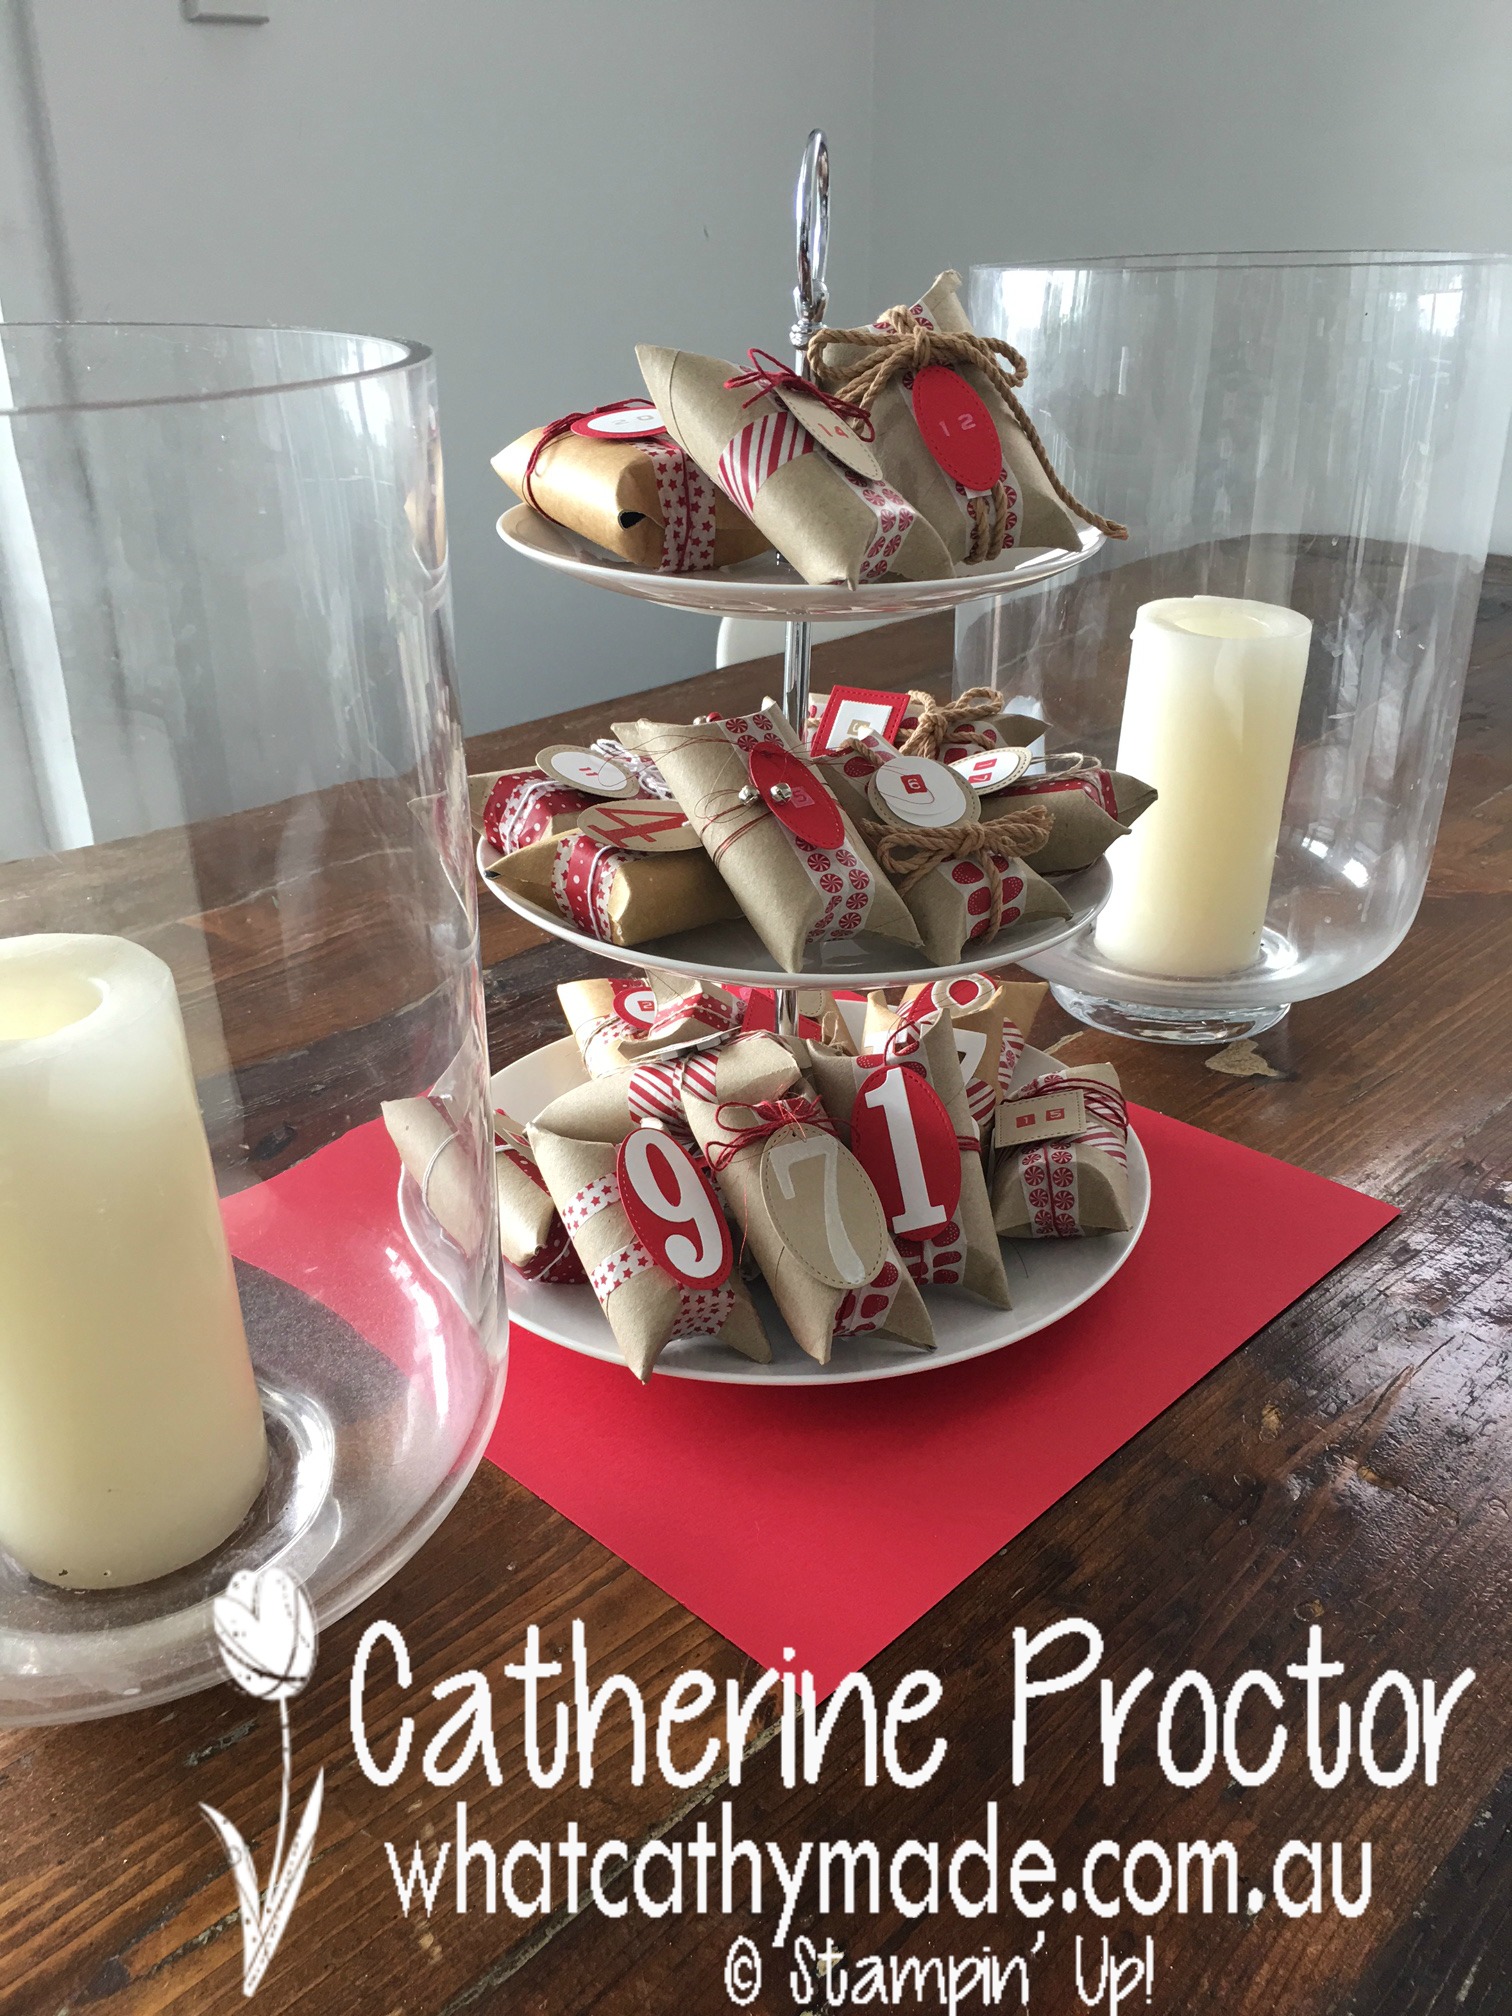
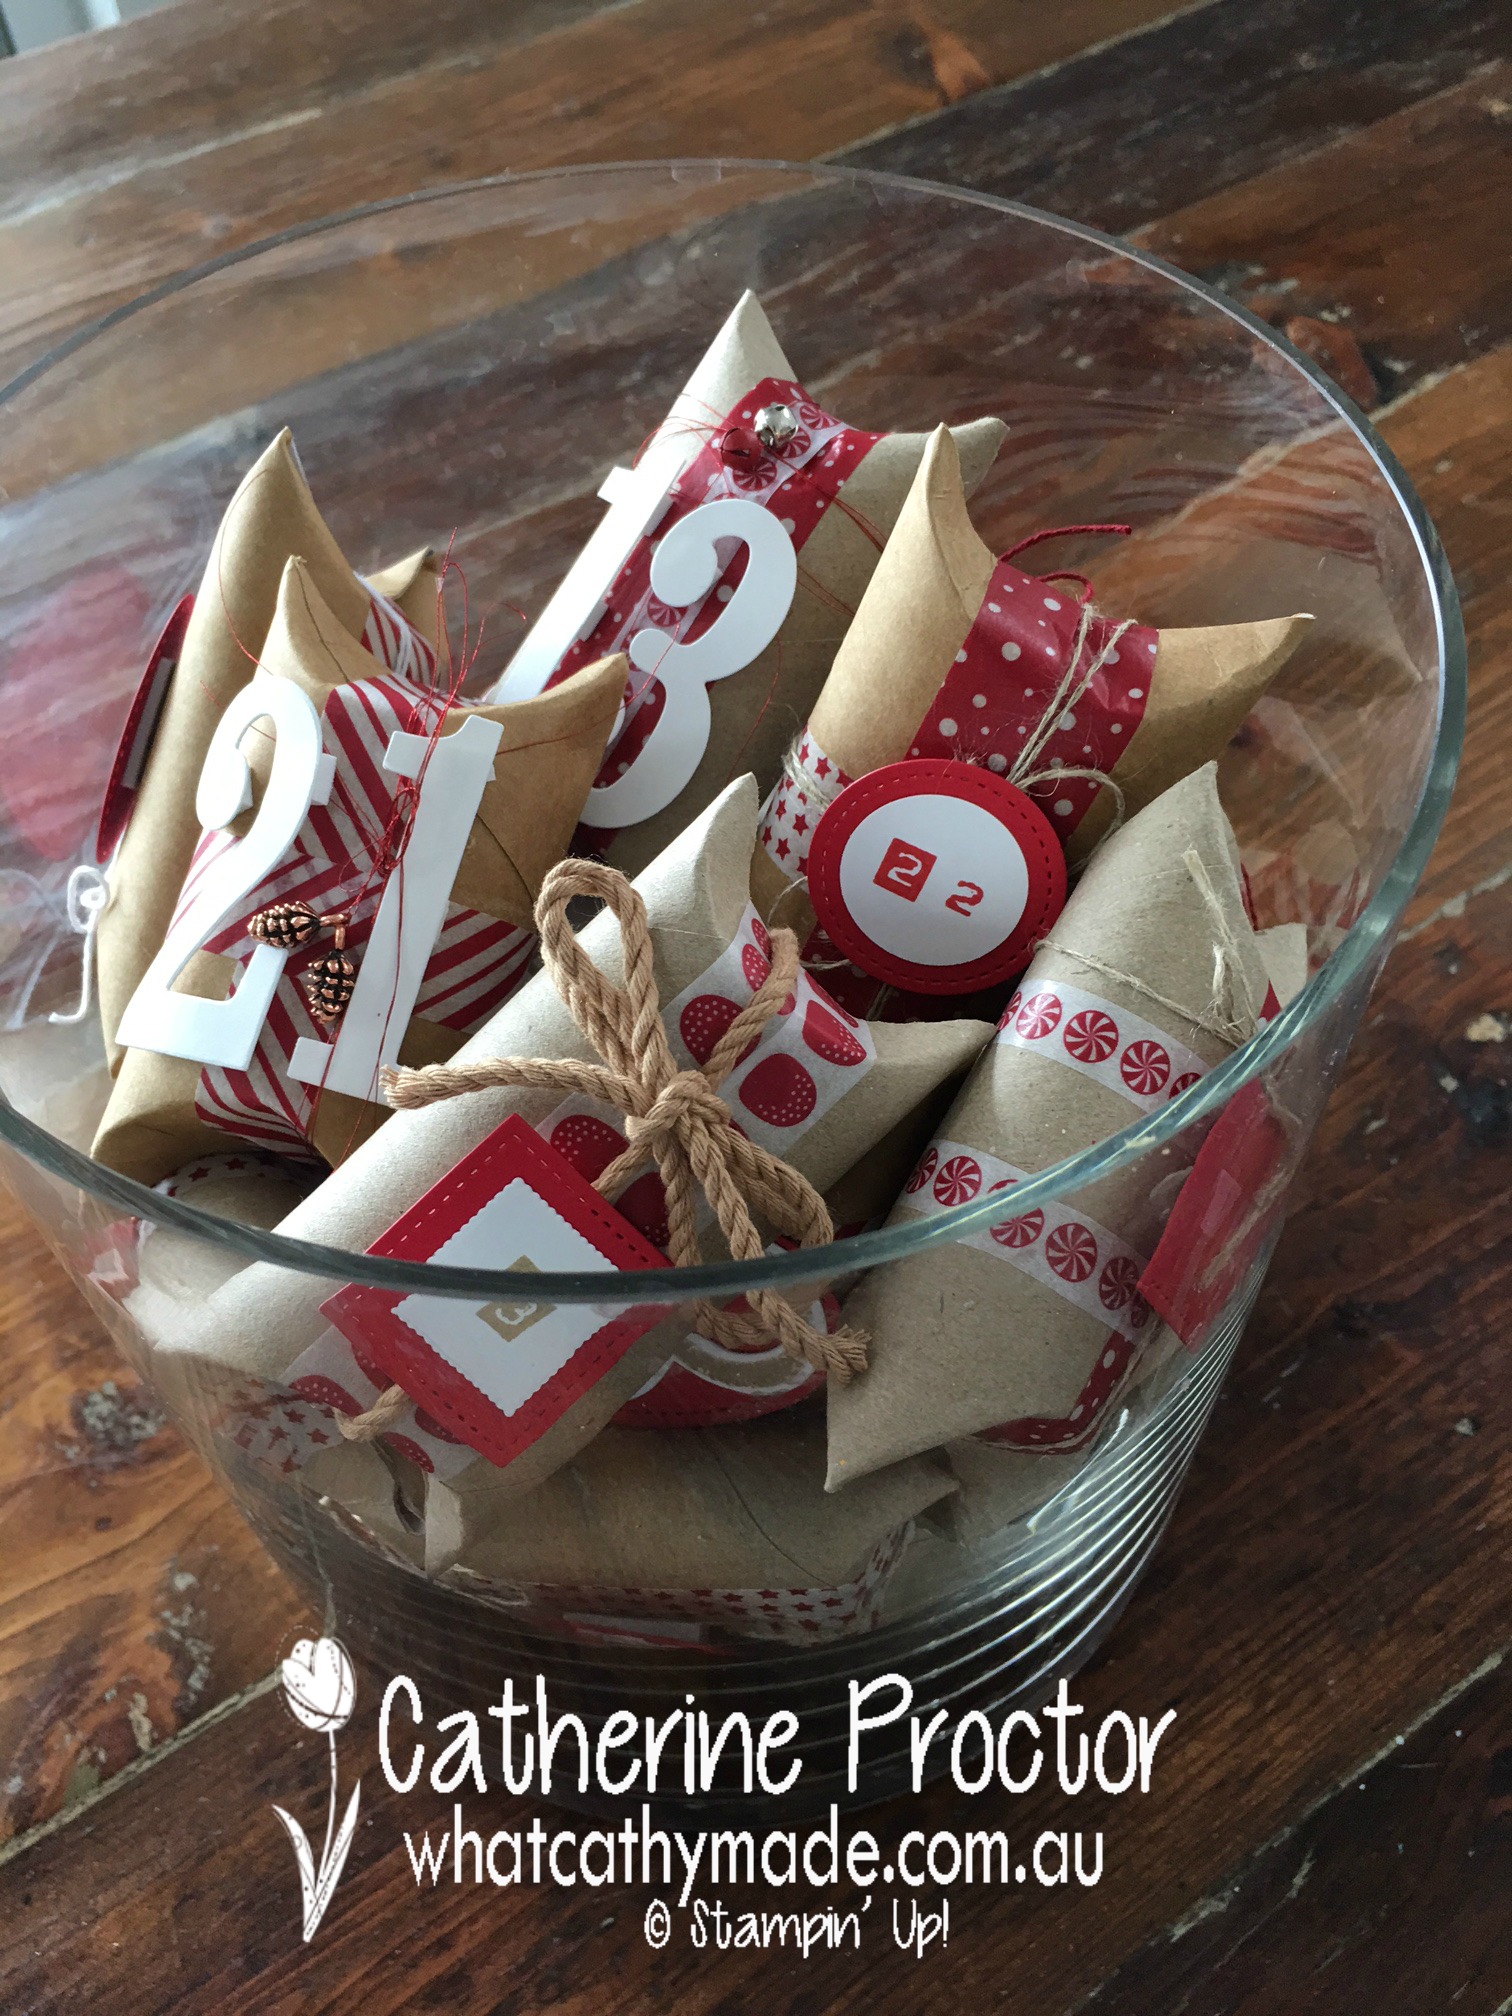
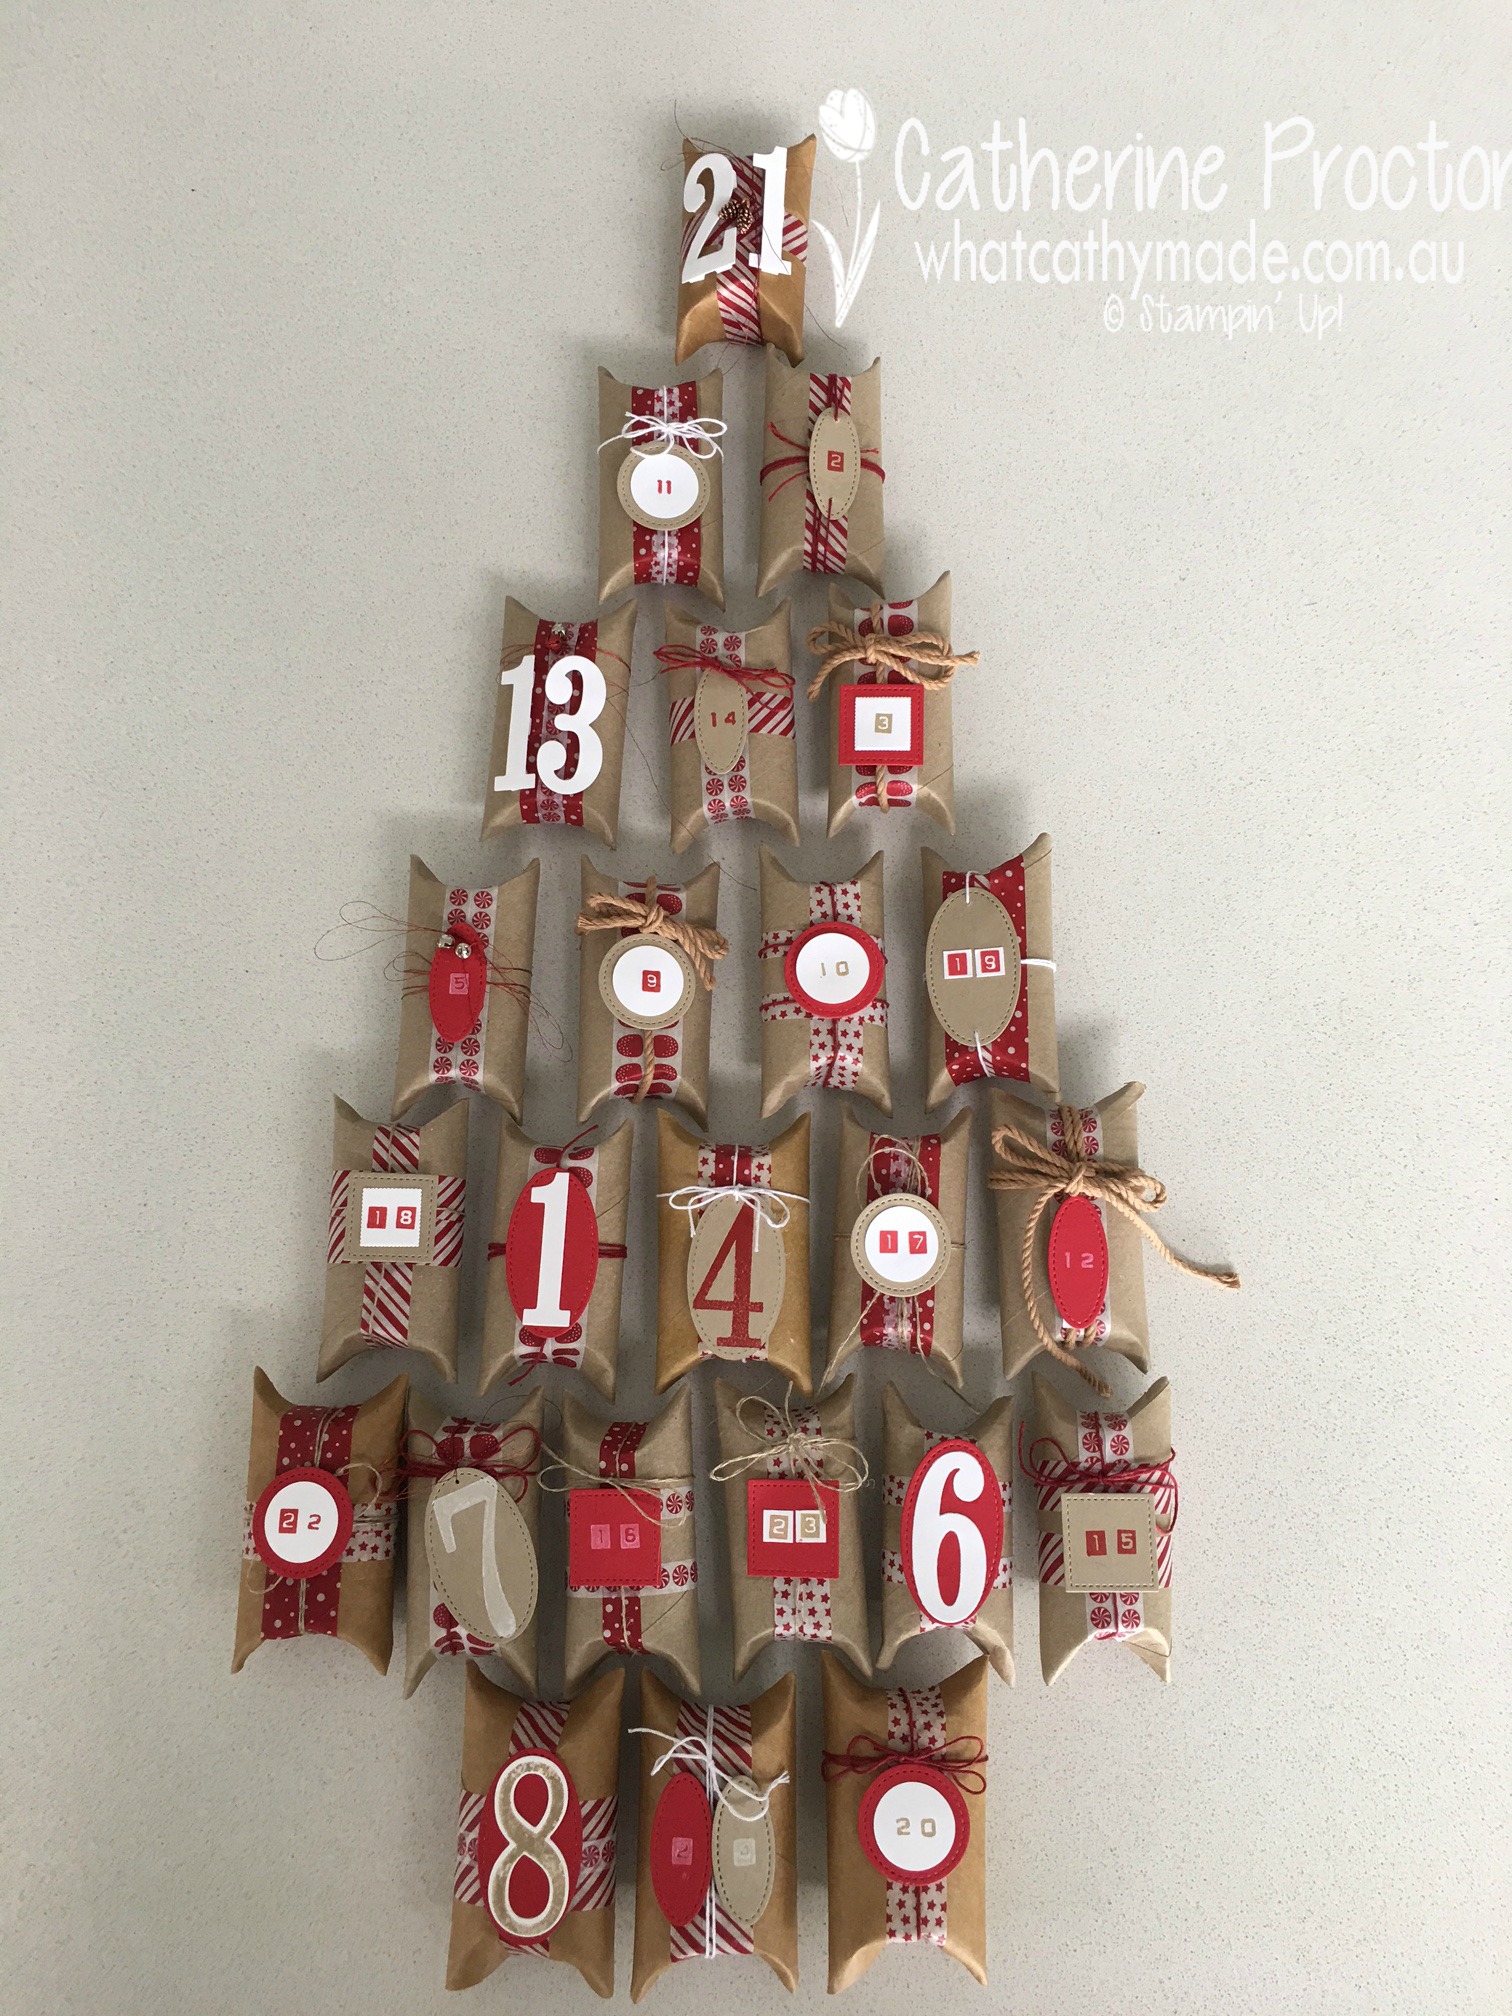
How will you display your advent calendar?
Will you display it on a wall (simply attach with bluetack or mini glue dots), layered on a tiered cake stand or stacked in a vase or a bowl? One of my personal favourite ways is to attach it to the wall in the shape of a Christmas tree.
However you decide to display your calendar and whatever you chose to fill it with not only will your children will love their personalised advent calendar…
…but it will also become a beautiful Christmas decoration in its own right.
I don’t know about you but my card making inspirations come from the most unexpected places sometimes. And because Stamping’ Up! is so on trend with its colours and designs I often find I’ve already got the stamp sets, papers or punches in my stash to CASE my ideas inspired by advertising material, home wares and clothing.
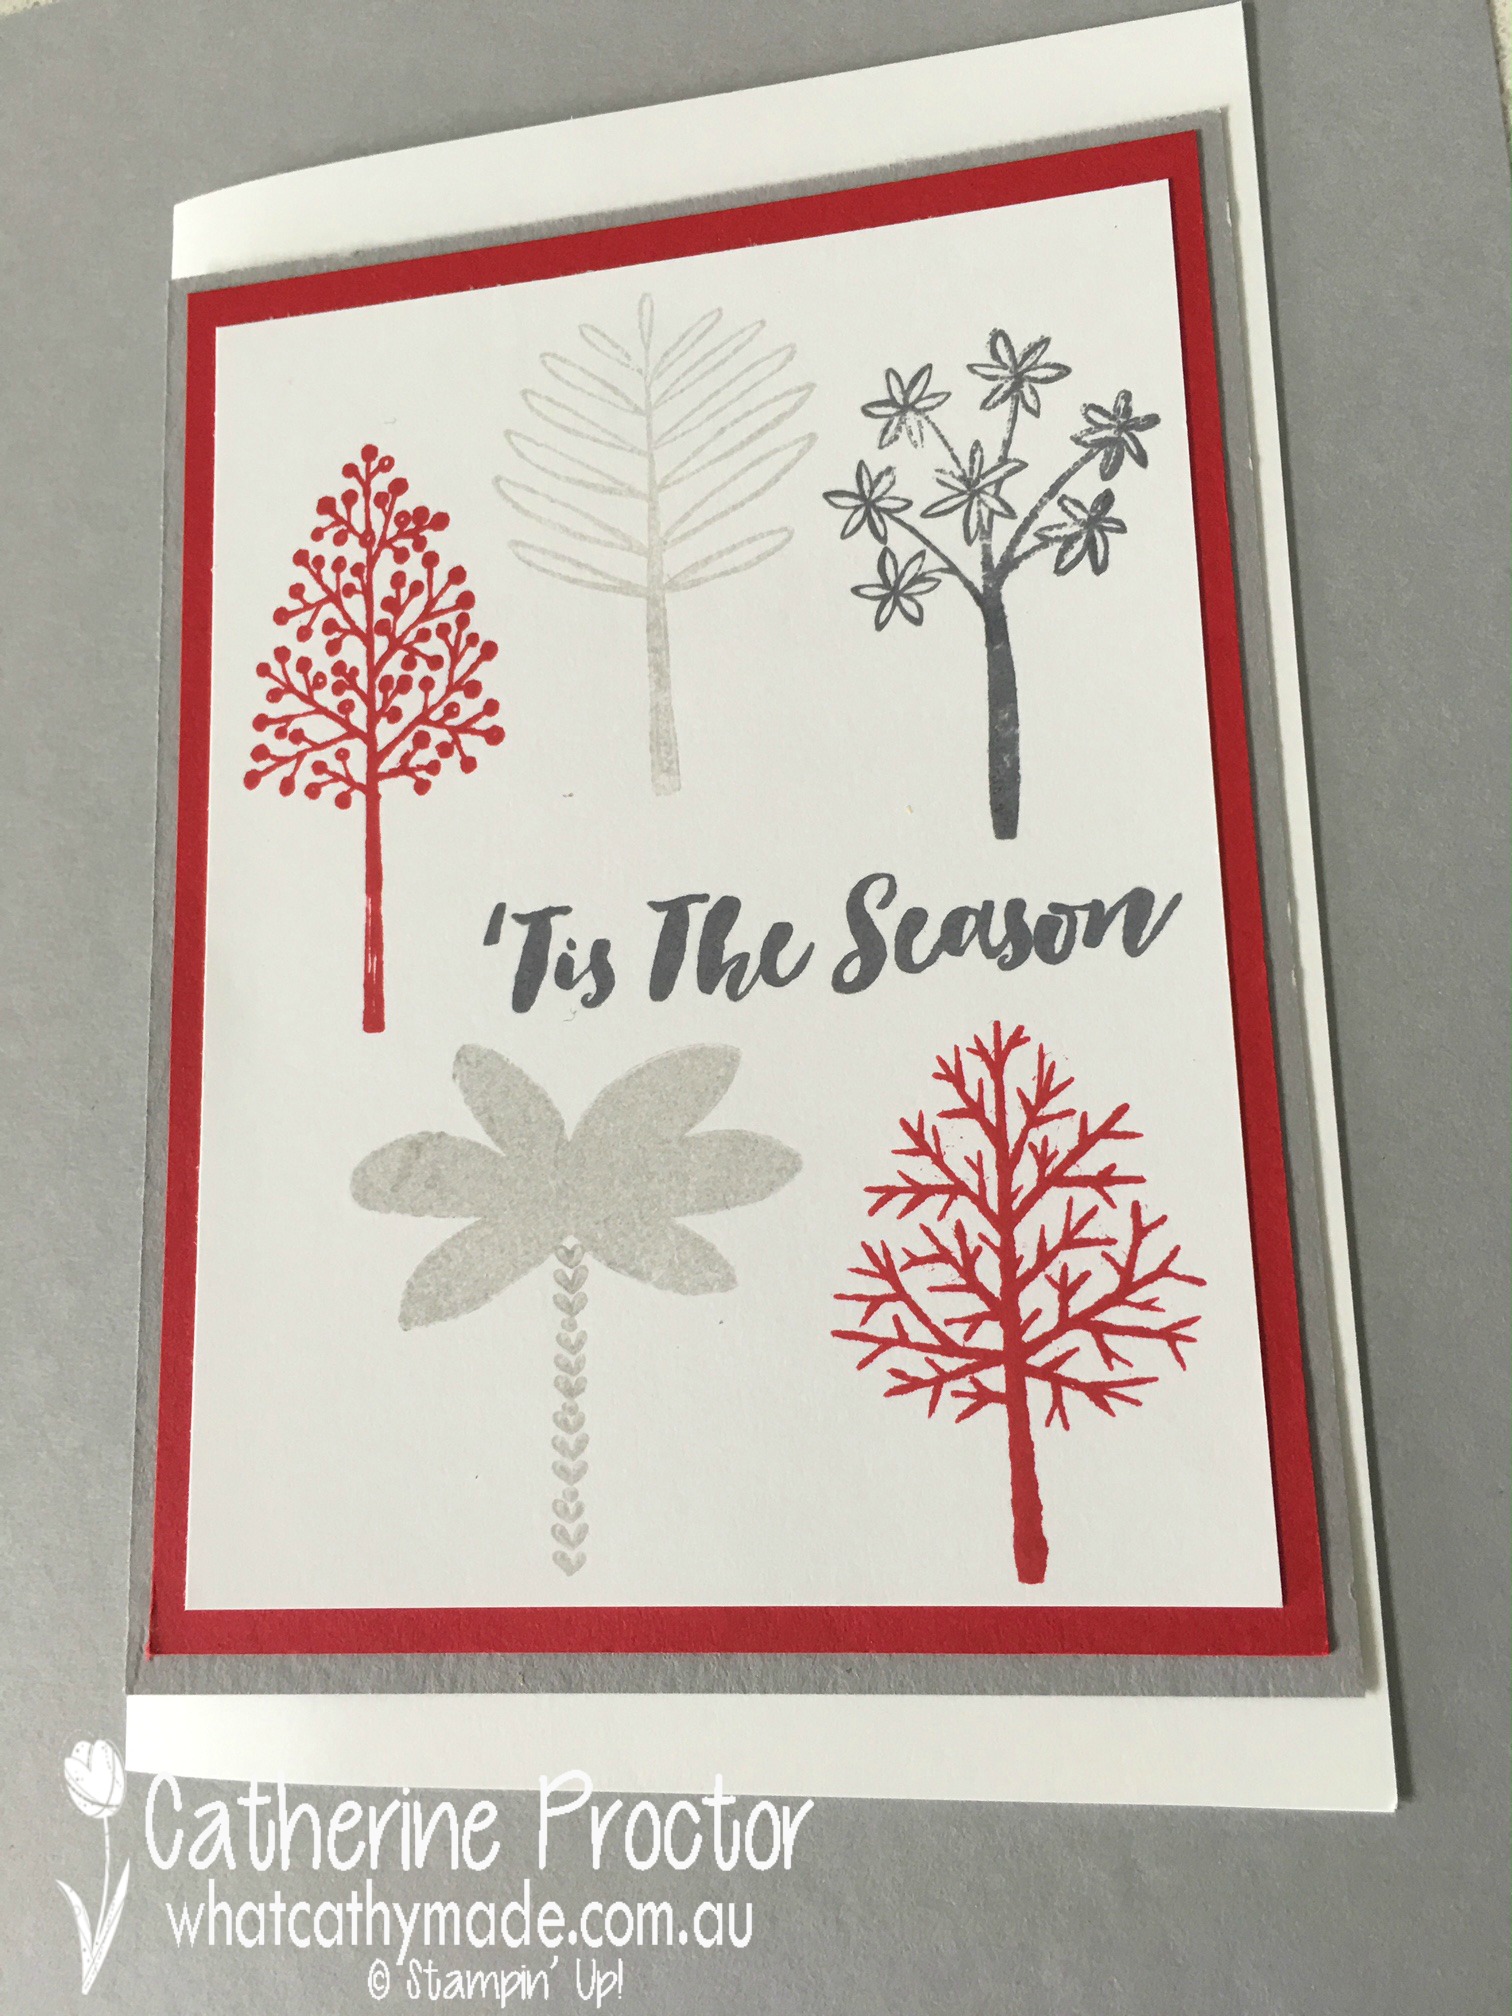
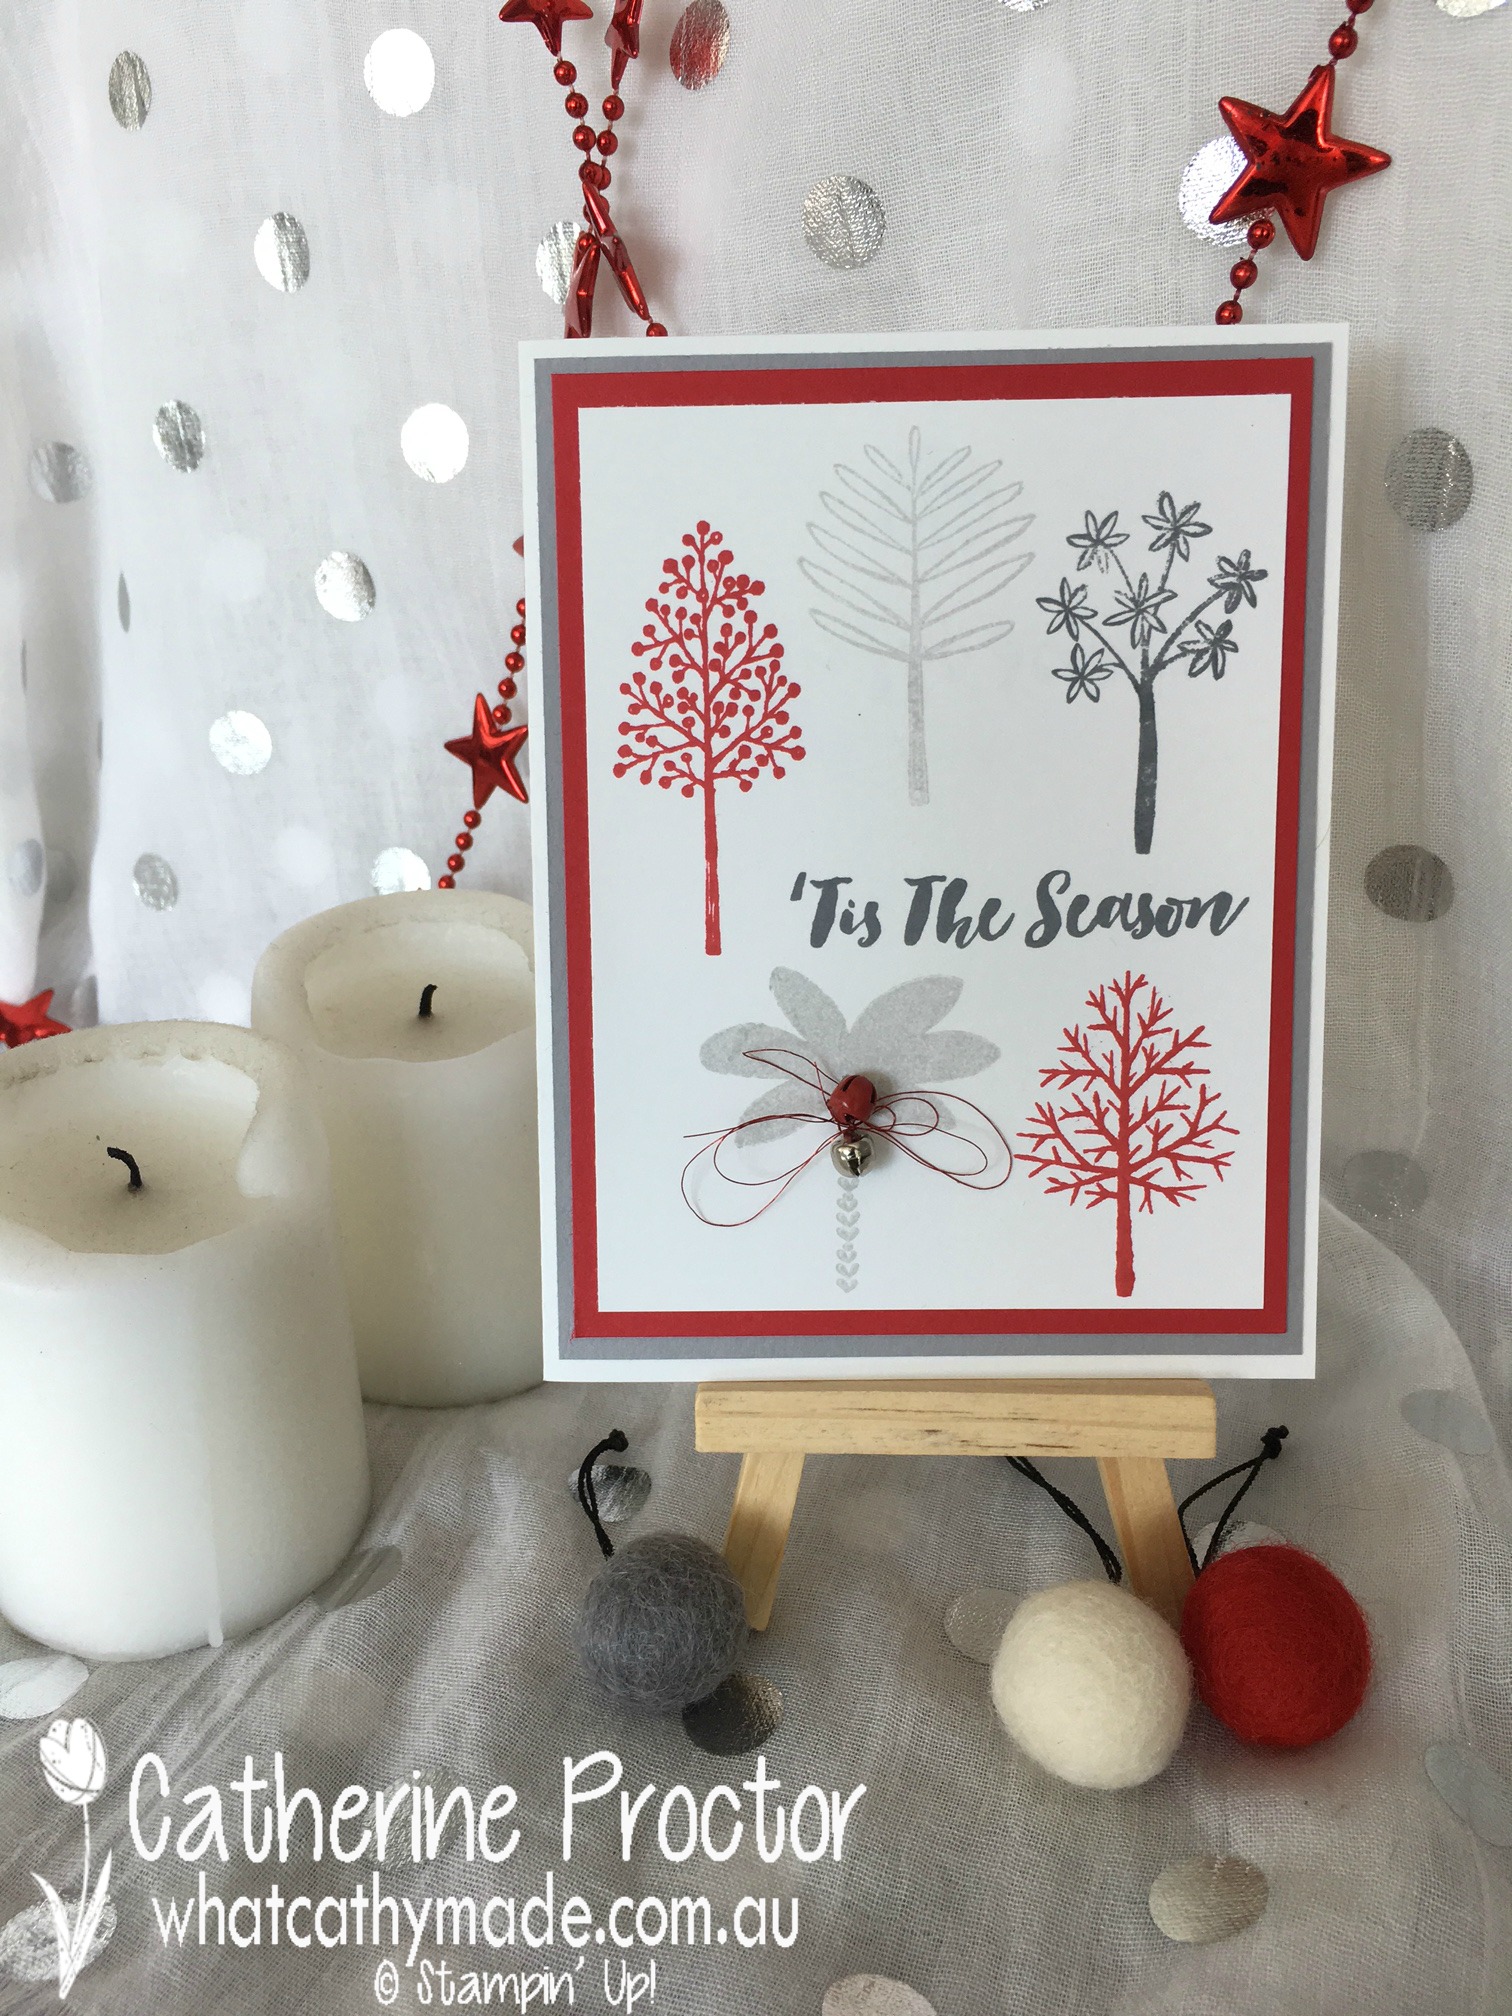
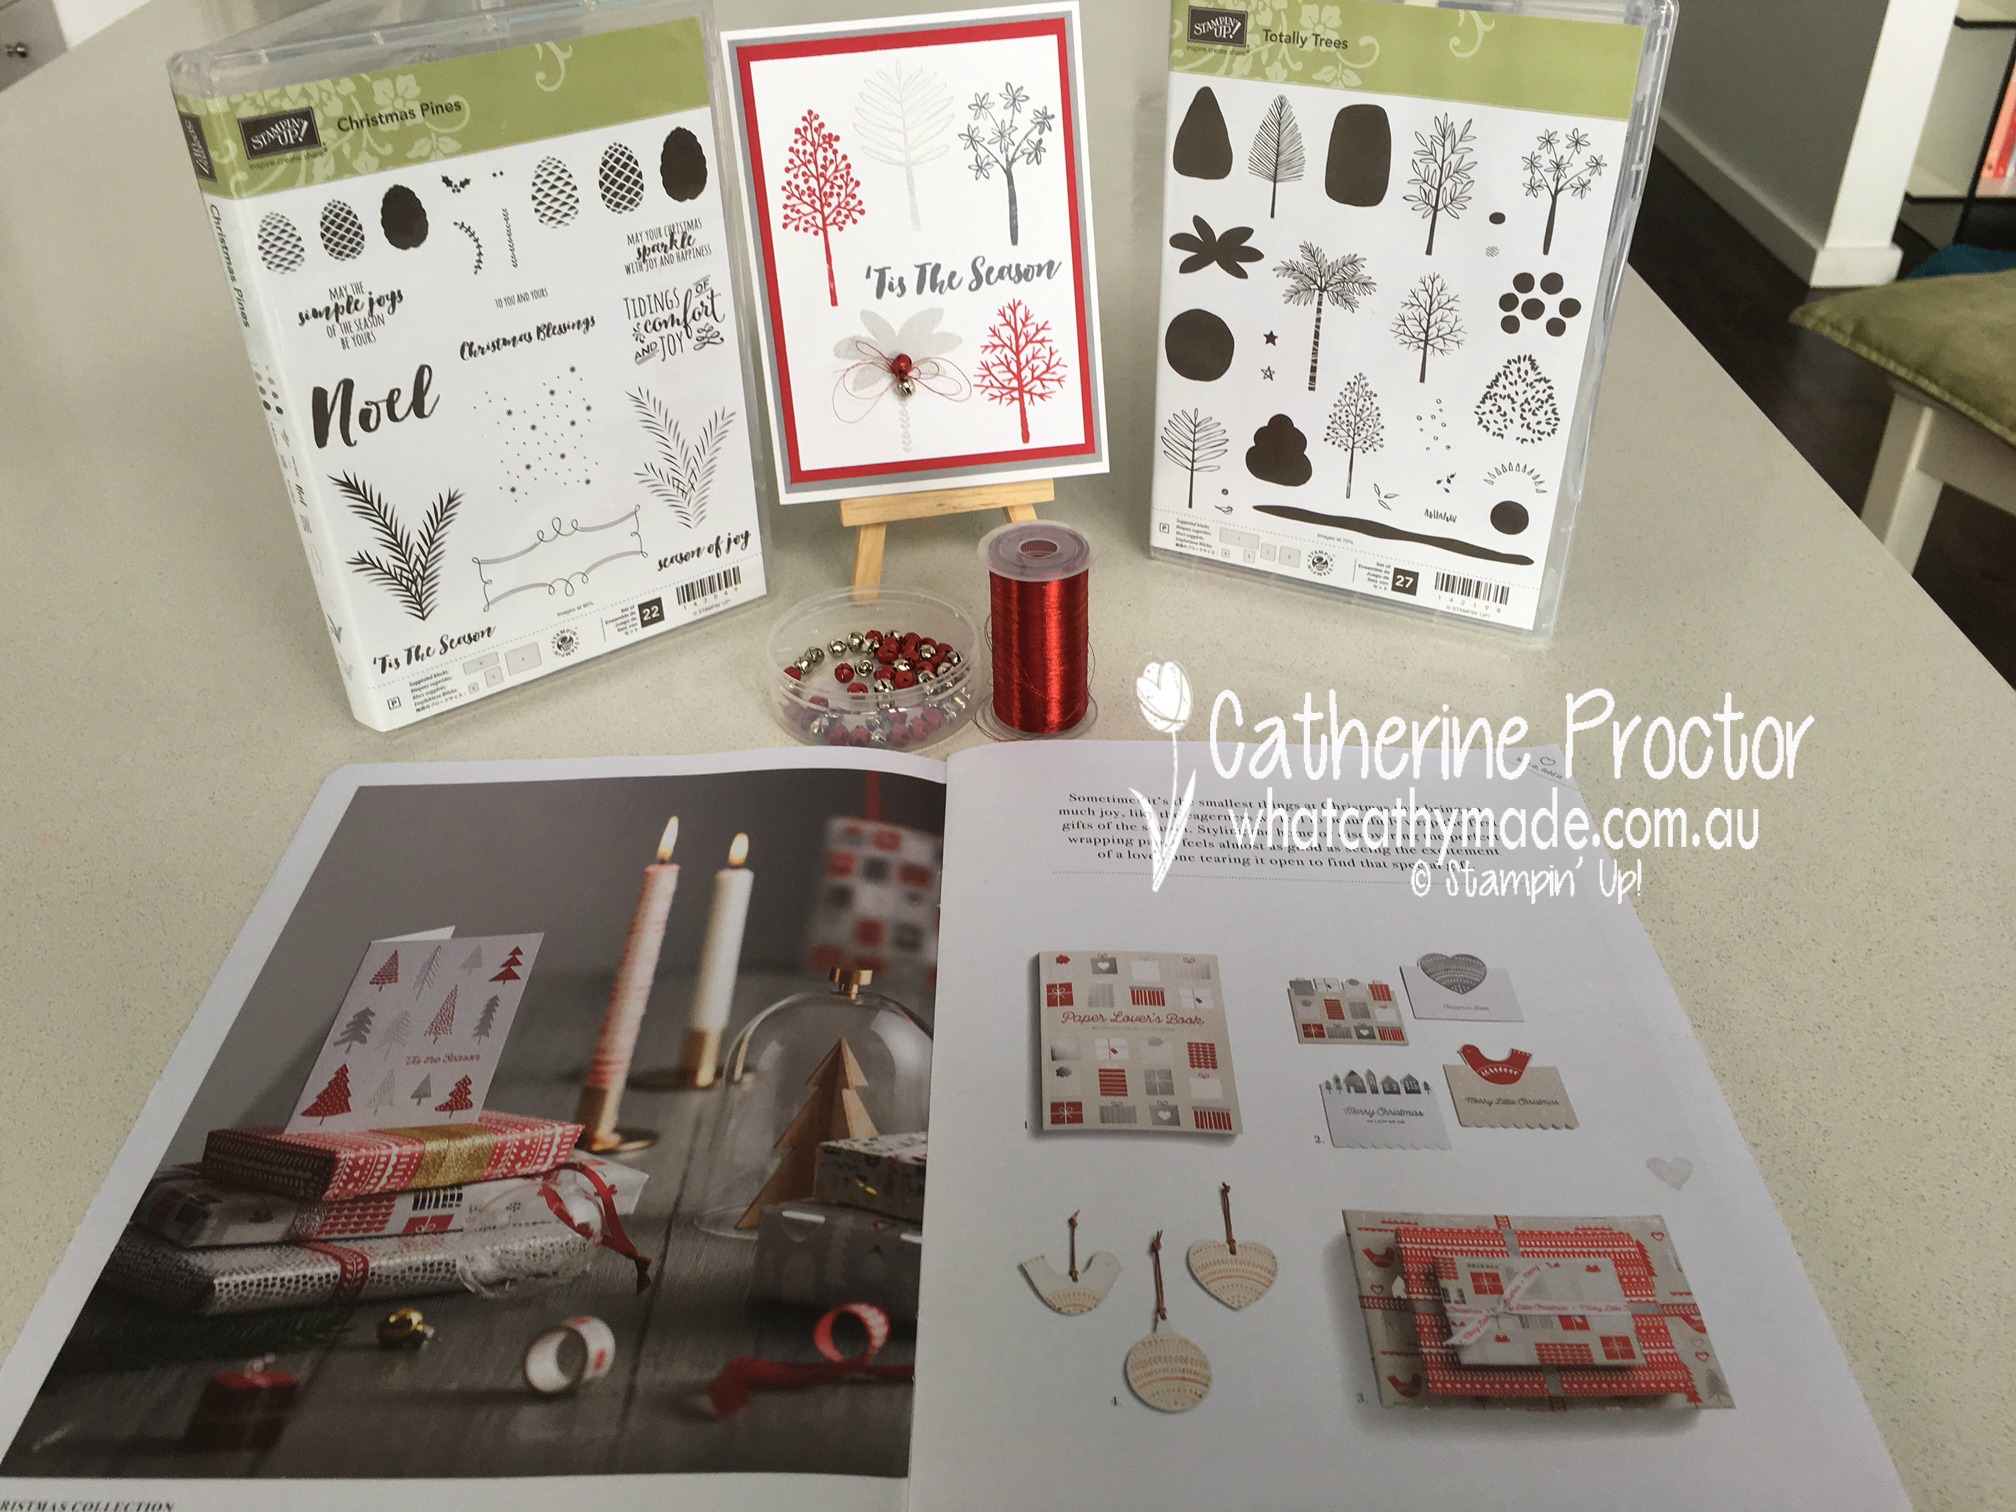
So as soon as I opened the latest Kikki K Christmas catalogue I knew exactly what my main Christmas card would be this Christmas, using my absolute favourite stamp set in the Holiday Catalogue: Totally Trees.
can be used all year round, not just at Christmas time
works with so many different colour combinations
has a wonderful retro feel, yet is a thoroughly modern design
is just so versatile and easy to use
How do you translate inspiration into a card?
The two things that attracted me to this Kikki K card were the beautiful tree shapes and the colour palette. I also loved the sentiment “’tis the season”.
The gorgeous sentiment came from the Christmas Pines Stamp Set, which is on sale this week for $45.75!
Then I started layering up using real red and smoky slate card stock. Originally I just mounted the stamped image on the red card stock but it needed something more and when I added a layer of smoky slate card stock it looked so much better.
However, it’s really the little touches that make this card, especially the metalic thread and the super cute mini jingle bells.
This card was so easy to make I’m thinking of mass producing this design for most of my Christmas cards this year.
I might try some different colour combinations as well, such as mint macaroon, emerald envy and black.
Or maybe quite a modern take on Christmas with dapper denim, soft sky and black.
What inspires you?
And how do you translate your inspiration into your card making?
 Today I am participating in a blog hop along with the super talented ladies in the Art With Heart Team. We thought it would be fun to share some projects using our favourite retiring products from both the 2016-2017 annual and 2017 occasions catalogues!
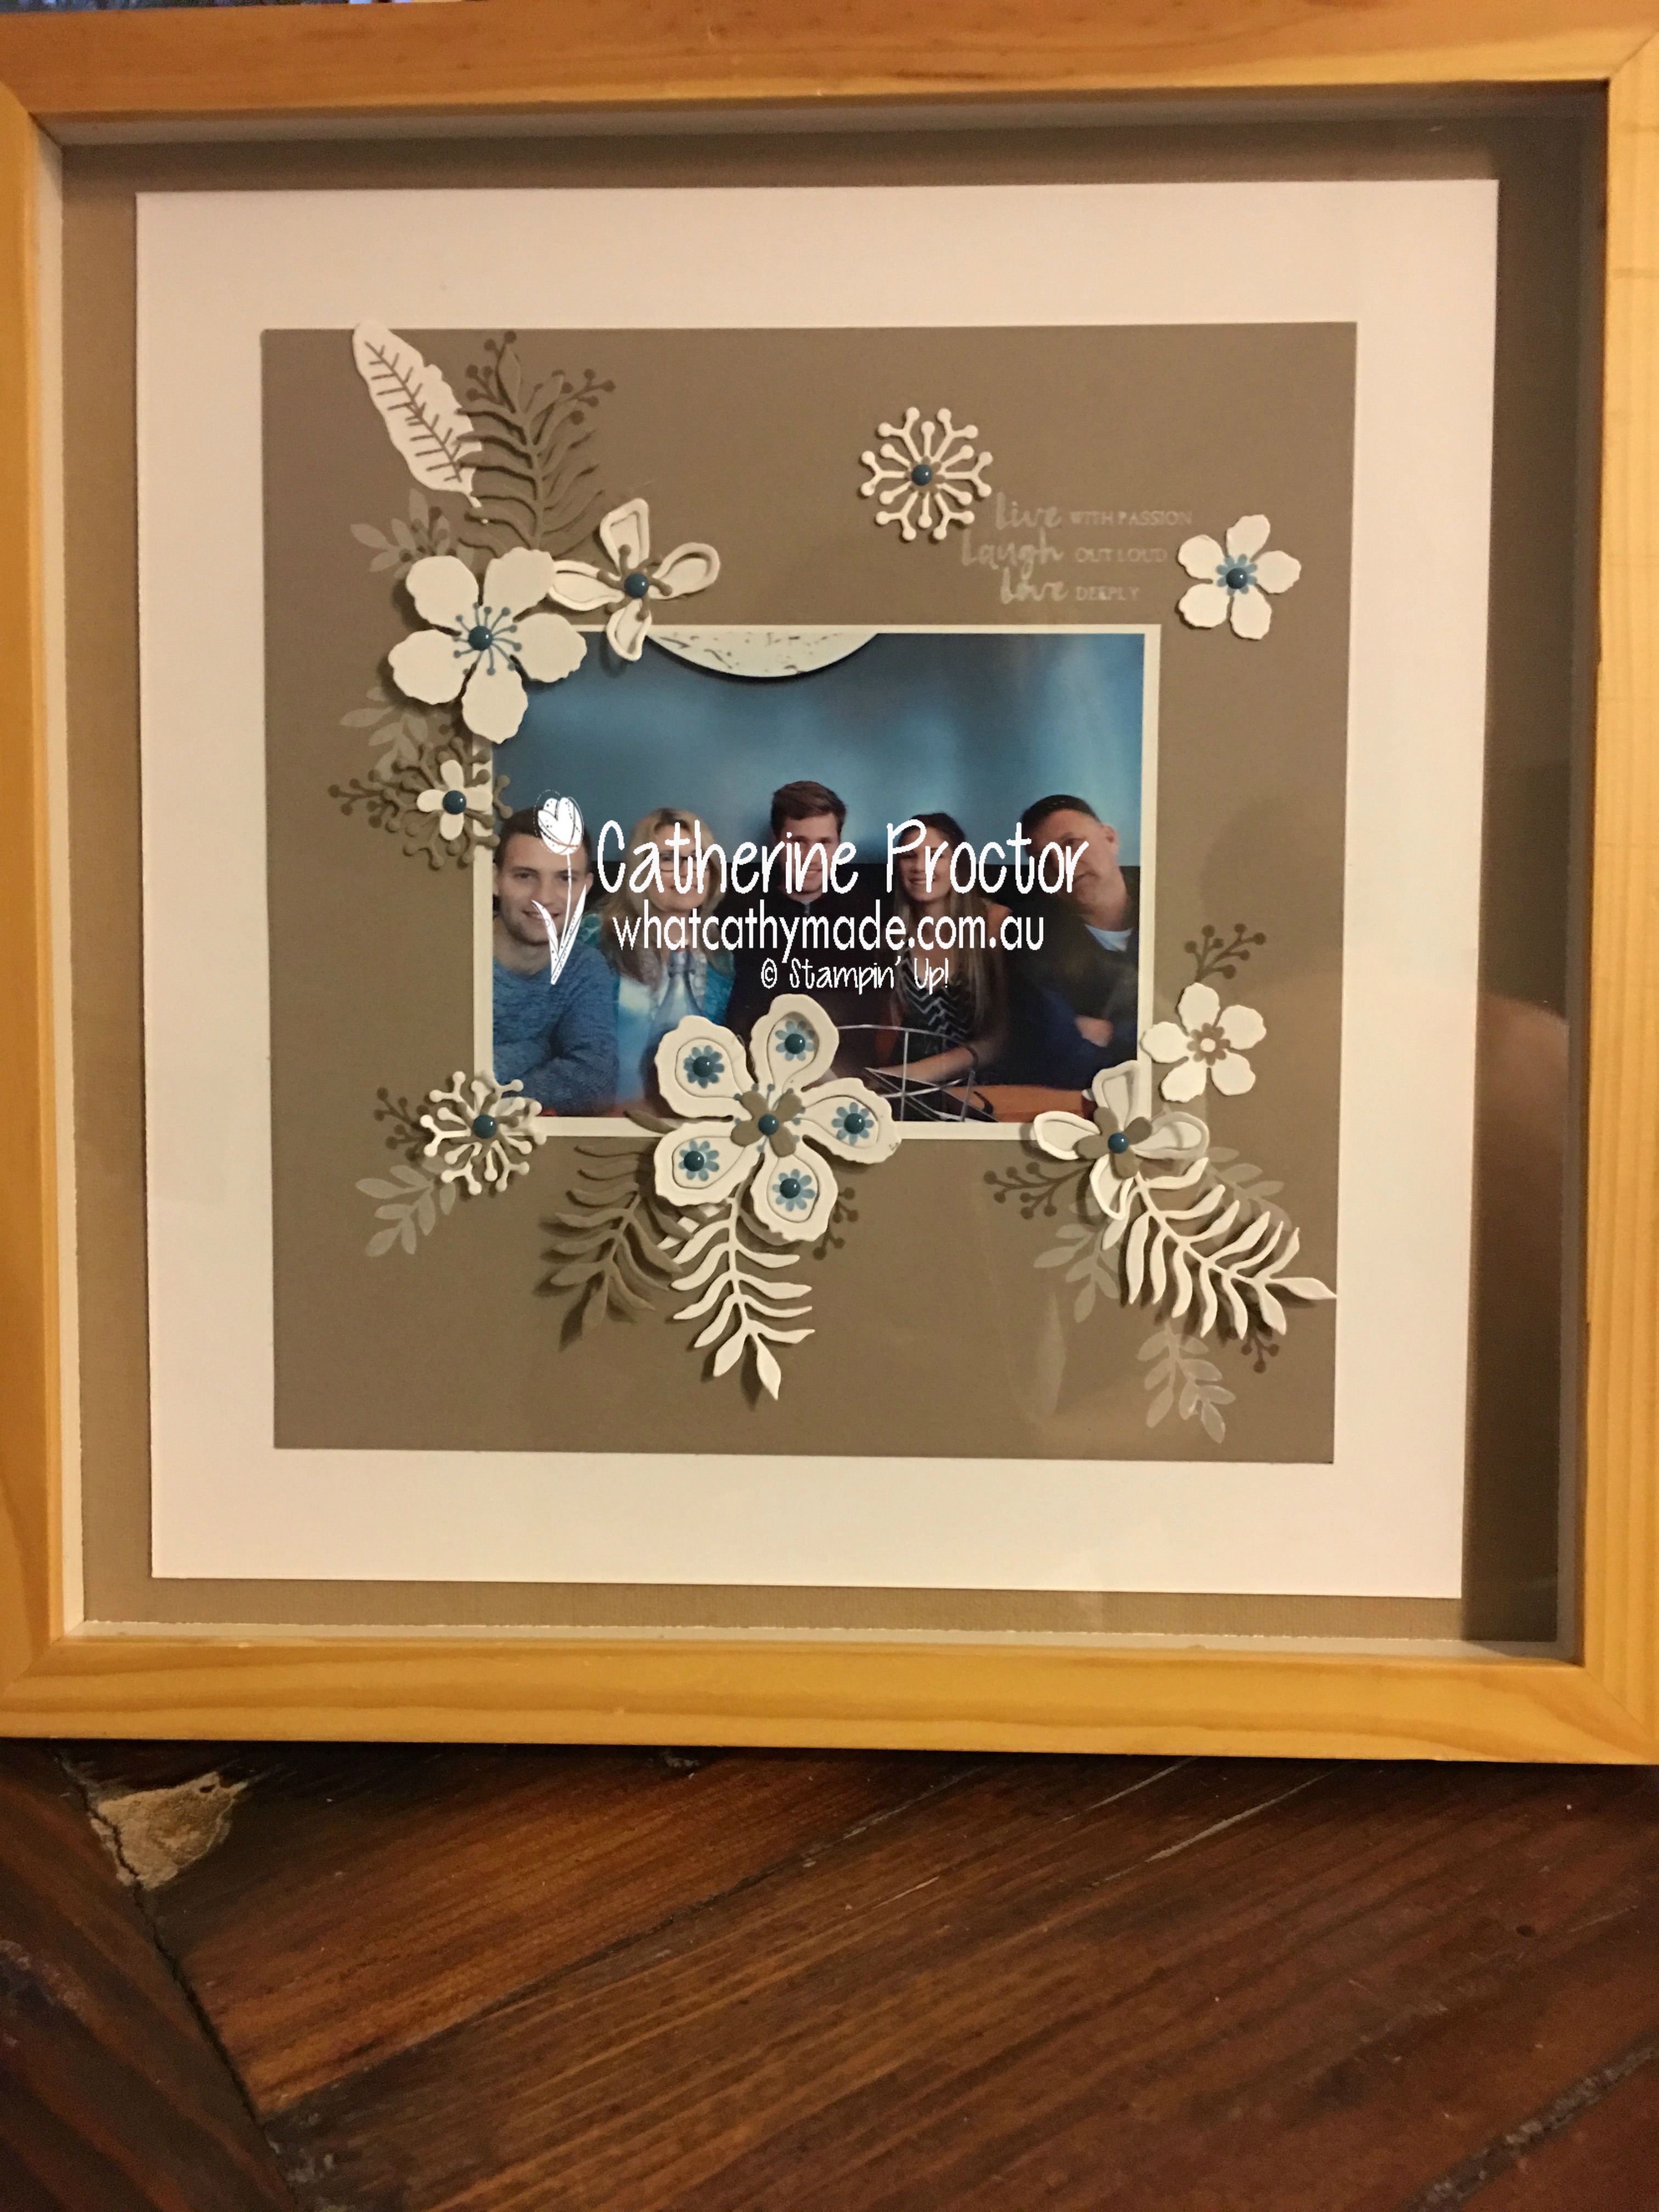


 For my first Easter card I decided to give my rabbit Sweet Sugarplum ears to match the beautiful background paper from the Succulent Garden Designer Series Paper.


 …which is why I love this set so much!
 Both my boys would have loved to receive this card when they were younger…in fact I’m sure that even as teenagers they would still secretly love it today!
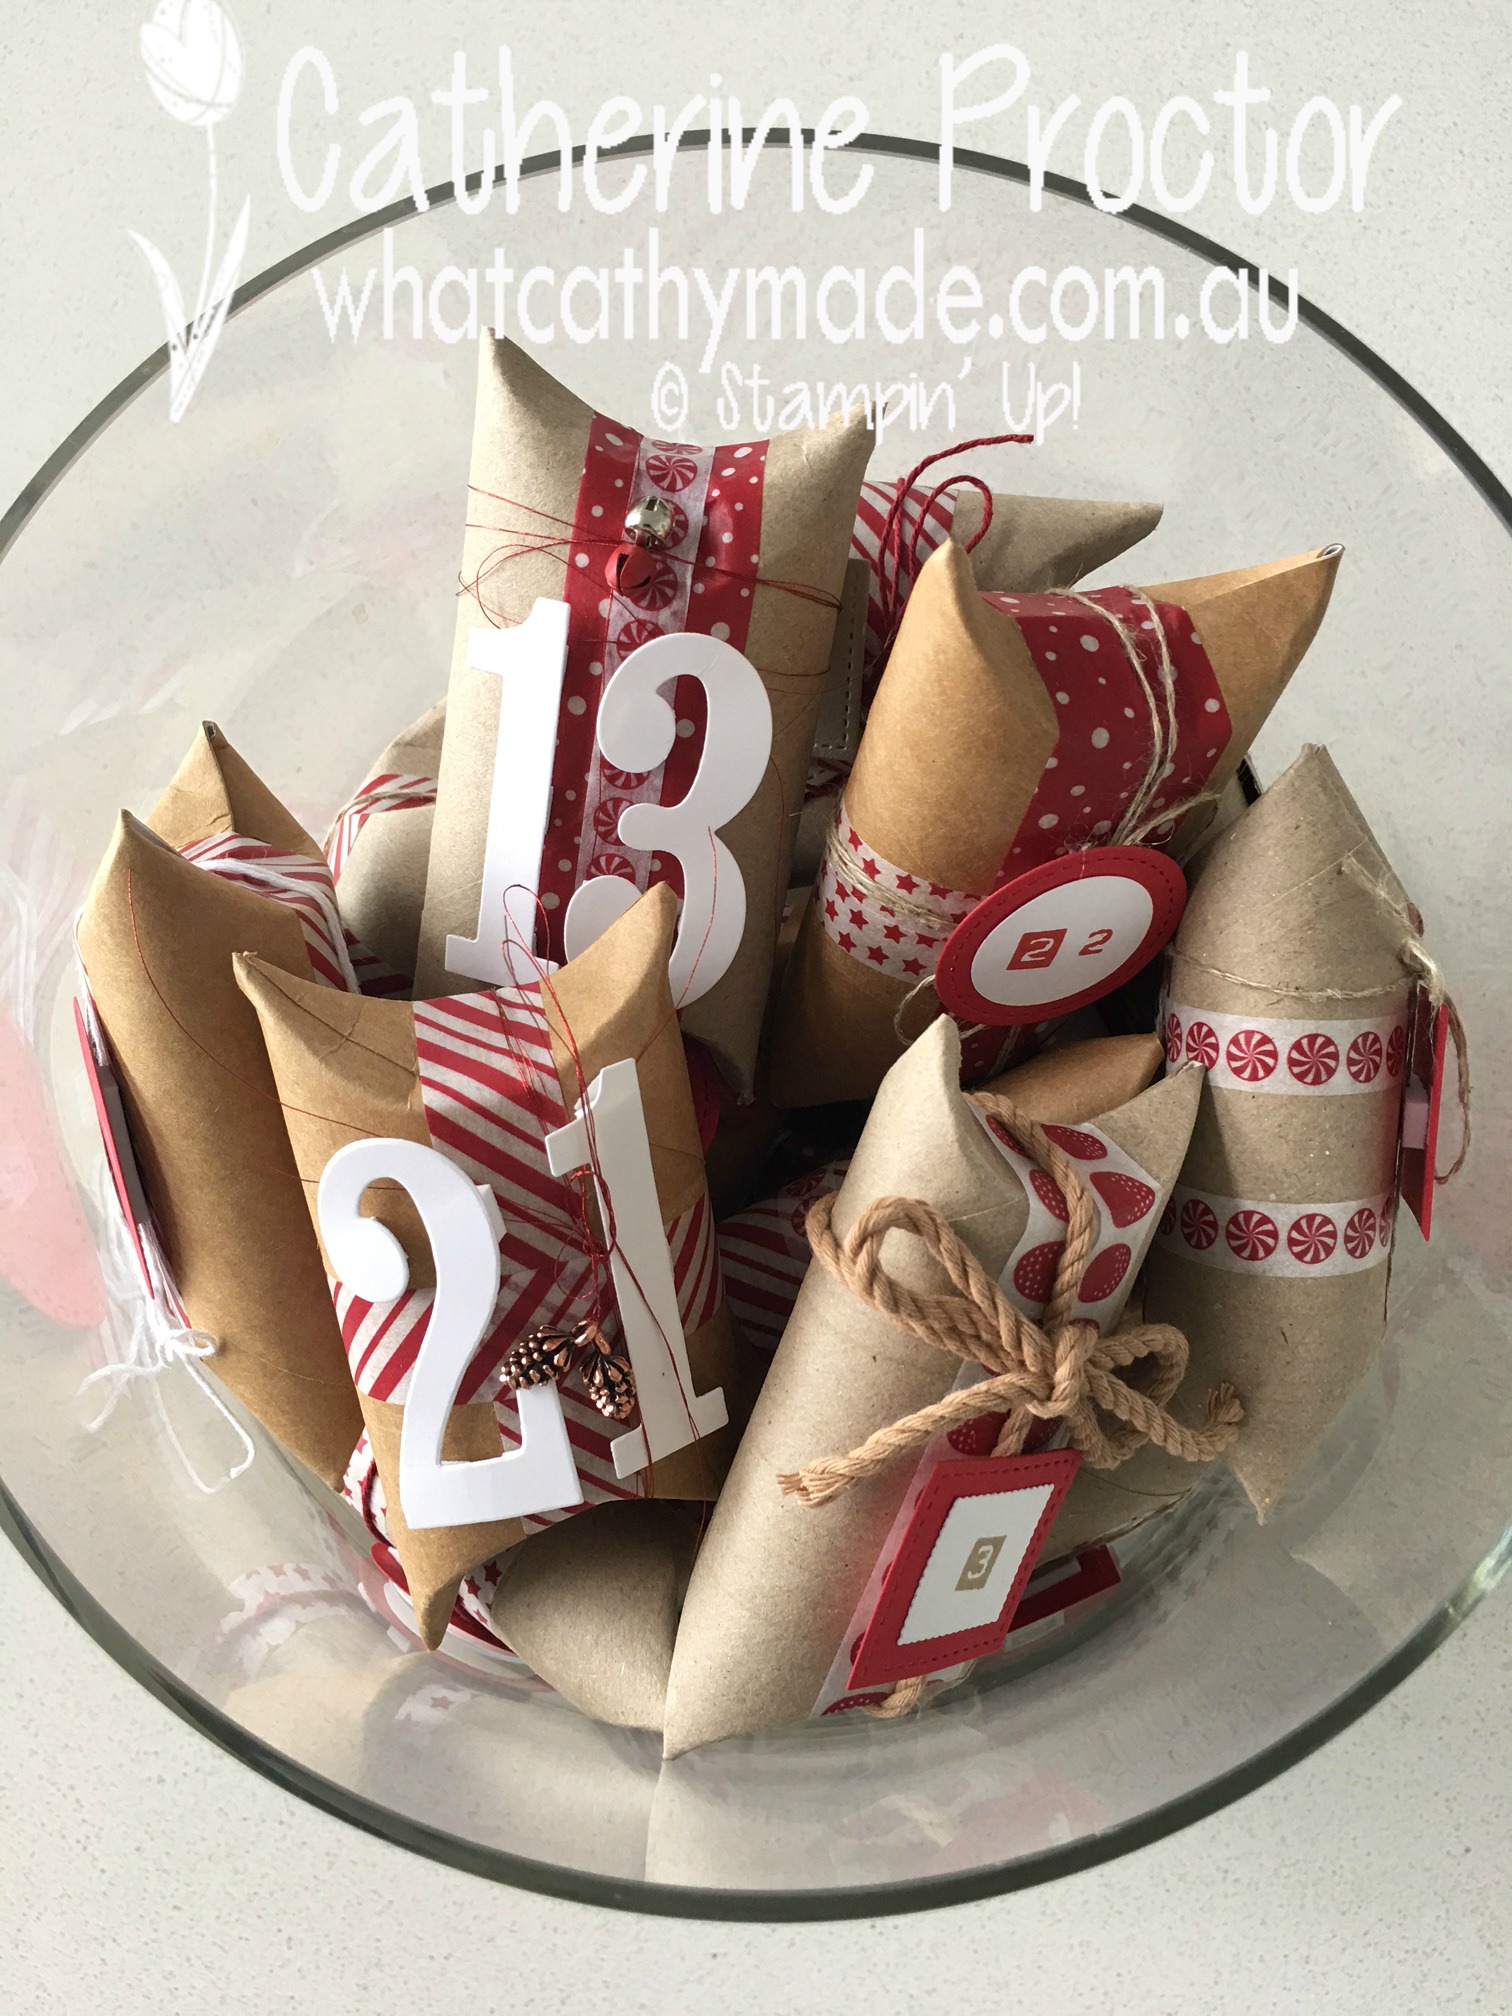

 I don’t know about you but my card making inspirations come from the most unexpected places sometimes. And because Stamping’ Up! is so on trend with its colours and designs I often find I’ve already got the stamp sets, papers or punches in my stash to CASE my ideas inspired by advertising material, home wares and clothing.
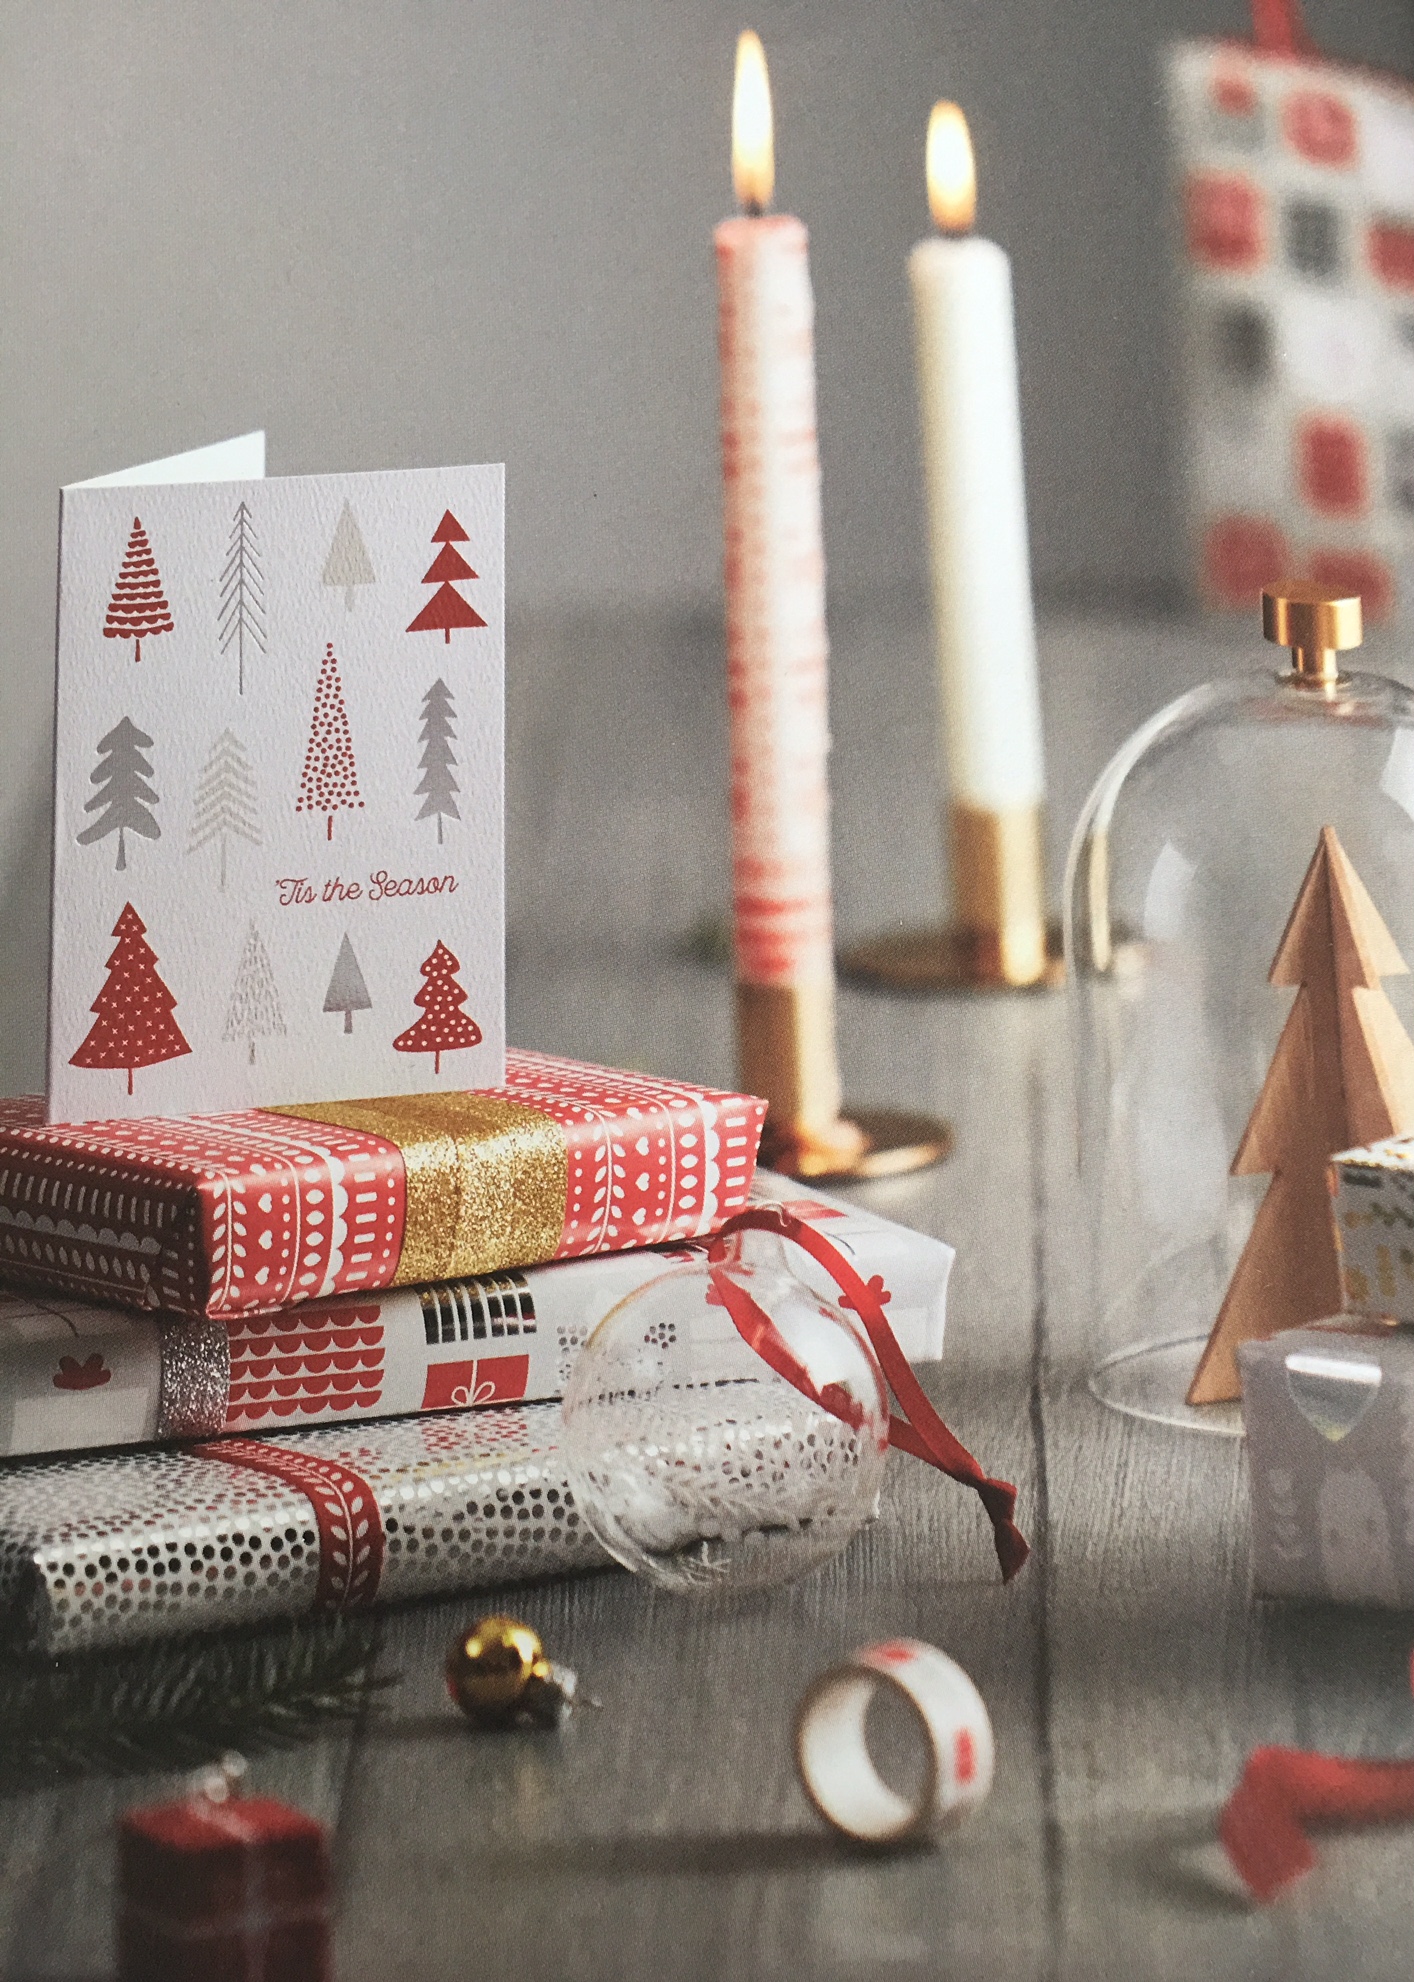
 Then I started layering up using real red and smoky slate
 This card was so easy to make I’m thinking of mass producing this design for most of my Christmas cards this year.