Welcome to week 16 of our 2021-22 Colour Creations blog hop! Tonight we are showcasing Early Espresso, a rich, dark brown from the Neutrals colour collection.
Our talented Art With Heart team leader, Claire Daly, recently shared some cards she made using a 6×6 One Sheet Wonder template and the stunning Painted Christmas DSP. Her cards were so beautiful, easy to make several at once and simply perfect for showcasing DSP patterns … I just had to have a try at making my own 6×6 One sheet wonder cards too.
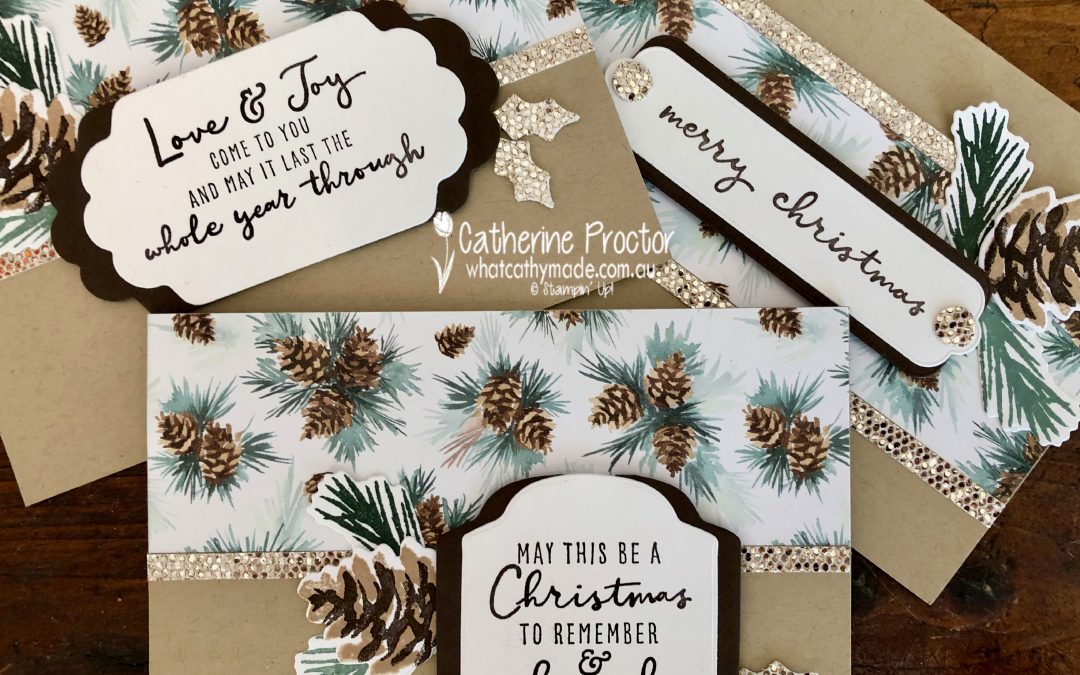
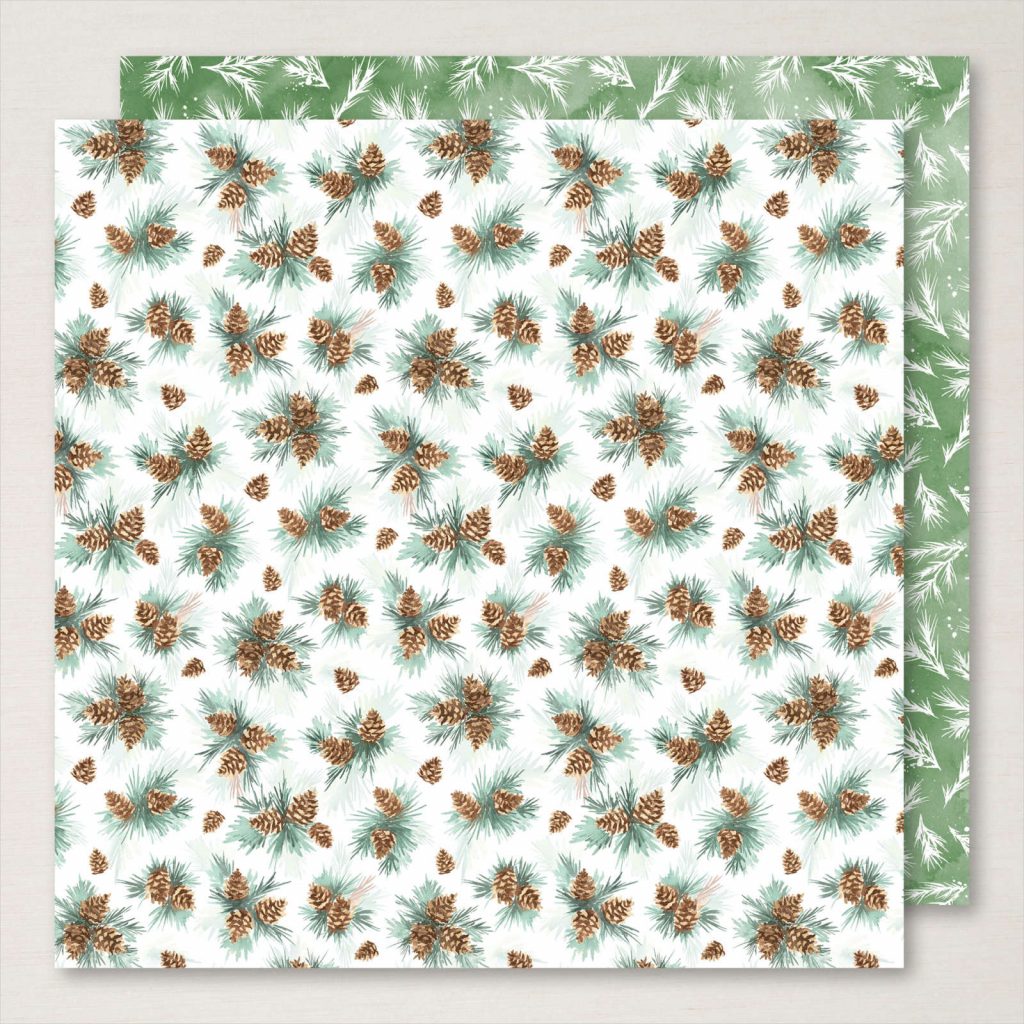
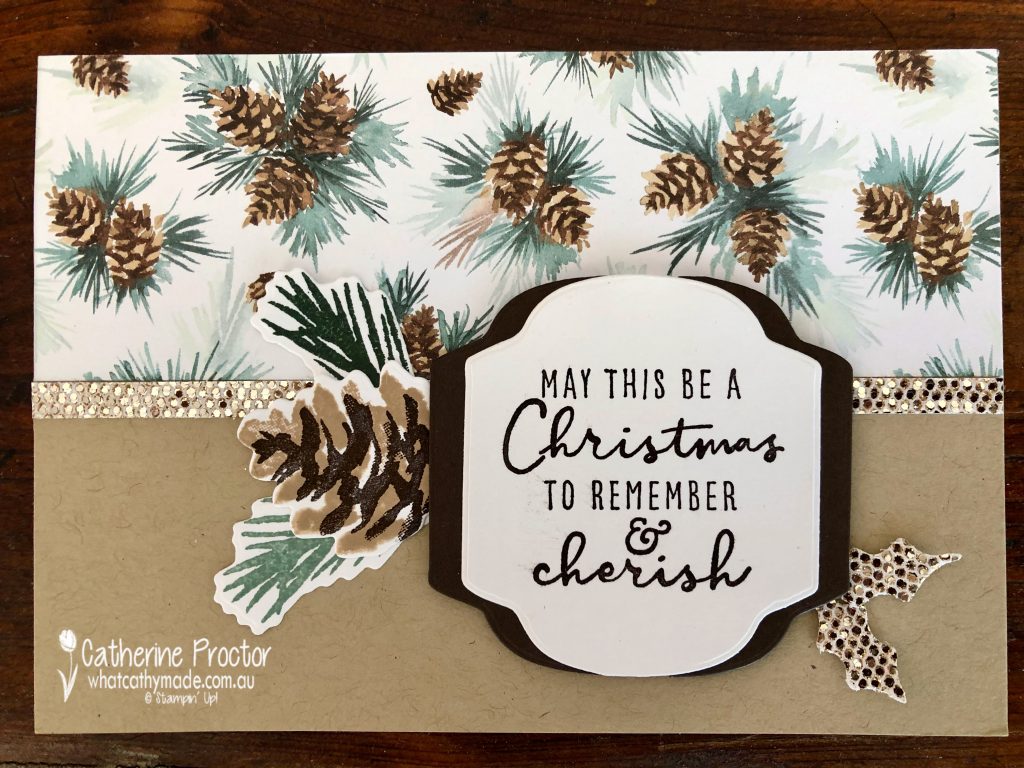
I’ve used this pretty pinecone pattern for my One Sheet Wonder cards – it’s my favourite design from the Painted Christmas DSP and it combines Early Espresso with Crumb Cake, Soft Succulent, Evening Evergreen and Basic White.
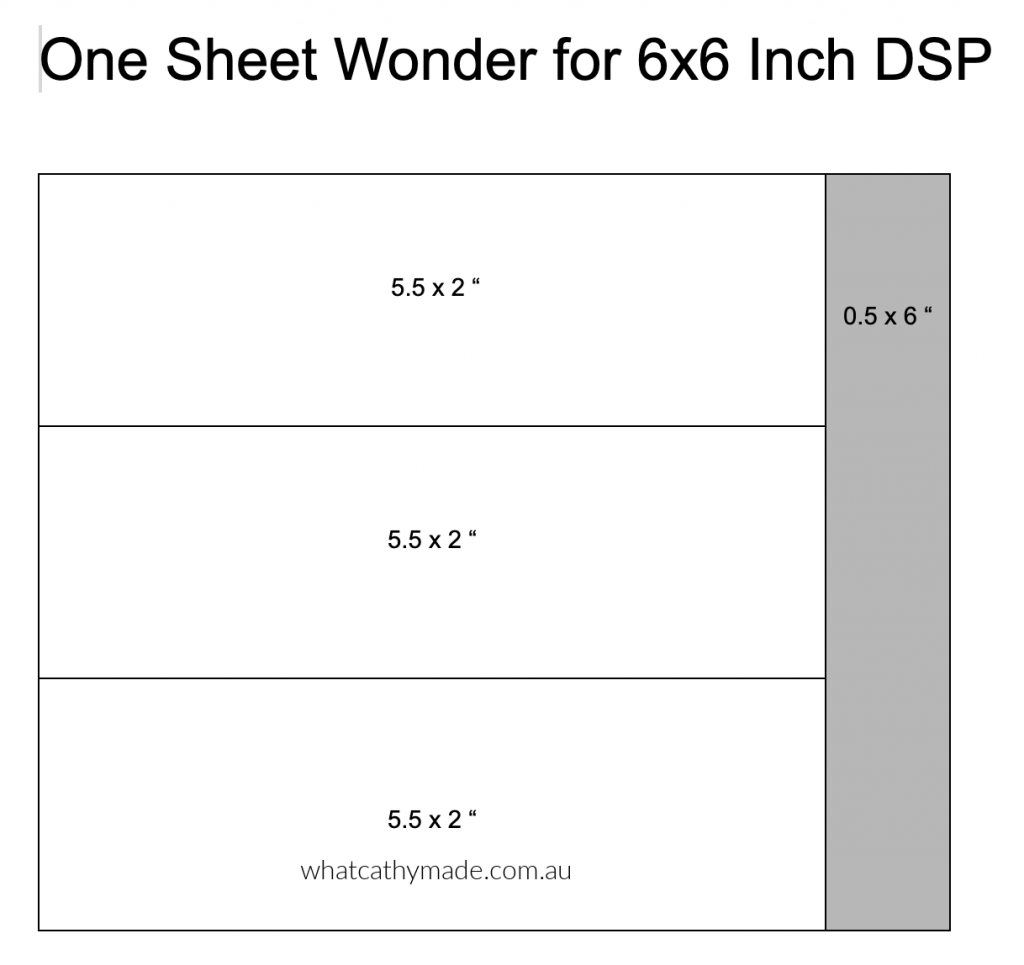
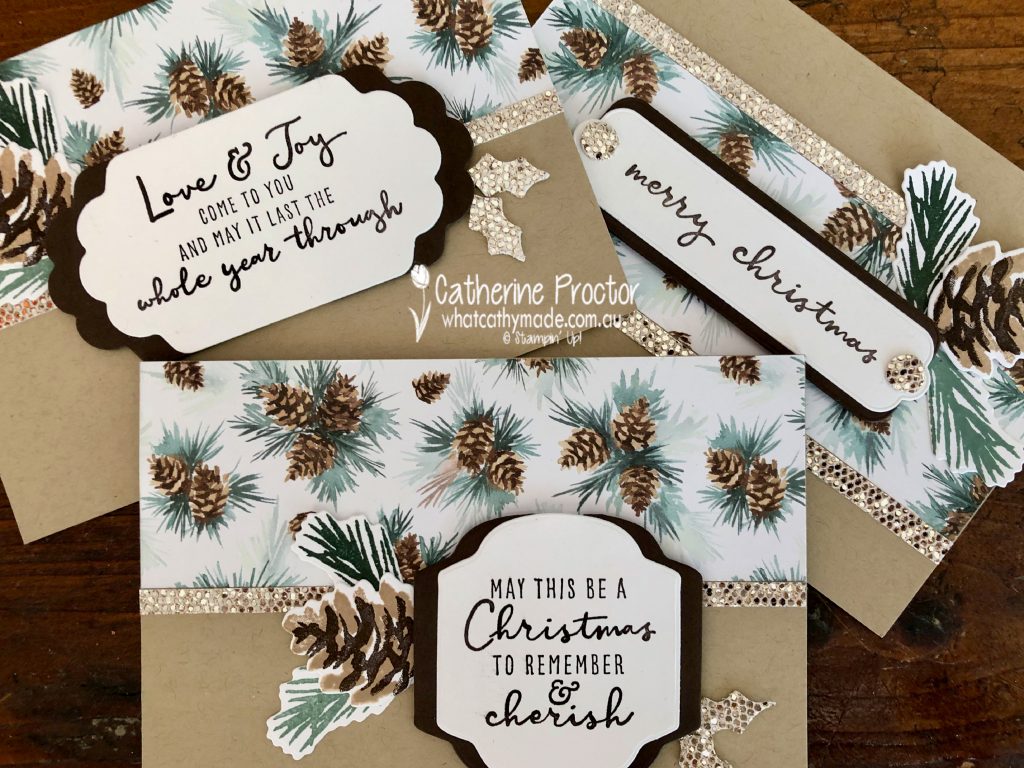
My 6×6 One Sheet Wonder is quite different to Claire’s design – in fact, mine is so simple I’m not sure it actually qualifies as a One Sheet Wonder! You simply trim 0.5cm off one side of the 6×6 inch square, turn the paper once and cut into three 2 inch strips.
You will now have three strips of DSP that measure 5.5 x 2 inches and an extra strip that measures 0.5 x 6 inches. I discarded the long skinny strip and created 3 different card layouts using the 5.5 x 2 inch strips.
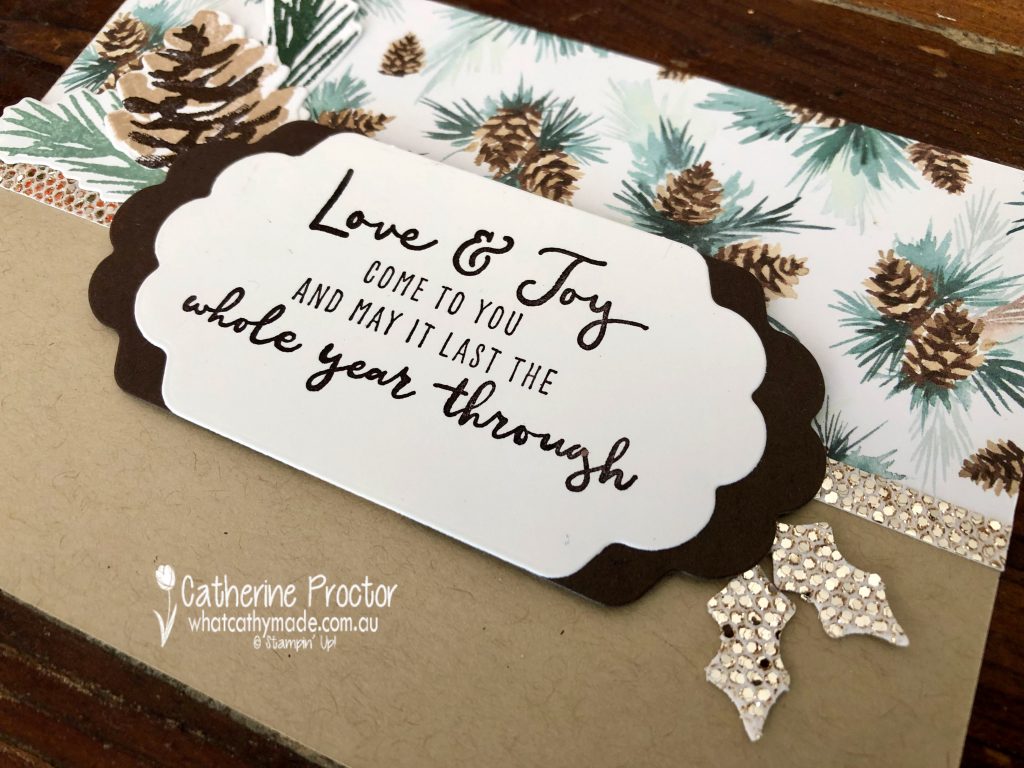
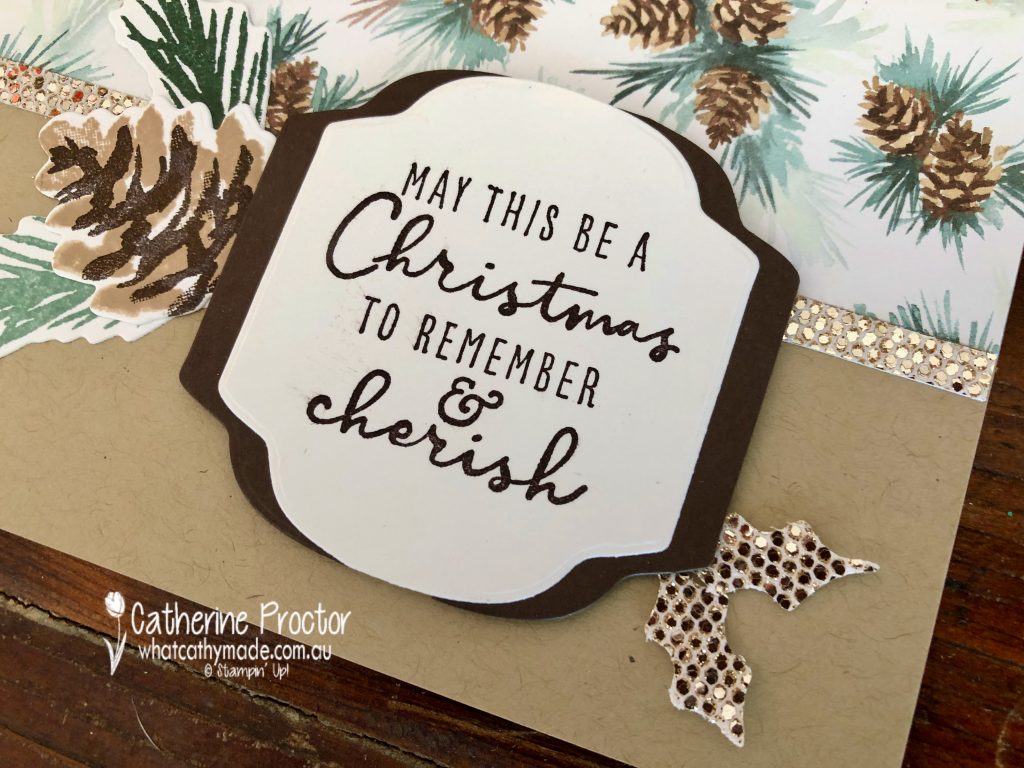
For card one I laid the strip of DSP across the top of the card and placed the sentiment in the middle of the card. The sentiments are all from the Christmas To Remember stamp set, stamped in Early Espresso and die cut out with the Seasonal Label dies.
Card two is also a horizontal card with the strip of DSP on the top, however it uses a different sentiment, placed on the right side of the card instead of the centre.
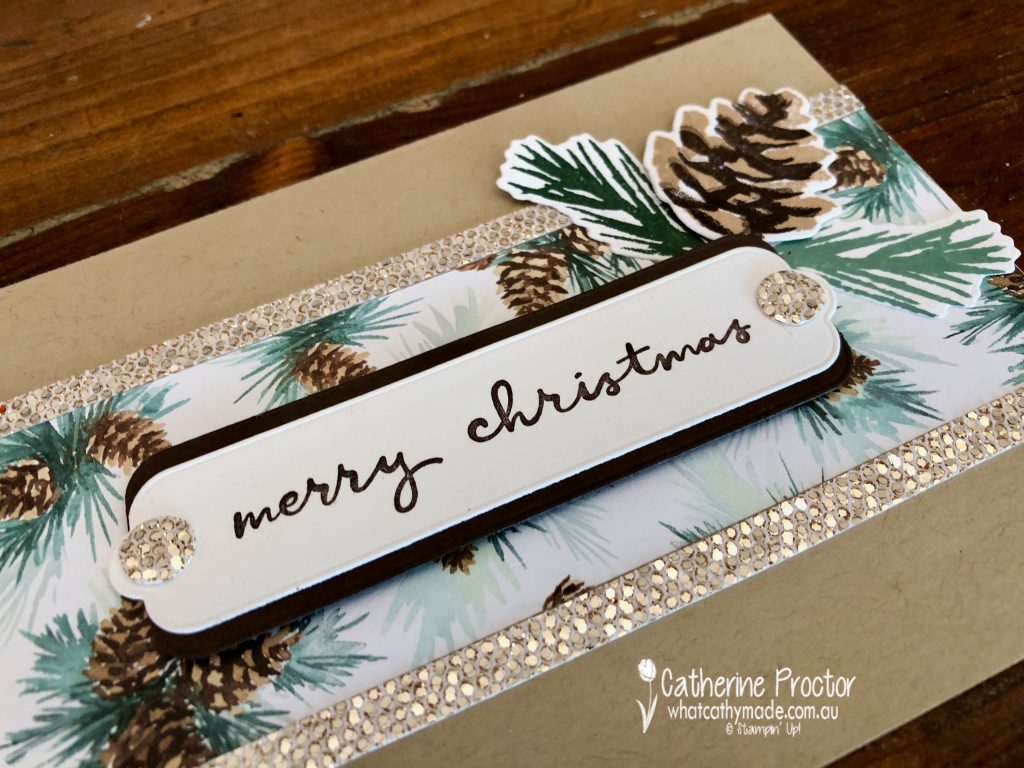
Card three has the DSP across the middle of the card, with a longer more narrow “Merry Christmas” sentiment attached in the middle of the DSP.
For all three cards I die cut the same label in Early Espresso, cut it in half and used it to layer under the sentiments.
The pinecones are stamped with stamps from the Christmas Season Stamp set, stamped in colours to coordinate with the DSP. I’m sure you’ve noticed that I also added some Be Dazzling DSP to my cards. This FREE SALE-a-bration paper is only available until the end of September, so don’t miss out!
Now it’s time to hop on over to our next participant, my friend Kate Morgan – I can’t wait to see what she’s made this week!
If you find a broken link or have come to this blog hop from a different entry point, you can view the the full list of participants below:
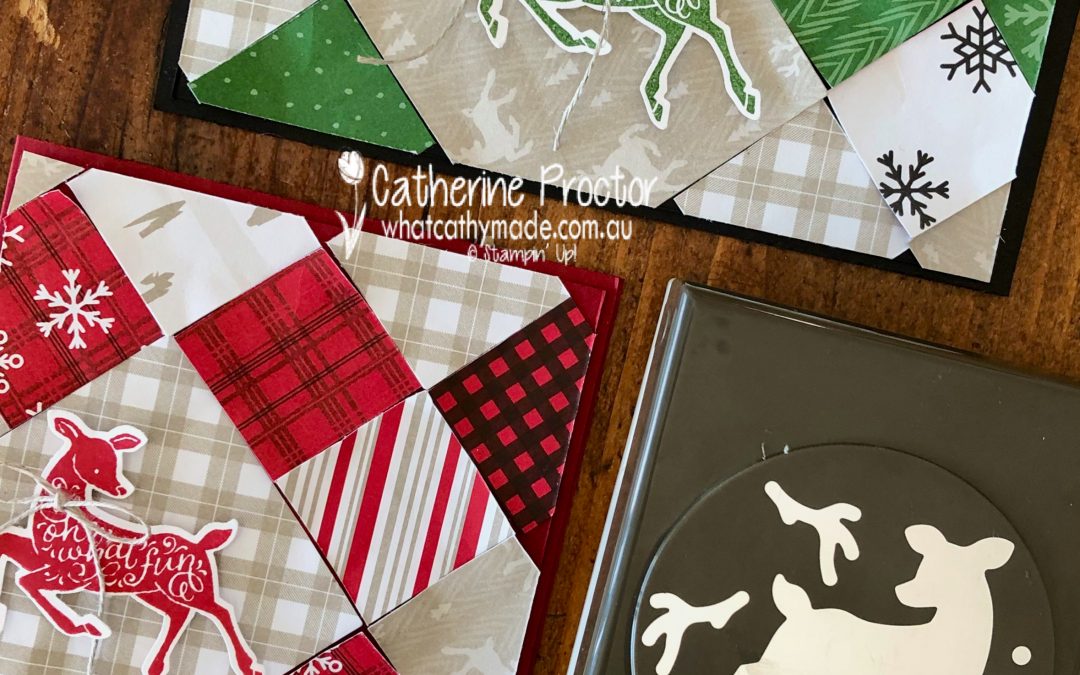
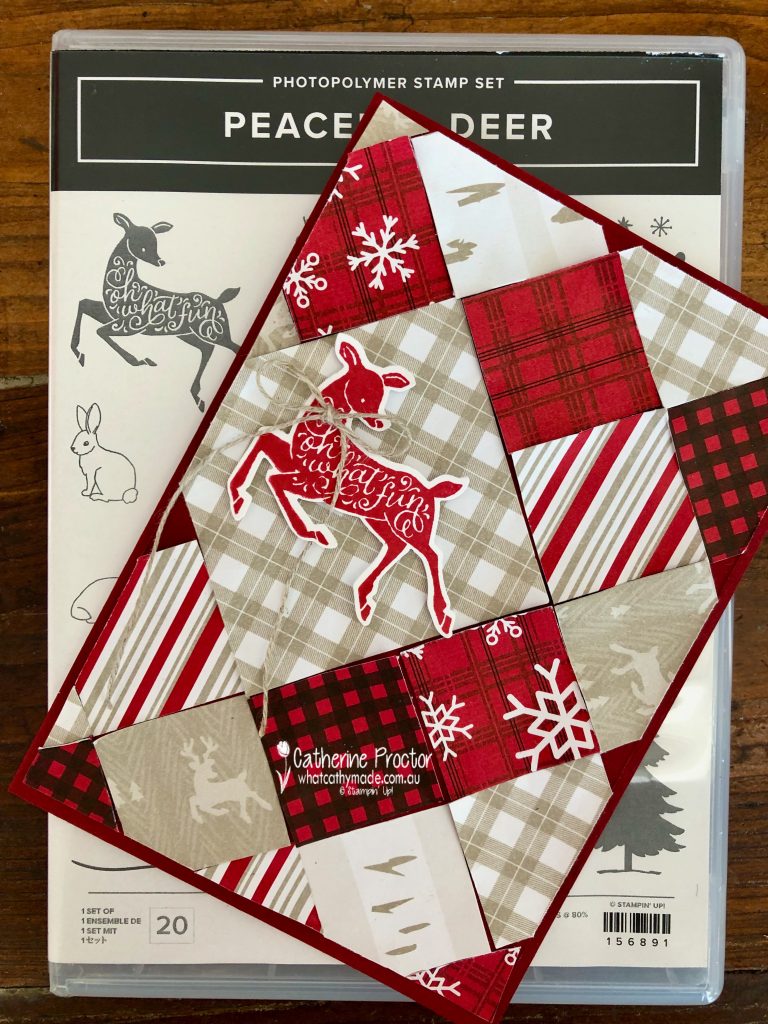
Hello crafters! I’ve got two cards for you this week that use a great technique for crafting with scraps of DSP. I was inspired to revisit this “paper patchwork” technique after seeing a Sweet Symmetry DSP paper patchwork card made by Martin Stone, one of the very talented Artisan Design members.
Although these cards use the FREE SALE-a-bration Peaceful Prints DSP, you can use this design/layout with any DSP. The secret to getting great texture is to scrunch up each square of DSP before adhering it to the card base. When you adhere, use Multipurpose glue and don’t adhere right to the edge of each square – let the edges stick up.
I split the Peaceful Prints DSP into the reds and greens and cut 3x3cm squares using my paper trimmer. Each card also has one larger 6x6cm square of DSP which I stuck down first and then added the other squares around it.
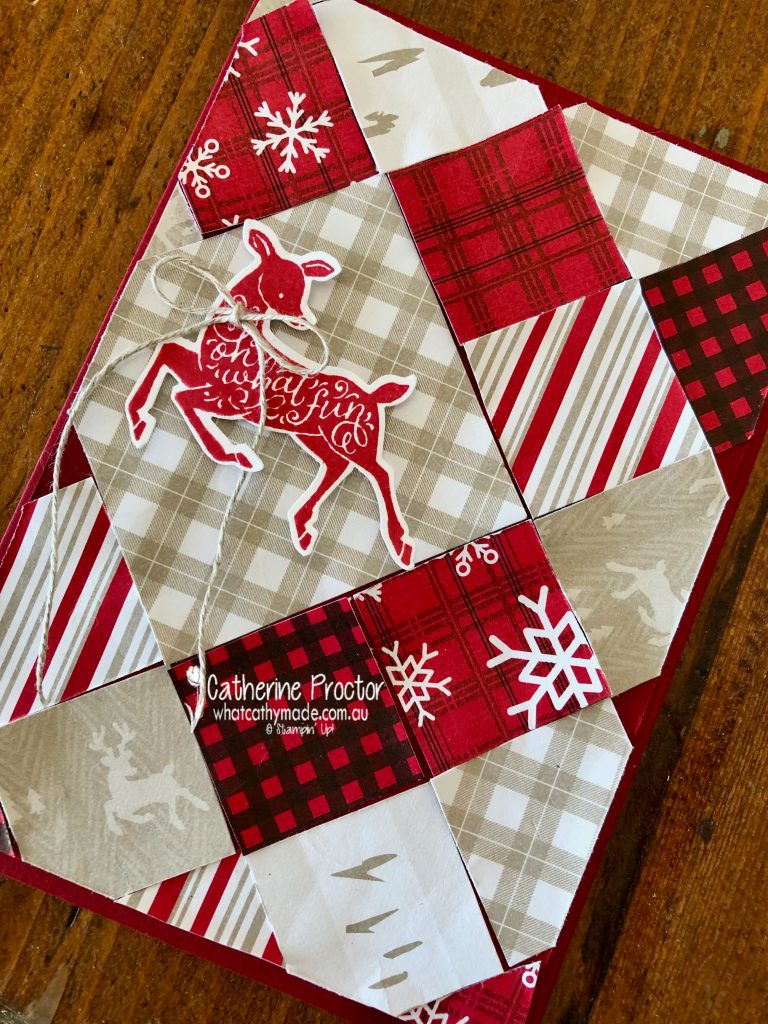
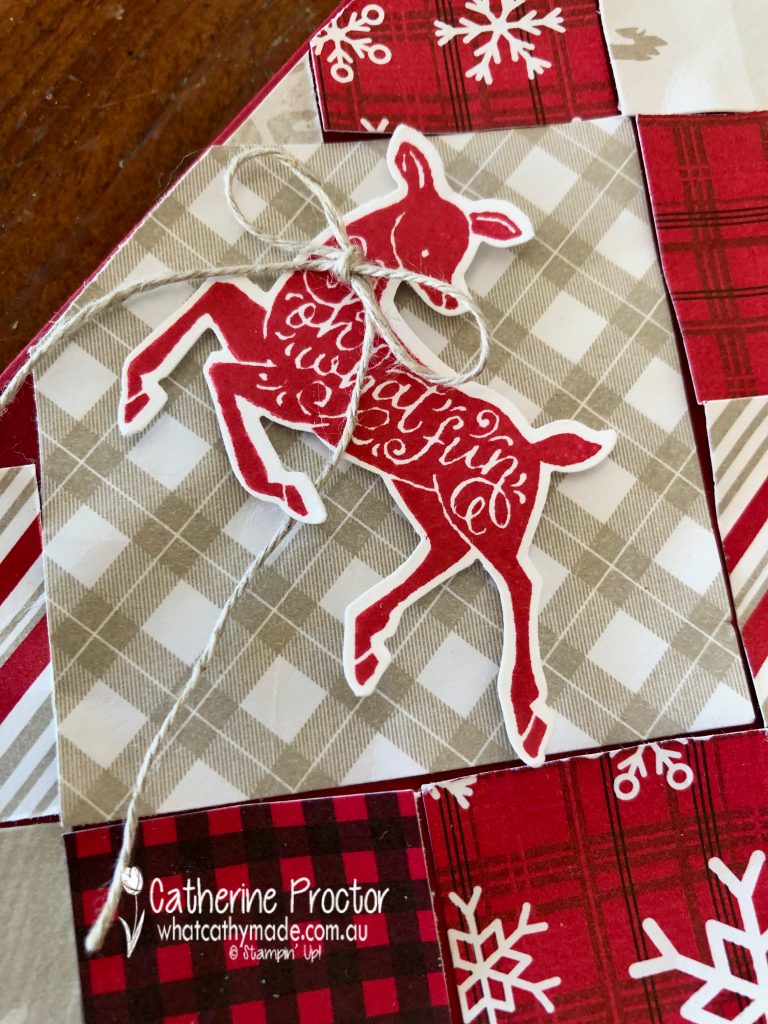
This red card uses the DSP in Real Red, Cherry Cobbler, Basic Black, Sahara Sand and Basic White. The card base is half an A4 sheet of Cherry Cobbler and the deer from Peaceful Deer is stamped in Real Red.
I added a bow of linen thread to the deer.
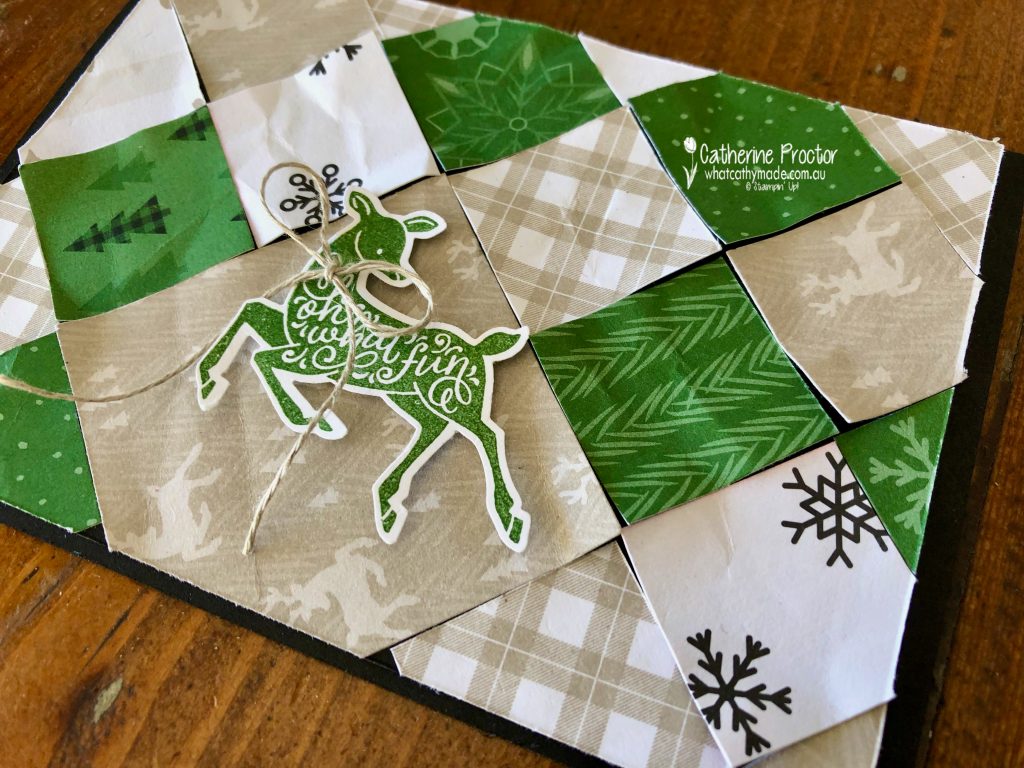
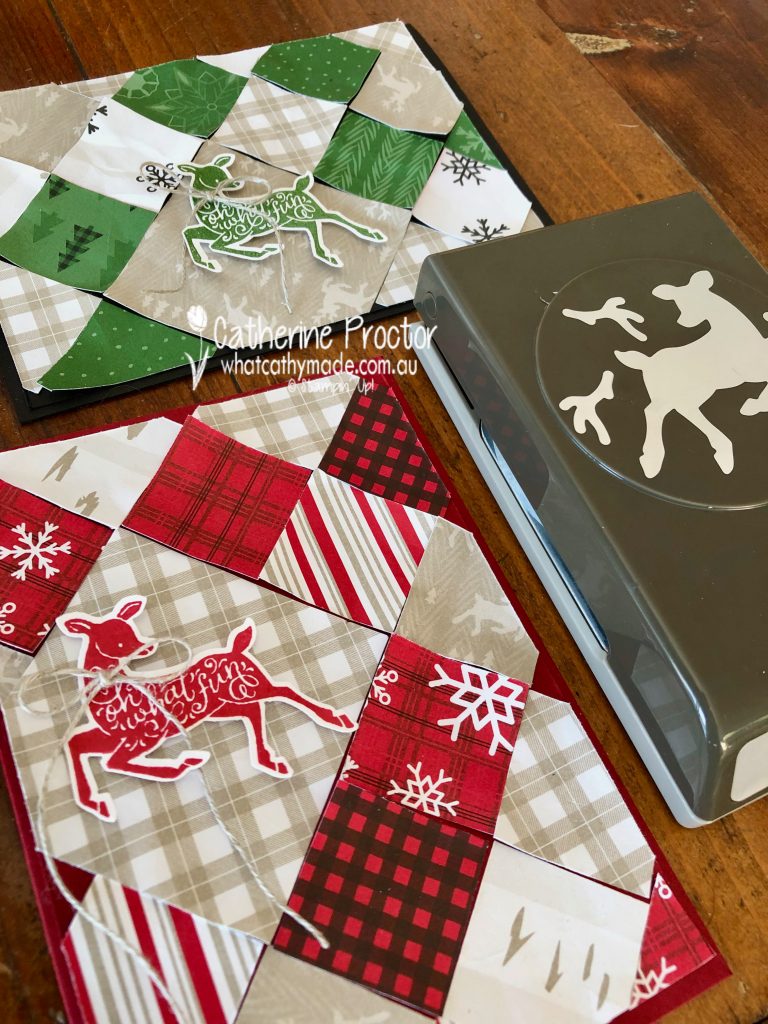
The green card has exactly the same size and layout – I just flipped the card over to landscape before attaching my Garden Green Deer and bow of linen thread. The card base is Basic Black and the DSP is Garden Green, Sahara Sand, Basic Black and Basic White.
After photographing my cards and uploading them to my website I suddenly realised the deer and the trees on the DSP are adhered upside down on my card, whoops! Hopefully the elegance of the stamped and punched deer draws your eye away from noticing my mistakes!
Red or green? Which card is your favourite?
Now it’s time to hop on over to our next participant, the lovely Christine Blain. I can’t wait to see what Christine shares with us today!
If at any time you find a broken link please head to the blog of this week’s Host of the Heart of Christmas Blog Hop, Tina Gillespie, as she has the full list of links for everyone who is participating.
You can purchase any of the products I’ve used tonight, here.
Thanks for visiting my site. I’ll be back with another card on Wednesday.
In the meantime, wherever you are in the world, stay safe, stay calm … and keep on crafting xxx
Welcome to week 15 of our 2021-22 Colour Creations blog hop! Tonight we are showcasing Daffodil Delight, a bold yellow from the Brights colour collection.
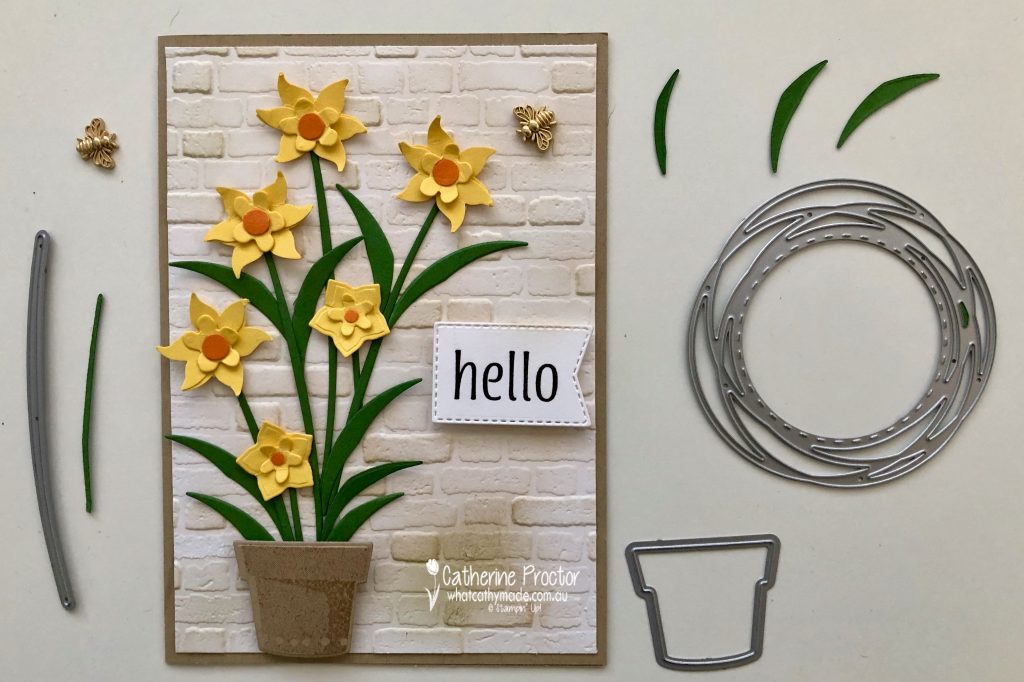
I really wanted to make a daffodil card for our Daffodil Delight blog hop, however as we only use current Stampin’ Up! products in these blog hops and I didn’t have any daffodil stamps, punches or dies. It was time to get creative.
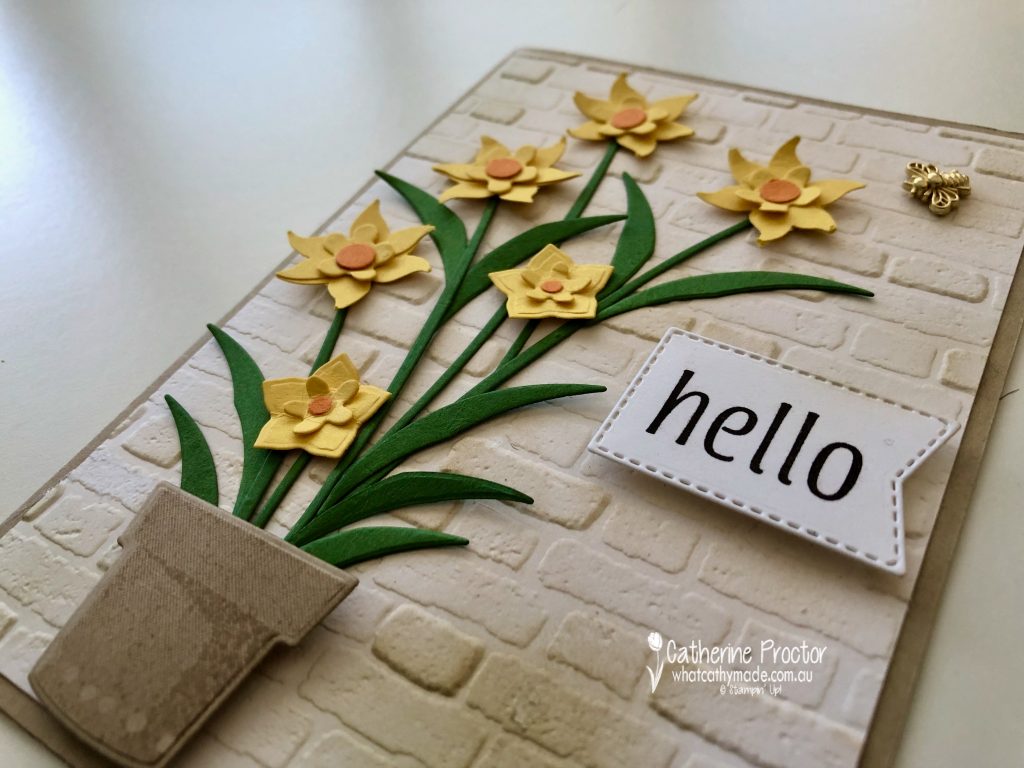
I’m not sure just how botanically correct my daffodils are, so please allow me some artistic licence!
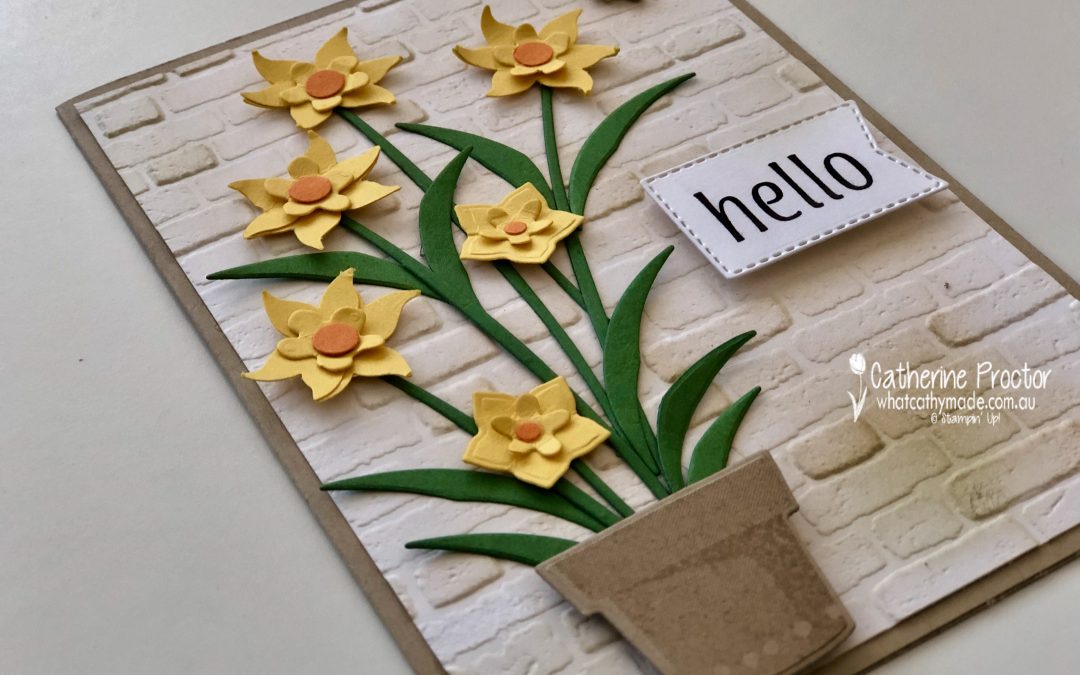
For the embossed Whisper White layer of my card front, I’ve deliberately inked my embossed brick wall darker in some places than others, applying both Crumb Cake and Garden Green with a blending brush to give a more realistic effect.
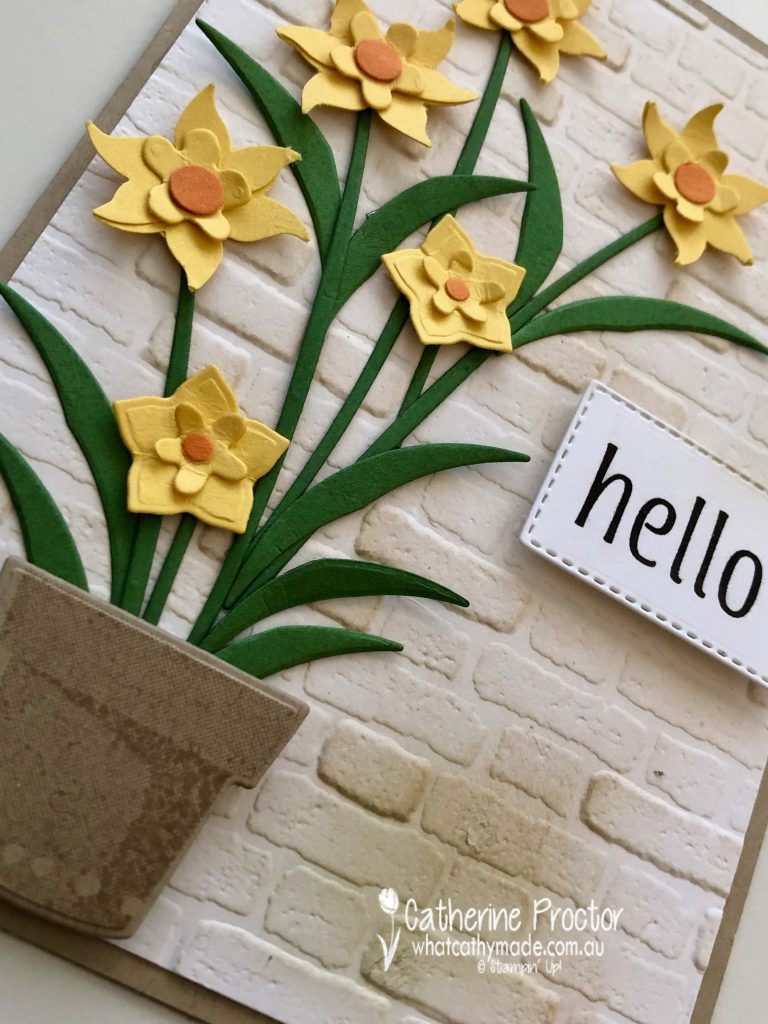
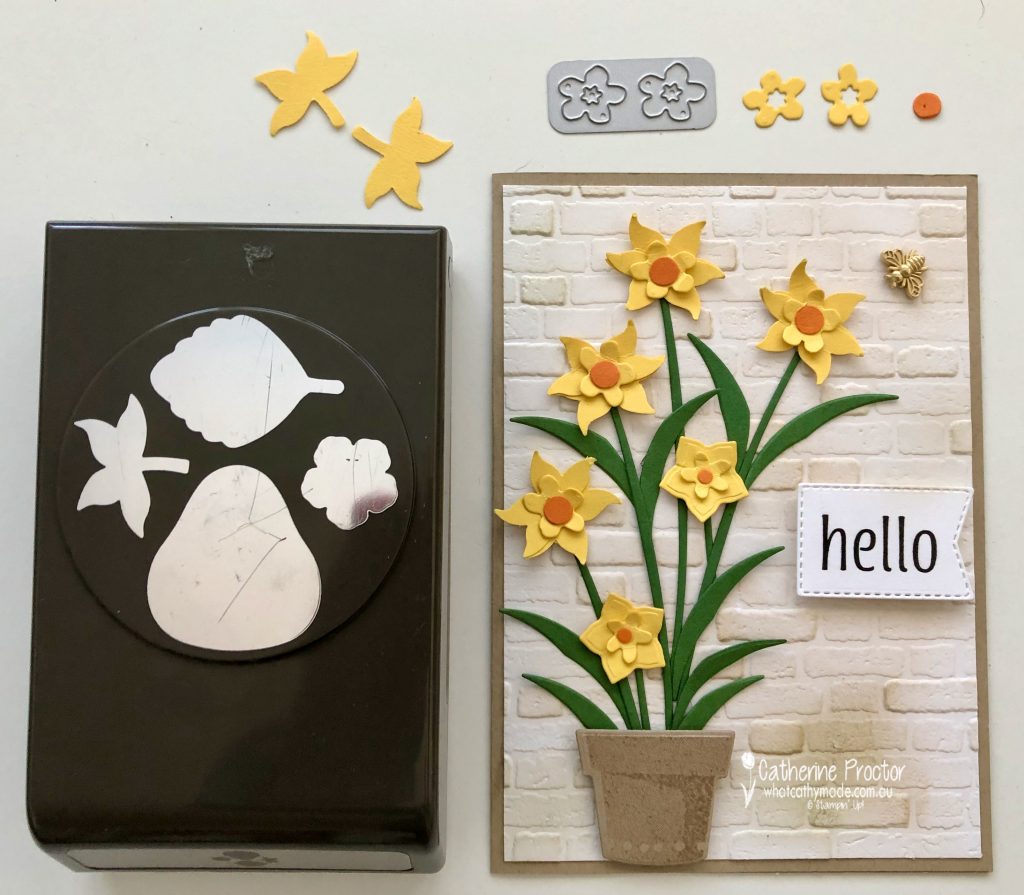
There are two sizes of daffodils on this card. For the back layer of the larger daffodil I punched two leaves in Daffodil Delight from the Strawberry Builder Punch. I them removed the leaf stems and overlapped the dies when gluing them together.
The middle layer of the large daffodil is die cut in Daffodil Delight using the small double flower dies from the Cherry Blossom Dies. The Pumpkin Pie circle in the centre of the flower is punched with a standard sized hole punch for ring binders.
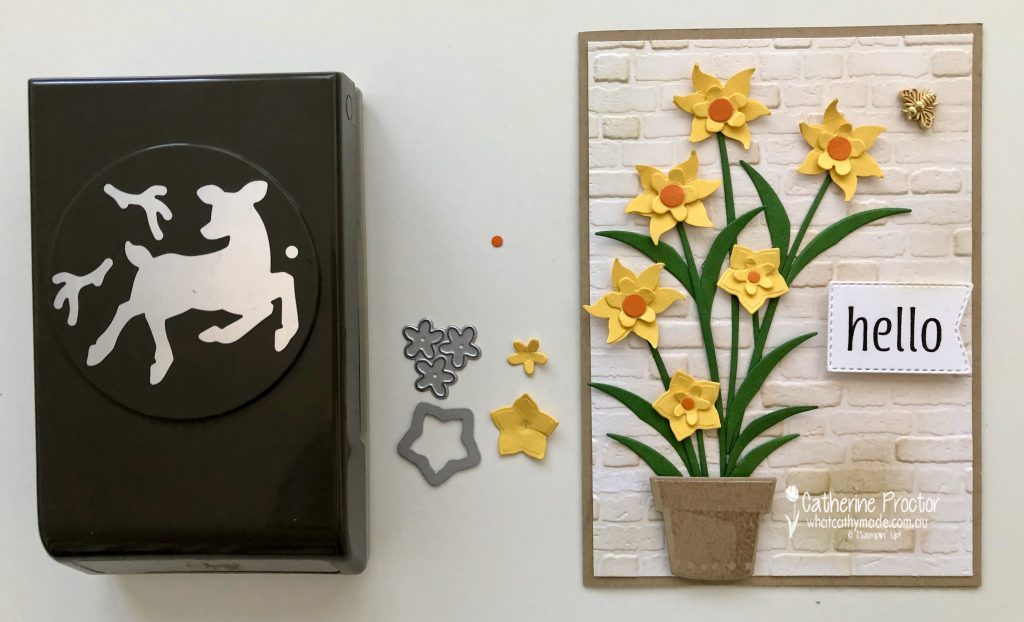
The two smaller daffodils use the flower die from Birds & More as the background layer and the triple flower die from Pierced Blooms for the middle layer, both cut from Daffodil Delight. The Pumpkin Pie flower centre is punched using the deer nose in the Deer builder punch.
Stems and leaves are die cut from Garden Green card stock using the stem die from Pierced Blooms dies and the offcuts from the circle wreath die in the Painted Labels dies. The cute little pot was stamped in Crumb Cake using a stamp from the Plentiful Plants stamp set and then die cut from Crumb Cake card stock using the coordinating Perfect Plants Dies.
I’ve recently acquired the Artistically Inked bundle and just couldn’t resist adding this gorgeous “hello” sentiment to the front of the card – isn’t this font so eye catching? I die cut it out with one of the Tasteful Labels dies.
My final touch was a Bumblebee trinket. I’ve been hoarding these – it’s time I started adding these adorable embellishments to my cards!
Now it’s time to hop on over to our next participant, the very talented Rachel Woollard – I can’t wait to see what she’s made this week!
If you find a broken link or have come to this blog hop from a different entry point, you can view the the full list of participants below:
Today I’m sharing another card I made for the “G’day Fri’yay’ Card Making Challenges” Facebook group, a fortnightly Card Making Challenge with Aussie Themes.
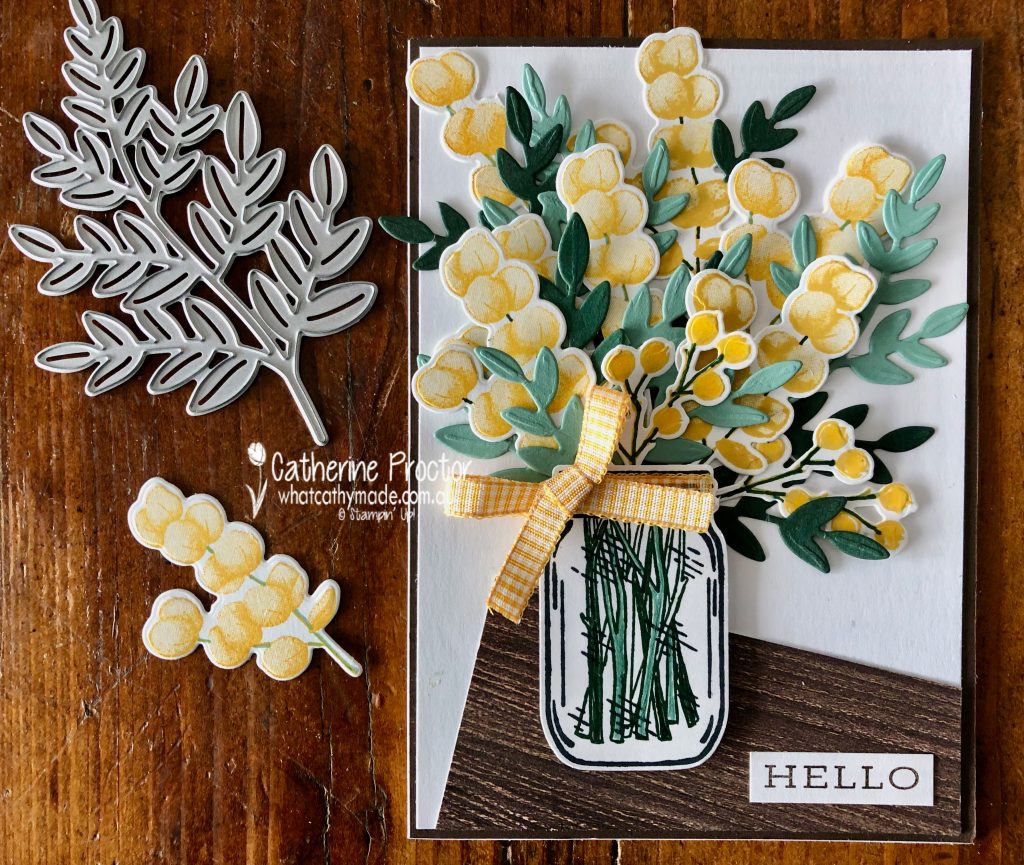
The theme for this challenge is “Spring” and for me nothing announces the start of spring in Australia like wattle does. September 1 is the start of spring as well as Wattle Day, a celebration of our national flower.
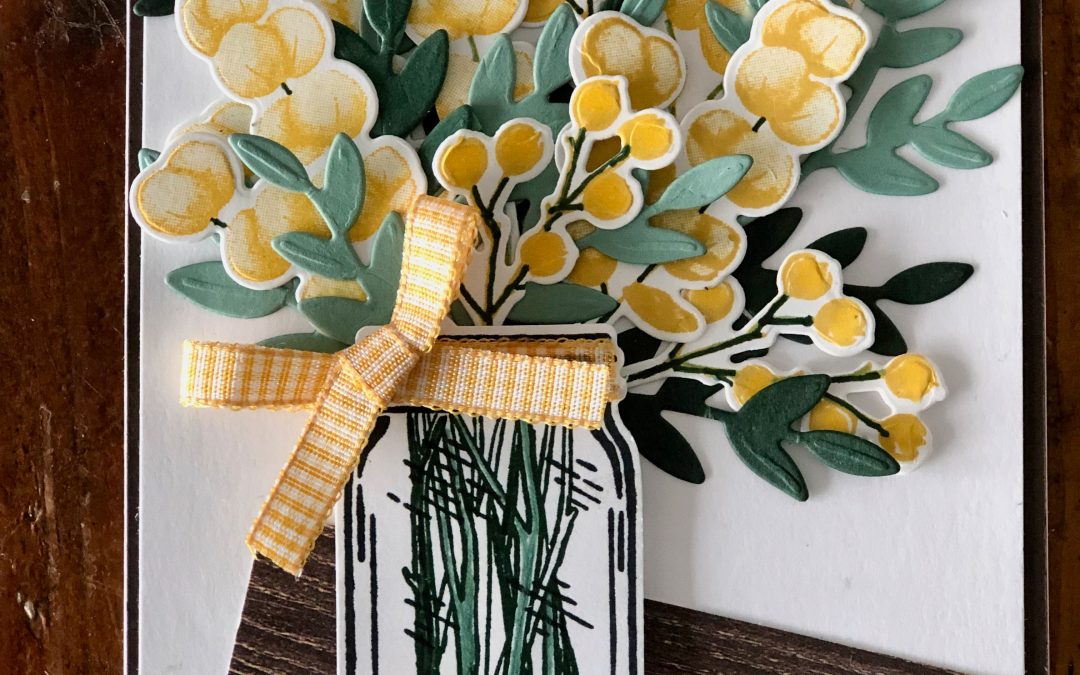
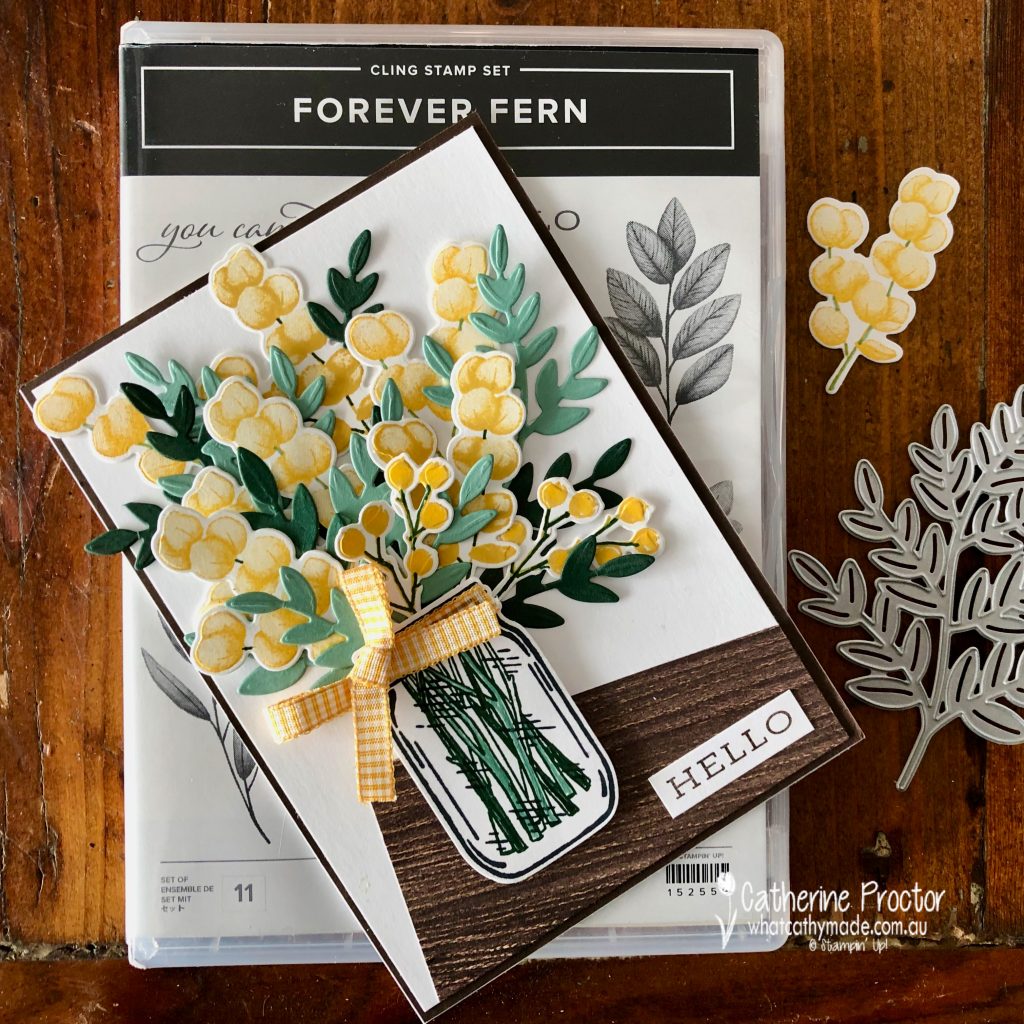
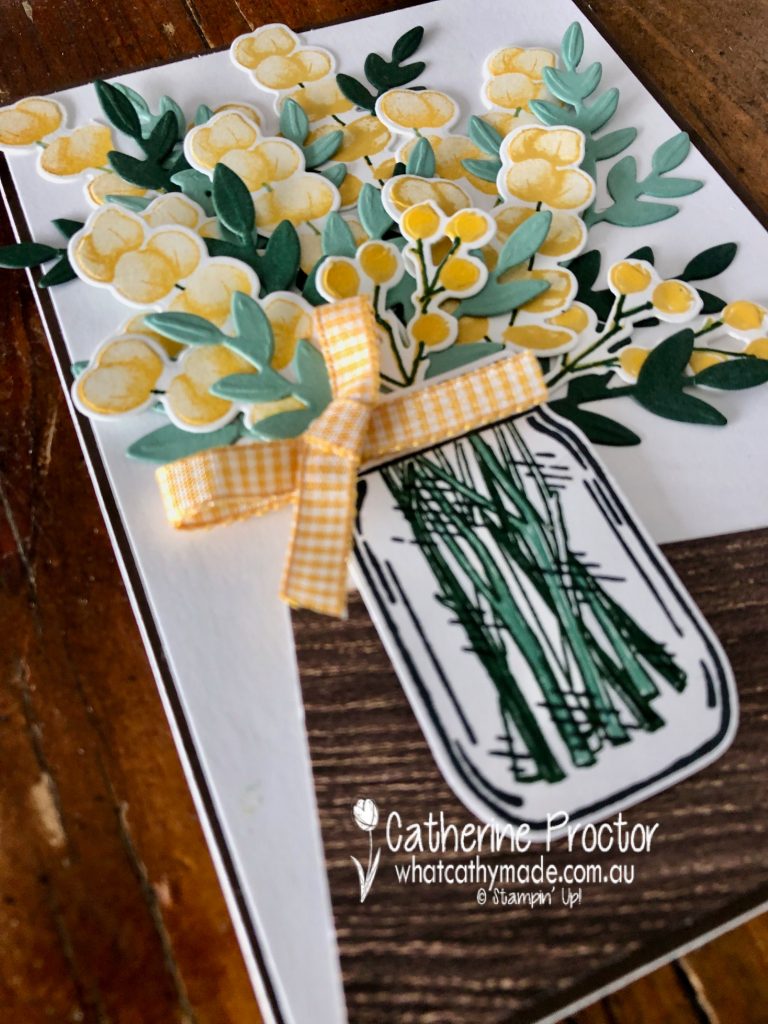
To celebrate the arrival of spring I’ve created a jar of wattle sitting on the edge of a wooden table, using the Forever Fern stamp set, the coordinating Forever Flourishing dies and the Jar of Flowers stamp set with coordinating Jar punch.
Three of the new In Colours (Bumblebee, Soft Succulent and Evening Evergreen) were paired with Daffodil Delight to stamp and die cut my wattle. I love how “Australian” Soft Succulent and Evening Evergreen look when used for foliage.
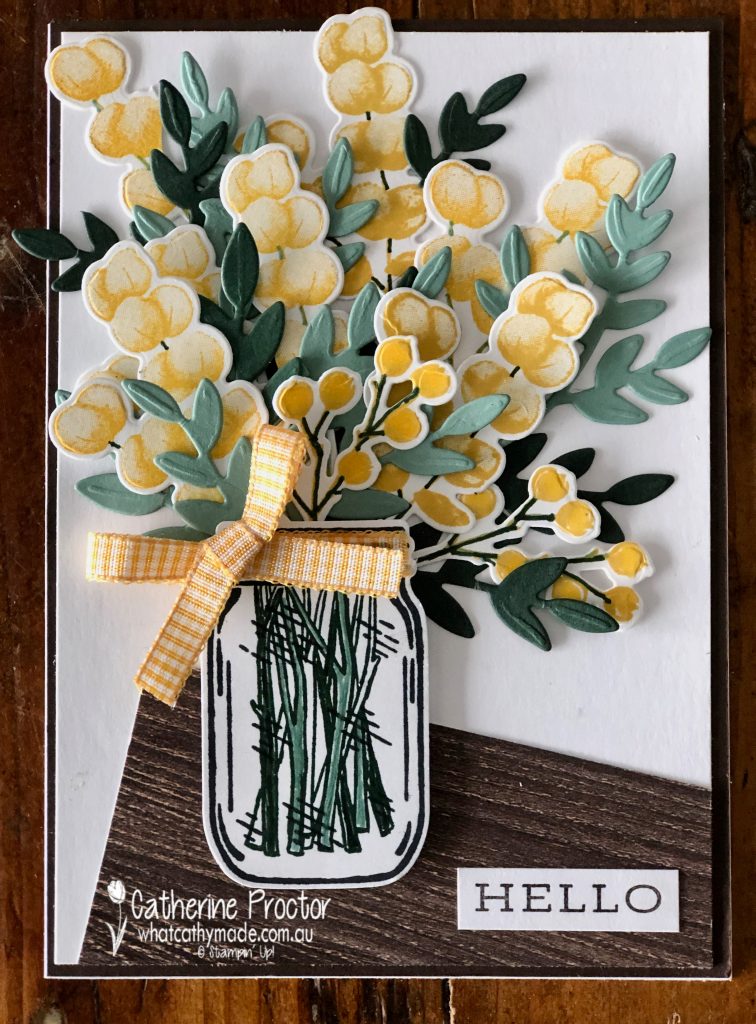
The wattle was all stamped in either Daffodil Delight or Bumblebee and then I used my Soft Succulent and Evening Evergreen markers to draw on the stems of the wattle and turn them from yellow to green. The smaller wattle springs at the front are stamped using the poinsettia petals stamp set.
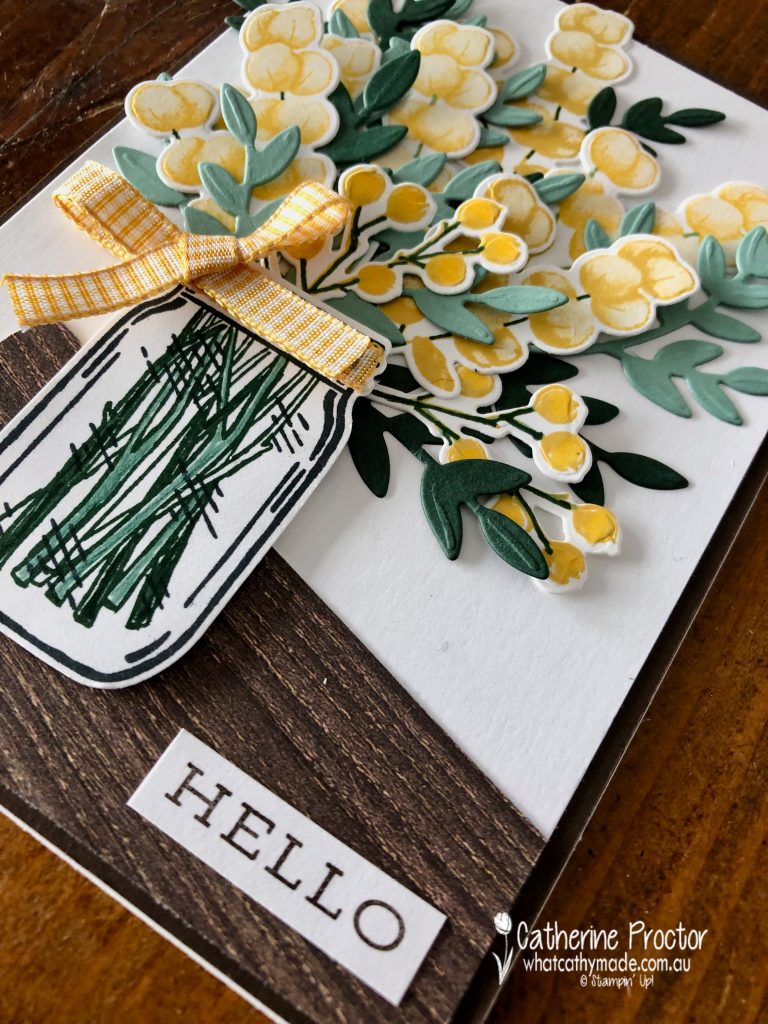
The large fern die was used to die cut all my foliage and then it was simply a case of chopping up the foliage and arranging it with my flowers. I used my Soft Succulent and Evening Evergreen markers to also colour in the stamped stems in the jar – the jar and the stems are from the Jar of Flowers stamp set, punched out with the coordinating jar punch.
The Hello sentiment is also from the Forever Fern stamp set and a bow of Bumblebee gingham ribbon is the finishing touch.
I’ve used a piece of In Good Taste DSP set at an angle to creates the impression of the edge of a wooden table.
Thanks for visiting my blog today. I’ll be back tomorrow on our weekly AWH Colour Creations Showcase – we are showcasing Daffodil Delight this week.
If you live in Australia, you can find and purchase all these products in my Stampin’ Up! Online Store. Don’t forget to use my monthly Host Code (if your order is between $50 – $250) and I will send you a thank you gift the following month. If your order is over $250 don’t use the host code because you will qualify for your own stamping rewards.
My September Host Code is WVX3UYCR and it is valid until midnight September 30.
In the meantime, wherever you are in the world, stay safe, stay calm … and keep on crafting xxx
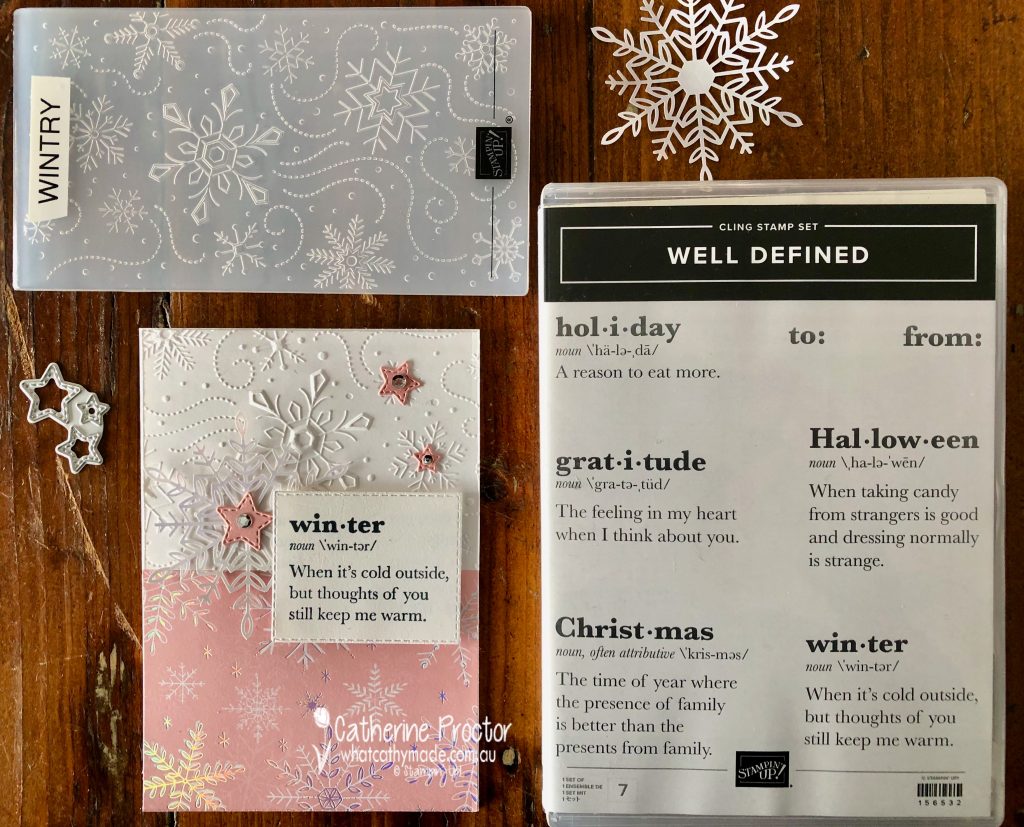
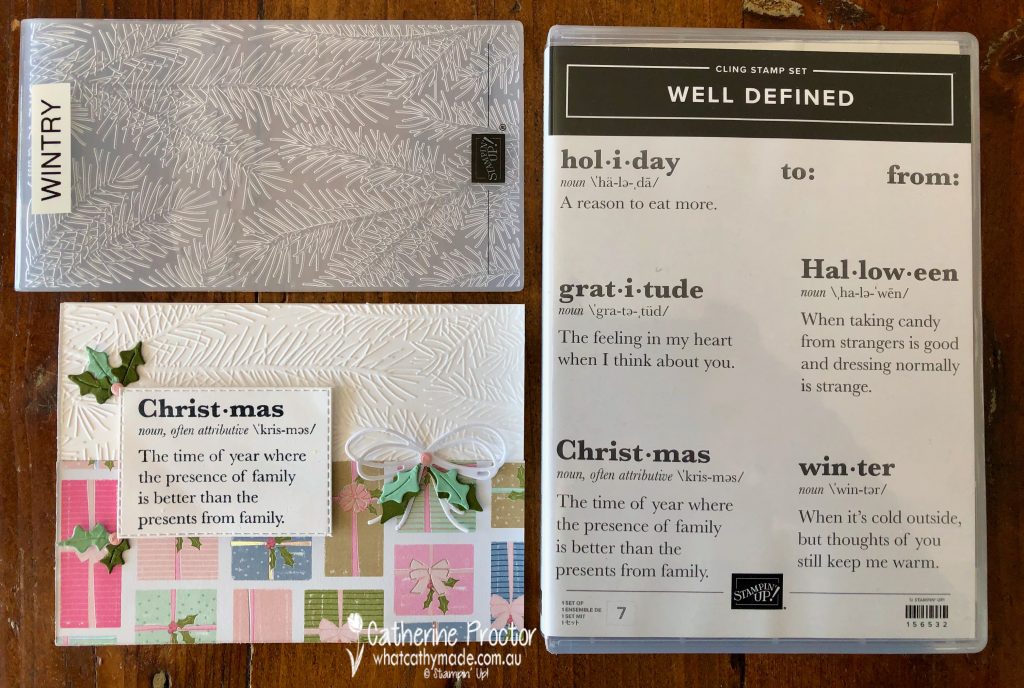
Hello crafters! For my cards this week I’m using the Whimsy & Wonder DSP and the Seasonal Swirl dies again, this time pairing them with the Well Defined stamp set and matching embossing folders.
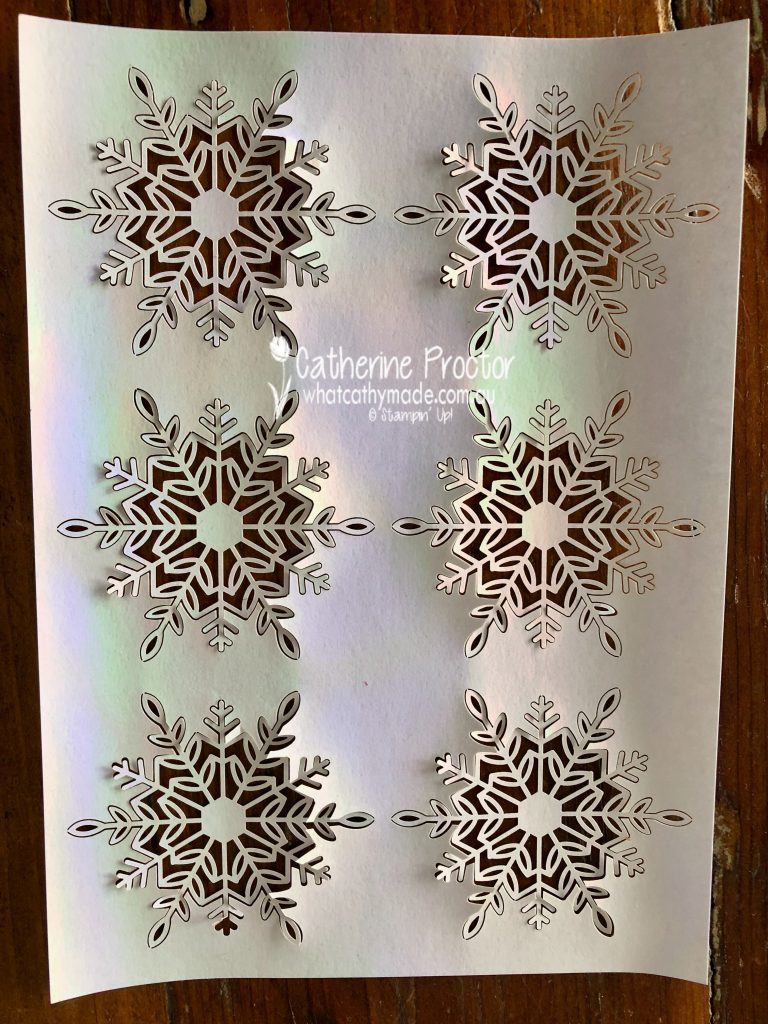
I’ve also created my own matching embellishments using the leftover iridescent foil that surrounds the Wonderful Snowflakes embellishments. There is plenty of spare foil here – don’t waste it! Use your dies and punches to create homemade embellishments to match your cards.
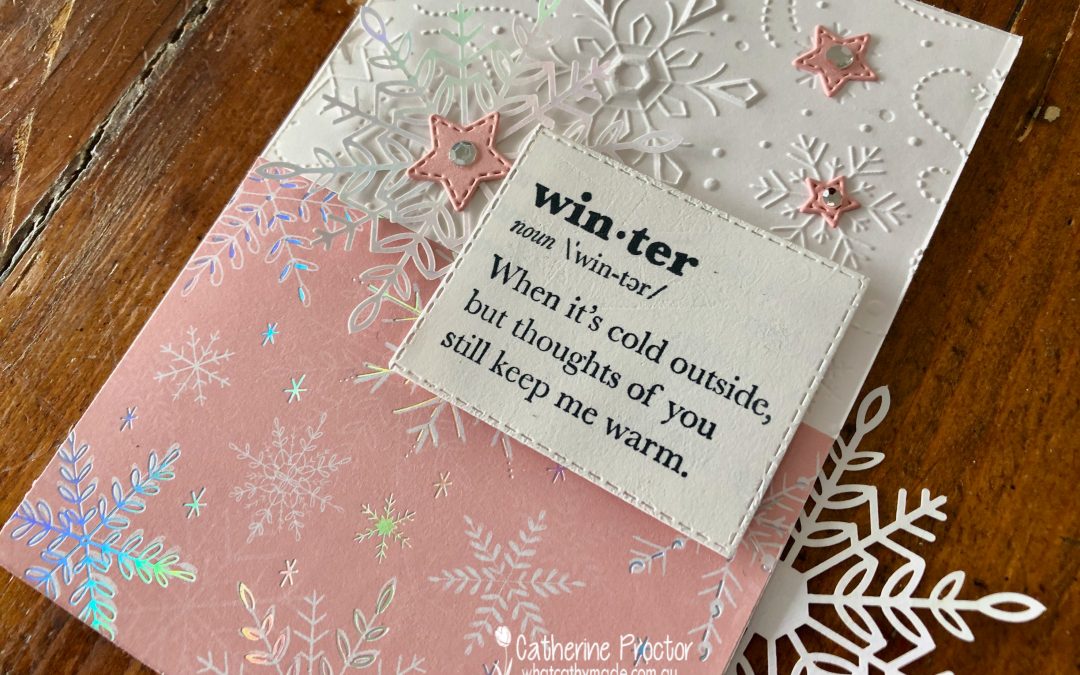
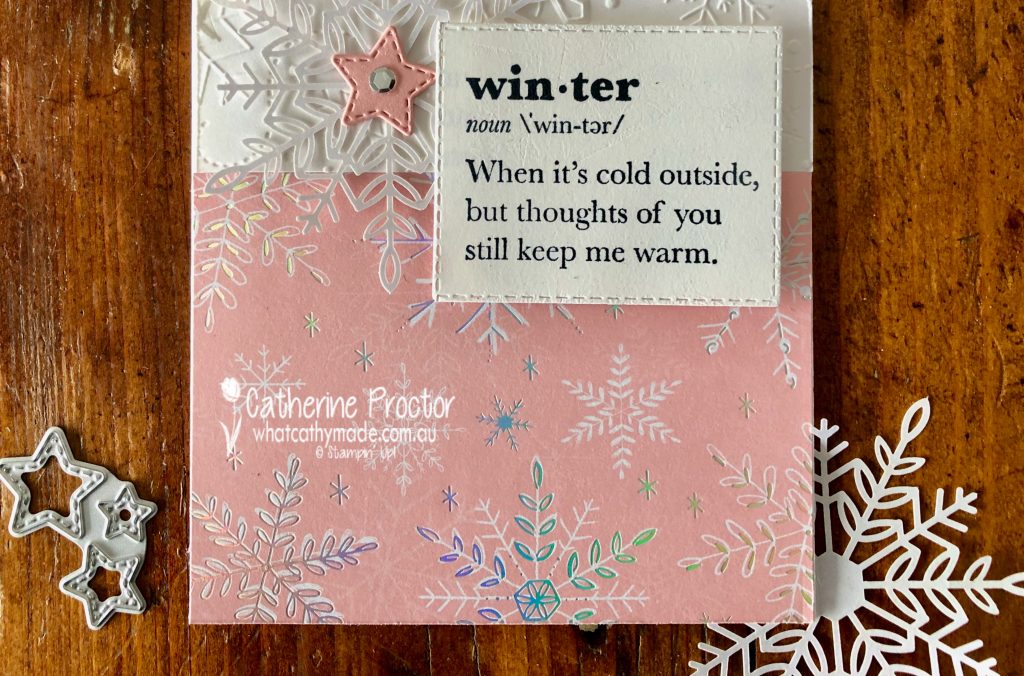
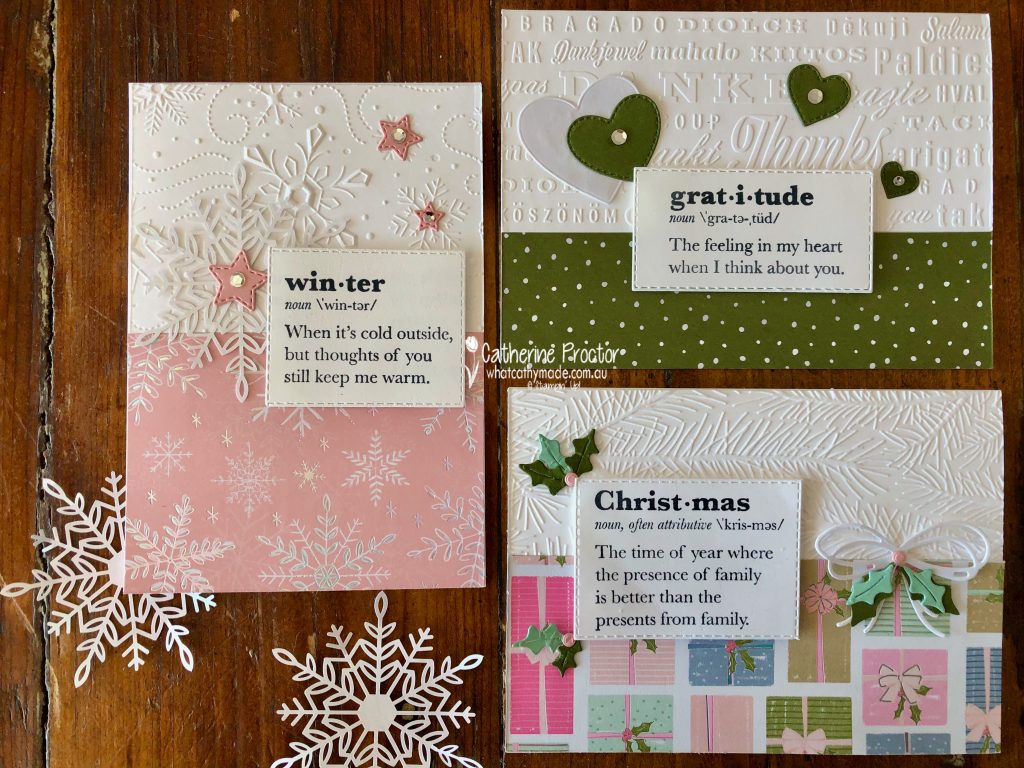
The different elements I used for each card were inspired my the particular definition I chose from the Well Defined stamp set. I think this first card is my favourite.
I’ve used the stamp that has “Winter” as the definition word, so I used the snowflake patterned DSP, the snowflake Wintry Embossing folder, one of the Wonderful Snowflakes embellishments and tiny stitched stars from the Seasonal Swirl dies. Subtle Shimmer Sequins add a final touch of bling.
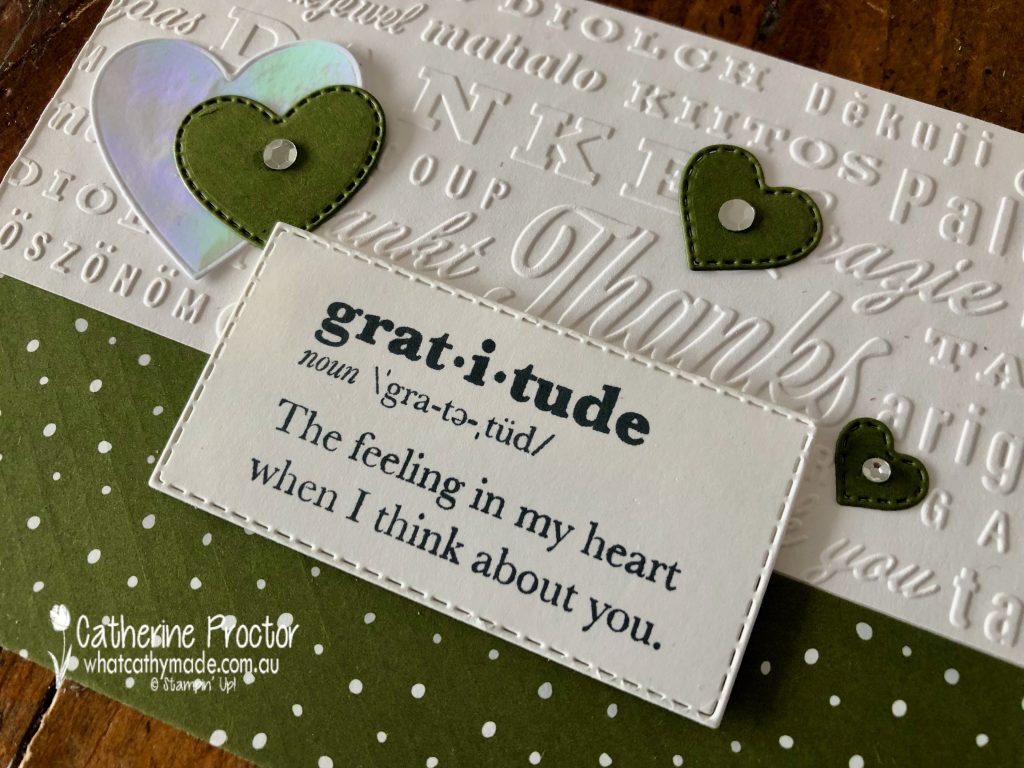
Card two uses the gratitude definition stamp, so the Thanks embossing folder from the Hello and Thanks embossing folders and stitched hearts were the obvious embellishments choice. The iridescent heart is die cut from leftover iridescent foil using the largest heart die in the Seasonal Swirl dies.
I like that this card uses mainly Christmas products to make a thank you card.
Card three is features the “Christmas” dictionary definition that references presents, so I used the Whimsy & Wonder DSP pattern with presents and holly on it. The holly embellishments are die cut using the Seasonal Swirl dies and the iridescent foil bow is die cut using the bow die from Pierced Blooms dies.
Which card is your favourite?
Now it’s time to hop on over to our next participant, the lovely Michele Taylor … I can’t wait to see what Michele shares with us today!
If at any time you find a broken link please head to the blog of this week’s Host of the Heart of Christmas Blog Hop, Tina Gillespie, as she has the full list of links for everyone who is participating.
You can purchase any of the products I’ve used tonight.
Thanks for visiting my site. I’ll be back with another card on Wednesday.
In the meantime, wherever you are in the world, stay safe, stay calm … and keep on crafting xxx