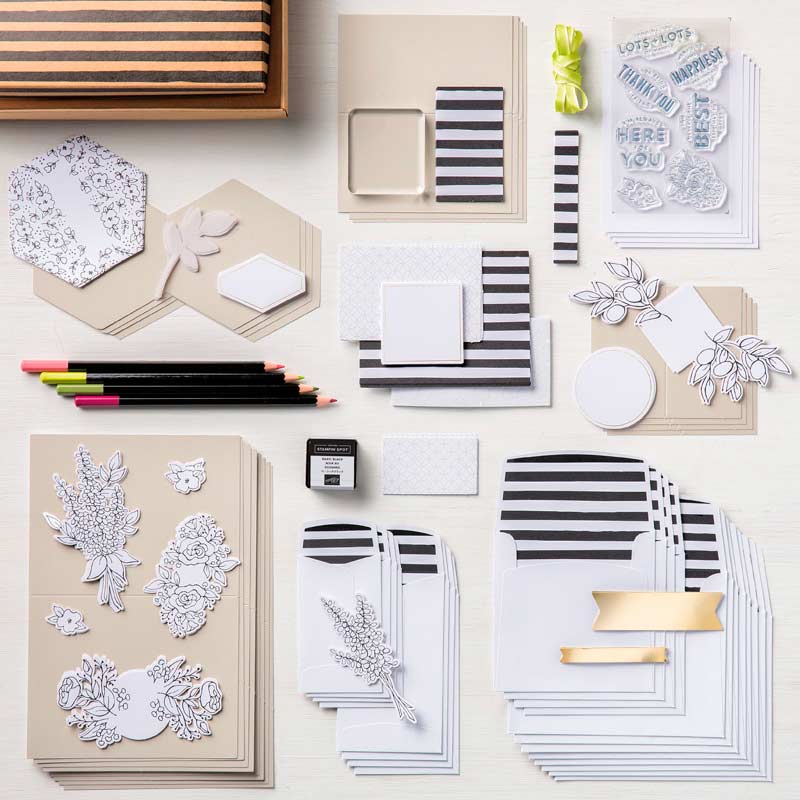
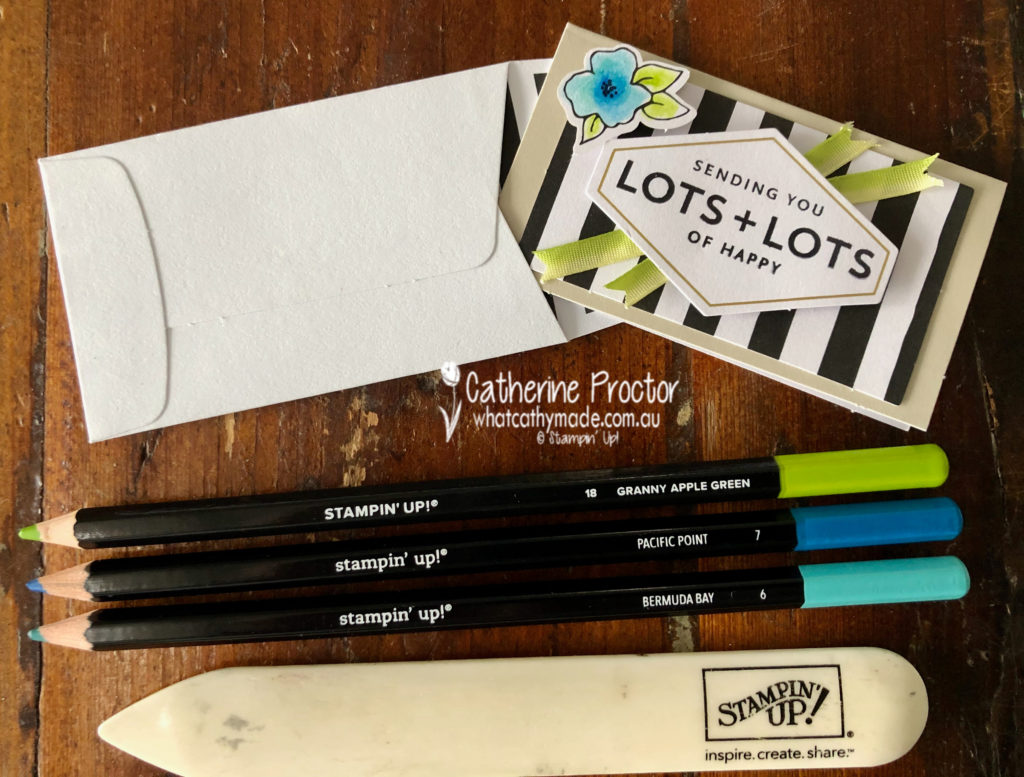
Today I’m farewelling the Lots Of Happy Card Kit – one of my favourite kits of all time. It includes everything you need to make 20 cards, even the acrylic block to mount your stamps on and the adhesives to attach the elements to the card front.
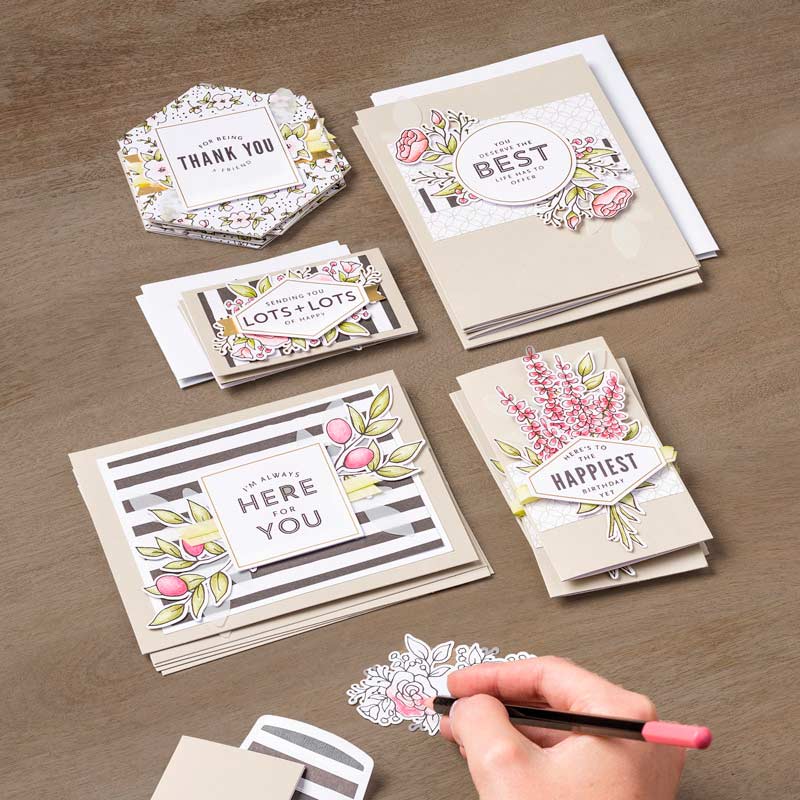
The watercolour pencils included in the kit are some of my favourite colours. Here’s what the cards look like coloured in with the pencils included in the kit.
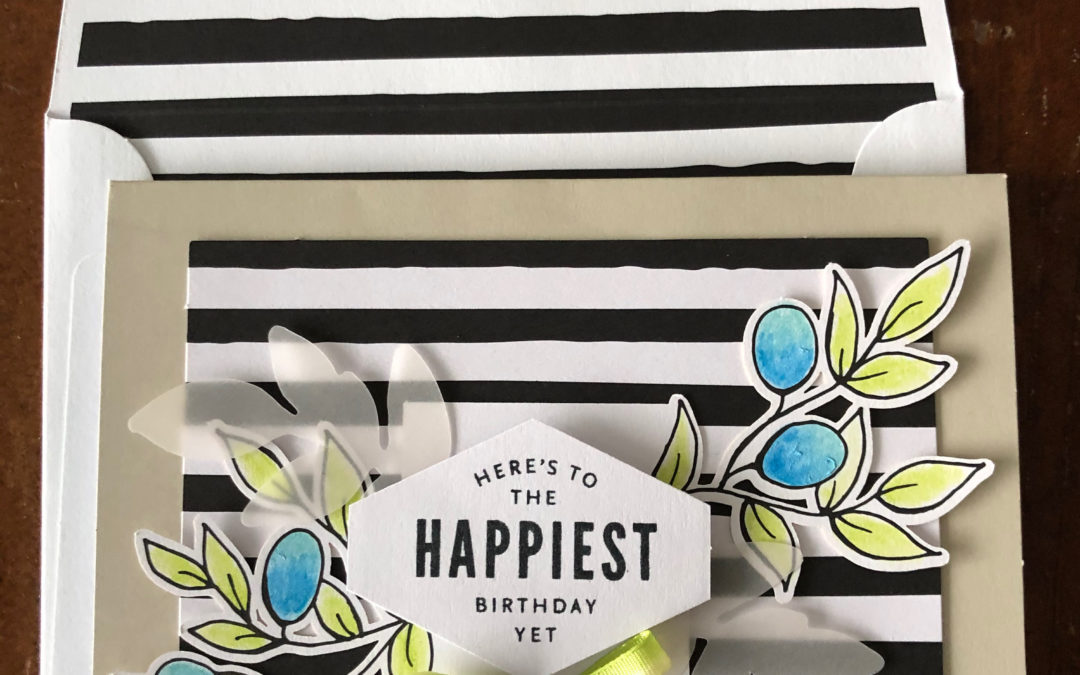
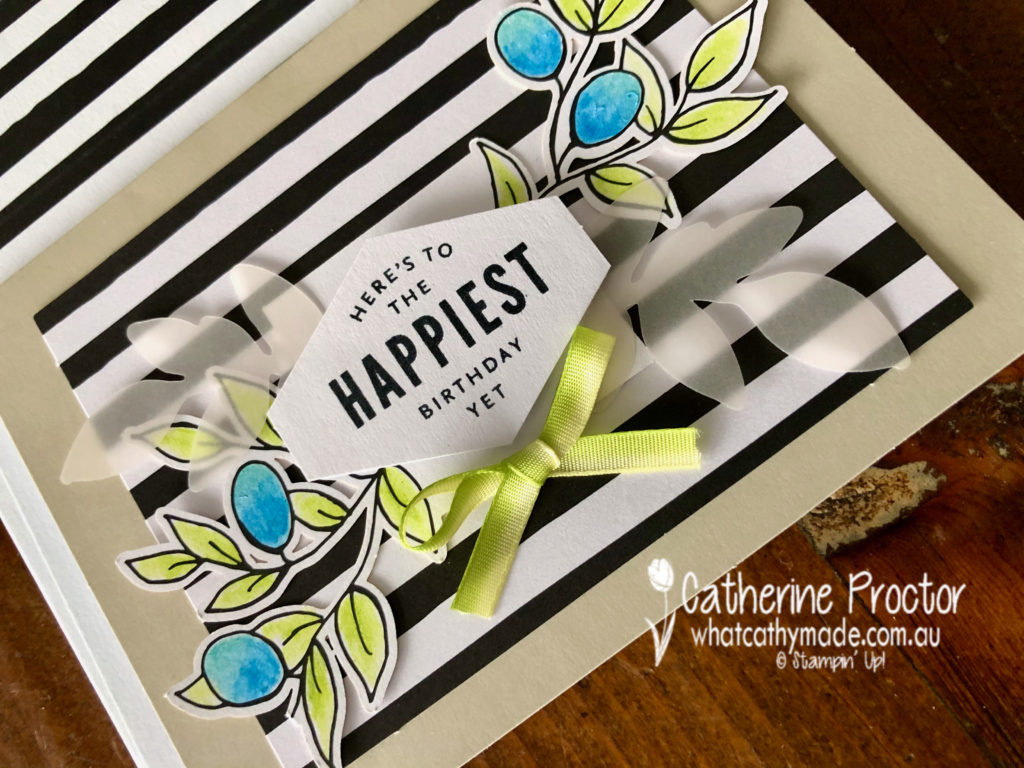
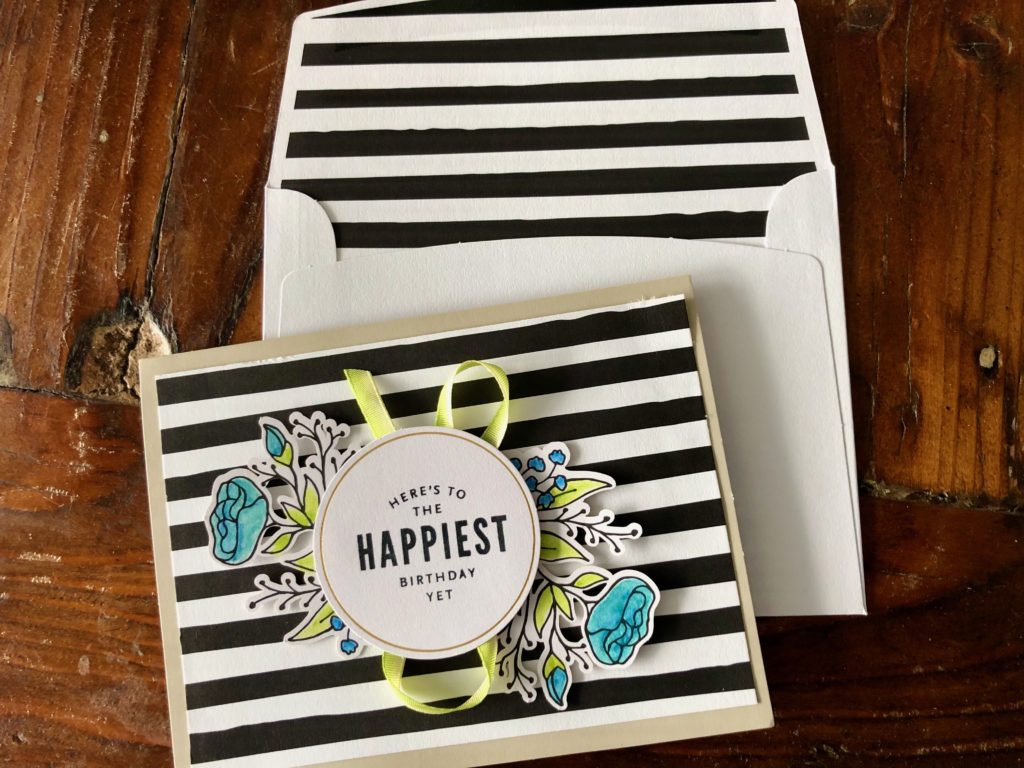
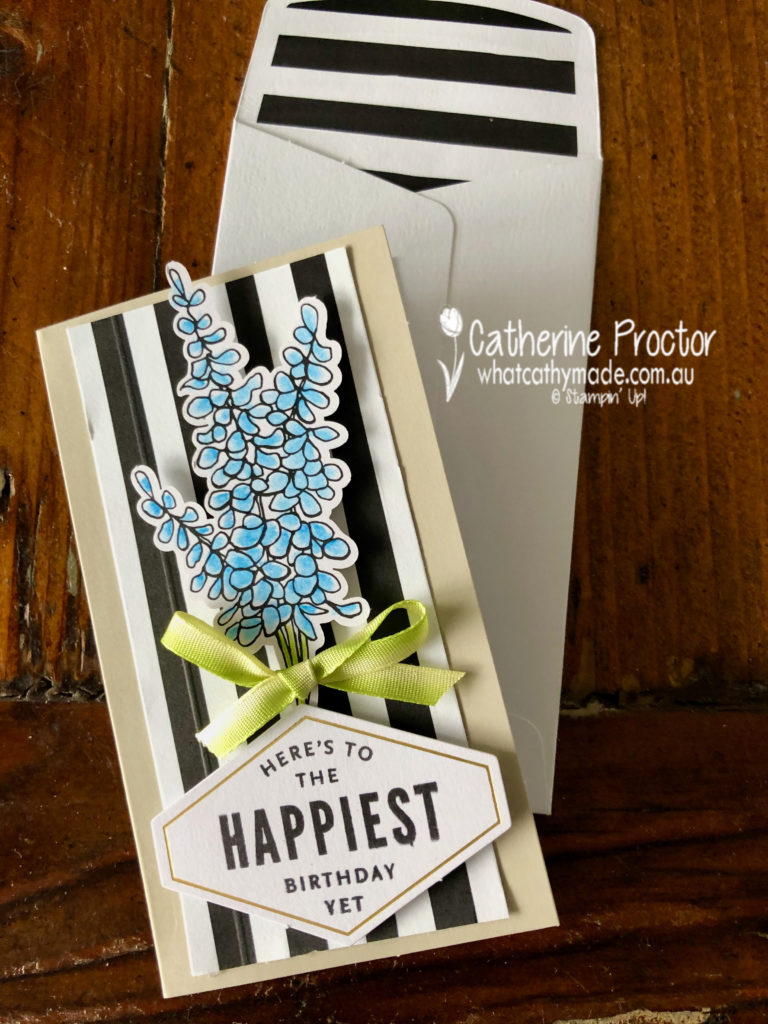
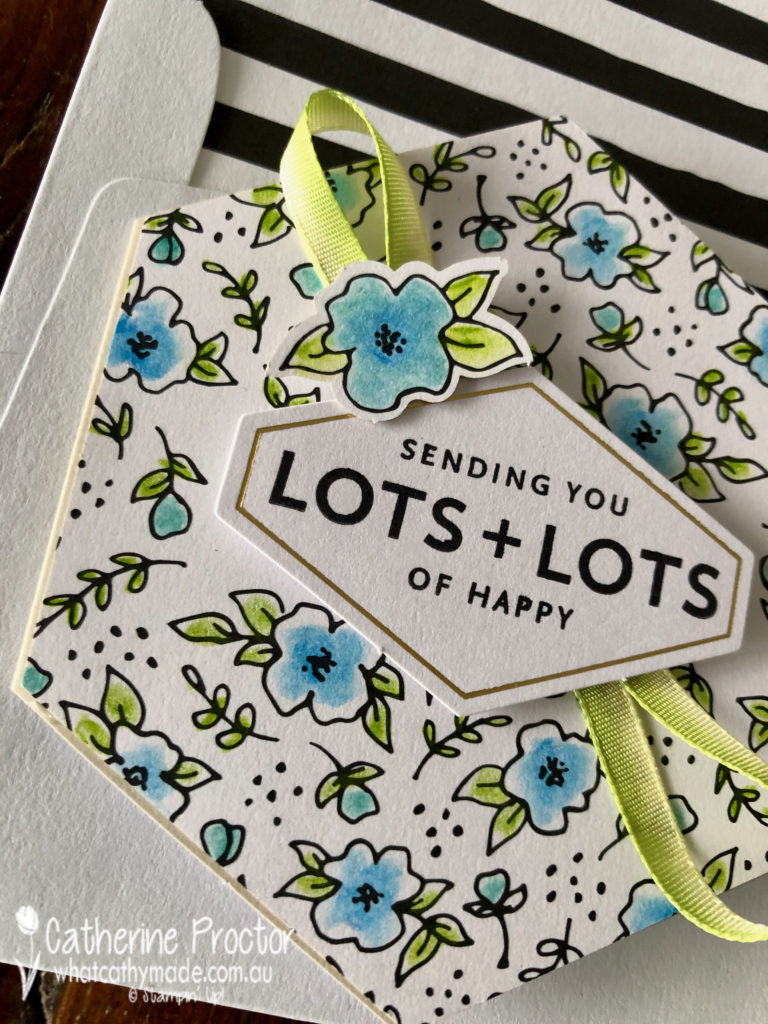
For my cards tonight I thought I’d show you how these cards look created with different colours, mixing up the design elements. I used Bermuda Bay, Pacific Point and Granny Apple Green watercolour pencils and my blender pen to blend the colours together.
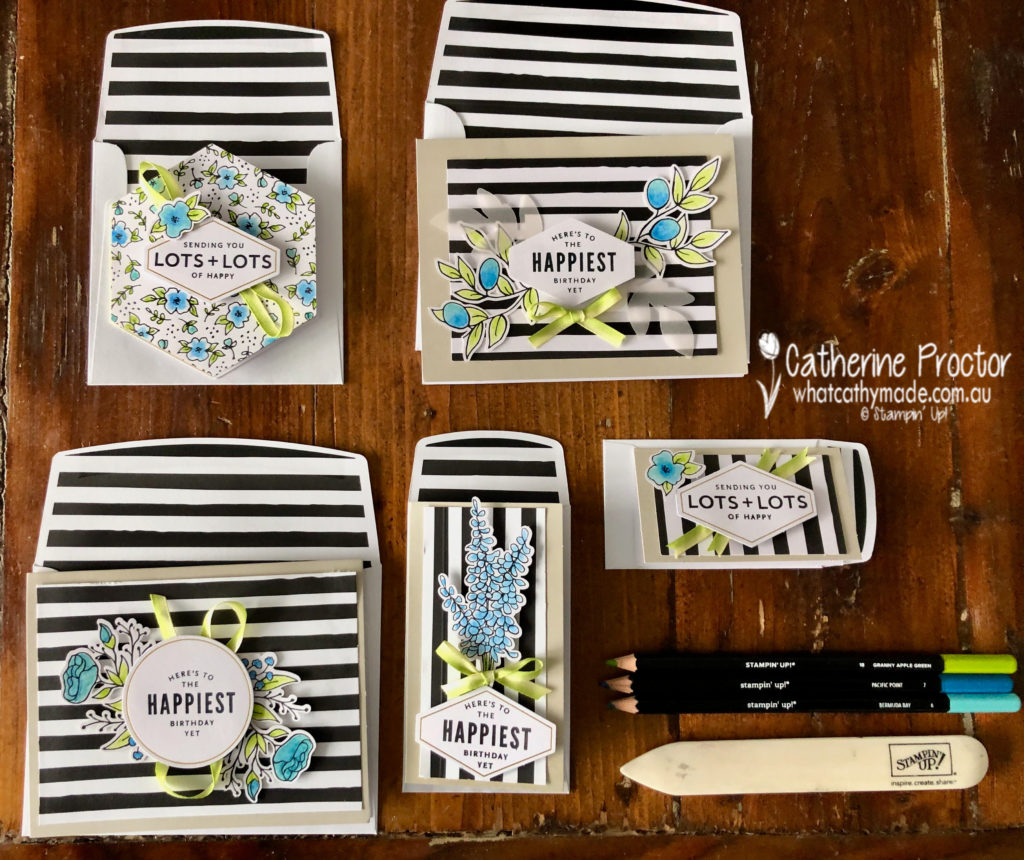
I love how this bold black and white striped paper works so well with the Sahara Sand Card bases as a neutral palette you can mix with any other colours.
The card bases come in 5 different sizes and shapes. This birthday card is made from one of the large card bases.
And here’s the other birthday card design I made using one of the large card bases.
This smaller, rectangular note card is just perfect to accompany a gift.
And how cool is this hexagonal shape. Like every card in this kit, it comes with its very own matching envelope.
The smallest note card base is so adorable. I like to include little notecards this size when I’m giving a bunch of flowers or a small gift like a pair of earrings.
Tomorrow I will be sharing some more cards with you, but in the meantime you can view all the retiring products in my online shop.
Would you like me your very own Stampin’ Up! 2020-21 Annual Catalogue?
If you’d like me to post you your very own copy of the 2020-21 Stampin Up! Mini Catalogue, the 2019-20 Stampin Up! annual catalogue, or to simply find out about more about Stampin’ Up! contact me.
Wherever you are in the world, stay safe, stay calm…and keep on crafting xxx
Welcome to the Monthly Art With Heart Creative Showcase.
This month the Art With Heart Team have amazing projects to share with you that have been inspired by the card sketch below. The sketch is to be used as a starting point and has been interpreted in many creative ways by the Art With Heart Team.
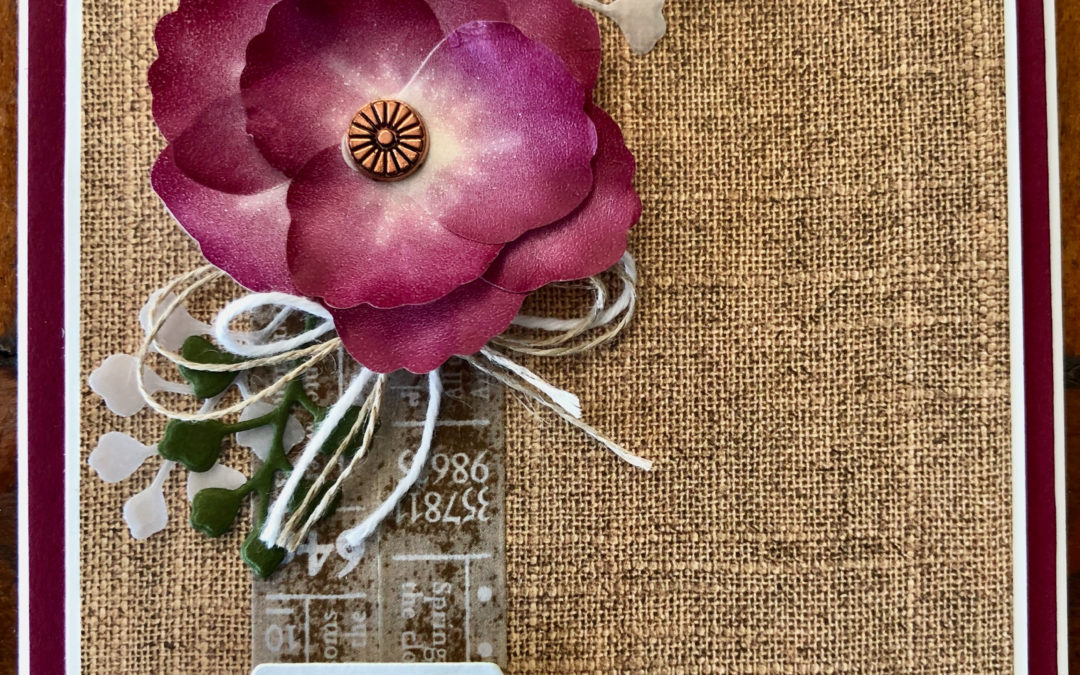
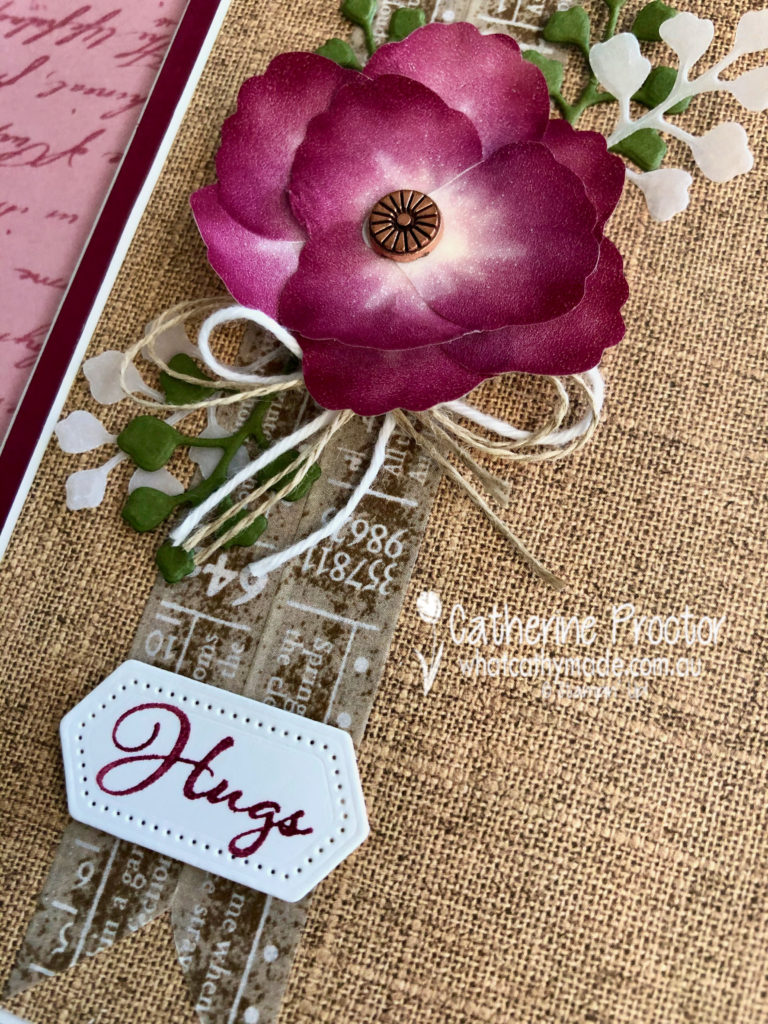
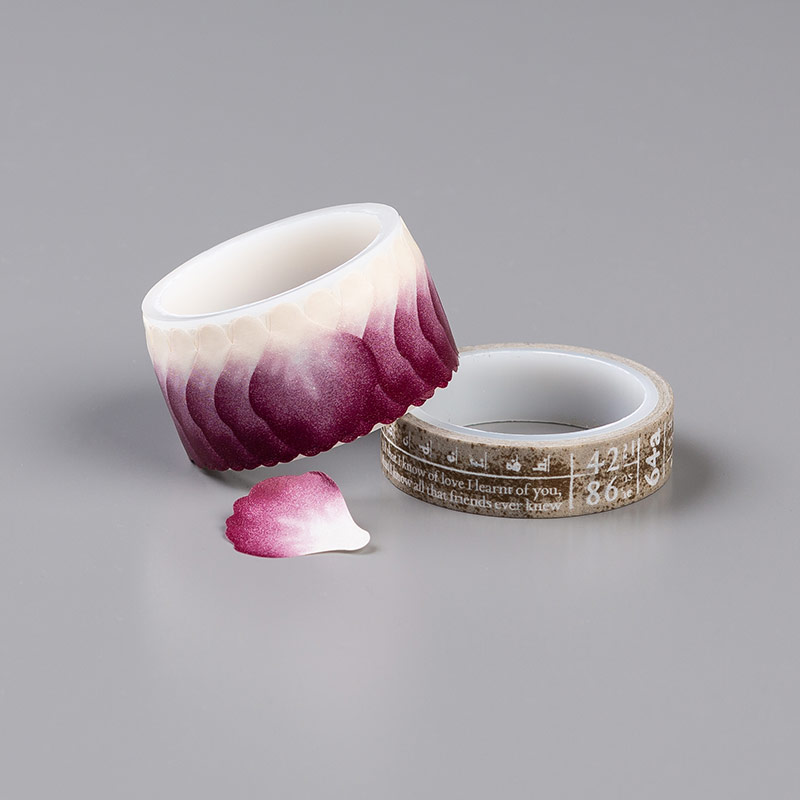
I had so many ideas for my card tonight but in the end I decided to showcase the soon to be retired pressed petals specialty washi tape in a card that has a lot of texture and dimension.
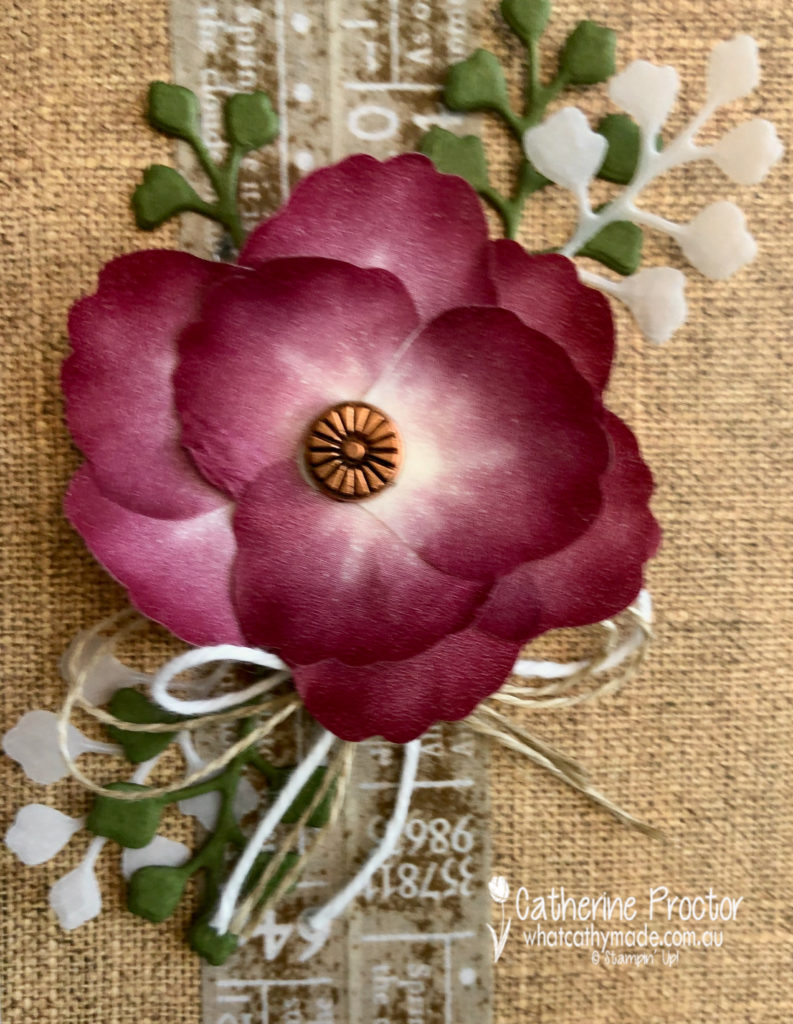
I really love the texture that this burlap/hessian looking paper gives to the background of my card. It is from the Pressed Petals Specialty Designer Series paper which is full of photographed images of flowers, wood and burlap on one side and vintage images on the other side.
But the real star of the show is this stunning flower. Can you believe it is made from washi tape?
It comes in a pack with the printed washi tape that runs underneath the flower and the sentiment…and it’s so easy to use. You simple peel the petals off, one by one, and adhere them to a small circle of cardboard to form a flower. The Pressed Petals Specialty Washi Tape pack is on special right now for just $7.80, a bargain! And the Pressed Petals Specialty Designer Series Paper is also reduced before it soon retires too, from $25 to $18.75.
I used my embossing buddy on the back of the petals to take away some of the stickiness – this helps the petals to sit upright rather than cling to each other. To finish my flower off I placed an antique copper designer element in the centre.
Layered behind the flower are some sprigs I die cut from Mossy Meadow card stock and white vellum using the Nature’s Thought dies. And a double bow of white bakers twine and linen thread sits just under the flower for even more texture.
The hugs sentiment is created using the marker technique to colour just the word “hugs” from the “hugs, prayers, love” sentiment in the Positive Thoughts Stamp set. I coloured the stamp using my Merry Merlot marker and then die cut it out using the smallest stitched nested labels dies.
If you have a broken link or have come to this blog hop midway, you can view all the participants below:
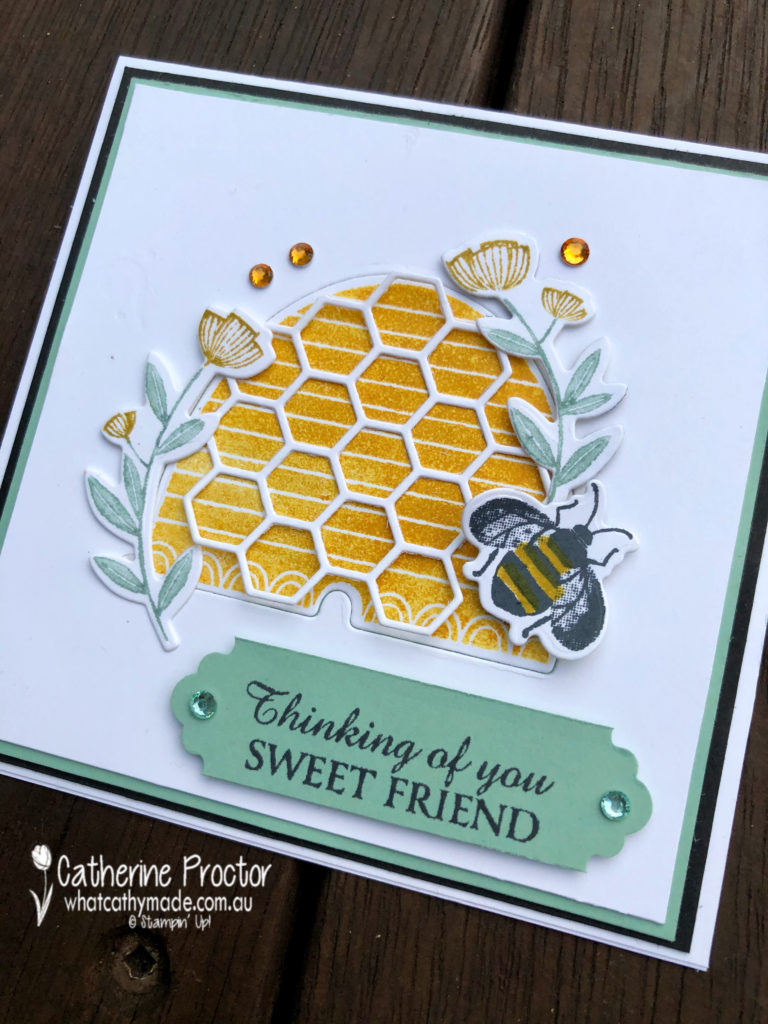
Did you know that today, May 20, is International Bee Day?
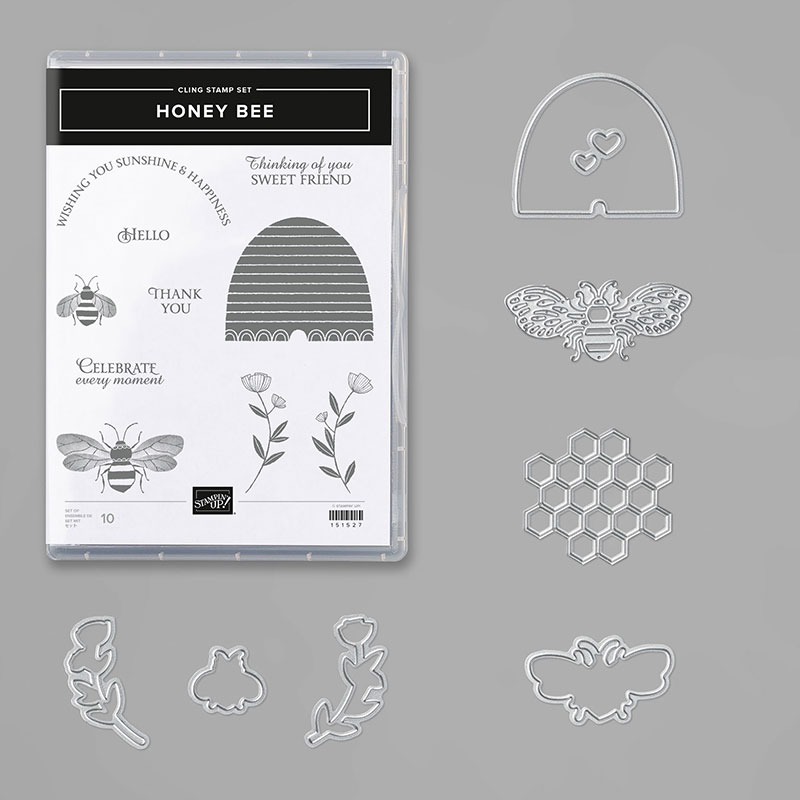
As soon as I heard this on the radio today I knew exactly which retiring product I would feature in my blog today: the adorable Honey Bee bundle.
I resisted purchasing this bundle for a very long time because I had borrowed my mum’s bundle, but it is just so adorable I had to buy a set for my self before it retired.
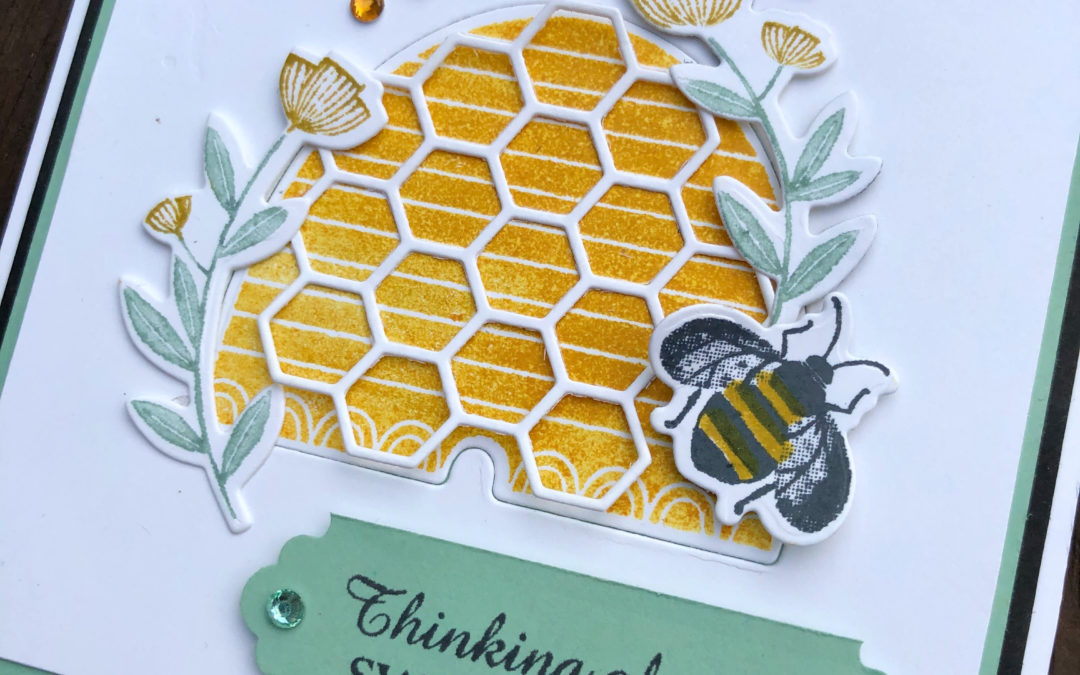
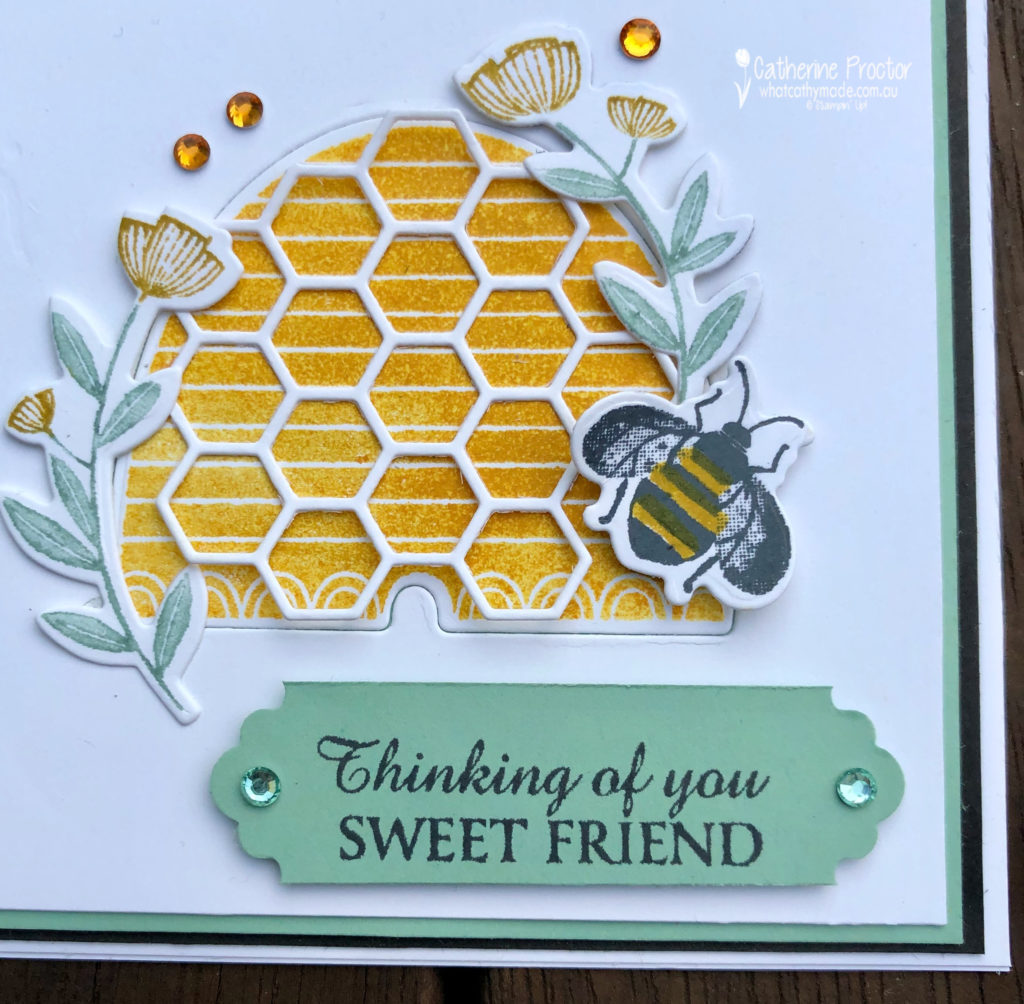
Here’s the card I made today for a special friend of mine who has her very own bee hive.
The colours I used were Crushed Curry, Basic Black and Mint Macaroon. I punched the “Thinking of you Sweet Friend” using the new Lovely Label punch which will be available to purchase on June 3 when the 2020-21 Annual Catalogue goes live.
A few Holiday Rhinestone Basic Jewels finished off my card, just in time before I gave it to my very special bee keeping friend, Amanda.
Tomorrow I will be sharing some more cards with you, but in the meantime you can view all the retiring products in my online shop.
Would you like me your very own Stampin’ Up! 2020-21 Annual Catalogue?
If you’d like me to post you your very own copy of the 2020-21 Stampin Up! Mini Catalogue, the 2019-20 Stampin Up! annual catalogue, or to simply find out about more about Stampin’ Up! contact me.
Wherever you are in the world, stay safe, stay calm…and keep on crafting xxx
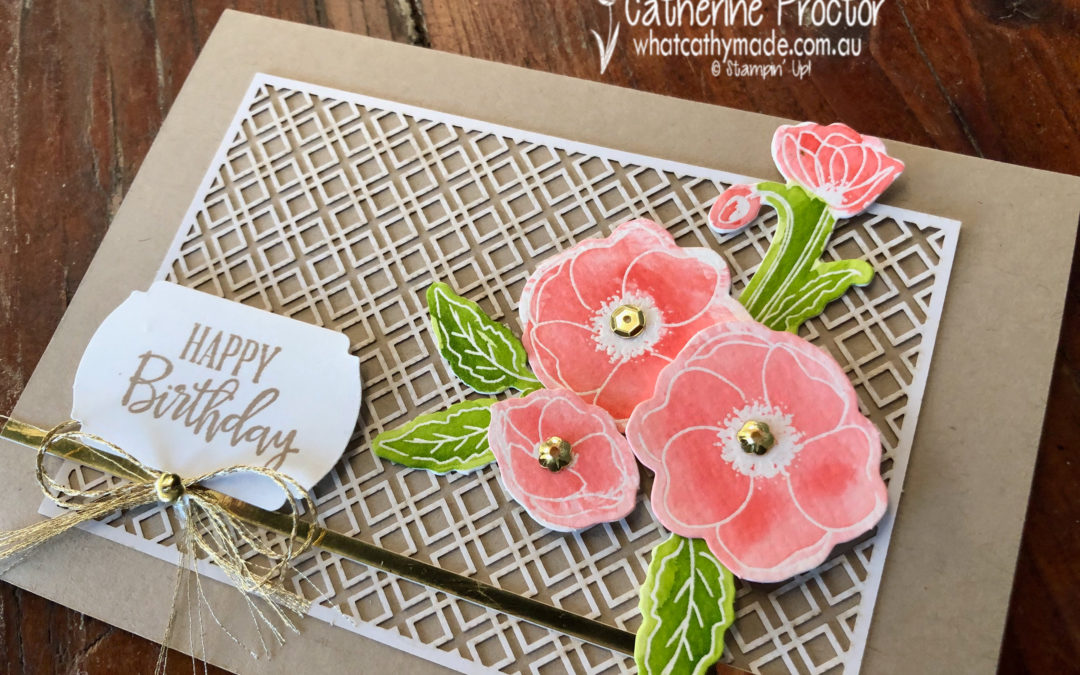
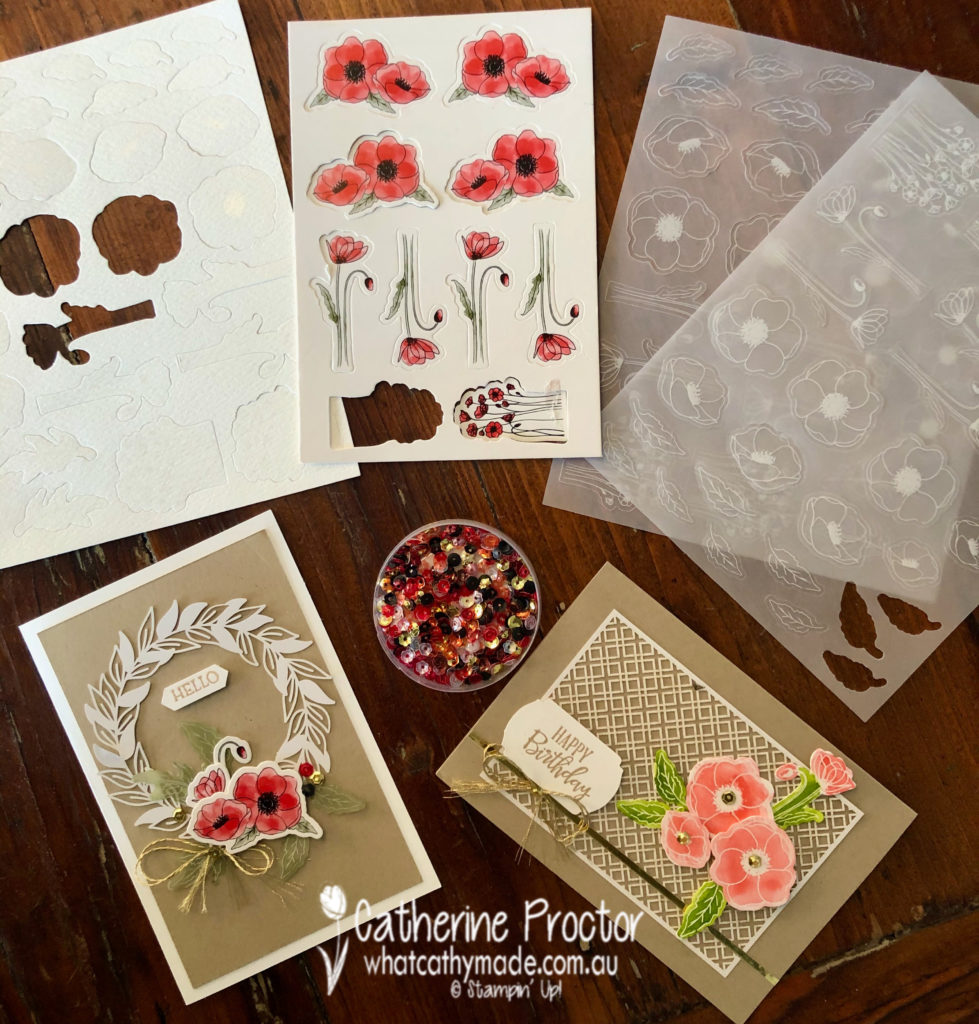
Today I’m giving you a sneak peek of the Forever Gold Laser-cut Specialty paper, the Forever Greenery Trim combo pack…and farewelling a beautiful product you might have previously overlooked: The Peaceful Poppies elements.
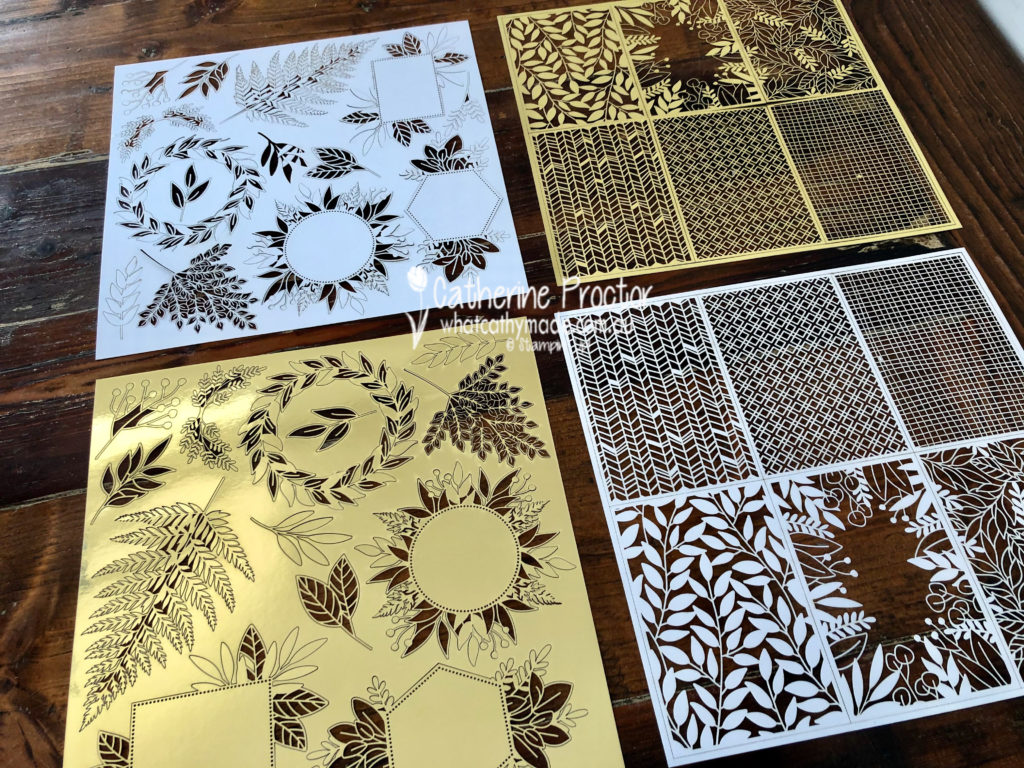
Let’s take a look at this stunning new Forever Gold Laser-cut Specialty paper. In each pack you receive 6 sheets in total, three each of two different designs. One side of the paper is gold and the other side is white. This photo shows the two different designs in both gold and in white.
Here’s a close up of the white side of the sheets with card front sized pieces.
The other sheet has a wreath, boughs and beautiful leaves.
The two cards I’ve made today also use the soon to be retired Peaceful Poppies Elements. As you can see in my photo below there are three different elements in the Peaceful Poppies Elements: top left is embossed watercolour paper, top middle are card stock die cut images and top right is embossed vellum.
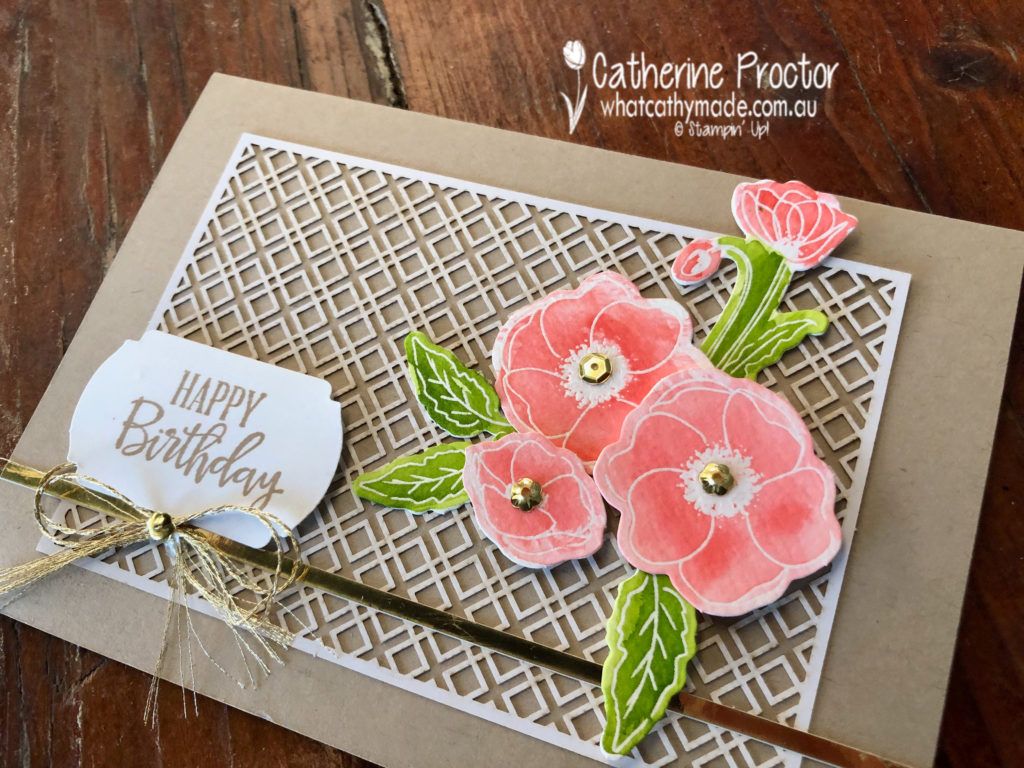
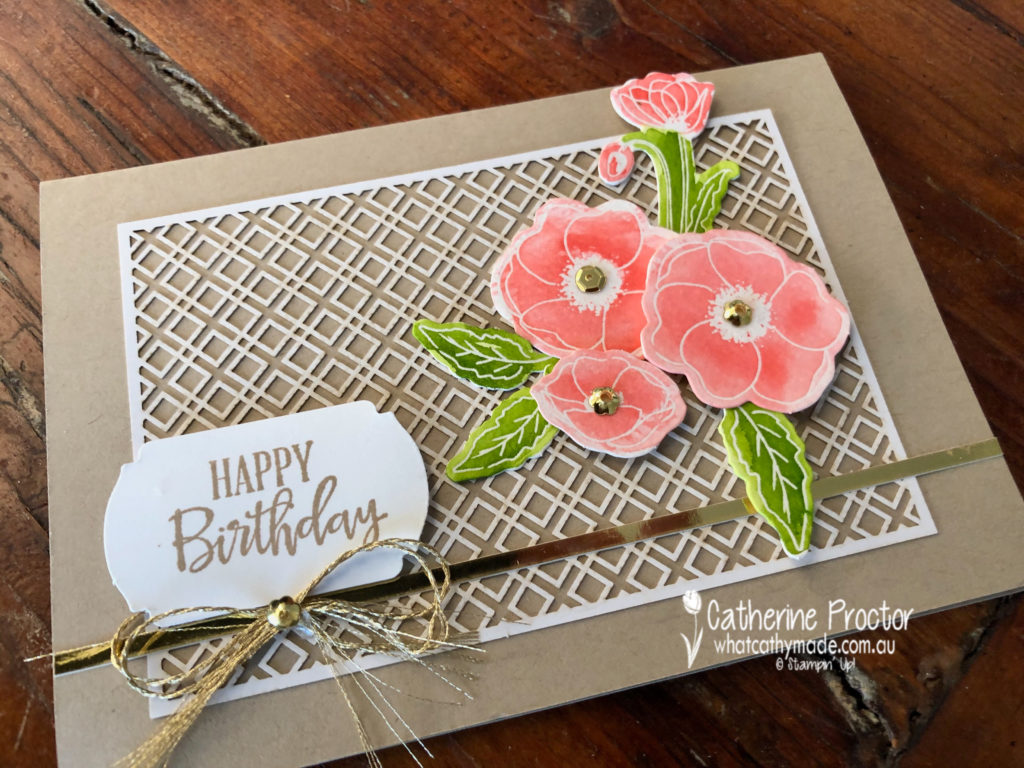
My “Happy Birthday” card uses the white side of one of the Forever Gold Laser-cut Specialty paper card fronts, and the Peaceful Poppies Elements embossed watercolour paper.
To colour my poppies I transferred Flirty Flamingo ink and Granny Apple Green ink directly from my ink pads onto acrylic blocks and then used my aqua painter brush to lift the ink off the block and colour in the poppies and leaves.
Once they were dry I attached them the card front, added a strip of gold from the edge of the specialty paper, as well as a sentiment and a bow of the new gold trim. Some gold sequins from the Peaceful Poppies Sequins complete my card. I love how this new gold trim frays at the end!
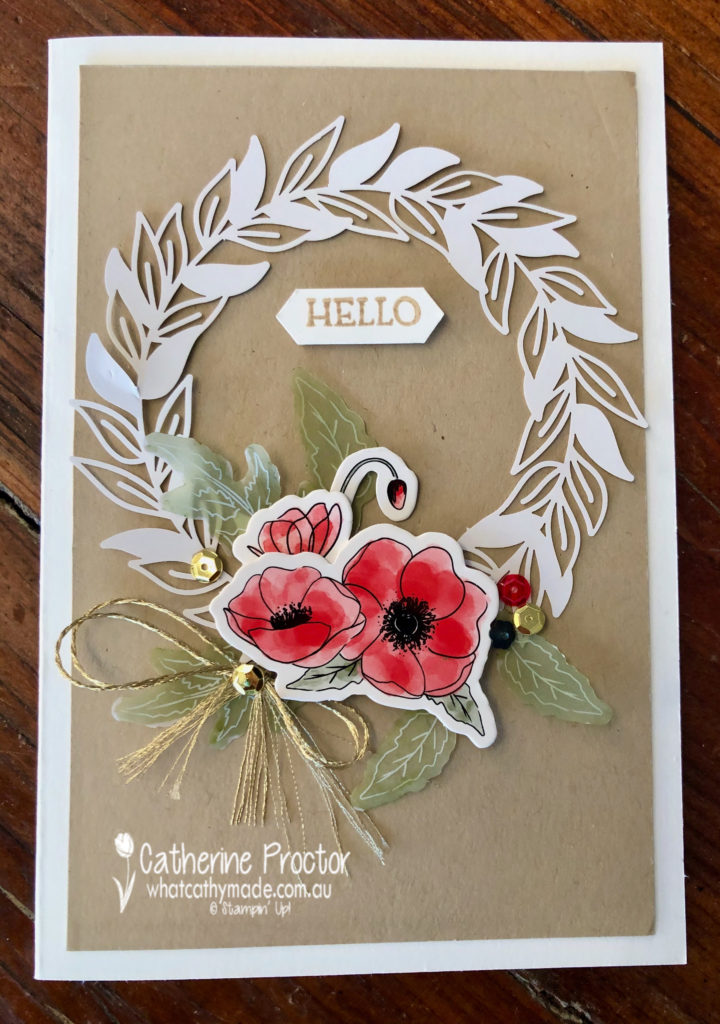
The other card uses the wreath from the other sheet of the Forever Gold Laser-cut Specialty paper, and the vellum and die cut Peaceful Poppies Elements. I used my Old Olive Blend pen to colour the reverse side on the vellum leaves before adhering to the wreath.
Again, a sentiment, a bow of the new gold trim and assorted sequins from the Peaceful Poppies Sequins complete my card.
Tomorrow I will be sharing some more cards with you, but in the meantime you can view all the retiring products in my online shop.
Would you like me your very own Stampin’ Up! 2020-21 Annual Catalogue?
If you’d like me to post you your very own copy of the 2020-21 Stampin Up! Mini Catalogue, the 2019-20 Stampin Up! annual catalogue, or to simply find out about more about Stampin’ Up! contact me.
Wherever you are in the world, stay safe, stay calm…and keep on crafting xxx
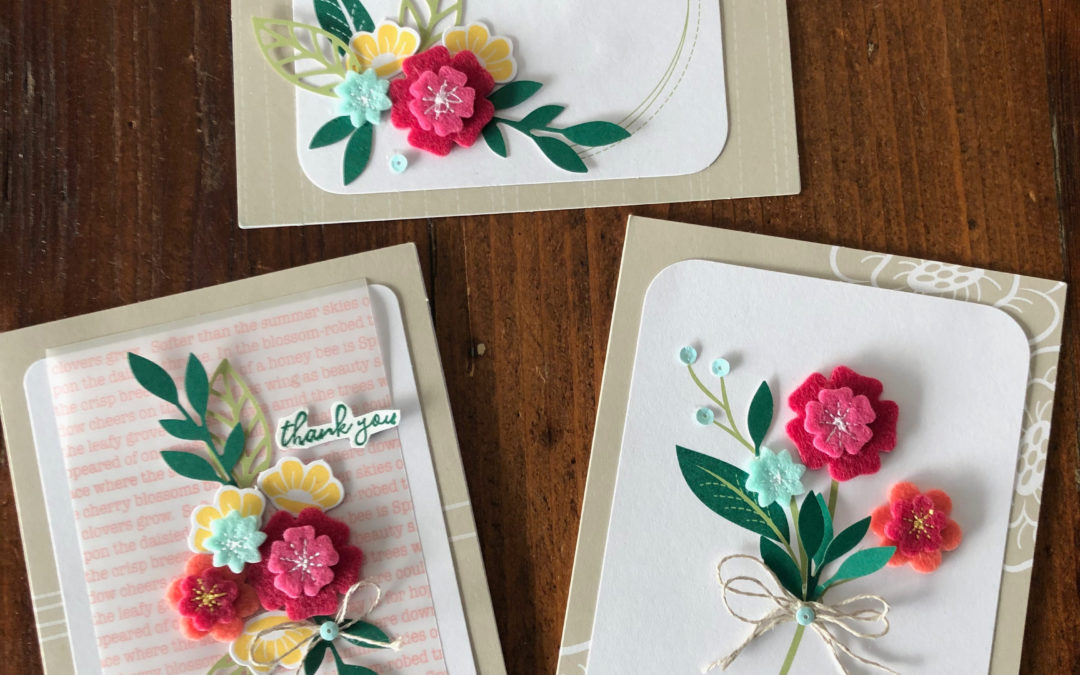
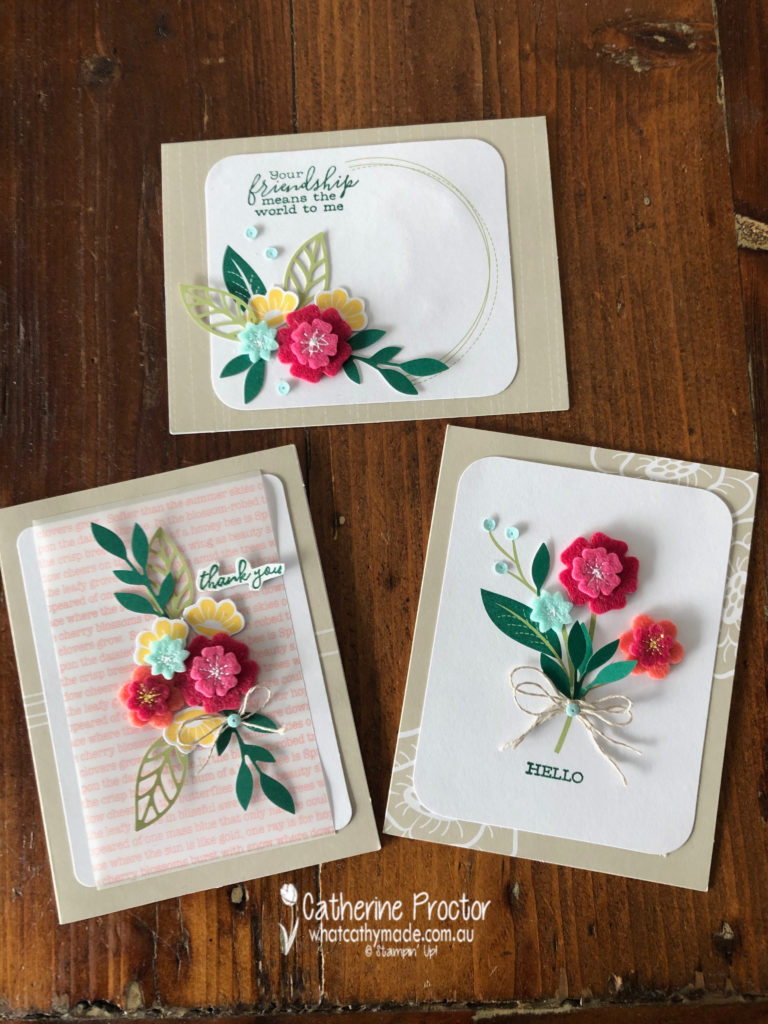
Hands up if you love a card kit for super quick, easy to make cards?
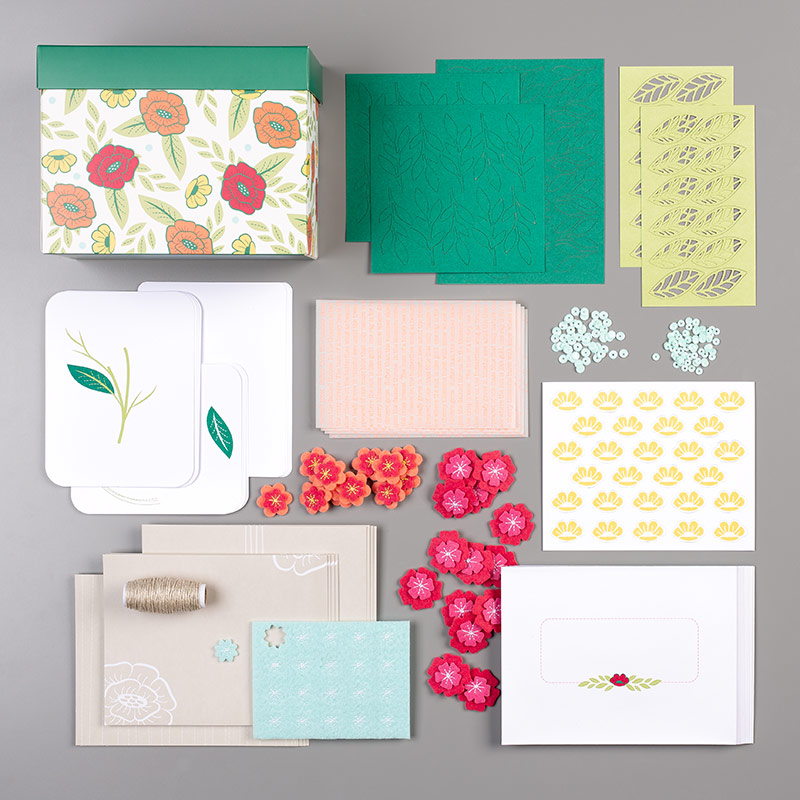
With card kits all the hard work is done for you, but I especially love the For the Love of Felt card kit because I’m also a sewer so I have a thing for the feel, texture and look of felt.
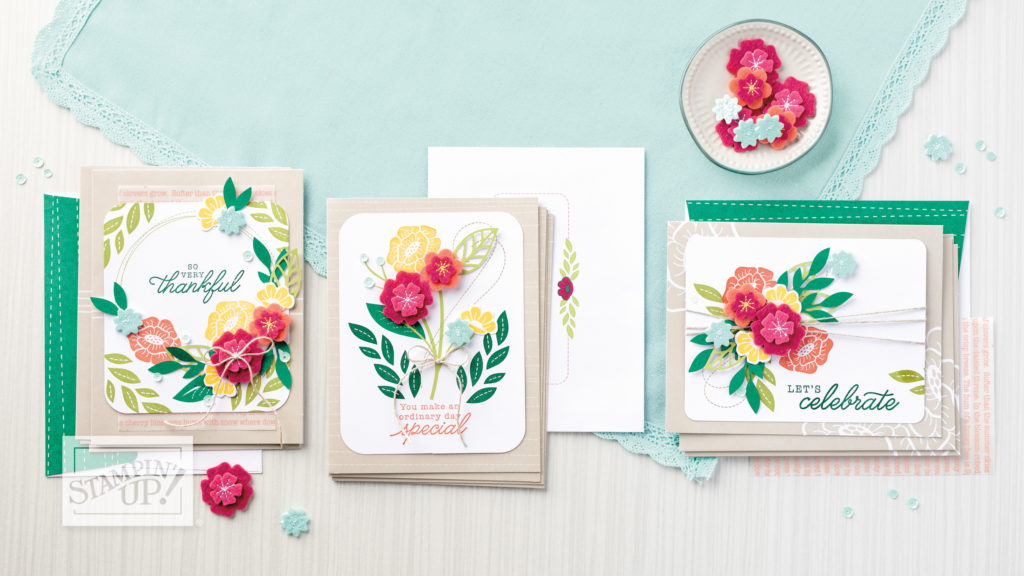
The For the Love of Felt card kit comes in the cutest box with almost everything you need to make amazing cards – you just need to add some adhesives and stamps (if you want to add sentiments).
There is a co-ordinating stamp set for this kit but I wanted to use a different stamp set for my cards to show you how you any sentiments work well with this kit. The sentiments for all three of my cards today come from the Free as a Bird stamp set.
There are three different deigns for the card bases in this kit, and three different images on the card tioppers.
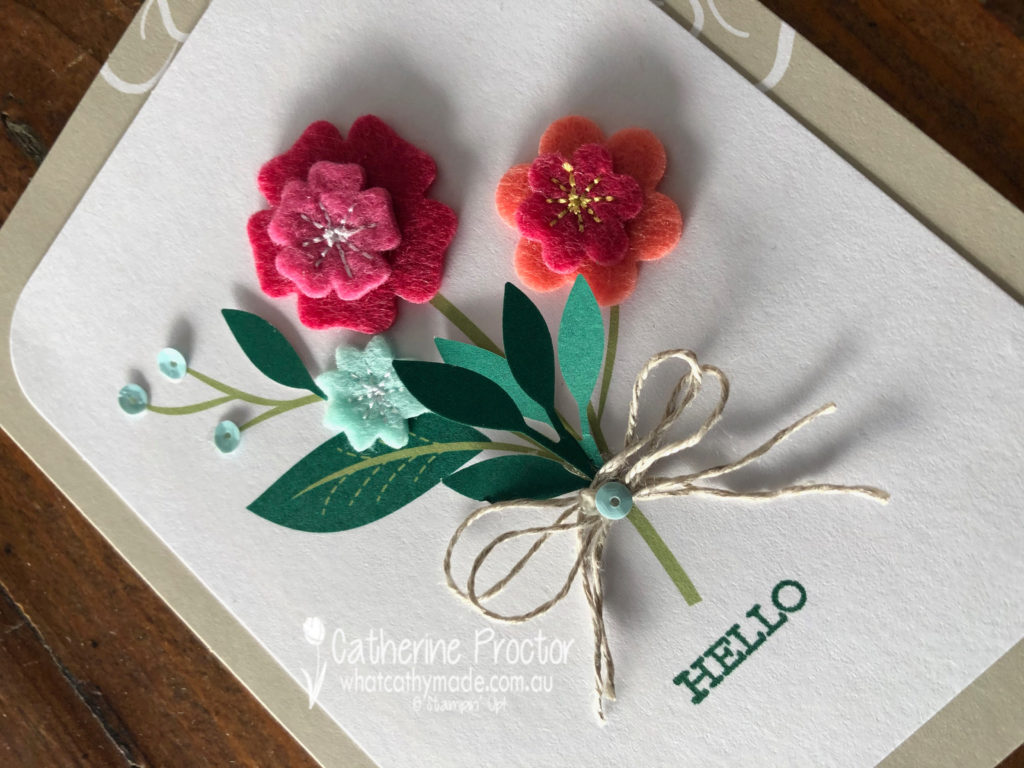
Card one uses the floral card base and the plain white card topper. A little “hello” is the perfect touch for my simple bouquet.
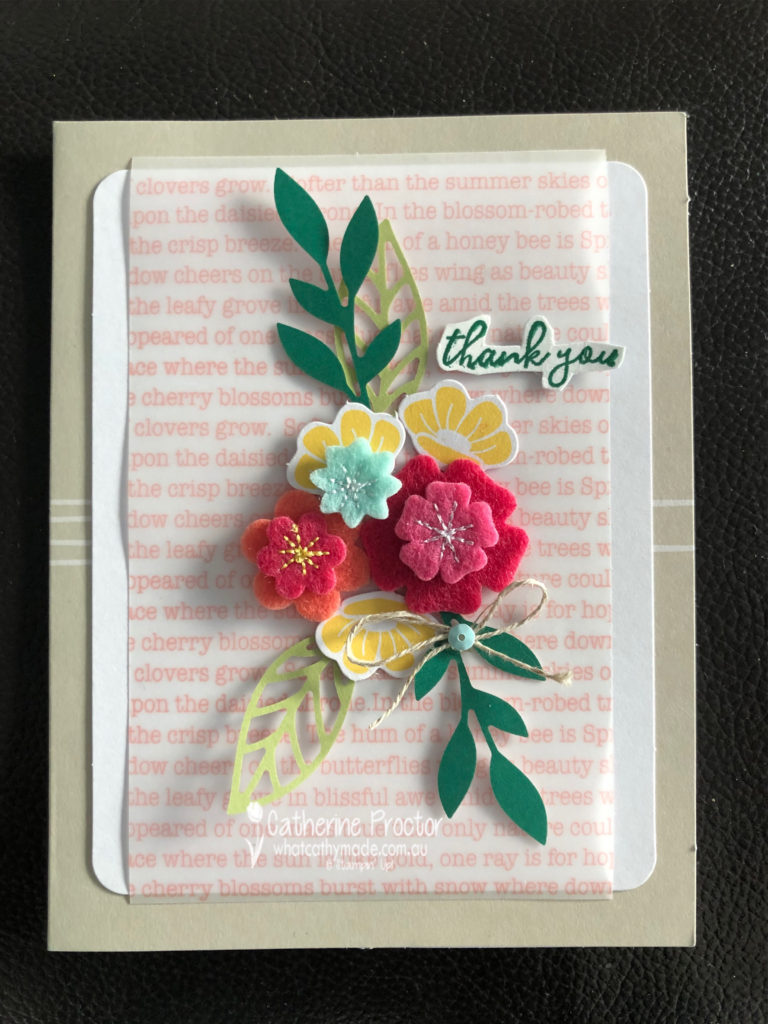
Card two uses the plainest card base and the printed vellum layer. I fussy cut the thank you sentiment with my paper snips..
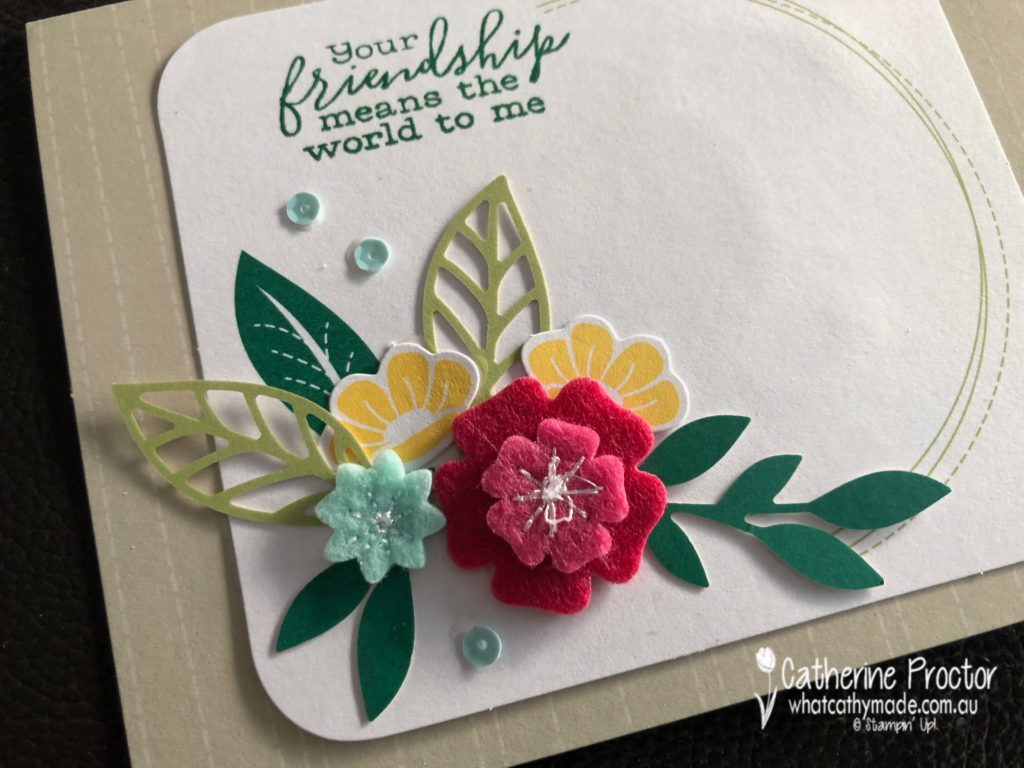
Card three is my favourite, using the wreath topper and the beautiful “Your friendship means the world to me” sentiment stamped onto the wreath topper.
The picture below shows how the cards are supposed to look is you use the co-ordinating stamp set but I think it really doesn’t matter how you assemble your cards or what stamp set you decide to use…with these gorgeous embellishments you really can’t go wrong!
Tomorrow I will be sharing some more cards with you, but in the meantime you can view all the retiring products in my online shop.
Would you like me your very own Stampin’ Up! 2020-21 Annual Catalogue?
If you’d like me to post you your very own copy of the 2020-21 Stampin Up! Mini Catalogue, the 2019-20 Stampin Up! annual catalogue, or to simply find out about more about Stampin’ Up! contact me.
Wherever you are in the world, stay safe, stay calm…and keep on crafting xxx