Welcome to week 3 of the Art With Heart “Heart Of Christmas” blog hop.
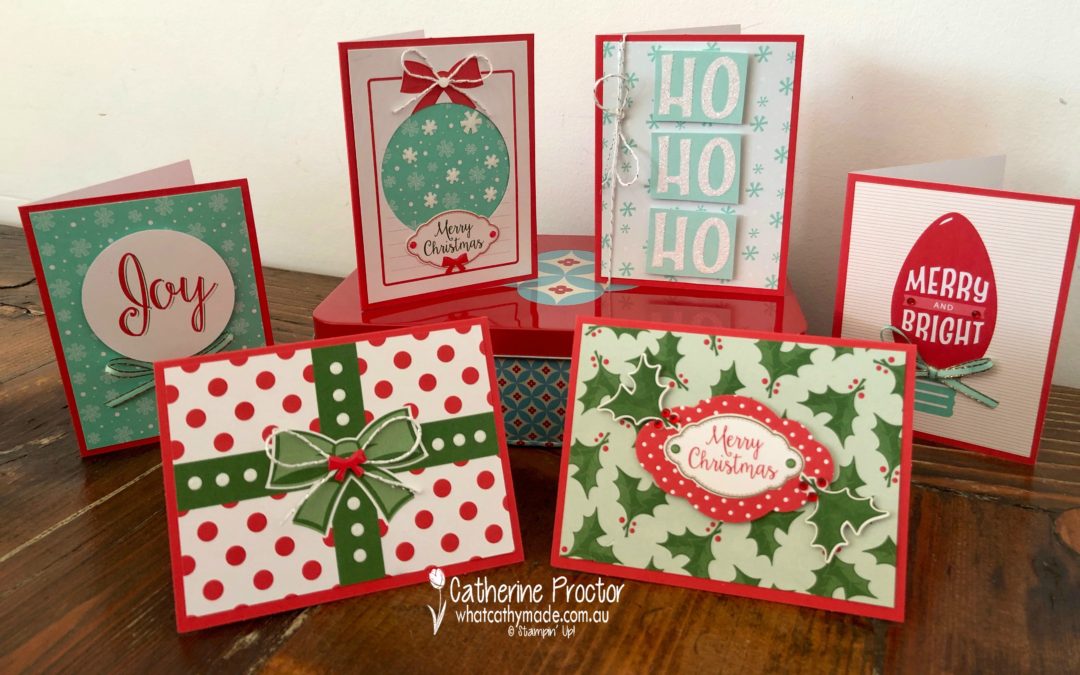
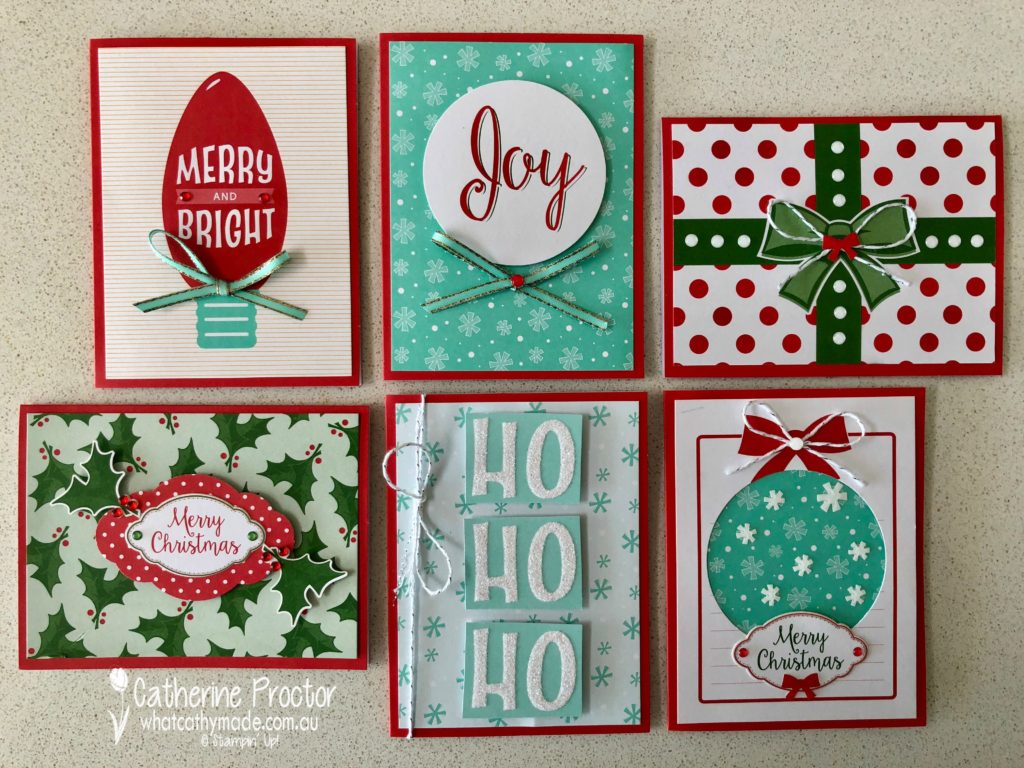
Stampin’ Up!’s Santa’s Workshop Memories & More Card Pack make it so quick and easy to create professional-looking Christmas cards…in fact, it is so easy I’m almost embarrassed to claim creative credit for these cards.
Luckily, I did a little creative cutting and embellishing to make these cards my own design, but even so, I still managed to make 6 cards in less than 30 minutes!
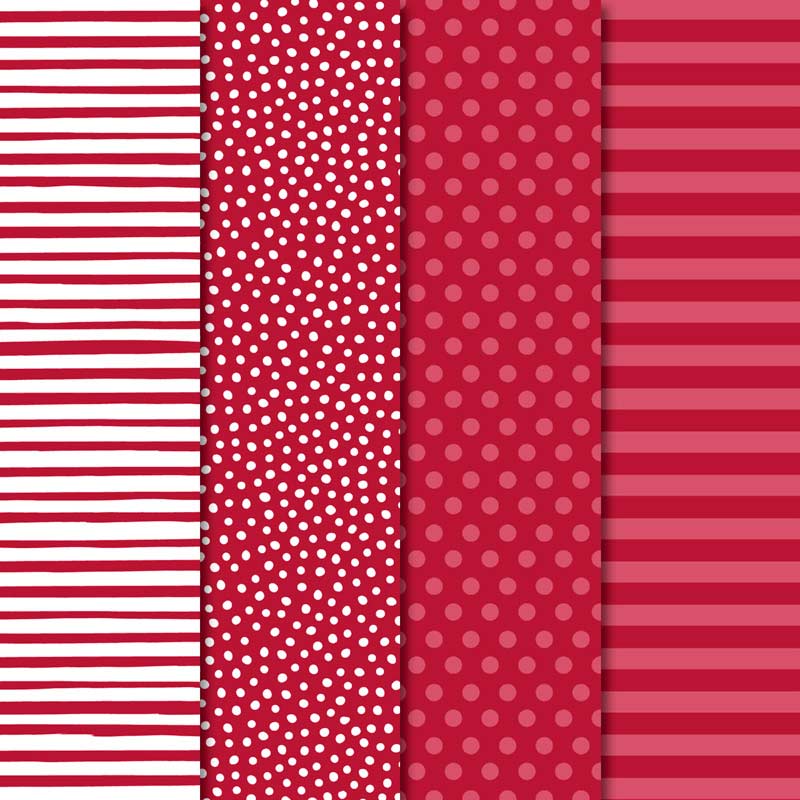
And as if Stampin’ Up haven’t made it easy enough already with 50 pre-printed cards suitable for both scrapbooking and card making, this year they’ve also released the co-ordinating Santa’s Workshop Memories & More 20 cards in two sizes (with matching envelopes) in Poppy Parade, which I’ve used to make my cards this week.
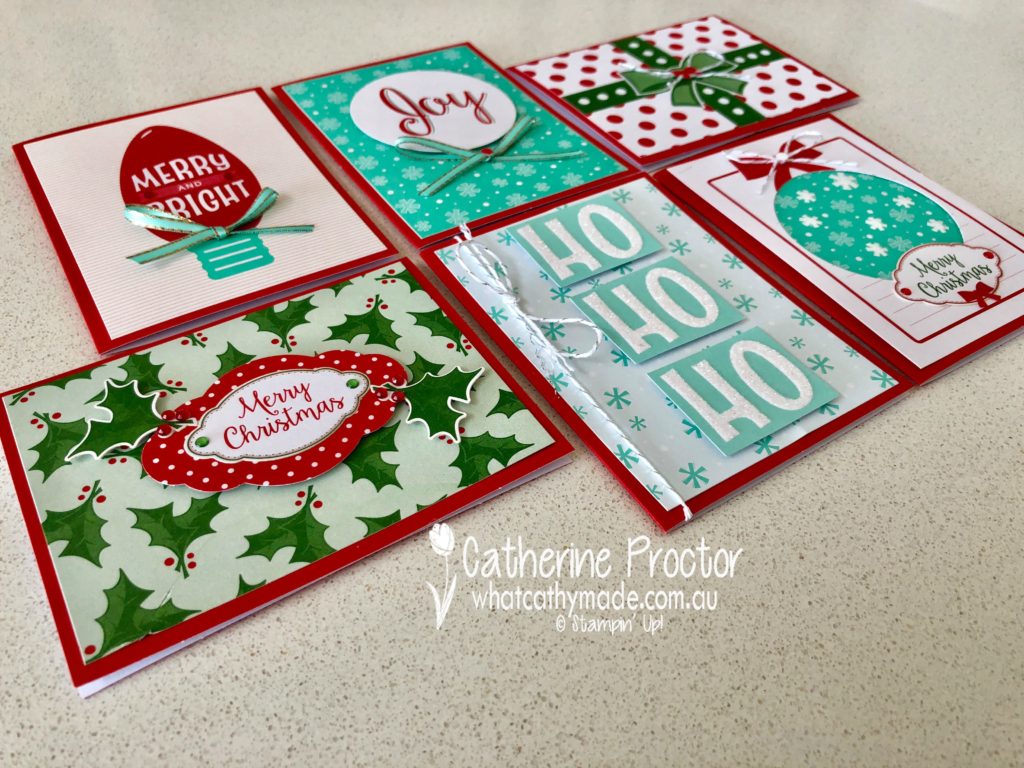
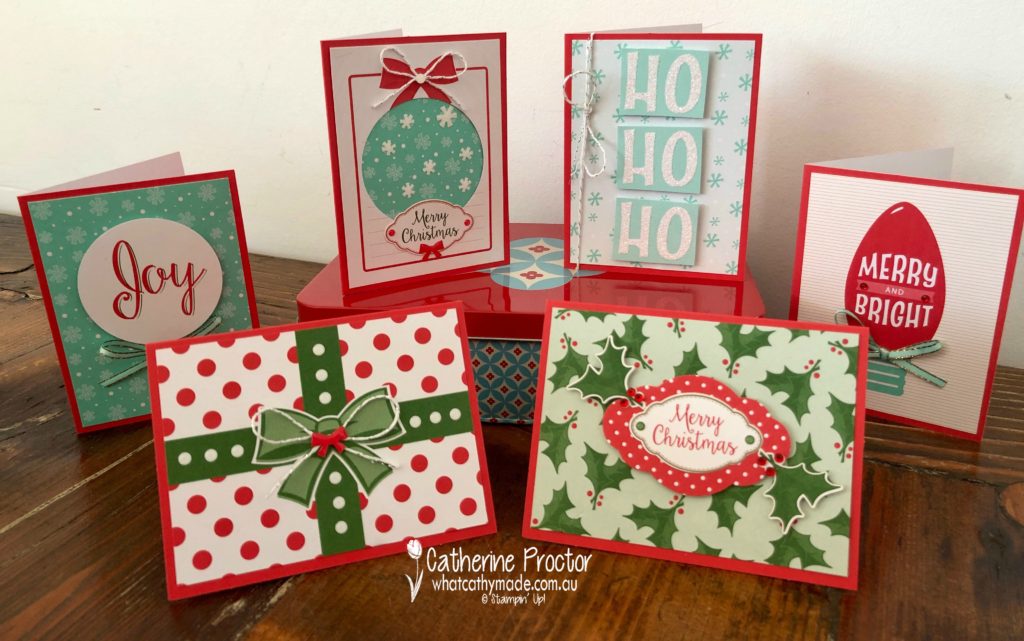
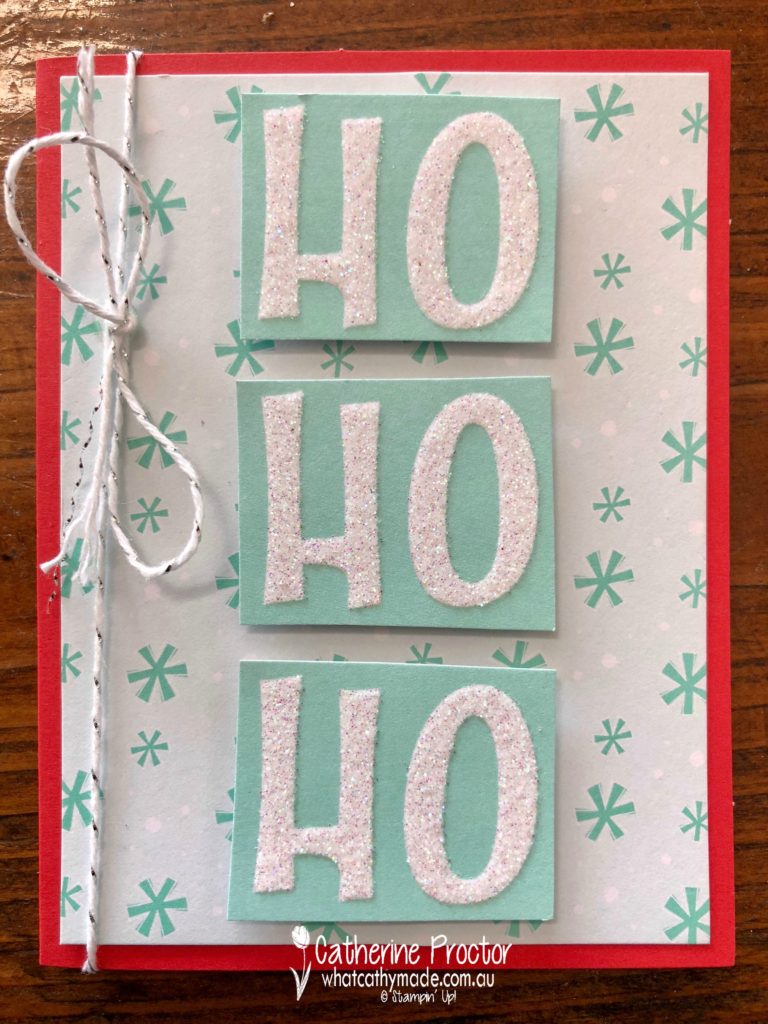
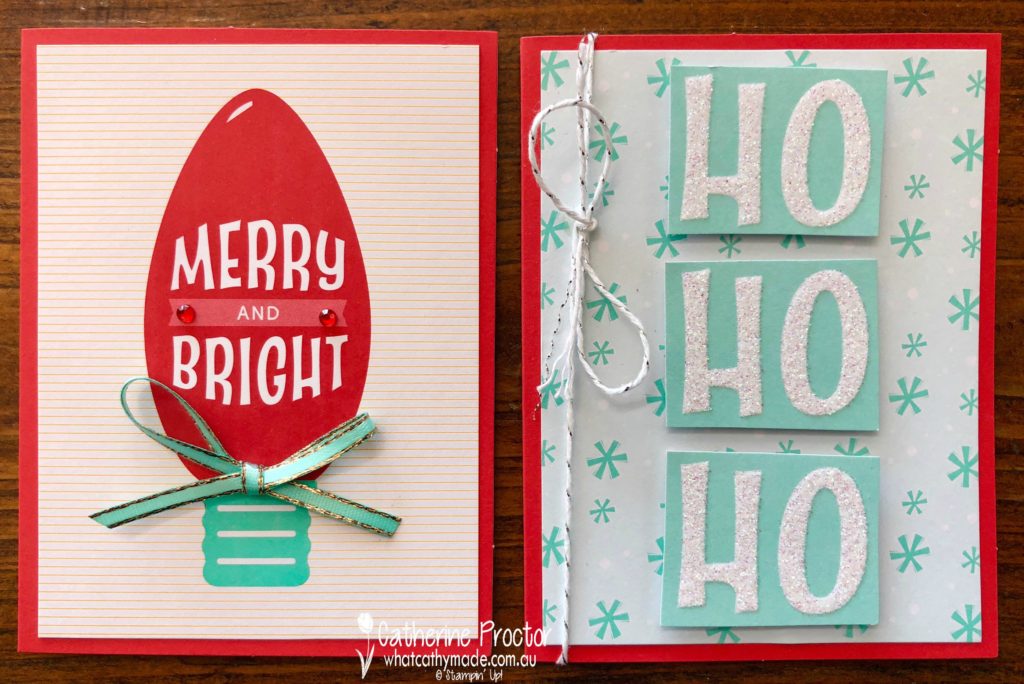
How gorgeous do the colours Poppy Parade and Coastal Cabana look together? For my first card below, I used one of the smaller Memories & More cards as the background and then chopped up the frosted glittery “ho ho ho” from one of the larger Memories & More cards to mount on top. Silver and white bakers twine complete the card.
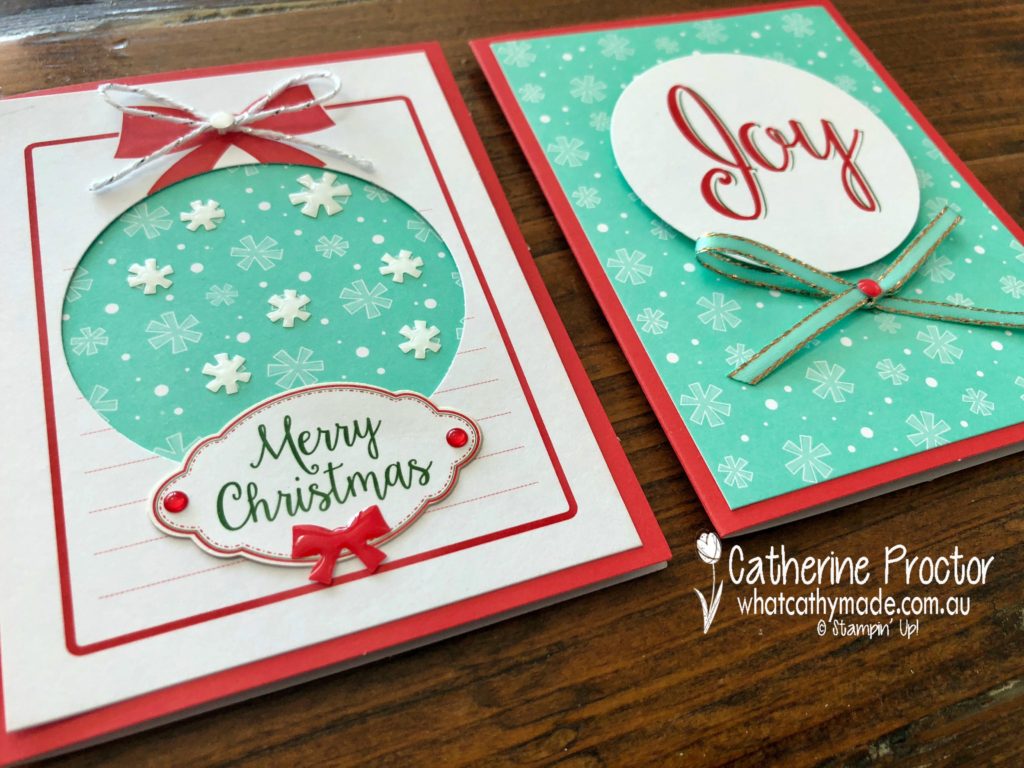
My next 2 cards use a Coastal Cabana background card and the same card on top. I used my largest Stampin’ Up! punch to punch the word joy out of the Memories & More card and mounted it onto the card on the right, then flipped over the card and used the reverse side and negative image for the card on the left, embellished with some Santa’s Workshop enamel shapes and stickers from the Memories & More card pack.
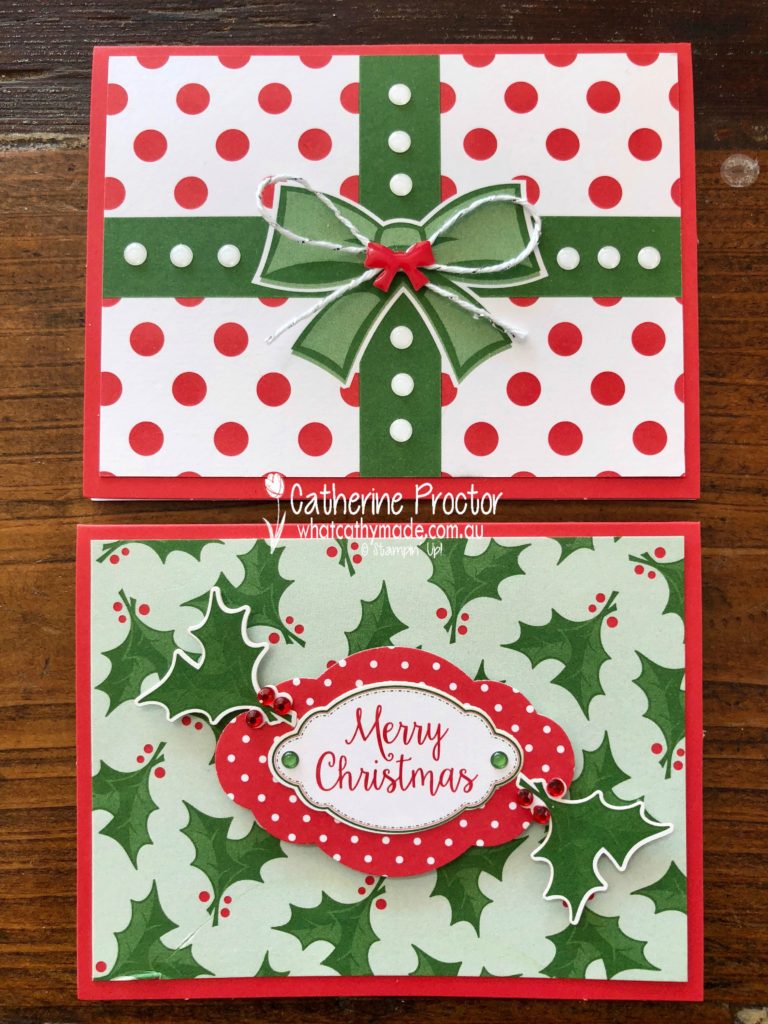
For my “Merry Christmas” card below I used my Pretty Label punch to punch out a red and white spotted memories & more card as an extra layer under the “Merry Christmas” sticker, then I added two holly stickers and some red rhinestone jewels. The top card also features a dotty card to which I added further dots, using white Santa’s Workshop enamel shapes to embellish the green bow.
And finally, how cute is this “Merry and Bright” Memories & More card? All it needed was a couple of red rhinestone jewels and a bow of Coastal Cabana ribbon to add a little extra bling.
To see what the rest of the AWH team have made head back to the lovely Claire Daly’s blog.
To purchase any of the products I used in this project from the annual catalogue you can shop with me here.
You can order the new products from the holiday catalogue from September 5, or if you join as a demonstrator you can order them now…contact me if you’d like to find out more or receive a free copy of the holiday catalogue.
Welcome to week 13 of the Art With Heart Colour Creations Blog Hop!
This week we are showcasing one of the neutrals: Crumb Cake.
I probably use Crumb Cake more than any other colour (apart from Whisper White) because I find it such a perfect neutral to use with absolutely any colour. But for this week’s project, I decided to use it with white and black to showcase the crumb cake on its own, without any other colour dominating it.
I love the vintage/shabby chic effect you can get when you use this combination of colours, but it’s a style I don’t usually create with, so I had a lot of fun making my cards this week.
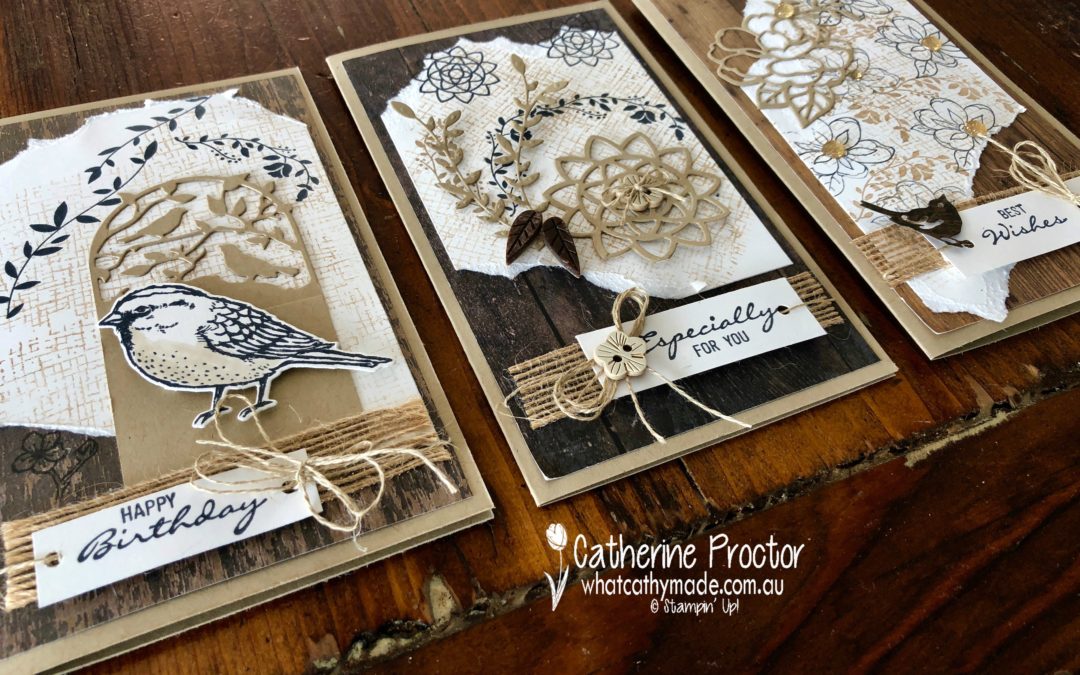
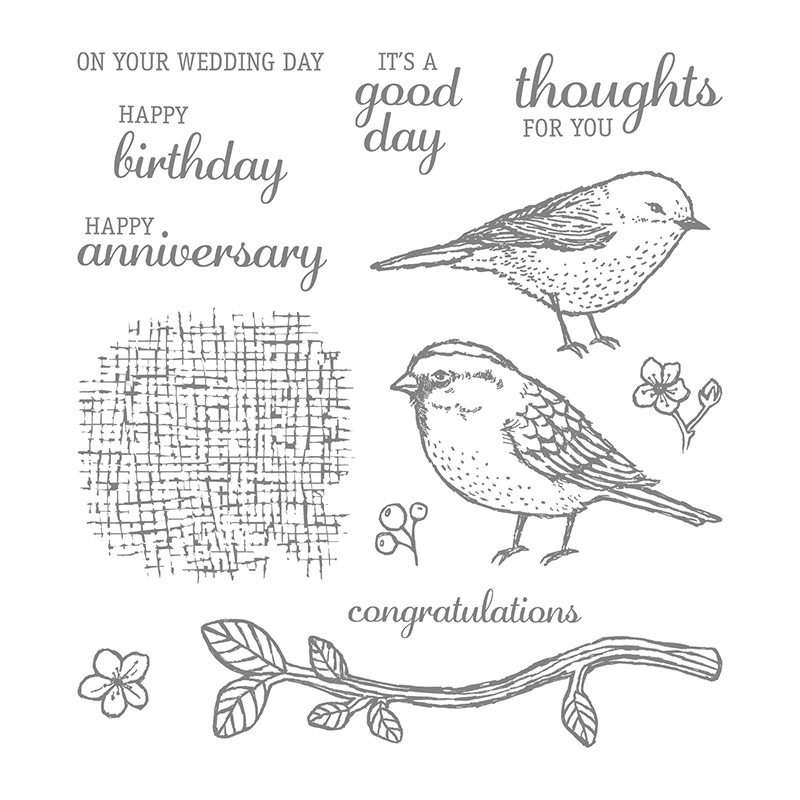
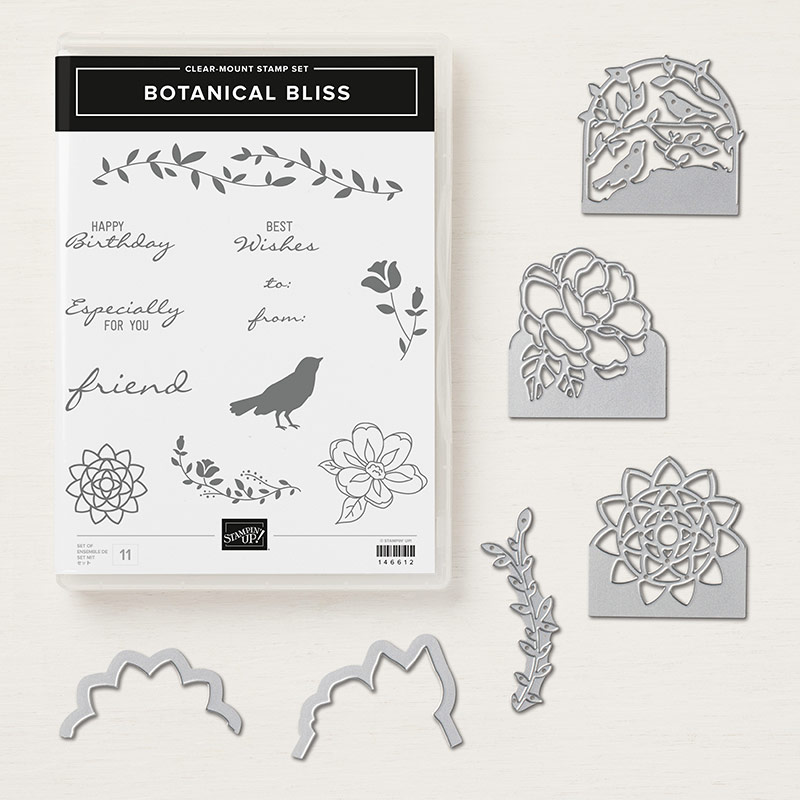
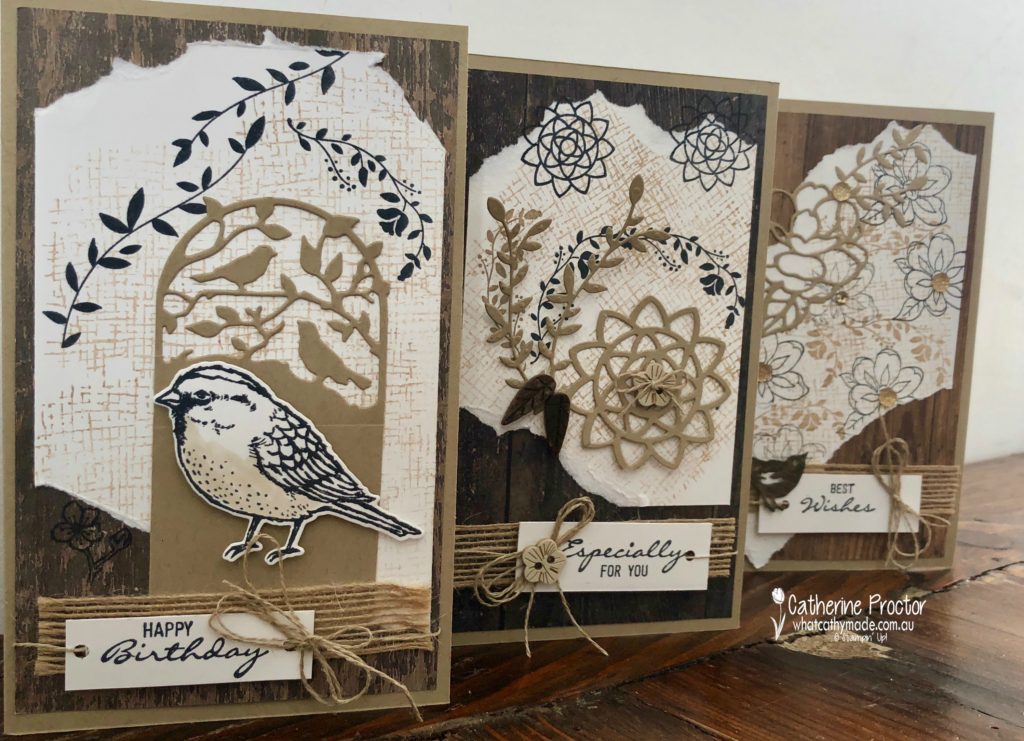
The stamp sets and coordinating dies are the Best Birds stamp set, Birds & Blooms Thinlits dies, and the Botanical bliss bundle.
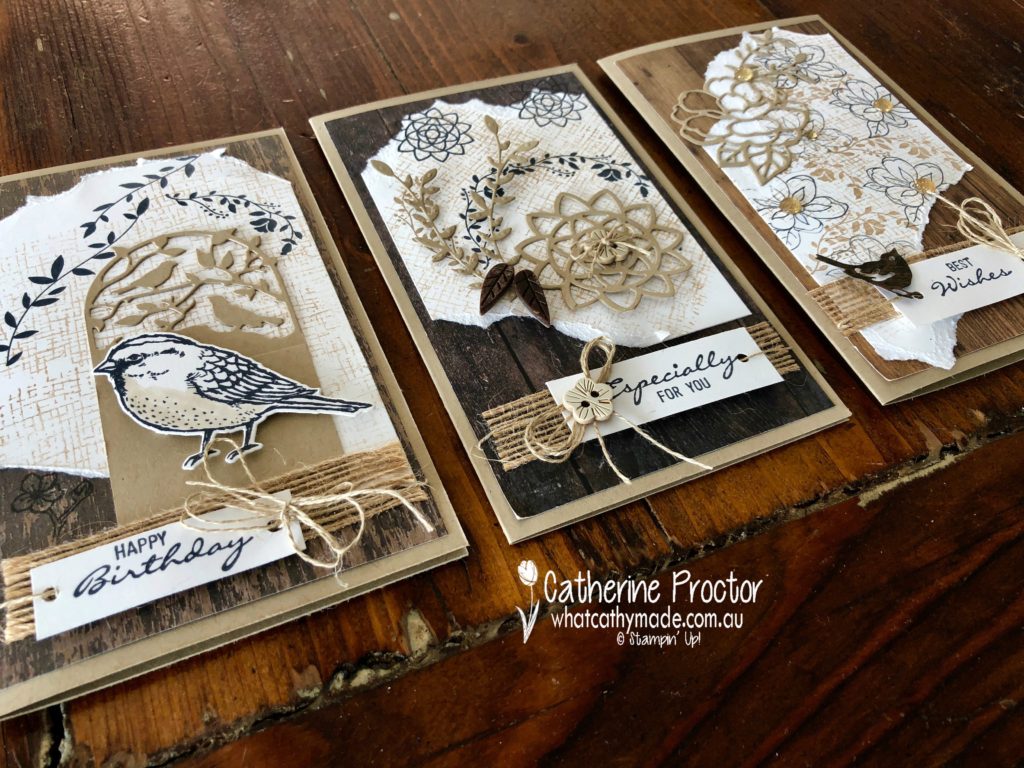
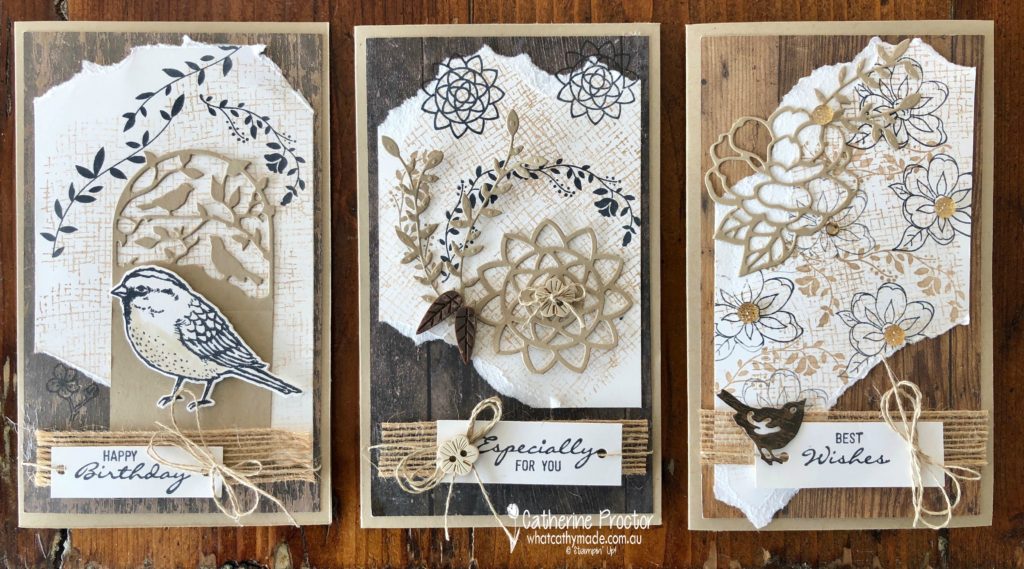
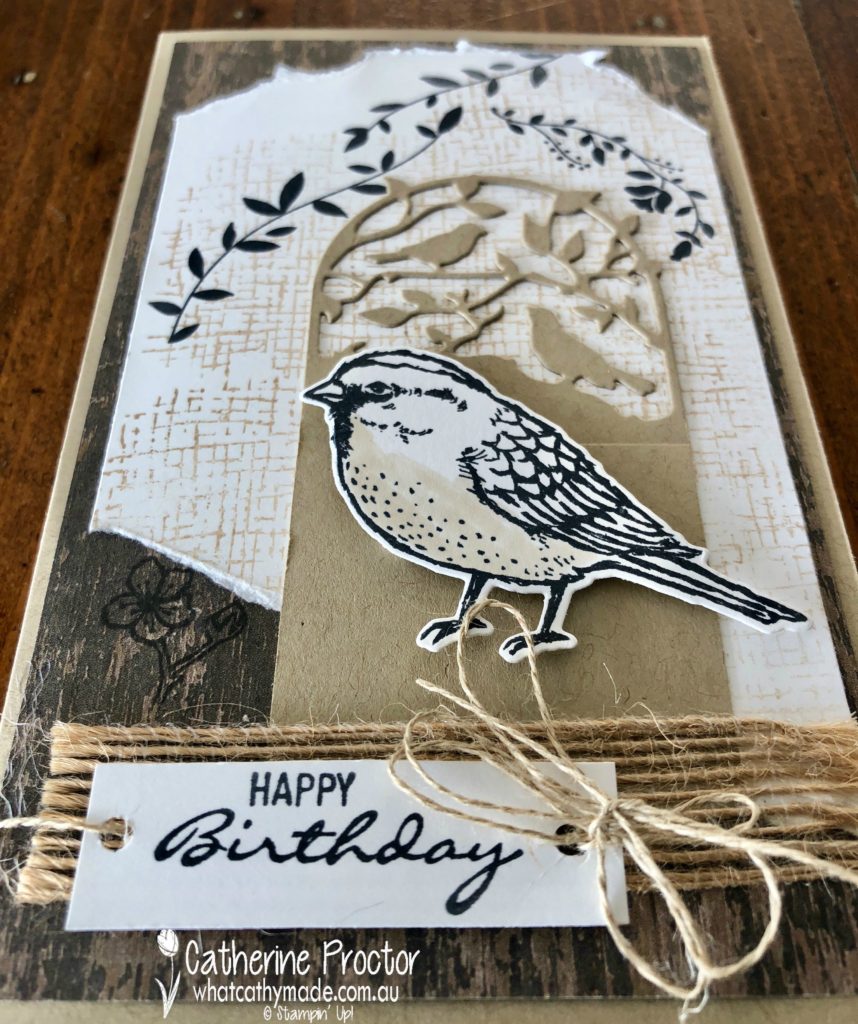
My first card is a happy birthday card, featuring the largest bird from Best Birds stamp set. I’ve coloured its tummy in with the light Crumb Cake marker.
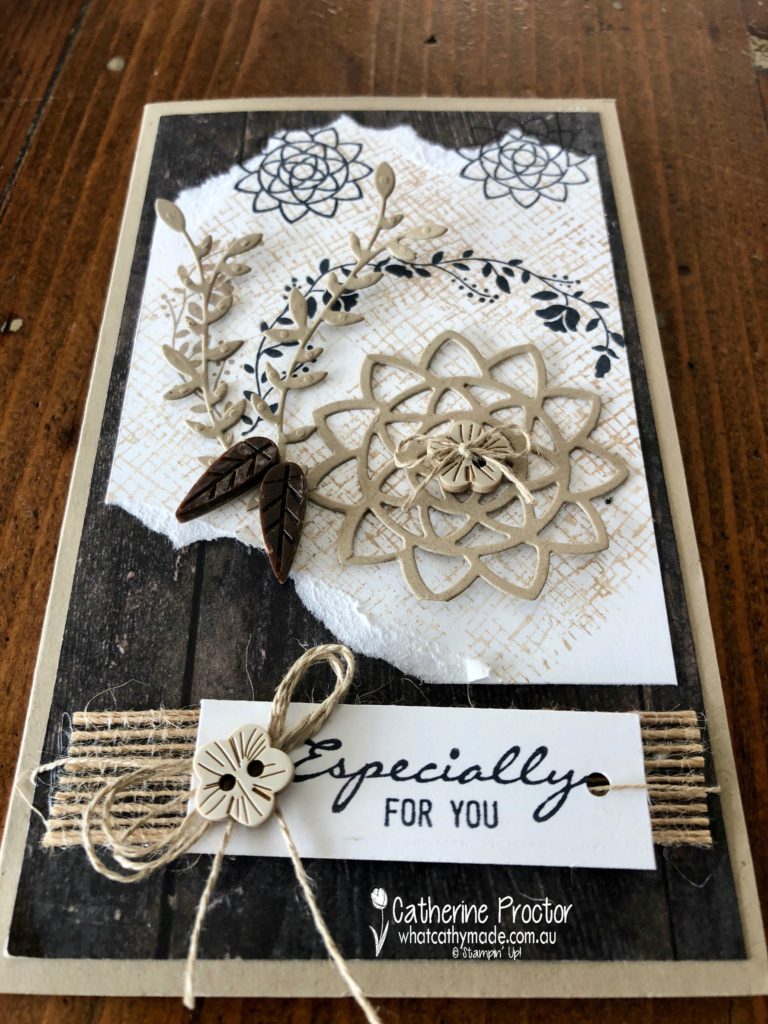
Like the other two cards, I’ve attached the sentiment onto a strip of burlap ribbon, tied on with some linen thread. The sentiments for all three cards come from the Botanical Bliss stamp set…I just love this font. The Crumb Cake die cut pieces on top of each card are cut with these co-ordinating dies.
My second card is an “Especially for You” card, and it features some of the gorgeous Tropical Chic embellishments.
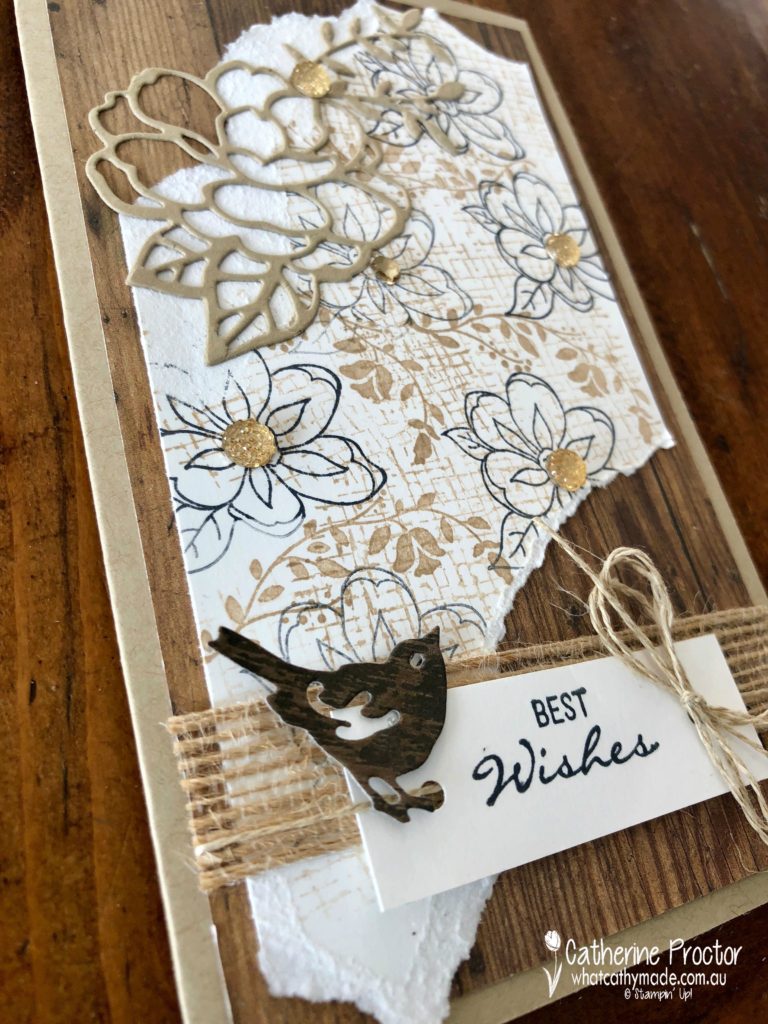
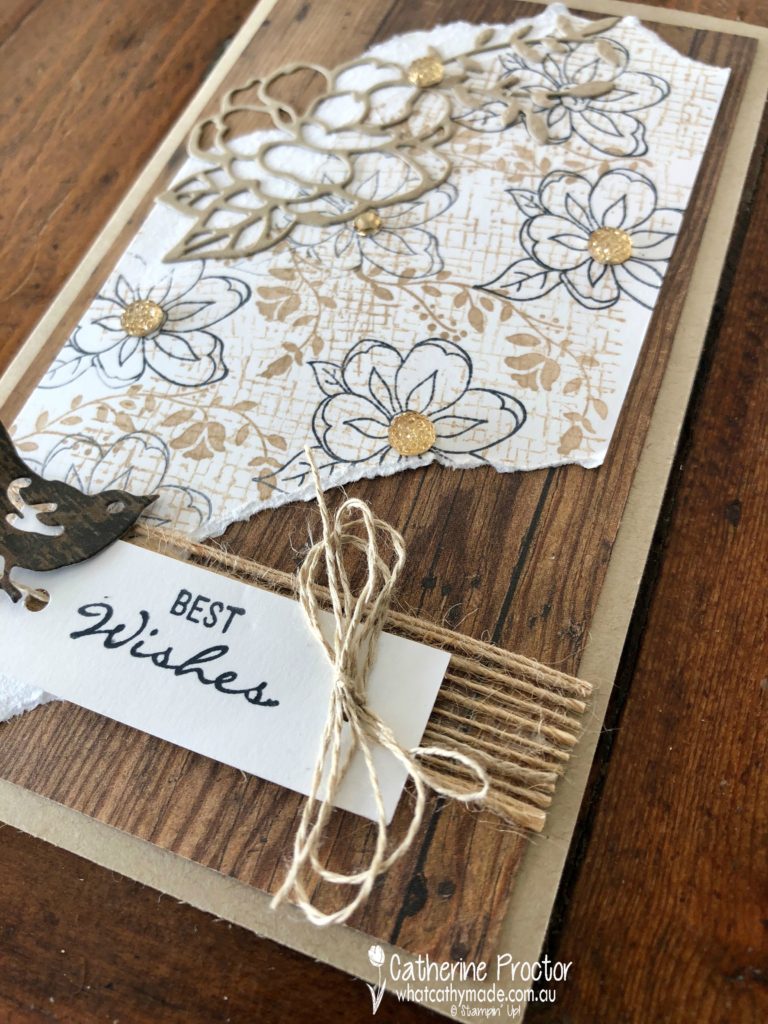
My third card is my “Best Wishes” card and features the little bird from the Birds & Blooms Thinlits dies, cut out of the stunning Wood Textures Designer Series Paper, as well as the gold facetted gems in the centre of the flowers, and one tiny little Rhinestone Basic Jewel, coloured in with my Crumb Cake Stampin’ Up! blend.
For all three cards, I created my own patterned paper background, made by stamping images from both stamp sets in Crumb Cake and Basic Black onto Whisper White card stock, mounted onto Wood Textures Designer Series Paper with a Crumb Cake card stock base.
To see what the rest of the team have made click on the links below.
Tonight the Art with Heart team are sharing creative projects featuring stamp sets that you can colour in. We hope our blog hop inspires you to pick up some Stampin’ Write markers, watercolour pencils, Stampin’ Blends or another form of colouring medium and colour in with your stamps.
Don’t forget to contact any of the ladies on the blog hop to order any products, especially these limited edition Colour Your Season products (pictured below), only available until the end of August, or until supplies last.
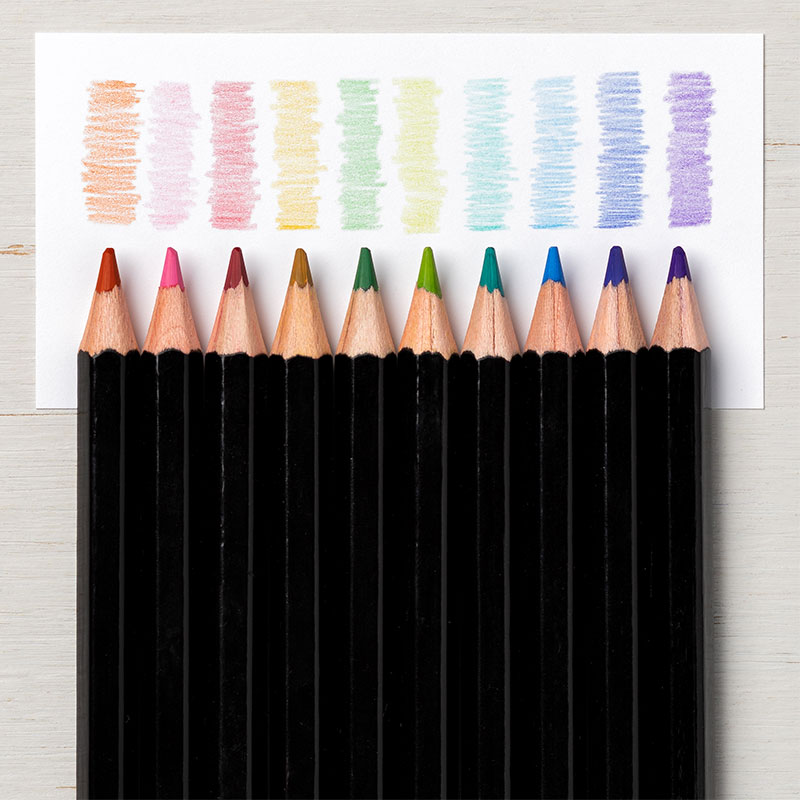
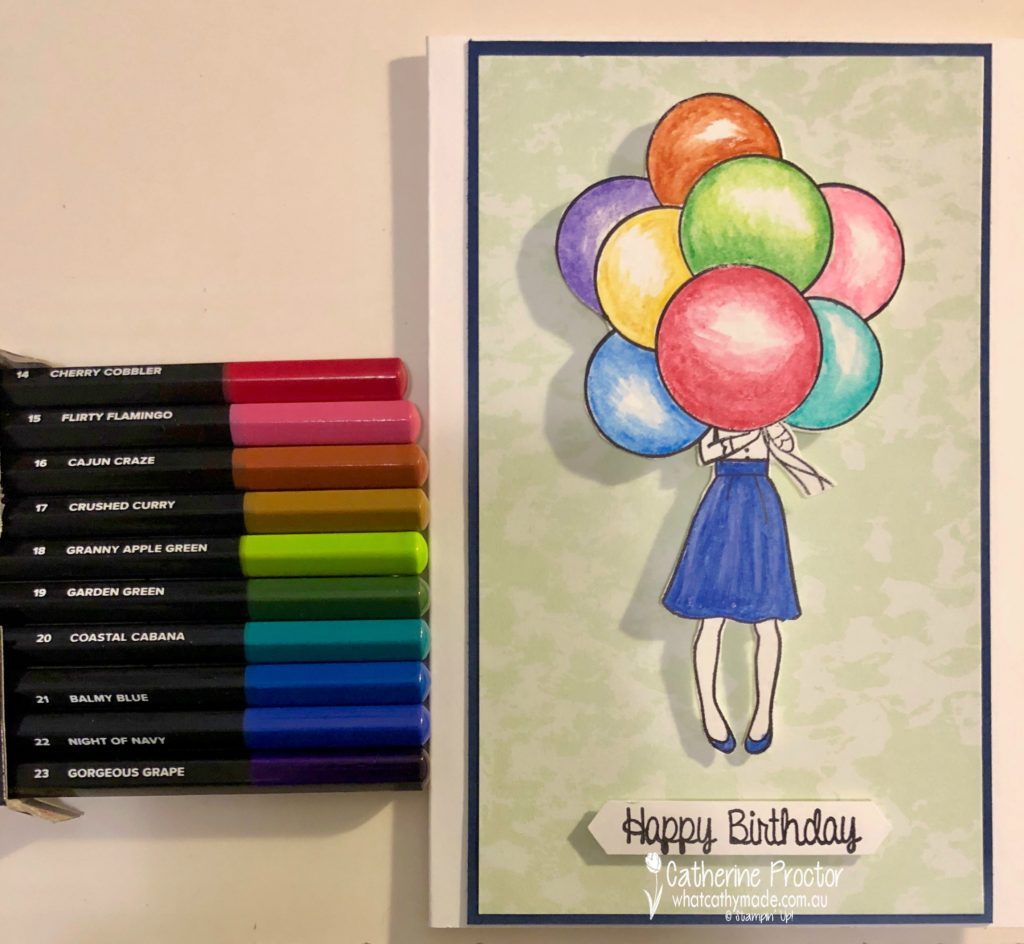
My project tonight uses the new watercolour pencils. Here’s a close up of these gorgeous high-quality pencils, available in 10 new colours: Balmy Blue, Cajun Craze, Cherry Cobbler, Coastal Cabana, Crushed Curry, Flirty Flamingo, Garden Green, Gorgeous Grape, Granny Apple Green, and Night of Navy.
These pencils are so easy to use and combined with the blender pen they give the most beautiful watercolour effect.
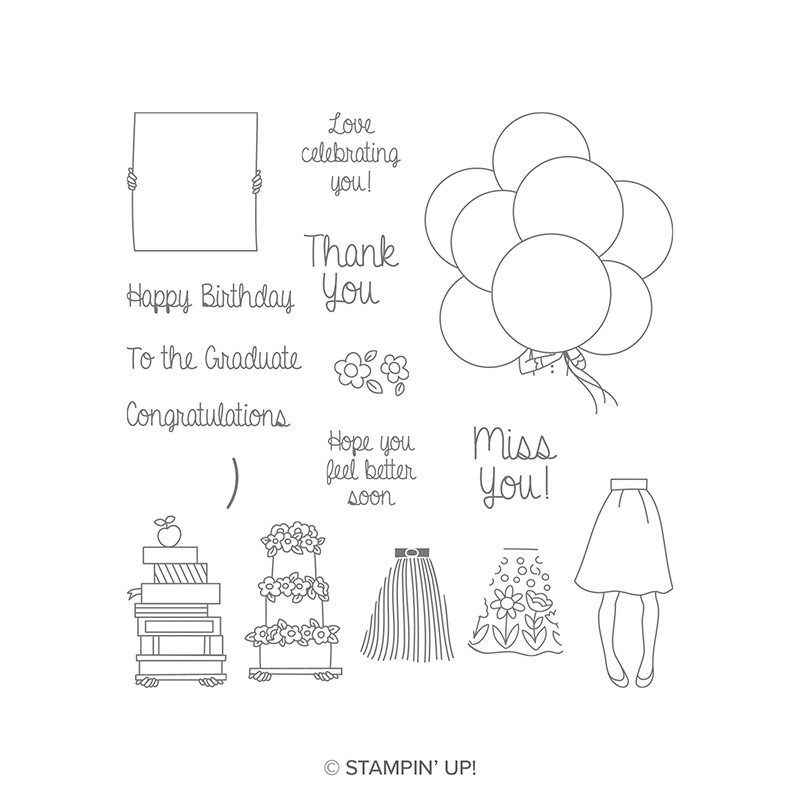
I’ve chosen a stamp set that allows me to showcase all of these gorgeous new watercolour pencils: it’s a hostess set called Hand Delivered.
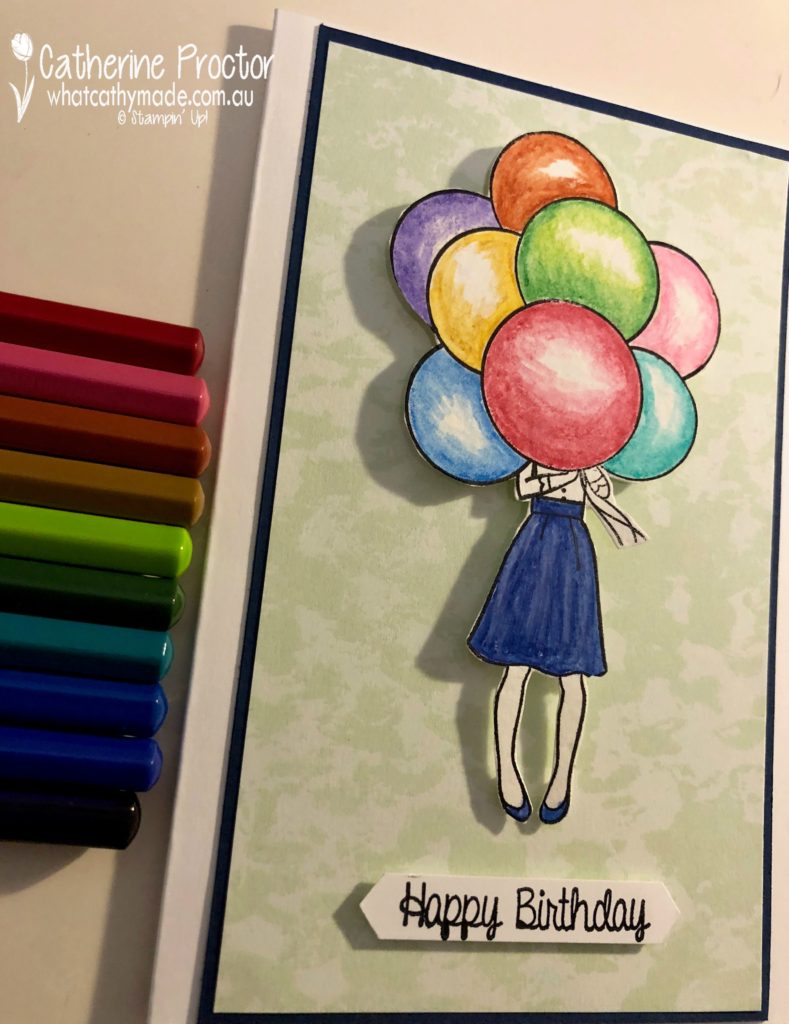
You could colour these images in with your Stampin’ Markers, ink from your ink pads using an aqua painter as your brush, and Stampin’ Blends, or, as I have done on my card below, you can use watercolour pencils and blender pens.
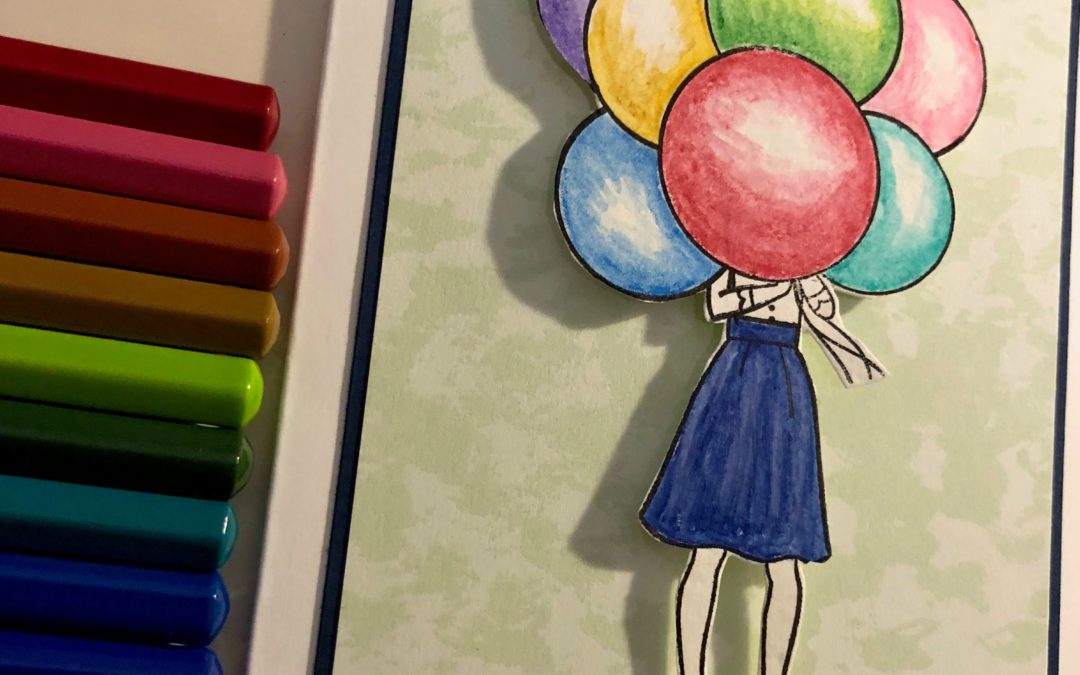
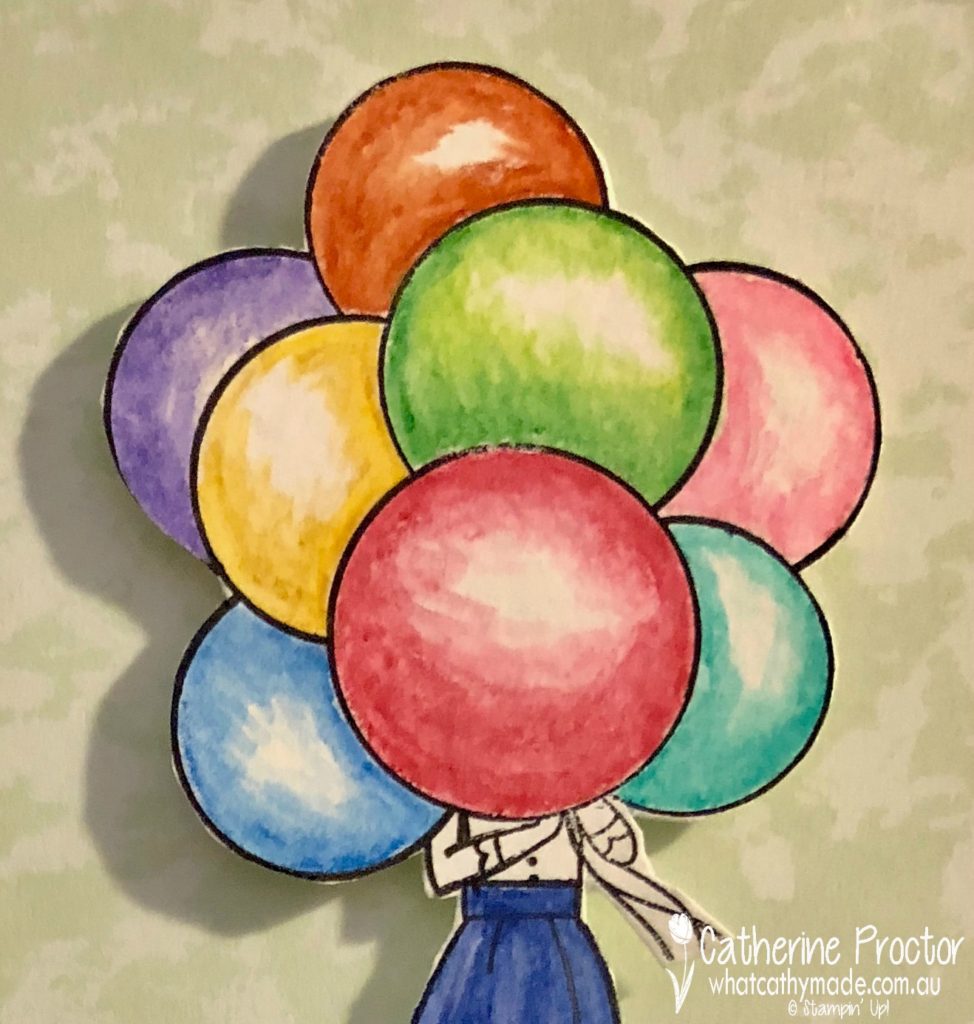
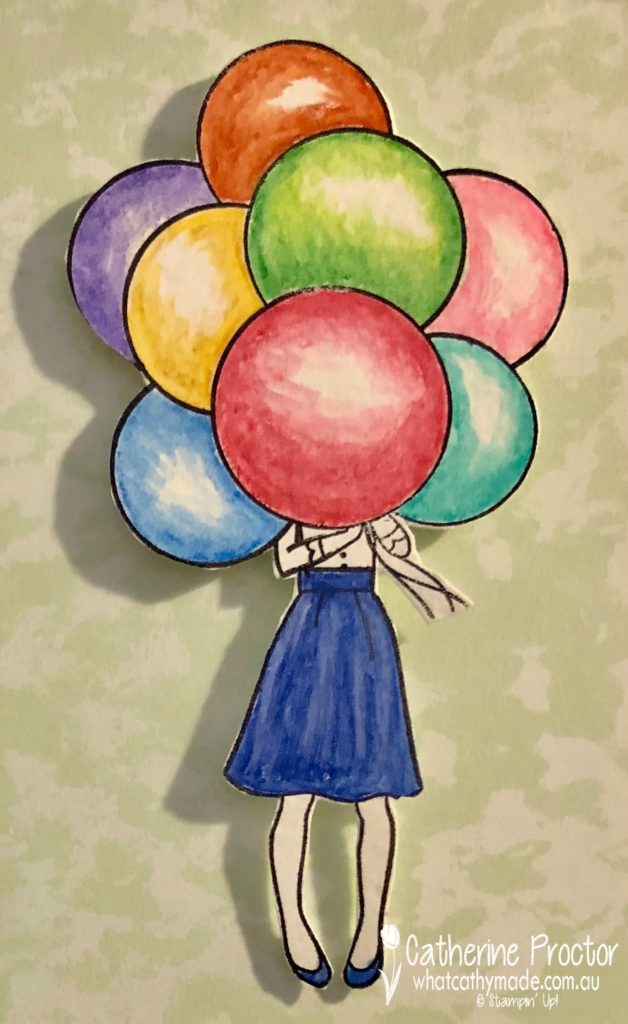
This colouring-in technique is so incredibly easy. You simply stamp your image in black ink and then colour in with your watercolour pencils, working from the outside in. The trick to getting dimension is to leave some white space in the middle of each balloon (where the light would reflect) and then use your blender pen to smooth out any pencil lines, being careful to keep the centre of each balloon white.
Here’s a close-up of the balloons…don’t they look so shiny and realistic?
Once I’d finished colouring in, I fussy cut my balloon lady out (using my paper snips) and mounted her onto the DSP with mini dimensionals, layered over a base of Night of Navy cardstock (to match her skirt) and a Whisper White card base.
My balloon lady reminds me of a Royal Doulton figurine my grandmother had…I think it was called the Balloon Seller? I loved looking at that figurine.
The final touch is the “Happy Birthday” stamp, which I punched out using my classic label punch.
Now it’s time to hop on over to our next participant, the very talented, Caroline Manwaring.
If you find a broken link or have come to this blog hop from a different entry point, you can view the participants below:
Welcome to week 2 of the Art With Heart “Heart Of Christmas” blog hop.
Claire Daly began this weekly Christmas blog hop for the first time last year, and it was so inspiring for everyone involved she’s decided to do it again this year. Thank you, Claire!
Boy oh boy, I love twinkling lights and lanterns at any time of the year, but especially at Christmas time.
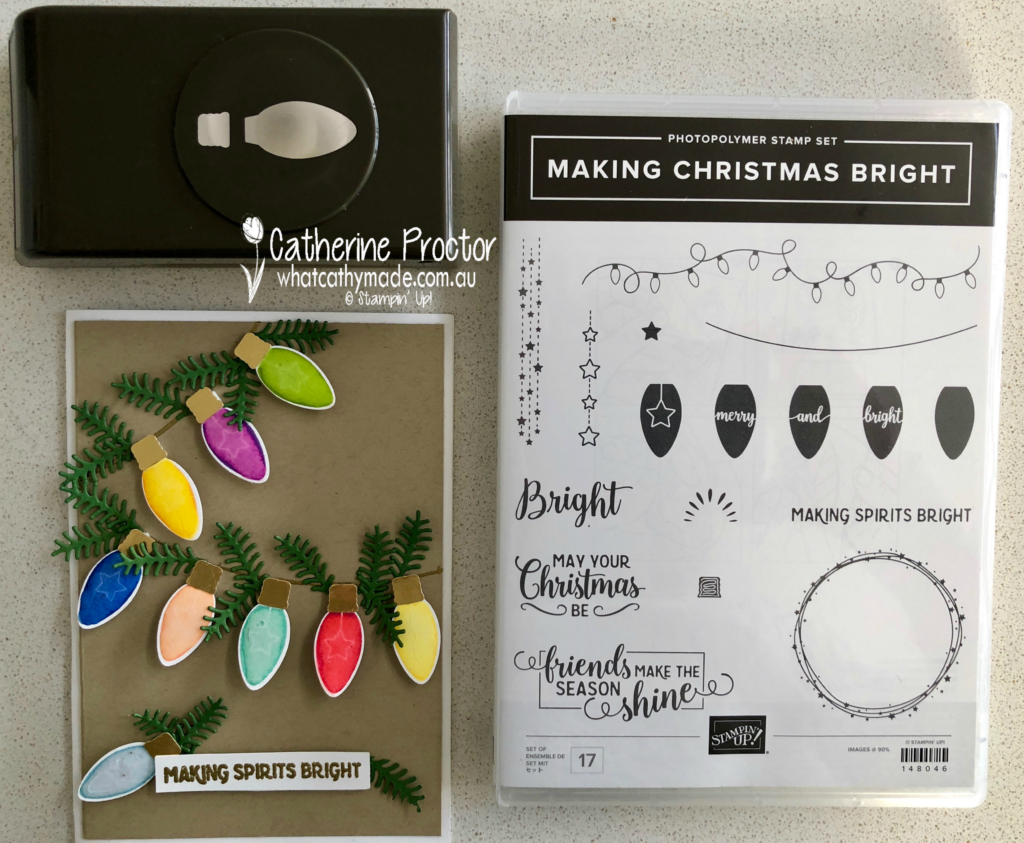
So when I saw this new punch bundle in the upcoming the Holiday Catalogue it went straight to the top of my wishlist!
The Making Christmas Bright bundle has so much possibility and versatility…I just know I’ll be making a lot of cards with this set.
I’m particularly excited about the card I’ve made today because it uses a technique I’ve been wanting to try for a long time, but I have to confess i don’t actually know the name of this technique, LOL!
So, I’ll just call it the fine tip glue technique for want of a better term.
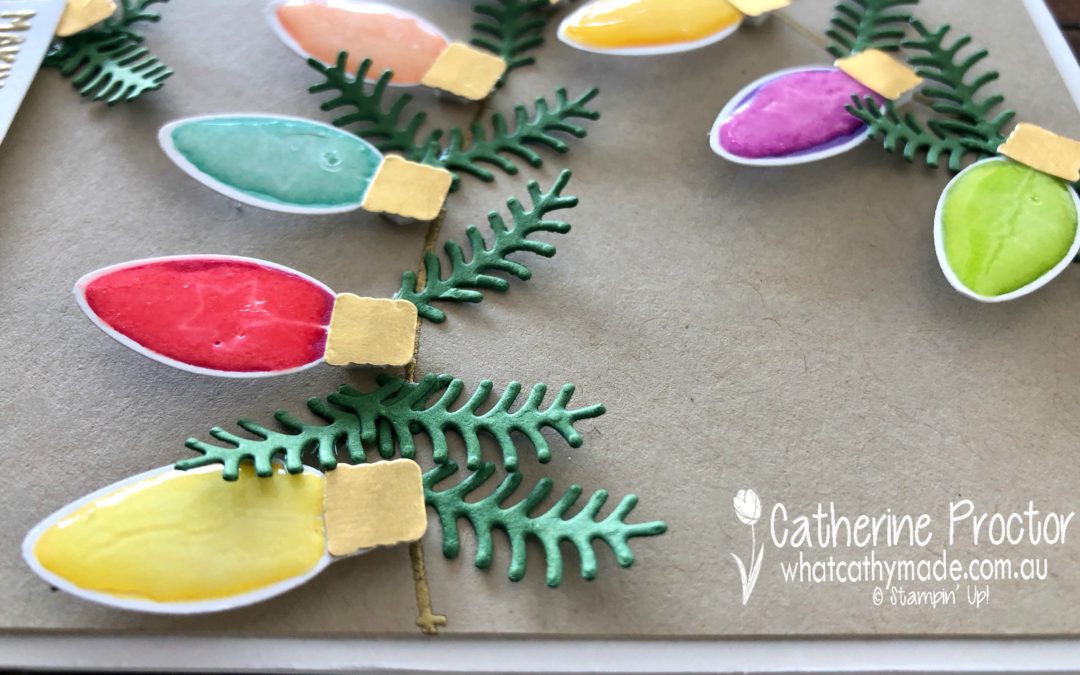
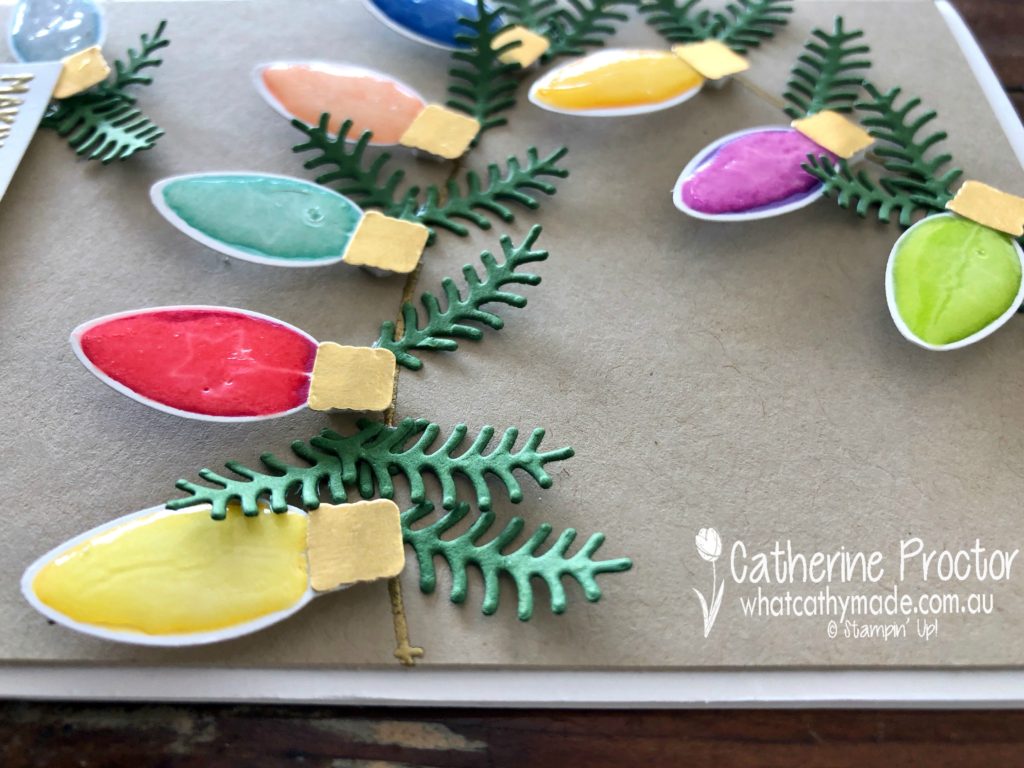
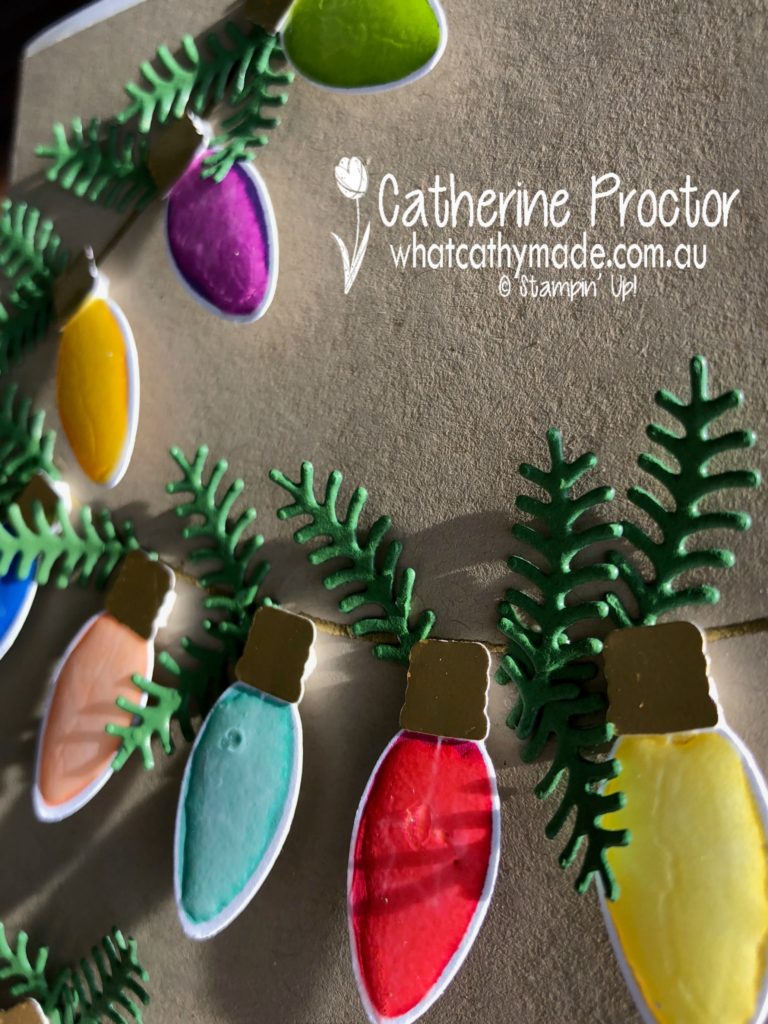
This is such an easy technique and so perfect for this bundle because it really makes the Christmas lights look shiny like glass. Here’s a close-up side angle to give you a better look.
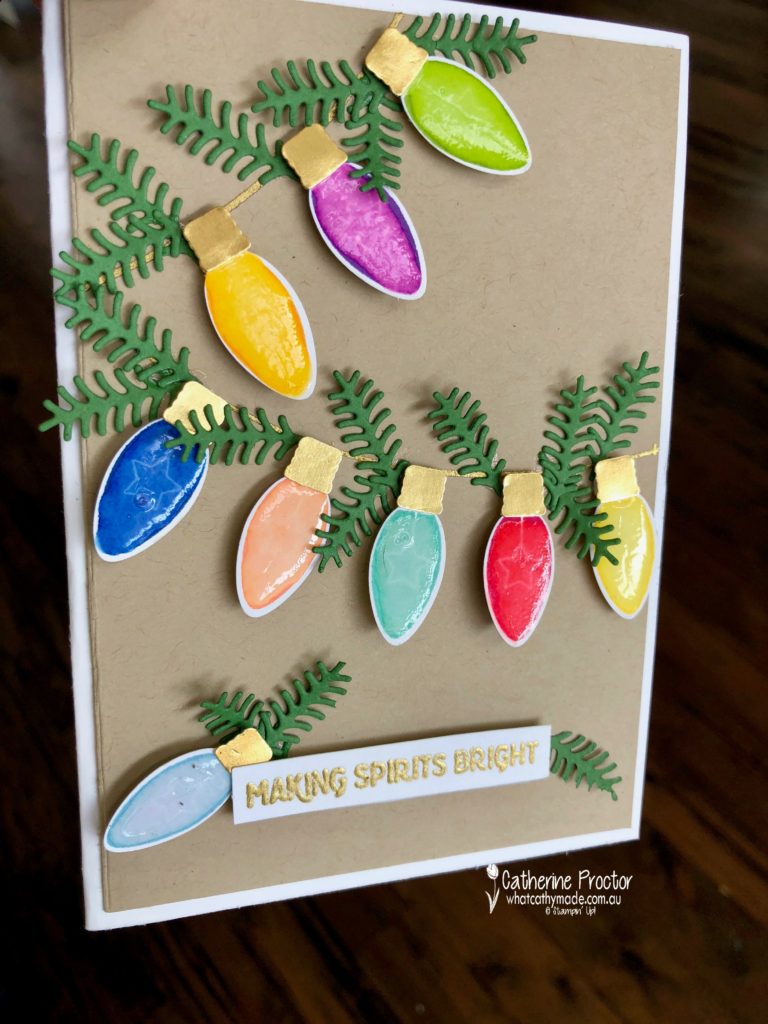
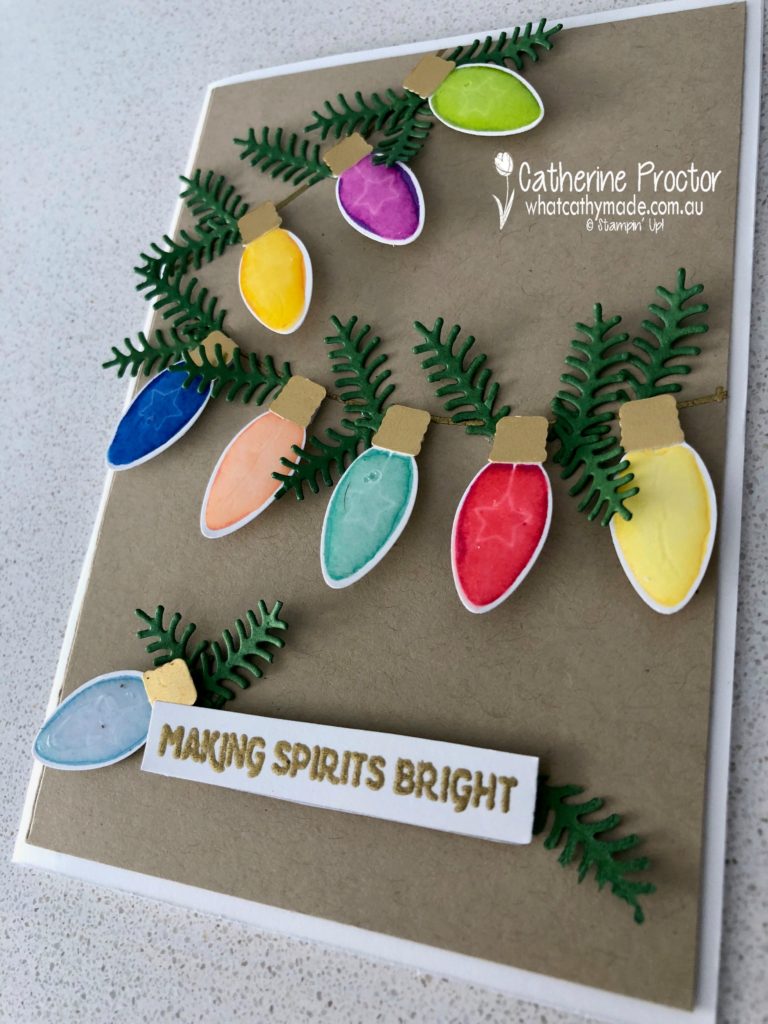
After stamping the light bulbs in assorted colours and punching them out with the Christmas Bulb builder punch I simply covered the images with a thin layer of Stampin’ Up! fine-tipped glue and left them to dry.
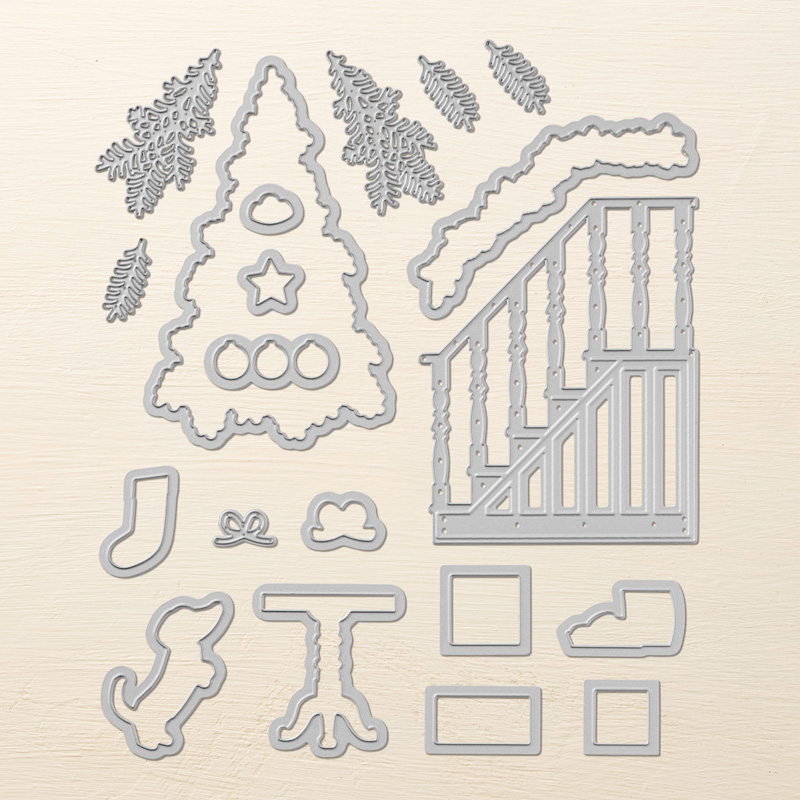
The base of the light bulbs were punched out of gold foil, and the pine needles were die cut from Garden Green cardstock using the Christmas Staircase dies. There are three of these pine needle branches in the set, which makes die cutting them out so quick and easy.
Crumb Cake cardstock was the ideal neutral card base to make all of these colours pop, and I heat embossed the gold strand the lights are hanging from (there’s a stamp for this in the Making Christmas Bright stamp set but it’s hard to see on my card under the pine needles and bulbs) as well as the “Making Spirits Bright” sentiment.
The final touch was to use mini dimensionals to adhere my light bulbs and make them really pop.
To see what the rest of the AWH team have made head back to the lovely Claire Daly’s blog.
To purchase any of the products I used in this project from the annual catalogue you can shop with me here.
You can order the new products from the holiday catalogue from September 5, or if you join as a demonstrator you can order them now…contact me if you’d like to find out more or receive a free copy of the holiday catalogue.
Welcome to week 12 of the Art With Heart Colour Creations Blog Hop!
This week we are showcasing one of the beautiful brights: Coastal Cabana.
Coastal Cabana looks gorgeous with so many different colours but one of my favourite combinations is to use it with a vibrant red or pink. For this week’s blog, I decided to pair it with a gorgeous new red: Poppy Parade with just a touch of the delicious Granny Apple Green.
And no, I haven’t accidentally used Bermuda Bay instead of Coastal Cabana…Coastal Cabana can look a lot like Bermuda Bay depending on the light and the angle from which you take your photo.
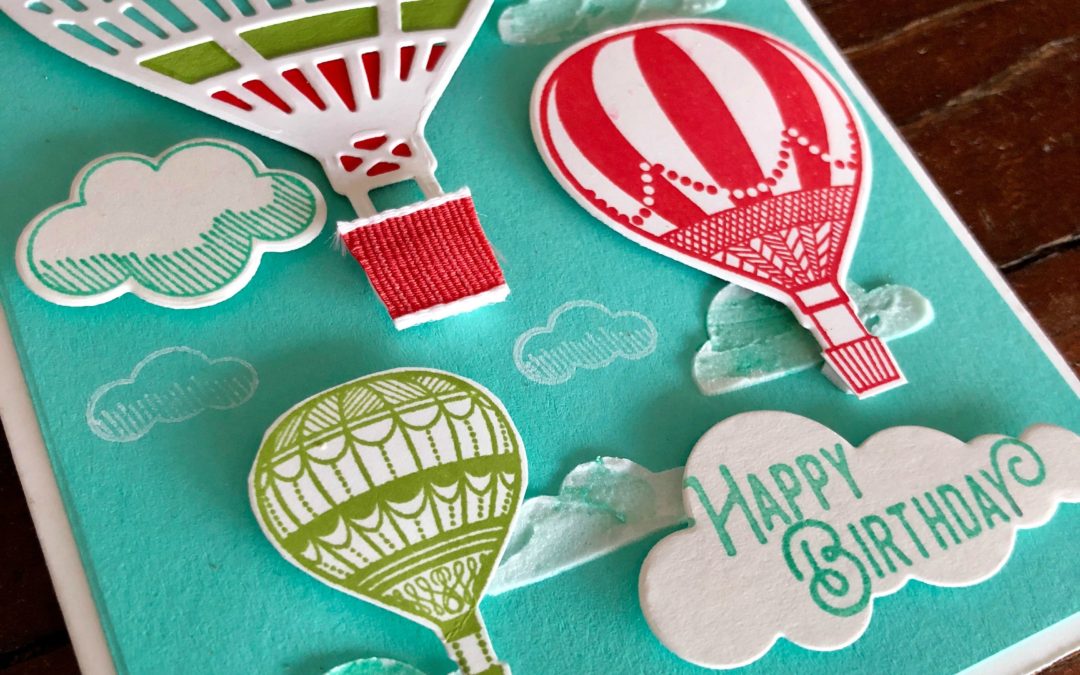
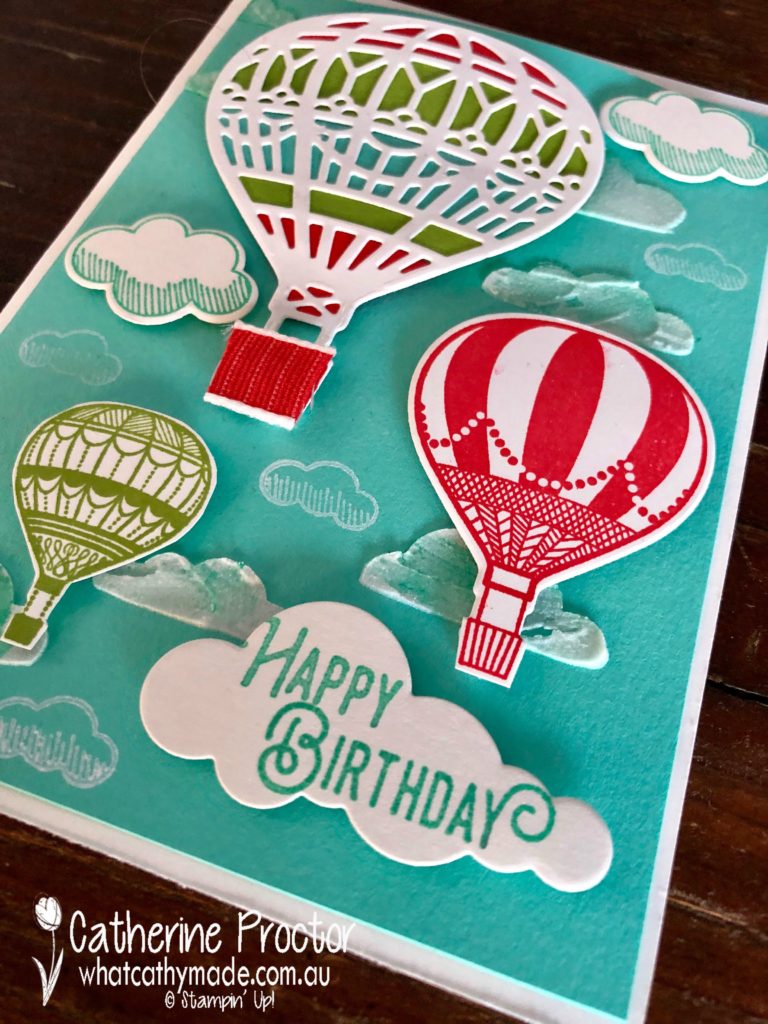
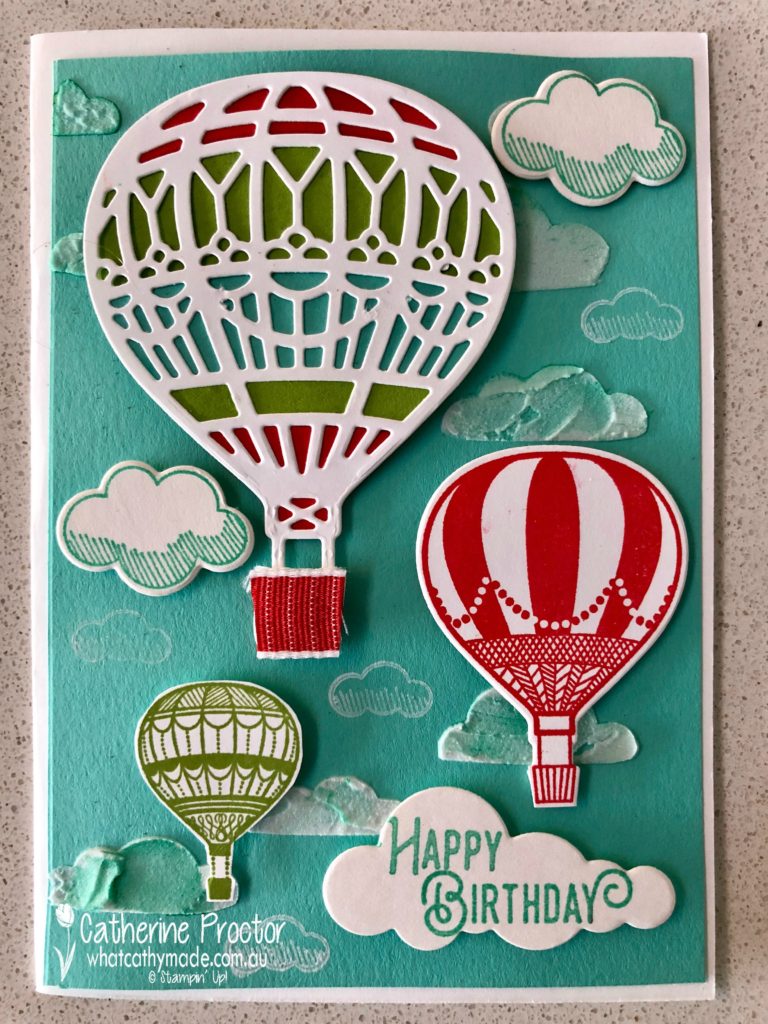
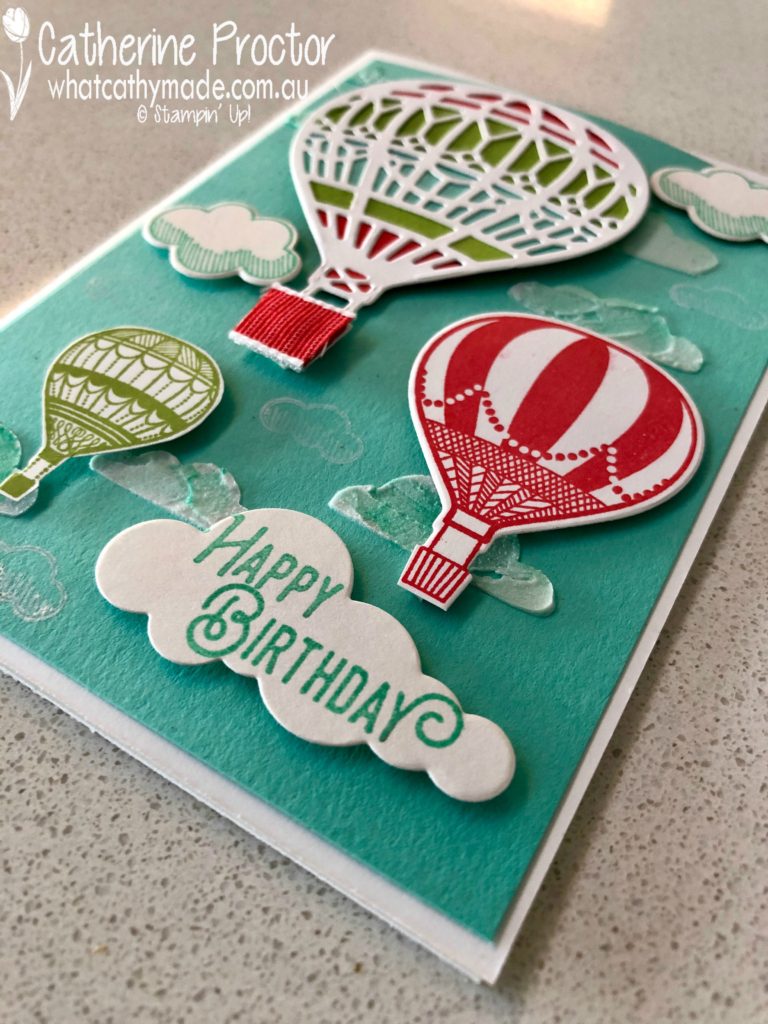
The layout and colour scheme for my “Up and Away” card was CASED from a card I saw on Facebook, made by a very talented USA Stampin’ Up! demonstrator called Sara Flemming, however, I’ve changed a lot of the elements on this card to add more layers of texture and to give me a chance to play with my embossing paste again.
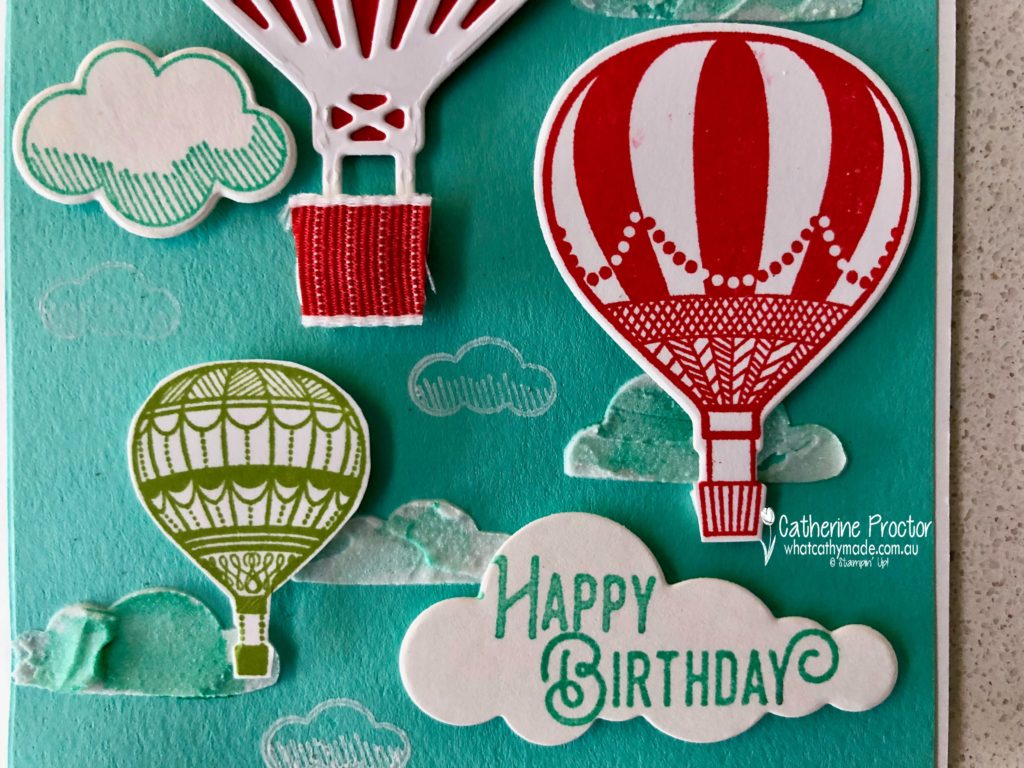
I began this card by using the cloud mask from the Party Pattern masks and my white embossing paste to make some fluffy clouds on my base layering piece of Coastal Cabana card stock. Once the paste was dry I I thought they looked too stark so used my aqua painter to tone down the whiteness of the clouds by colouring them with Coastal Cabana ink from my ink pad.
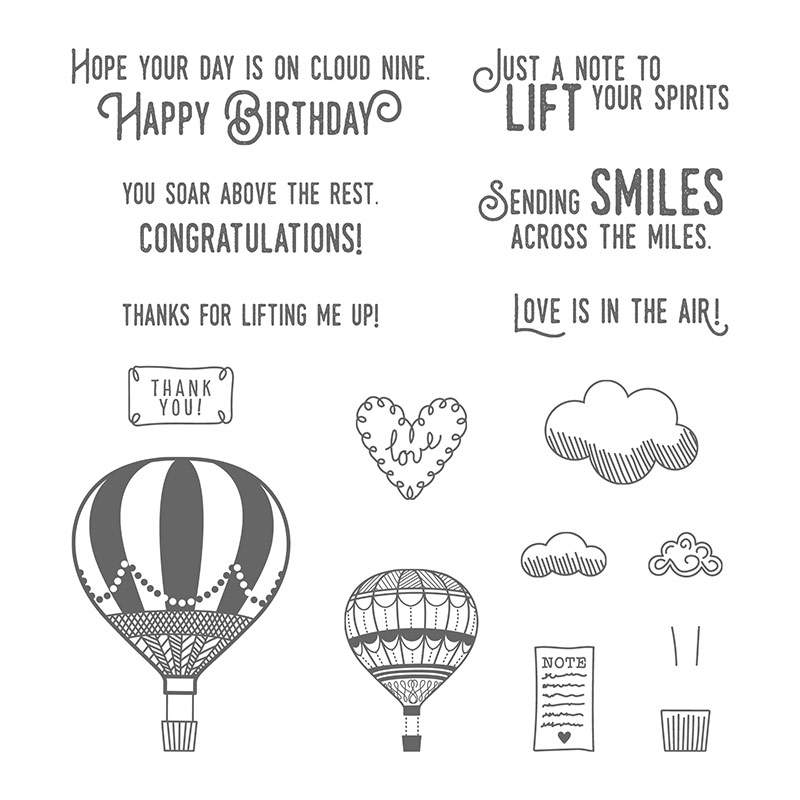
Can you see the other tiny white clouds stamped on the Coastal Cabana? These are stamped on using Whisper White craft ink using the one of the smallest cloud stamps from the gorgeous Lift Me Up stamp set.
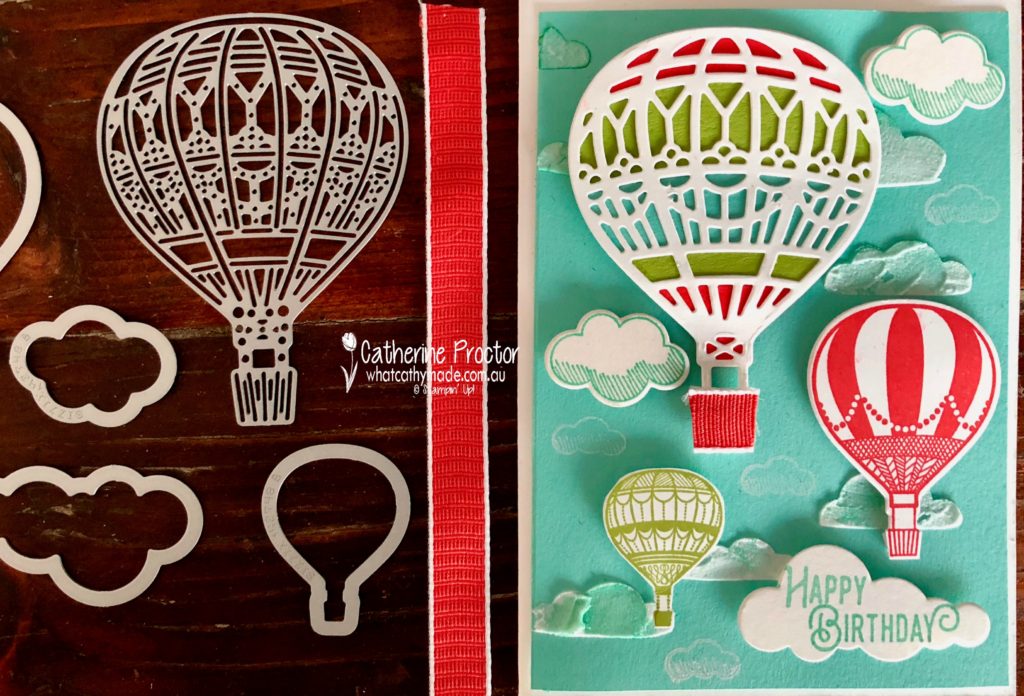
The medium clouds and the balloons were also stamped with the Lift Me Up stamp set and then cut out using the co-ordinating Up and Away thinlits. The largest balloon has several different dies to create a multicoloured ballon and I used these dies to cut out my 3 different card stock colours: Coastal Cabana, Poppy Parade, and Granny Apple Green.
I used the largest cloud from this thinlit set to stamp my Happy birthday sentiment on by using the masking technique. This is so simple to do by using washi tape to cover the part of the sentiment you don’t want to stamp…just don’t forget to remove the washi tape from the stamp AFTER you’ve inked up the stamp and BEFORE you stamp the sentiment!
After adhering all of the elements to the card using Mini Stampin’ Dimensionals, my final touch of texture was to add a little piece of the gorgeous new Poppy Parade Textured Weave Ribbon to the top of the Balloon basket. This ribbon is coming out in the new Holiday Catalogue…contact me if you’d like me to send you a copy of this catalogue.
To see what the rest of the team have made click on the links below.
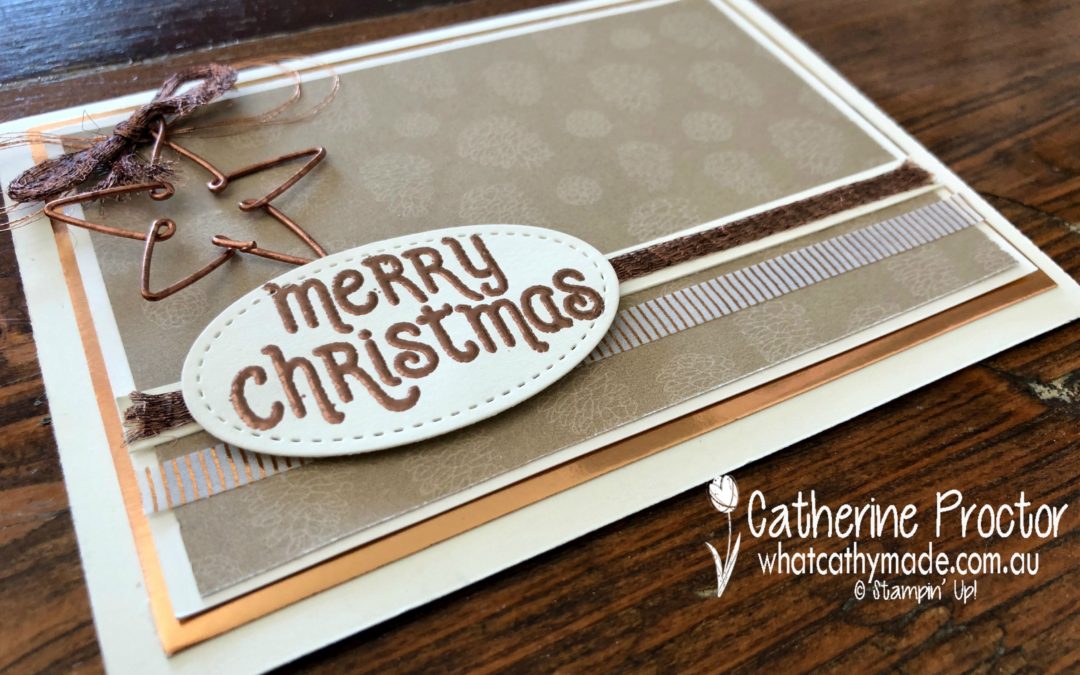
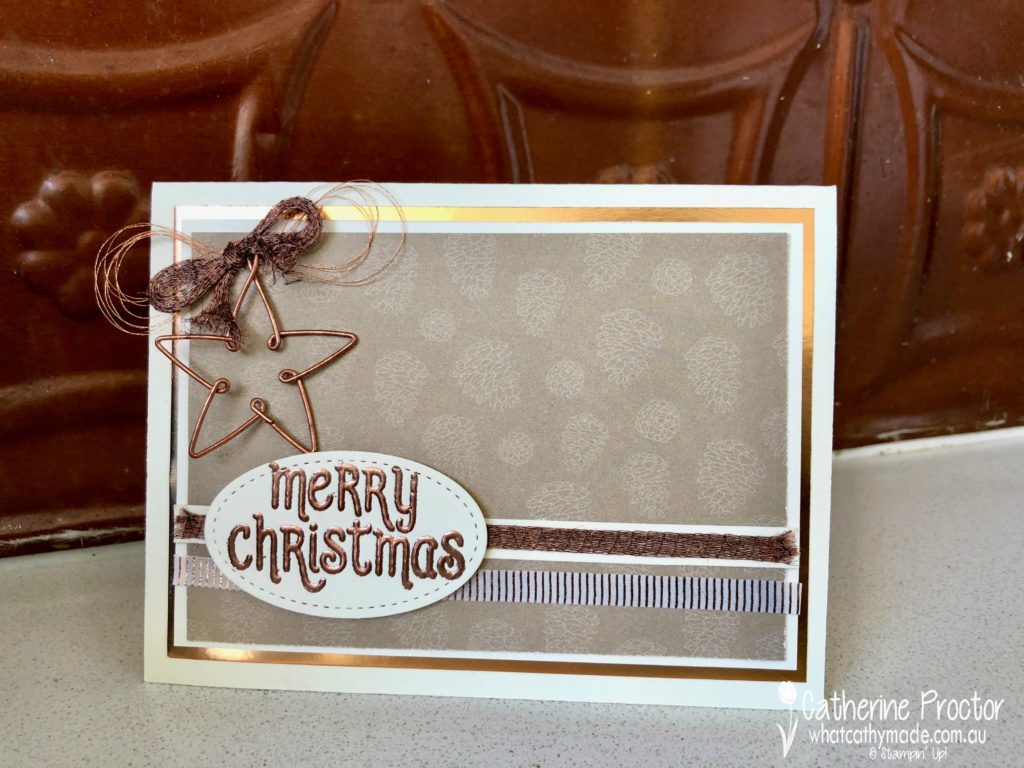
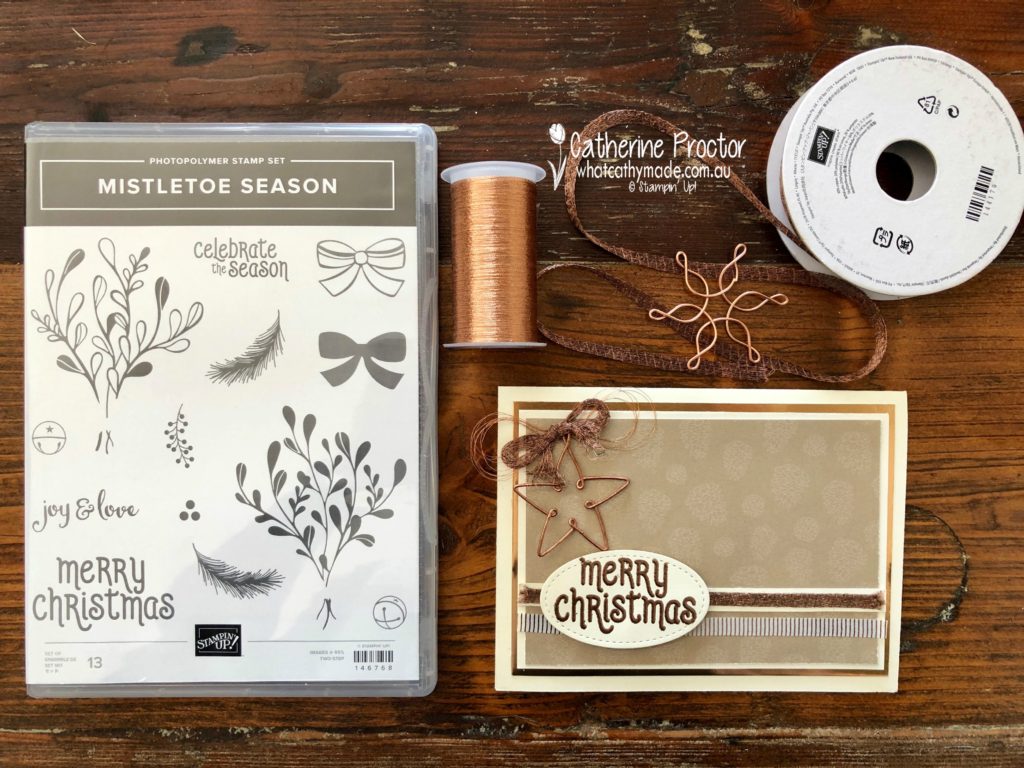
Anyone who’s ever been to my home knows I love copper.
My kitchen and pantry splashback, as well as my island bench all feature panels of pressed tin in a deep copper colour. I intended to paint these splashbacks with silver paint once they were installed (the copper colour is actually a byproduct of the priming process in the factory) but 5 years on since we finished our renovation I still can’t bring myself to cover the copper in silver.
So what better place to photograph my copper Christmas card for this week’s AWH Heart of Christmas blog hop than on my kitchen bench in front of my splashback!
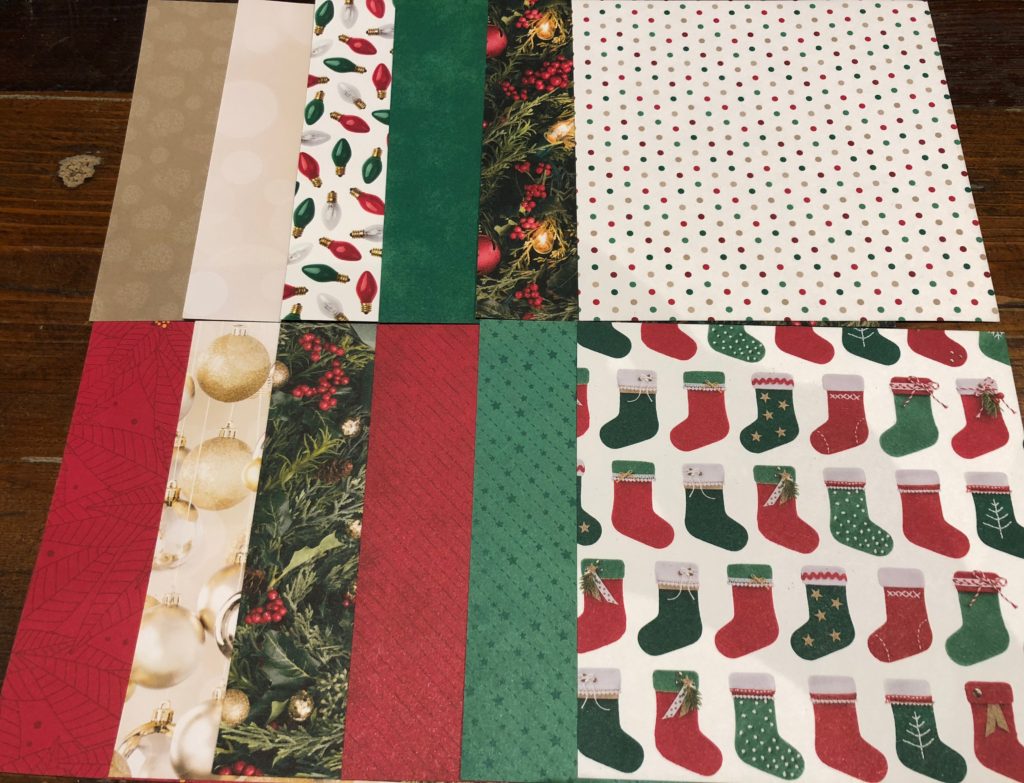
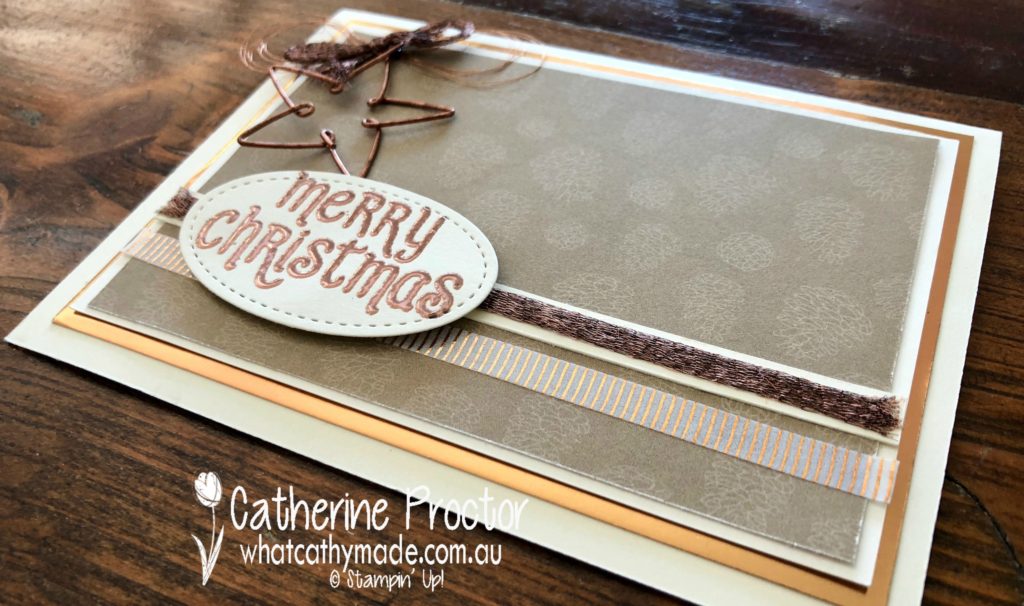
Because the copper elements on this card are so rich I deliberately kept the rest of the elements quite neutral, using Very Vanilla Cardstock, and a sheet of a gorgeous new Crumb Cake coloured designer series paper from the holiday catalogue called All Is Bright DSP. Here’s a sneak peek of this DSP.
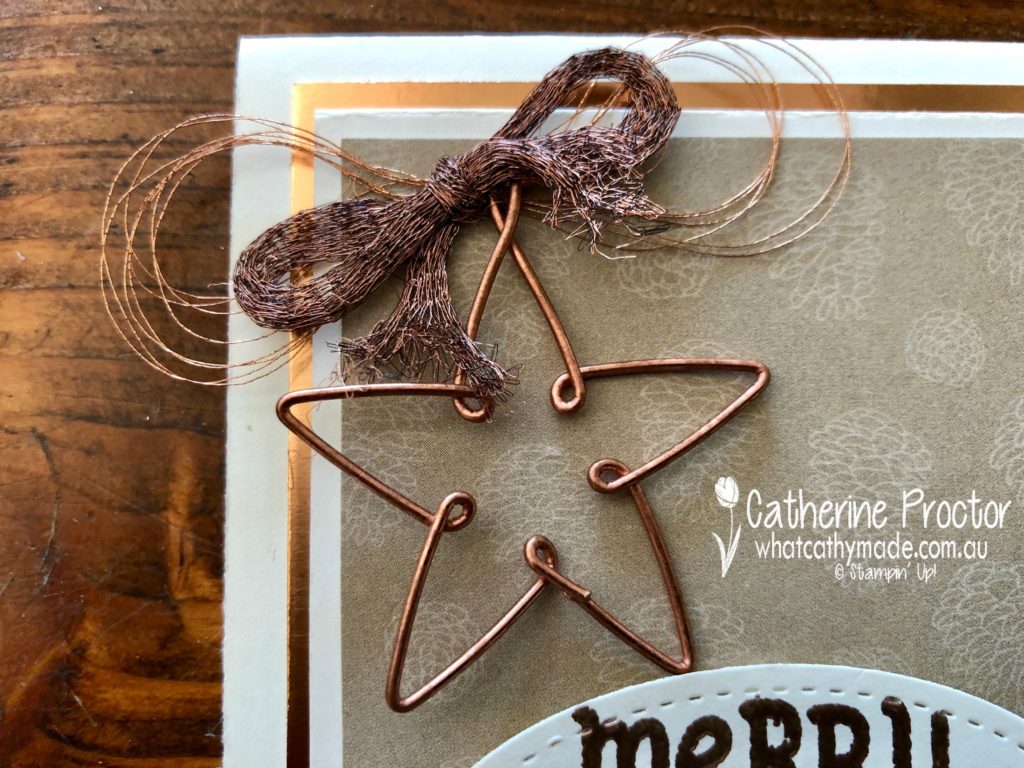
The other copper elements in this card include the copper star (part of the Snowflakes and Stars Wire Elements) and the copper washi tape (part of the Suite Season Washi Tape) both from the upcoming holiday catalogue. If you’d like me to post you your very own copy of the brand new holiday catalogue or the 2018-2019 annual cataloguecontact me.
Products used from the annual catalogue include copper foil, copper metallic thread, copper embossing powder, copper trim, stitched framelits, and the Mistletoe Season Photopolymer Stamp Set.
This copper trim frays beautifully…and was just the perfect size to thread through the loop of the copper star.
I can’t wait to see what the rest of the team have made. To hop along our blog hop visit the gorgeous Clare Daly’s page here as she will be hosting the AWH Heart of Christmas blog hop each week.
Thanks for hopping along with the AWH today. To purchase any of the products I used in this project from the annual catalogue you can shop with me here.
You can order the new products from the holiday catalogue from September 5, or if you join as a demonstrator you can order them now…contact me if you’d like to find out more.
Welcome to week 11 of the Art With Heart Colour Creations Blog Hop!
This week we are showcasing one of the regals colours: Cherry Cobbler.
This gorgeous rich colour is one of my favourite colours to use for Christmas, so I just couldn’t resist making a Christmas card this year using some of the beautiful new products from upcoming holiday catalogue, which I’m able to order early as a demonstrator.
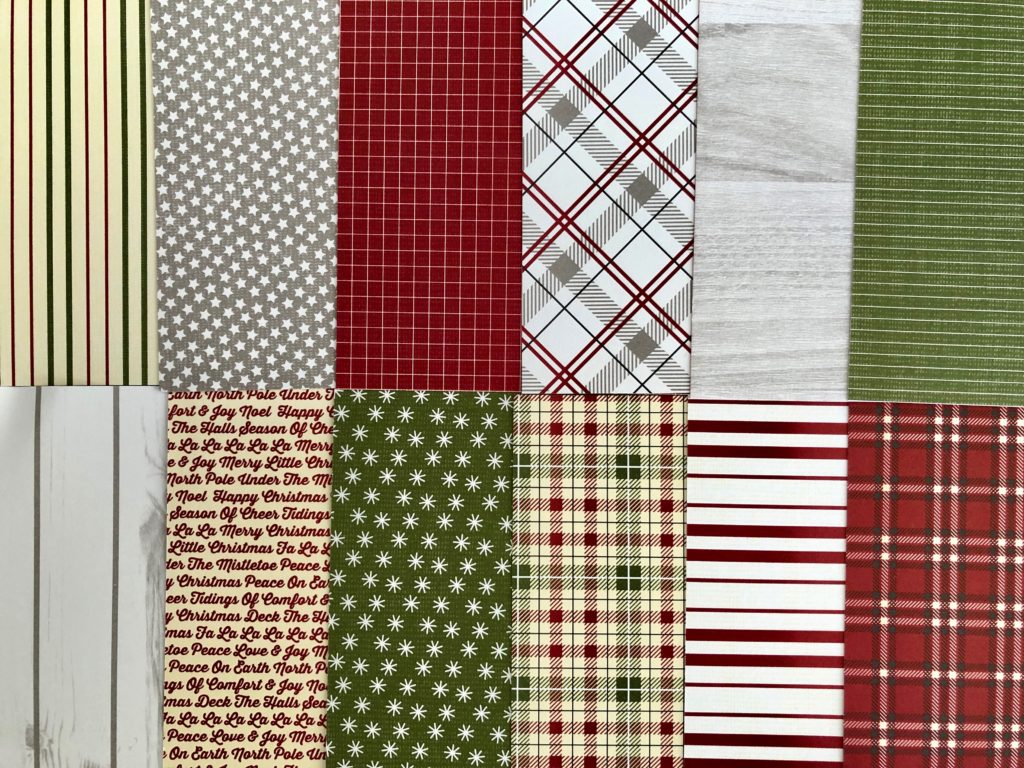
Here’s the designer series paper that inspired me to make this card. It’s called Festive Farmhouse DSP and I love this colour combination of Basic Black, Cherry Cobbler, Very Vanilla, Mossy Meadow, Gray Granite and Whisper White… it’s so classic!
As so often happens when I make a card, the card I ended up making is totally different to the card I thought I was going to create!
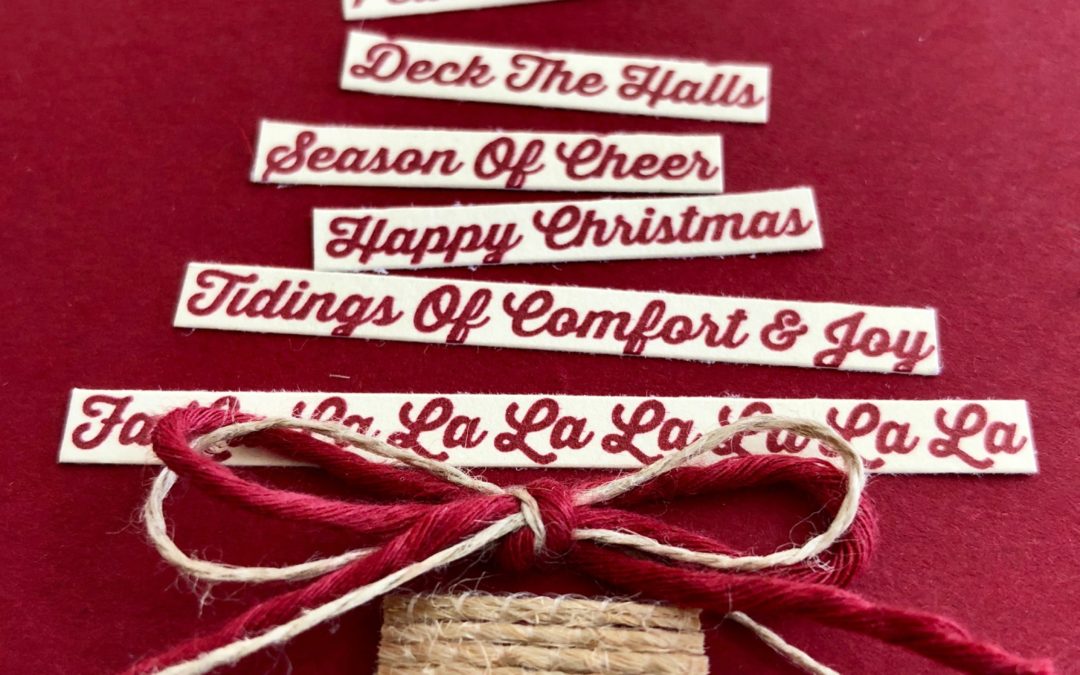
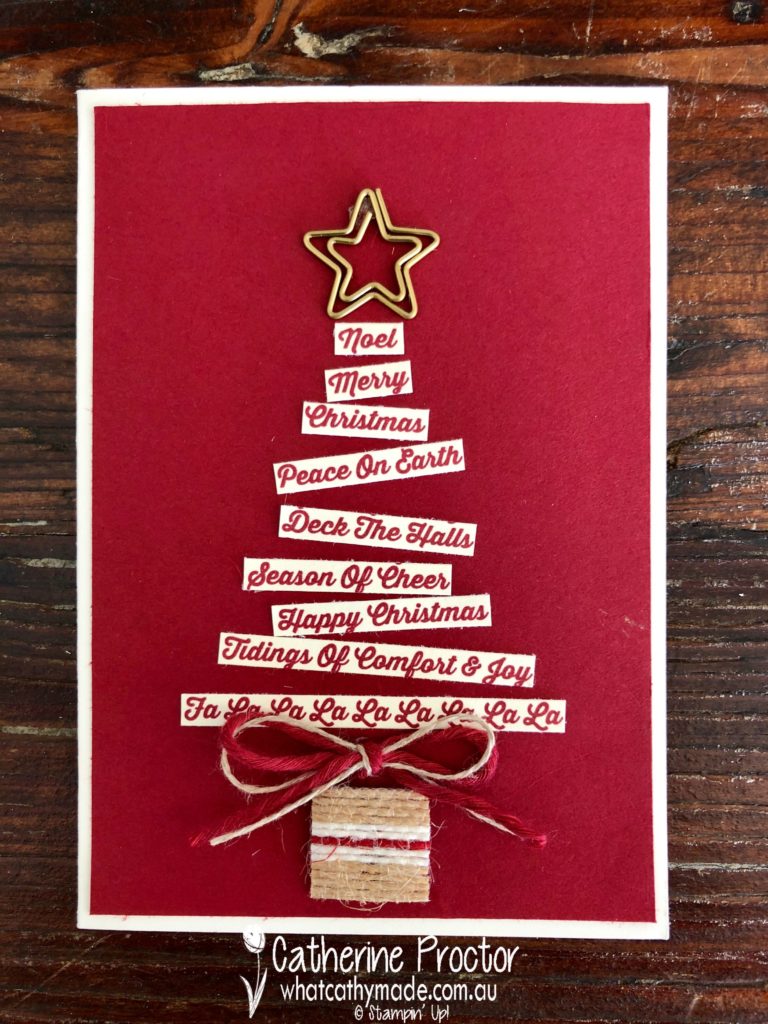
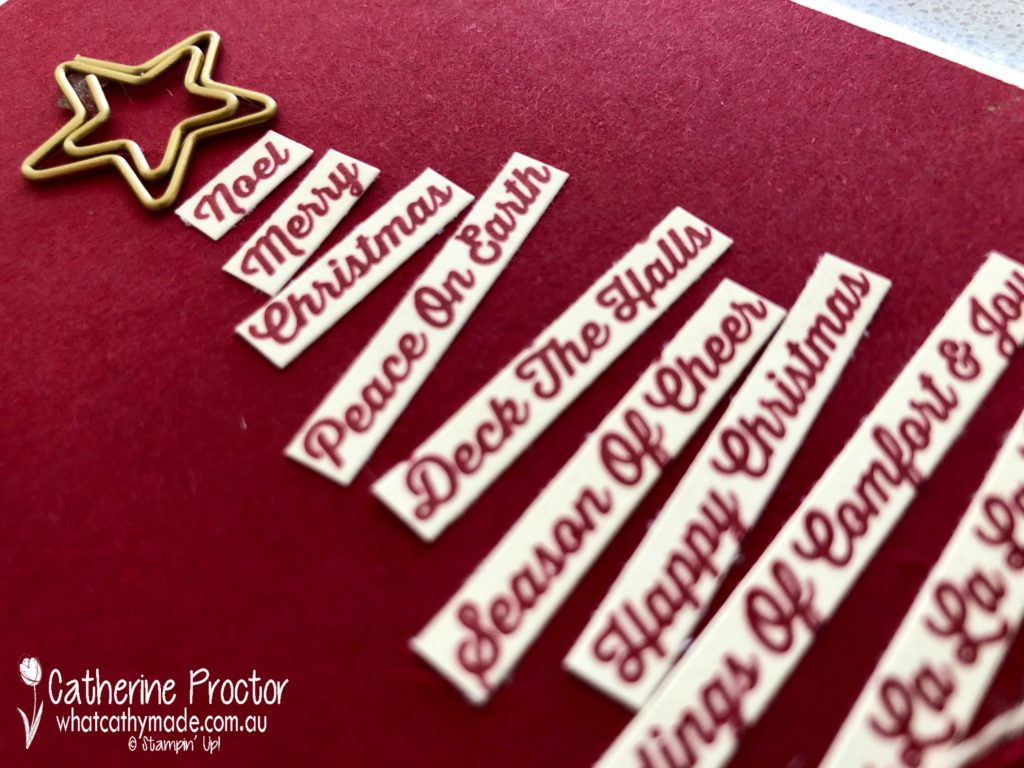
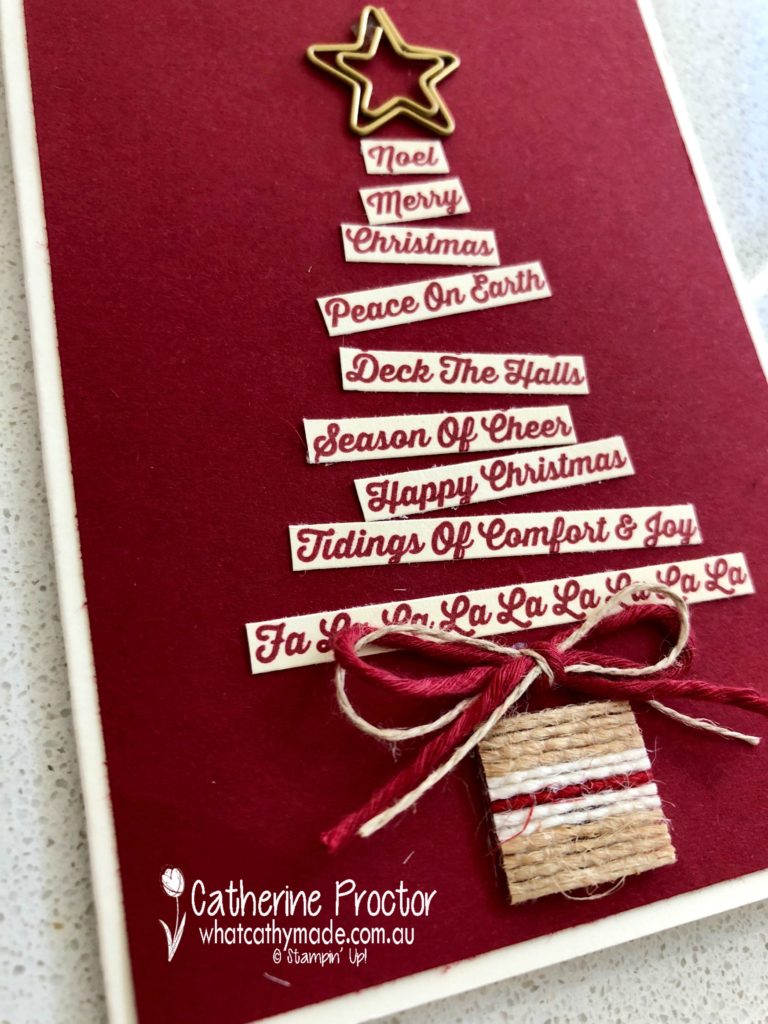
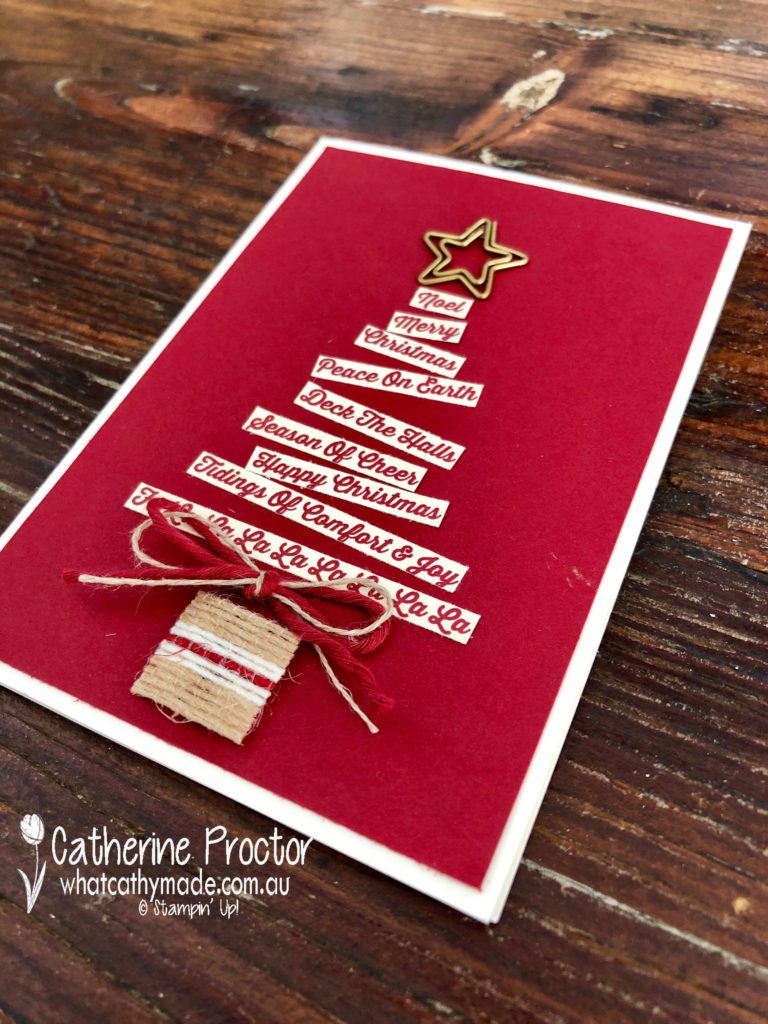
As soon as I saw the DSP with the Chery Cobbler writing on it I was smitten, and I knew I was going to use that DSP as the background paper for my card. But when I was trimming it to size, I saw there was an even better way to showcase all of the lovely Christmas sentiments on it, by using all of the little strips to make a tree.
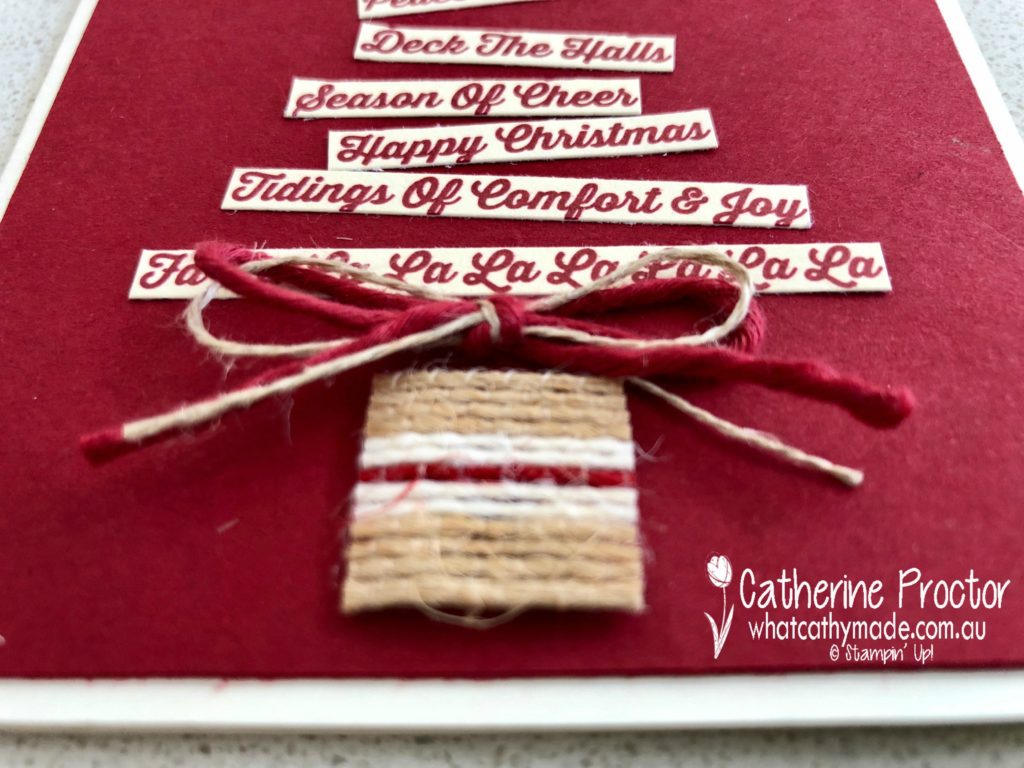
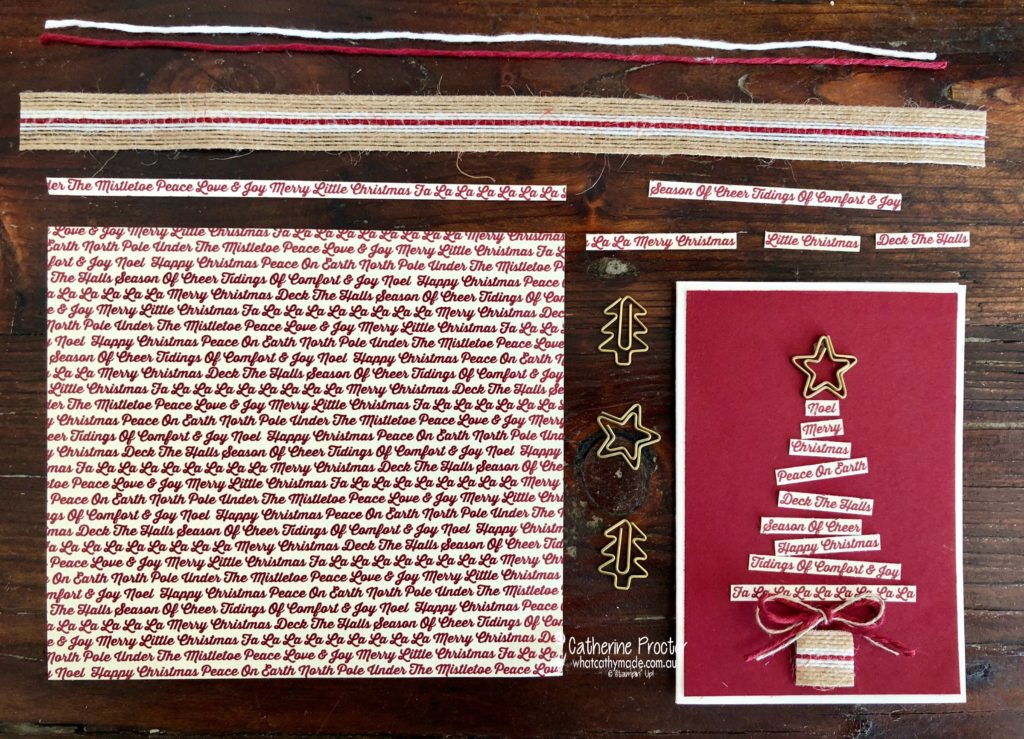
There are some other lovely products from the new holiday catalogue featured in this card, such as the piece of striped burlap trim I used to make the pot the tree sits in, and the Festive Farmhouse cotton twine that sits above the little pot.
And on top of the tree sits the cutest star, which is one of two gold embellishments (the other one is a tree) in the All is Bright paper clips.
Here’s a closer look at the all of the lovely new products from the holiday catalogue used on this card.
If you wanted to mass produce this design for Christmas (and it’s very quick and easy to make using your Stampin’ Up! paper trimmer to cut precisely between the lines of text) you’d get dozens and dozens of cards from each sheet of this DSP.
To see what the rest of the team have made click on the links below.
Welcome to week 10 of the Art With Heart Colour Creations Blog Hop!
This week we are showcasing one of the subtles colours: Calypso Coral.
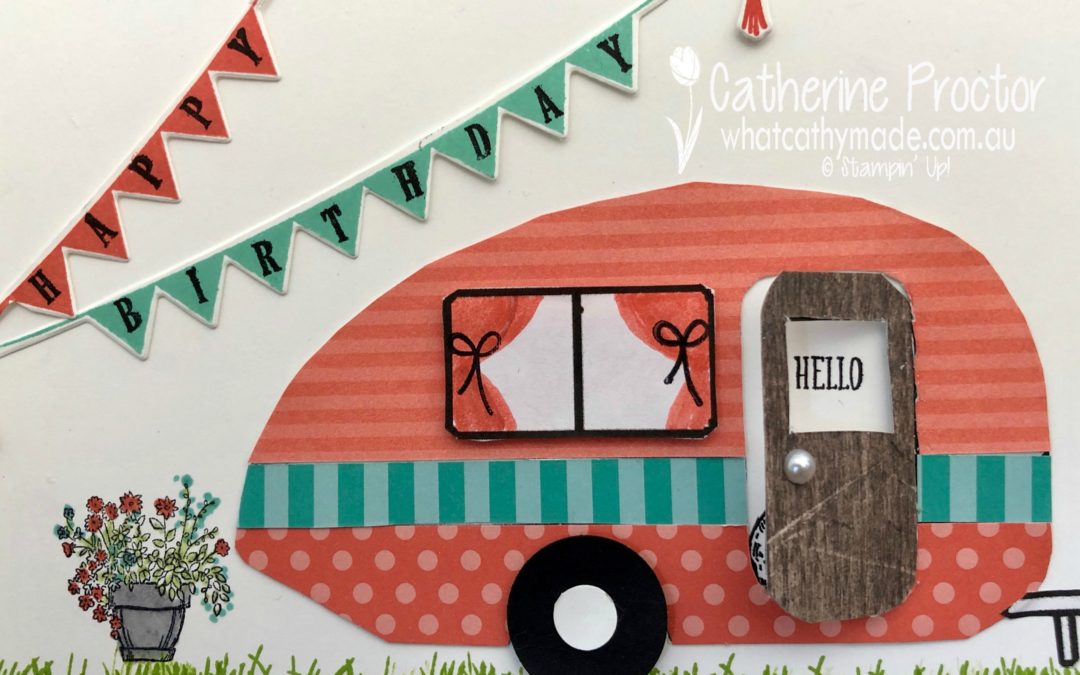
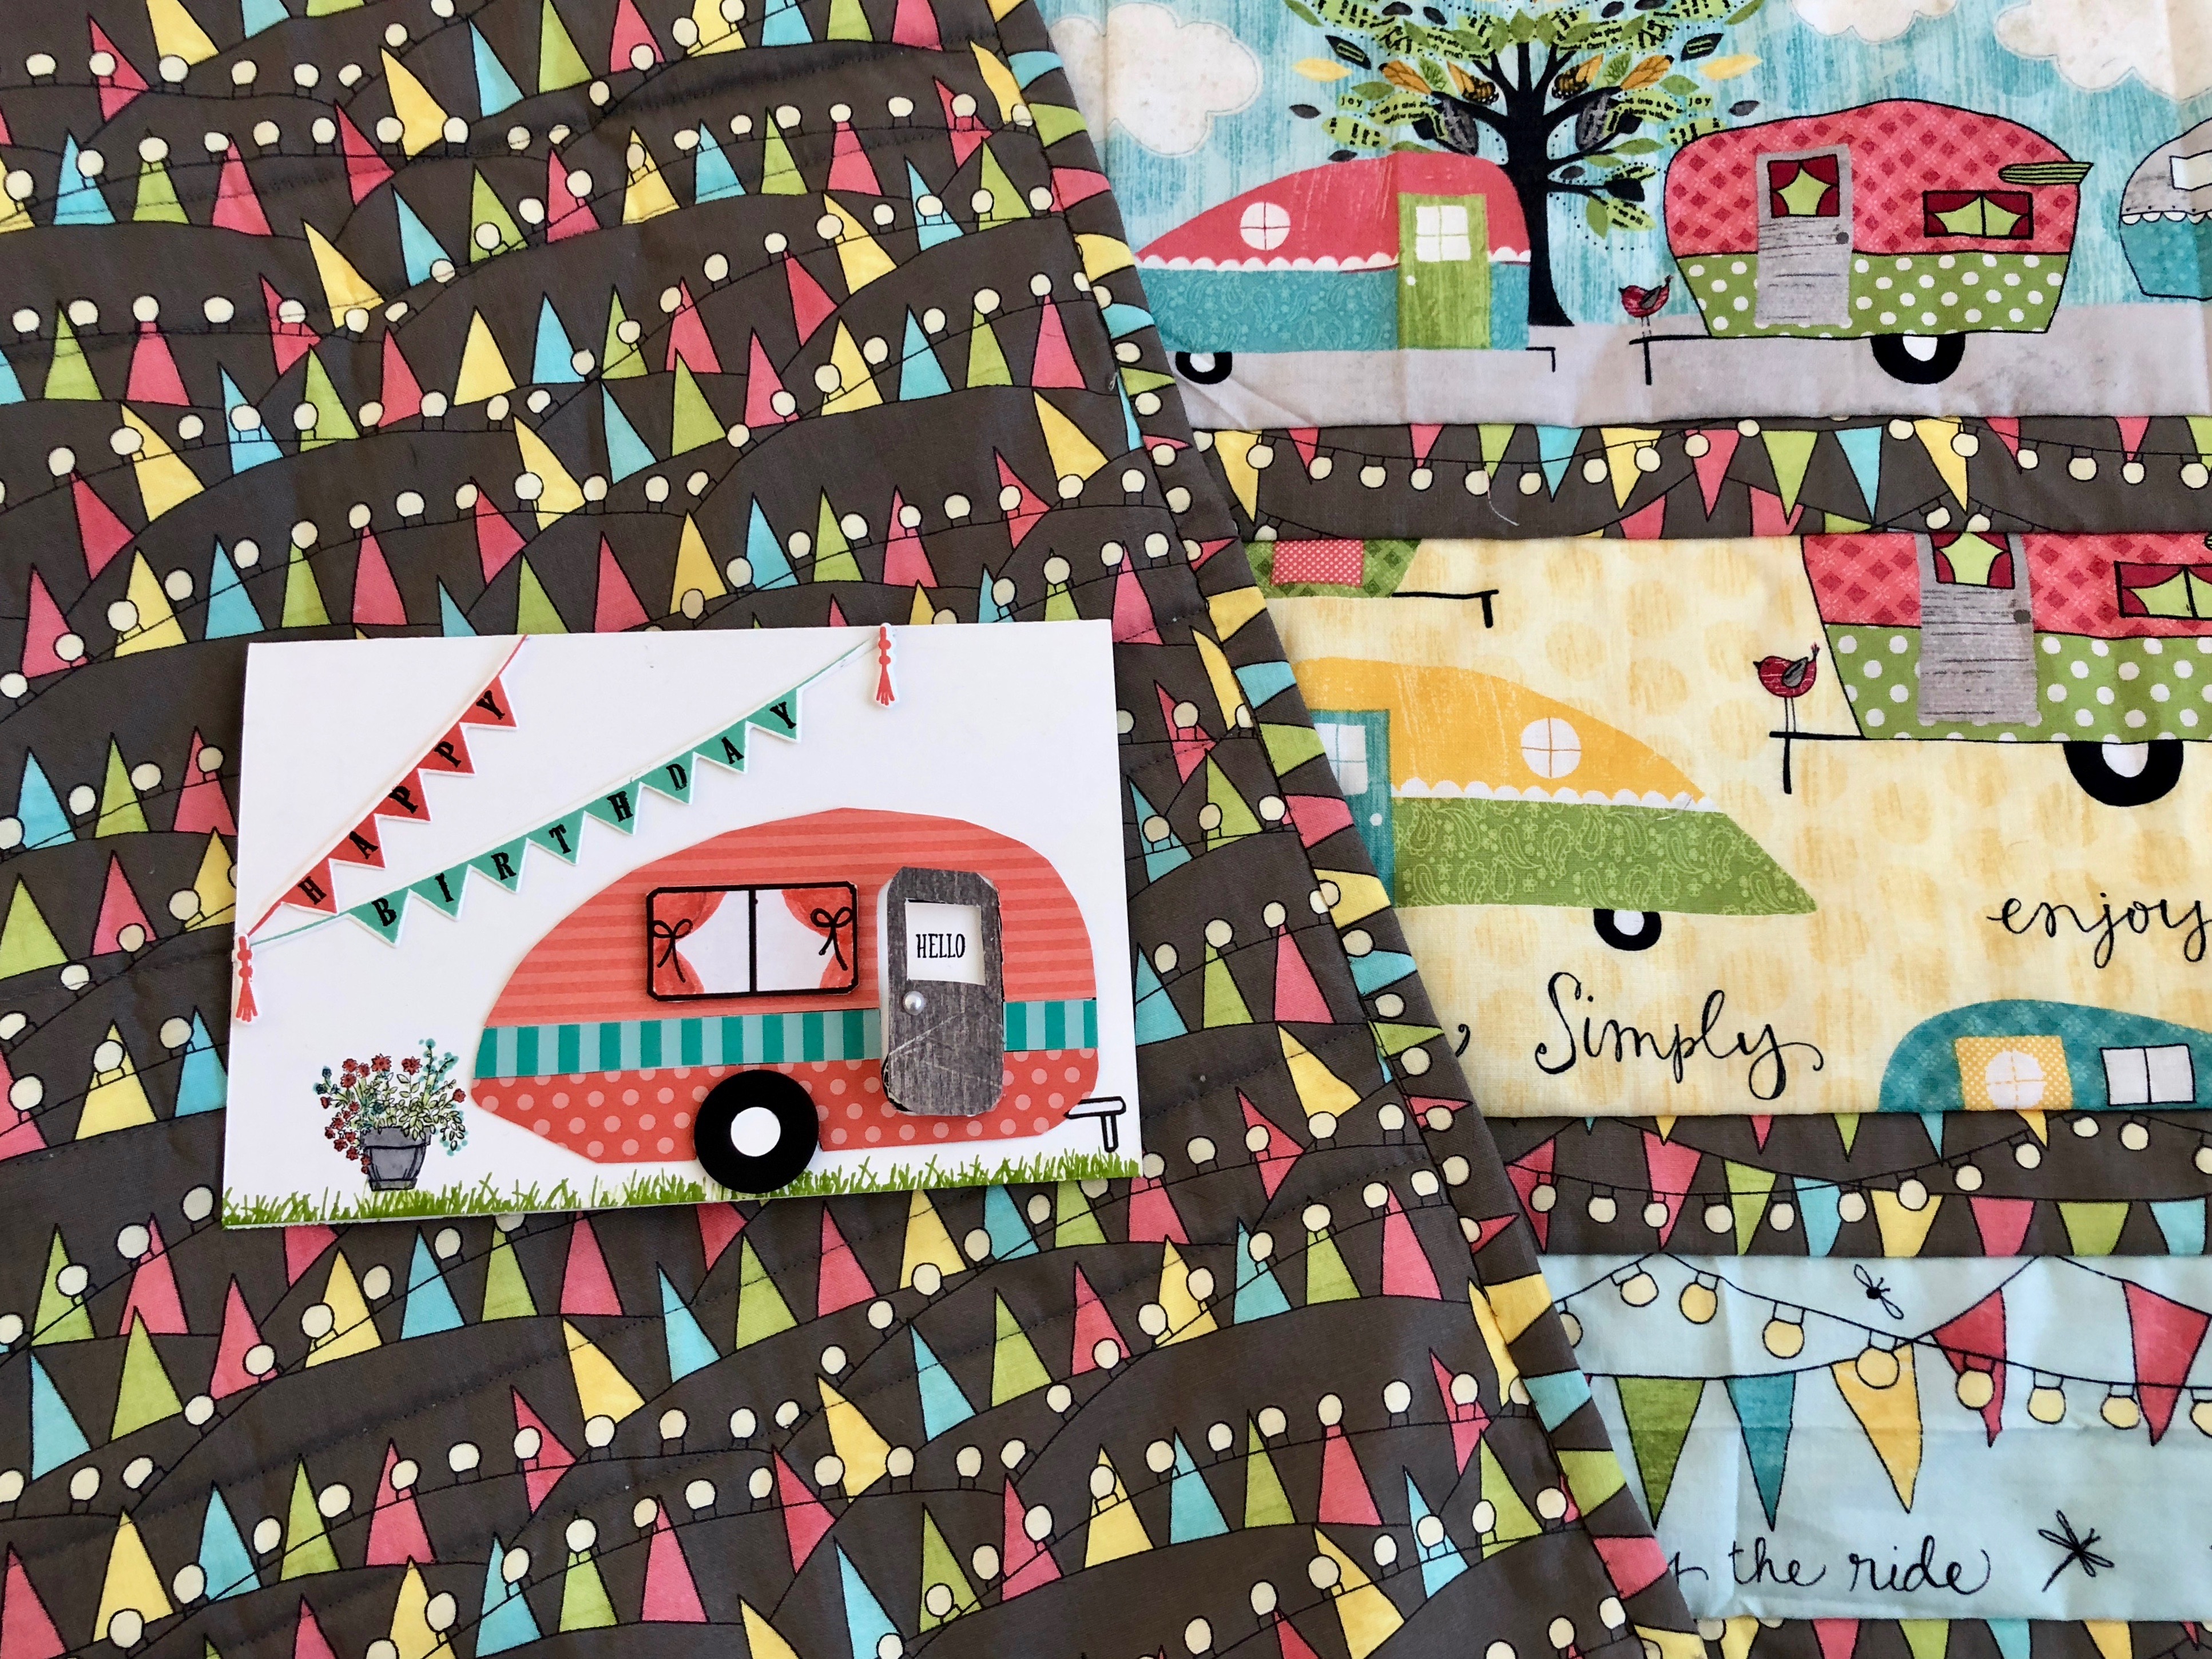
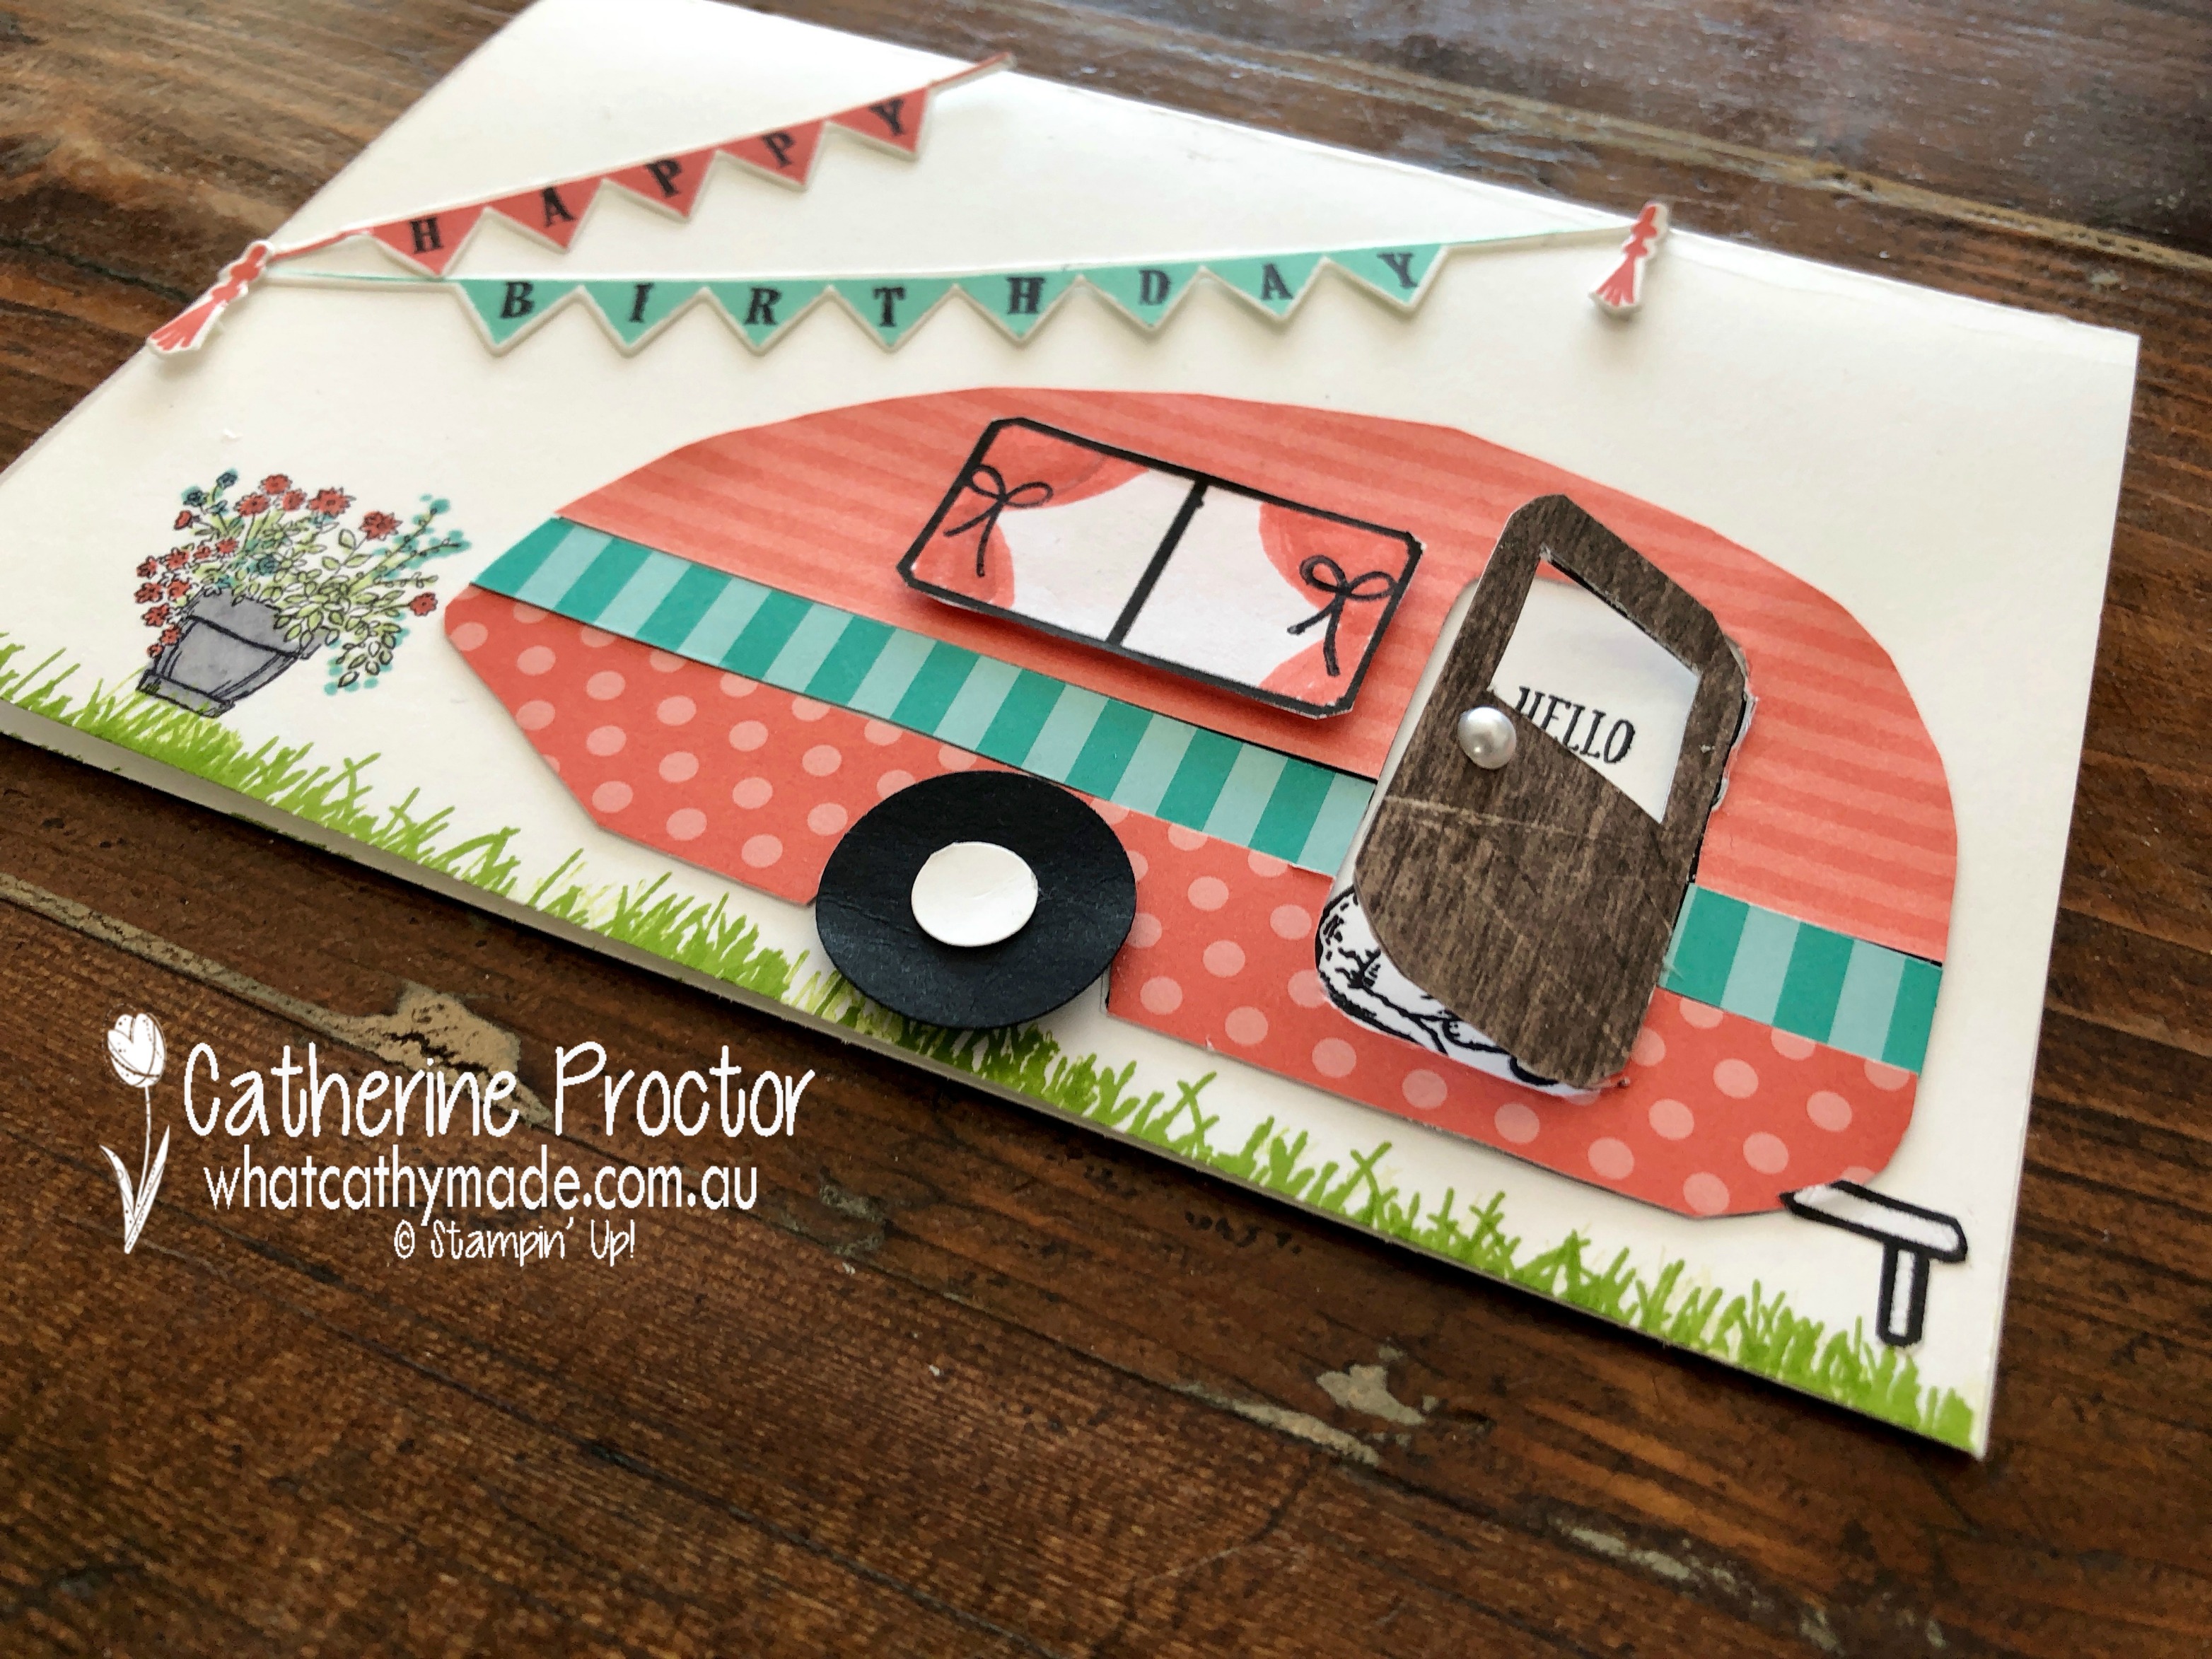
The timing of this colour couldn’t have been more perfect as I needed to use Calypso Coral this week to make a caravan themed card (and matching quilt) for the birthday of someone very special in my life: my crafting partner in crime, Jen Boffey!
So why the caravan theme?
Well, I’d like you to meet Sylvia, Jen’s vintage caravan that we craft in. Here’s a photo of Sylvia in all her glory…she’s even been featured in a book called She Sheds!
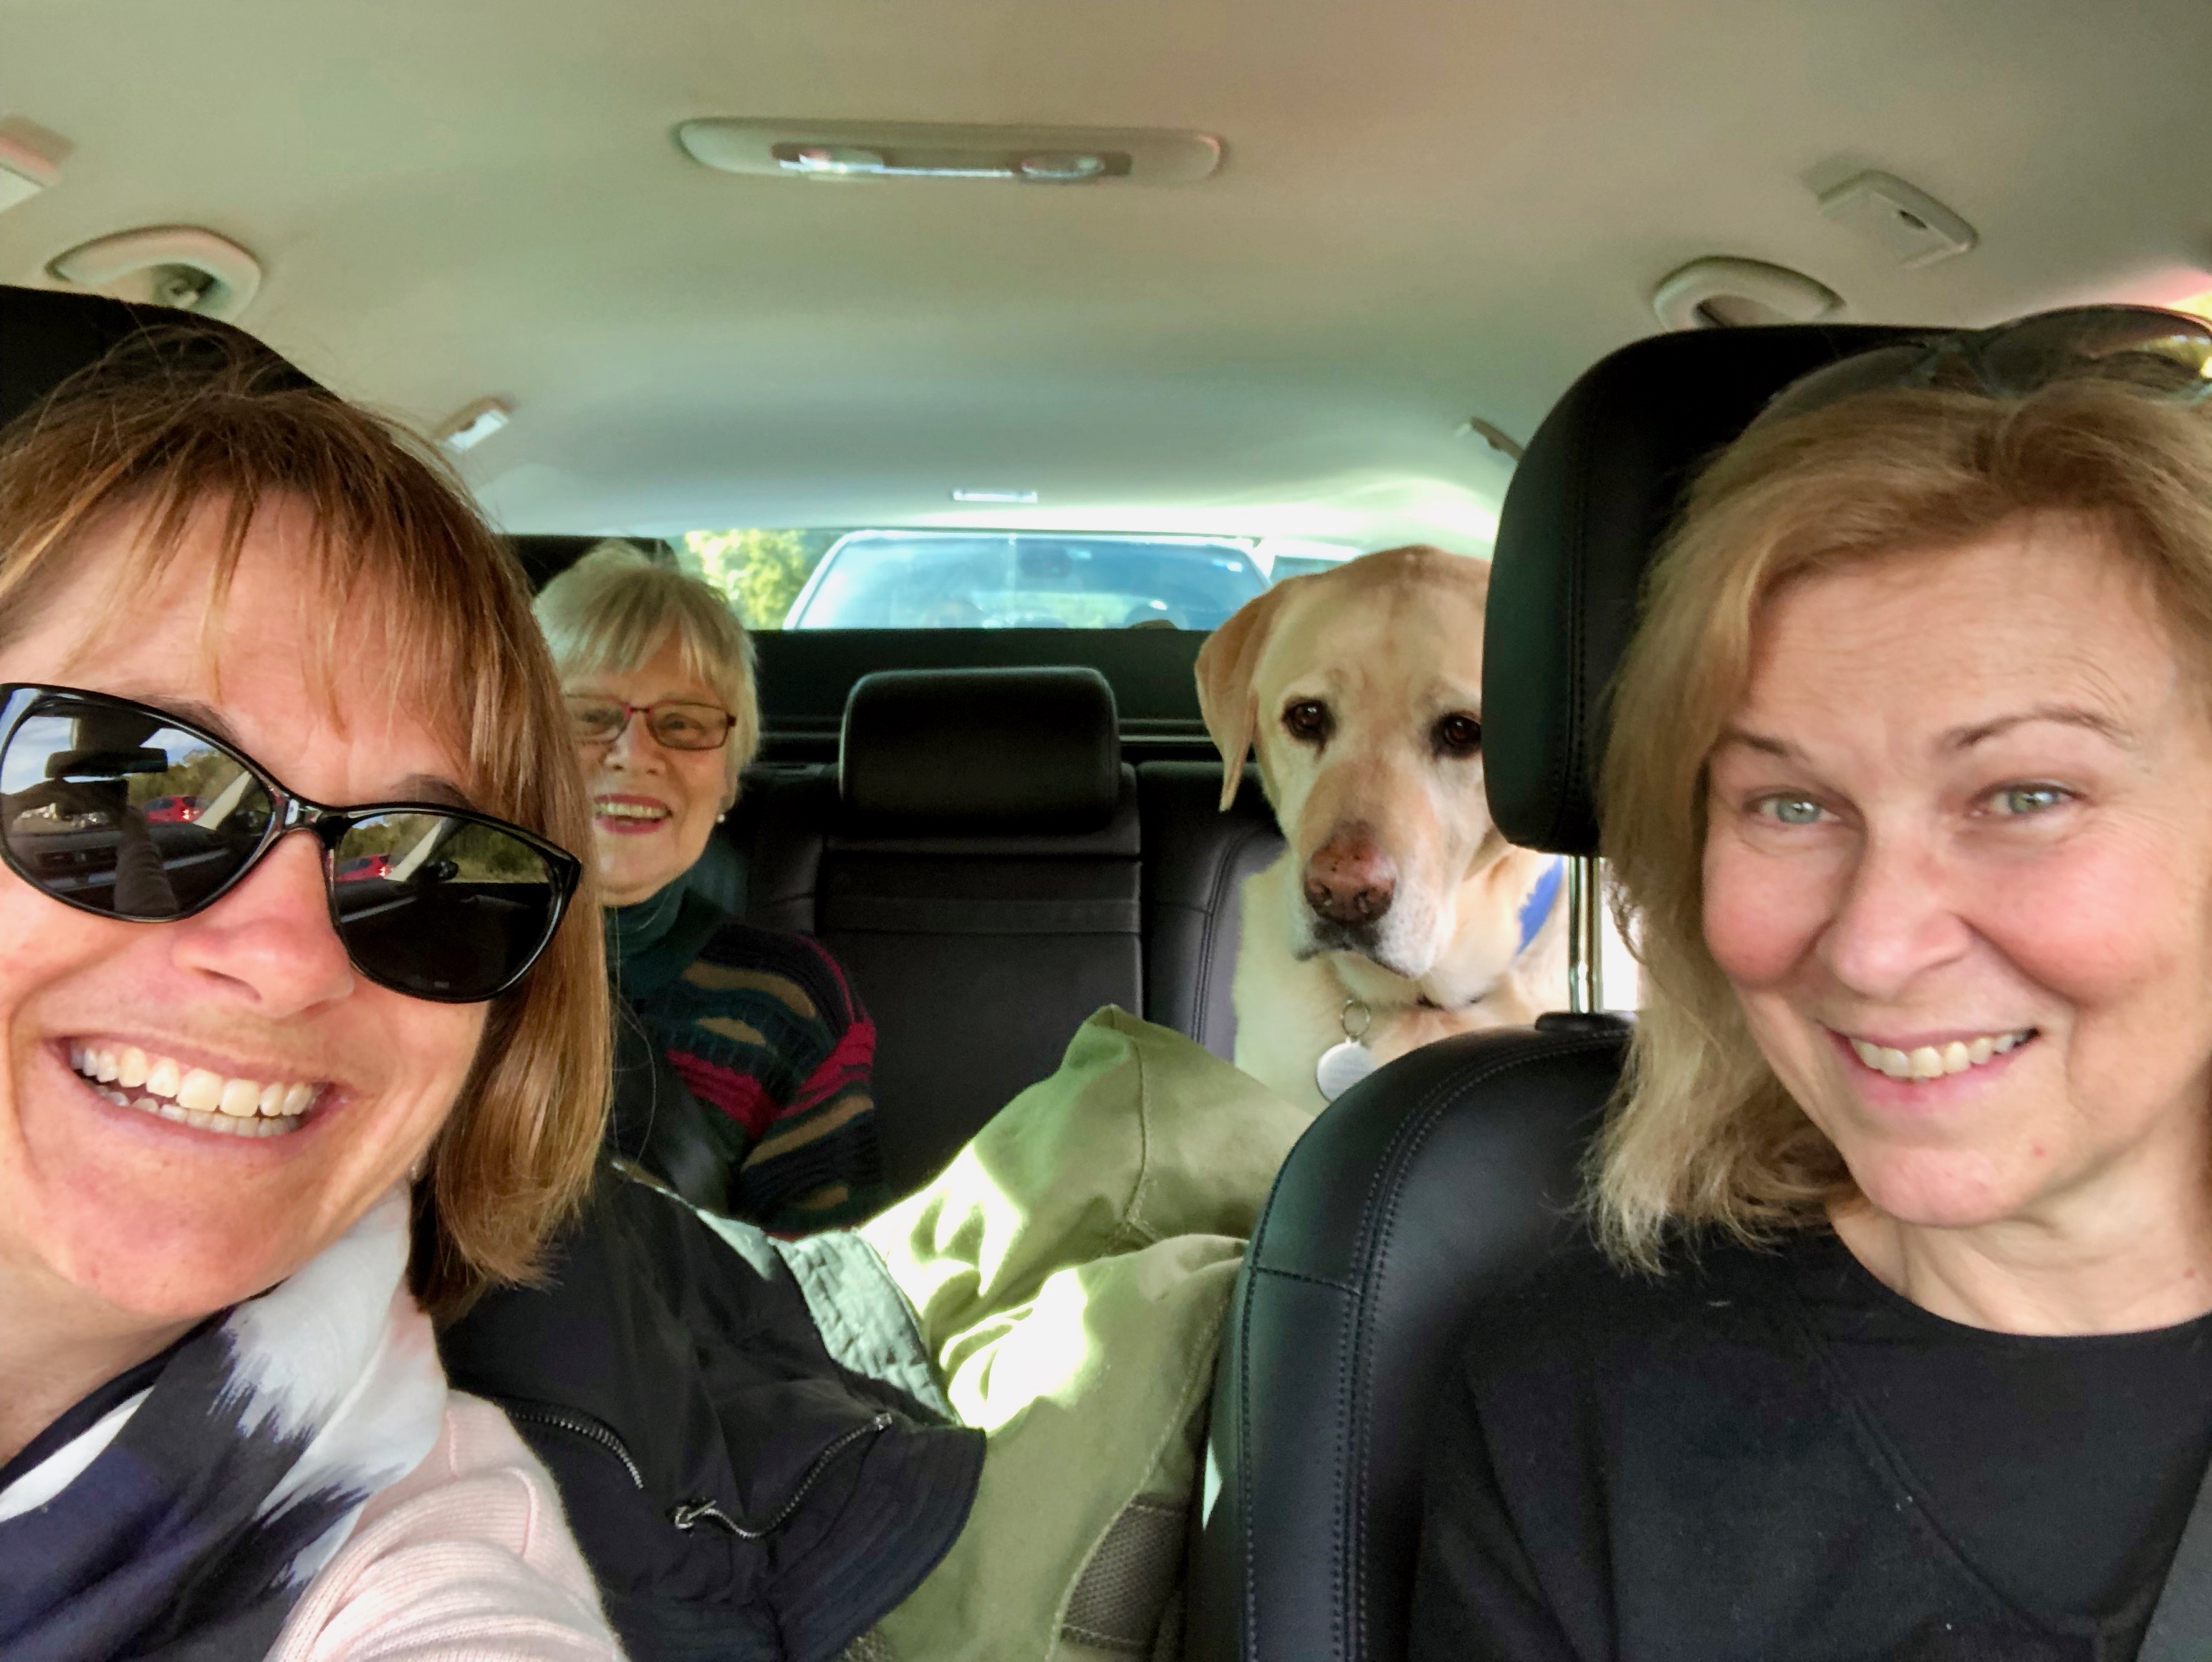
Jen, her dog Nige (he’s photobombing the photo above!) and my mum and I have an annual crafting weekend in the Blue Mountains and we always stop for lunch at Glenbrook on our way to Blackheath.
Here we are on our way up there this year…Nige, would you stop photobombing our photos, please!!!
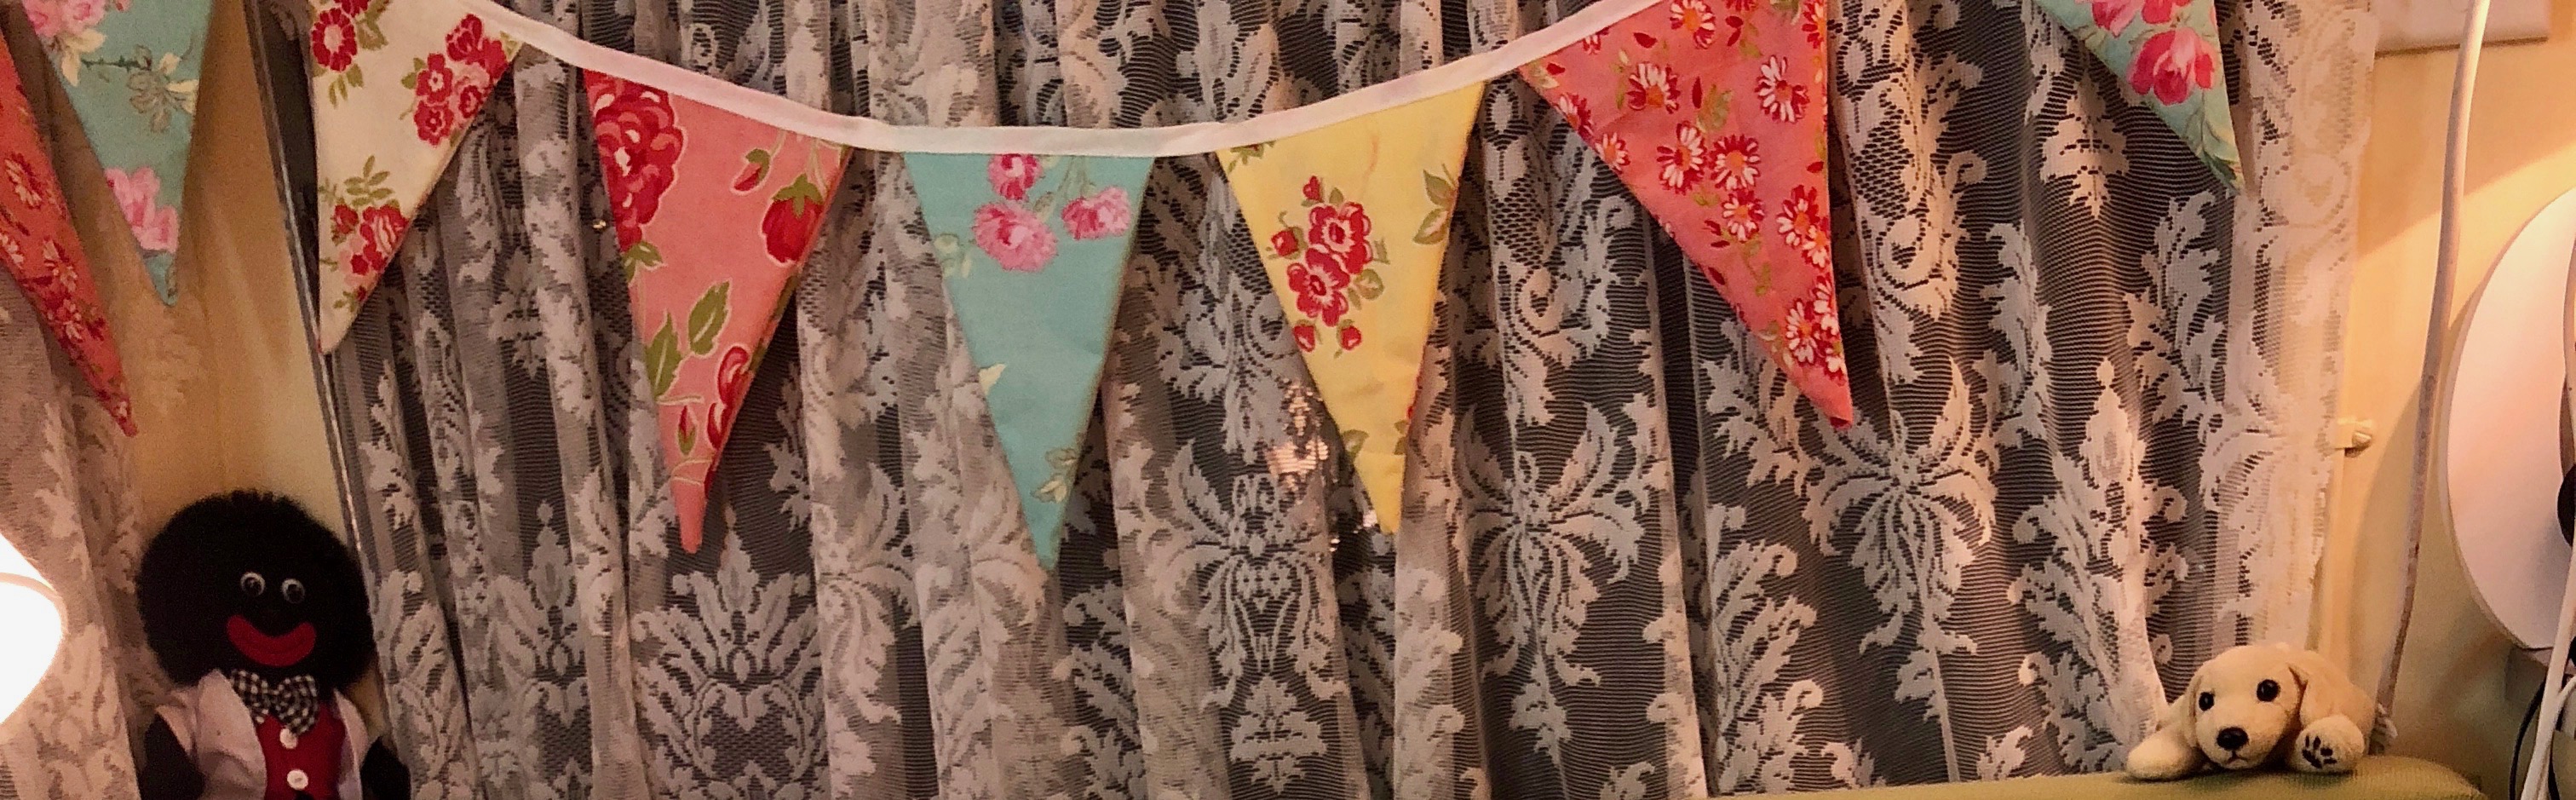
There’s a lovely patchwork shop at Glenbrook that we visit after lunch. In the past, I’ve bought fabric from here to make bunting and cushions for Sylvia…and you can see from the photo of the bunting I made that Calypso Coral, Flirty Flamingo, Daffodil Delight, Coastal Cabana and Bermuda Bay are all part of the retro colour scheme in Sylvia.
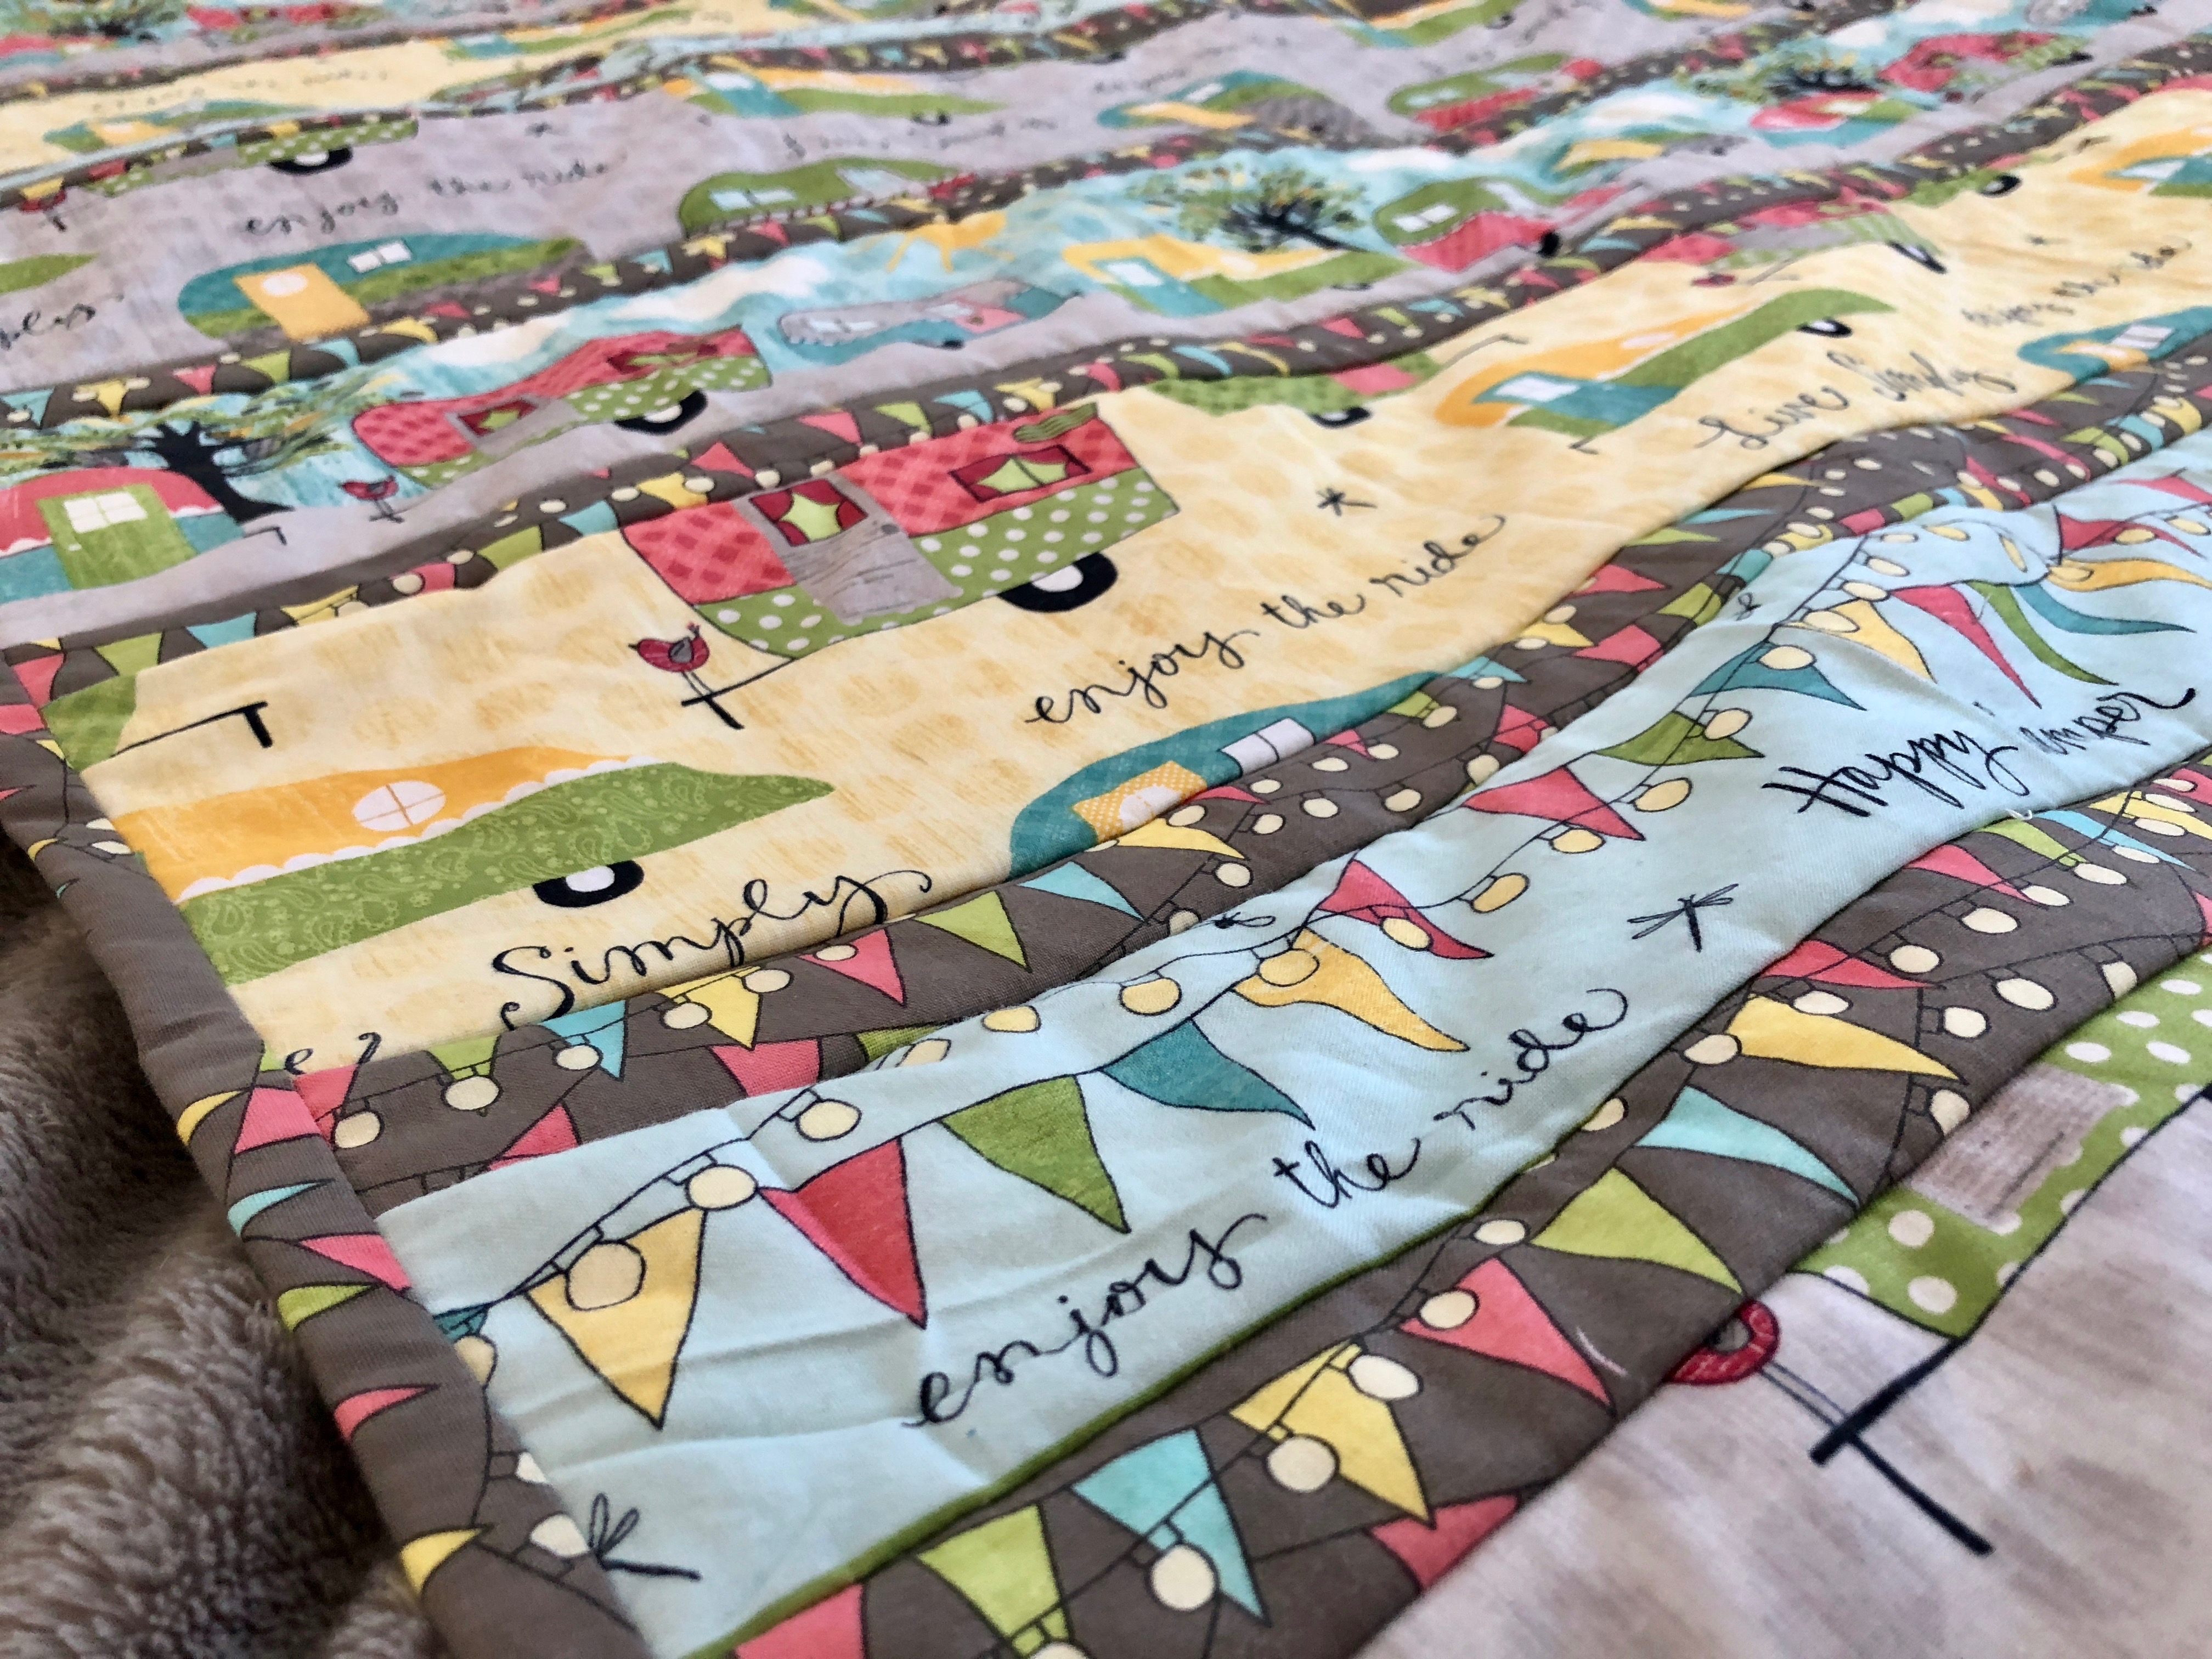
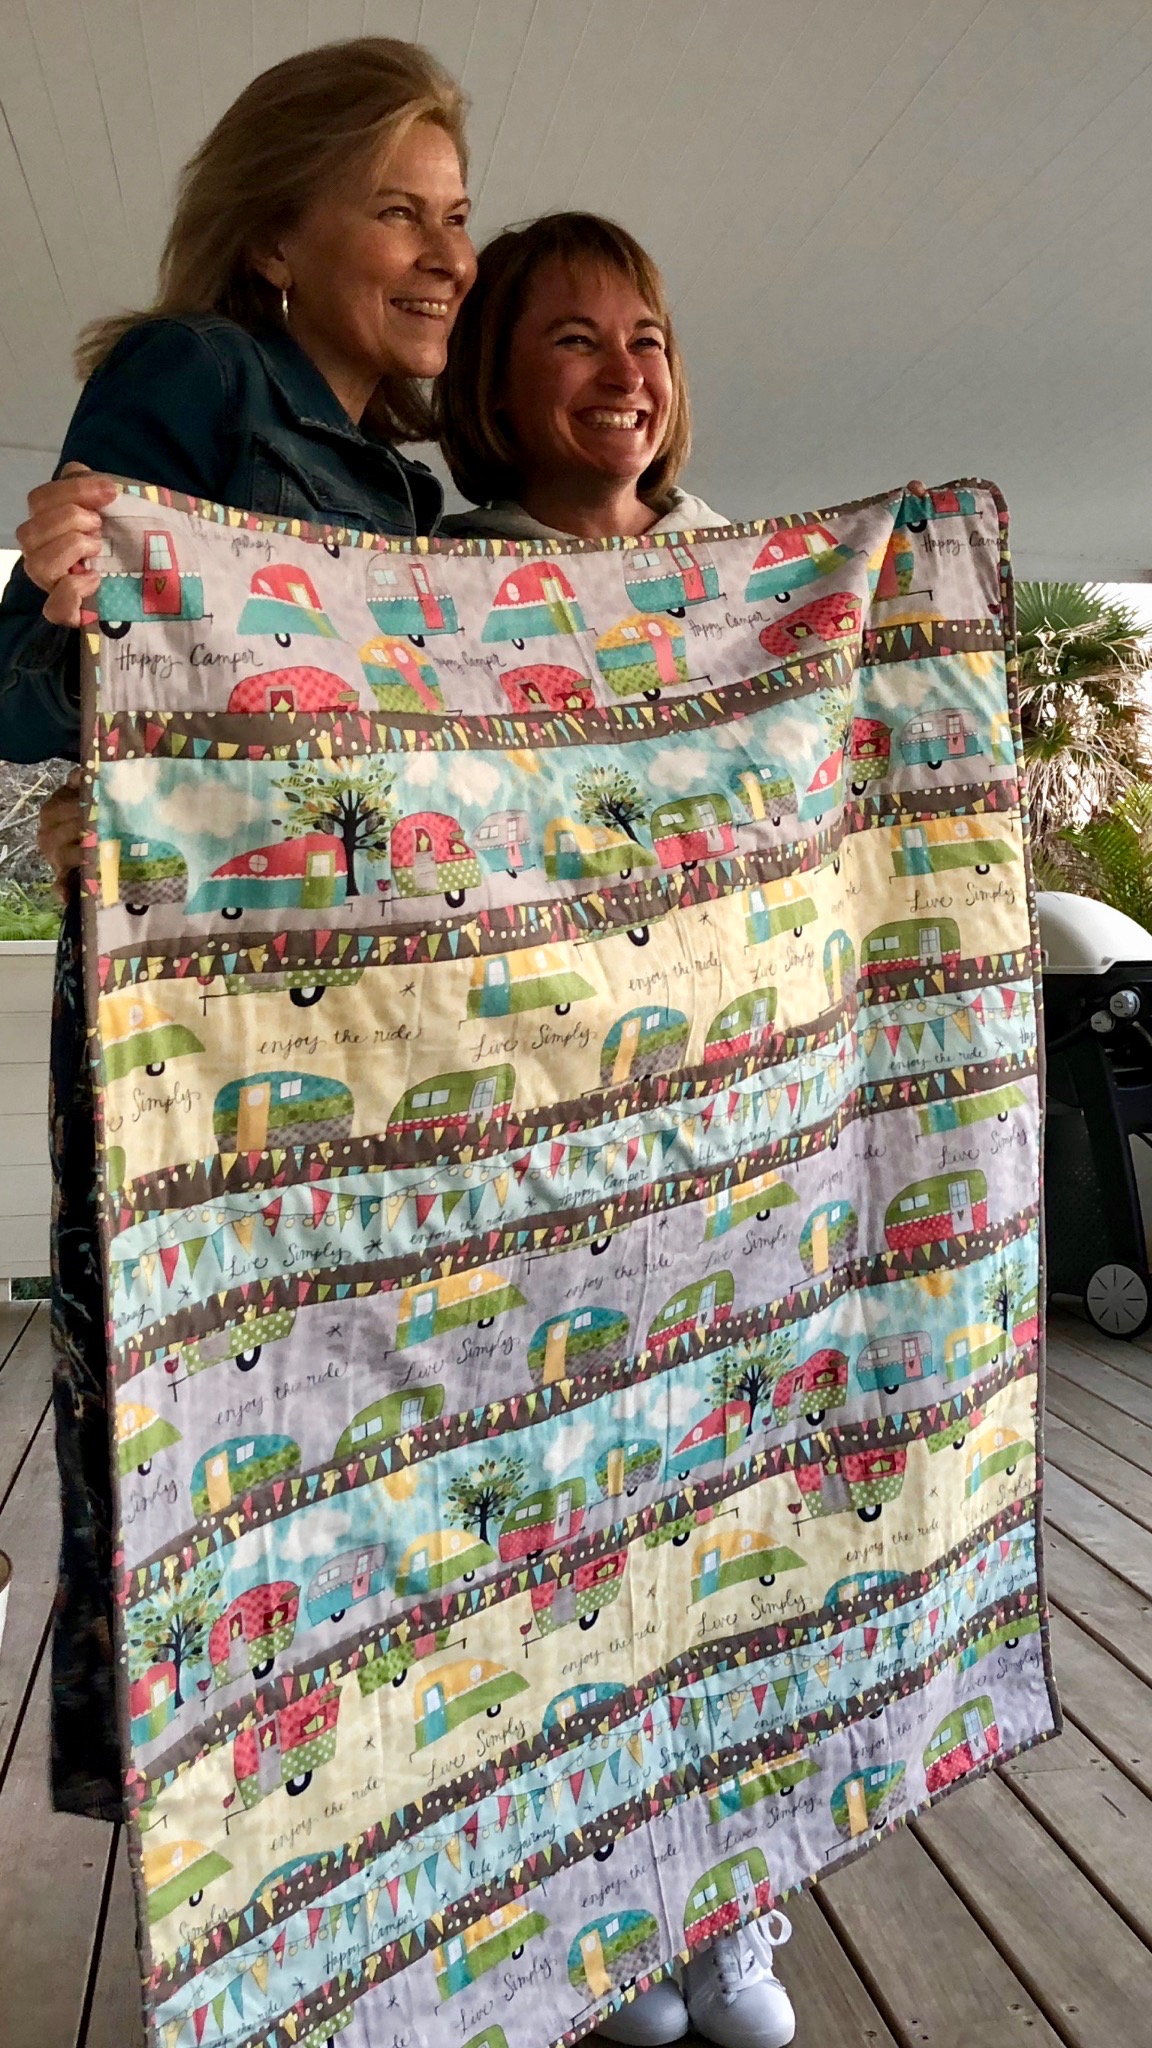
This year we found the most incredible vintage caravan fabric in the patchwork shop, so I decided to make a “quilt as you go” strip quilt with matching caravan card to accompany it for Jen’s birthday. How lovely do all of these beautiful bright colours look together!
The strip method of quilting is fabulous for fabric designs that feature large-scale prints (such as in my quilt below) and “quilting as you go” makes for a super speedy and easy quiltmaking. Strips of the gorgeous bunting backing fabric were used to divide up the large-scale prints, as well as to make the binding for the quilt.
So how did I make a matching card for the quilt without a caravan stamp set or dies?
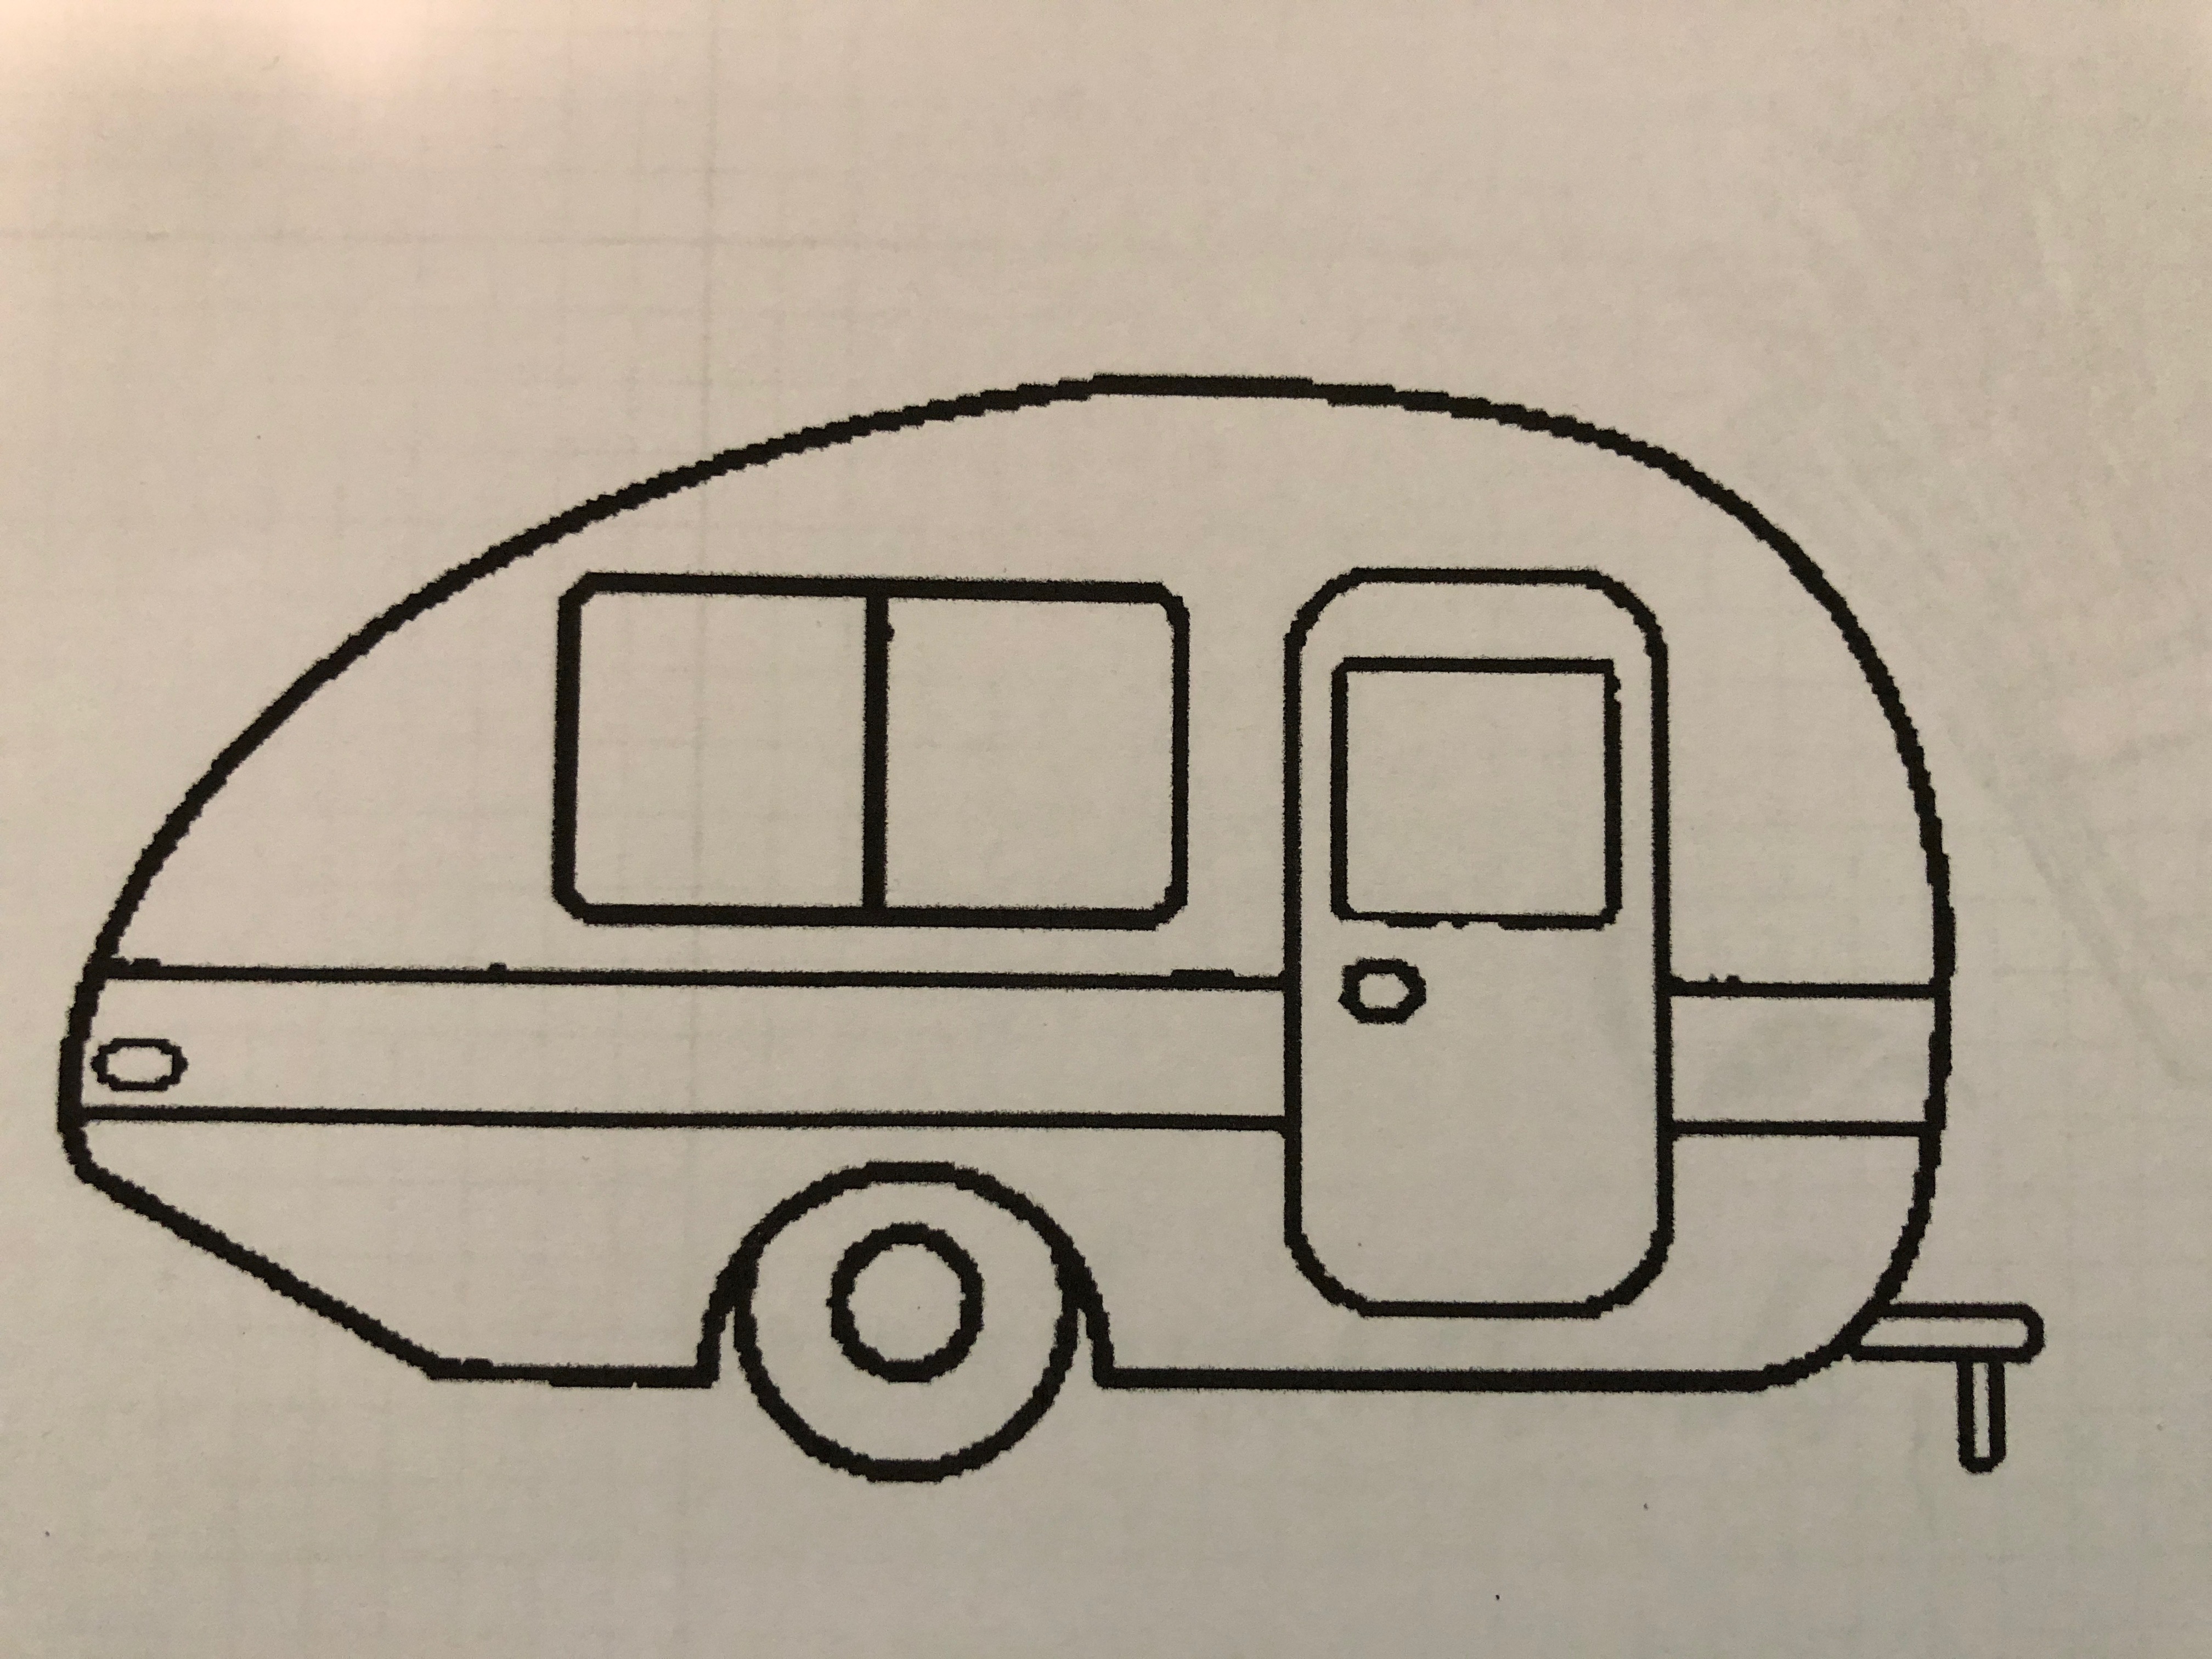
Well, the beauty of paper crafting is that you really are only limited by your imagination. I simply searched on Pinterest for a caravan template that I then printed out and customised with my Stampin’ Up! cardstock, DSP and stamps. Too easy!
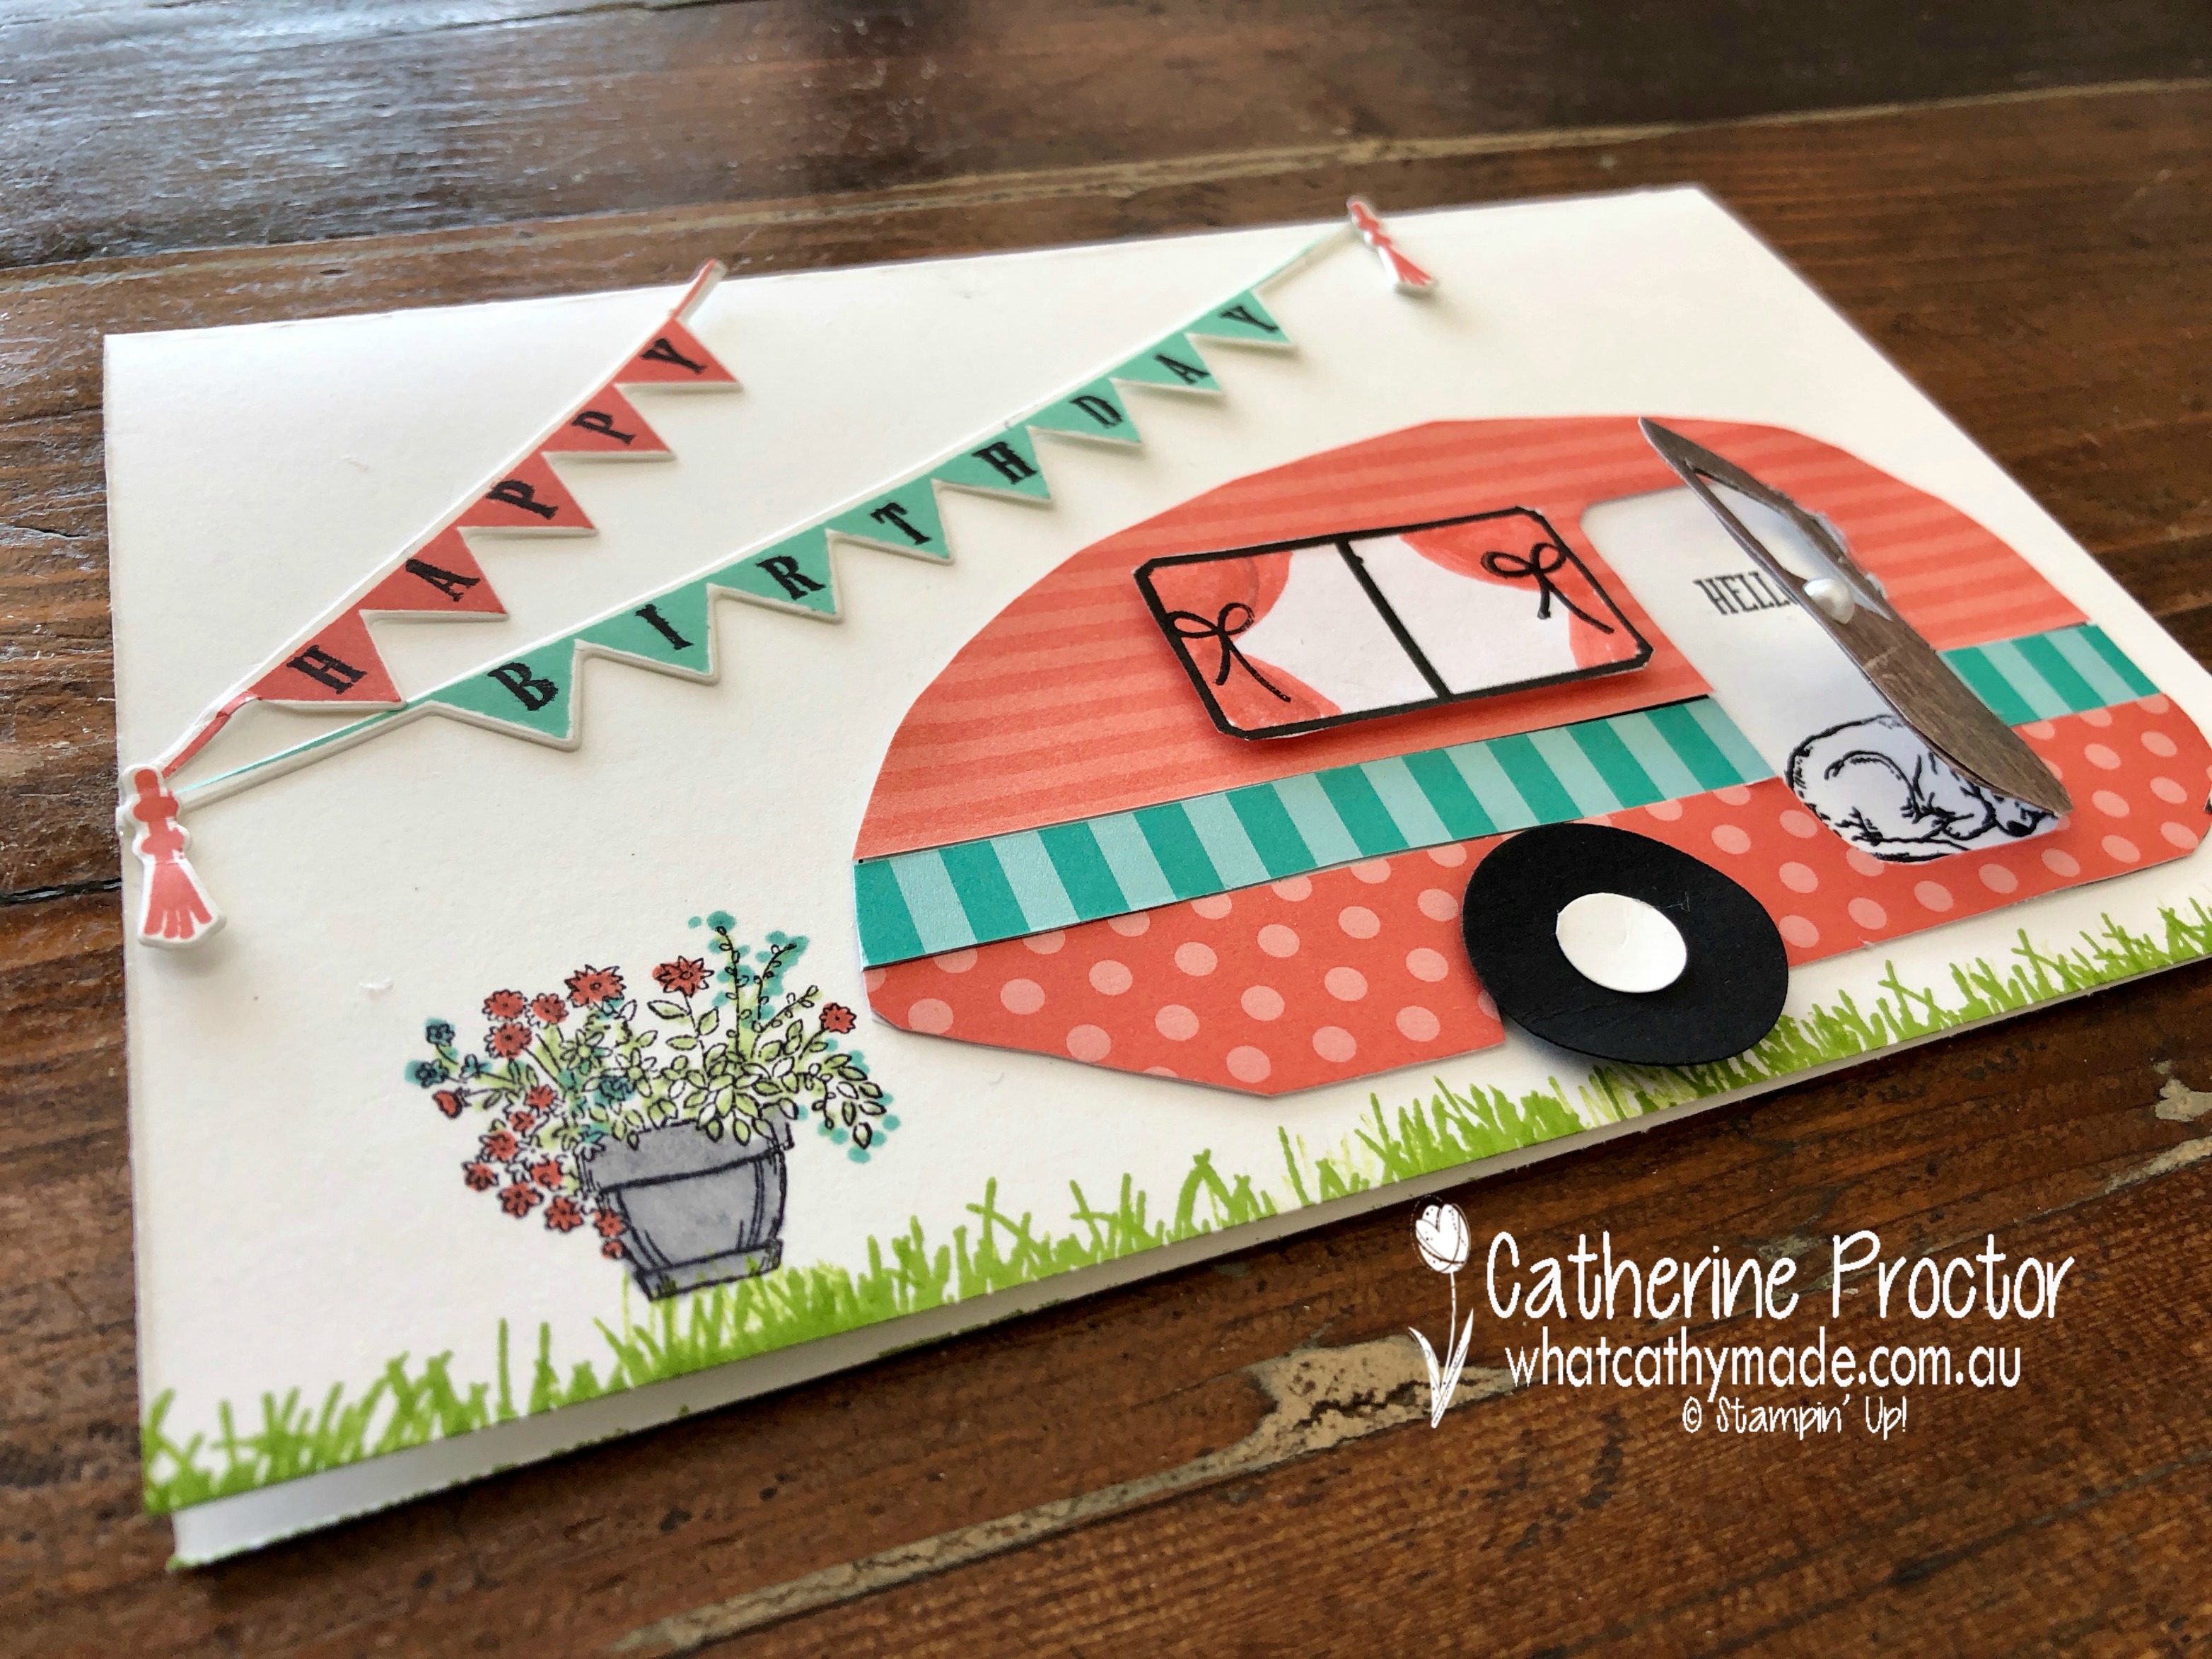
Because Nige is such an important part of Jen’s life and he sits with us in the caravan when we craft I wanted to include him in this card. The Sitting Here stamp set has a dog stamp that looks just like Nige, so I cut the caravan door on one side so it would open to reveal Nige sleeping inside. The cute little pot plant is also from the Sitting Here stamp set.
I stamped the Happy Birthday in Calypso Coral and Bermuda Bay using the Pick a Pennant bundle…this was just perfect for this card as it references the bunting fabric on the quilt, as well as the bunting I’ve already made for Sylvia.
And the awesome grass stamp is from the Enjoy Life stamp set, stamped in Granny Apple Green…I love this stamp and this colour!
Because I only had a few hours spare to make this quilt and its matching card I very quickly made the caravan card on the morning of Jen’s birthday, but I still hadn’t quite finished binding the quilt.
So I turned up to her birthday drinks and gave her the quilt with the binding still pinned in place…and then sat and sewed the binding down while we enjoyed a glass of champagne with her friends. I’m such a nana!!!!
Here’s Jen and I with the finished quilt…yes, I got it finished just in time before we had to go home!
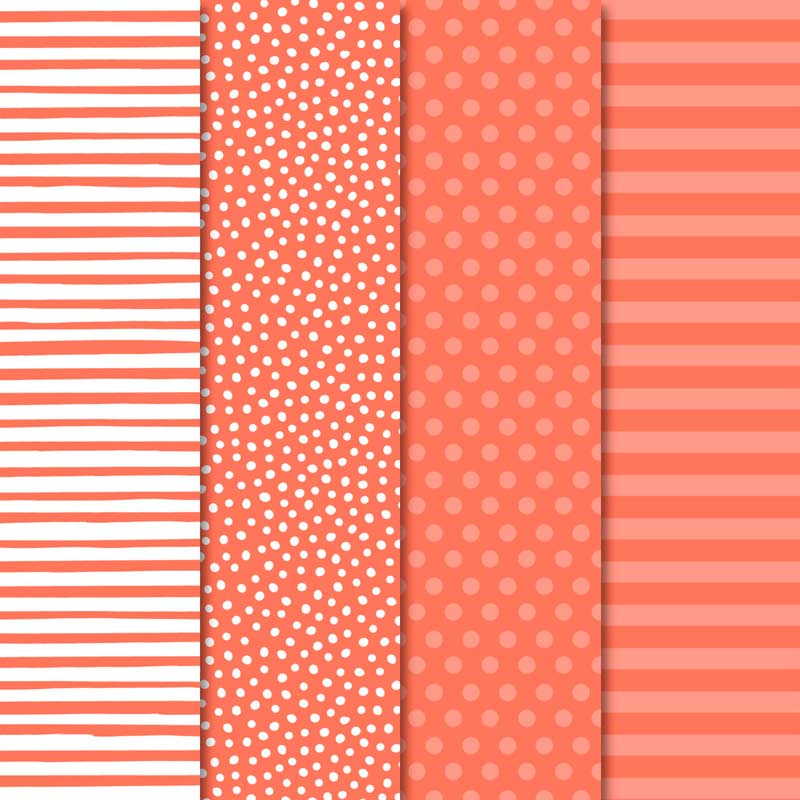
And finally, here’s the quilt with its matching Calypso Coral caravan card. I love how the spotty 6×6 DSP in Calypso Coral exactly matches the caravan print on the quilt fabric!
To see what the rest of the team have made click on the links below.
Welcome to week 9 of the Art With Heart Colour Creations Blog Hop!
This week we are showcasing one of our new In Colours: Call Me Clover.
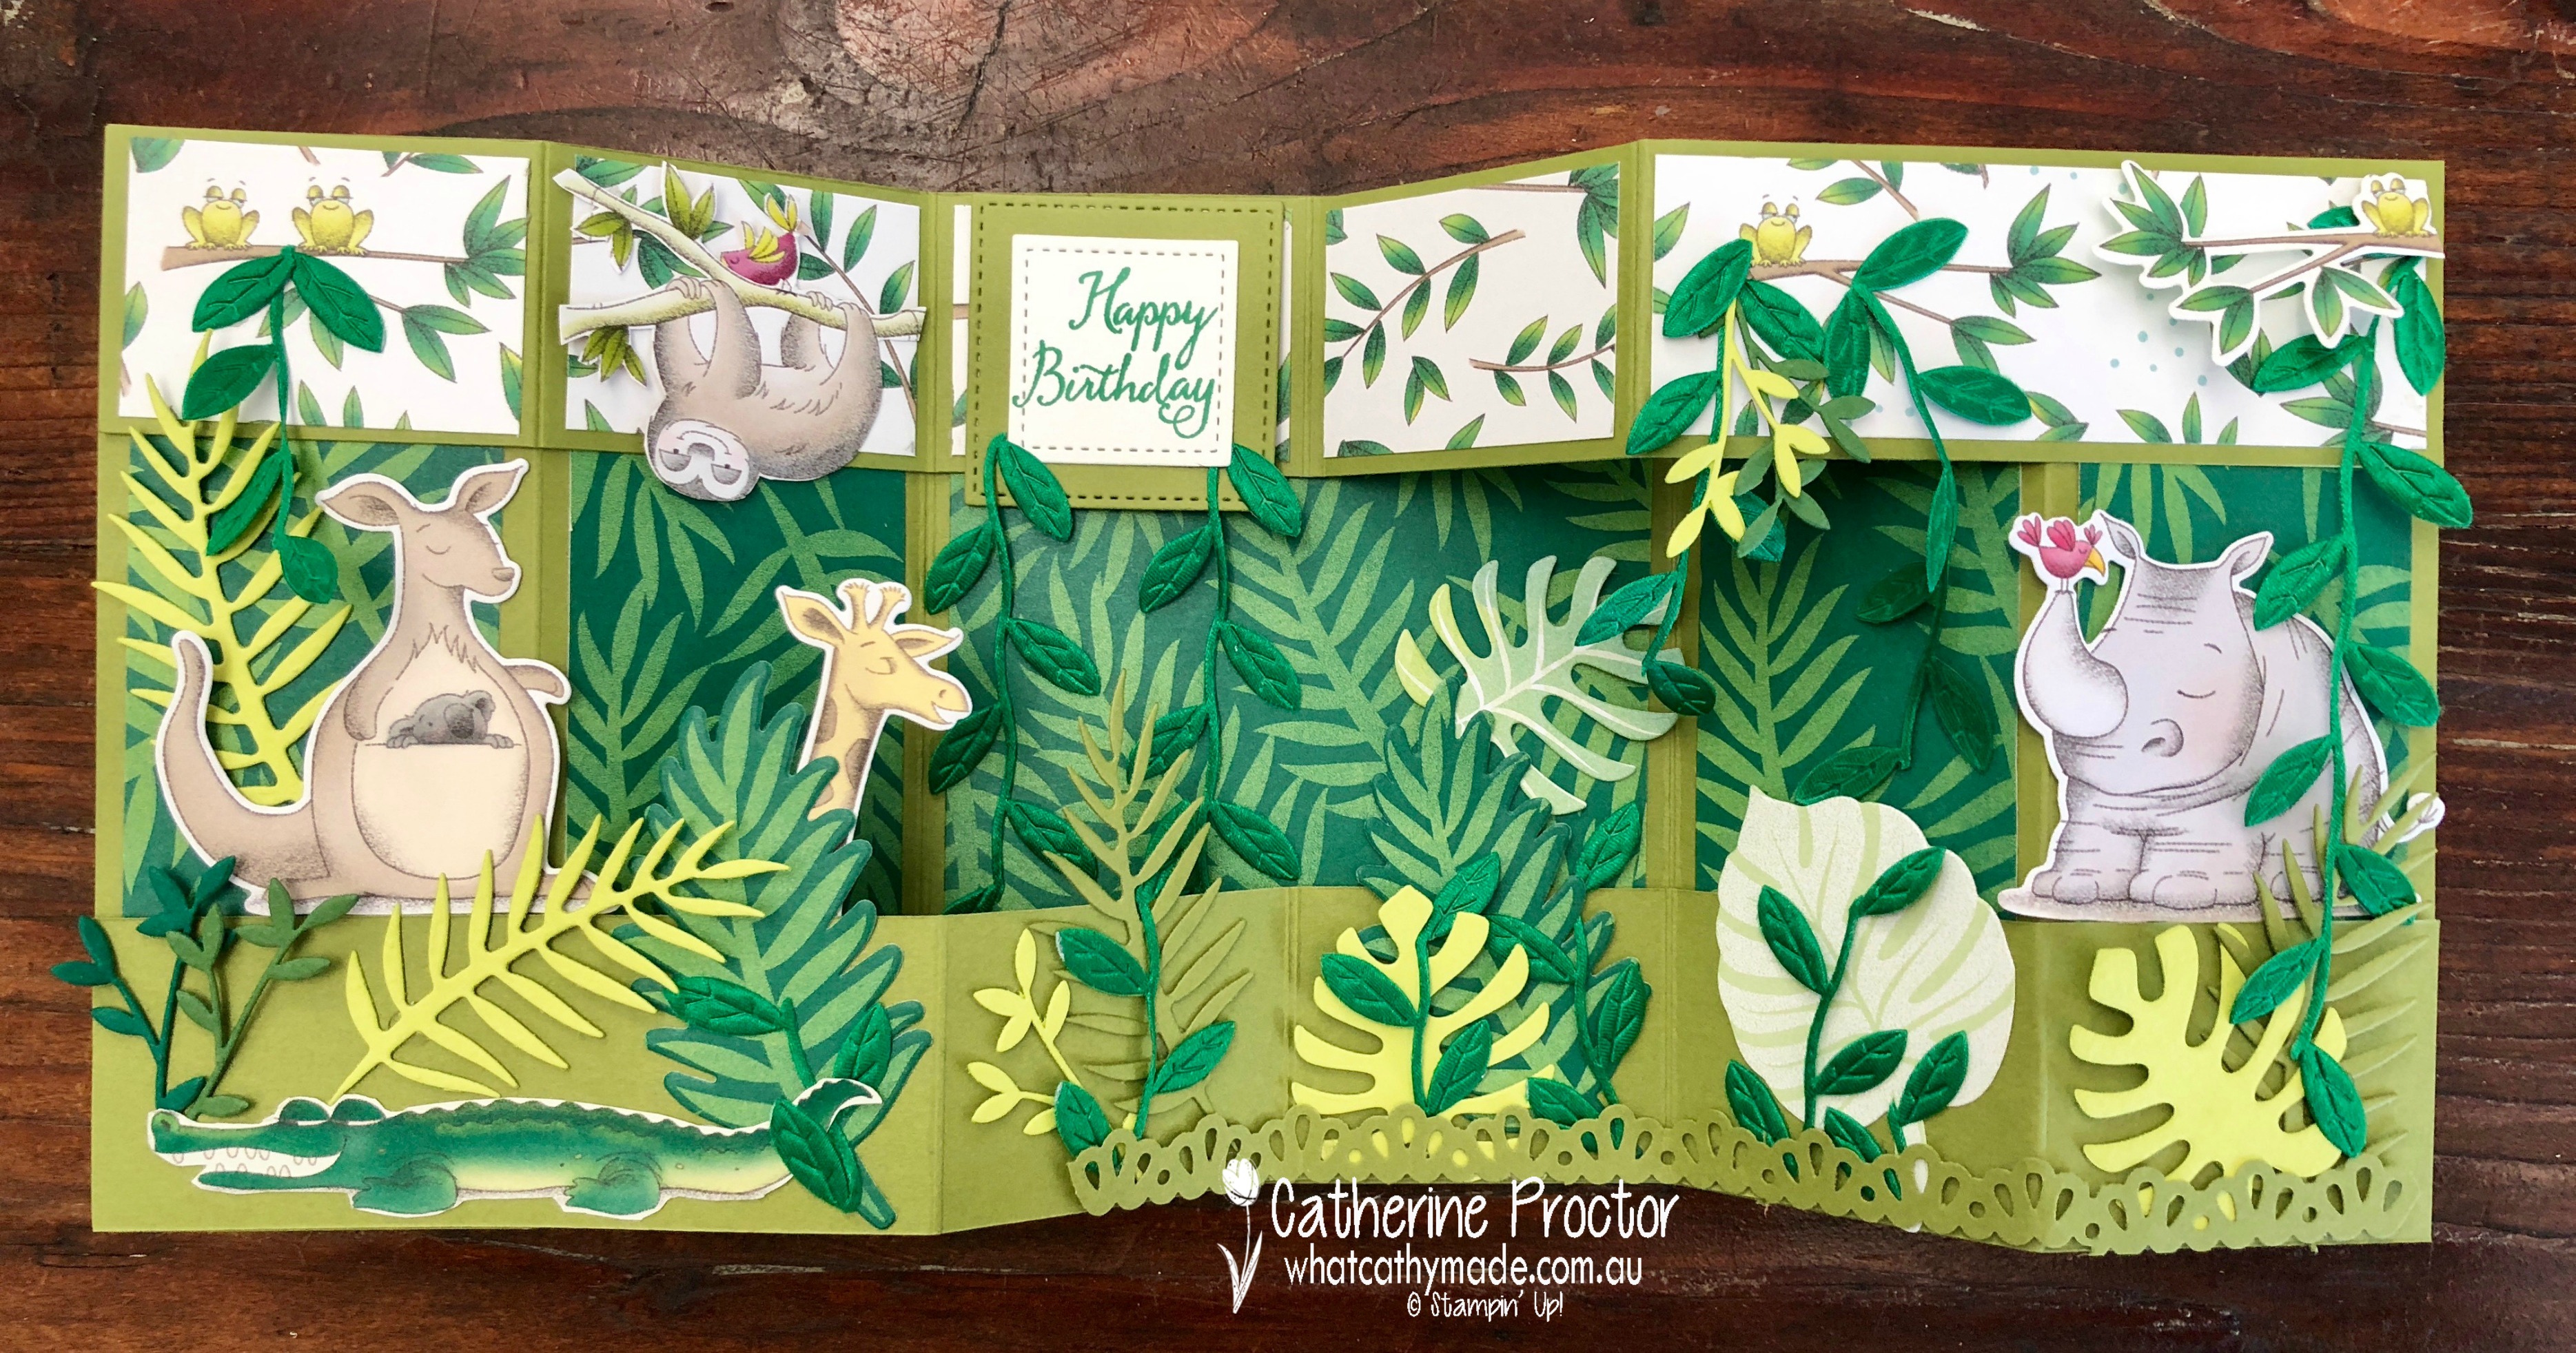
One of my favourite products in the Annual catalogue is the gorgeous Call Me Clover leaf ribbon, which I used last week to make a Taronga Zoo birthday card for my niece…and yes, she loved her card. In case you didn’t see my blog last week, here’s a photo of the card and you can see how this gorgeous ribbon adds so much dimension and texture to this card.
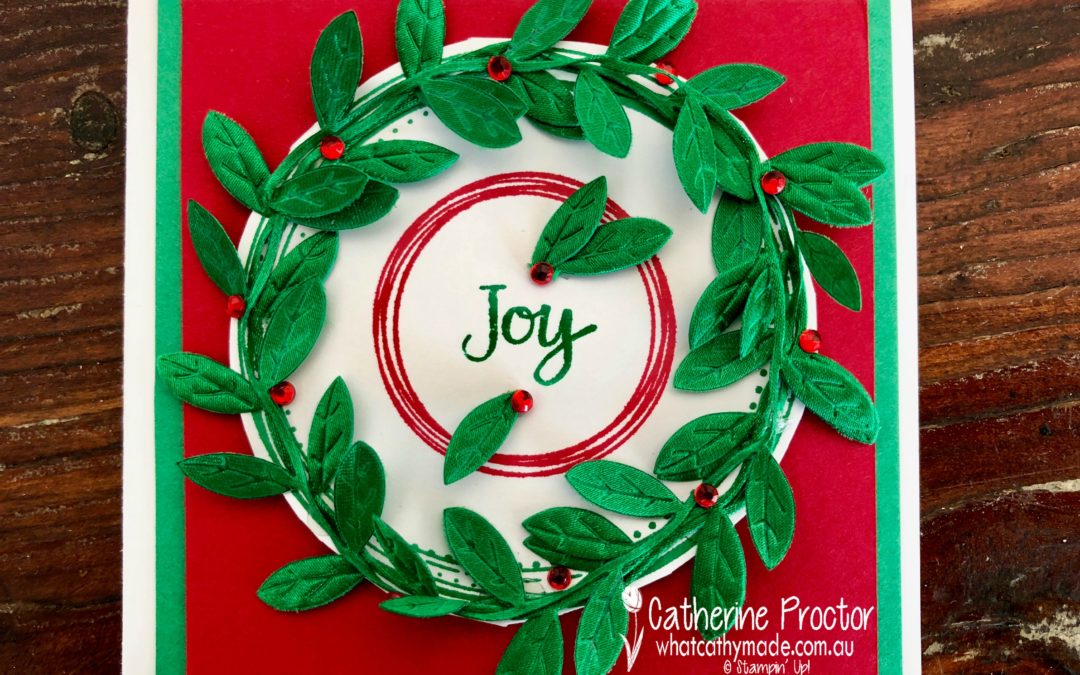
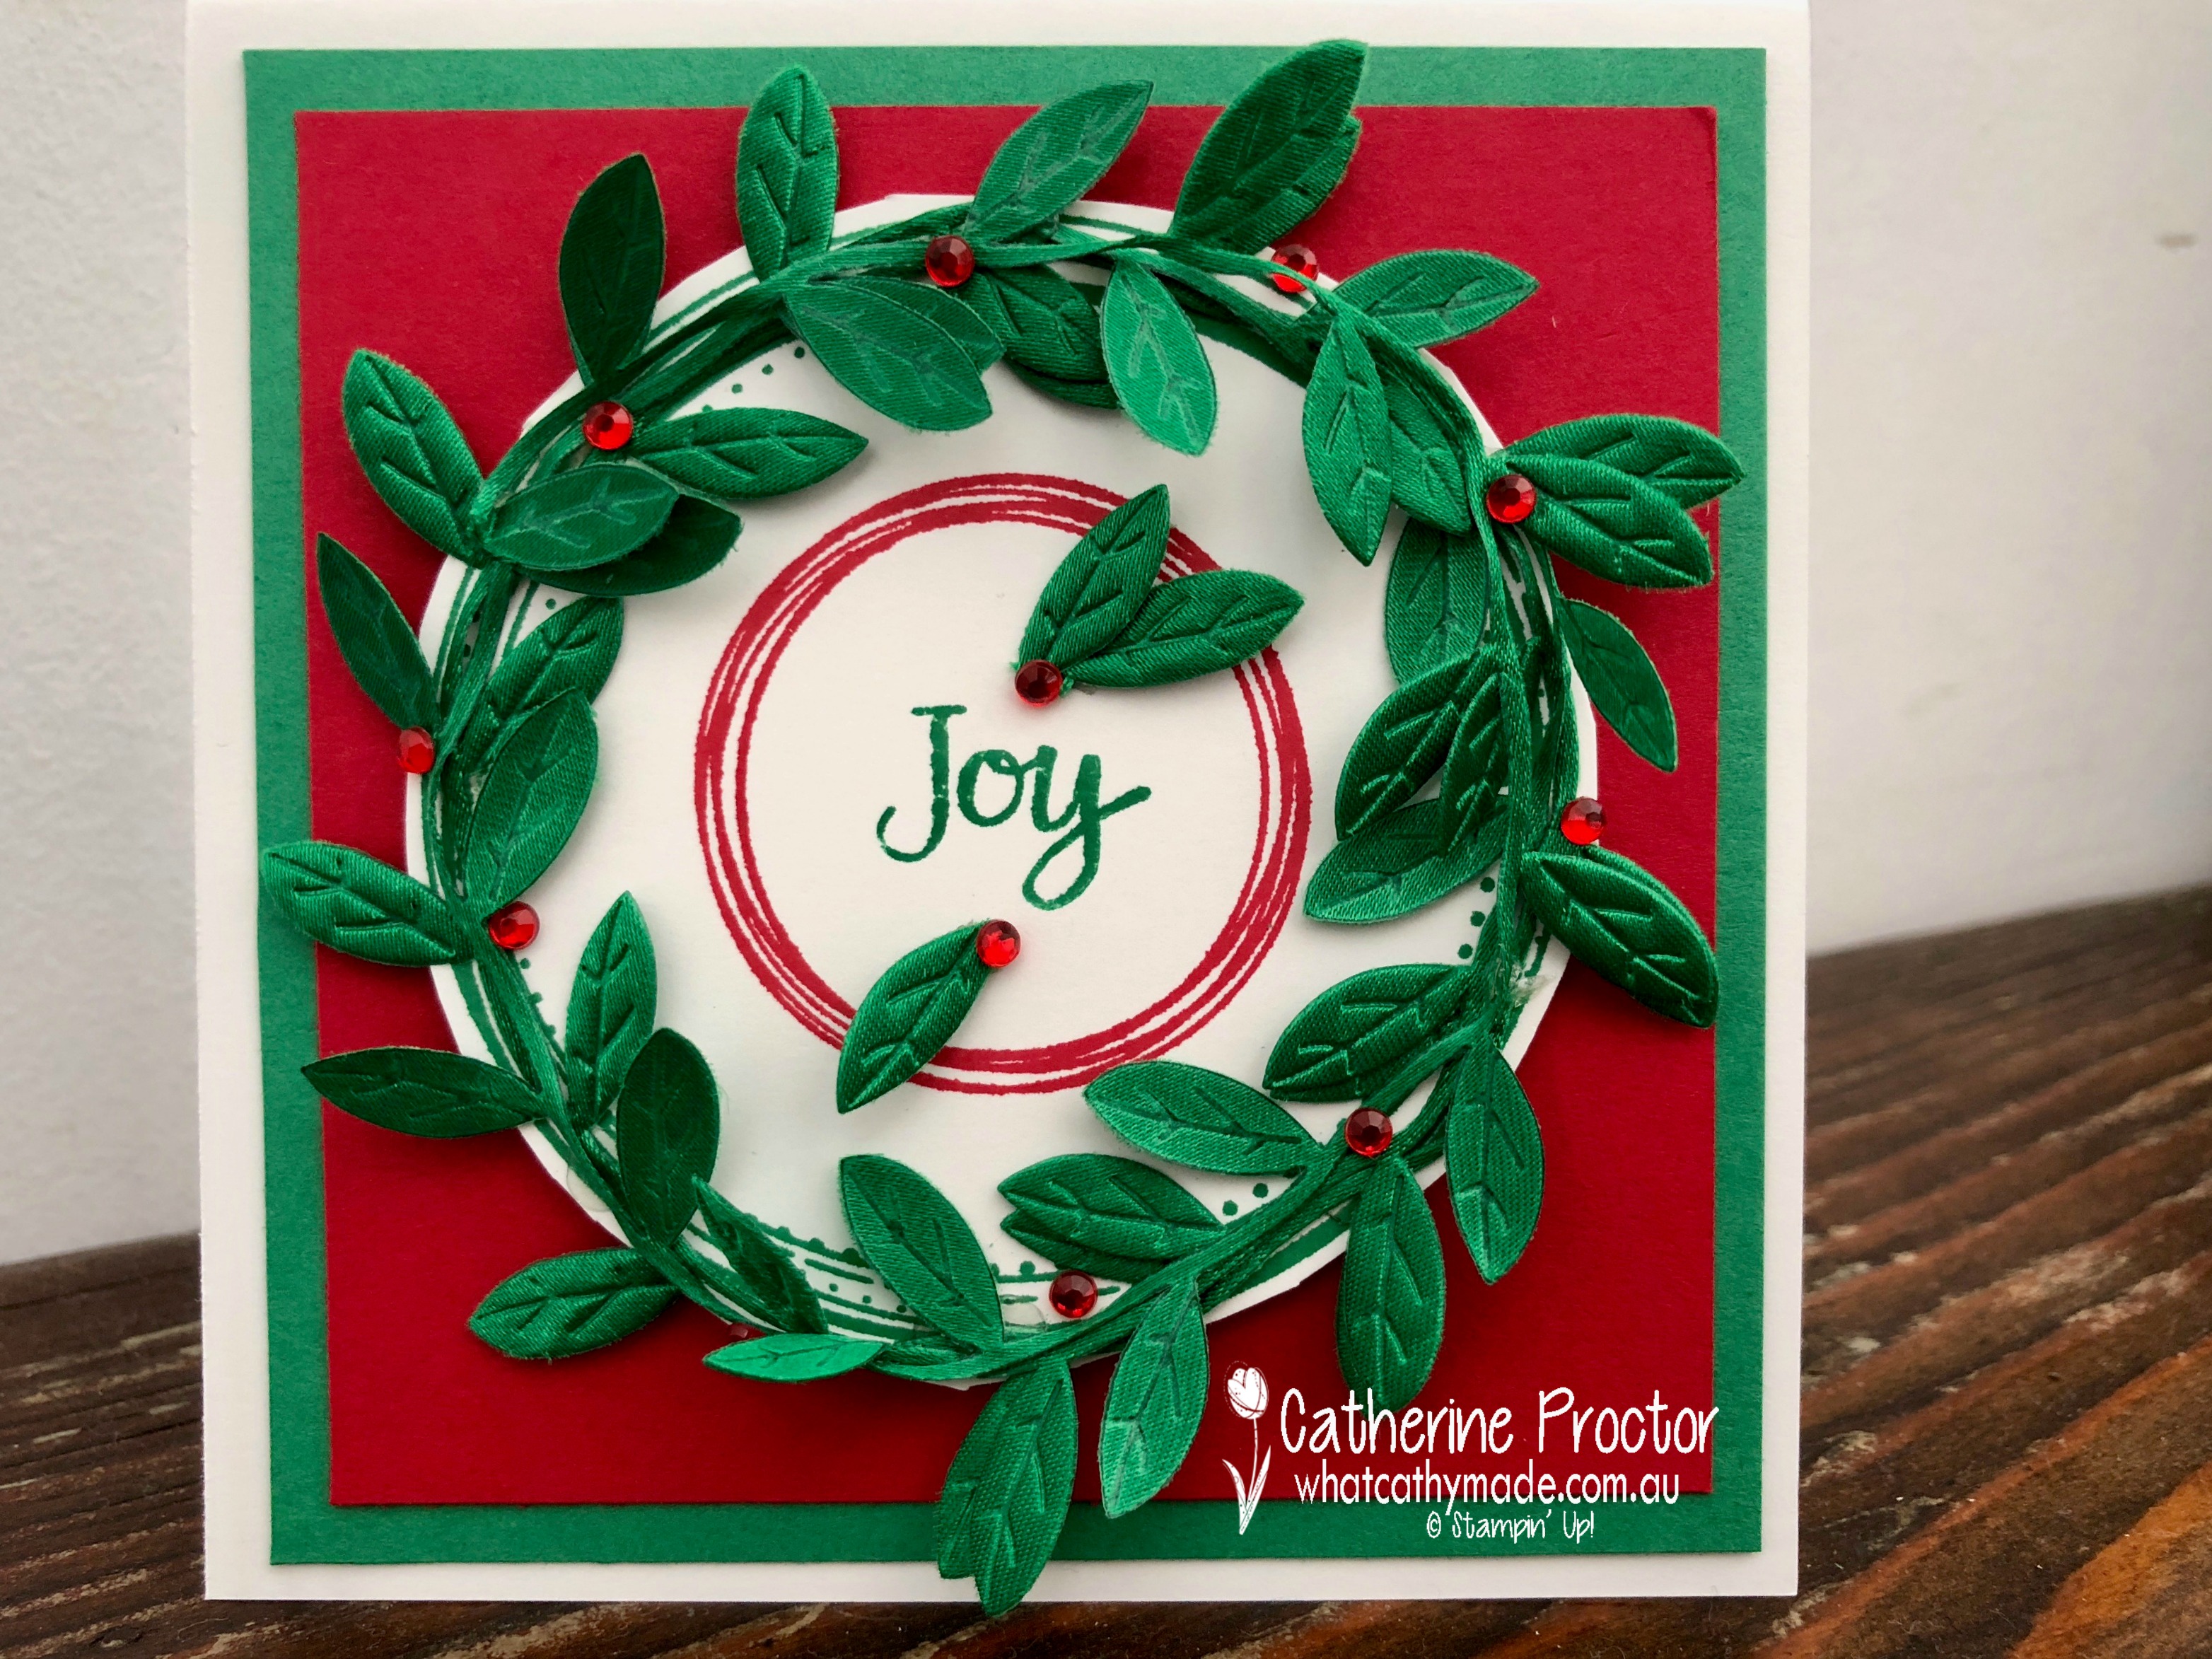
I had so much fun playing with this leaf ribbon I decided to use it again for this week’s blog, but this time for a completely different card: my very first Christmas card of the year!
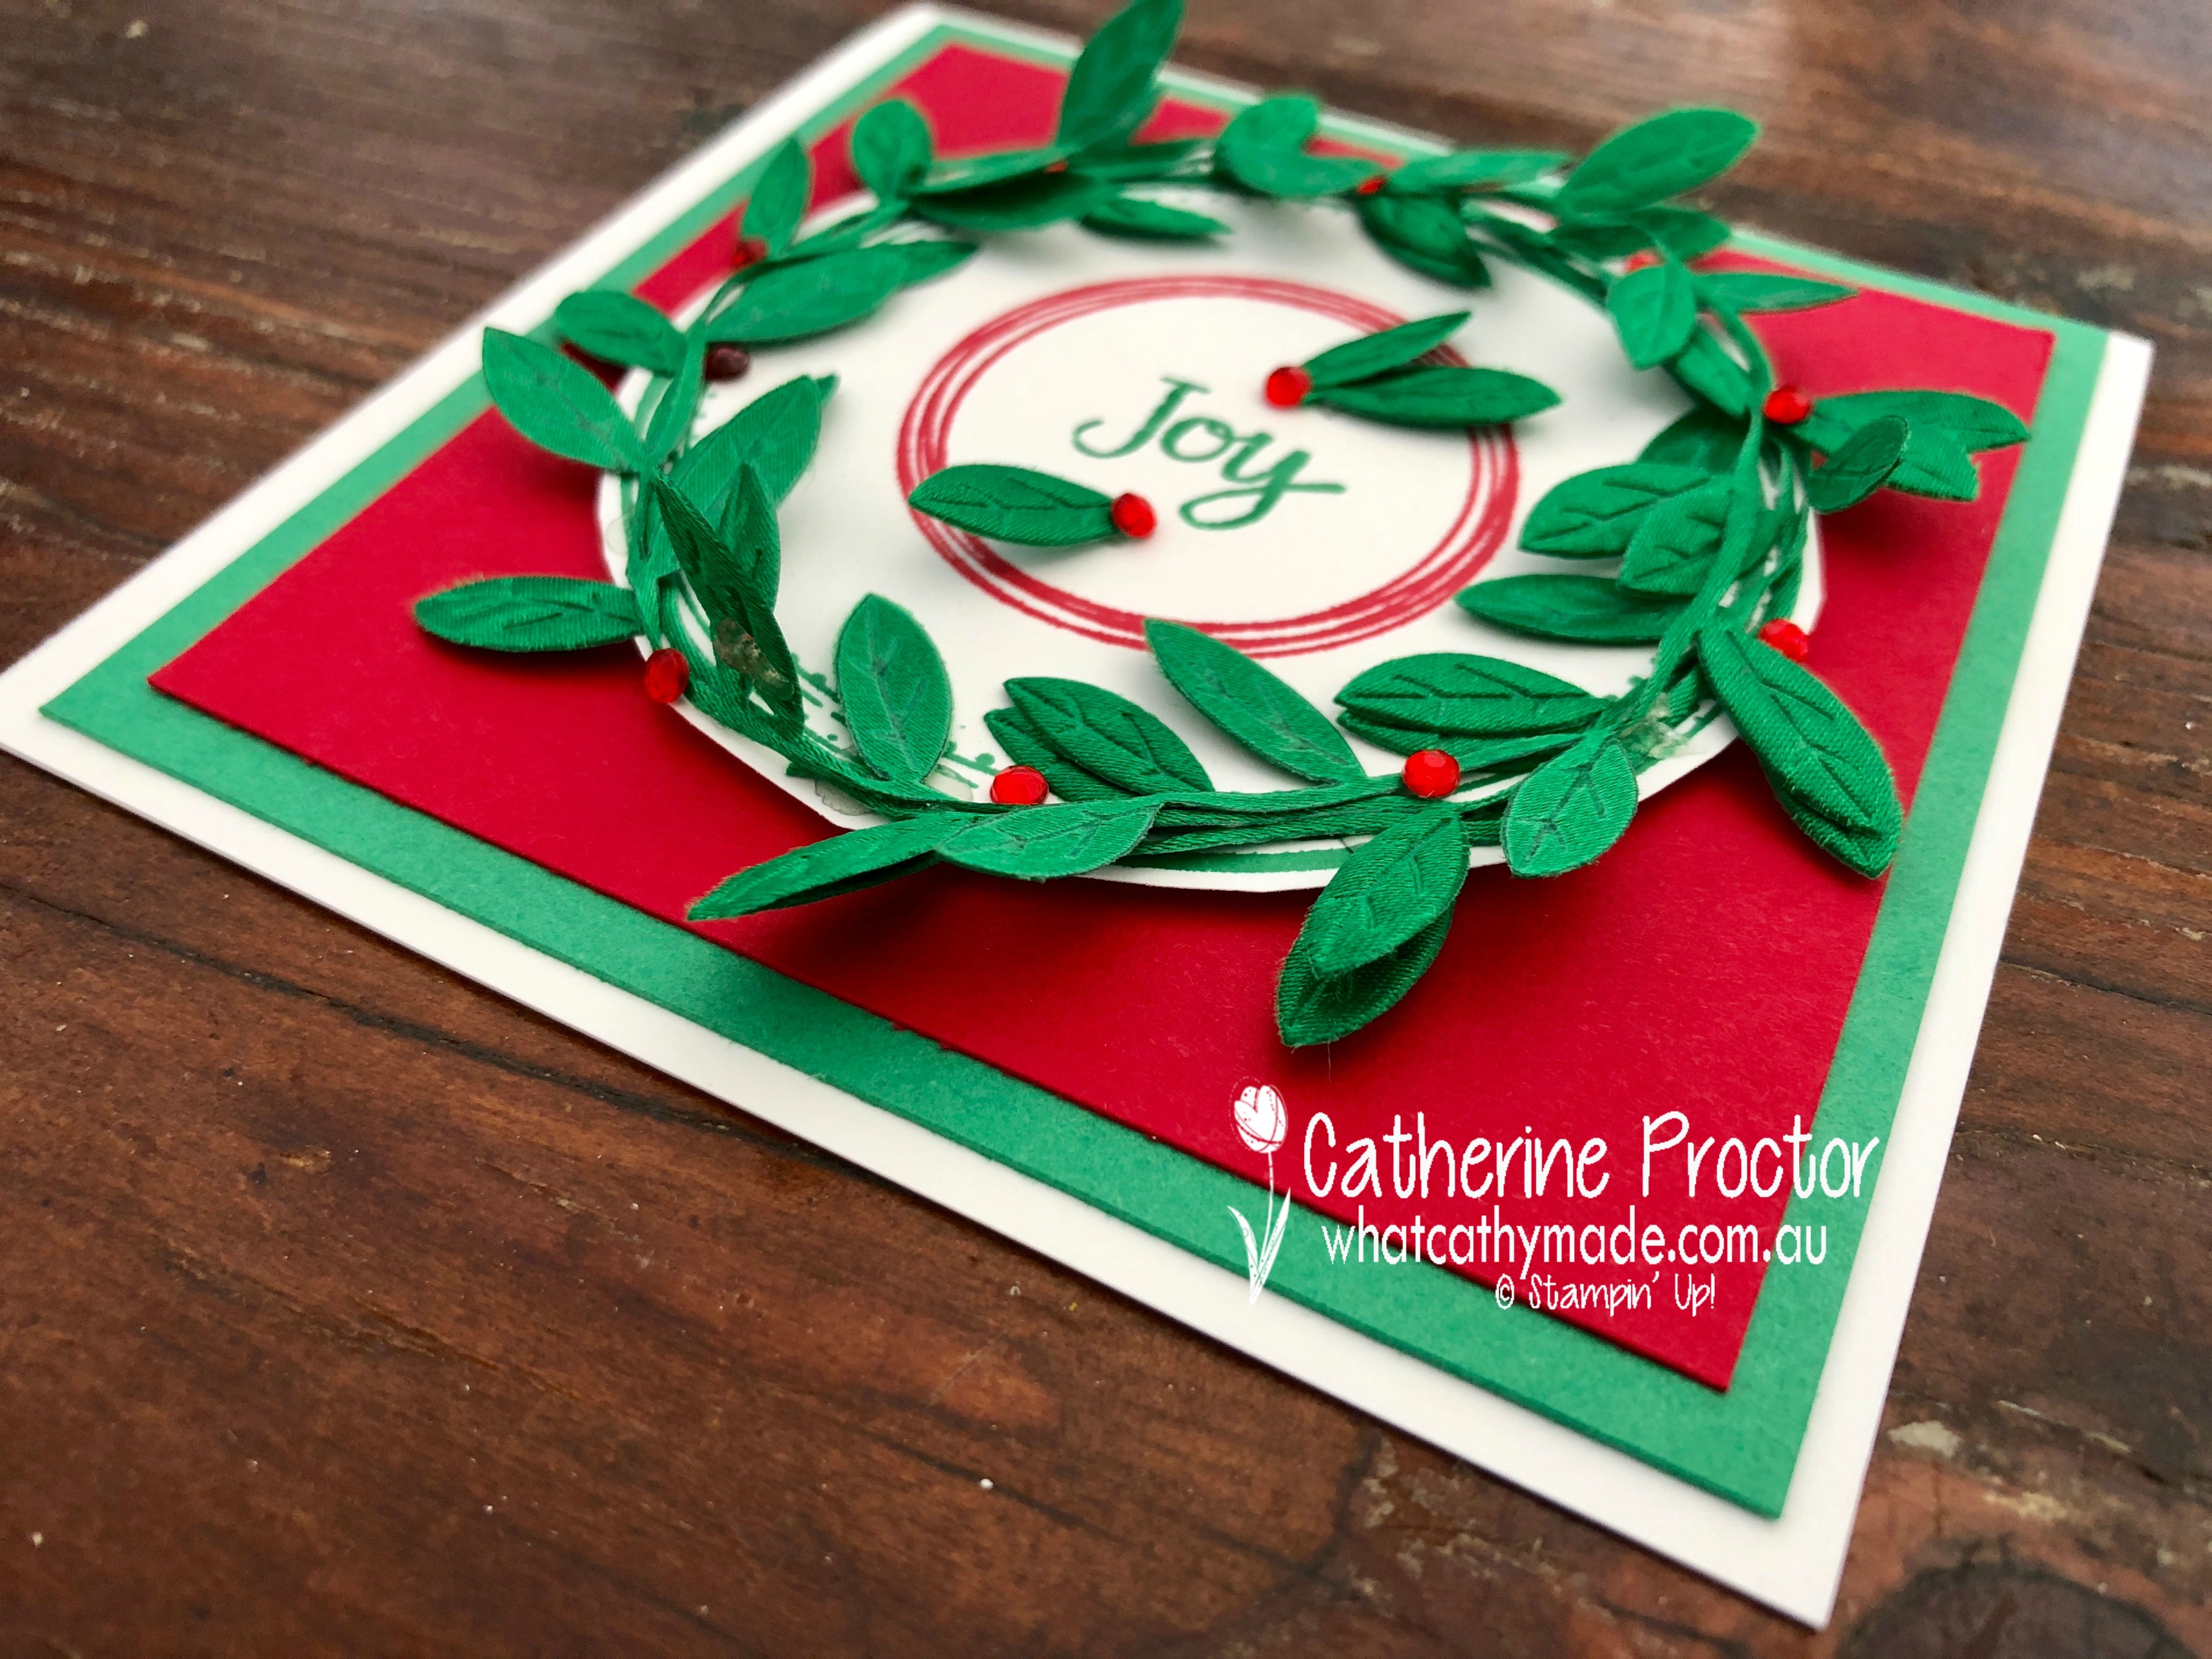
The colour combination of Real Red and Call Me Clover really screams Christmas to me, and the leaf ribbon makes such a quick and easy Christmas wreath. I used the swirly frames stamp set to stamp the larger circle in Call Me Clover and then the inner circle in Real Red. The leaf ribbon was adhered to the larger circle with glue dots and then Red Rhinestone basic jewels add the final touch.
I chopped some of the leaves off the ribbon to make individual holly sprigs to add dimension to the “joy” sentiment, which was stamped by inking up just one part of a stamp from the “Ready for Christmas” stamp set.
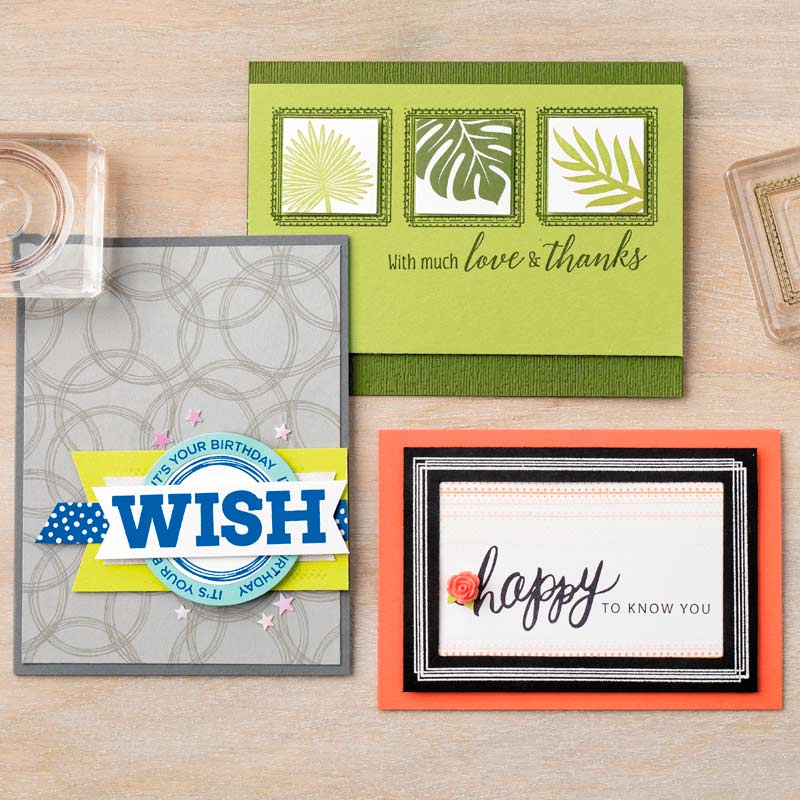
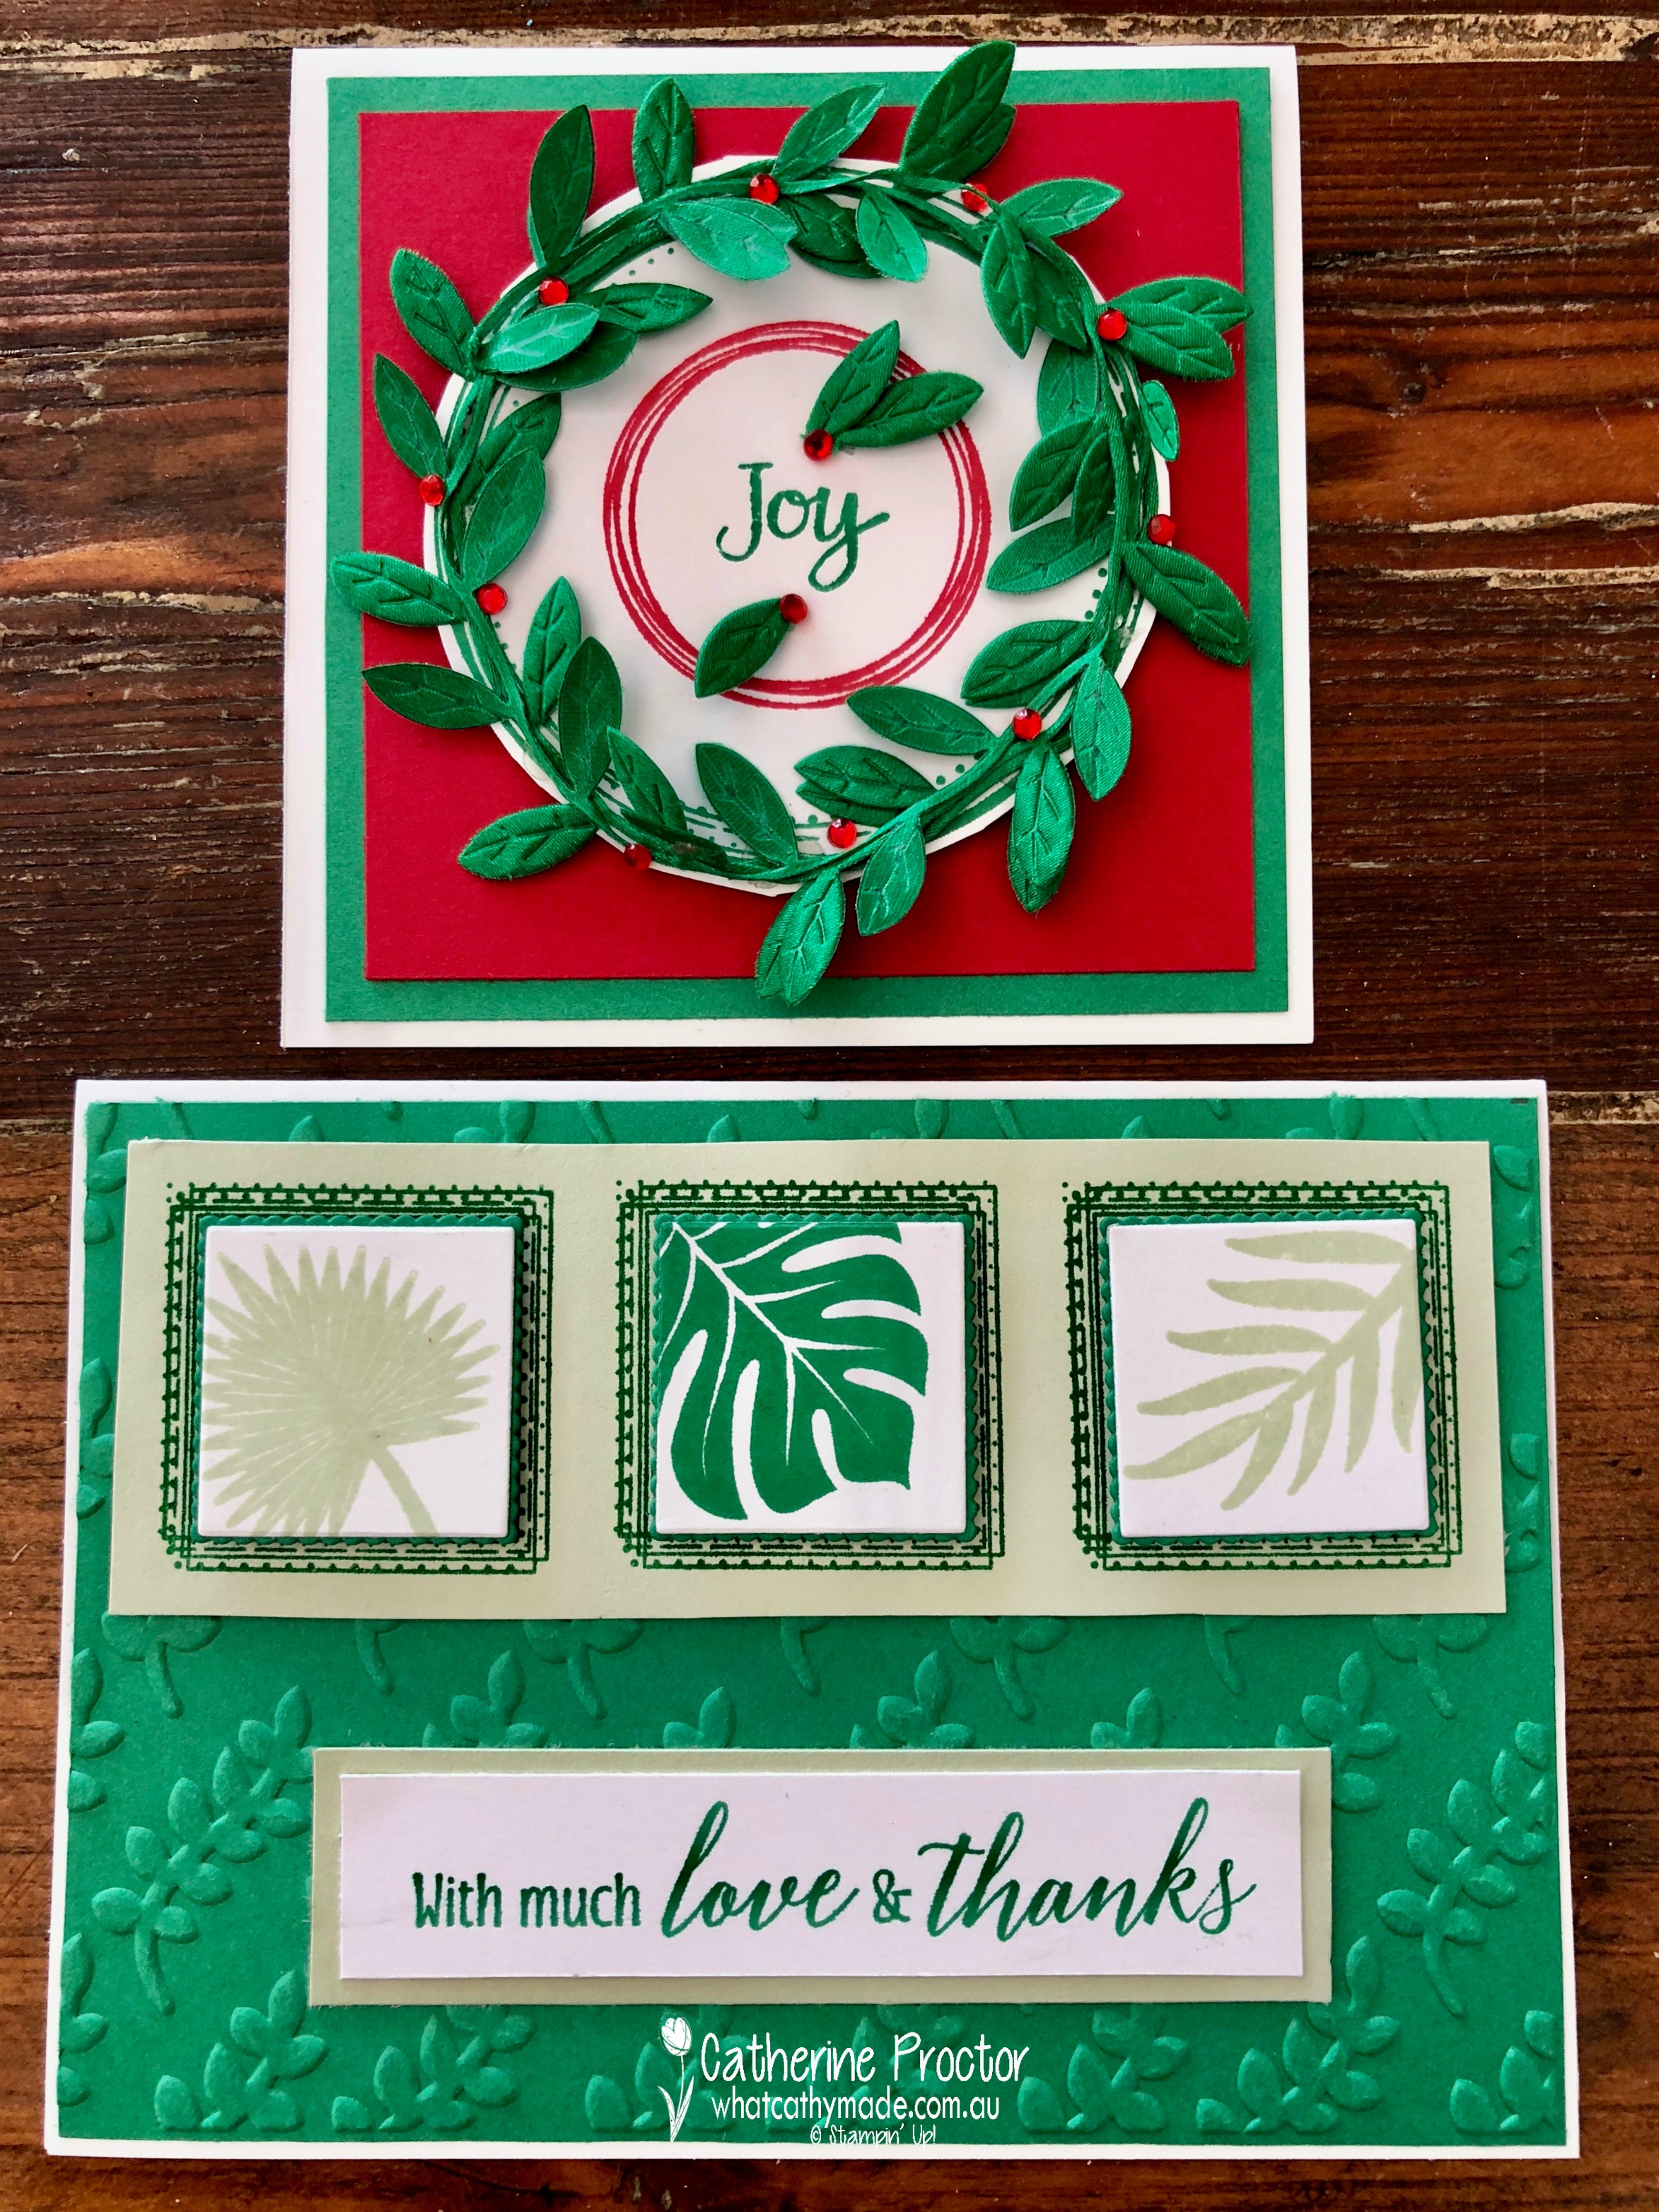
While I had my swirly frames stamp set out I decided to also use it to CASE the card from page 137 of the annual catalogue. Here’s the original card from the catalogue stamped in in Old Olive and Lemon Lime Twist.
And here’s my version using Call Me Clover and Soft Sea Foam.
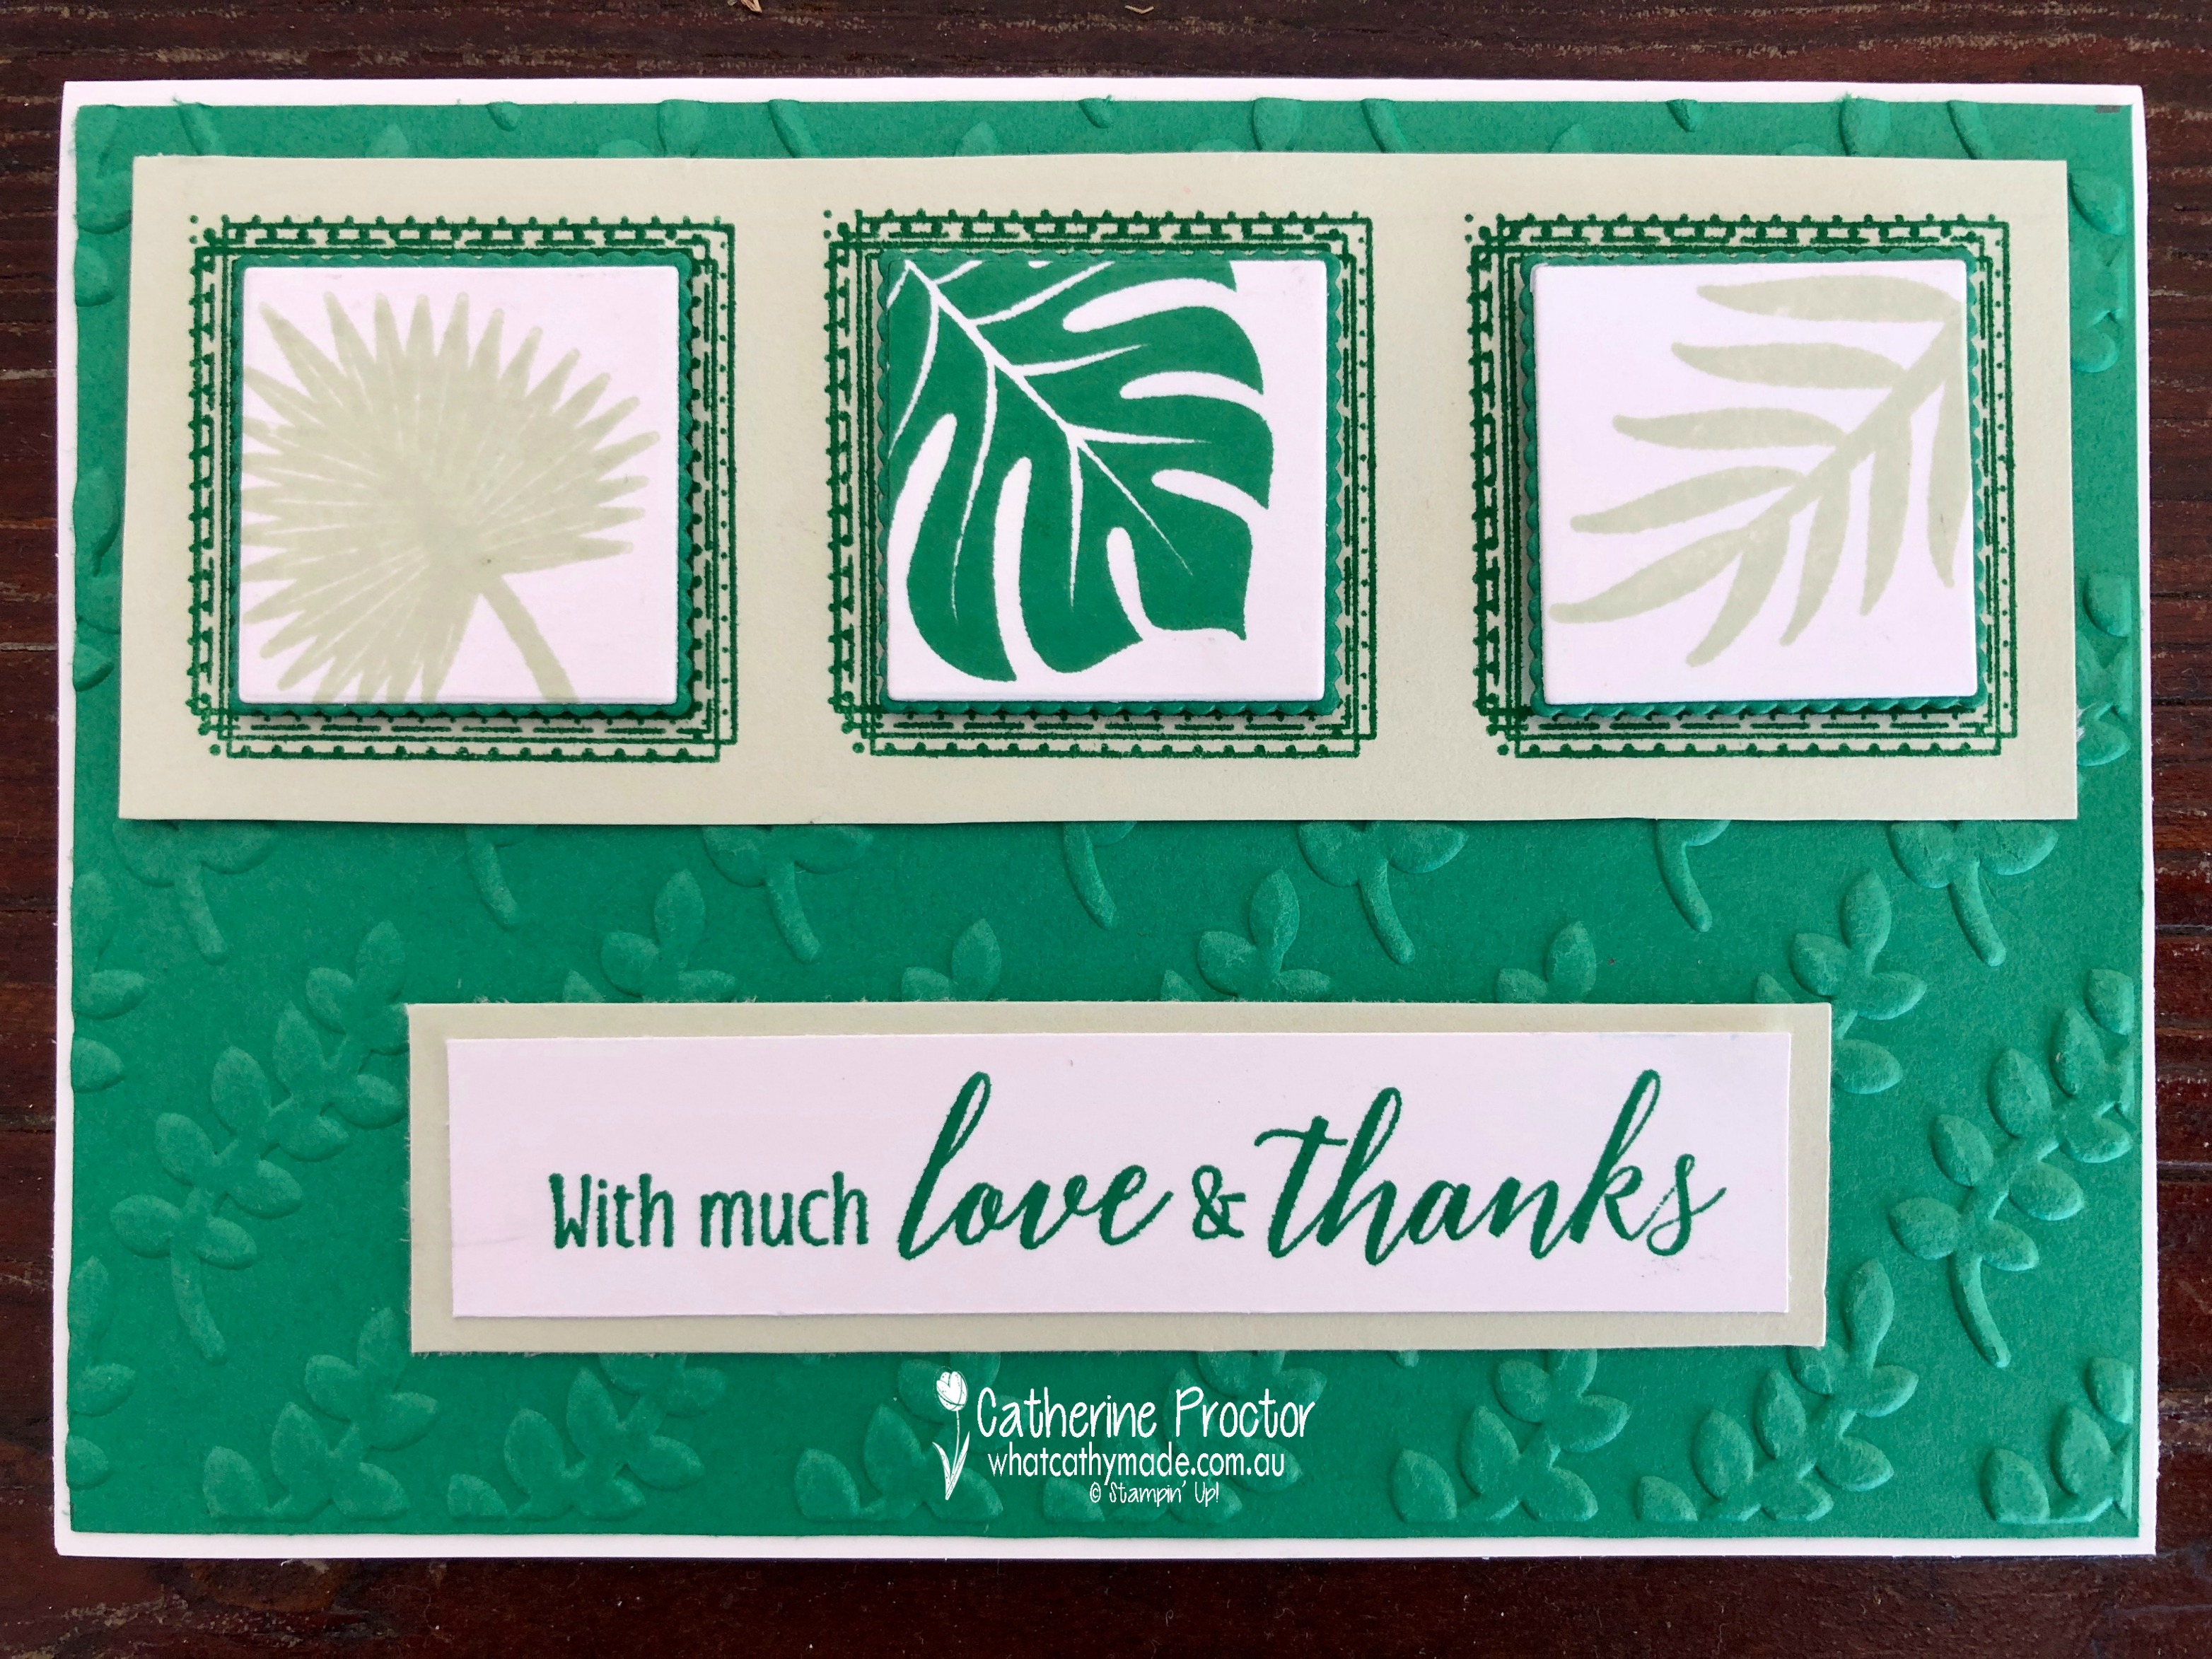
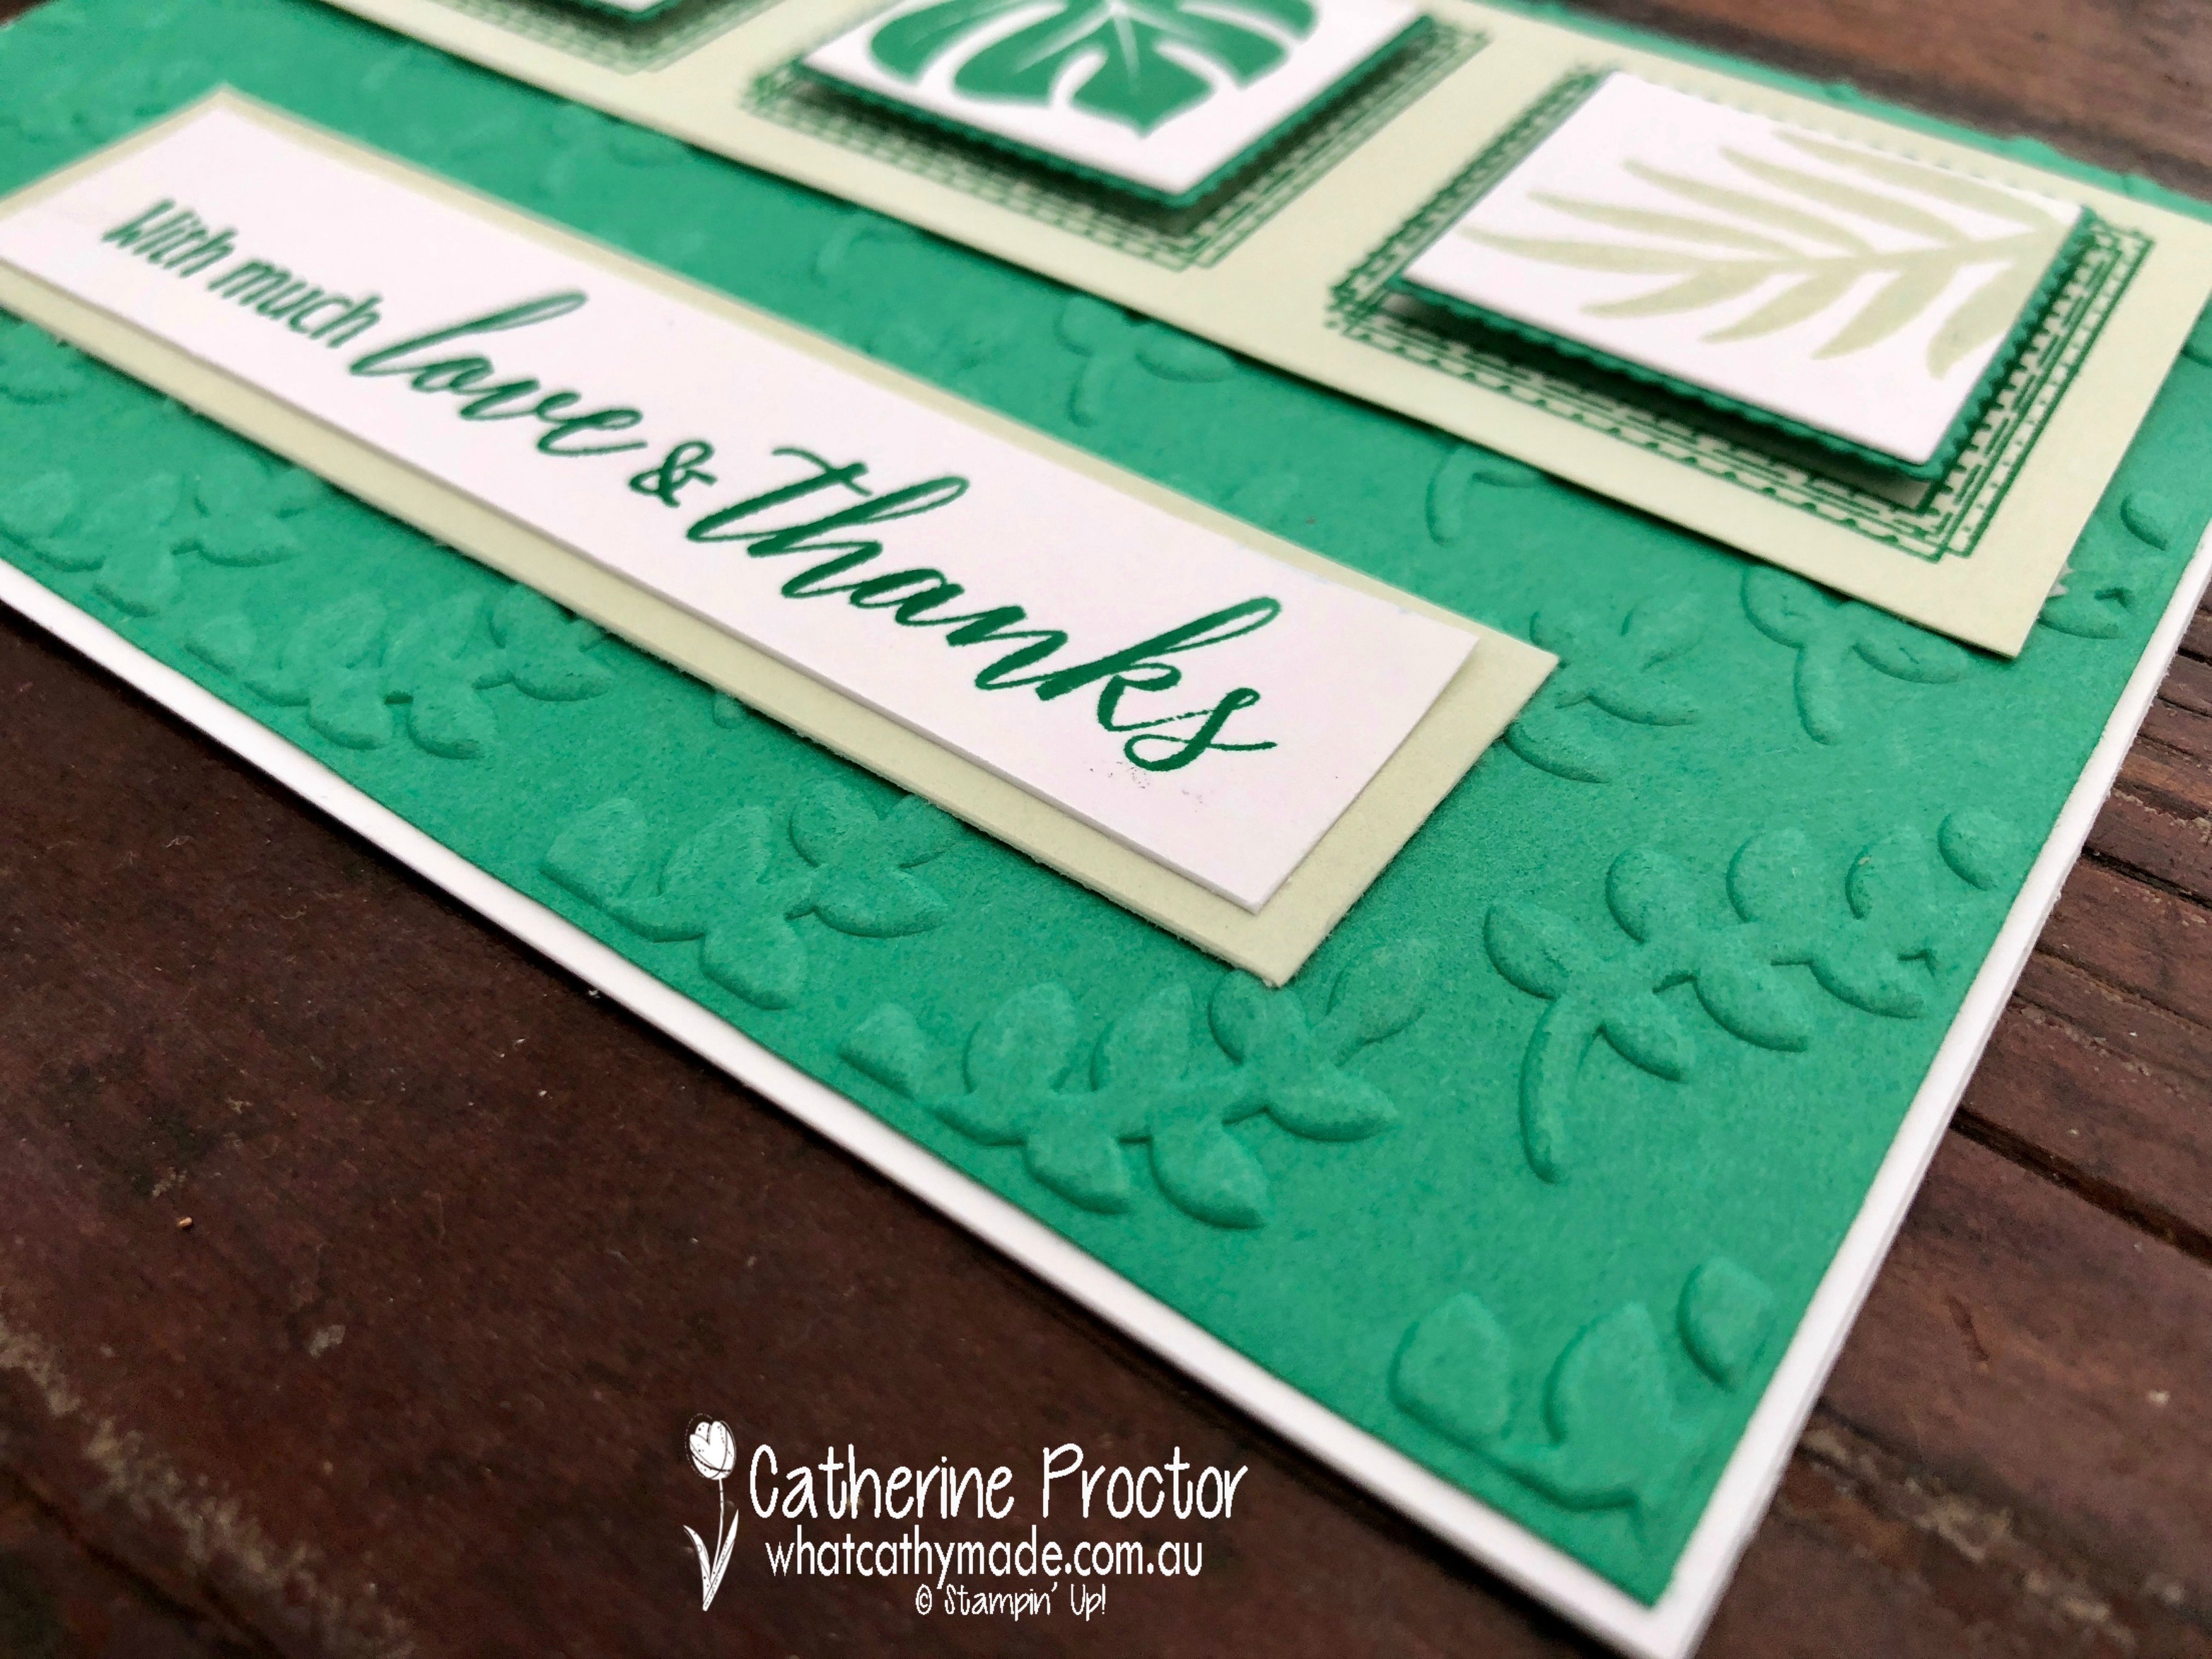
Did you notice the embossed backgrounds on both cards? The original card that I CASED has been embossed with the subtles folder, which I don’t have yet (it’s on my list!!) so instead, I used the climbing vine embossing folder…here’s another angle to show it to you in greater detail.
I love the look of Call Me clover with both Soft Sea Foam and Real Red, and I can’t wait to see what colours the rest of the Art With Heart Team have used on their Call Me Clover projects!
To see what the rest of the team have made click on the links below.
Welcome to week 8 of the Art With Heart Colour Creations Blog Hop!
This week we are showcasing one of the regals family: Cajun Craze.
I need to share a little secret with you…Cajun Craze is a colour I had never used before today, and it was a colour I really struggled to embrace. But the process of making my project for this week not only made me enjoy this colour and see its possibilities…it also made me use some products I’d had for quite a while but had been too scared to use!
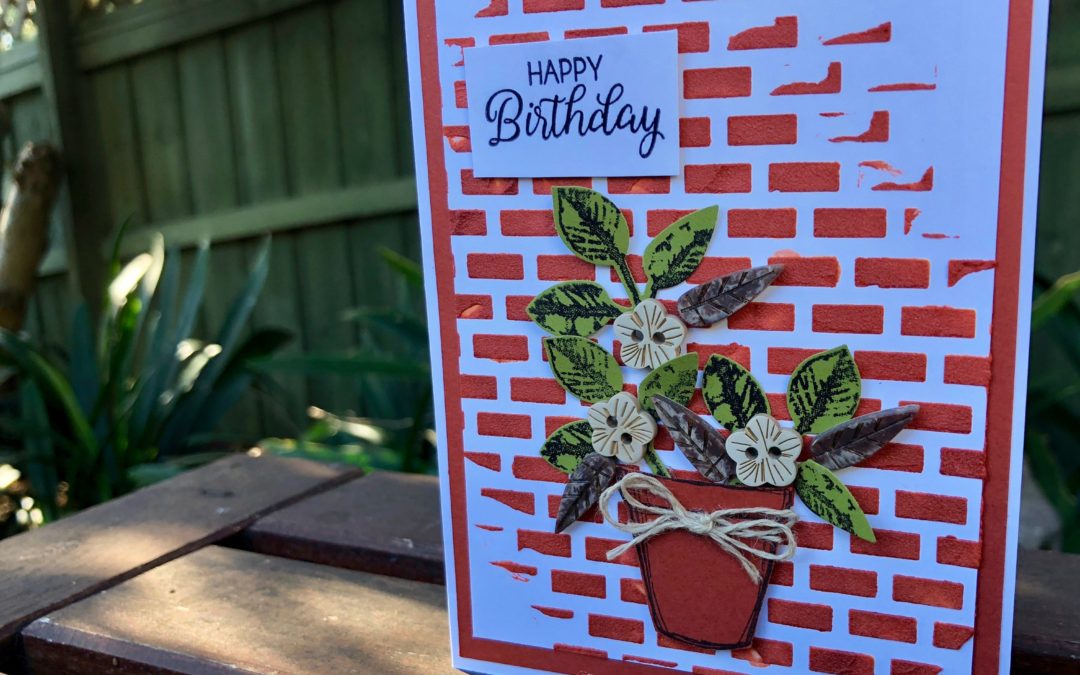
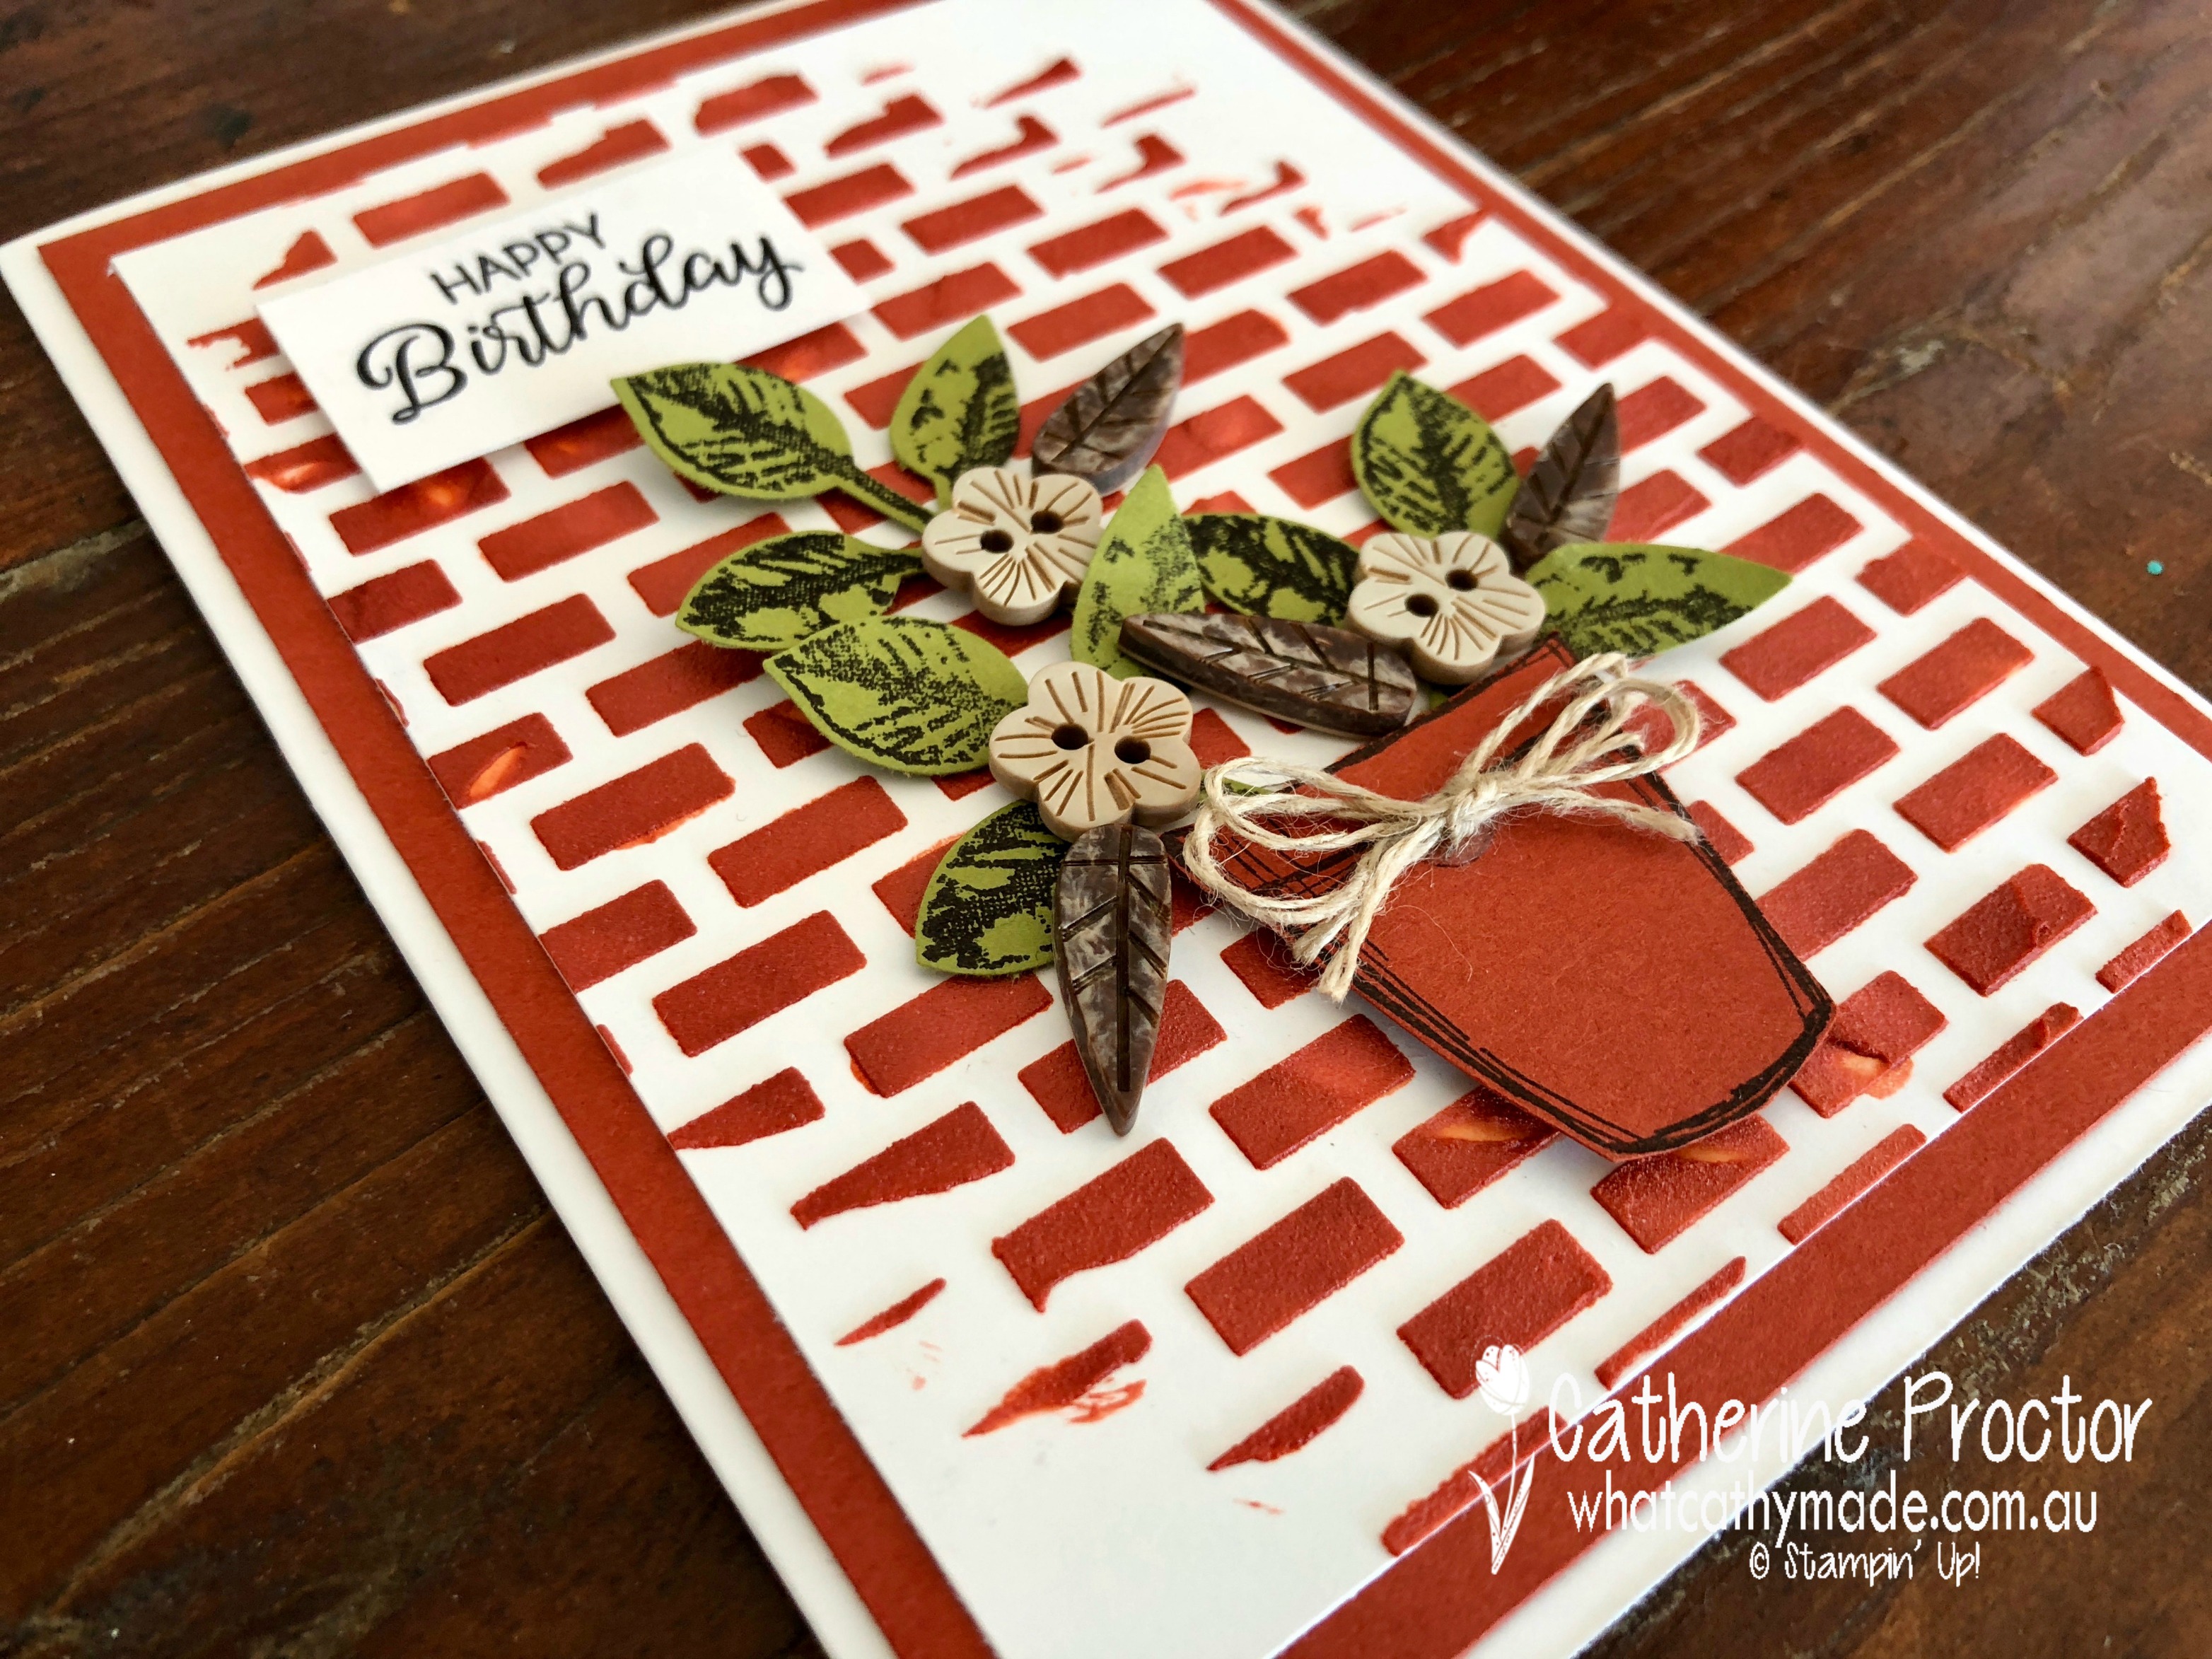
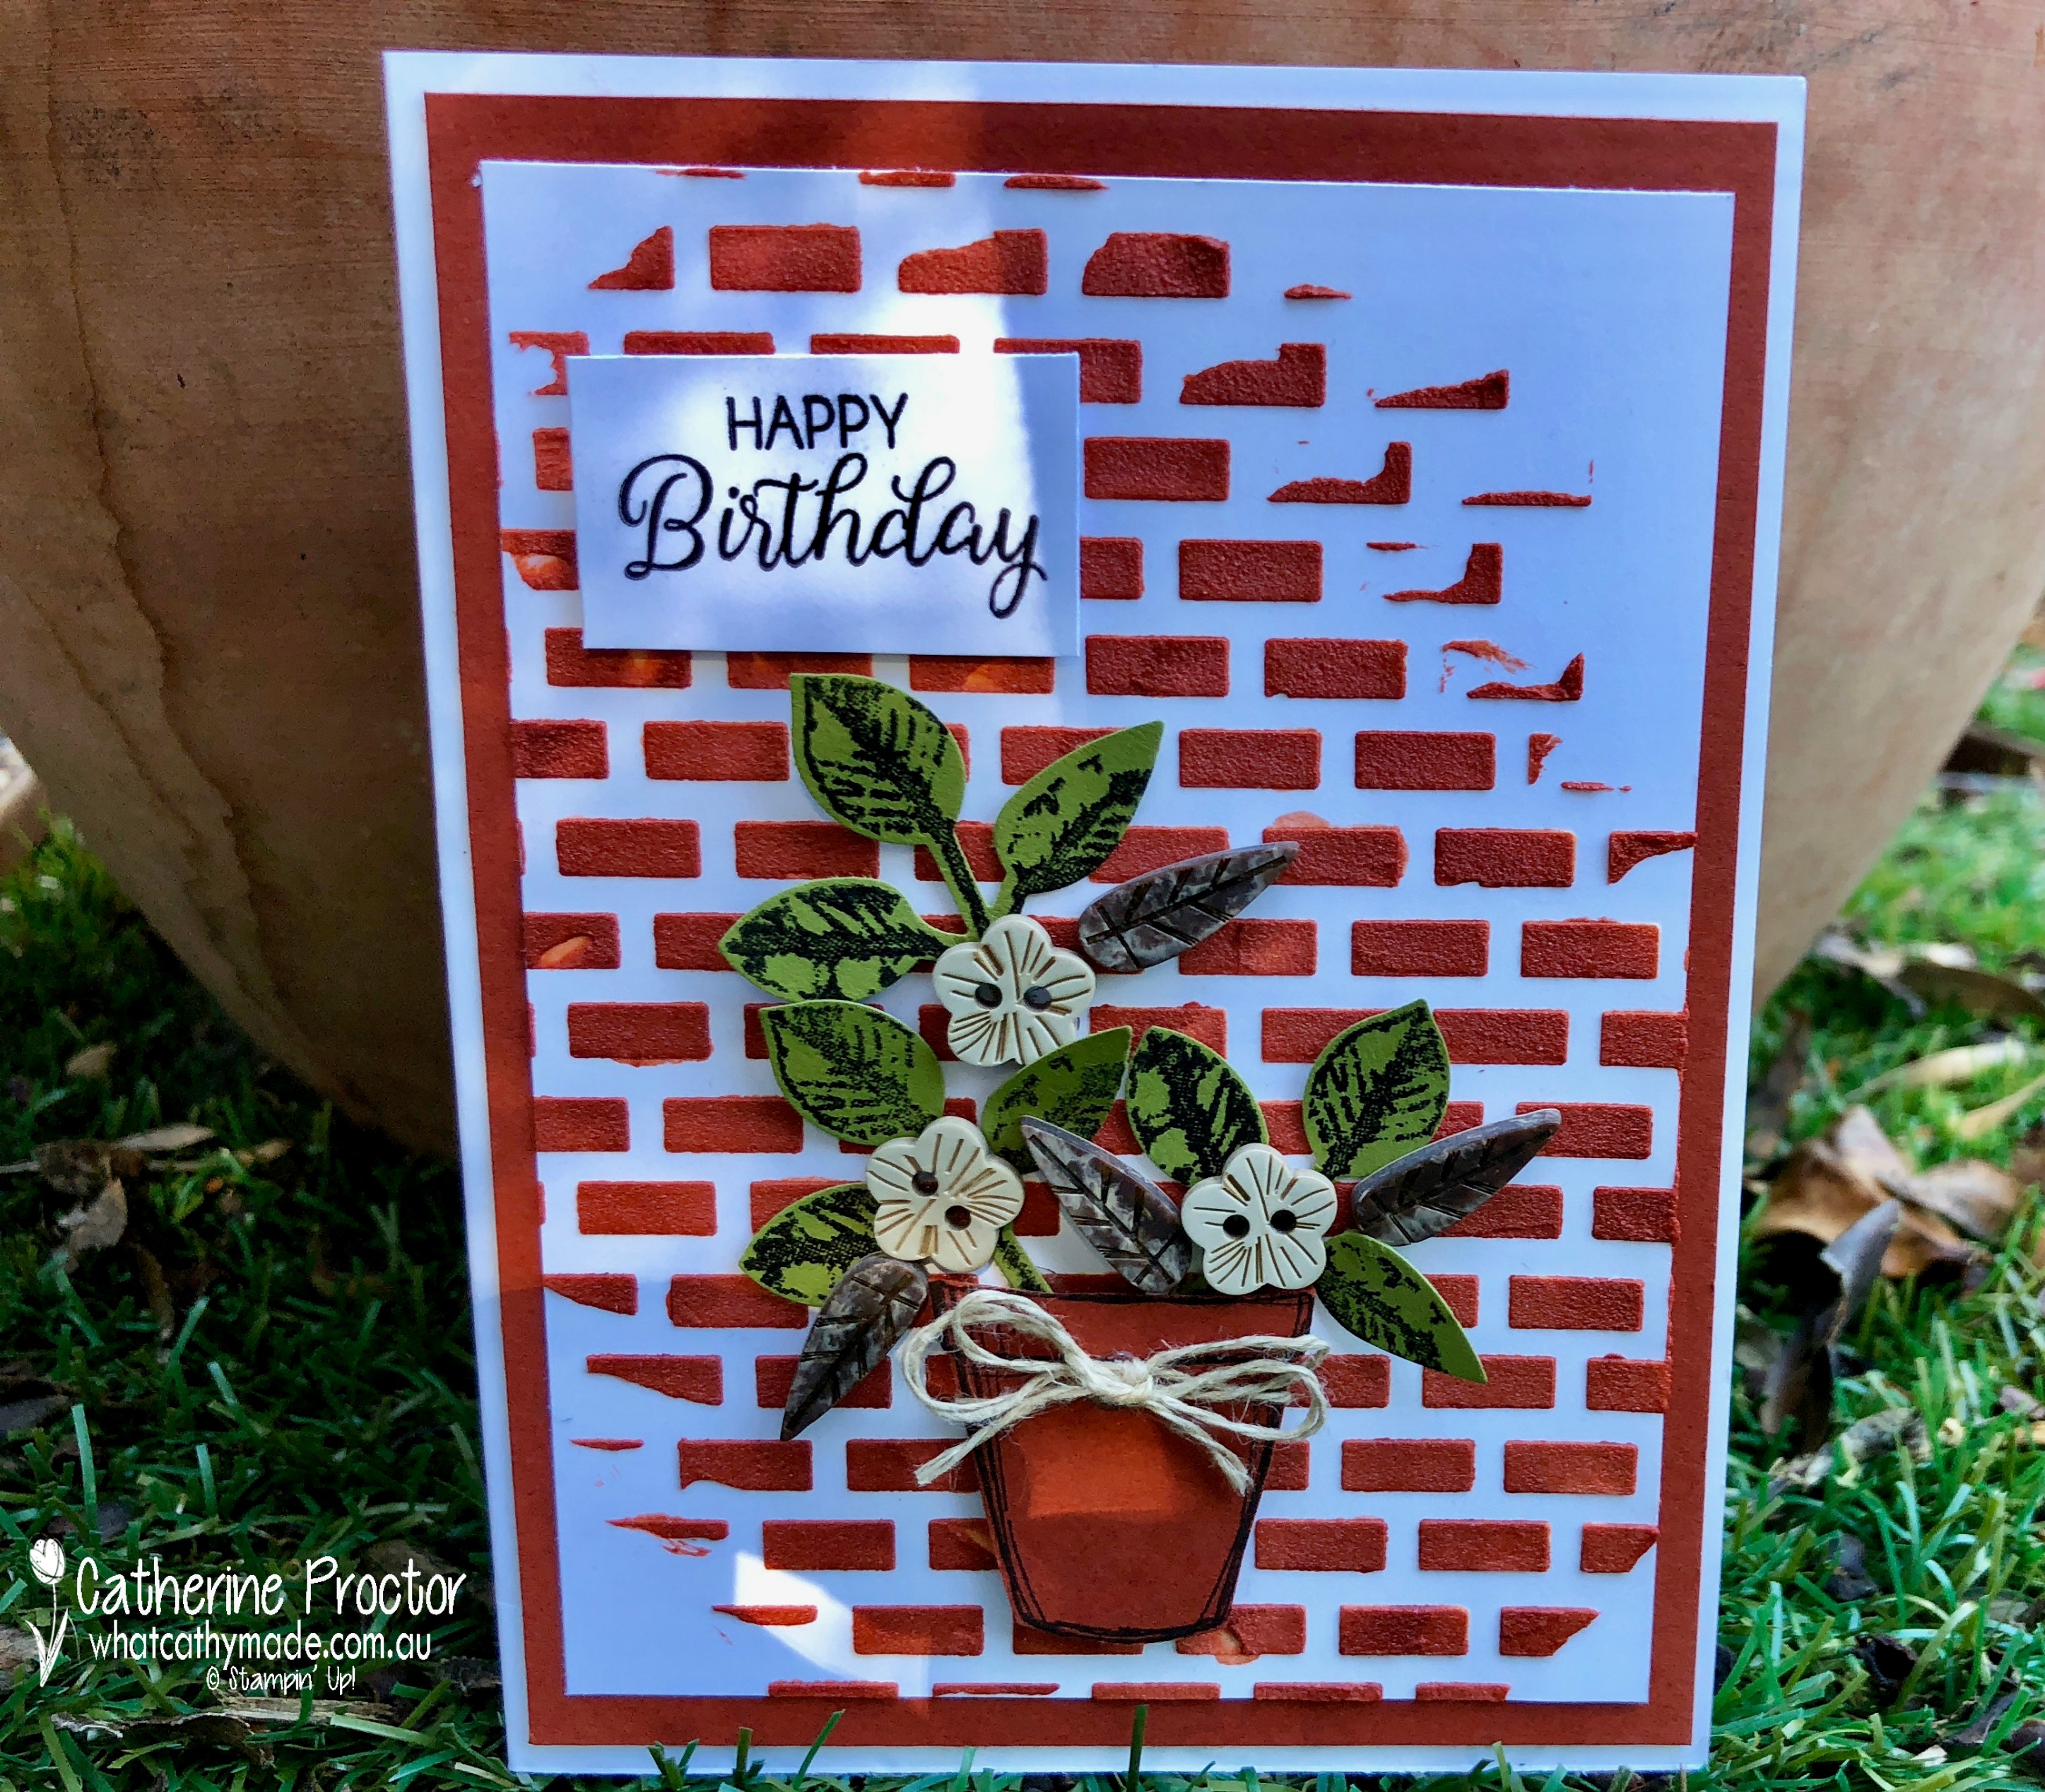
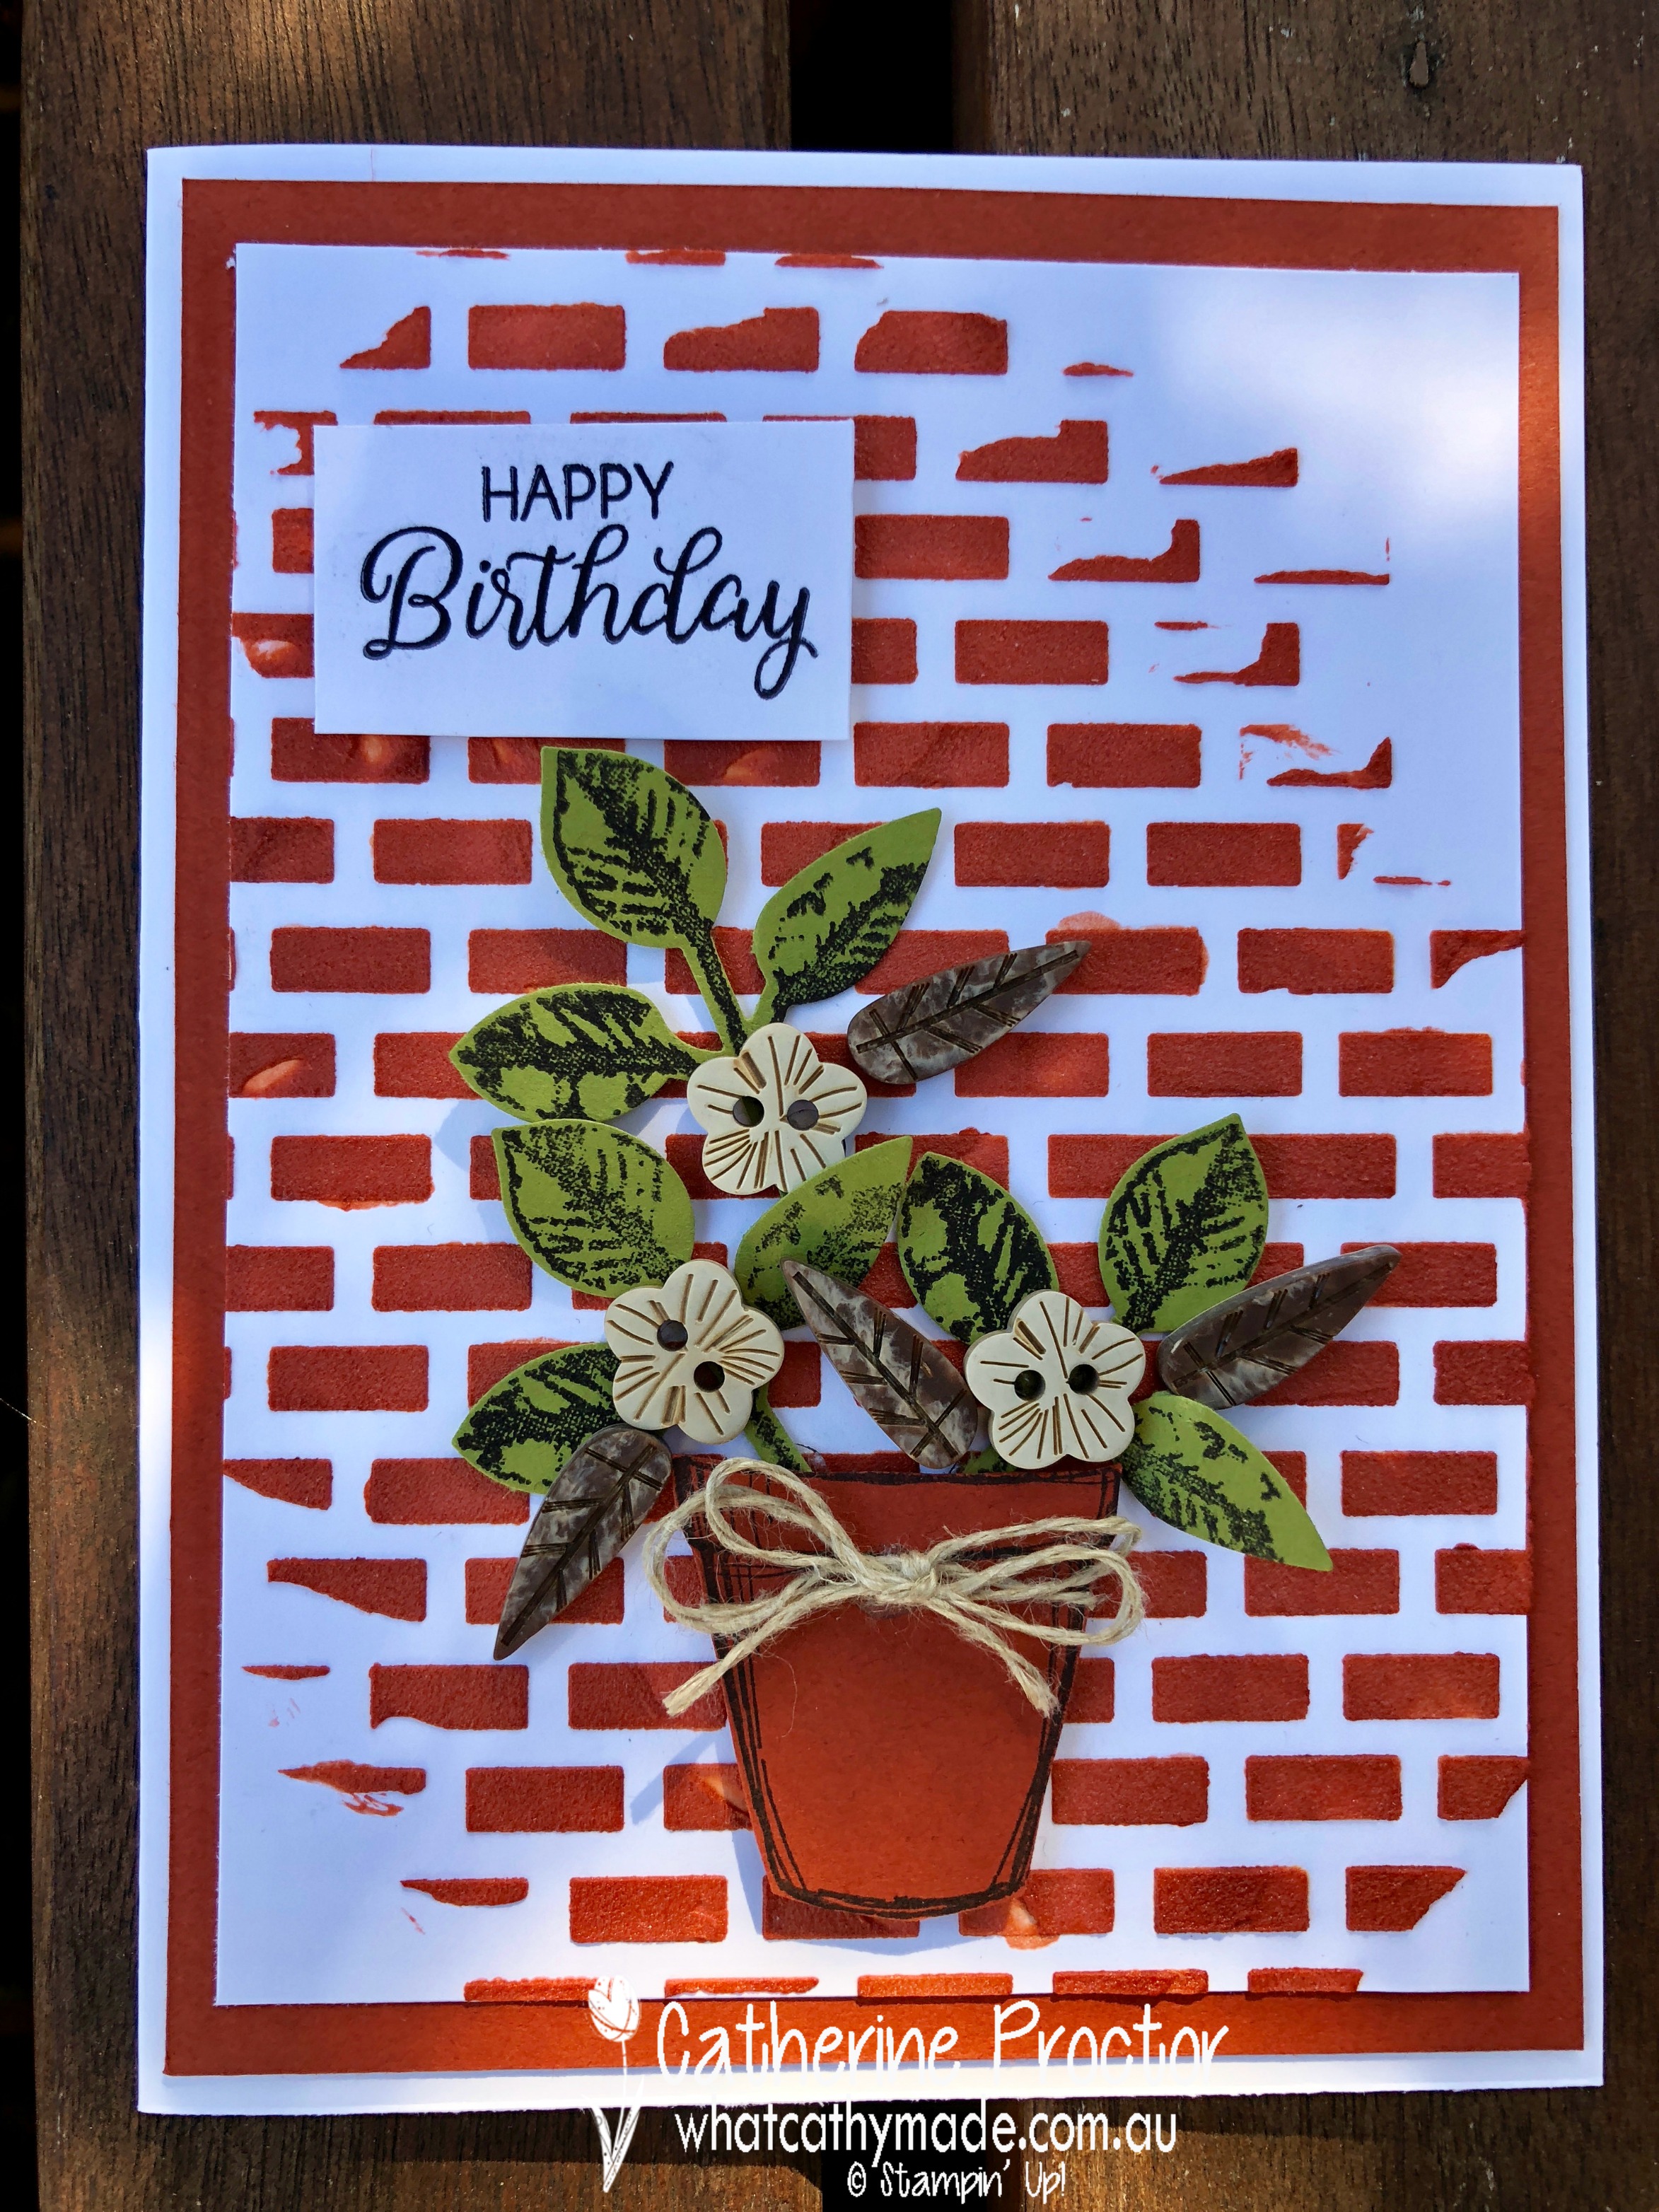
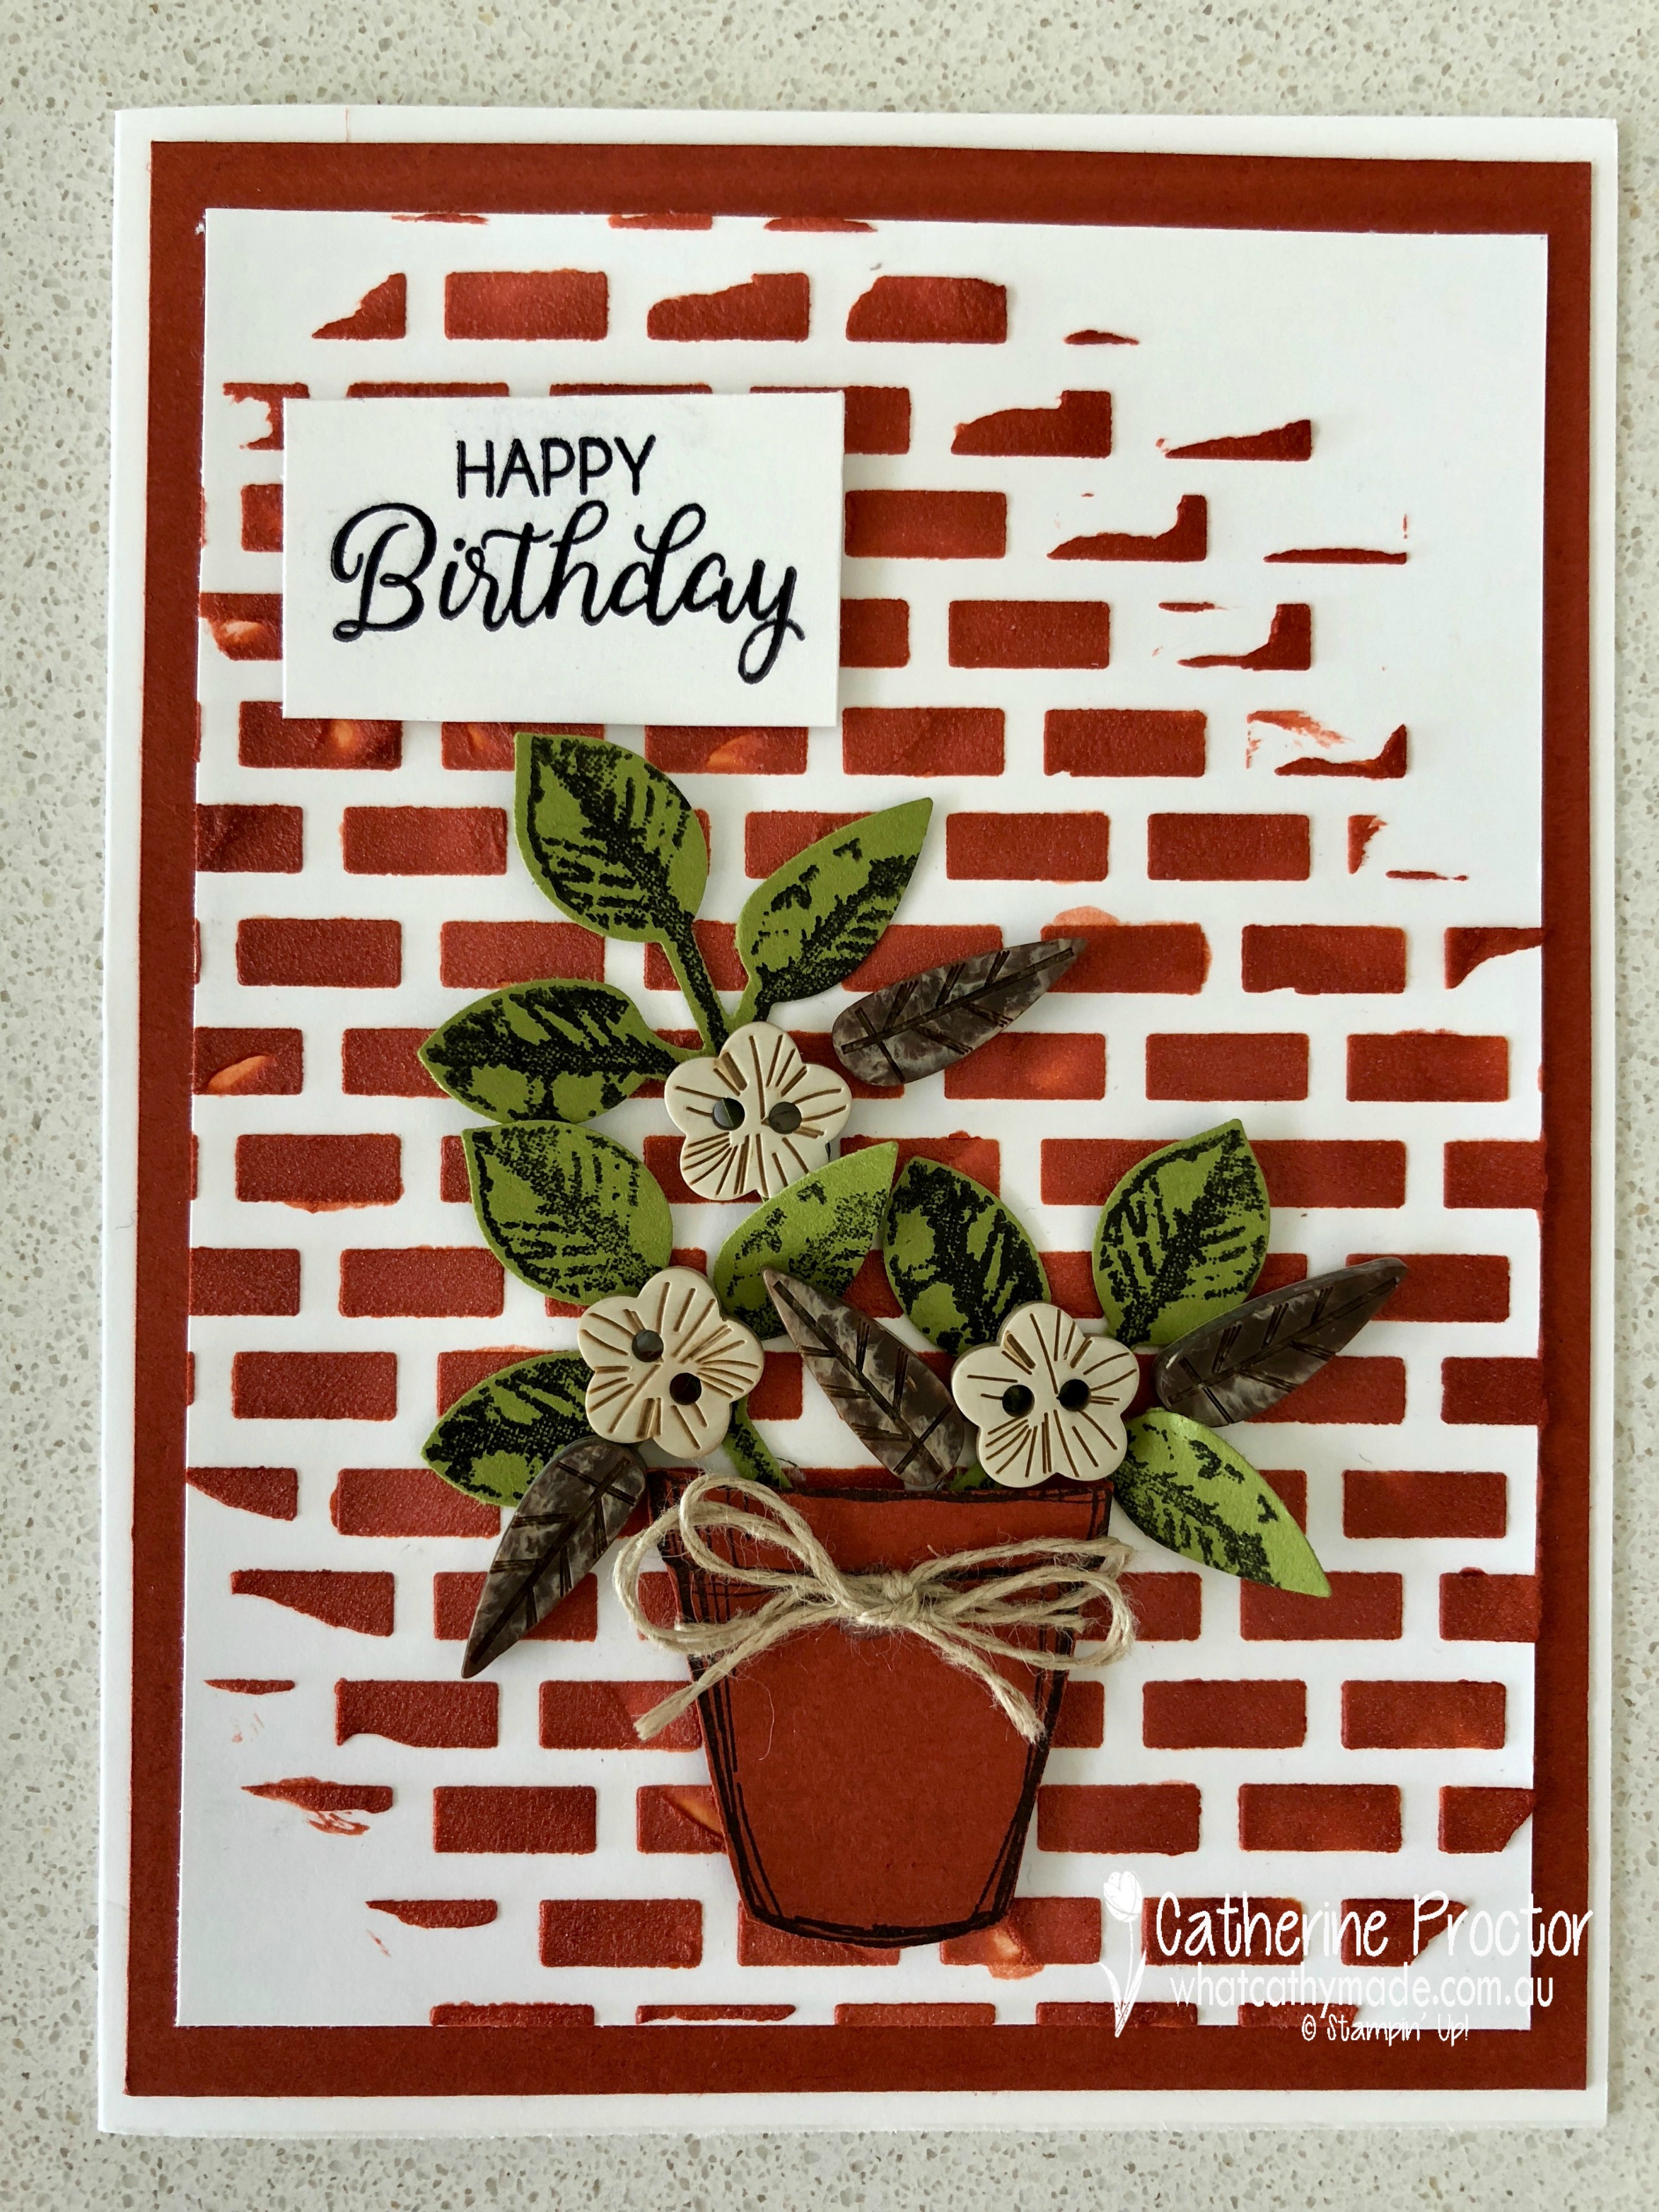
That’s right, I had been too scared to use embossing paste but let me tell you it is SOOOOOO much fun to play with, super easy to use and to colour (even without re-inkers) … check out the dimension on my Cajun Craze brick wall below!
I think nature is such a wonderful source of inspiration and as soon as I realised Cajun Craze was the colour of terracotta and house bricks the design of this card fell into place.
I was wondering how to tint the embossing paste without a re-inker but it is actually so easy to do by using an ink pad and a silicon sheet. You simply open the inkpad and tap some ink onto the silicon sheet, add some embossing paste and mix it all together with a palette knife.
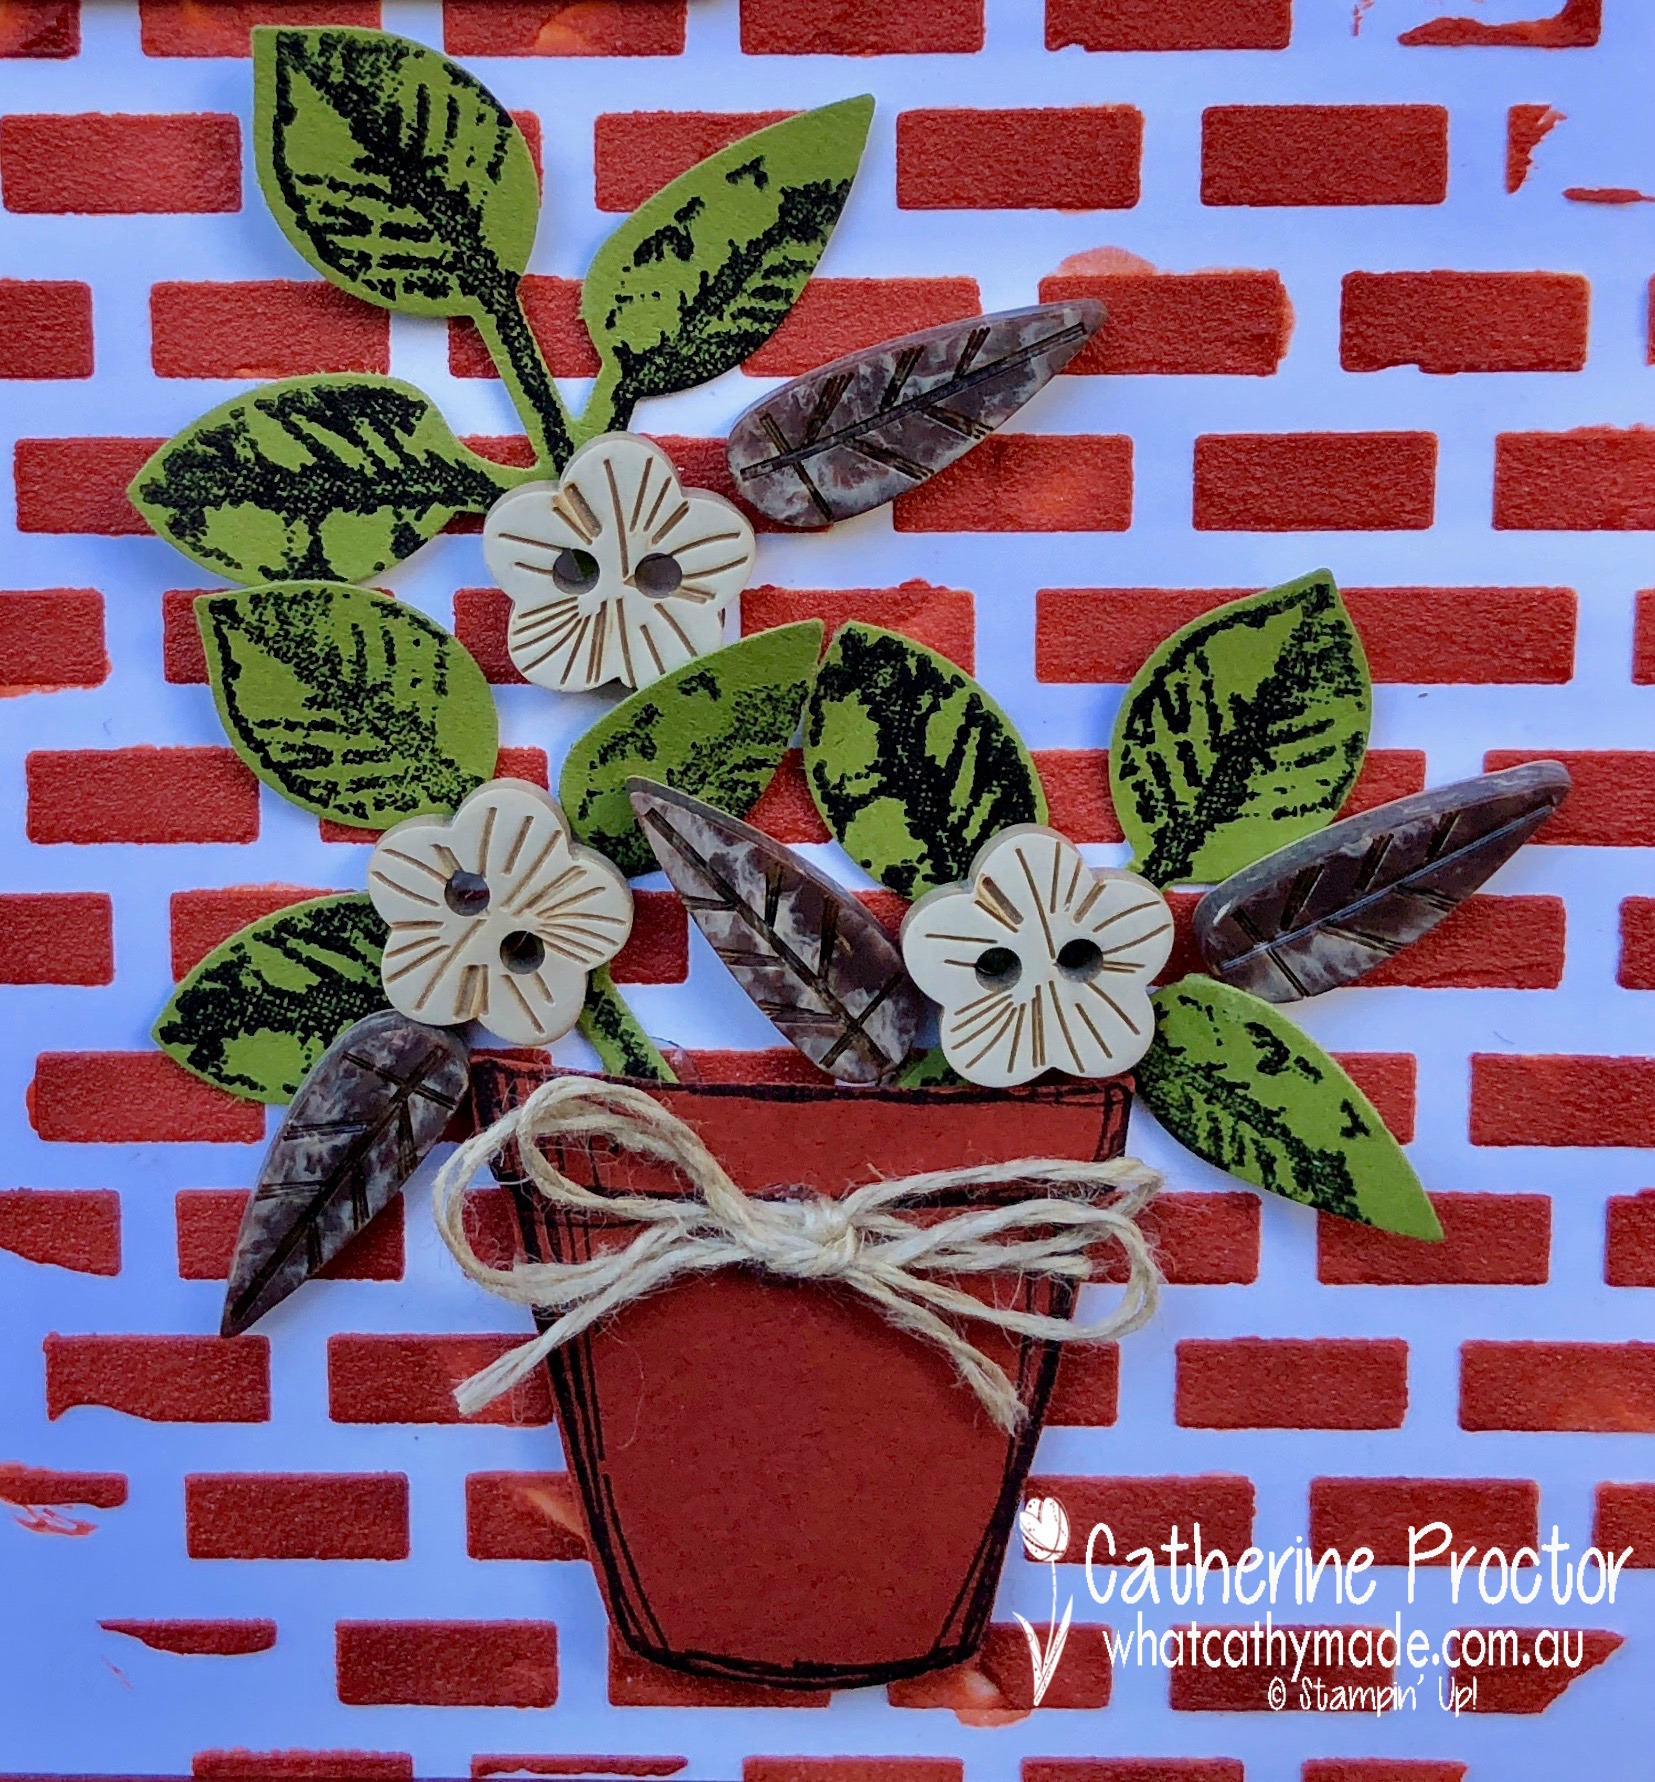
My little terracotta pot is stamped using the Crafting Forever stamp set and then fussy cut and attached to the brick wall with Stampin’ Dimensionals. I wrapped linen thread around the pot, used a glue dot to hold the knot in place and tied a double bow. The old olive leaves are stamped with the Painted Harvest Stamp Set and then punched out with the leaf punch, and the little flowers and skinny leaves are the gorgeous Tropical Elements embellishments, also attached with glue dots.
Here’s a close up of these gorgeous little embellishments!
The final touch is the Happy Birthday sentiment stamped from the Beautiful Bouquet Stamp set…this is my favourite Happy Birthday stamp and I’ve lost track of the number of times I have used it!
To see what the rest of the team have made click on the links below.


 Thanks for hopping along with us today. To purchase any of the products I used in this project you can shop with me