The Art With Heart Team are back with our last Blog Hop for 2019.
Getting in the spirit of Christmas and New Year celebrations, this month our theme is ‘Add A Little Sparkle’. We have a huge range of sparkly projects to share with you featuring products such as Glimmer paper, Rhinestones, Delicata Ink, Shimmery White card stock and much more. All of these products are available from Stampin’ Up! and any of these lovely ladies would be happy to assist you.
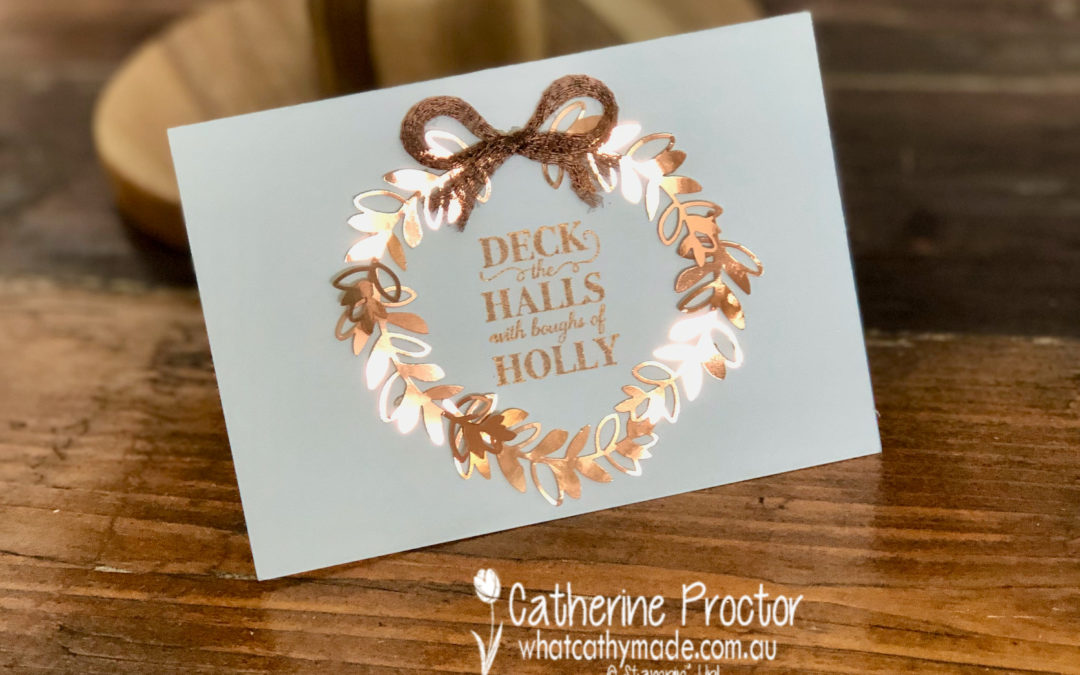
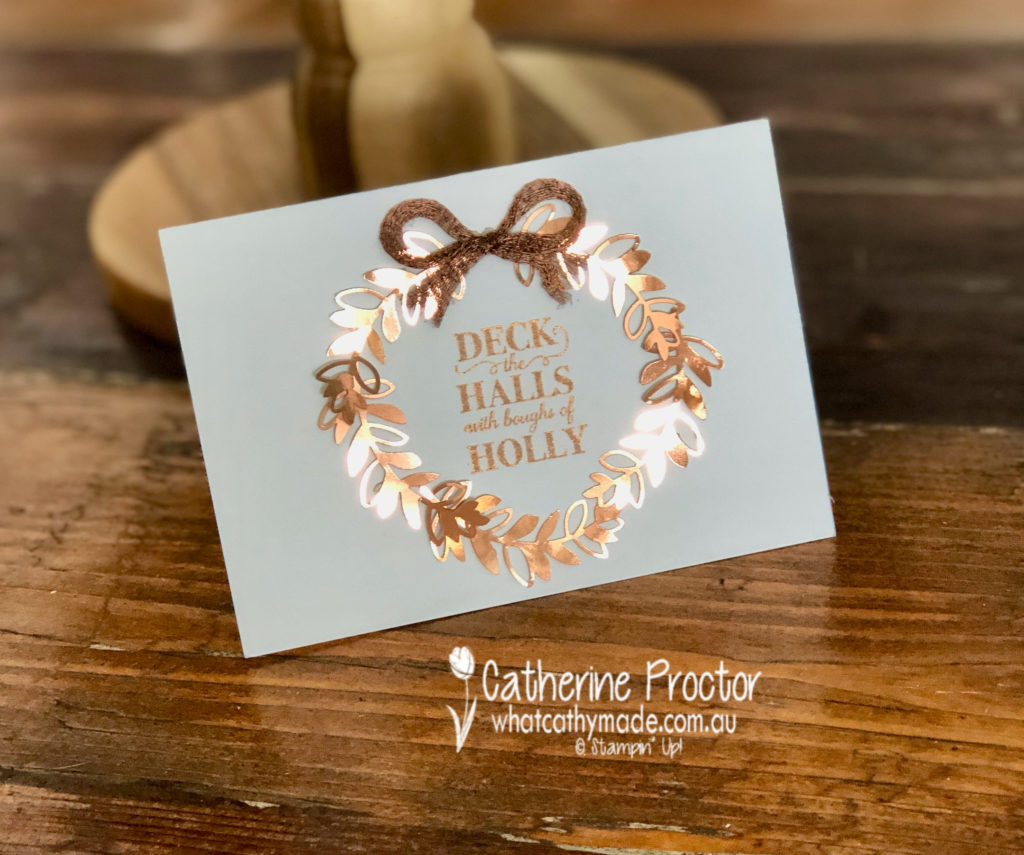
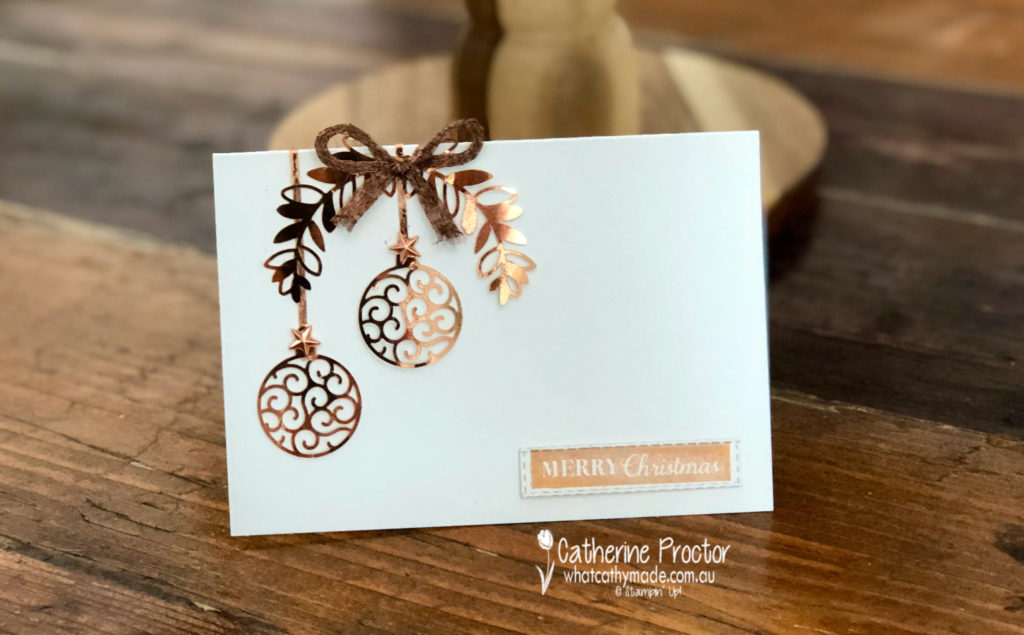
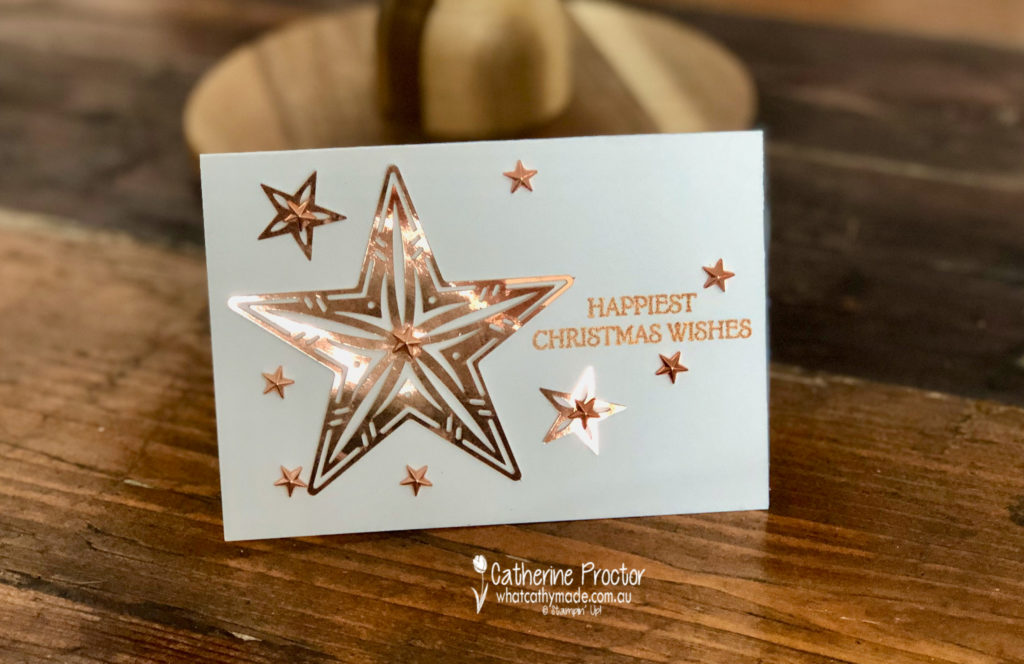
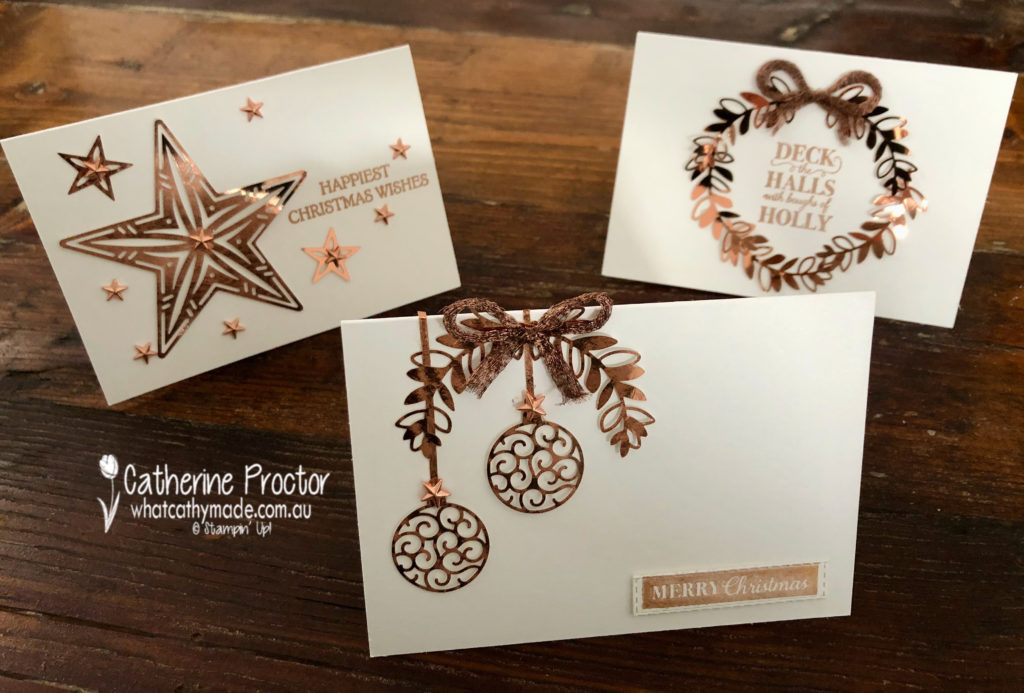
For my cards tonight, I’ve added some sparkle with three products from the 2019 Holiday Catalogue: the Brightly Gleaming Foil Elements, the Star Designer Elements and the Celestial Copper Delicita Metallic Ink.
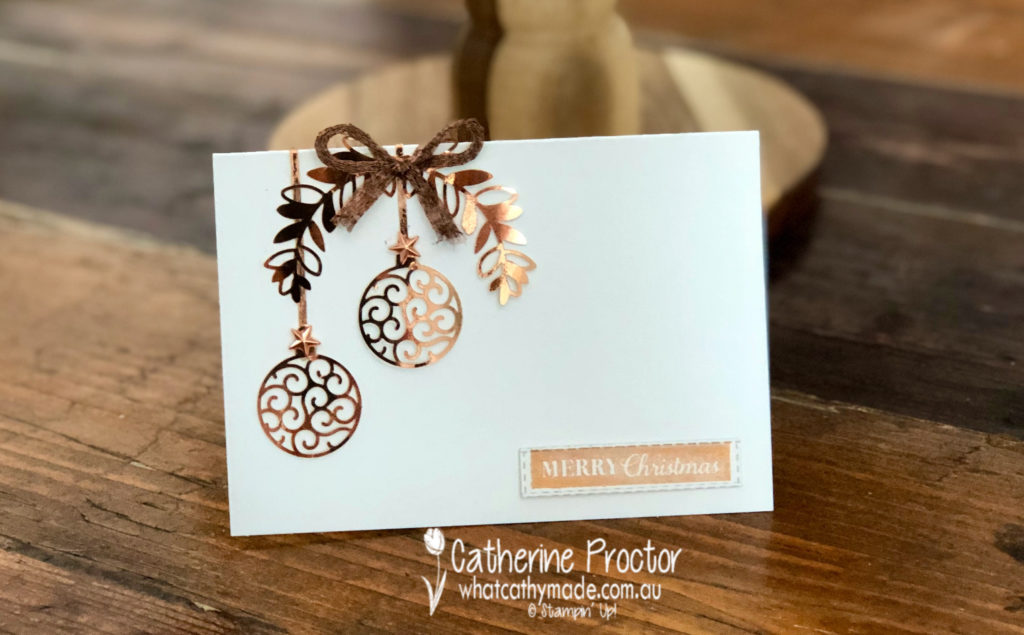
Brightly Gleaming Foil Elements
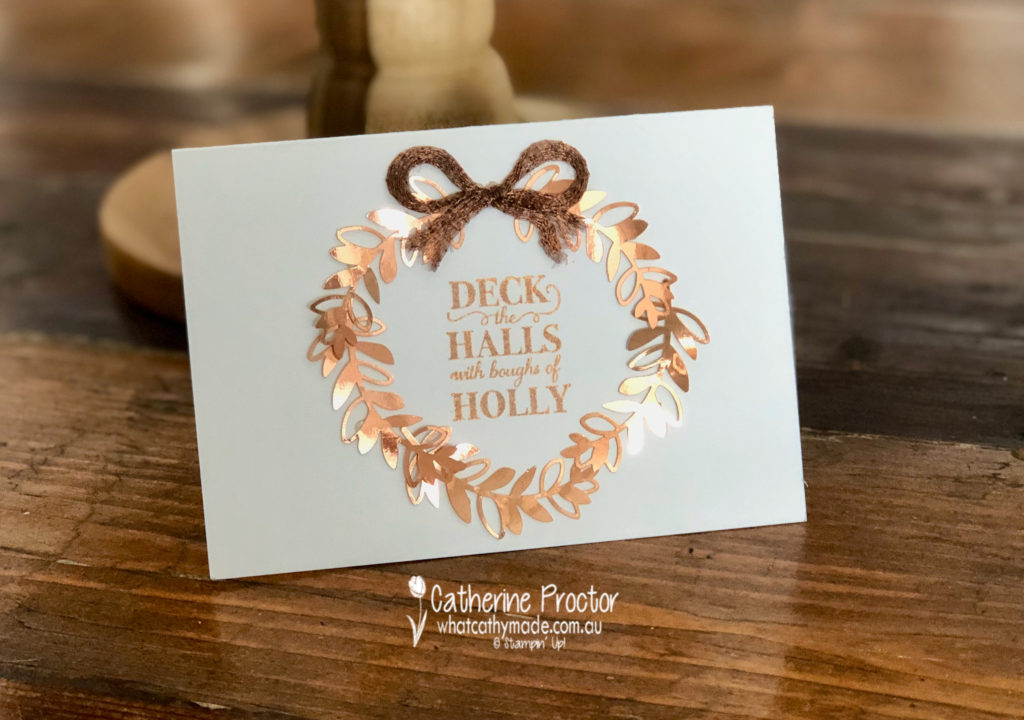
Card one is a wreath card, using the sprig elements, overlapped to form a wreath.
The bow at the top of my wreath is the 1/4 inch copper trim and sentiment is from the Christmas Gleaming Stamp Set, stamped in Celestial Copper Delicata Metallic Ink.
Card two uses two of the ornament embellishments, as well as two sprigs.
Again, the sentiment is stamped in Celestial Copper Delicata Metallic Ink and the bow is tied from the 1/4 inch copper trim, but this time using a different sentiment from the Christmas Gleaming Stamp Set.
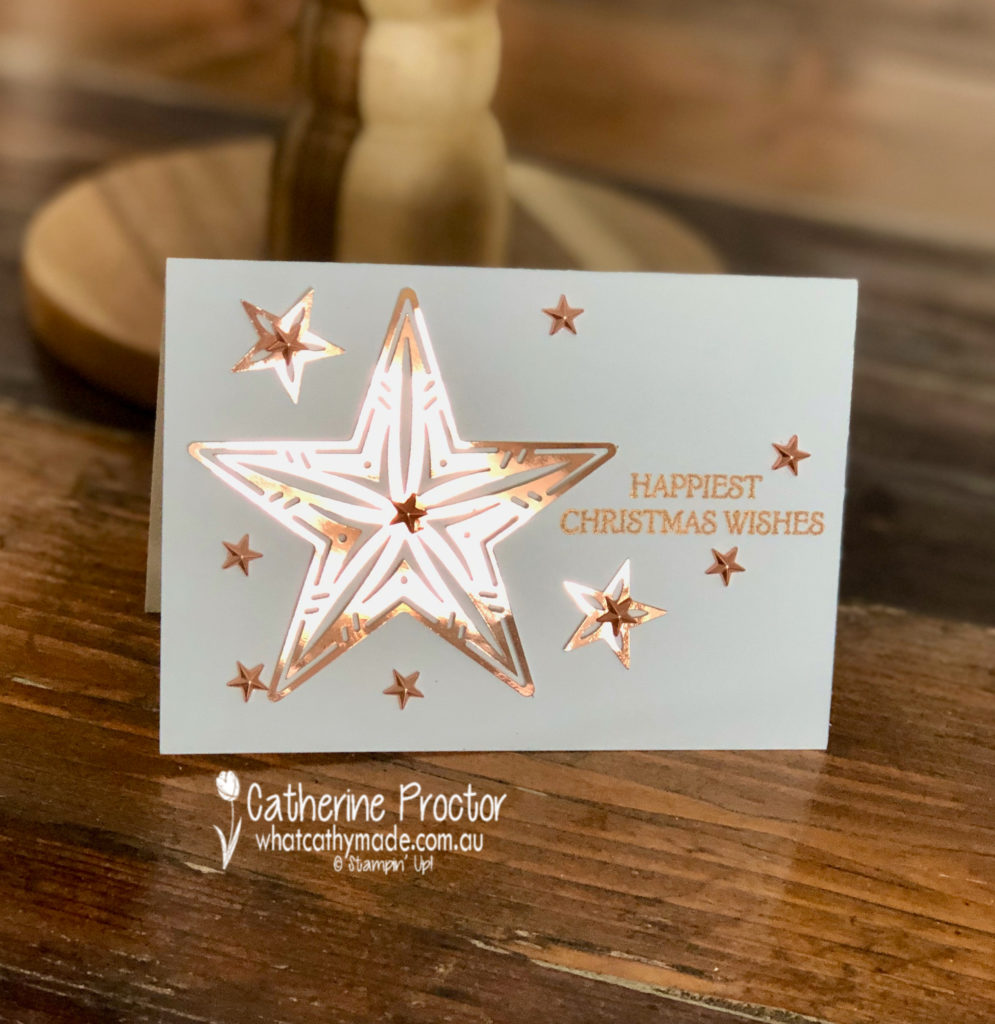
Card three features the brightly gleaming star elements in different sizes and the star designer elements.
The sentiment for this card comes from an old favourite, the Dashing Deer Stamp set.
Which of the three cards do you prefer? I can’t make up my mind!
The next demonstrator to share their sparkly projects with you is the delightful…..Vicki Boucher!
If you have a broken link or have come to this blog hop midway, you can view all the participants below:
The Art With Heart Team are back with another inspirational Blog Hop.
This month we are featuring Gift Bags and Boxes, just in time for the Christmas gift giving season. The bags and boxes featured are all made using current Stampin’ Up! products and any of our wonderful team members are happy to help you with the supplies you will need to reproduce these beautiful projects.
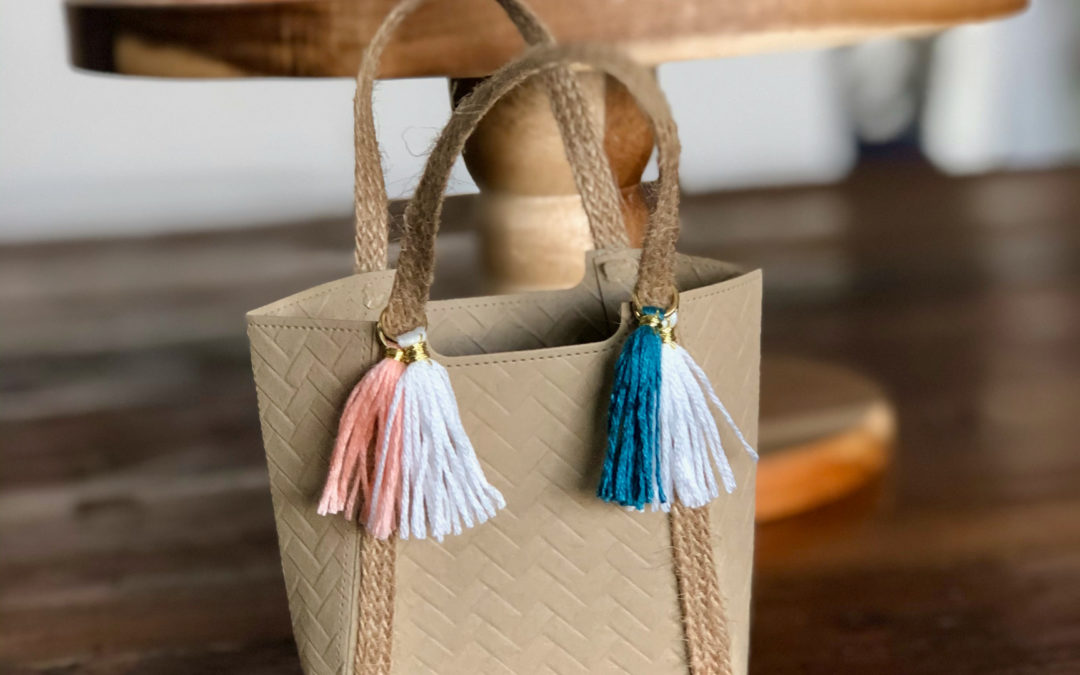
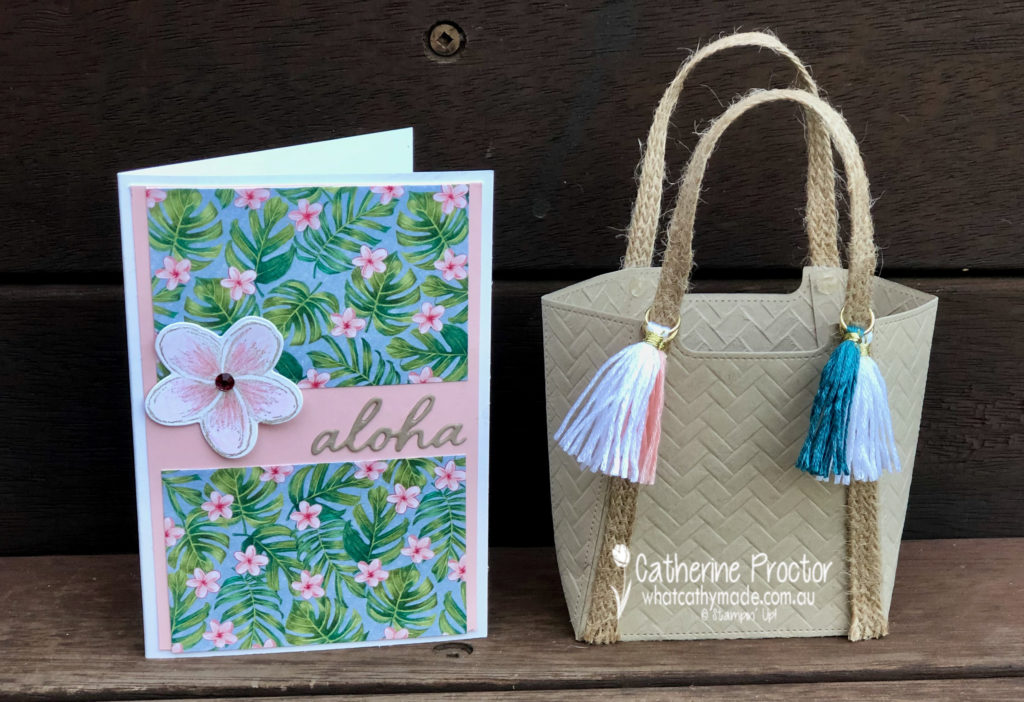
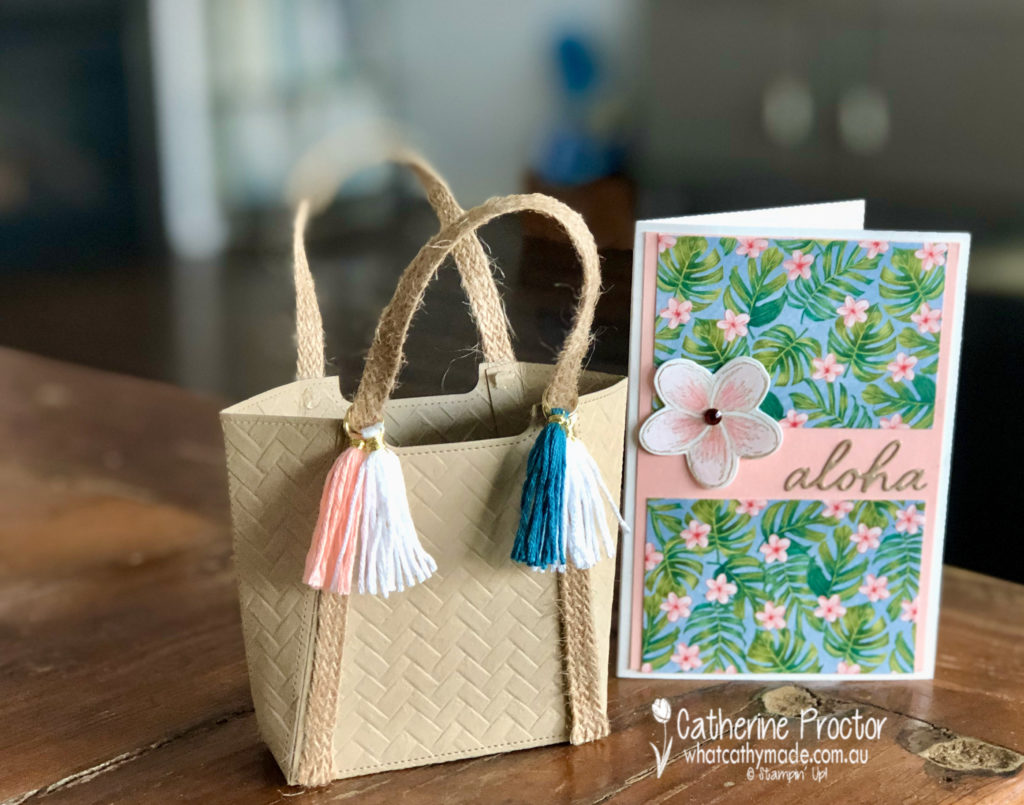
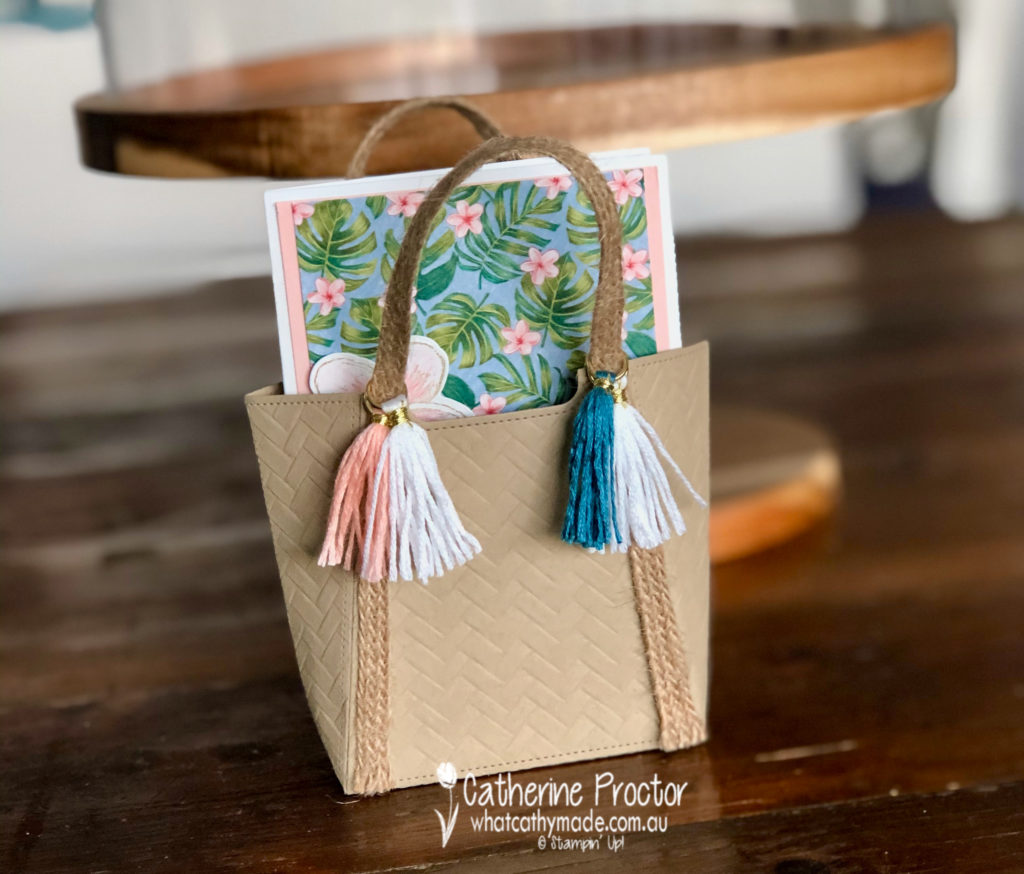
The project I’ve made for you tonight is a beach bag with matching card featuring brand new products from the upcoming Stampin’ Up! January -June 2020 Mini Catalogue — it used to be called the Occasions Catalogue.
You can order from this catalogue on the 3rd January 2020 but if you can’t wait until then to get your hands on these goodies, contact me about becoming a Stampin’ Up! demonstrator so you can order them now.
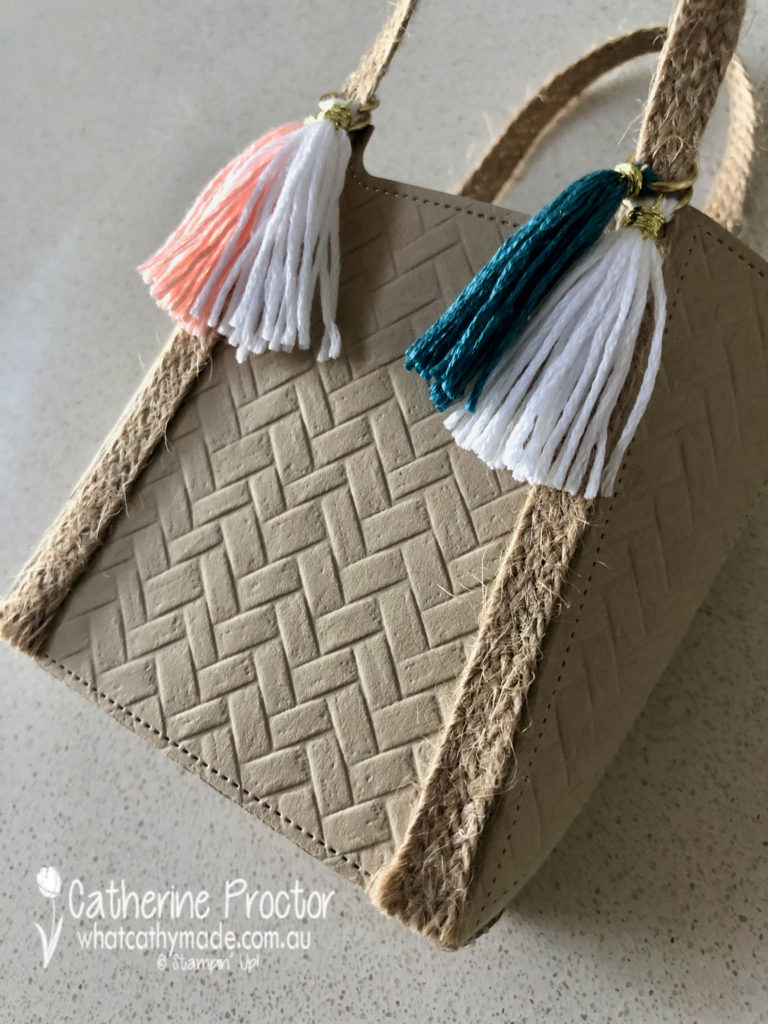
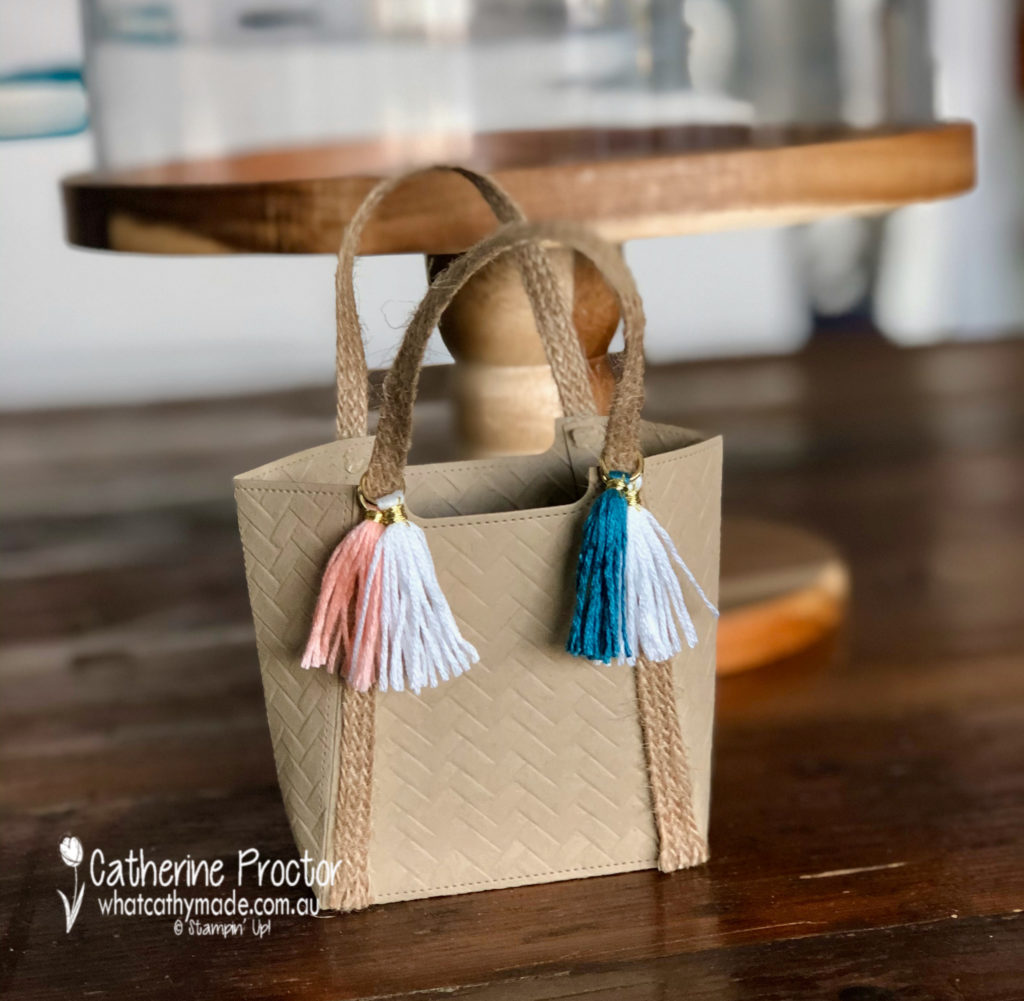
My first step in making my beach bag was to emboss the Crumb Cake card stock using a new embossing folder called the Coastal Weave embossing folder. I embossed 2 pieces of card stock to make my basket. Here’s a closer look at this gorgeous basket weave effect.
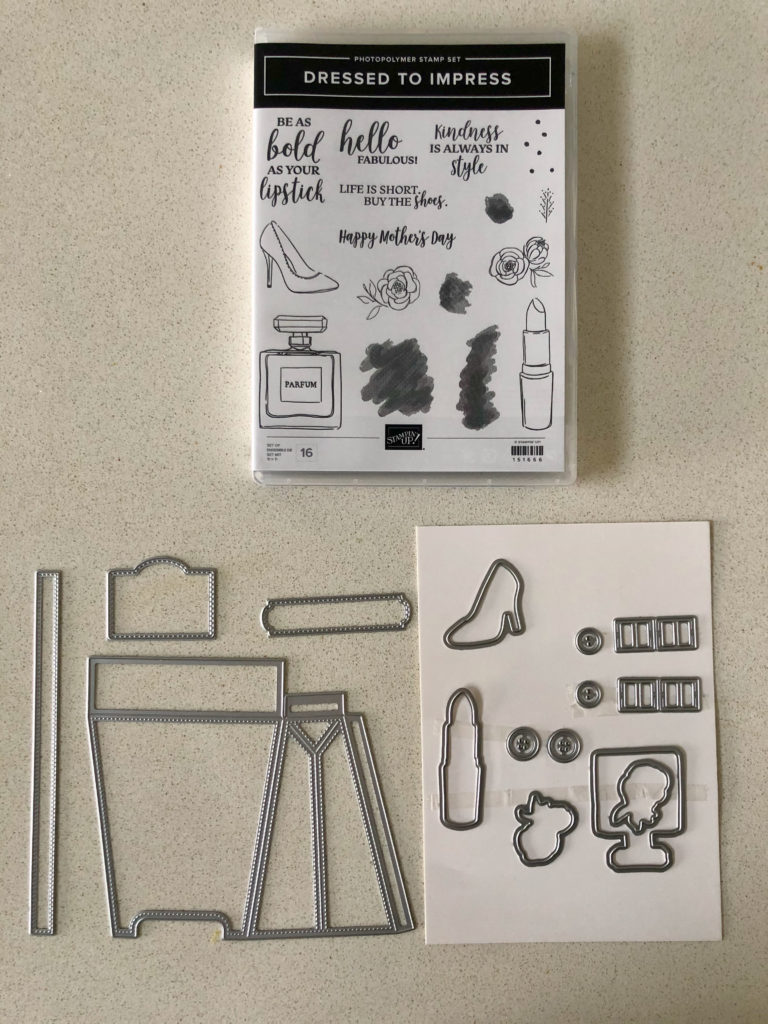
I then die cut out 2 pieces using the largest die from the All Dressed Up Dies. These dies are so cute – they come in a bundle with the Dressed to Impress stamp set and there are shapes for shoes, perfume, lipstick, flowers…and everything you need to make a bag, including buttons, buckles and a strap.
You can see in the photo below that the dies on the bottom left are all stitched, which I love!
Joining the two sides of the basket together is very simple and easy using tear and tape, and then the fun begins with decorating the basket.
Instead of using the die for the basket straps I made my own straps by using the new 5/16 (8mm) Braided Burlap Trim. Attaching it is once again very simple, using tear and tape.
I’ve also added some new Best Dressed Tassels in Petal Pink, Pretty Peacock and Whisper White – aren’t they simply divine! If you want to add these tassels, don’t forget to thread them onto your length of trim before you adhere it to the bag.
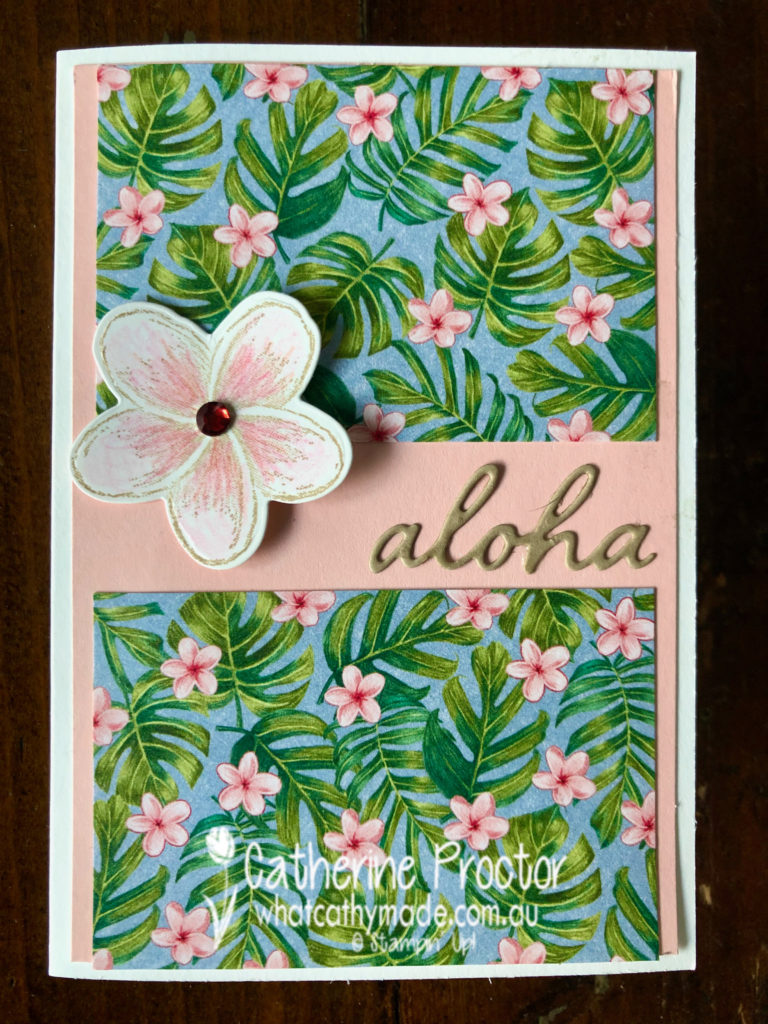
My matching card uses materials from the Tropical Oasis Suite, including the “Aloha” die from the In the Tropics Dies, the frangipani flower from the Timeless Tropical stamp set and its matching die from the In the Tropics Dies.
The floral card stock is from the Tropical Oasis Memories & More Card Pack. I’m so in love with all these products!!!
I have a very special person in mind for my gift bag with matching card and I just know she will love this suite as much as I do!
The next hop in the Blog Hop is the very talented……..Vicki Boucher
If you have a broken link or have come to this blog hop midway, you can view all the participants below:
Hello friends! Welcome to week fifteen of the 2019 Heart of Christmas blog hop!
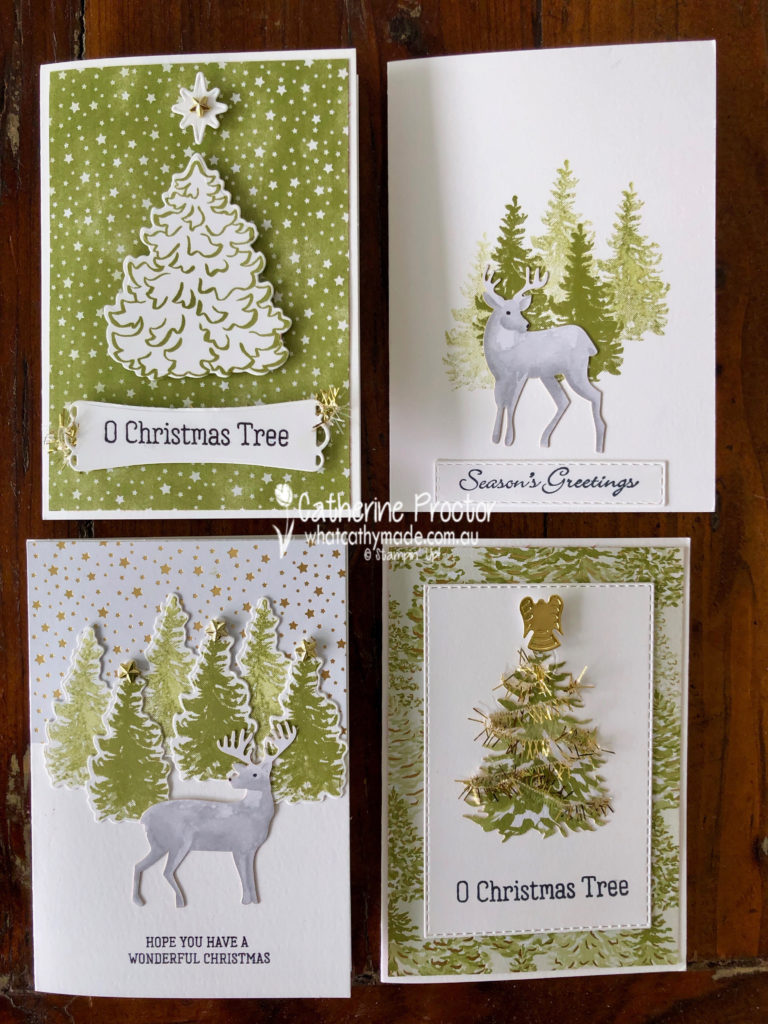
A month ago I shared with you two of the cards I made using The Most Wonderful Time Product Medley and this week I have four more I’d like to show you…this time featuring Old Olive with a touch of gold.
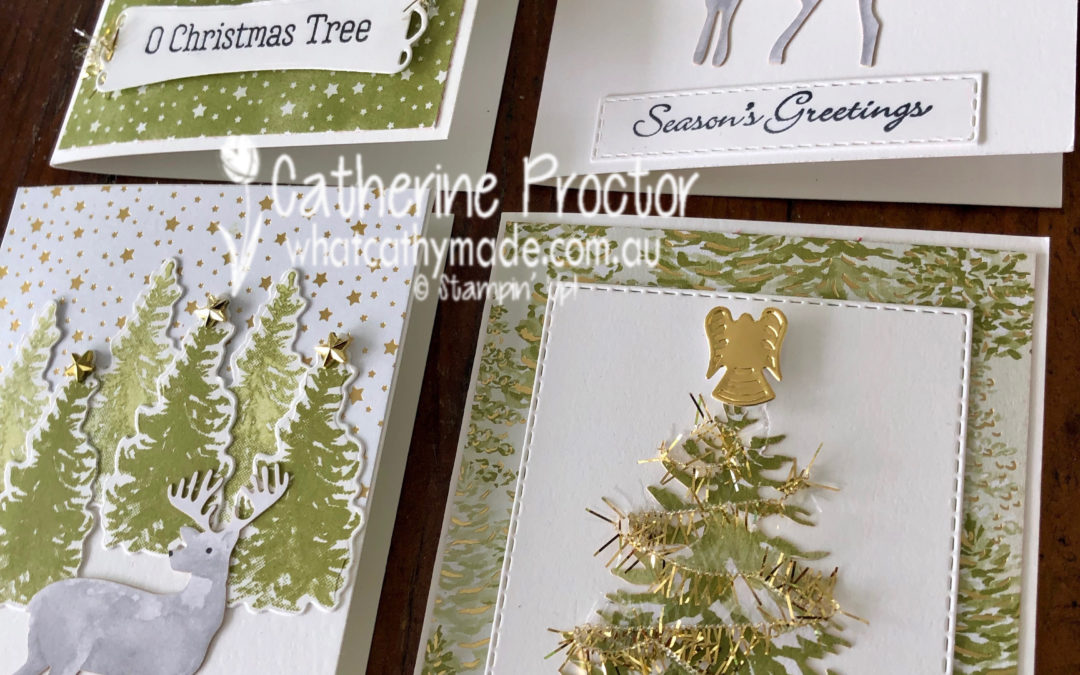
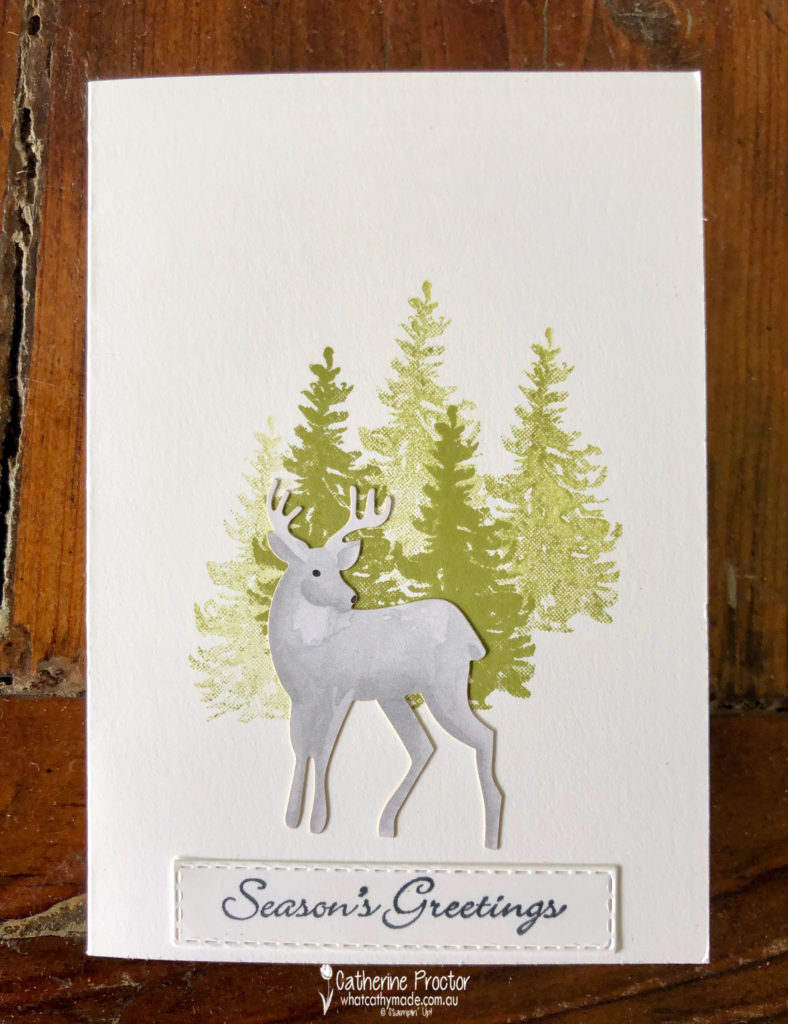
Two of these cards use the stunning deer stickers that come in this medley, making card making so quick and easy.
The “Season’s Greetings” sentiment has been die cut with the smallest stitched rectangle die and the trees are all stamped in Old Olive, some at full strength and some stamped off.
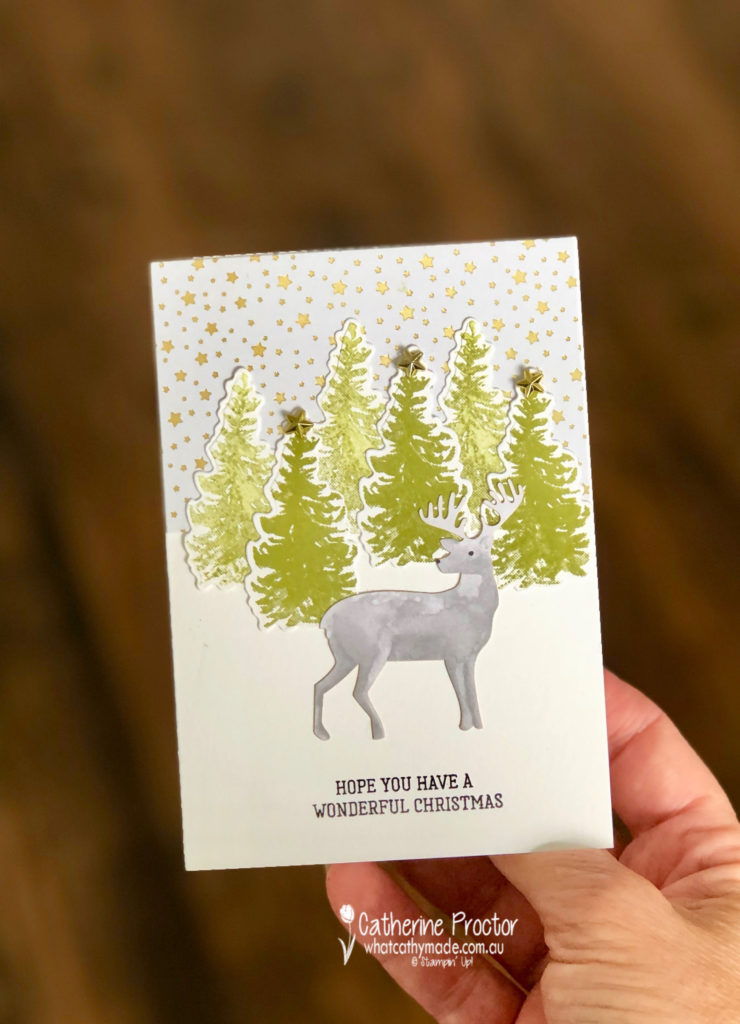
For card two I stamped and die cut some of my trees and layered them onto a piece of the star background card stock. Can you see the little gold faceted stars stuck to the top of my trees?
This time I stamped the sentiment straight onto my card.
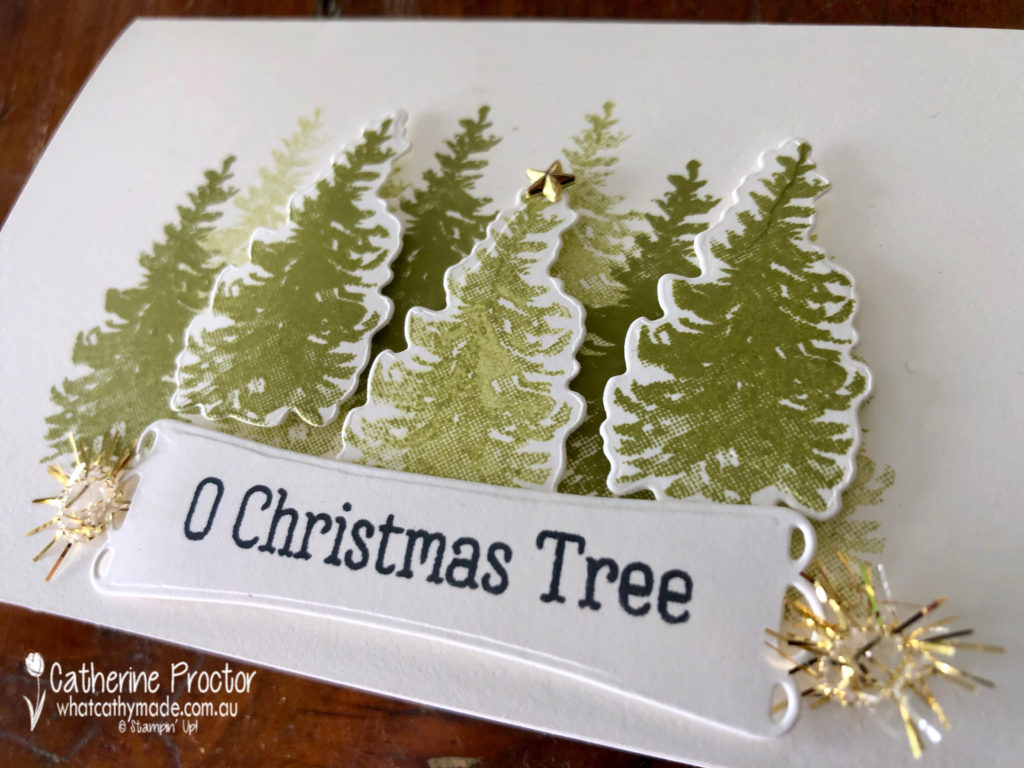
Card three and four are all about trees. I’ve stamped and die cut the trees again, stamping off once and twice to get the different depth of colour in the trees. One gold faceted star and a hint of gold tinsel add some bling, while the sentiment is die cut with a die that comes in the medley.
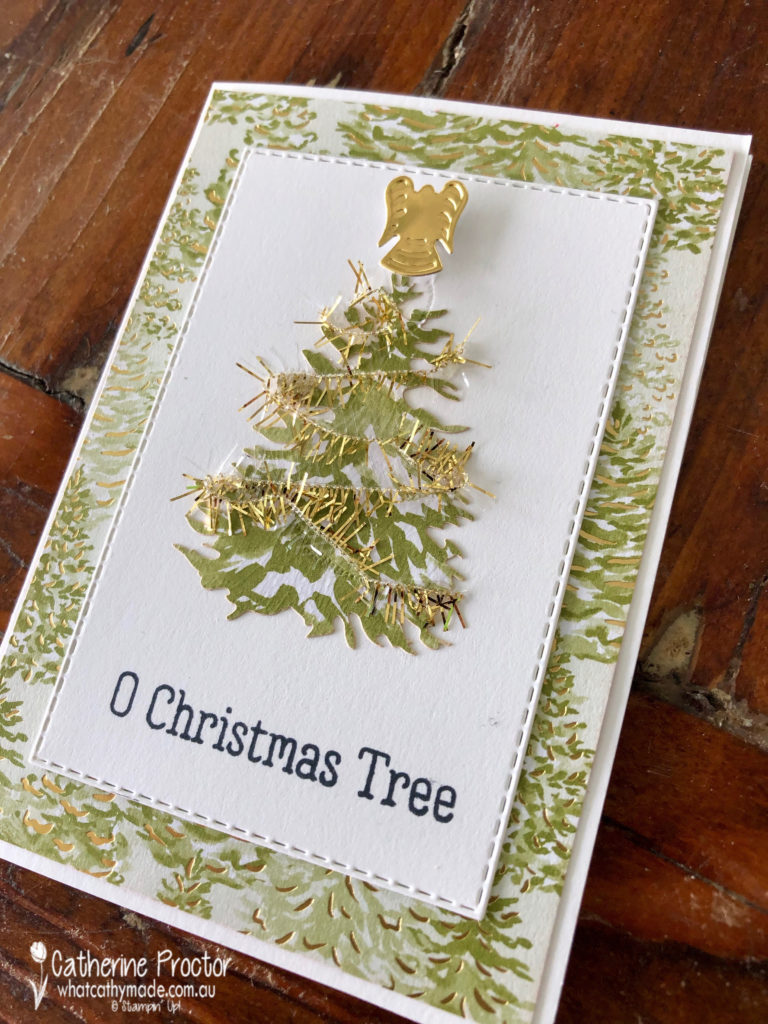
My final card features a single tree with a gorgeous little gold angel sitting at the top. This is die cut from gold foil – there is also also a die for a little star to sit on top of the tree, so cute!!!
I’ve wrapped the tree in some of the mini gold tinsel. The background DSP has touches of gold as well – hopefully you can see the gold touches in the photo below.
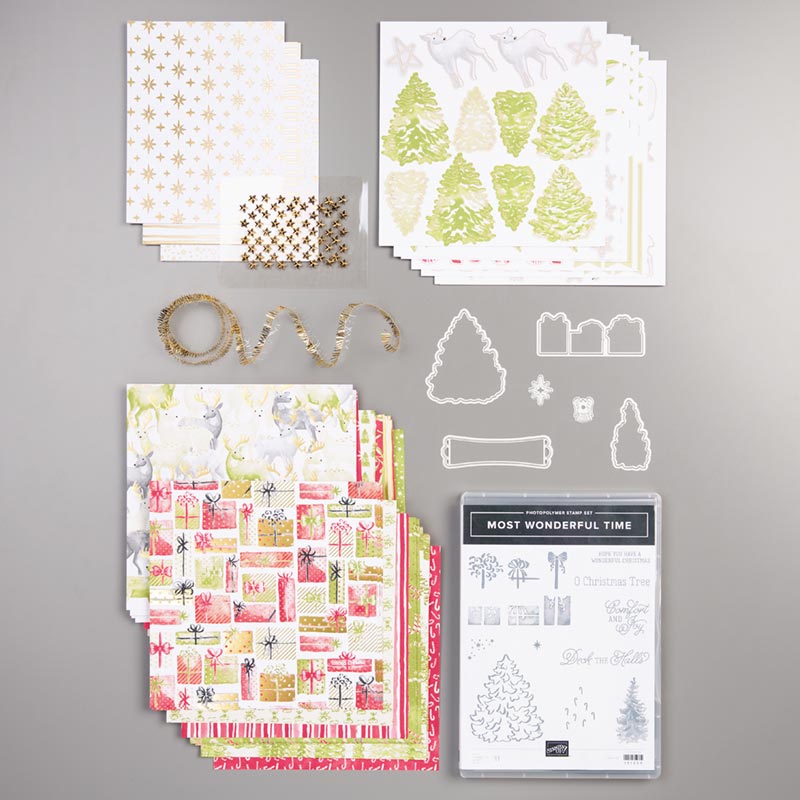
Just in case you missed it the first time I shared some cards I made using he Most Wonderful Time Medley, here’s a closer look at everything you get.
Christmas is coming fast, with less than a month to go now, so if you’re looking for a quick and easy way to make a lot of Christmas cards, I can highly recommend this medley.
All you need to add is your trimmer, ink and adhesives, because the medley includes: * an 11-piece Most Wonderful Time photopolymer stamp set * 48 sheets of 6″ x 6″ (15.2 x 15.2 cm) Designer Series Paper, 8 each of 6 double-sided designs * 12 gold foil card fronts, 4 each of 3 designs * 6 sticker sheets, 2 sheets each of 3 designs * Gold/white tinsel trim, 10 yards (9.1 m) * 58 adhesive-backed gold faceted stars * 6-piece Most Wonderful Time Dies (these co-ordinate with the Most Wonderful Time photopolymer stamp set)
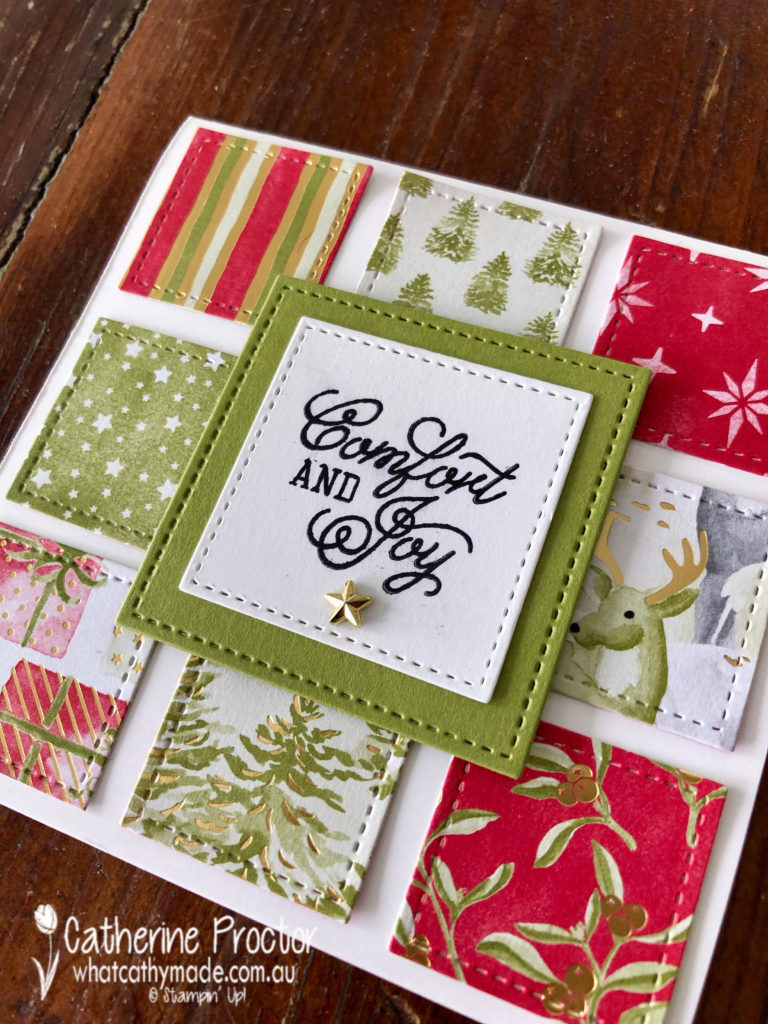
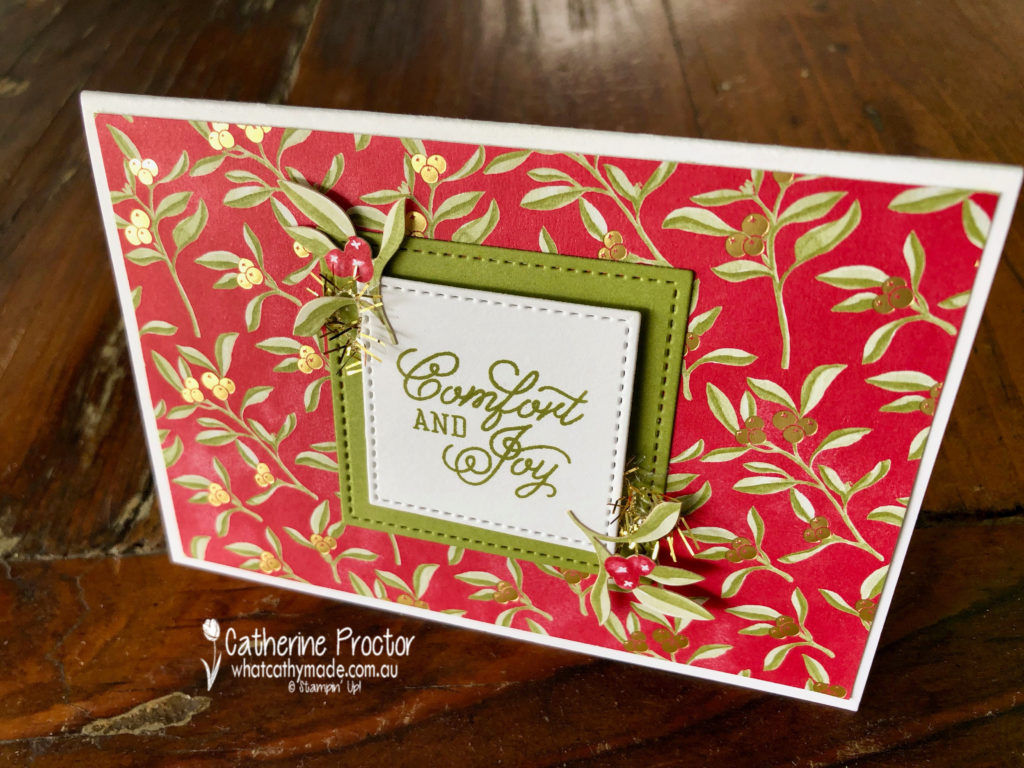
Here’s the two cards I shared with you last month.
The lovely Michele Taylor is hosting our Heart of Christmas blog hop this week – to see what the rest of the team have made this week you can visit Michele’s page here.
To purchase any of the products I used in this project you can shop with me here.
If you’d like me to post you your very own copy of the 2019 Stampin Up! Holiday Catalogue, the 2019-20 Stampin Up! annual catalogue, the mini catalogue or the Sale-a-bration catalogue or to simply find out about more about Stampin’ Up! contact me.
Welcome to Week 13 of the Heart of Christmas blog hop.
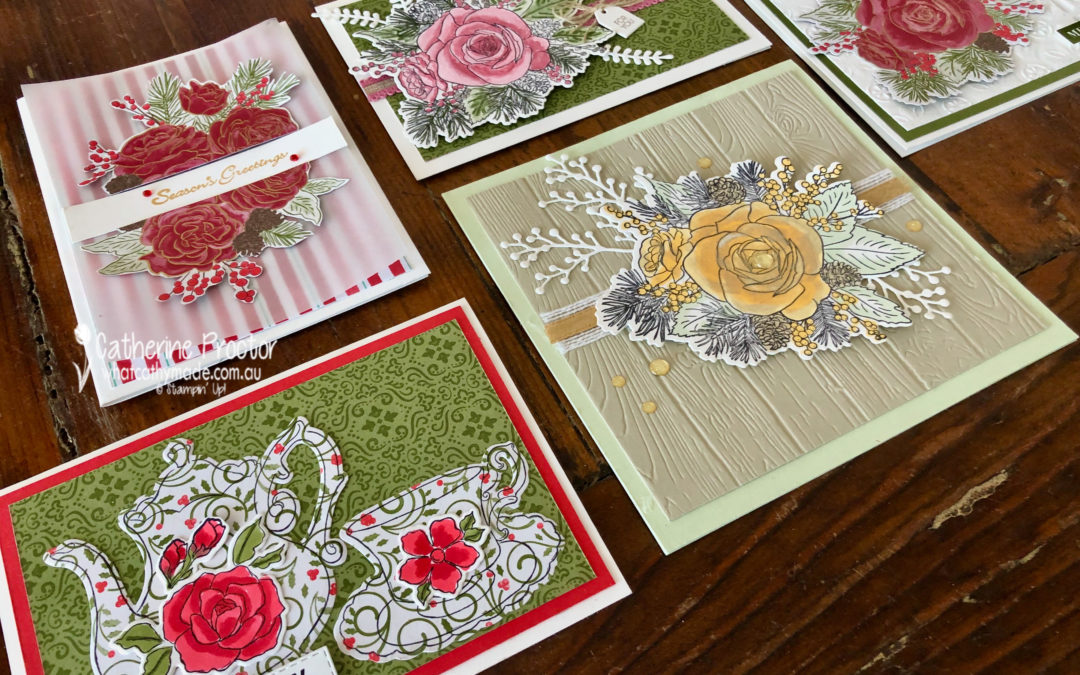
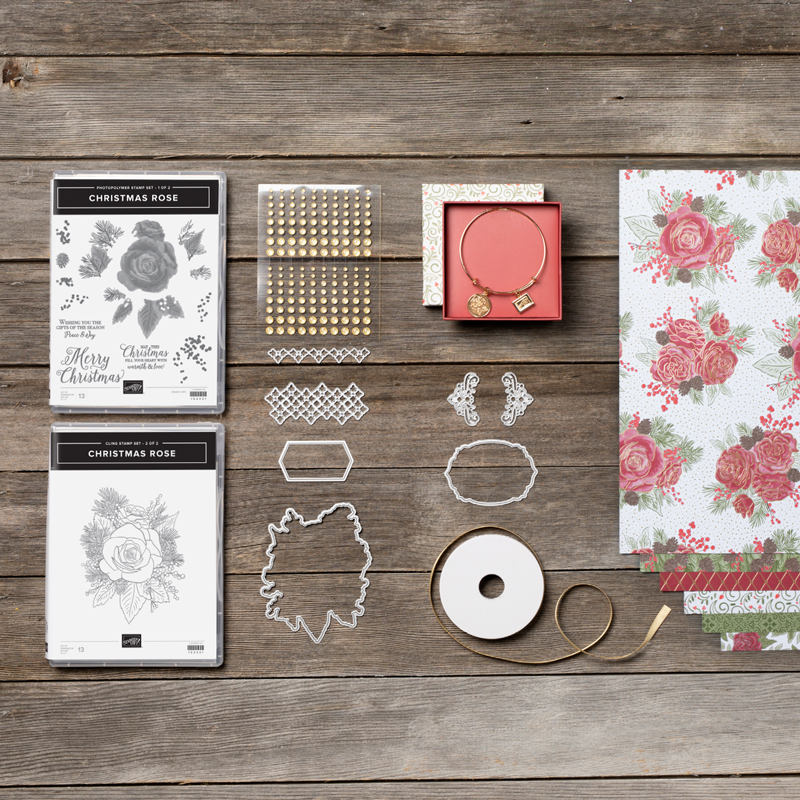
This week I’m sharing with you a variety of cards I’ve made using Stampin’ Up!’s brand new “Christmastime Is Here Suite”.
This suite is not in the Holiday Catalogue, but you can order it online here.
All of the products in the suite can either be ordered together or individually. This video gives you closer look.
Yes this is a Christmas suite, but the DSP patterns and the rose themed stamps and dies are also ideal for a variety of cards, including Christmas, birthday, Mother’s Day, thank you and sympathy cards.
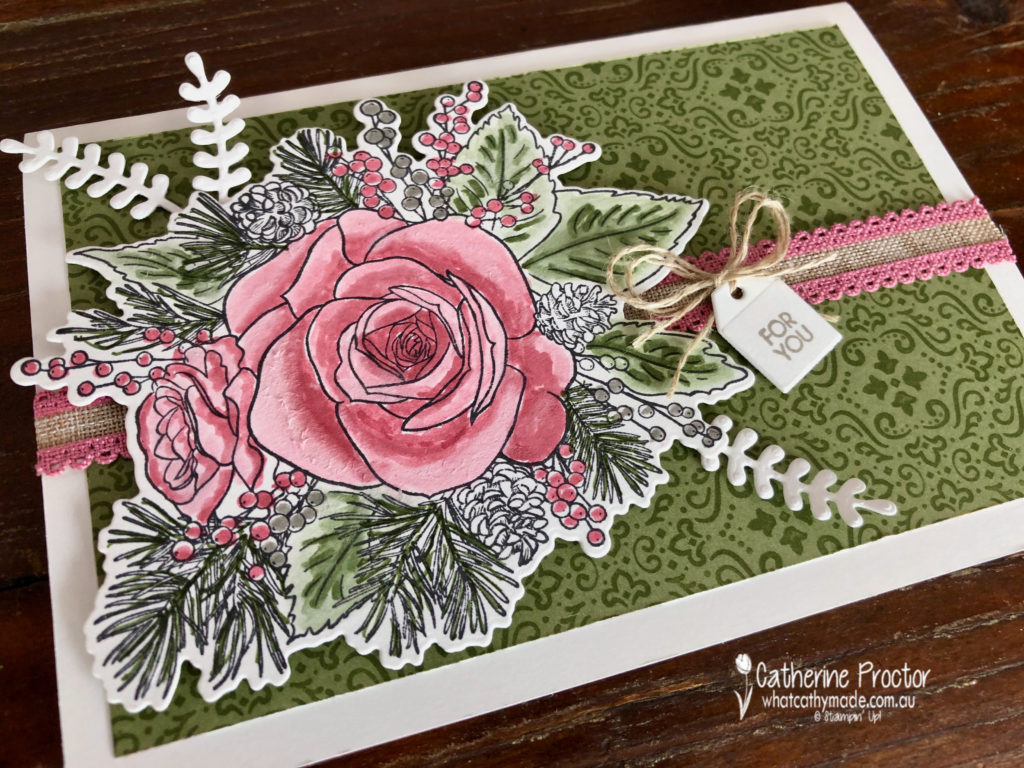
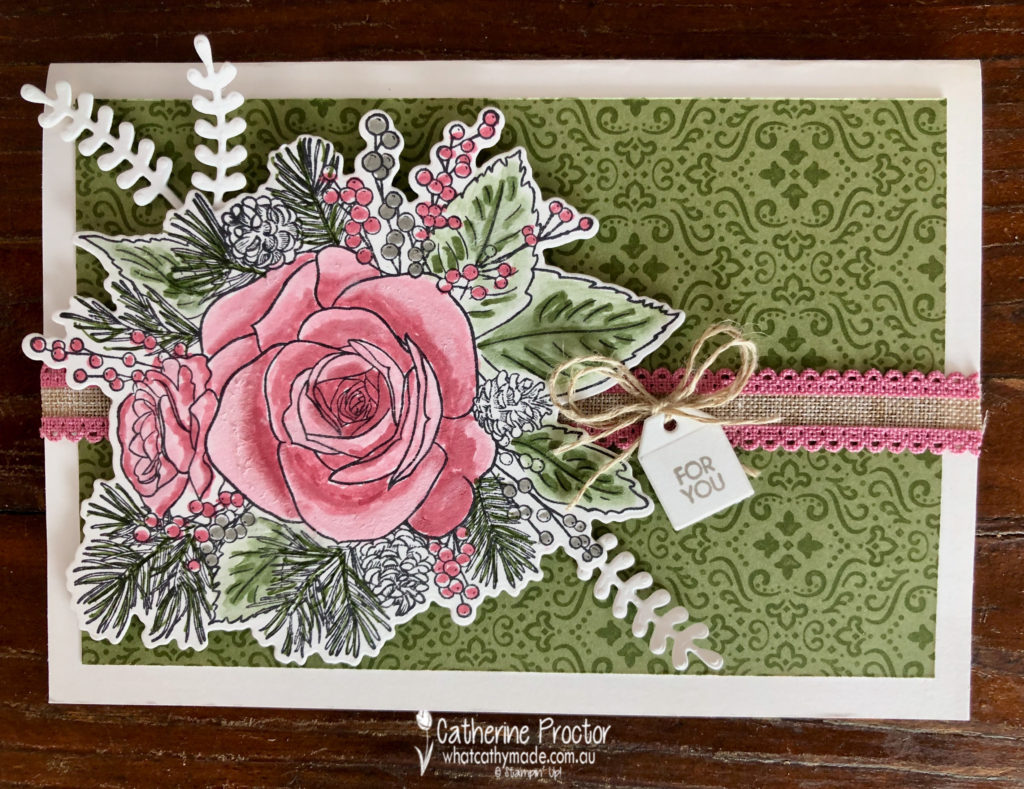
Card one is a “for you” card that I shared in a blog last week. Here it is again in case you missed it.
After stamping the rose image in Memento ink onto Whisper White card stock I used my marker pens in Rococo Rose, Mossy Meadow and Gray Granite to colour directly onto the stamped image and then I blended using the clear blender pen, NOT the stampin blends.
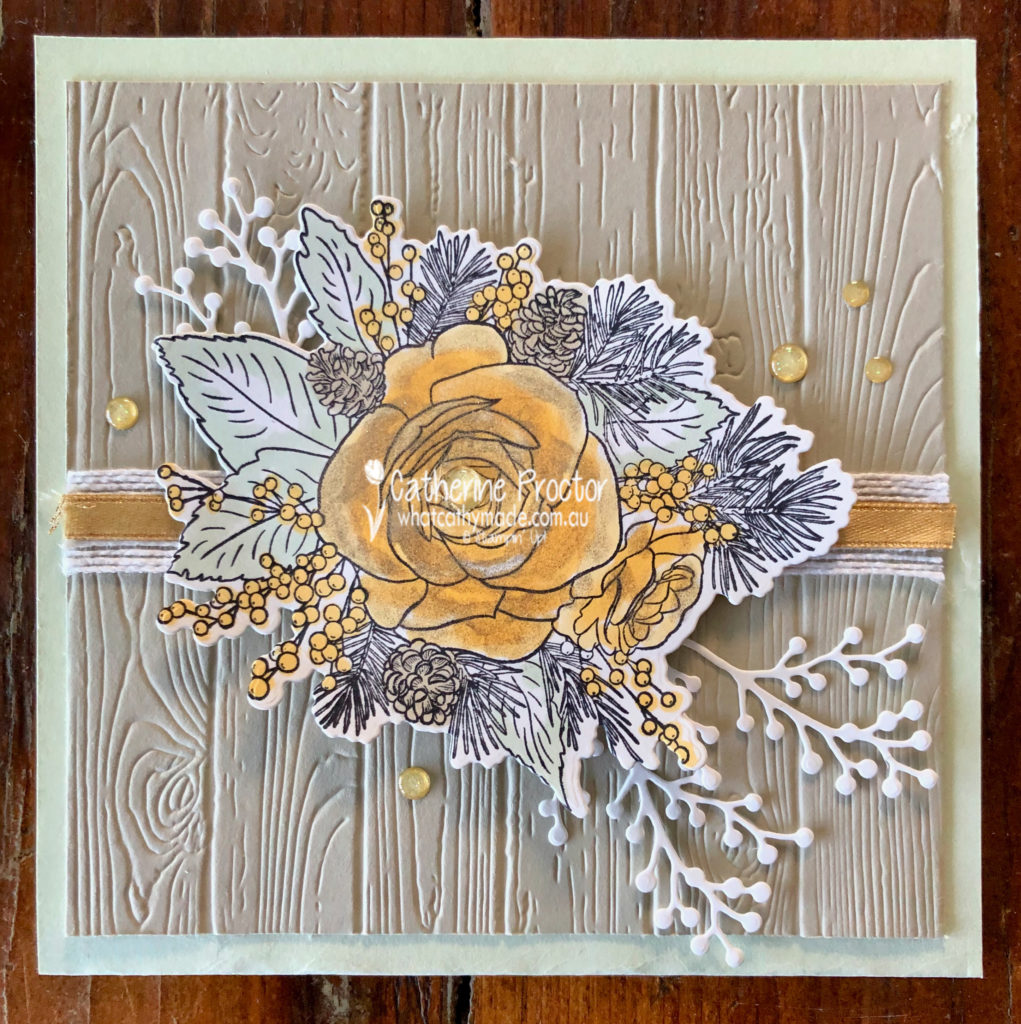
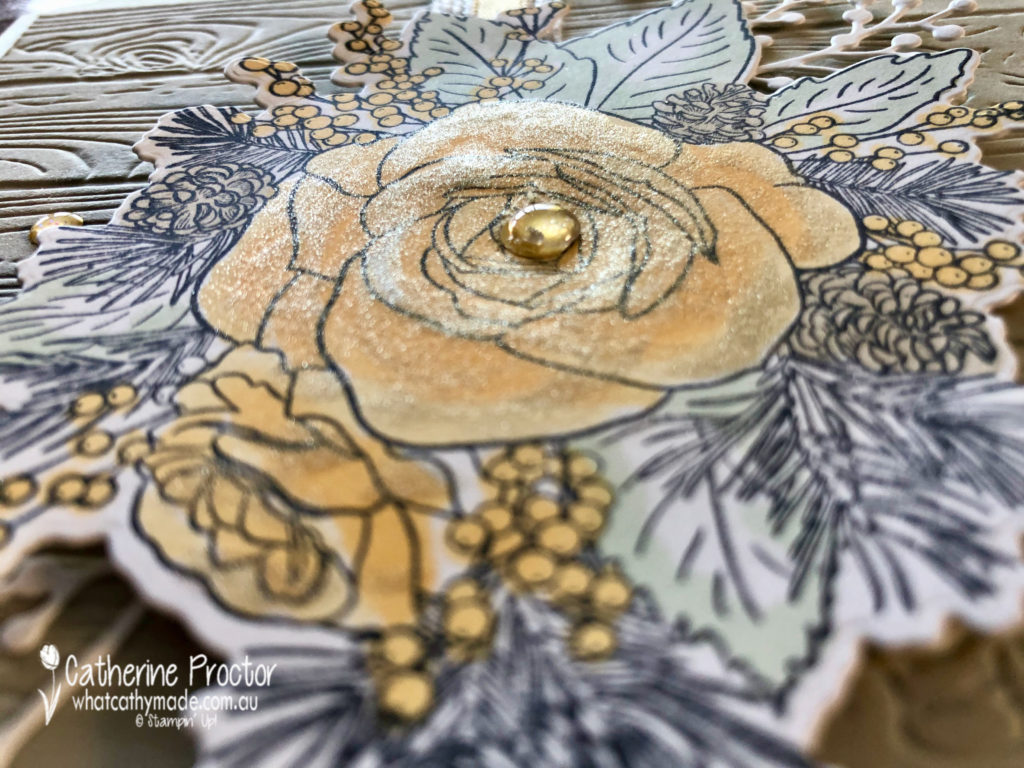
Card two uses exactly the same stamped image but colouring in with soft saffron and soft sea foam it gives it a totally different effect.
This time I made a square card and mounted the image onto a piece of Sahara Sand, embossed with the pinewood embossing folder.
I’ve also used the Gold 1/4″ (6.4 mm) Shimmer Ribbon and Gold Glitter Enamel Dots from the suite as well as branches die cut in Whisper White using the Frosted Bouquet dies.
I finished of with some Wink of Stella but did go a teeny weeny bit overboard, making my card very glittery!
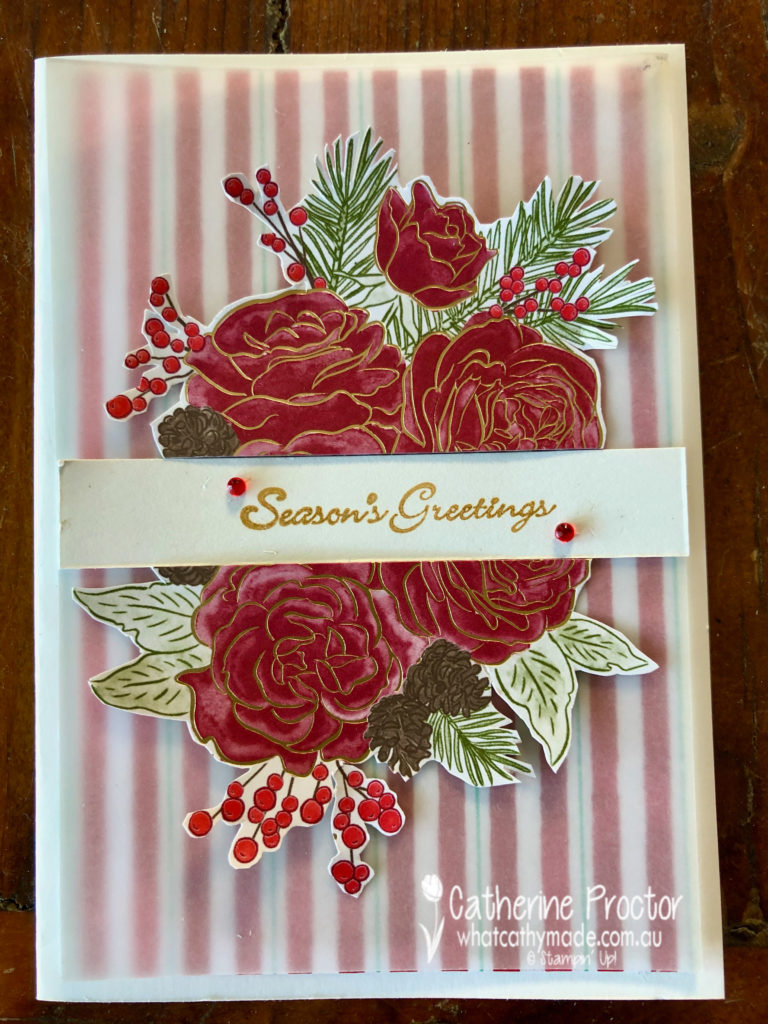
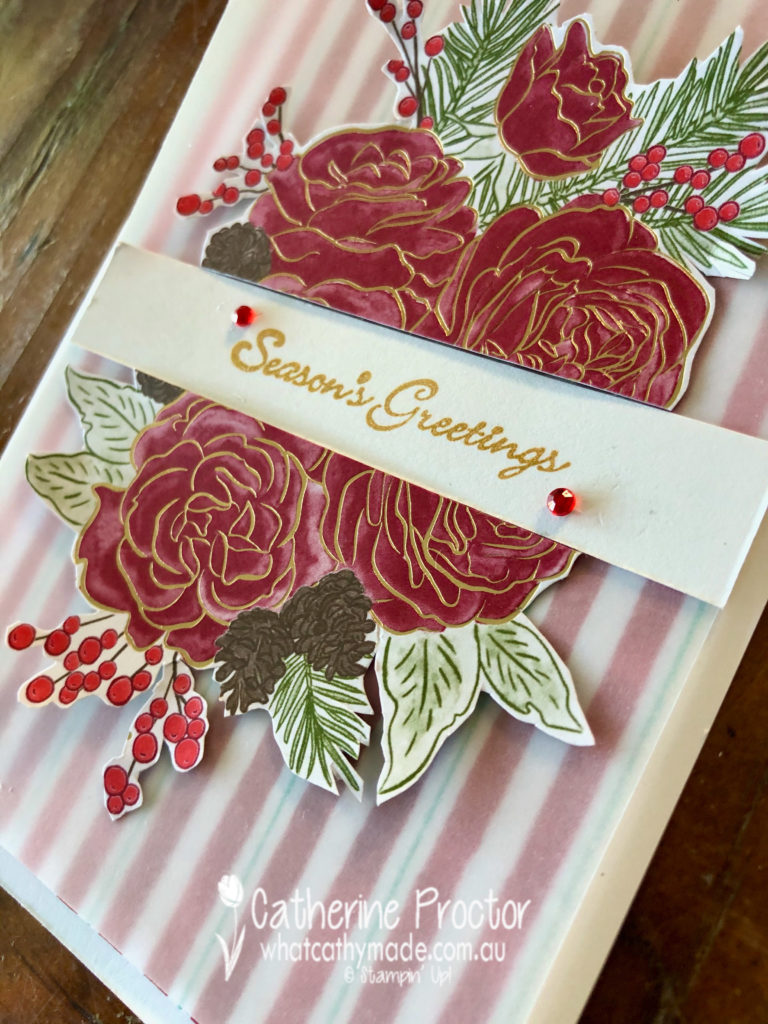
Card three is a Christmas card that uses a piece of Let it Snow DSP, overlaid with vellum. I fussy cut the image from the Christmastime is Here DSP, before cutting it in half to sit either side of the “Seasons Greetings” sentiment from Itty Bitty Christmas stamped in gold.
Red Rhinestones add a touch of bling and cover a smudge of ink!!!!
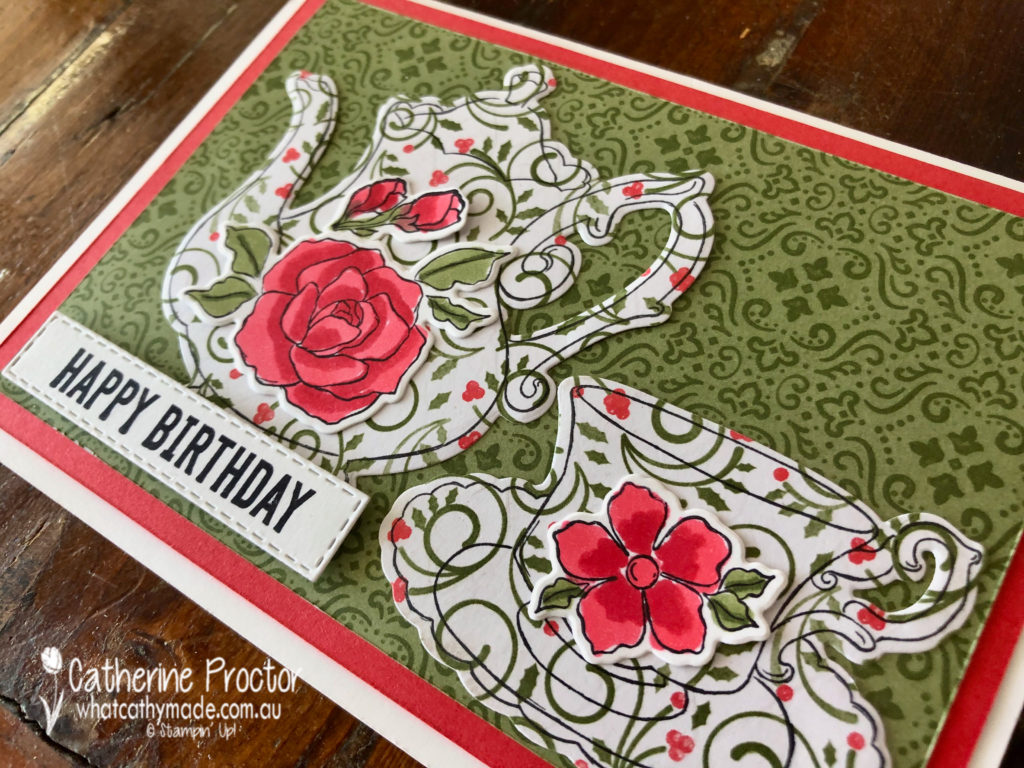
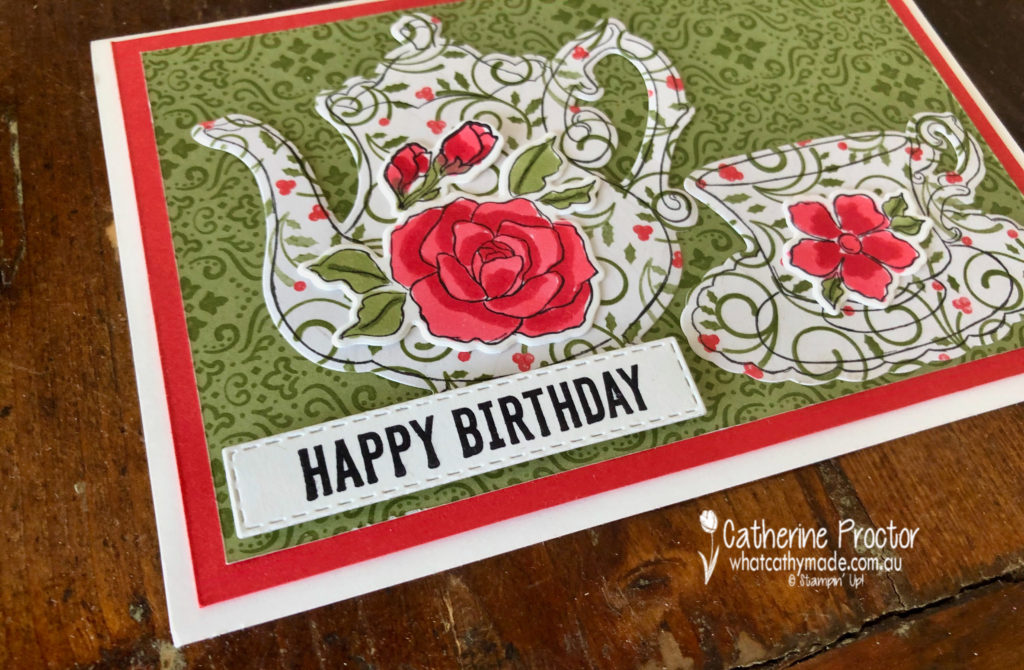
Card four uses two different patterns from the Christmastime Is Here DSP to make a birthday card that could very easily be used as a Mother’s Day card if I changed the sentiment.
I picked up on the Poppy Parade and the Mossy Meadow colours in the DSP and used my blender pens in these colours to colour in stamped flowers from the Tea Together stamp set. The teapot, cup and saucer were also stamped from this set and then all cut out using the matching dies.
The happy birthday sentiment is from the Itty bitty Birthdays stamp set die cut out with my stitched rectangle dies.
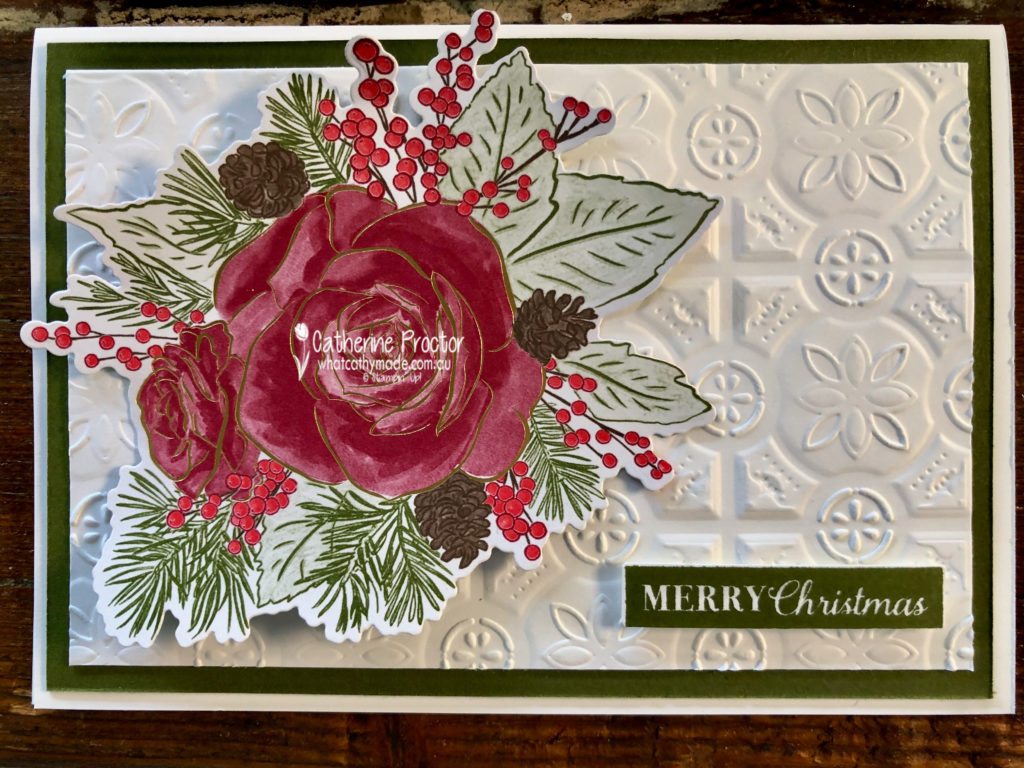
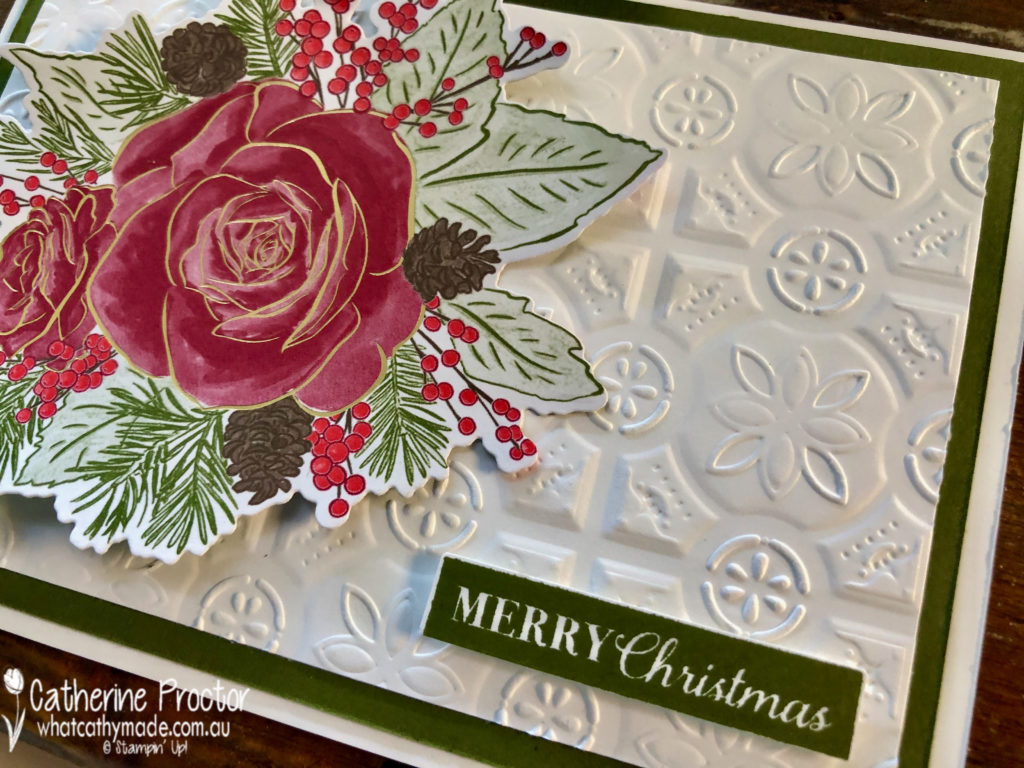
My final card is another one I shared with you last week and perhaps the most traditional of the lot – a Merry Christmas card.
I simply die cut out the image from the DSP , using the same die that I used to cut out my stamped rose in the other cards. Very quick and super easy.
The lovely Judy May is hosting our Heart of Christmas blog hop this week – to see what the rest of the team have made this week you can visit Claire’s page here.
To purchase any of the products I used in this project you can shop with me here.
If you’d like me to post you your very own copy of the brand new 2019 Stampin Up! Holiday Catalogue, the 2019-20 Stampin Up! annual catalogue or to simply find out about more about Stampin’ Up! contact me.