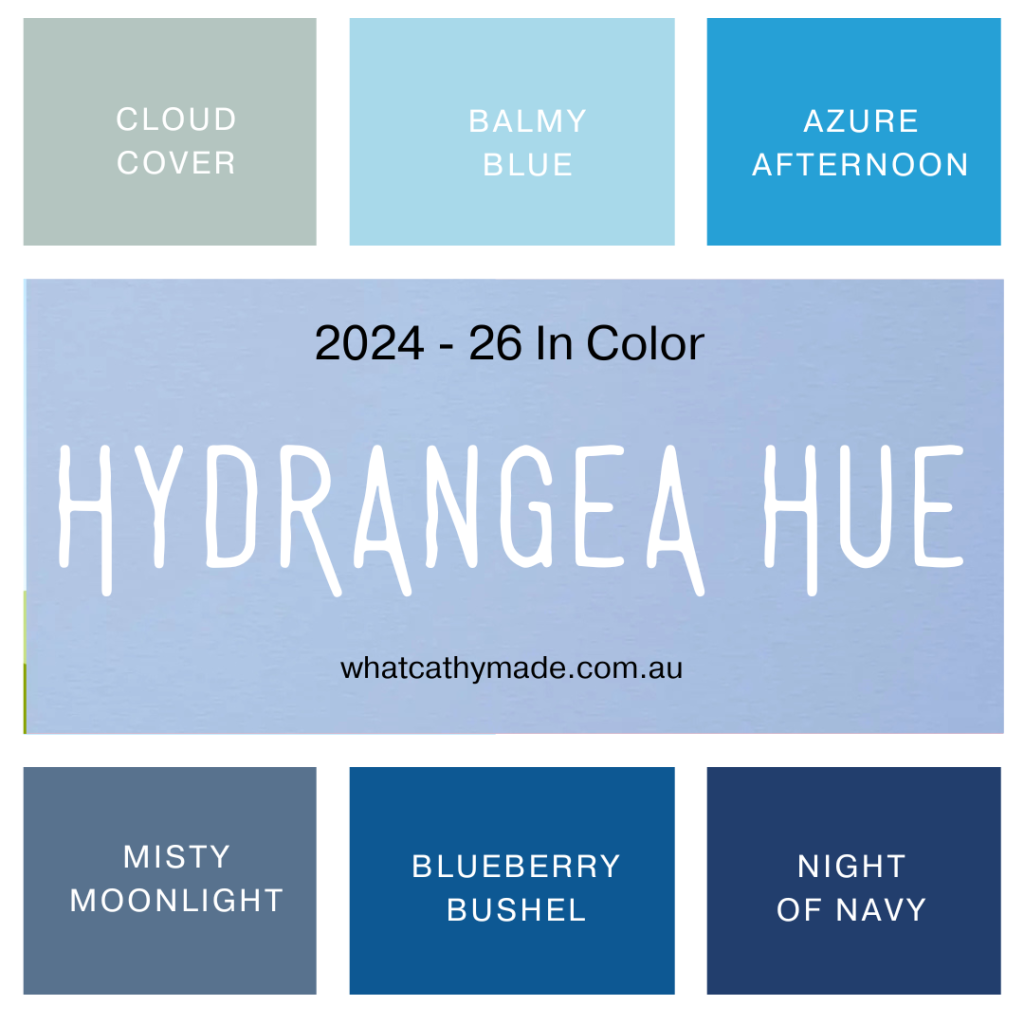
This week for the Art With Heart Team Colour Creations Blog Hop we are featuring one of the beautiful new 2026–2028 In Colours, Hydrangea Hue. This is such a soft and stunning shade of lavender blue, similar to another retired InColour, Seaside Spray. Here’s how it compares to the current blues in the Stampin’ Up! range.
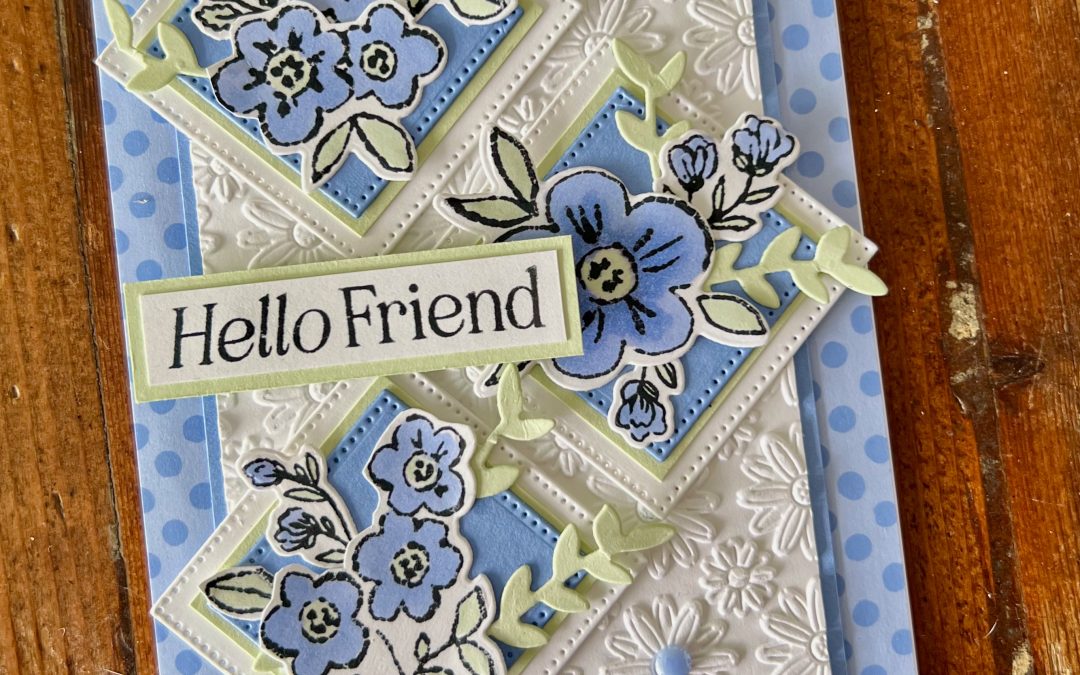
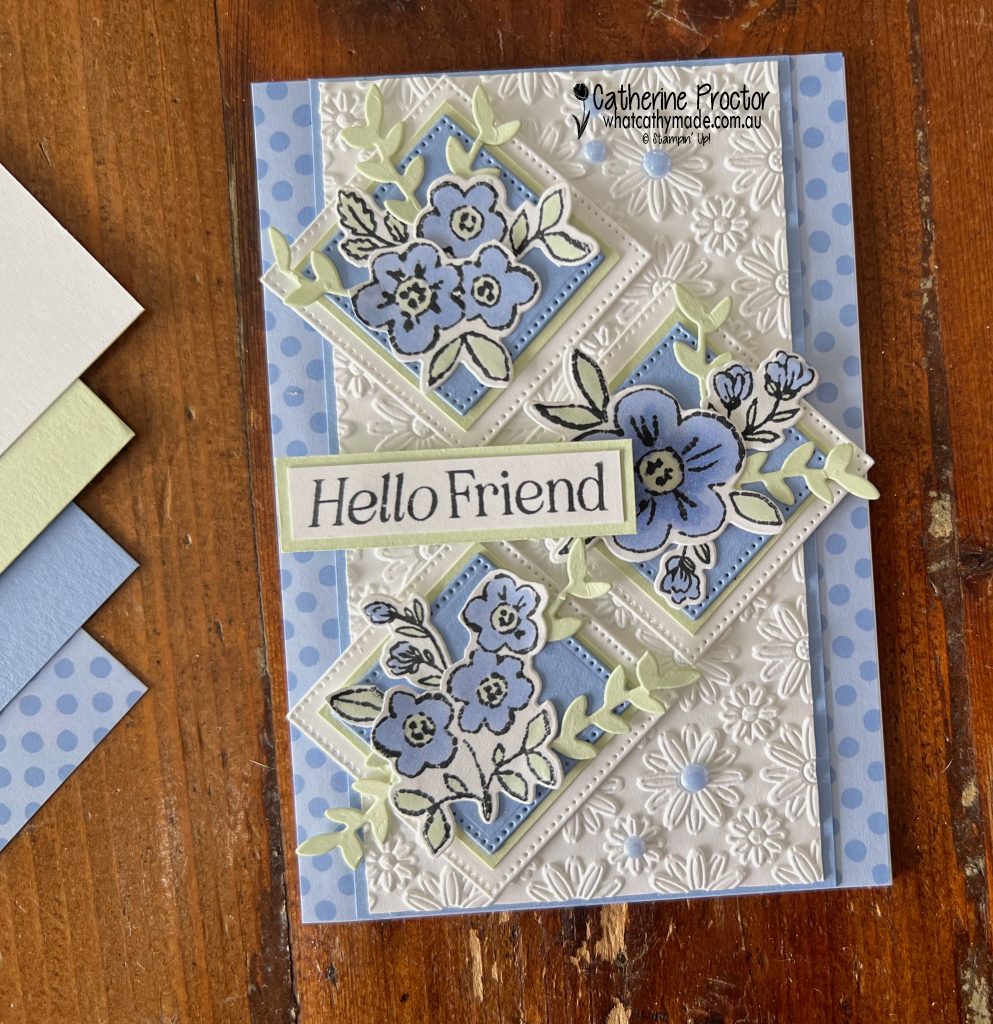
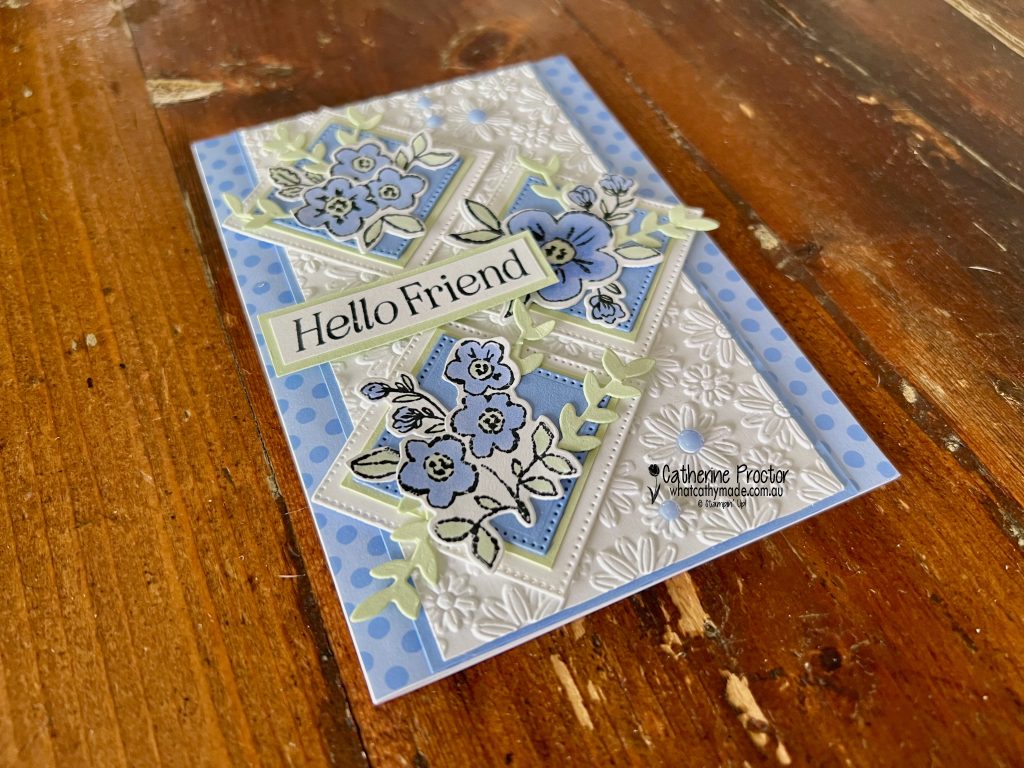
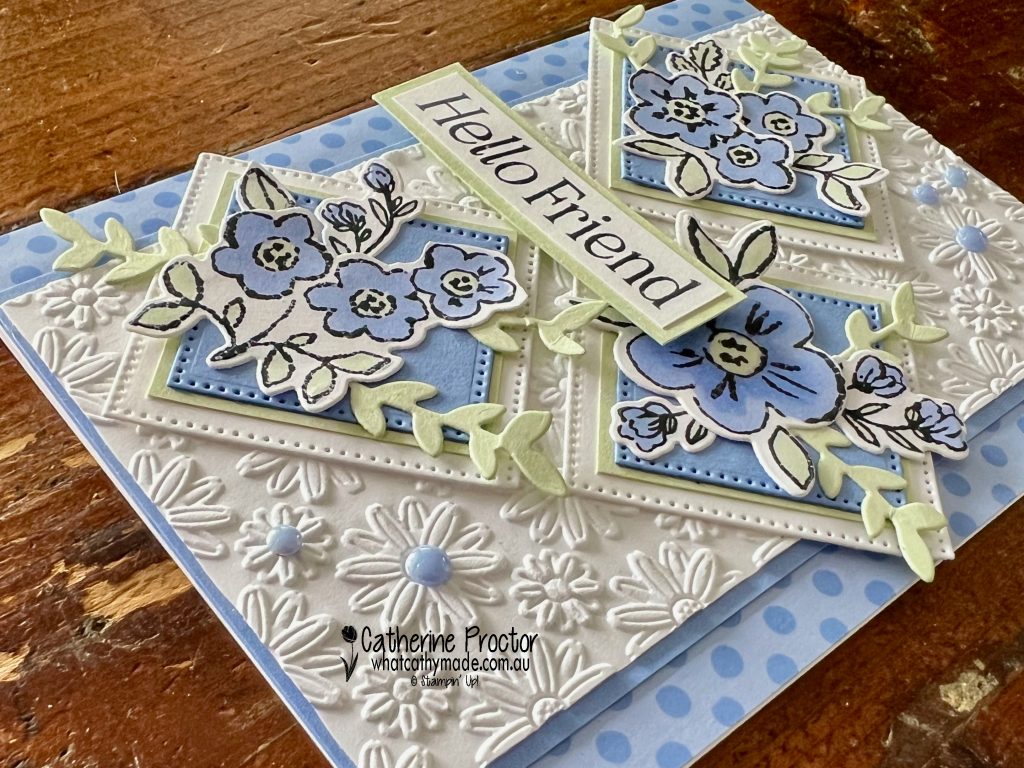
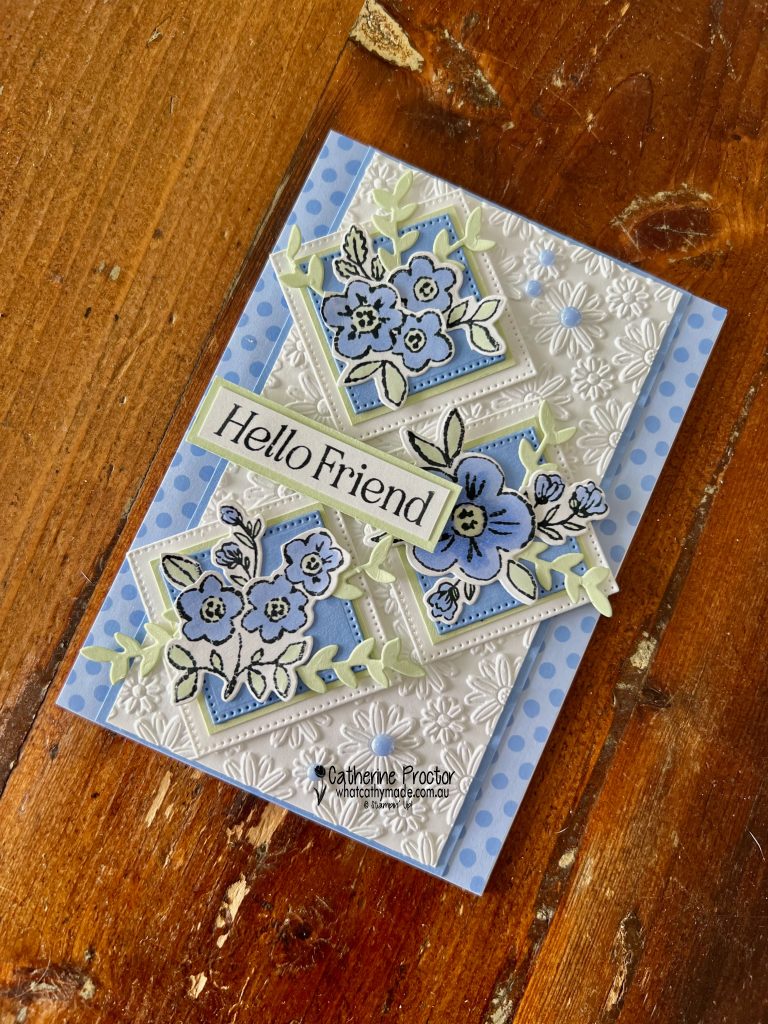
For my “Hello Friend”card I paired Hydrangea Hue with Soft Sea Foam, Basic White and touches of Basic Black for contrast. I absolutely love how fresh and soft Hydrangea Hue and Soft Sea Foam look together, with the black and white adding definition and contrast.
The background is a layer of 2026–2028 In Colour Painted Patterns 12″ x 12″ Designer Series Paper, over which I’ve added a strip of Hydrangea Hue card stock and an embossed layer of Basic White cardstock.
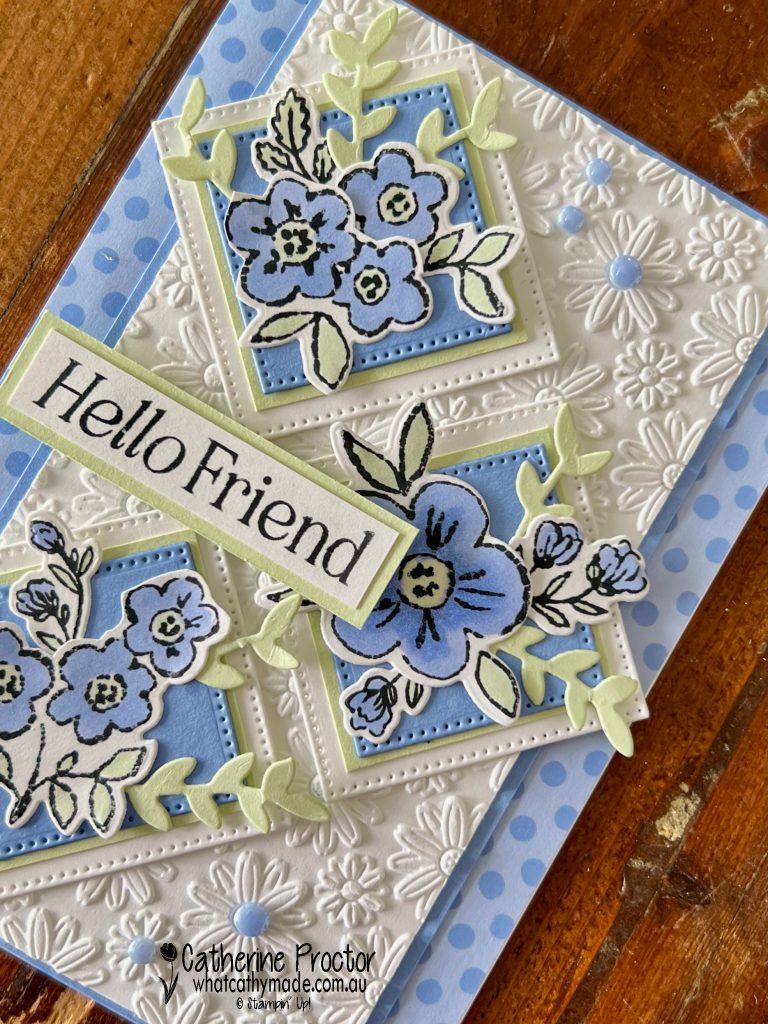
I love this Lazy Daisy Embossing Folder so much I accidentally ordered it not once, but three times! Luckily I was able to exchange two of these embossing folders. Take a closer look in the photo below at just how gorgeous this pattern is.
The layered diamond panels were created using two of the square Stylish Shapes Dies. I arranged them diagonally across the card front to create movement and draw the eye across the floral elements.
The flowers and die cut foliage are all from the Heirloom Boutique Bundle and were coloured using Hydrangea Hue Stampin’ Blends and Soft Sea Foam Stampin’ Blends. I carefully cut up the stamped and die cut images to layer them. I also added extra layers of die-cut Soft Sea Foam foliage behind each floral cluster.
To finish the card I added a sentiment from the Lovely Arrangements Stamp Set and some of the new 2026–2028 In Colour Dots which coordinate beautifully with Hydrangea Hue and add just the right amount of shine.
Take a look at some more Hydrangea Hue inspiration on our Insta Hop!
Our blog hop is now an Instagram hop but the good news is that you don’t need to have an Instagram account to view all of the other projects!
Simply go to my Insta handle in a new search engine window to follow the Instagram hop: @whatcathymade.
Next week we are showcasing the final one of the brand new 2026–27 In Colours, Peaceful Pine.
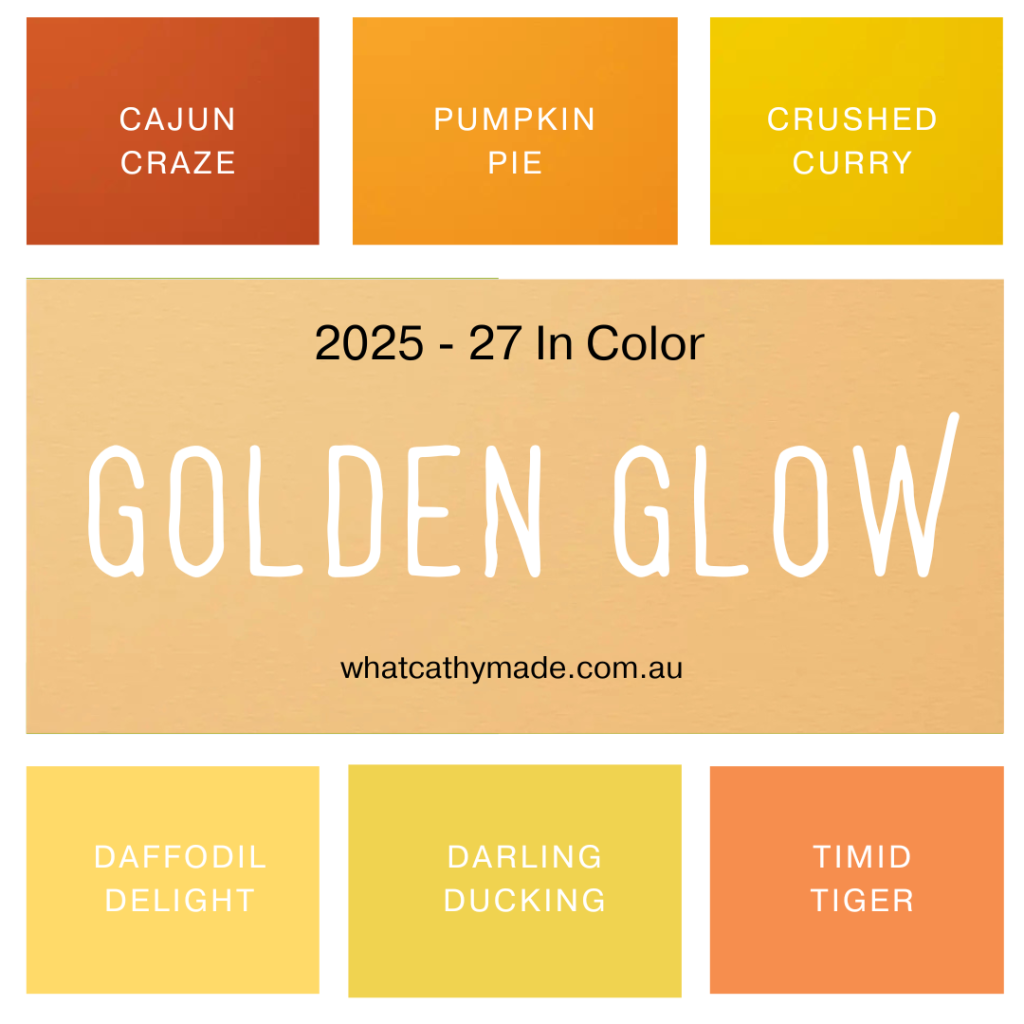
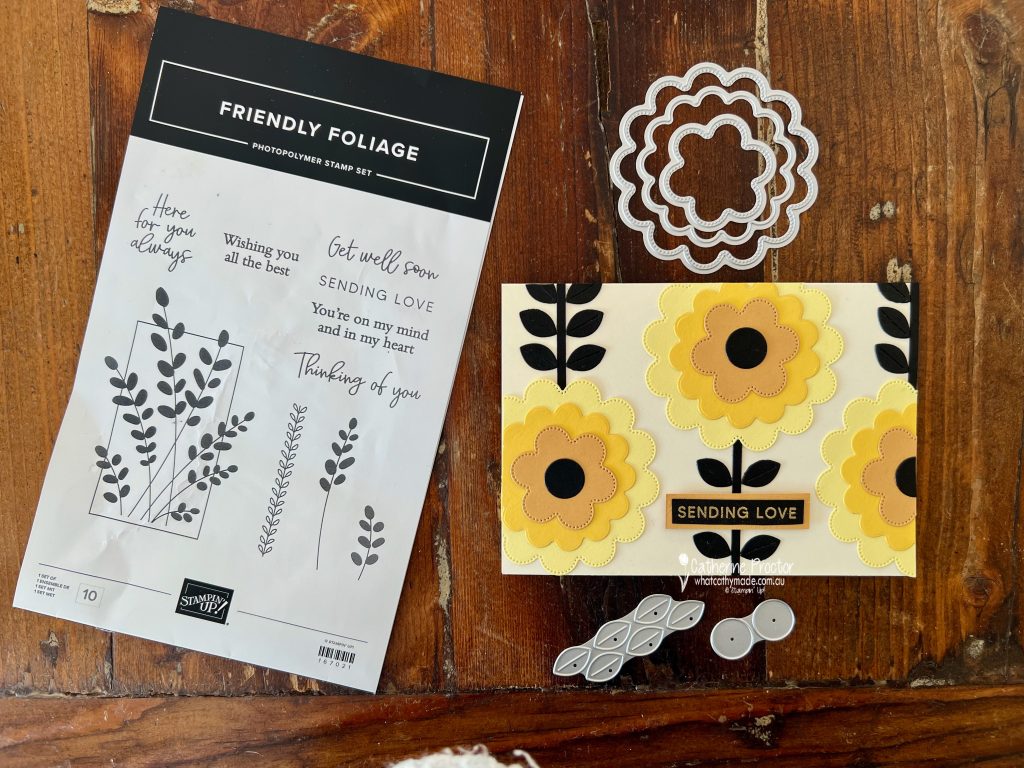
This week for the Art With Heart Team Colour Creations InstaHop we are featuring another one of the fresh new 2026–28 In Colours, Golden Glow. This warm mid yellow/brown shade sits beautifully between yellow, light brown and orange shades.
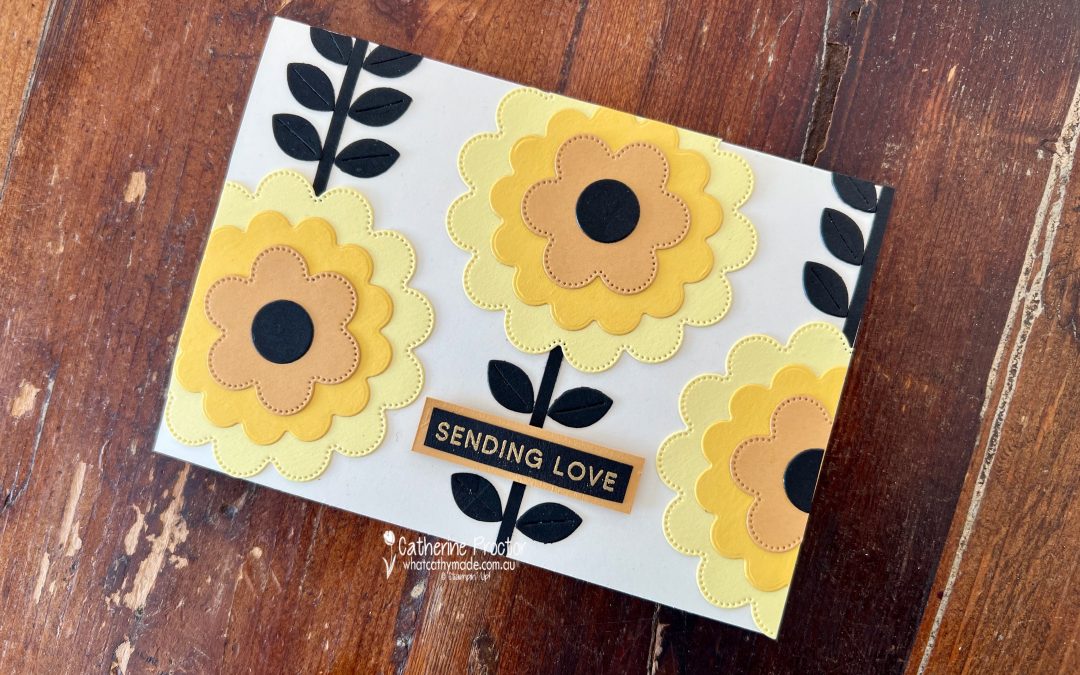
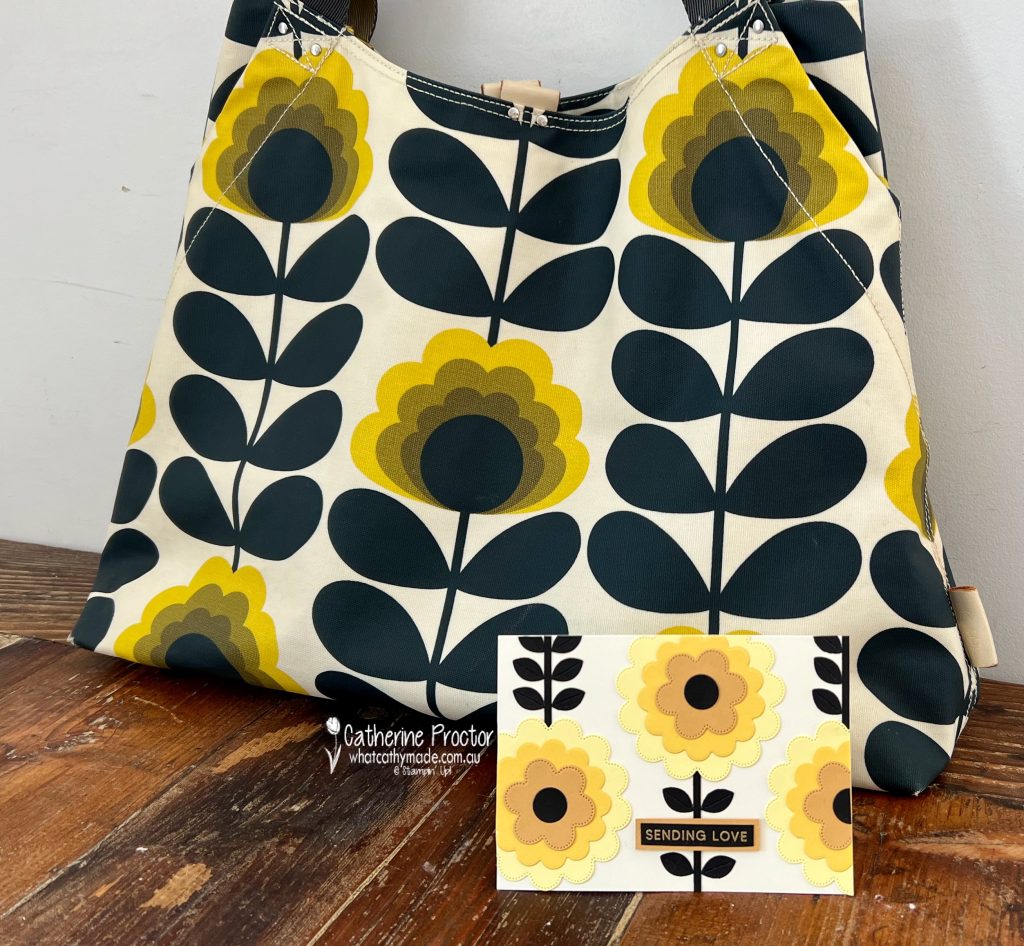
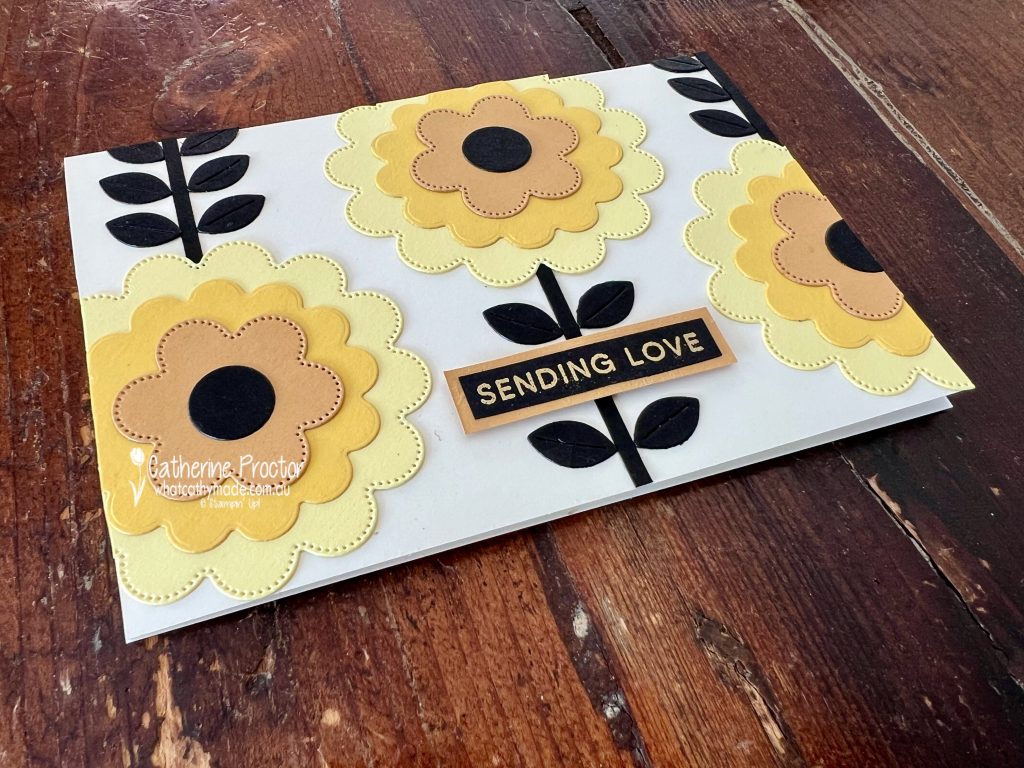
My card design was based on my favourite bag, an Orla Kiely matte coated cotton canvas tote I purchased in New York. I love her iconic floral patterns and bold retro-style colour palettes.
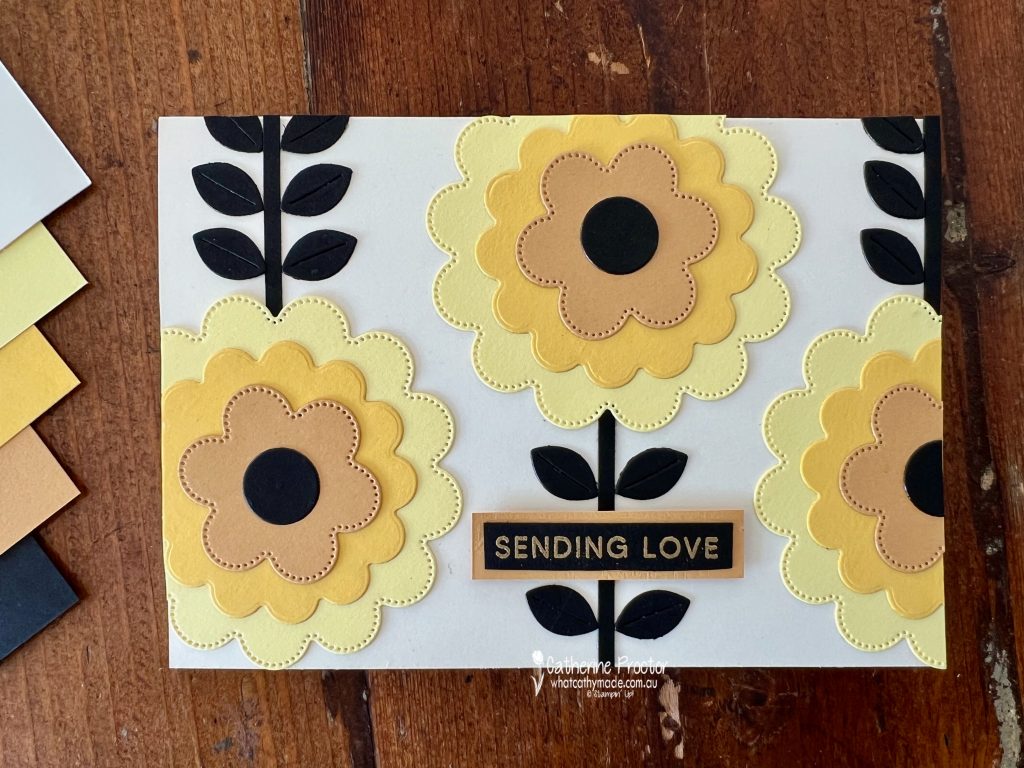
Using the bag as my starting point, I paired Golden Glow with Very Vanilla, Basic Black, Daffodil Delight and Lemon Lolly. I absolutely love the rich caramel warmth Golden Glow develops when combined with these softer yellows.
These colours work together beautifully to create a soft vintage feel while still looking clean and modern. The colours in order from the centre of the flower to the outside are Basic black, Golden Glow, Daffodil Delight and Lemon Lolly on a Very Vanilla card base.
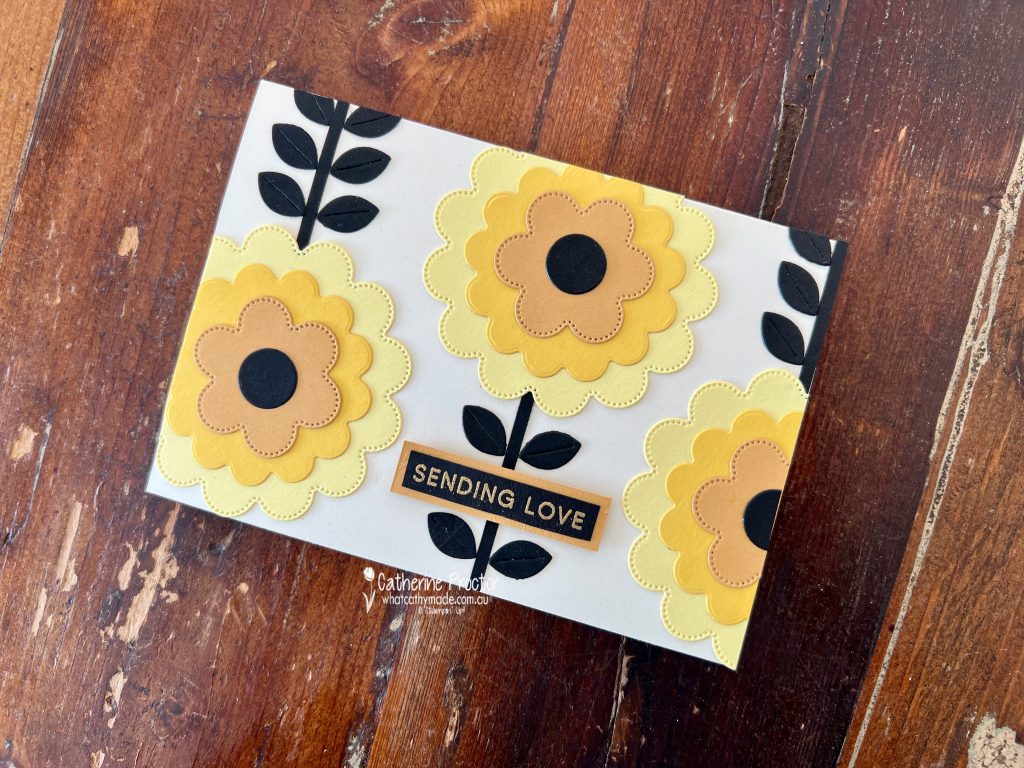
I created the flowers by layering the Scalloped Blooms Dies to recreate the bold graphic look of the original design. I also used the leaf dies from the Scalloped Blooms Dies, along with thin strips of Basic Black cardstock, to create the dramatic black stems and leaves across the card front.
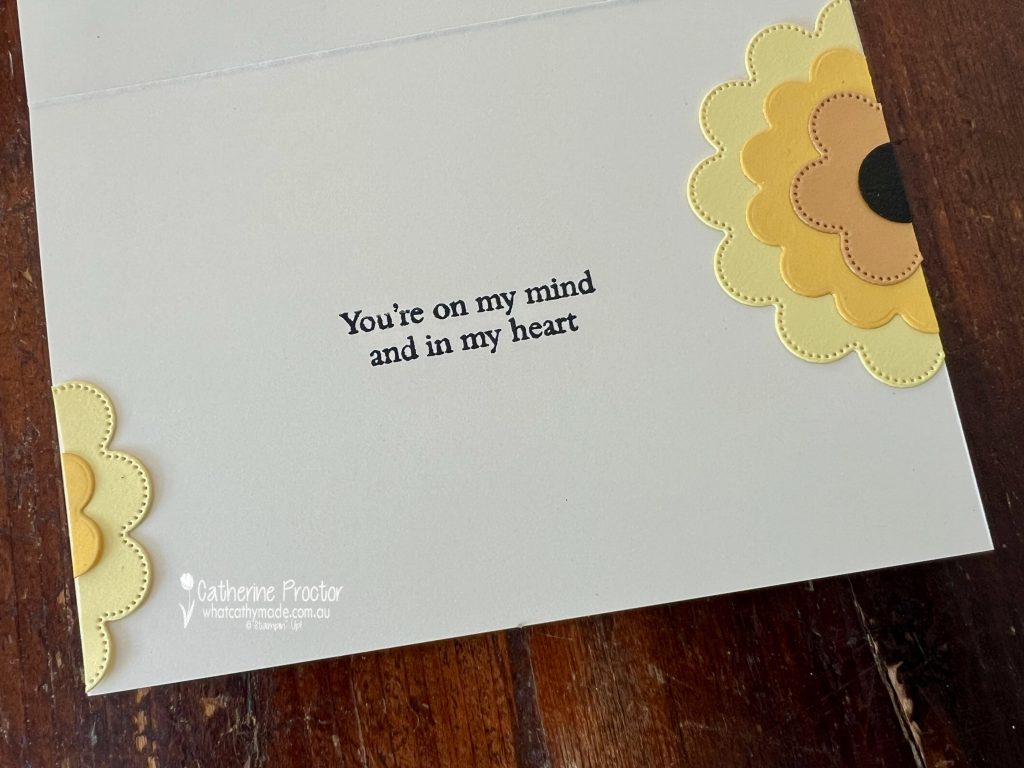
The sentiments on both the front and inside of the card are from the Friendly Foliage Stamp Set and were exactly what I wanted for this sympathy card. I gold heat embossed the front sentiment onto Basic Black cardstock and layered it over a strip of Golden Glow cardstock to help it stand out against the black floral stems.
I also used trimmed offcuts from the flower dies to decorate the inside of the card so nothing went to waste while still carrying the floral theme throughout the project.
Take a look at some more Golden Glow inspiration on our Insta Hop!
Our blog hop is now an Instagram hop but the good news is that you don’t need to have an Instagram account to view all of the other projects!
Simply go to my Insta handle in a new search engine window to follow the Instagram hop: @whatcathymade.
Next week we are showcasing another one of the brand new 2026–27 In Colours, Hydrangea Hue.
Welcome to Week Two of the brand new AWH Colour Creations series for 2026–27. If you haven’t joined us before, we hop through all 50 Stampin’ Up! colours, beginning with the five new InColours and then the core colours in alphabetical order.
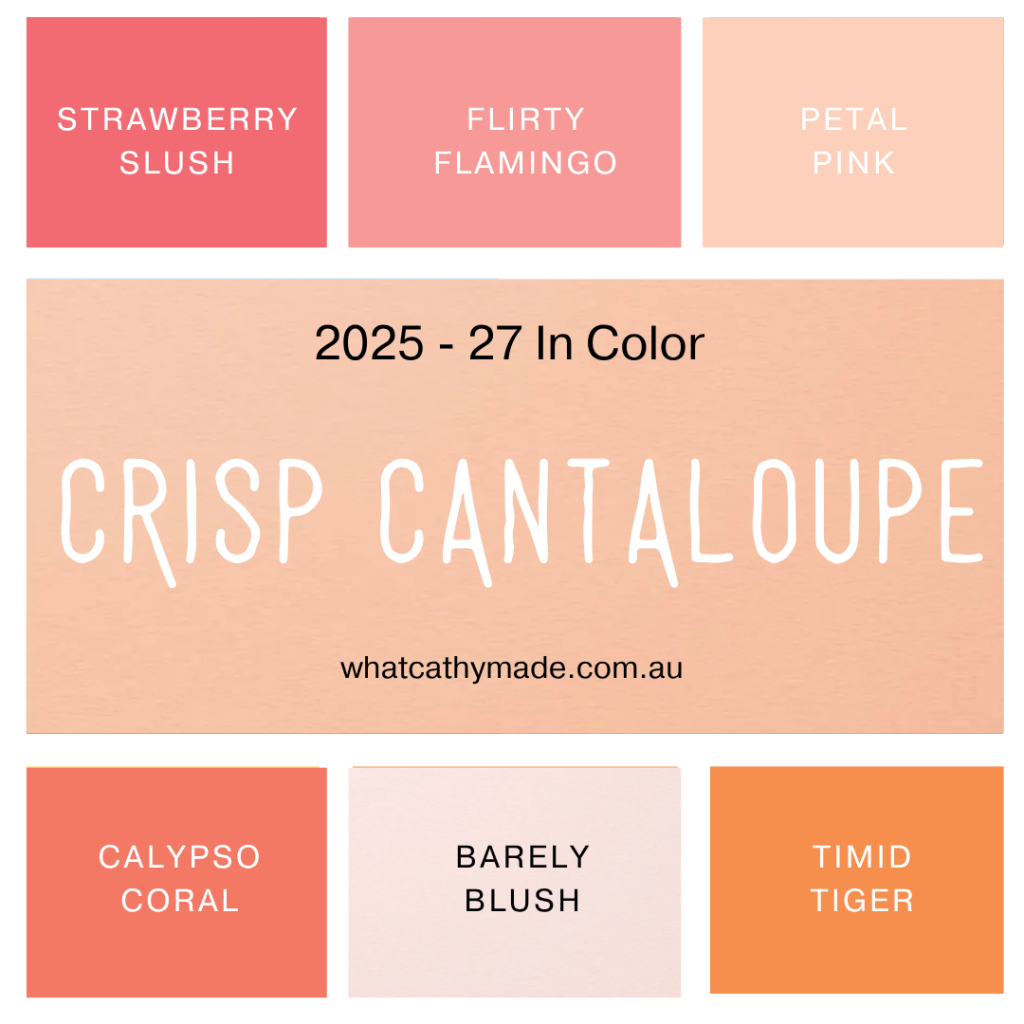
This week we are featuring Crisp Cantaloupe, one of the fresh new 2026–28 In Colours. It is a soft peachy-apricot shade that sits beautifully between pink and orange.
Here it is in comparison to the other current pinks in our colour range.
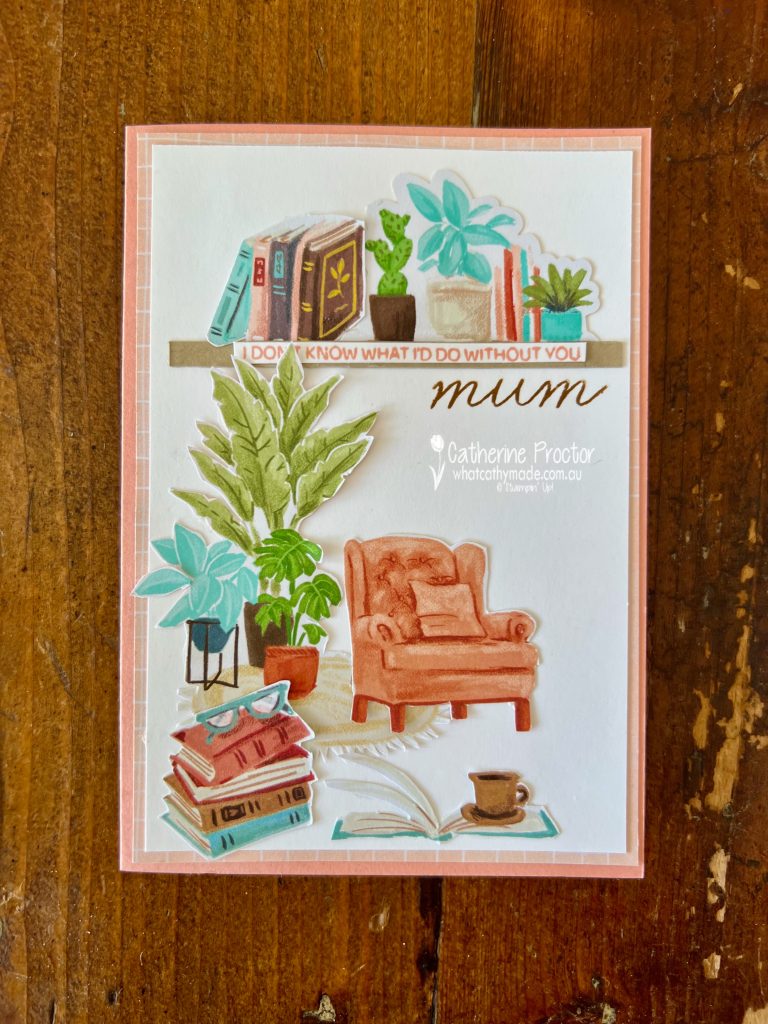
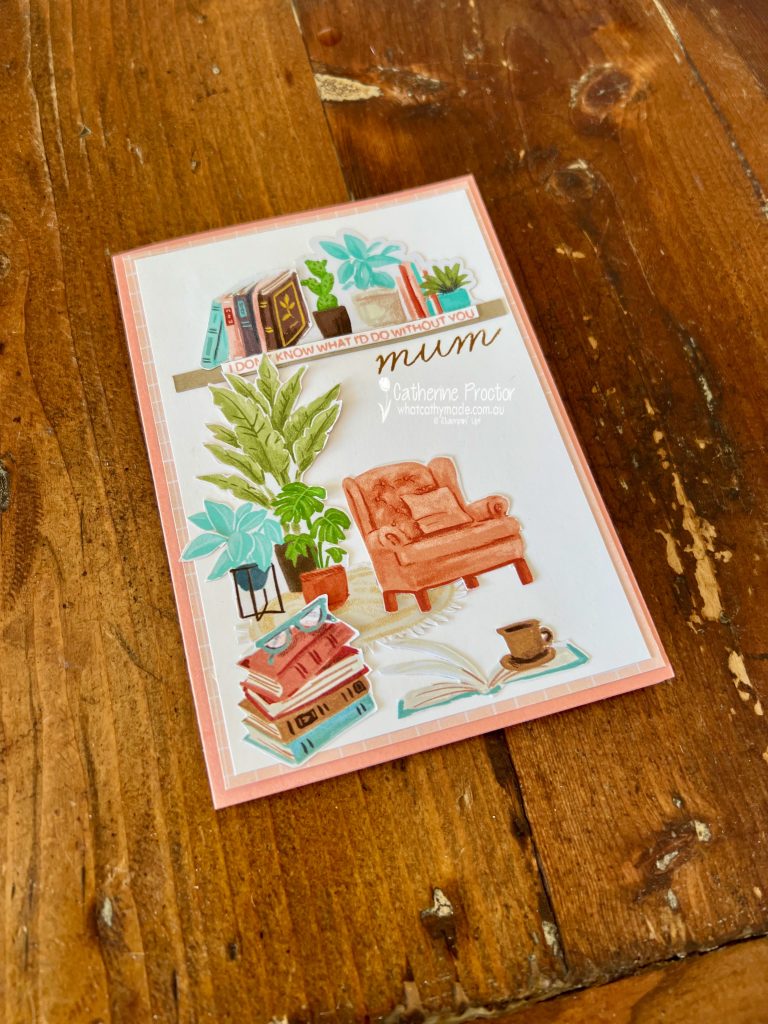
I’ve created a very personal Mother’s Day card inspired by books, quilting and my mum’s lifelong love of reading. Even though the Hobby Haven 12″ x 12″ Specialty Designer Series Paper doesn’t contain Crisp Cantaloupe, the colours in the DSP worked beautifully with my Crisp Cantaloupe card base.
I layered the Petal Pink and white grid-striped DSP before building a cosy little reading scene using die-cut elements and fussy-cut images from the Hobby Haven DSP.
The sentiments on both the front of the card are from the Sending Salutations Stamp Set, stamped in Crisp Cantaloupe, and the word “mum” is from the A Family Celebration Stamp Set, stamped in Pecan Pie.
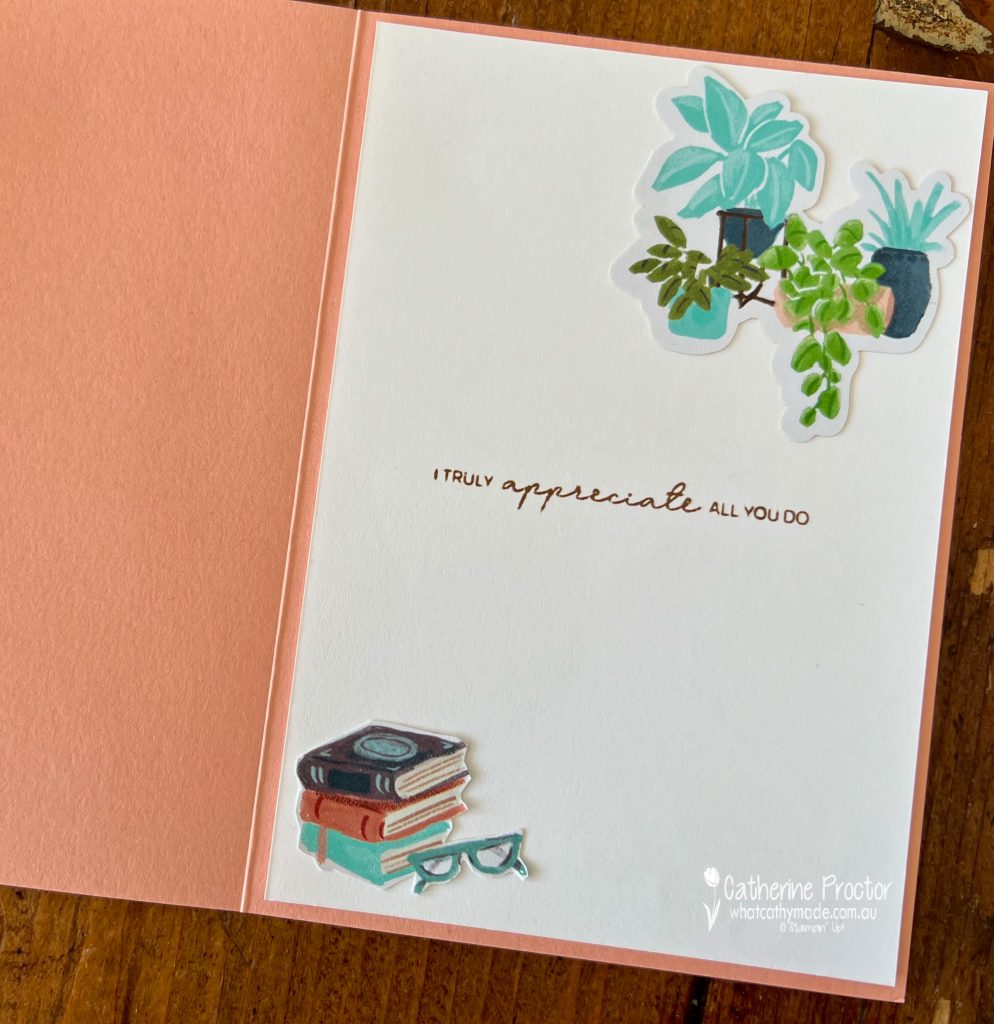
I also continued the book-themed scene inside the card with extra die-cut elements and more fussy-cut pieces from the Hobby Haven DSP, stamping the inside sentiment in Pecan Pie to tie in with the DSP colours.
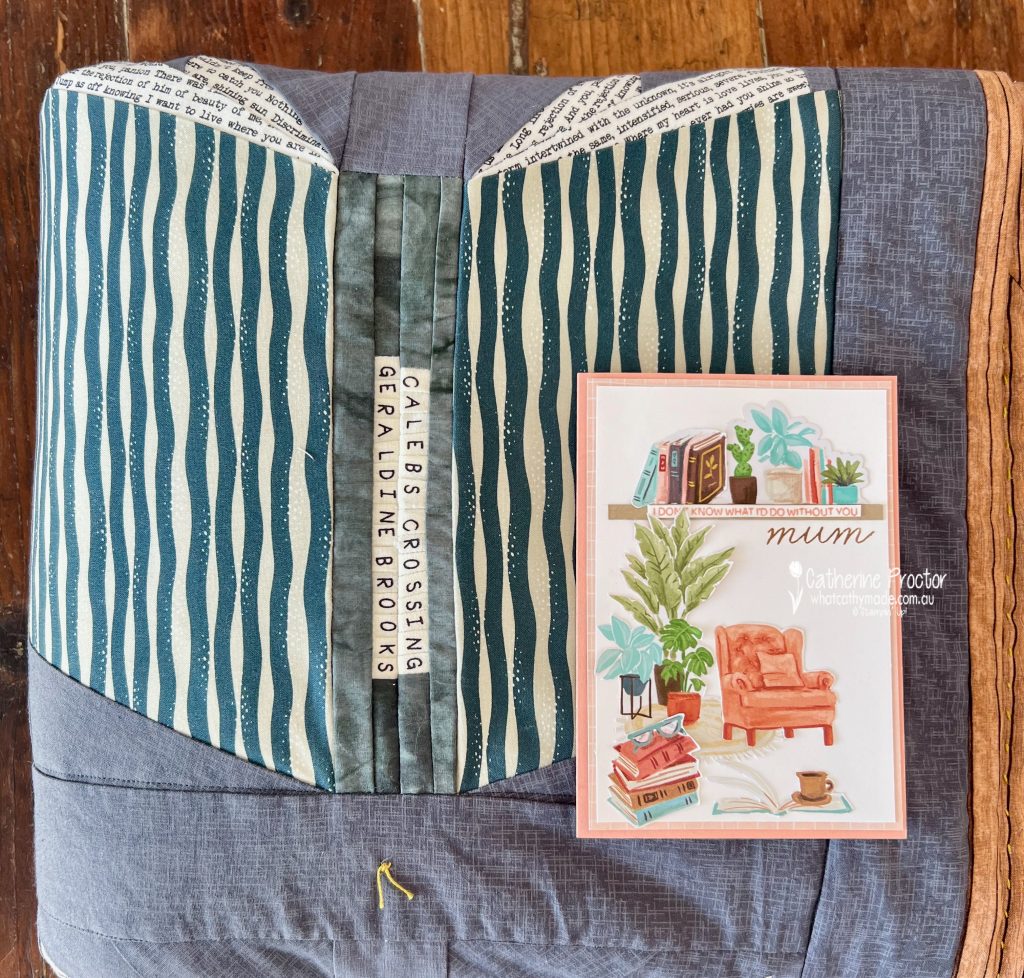
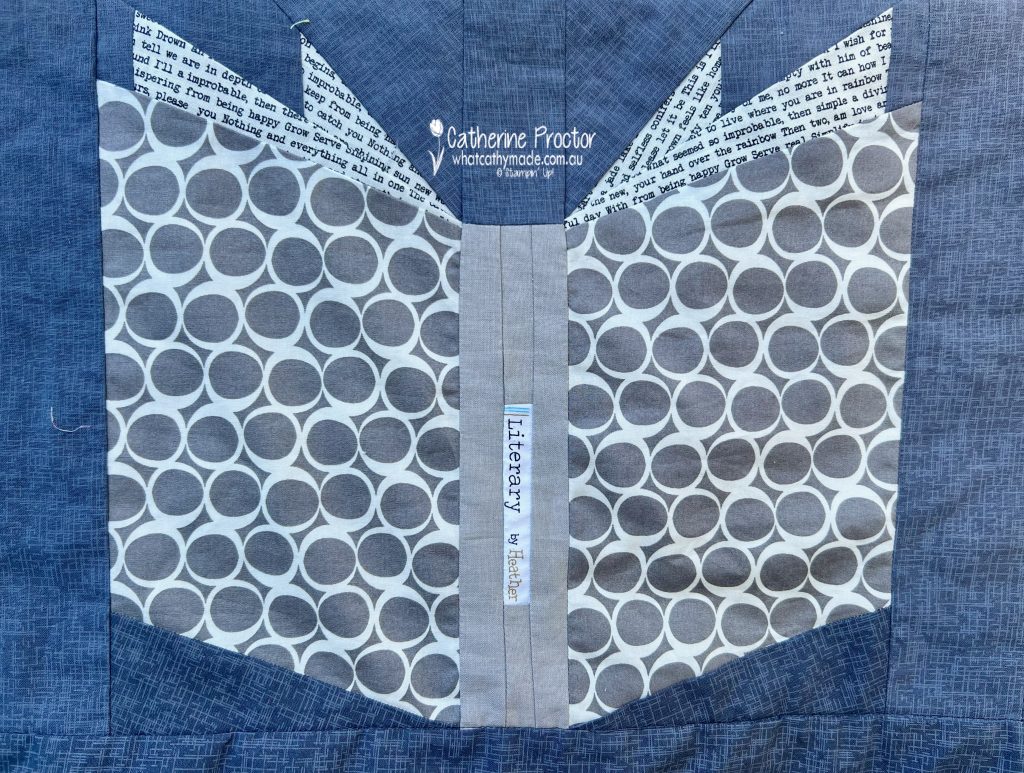
The inspiration behind the card was especially meaningful this year. For Mother’s Day I made my mum a lap quilt using the #booknerd quilt pattern so she can stay warm while sitting in her favourite reading chair with a good book.
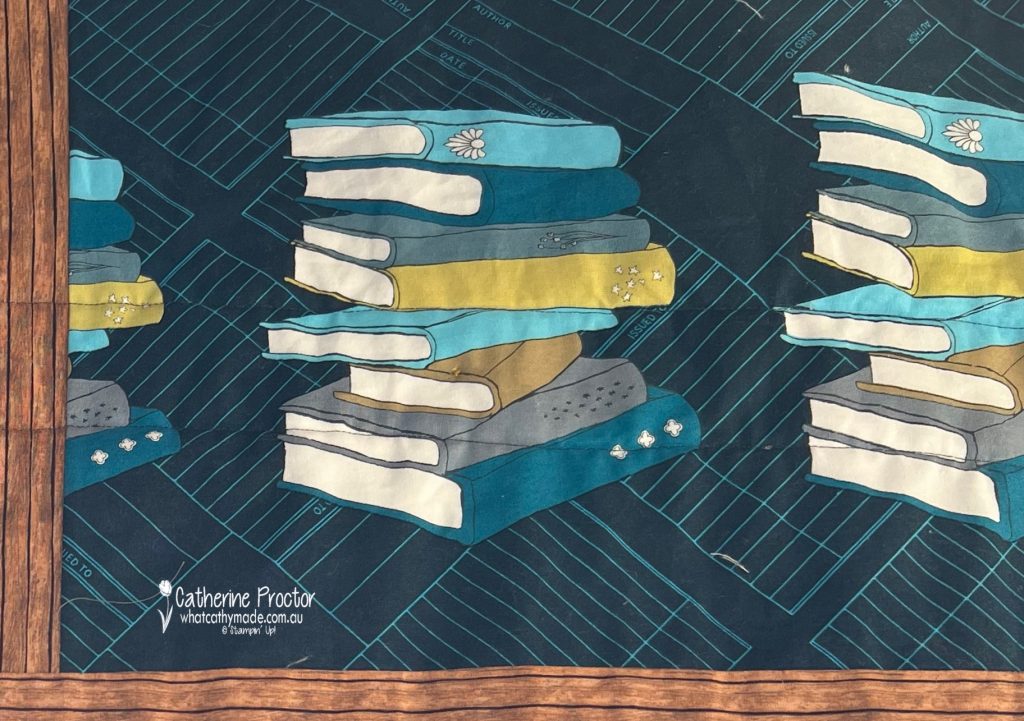
The quilt itself was inspired by a remnant piece of fabric from the Literary range by Heather Givens — I used this for the quilt backing. It felt particularly fitting because Mum’s name is Heather and she’s a retired English teacher!
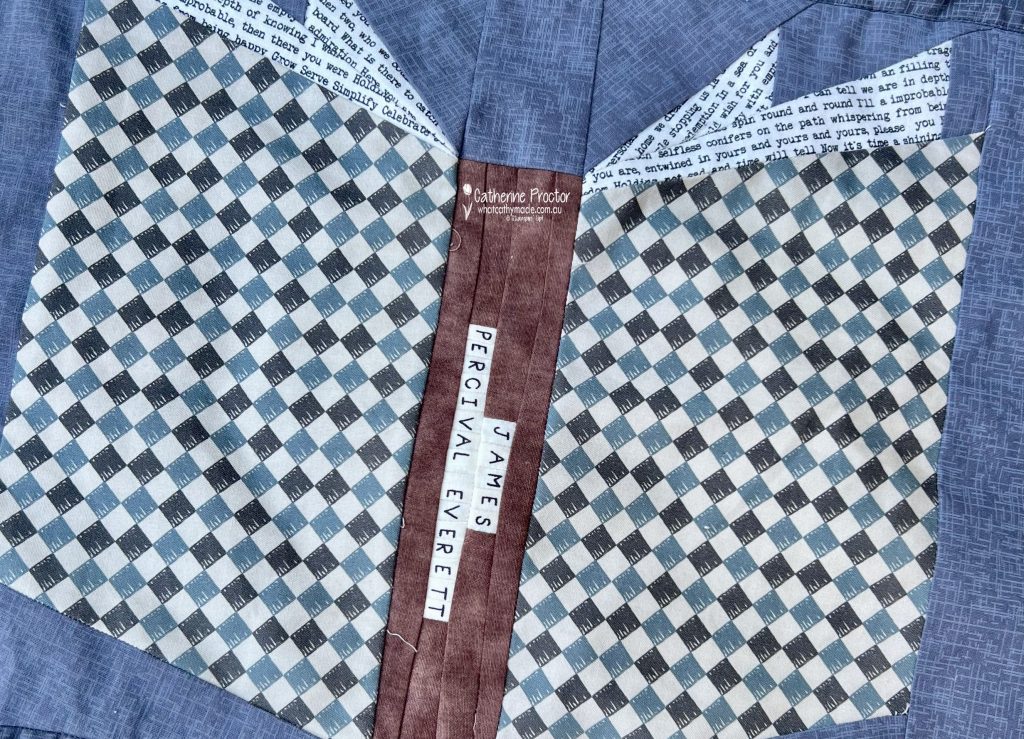
One of my favourite details was repurposing the selvedge edge from the Literary fabric backing as one of the book spines in the quilt design.
I personalised the fabric book spines to include some of her favourite books and I’m sure her favourite one was “James” by Percival Everett.
I love creating cards that perfectly reflect both the gift and the interests of the person I’m giving them to. I also love when card making becomes part of a bigger handmade story. This project ended up being about far more than colour. It became a celebration of comfort, creativity, books, memories and mothers.
Take a look at some more Crisp Cantaloupe inspiration on our Insta Hop!
Our blog hop is now an Instagram hop but the good news is that you don’t need to have an Instagram account to view all of the other projects!
Simply go to my Insta handles in a new search engine window to follow the Instagram hop: @whatcathymade.
Next week we are showcasing another one of the brand new 2026–27 In Colours, Crisp Cantaloupe.
Welcome to the brand new AWH Colour Creations series for 2026–27. If you haven’t joined us before, we hop through all 50 Stampin’ Up! colours, beginning with the five new InColours and then the core colours in alphabetical order.
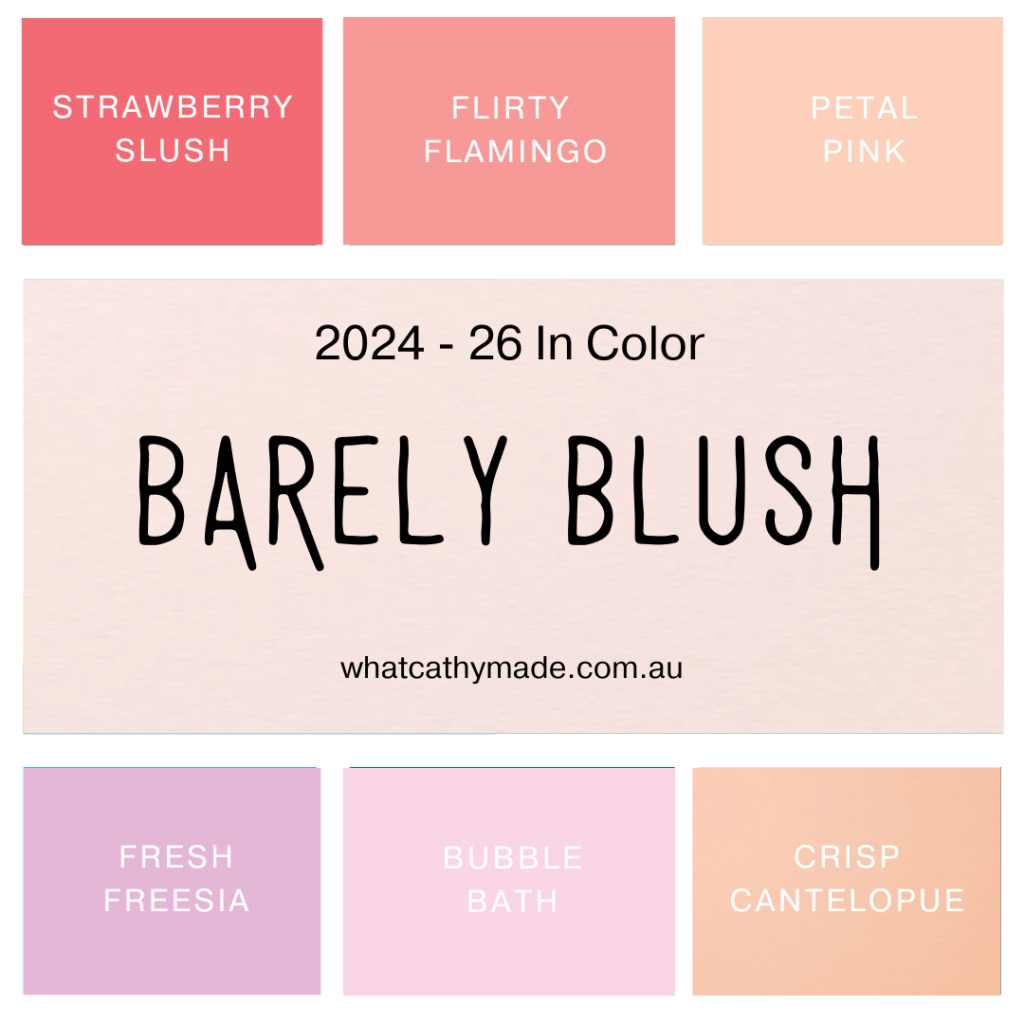
This week we are featuring Barely Blush, one of the fresh new 2026–28 In Colours. It is soft, subtle and effortlessly pretty. Think delicate florals, gentle backgrounds and that barely-there hint of pink that works for almost any occasion.
Here it is in comparison to the other current pinks in our colour range.
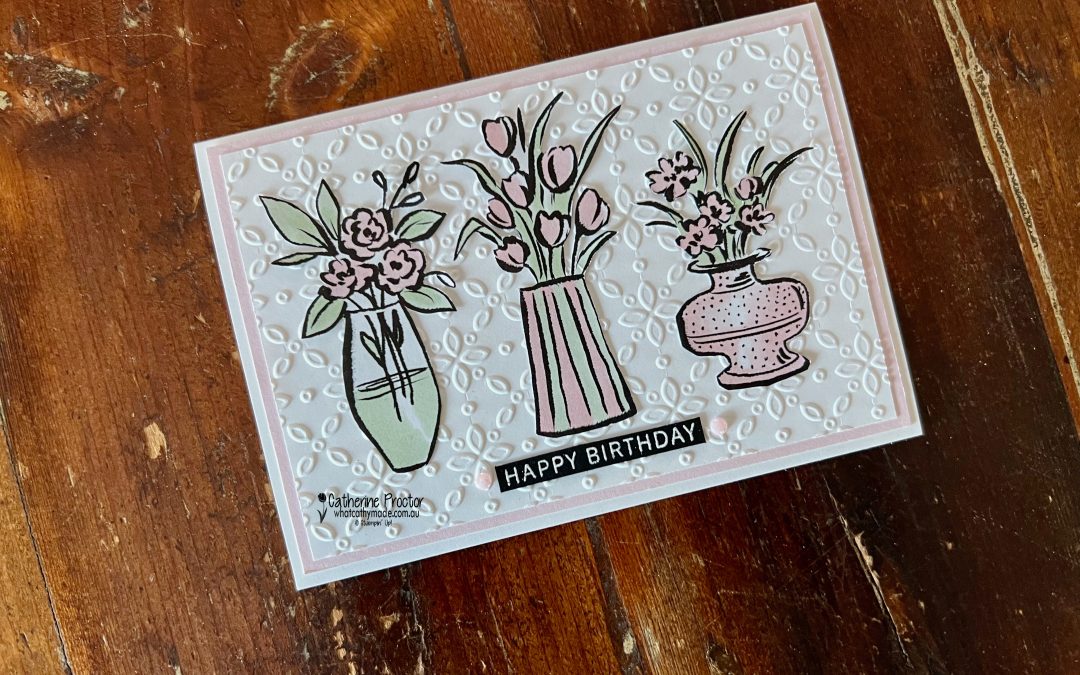
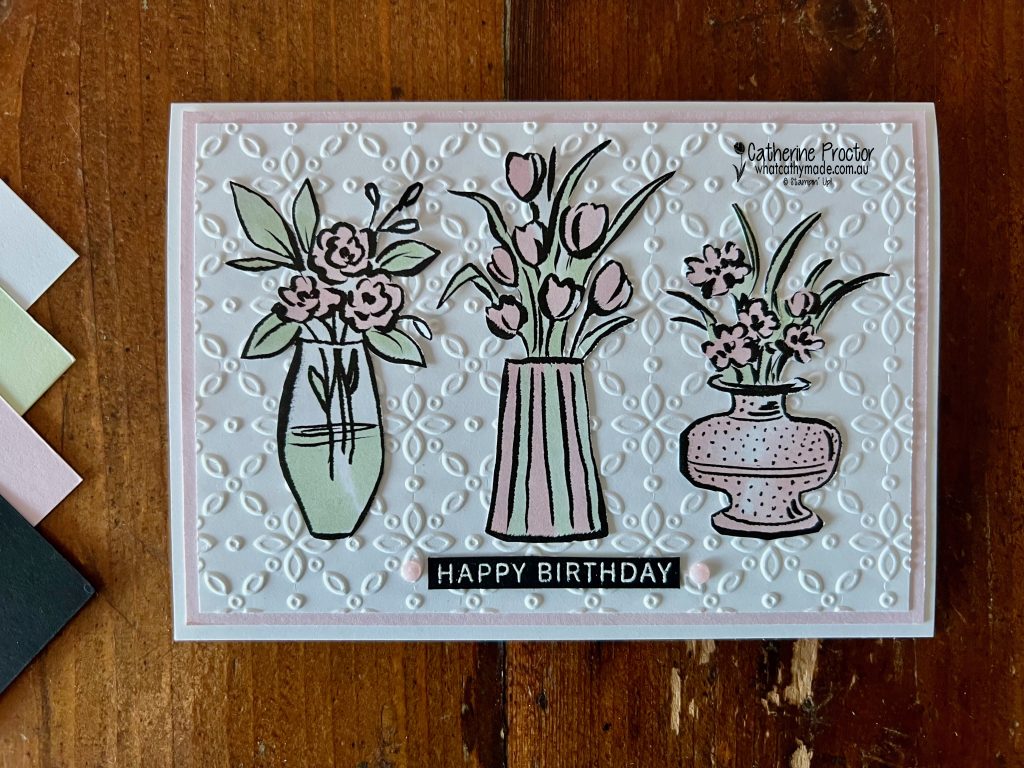
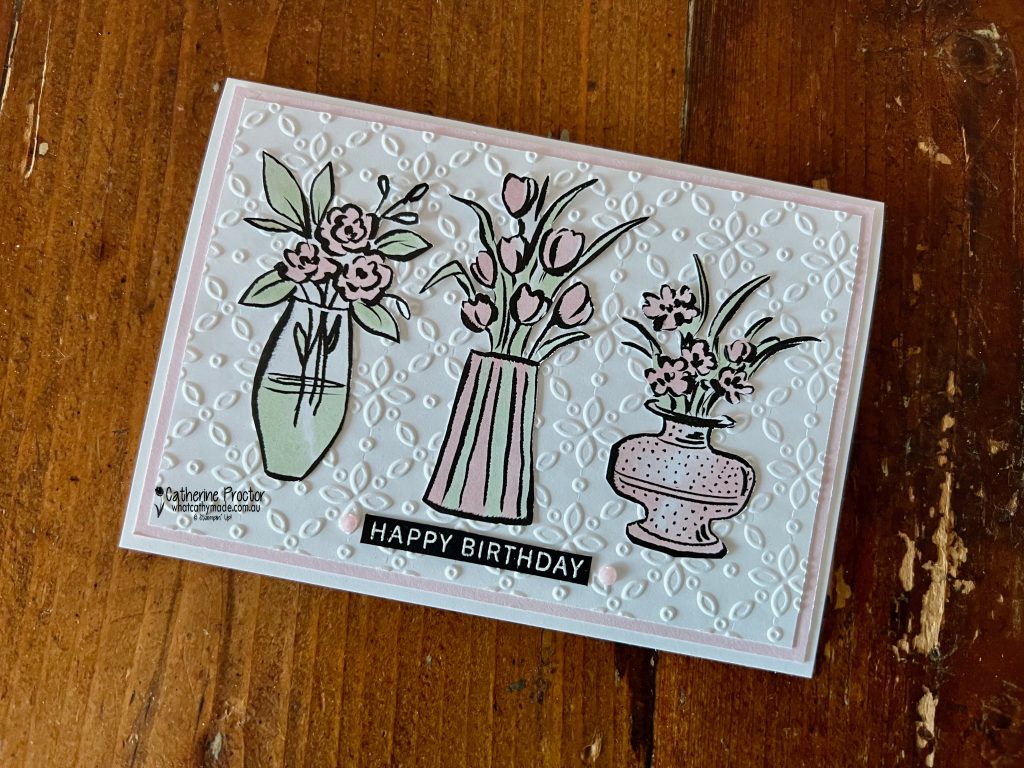
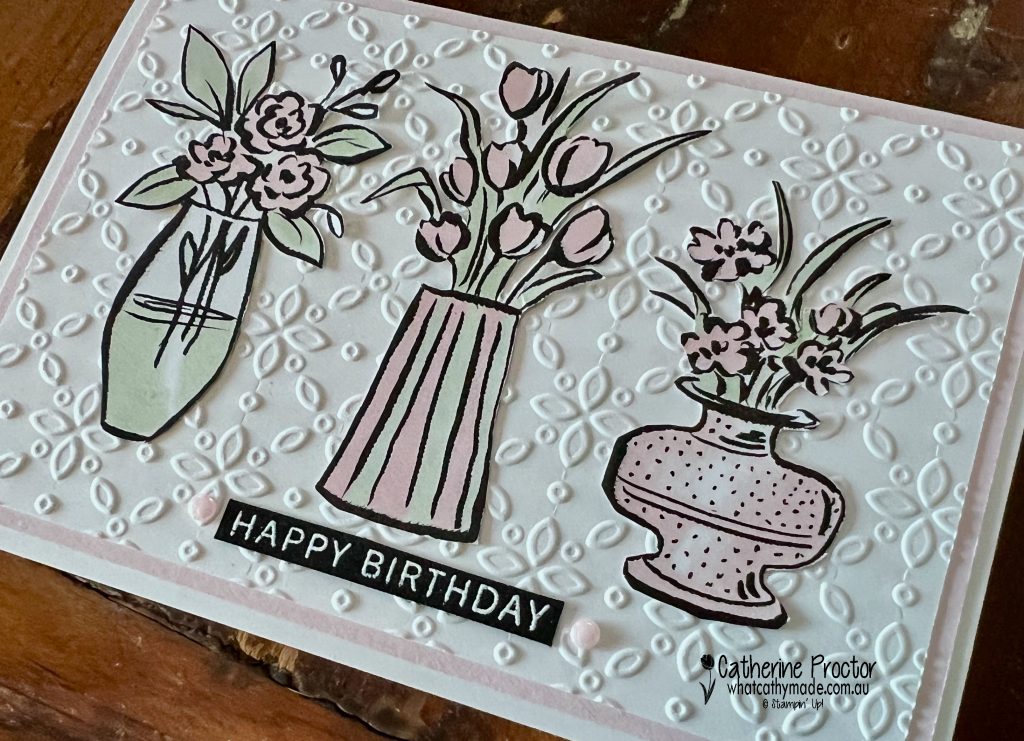
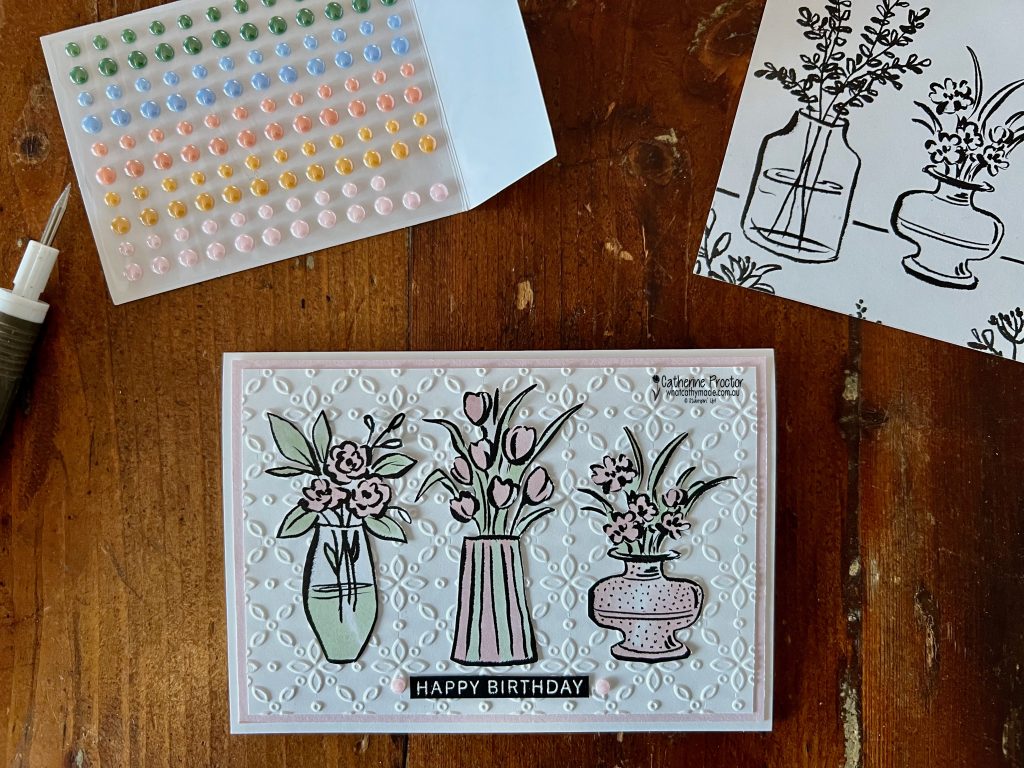
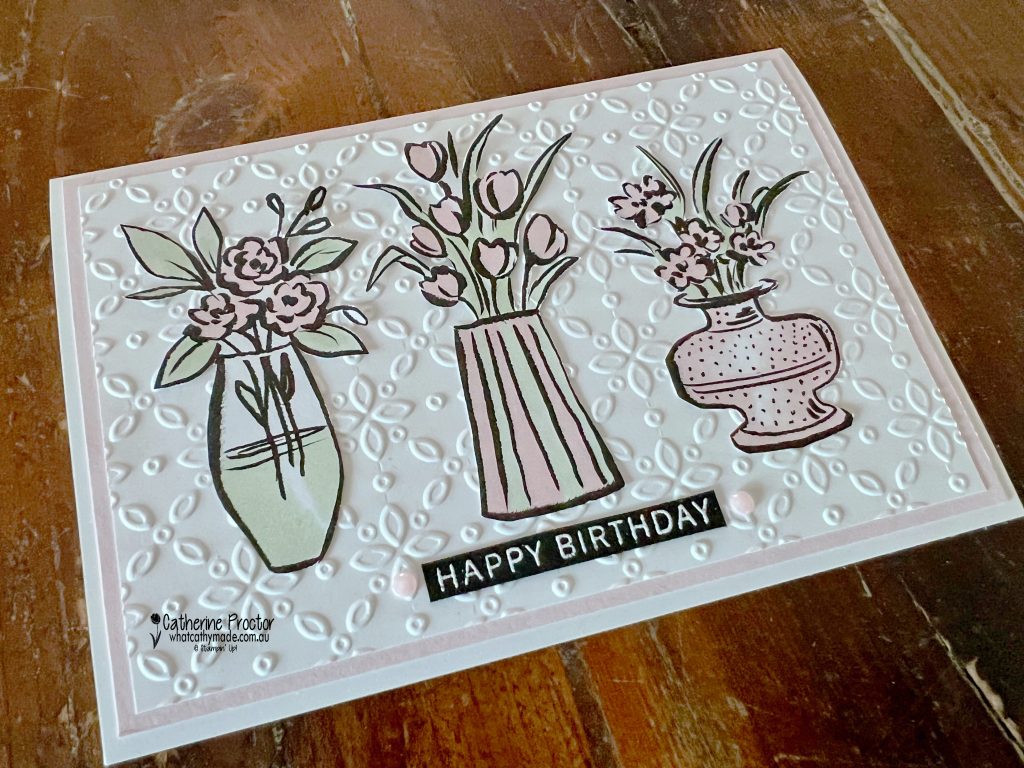
Since Barely Blush is such a soft pink I’ve paired it with Soft Sea Foam, Basic White and pops of Basic Black.
After adding a layer of the Barely Blush card stock to my card base I embossed a panel of Basic White card stock using the Eyelet Embossing Folder. This is currently on the Last Chance list and I love how the texture adds just enough detail while still keeping the overall look light and feminine.
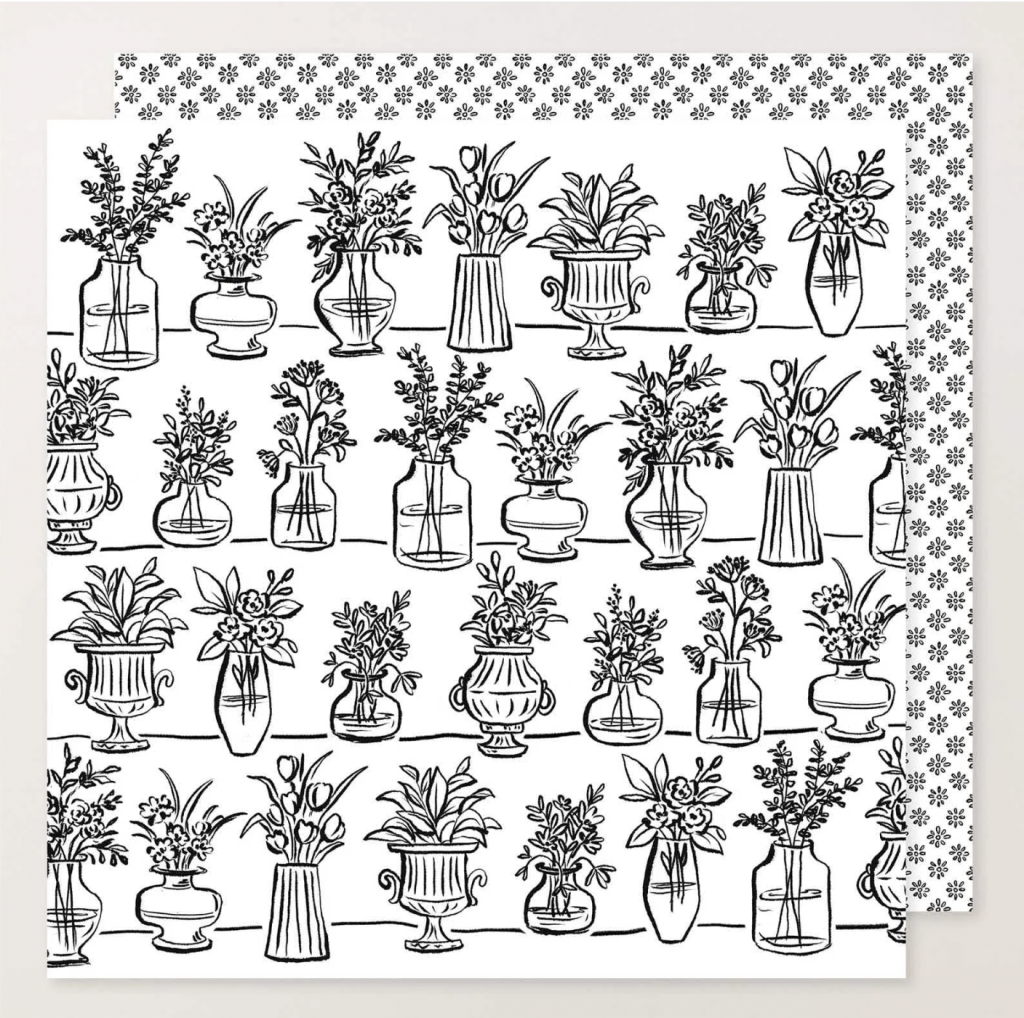
The three vases of flowers have been fussy cut from the Artisan Sketched Garden 12 x 12 Designer Series Paper, which is coloured in using the light and dark Barely Blush Stampin’ Blends and Soft Sea Foam Stampin’ Blends.
I’ve added decorative dots to the vase on the far right using one of the Stampin’ Up! 0.4 mm Journaling Pens. I love adding my own decorative details like this to my cards!
The “Happy Birthday” sentiment is from the Lovely Arrangements Stamp Set, white heat embossed on Basic Black card stock. I’ve finished the card off with two of the Barely Blush embellishments from the 2026–2028 In Colour Dots.
So what do you think of the new 2026–28 In Colour, Barely Blush? I really love its softness and I also the versatility of this gorgeous black and white designer series paper. I can certainly see myself using these two products a lot in the coming year.
Take a look at some more Barely Blush inspiration on our Insta Hop!
Our blog hop is now an Instagram hop but the good news is that you don’t need to have an Instagram account to view all of the other projects!
Simply go to my Insta handles in a new search engine window to follow the Instagram hop: @whatcathymade.
Next week we are showcasing another one of the brand new 2026–27 In Colours, Crisp Cantaloupe.
It’s hard to believe we’ve reached Week 50 of our 2025–26 AWH Colour Creations hop, finishing with one of the retiring 2024–2026 In Colours Summer Splash.
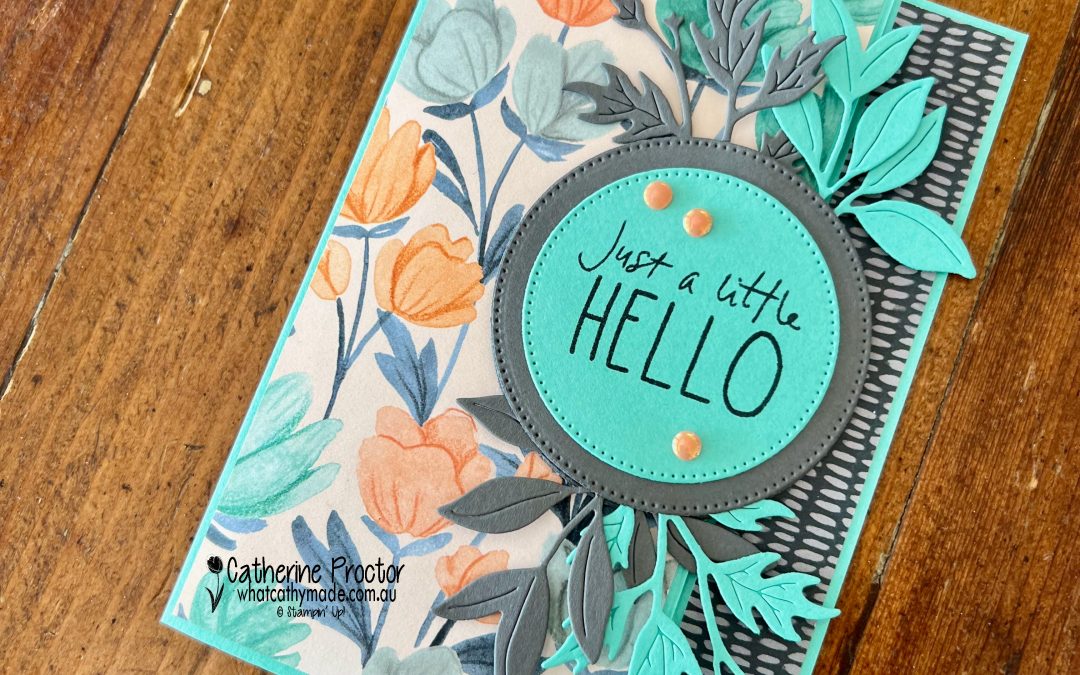
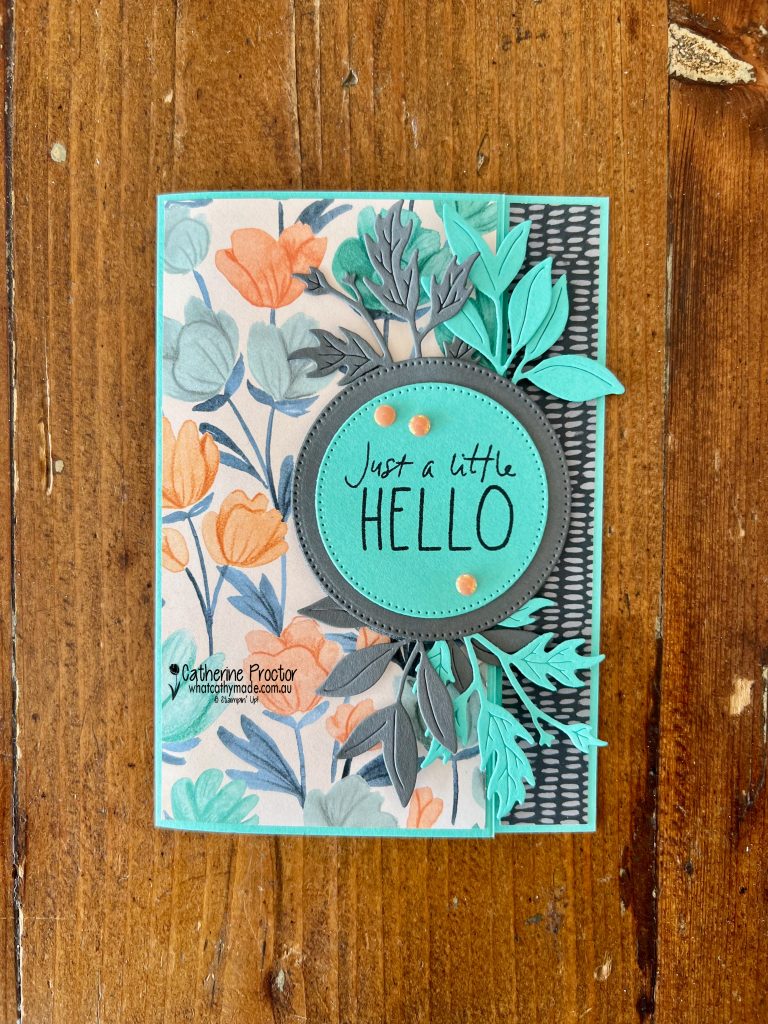
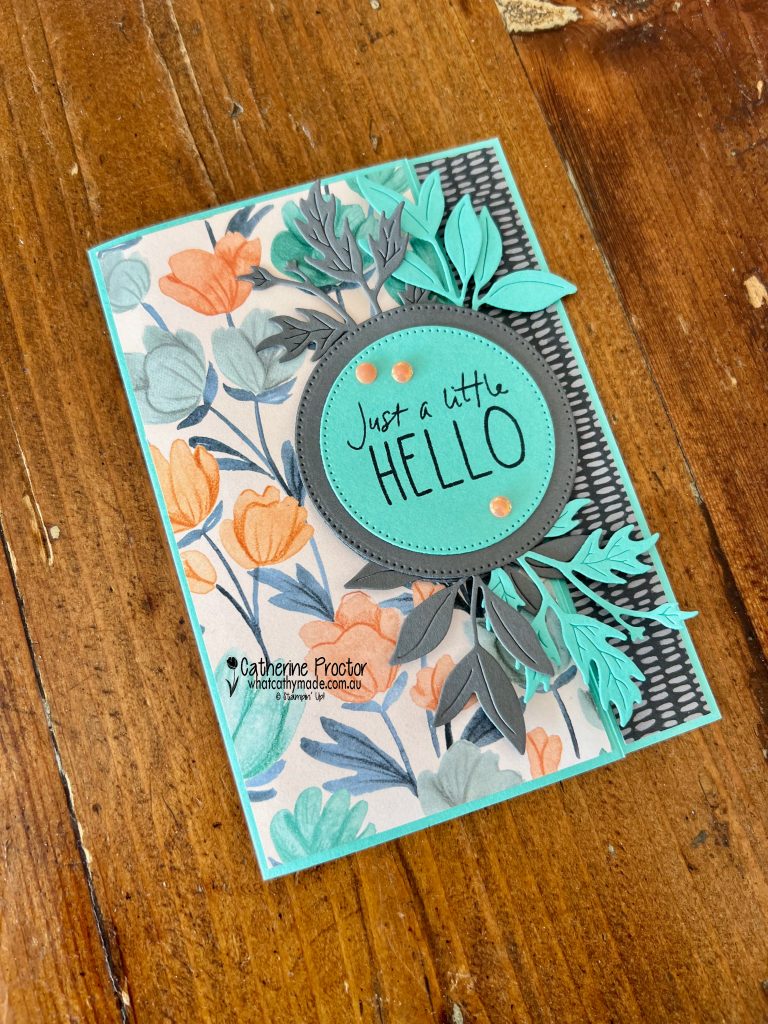
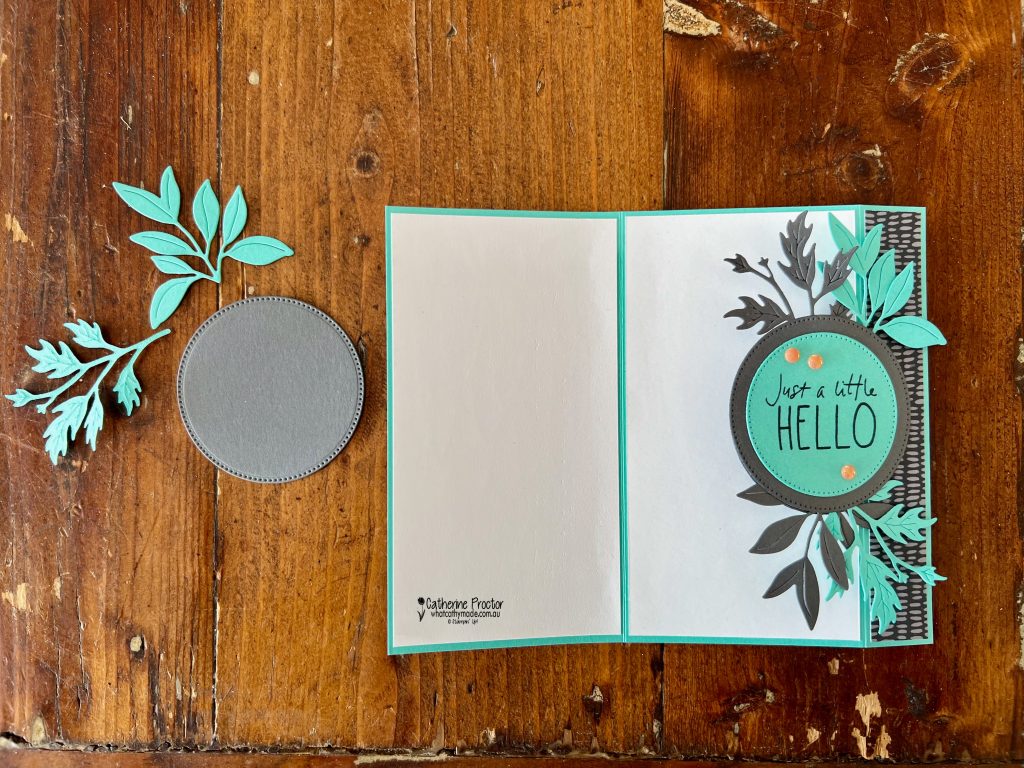
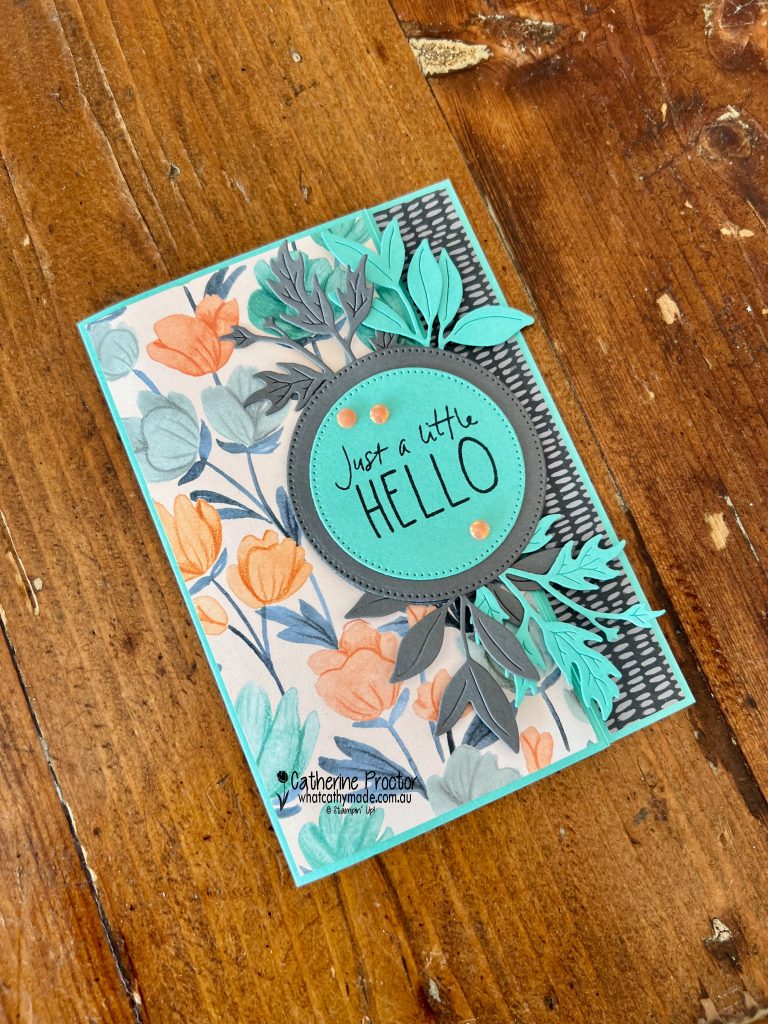
I wanted to create something a little interactive, so I made a side latch card featuring the beautiful Florals in Bloom 12″ x 12″ Designer Series Paper.
Inspired directly by the DSP, my colour combination pairs Summer Splash with Timid Tiger, Cloud Cover and Secret Sea.
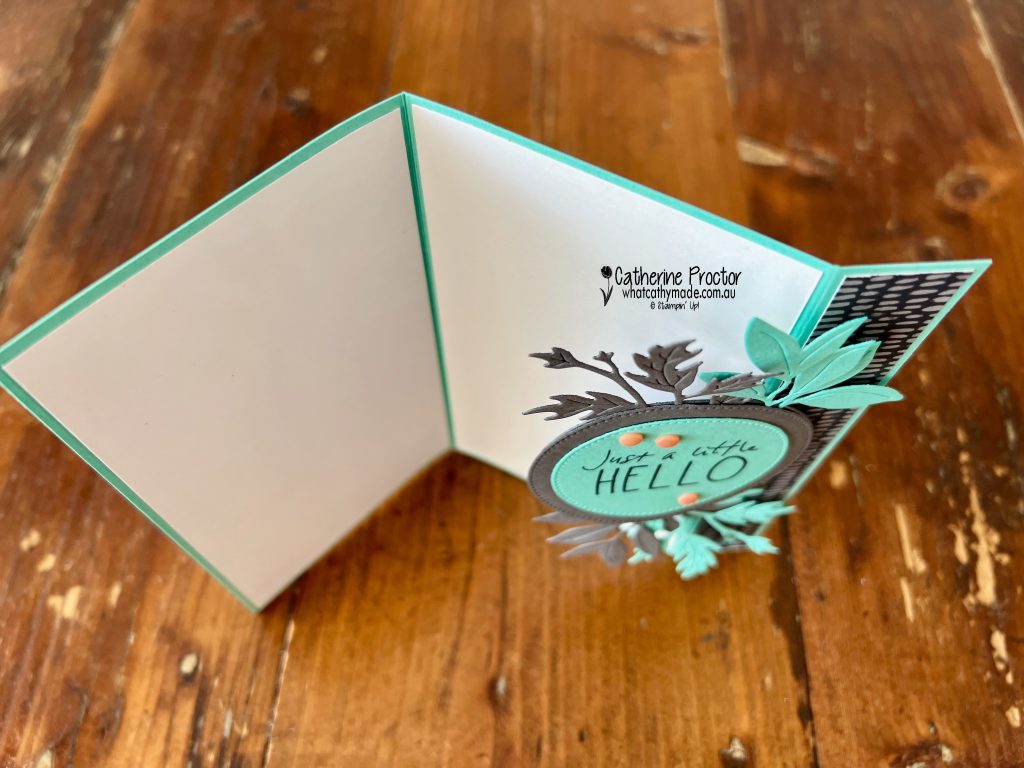
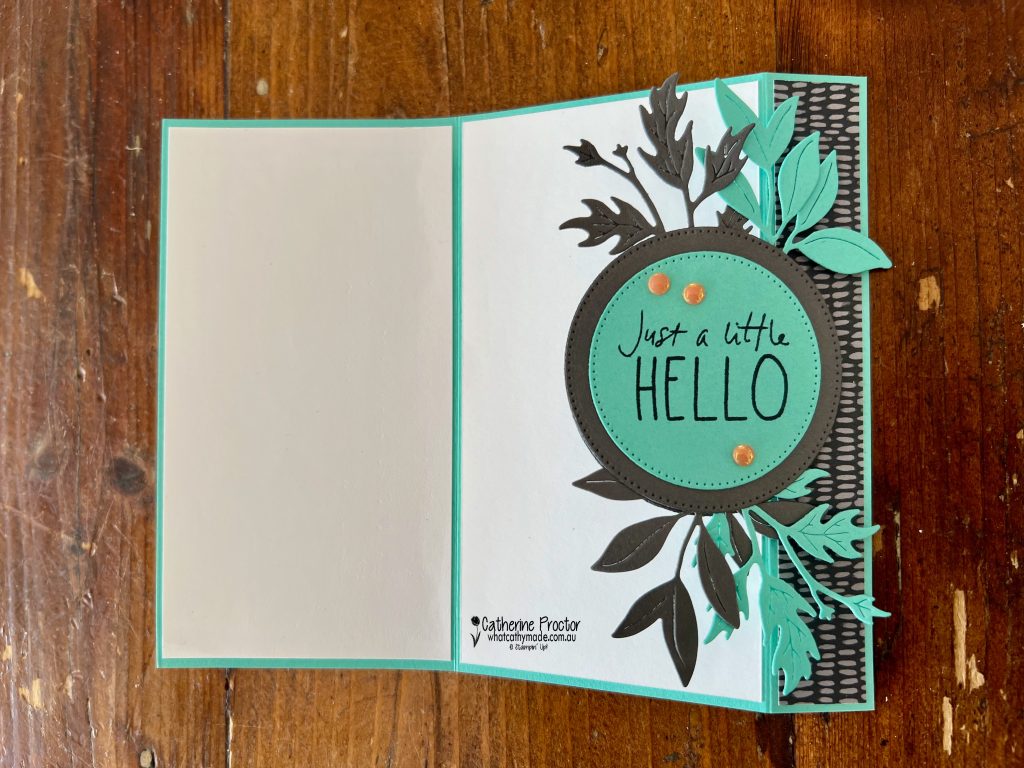
The side latch mechanism keeps the card closed and adds a lovely dimensional focal point. I’ve simply layered die cut circles using the Stylish Shapes dies, however any die cut or punched shape will work.
The circular latch is layered with Summer Splash centre panel with the sentiment from the Cutest Crew stamp set. The slightly larger die-cut circles in Secret Sea hold the foliage and “lock” the card.
To add texture and movement, I used the Help Me Grow Dies to create layered foliage in Summer Splash and Secret Sea. These were tucked behind the circle latch to frame the sentiment and add interest.
Finally, I added a few Timid Tiger 2025–2027 In Colour Flat Pearls for a subtle pop of shine. They bring everything together without overwhelming the design.
Take a look at some more Summer Splash inspiration on our Insta Hop!
Our blog hop is now an Instagram hop but the good news is that you don’t need to have an Instagram account to view all of the other projects!
Simply go to my Insta handles in a new search engine window to follow the Instagram hop: @whatcathymade.
We kick off our 2026-27 Colour Creations hop next week, starting with the brand new 2026–27 In Colours:
Barely Blush
Crisp Cantaloupe
Golden Glow
Hydrangea Hue
Peaceful Pine
I can’t wait to start creating with these fresh new shades.
Thanks so much for following along this year. See you next week for a brand new colour journey.