Welcome to week two of our Art With Heart 2023-24 Colour Creations blog hop!
This week we are showcasing another brand new 2023-25 In Colour: Copper Clay. Copper Clay is a rich copper brown, similar to the 2020-2022 In Color, Cinnamon Cider.
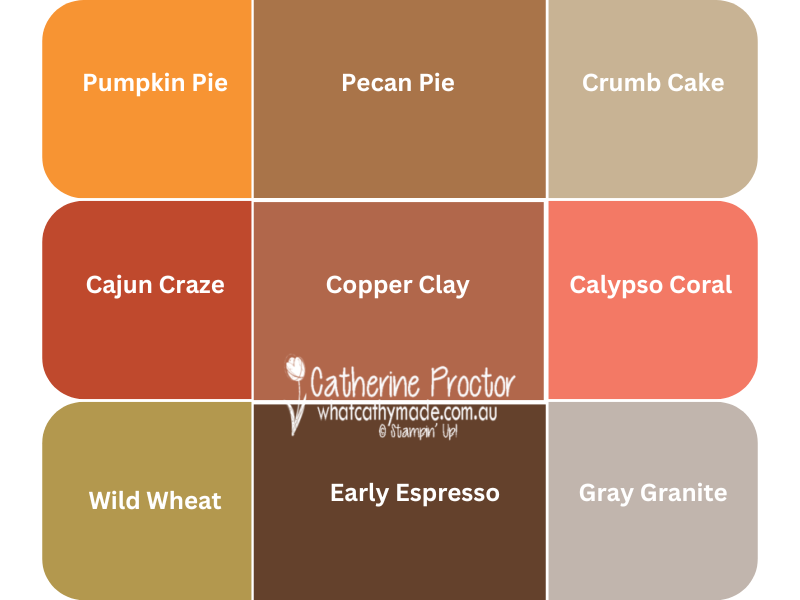
Here’s how Copper Clay compares to the current Stampin’ Up! browns, oranges and other neutral colours. It has red and pink undertones, which is why I’ve included Cajun Craze and Calypso Coral in this chart.
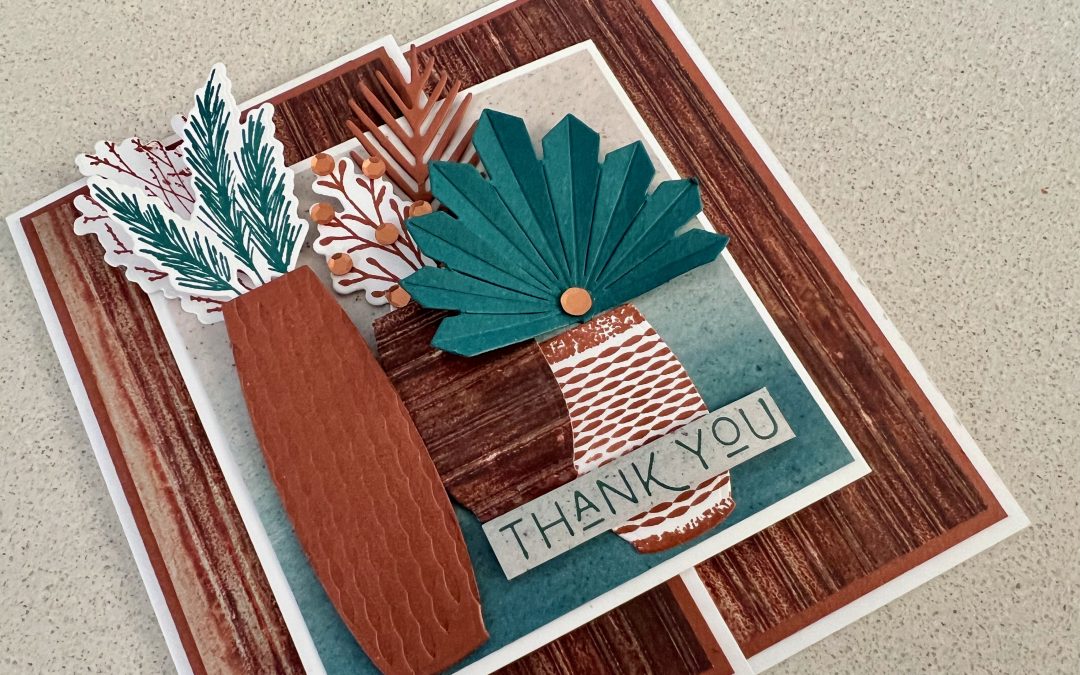
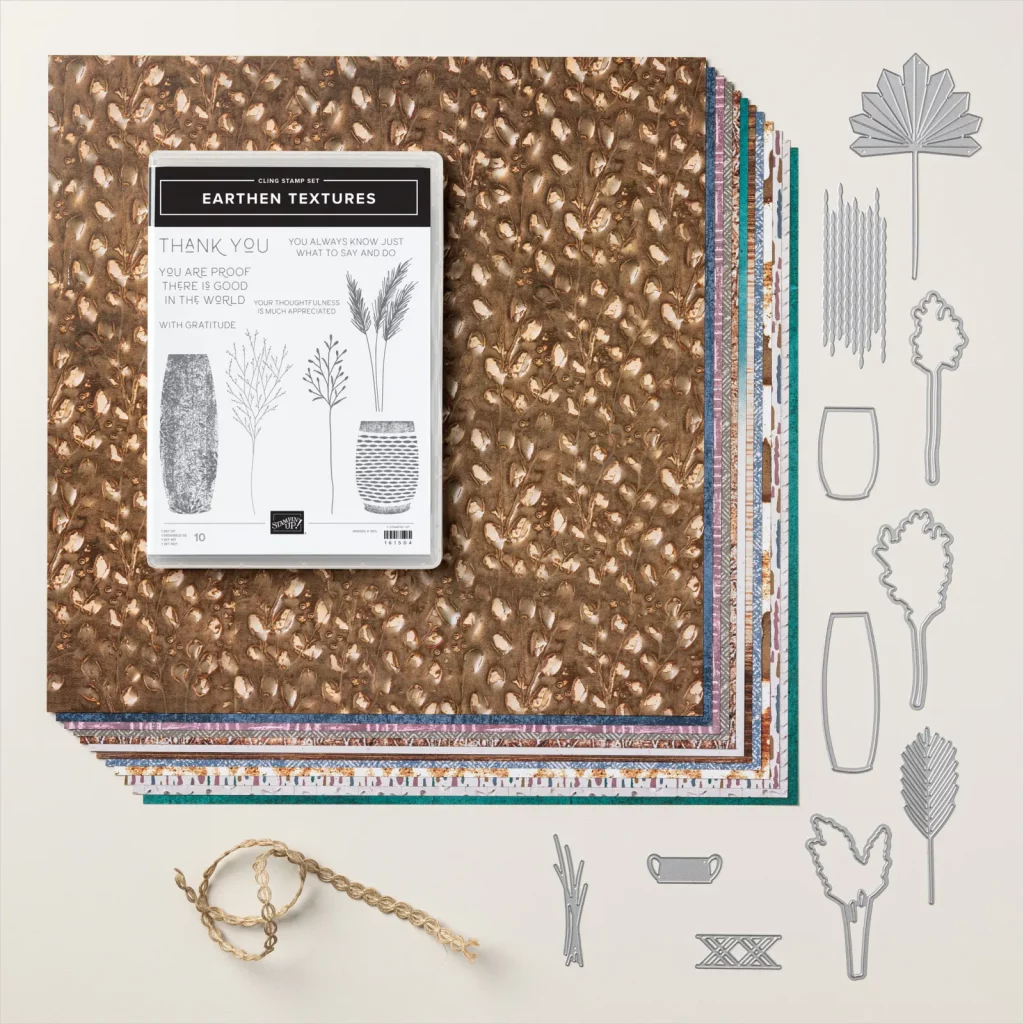
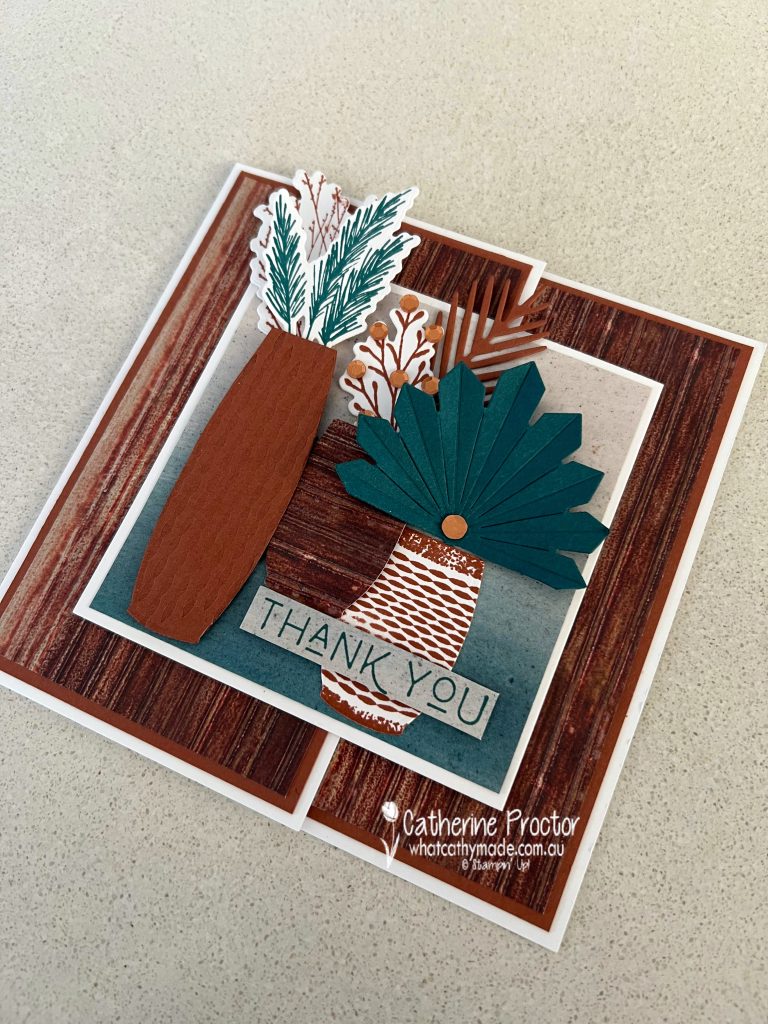
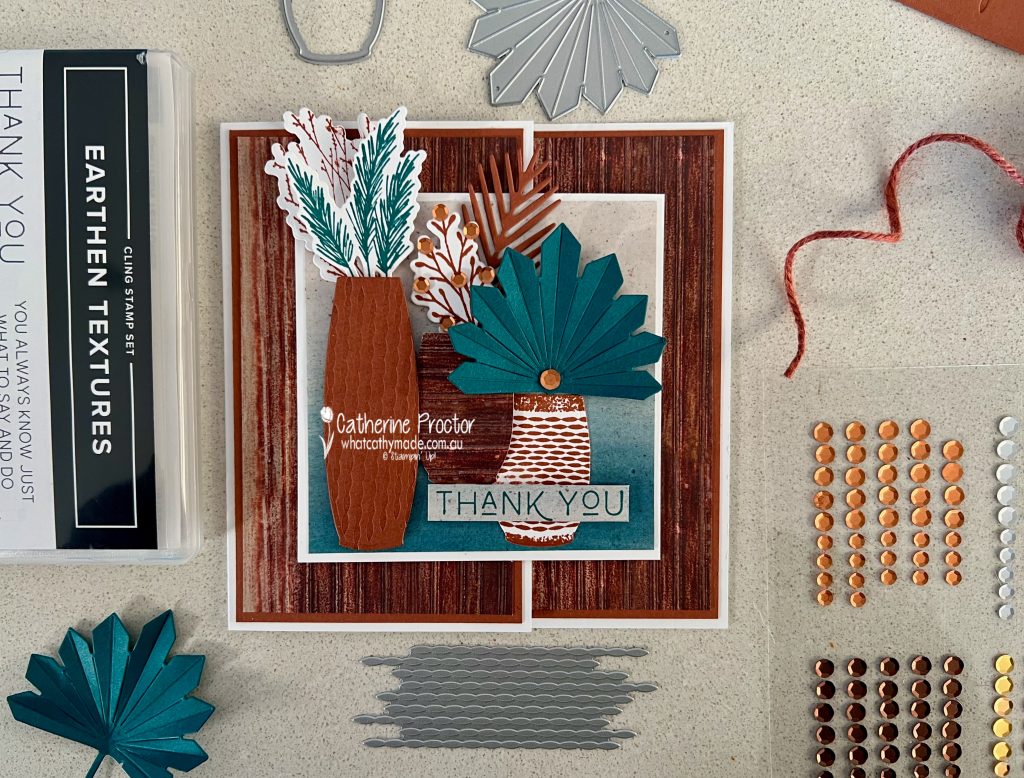
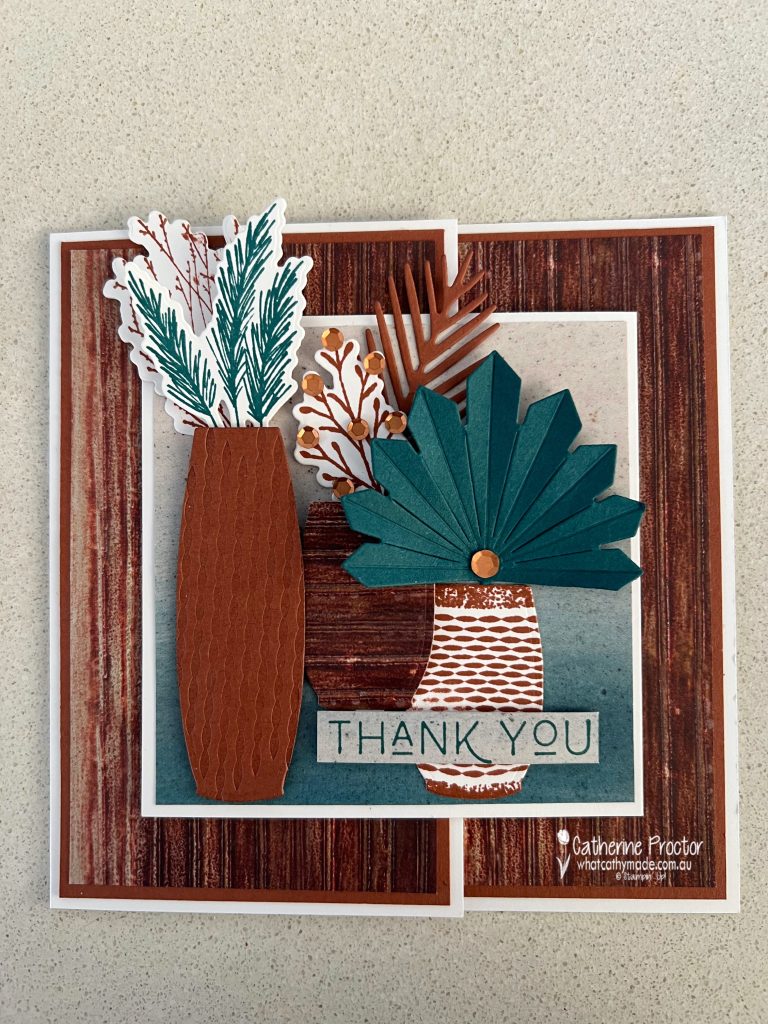
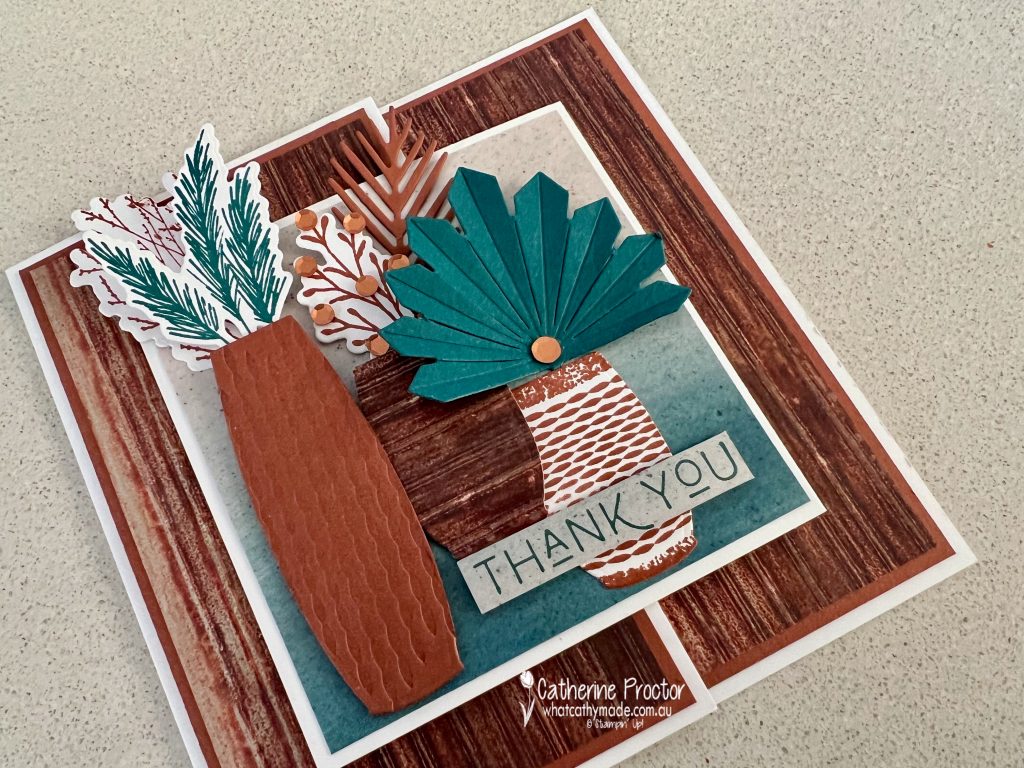
For my Copper Clay card today I couldn’t resist using products from an exciting new suite called the Earthen Elegance Suite Collection.
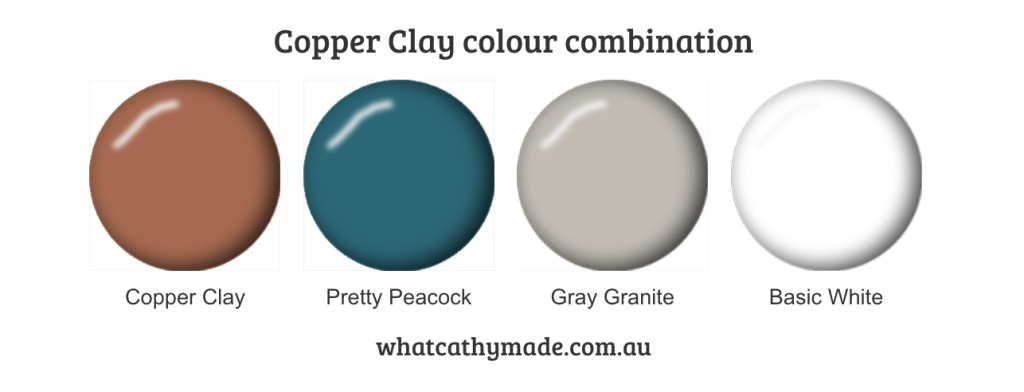
Copper Clay is an earthy terracotta colour and its complimentary colour on the colour wheel is teal, which is why Pretty Peacock works so well with Copper Clay. I’ve also added a touch of Gray Granite (in the DSP pattern) to my card and it has a Basic White card base.
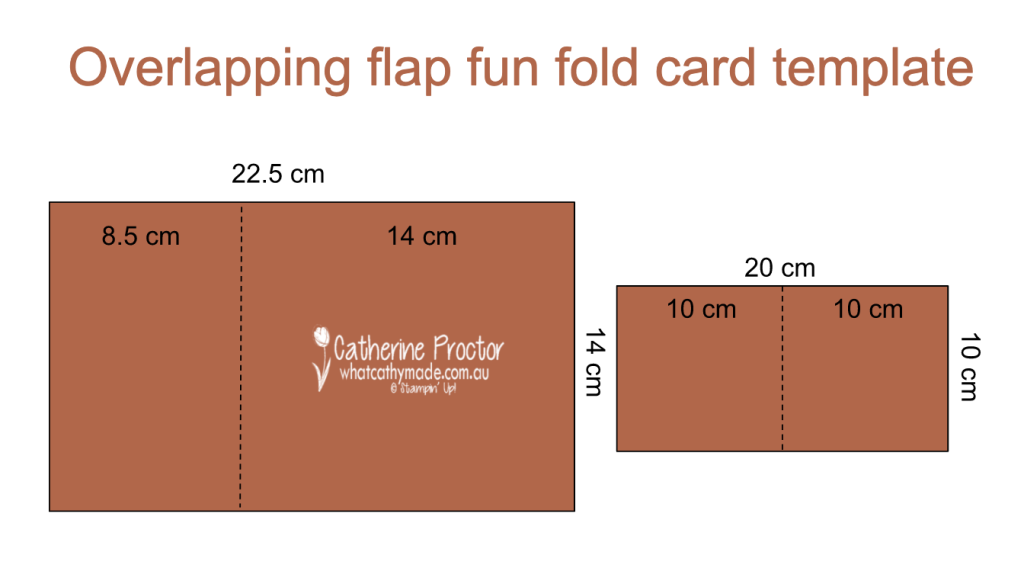
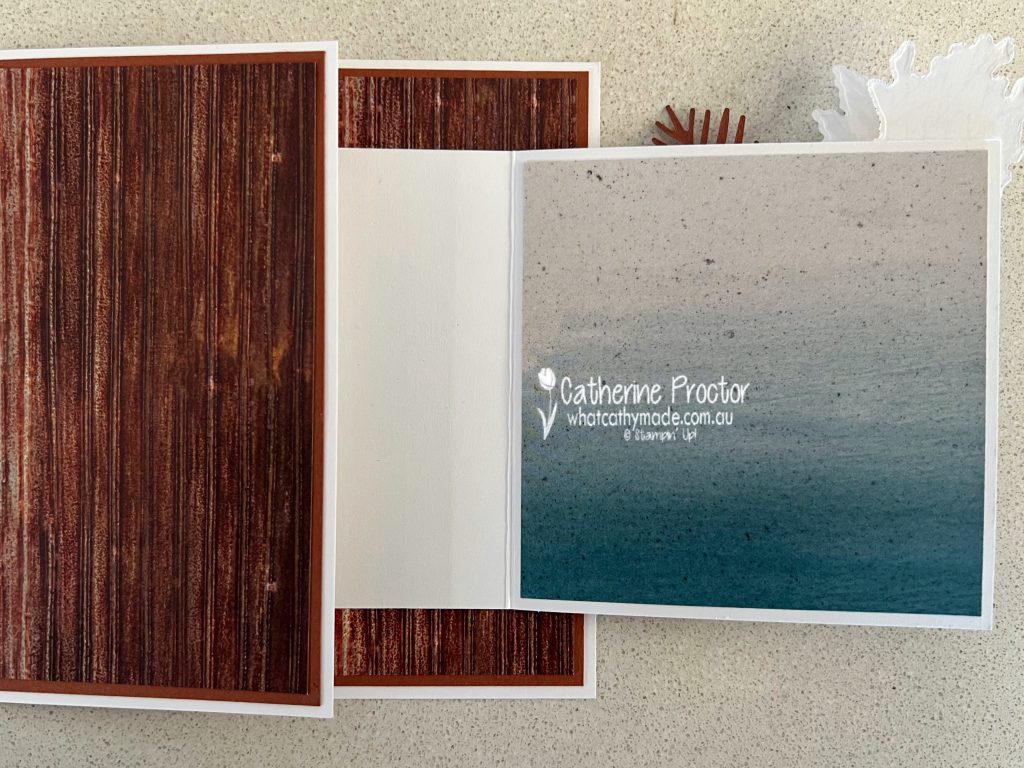
My overlapping fancy fold card really is one of the simplest fancy fold cards you can make. It’s basically two single fold cards of different sizes with their bases adhered together and their spines facing in opposite directions, making the front flaps overlap.
You can make this type of fancy fold in so many different sizes and shapes – here’s the template I’ve created for the card base I’ve used today. Add as many layers as you want – simply subtract 5 mm from the top and side measurements of each additional layer.
The front of my card has a layer of Earthen Elegance DSP (9.5 x 9.5 cm), decorated with a trio of vases and pots.
The tallest pot on left was embossed and die cut using dies from the Earthen Textures dies
The middle pot is die cut from the same Earthen Elegance DSP pattern I’ve used on the card base and left flap
The right pot is stamped in Copper Clay ink on Basic White card stock and die cut using a pot die – both stamps and dies from the Earthen Textures bundle
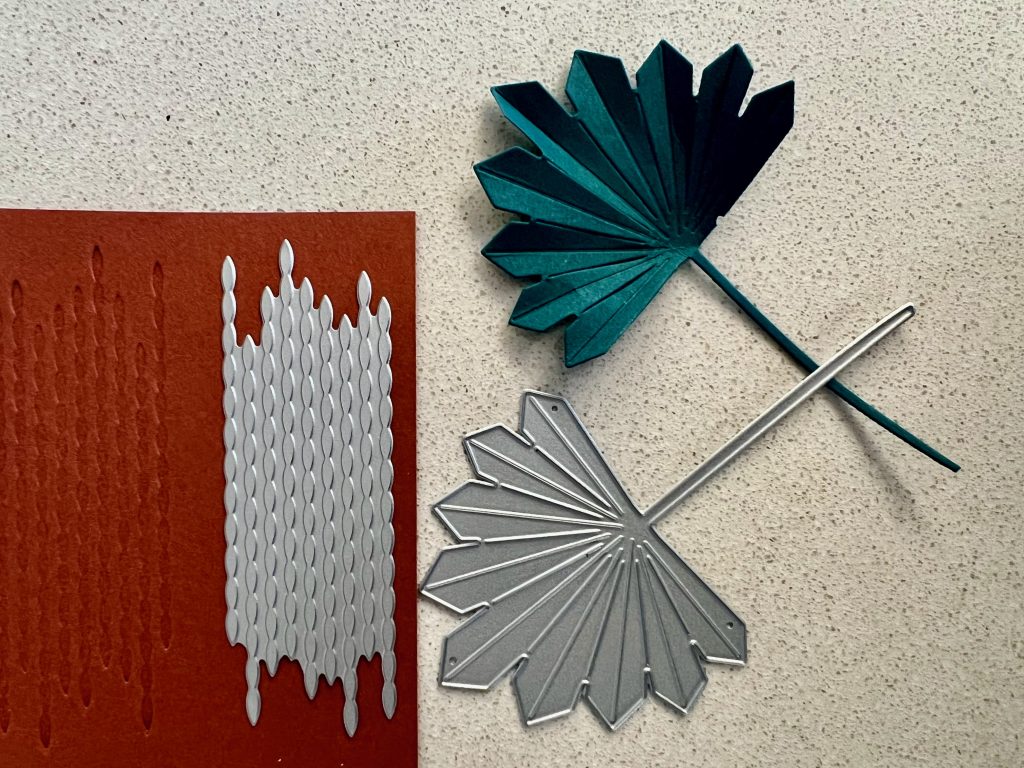
In the photo below, you can see two of the Earthen Textures dies in greater detail.
The die on the left embosses the card stock, but does not cut it – I used this die to add texture to the tallest vase. The die on the right cuts and scores fold lines in a palm (not sure if this is a Chinese fan palm or a sun cut palm leaf?) – you fold along these scored lines with your fingers to add dimension.
Here’s the card photographed from different angles so you can see how the fancy fold opens up. When laid flat and closed…
Right front flap opened…
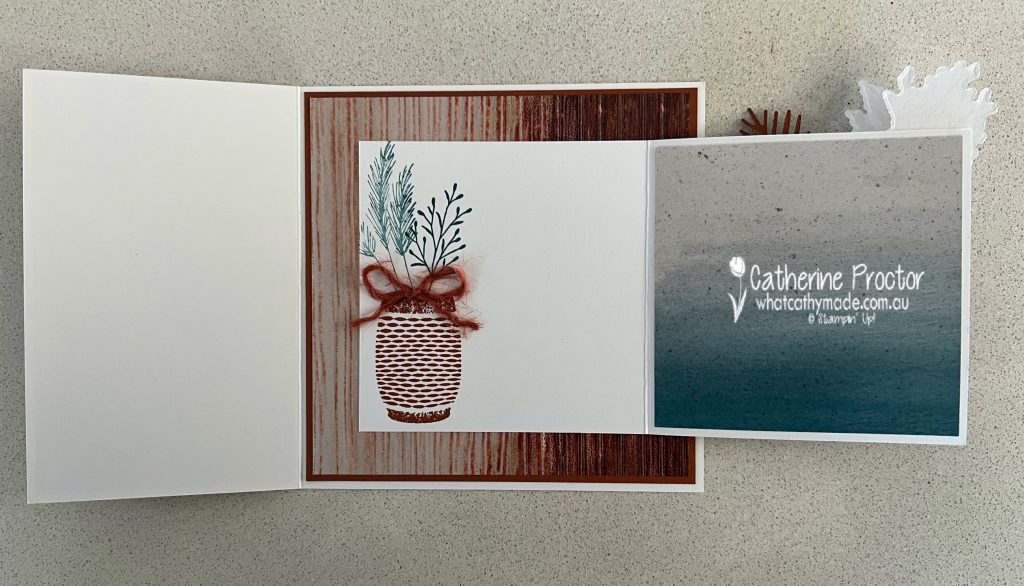
Fully opened up…
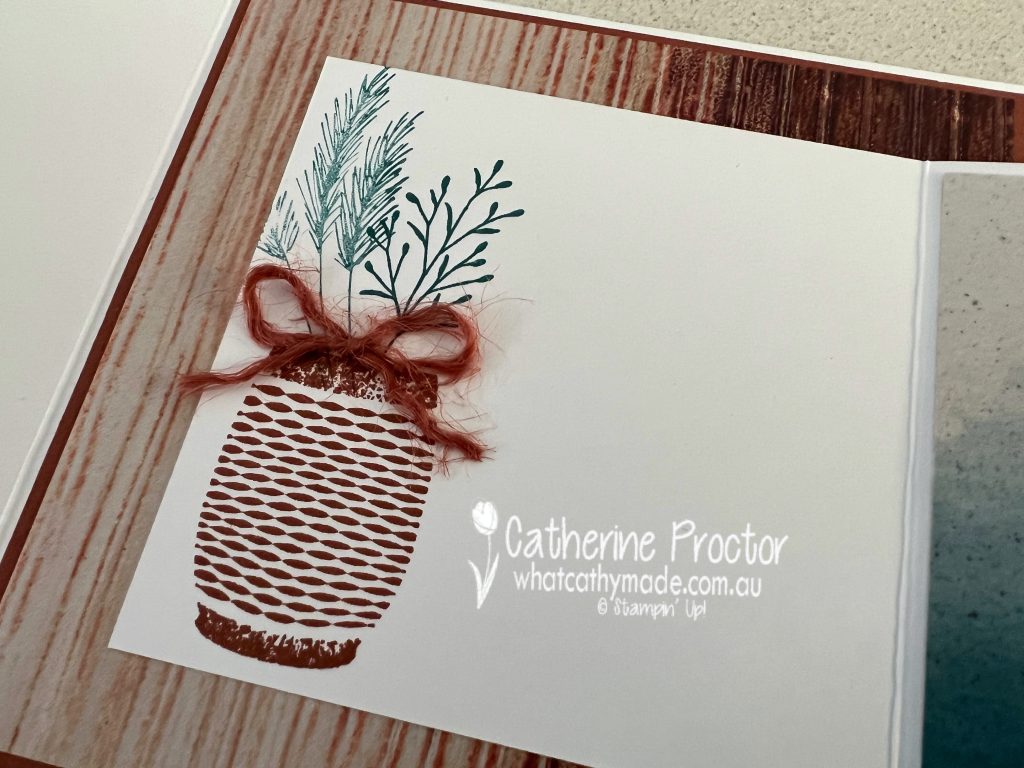
I’ve used the Copper Clay 2023–2025 In Color Jute Trim inside the card – I simply cut this jute to length, unraveled it and tied one strand into a bow.
The sentiment on the front of the card is from the Earthen Textures stamp set, stamped in Pretty Peacock onto the same Earthen Elegance DSP design that is on the front of the card.
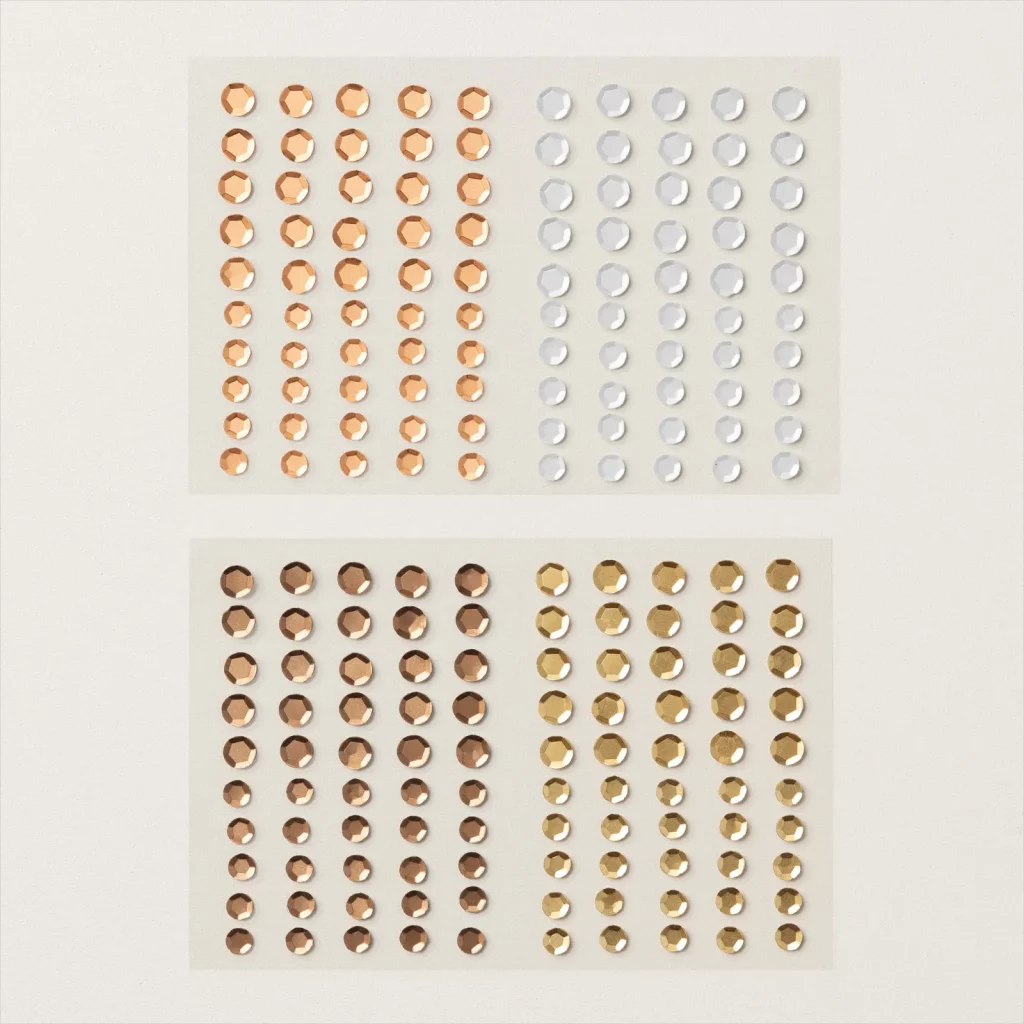
Did you also notice the copper sequin embellishments on the front of my card? These are from the new Neutrals Adhesive-Backed Sequins, especially useful for cards using neutral colours.
Now it’s time to hop on over to our next participant, the lovely Andrea Sargent – I can’t wait to see what Andrea has made this week!
If at any time you find a broken link, you can find the complete list of all participants below.
Welcome to week one of our Art With Heart 2023-24 Colour Creations blog hop!
We have a brand new blog hop header and next blog button – thank you to my friend Sharon Davern for creating these for our AWH Colour Creations 2023-24 blog hop!
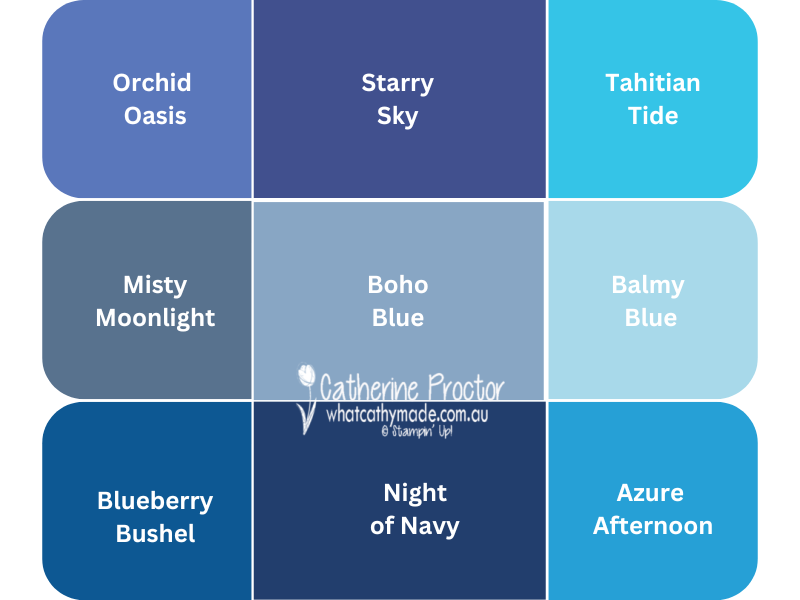
This week we are showcasing a brand new 2023-25 In Colour: Boho Blue. Boho Blue is such a beautiful soft blue – I know I will use this one a lot. Here’s a chart I created to show you how Boho Blue compares to the other current Stampin’ Up! blues.
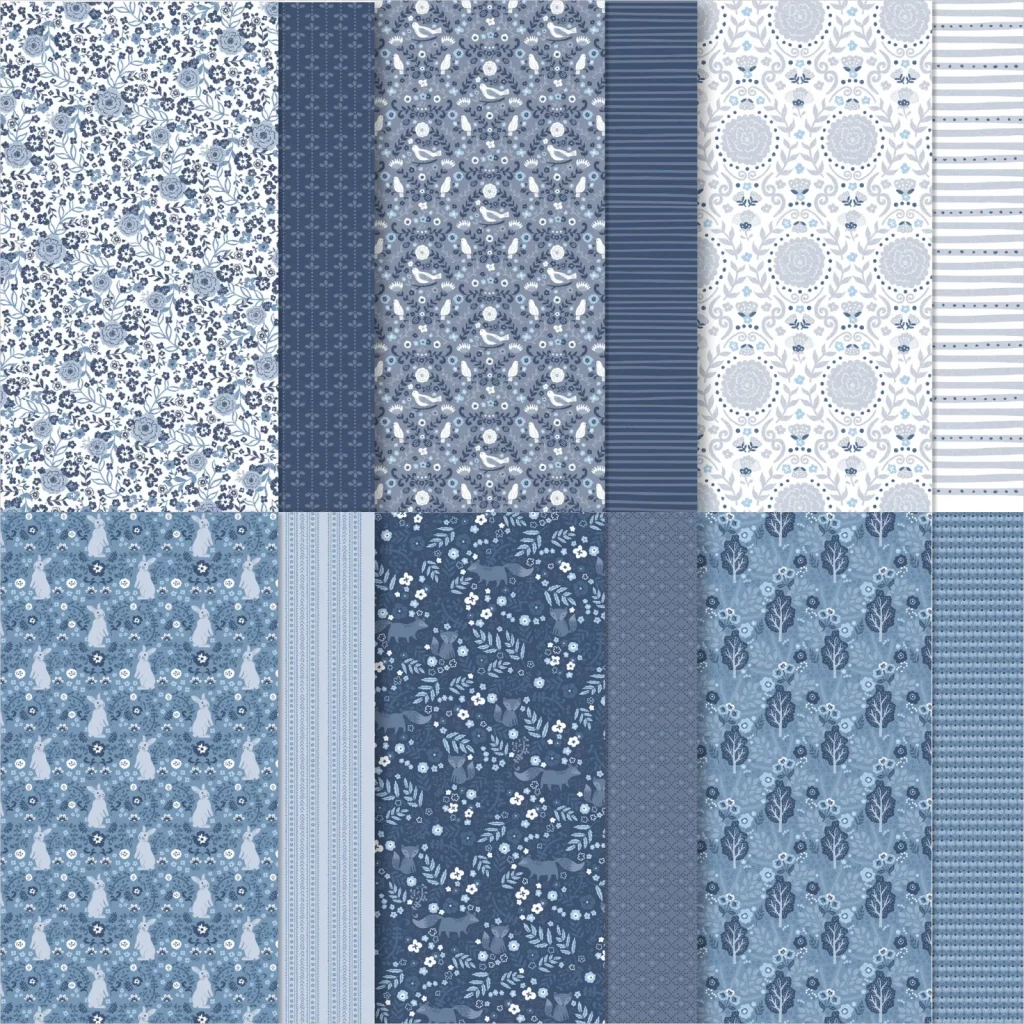
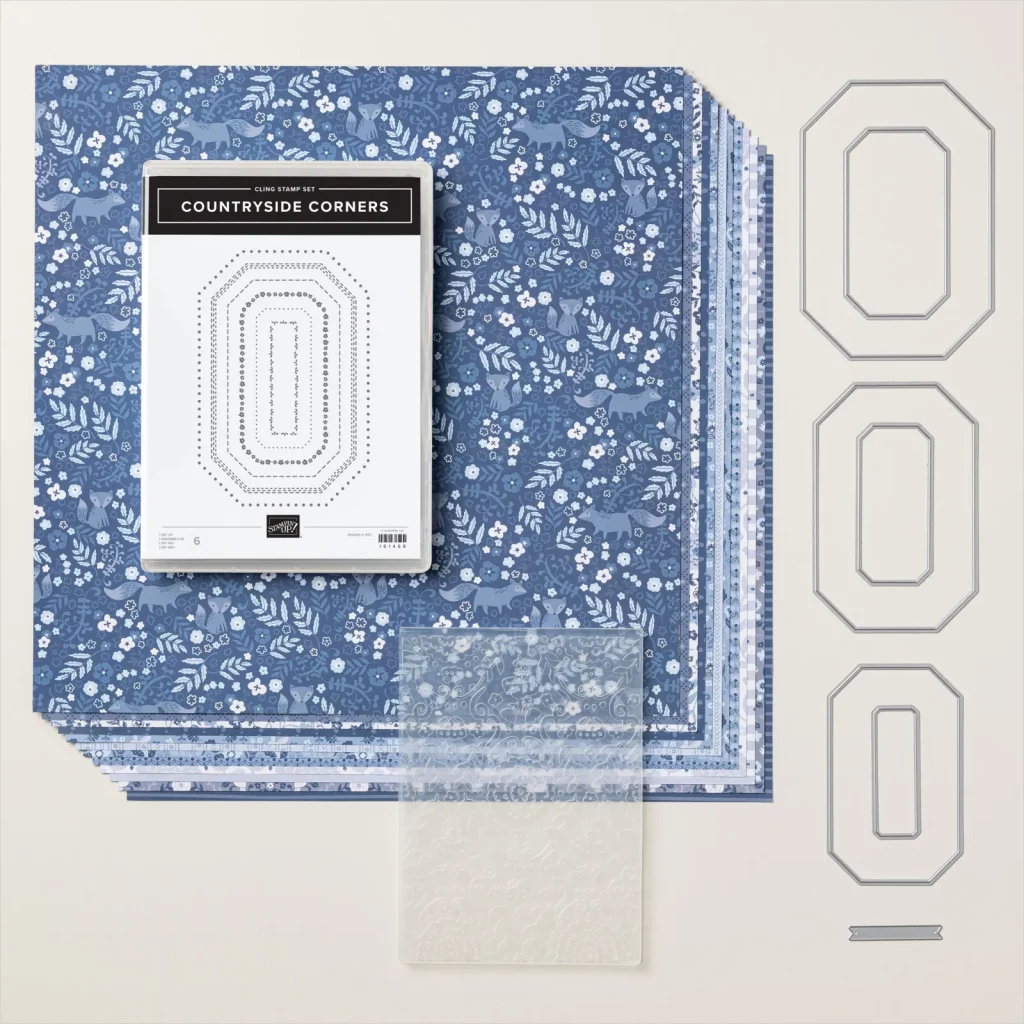
One of the products Stampin’ Up! demonstrators were able to order early from the 2023-24 catalogue was this stunning Countryside Inn DSP. It pairs Boho Blue with Balmy Blue, Misty Moonlight and Night of Navy.
When you place Boho Blue beside Balmy Blue, it really makes Balmy Blue look a lot like Pool Party!
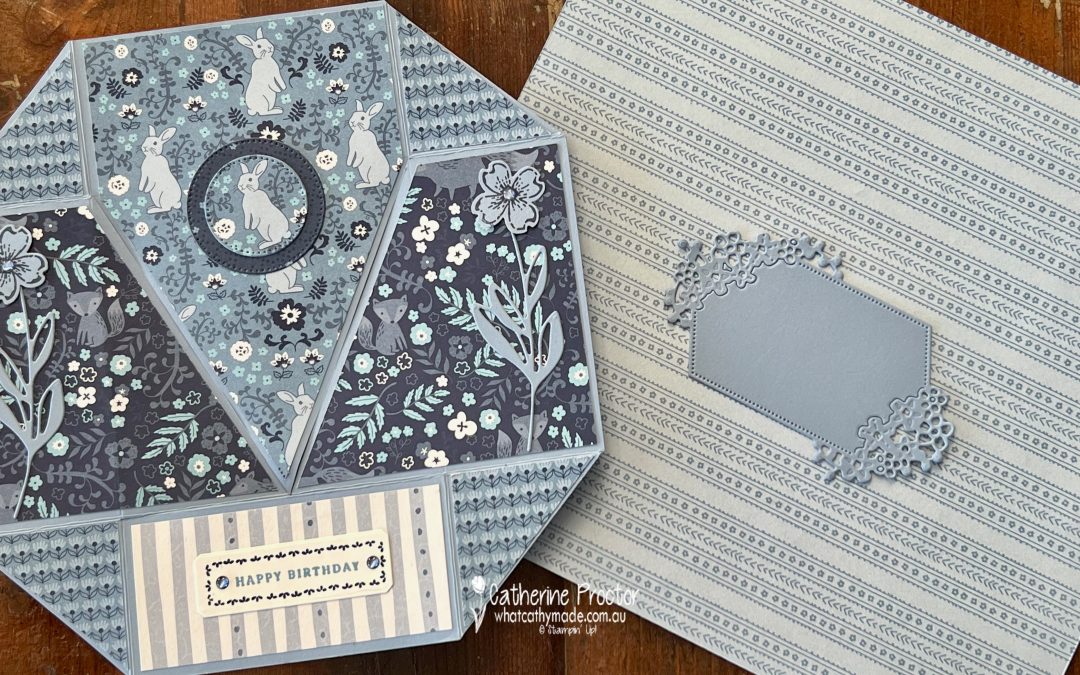
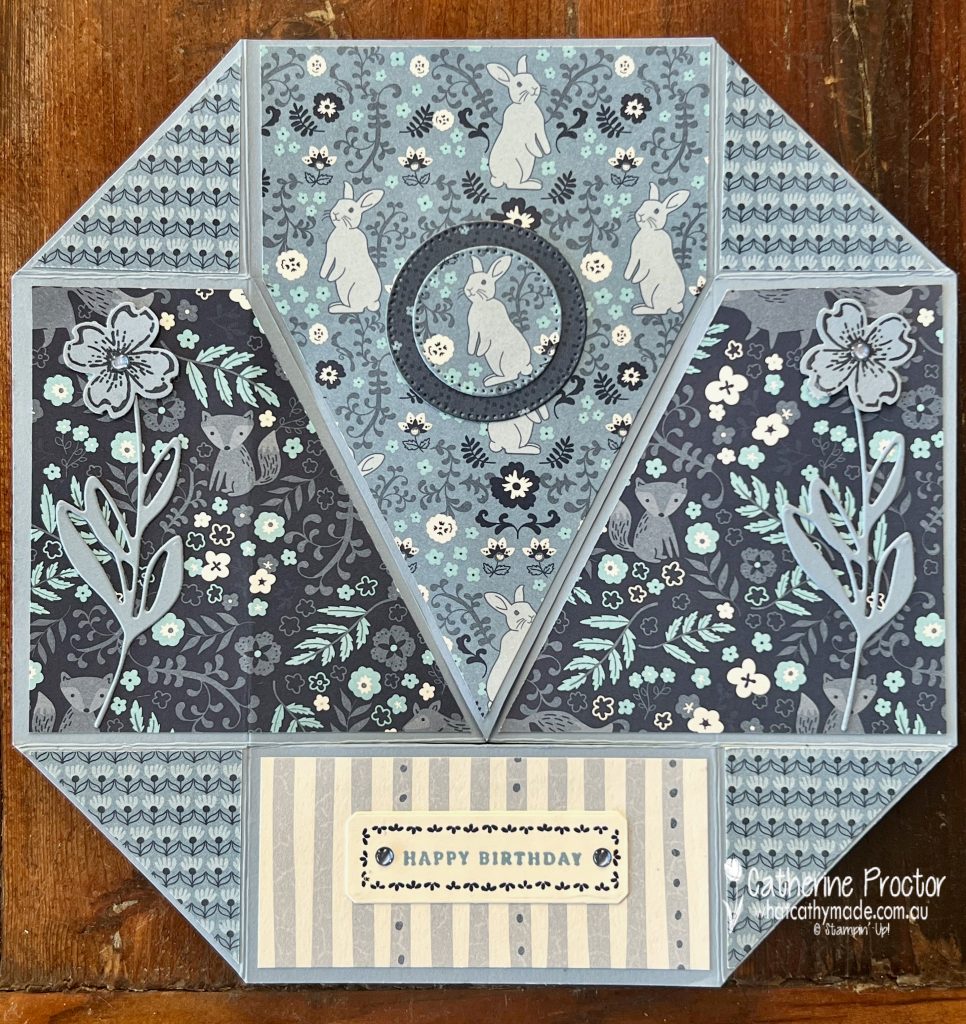
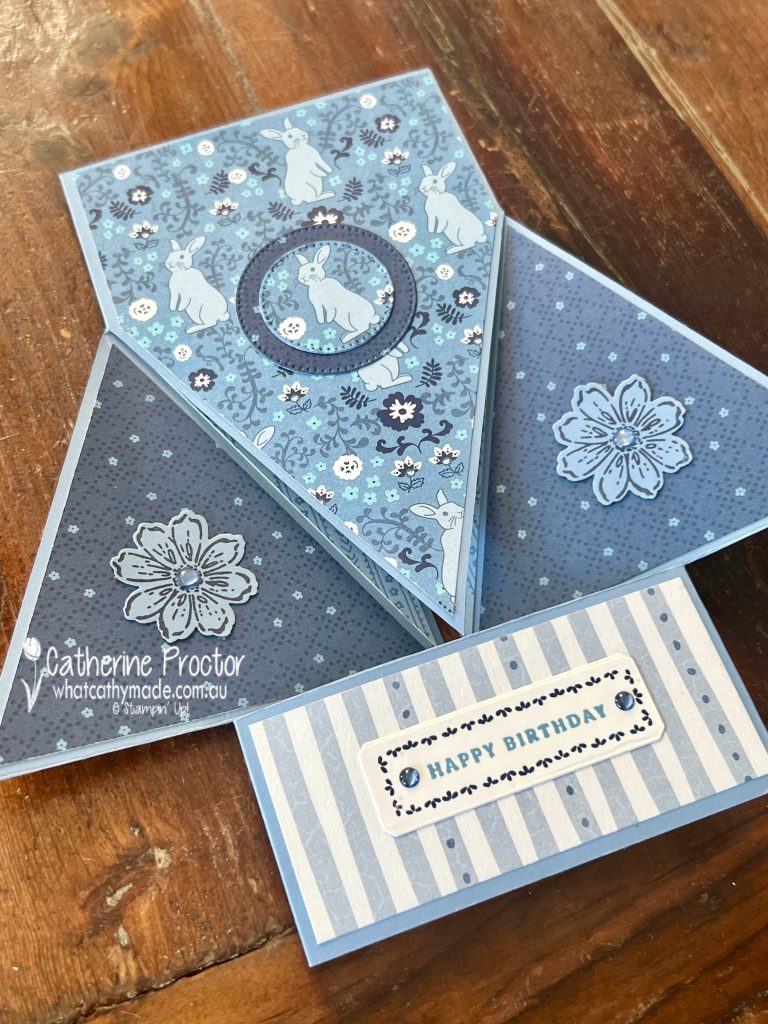
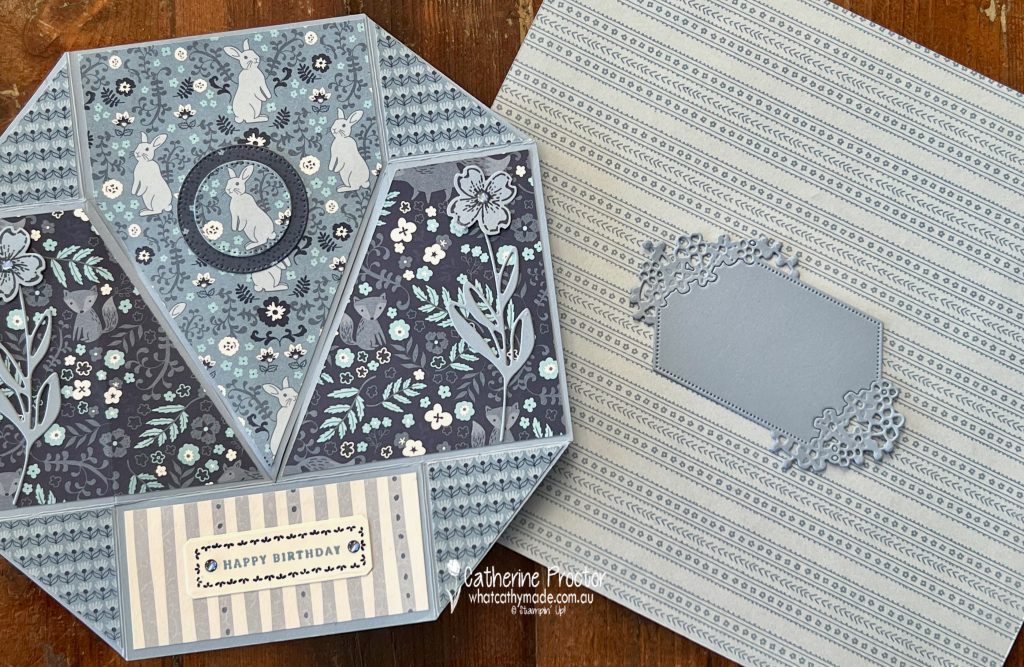
I decided an octagonal never ending card would be a wonderful way to showcase Boho Blue and as much of this DSP as possible.
This short video shows how this magical card works – never ending cards really have the ultimate wow factor!
A video I found on Pinterest from a cardmaker called Els Ham showed me the mechanics of making this style of never ending card, however I’ve changed the size of my card to make it a lot bigger than Els’ original card.
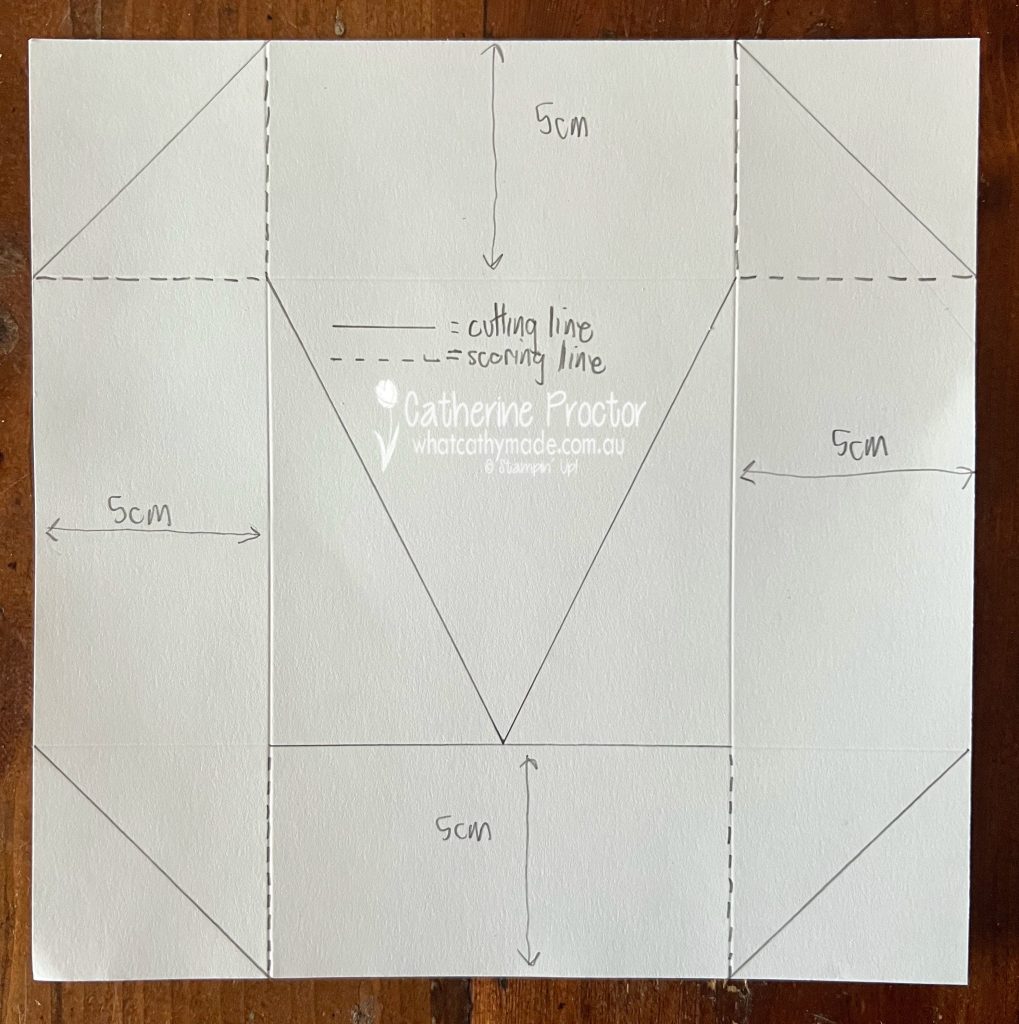
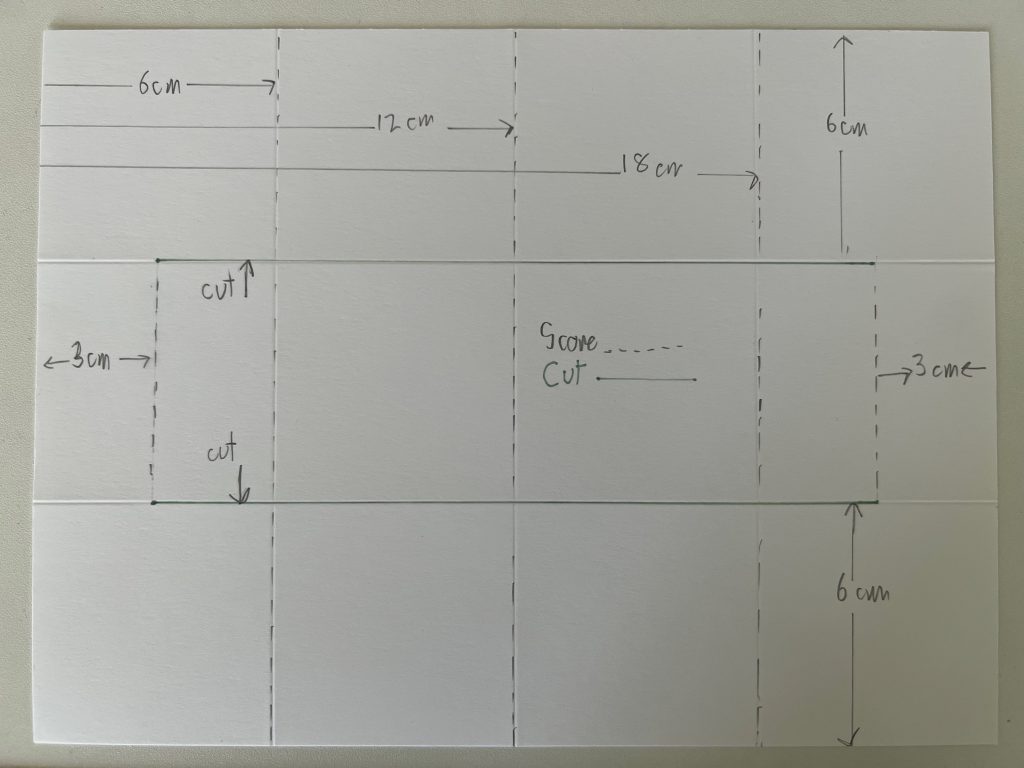
This template shows you how to cut and fold your 20 x 20 cm cardstock base. Start by scoring 5 cm in from all four sides. Once you’ve followed the template below to cut, score and fold your card, you can then decorate all the panels.
Always decorate the front of the card first before you decorate the reverse sides. Fold the card as you decorate the reverse sides to make sure you get any sentiments the right way up.
Here’s the card photographed from all the different angles. Front view…
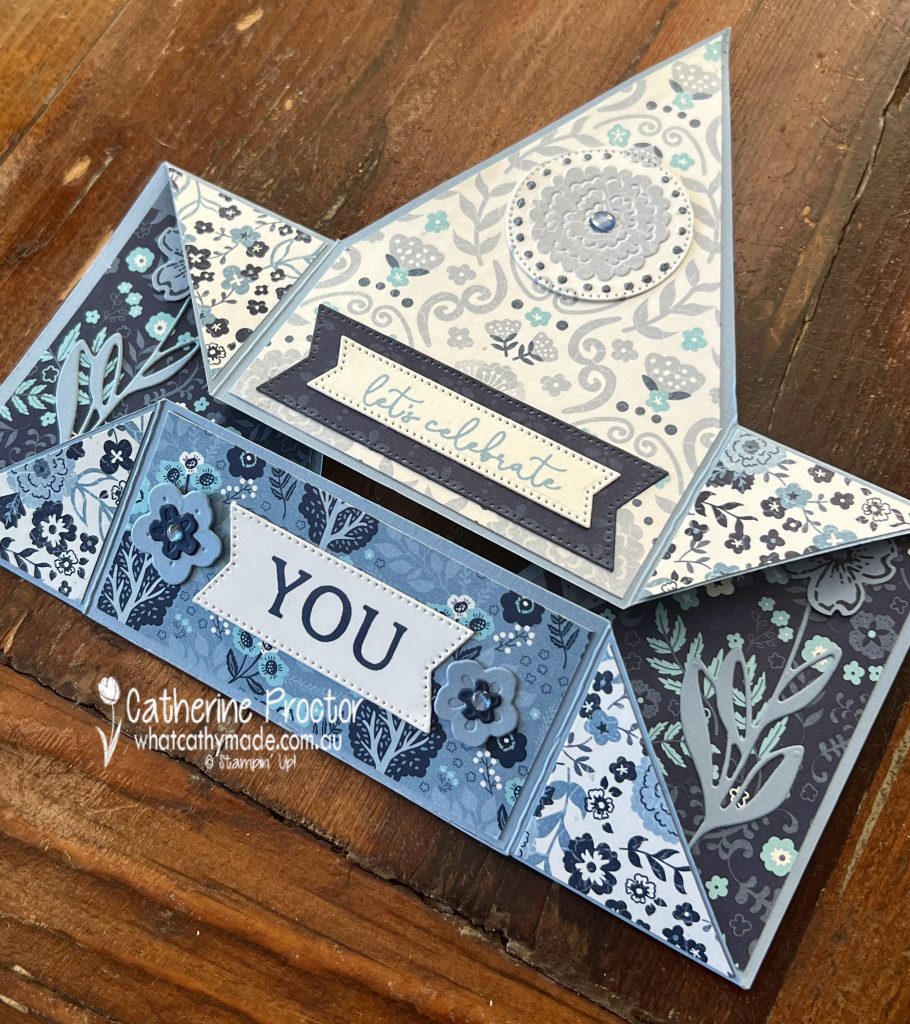
Left and right middle flaps reversed…
Bottom and top flaps reversed…
Middle flaps reversed again…
Top and bottom flaps reversed to return to the front view of the card…
I’ve used various stamps and dies from the Petal Park stamp set, Sentimental Park stamp set, Sentimental Park dies, Petal Park Builder punch and the Stylish Shapes dies to embellish this Boho Blue never ending card.
Every product from the Countryside Inn Suite collection was also used: the Countryside Corners bundle (Countryside Corners stamp set and Countryside Corners dies), the Countryside Blossoms Embossing folder and the Countryside Inn DSP
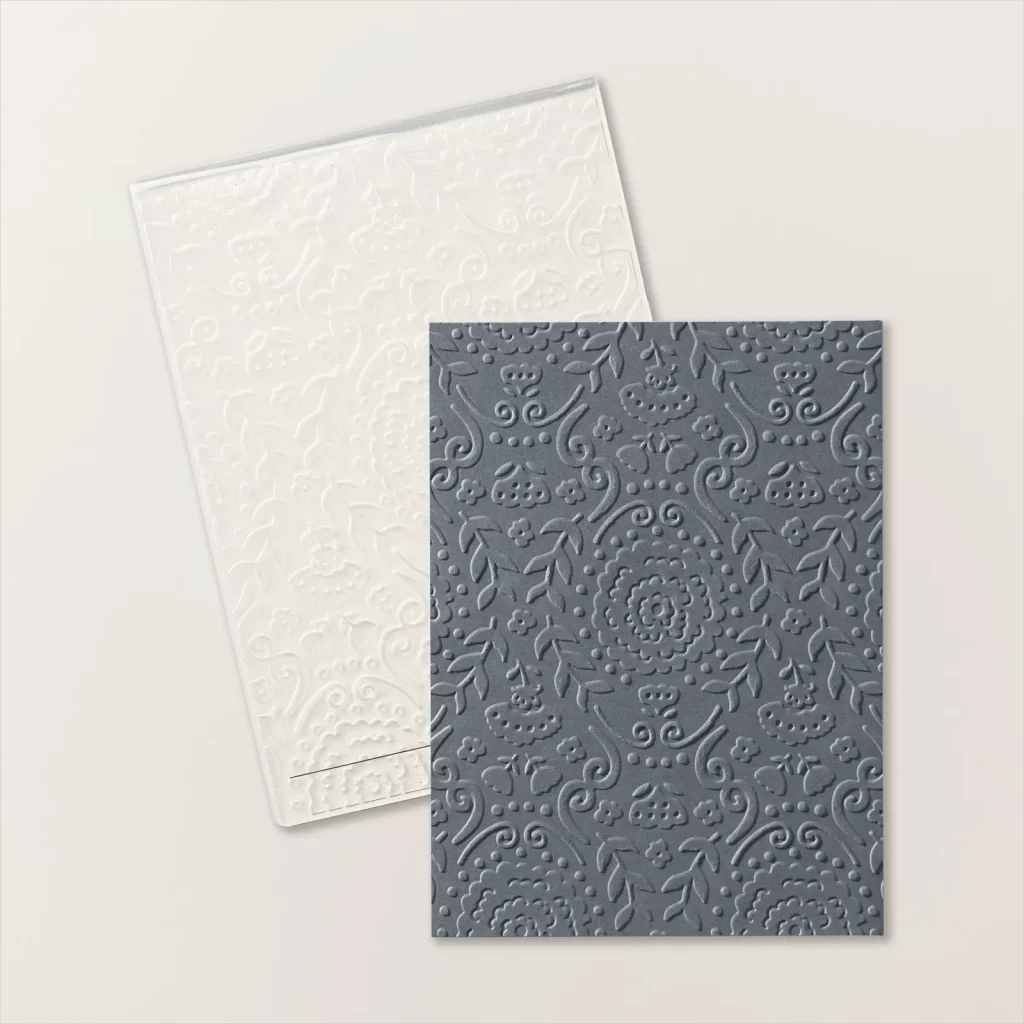
One really cool feature of this suite is the Countryside Blossoms Embossing folder – it actually embosses the Countryside Inn DSP!
Here’s a close up of the embossing of the DSP. The gorgeous Boho Blue embellishments you can also see in this image are from the 2023-2025 In Colour Dots.
This is a very large card, measuring 20x20cm, so to make an envelope for it I used a C4 business envelope, trimming 10 cm off the base of the envelope before folding and gluing the base up to reseal the bottom of the envelope.
I then decorated the front and back of the envelope with the Countryside Inn DSP and a Boho Blue address label, die cut using the Sentimental Park dies.
I love Boho Blue so much I’ve already ordered another pack of the cardstock!
Now it’s time to hop on over to our next participant, the lovely Kate Morgan – I can’t wait to see what Kate has made this week!
If at any time you find a broken link, you can find the complete list of all participants below.
This year we’re starting the Stampin’ Up! Colour creations with our five new In colours, so we’ll be back next Wednesday, May 10, with another new 2023-24 In Colour, Copper Clay!
Welcome to week thirty five of our Art With Heart 2022-23 Colour Creations blog hop. This is a weekly blog hop where we showcase the stunning range of Stampin’ Up! colours in alphabetical order over 12 months and this week we are featuring Pale Papaya from the 2021-23 In Colours.
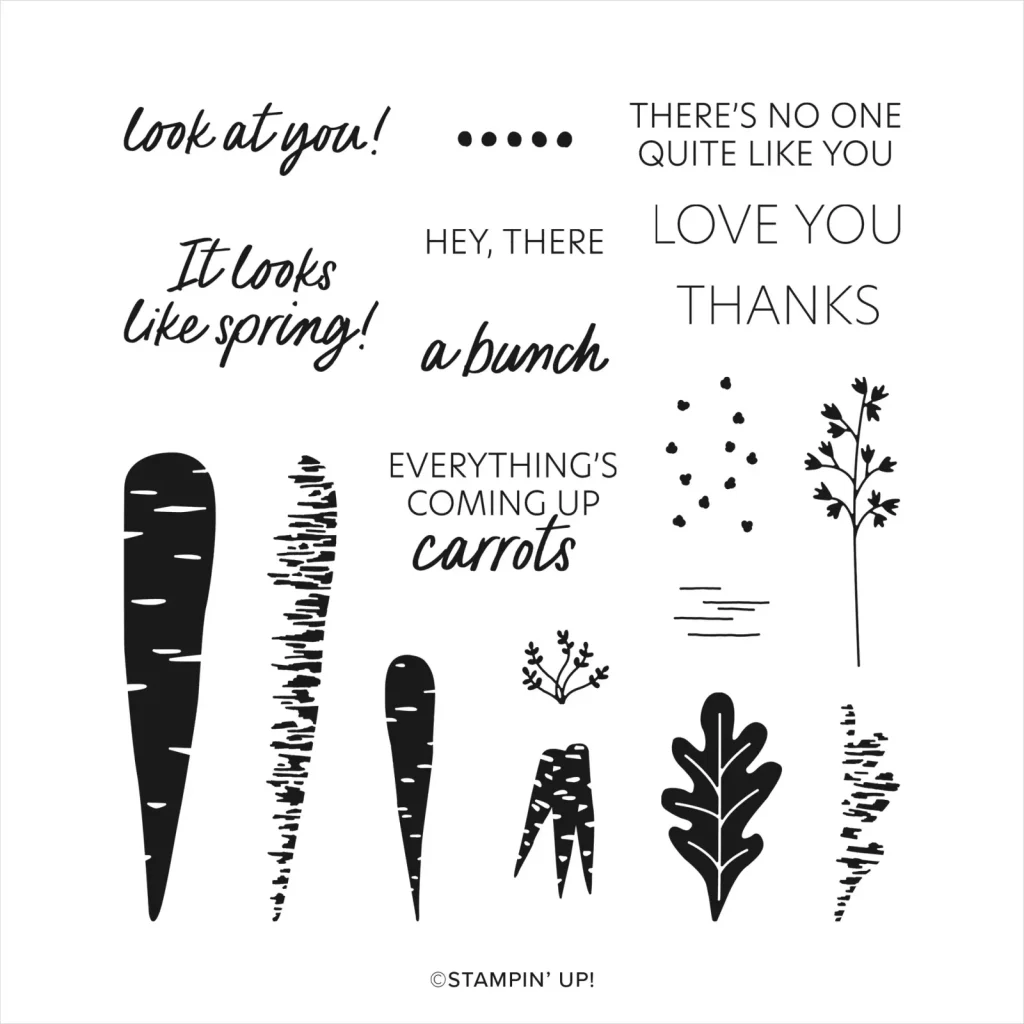
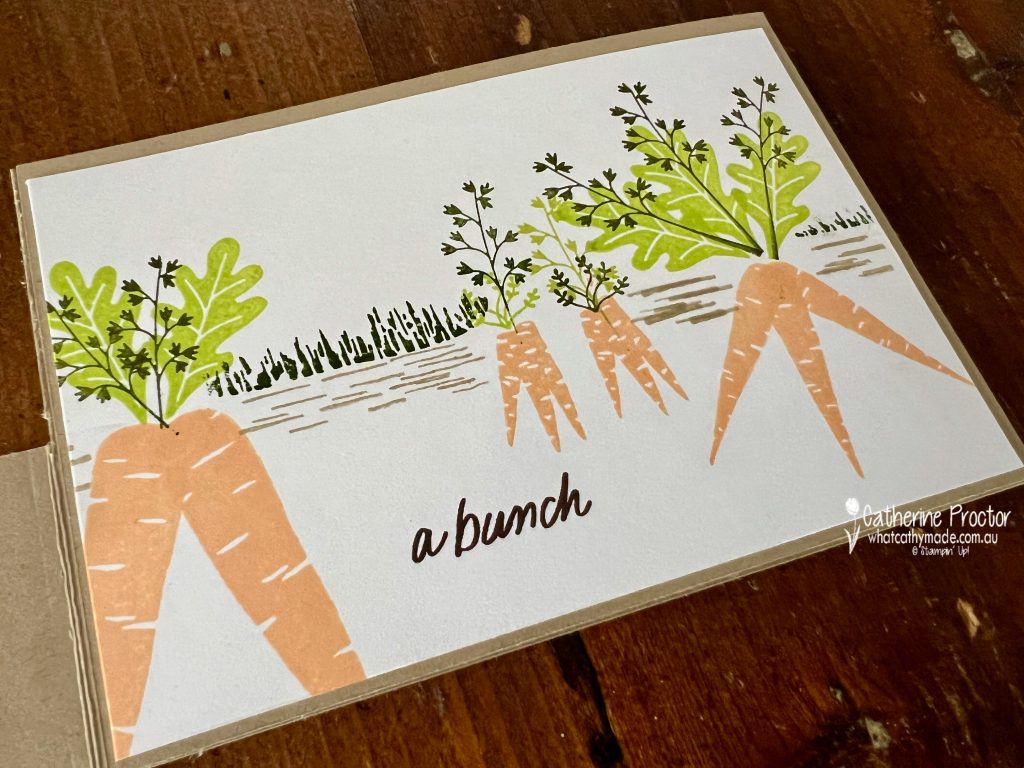
The new January-April Mini Catalogue and SALE-a-bration Catalogue launched last week and one of the free SALE-a-bration items you can redeem for a $90 spend is the Thanks A Bunch stamp set.
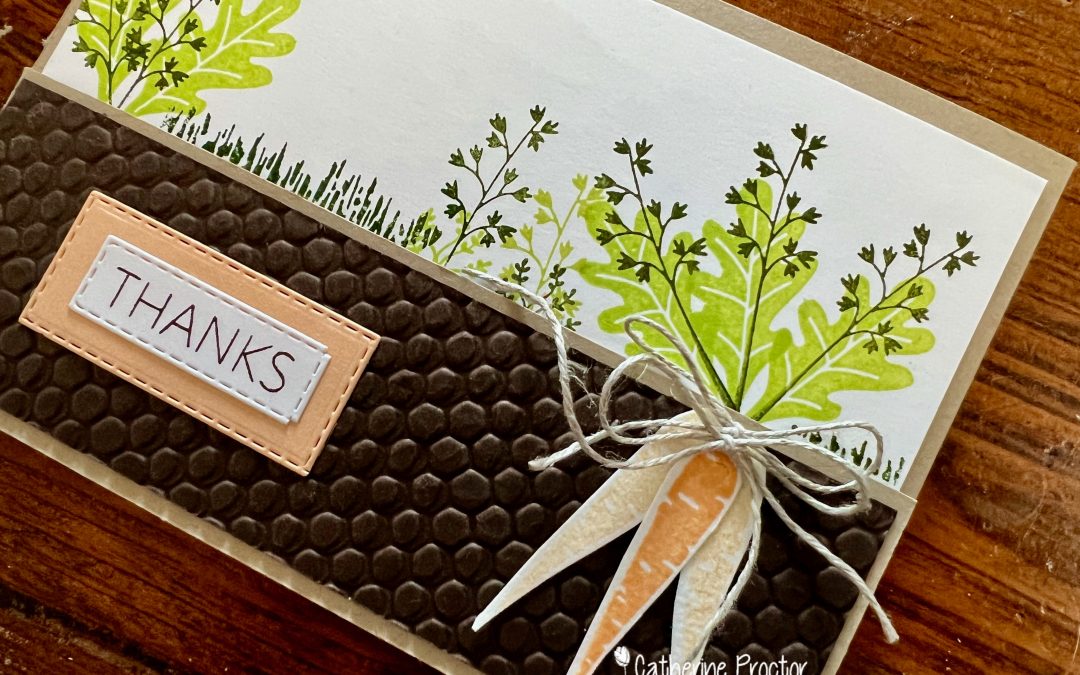
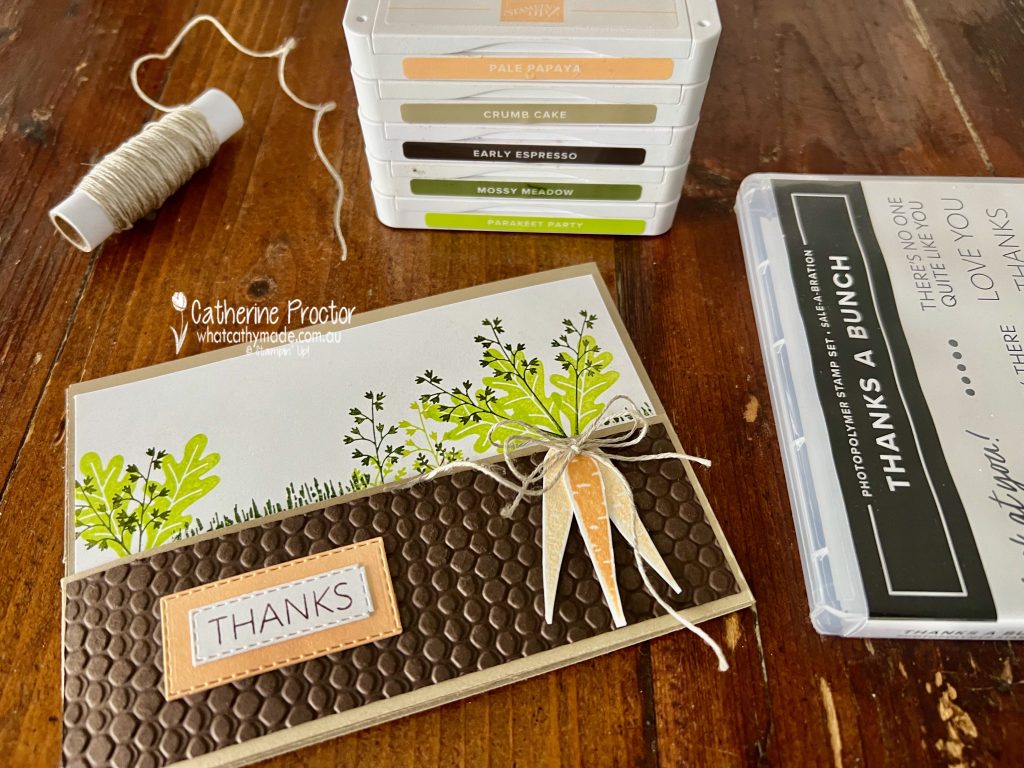
Pale Papaya is a great colour to use for carrots and I’ve used it both at full strength and stamped off once for the front of my split front, tri-fold fold card. Other colours used include Crumb Cake, Early Espresso, Mossy Meadow and Parakeet Party.
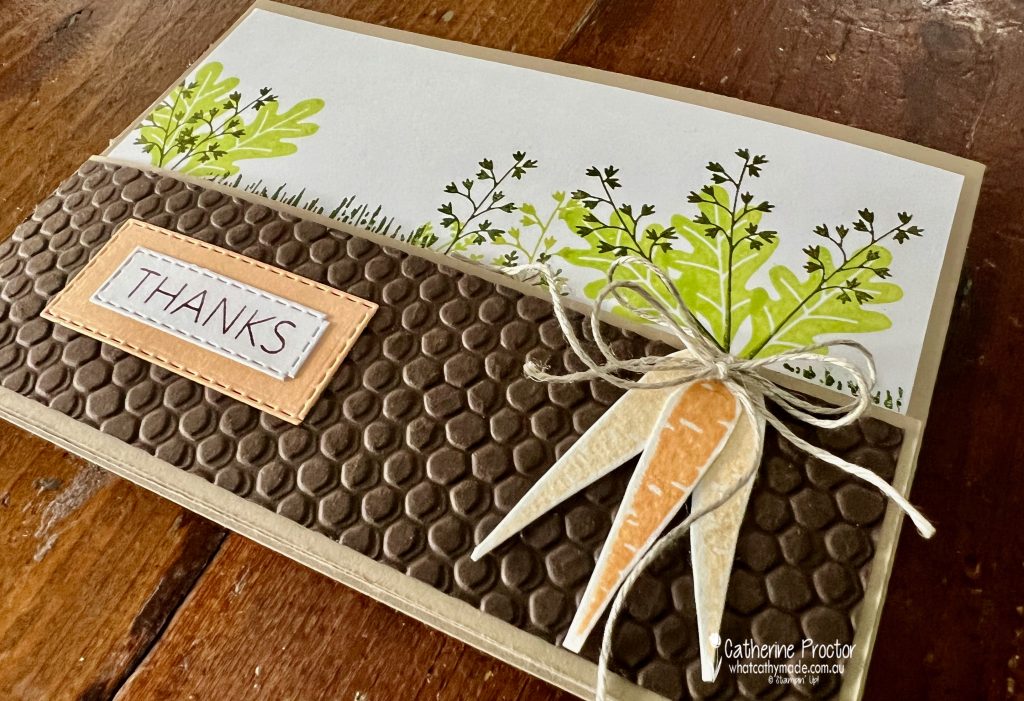
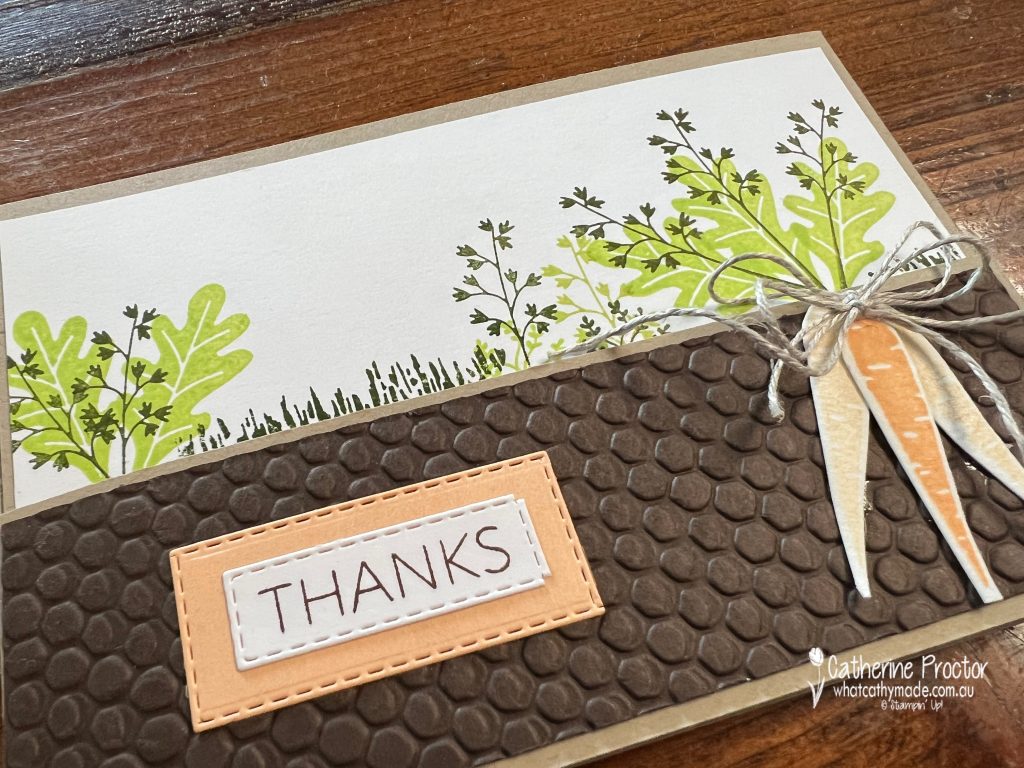
The Hive embossing folder was used to emboss Early Espresso cardstock to create soil for the front flap. As the split front, tri-fold fold card opens the layers of carrots are revealed.
The middle flap shows carrots above and below the ground. One of the carrot shading stamps works really well to create grass once it is turned on its side.
Split front, tri-fold fold card instructions
Cut a sheet of A4 Crumb Cake cardstock at 10.5cm down the middle to divide into two long halves that each measure 21cm wide x 10.5 cm high.
Score both pieces at 14.8cm and fold in half along the score line to make two cards.
One of these cards will become the card base and the left split front panel, while the other card will be used for the right panel.
To create the left split front panel measure and cut off the top 5cm across the top of the left panel of one of the cards.
To create the right panel with the other card, measure 2 cm parallel to the middle score line and cut all the way down the card. You will now have a right panel with a 2cm wide flap which you use to adhere to the back of the right hand side of the card base.
Fold the right flap over the card base and then fold the left split front panel over the right panel – I’ve adhered the embossed Early Espresso cardstock, the “Thanks” greeting and the bunch of tied carrots to the left split front panel.
Stamp and decorate the cardstock layers for your right card flap and card base BEFORE adhering to your split front, tri-fold fold card base.
All of the sentiments in this card are from the Thanks a Bunch stamp set, stamped in Early Espresso.
Now it’s time to hop on over to our next participant, the lovely Tina Gillespie – I can’t wait to see what Tina has made this week!
If at any time you find a broken link, you can find the complete list of all participants below.
If you live in Australia, you can find and purchase these products in my Stampin’ Up! Online Store once they are available to purchase tomorrow morning.
We’ll be back next Wednesday January 18 with projects showcasing one of the Subtles, Pear Pizzazz.
Welcome to week thirty two of our Art With Heart 2022-23 Colour Creations blog hop!
This is a weekly blog hop where we showcase the stunning range of Stampin’ Up! colours in alphabetical order over 12 months and this week we are featuring Night of Navy from the neutrals family.
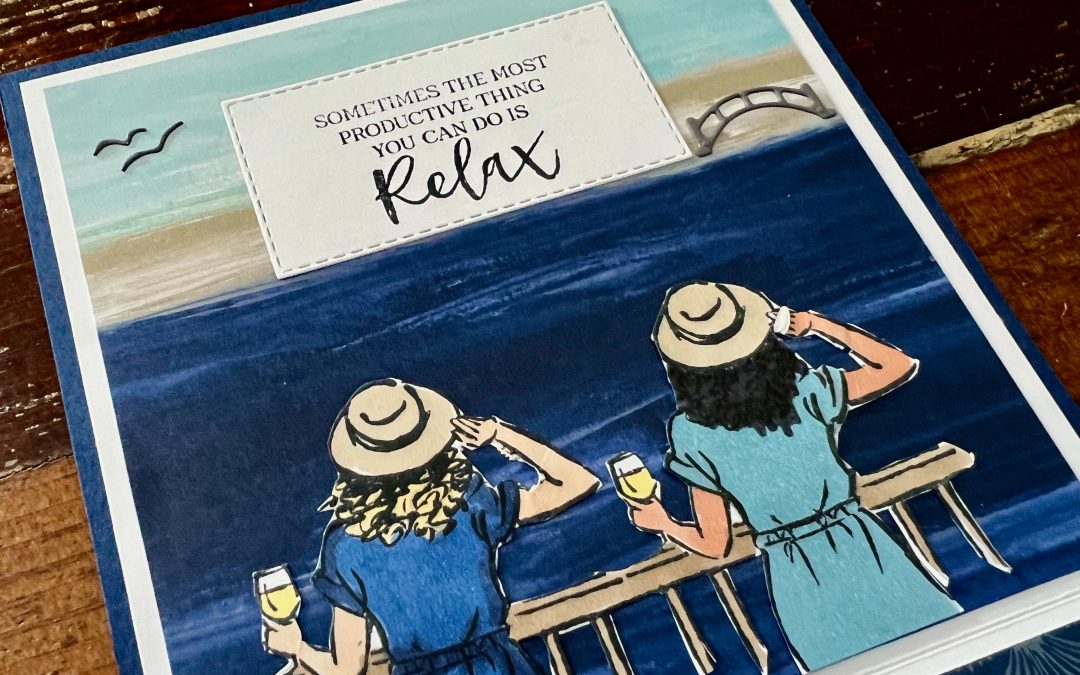
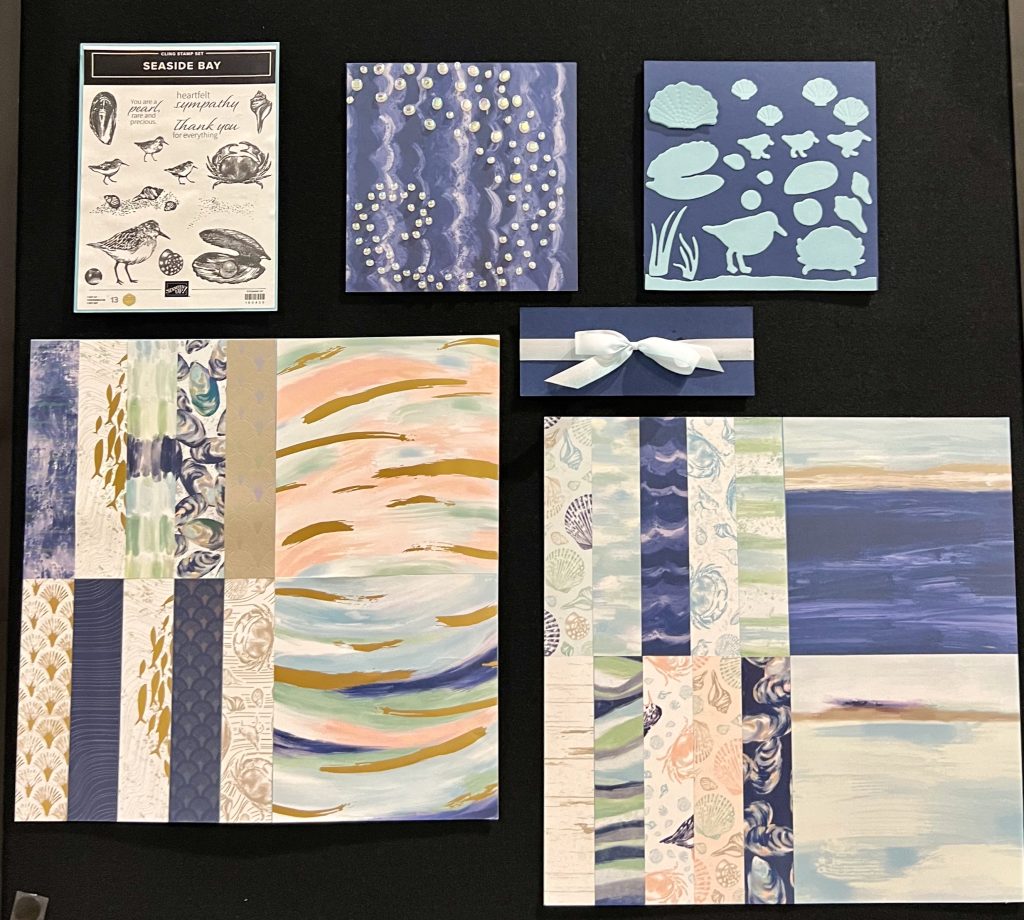
This is a special card I made for my sister-in-law’s birthday last week. My present to her is a girl’s night out together at the Open Air cinema, a new tradition we started last year.
I highly recommend this experience to anyone who is visiting Sydney, as you get to enjoy a drink and a meal, before watching a movie on a giant outdoor screen that rises up from our iconic Sydney Harbour!
photography – andrewmaccoll.com
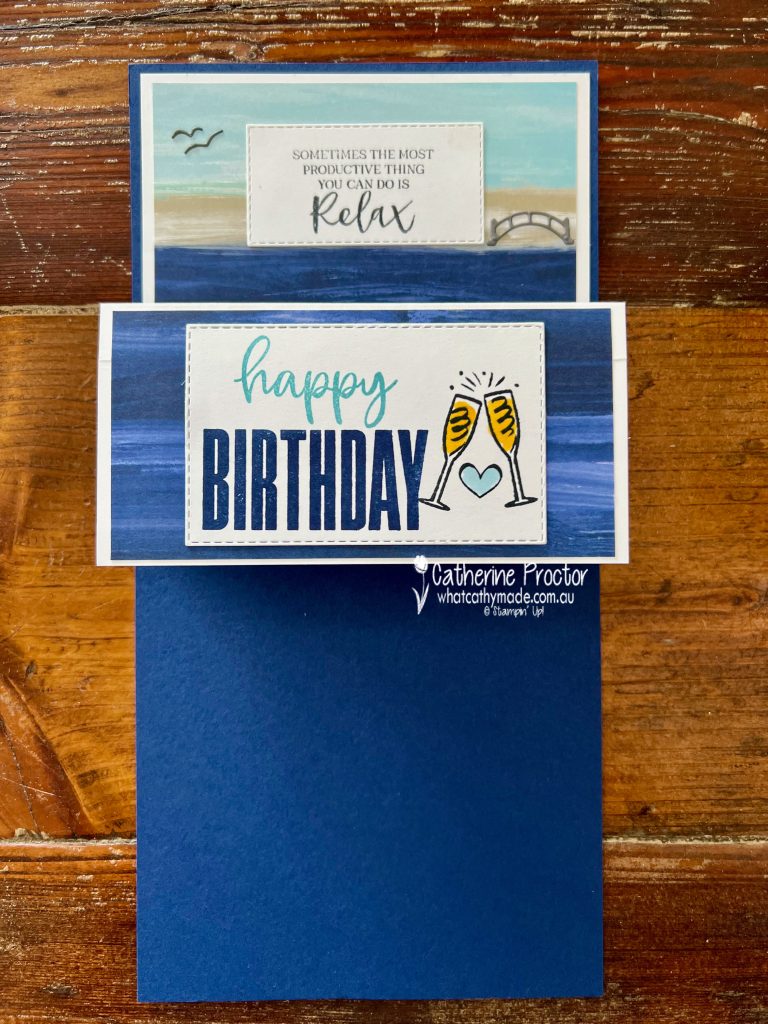
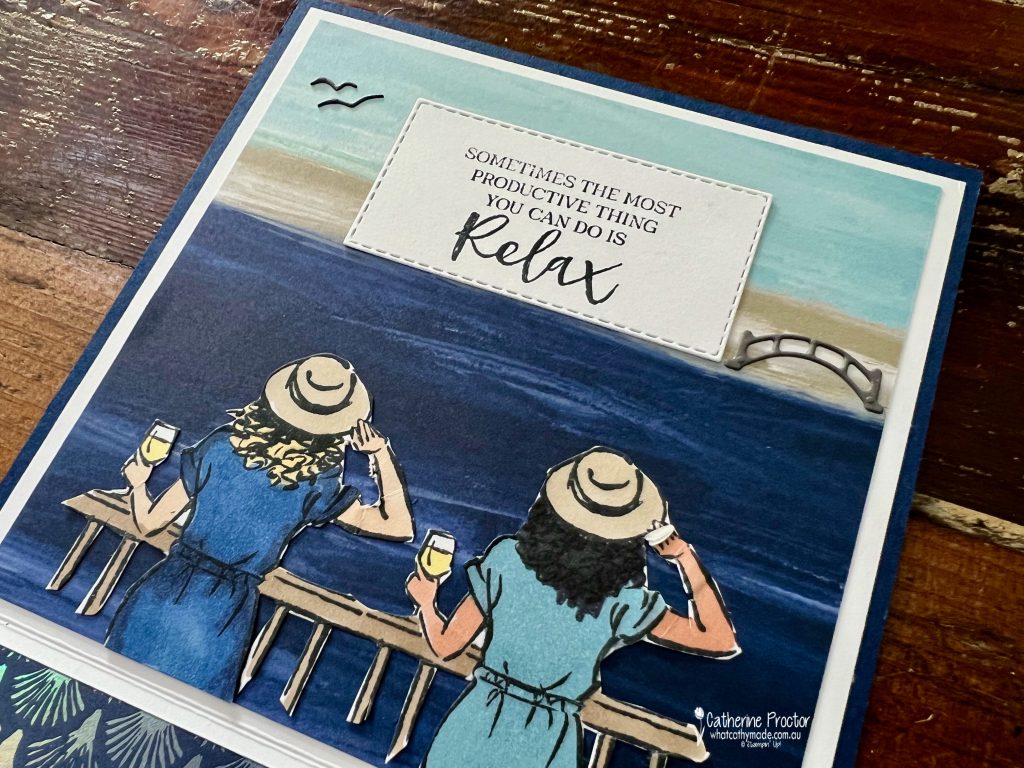
To recreate the Open Air Cinema experience I decided to make a double easel card, using the Stitched Rectangle Dies to create the actual cinema screen in the harbour.
Here’s what the card looks like when it’s closed.
Opened up…
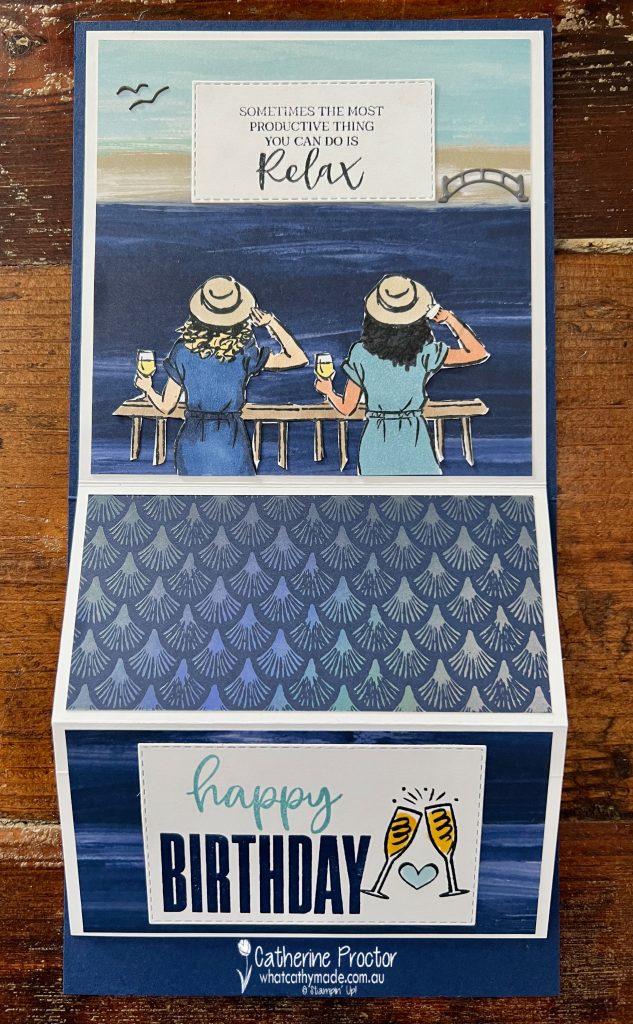
Laid out flat…
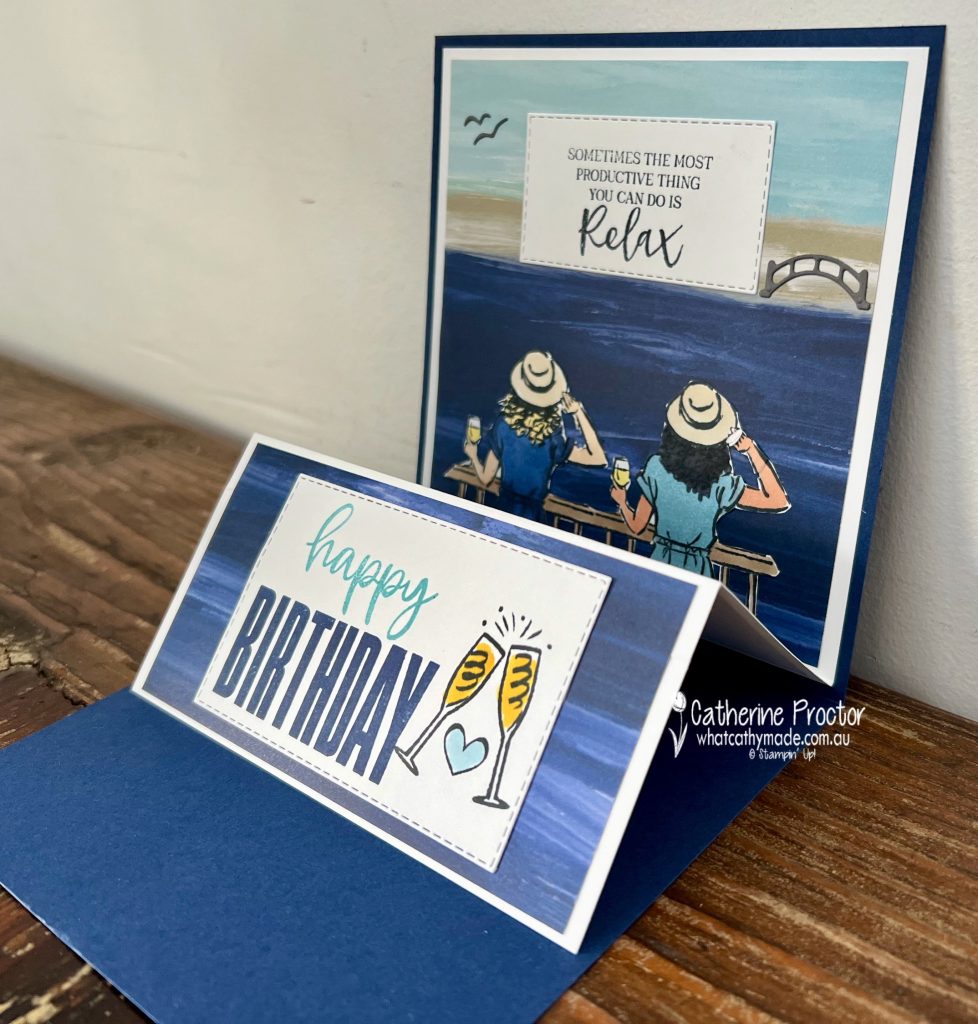
Folded into an easel…
We always drink champagne together to start the night so I stamped one of the images from the “In The Moment” stamp set twice and fussy cut it out to show us both enjoying a drink and looking at the view before the movie starts.
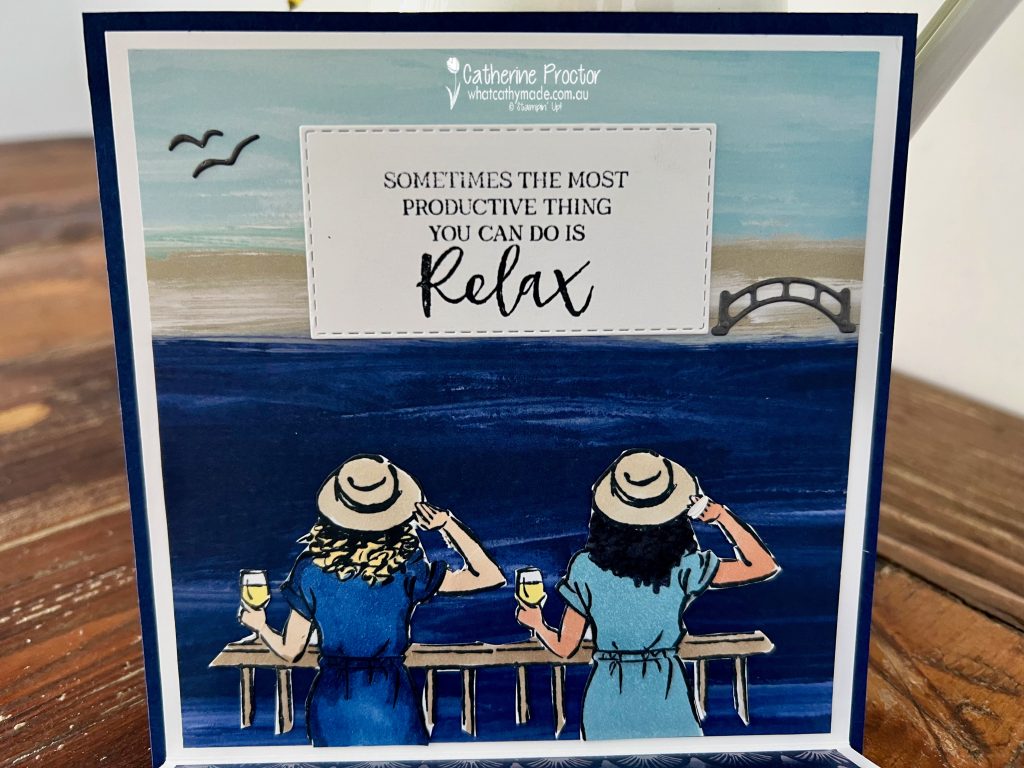
Hang on a sec! What is the Designer Series Paper you’ve used for the front of the card and the inside harbour scene, I hear you ask?
By The Bay is a gorgeous 6×6 DSP from the January–April 2023 Mini Catalogue, which will be available from January 5. It’s part of the By The Bay suite and one side of all of the DSP designs is pearlised – so stunning!
I’ve used one of the pearlised patterns for the front of my double easel card. To tie it flat I’ve used another new product from the catalogue: Night of Navy Bordered Ribbon.
The Sydney Harbour Bridge and birds in the sky are created using the Waterfall dies, currently on sale in the clearance rack and reduced to $26.
Other products used in the card include the Biggest Wish stamp set for the birthday sentiment, the Breaking News Stamp set for the clinking champagne glasses and heart, and the Floral Gallery Dies for the sentiment on the front of the card.
Now it’s time to hop on over to our next participant, the lovely Fiona Ryan – I can’t wait to see what Fiona has made this week!
If at any time you find a broken link, you can find the complete list of all participants below.
Welcome to week thirty of our Art With Heart 2022-23 Colour Creations blog hop!
This is a weekly blog hop where we showcase the stunning range of Stampin’ Up! colours in alphabetical order over 12 months and this week we are featuring Mint Macaron from the subtles family.
Hands up if you’re excited about the drill die in Stampin’ Up!’s Rugged Icons dies!
That’s my hand you can see frantically waving in the background, as my youngest son, after trying university for a year, decided to become an electrician instead and he has never been happier.
I think he has finally found his tribe 🙏😍 … and I’ve found the perfect die for my tradie son!
When Ben turned 21 last weekend I knew I wanted to use the drill die from the Rugged Icons die and the die-cut pieces from the He’s The Man DSP, but I wasn’t sure what type of card I would make.
When I saw this fabulous Masculine Fun Fold 3D Shutter Card made by my fellow AWH teammate and friend, Kate Morgan, for our Colour Creations Merry Merlow blog hop last week I knew I’d found the perfect design.
Unfortunately, Kate’s template was too small for these die cuts, so I’ve created a new template for my card.
Trifold Shutter Card Template
Start with a piece of cardstock (this is for the inside fancy fold) measuring 24 cm wide x 18 cm high.
Cut, score and fold the cardstock as shown on the template to make the fancy fold.
Make an inner card base measuring 24.5 cm wide x 17.5cm high, scored at 12.25 cm and then folded in half.
After decorating the inside of your trifold shutter card, glue the outside panels to the inside of your card base as shown below.
I have to confess that it was not until I’d finished making the card that I realised the light green in the He’s The Man DSP was Soft Succulent, not Mint Macaron! So I’ve used Mint Macaron cardstock throughout but I think it still works okay?
All of the images inside the card are from the He’s the Man DSP apart from the centre 2 panels that have “21 today” and “create memories”. Can you guess where these are from?
The word “today”, the tiny heart above it, the “create memories” and the two sprigs are all stickers from the “Today Is the Day Memories & More Card Pack”.
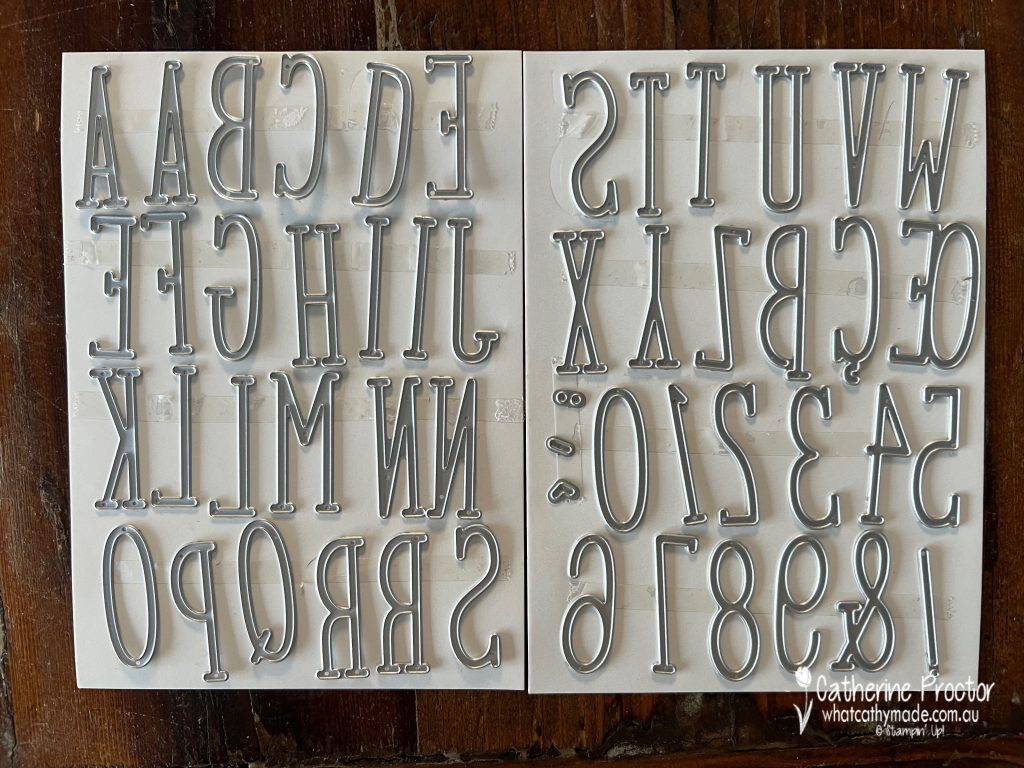
The “21” on the inside of the card and the “Happy Birthday” on the front of the card are a brand new product from the forthcoming January – April mini catalogue: Alphabet À La Mode dies. These dies are 1 ½ inches (3.8cm) high and there are 52 dies in the set!
If didn’t already have your hand in the air for the Rugged Icons dies, I bet you do for these brand new Alphabet À La Mode dies!
I’ve also used these Alphabet À La Mode dies (always attach an adhesive sheet on the back of the card stock before die cutting) to make the Happy Birthday for the front of my card.
A card this size needs a homemade envelope, which leads me to a confession. It was when I used this sheet of He’s The Man DSP to make the envelope that I realised I’d mixed up my greens!!!!!
This photo also shows the back panel of the card for writing on. A couple of glue dots under the “Cheers to all your years” die cut make a resealable envelope for the card.
Now it’s time to hop on over to our next participant, the lovely Di Furniss – I can’t wait to see what Di has made this week!
If at any time you find a broken link, you can find the complete list of all participants below.
Welcome to week eight of the Heart Of Christmas Blog Hop!
With only 8 days to go until the end of Sale-a-bration I just couldn’t resist creating another Christmas card using four of the gorgeous Sale-a-bration items: Rings of Love DSP, Silver Foil, Silver and gold DSP and my absolute fave, Tree Lot dies.
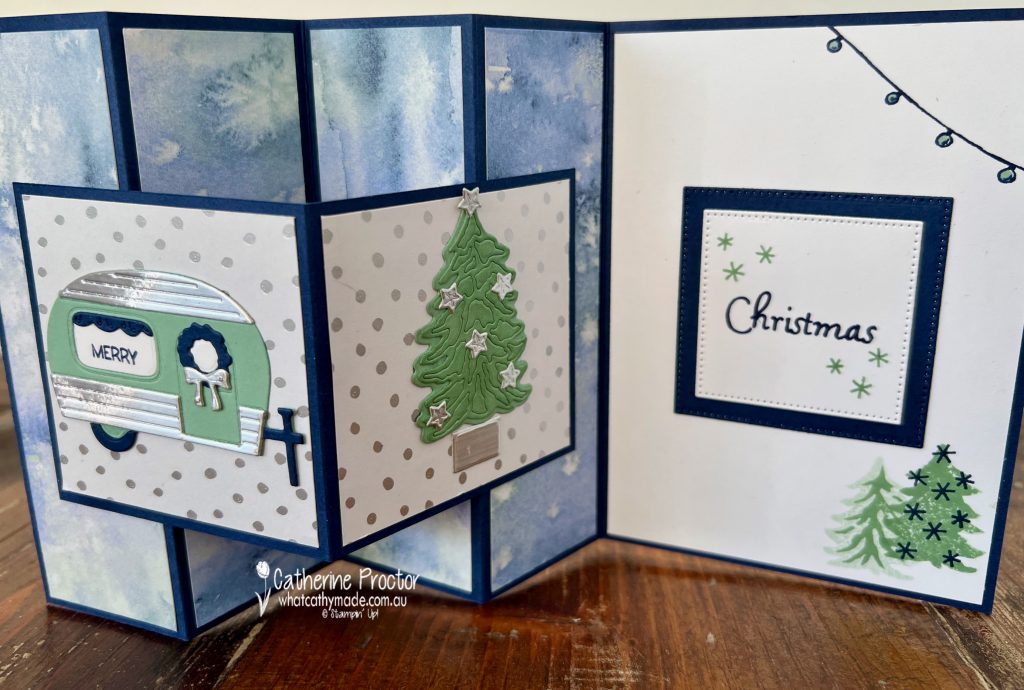
I’ve used some of the colours in the Rings of Love DSP as well as the Silver from the Silver DSP and the Silver Foil for my accordion fold card.
An accordian card fancy fold is a great card for display as it stands up really well without any support.
Accordion Fancy Fold Card Template
Night of Navy cardstock base 14 x 28 cm
Score at 4.5, 9, 13.5 and 18 cm
Adhere 4 x Rings Of Love DSP measuring 13.5 x 4 cm to the folded panels
Night of Navy cardstock 4 x 7.5, scored at 7.5
Adhere 2 x Silver spotted Silver and Gold DSP measuring 7×7 cm to the Night of Navy cardstock
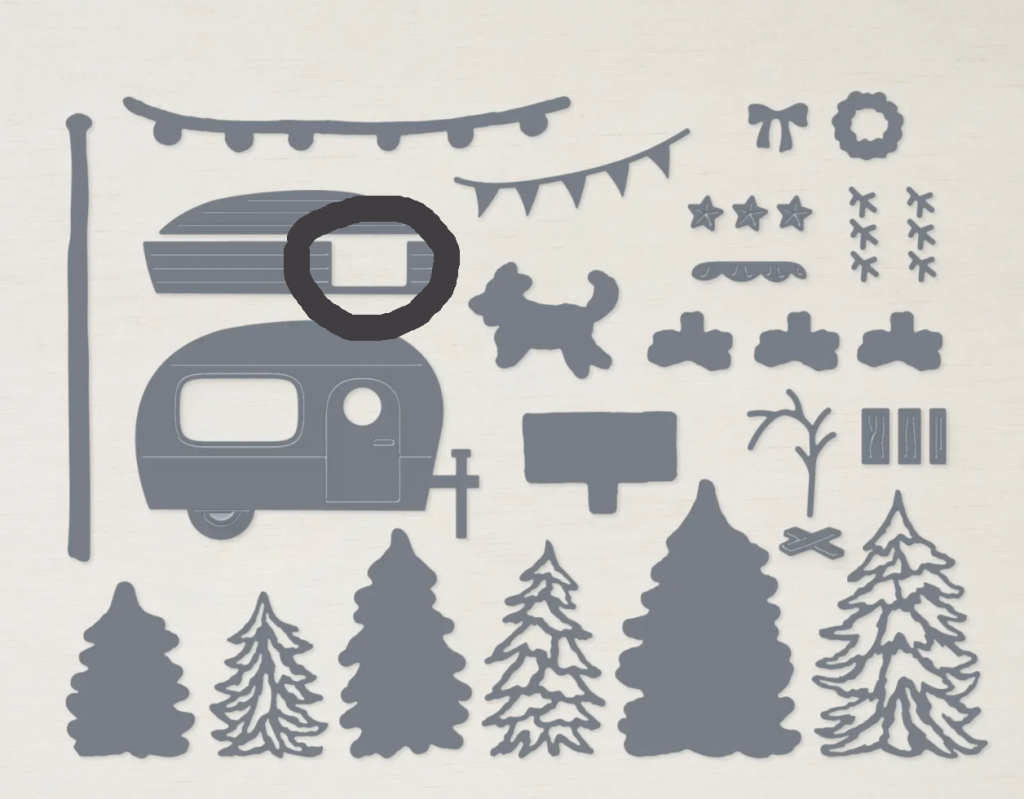
Die cut caravan, embellishments and trees from scraps of Silver Foil, Mint Macaroon and Night of Navy cardstock
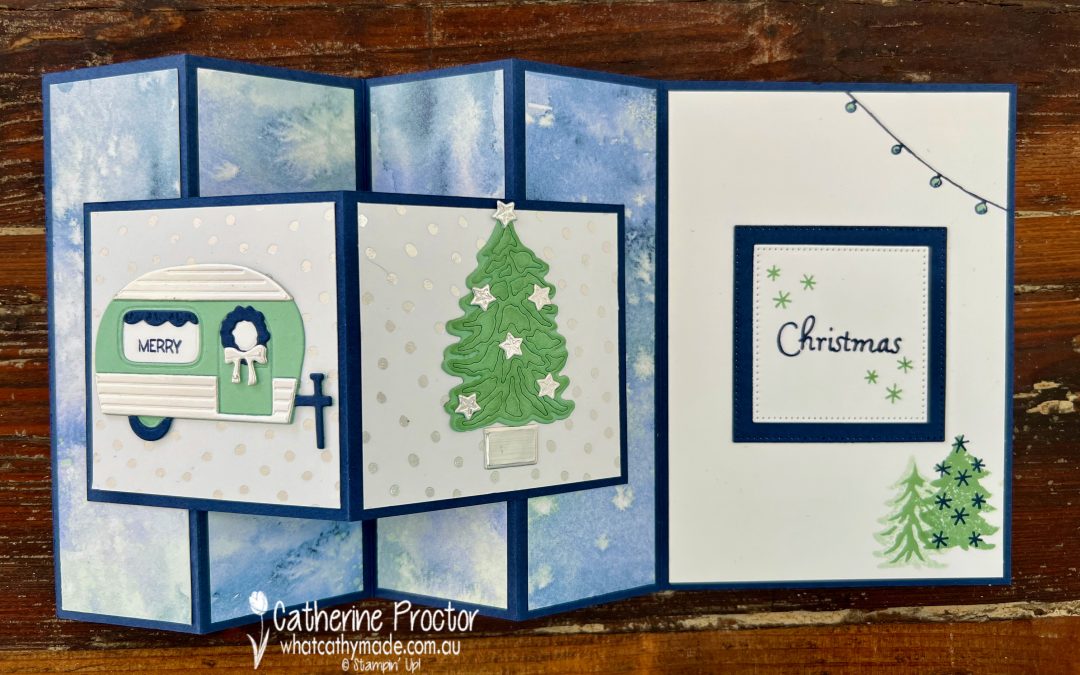
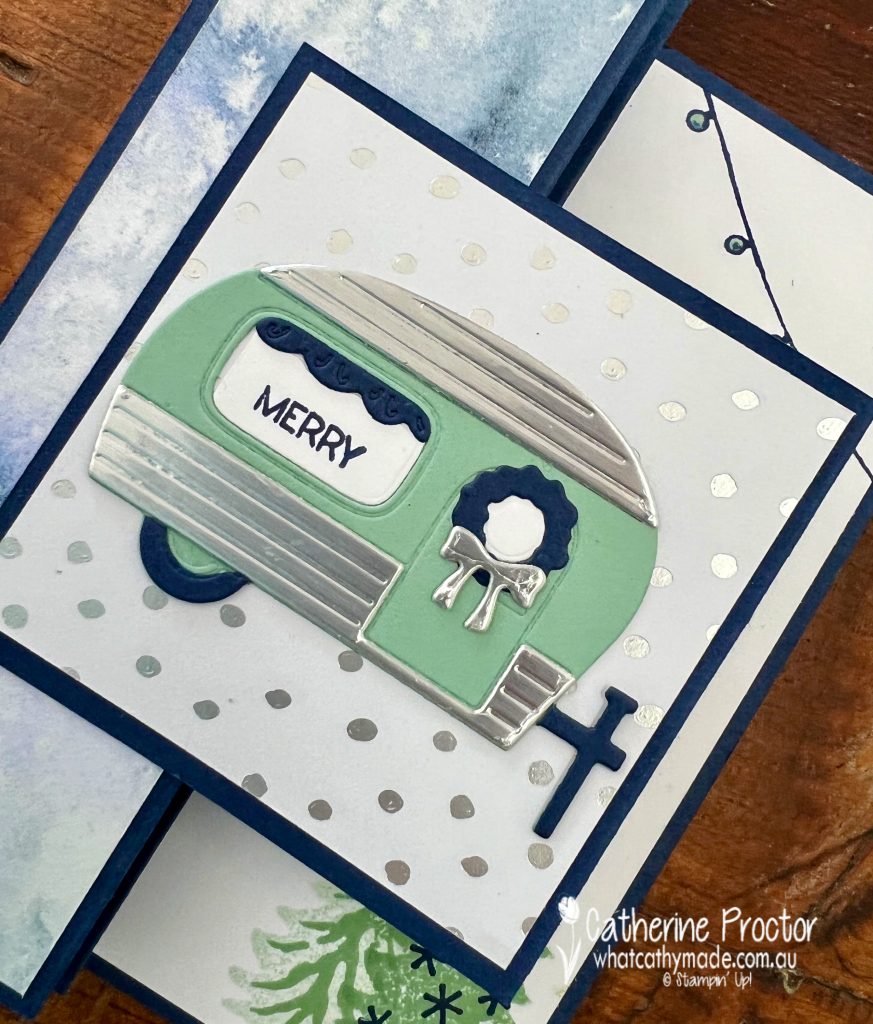
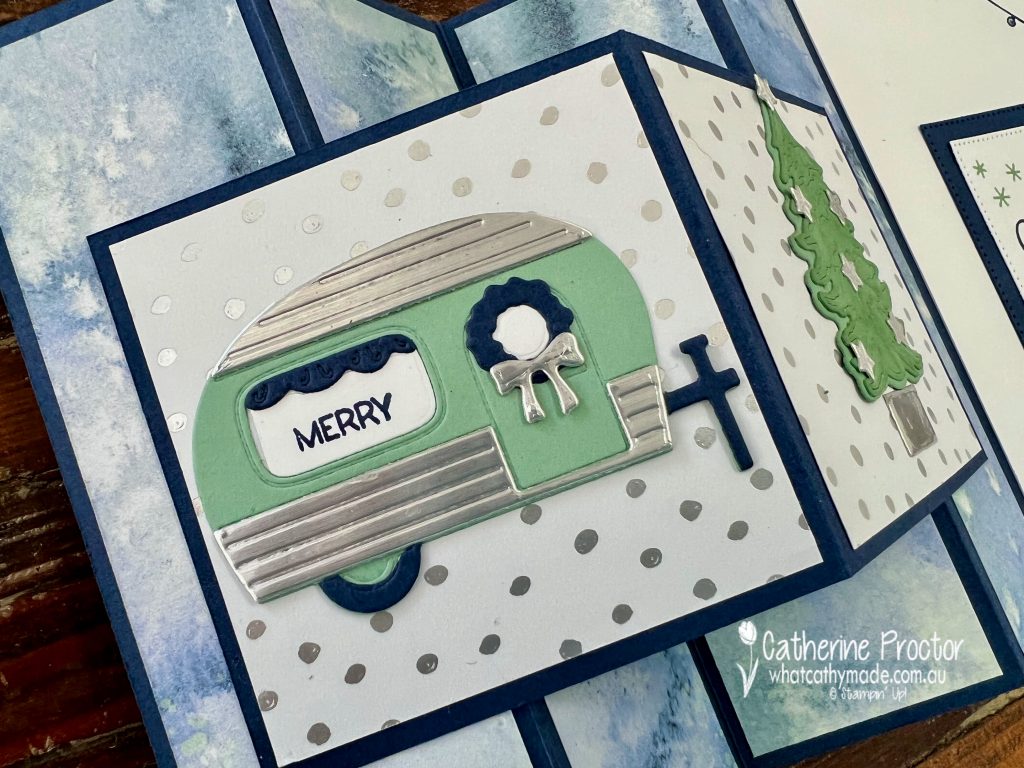
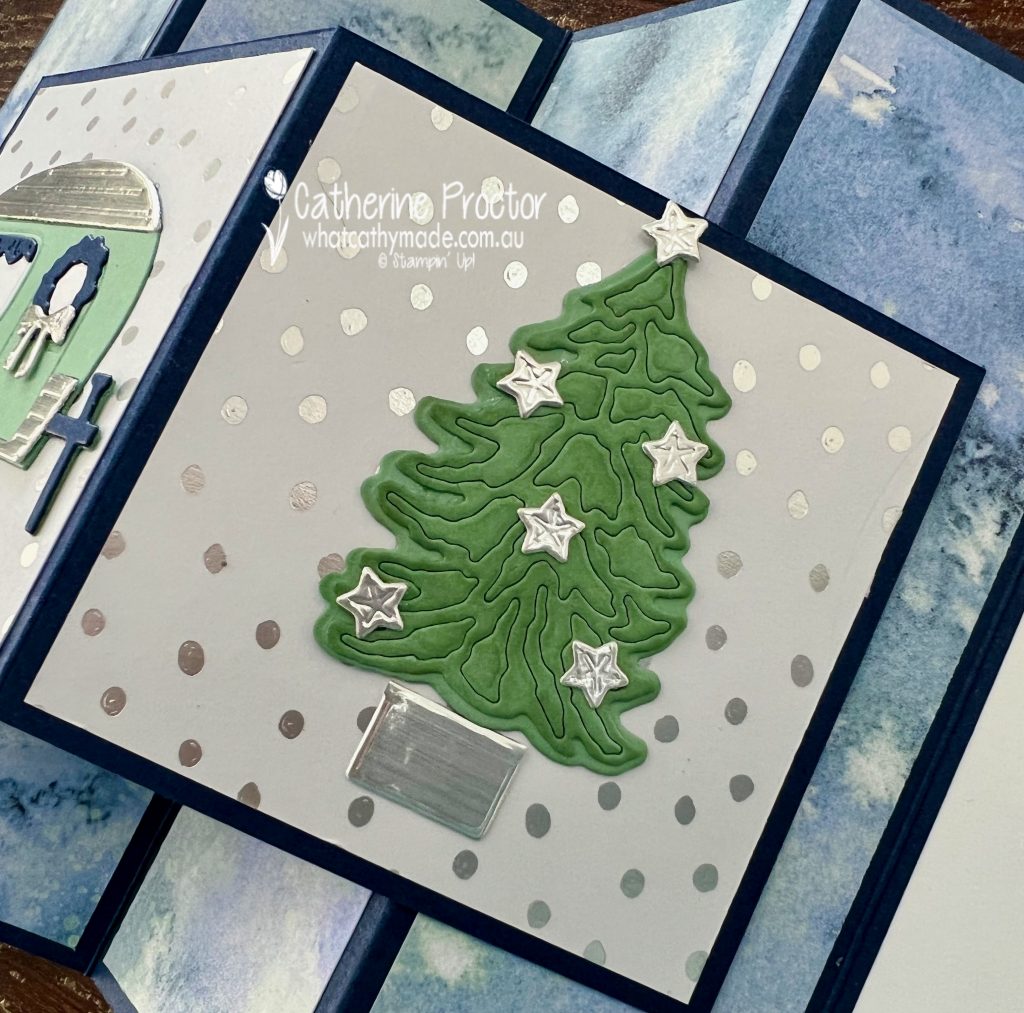
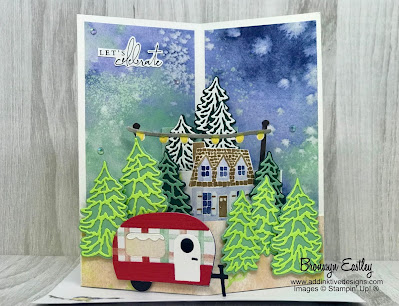
The front panel is decorated with the dotted Silver DSP, topped with a Mint Macaron, Silver foil and Night of Navy caravan, die cut using the Tree Lot dies.
In the caravan window I stamped the word “Merry” from the “Be Cool – Be Chill – Be Merry” sentiment from the Penguin Place stamp set. It was easy to ink up just the word “MERRY” using Night of Navy ink without any masking required as it is the last word in the sentiment.
The Middle panel of the accordian fold card has a Mint Macaron tree covered in Tree Lot dies silver stars.
Did you notice the silver pot under the Christmas tree? This pot is the negative piece left over from die cutting the bottom section of the caravan.
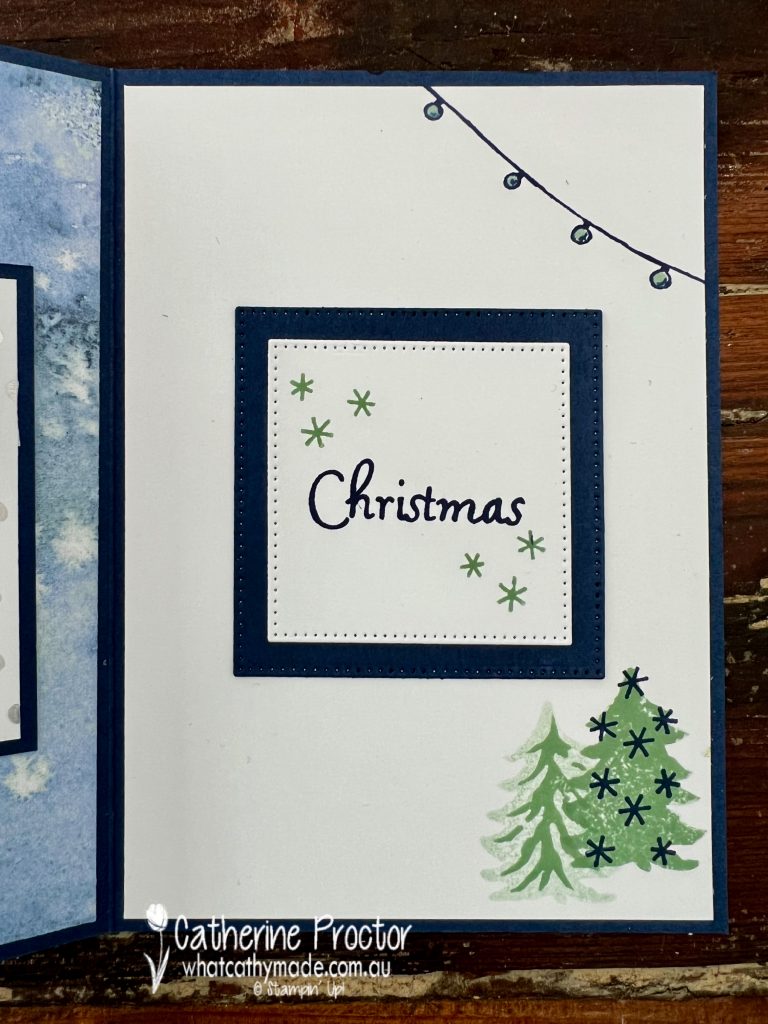
The “Christmas” sentiment on the inside of the card was stamped using the “Merry Christmas” sentiment from the Trees For Sale stamp set. The string of lights, stars and trees are all from this stamp set too.
Now it’s time to hop on over to our next participant, the lovely Rachel Woollard – I can’t wait to see what Rachel has made this week!
If at any time you find a broken link, you can find the complete list of all participants on Sharon’s blog. Sharon Davern is the host of our Heart of Christmas blog hop this year – thank you so much Sharon!!
Welcome to week sixteen of our Art With Heart 2022-23 Colour Creations blog hop! This is a weekly blog hop where we showcase the stunning range of Stampin’ Up! colours in alphabetical order over 12 months and this week we are featuring Crushed Curry, a rich deep yellow in the regal family.
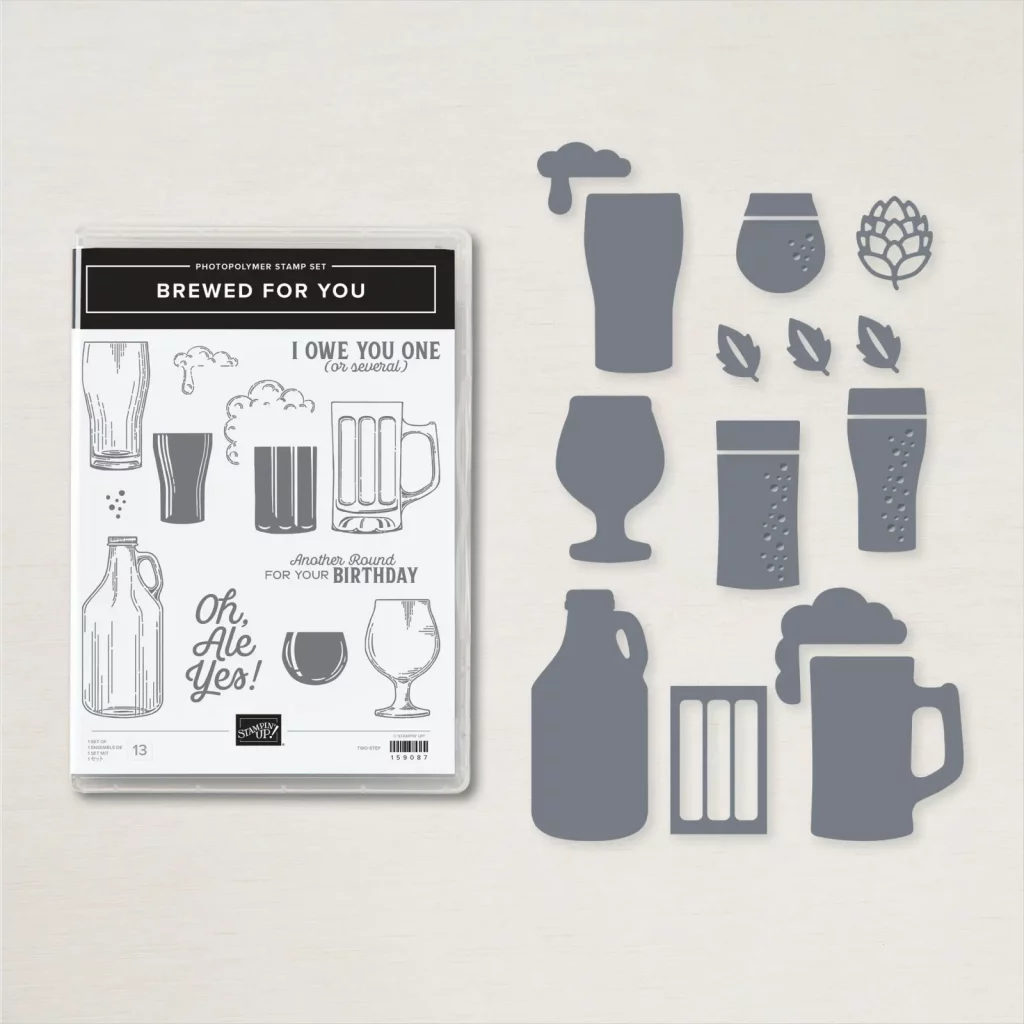
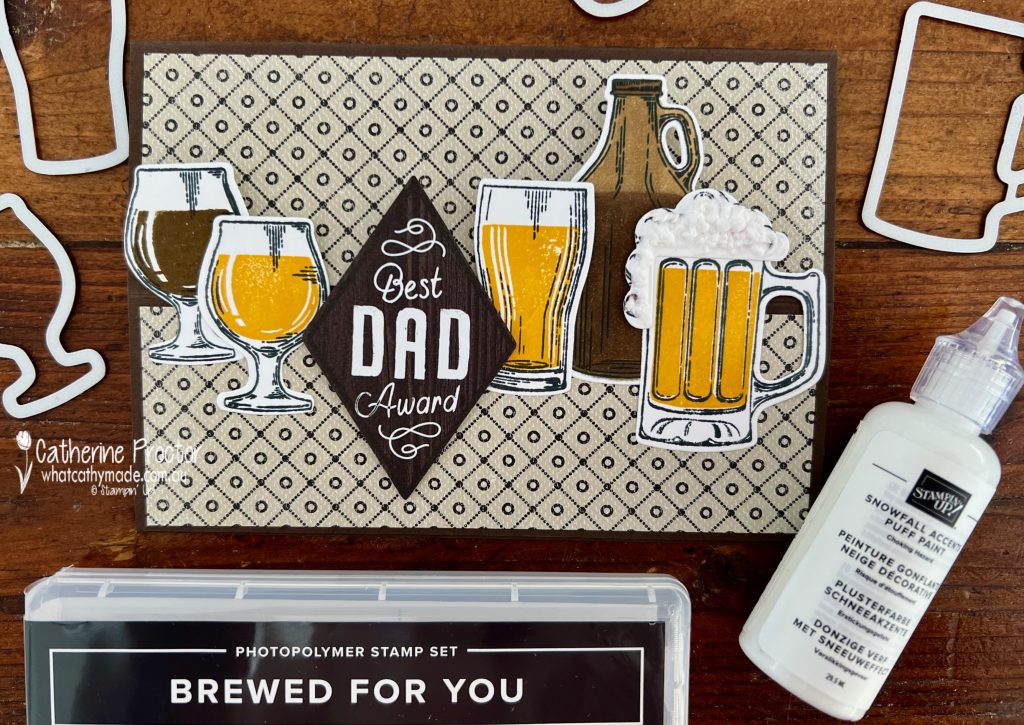
I’ve taken the opportunity this week to make a Father’s Day card for my husband using the Brewed For You bundle and elements from the He’s the Man Suite.
The Brewed For You bundle was a must have purchase for me as my husband and both my sons are quite obsessed with and incredibly knowledgeable about craft beer!
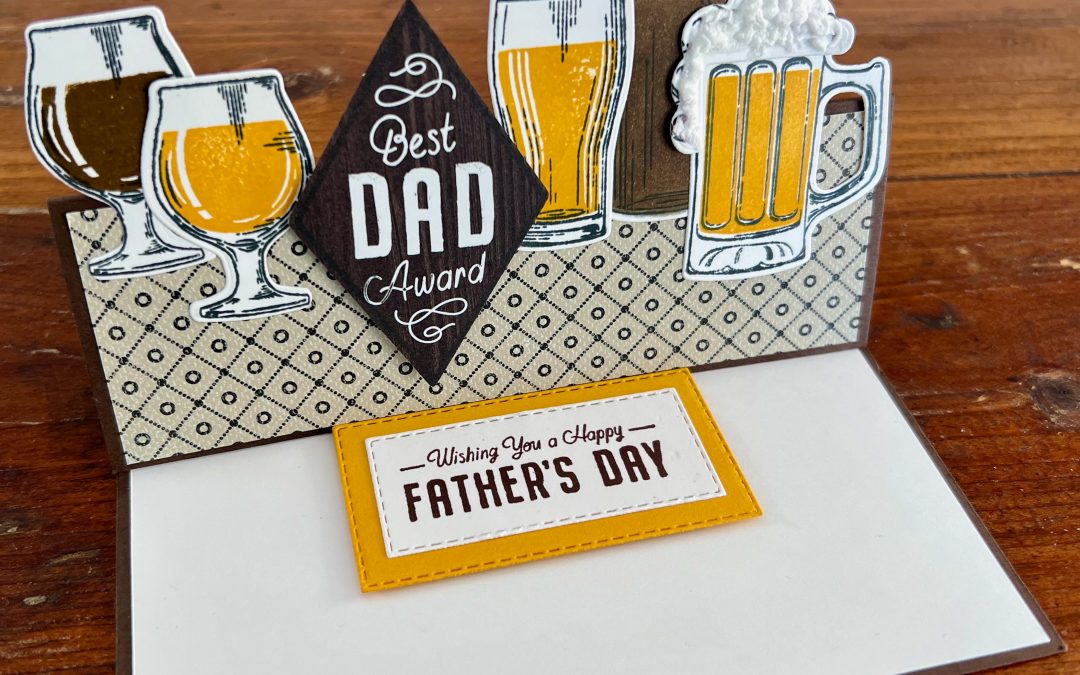
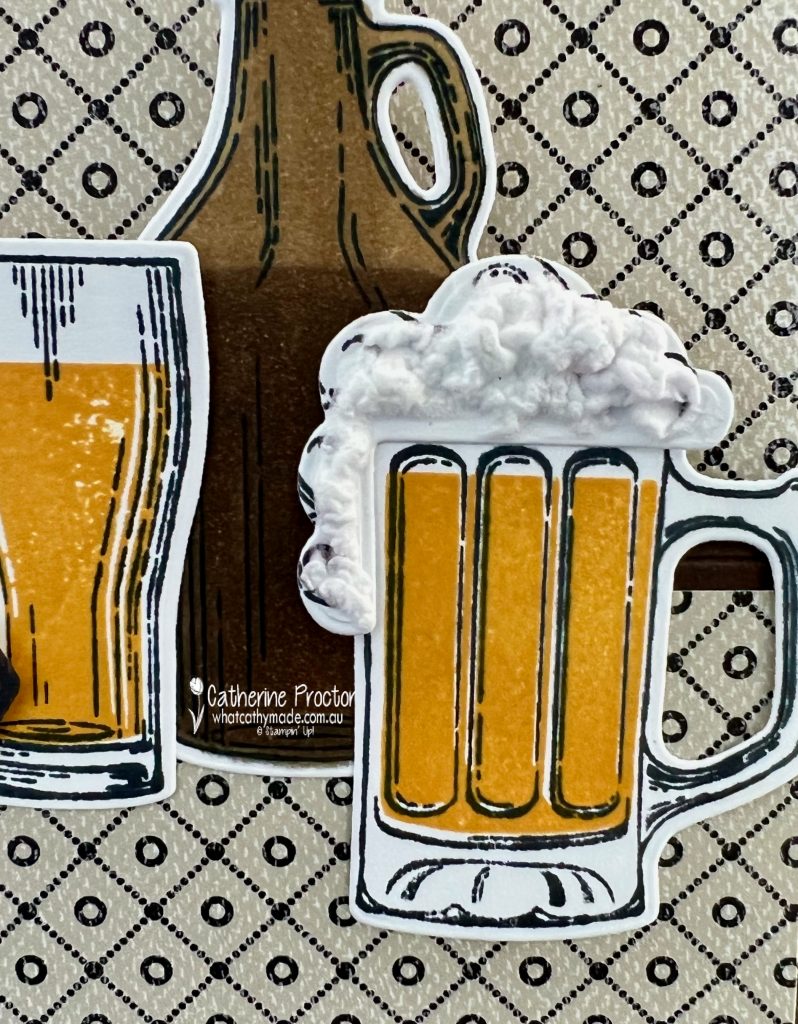
Crushed Curry is such a bold yellow I’ve used it sparingly to colour the IPA beers using the two step stamps included in the Brewed For You stamp set, as well as to layer under the inside sentiment.
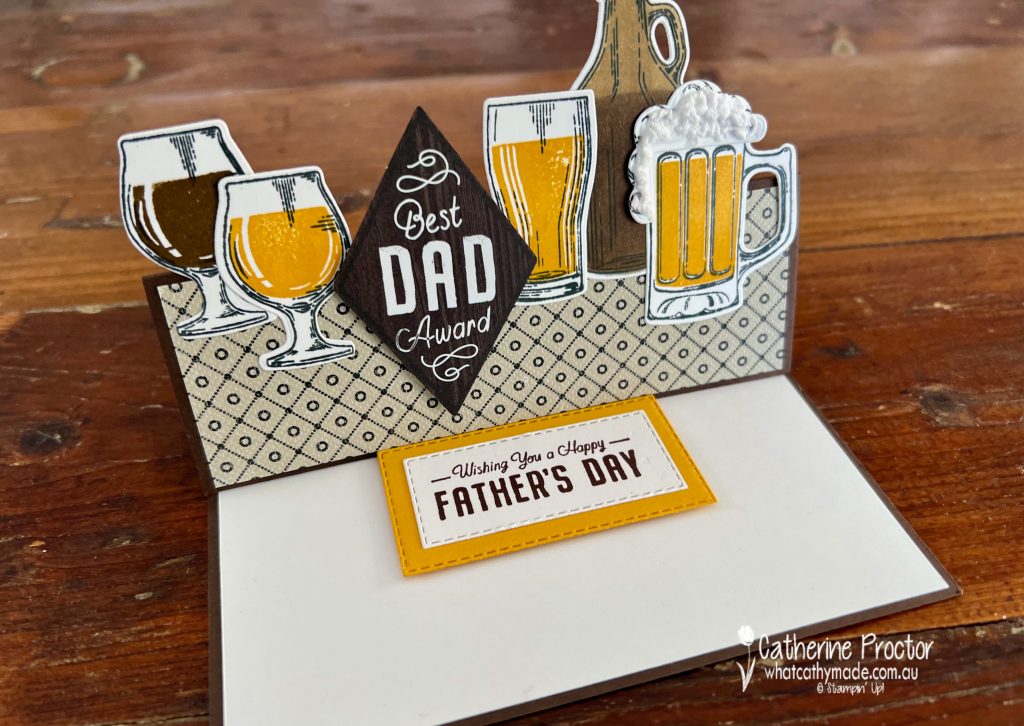
The “growler” contains a stout (some of it already poured into the glass on the far left), stamped and coloured with Soft Suede ink and Stampin’ Blends.
A full width easel card allows me to include as many beers as possible – this type of fancy fold is seriously one of the easiest but most effective fancy folds you can make!
Here’s what it looks like when the card is closed. At first glance it appears to be just a normal card.
But when you open it up it looks like this!
And this is what it looks like from the side. This is a great card for display.
Full Width Easel Card Instructions
Make a card base of any size – today I’ve used half an A4 sheet of cardstock, folded in half
Measure the halfway point of the front of the card base and score across this halfway point
Fold this score line and then decorate the card inside and out with DSP and cardstock
To make the “easel” stand, use dimensionals to attach a sentiment to the middle of the inside of the card
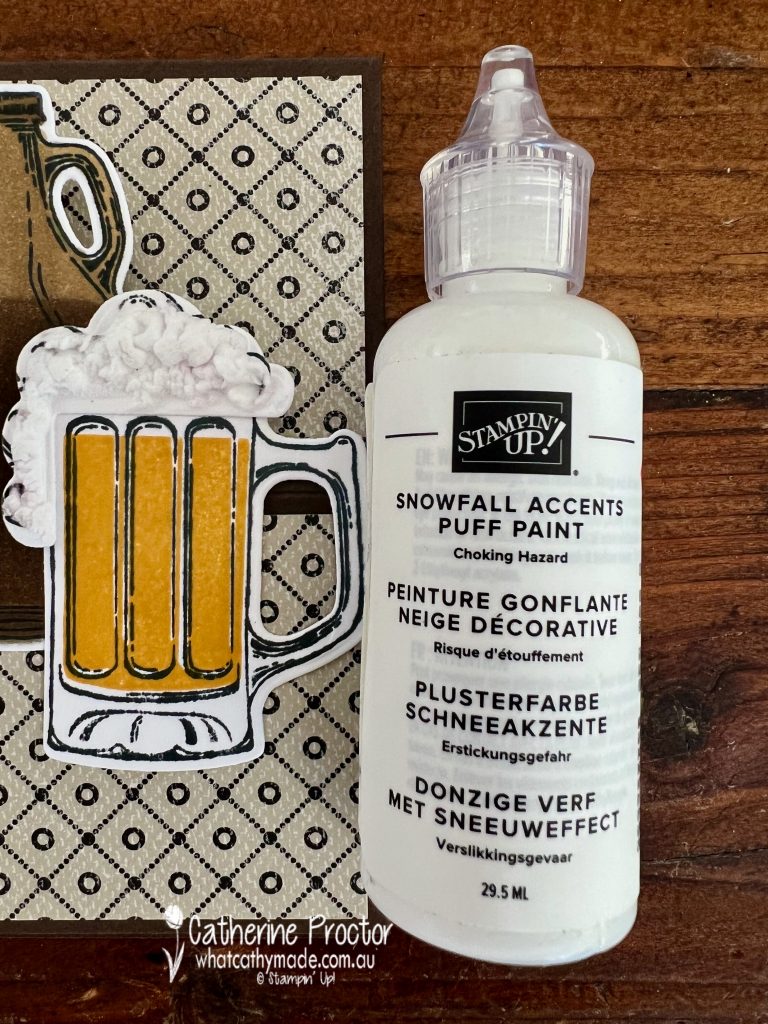
Creating Beer Froth
The froth on the beer is created using the Snowfall Accents puff paint. Make sure you use a heat tool to froth it up as it dries.
I only added froth to one beer glass because most craft beers don’t really have a “head” compared to the more mainstream beers.
I’ve used all of the different glass dies for the beers on this card as we have an entire shelf in the kitchen cupboard dedicated to different kinds of beer glasses! And yes, my wine fridge has also been turned into a beer fridge!
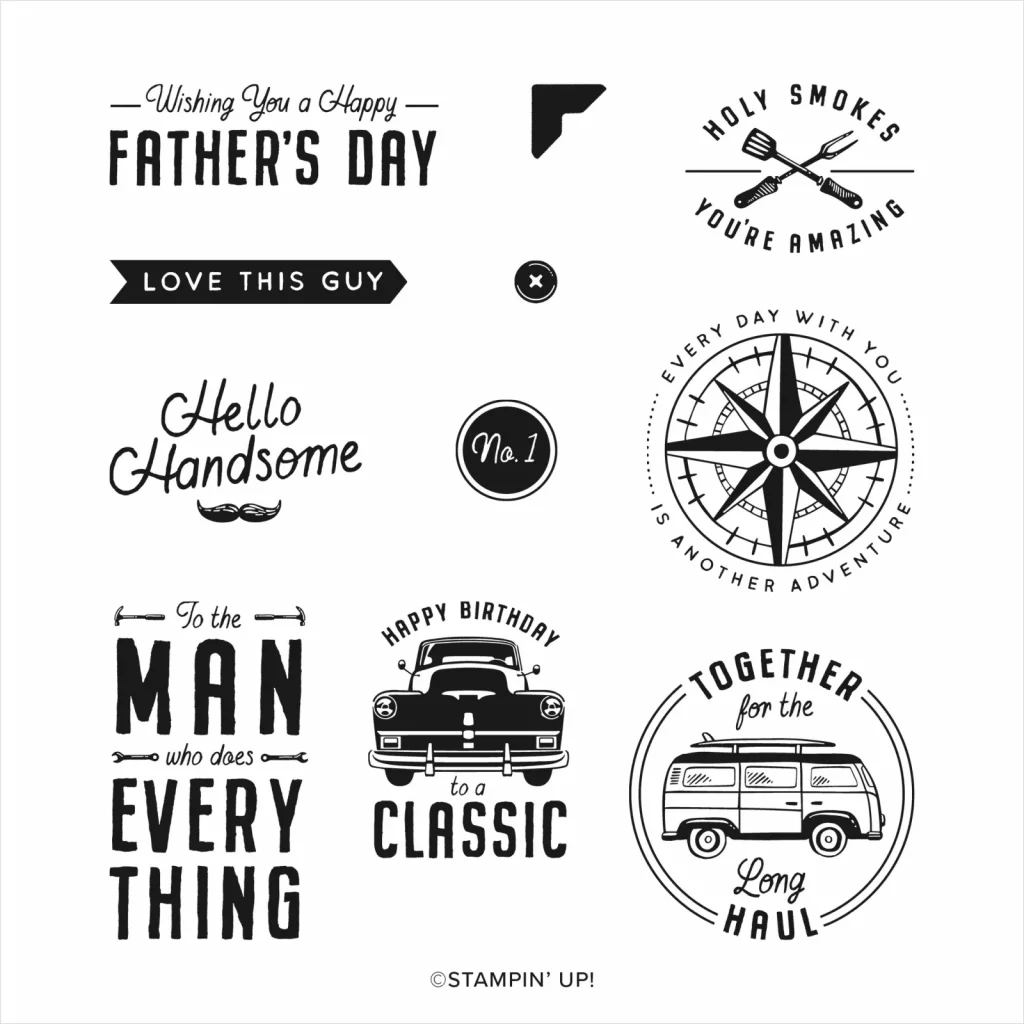
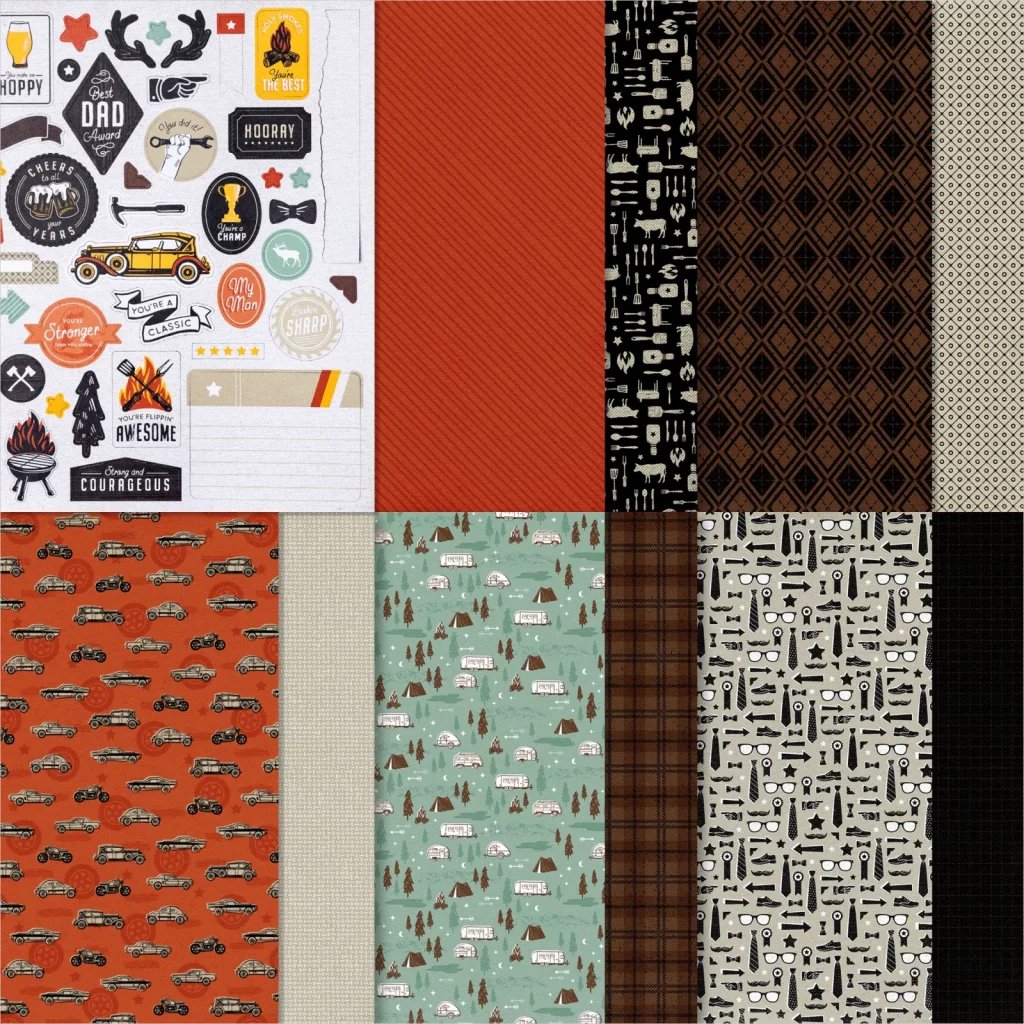
The sentiment on the front of the card is a die cut image from the He’s the Man DSP. I’ve also used a sheet of the He’s the Man DSP to decorate the front of the card – I love the vintage vibe of this DSP.
The sentiment inside that forms the easel mechanism is from the He’s All That Stamp Set, die cut using the Stitched Rectangles dies and mounted onto the card using dimensionals.
I’ve just added a shadow to the bottom of the beer glasses in this last photo, using the Ivory Stampin’ Blend. I think it really grounds the beer glasses onto the card.
Now it’s time to hop on over to our next participant, the lovely Ros Davidson – I can’t wait to see what Ros has made this week!
If at any time you find a broken link, you can find the complete list of all participants below.
Welcome to Bronwyn’s fifth Birthday Blog hop! You might have come to my blog from Nikki Spencer.
We’re a group of stamping friends who are celebrating Bron’s 60th Birthday in 2022 with six blog hops, over six months, with six fun themes! Tonight we are sharing fancy folds, a style of cardamking which Bronwyn specialises in!
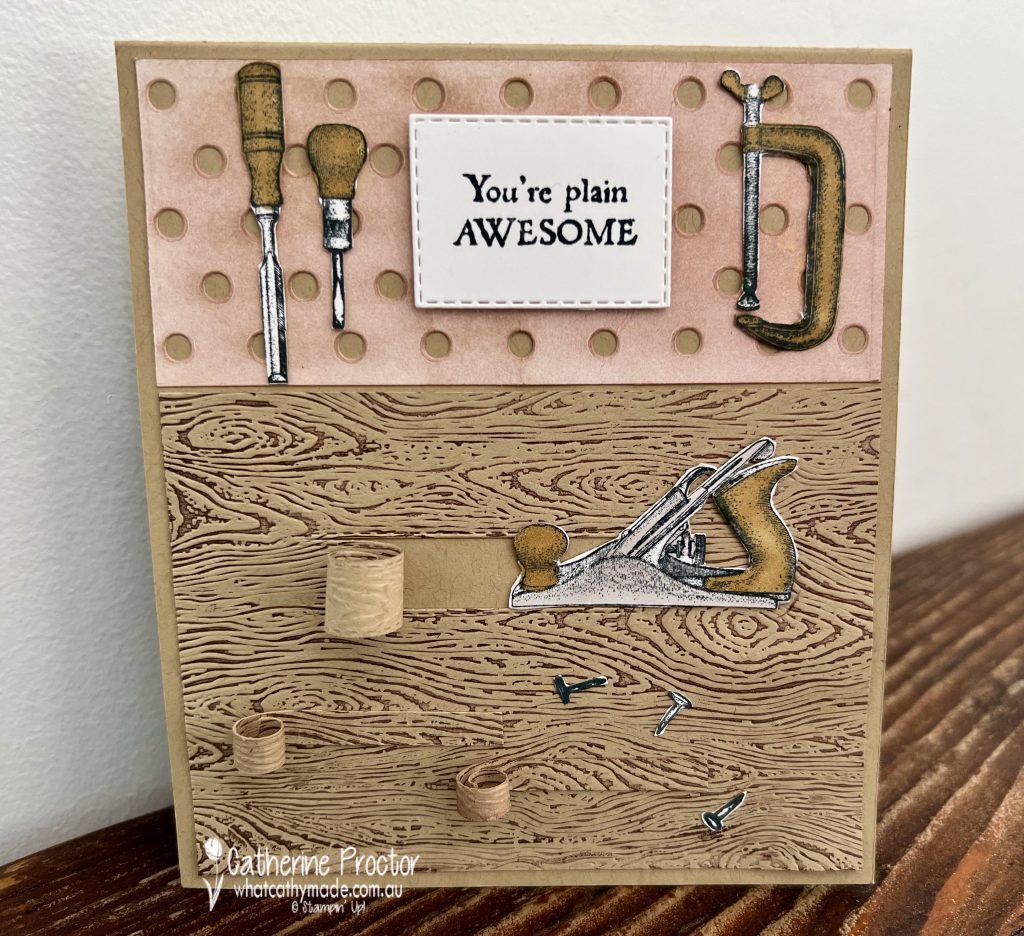
My card tonight is a very simple fancy fold, but it was just perfect for the stamp set I am using – the “Vintage Tools” stamp set. I made this card for my father’s birthday last month.
My dad is an incredible woodworker and craftsman and when my parents downsized homes I was lucky enough to inherit some of his vintage tools – many of these tools originally belonged to my grandfather.
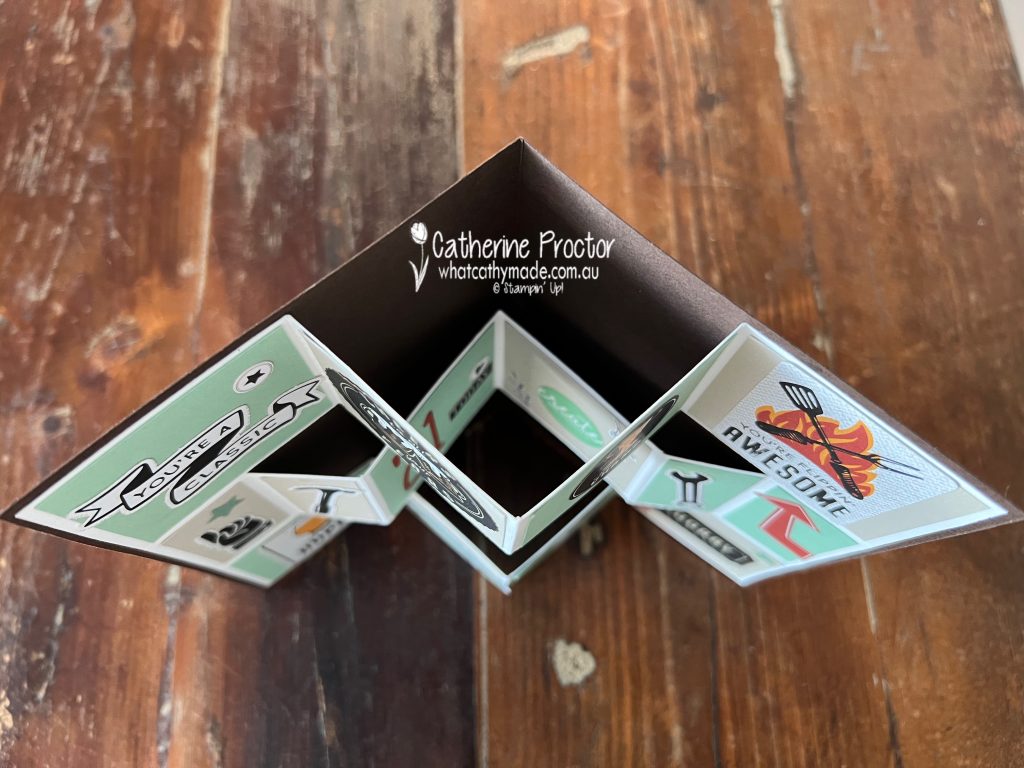
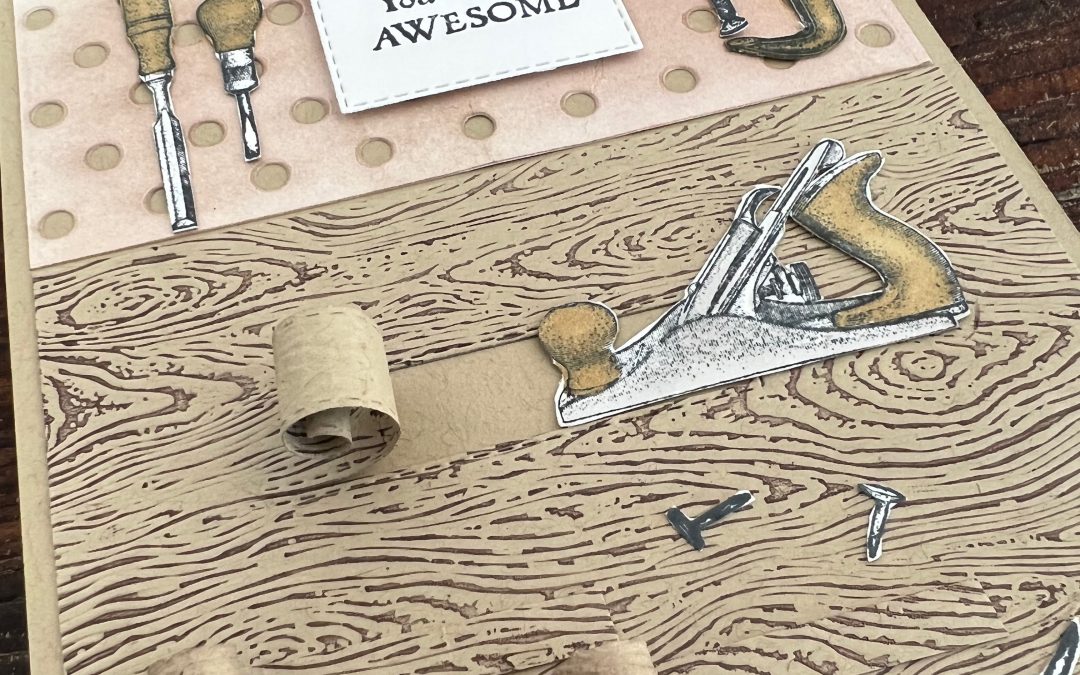
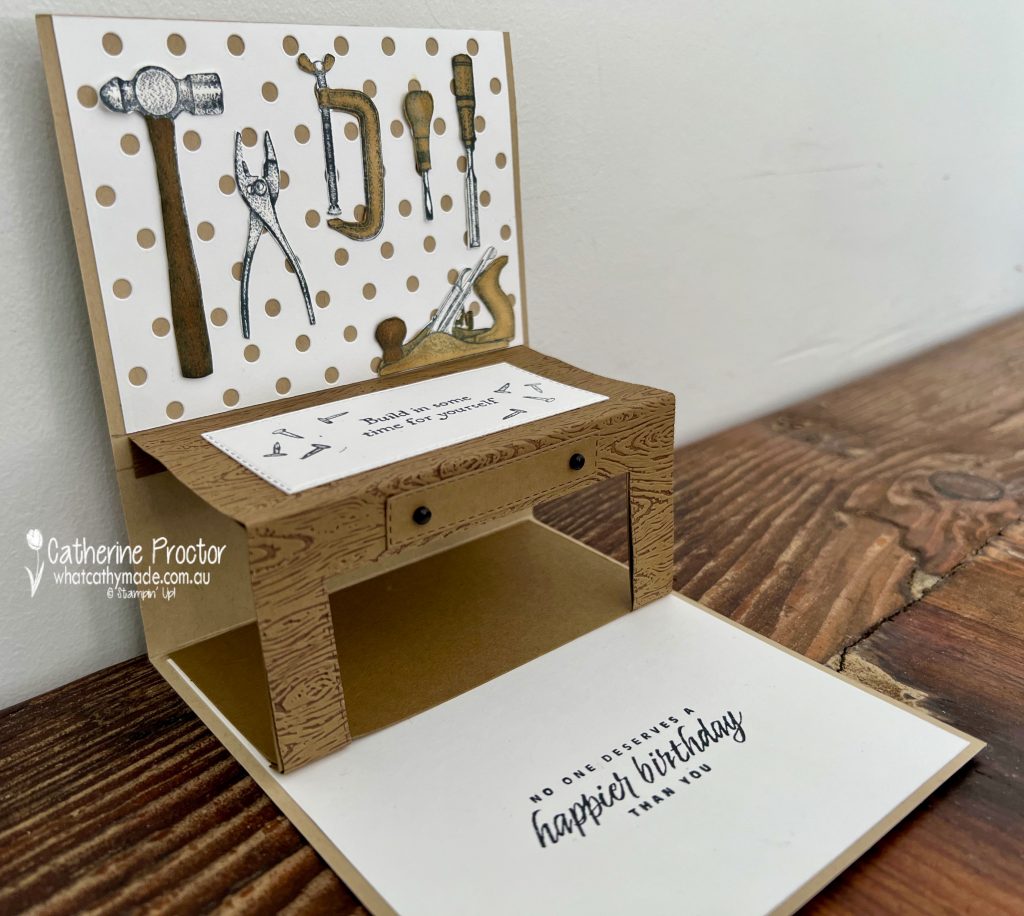
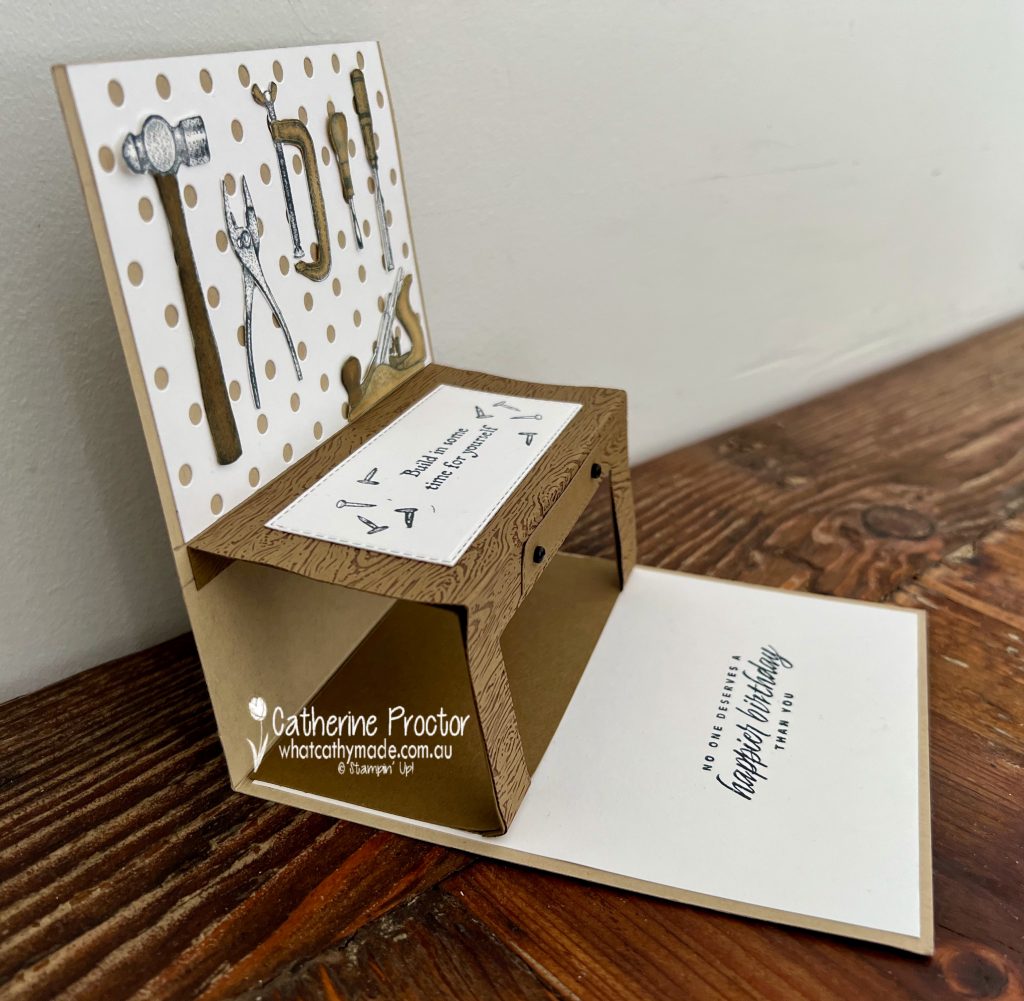
So you can see why I decided to make a pop-up tool bench.
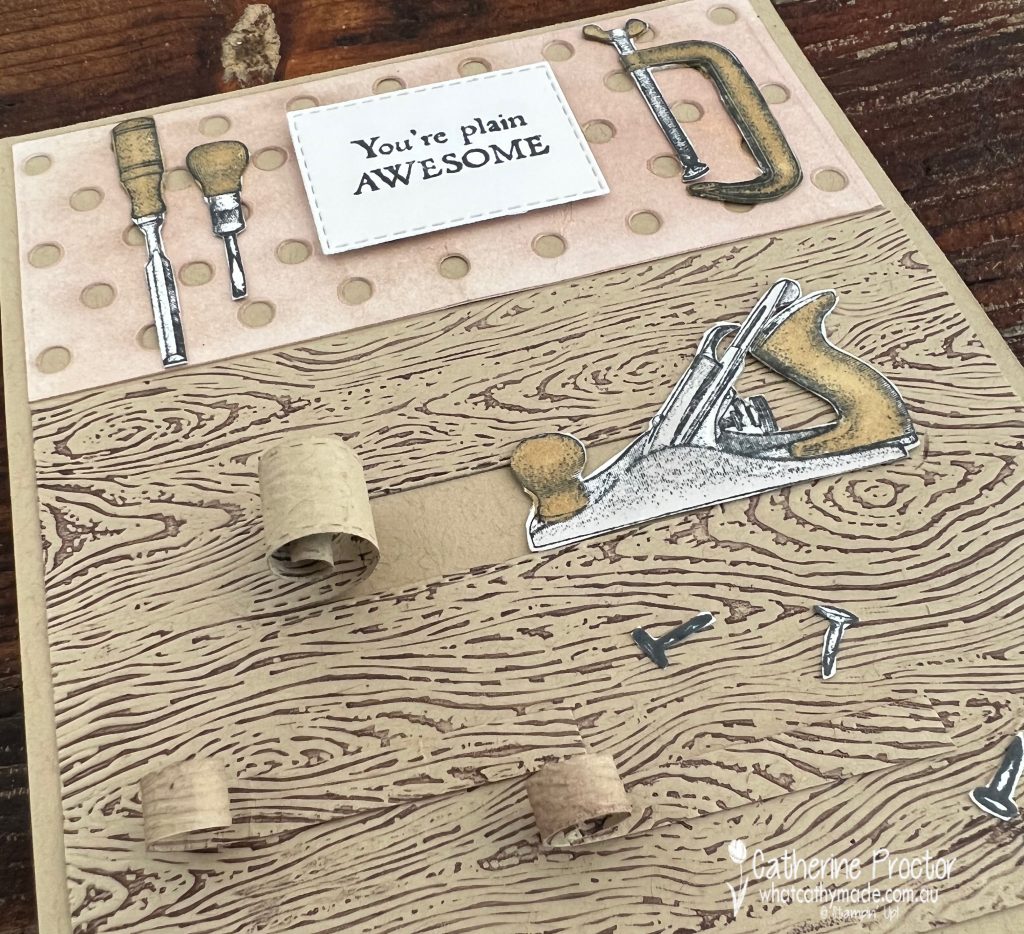
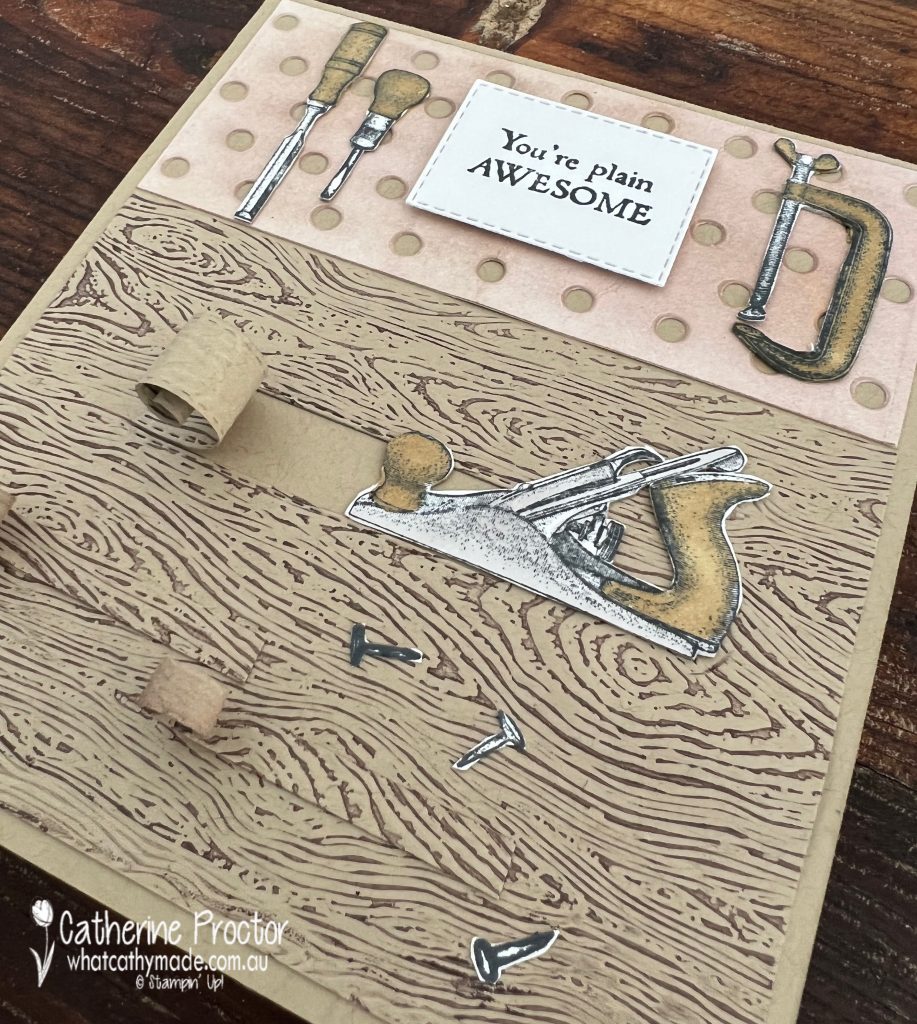
I got the idea for the paper shavings on the front of the card from an overseas Stampin ‘Up Demonstrator called Robin Broome, whose husband is a professional woodworker.
These paper curls are so cool and I love how they make the front of the card 3D too!
The textured wood on the front of the card is created by wiping the top inside section of the Timber Embossing Folder with Early Espresso ink before using it to emboss Crumb Cake cardstock. Once the cardstock is embossed, run the embossing folder under water to clean.
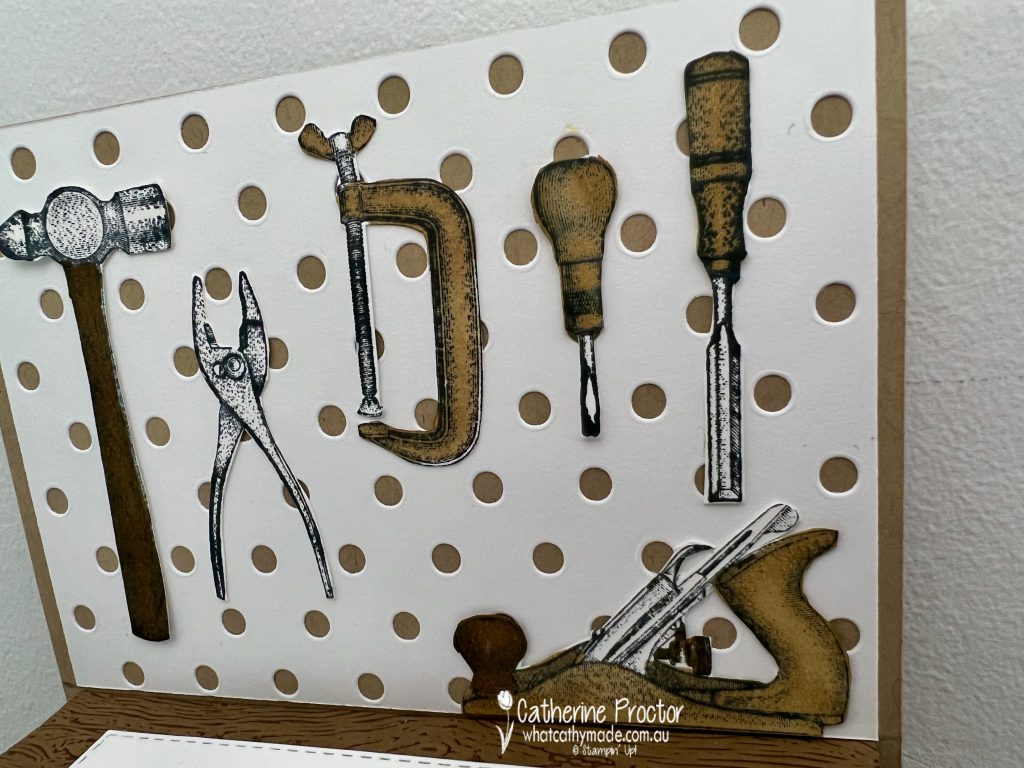
The pegboard is created using the Dots & Spots Die, aged with some Soft Suede ink blended onto the Basic White card stock with a blending brush.
All of the tools, both inside and out, have been coloured using Soft Suede Stampin’ Blends and then fussy cut with paper snips.
To reinforce the legs of the tool bench I added an extra strip of cardstock under the legs.
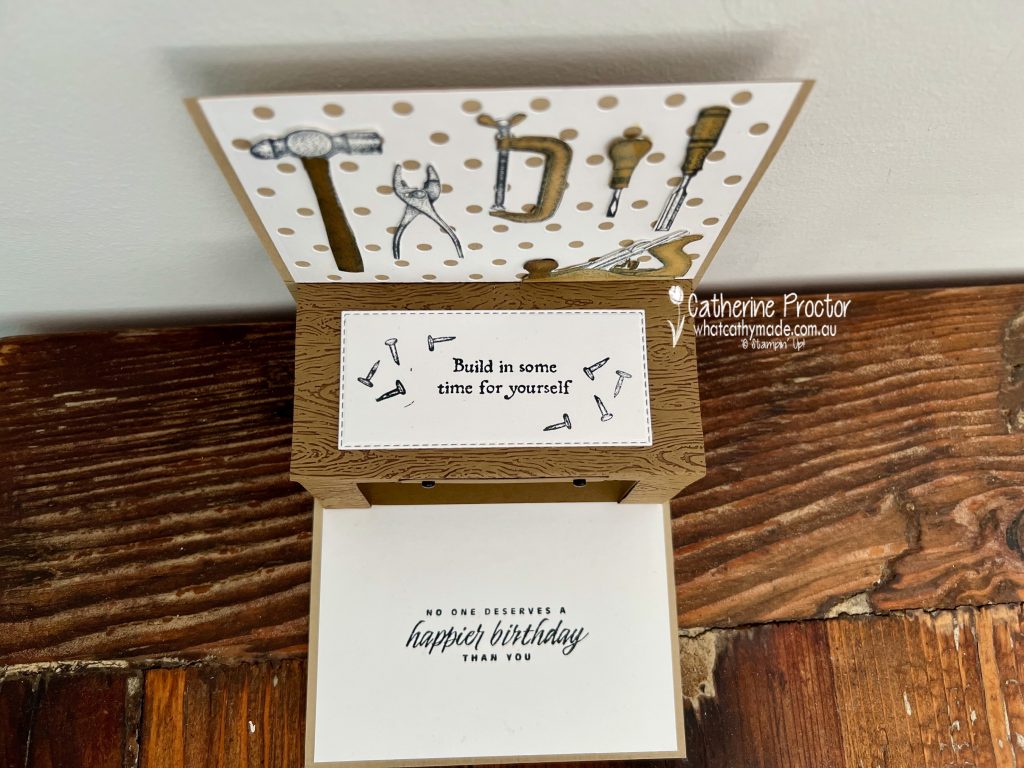
The tool bench drawer is die cut with the Stitched Rectangle die and the handles are Matte Black dots.
Here’s what it looks like from above when popped up!
I love creating very personalised cards for my family and friends.
Next up on Bronwyn’s Birthday Blog hop is my friend Andrea Sargent. I can’t wait to see what Andrea has created today! If you get lost or a link is broken, the birthday girl, Bronwyn, has a list of all the participants on her blog.
Welcome to Bronwyn’s fourth Birthday Blog hop! You should have come to me from Chantell Randall.
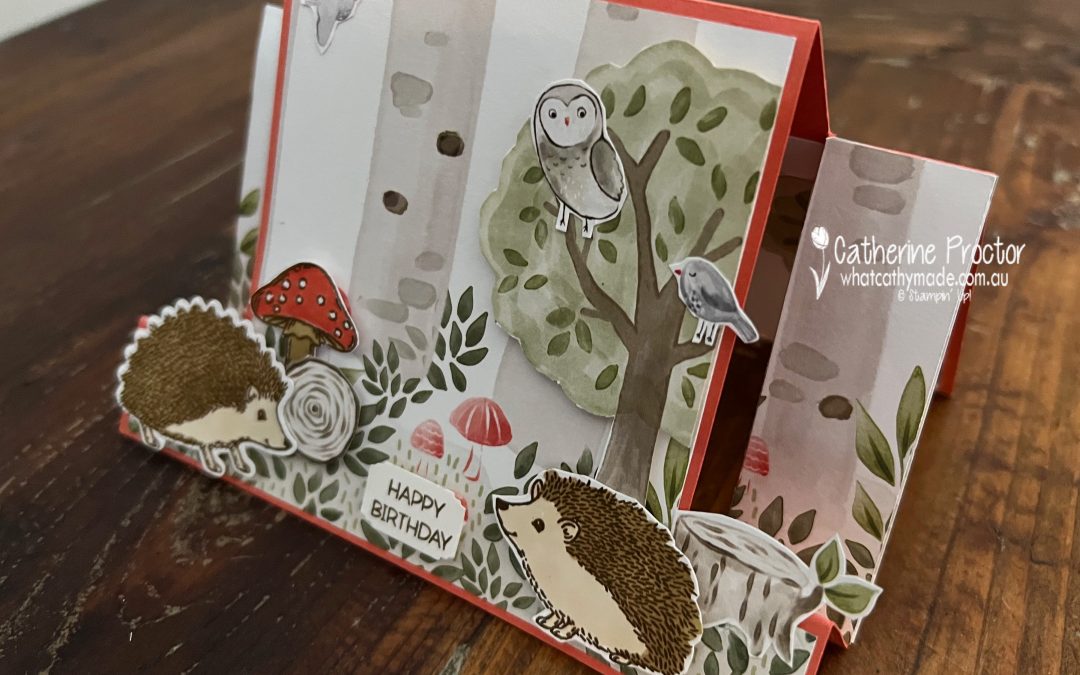
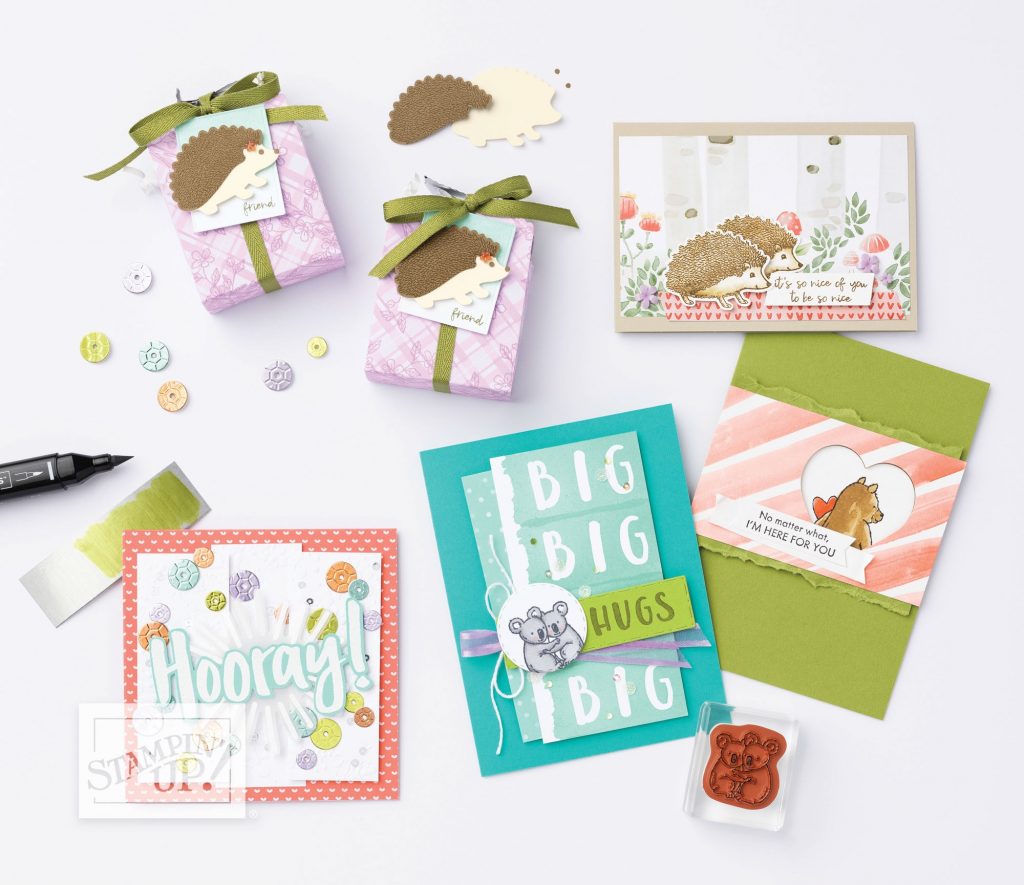
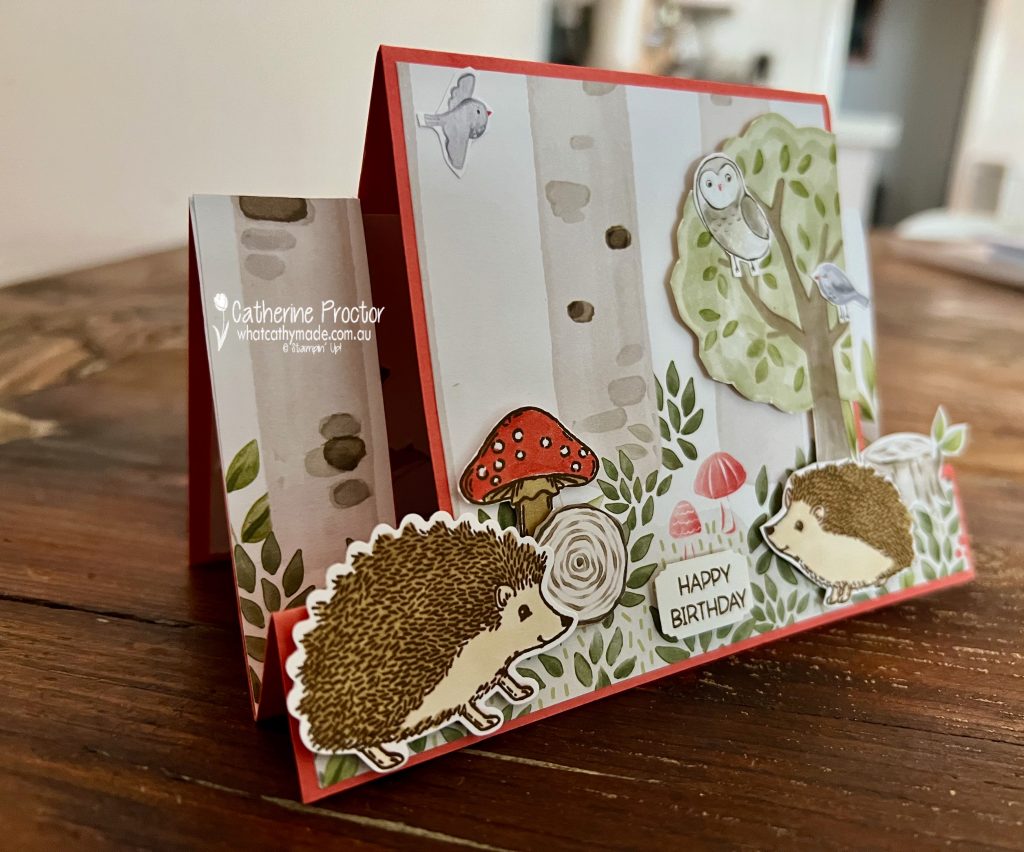
We’re a group of stamping friends who are celebrating Bron’s 60th Birthday in 2022 with six blog hops, over six months, with six fun themes! Tonight we are CASEing the Catty from a page in the sixties (i.e. any card from pages 60-69 in the Stampin’ Up! Annual Catalogue 2022-23). I’ve decided to CASE the hedgehog card on page 61 – top right in the photo below.
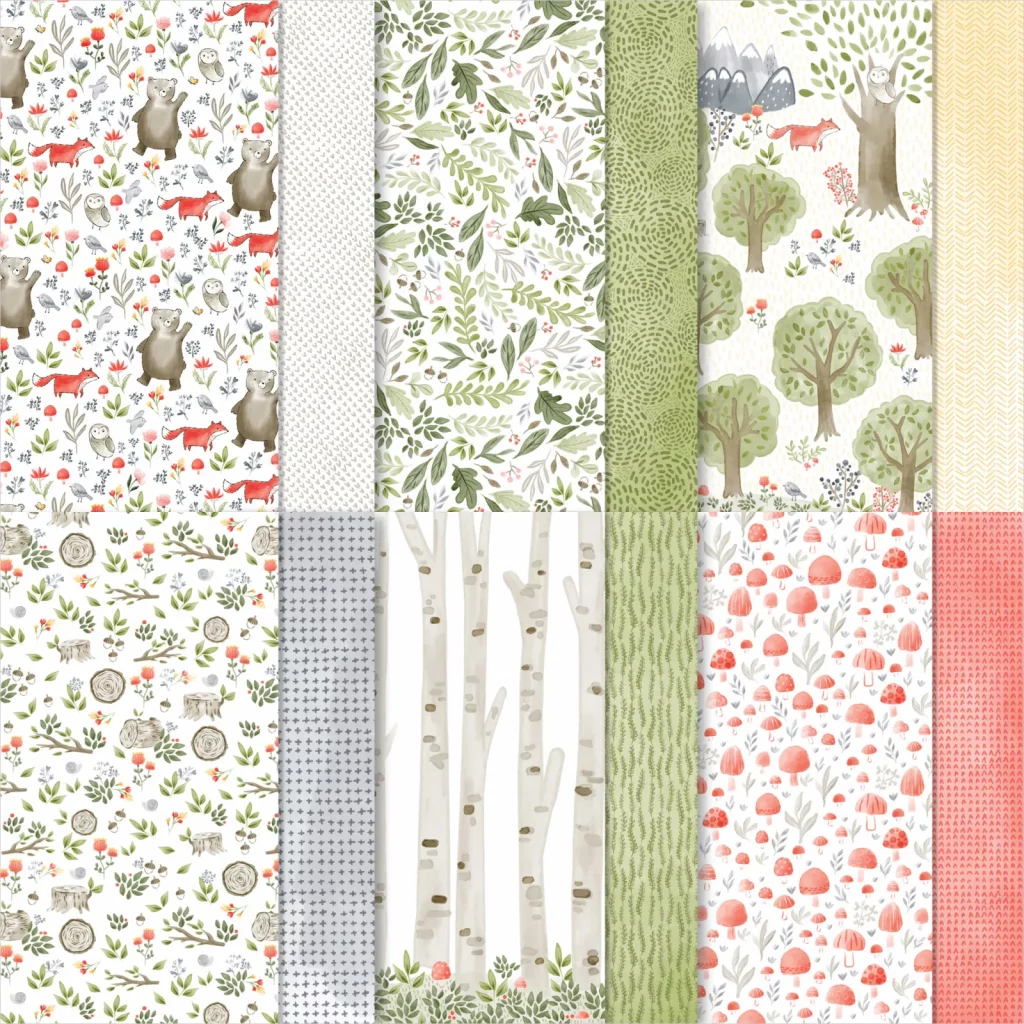
I loved the way this card combined the Happy Forest Friends DSP with the gorgeous Happy Hedgehogs stamp set. The tree DSP works really well with the hedgehogs and makes them look like they are in the woods.
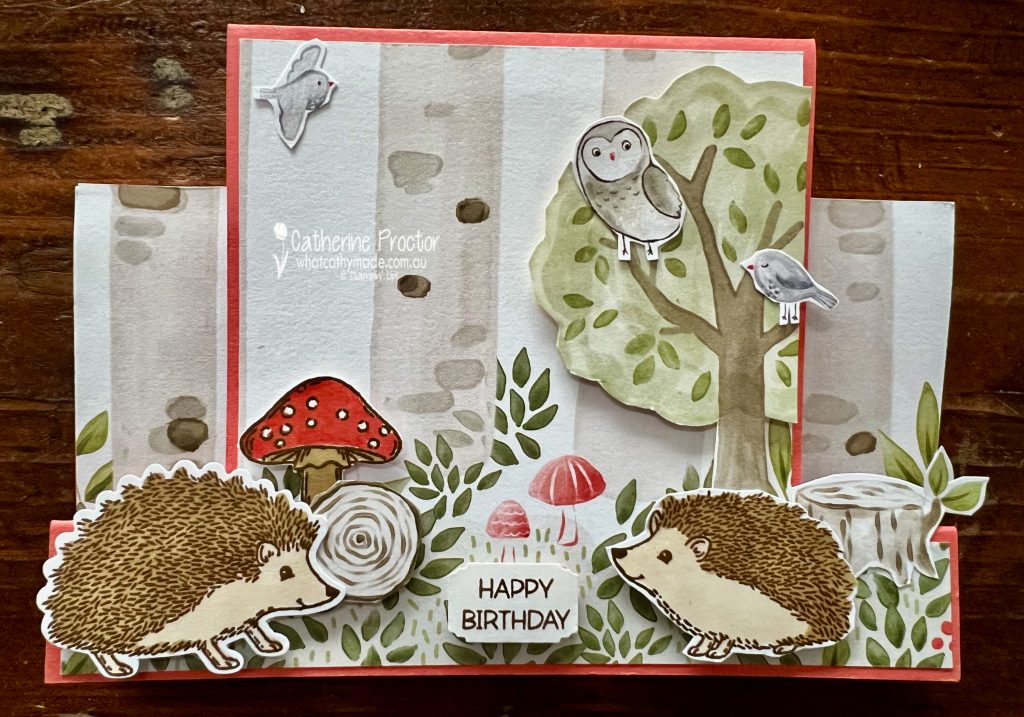
I’ve made my card 3D by making a fancy fold that I found on YouTube created by an overseas Stampin’ Up! demonstrator, but I’m not sure what this fancy fold is called? It was really fun to make and I altered the measurements to fit our Australian A4 cardstock.
Here’s what it looks like laying flat.
A lot of the elements on this card are images fussy cut from various DSP designs in the Happy Forest Friends DSP. The colour scheme of Calypso Coral and Soft Suede that I used to stamp and colour the hedgehogs and the large mushroom are inspired by the DSP.
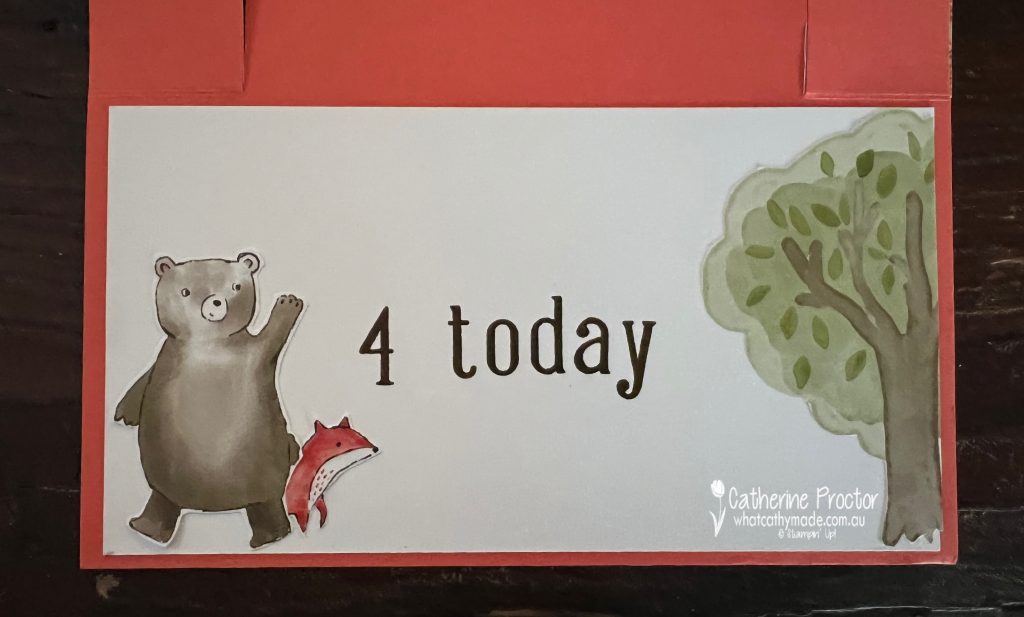
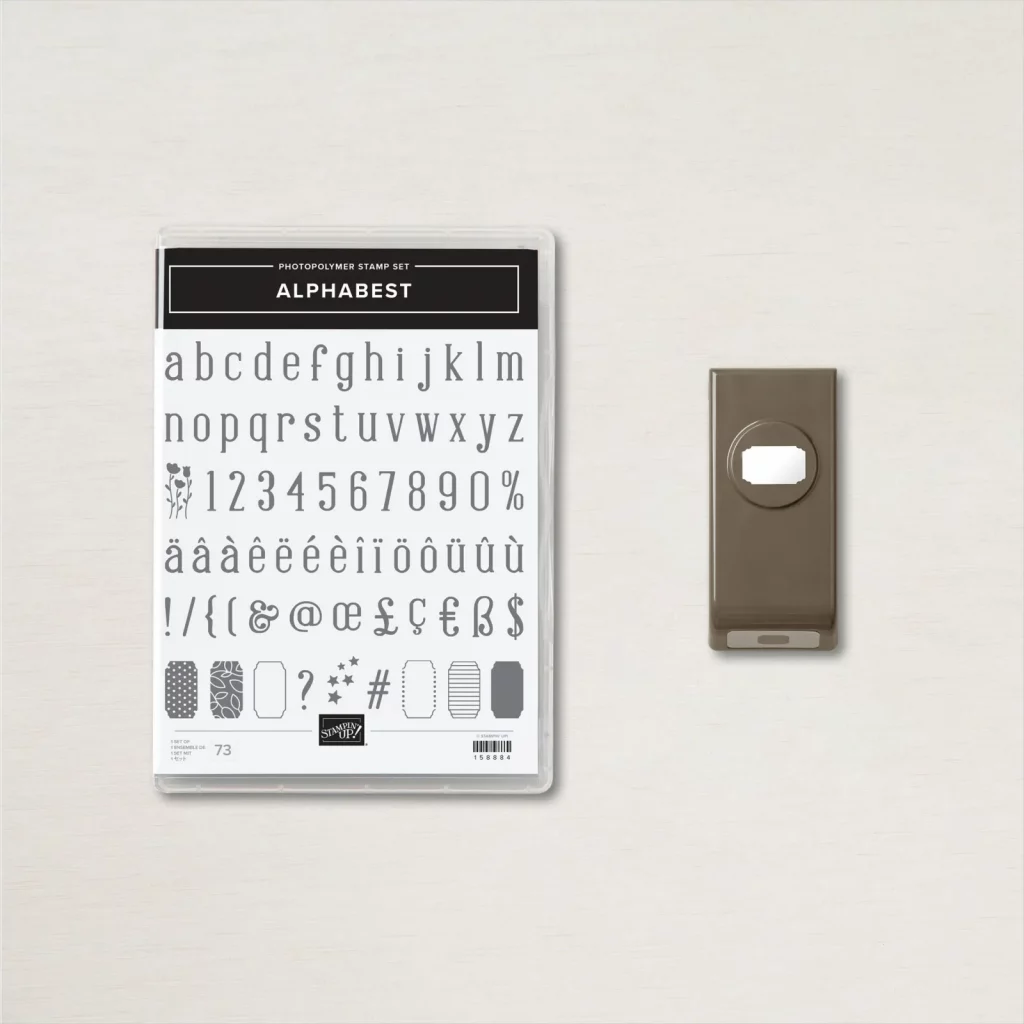
My youngest niece just turned 4 last week so I made this card for her birthday, using the Alphabest stamp set and more fussy cut images to personalise the inside of the card.
The Best Label punch (part of the Alphabest bundle) was the perfect size to punch out the “Happy Birthday” sentiment on the front of the card from the Penguin Place stamp set.
Next up on Bronwyn’s Birthday Blog hop is Vicki Arrowsmith. I can’t wait to see what Vicki has created today!
I’ll be back tomorrow with the Heart of Christmas blog hop and then again on Wednesday with the AWH Colour Creations blog hop, where we will be showcasing Blushing Bride.
Until then, wherever you are in the world, stay safe, stay calm … and keep on crafting xxx
Welcome to week 35 of our 2021-22 Colour Creations blog hop! Tonight we are showcasing Petal Pink from the Subtles family.
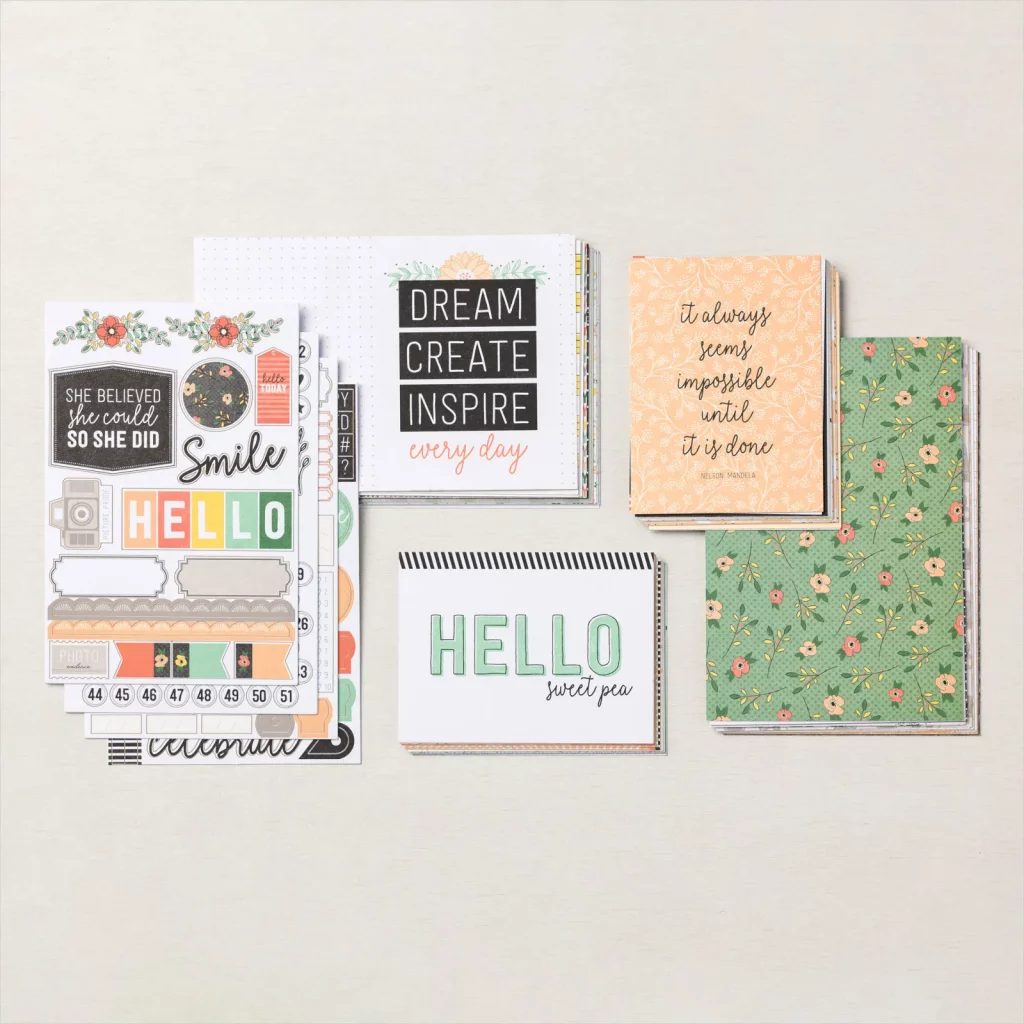
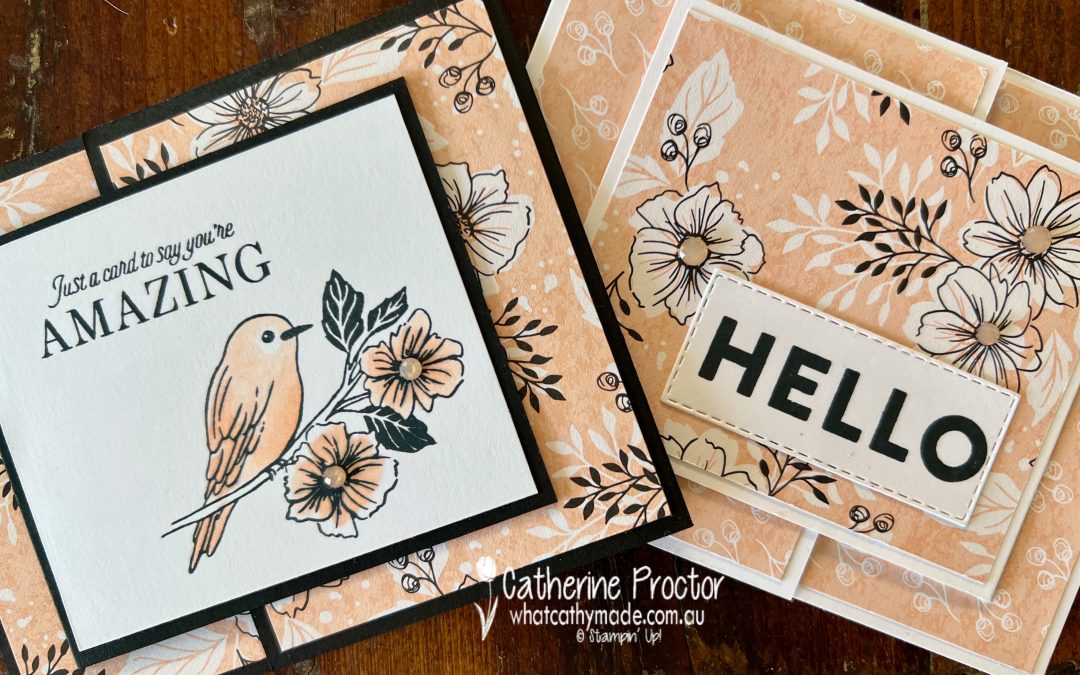
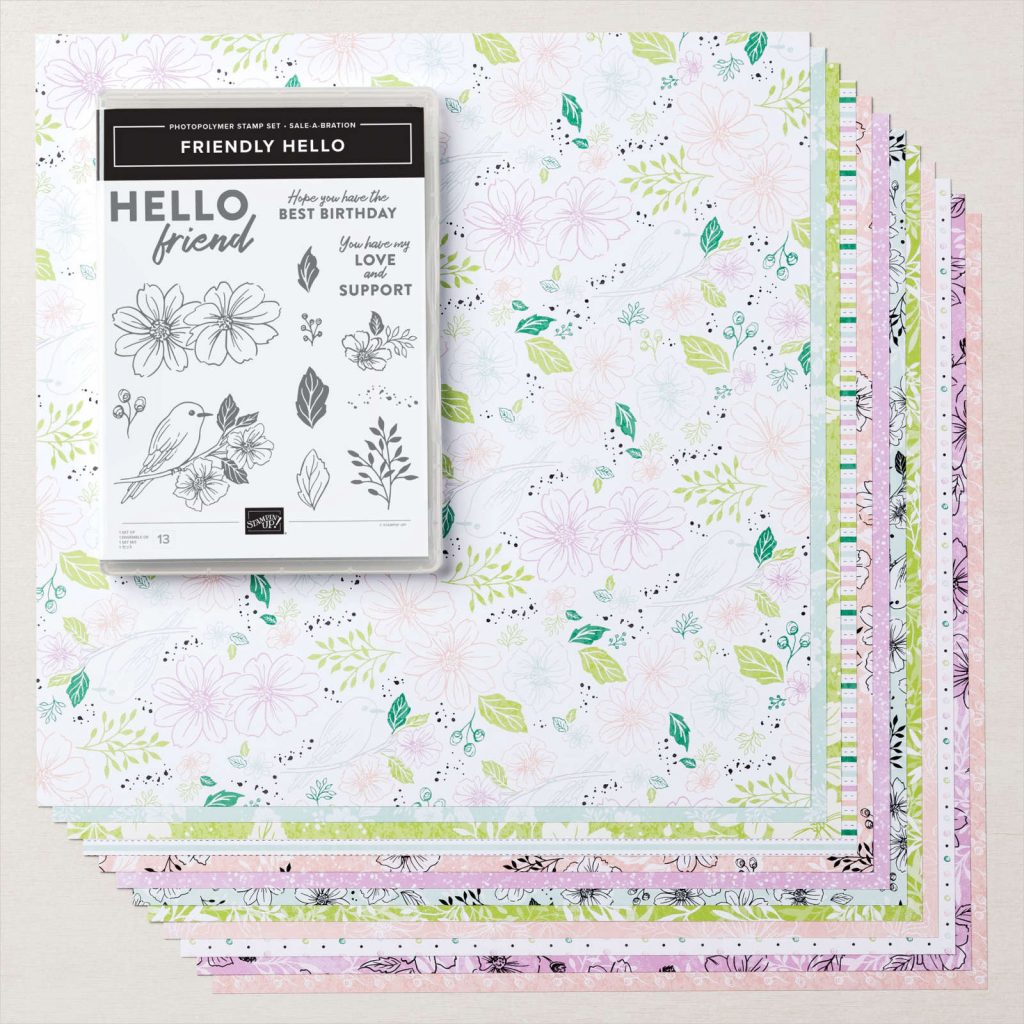
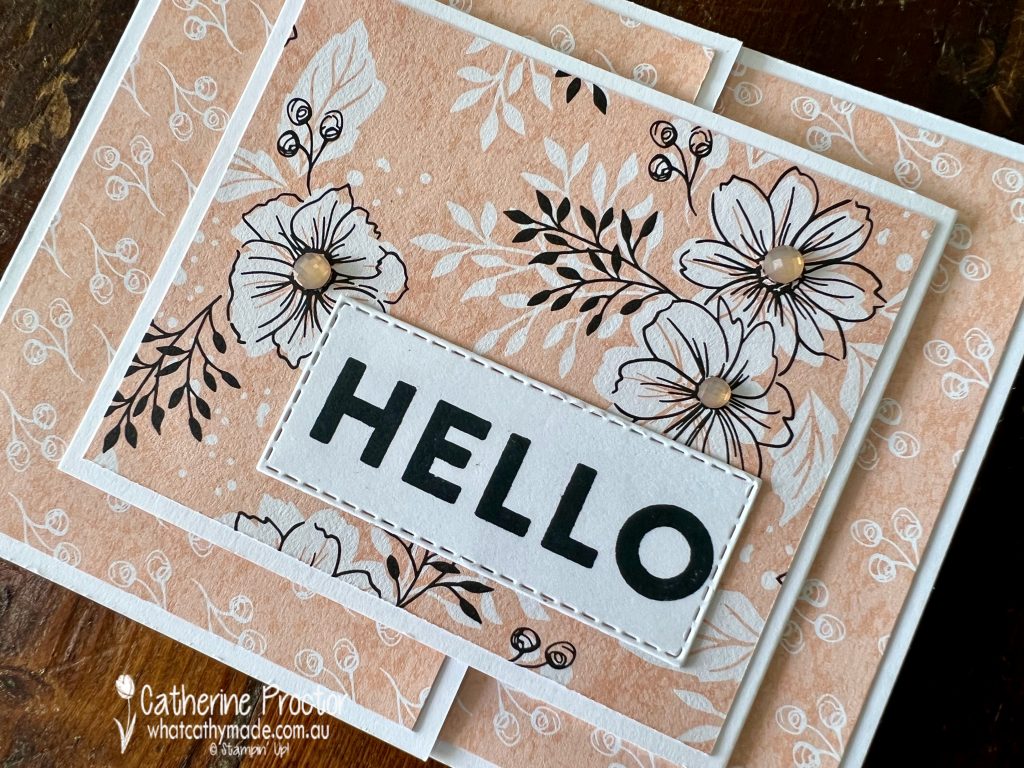
My cards tonight use the stunning Friendly Hello Designer Series Paper and the Friendly Hello Stamp Set from the The Friendly Hello Bundle, which is one of the free SALE-a-bration products.
The Friendly Hello DSP is so versatile. Some images from the stamp set are designed to be stamped directly onto the paper, some of the papers are printed to look like they have already been stamped on and all the designs can just be used as they are.
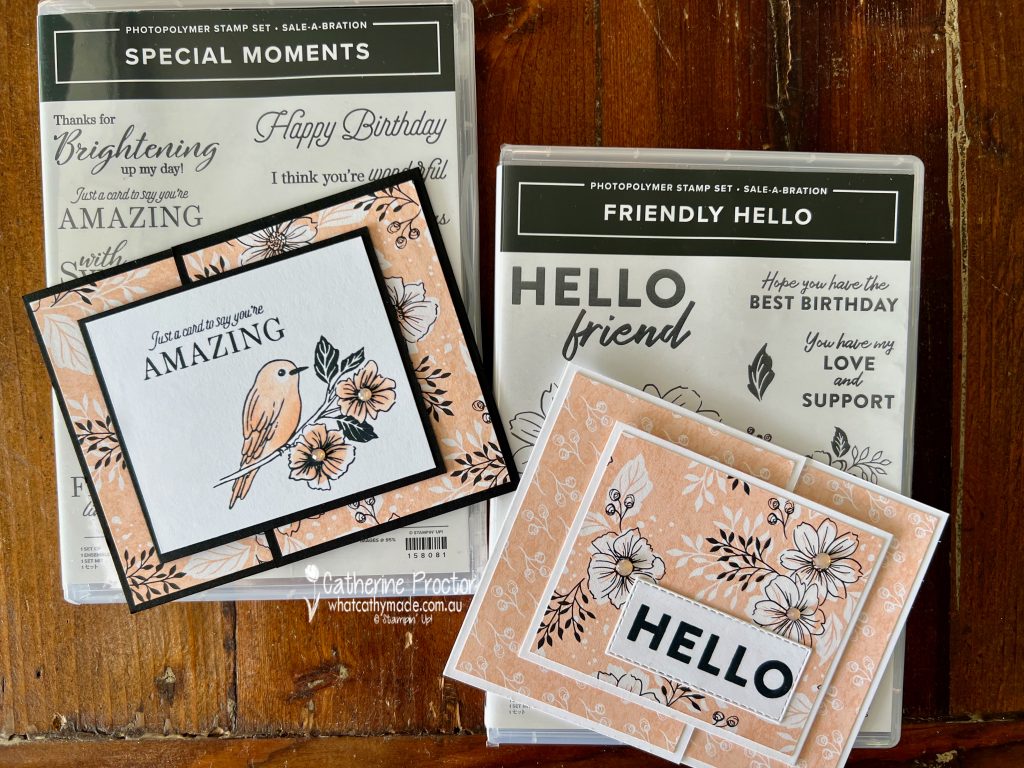
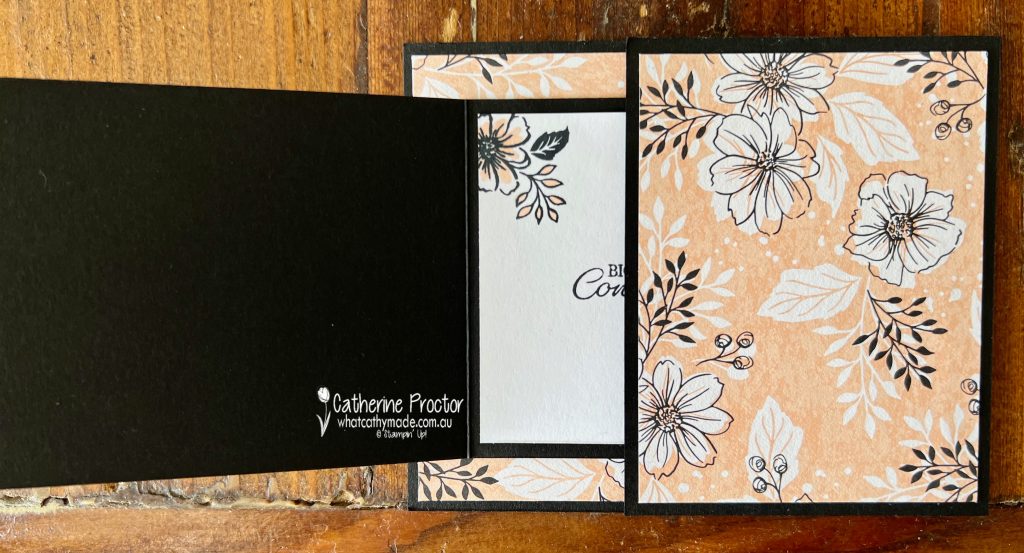
To showcase this beautiful DSP I’ve made a couple of “joy fold” fancy fold cards. This simple fancy fold is a “smaller card within a card”, with the front flaps overlapping and it is a great fancy fold for using beautiful DSP.
This 30 second video shows you how this fancy fold works.
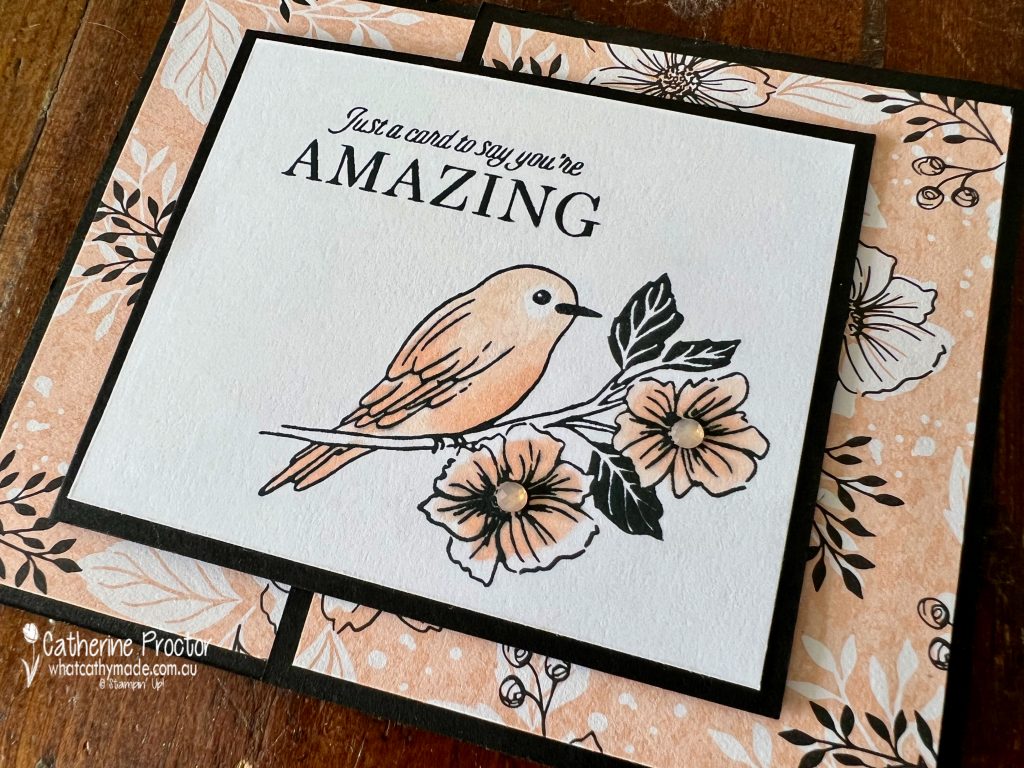
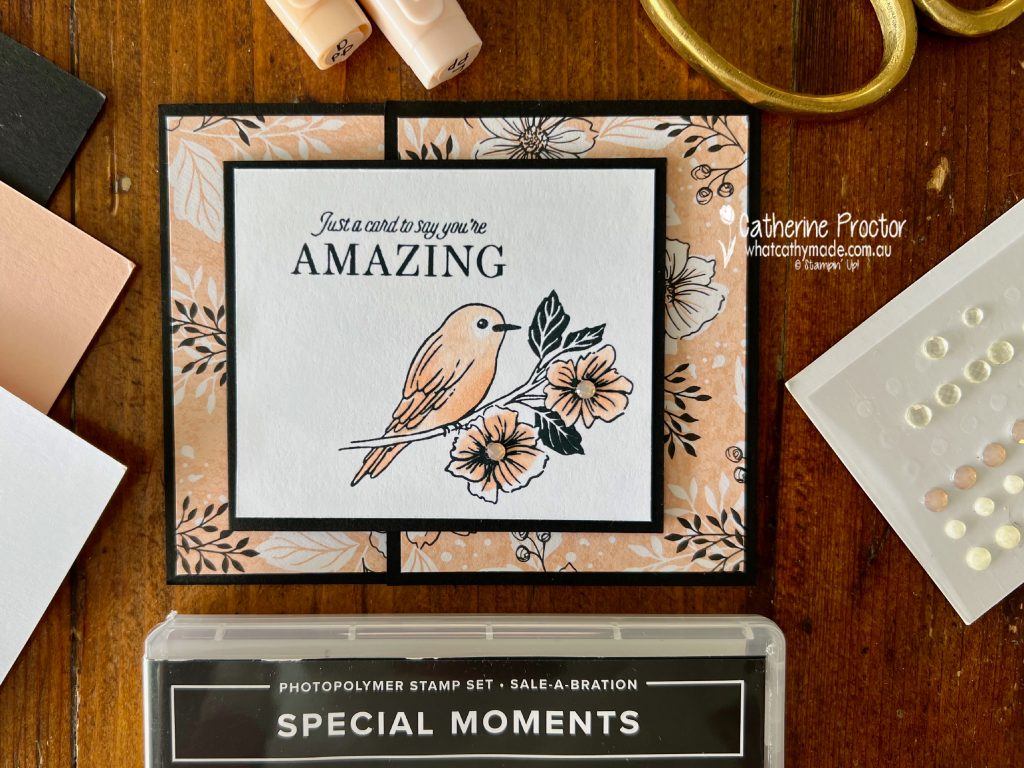
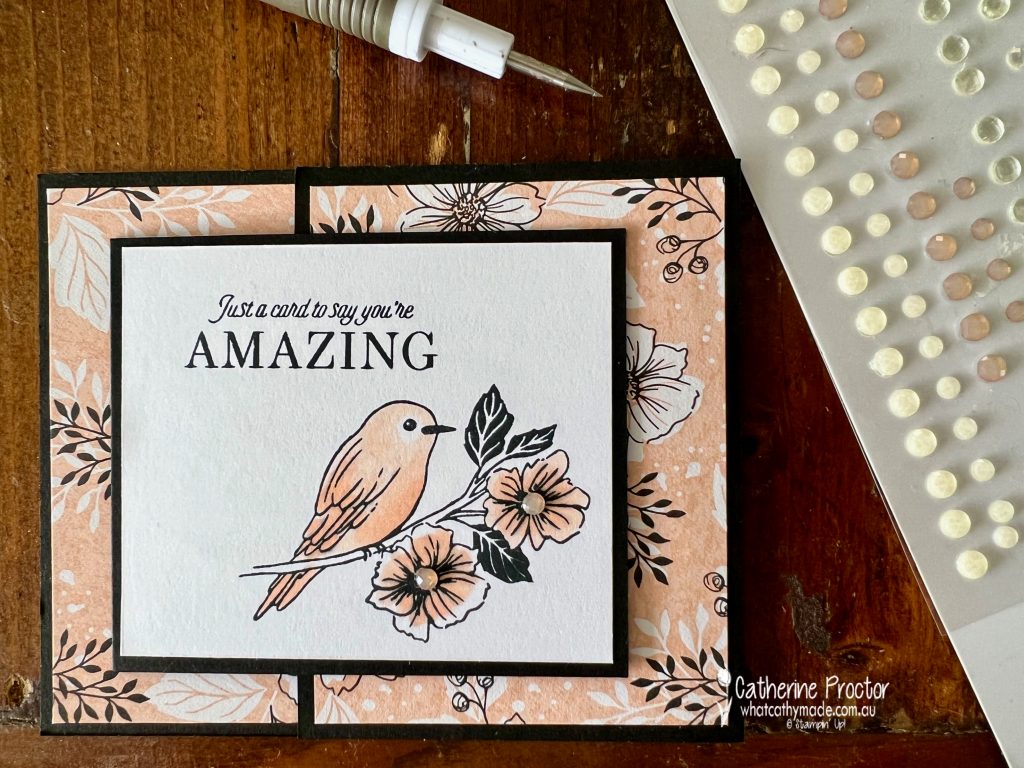
Card one is on a Basic Black card base with the top card opening to the left and the base card opening to the right. Instead of using DSP on the front of the top card, I stamped the bird from the Friendly Hello stamp set and the sentiment from the Special Moments stamp set, another free SALE-a-bration stamp set.
I quickly coloured the bird and the flowers using light and dark Petal Pink Stampin’ Blends.
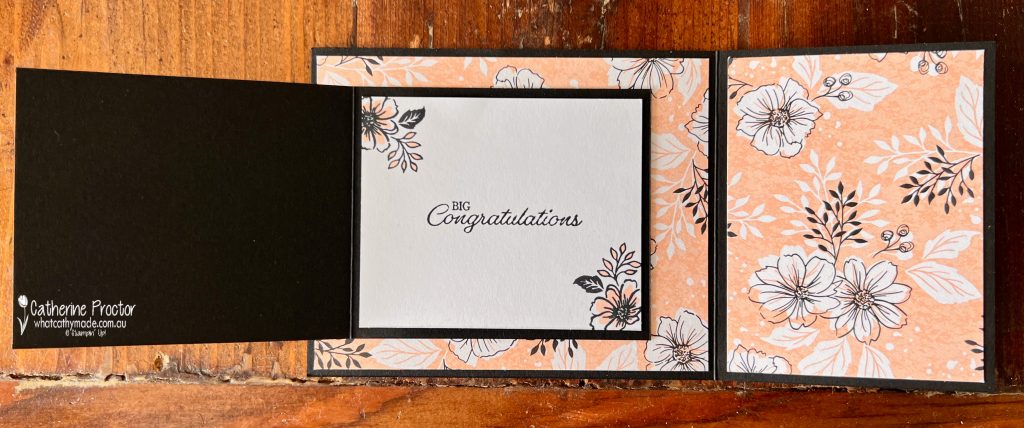
Here is how my joy cards look as you open up the front flap…
…And the middle flap. This inside sentiment is also from the Special Moments stamp set.
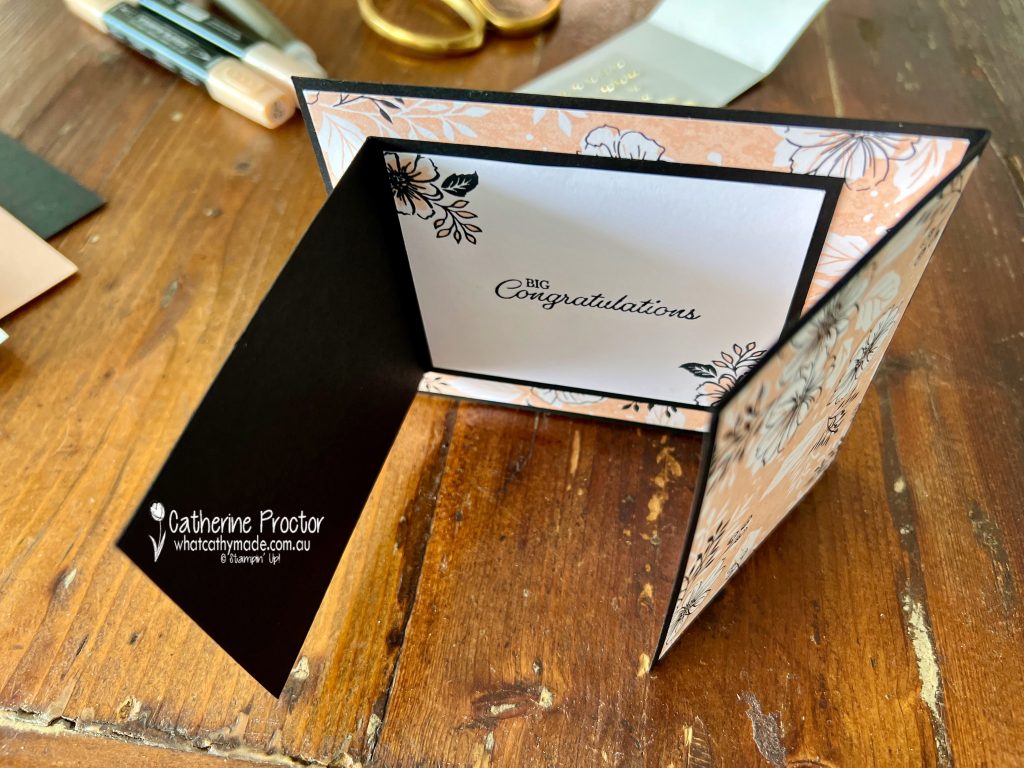
And from above!
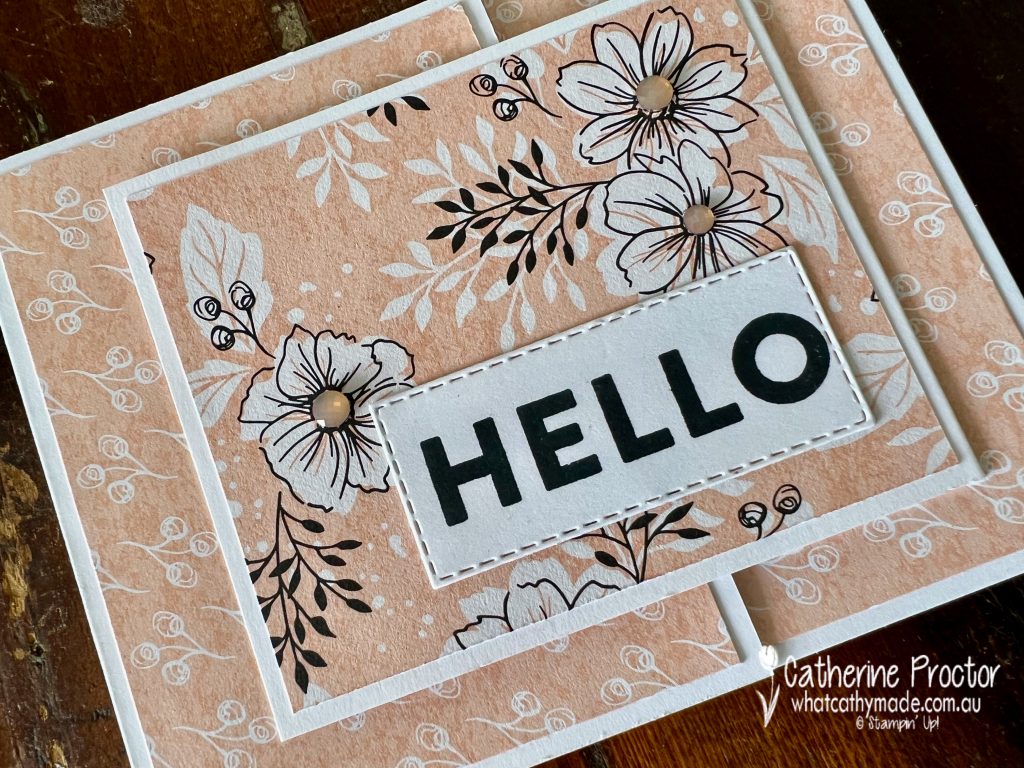
My second card is on a Basic White card base with the top card opening to the right, the base card opening to the left and DSP on the front flap.
To create the “Hello” sentiment I used a Post It note to mask off the word “friend” from one of the Friendly Hello stamps, inked up the stamp and them removed the post it note BEFORE stamping the sentiment onto Basic White card stock.
Both cards are embellished with the Petal Pink Elegant Faceted Gems.
Now it’s time to hop on over to our next participant, the lovely Christine Blain– I can’t wait to see what Christine has made this week!
If at any time you find a broken link, you can find the complete list of all participants below.


")
")
")

 Specialty Designer Series Paper")


")


